Nightreign offers a fresh perspective on the realm of Elden Ring. It introduces unique gameplay mechanics that set it apart from its predecessor, which may explain its varied reviews. Despite this, it remains an engaging experience that keeps players hooked for extended periods, particularly those who enjoy cooperative play.
Instead of giving players free rein to develop their characters as they wish, Nightreign provides a variety of pre-constructed Nightfarers, each with distinct abilities. Each character also has an individual Remembrance questline, comprising personal tasks that help the hero achieve their maximum potential and come to terms with their past. One such Nightfarer is the Executor. For those wanting to finish his Remembrance questline, here’s what you should know.
Unlock The Journal
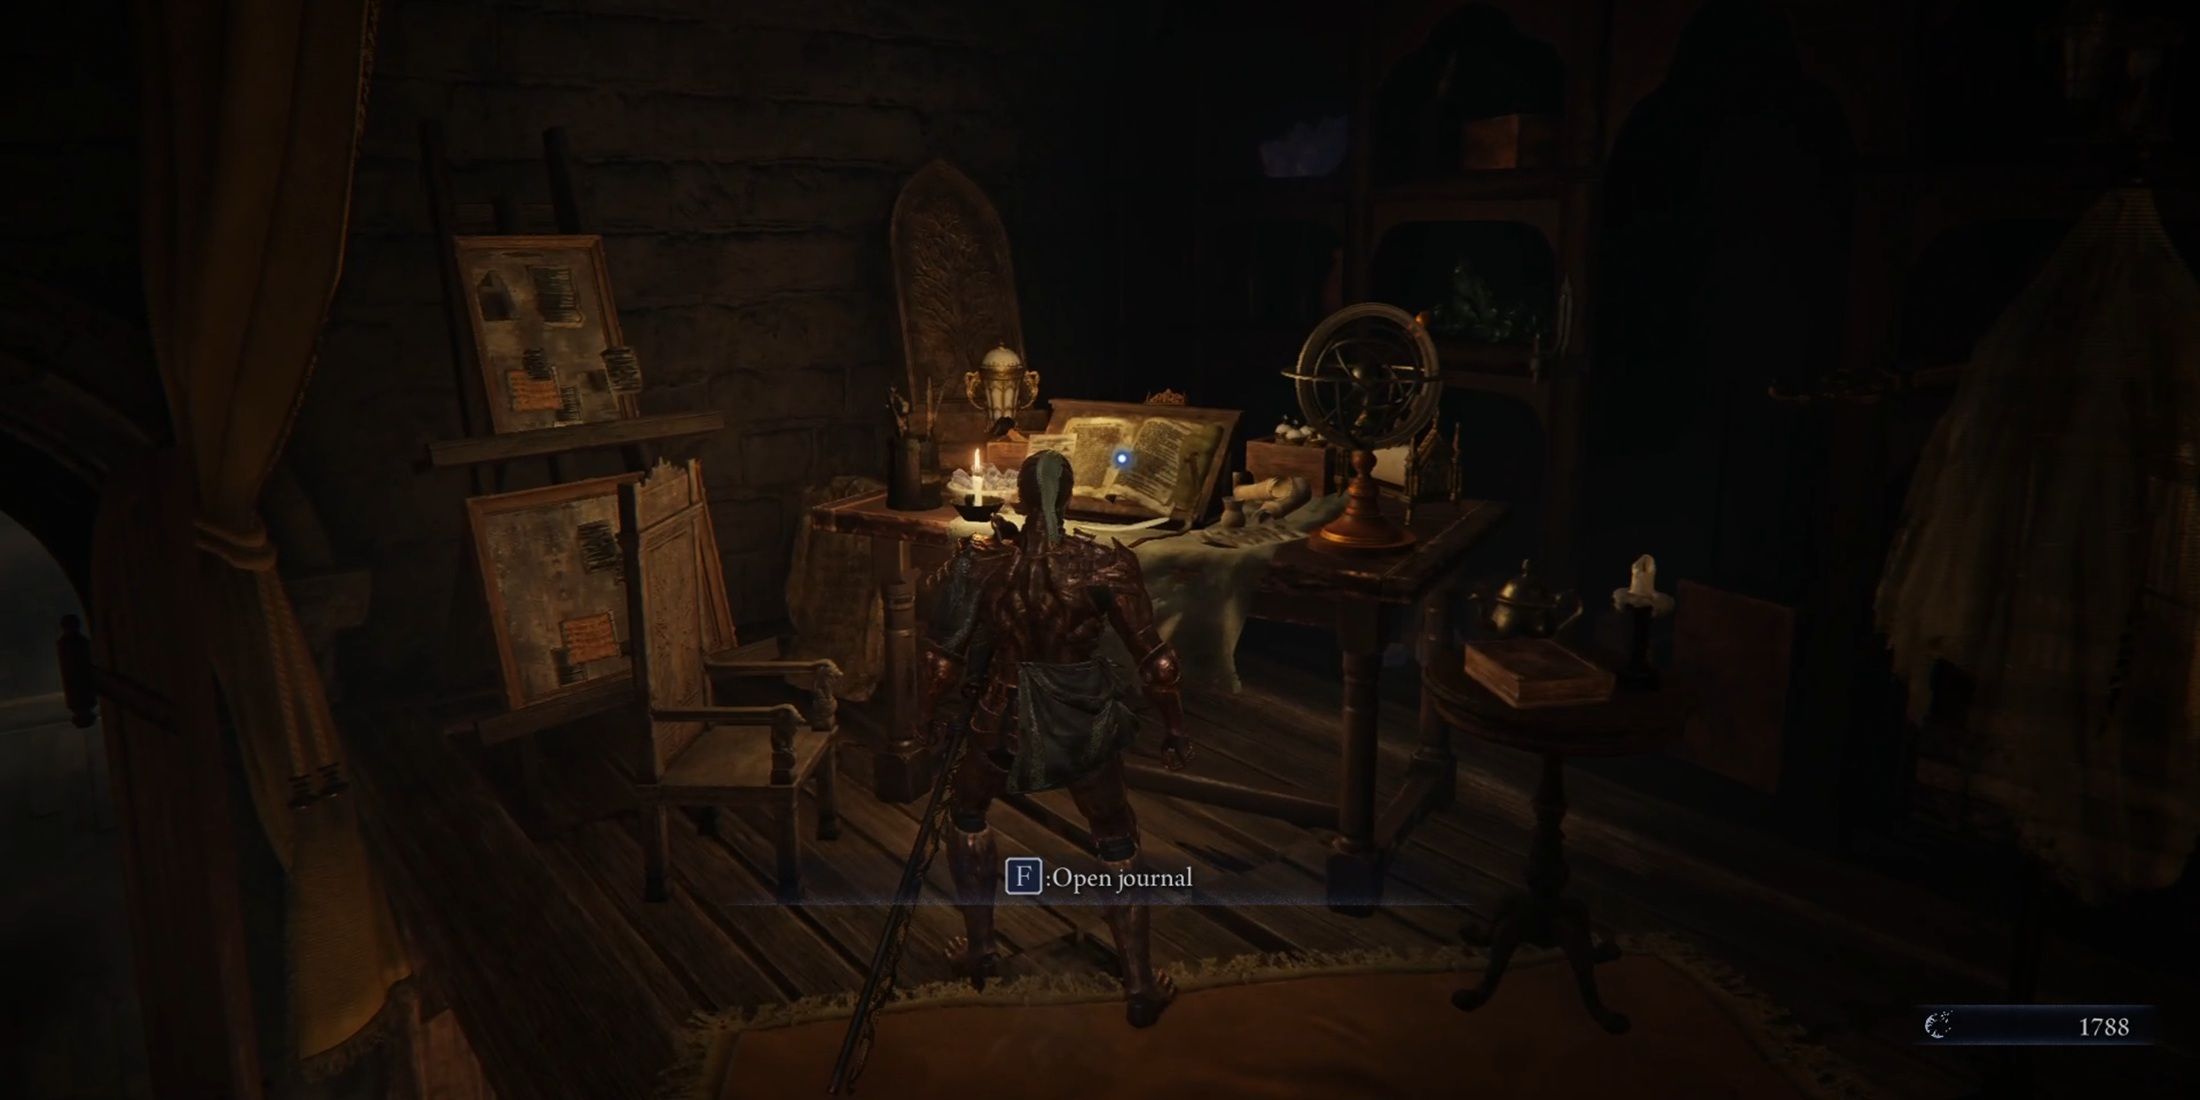
To embark on the Remembrance questline, first make sure you have unlocked the journal – this interactive spot is found within the Roundtable Hold. The unlocking process can be achieved by completing an Expedition, whether successful or not. This location in the game serves as a point where you can utilize memory fragments to journey back through time and replay the character’s memories.
For each character, there’s a unique journey known as the Remembrance quest, which upon completion grants players the distinctive Remembrance skin related to that specific character. Yet, these quests offer additional prizes throughout their progression, making them an enjoyable and rewarding experience.
How To Collect Memory Fragments
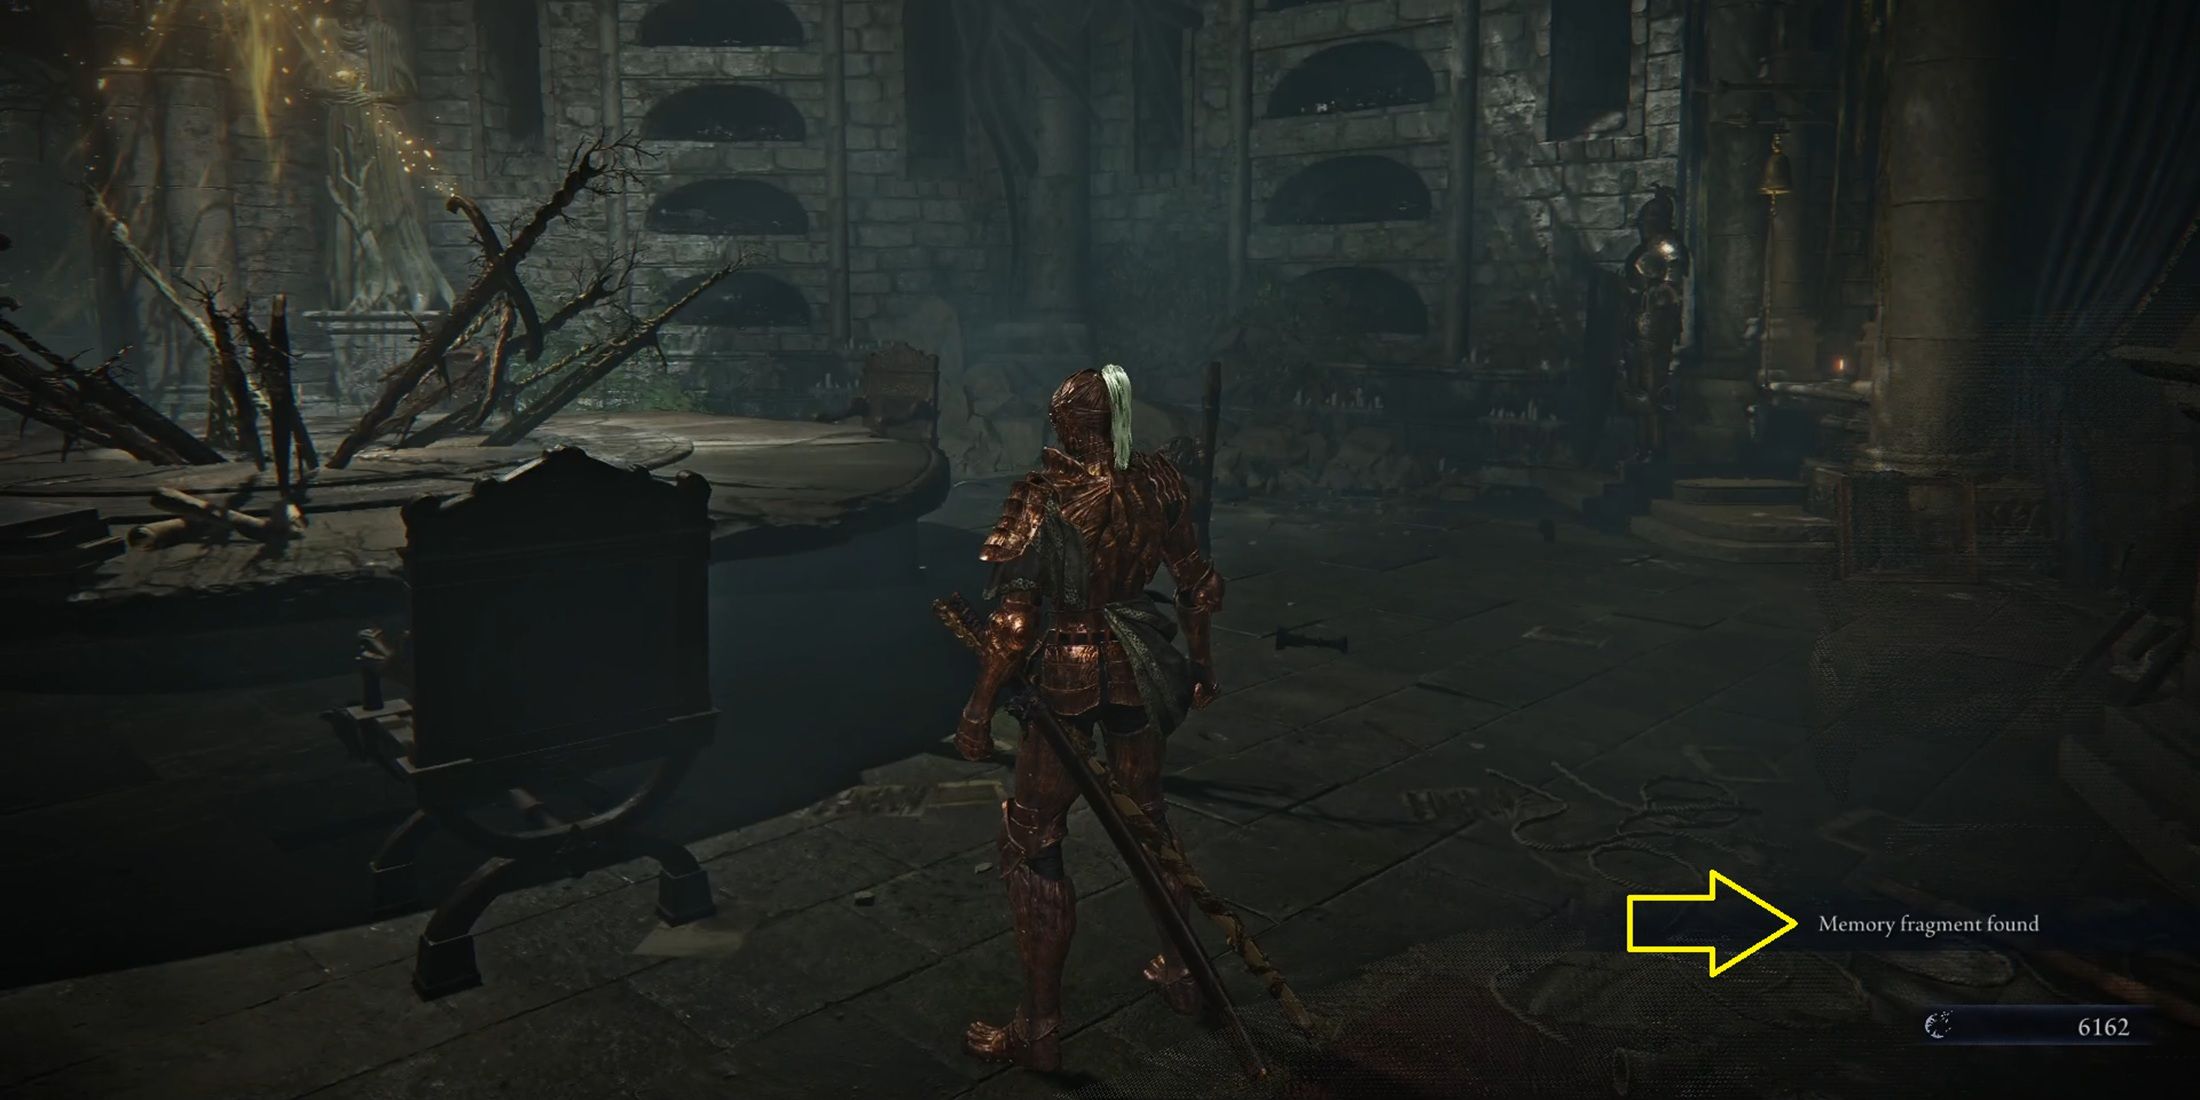
After opening your journal, you can access it at Roundtable Hold. The number of pages you see depends on how far you are in the game. To enlarge your journal, gather memory shards by finishing quests or expeditions.
A successful journey’s end and vanquishing the Nightlord consistently yields memory pieces, propelling the story forward (with a few exceptions like the Duchess), unveiling fresh memories to revisit. Occasionally, even a failed expedition can enrich the journal, but this only occurs in the early stages of the questline. As the narrative unfolds, players will find themselves compelled to subdue Nightlords and advance in the game’s main storyline.
Beginning Remembrance
Whenever I delve into memories, it feels like a journey through time. However, as a player, you’re not bound by this temporal constraint – you can exit the memory whenever you wish and return to the present moment. It’s important to note that while in the memory, there won’t be drastic changes between the two timelines. Rest assured, should you meet an untimely end or fail a mission, you’ll find yourself back in the here and now. To continue your memory exploration, simply revisit the journal once more.
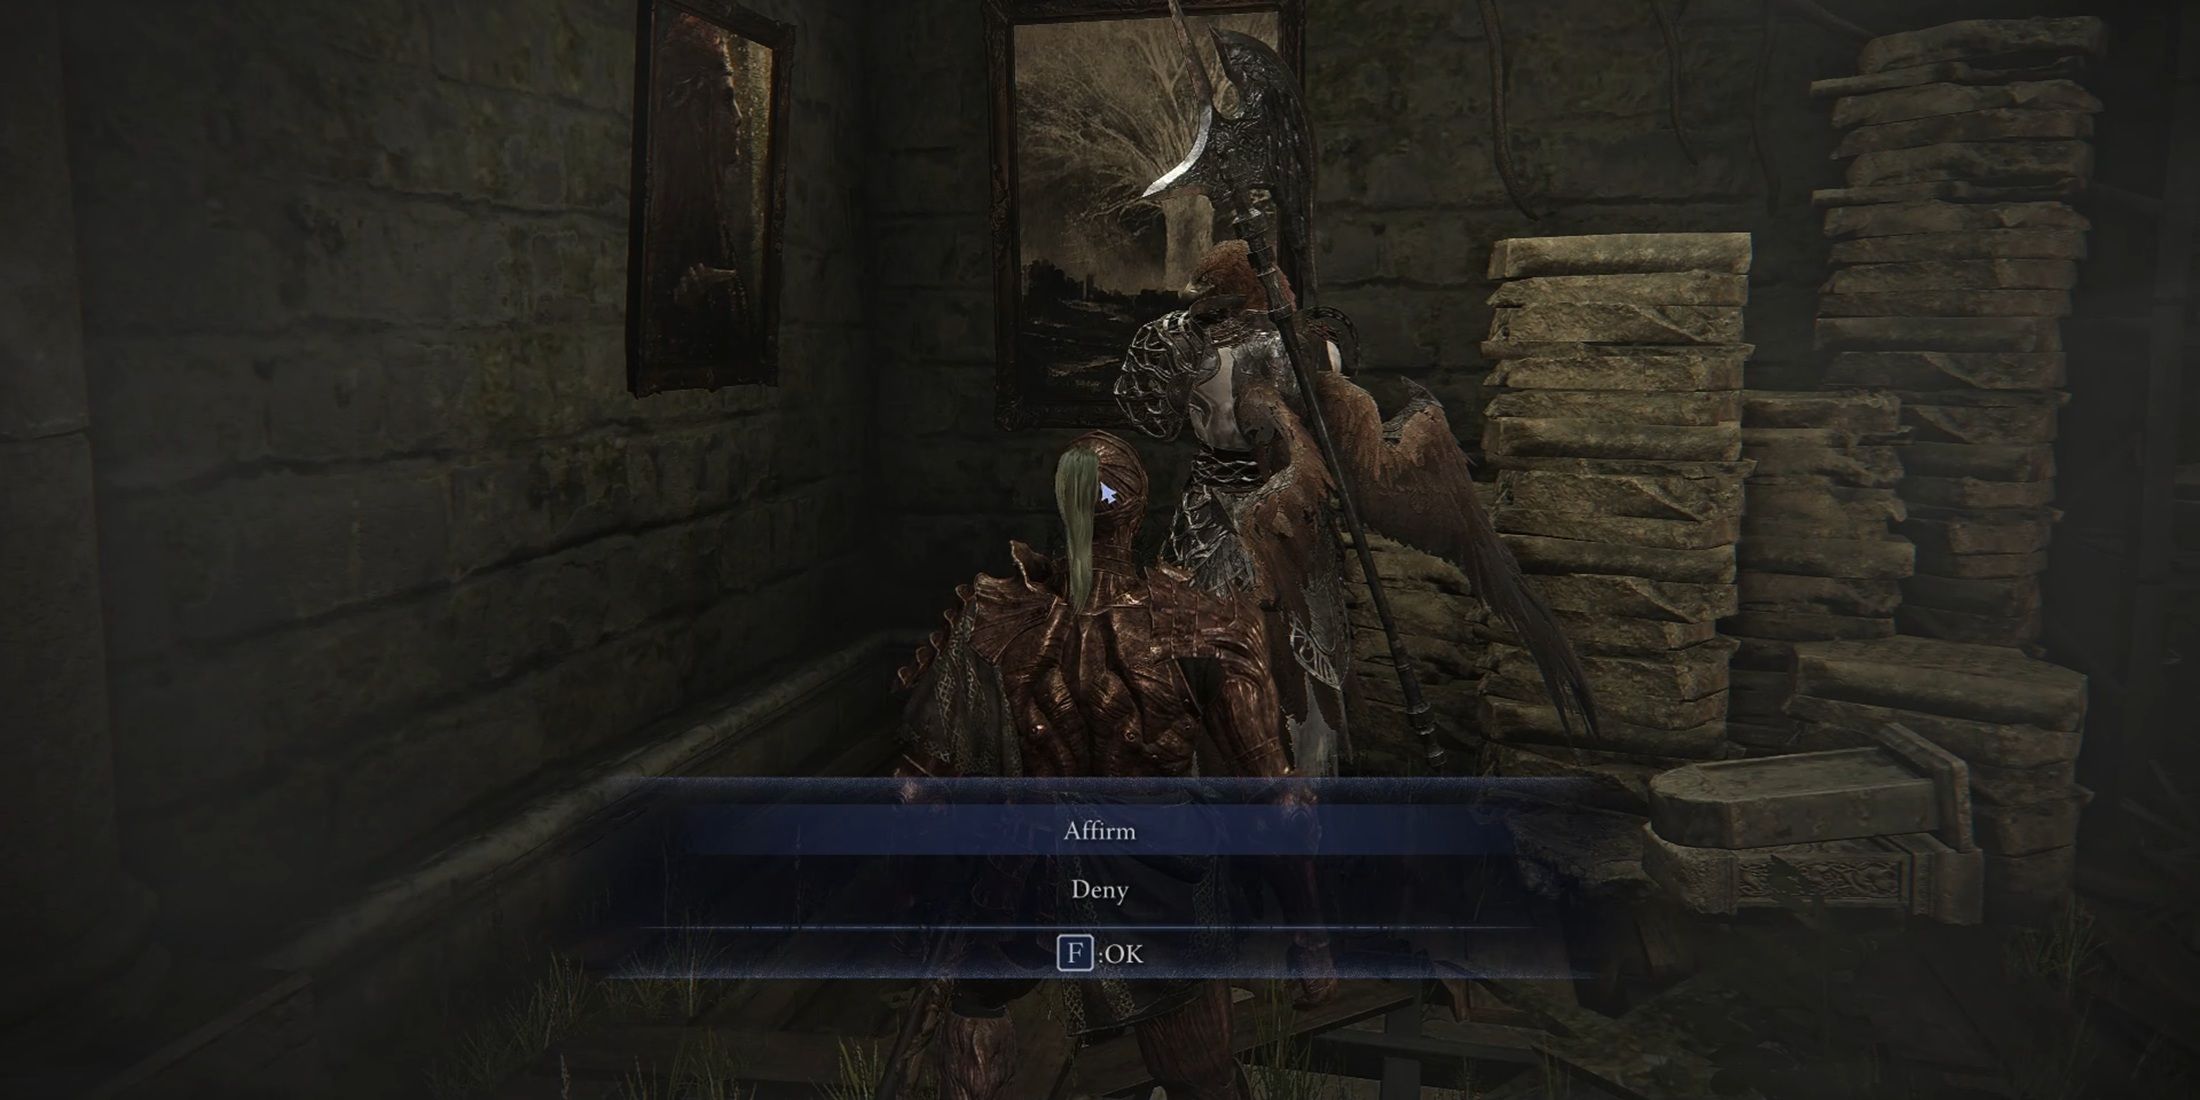
Once you initiate a memory sequence, you’ll find yourself back at the Roundtable Hold. To discover your next task, take a look at your journal. The initial move is to engage with the Guardian, who can be found in the same room as your journal. Choose “Agree” during your conversation with him, then proceed to the main hall and interact with the Priestess. She will brief you on Personal Objectives, which are now significant locations within Expeditions.
The Executor’s Remembrance Quest
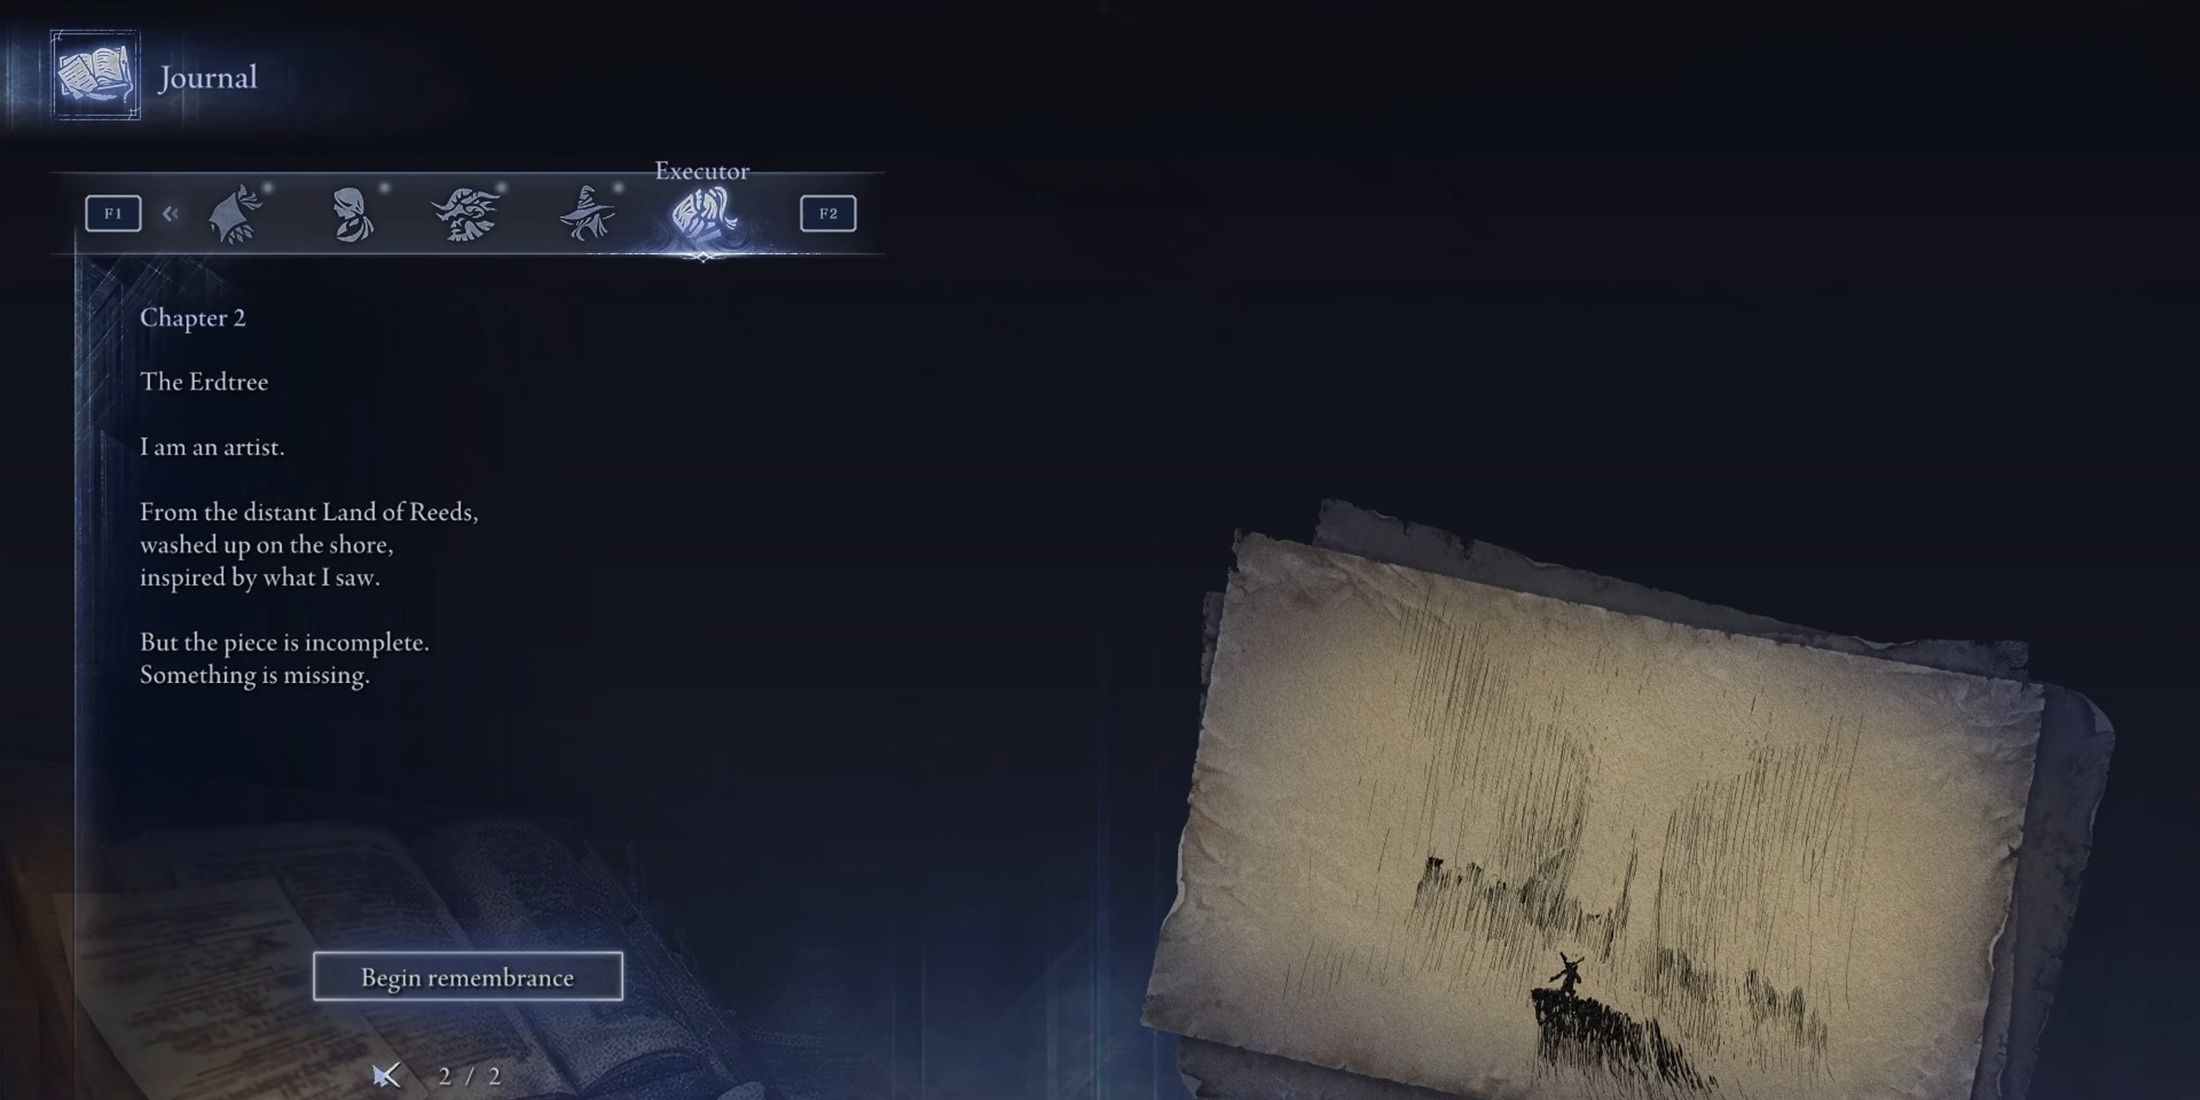
Chapter 2 Remembrance
In Chapter 2 of the journal, the Executor encounters their initial memory revival: it’s time for an adventure! To kick things off, they must gather a specific kind of bloom. They can pick any journey they prefer, and as long as they manage to find the flowers, the mission advances, whether they complete the expedition or not.
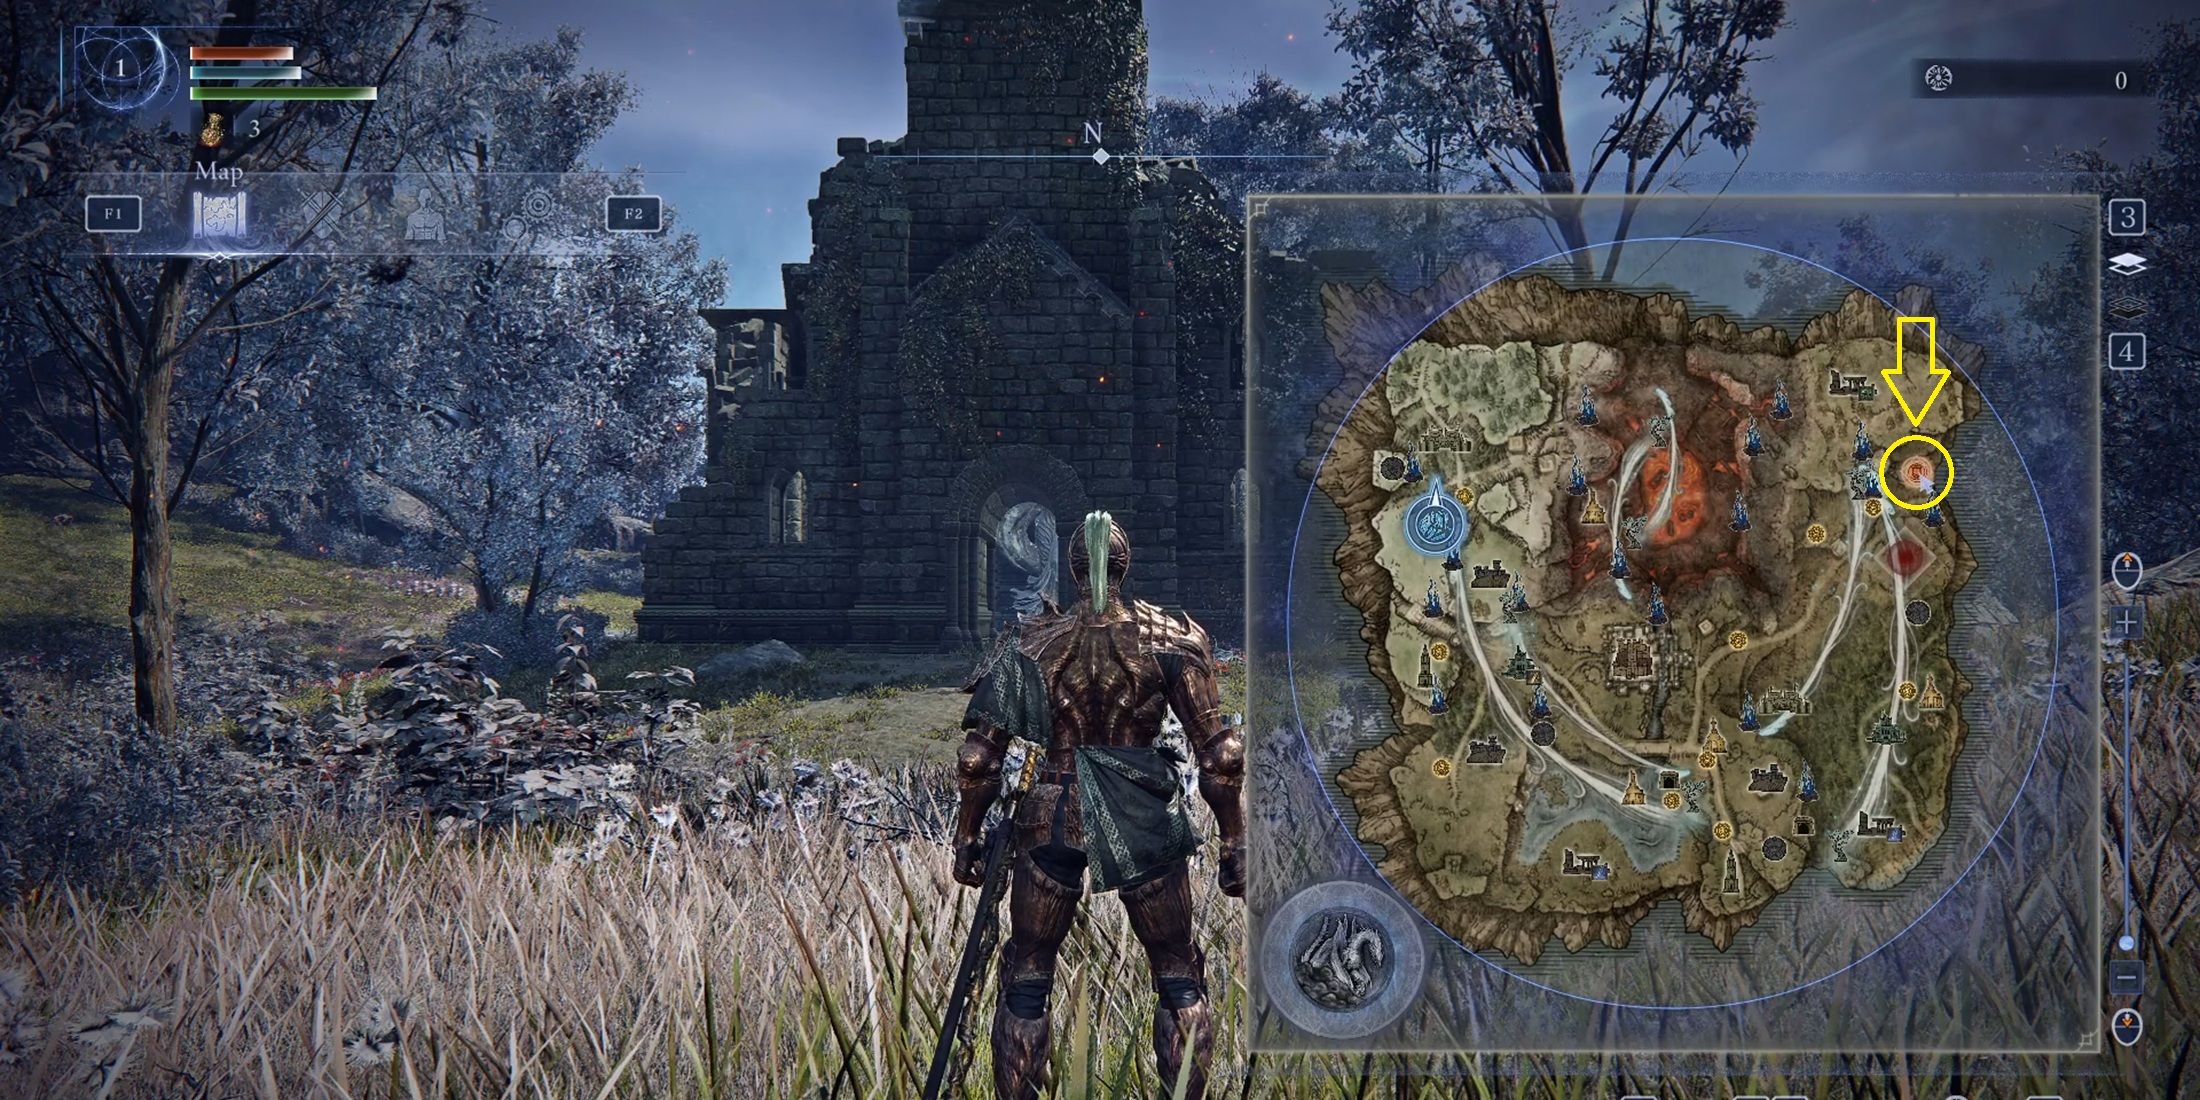
When you embark on your journey, you’ll find a fresh orange marker on the map signaling the spot of your mission objective – the elusive Blessed Flowers. However, they won’t be an easy grab; a formidable boss stands guard over them. So, prioritize this task before the moving night ring begins its advance.
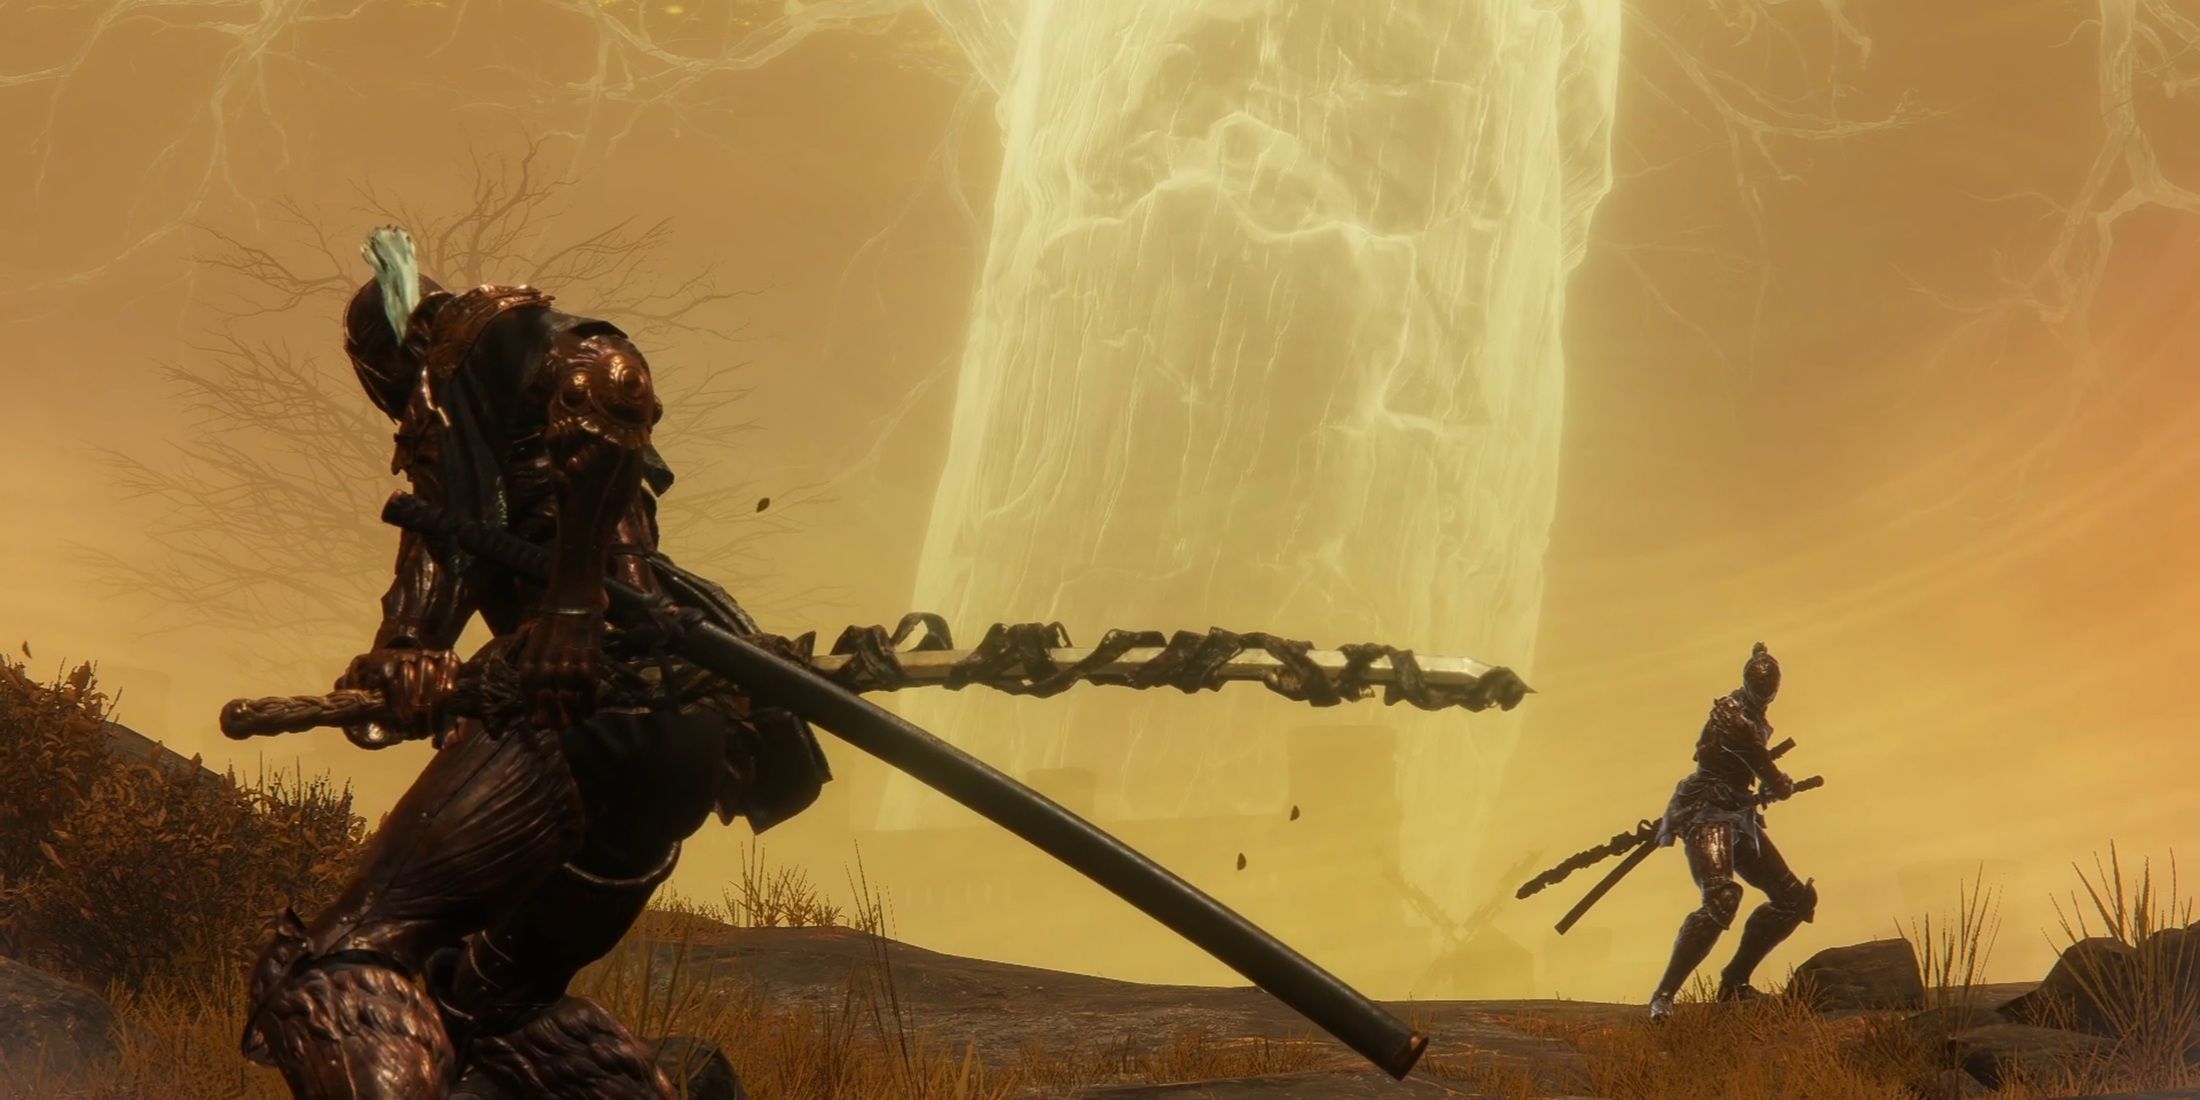
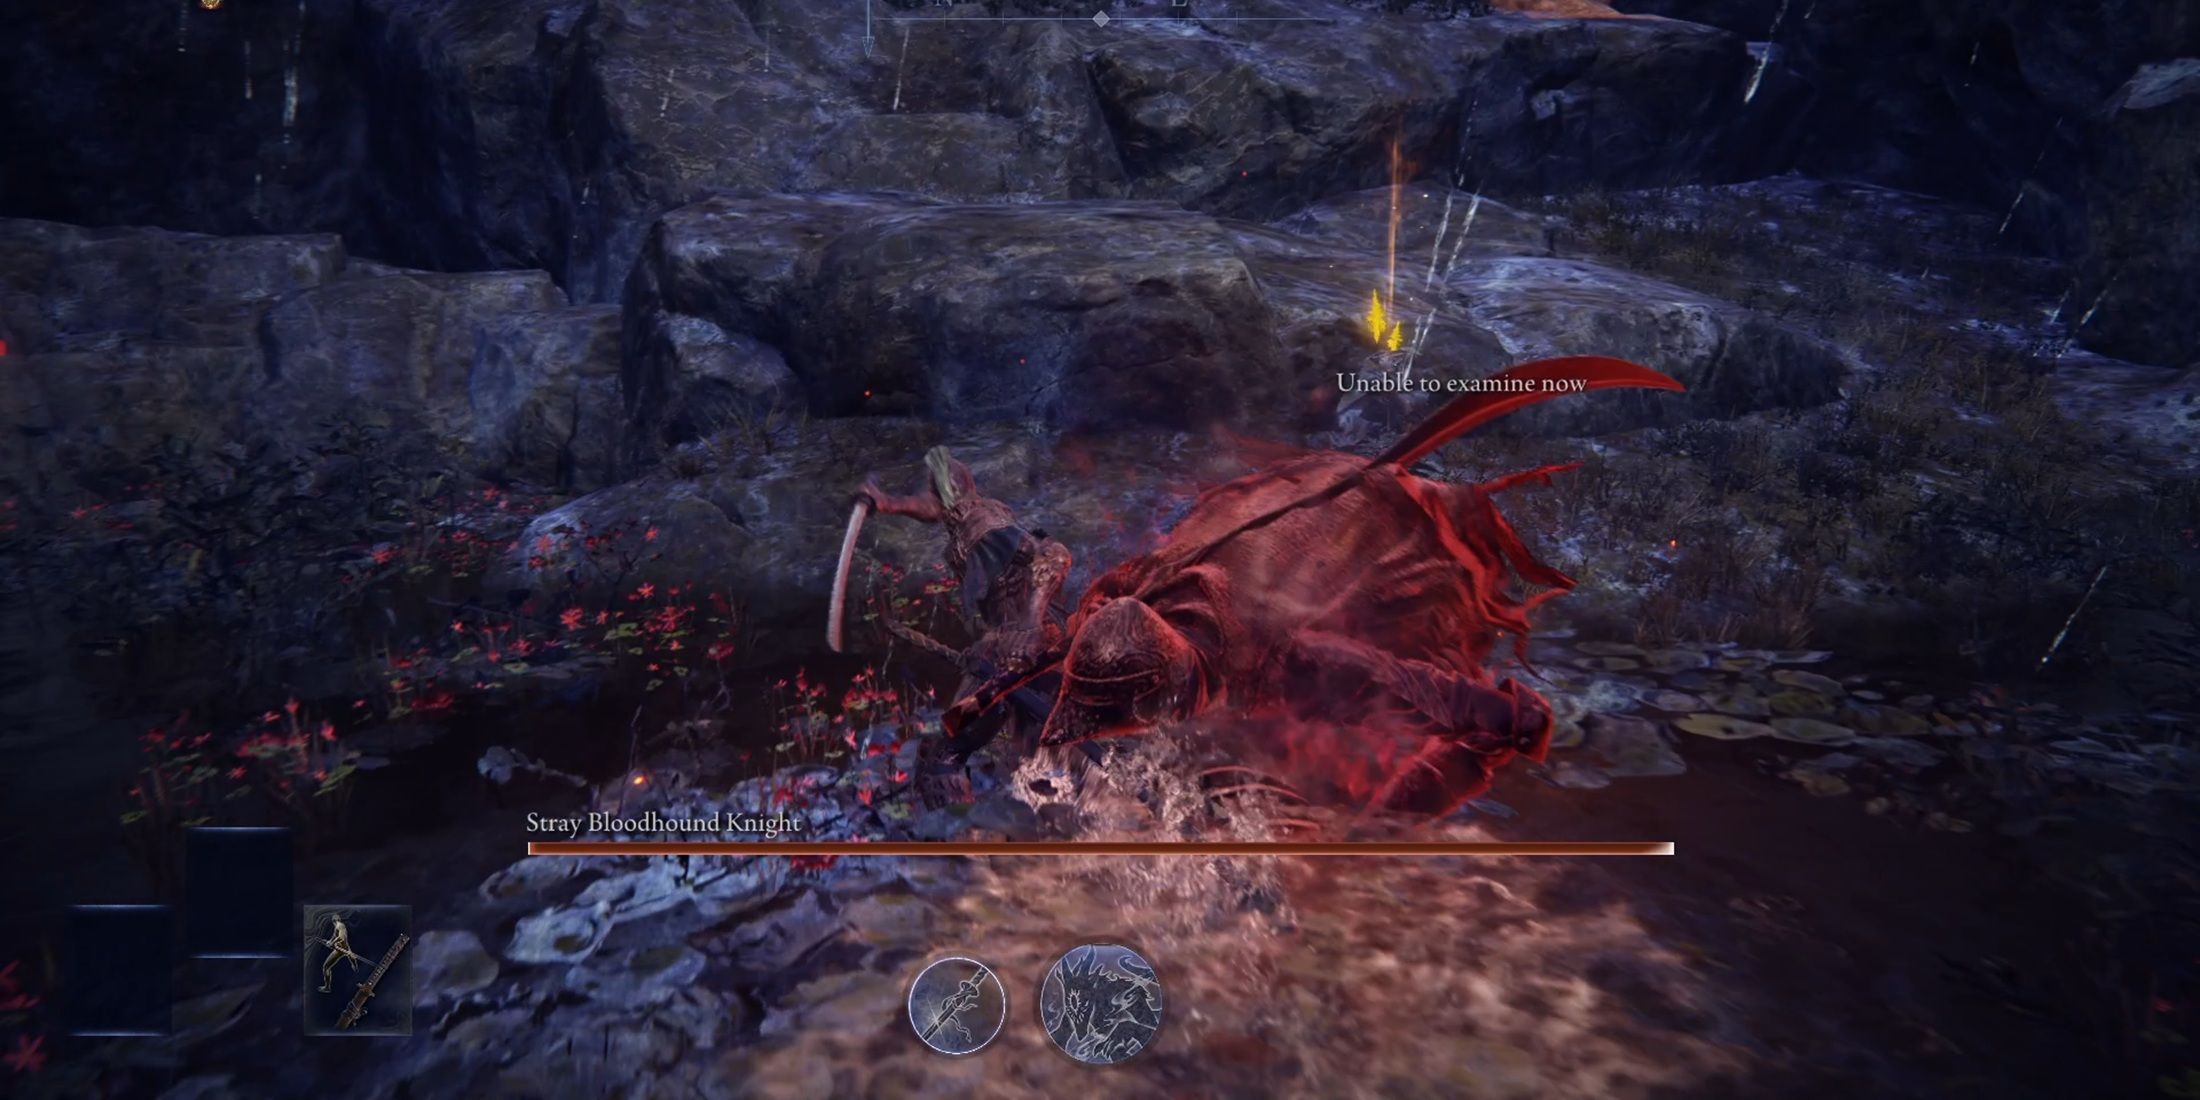
Remember that your boss will appear as an unexpected foe near the flower. You’ll encounter a Roaming Bloodhound Knight, and the battle will be challenging not just due to the boss’s weapon, but also because of the confined space – it’s surrounded by cliffs and rocks.
Just as the name implies, the boss wields Bleed weapons that cause bleeding damage when they hit you. The good news is that his combo sequences aren’t overly rapid. However, he does switch between two bleed weapons. It might seem like there’s an opening for a counterattack before Stray swings her sword, but beware – he can strike with his off-hand as well. Remember to time your moves carefully and exercise patience during attacks.
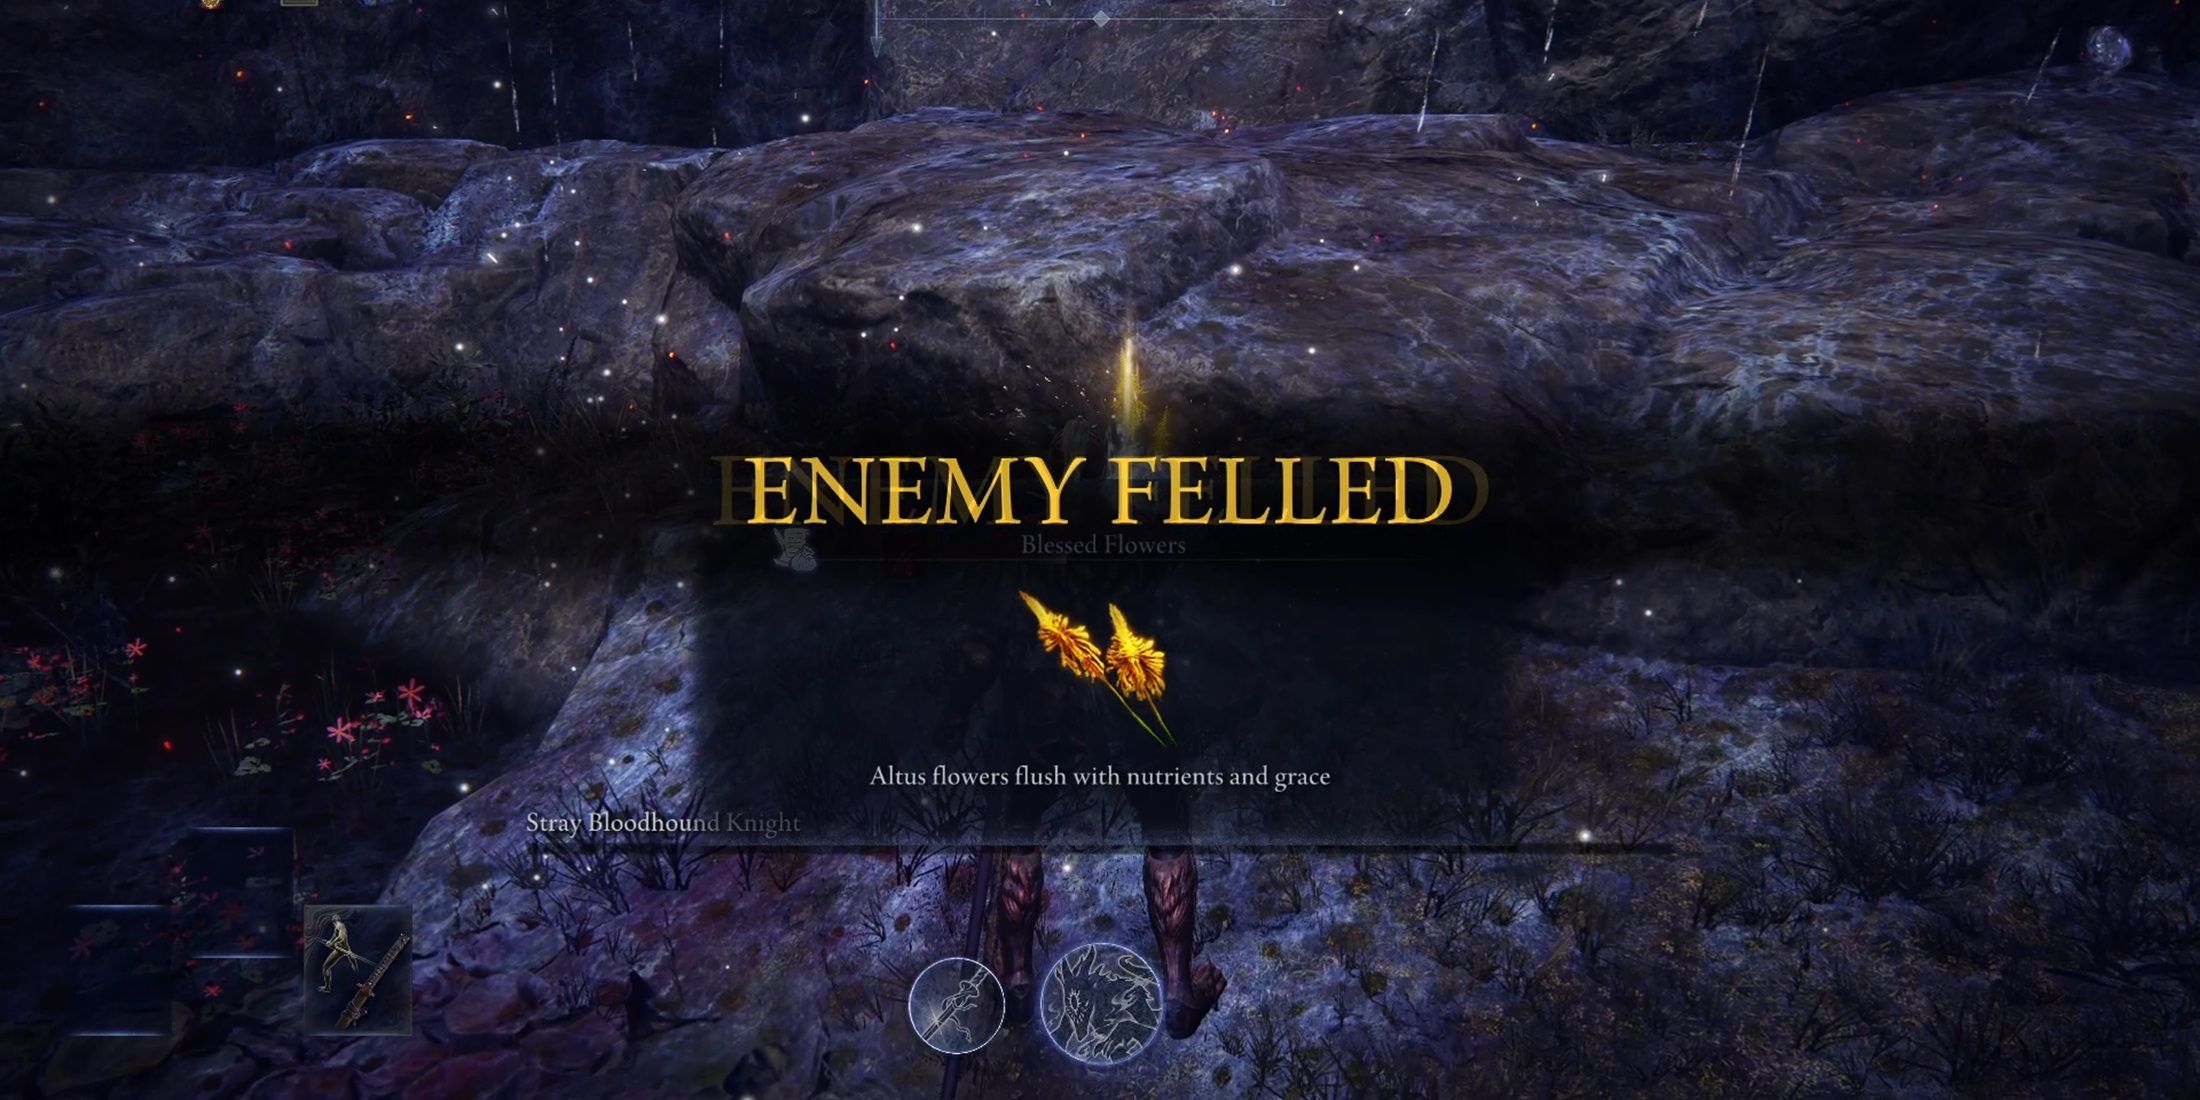
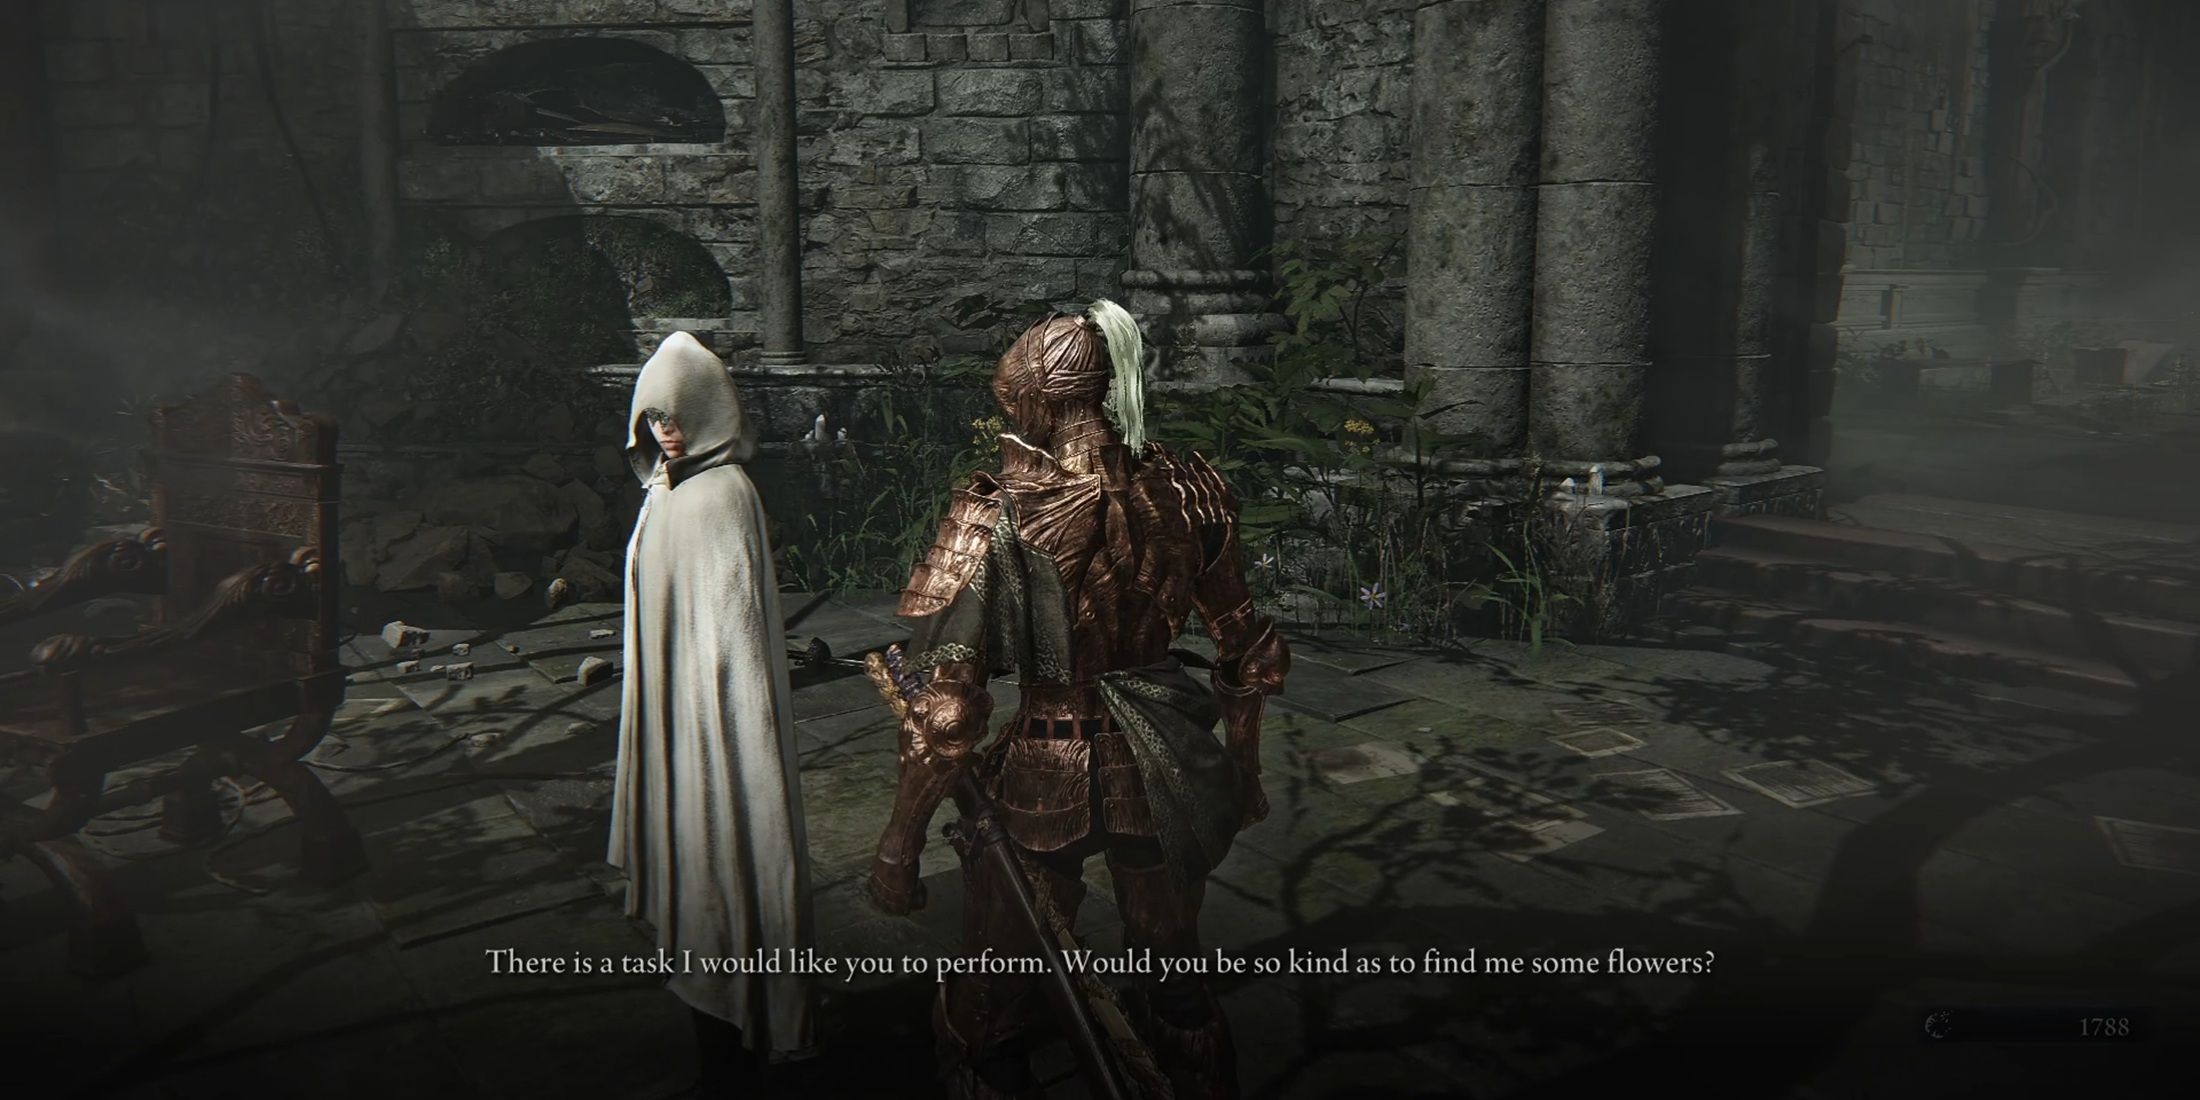
The flowers can be collected once you defeat the boss, but do keep in mind that the boss won’t offer any loot. Instead, you’ll receive Runes for emerging victorious from this battle. Once you’ve picked the flowers, the rest of the journey holds no significance. Upon returning to the Roundtable Hold, make sure to speak with the Priestess. She’ll then request that you present the flowers to Iron Menial upon your return.
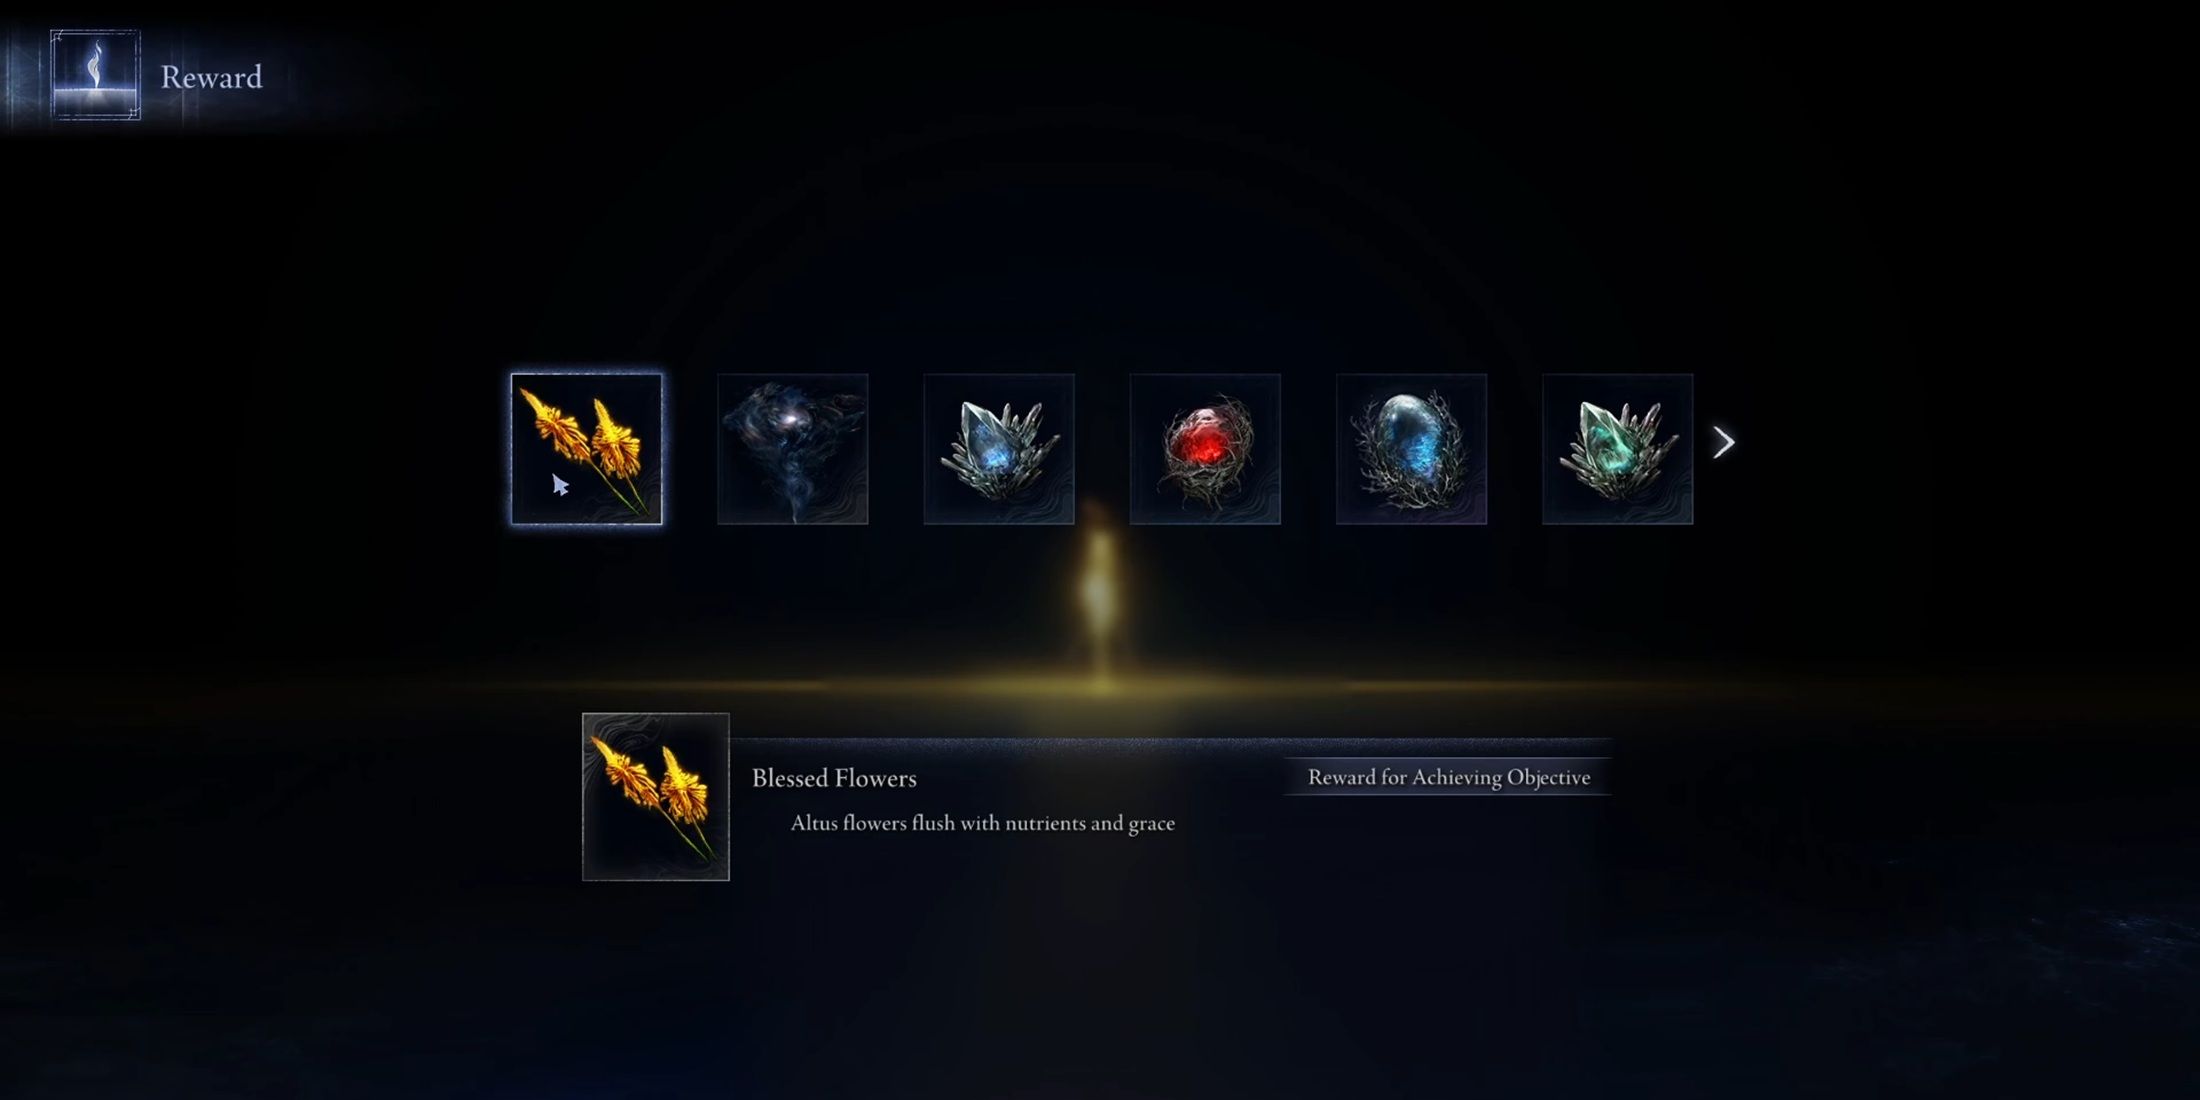
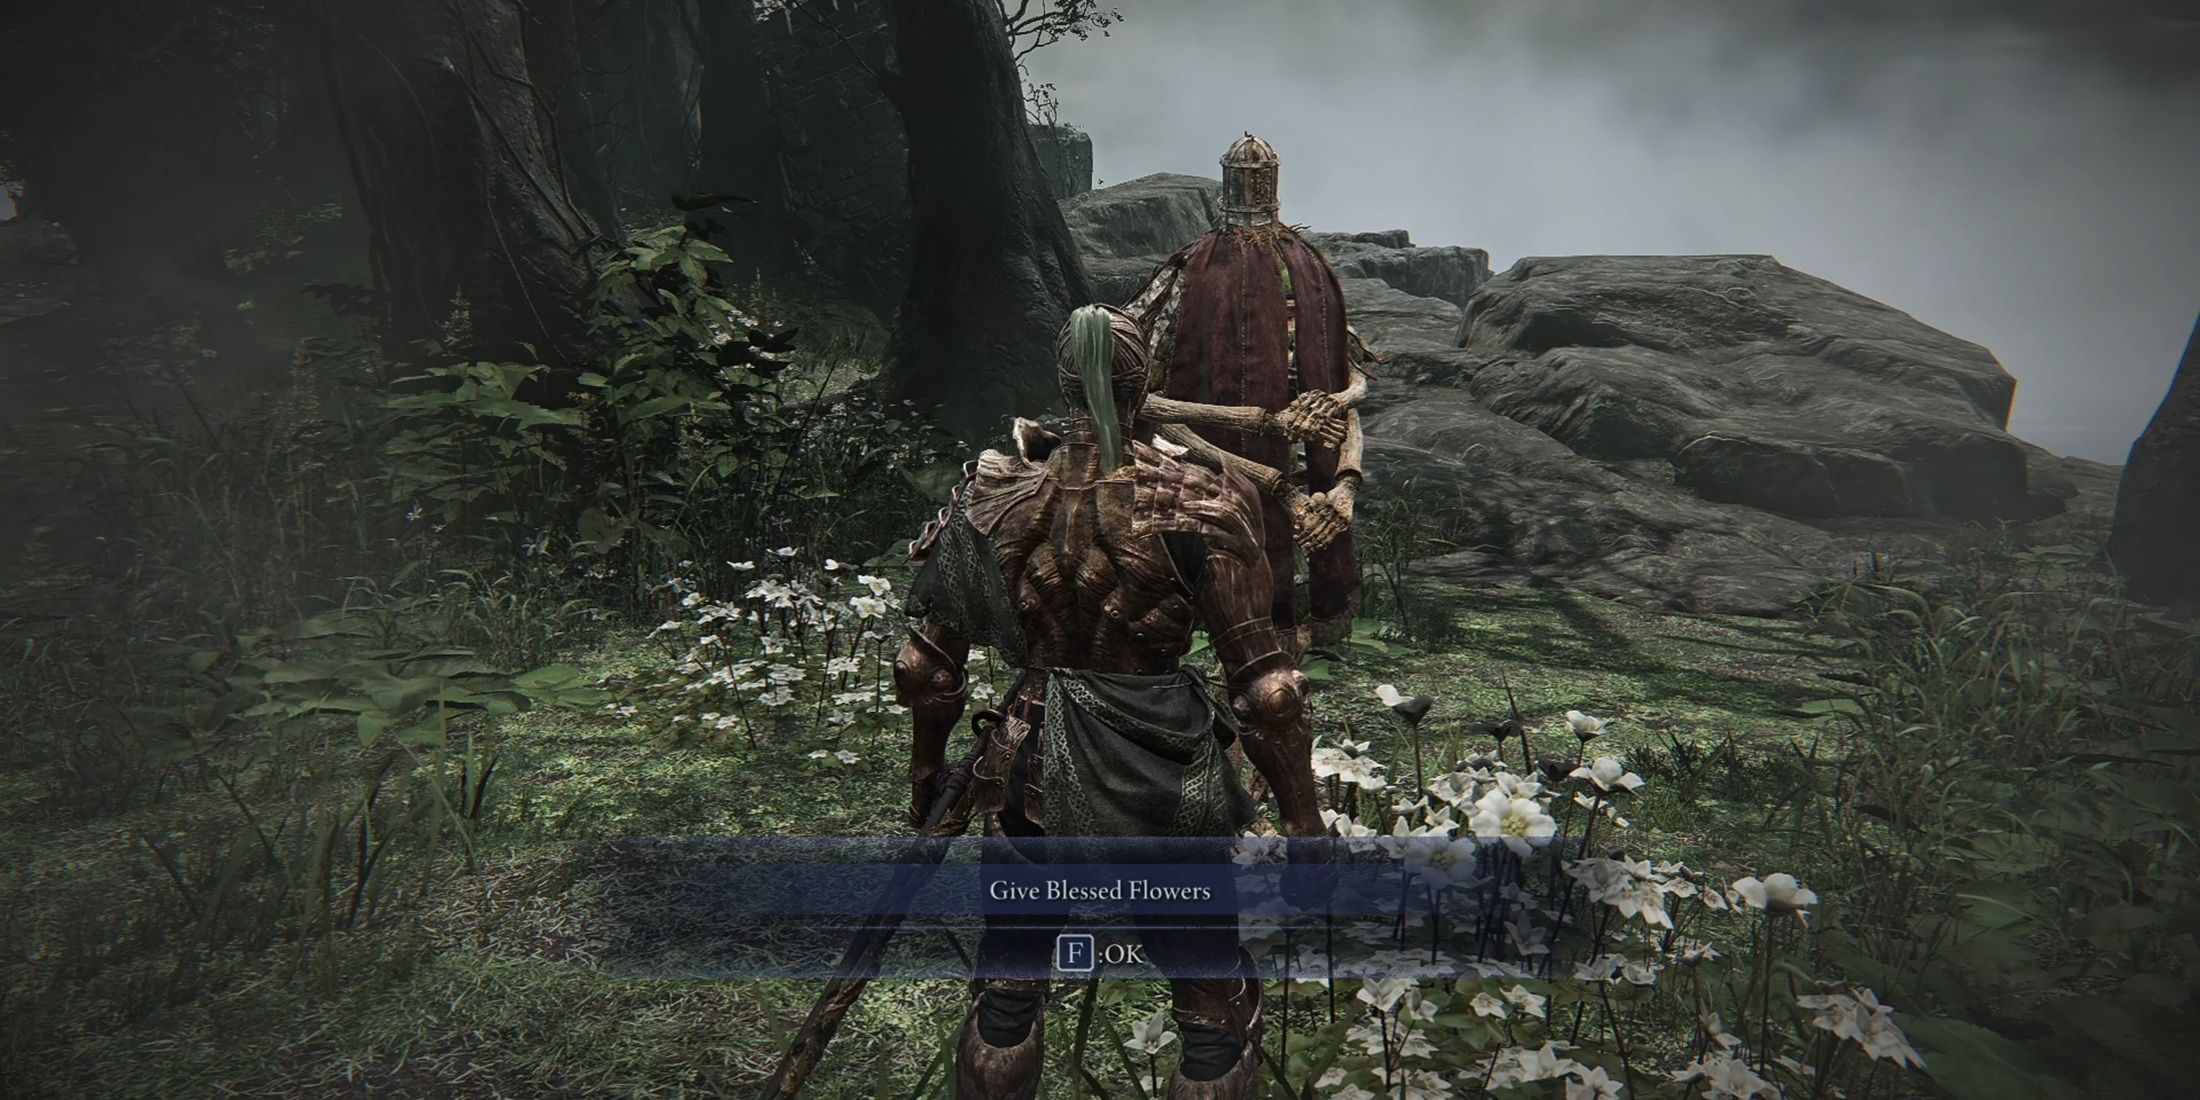
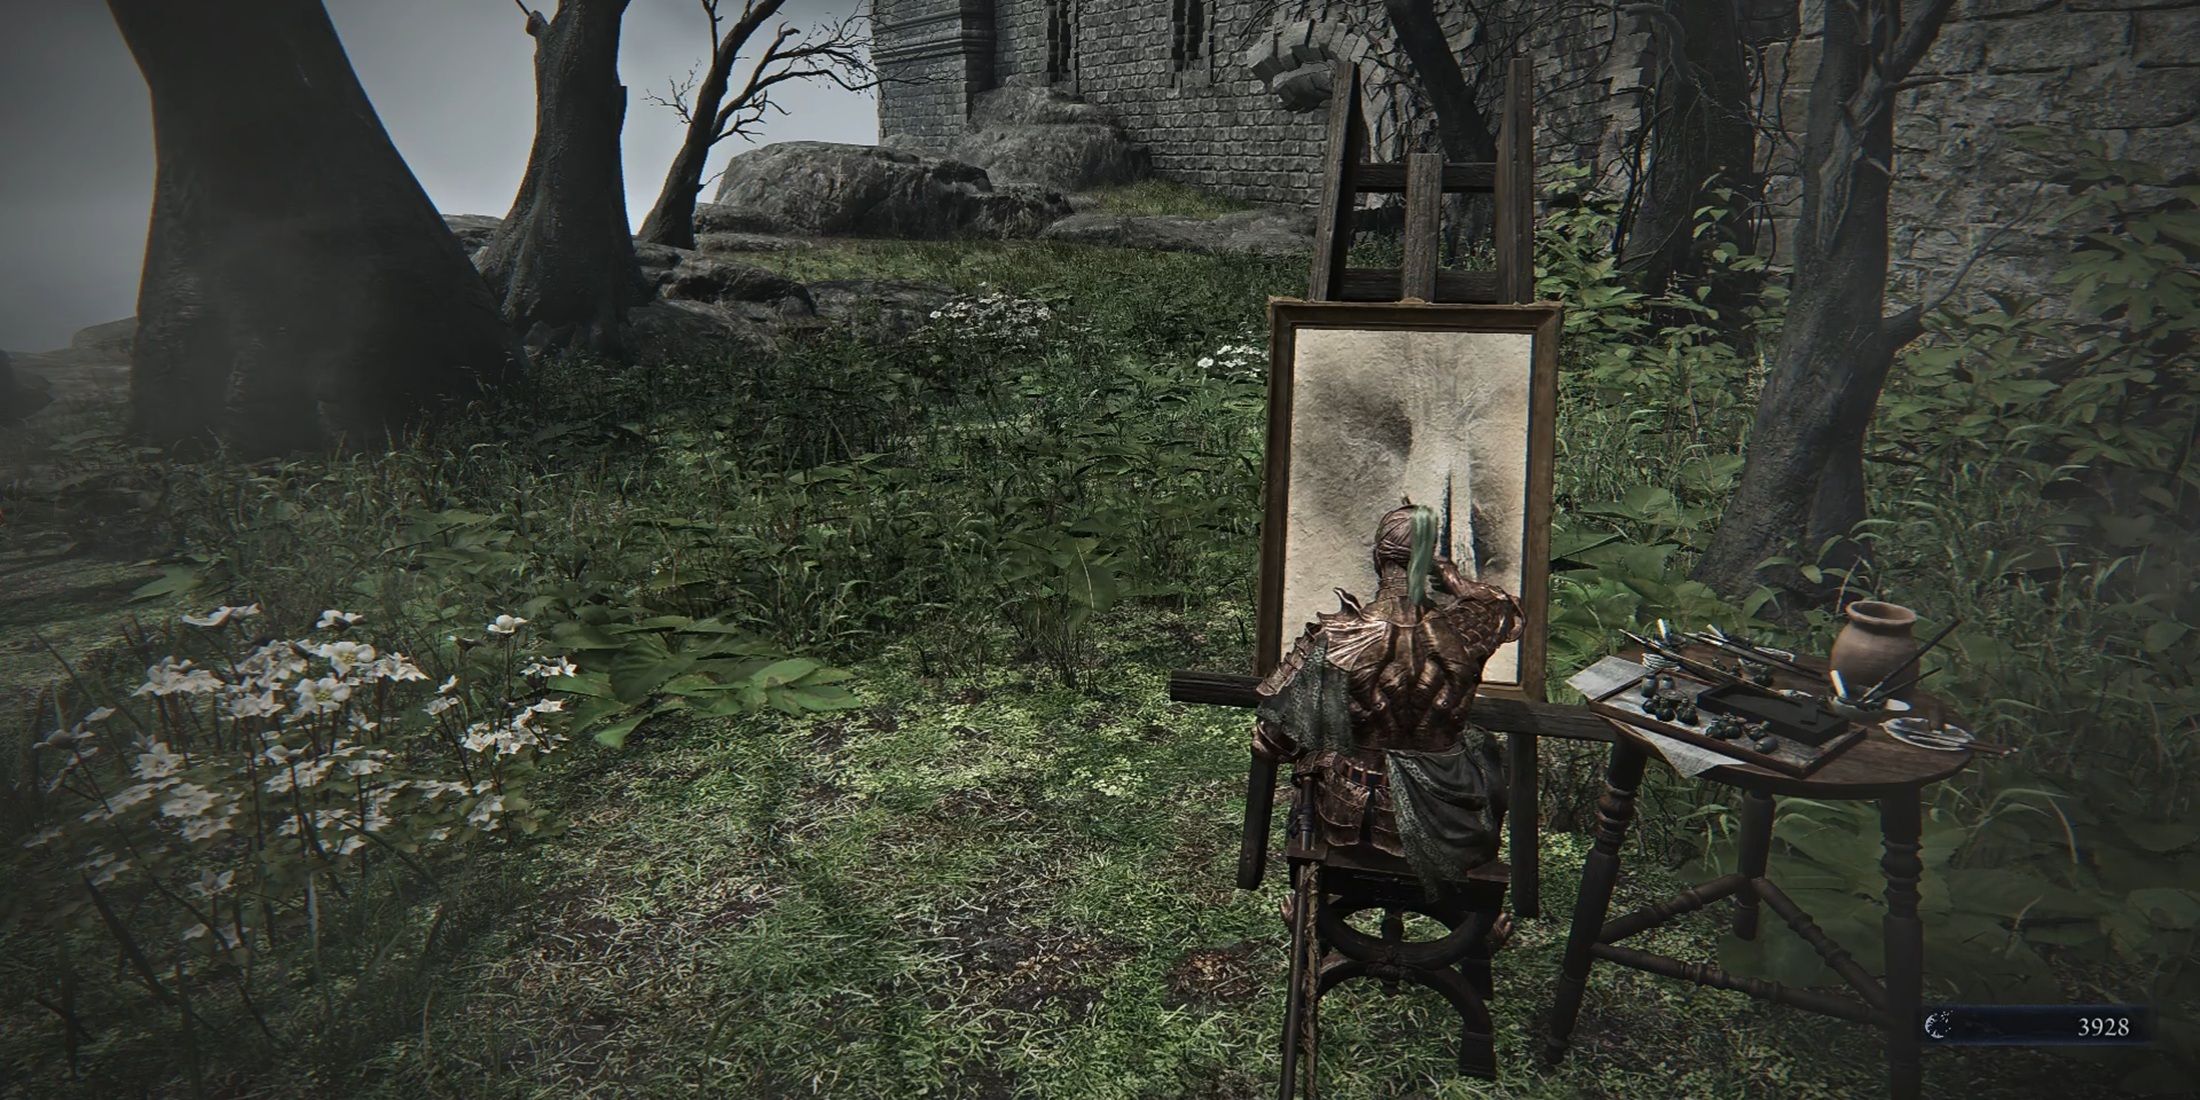

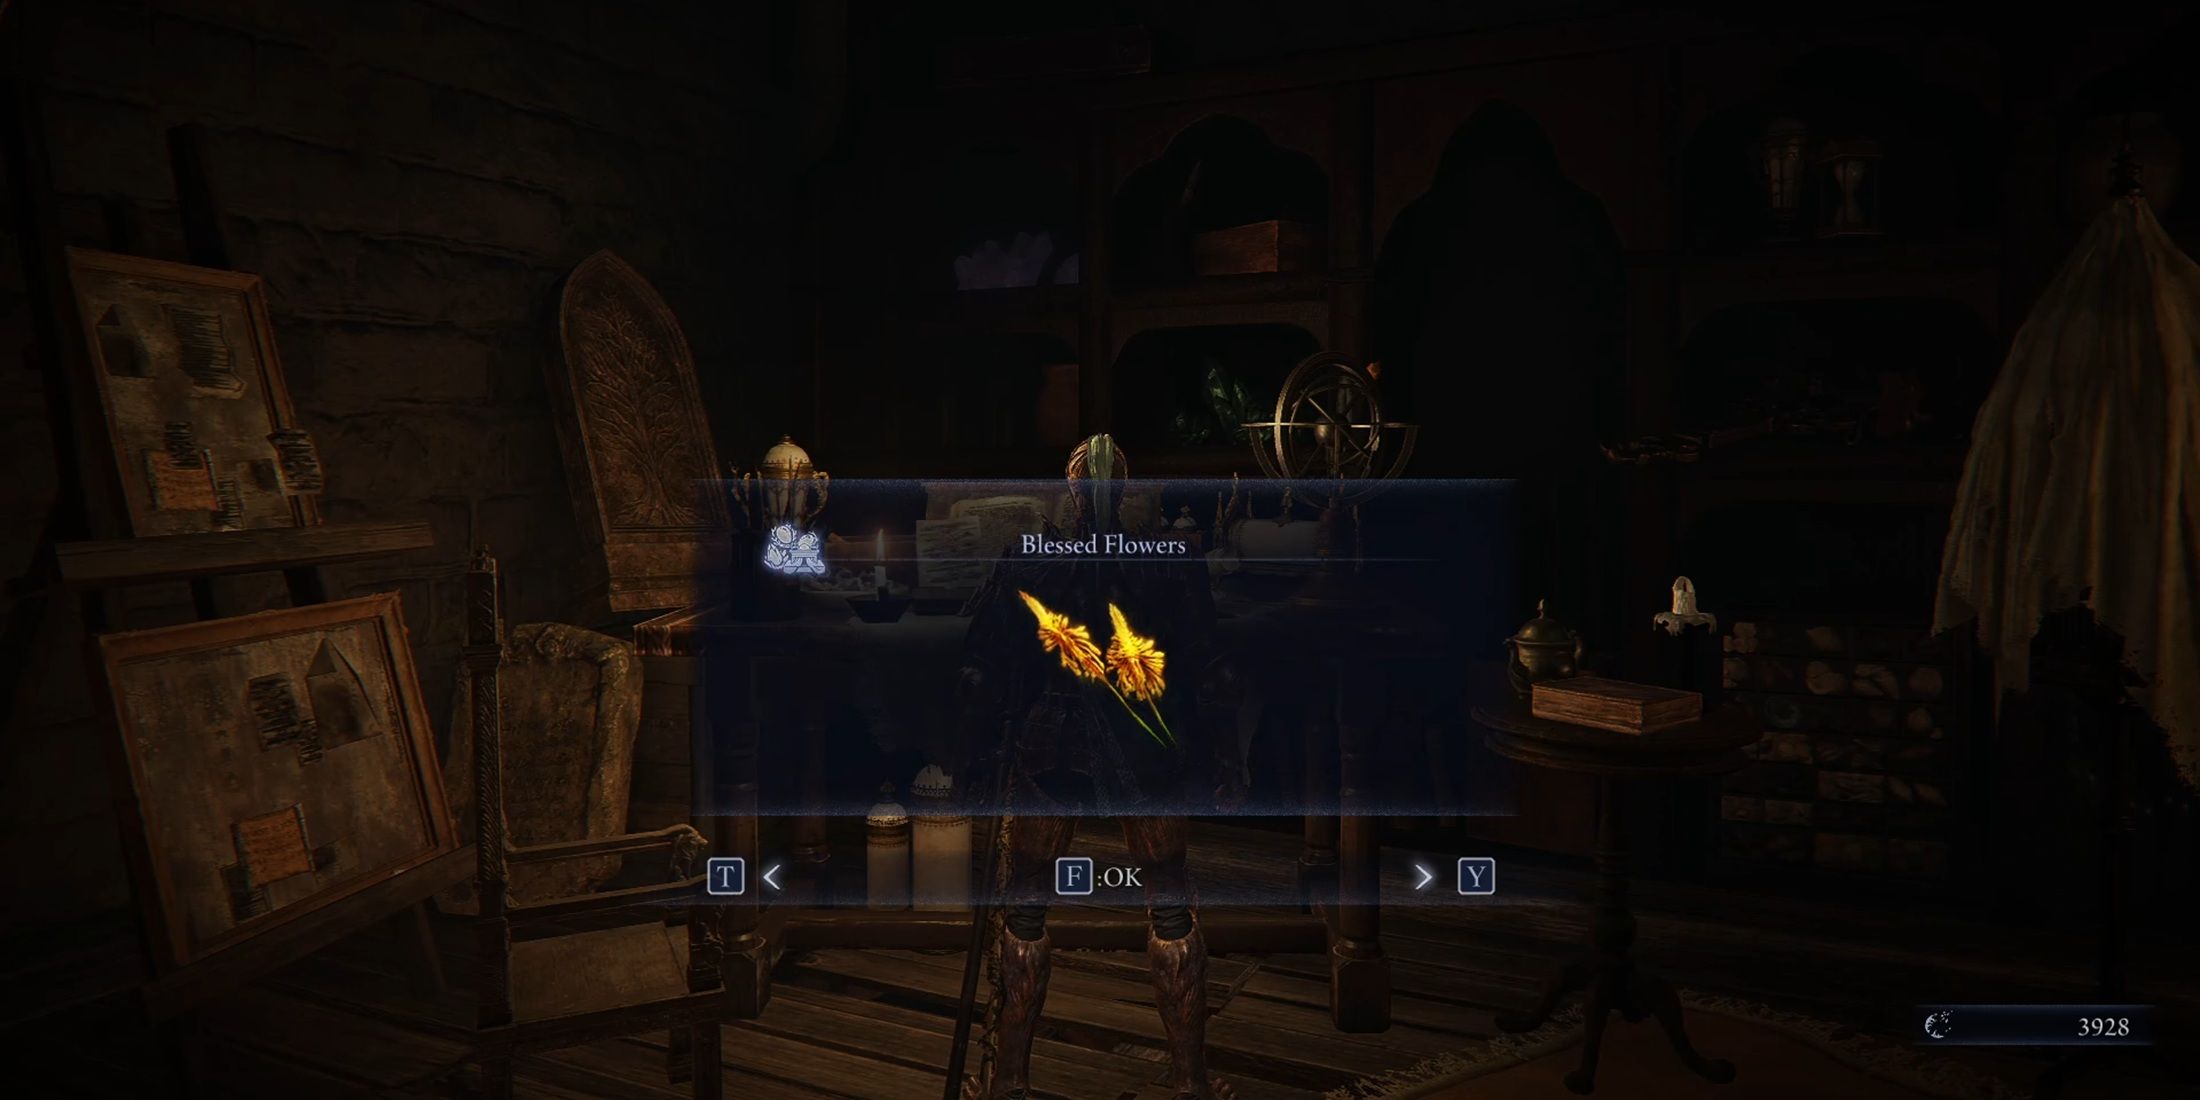
Make your way to the chamber housing the merchant’s jar, and you’ll discover a door there. Step outside, and you’ll encounter Iron Menial near a painting. Hand over the flowers to Iron Menial, then engage with the painting. Afterward, a spell will materialize beside Iron Menial. Touch it to complete the quest. This action will return you to the present, bestowing upon you two rewards: Executor’s Chalice and Blessed Flower Relic.
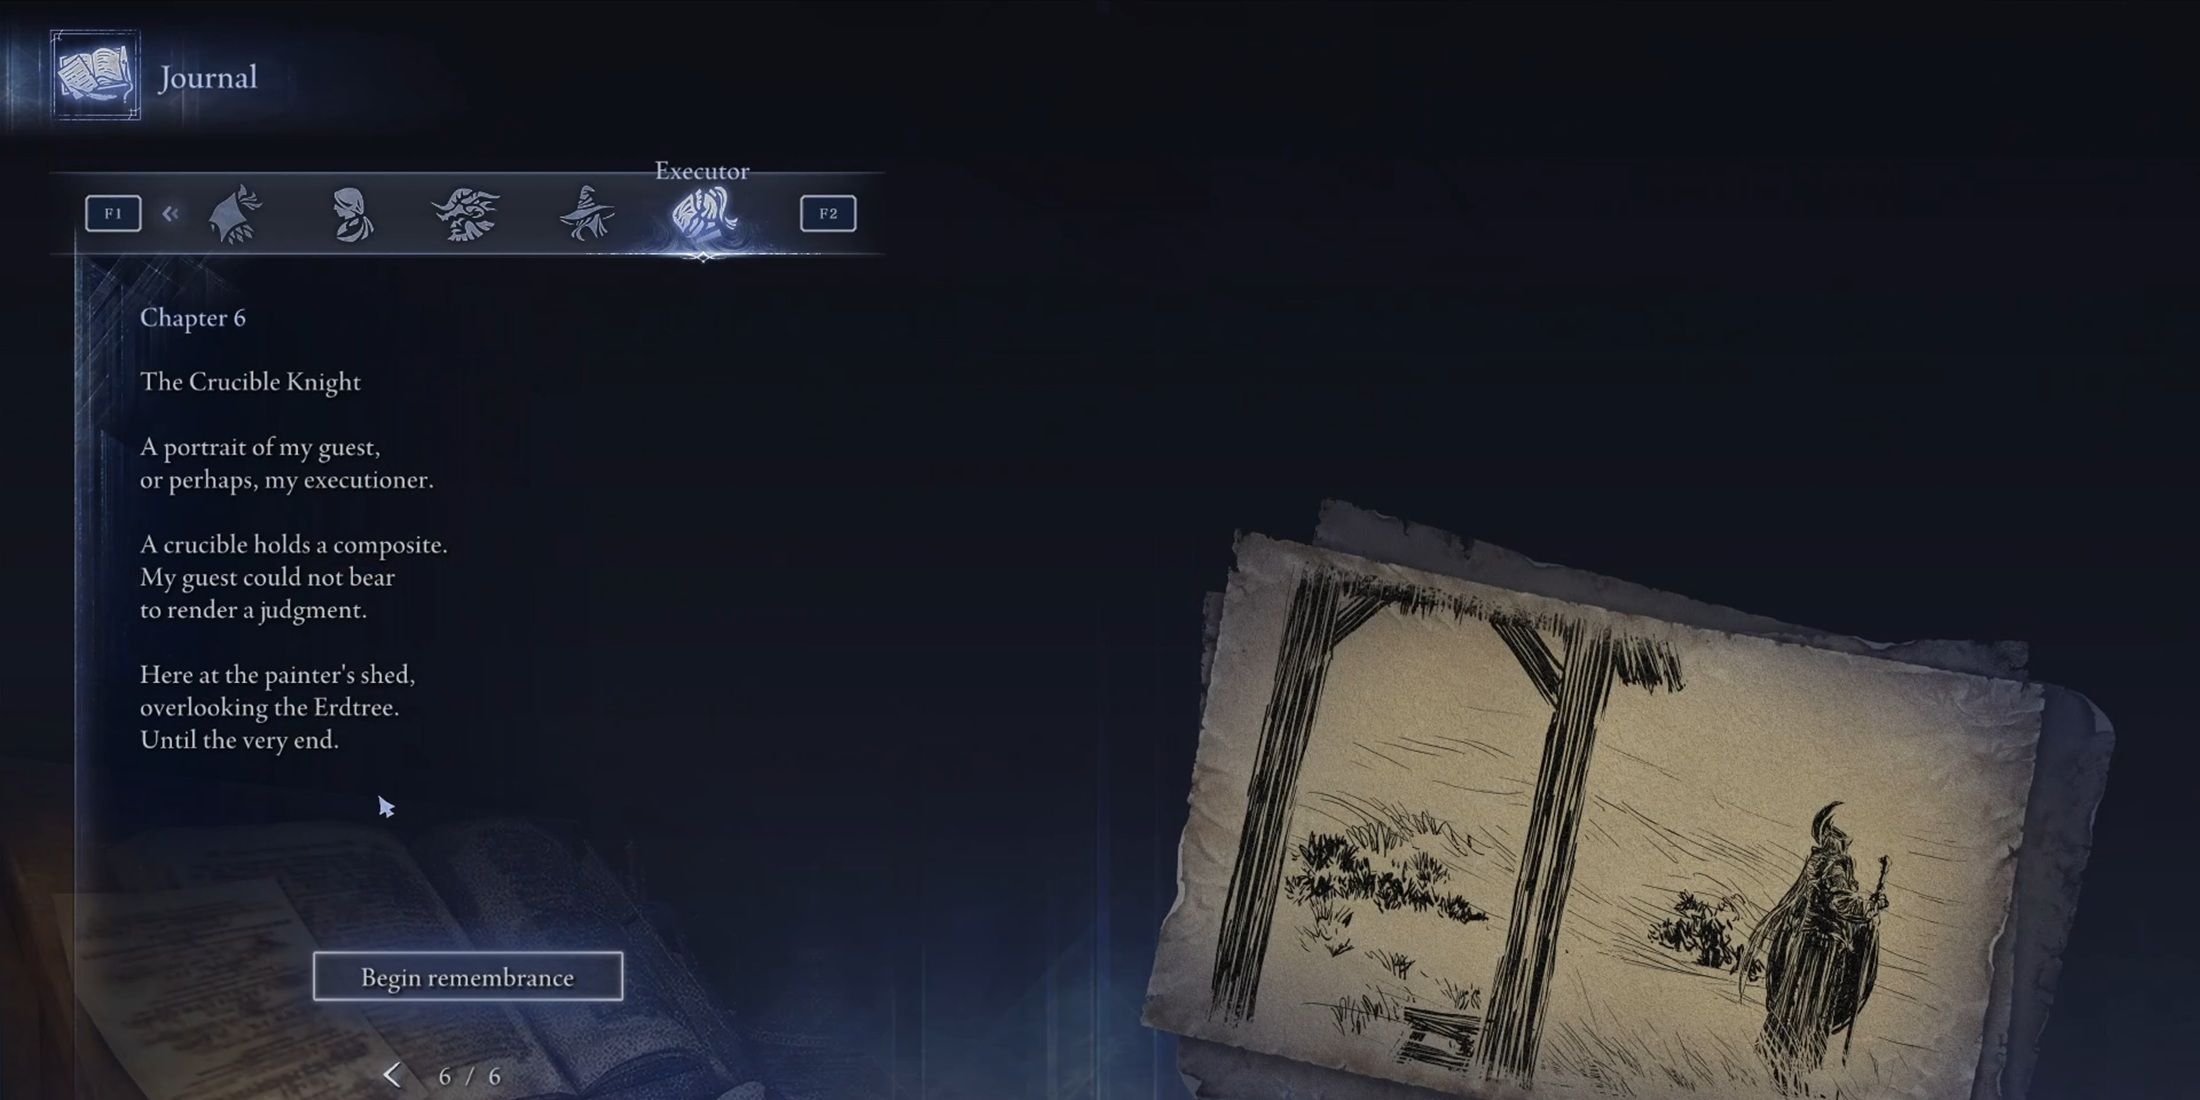
Chapter 6 Remembrance
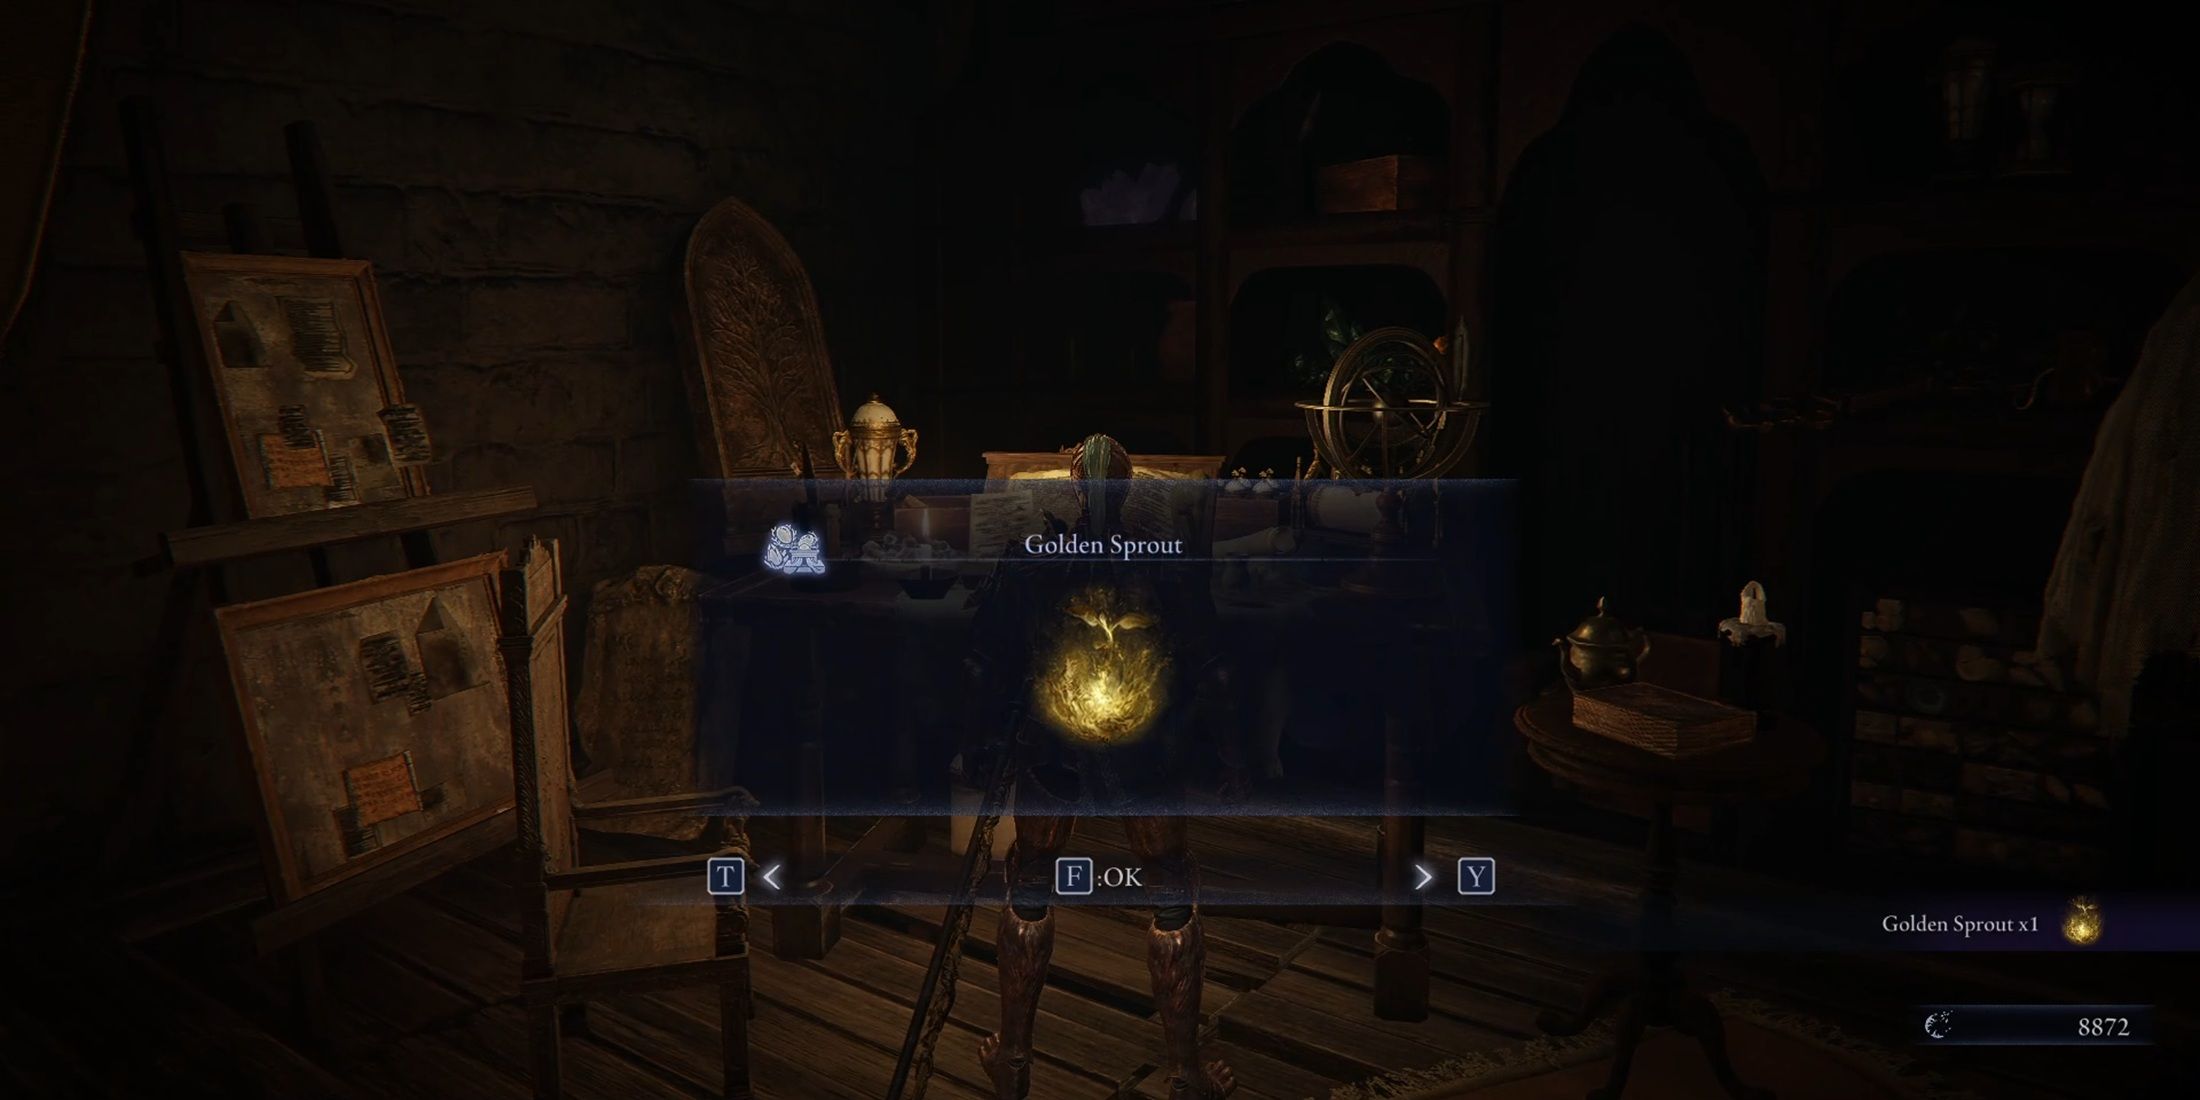
By finishing the recent mission, you’ll gain access to all journal entries up until Chapter 5, however, the subsequent memory to revisit won’t become accessible until Chapter 6. This means you’ll have to partake in more expeditions to gather memory shards. Conquering a Nightlord ensures a memory shard as a reward. Once you’ve initiated the memory, return to the Priestess to receive details about your next task. This time around, you’ll be required to find a Golden Seedling, a process quite similar to that of the prior mission.
![]()
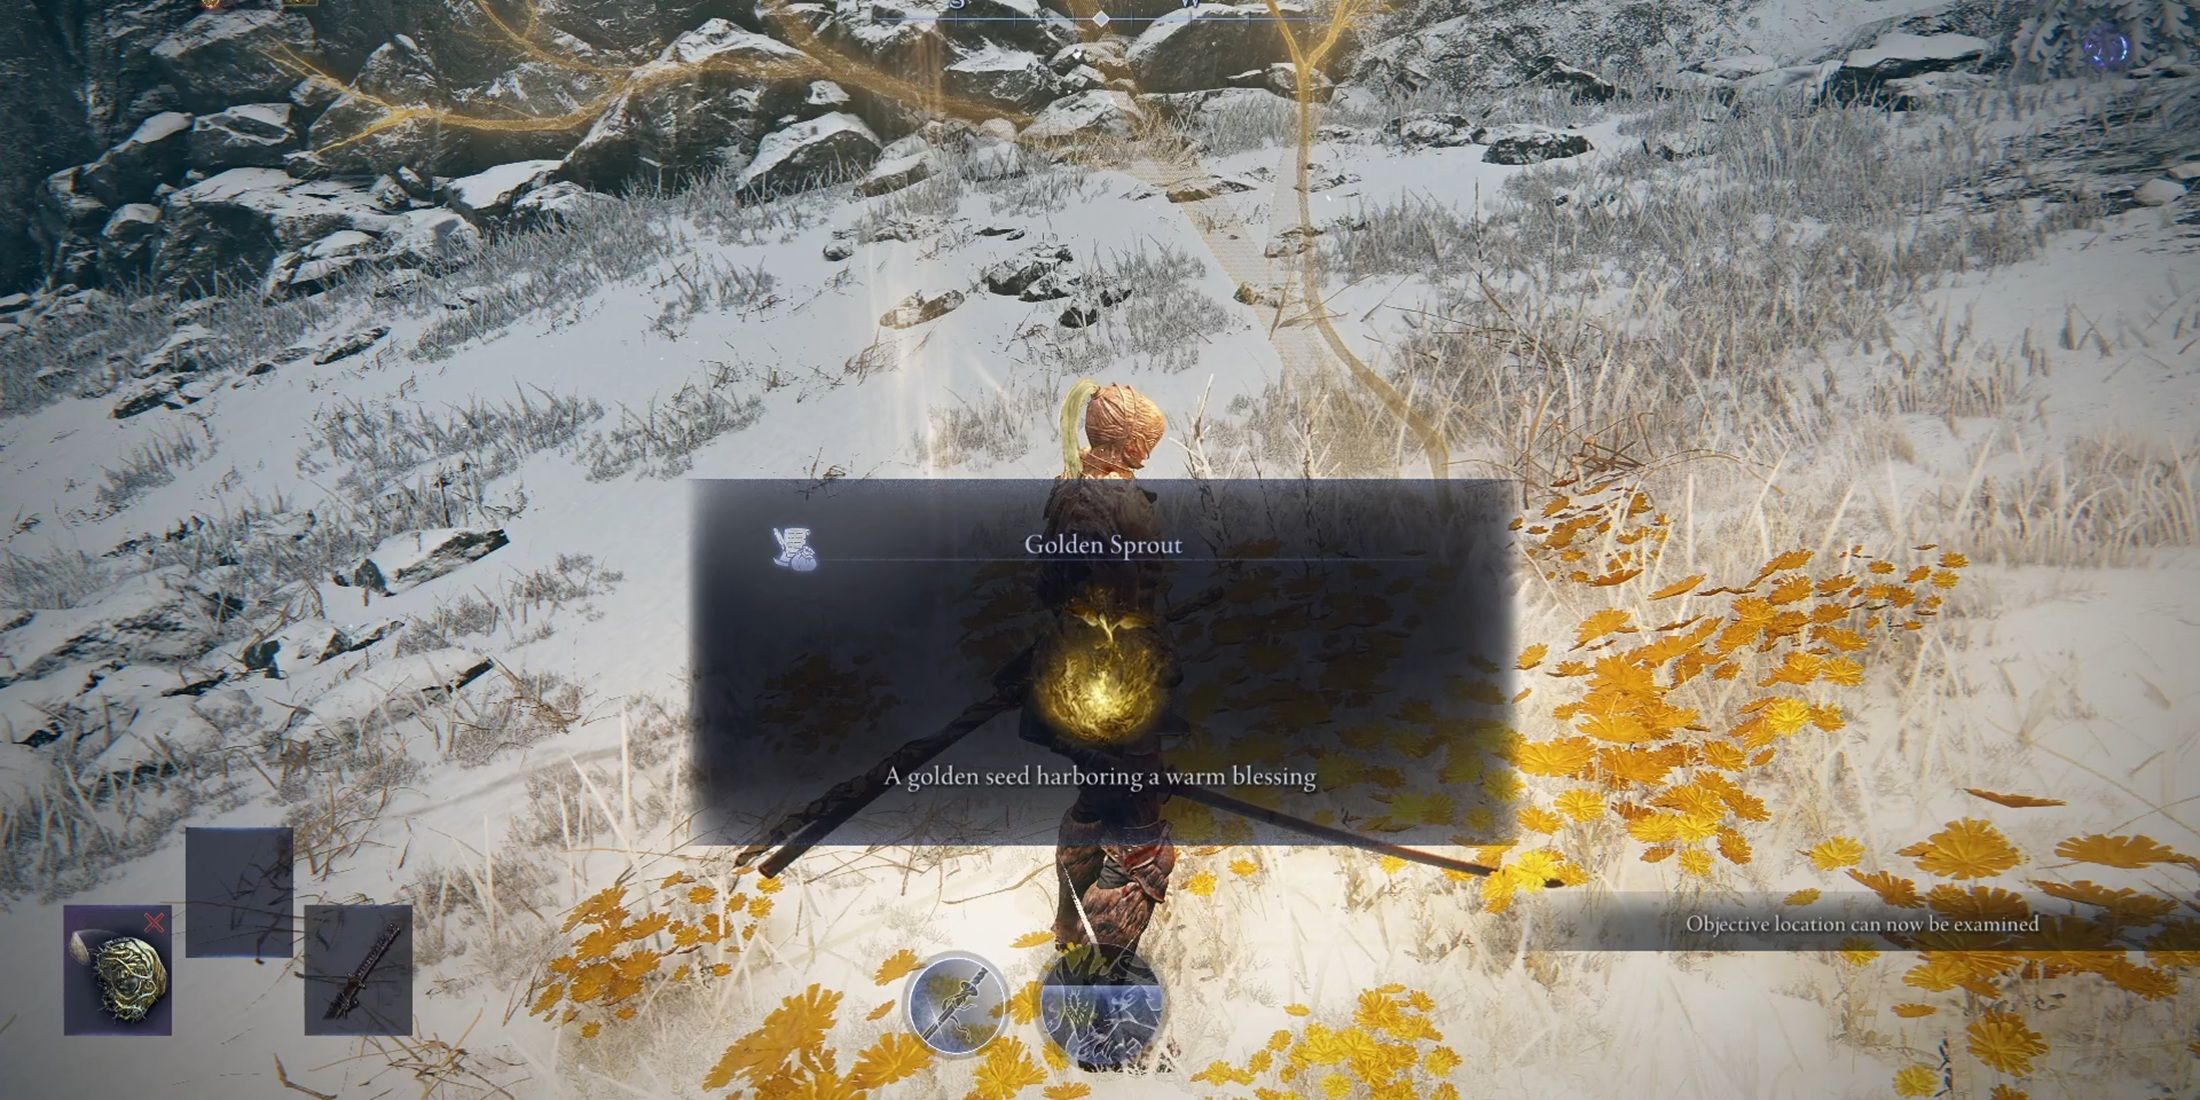
Embark on your journey and make your way towards the designated goalpost. At this destination, you’ll encounter the Erdtree Avatar as your adversary. Compared to the Bloodhound Knight with Stray Blood, this combat should be less challenging due to the Erdtree Avatar’s relatively slow movements. However, maintain a safe distance from him to avoid getting too close. Upon defeating the boss, grab the Golden Sprout and carry on with your expedition until you return to the Roundtable Hold. Before presenting the Golden Sprout to the Priestess, take a detour to the Relic Rite and gather any necessary gear for the upcoming fight.
Speaking to the Priestess transports you to a climactic battle, pitting you against the archenemy of the Executor. In this encounter, the adversary will mirror the Executor, wielding the same types of weapons that the player possesses.
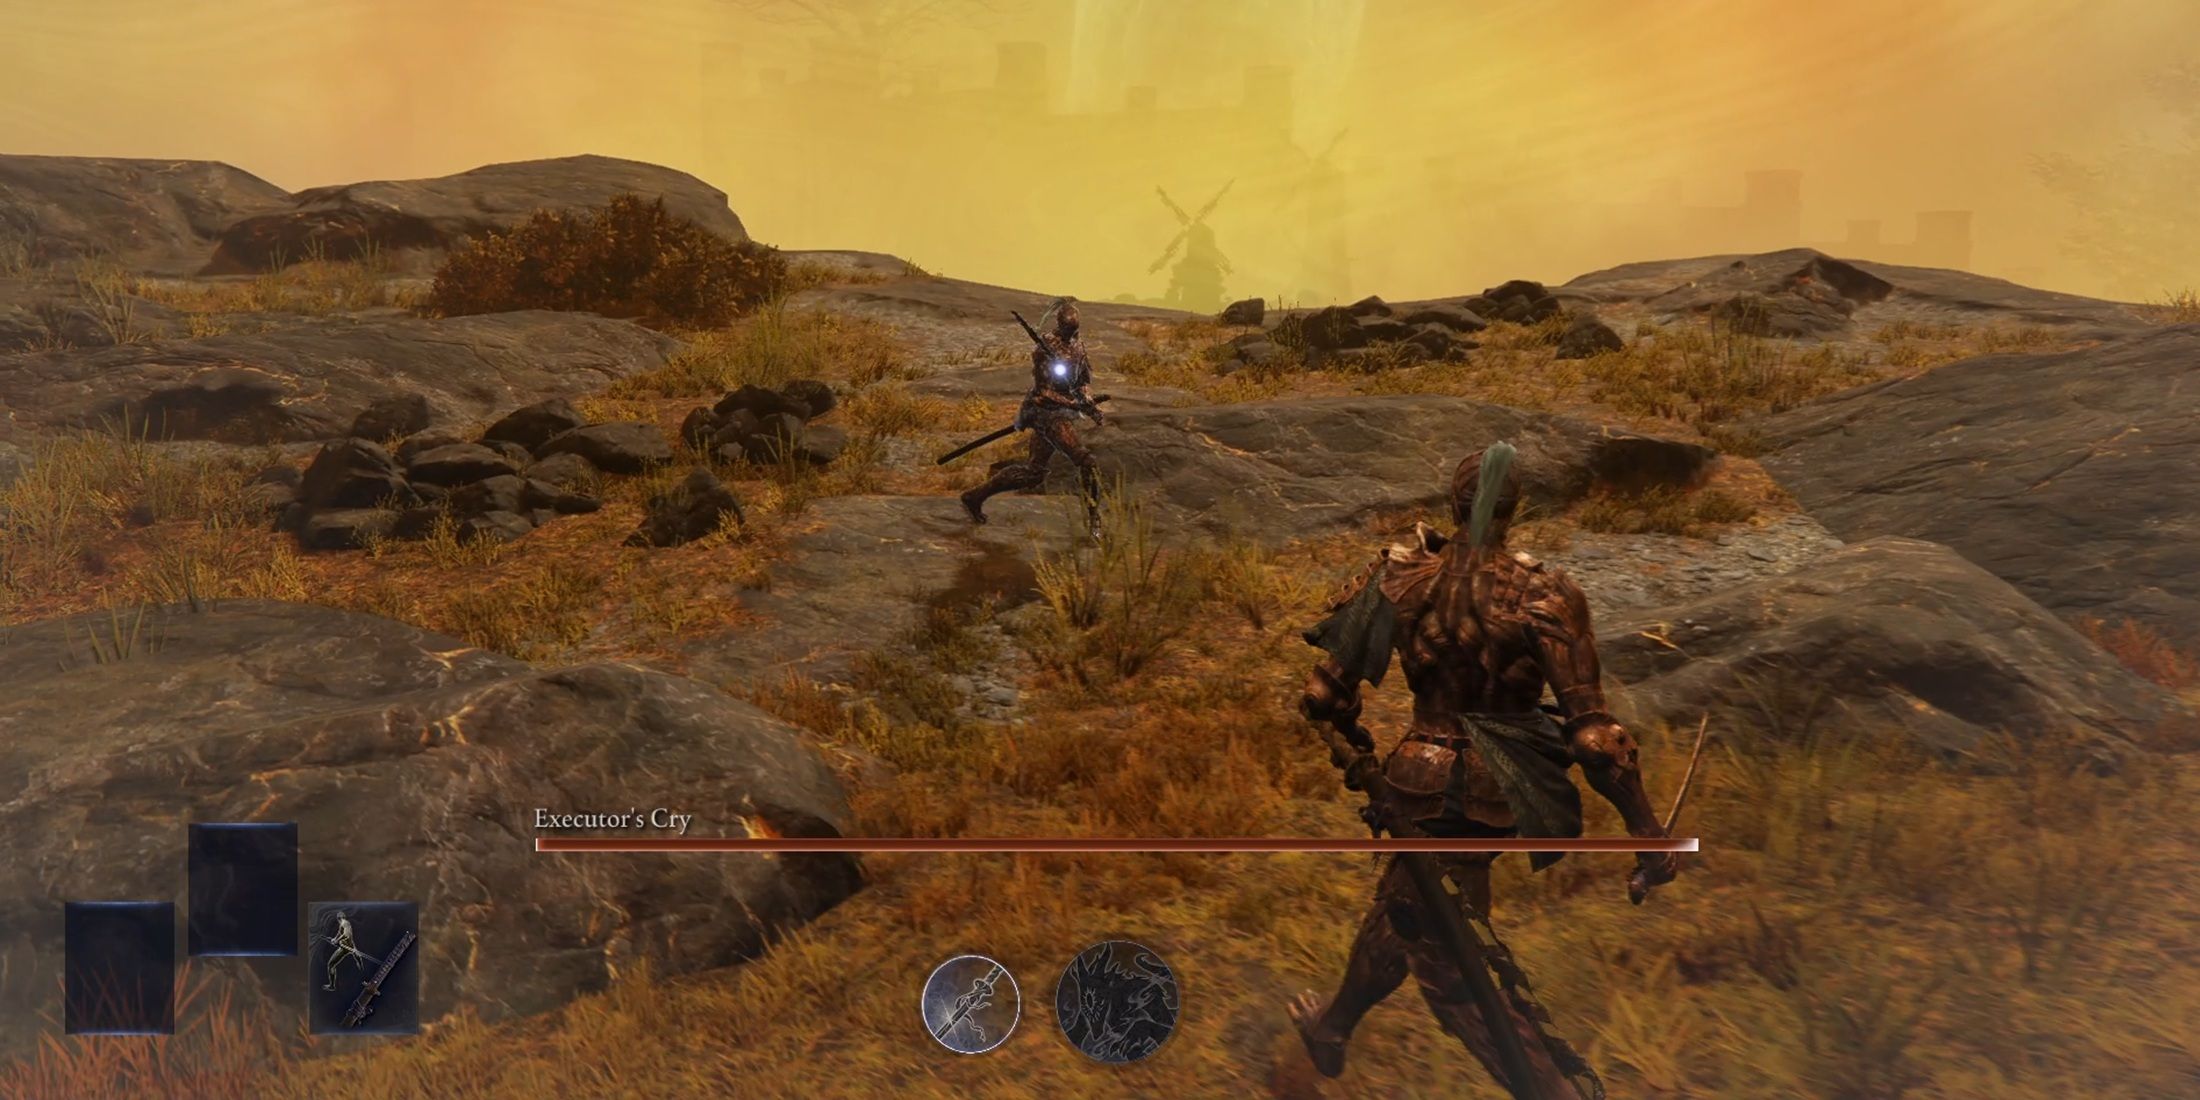
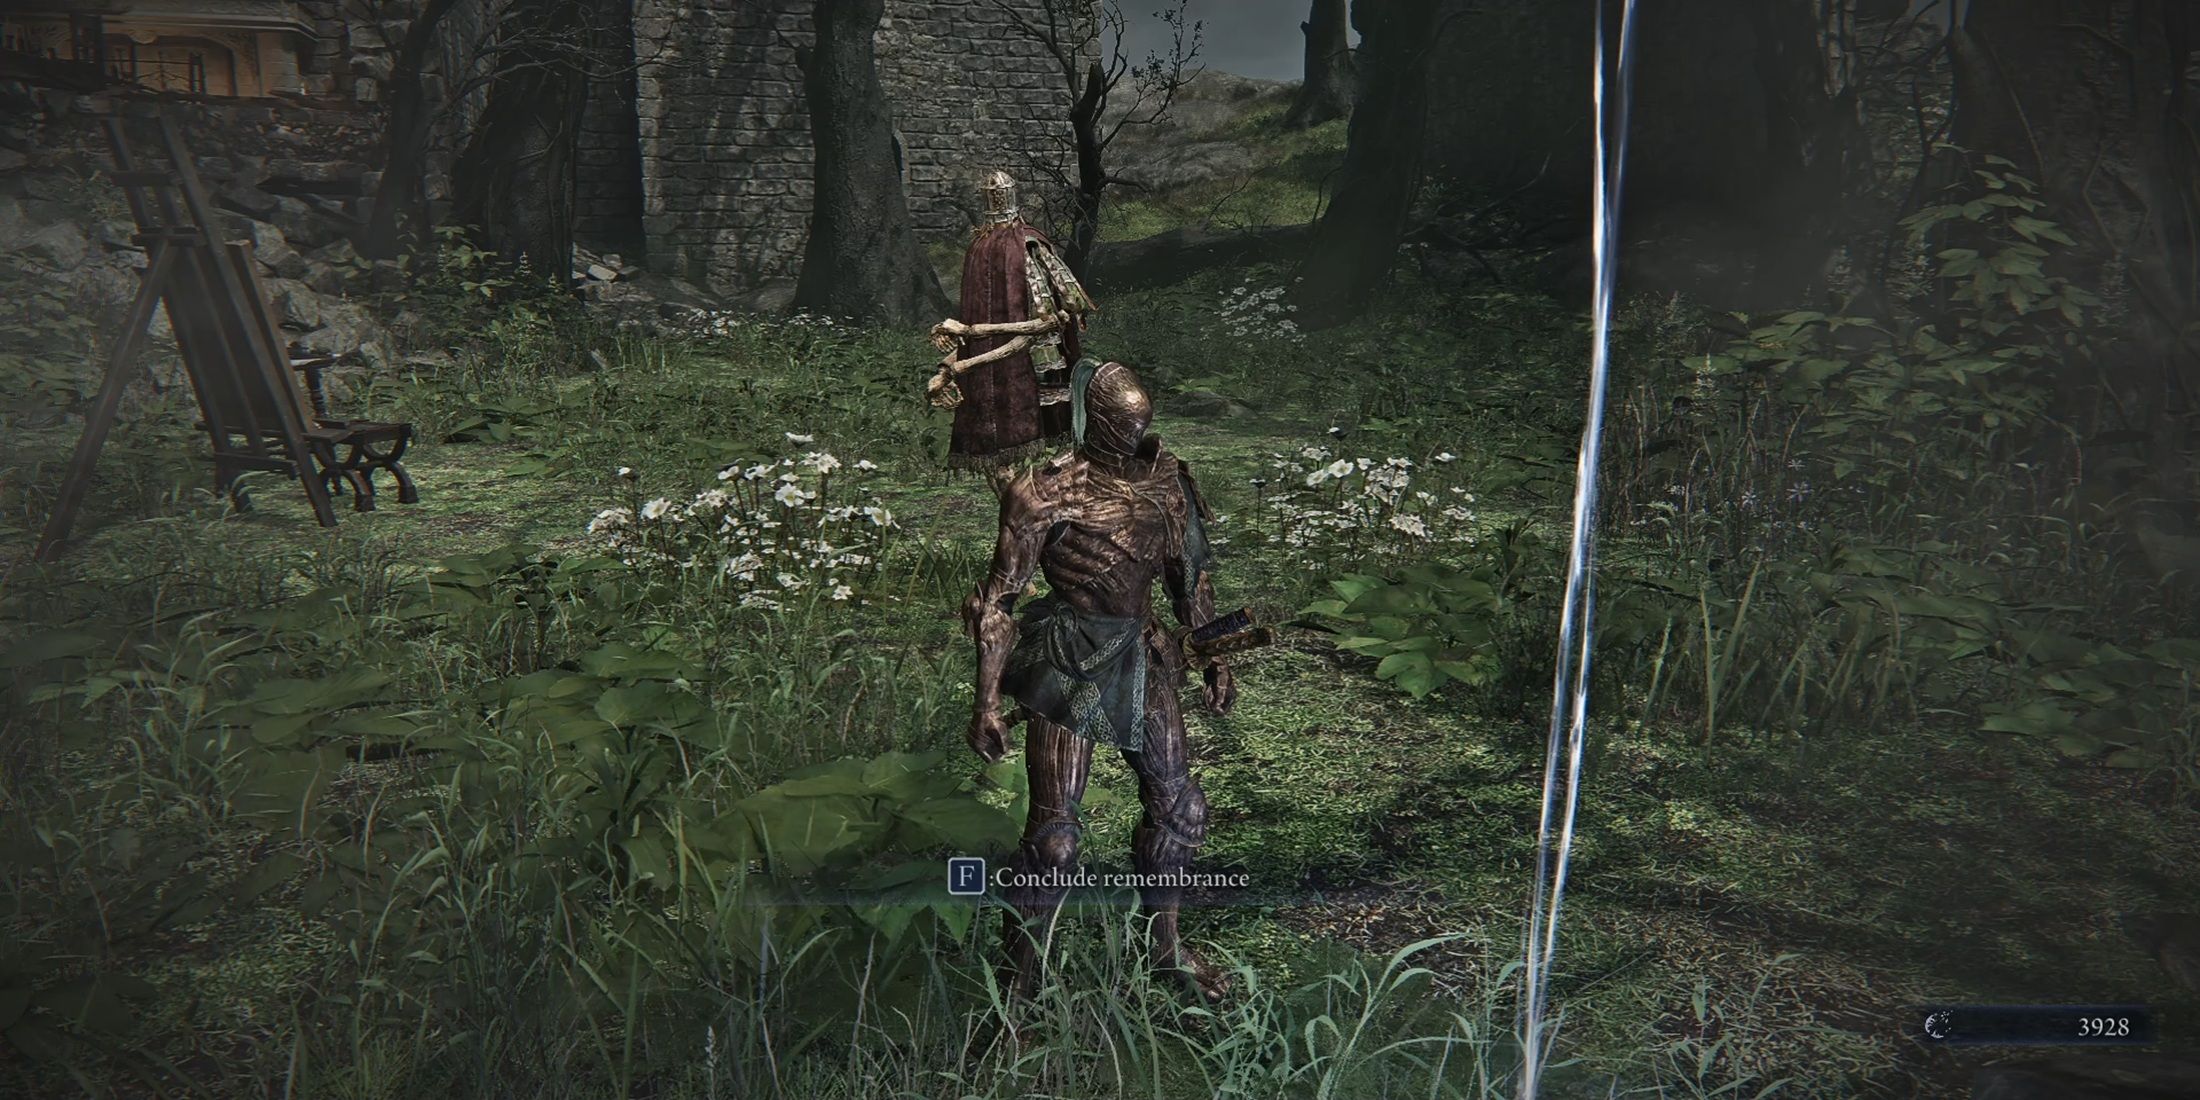
Following your victory over the ‘Executor’s Cry’, take a moment to survey the surroundings, and you’ll notice a radiant glow in the distance. Make your way towards it until you come across a quaint little house. Enter the dwelling and prepare to witness the concluding act of the memory. Completing this will mark the end of the ‘Executor’s Remembrance’ questline.
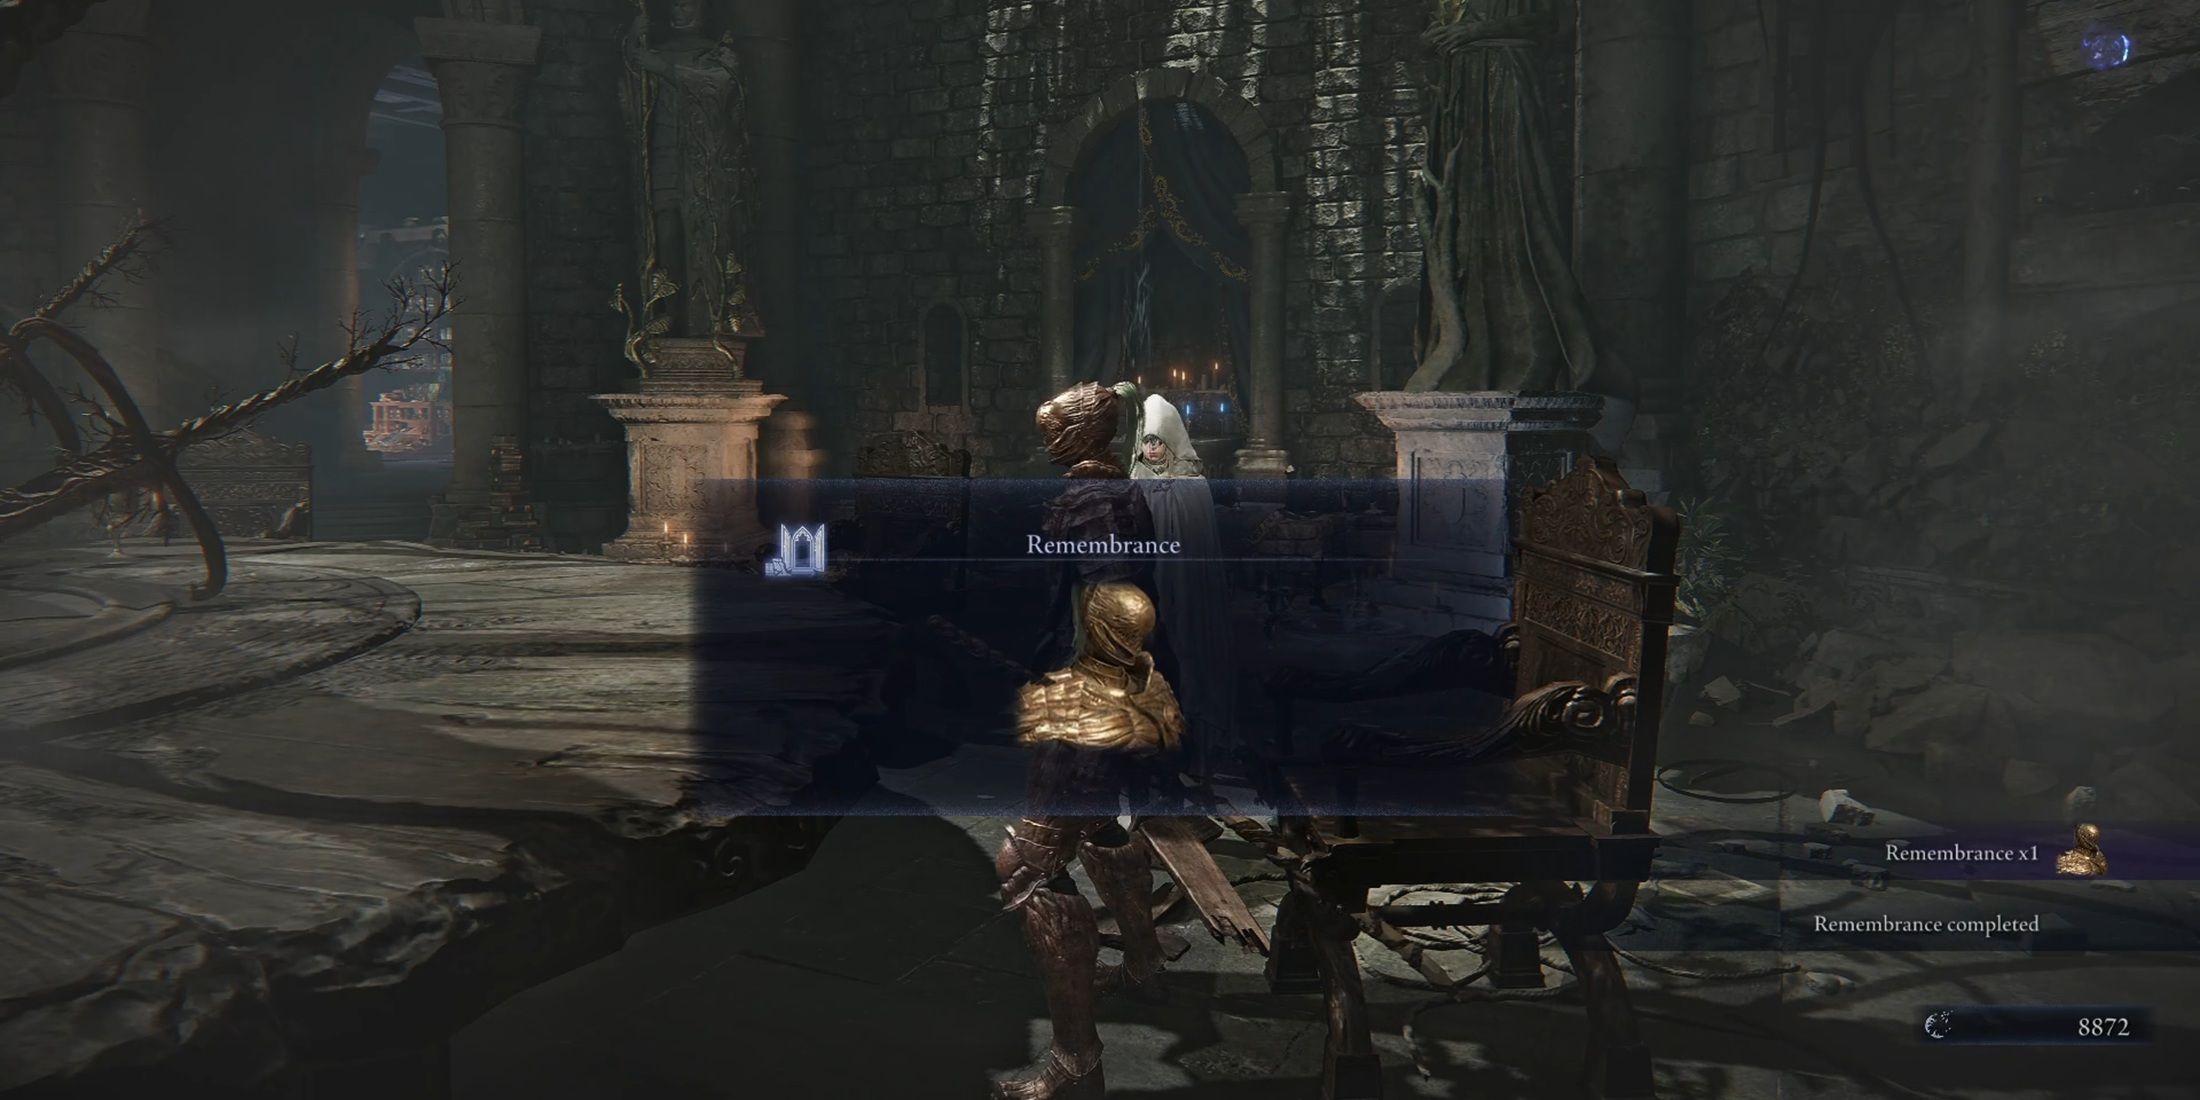
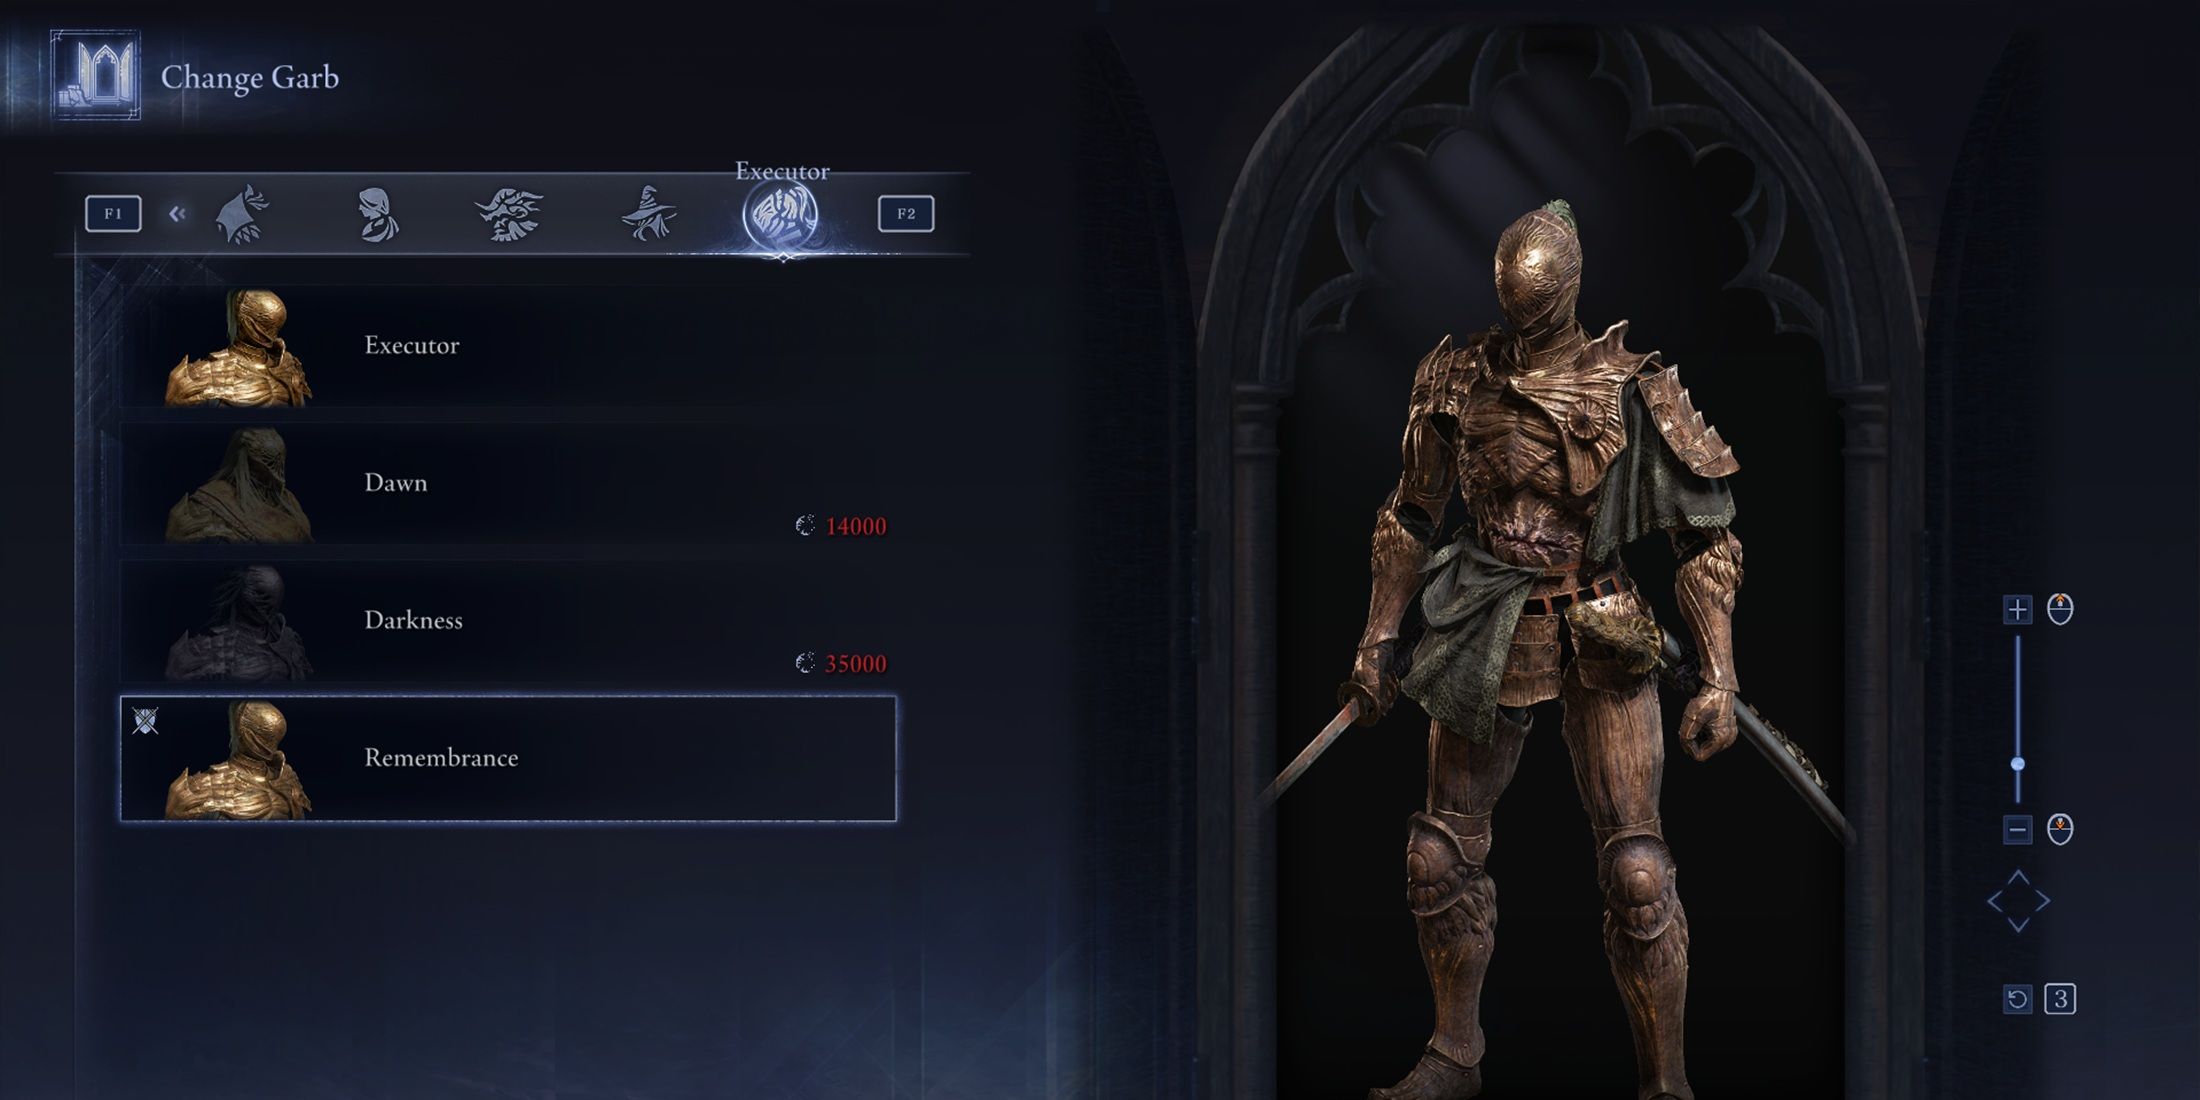
Upon your return to Roundtable Hold, you’ll be granted the Remembrance skin for your character as a finishing prize. To put on the Remembrance skin, navigate to the Garb section within Roundtable Hold. Interact with the conclusion spell to transport back to the current time and collect the Golden Sprout relic too. For those intrigued by the storyline, take a moment to review the journal one last time to read the Chapter 7 documents.
Read More
- All Skyblazer Armor Locations in Crimson Desert
- All Shadow Armor Locations in Crimson Desert
- How to Get the Sunset Reed Armor Set and Hollow Visage Sword in Crimson Desert
- Marni Laser Helm Location & Upgrade in Crimson Desert
- Best Bows in Crimson Desert
- All Helfryn Armor Locations in Crimson Desert
- All Golden Greed Armor Locations in Crimson Desert
- How to Craft the Elegant Carmine Armor in Crimson Desert
- Keeping Large AI Models Connected Through Network Chaos
- One Piece Chapter 1179 Preview: The Real Imu Arrives in Elbaf
2025-06-01 22:05