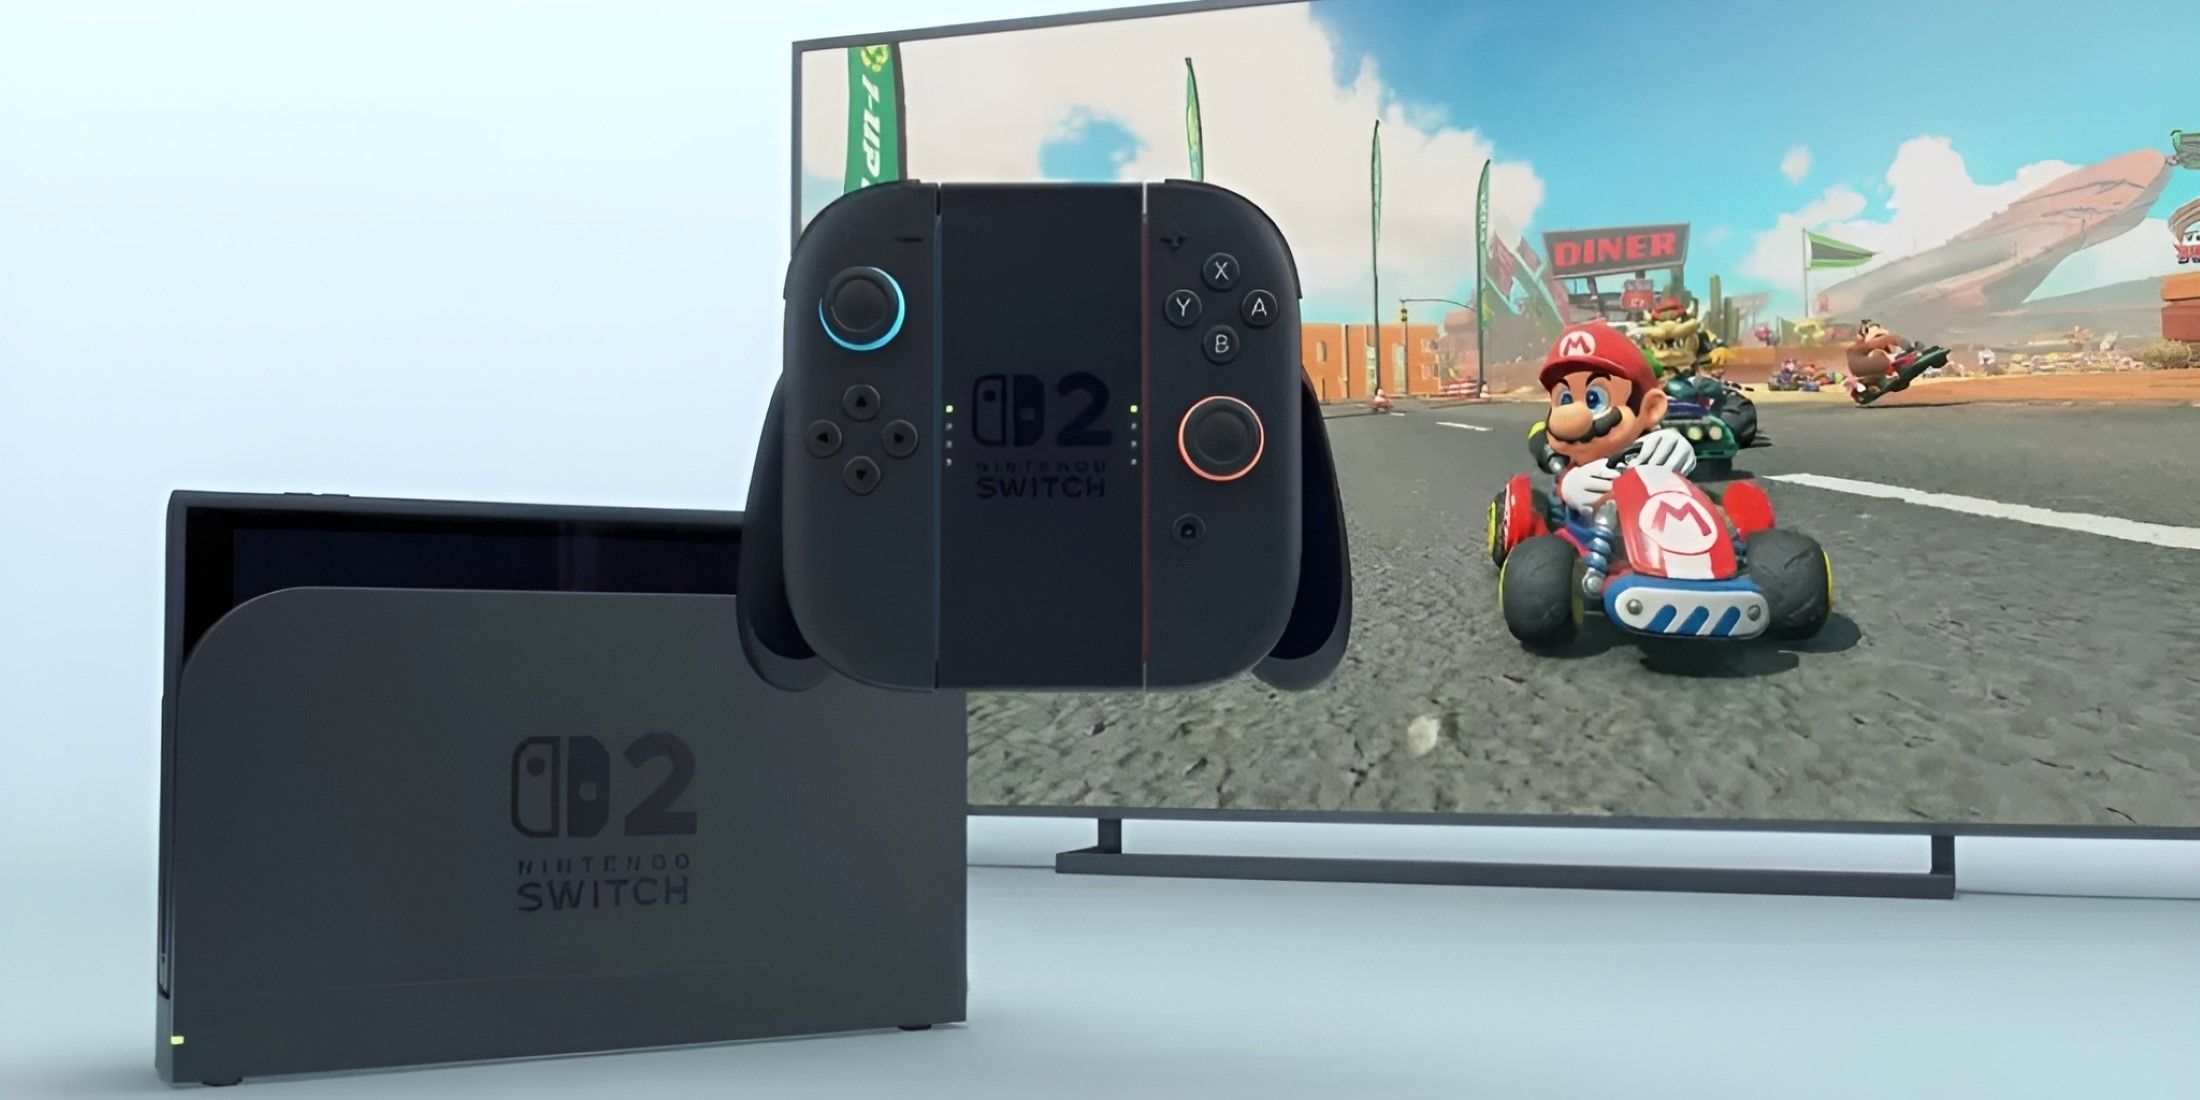
Among the key attractions of the Nintendo Switch, and subsequently the upcoming Nintendo Switch 2, is its versatility in being played either as a handheld device or connected to a TV. The Switch 2 offers effortless transition between these modes once properly configured, allowing you to switch back and forth whenever you desire.
Among the essential accessories not physically connected to the Switch 2, the Docking Station plays a crucial role as it allows you to connect your system with your television. Here’s a simple guide on how to set up the docking station and link your Switch 2 to your TV.
A vital accessory not physically part of the Switch 2 is the Docking Station, which enables the connection of the device to your television. Below you will find instructions for setting up the docking station and connecting your Switch 2 to your TV.
How To Connect Switch 2 To A TV
The essential accessory for your Switch 2, besides the console itself, is the Docking Station. To link your Switch 2 to a TV, it’s crucial to locate your Docking Station near your TV and ensure all cables are securely connected. Don’t forget to have a game at hand for seamless playtime.
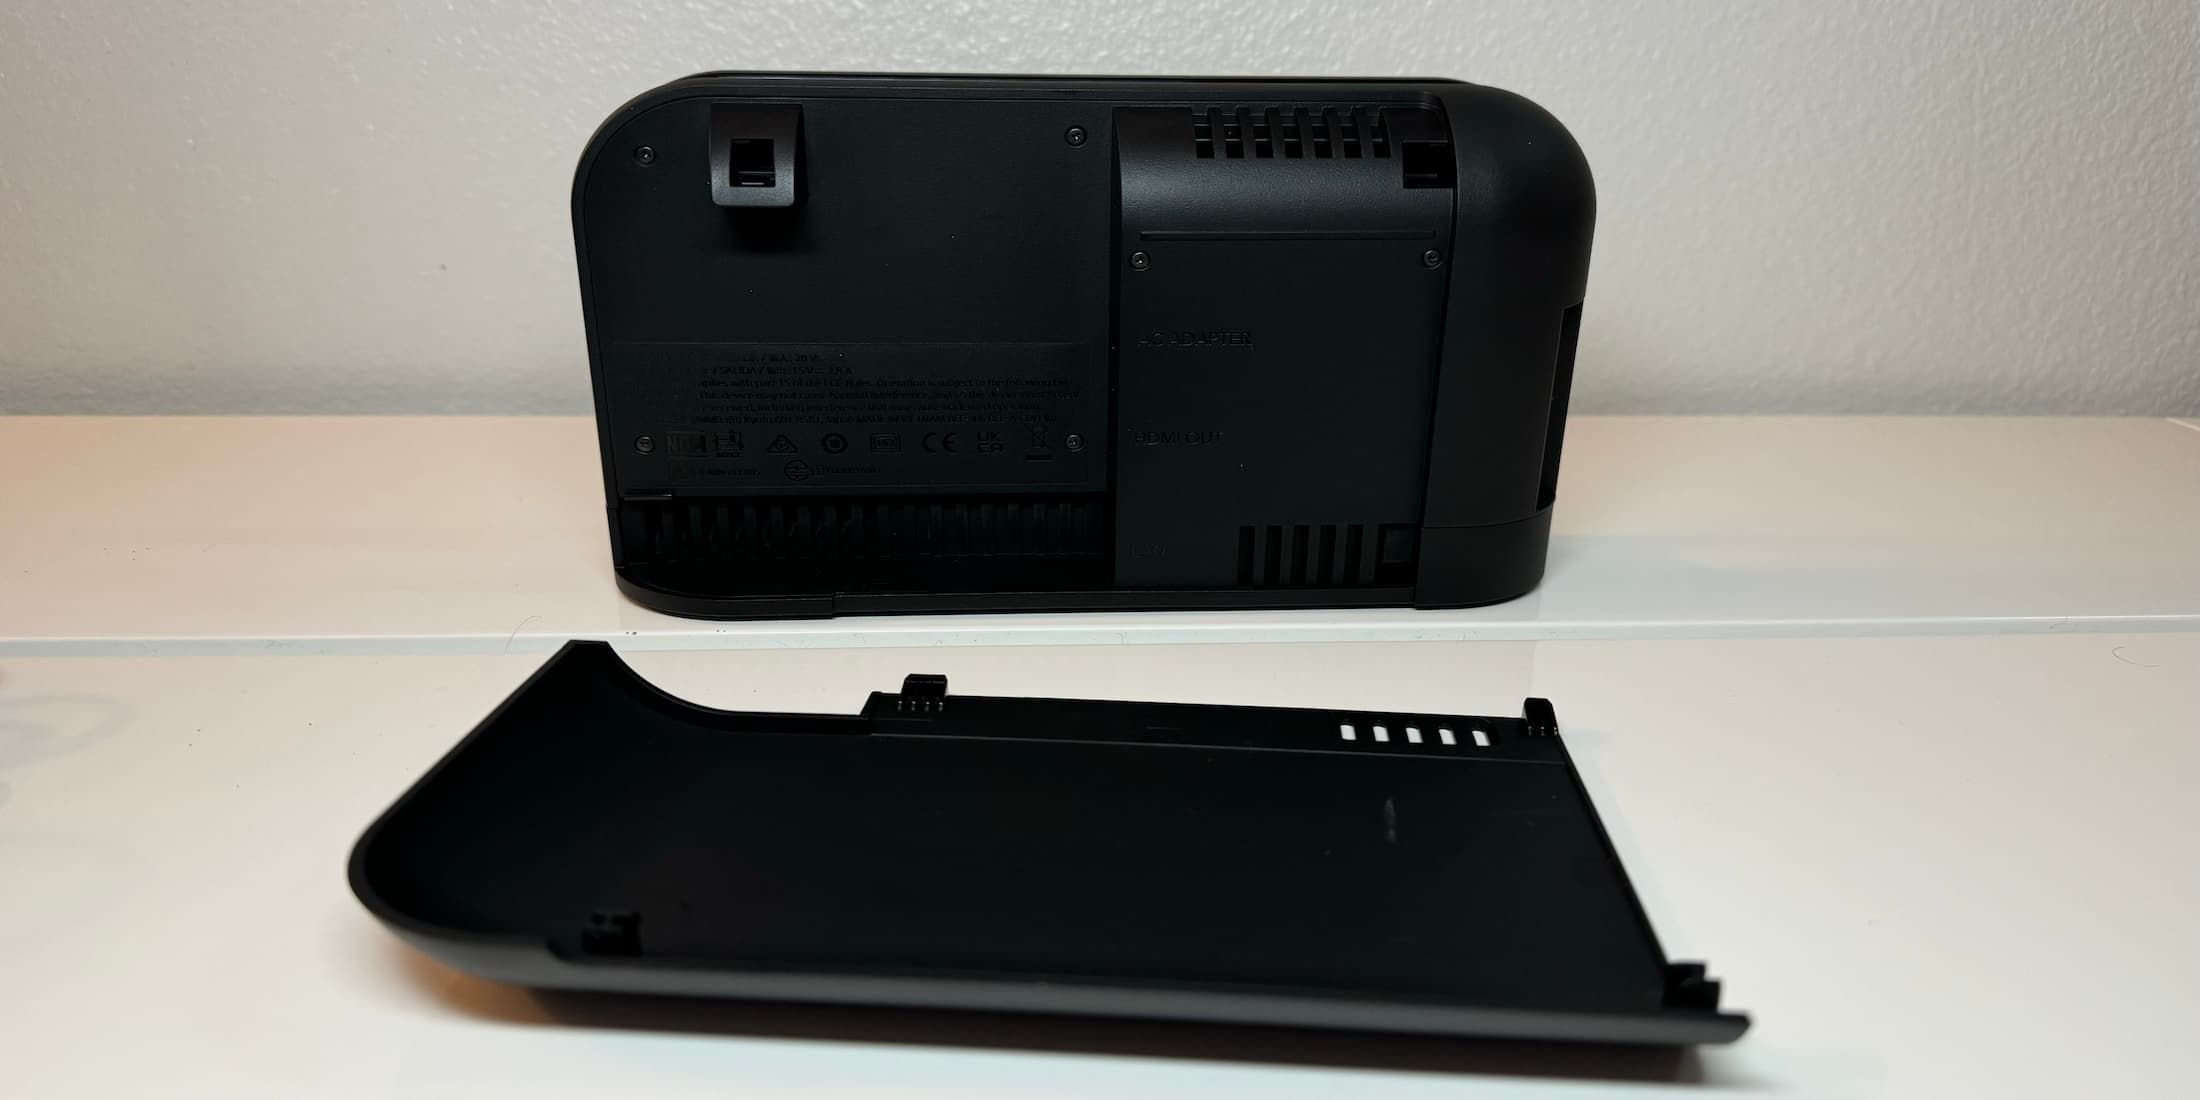
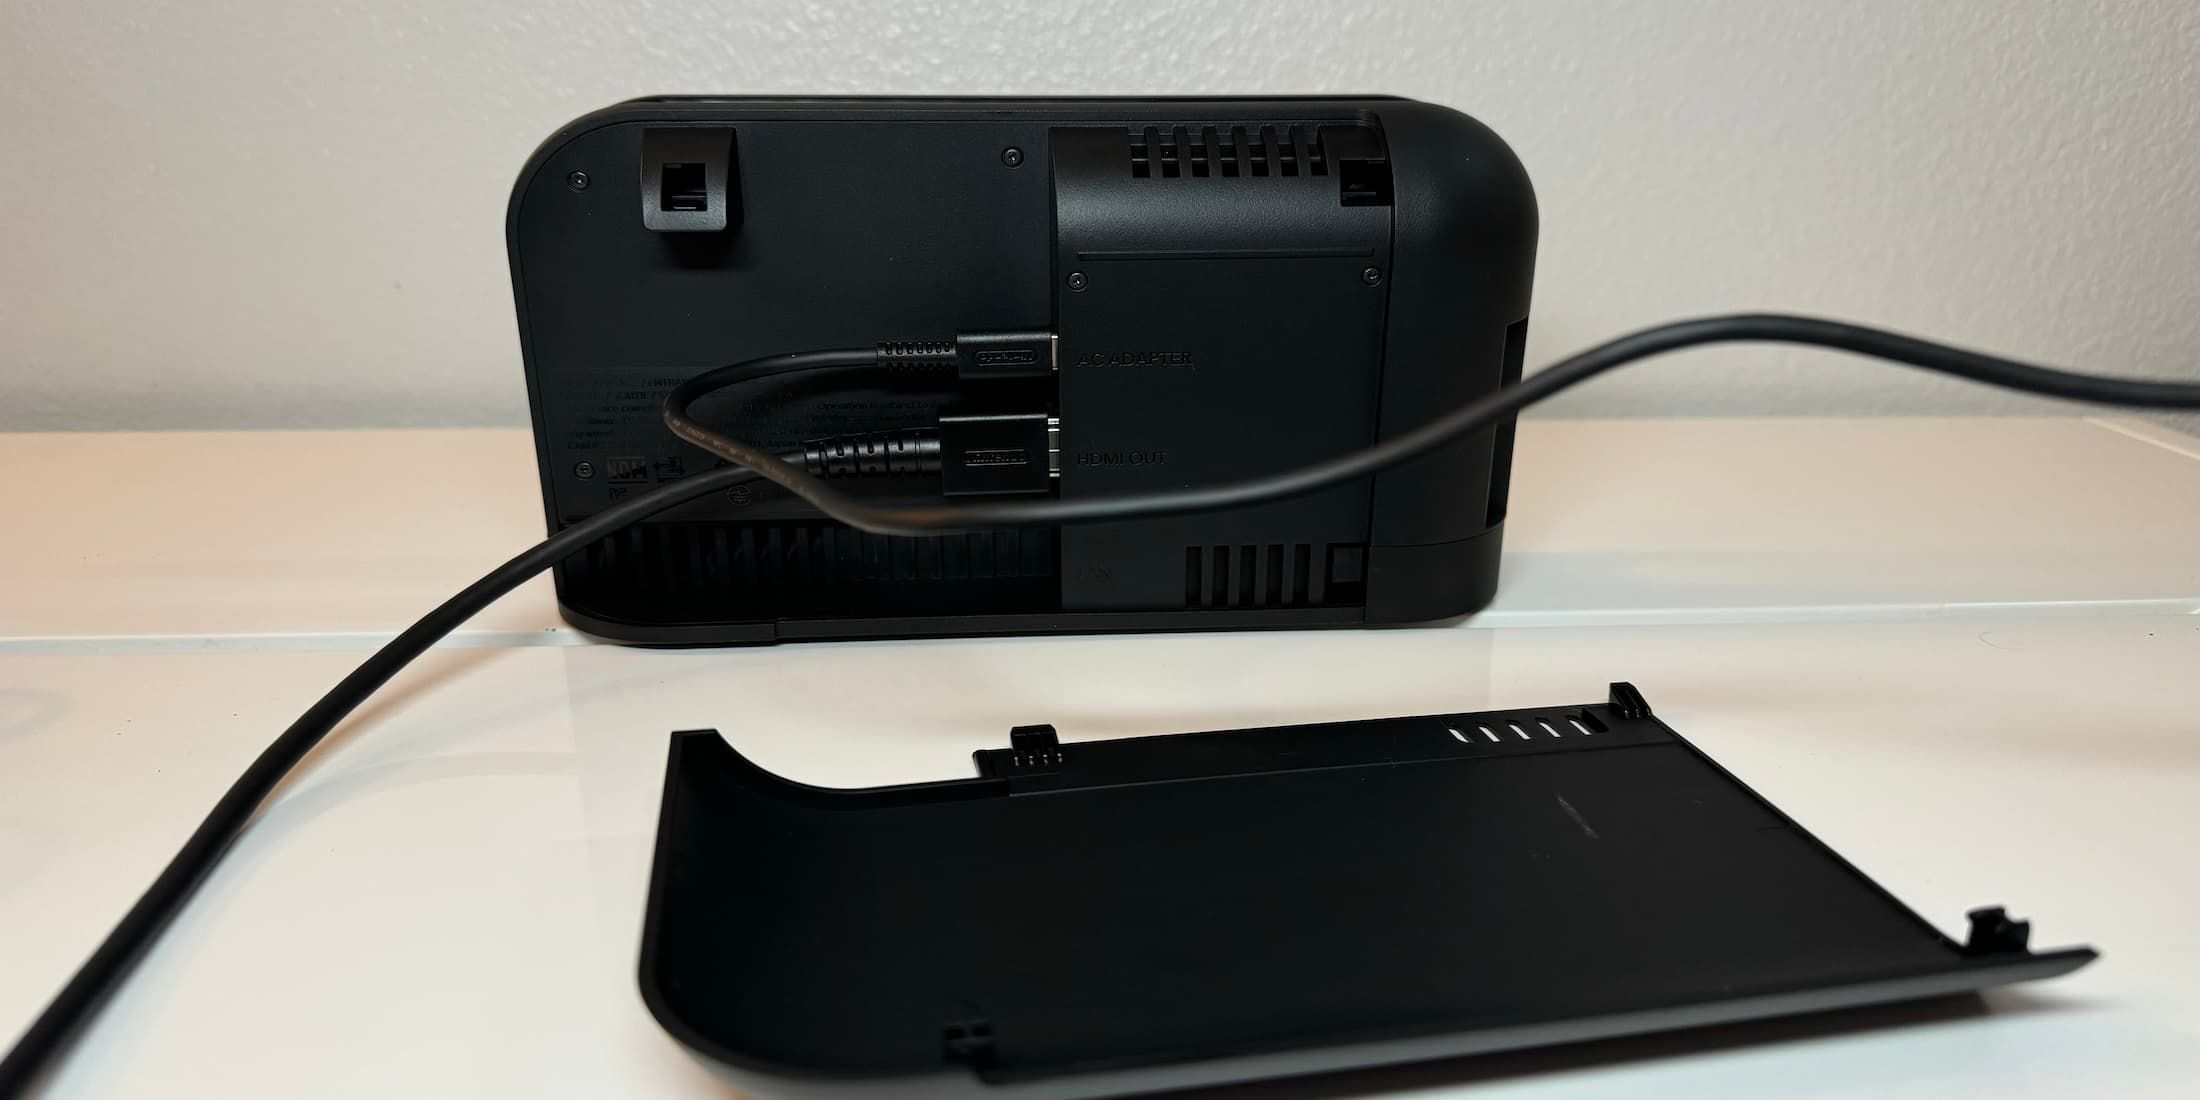
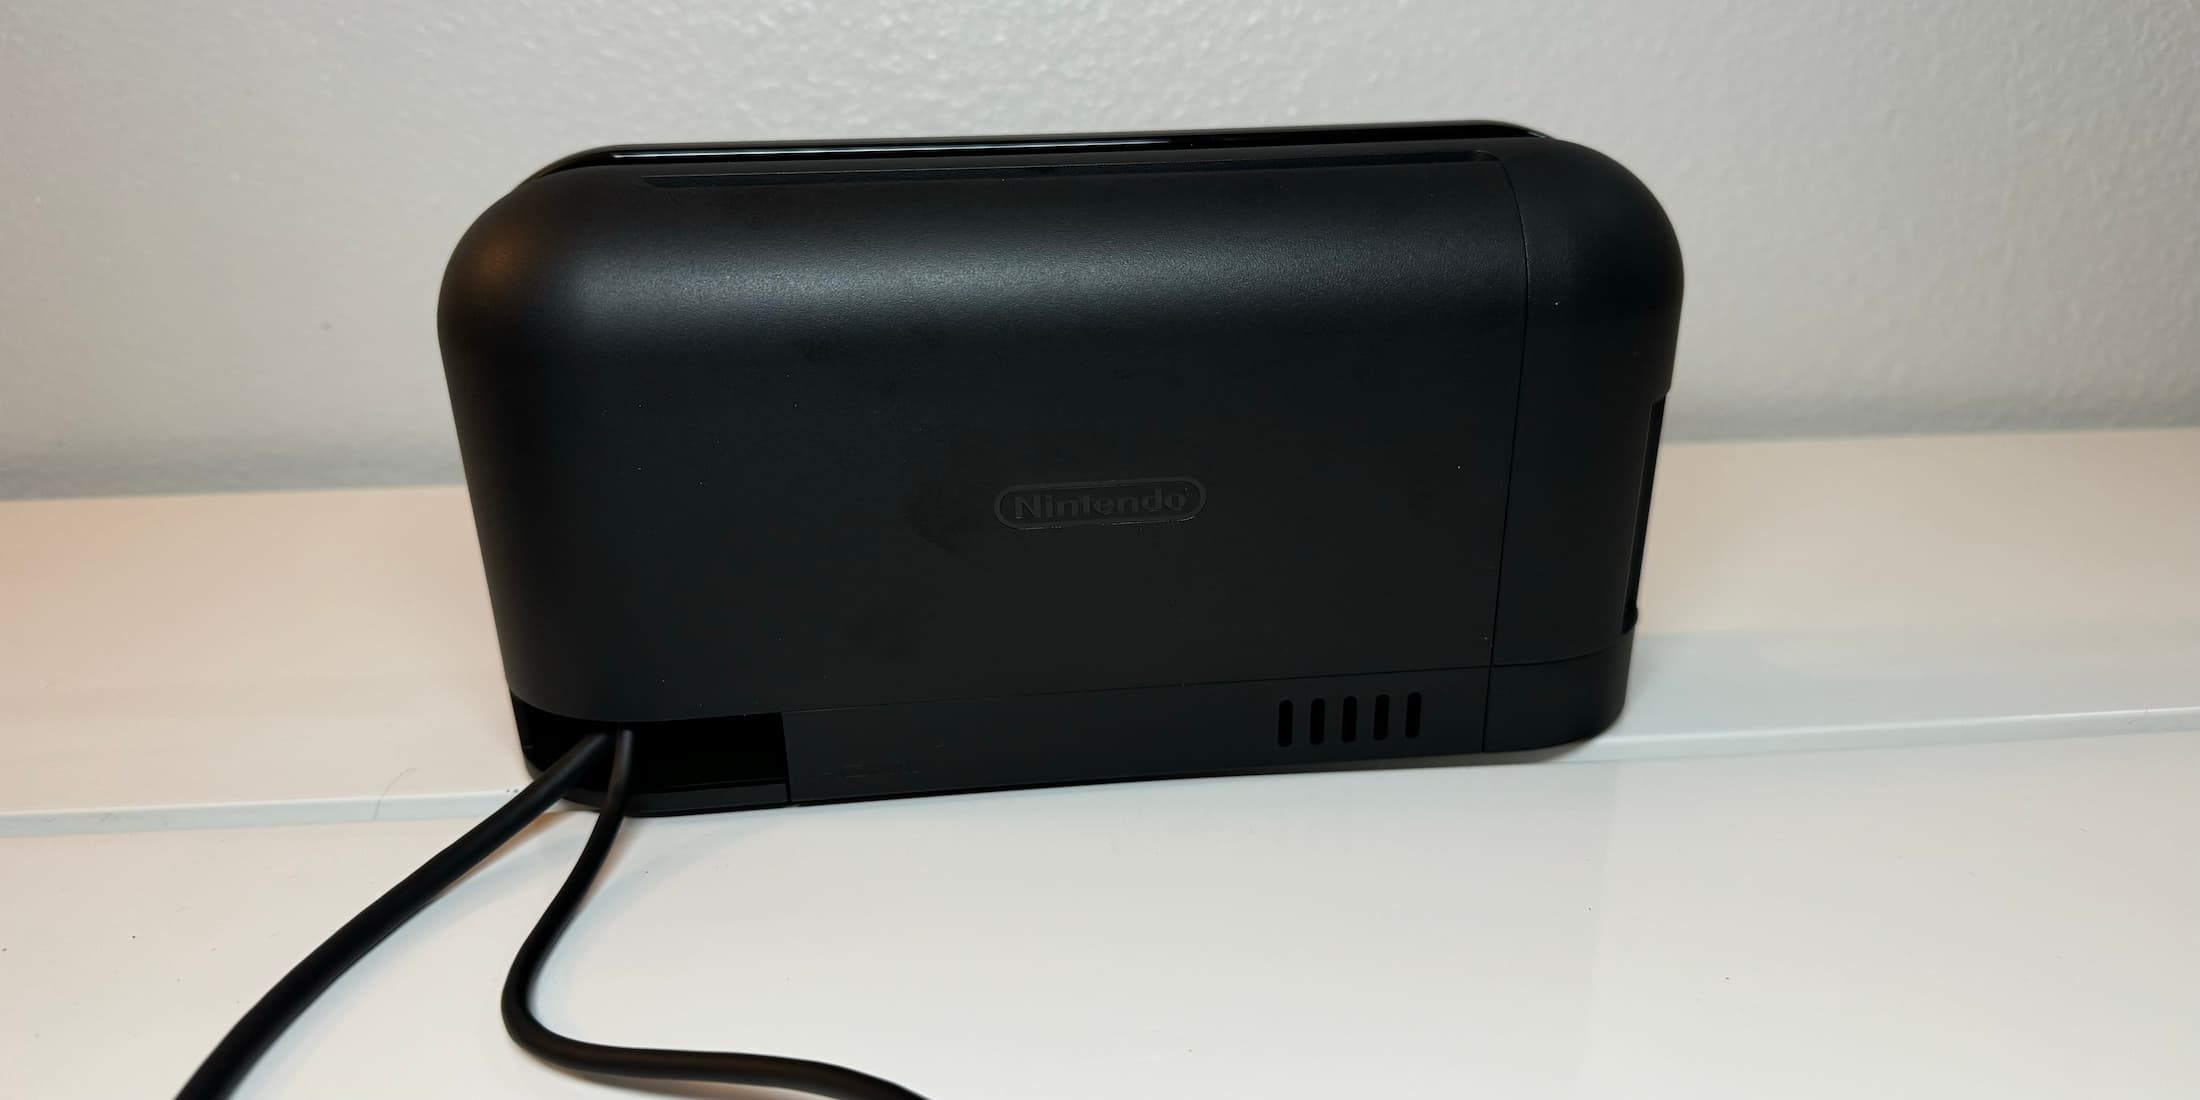
Initially, examine the backside of your Docking Station, particularly a narrow space at the upper part, just above the Nintendo emblem. Gently tug on that top piece of plastic where it’s separated to detach the back panel. Upon removal, notice two slots for an AC Power cord and an HDMI cord, which come with your new Switch 2. Connect your AC adapter to the uppermost slot, and attach one end of your HDMI cable to the middle slot. Ensure that all cables exit from the bottom left opening as you reassemble it.
If you’d like to connect using a Local Area Network (LAN) cable, you can insert it at the bottom part of the device; however, please note that this connection method is not mandatory.
After connecting all components to the Docking Station, insert the opposite end of the AC adapter into a power outlet, and attach the other end of the HDMI cable to your television. Once the HDMI cable is connected to your TV, gently slide your Nintendo Switch 2 into the Docking Station. You’ll know it’s properly positioned when the Joy-Cons align perfectly with the sides of the Docking Station, and the device slides smoothly into the charging port located in the center of the Docking Station.
Instead of turning on your “Switch 2”, the screen might remain black, but don’t worry, the green light situated in the bottom-left corner of your Docking Station will illuminate. This light signifies that your Docking Station is linked to your TV, and by confirming that the “Switch 2” is powered on. To proceed, navigate to the HDMI settings on your TV where you’ve connected the “Switch 2”, and you’ll be able to spot it there.
Read More
- All Skyblazer Armor Locations in Crimson Desert
- All Shadow Armor Locations in Crimson Desert
- How to Get the Sunset Reed Armor Set and Hollow Visage Sword in Crimson Desert
- Marni Laser Helm Location & Upgrade in Crimson Desert
- All Helfryn Armor Locations in Crimson Desert
- All Golden Greed Armor Locations in Crimson Desert
- Best Bows in Crimson Desert
- Keeping Large AI Models Connected Through Network Chaos
- How to Craft the Elegant Carmine Armor in Crimson Desert
- All Icewing Armor Locations in Crimson Desert
2025-06-06 07:03