In Borderlands 4’s Terminus District, dominated by Dominion, players can come across advertisements for the No Escape Room, an exhilarating activity with a twist: those who fail will meet their end within it. With the Smiley Man welcoming players to their potential salvation or demise, it’s up to you to devise a means of escaping the No Escape Room without resorting to Fast Travel, if you wish to finish this quest and demonstrate that your Vault Hunter has the necessary skills. Below is a guide to solving each escape room within the No-Escape Room side mission in Borderlands 4.
How to Open the Chests in the Correct Order in the No-Escape Room
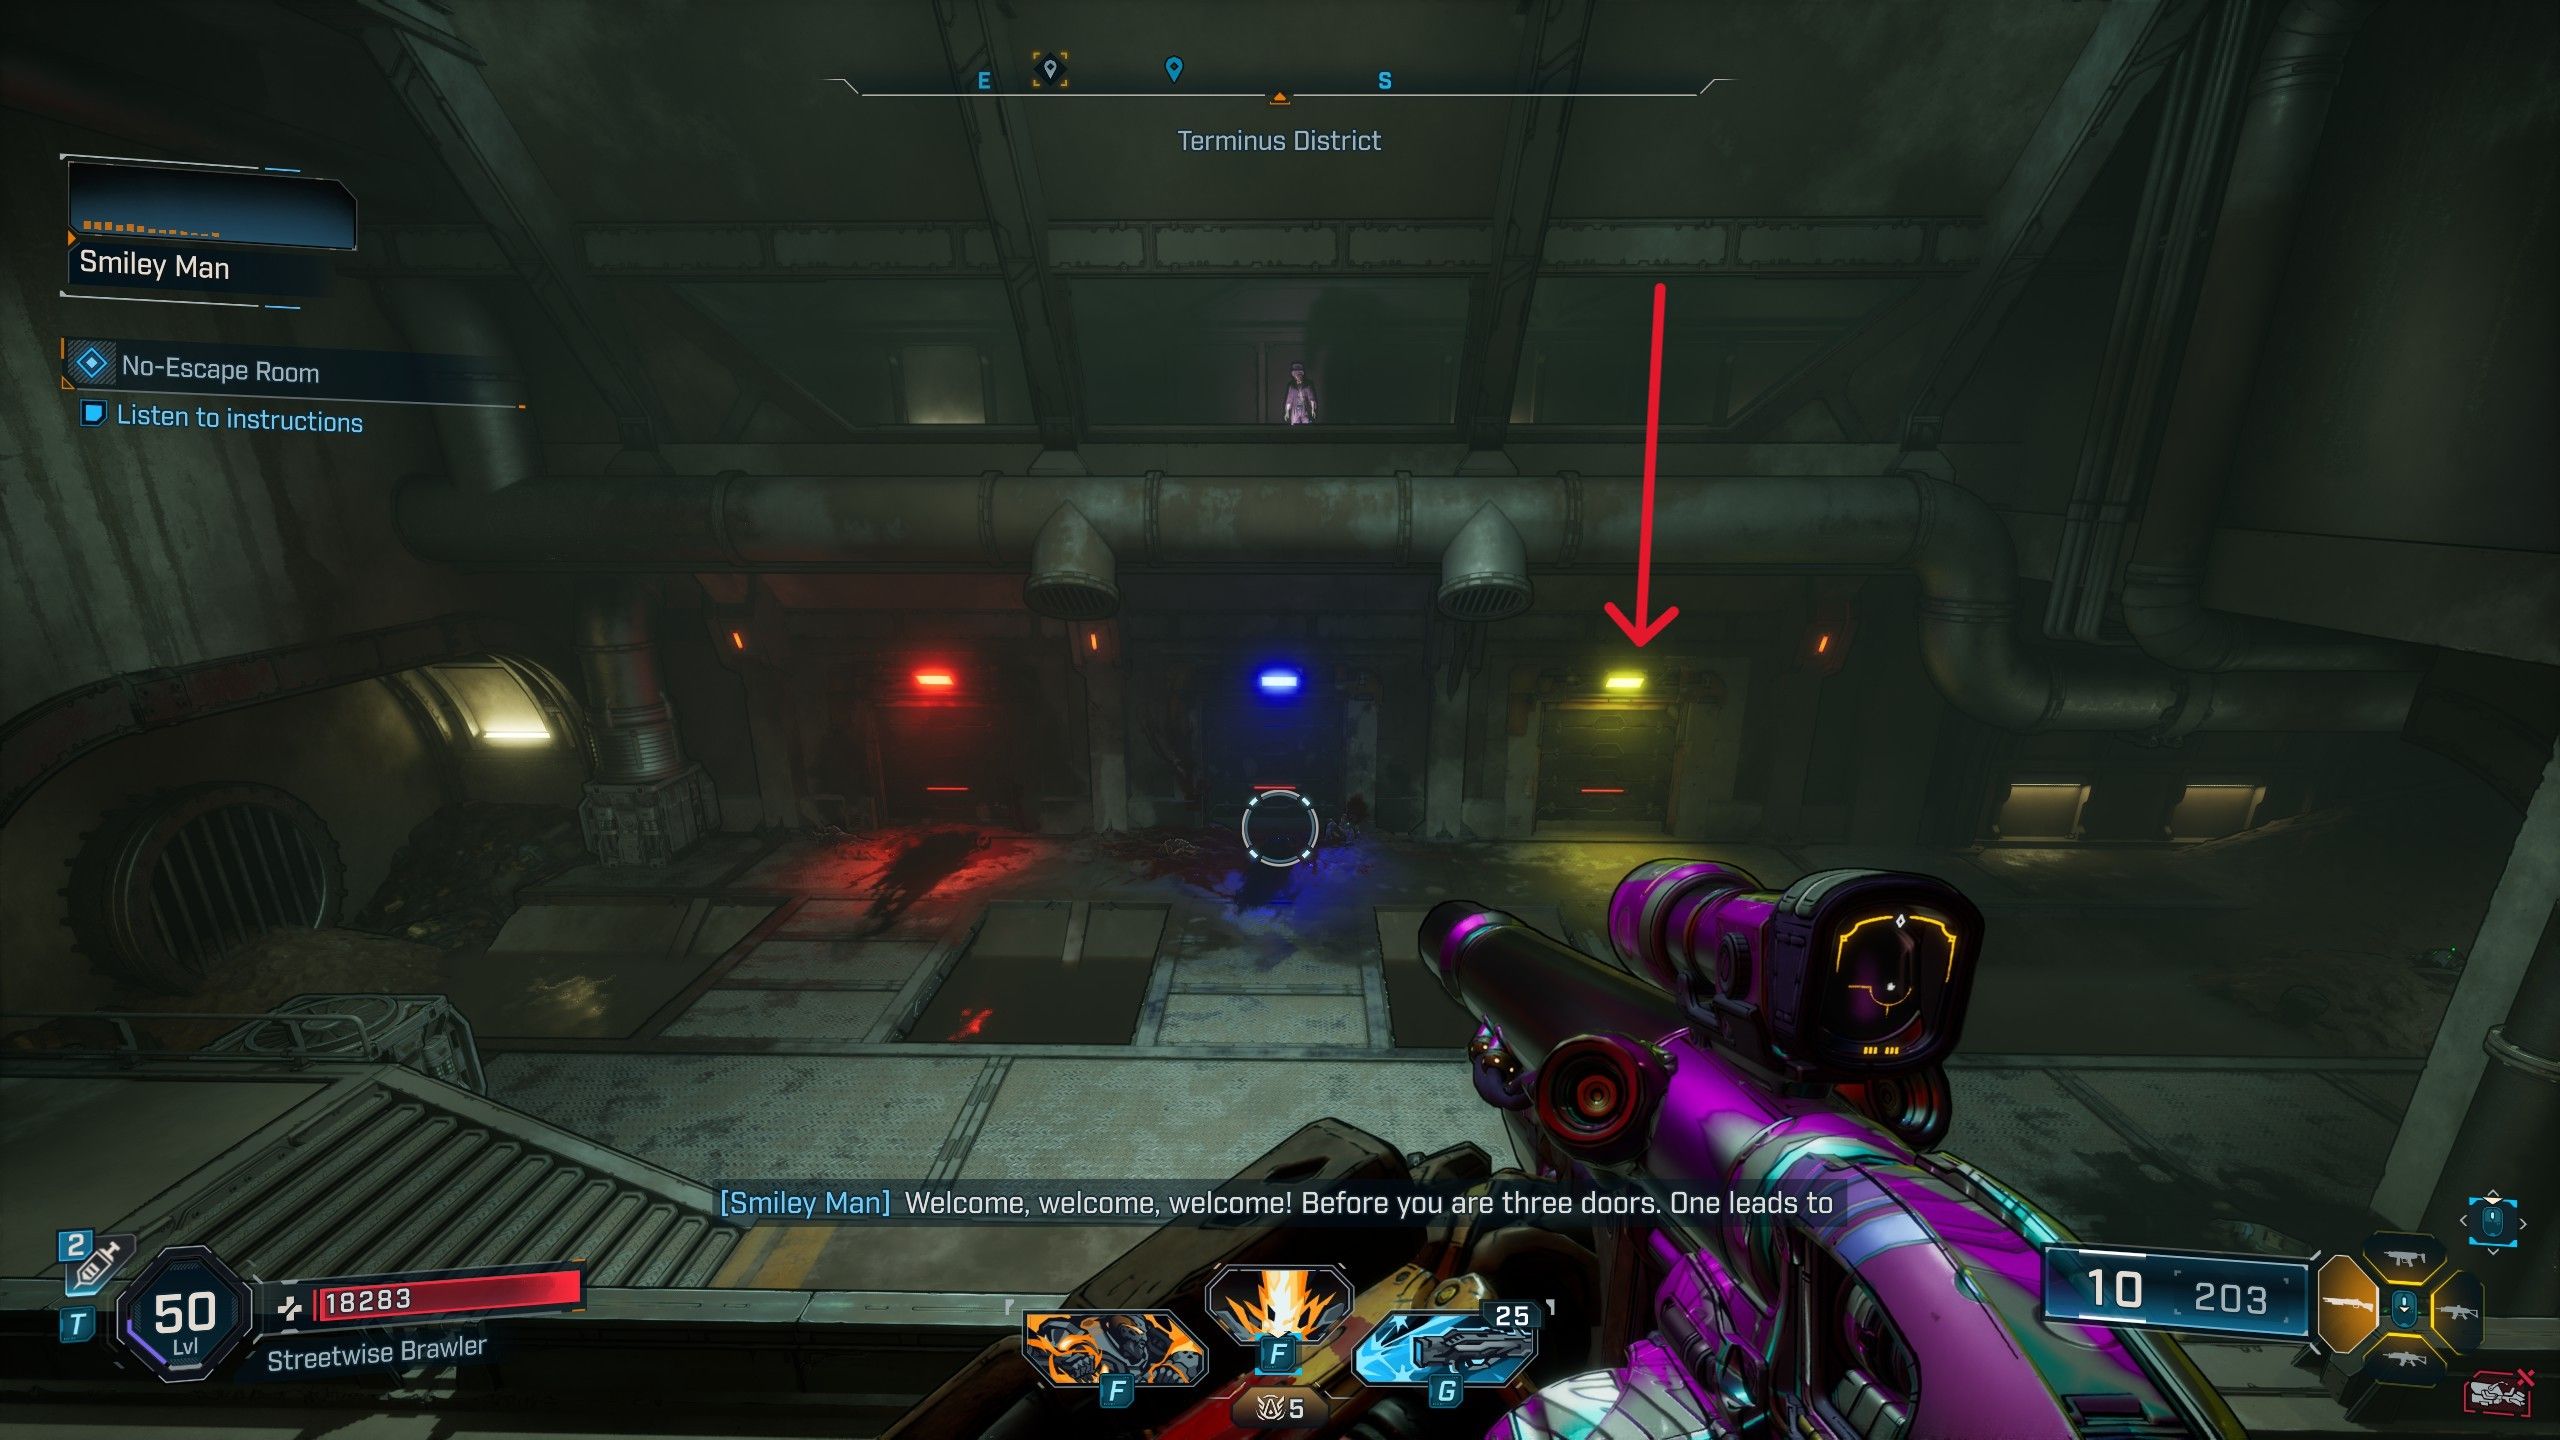
The rightmost yellow door, which is clean and free of any corpses or blood, should be your choice. This door leads to the next room, where you’ll find a grapple hook point above, enabling you to advance into the second room by using it.
How to Find the Correct Key Order in the No-Escape Room
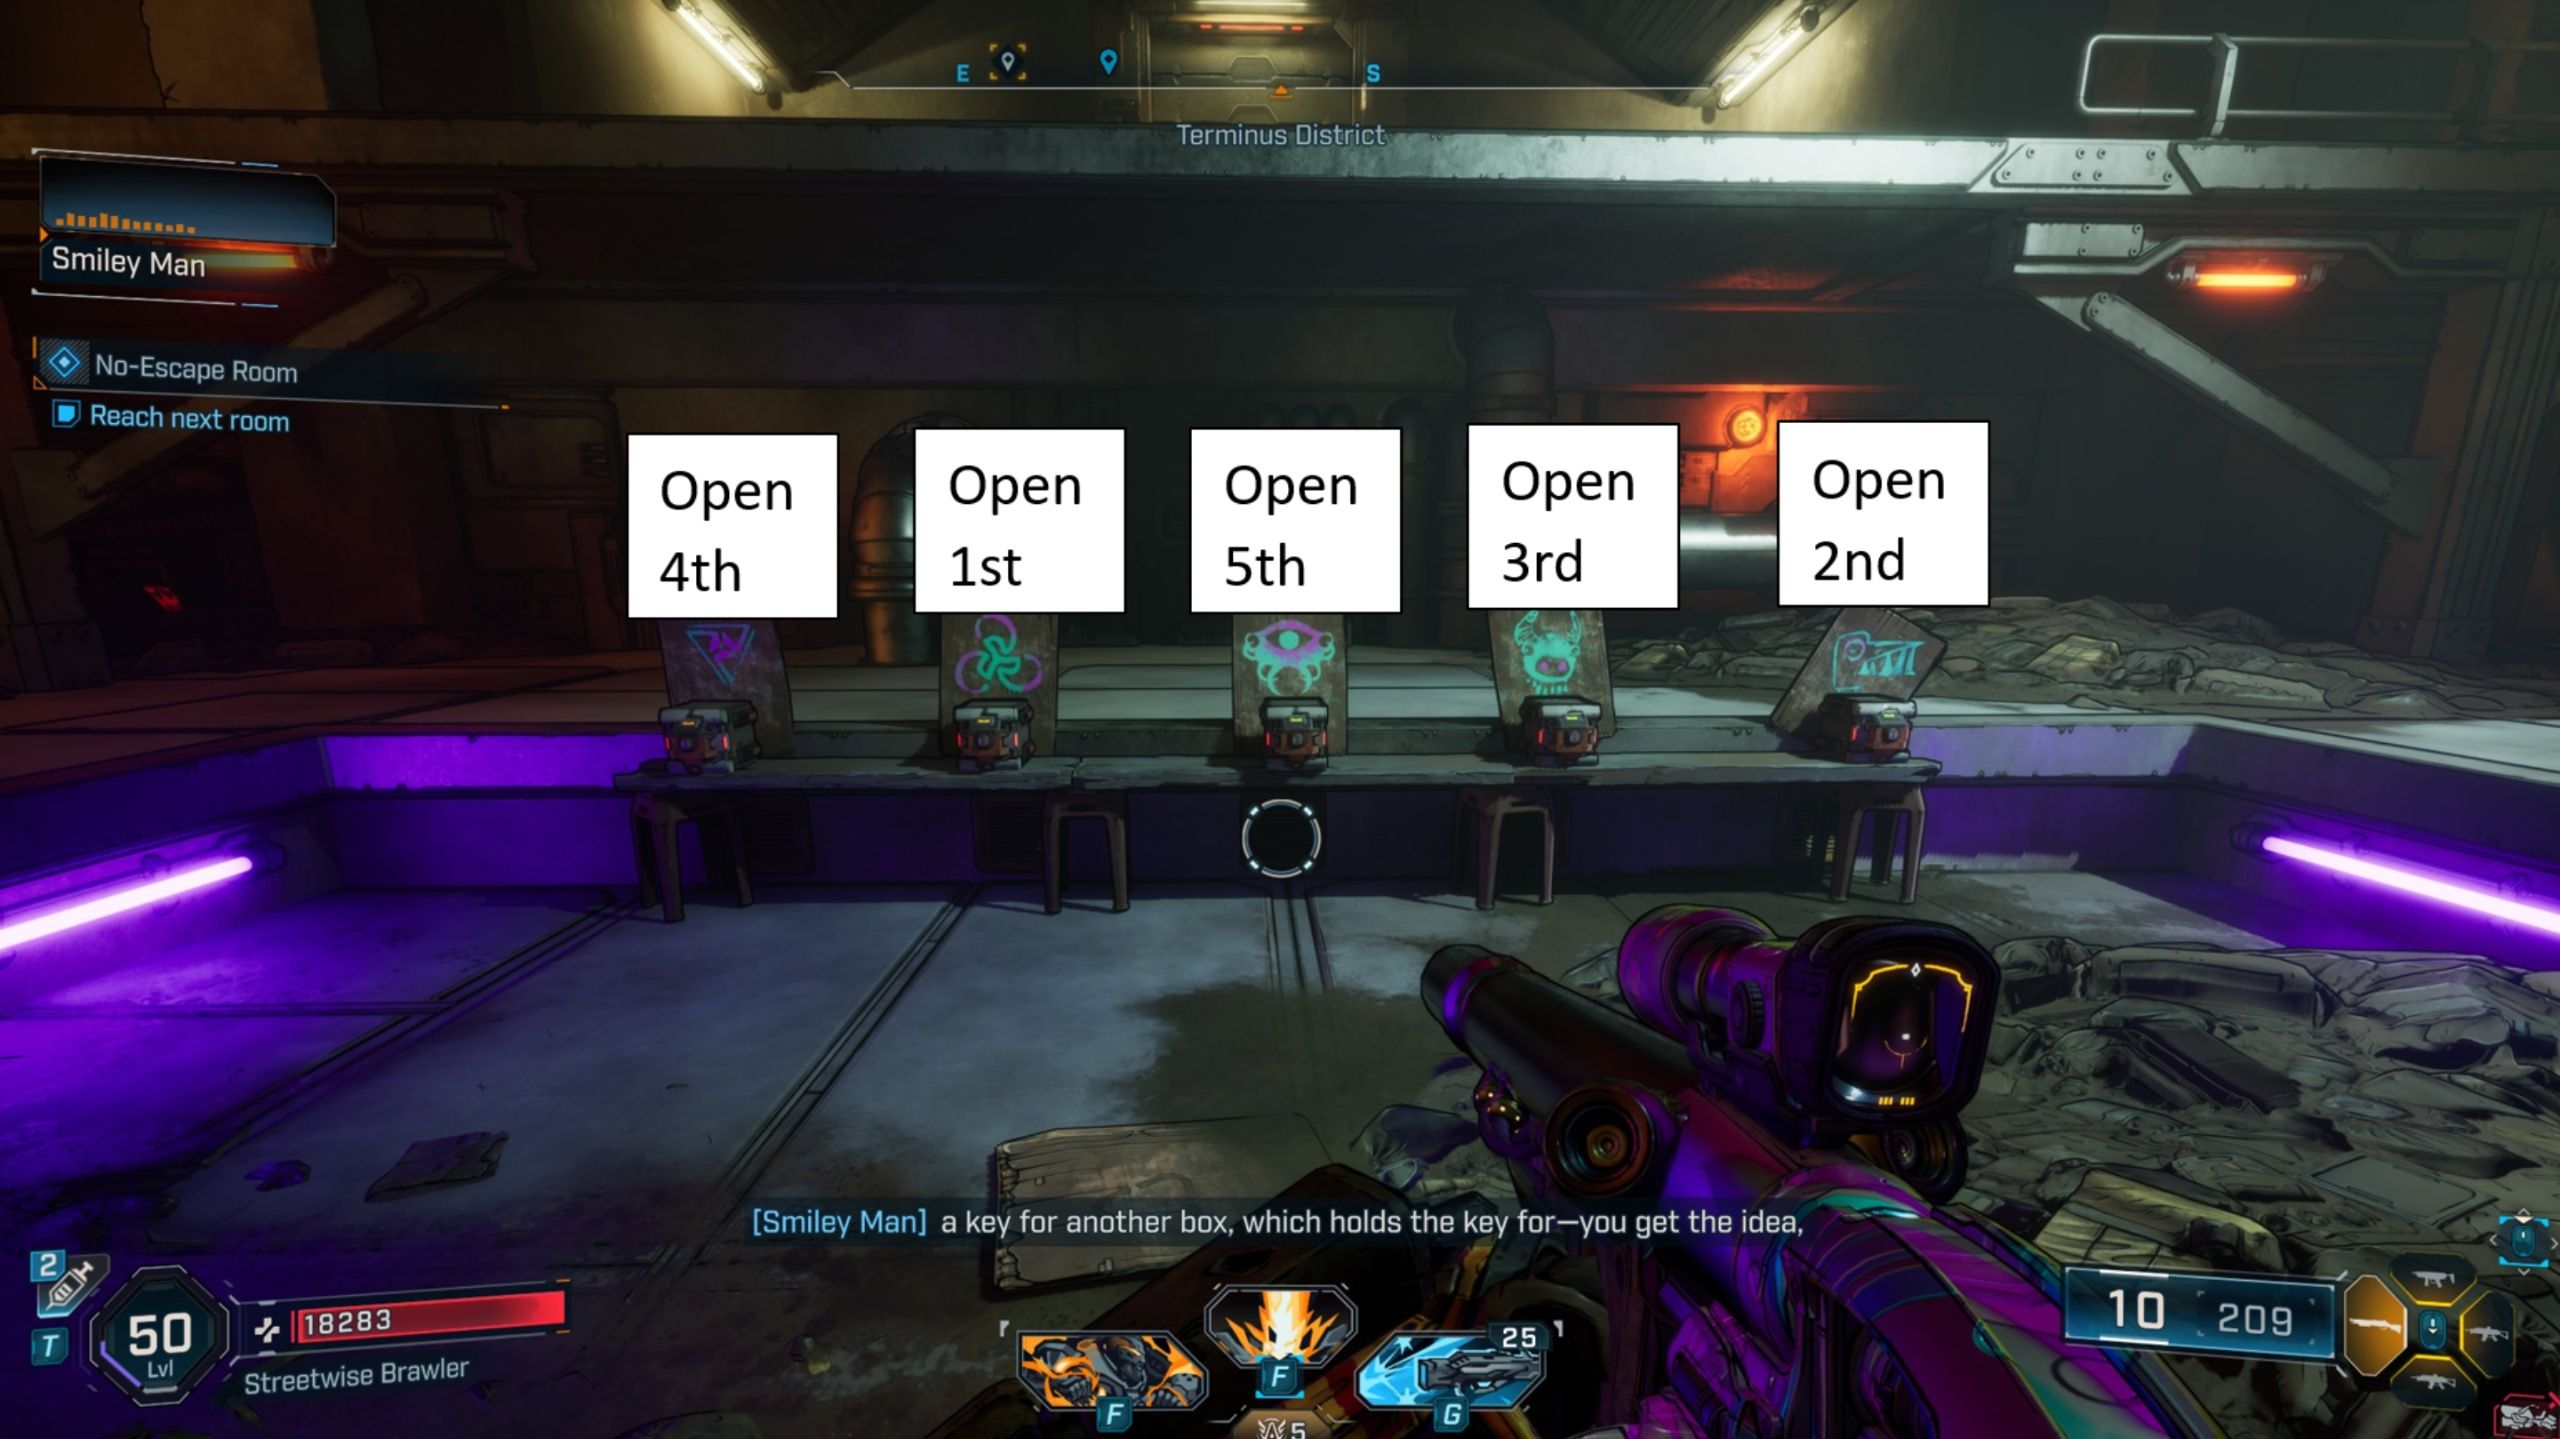
In the second chamber of the No Escape Room, participants are tasked with locating a key hidden inside a box. To unlock this initial box, they need another key, which is found within yet another box. This pattern continues for five boxes, each identified by a distinct symbol. The order in which these boxes must be opened is precise. Clues to the correct sequence can be discovered by examining the surroundings for cardboard signs, but we’ve already revealed the solution in the image provided and will explain it further below:
- Open the 2nd chest, noted for the trinity circles
- Open the 5th chest, noted for the bird drawing
- Open the 4th chest, noted for the cow drawing
- Open the 1st chest, noted for being a triangle
- Open the 3rd chest, noted for being an eyeball
How to Escape the Maze in the No-Escape Room
Upon descending into the labyrinth, players should aim to follow the trail of carrots scattered on the ground, as they guide the way out of the maze. Please note that parts of the path may be obstructed by fire, so tread carefully and have your Repkit handy for healing purposes. The video above demonstrates our chosen route through the labyrinth, however, here’s a simplified guide for players starting off: Follow the carrot trail to navigate the maze, but keep in mind that some sections are blocked by fire, so be prepared to use your Repkit for recovery.
Following their departure from the labyrinth, Smiley Man confines the Vault Hunters within a lethal area. To break free, scan to the right and employ your grappling hook to open a ventilator shaft. Inside, aim at the powered gadget to disable the force field and poisonous gas. Upon opening another door, Smiley Man will stride through, but avoid his path as it leads to an incinerator that’s fatal. Instead, scour to the left of this door for the exit door.
Read More
- All Skyblazer Armor Locations in Crimson Desert
- How to Get the Sunset Reed Armor Set and Hollow Visage Sword in Crimson Desert
- All Shadow Armor Locations in Crimson Desert
- Marni Laser Helm Location & Upgrade in Crimson Desert
- All Helfryn Armor Locations in Crimson Desert
- All Golden Greed Armor Locations in Crimson Desert
- All Icewing Armor Locations in Crimson Desert
- Best Bows in Crimson Desert
- How to Beat Stonewalker Antiquum at the Gate of Truth in Crimson Desert
- One Piece Chapter 1180 Release Date And Where To Read
2025-09-12 21:17