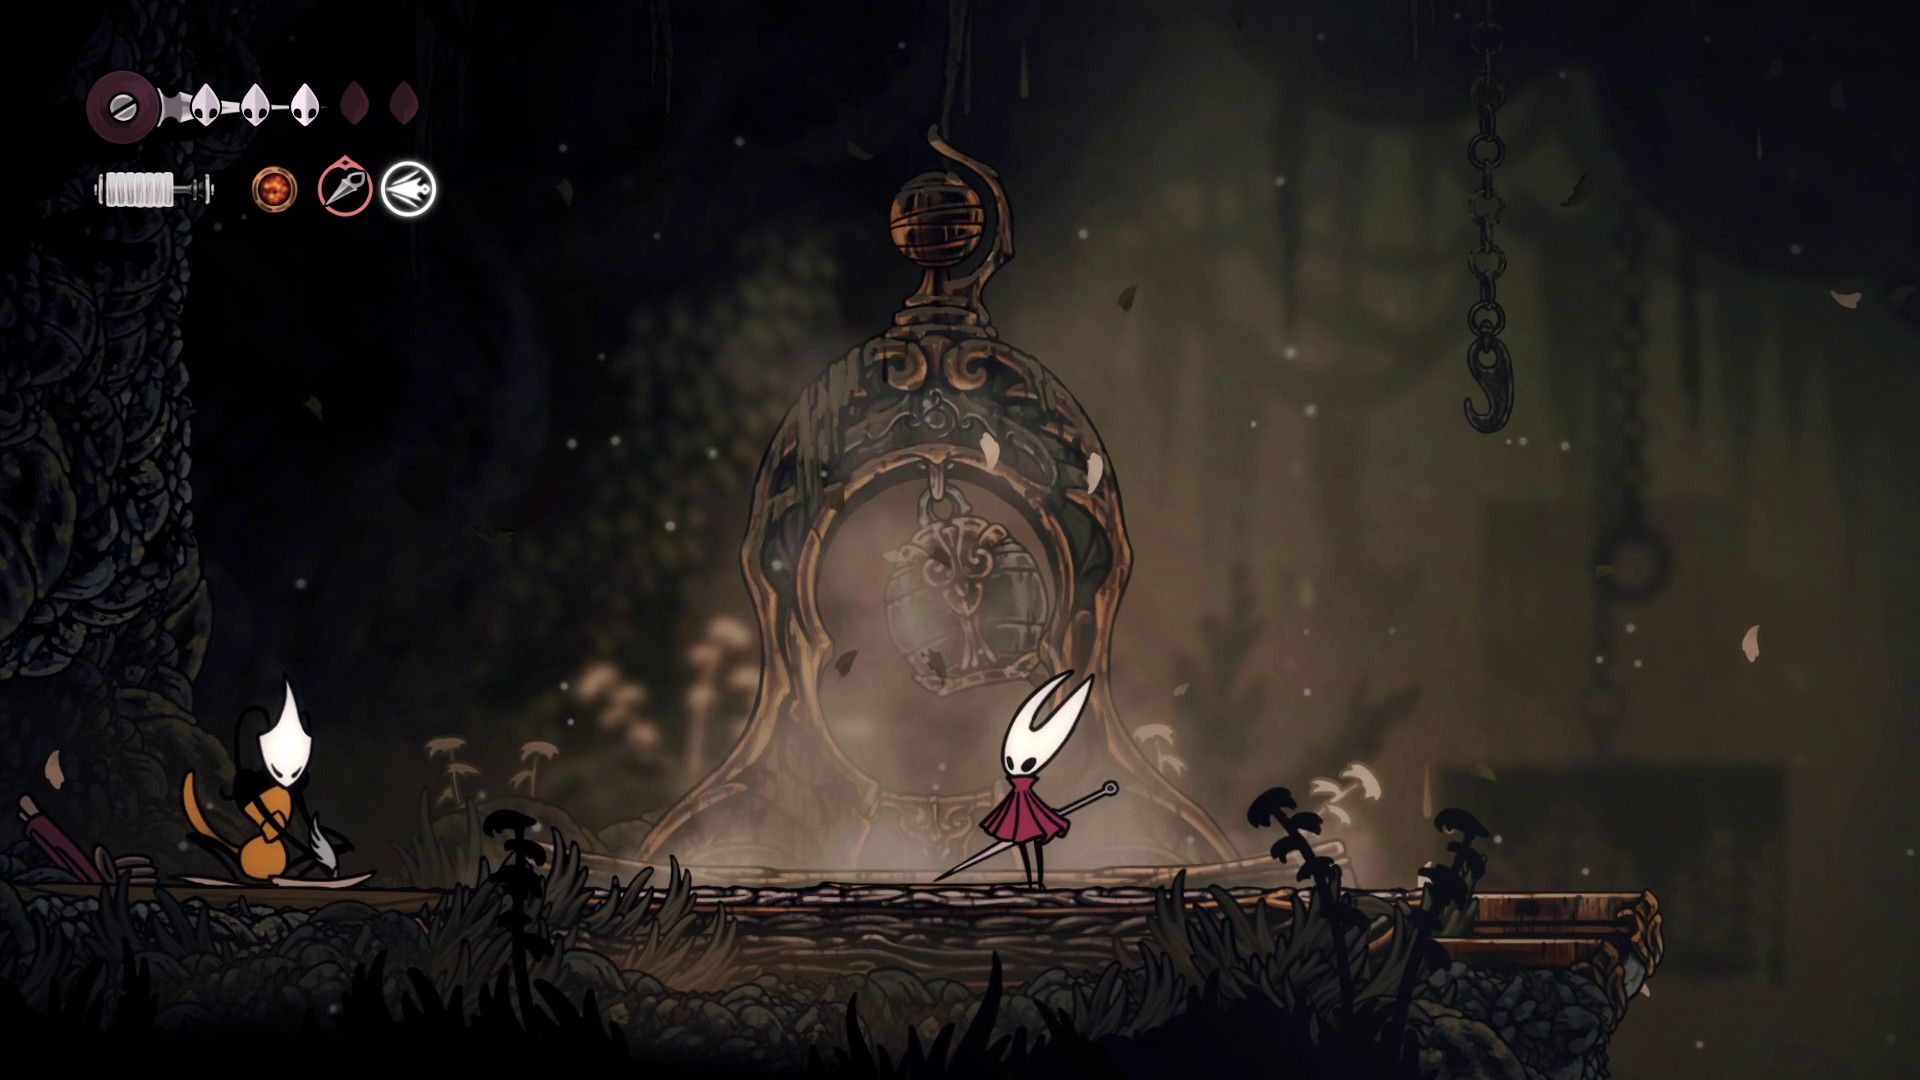
In the game known as Hollow Knight: Silksong, the locale named Sinner’s Road becomes accessible once you acquire the Cling Grip ability, which can be done after Greymoor. Upon arrival at this area, players might face a challenge in finding and utilizing a bench, due to its malfunctioning condition within the Sinner’s Road setting. This guide aims to help players navigate the process of repairing the benches in this game area.
For those players new to Silksong and seeking a clue about repairing the Sinner’s Road bench, it’s worth noting that the game often includes destructible walls, which could potentially offer a hint for fixing the bench.
How to Reach Sinner’s Road Bench in Silksong
Stepping into the second room on Sinner’s Road, I couldn’t help but notice an intriguing signpost on a bench pointing skyward. Being a seasoned Silksong player, upon spotting this sign, I would instinctively:
1. Approach the signpost closely to read its message.
2. Look upwards, as the sign seems to be indicating a direction or location above us.
3. If necessary, use my character’s abilities to reach higher platforms or ledges if there are any in that area.
4. Investigate the surroundings for any clues, hidden items, or puzzles that might be connected to the signpost.
- Cling Grip to ascend, and pass through the opening on the right.
- Head to the right side of the room, avoiding the poison water. Notably, it is possible to pogo on the spiked wheels.
- There is an elevated cage just before the room’s exit. Cling Grip to get on top of it, and platform to the left side of the room.
- Hit the switch, and pass through the gate that has just opened.
- Platform to the left side of the room to find an opening that leads to the bench room. There is a switch above this opening, and hitting it makes it much easier to return to the bench room.
How to Fix Sinner’s Road Bench in Silksong
Unstick the Gears
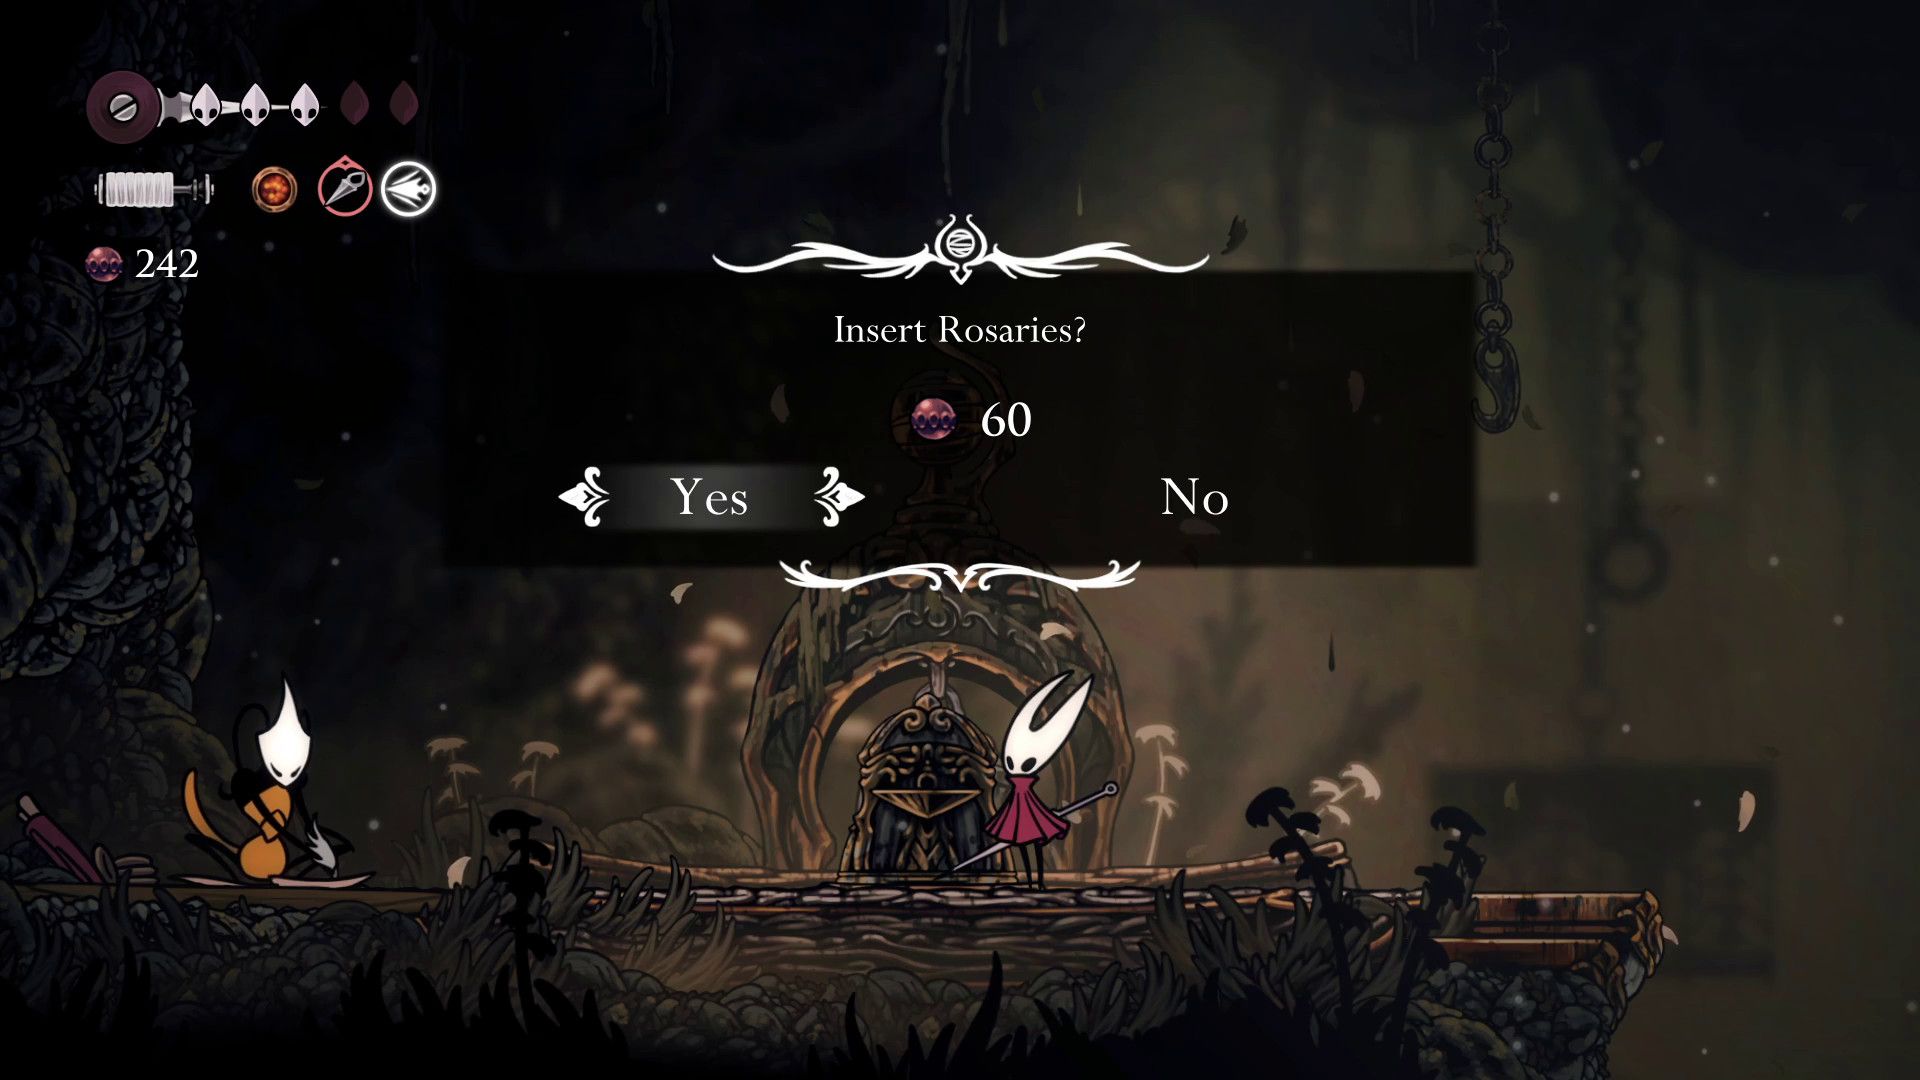
Upon sitting on the Sinner’s Road bench, players must insert 60 Rosaries to activate it. Once activated, the bench starts to ascend, but won’t reach its full height until Hornet performs maintenance on its stuck gears. To do this, players should follow these steps:
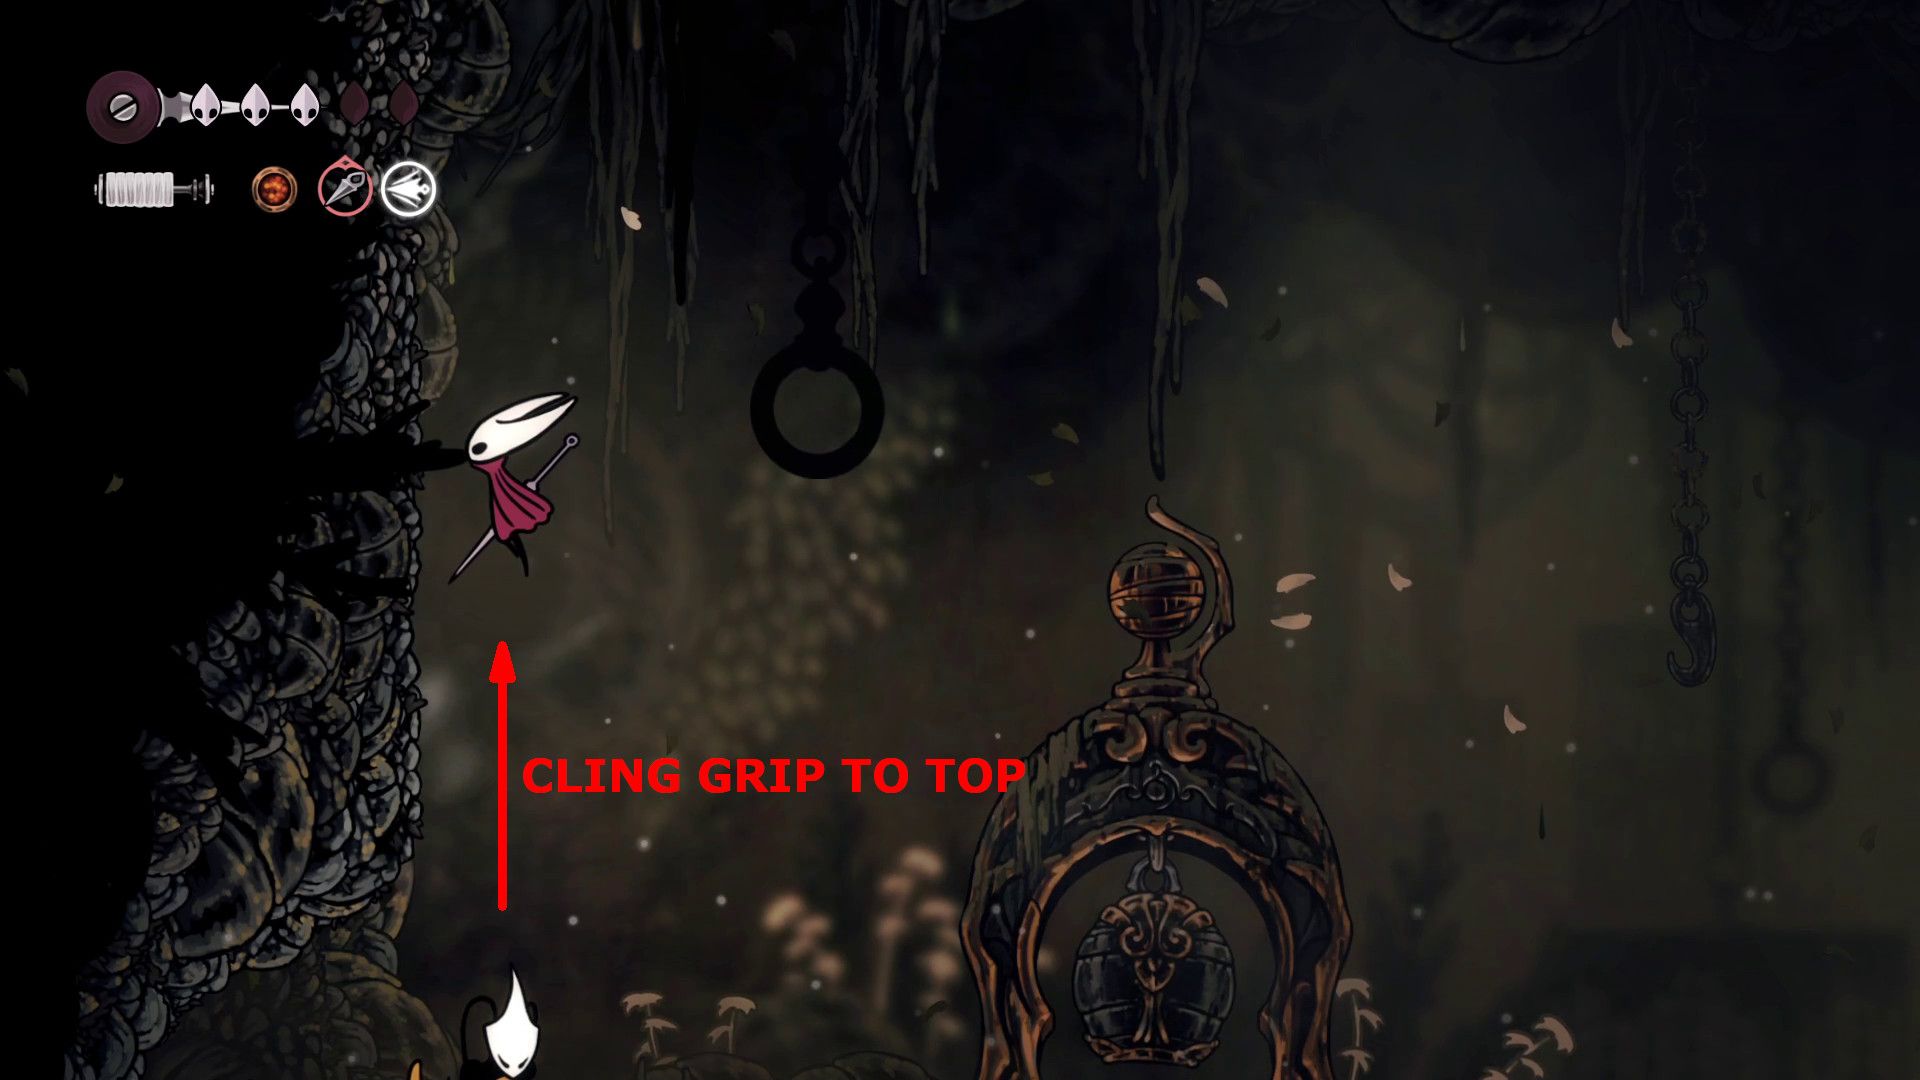
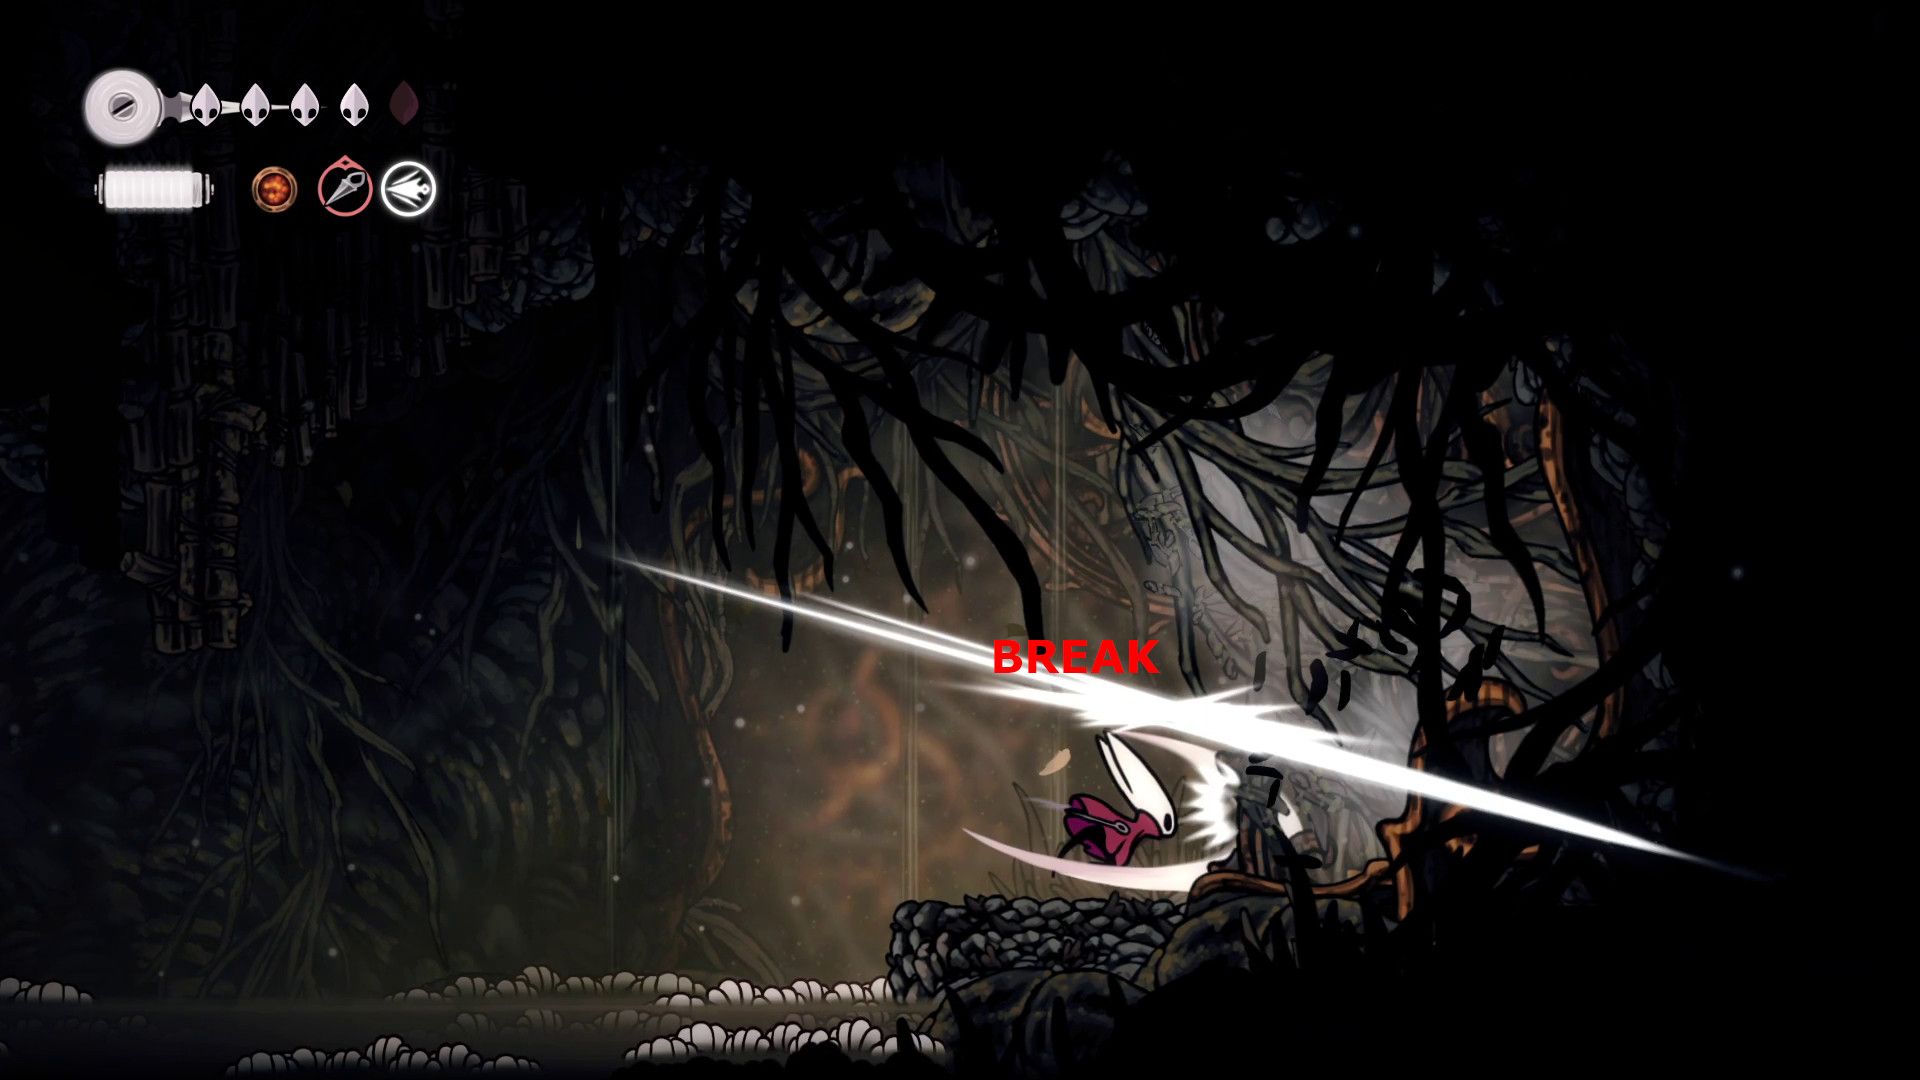
- Use Cling Grip to climb the wall to the left of the bench, just above Shakra.
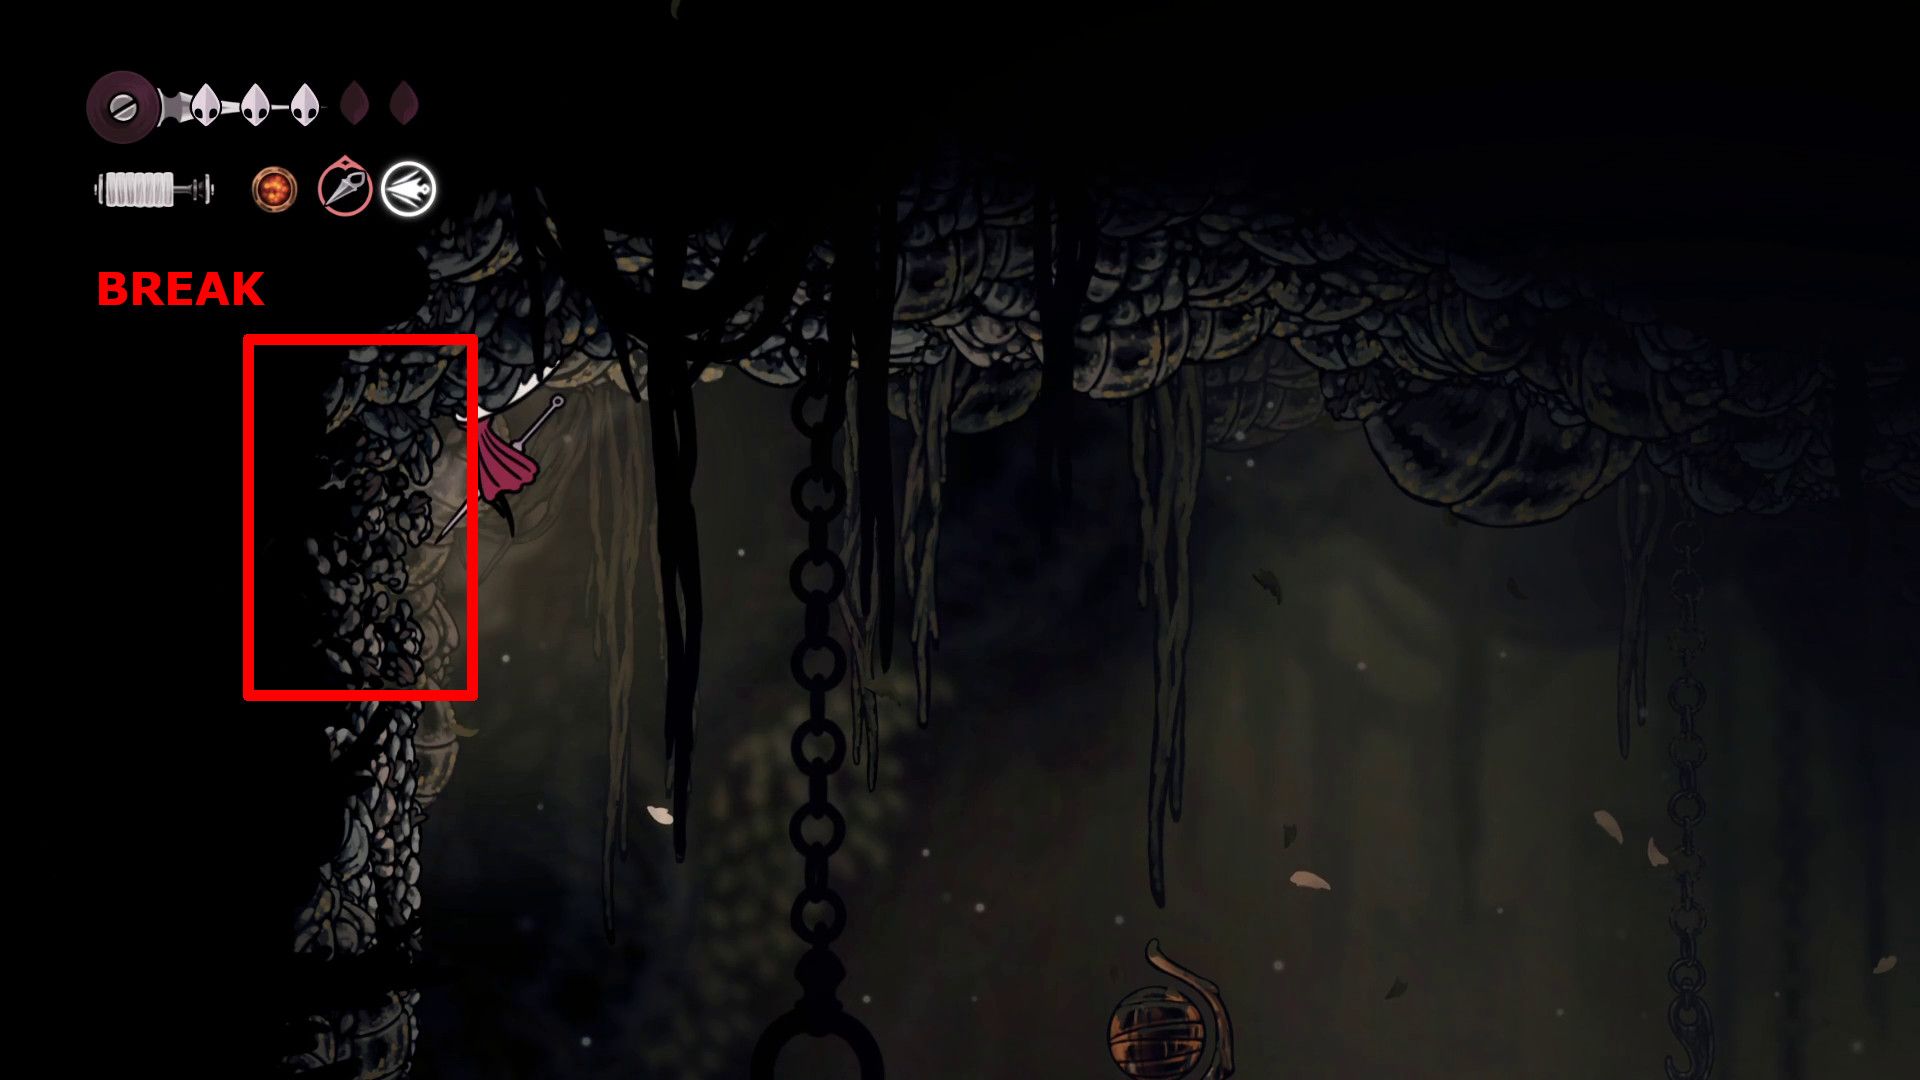
- At the top, repeatedly strike the wall to break it
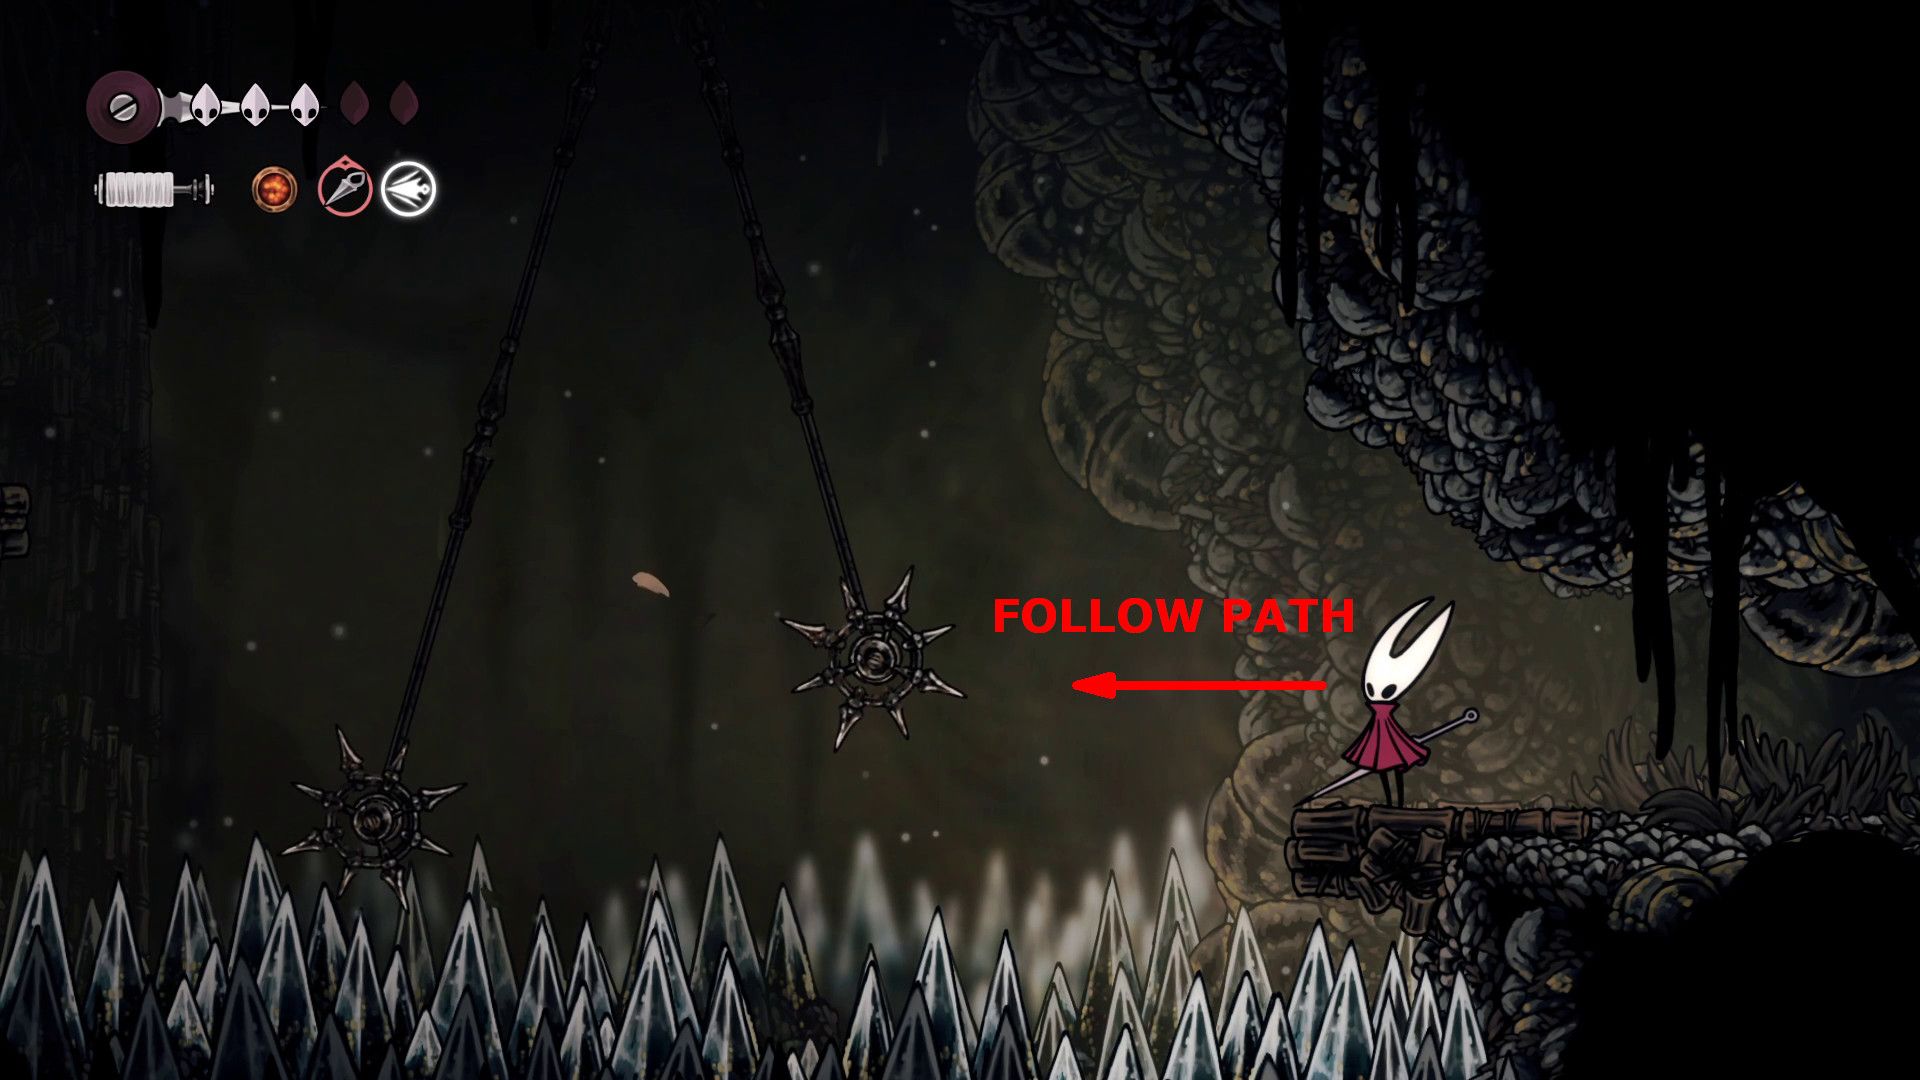
- Follow the path that is revealed, using all the abilities at Hornet’s disposal to avoid obstacles.
- Repeatedly strike the vines at the end of the path to unstick the gears and fix the Sinner’s Road bench.
Take note that the route to the gears is quite dangerous, so players should employ strategic jumps (pogos) and dashes at precise moments in order to navigate it safely. For those who find it difficult, here’s a helpful video tutorial showing you how to overcome this challenging part of the game.
To the left of the gears, there’s a vertical climb that players can use by sticking to it with their Cling Grip ability. This shortcut lets them avoid numerous hindrances along the way, enabling a quick trip back to the Sinner’s Road resting spot.
Read More
- All Skyblazer Armor Locations in Crimson Desert
- All Shadow Armor Locations in Crimson Desert
- How to Get the Sunset Reed Armor Set and Hollow Visage Sword in Crimson Desert
- Marni Laser Helm Location & Upgrade in Crimson Desert
- Best Bows in Crimson Desert
- All Helfryn Armor Locations in Crimson Desert
- All Golden Greed Armor Locations in Crimson Desert
- How to Craft the Elegant Carmine Armor in Crimson Desert
- Keeping Large AI Models Connected Through Network Chaos
- One Piece Chapter 1179 Preview: The Real Imu Arrives in Elbaf
2025-09-06 20:04