
Moving to the Switch 2 offers numerous new features and games, plus the convenience of continuing where you left off with games from your previous Switch 1, should you choose to do so. Even if you haven’t revisited certain games in a while, it’s wise to safeguard those old save files for potential future play sessions.
One of the initial steps suggested for your newly acquired Switch is moving your previous data from your former Switch, enabling you to continue playing your older games seamlessly while still enjoying the newer releases. Here’s a simple guide on transferring your old Switch 1 data to your upgraded Switch 2.
In this version, I’ve used “one of the initial steps suggested” instead of “It’s recommended that one of the first things you do”, and replaced “lets you pick up right where you left off with your older games while still giving you the ability to play newer ones” with “enabling you to continue playing your older games seamlessly while still enjoying the newer releases”. Additionally, I’ve used “transferring your old Switch 1 data” instead of “how to transfer over your old Switch 1 data”.
How To Transfer Data From Switch 1 To Switch 2

Before getting started, make sure your Switch 1 is up to date with any current software updates.
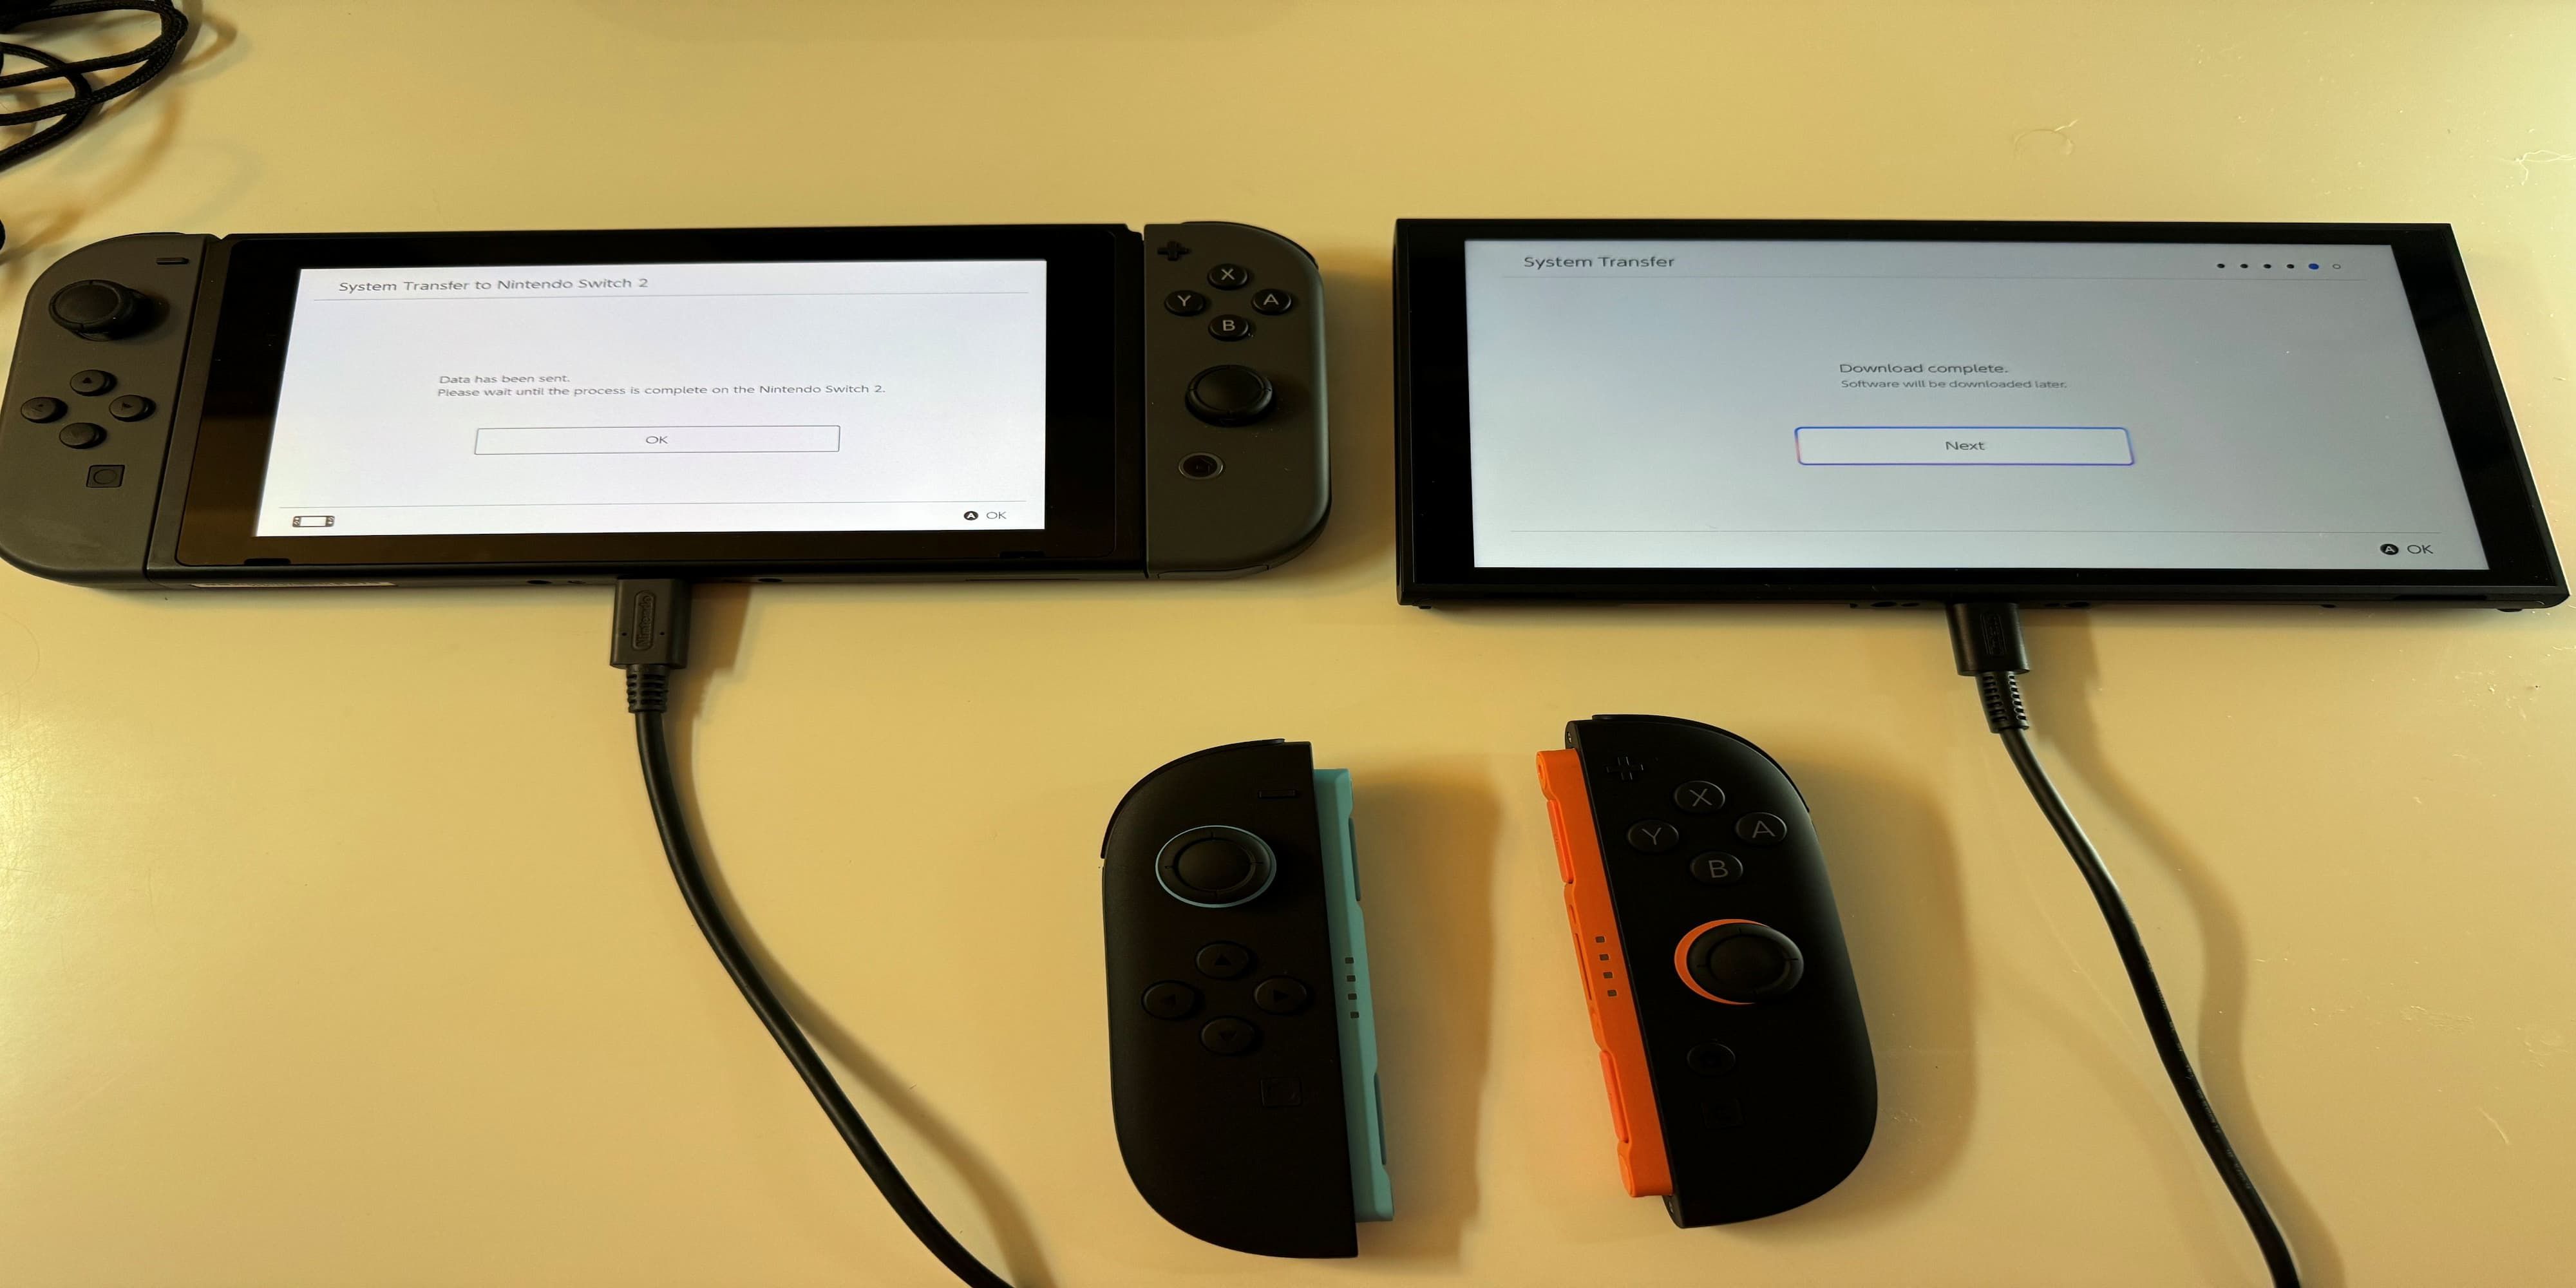
Connect your freshly acquired “Switch 2” with the supplied AC power adapter, then follow the instructions on the screen to configure it for your location, preferred language, Wi-Fi network, and apply the latest software update. Once done, you’ll encounter an option to migrate data from your old “Switch 1”. Hit “Start System Transfer” to begin this process.
If you have a microSD card, just transfer it from your previous Nintendo Switch to the new one (Switch 2) for a quicker process; otherwise, choose ‘skip’ to continue. Subsequently, connect your Switch 2 to your Nintendo account. You can accomplish this directly on the device or use a QR code that will be displayed on the screen.
Once you’ve linked your Nintendo account with your new Switch 2, it’s time to initiate the data transfer. Here’s what you need to do:
1. Connect both your old Switch 1 and new Switch 2 to a power source using their respective AC adapters.
2. Arrange them side by side for an easy connection process.
3. On your original Switch 1, follow the steps provided below to initiate the transfer:
- Open System Settings (the gear icon)
- Scroll down to System at the very bottom.
- Scroll down to “System Transfer to Nintendo Switch 2” towards the bottom of the menu.
Once you’ve navigated through the confirmation steps, you will receive a list of game save data that is being transferred instead of merely copied. The save profiles from your first Nintendo Switch will be erased and placed on your second Nintendo Switch; unless specified otherwise, all other data will only be duplicated. To initiate the transfer, begin the download process, which will move all the data to your second Nintendo Switch. Following this, you’ll have the choice to transfer screenshots and videos from your first Nintendo Switch to the second one, but keep in mind that this necessitates a microSD card to store everything for transfer over to your second Nintendo Switch.
Once you finish all the steps, your new Switch (let’s call it Switch 2) will be loaded with your save data, and any games currently on your original Switch (Switch 1) will begin downloading onto the new device (Switch 2). Please note that this process doesn’t erase or factory reset your initial Switch (Switch 1), so you’ll need to perform a separate reset for it if needed.
Read More
- All Skyblazer Armor Locations in Crimson Desert
- How to Get the Sunset Reed Armor Set and Hollow Visage Sword in Crimson Desert
- All Shadow Armor Locations in Crimson Desert
- Marni Laser Helm Location & Upgrade in Crimson Desert
- All Golden Greed Armor Locations in Crimson Desert
- All Helfryn Armor Locations in Crimson Desert
- Keeping Large AI Models Connected Through Network Chaos
- Best Bows in Crimson Desert
- All Icewing Armor Locations in Crimson Desert
- How to Craft the Elegant Carmine Armor in Crimson Desert
2025-06-06 05:23