As a seasoned adventurer with countless hours spent navigating through labyrinthine structures and solving intricate puzzles, I found myself immersed in the mysterious world of Fear the Spotlight. The pool area, filled with the same sludge as the urinal, was a grim reminder of the challenges that lay ahead. However, I was determined to press on, guided by my instincts and the yellow sticky note’s cryptic message.
Step into the PS1-style horror survival genre with “Fear the Spotlight”, where cunning puzzles await, designed to stretch your problem-solving skills to their limits and encourage creative thinking. Delve deeper into the game in “Vivian’s Story”, which unfolds within the enigmatic Webber Building. As you progress through the initial stages of the game, you’ll eventually approach the facility’s entrance, only to discover it shrouded in a thick veil of smoke.
To move forward, you must eliminate the smoke, and this calls for resolving an intricate riddle that centers around the fuse box. Initially, the puzzle might appear challenging, but as you delve into it, the pieces will gradually come together. For those finding it difficult, here’s a comprehensive walkthrough to cracking the Fuse Box Puzzle in the game Fear the Spotlight.
Fuse Box Puzzle Solution in Fear the Spotlight
Upon passing through the Rose Door, you’ll find yourself in the School Yard. The entrance to Webber Building lies straight on, but a message from the door informs you that there’s smoke within the building which needs to be cleared before entering.
On one side, you’ll come across an unpowered HVAC system. In the courtyard, there’s another entrance that takes you to the Gymnasium. Step inside, then look for a door labeled ‘Mechanical’ on the gym’s far-left side. Upon entering, you’ll spot a Power Diverter, but for now, it’s inaccessible. Proceed downstairs, and you’ll reach the Fuse Box.
How to Open the Fuse Box
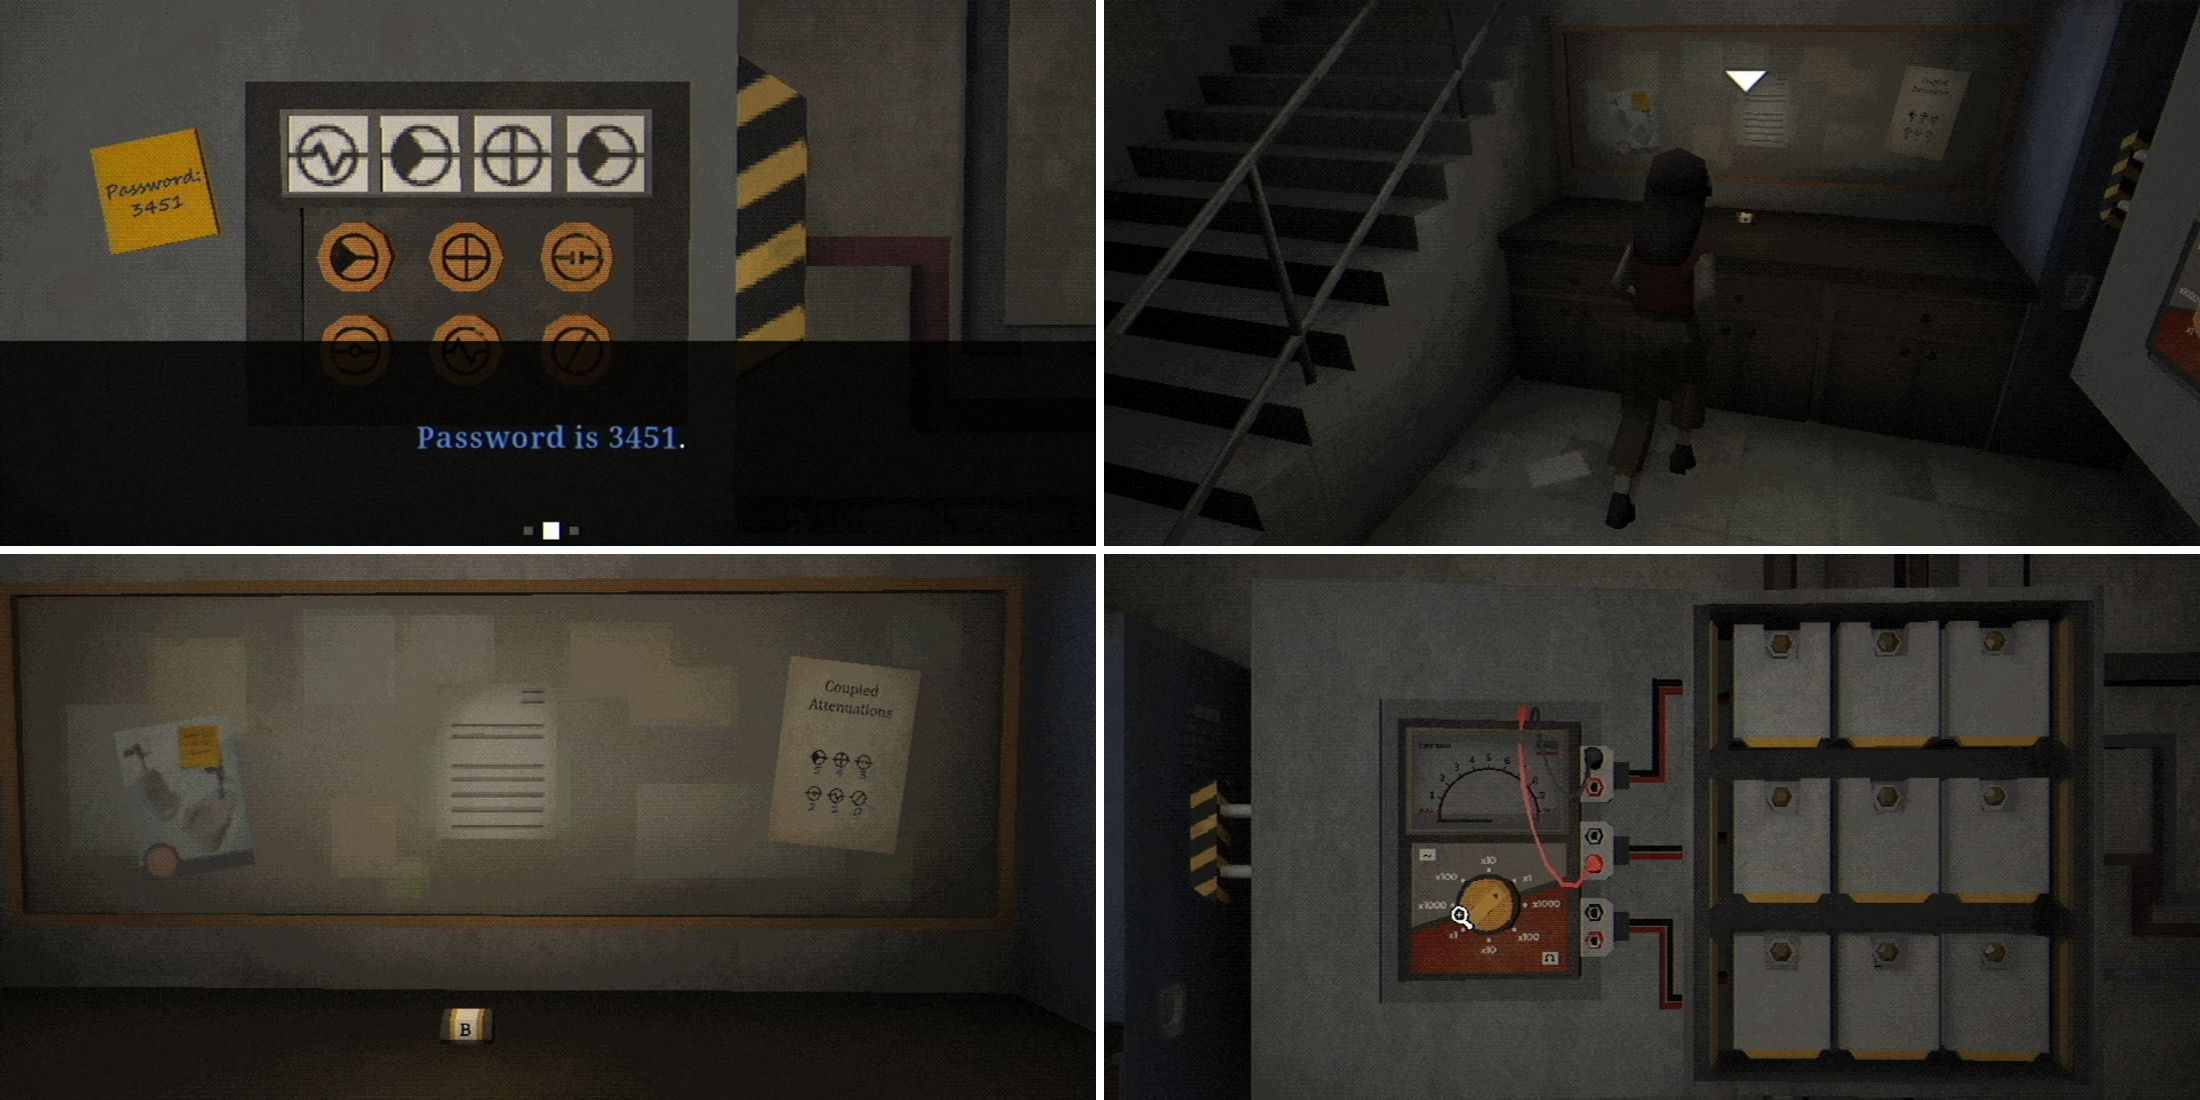
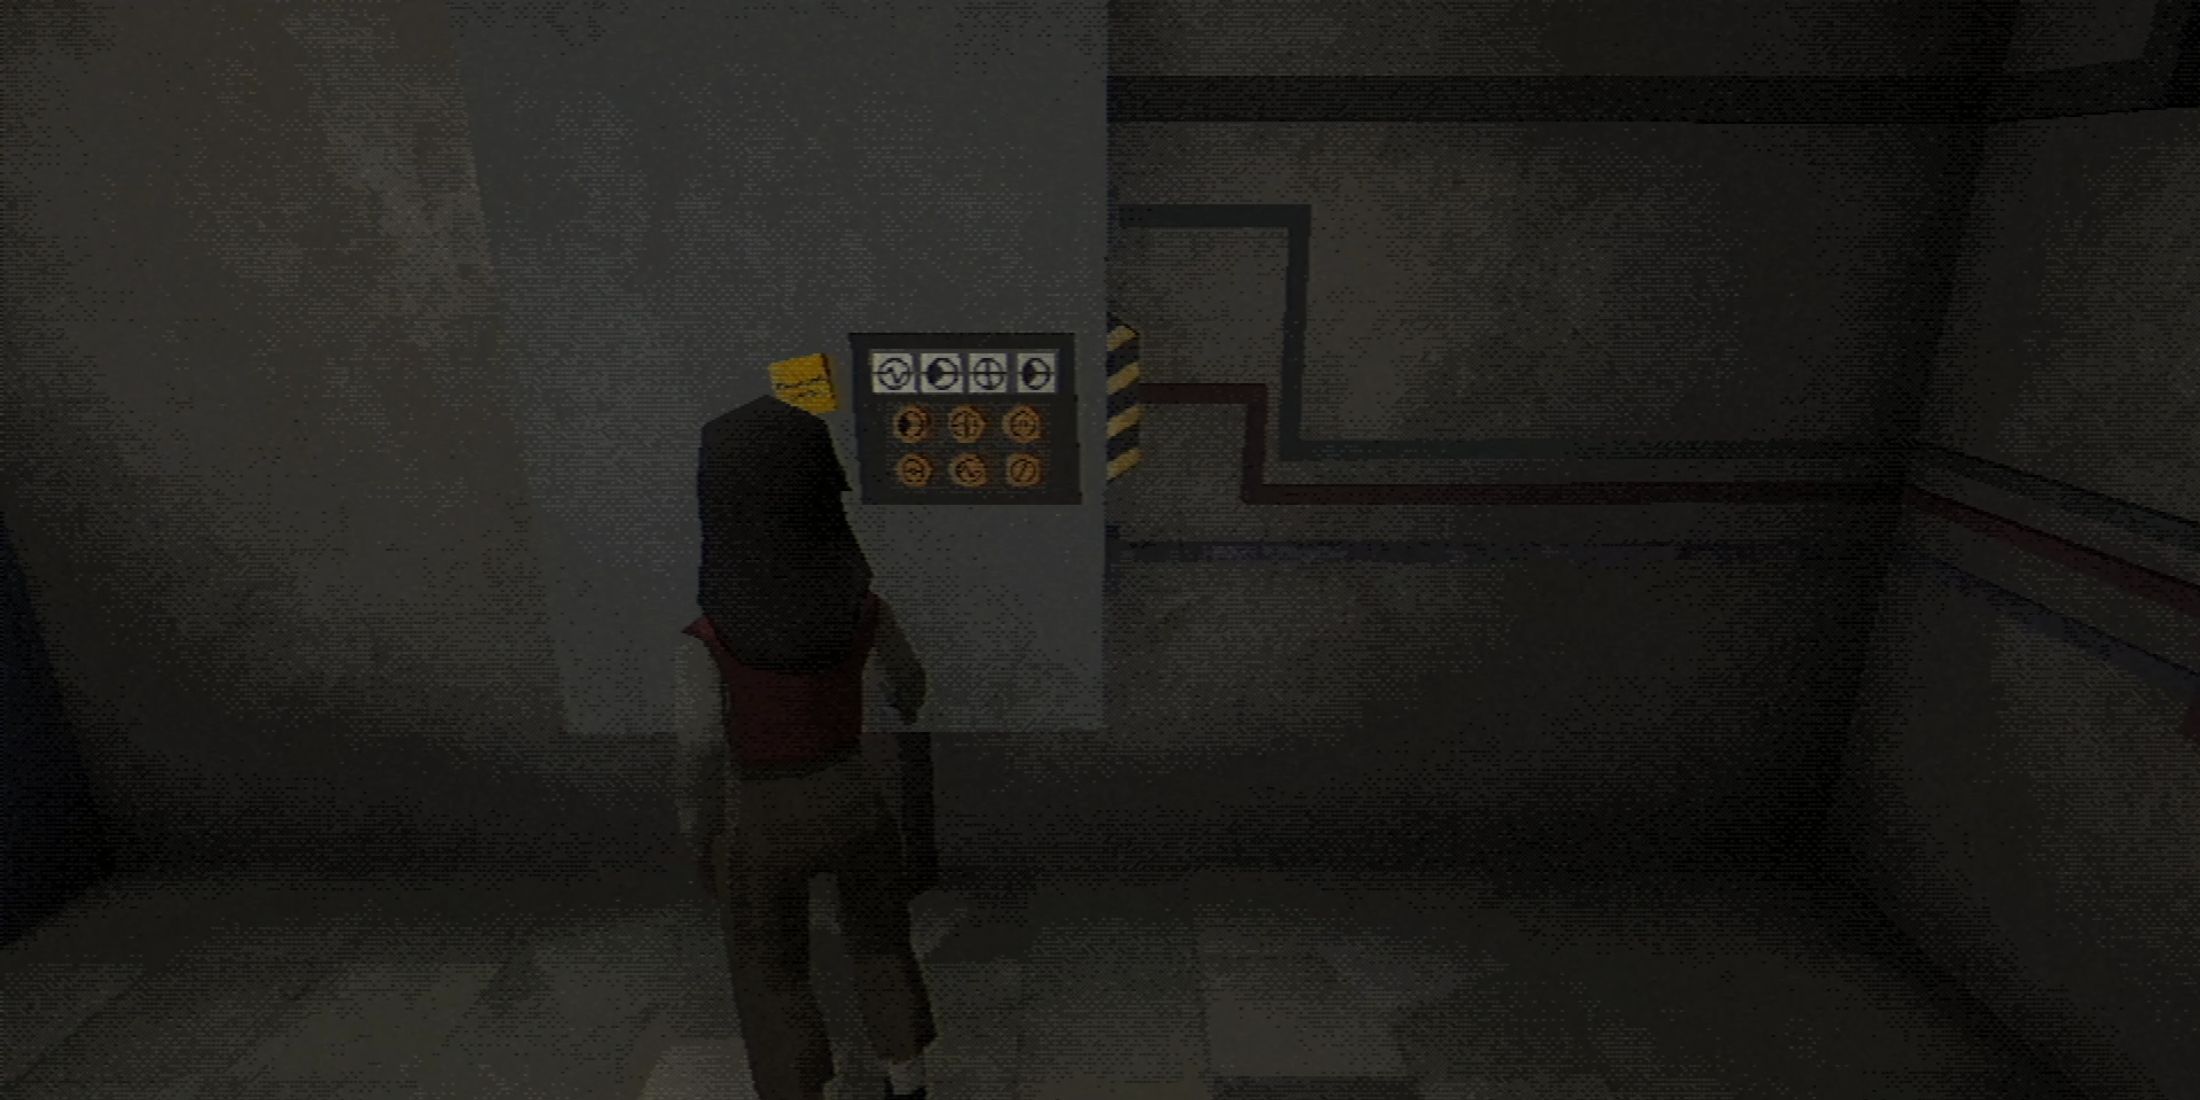
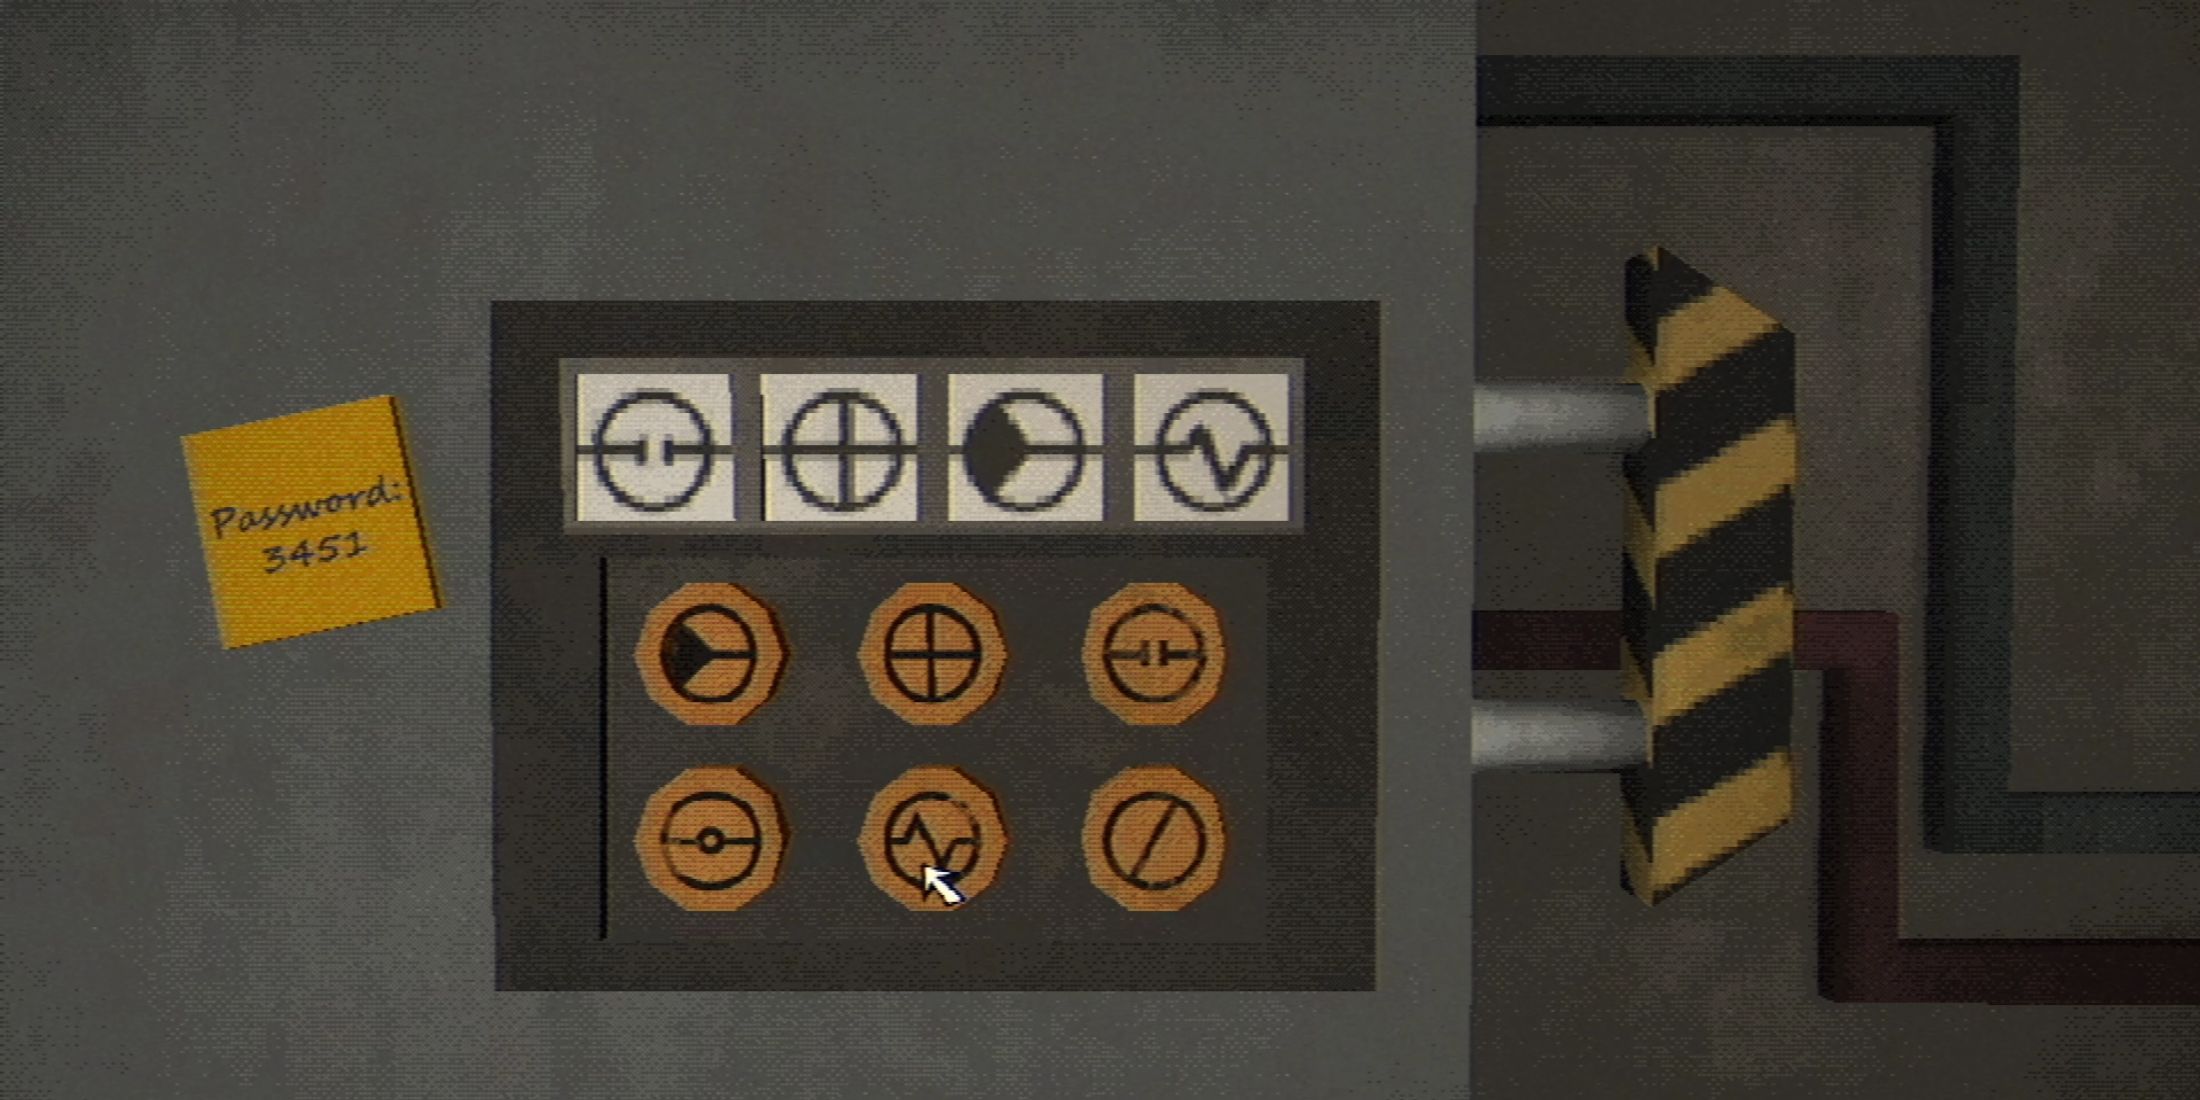
Interacting with the Fuse Box reveals it’s locked. To start solving the puzzle, you need to unlock it first. You’ll find six symbols you can click on, while a note on the left provides the password: 3451.
On the left side of the Fuse Box, you’ll find a table with the B item from Fuse B. Interact with this table and take notice of the note labeled “Coupled Attenuations” on the board nearby. The figures in this note correspond to the various symbols marked on the Fuse Box, which serves as your primary key to solving the Fuse Box puzzle. After understanding these connections, return to the Fuse Box and select the symbols that align with the numbers from your password, allowing you to open it.
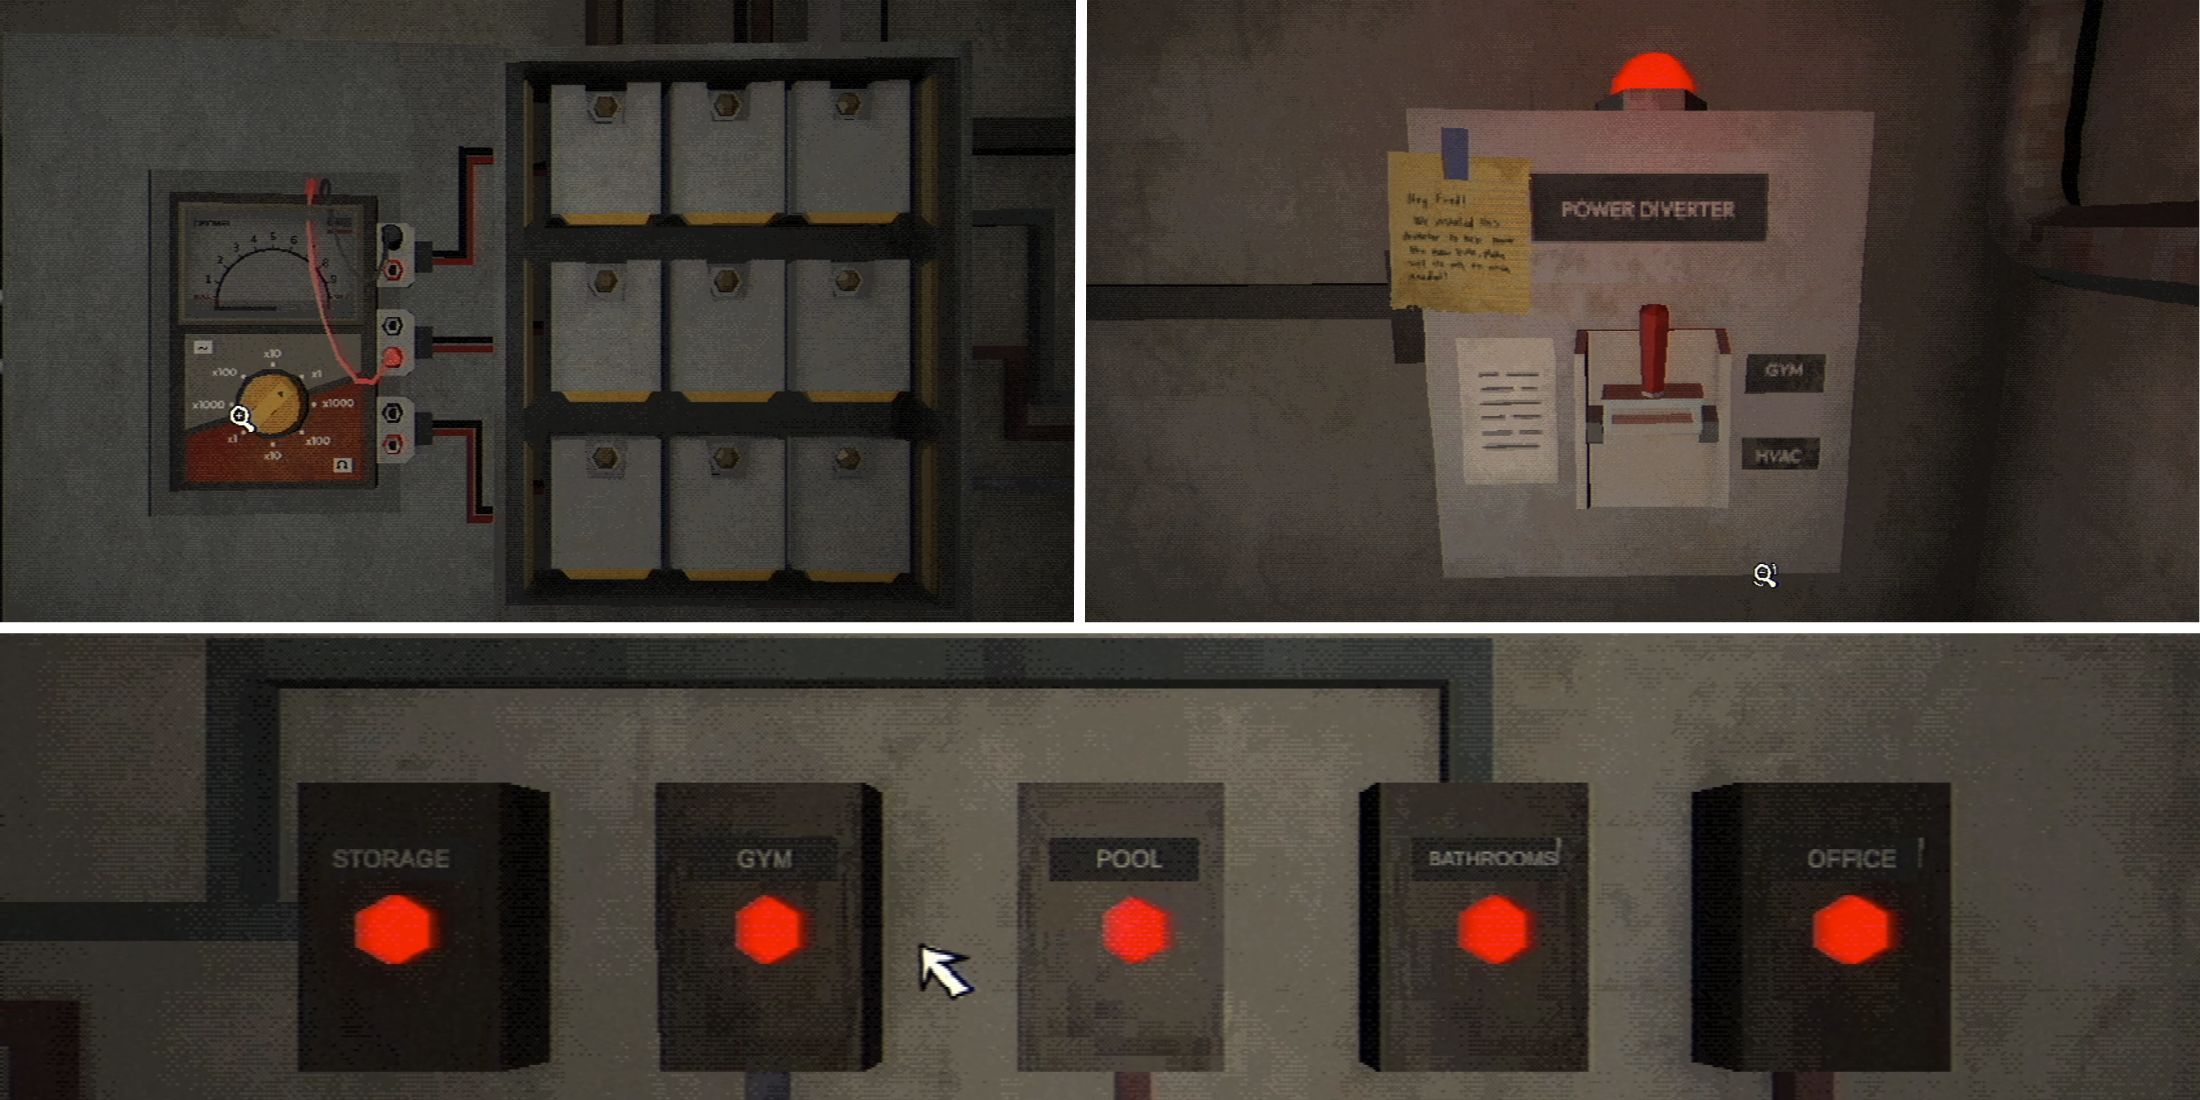
Once opened, you’ll come across a display screen, a rotating multimeter gauge in yellow, and two wires located in the left compartment, as well as six openings for connecting wires. On the opposite side, there are nine shuttered sections.
Accessing the Storage and Bathrooms
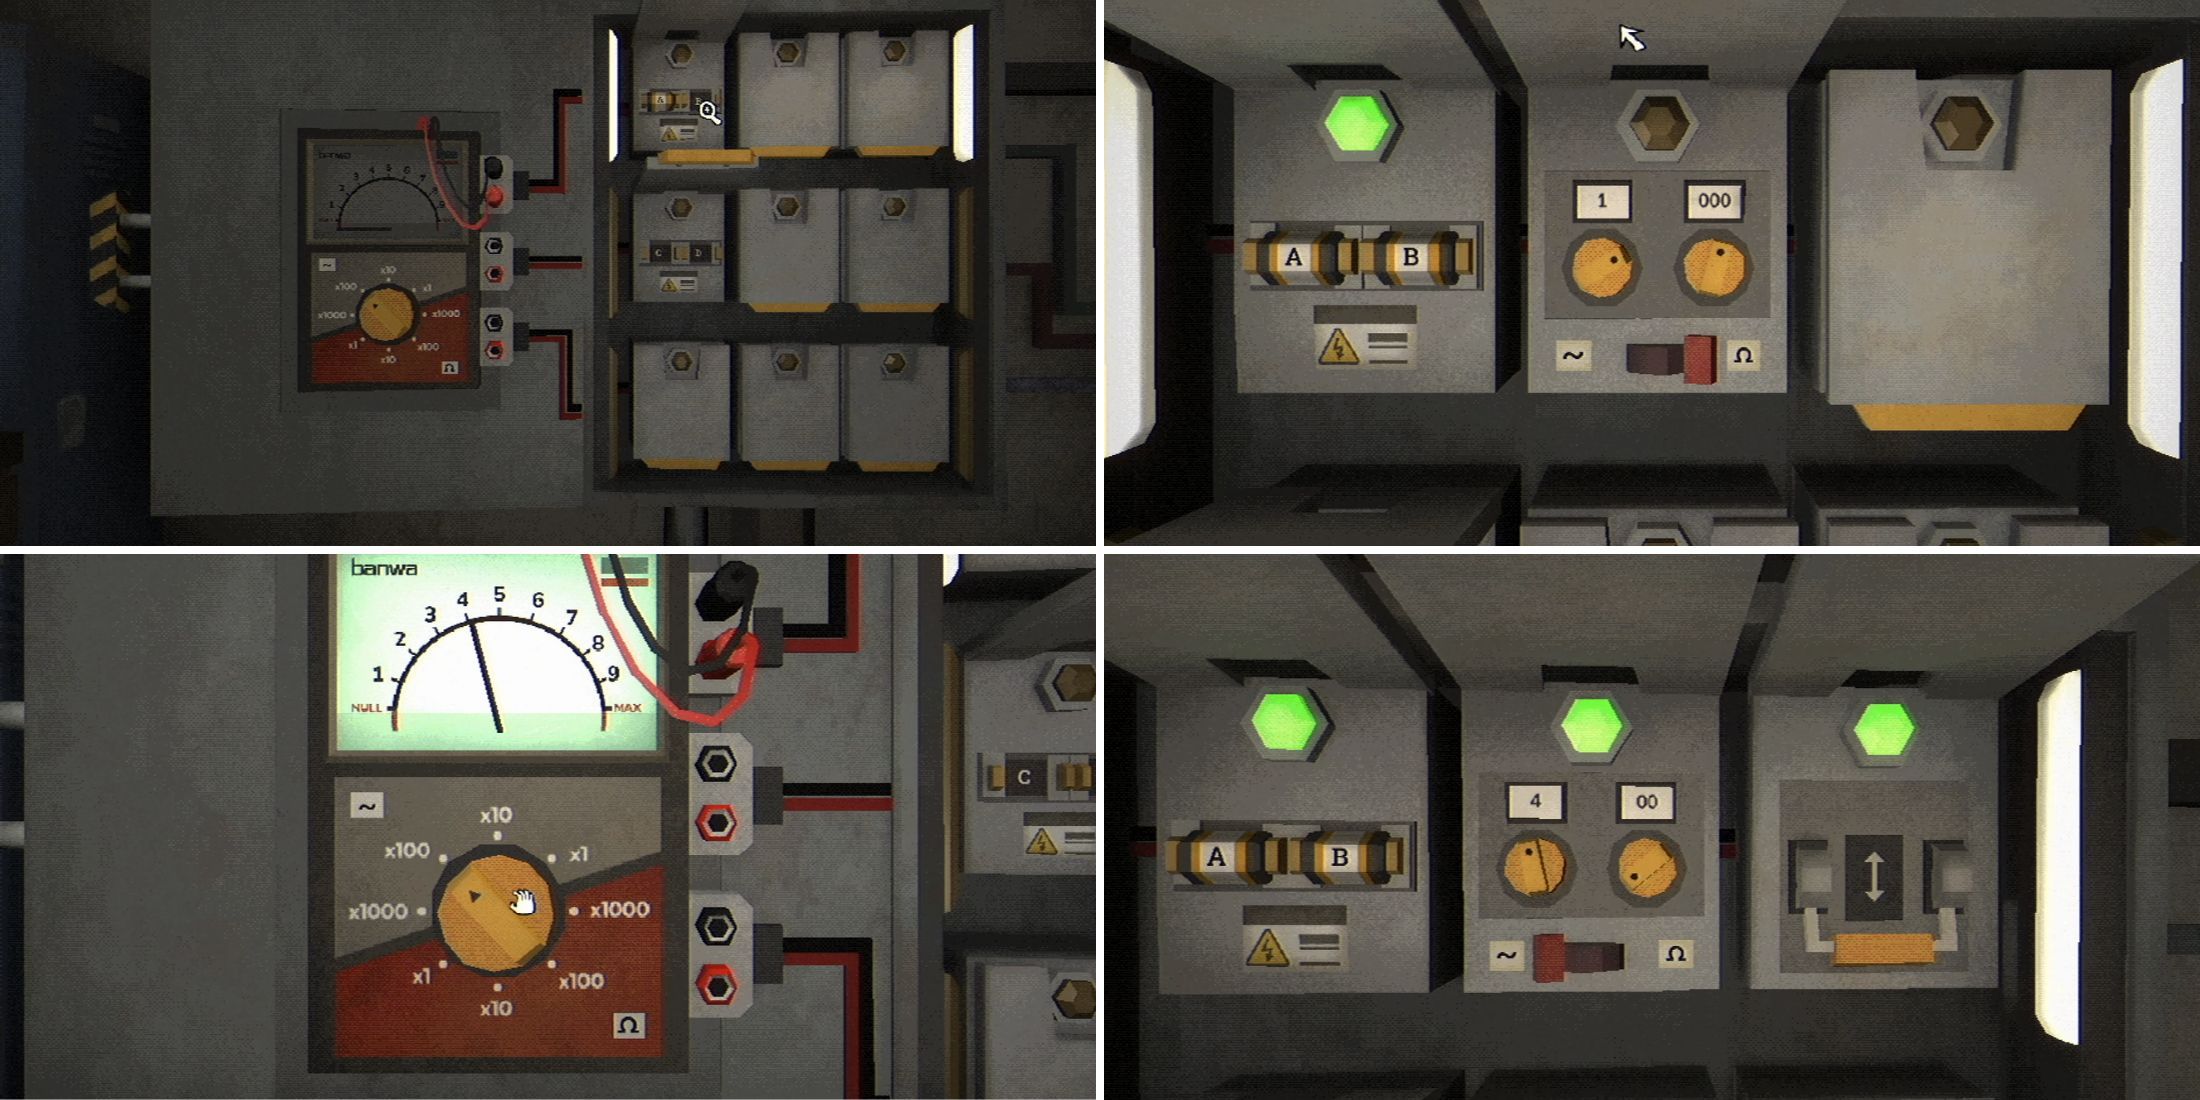
Once you’ve opened the fuse boxes, swap the red and black wires into the first group of holes. This action will illuminate the upper left panel and enable it to be raised. Lift it, and you’ll discover a fuse is missing. Insert the Fuse B that you previously picked up in the vacant slot to activate the next panel.
As a gamer, I’d say: Head back to the left part of the Fuse Box and adjust the multimeter knob until the top display glows green. If you’ve followed the steps accurately, the top indicator should read 4, with the dial set to x100 on the gray side.
Go to the second panel located in the right section, uncover it. Inside you’ll notice two dials and a slider at the bottom. Adjust the dial on the left to 4, similar to what’s displayed on the top screen to the left, and set the right dial to 00. Move the slider towards the left, which will release the final panel in that row. Once uncovered, lift the cover and draw the lever to open the shutters within the storage room and bathrooms.
Finding Fuse C and D
After you’ve managed to enter both the Storage Room and the restrooms (the bathroom door might be a bit wonky), make your way back to the main Gymnasium hall. In the Storage Room, there’s a cabinet on your left that’s locked tight. To unlock it, keep an eye out for the Cabinet Keys.
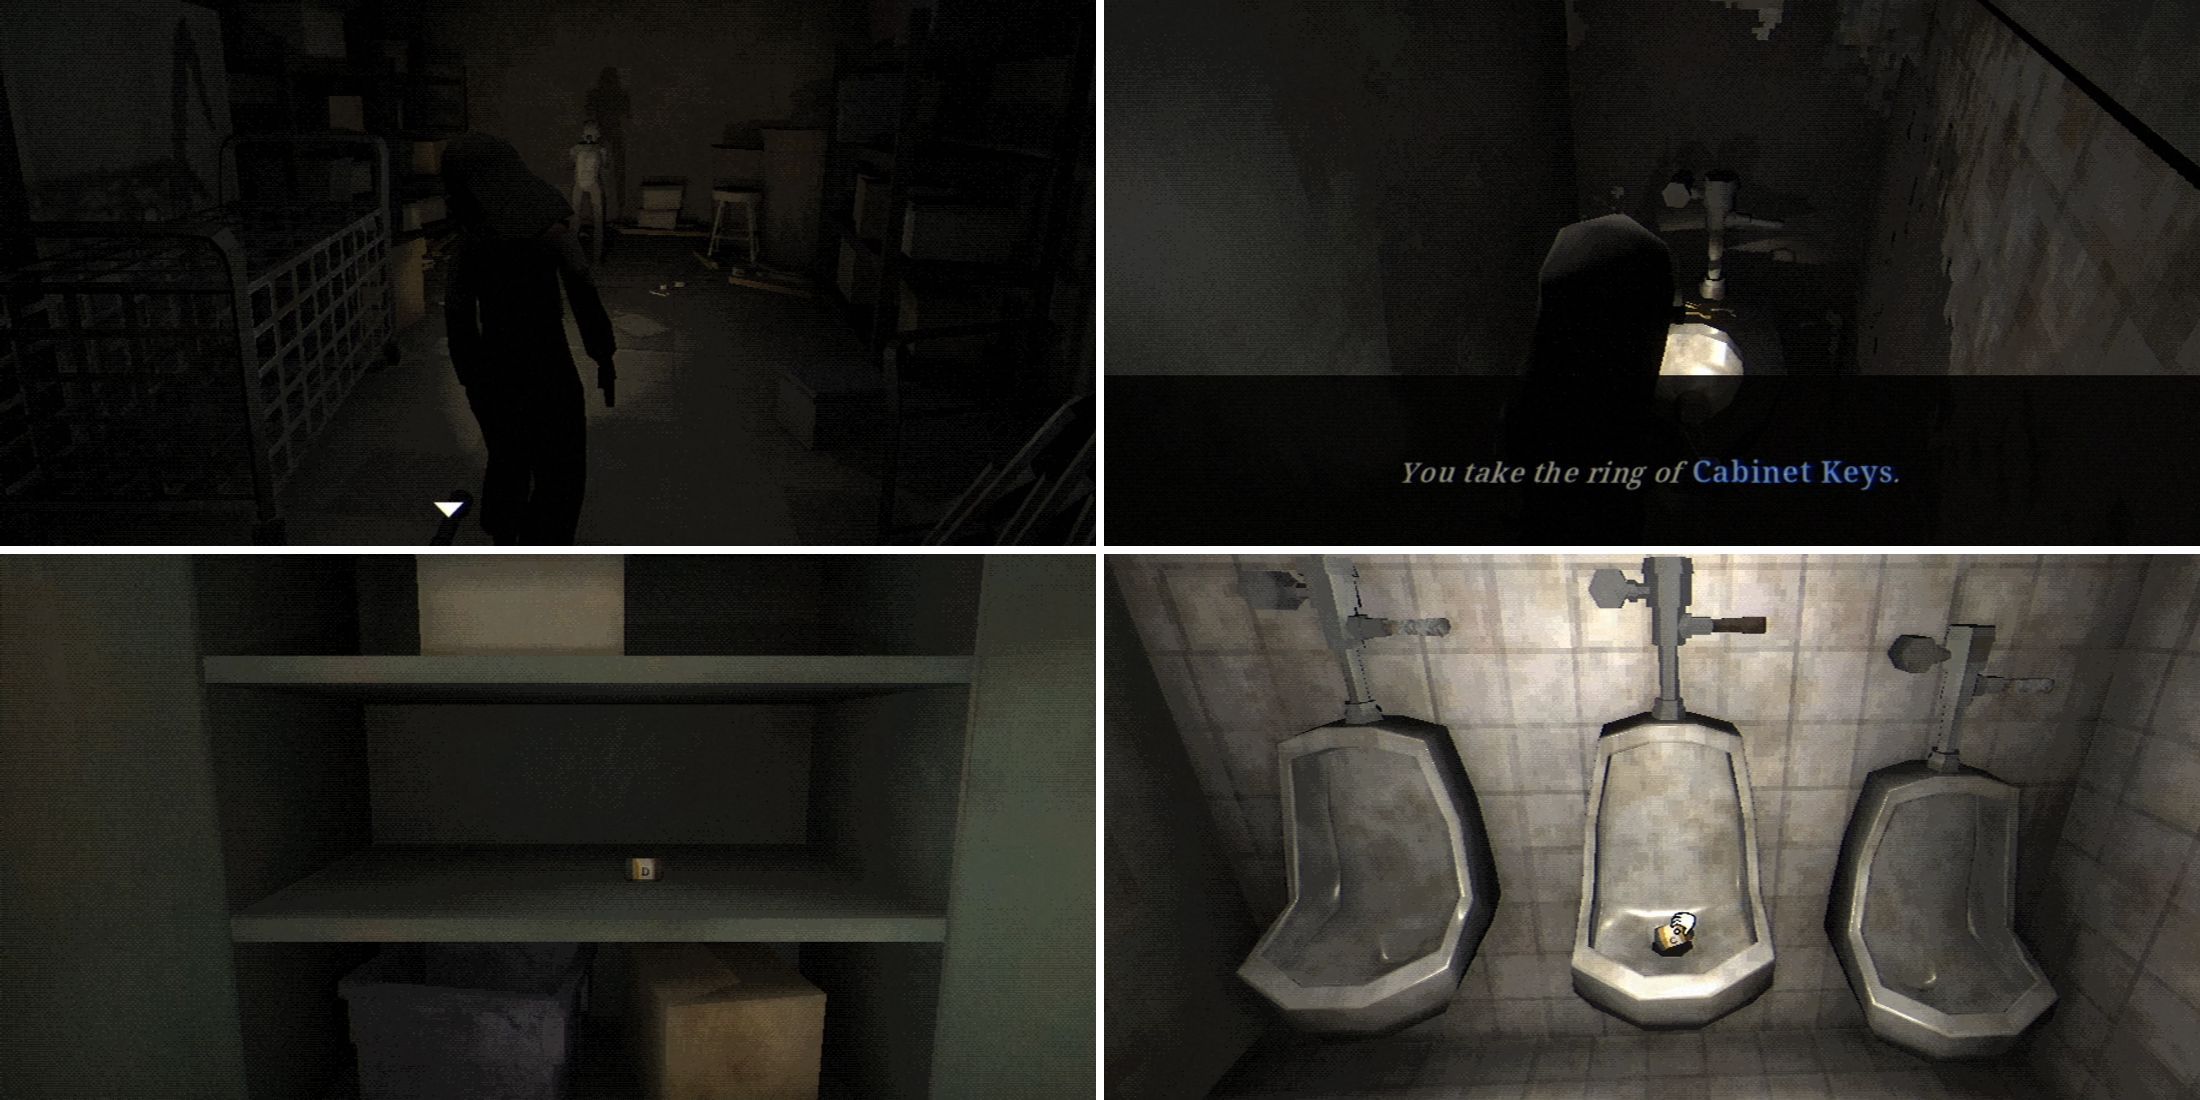
Advance, then duck beneath the table to grab the flashlight. Nearby, there’s a vent you can undo with your screwdriver. Proceed through the opening to enter the Girl’s Bathroom.
Initially, you’ll notice someone inside a bathroom stall on your right, but for the moment, you can’t enter it. As you approach the exit, that very stall will open up. Return to it and grab the cabinet keys left behind. Exit the bathroom via the main door. Now, you’ve reached the problematic shutters’ opposite side. Proceed into the boys’ restroom next.
Use the lever on the right side to lift the shutters and unlock the shortcut back to the main hall.
Approach the centrally located toilet, and when you notice Vivian mentioning something at the base but not touching it until you clear the black gunk with the flush, actuate the flush and grab Fuse C. Then, return to the cabinet you spotted in the Storage Room earlier, utilize the Cabinet Keys to unlock it, and retrieve Fuse D.
Accessing the Pool and the Office
Once you’ve grabbed the new fuses, head back towards the Fuse Box, but beware! The Spotlight Head has resurfaced and is wandering about the Main Hall of the Gymnasium. Hide behind the covers in the hall to make your escape and head back to Mechanical instead.
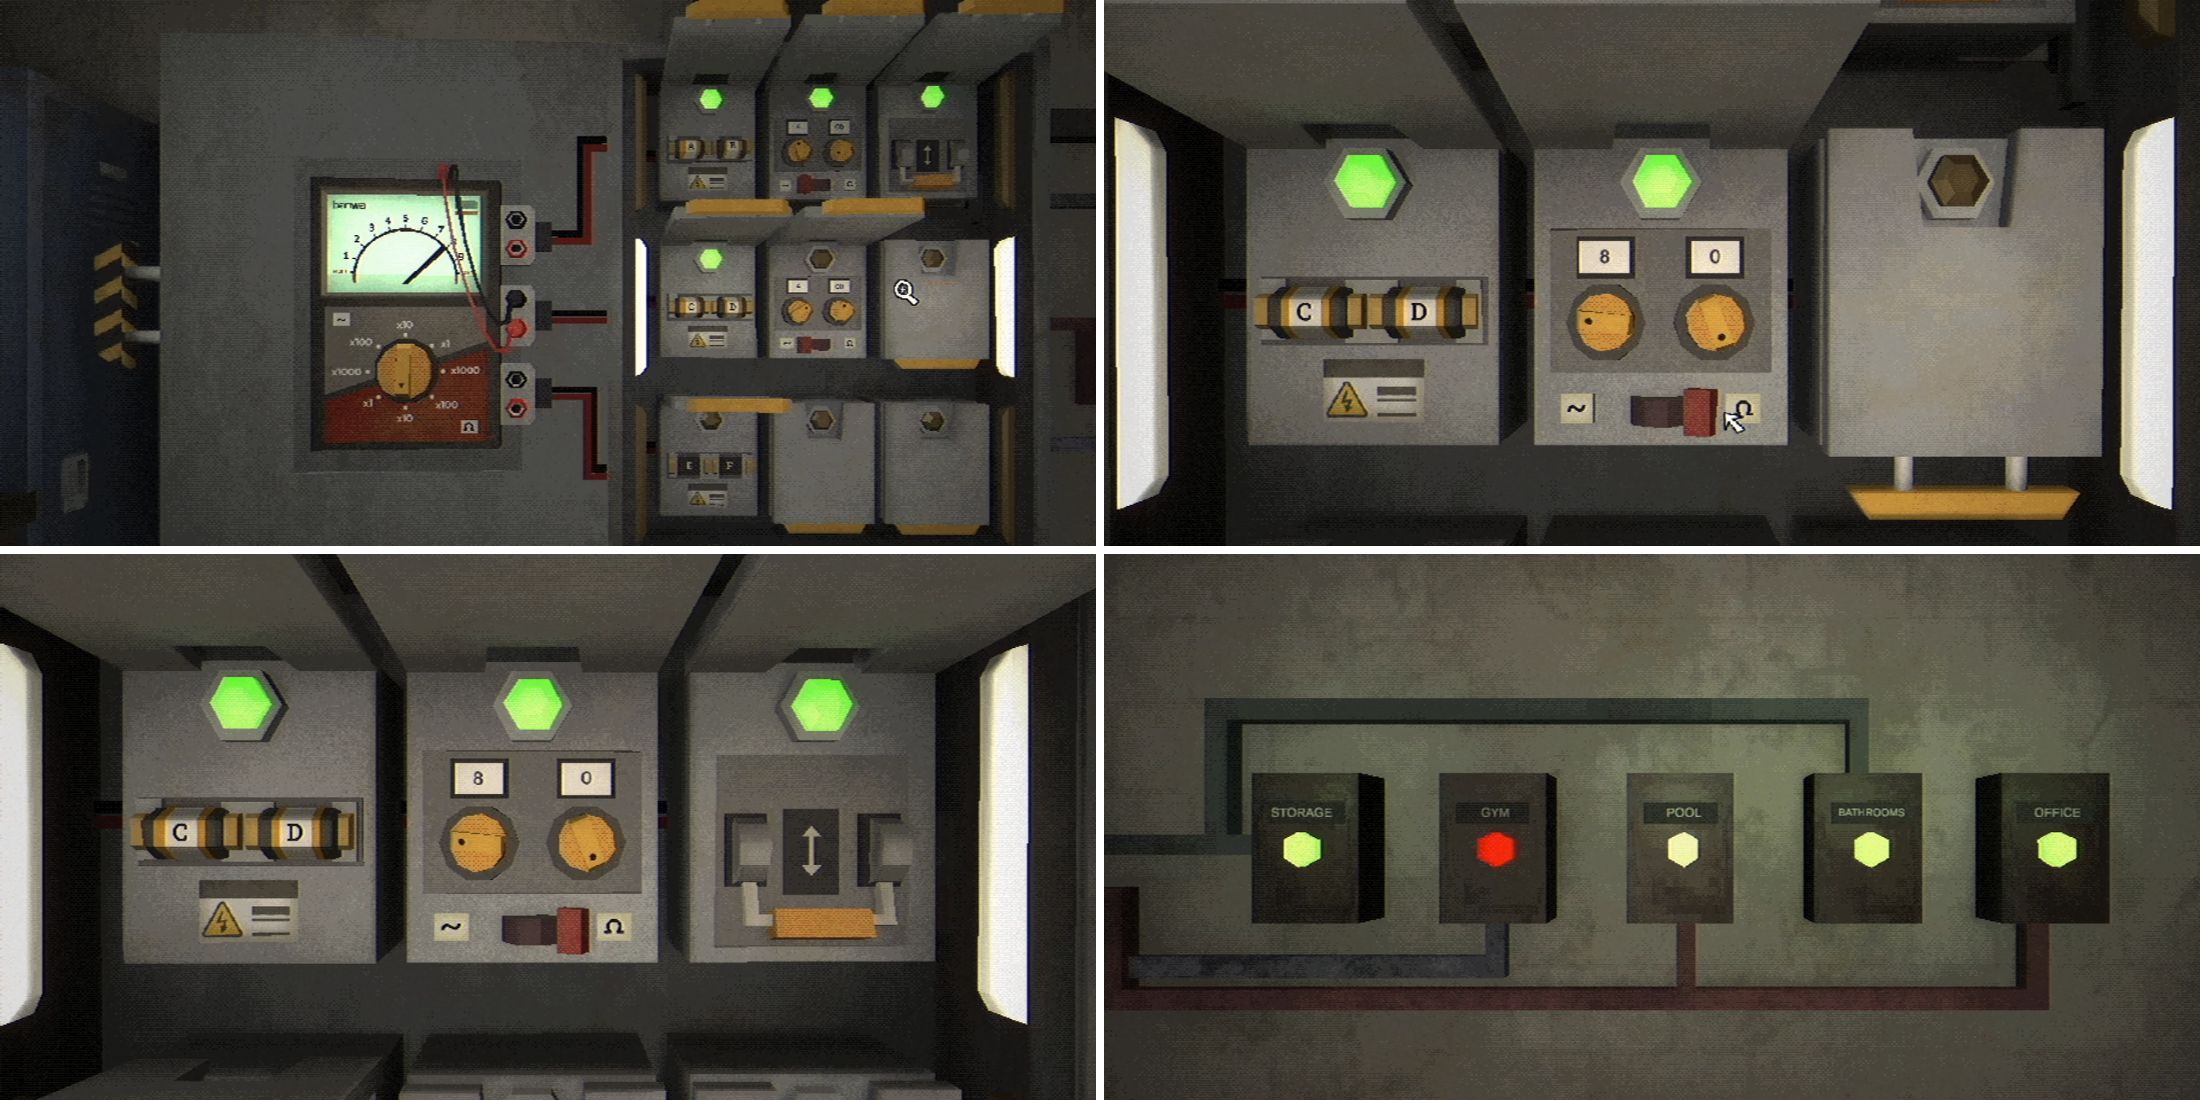
In the Fuse Box, connect the Red and Black wires to the second row’s pair of slots, then raise the second row’s first panel. Insert Fuses C and D into the available slots, and proceed to open the next panel. On the left display, adjust the dial so it shows x10 with the bottom facing downwards. Observe that the top screen’s indicator displays 8.
In the second row’s second column, adjust the left knob to 8 and the right one to 0. Slide the control to the right, which will release the third panel. Lift it up and pull the handle to open the shutters for both the Pool and Office spaces.
Finding Fuse E and F
Make your way out of Mechanical, keeping a low profile to steer clear of the Spotlight. Navigate through debris until you reach the Pool area. Upon arrival, notice that the pool is filled with the same ominous black goo as seen earlier at the urinal. You’ll need to figure out how to empty it. Approach the ladder leading into the pool and secure it for future use.
Enter the Pool Office and pick up when the phone rings. Following the call, focus on the yellow note stuck on the computer screen to read it – this could be a hint for the password you’ll soon require. In the same room, locate the Storage Cabinet with a yellow tag. Use the keys in your possession to open it and retrieve Fuse E. Also, take notice of the safe cornered near the window in the office, below the windowpane.
Currently, explore the Trophy Case and take a look at the various trophies. You’ll see that both the female and male teams secured gold medals in 1987. This combination serves as the key for the office safe. Make your way back to the safe and enter this sequence to unlock it. Grab the Pool Pump Handle on your journey.
Exit the office, then veer left towards the staircase. Before you ascend, pull the lever to raise the grating and unfasten the hidden passage leading back to the main hall. Proceed upstairs to the stands and make your way to the Pool Drain Pump control panel. Grab the Pool Pump Handle and insert it into the slot, then rotate it fully clockwise. Flip the switches as they begin flashing to empty the pool.
First, retrace your steps to the pool ladder you encountered previously and utilize it to descend. At the foot of the ladder, discover a table where another message from your Mysterious Suitor awaits. Moreover, there’s a drain pipe nearby that holds the Raffle Handle. Exit via the ladder again. Steer clear of the Spotlight Head now lurking in the pool area and navigate back to the central hall instead.
In the central area of the gym, engage with the tumbling device positioned on the stage and manipulate the Raffle Wheel. Turn it to the left, which will trigger the release of Fuse F.
Give the Tumbler a few more spins to unlock an extra achievement in
Fear the Spotlight
.
Powering the Gym
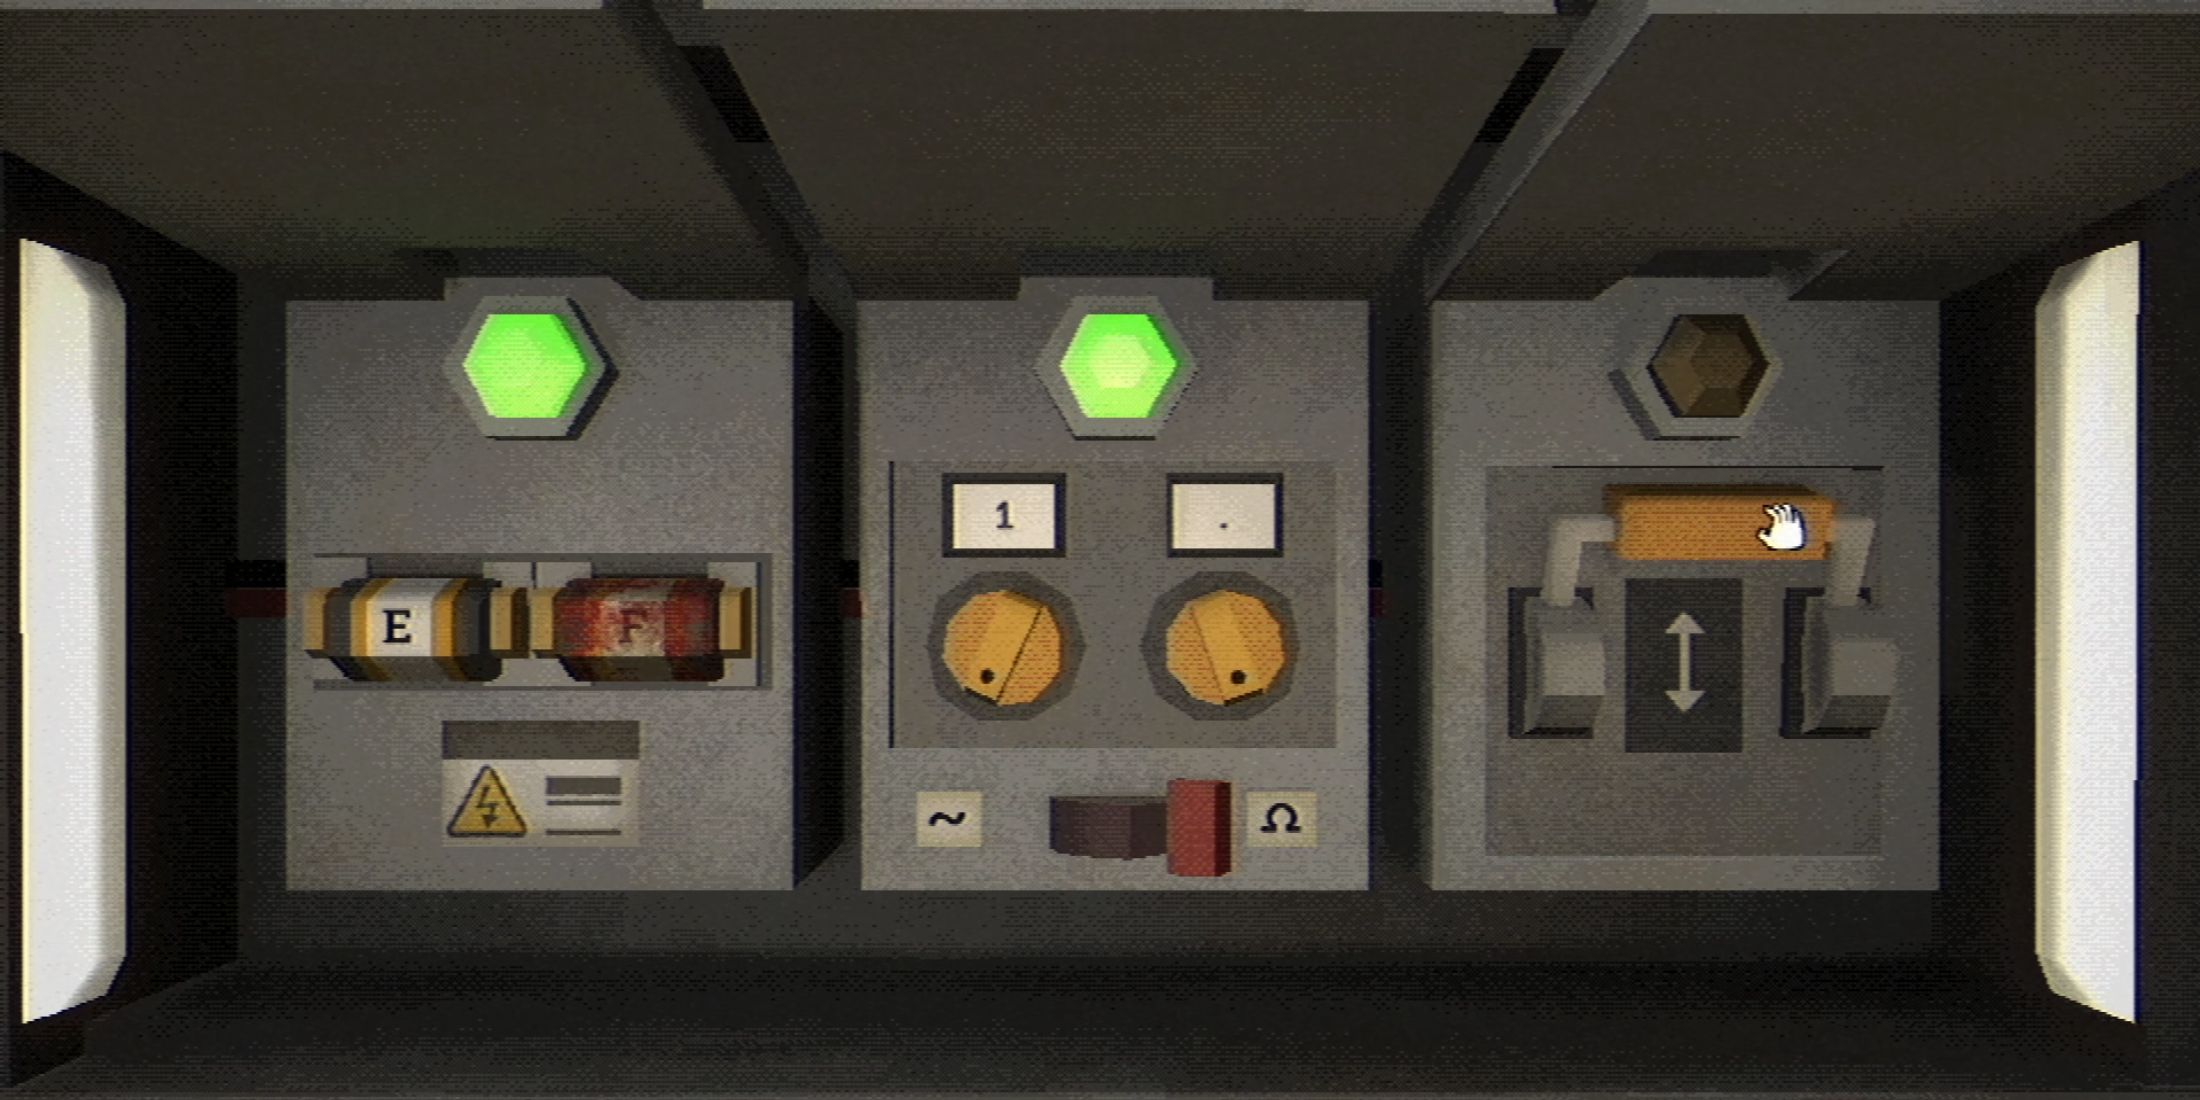
After obtaining Fuse E and F, make your way back to the Fuse Box. Arrange the wires in the lower compartment and insert the fuses into the initial section. Adjust the dial to position X1 on the red half.
On the second display, adjust the left knob to 1, the right one to a dot, then slide it towards the right side. Now, open the final panel and operate the handle.
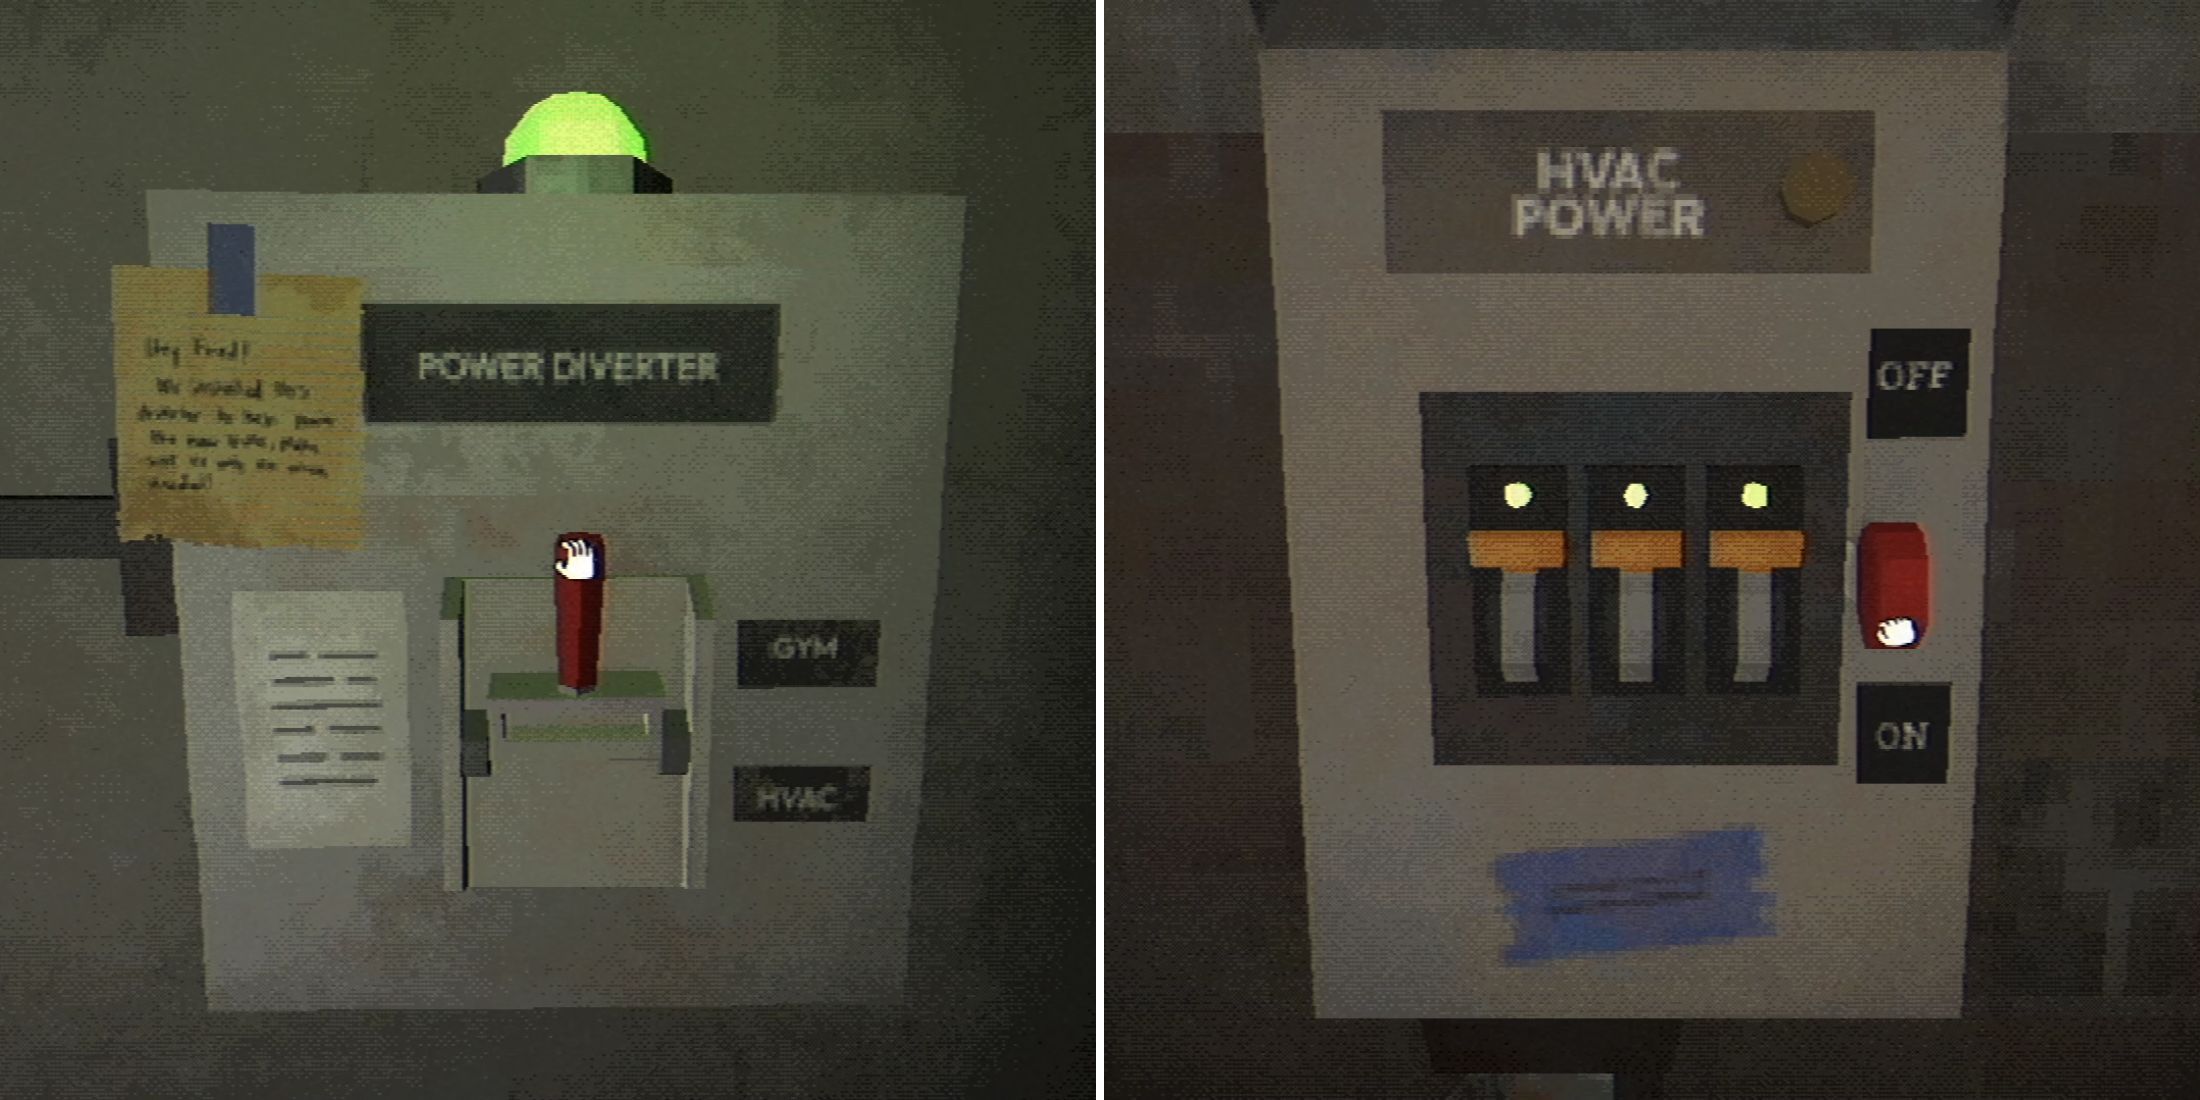
After successfully figuring out the Fuse Box riddle, you now have access to the Power Diverter in Mechanical, enabling you to redirect power towards the HVAC unit outside Webber Building. Upon leaving the gym, you’ll notice some mysterious apparitions in the main hall. Fear not as they won’t harm you. Simply walk out the door and proceed towards the HVAC unit, and you’ll find yourself standing before the Theater in “Fear the Spotlight”.
Read More
- SOL PREDICTION. SOL cryptocurrency
- USD ZAR PREDICTION
- BTC PREDICTION. BTC cryptocurrency
- LUNC PREDICTION. LUNC cryptocurrency
- USD PHP PREDICTION
- WIF PREDICTION. WIF cryptocurrency
- USD COP PREDICTION
- LOVELY PREDICTION. LOVELY cryptocurrency
- MDT PREDICTION. MDT cryptocurrency
- SCOMP PREDICTION. SCOMP cryptocurrency
2024-10-26 08:04