The primary controllers for the Nintendo Switch 2 are called Joy-Cons, which attach to the sides of the device, enabling handheld gameplay. Each Nintendo Switch 2 console includes two Joy-Cons, but many games support up to four and occasionally more players simultaneously.
Instead of buying two separate Pro Controllers or extra Joy-Con sets, you can instead link your Joy-Cons from your initial Switch device to your secondary one. This will allow you to effortlessly control with four controllers. Here’s a guide on how to connect new and even old Joy-Cons to your secondary Switch:
1. Turn off both your primary and secondary Switches.
2. Press and hold the sync button (located on the back of each Joy-Con) for about 3 seconds.
3. While still holding the sync buttons, turn on both switches.
4. The LED lights on the Joy-Cons will start flashing rapidly to indicate they are in pairing mode.
5. If the process is successful, the LED lights will stop flashing and stay solid. Your Joy-Cons are now synced with your secondary Switch.
6. Repeat steps 1-5 for any additional Joy-Cons you want to connect.
How To Sync Joy-Cons To A Switch 2
As a dedicated Nintendo Switch 2 enthusiast, I’ve found it incredibly convenient that pairing Joy-Cons with my device is a breeze. All I need to do is slide them onto the sides of my Switch 2, and voila! They automatically connect. This connection persists, so even when I detach them for independent play, they’ll reconnect seamlessly whenever I slot them back onto the console. It’s important to note that this method only applies to Joy-Cons and requires physical attachment, but you can also sync them wirelessly if preferred.
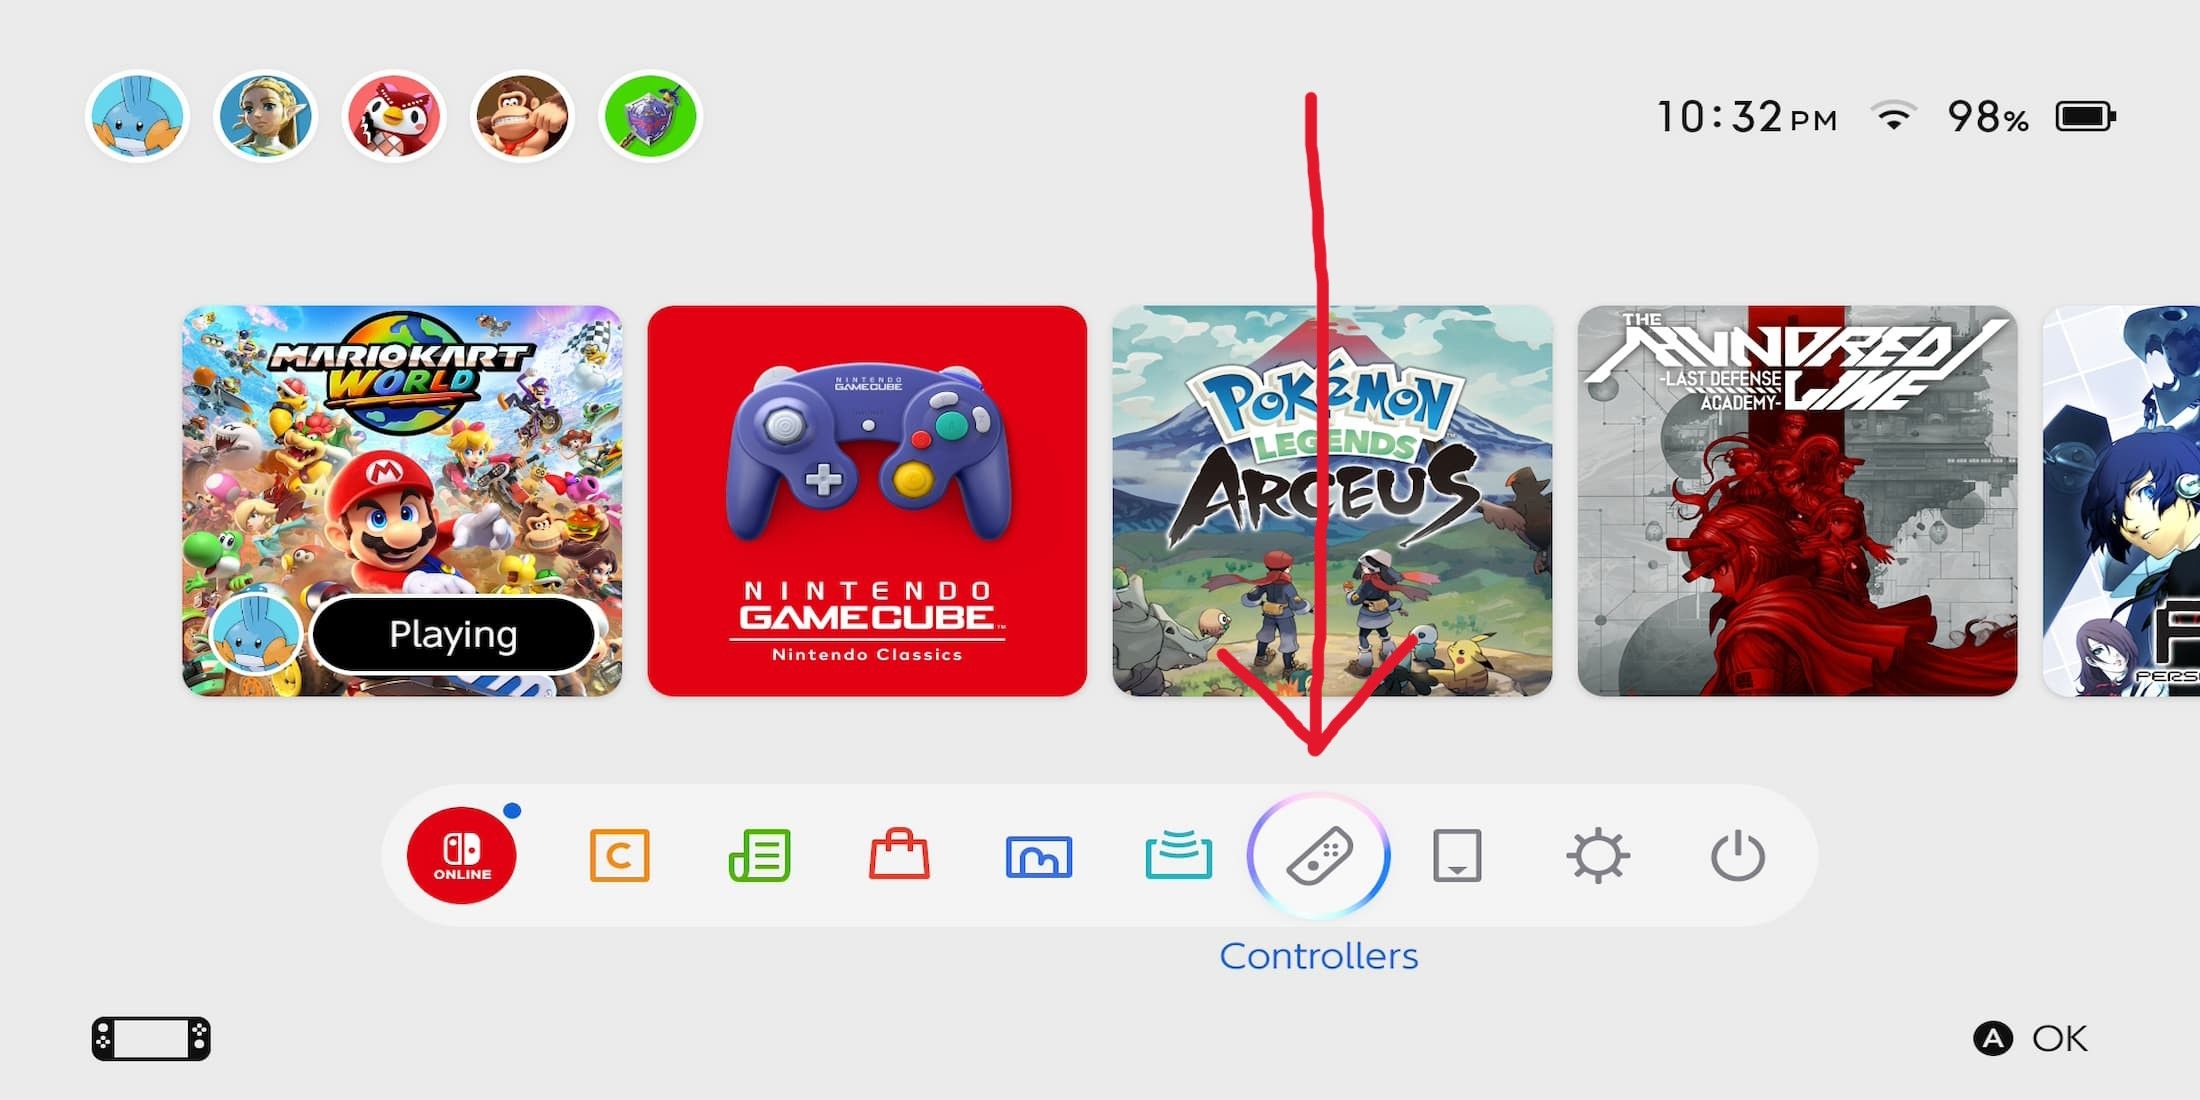
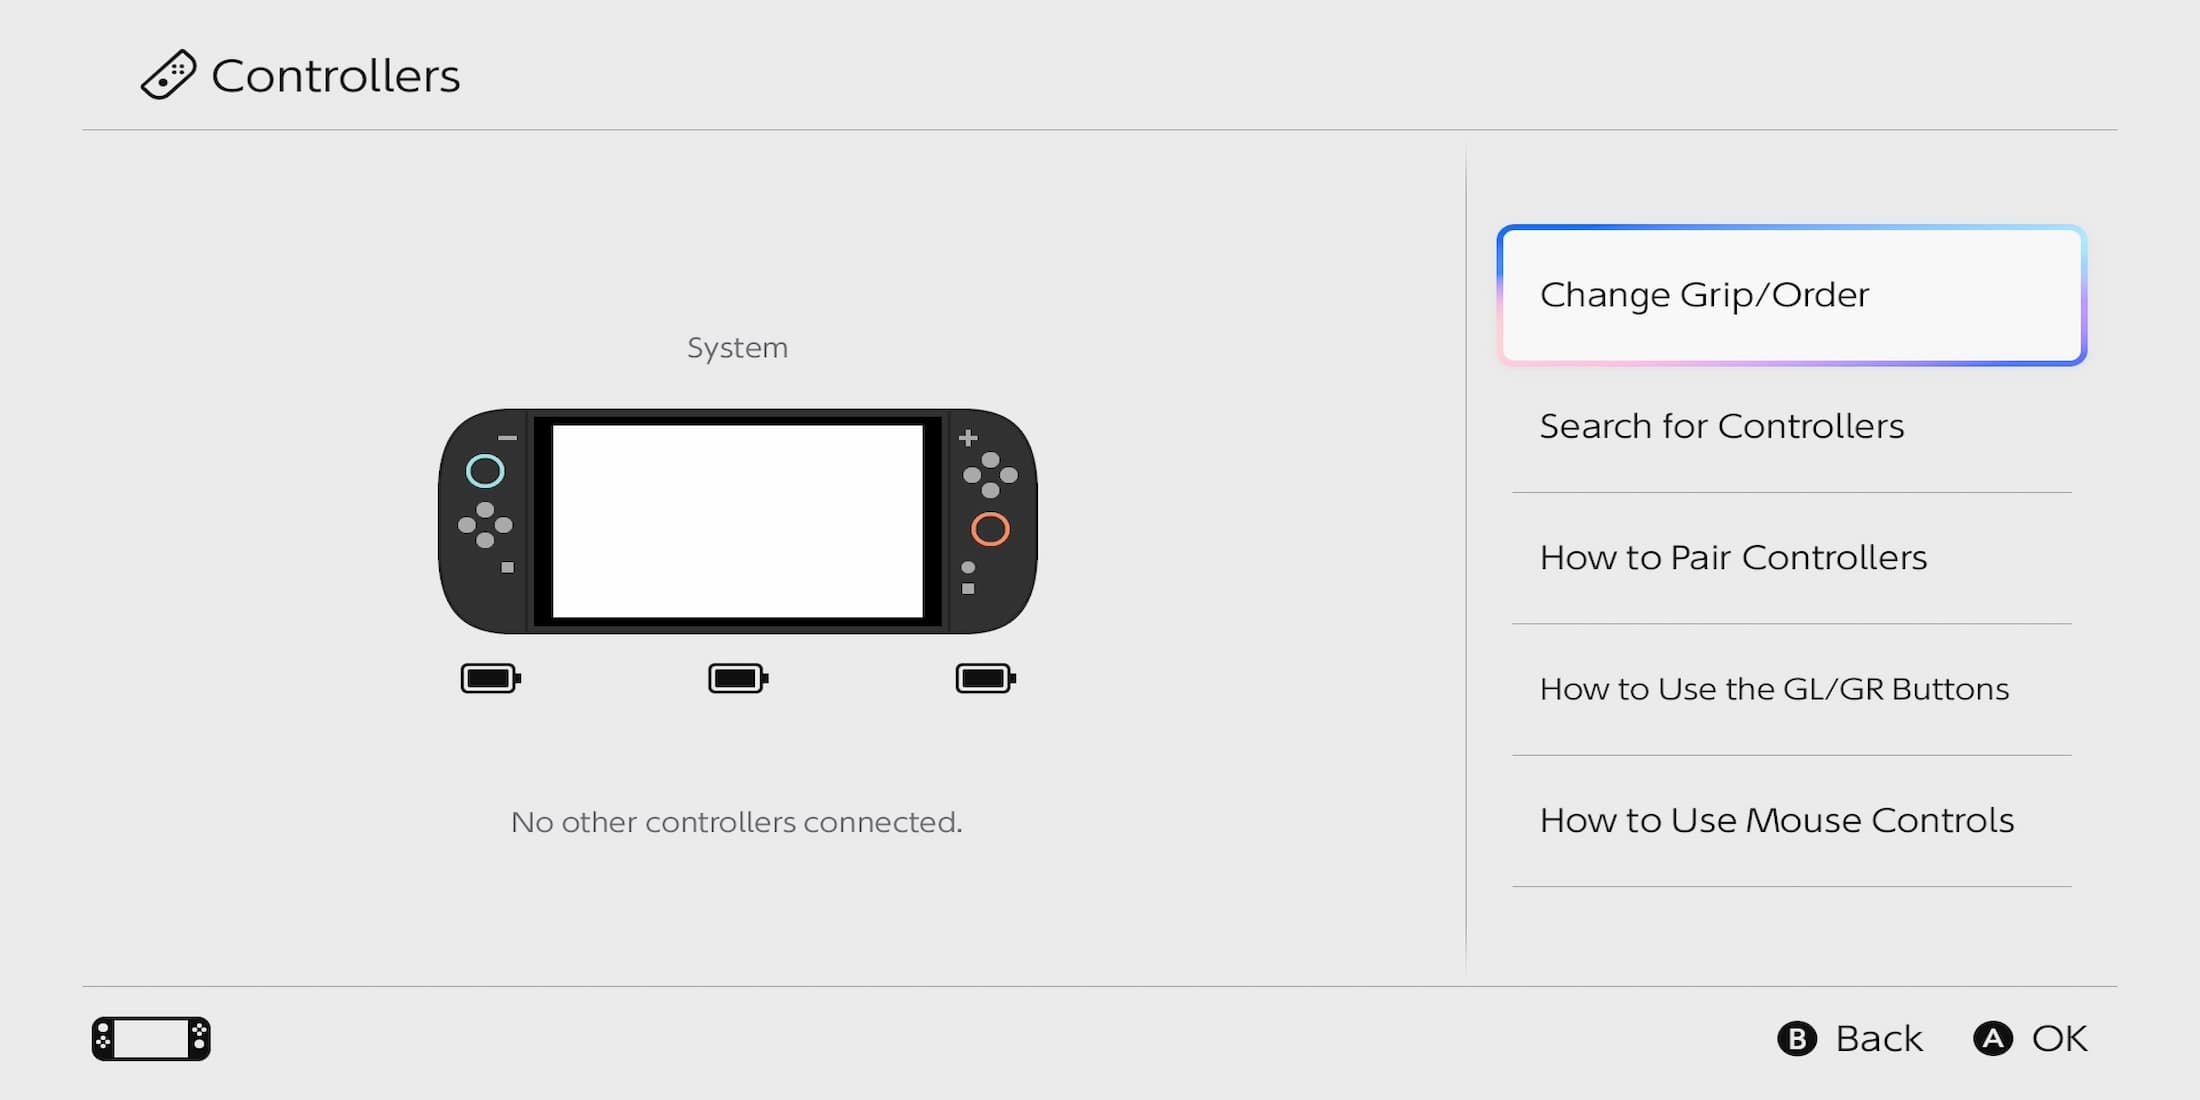
- On your home screen, scroll along the main menu to the, “Controllers” option.
- Select, “Change Grip/Order.”
- Press the corresponding buttons on your controller or Joy-Con to sync to the Switch 2.
How To Sync Switch 1 Joy-Cons To A Switch 2
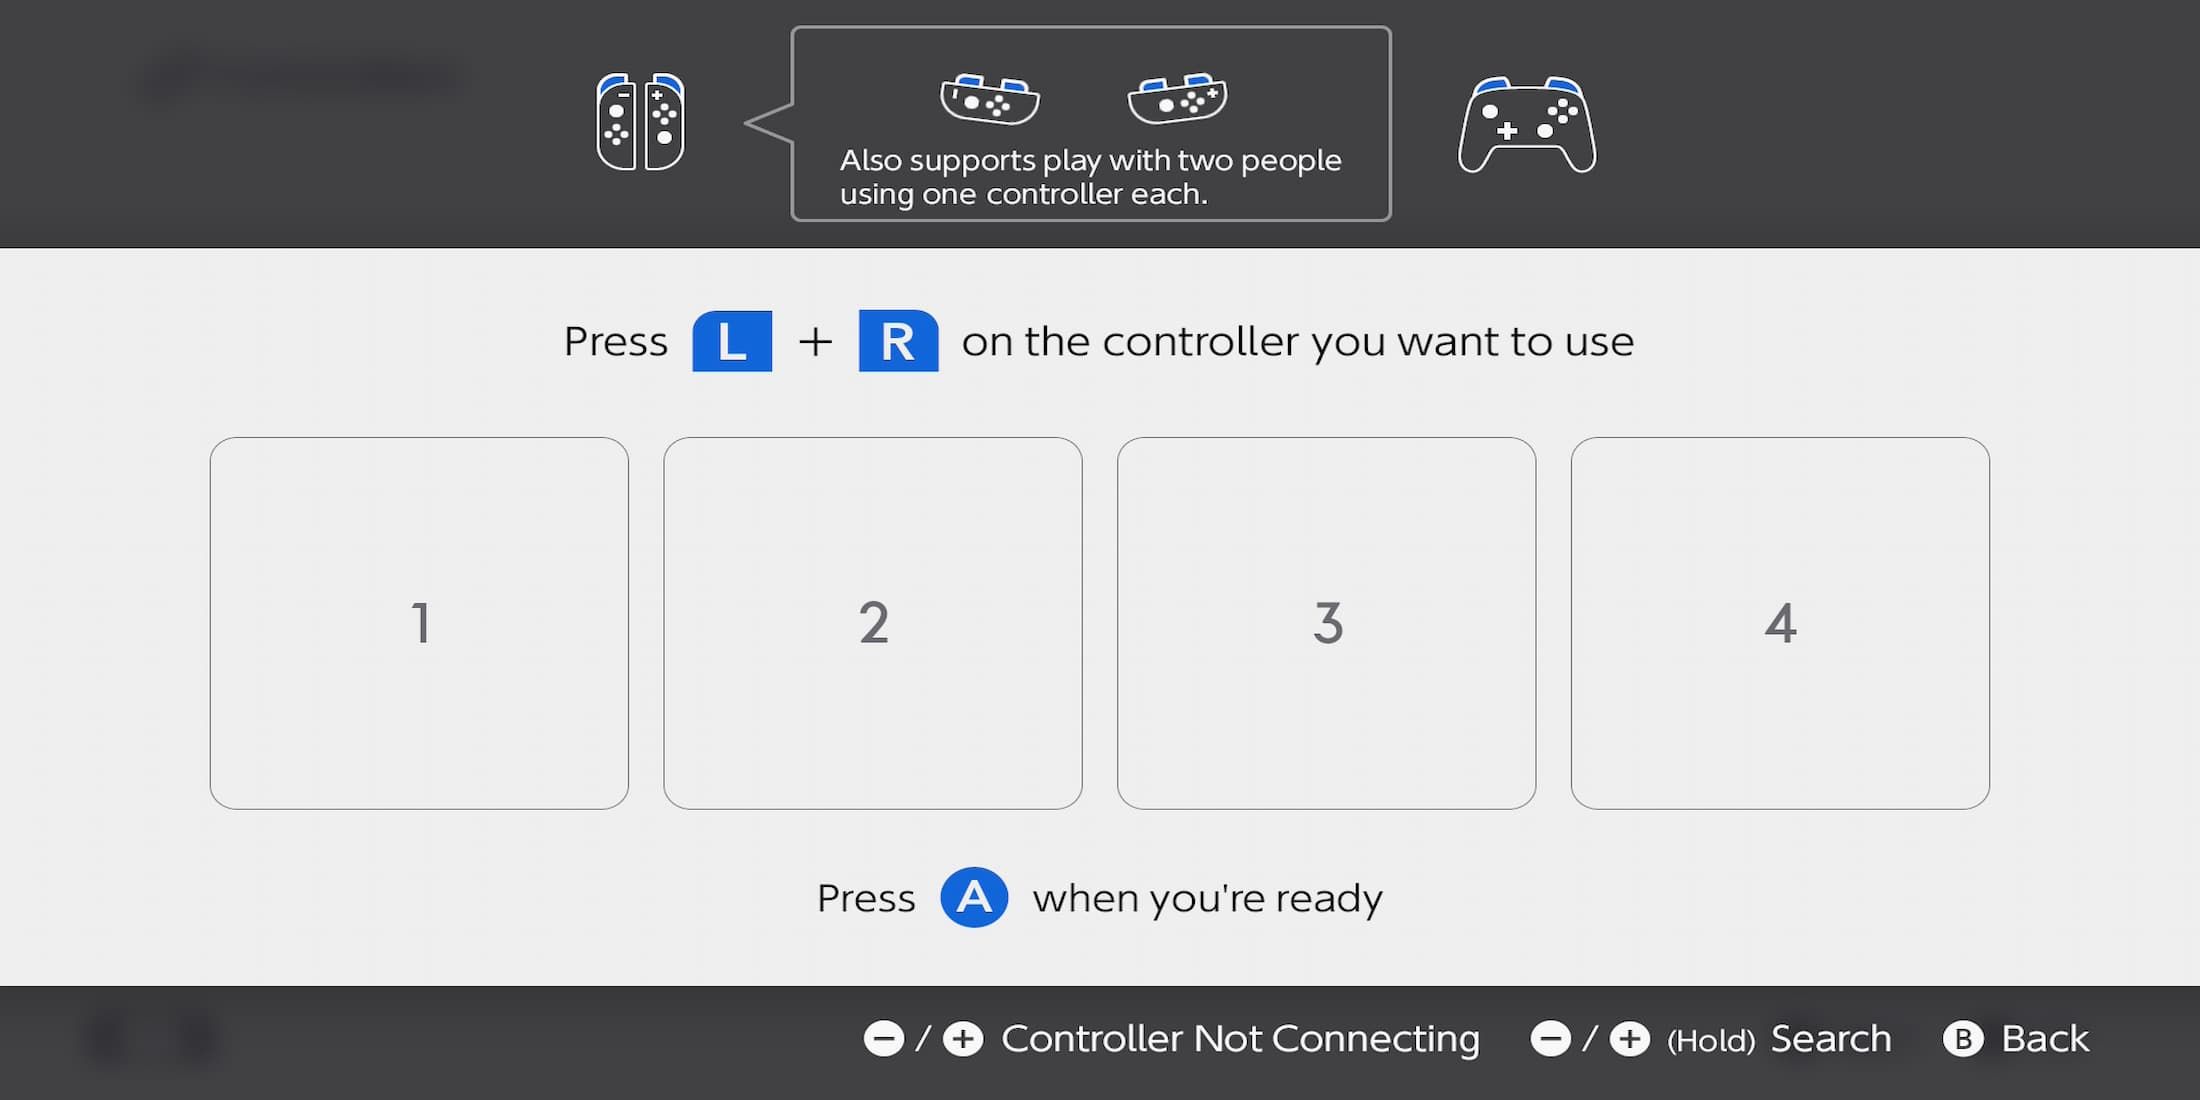
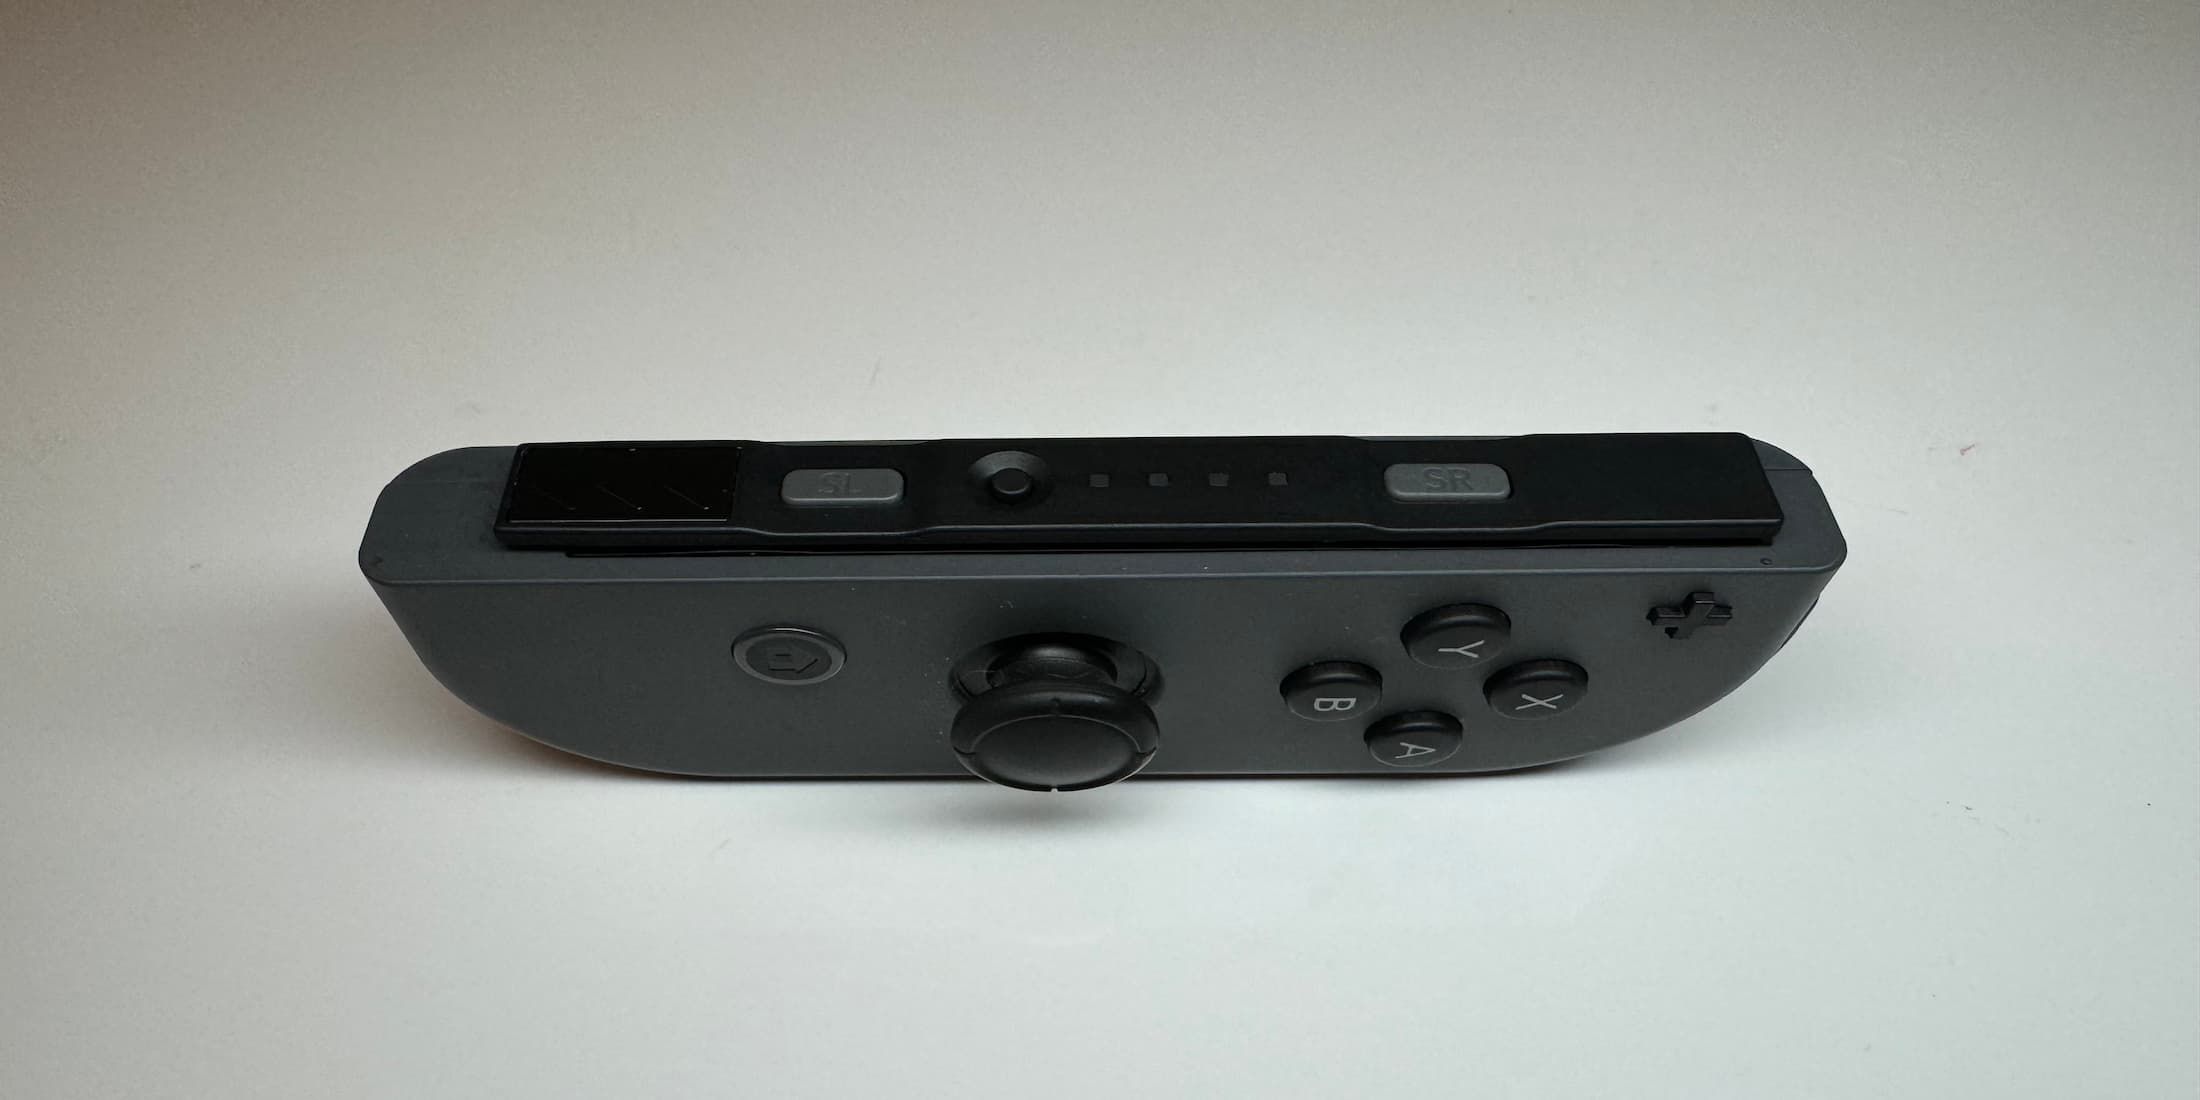
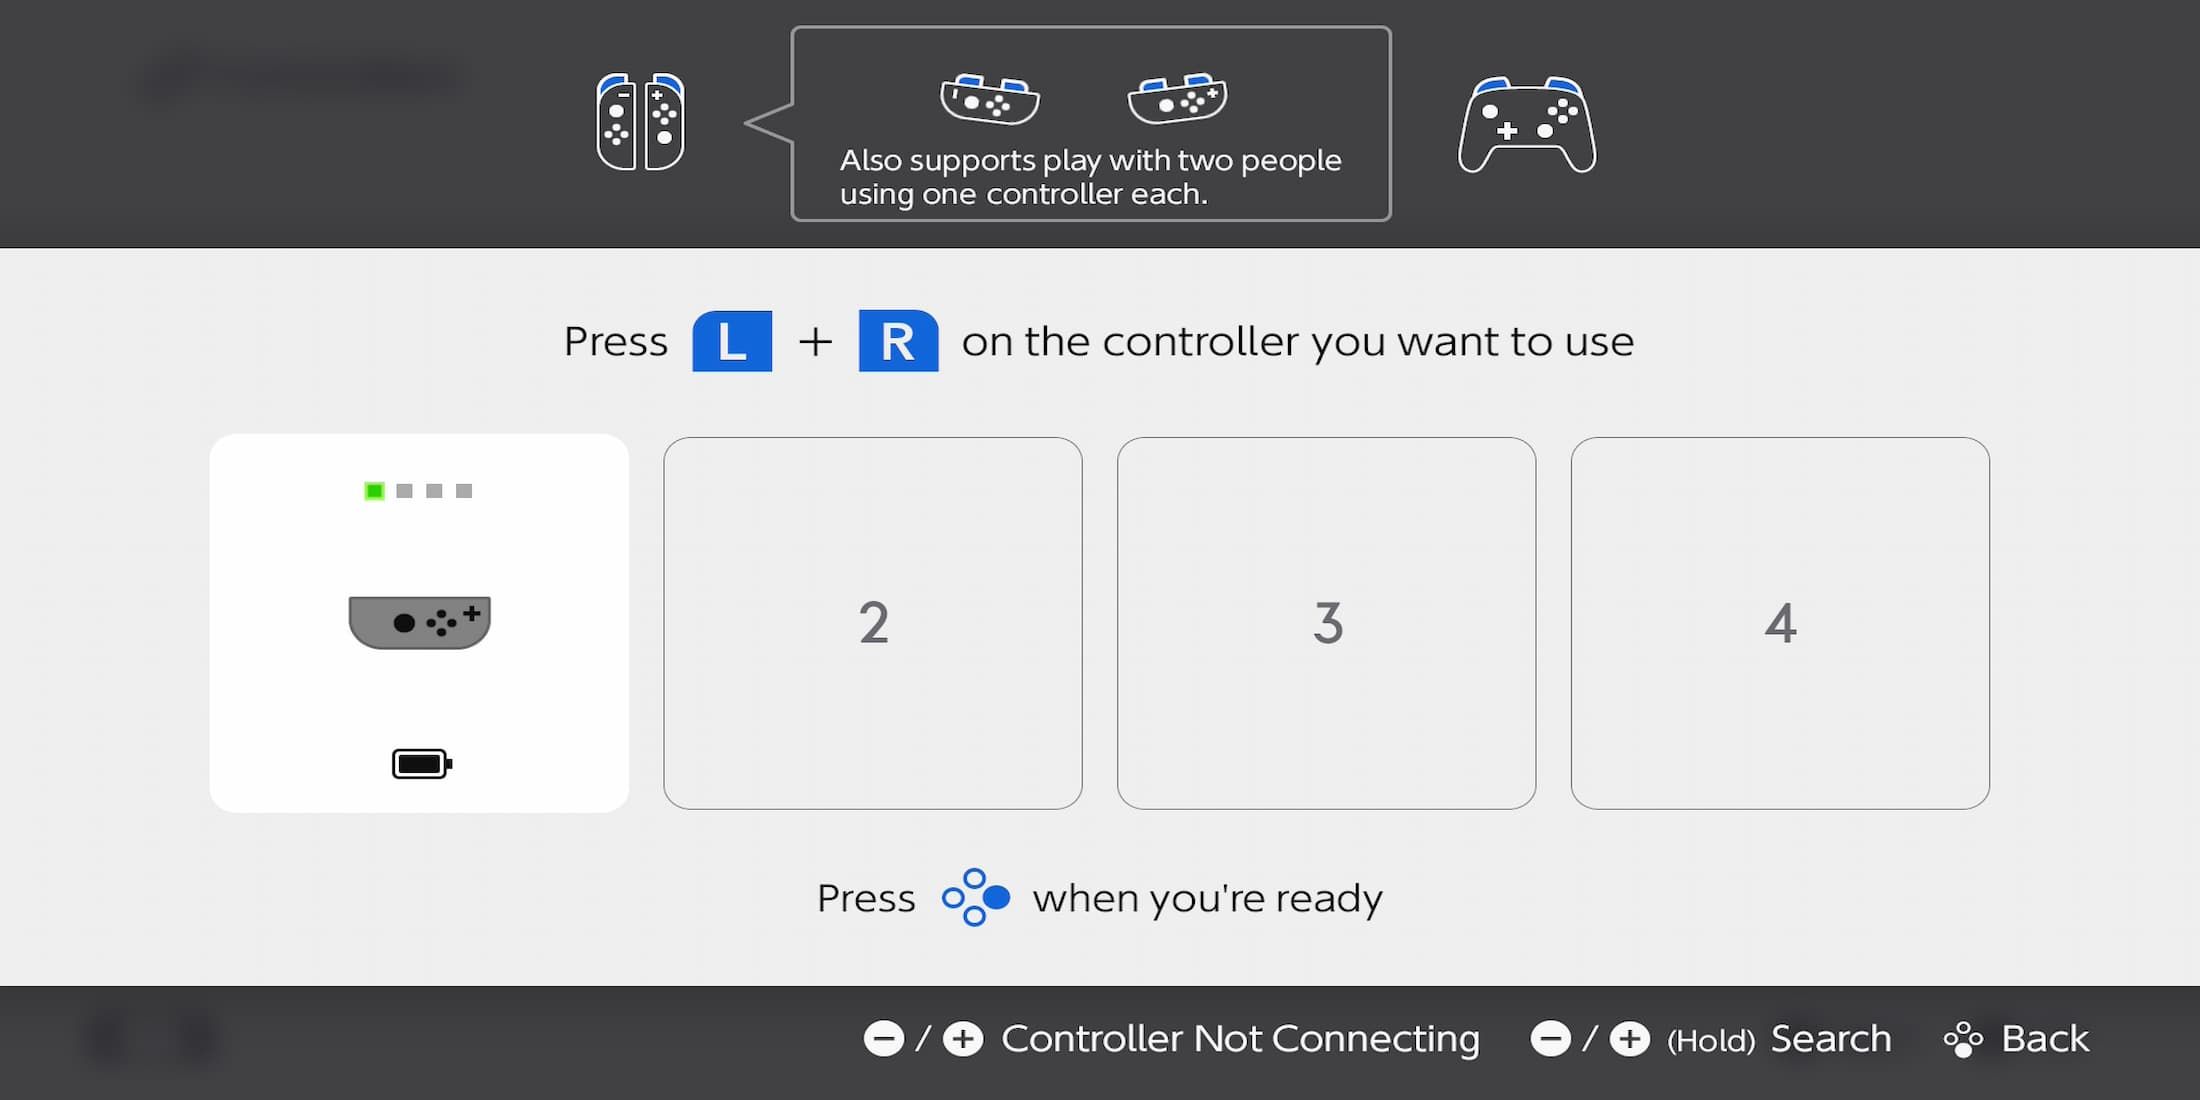
Linking your “Switch 1” Joy-Cons follows a similar process, as you’ll navigate to the Change Grip/Order menu within the Controllers settings. Typically, the screen buttons will show what keys to press, but in this case, press them briefly to initiate your Joy-Con’s search for a Switch to connect with. After pressing the button, the green light will traverse along the four squares on the side of your Joy-Con. To make it search for a new Switch, locate the small circular button just to the left of SR and press it while the green light is still moving. This will keep your Joy-Con searching for another Switch.
In simple terms, when your Switch 2 is the only device within range looking for a controller, your Joy-Con will link with the Switch 2, and their icon will resemble that of old Joy-Cons. However, it’s crucial to note that old Joy-Cons can’t be charged using a Switch 2. You’ll either need an older Switch 1 or a separate charging method if you frequently use these Joy-Cons.
Read More
- All Shadow Armor Locations in Crimson Desert
- Sega Reveals Official Sonic Timeline: From Prehistoric to Modern Era
- Dark Marksman Armor Locations in Crimson Desert
- Genshin Impact Dev Teases New Open-World MMO With Realistic Graphics
- The Limits of Thought: Can We Compress Reasoning in AI?
- Where to Pack and Sell Trade Goods in Crimson Desert
- How to Beat Antumbra’s Sword (Sanctum of Absolution) in Crimson Desert
- Enshrouded: Giant Critter Scales Location
- Who Can You Romance In GreedFall 2: The Dying World?
- Keeping AI Agents on Track: A New Approach to Reliable Action
2025-06-07 06:23