
As a Minecraft gamer, I’ve found myself frequently making use of the debug screen hidden within the game. This tool provides me with essential insights about my surroundings, such as creature hitboxes, compass directions, and crucially, coordinates. In this expansive open-world environment, the art of survival heavily revolves around resource gathering, and having a way to locate Diamonds and other valuable items makes the task much more manageable.
In addition to showing extensive data on the screen, you can also utilize the debug keybind alongside other commands, triggering particular in-game activities within Minecraft. This article will walk you through the intricacies of this popular feature.
Minecraft Debug Screen Explained
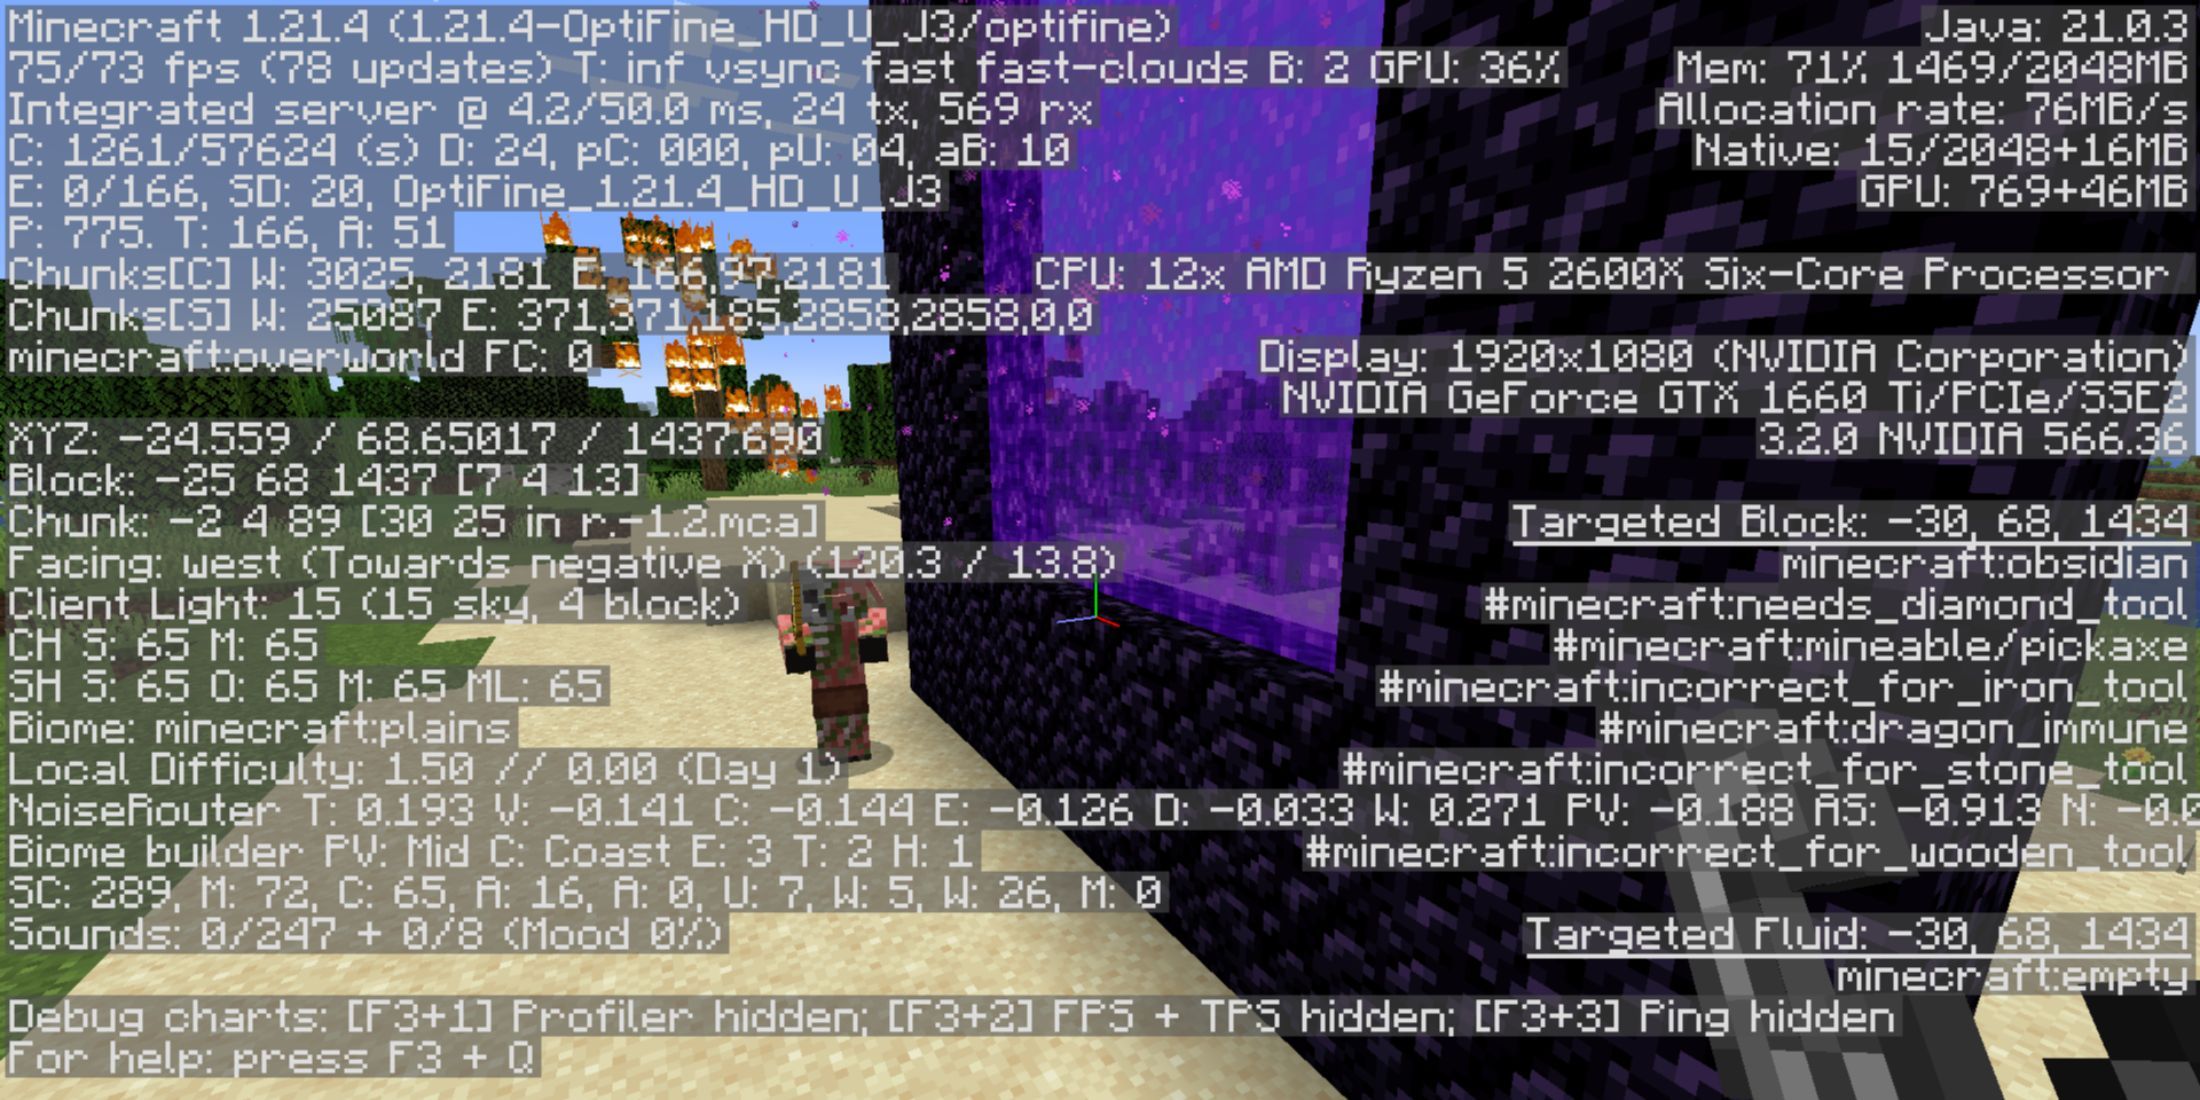
In the game Minecraft, the debug screen’s default shortcut key is F3. Pressing this key will display an additional layer of information such as the number of creatures in a specific area, the version of the game being played, and more. Whether you’re an experienced player or just starting out, you can rely on the coordinates displayed on the screen to help you locate strongholds, find the optimal height for diamond mining, and much more.
The table provides additional details and key points about the data shown when you activate the debug mode.
| Debug Options on the Left Side | What Does It Mean? |
|---|---|
| fps | This option is quite self-explanatory. It shows the max frame rate next to the current value. Players can also find the GPU utilization with this debug option. |
| C | Shows the number of sections rendered over the total sections in the loaded area. |
| E | Signifies the number of rendered entities and mobs over the total number available in an area. |
| XYZ | Specifies the player’s location on the map with X and Z being the horizontal distances, while Y reads the altitude. |
| Facing | Reveals the direction the player is facing. |
| Client Light | Detects the sky light and block light level. |
| Biome | Specifies the biome in which the player is currently located. |
| Local Difficulty | Players can view this information to learn the difficulty level of their current chunk. It further shows the clamped regional difficulty and the number of in-game days players have spent. |
To secure vital details such as the Client Light, it’s beneficial to establish defensive structures in the Minecraft world, as players aim to protect it from hostile creatures. With brightness levels exceeding 8, these aggressive mobs will stay away. Therefore, it’s prudent to frequently check the Client Light data.
Furthermore, the debug screen’s XYZ data shows where a character is located within the game world. This information can help players plan mining routes for ores and resources, as well as find their way back home by remembering the coordinates. Moreover, speedrunners can utilize the XYZ data along with rendered entity data to locate bastions and fortresses in the Nether region.
Looking over to the right side of the debug screen mainly provides system details, together with the current resource usage of the game in real time.
| Debug Options on the Right Side | What Does It Mean? |
|---|---|
| Java version | Reveals various information about the Java version being used. |
| Mem | Displays the percentage of used memory. |
| Allocation rate | Shows the rate of memory the game allocates for various actions. |
| CPU | Reveals the model name of the CPU and the number of cores it has. |
| Display | Specifies the resolution of the game, information about the GPU and its vendor. |
| Targeted Block | Players can view a block to find its coordinates, resource location, state, and tags. |
| Targeted Fluid | Shows information like coordinates, resource location, state, and tags of the targeted fluid. |
List of Debug Keybinds in Minecraft
Playing either a solo game or setting up a multiplayer server in Minecraft, mastering an extra debug key command will prove advantageous. These commands offer detailed insights into your environment and allow for swift actions that could be beneficial in numerous scenarios throughout your gaming experience: helping you navigate, troubleshoot issues, or simply expedite certain tasks more efficiently.
| Debug Keybinds | What Does It Do? |
| F3+A | Reloads all the chunks around the character. |
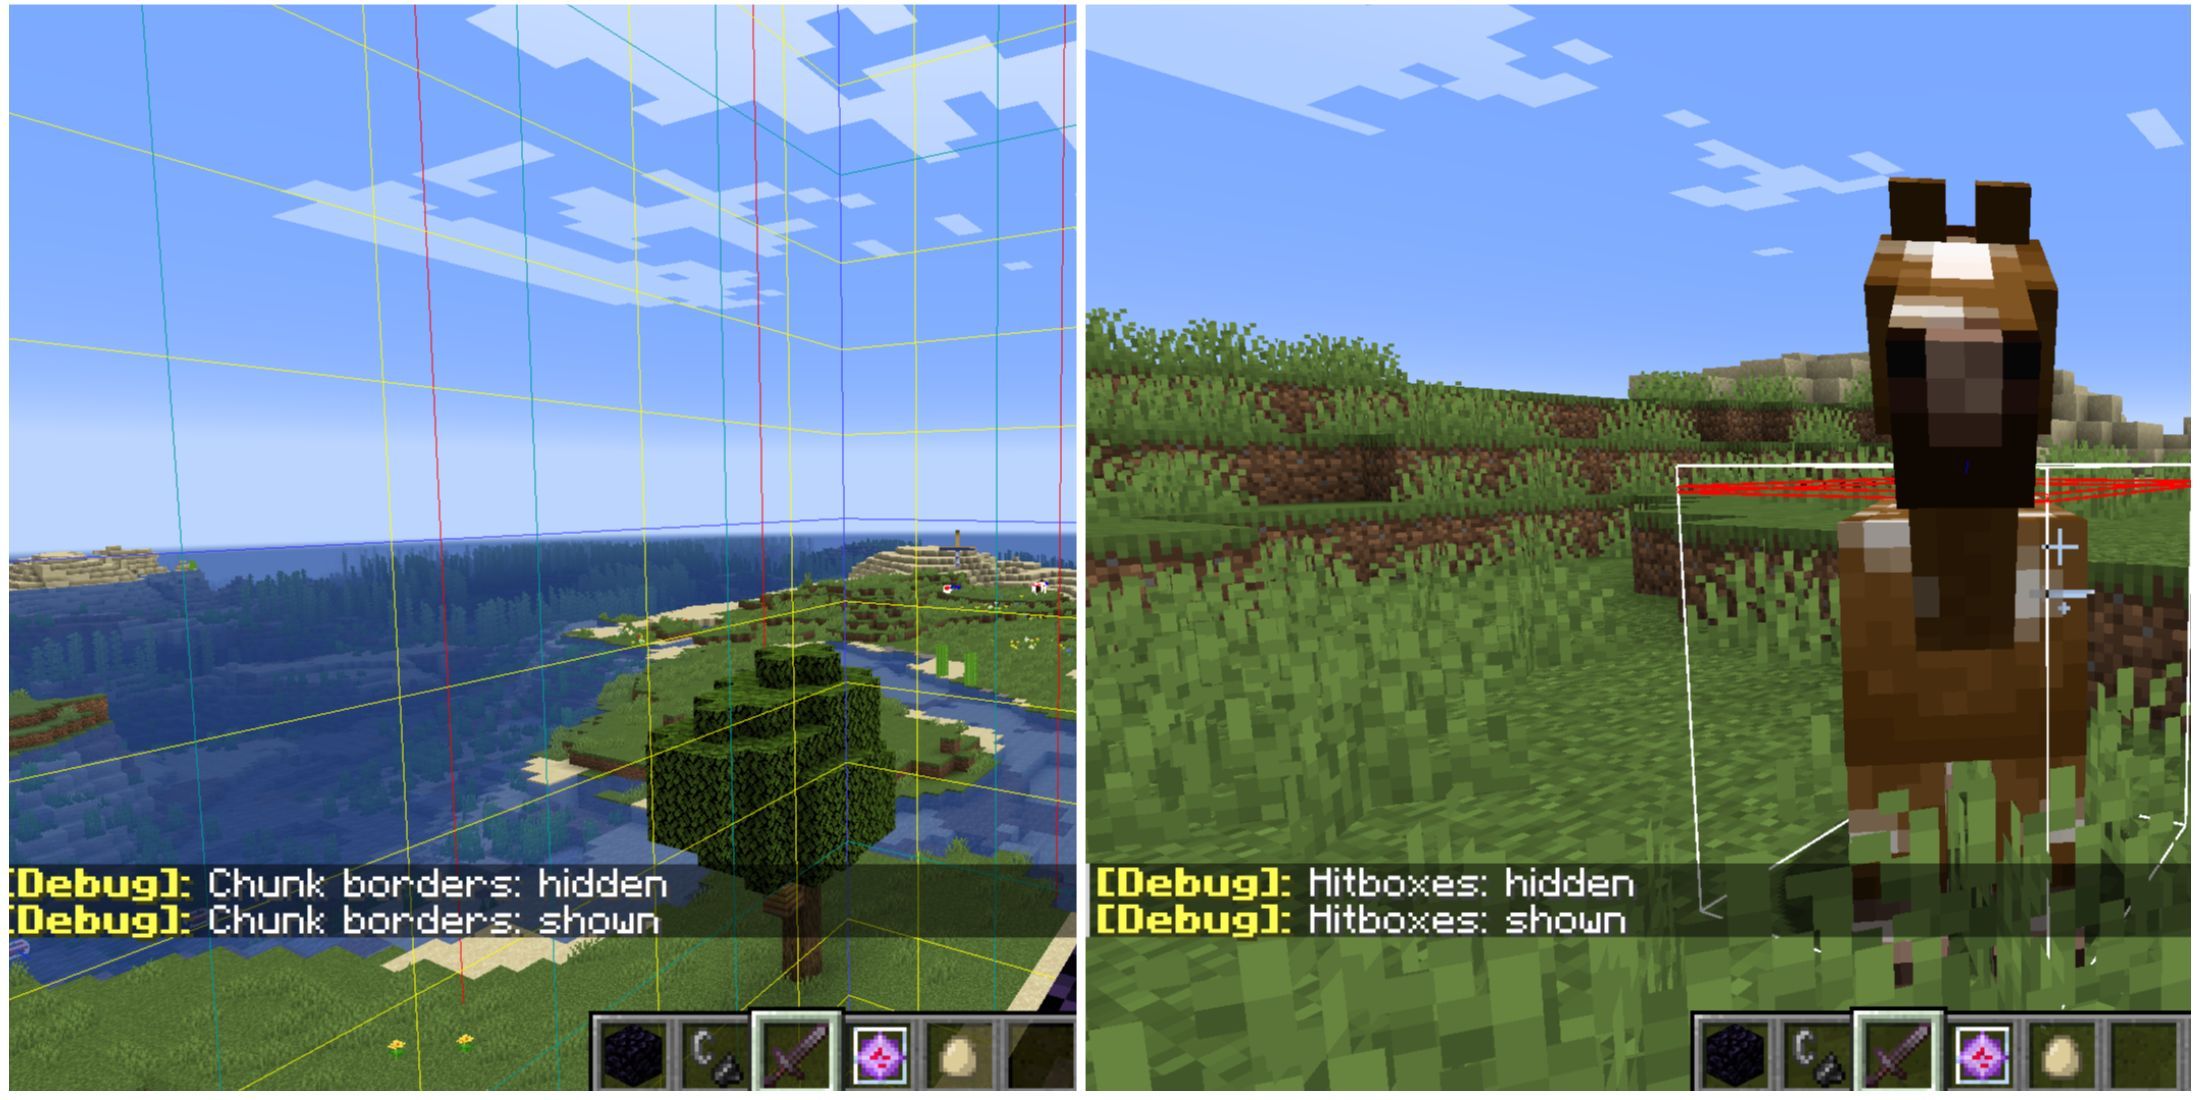
| F3+B | Toggles hitbox visibility of entities within visible range. |
| F3+C | Generates a /tp command with the player’s coordinates and rotations. Holding for 10 seconds will force a debug crash. |
| F3 + D | Can be used to clear the chat history. |
| F3 + G | Toggles the chunk border visibility. |
| F3 + H | Toggles the tooltip, allowing players to view the IDs of items, durability of tools, etc. |
| F3 + I | Copies server-sided entity or block date to the clipboard. |
| F3 + Shift + I | Copies client-sided entity or block date to the clipboard. |
| F3 + L | Generates performance metrics via a 10-second debug log process. |
| F3 + N | Cycles through Spectator and default gamemode. |
| F3 + P | Enables and disables auto pause for when the game loses focus. |
| F3 + Q | Opens a help menu, showing the list of available key combinations. |
| F3 + S | Transfers information about dynamic textures and font textures to “screenshots/debug/”. |
| F3 + T | Reloads the resource pack contents like textures, models, and sounds. |
| F3 + F4 | Opens a gamemode switcher menu where players can cycle through the options by pressing F4. |
| F3 + Esc | Triggers a Pause without the menu in the single-player world. |
| Shift + F3 | Displays the profiler graph’s debug screen. |
| Alt + F3 | Displays the Frame time graph’s debug screen. |
Read More
- Invincible’s Strongest Female Characters
- Nine Sols: 6 Best Jin Farming Methods
- Top 8 Weapon Enchantments in Oblivion Remastered, Ranked
- MHA’s Back: Horikoshi Drops New Chapter in ‘Ultra Age’ Fanbook – See What’s Inside!
- How to Unlock the Mines in Cookie Run: Kingdom
- Top 8 UFC 5 Perks Every Fighter Should Use
- Gold Rate Forecast
- USD ILS PREDICTION
- Fix Oblivion Remastered Crashing & GPU Fatal Errors with These Simple Tricks!
- How to Reach 80,000M in Dead Rails
2025-02-28 13:05