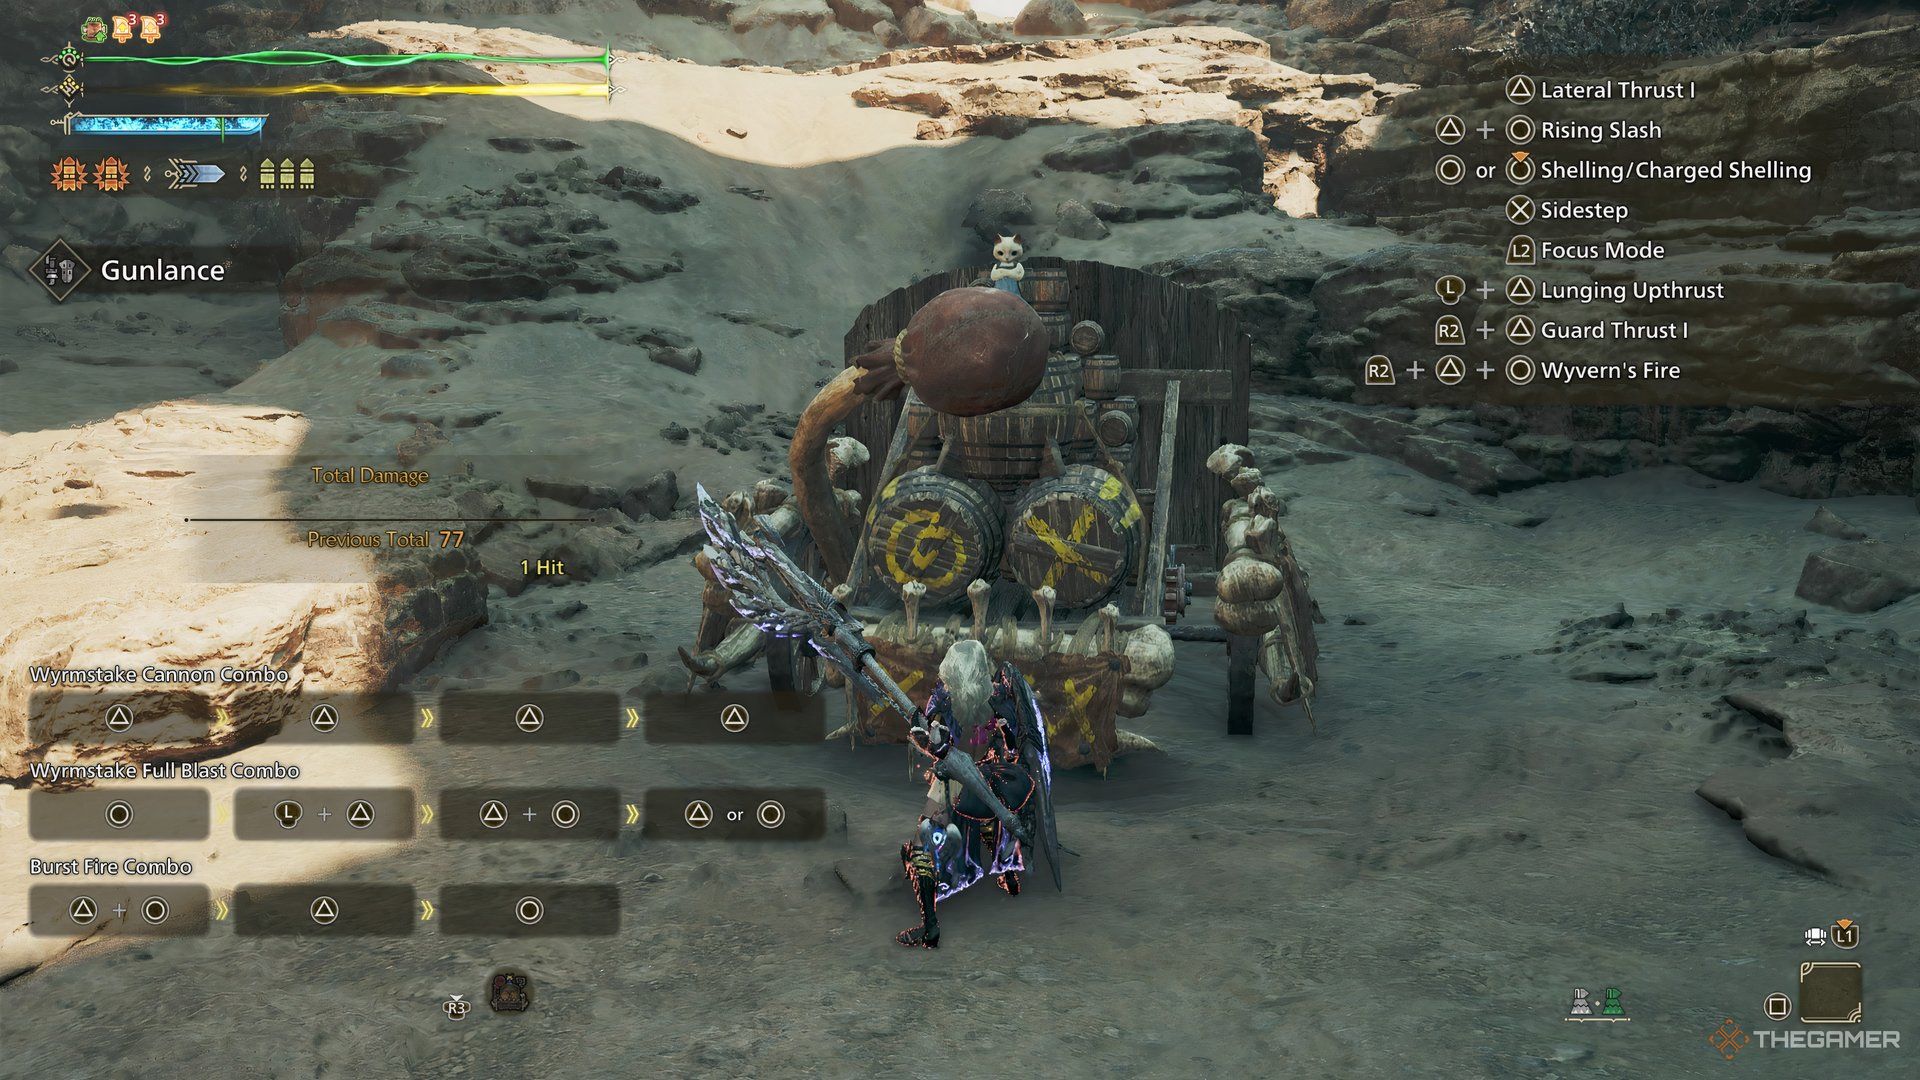
In Monster Hunter Wilds, the Gunlance is a unique blend of a protective shield for deflecting monsters and a long-range gun that fires powerful projectiles. Initially, it may seem slow and cumbersome, but as you grow accustomed to it, the Gunlance proves itself to be one of the most potent weapons in the game.
Even though using the Gunlance weapon can be quite exciting, preparing it for action may not always be straightforward, particularly if you’re unfamiliar with the weapon or the game itself. If you’re keen on unleashing some Wyvern Fire towards Gore Magala, here’s an in-depth guide designed to help you get started effectively.
In this game, every character setup (or build) is currently undergoing testing, since players are determining the exact amounts of damage each skill inflicts. Consequently, these builds might be altered in the future based on which skills prove most effective for defeating monsters.
Gunlance Build Overview
As a dedicated player, I must admit that the Gunlance stands out as one of the most intricate weapons in our game, rivaling the complexity of the Charge Blade. The reason lies in two key aspects. To begin with, swapping out a unique Gunlance build for another weapon type is simply not an option due to its distinct playstyle.
The second point is that this weapon operates relatively slowly, so mastering its use involves adapting your strategy accordingly. Furthermore, it boasts a rather intricate series of movements, and familiarizing yourself with each takes practice before you can effectively execute them simultaneously.
The weapon consists of two essential components: one is the Gunlance, your offensive tool against opponents, and the other is a defensive shield for protection. To ensure your gameplay strategy, focus on optimizing both the Gunlance and the shield by strategically selecting armor parts and decorations to create a seamless balance between attack and defense.
The fundamental concept of this weapon is to skillfully block incoming attacks from enemies (perfectly parry them) and subsequently retaliate with your weapon for a powerful counter-strike. Certain decorations bestow you with additional benefits whenever you successfully parry or get hit by the enemy, which in turn increase your weapon’s damage output.
Generally speaking, decorations that enhance your weapon’s performance are typically applied directly to the Gunlance, whereas those that improve your shield’s capabilities are usually incorporated into your armor instead.
In Monster Hunter Wilds, certain decorations are limited to being applied to either armor or weapons. This setup offers exciting build possibilities, yet the farming process may grow tiresome at times.
Gunlance Build Guide
Here’s a rundown of how you should get your Gunlance build ready:
| Gear Slot | Gear Piece | Decorations |
|---|---|---|
| Weapon | G. Lawful Bors (Guardian Arkveld) | Magazine/Ironwall Jewel (3), Artillery Jewel (3), Guardian Jewel (1) |
| Head | G. Ebony Helm Beta (Guardian Ebony Odogaron Gear) | Counter Jewel (2) |
| Chest | G. Ebony Mail Beta (Guardian Ebony Odogaron Gear) | Counter Jewel (2) x2 |
| Hand | G. Ebony Bracers Alpha (Guardian Ebony Odogaron Gear) | No Jewel |
| Waist | G. Ebony Coil Beta (Guardian Ebony Odogaron Gear) | Earplugs Jewel (2), Sheath Jewel (1) |
| Leg | Dahaad Shardgreaves Beta (Jin Dahaad Gear) | Earplugs Jewel (2) |
| Charm | Challenger Charm 2 |
As a dedicated gamer, I’ve found my preferred weapon for this build to be none other than the Guardian Arkveld Gunlance, famously known as G. Lawful Bors. This bad boy packs a punch with not one, but two Level 3 Jewel slots and a Level 1 Jewel slot ready to customize it further according to my playstyle.
The Ironwall Jewel Level Three comes with the capabilities of Loading Shells and Providing Security, whereas Artillery Jewel Three provides Artillery Level Three. Lastly, Guardian Jewel One offers Offensive Defense Level One.
*Using the Load Shells technique enhances the process of reloading, as well as boosting the ammunition capacity in your Gunlance.*
*Artillery Level Three amplifies the damage inflicted by shell explosive attacks and Wyvern Fire.*
*The Offensive Guard skill significantly intensifies your attack when you successfully execute a perfect guard.*
To place in the head slot, it’s essential to utilize the Guardian Ebony Helm Beta, featuring a Level Two Jewel Slot. You’ll then need to connect a Counter Jewel Two to it.
This item gives you Counterstrike Level One, which enhances your attacks when you are pushed back by enemies. Additionally, you will receive Burst Level Two from the armor piece, which amplifies your attack power when inflicting elemental damage.
In the chest pocket, you’ll want to insert the Guardian Ebony Mail Bet, a piece of armor that includes two Level Two Jewel slots. You’ll then need to target Counter Jewels Two at the same location, enhancing your Counterstrike by an additional two levels, bringing it up to Level Three. Additionally, you’ll gain Earplugs Level One, which will aid in neutralizing monster roars.

In the slot designed for hands, you’ll require the Guardian Ebony Bracers Alpha. Unfortunately, there are no spaces for jewels in this location. Nevertheless, the armor piece offers you with Burst Level Two and Divine Blessing Level One. Consequently, your Burst will increase to Level Four, enhancing the potency of your elemental damage.
As a gamer, I’ll be slipping back into the Guardian Ebony Odogaron armor, this time around, sporting a waist slot with one Level Two and one Level One slot. I’m fixing to add an Earplugs Level Two item, which is going to be a lifesaver when it comes to blocking those pesky monster roars, keeping my combos uninterrupted.
In the present game scenario, Burst is an incredibly potent ability to master. Make sure you fully upgrade it, as it allows for significant damage output. It’s a crucial component in this particular build strategy.
In the leg armor position, opt for Dahaad Shardgreaves Beta. This item includes a Level Two Jewel slot where you should affix Earplugs Level Two. When paired with the chest and waist slots, it raises your skill to Level Three. Furthermore, this armor piece provides Agitator Level Two, which amplifies your damage when monsters are enraged.
In the final charm slot, you’ll require the “Agitator Charm II”, which raises your Agitator level to two. When paired with the leg slot, this will boost the skill to level four.
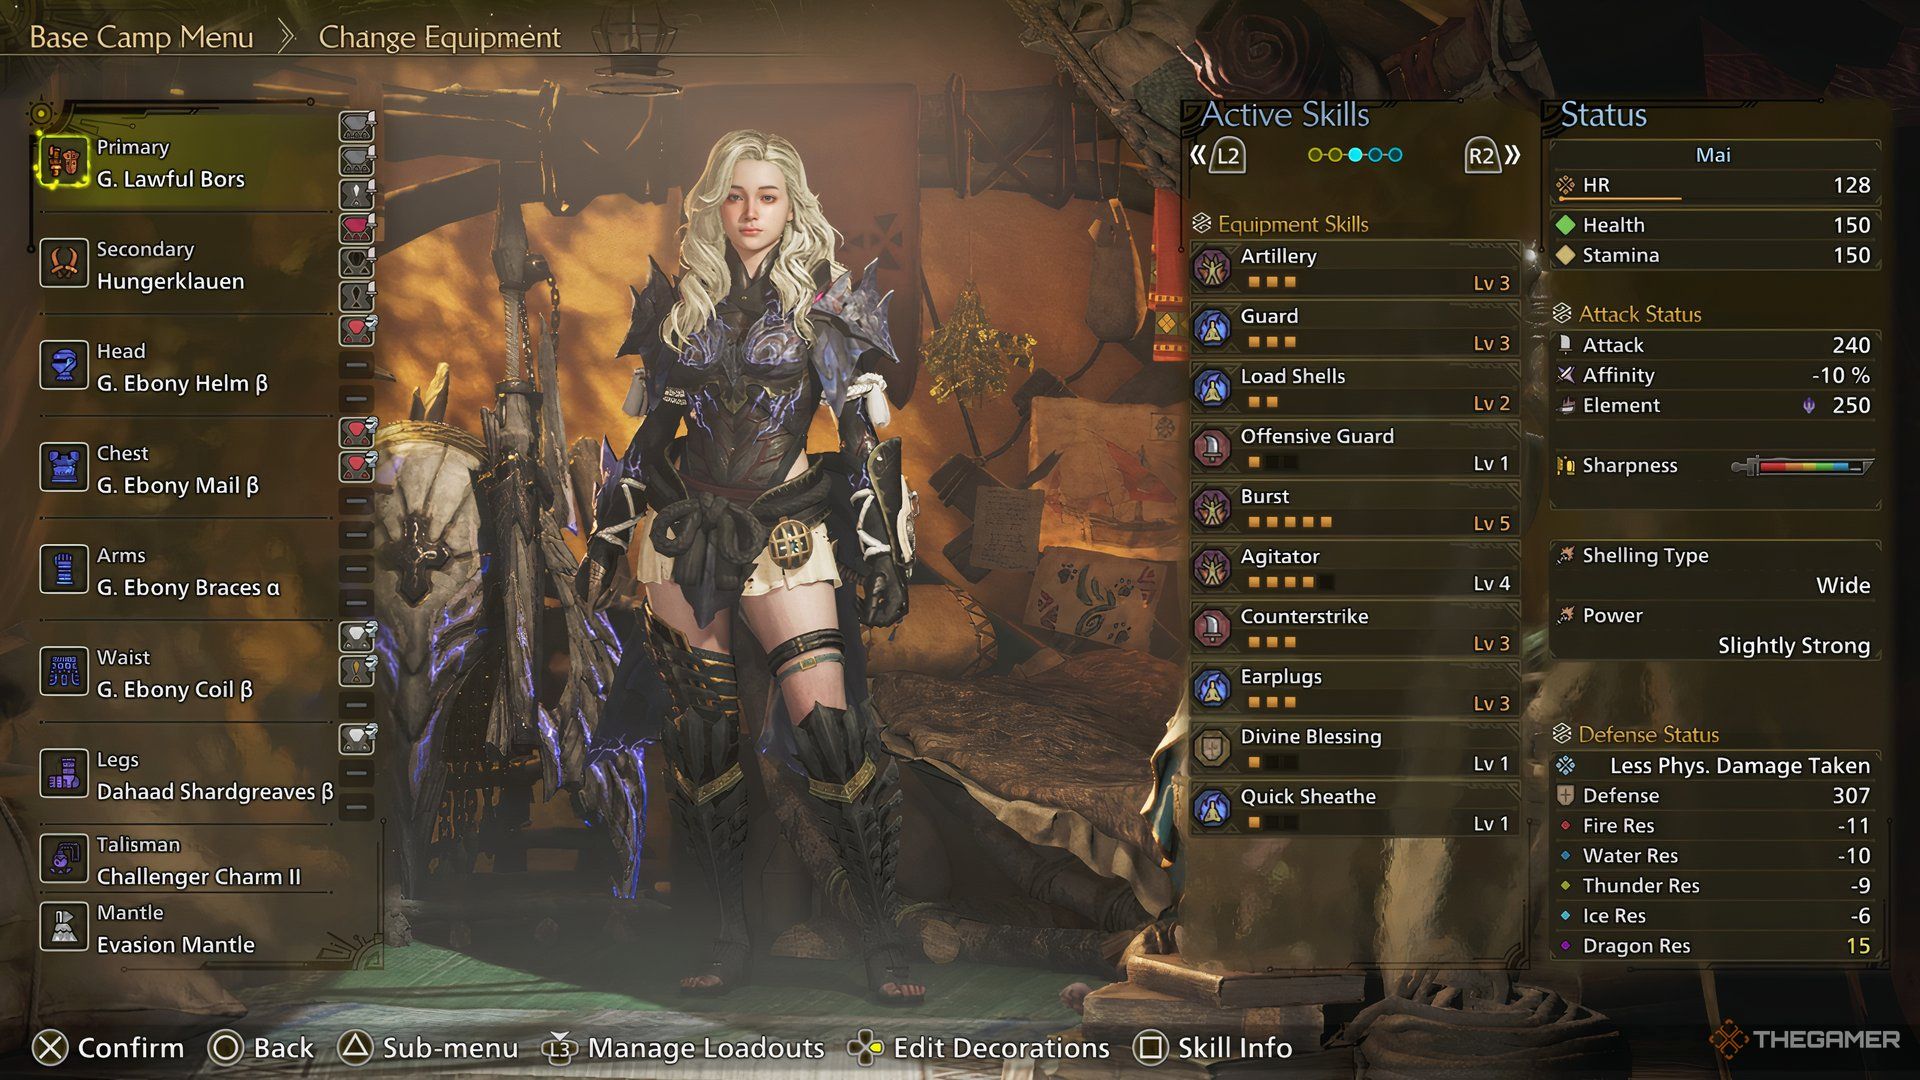
Gunlance Build Skill Overview
Here’s how the skills will line up once your build is ready:
- Artillery Level 3
- Guard Level 3
- Load Shells Level 2
- Offensive Guard Level 1
- Burst Level 5
- Agitator Level 4
- Counterstrike Level 3
- Divine Blessing Level 1
- Quick Sheathe Level 1
Tips To Play With Gunlance Build
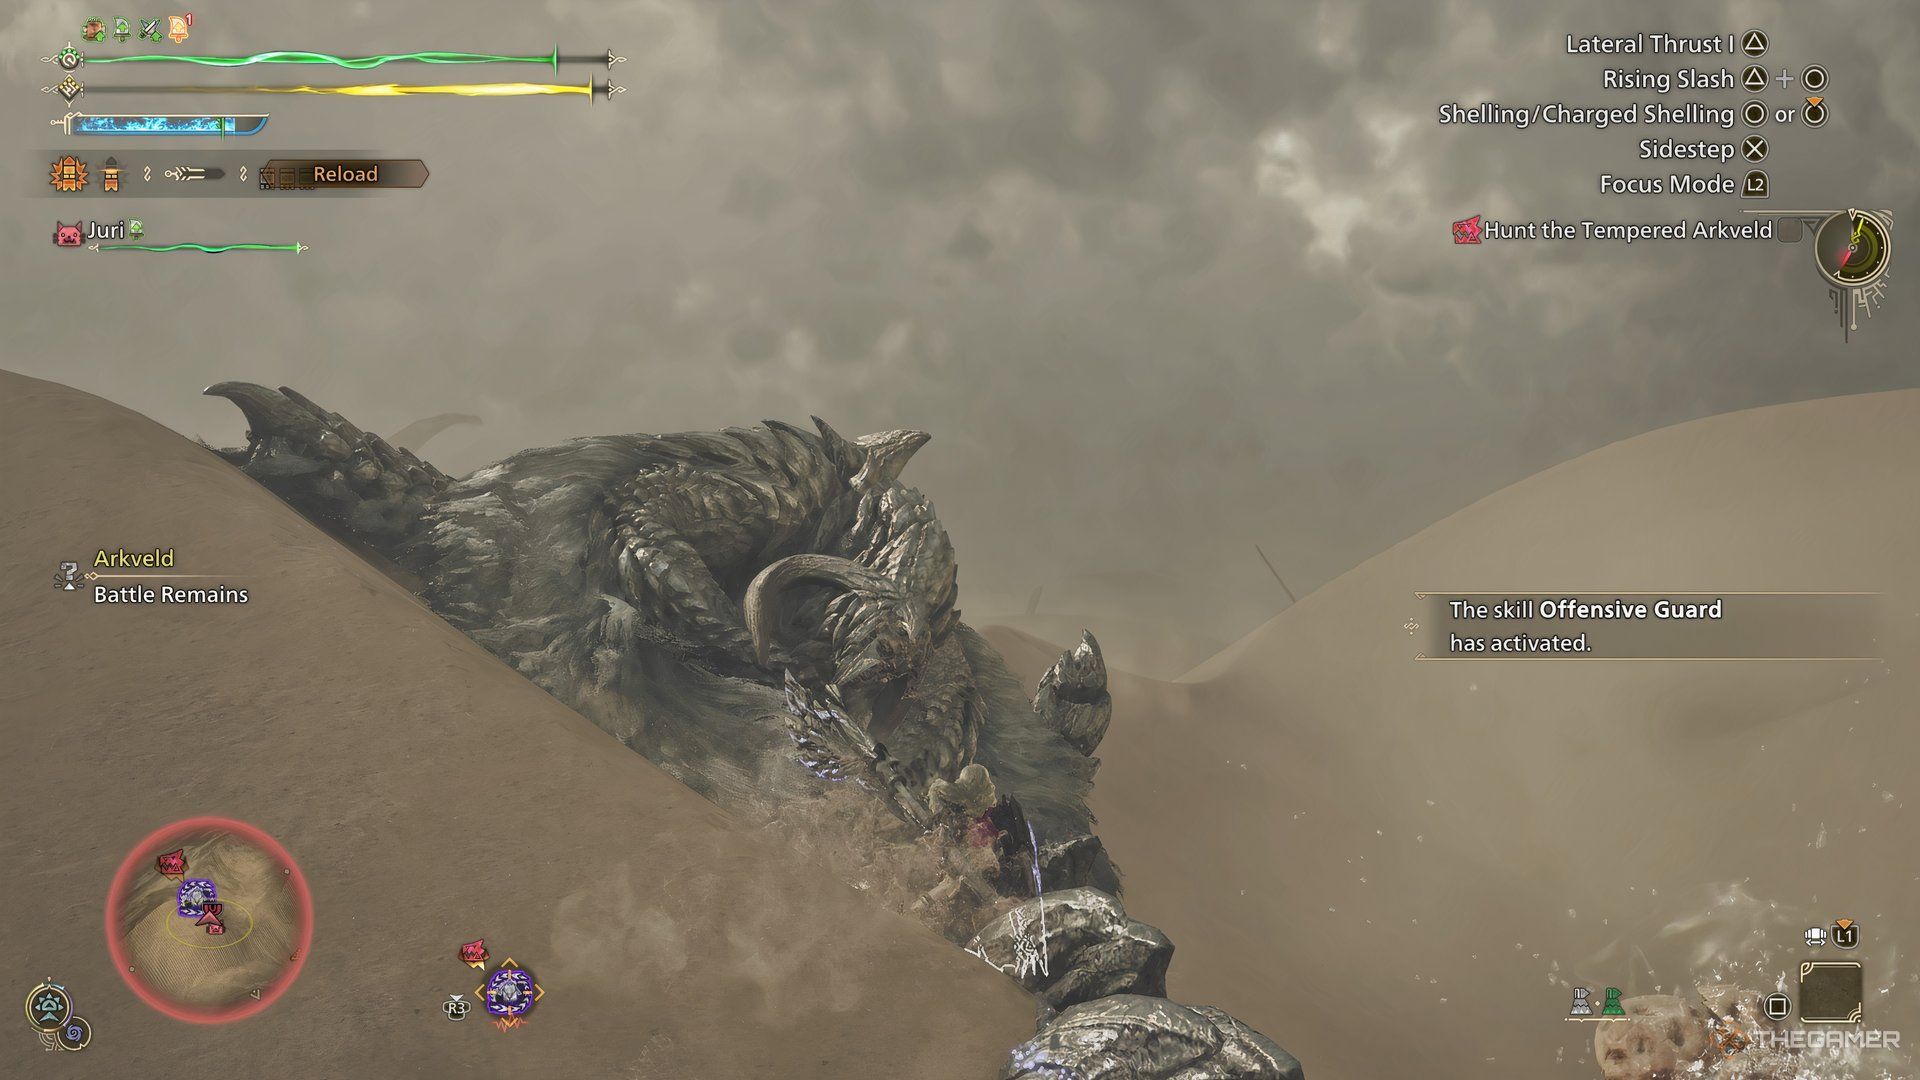
Mastering this Gunlance Build revolves around effectively timing and executing shield blocks. When a monster is about to strike you, quickly press your shield block button, which results in a perfect block. This perfect block initiates Offensive Guard Level One. Remember, it’s alright to take a hit from the monster occasionally, as it facilitates the activation of the Counterstrike skill with ease.
As a fan, I’d advise you to ensure that Burst is consistently activated by striking the monster accurately. In the beginning, it might seem challenging, particularly against Tempered Arkveld and Gore Magala, as slower weapons can make finding openings tricky. But with time and practice, mastering the perfect guard mechanic will help create more opportunities for successful strikes.
Additionally, keep in mind that while achieving a perfect block might not always be possible, simply defending as usual remains beneficial because it ensures you’ll never sustain any damage. The Gunlance shield is exceptionally robust, allowing you to engage monsters directly and fearlessly.
Read More
- Best Awakened Hollyberry Build In Cookie Run Kingdom
- AI16Z PREDICTION. AI16Z cryptocurrency
- Best Mage Skills in Tainted Grail: The Fall of Avalon
- Tainted Grail the Fall of Avalon: Should You Turn in Vidar?
- Nintendo Offers Higher Margins to Japanese Retailers in Switch 2 Push
- Nintendo Switch 2 Confirms Important Child Safety Feature
- Top 8 UFC 5 Perks Every Fighter Should Use
- Nvidia Reports Record Q1 Revenue
- USD ILS PREDICTION
- Tainted Grail: How To Find Robbie’s Grave
2025-03-09 18:39