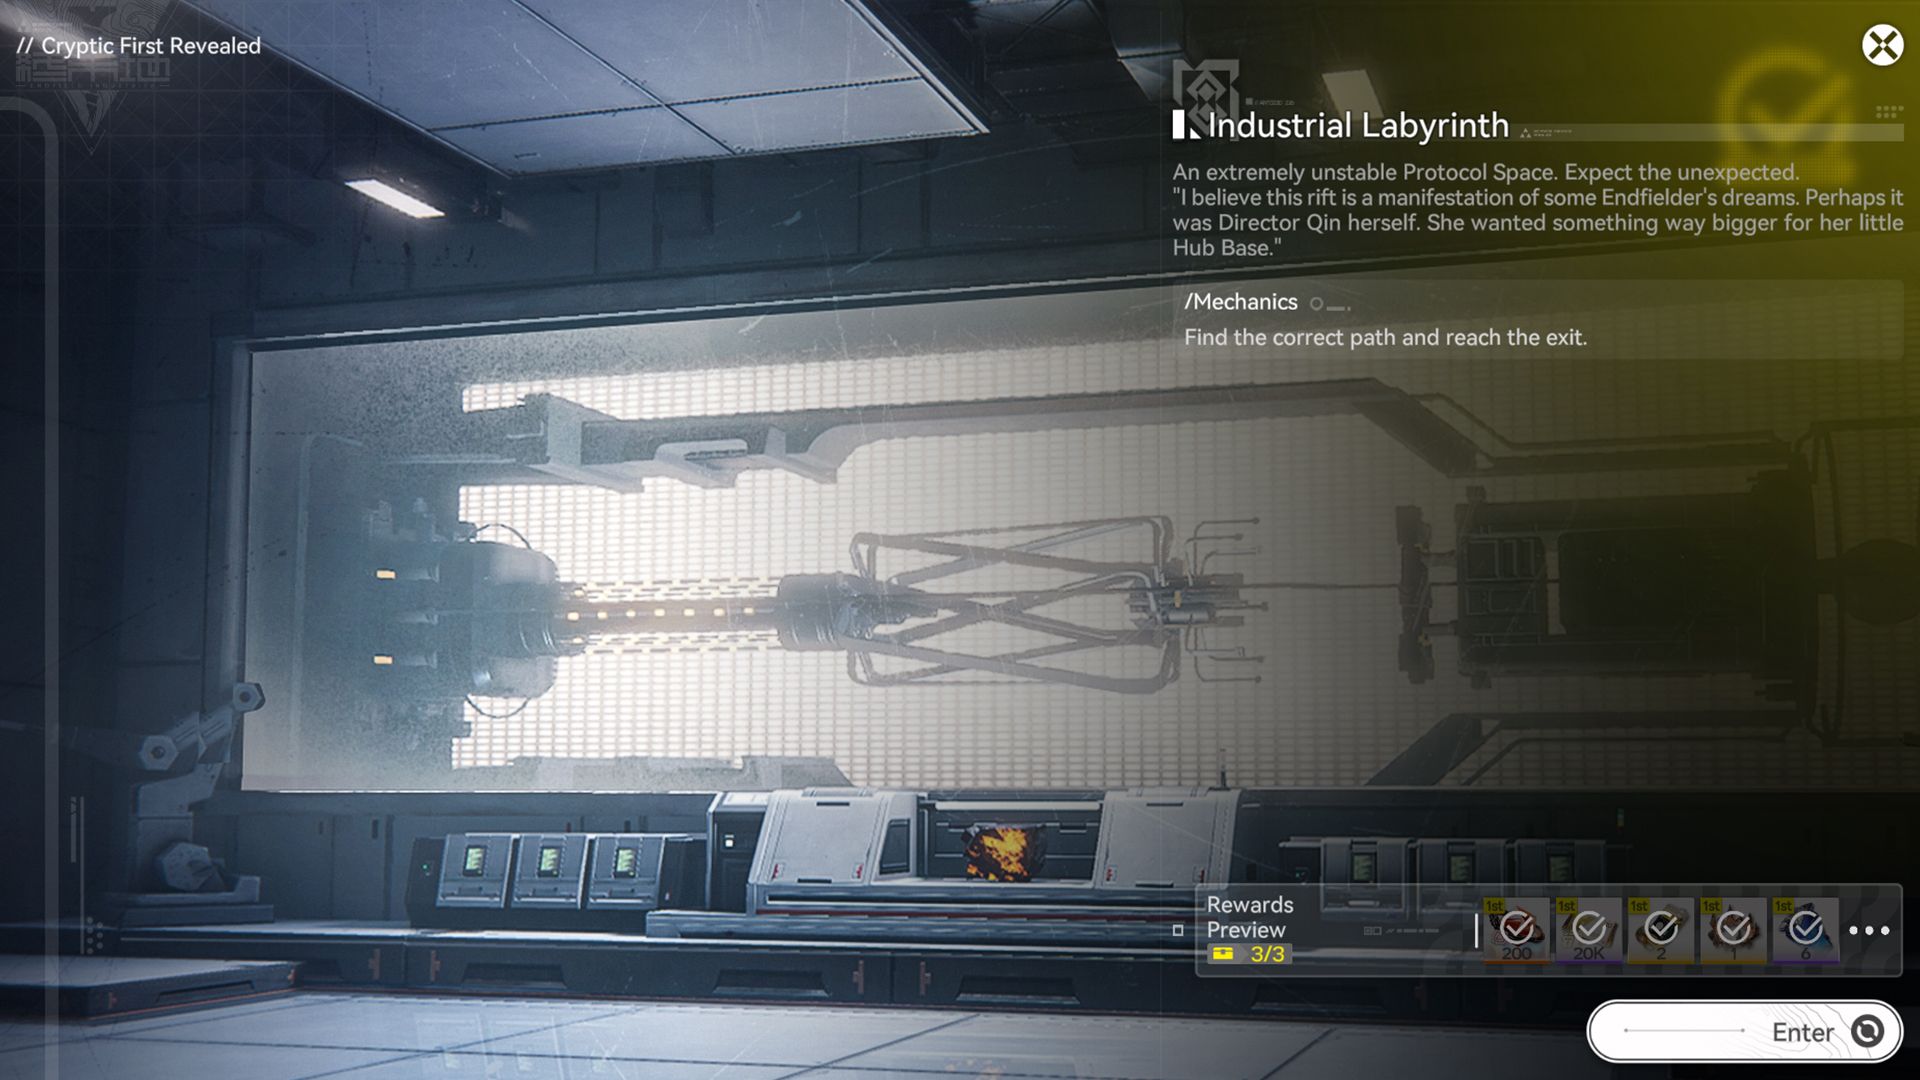
The fourth puzzle in Arknights: Endfield’s Delver of the Cryptic is called the Industrial Labyrinth. This puzzle is a maze that tests players’ attention to detail. As you explore the Industrial Labyrinth, new and previously hidden paths will become available. Remembering the correct route is crucial, particularly if you want to find all three Labyrinth chests in Arknights: Endfield.
Industrial Labyrinth Puzzle and Chest Guide in Arknights Endfield
The Industrial Labyrinth quest in Arknights: Endfield seems simple – you just need to find the correct route. However, it quickly becomes challenging because the path isn’t obvious, and locating the chests within the Labyrinth is surprisingly difficult.
You’ll start by walking through several hallways until you reach a room with a number on the wall. Remember that number – write it down or keep it in mind, as you’ll need it later. Keep going forward, following the only path the Industrial Labyrinth reveals.
First, focus on the opening in the wall that reveals a Labyrinth chest at the end. Simply continue straight ahead without turning. Once you reach the chest, a wall on your right will open, bringing you back to the beginning.
Don’t worry, just repeat the same route until you reach the corridor with the chest. This time, a hidden passage will open on the left side at the end.
The wall on the left always leads to a dead end, hiding the true path behind it. You’ll need to go down the corridor twice to finally reveal the correct way forward.
This leads you to find the first Labyrinth chest in Arknights: Endfield.
Once you open the Labyrinth chest, a new room will become accessible, but it’s guarded by laser beams on the floor. You can safely navigate through the room by following the wall on the right, which will lead you to the next area.
You’ll encounter several platforms, but some will give way if you step on them. To proceed, you need to step on them in this specific order:
- Center
- Center
- Left
For the second one, the order is:
- Left
- Center
- Center
- Right
- Center
Successfully navigating this area and completing the puzzles will unlock the second chest in Arknights: Endfield.
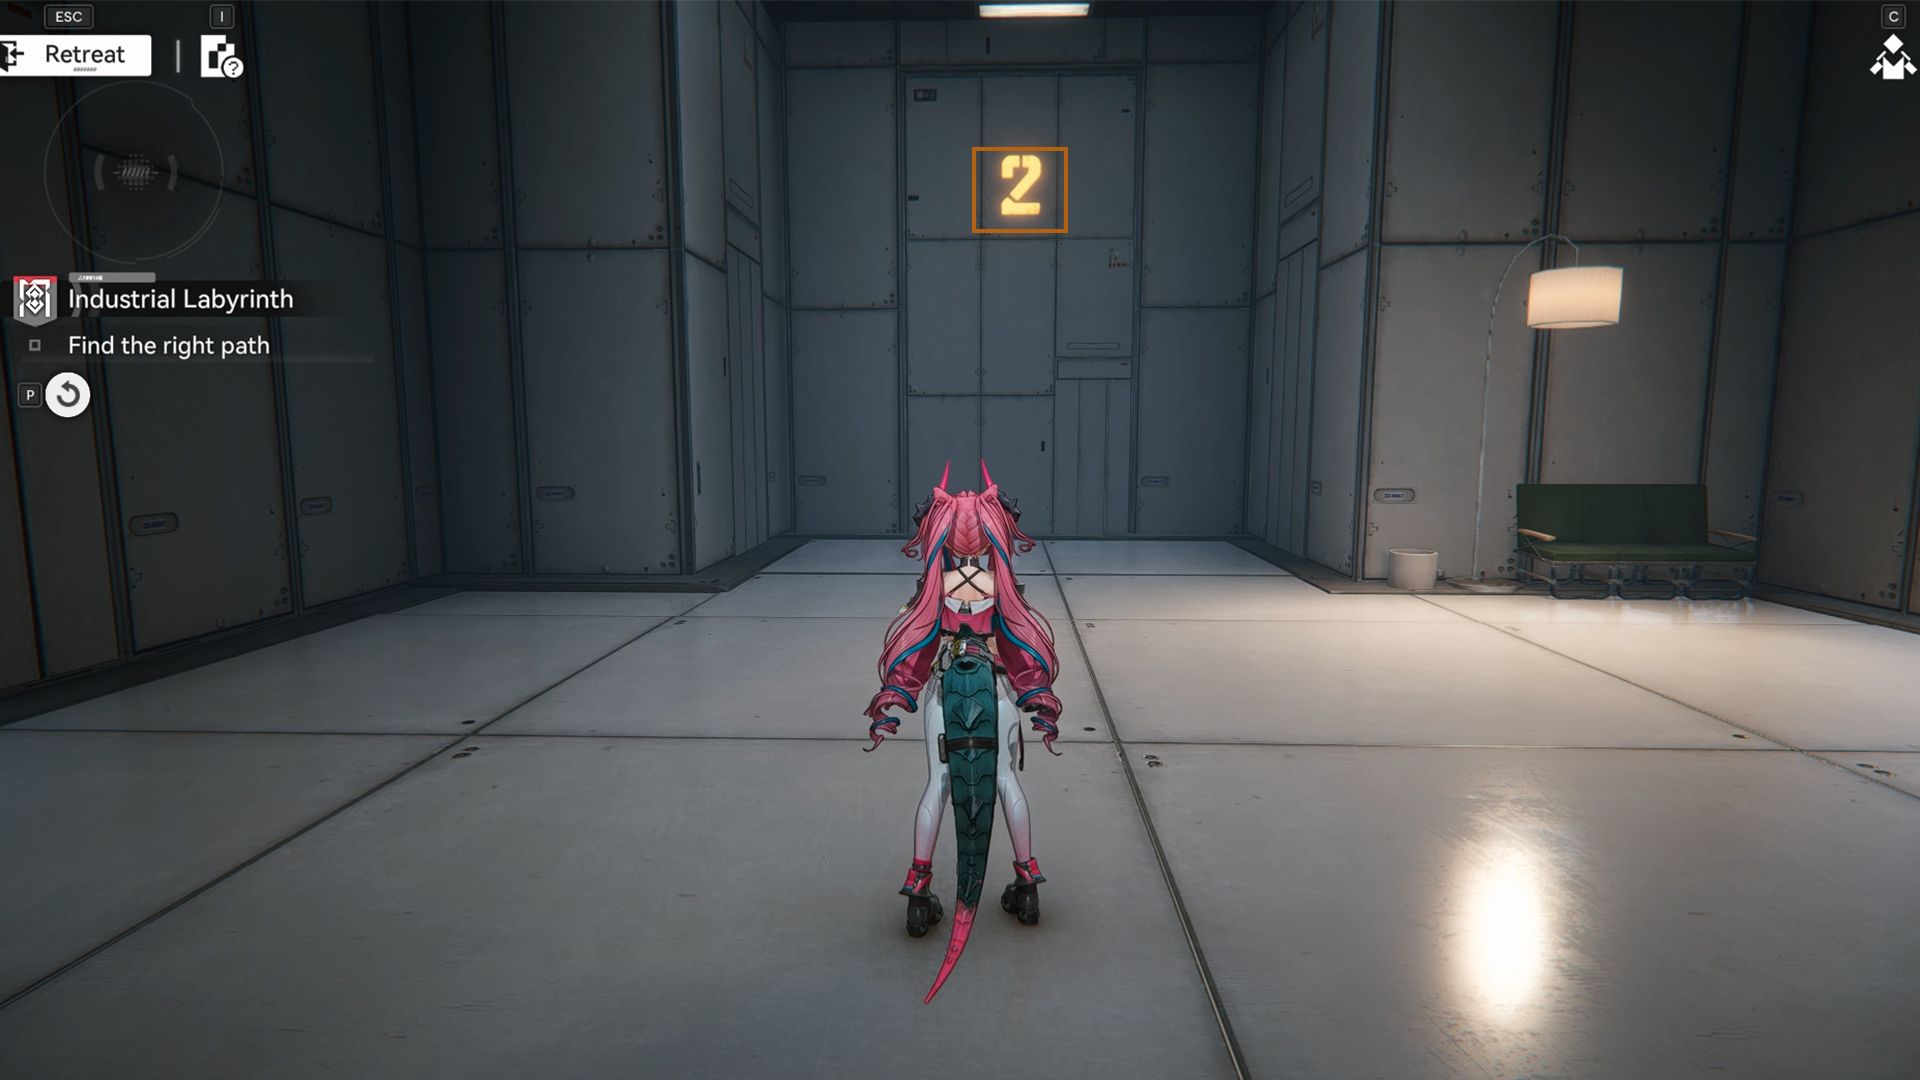
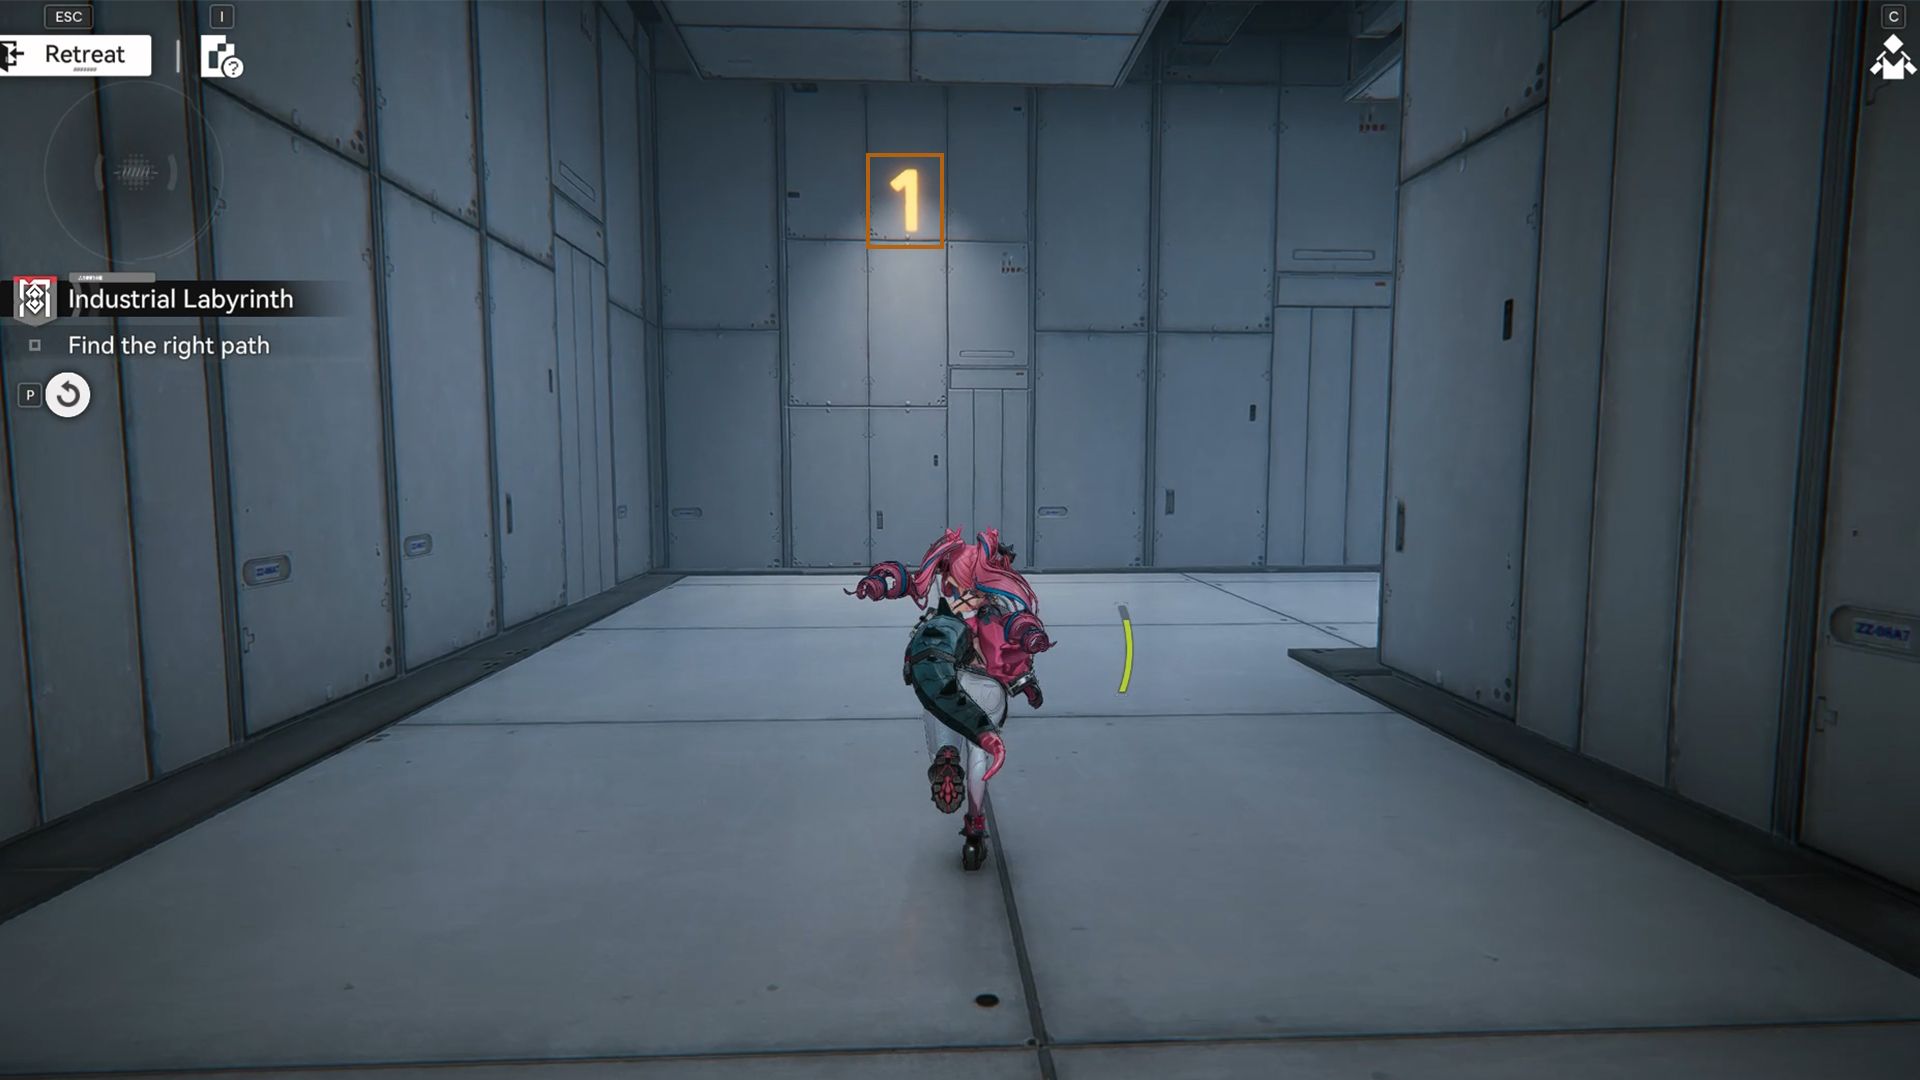
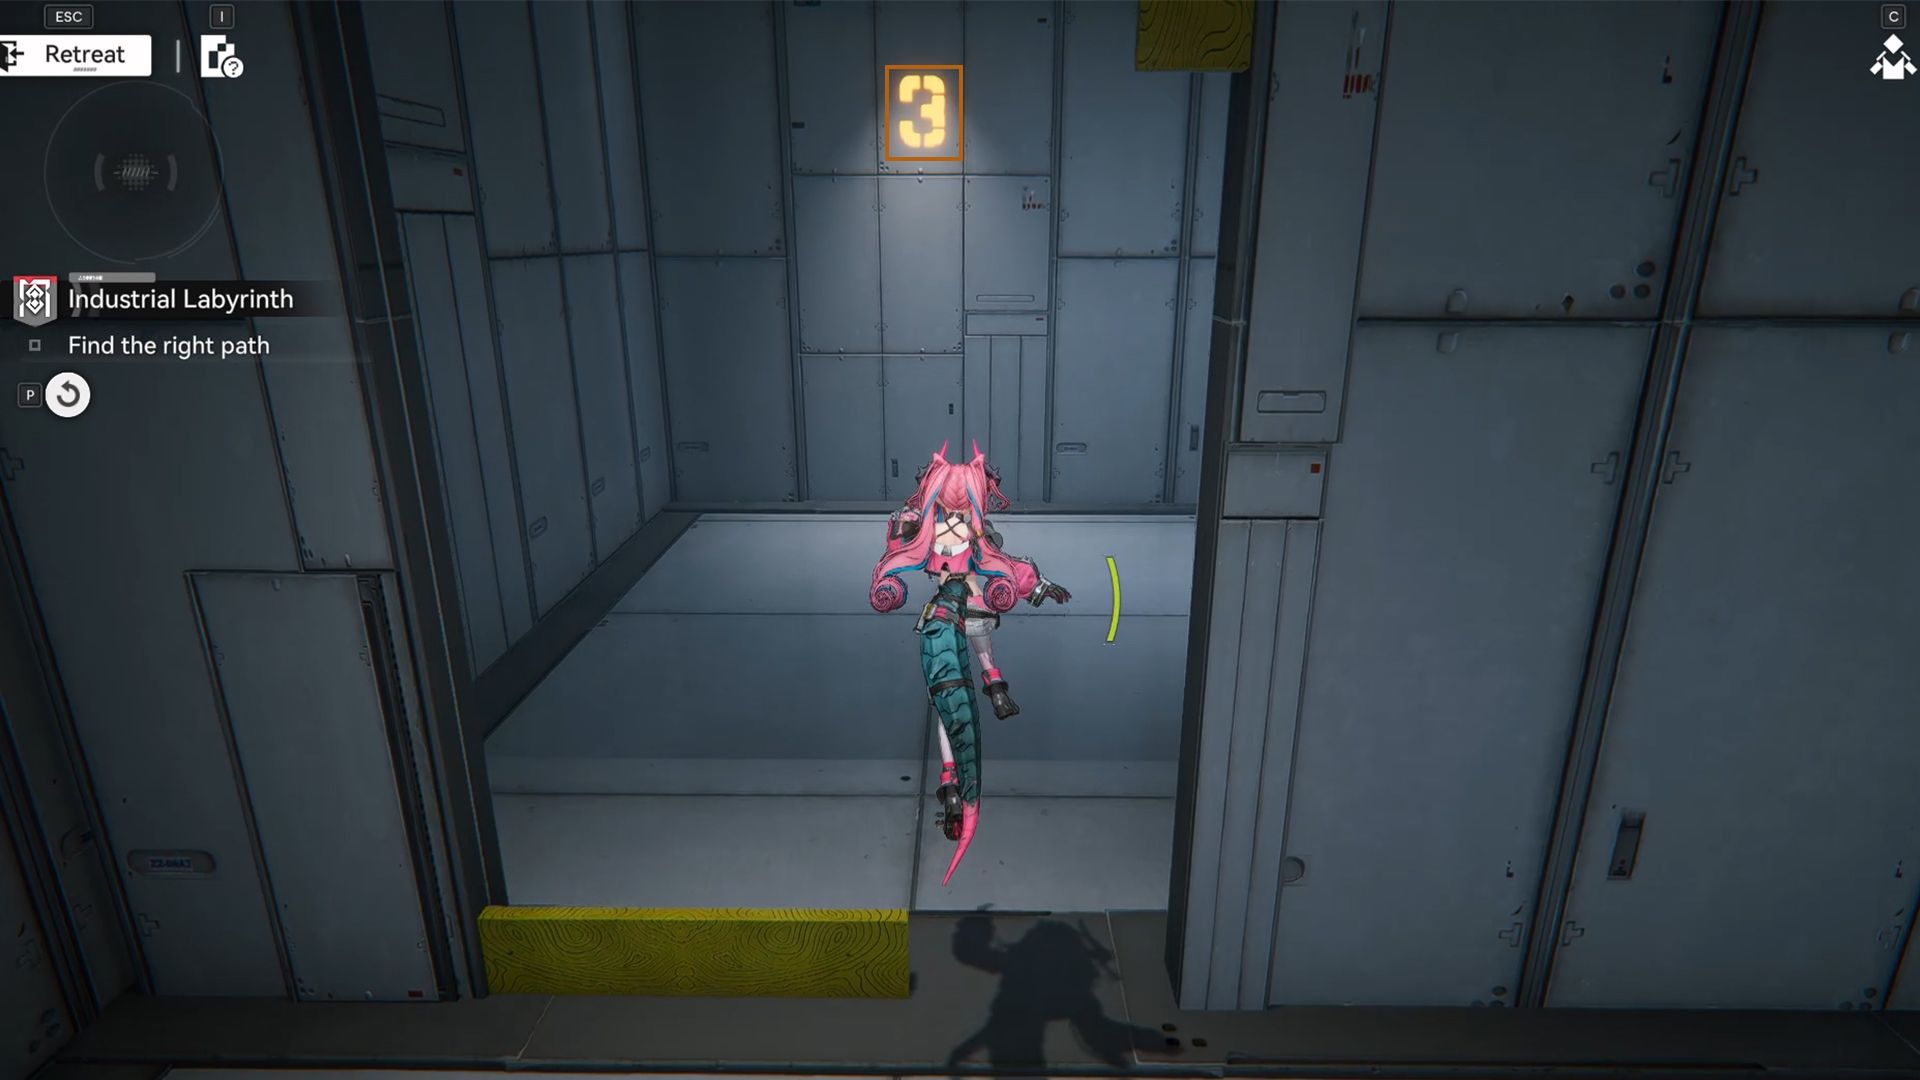
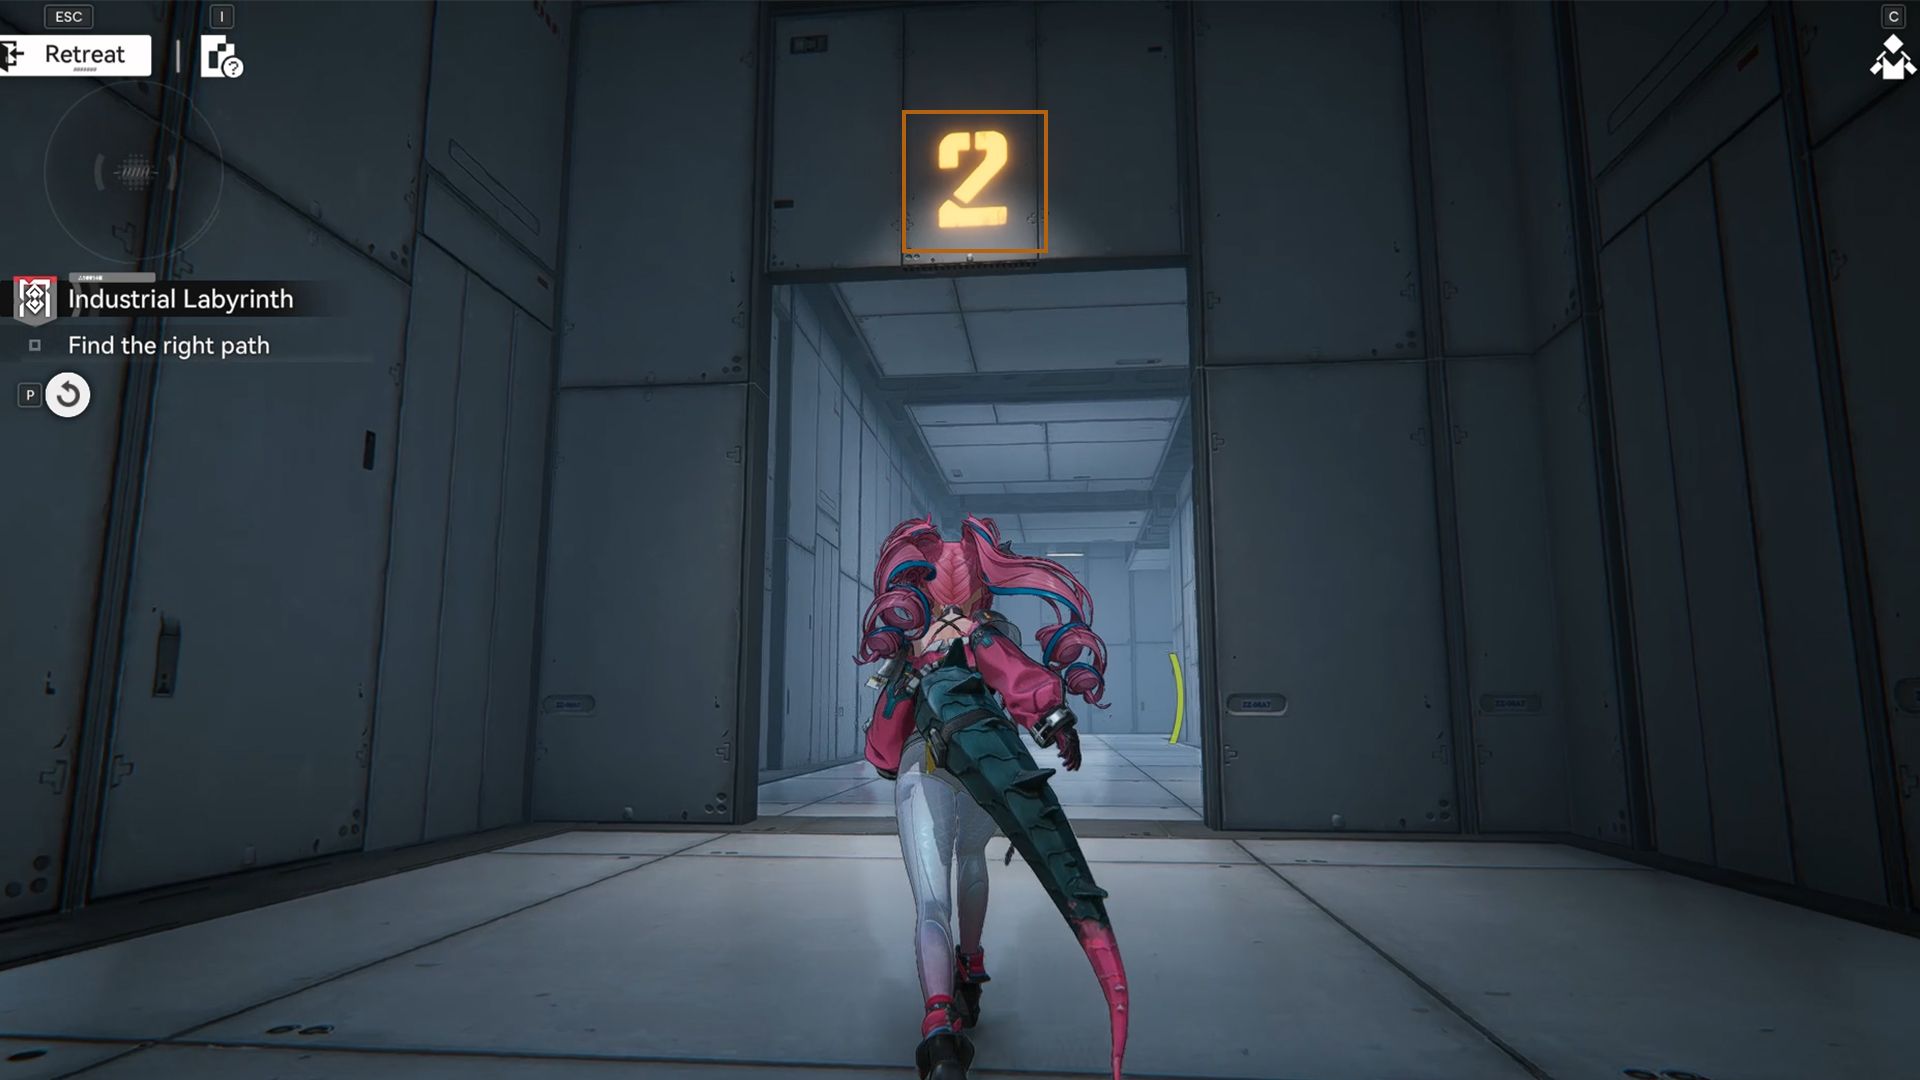
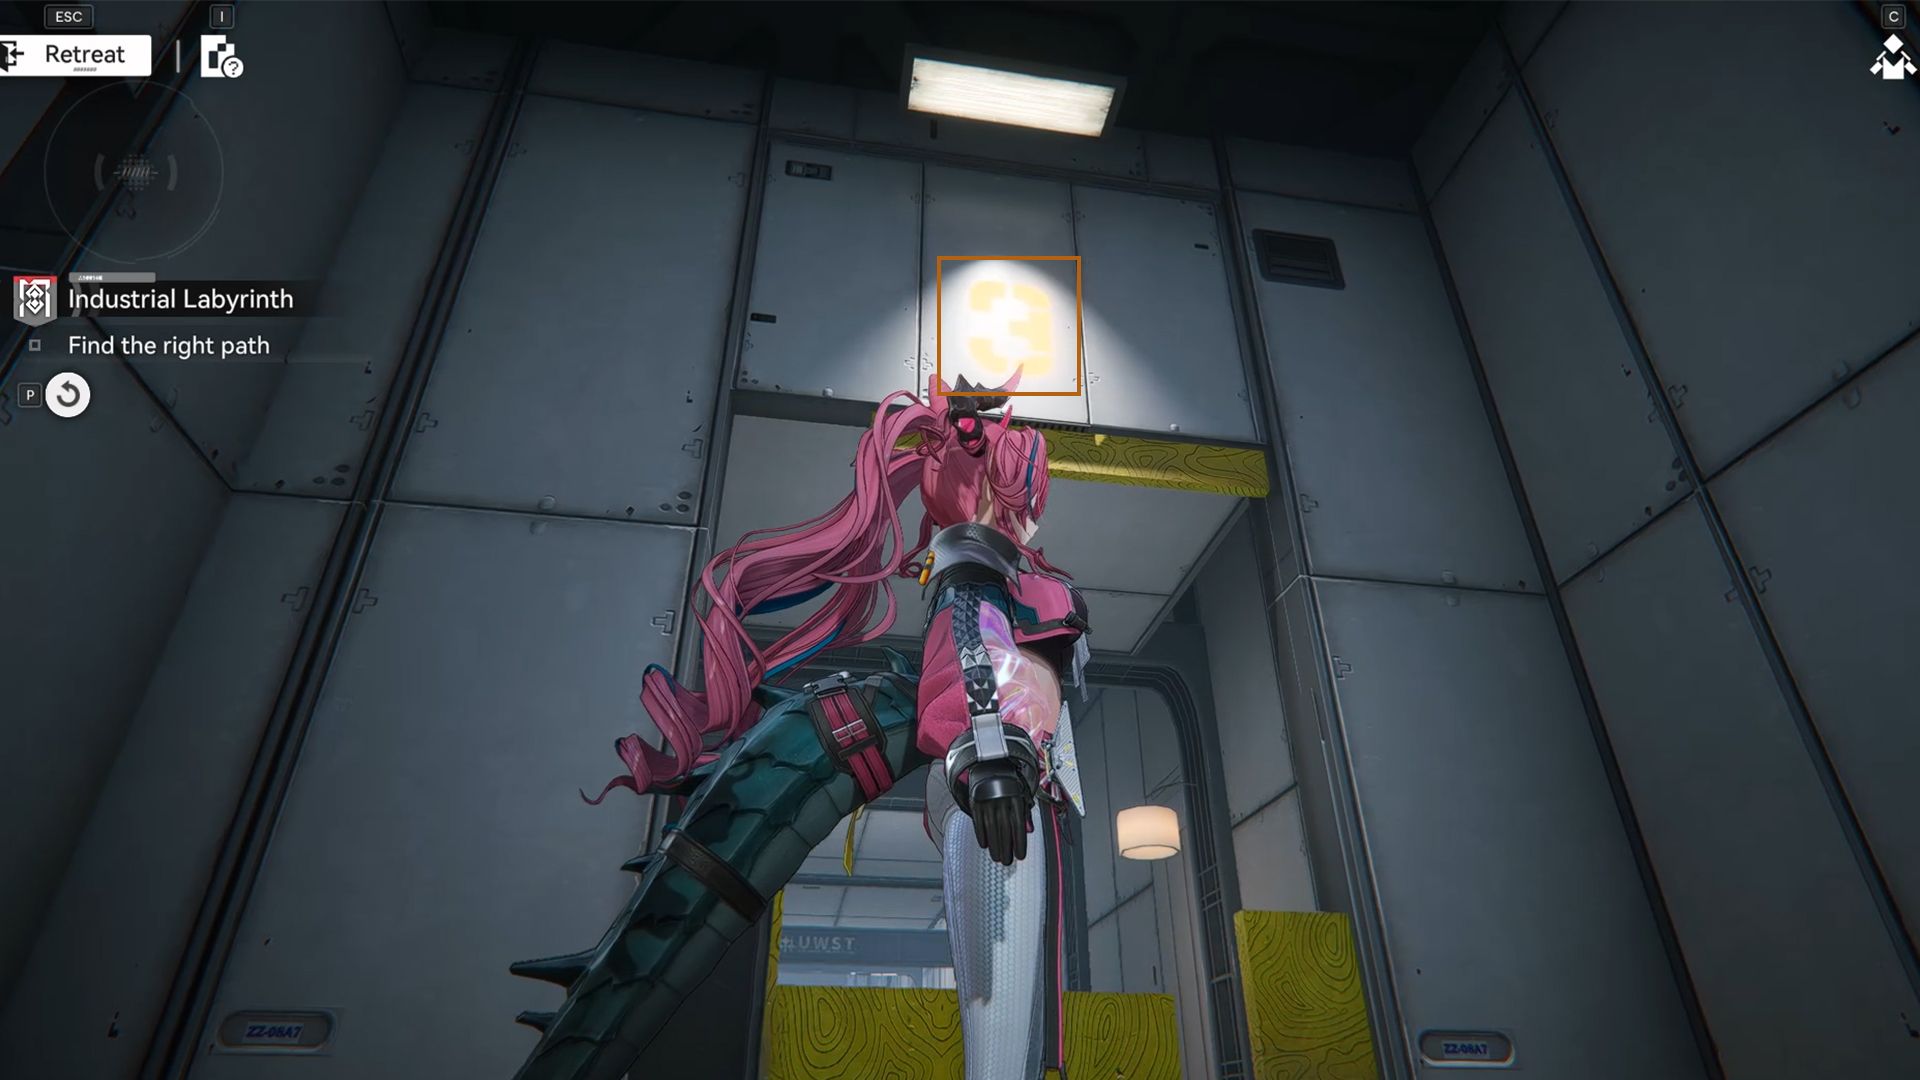
At last, you can put those clues to work! After opening the Labyrinth chest, your character will enter a room with numbers inscribed on the walls.
As you pass through each numbered wall, a new room or hallway will open up, revealing even more numbered walls. To escape the Labyrinth, simply follow the walls in the order 21323.
The final puzzle in the Industrial Labyrinth features a long hallway with walls that slide open. Don’t let it intimidate you – you can reach both the last chest and the exit using the same trick. Simply enter any room containing the exit portals and activate them. This will transport you through a series of rooms with portals behind you. Keep activating the portals until you arrive at the third and final Labyrinth chest in Arknights: Endfield.
Go back to the hallway and look for the path that doesn’t have a portal. If you’re lost, find the room without a portal – it will take you to the finish.
Continue straight ahead to reach the end of the Industrial Labyrinth, finishing the fourth stage of the Cryptic space event in Arknights: Endfield.
Read More
- All Skyblazer Armor Locations in Crimson Desert
- How to Get the Sunset Reed Armor Set and Hollow Visage Sword in Crimson Desert
- All Shadow Armor Locations in Crimson Desert
- Marni Laser Helm Location & Upgrade in Crimson Desert
- All Helfryn Armor Locations in Crimson Desert
- All Golden Greed Armor Locations in Crimson Desert
- All Icewing Armor Locations in Crimson Desert
- Best Bows in Crimson Desert
- How to Beat Stonewalker Antiquum at the Gate of Truth in Crimson Desert
- Legendary White Lion Necklace Location in Crimson Desert
2026-02-26 02:13