
To earn the “Major Gumshoe” Trophy/Achievement in Life is Strange: Reunion, you need to discover all 10 hidden pieces of optional evidence during a single playthrough. Not only will this unlock the trophy, but finding everything allows Max and Chloe to correctly identify the culprits at the game’s conclusion, which is required to achieve the Life is Strange: Reunion Trophy/Achievement for saving all the characters.
This guide shows you where to find all the optional evidence in Life is Strange: Reunion and helps you figure out if you’ve missed anything. Remember, you need to collect all optional evidence in a single playthrough, but if you miss something, you can restart from the scene where you missed it and create a new save to continue playing. If you do this, you’ll unlock the “Major Gumshoe” achievement at the start of the “All Available Evidence” scene.
Please be aware that this page contains some slight SPOILERS for Life is Strange: Reunion.
Optional Evidence Location 1
Evidence name: Reggie’s Notes.
Scene: Class Act.
You can find this optional clue after the “Class Act” scene. Once you’ve helped Reggie, check both pages of the notepad on the picnic table to add it to your evidence in Life is Strange: Reunion.
Optional Evidence Location 2 and 3
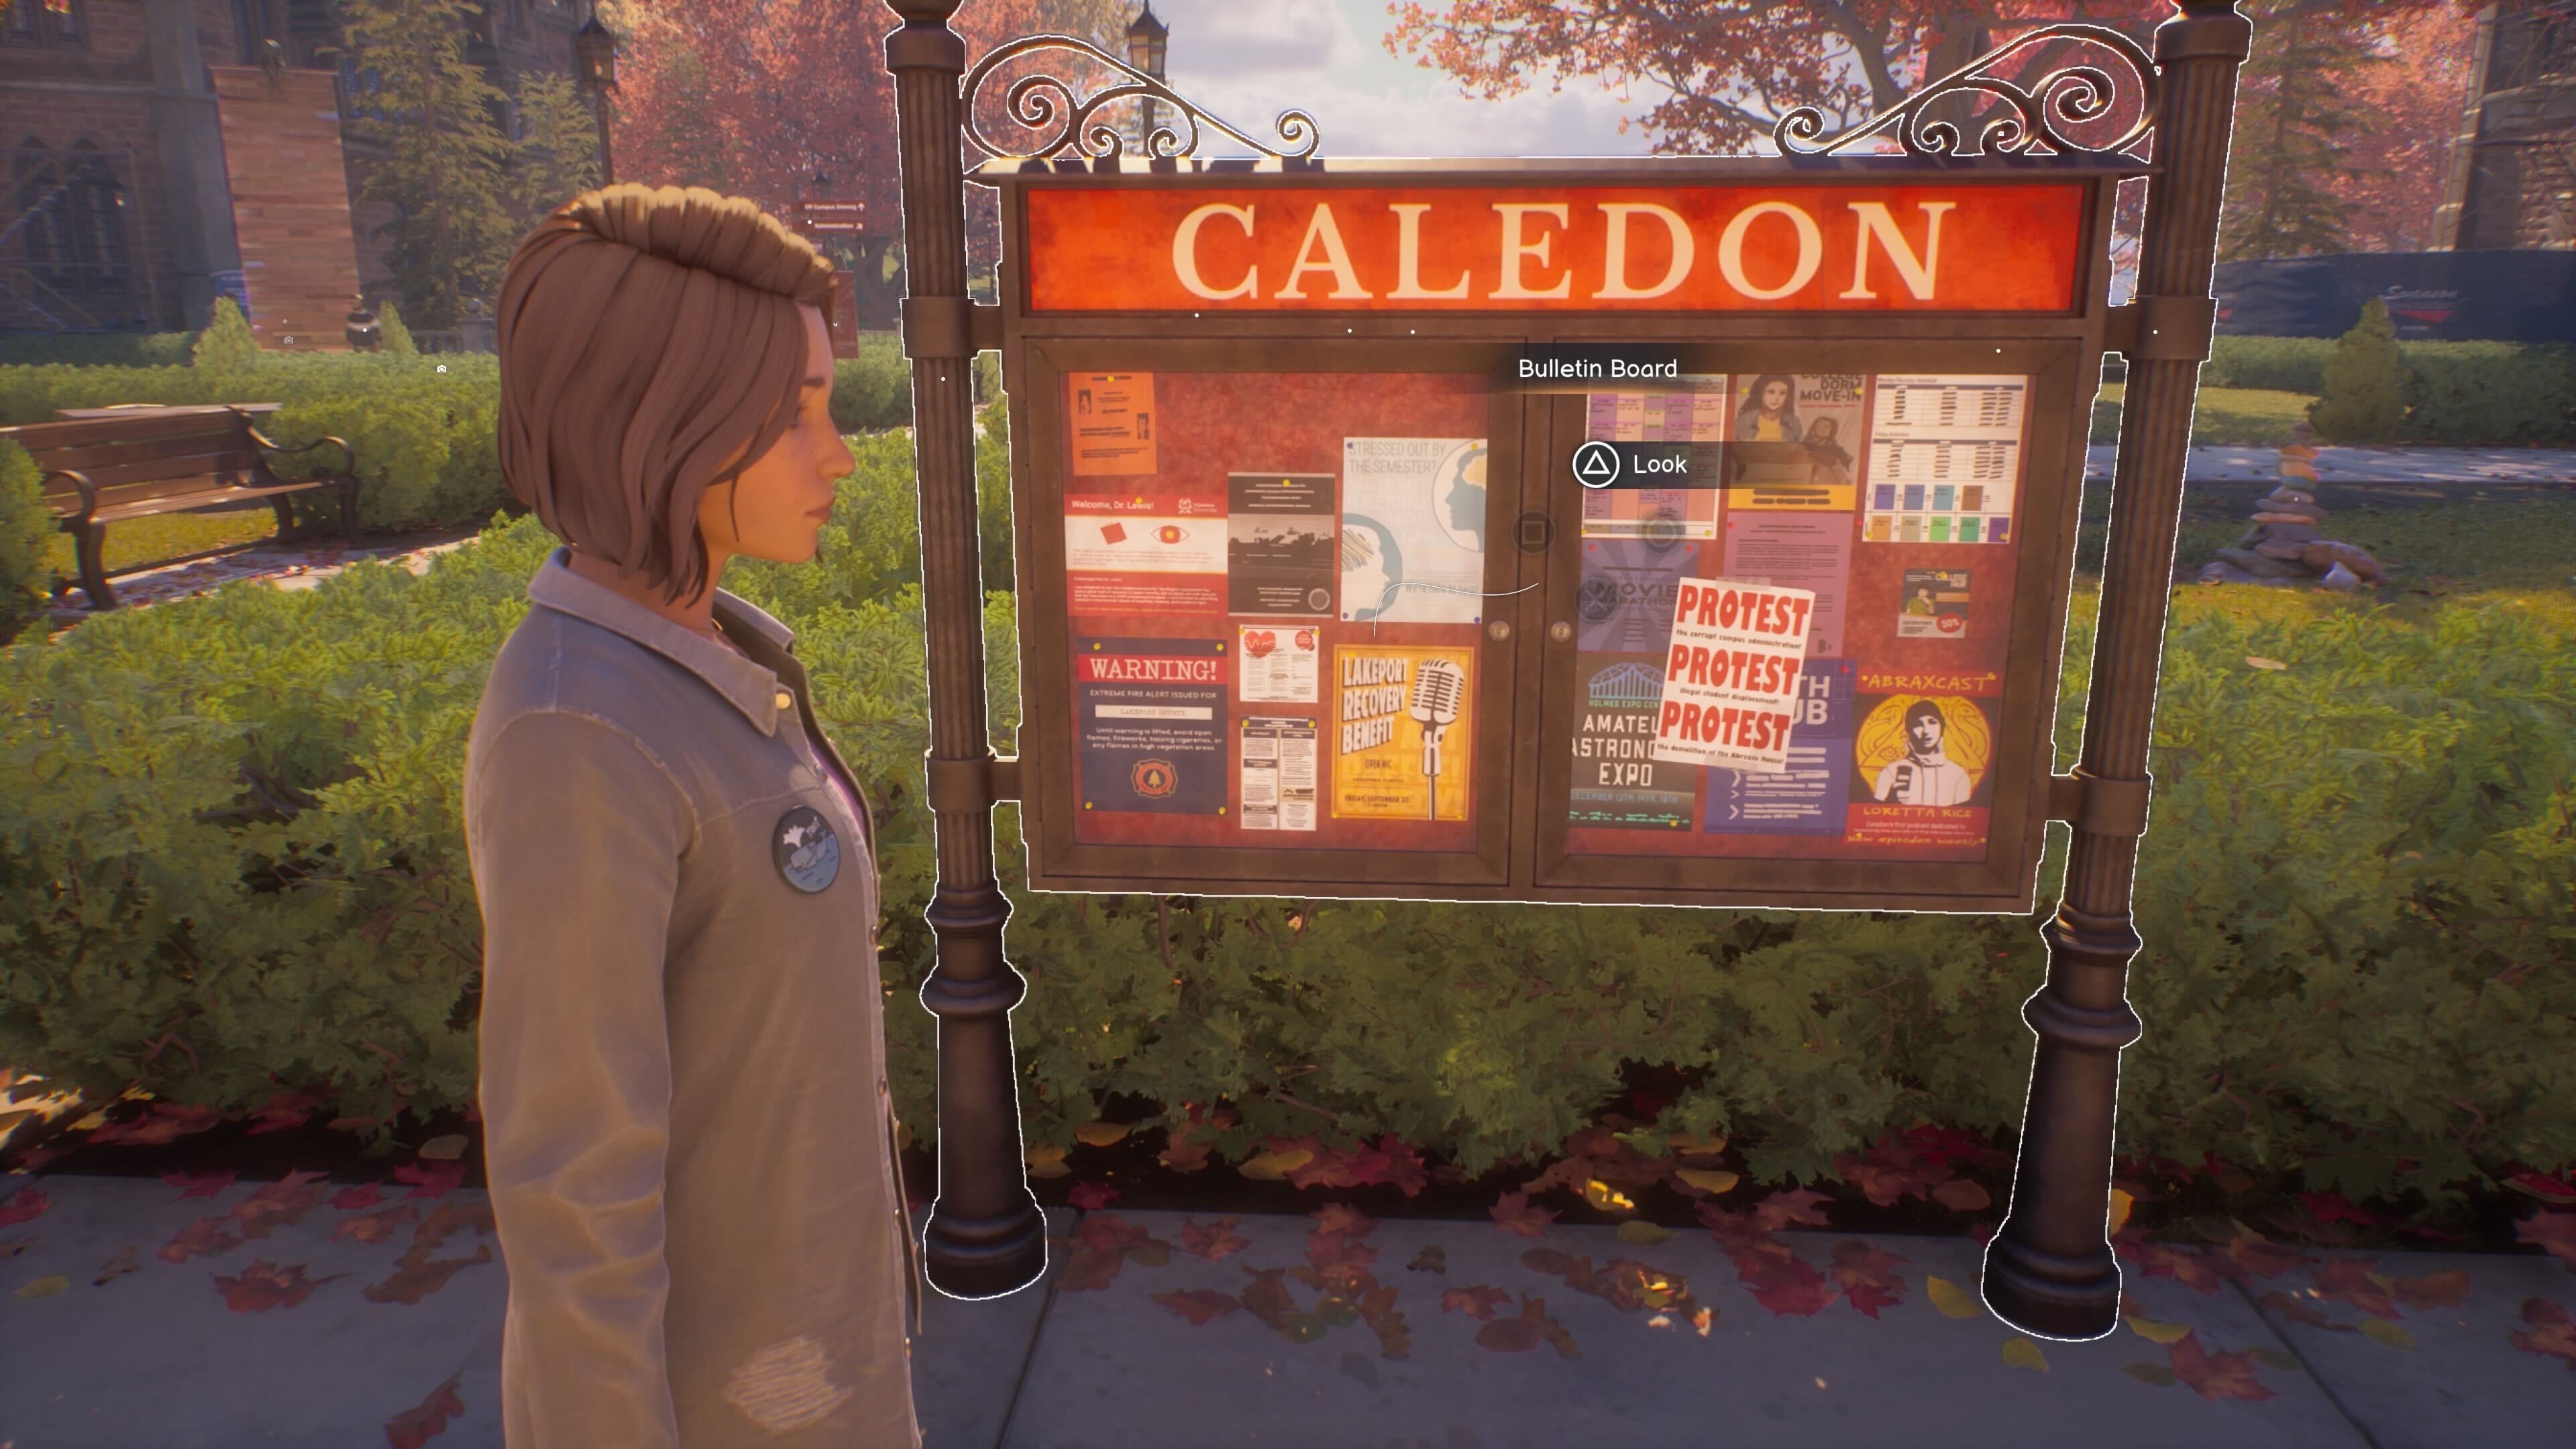
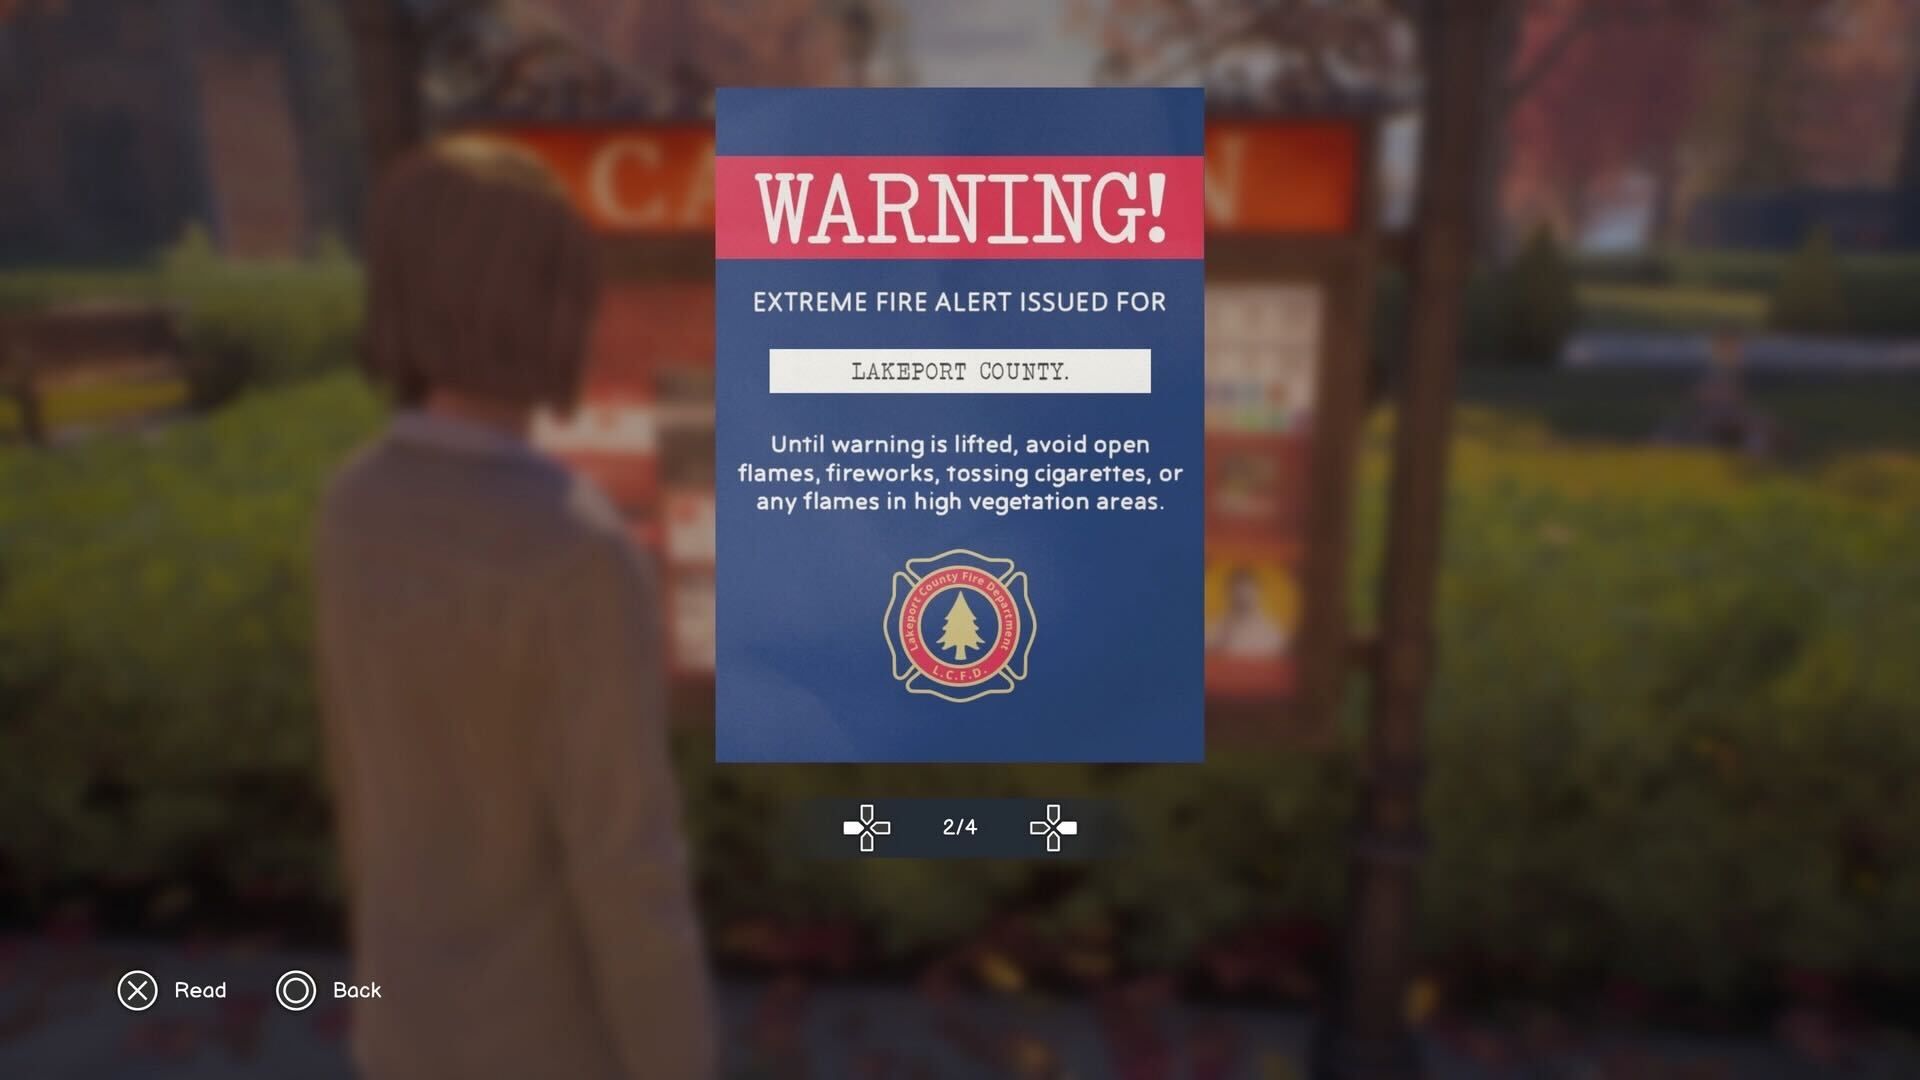
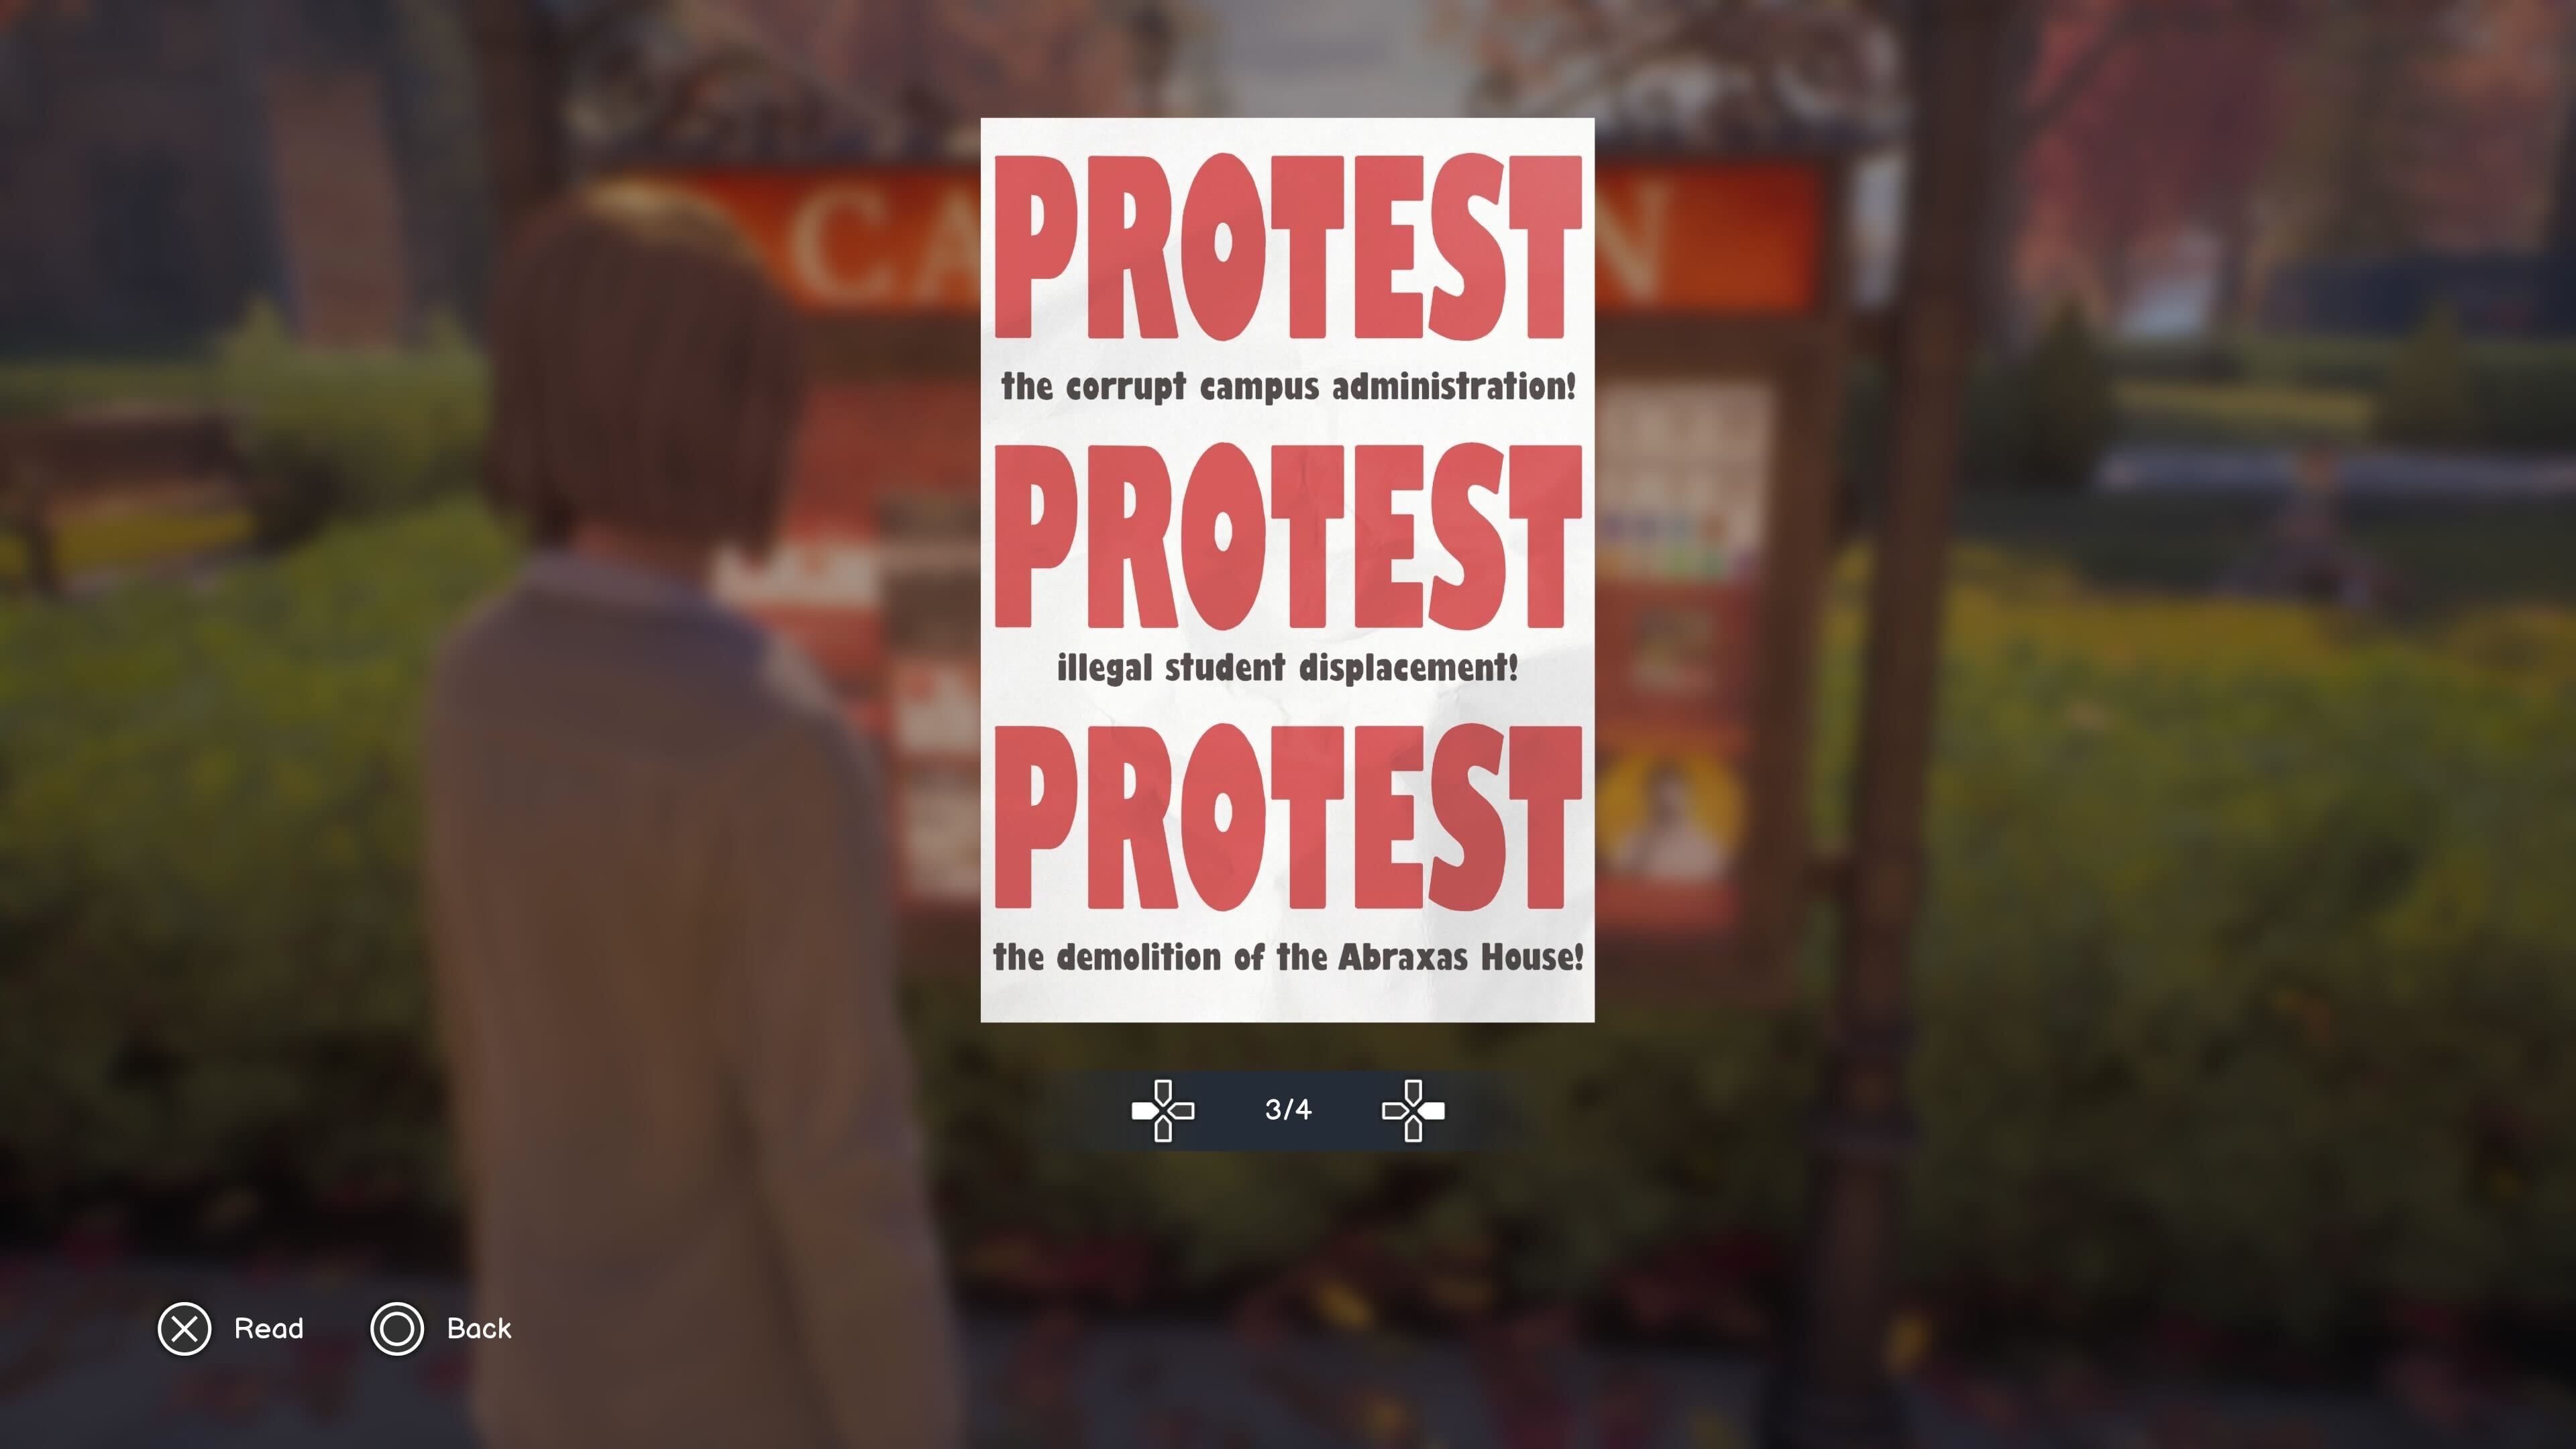
Evidence name: Fire Warning and Protest Sign.
Scene: Class Act.
You can find these optional evidence flyers on the bulletin board at Caledon University, near the stone cairn in the quad. Check it during the “Class Act” scene and browse through all the posters to add them to your collection.
Optional Evidence Location 4
Evidence name: Lucas’ Podcast.
Scene: Open Mic.
You can find this item after Amanda finishes her stand-up routine at the Open Mic. Talk to Lucas afterward to get a clue, then rewind time and ask him about his novel. He’ll point you towards podcast business cards on a table to the right of the restrooms. Examine the cards to add this evidence to your collection, and listening to them will help you find all the podcasts in Life is Strange: Reunion.
Optional Evidence Location 5
Evidence name: Fremont Map.
Scene: Fremont Street.
You can find this optional evidence at the beginning of the Fremont Street scene. Check inside the open door of the tanker truck located to the left of the Abraxas house.
Optional Evidence Location 6
Evidence name: Inspection Flyer.
Scene: Fremont Street.
You can find it to the right of the Abraxas house when the “Fremont Street” scene begins. Look on top of a car that has “Lakeport Remembers” written on the window.
Optional Evidence Location 7
Evidence name: Newspaper Article.
Scene: Admin Sleuth.
You can find this evidence while investigating the library with Loretta during the “Admin Sleuth” scene. Examine the “History of the Occult” book, then talk to Loretta and ask her about Jack Parsons to obtain it.
Optional Evidence Location 8
Evidence name: Demolition Contract.
Scene: Admin Sleuth.
Okay, so if you’re playing “Admin Sleuth” and you’re in Owen’s office, make sure to check the right-hand drawer of his desk. You’ll find some extra evidence in there – it’s optional, but definitely worth grabbing if you want to dig deeper into the case!
Optional Evidence Location 9
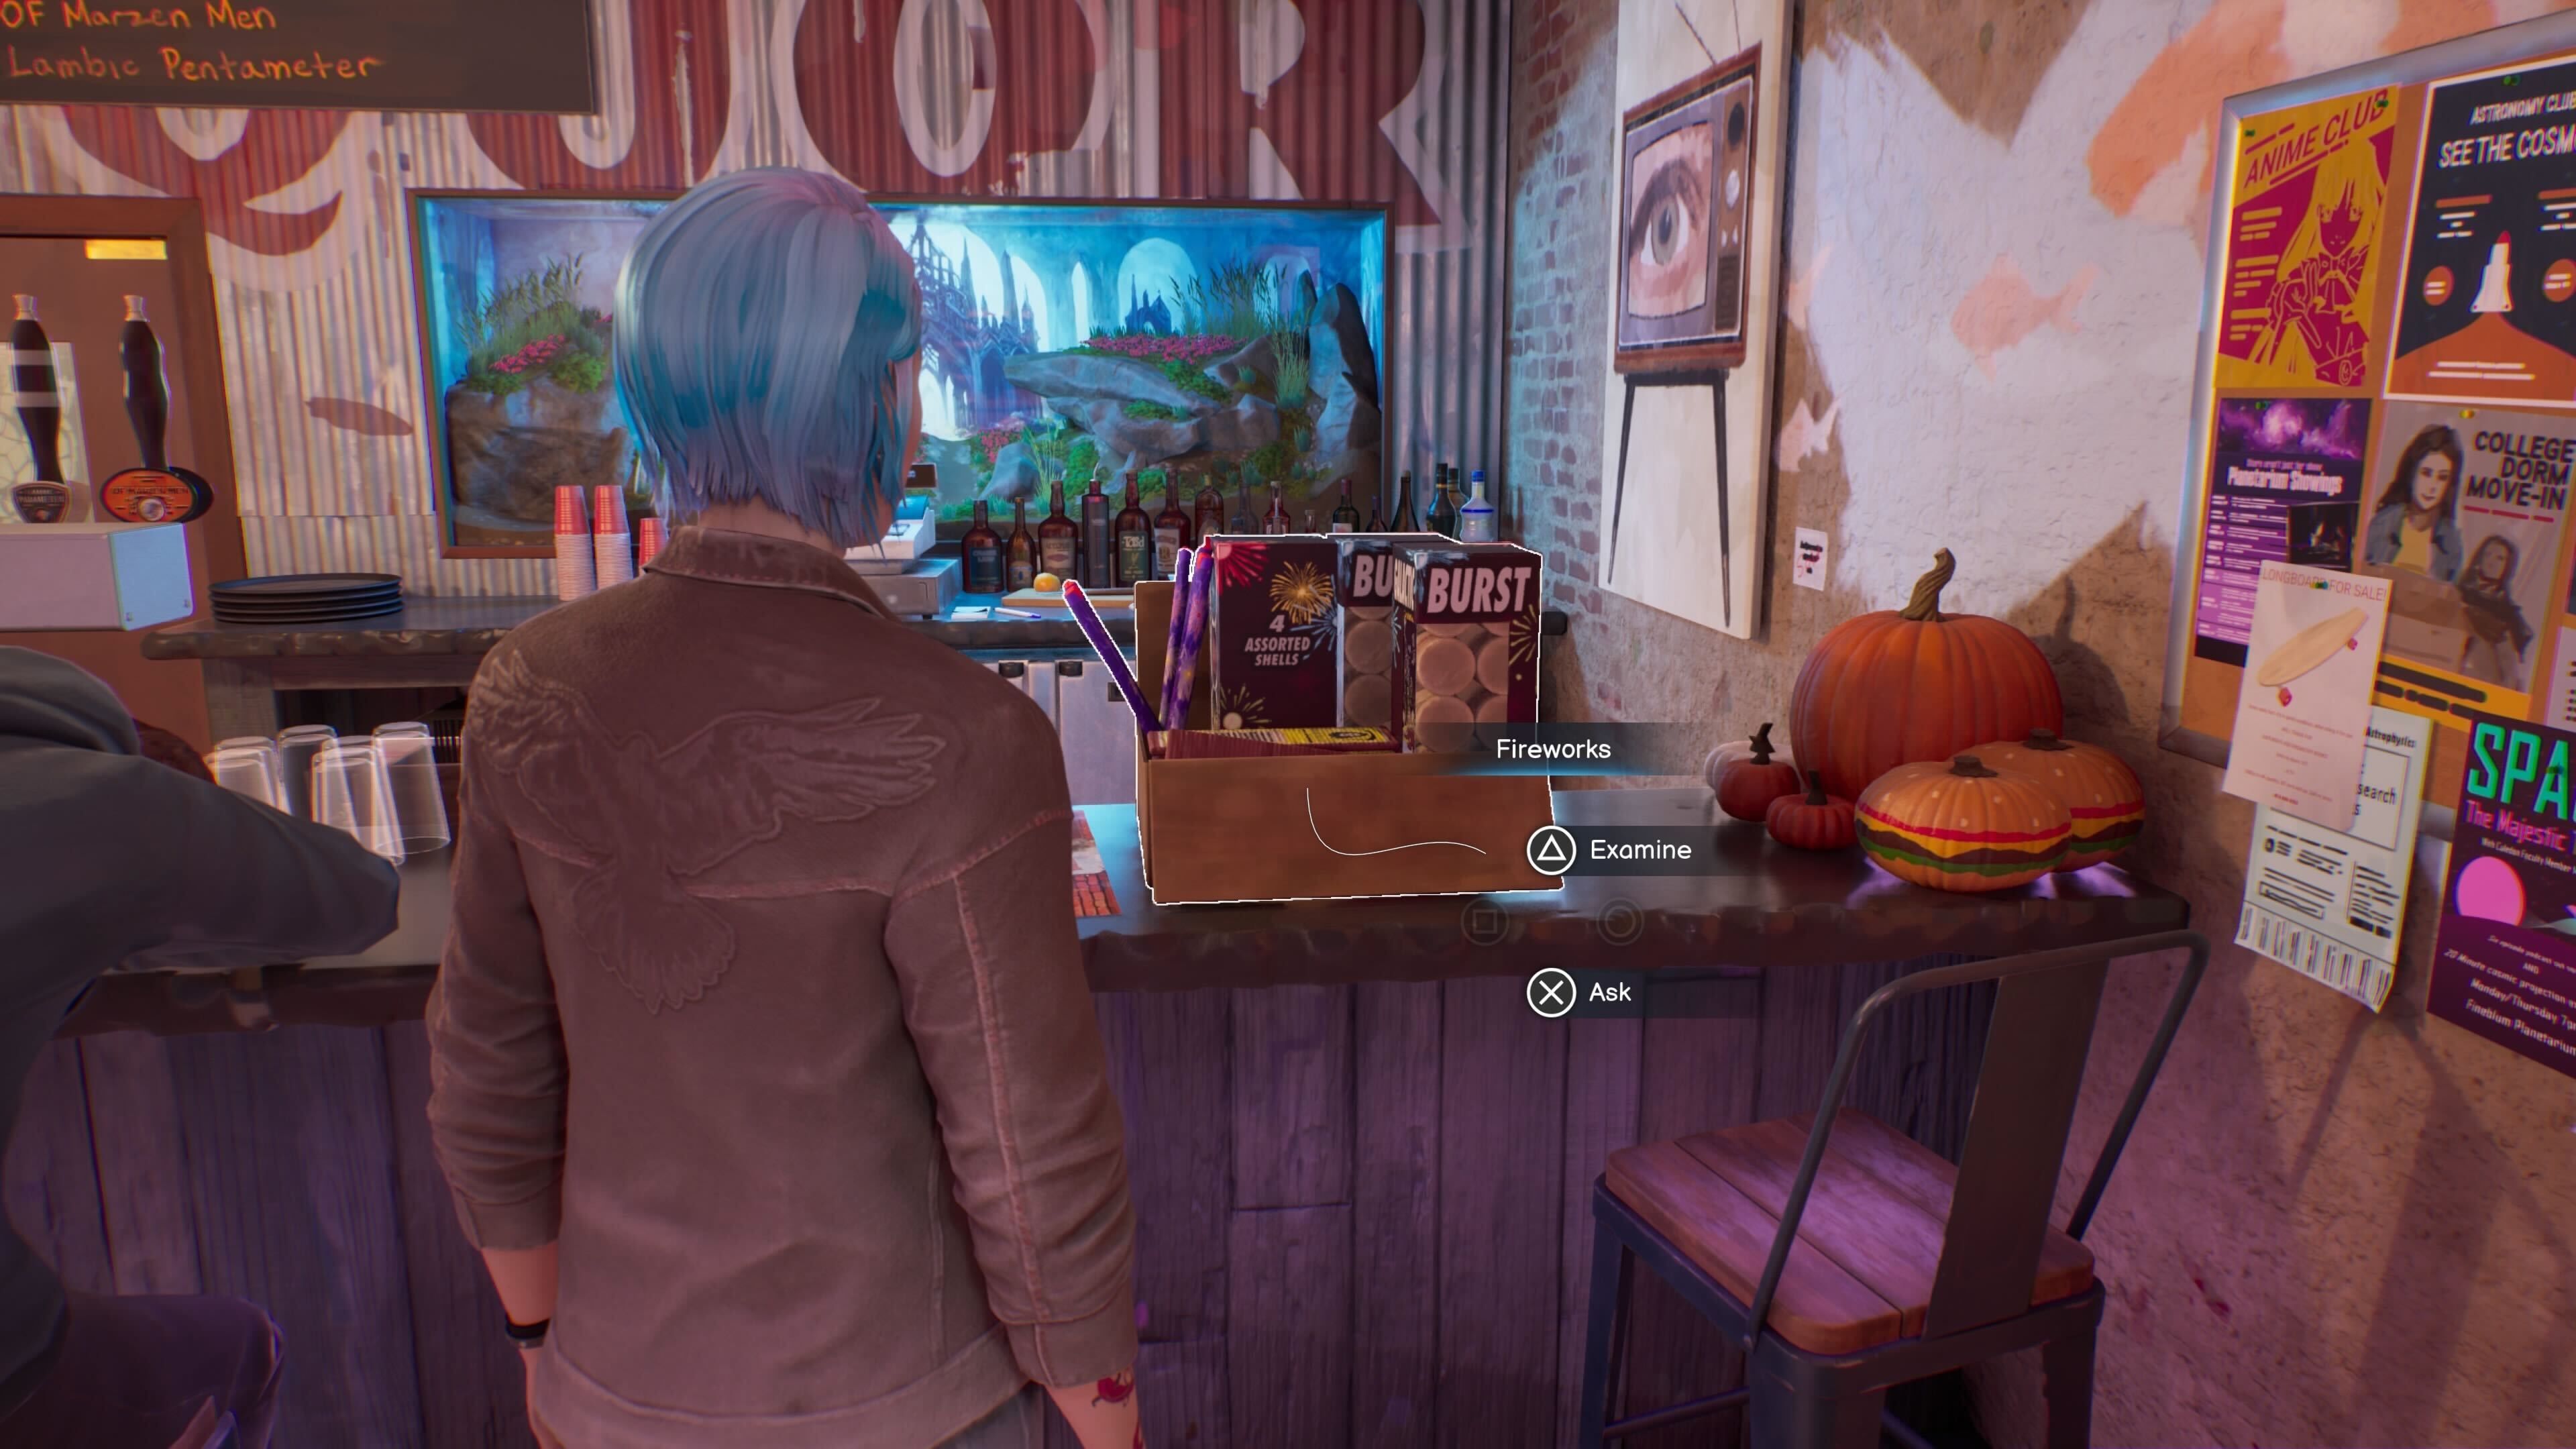
Evidence name: Fireworks Receipt.
Scene: Times in Turtle.
You can find this item at the beginning of the “Times in Turtle” scene while playing as Chloe. Examine the fireworks on the bar and talk about them to add this optional piece of evidence to your inventory.
Optional Evidence Location 10
Evidence name: Blueprint.
Scene: Mabon.
To find this final optional piece of evidence in Life is Strange: Reunion, you need to choose the “Attack” option while playing as Chloe during the Mabon scene in the basement.
How to unlock the Major Gumshoe Trophy/Achievement
If you find all 10 optional pieces of evidence in a single game of Life is Strange: Reunion, you’ll immediately unlock the “Major Gumshoe” Trophy/Achievement when the “All Available Evidence” scene begins. This lets you examine all the evidence and correctly identify the arsonists during the “Chloe’s Decision” and “Max’s Decision” scenes, helping you achieve the best possible ending.
If you don’t unlock a trophy or achievement, check the whiteboards in the “All Available Evidence” scene to see what you might have overlooked. The images show what the completed whiteboards should look like with all 10 optional pieces of evidence. You can also figure out what’s missing by comparing the evidence you’ve collected to the complete list in this guide.
If you’re going for the “Major Gumshoe” Trophy/Achievement and missed some evidence, you don’t need to start a new game. Just figure out what you’re missing, then use the “Restart” scene mode to go back to the first scene where you skipped evidence. This will create a new save file, and you can continue playing from there. Once you collect all the evidence, the Trophy/Achievement will unlock, and you can stop playing.
Read More
- All Shadow Armor Locations in Crimson Desert
- All Skyblazer Armor Locations in Crimson Desert
- How to Get the Sunset Reed Armor Set and Hollow Visage Sword in Crimson Desert
- Marni Laser Helm Location & Upgrade in Crimson Desert
- Best Bows in Crimson Desert
- All Golden Greed Armor Locations in Crimson Desert
- All Helfryn Armor Locations in Crimson Desert
- How to Craft the Elegant Carmine Armor in Crimson Desert
- Wings of Iron Walkthrough in Crimson Desert
- Keeping Large AI Models Connected Through Network Chaos
2026-04-04 21:08