
The Crystal of Atlan merges magic and steampunk elements, offering thrilling gameplay within the realm of MMORPG. Players can pick from numerous character classes and delve into diverse regions, making new acquaintances while aiding locals to combat the menace hiding in the depths of the shadows.
In their journey through Crystal of Atlan, gamers will gradually discover the various dungeons scattered throughout the game. These dungeons serve as vital locations for gathering materials, resources, or leveling up. Each region hosts several dungeons, some even boasting multiple levels. These dungeons are the primary means of exploration and offer additional rewards for those who can locate the hidden treasure chests. This guide will delve into all the 14 treasure chests found in Lumiville and Oreton for a comprehensive understanding.
Lumiville Treasure Chest Location 1
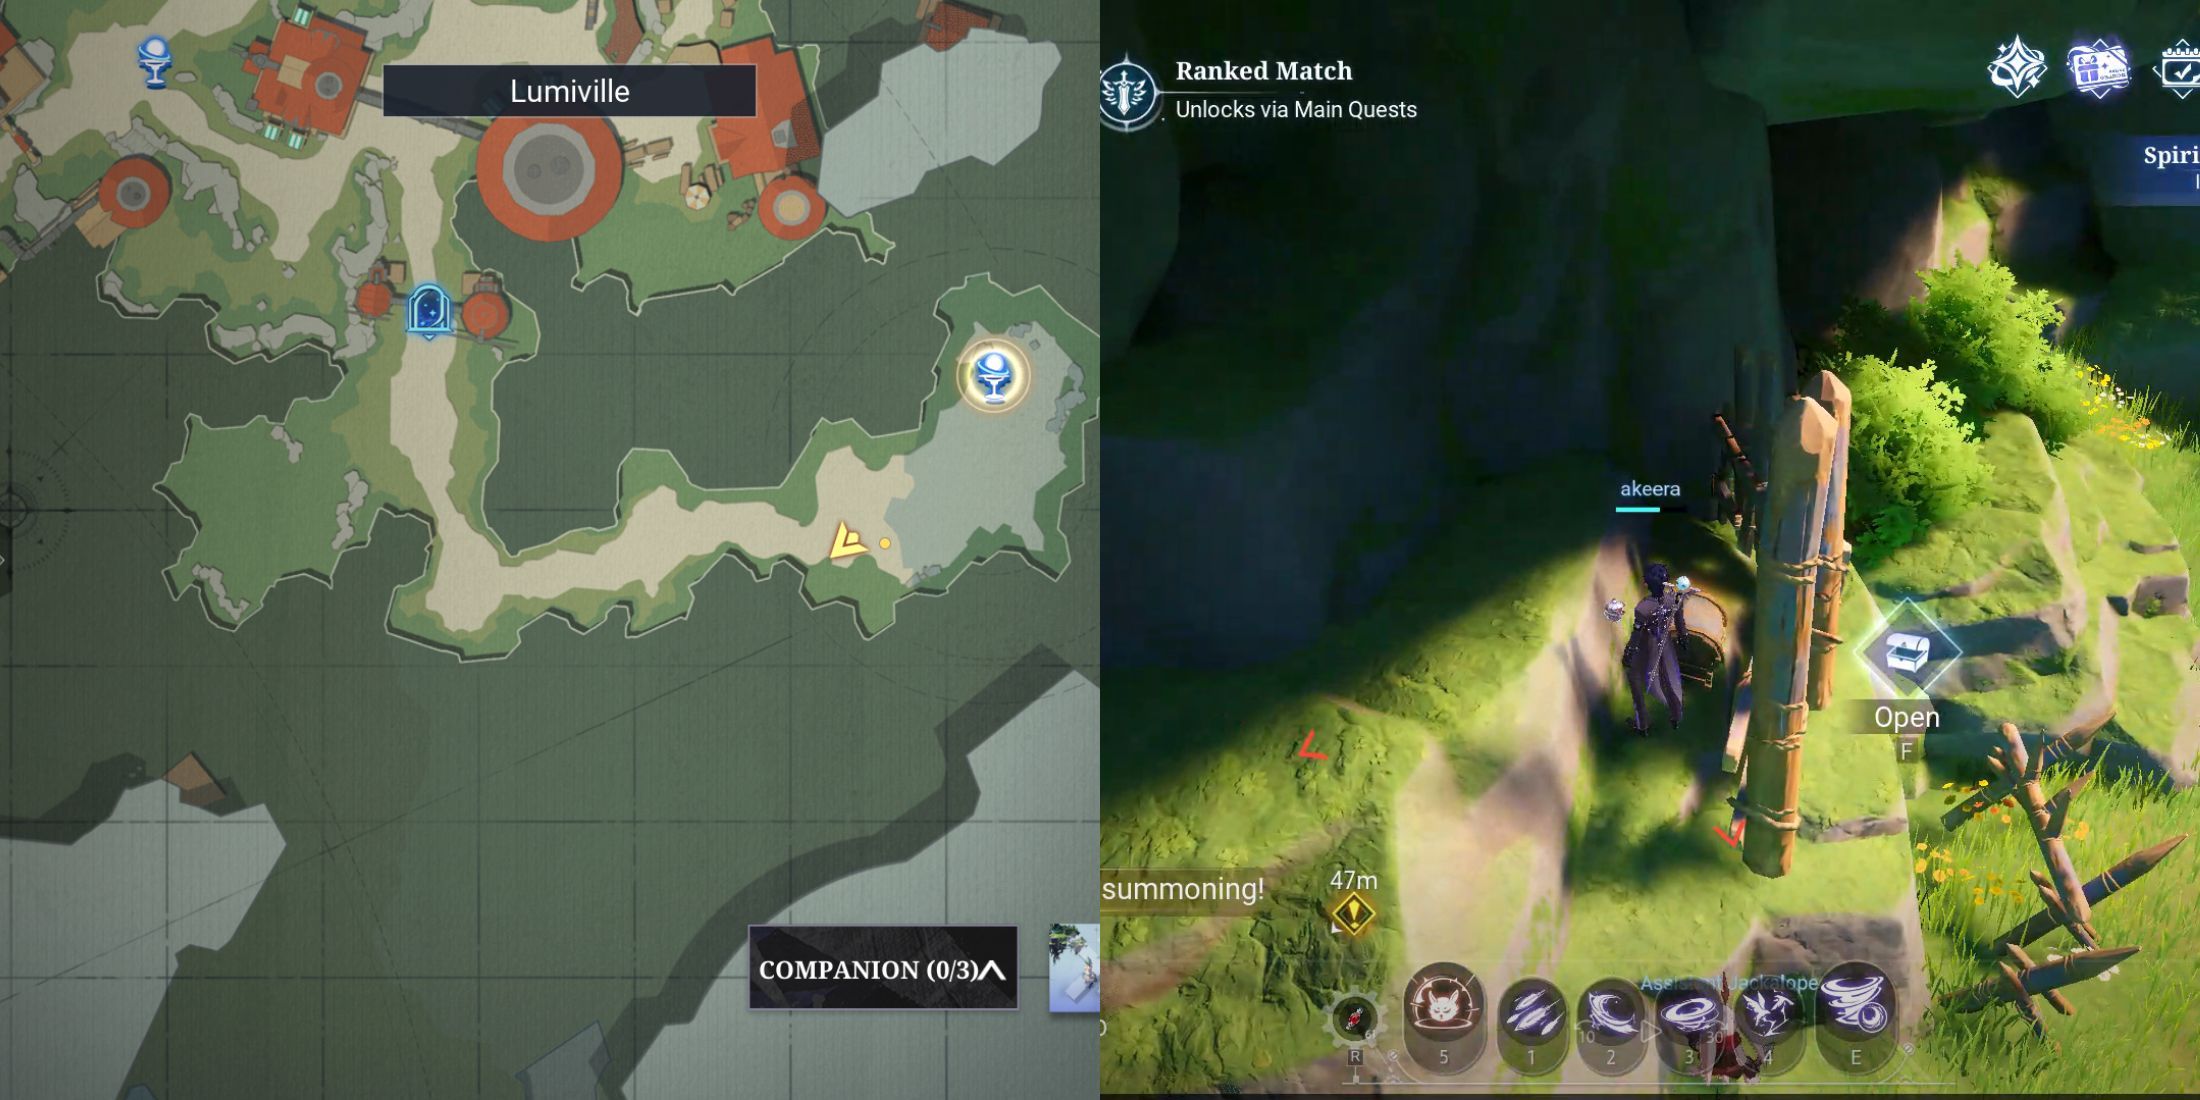
In Lumiville, there’s just one treasure chest that players can reach by venturing into the exploration zone situated southeast of the Village Entrance teleport spot. Upon entering this region, you’ll find it teeming with Tokkri enemies. Proceed forward, veer left after passing the initial encampment, and carry on straight until you spot a protrusion of rock from the mountain on your right. As you delve deeper, expect more adversaries, so don’t hesitate to eliminate them for smoother navigation.
Behind a wooden fortification of an adversary’s camp and a boulder lies the chest. Continue gazing to your right, and you should be able to locate it without difficulty.
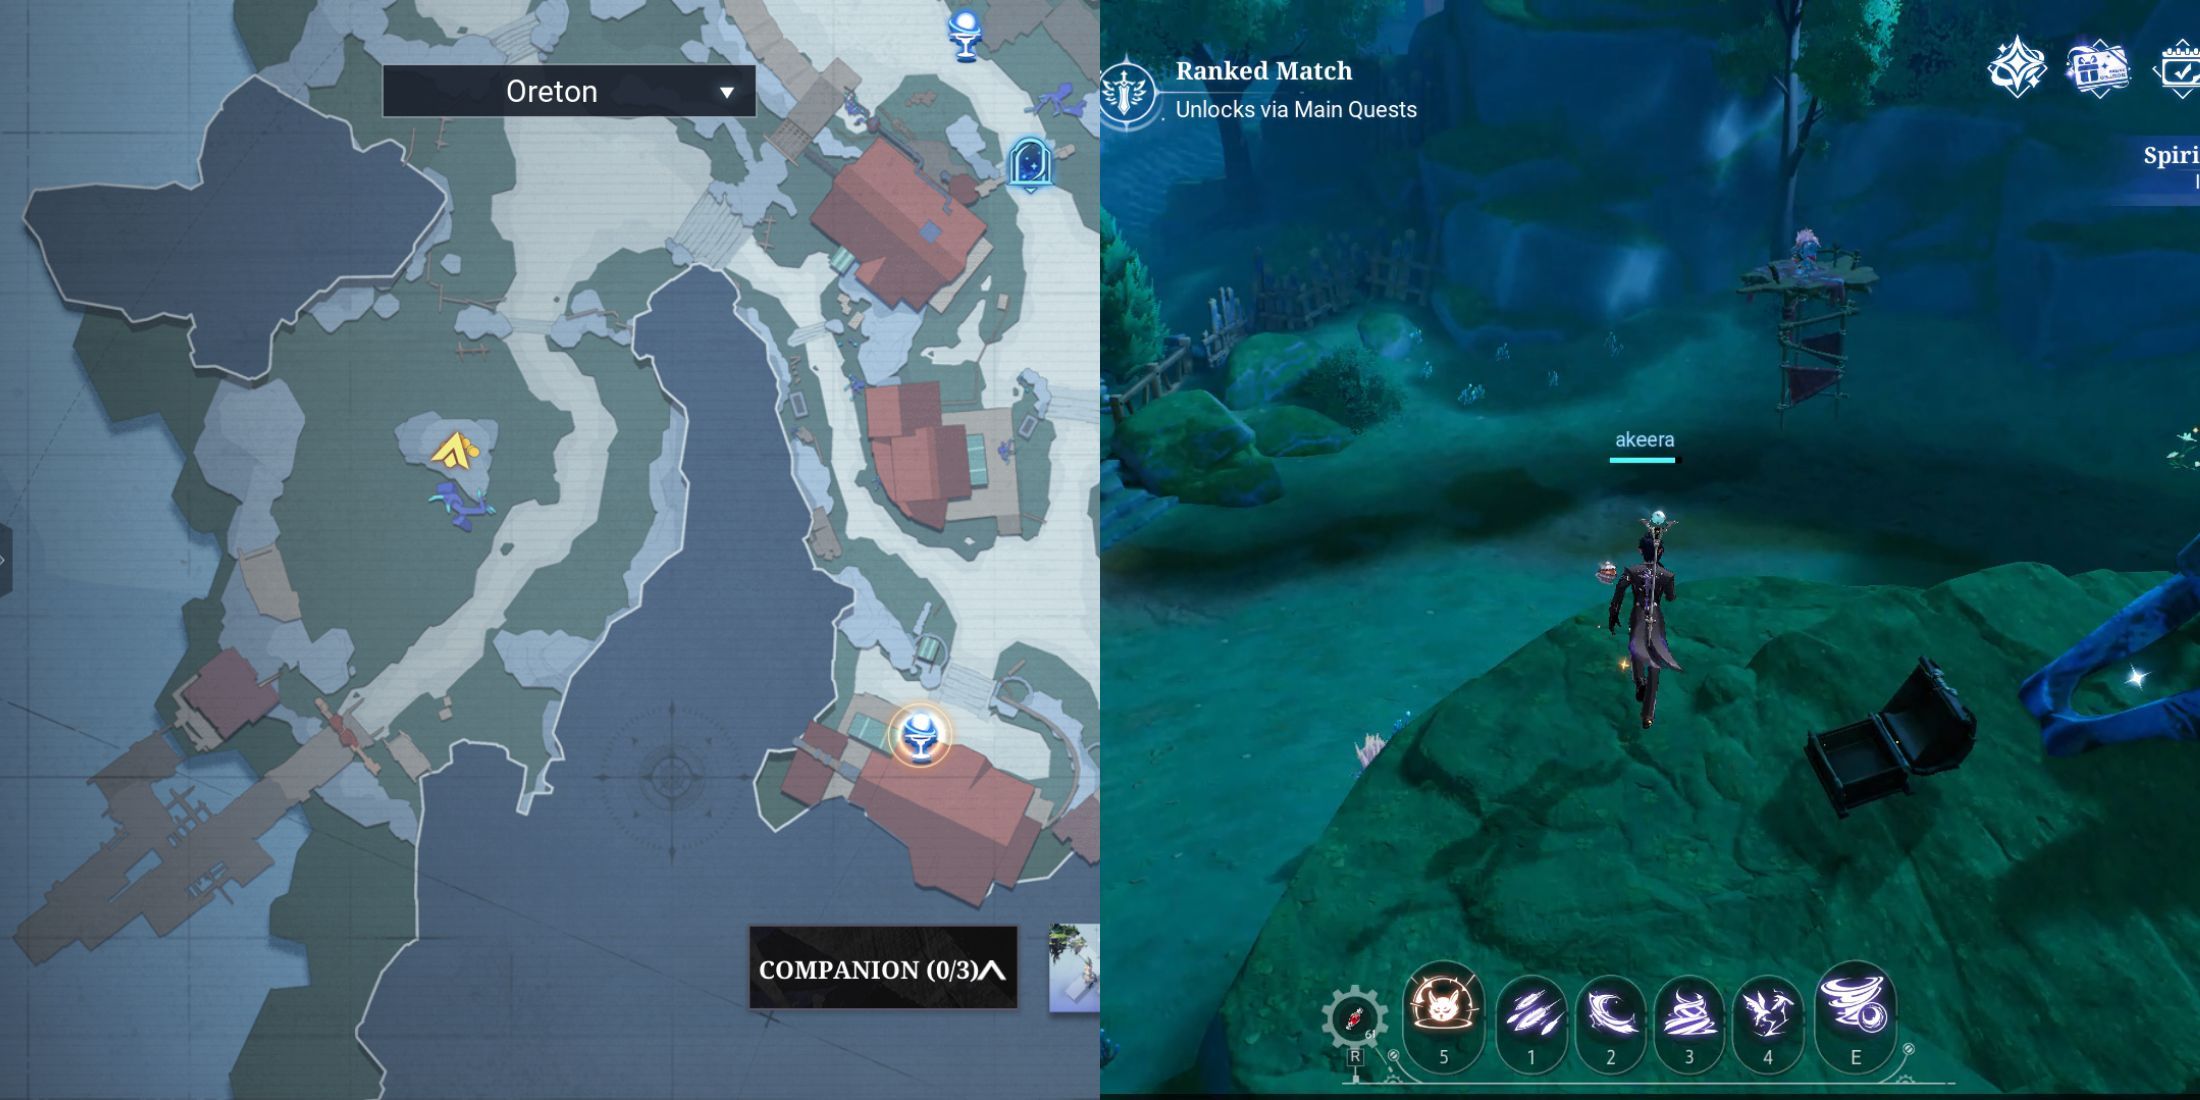
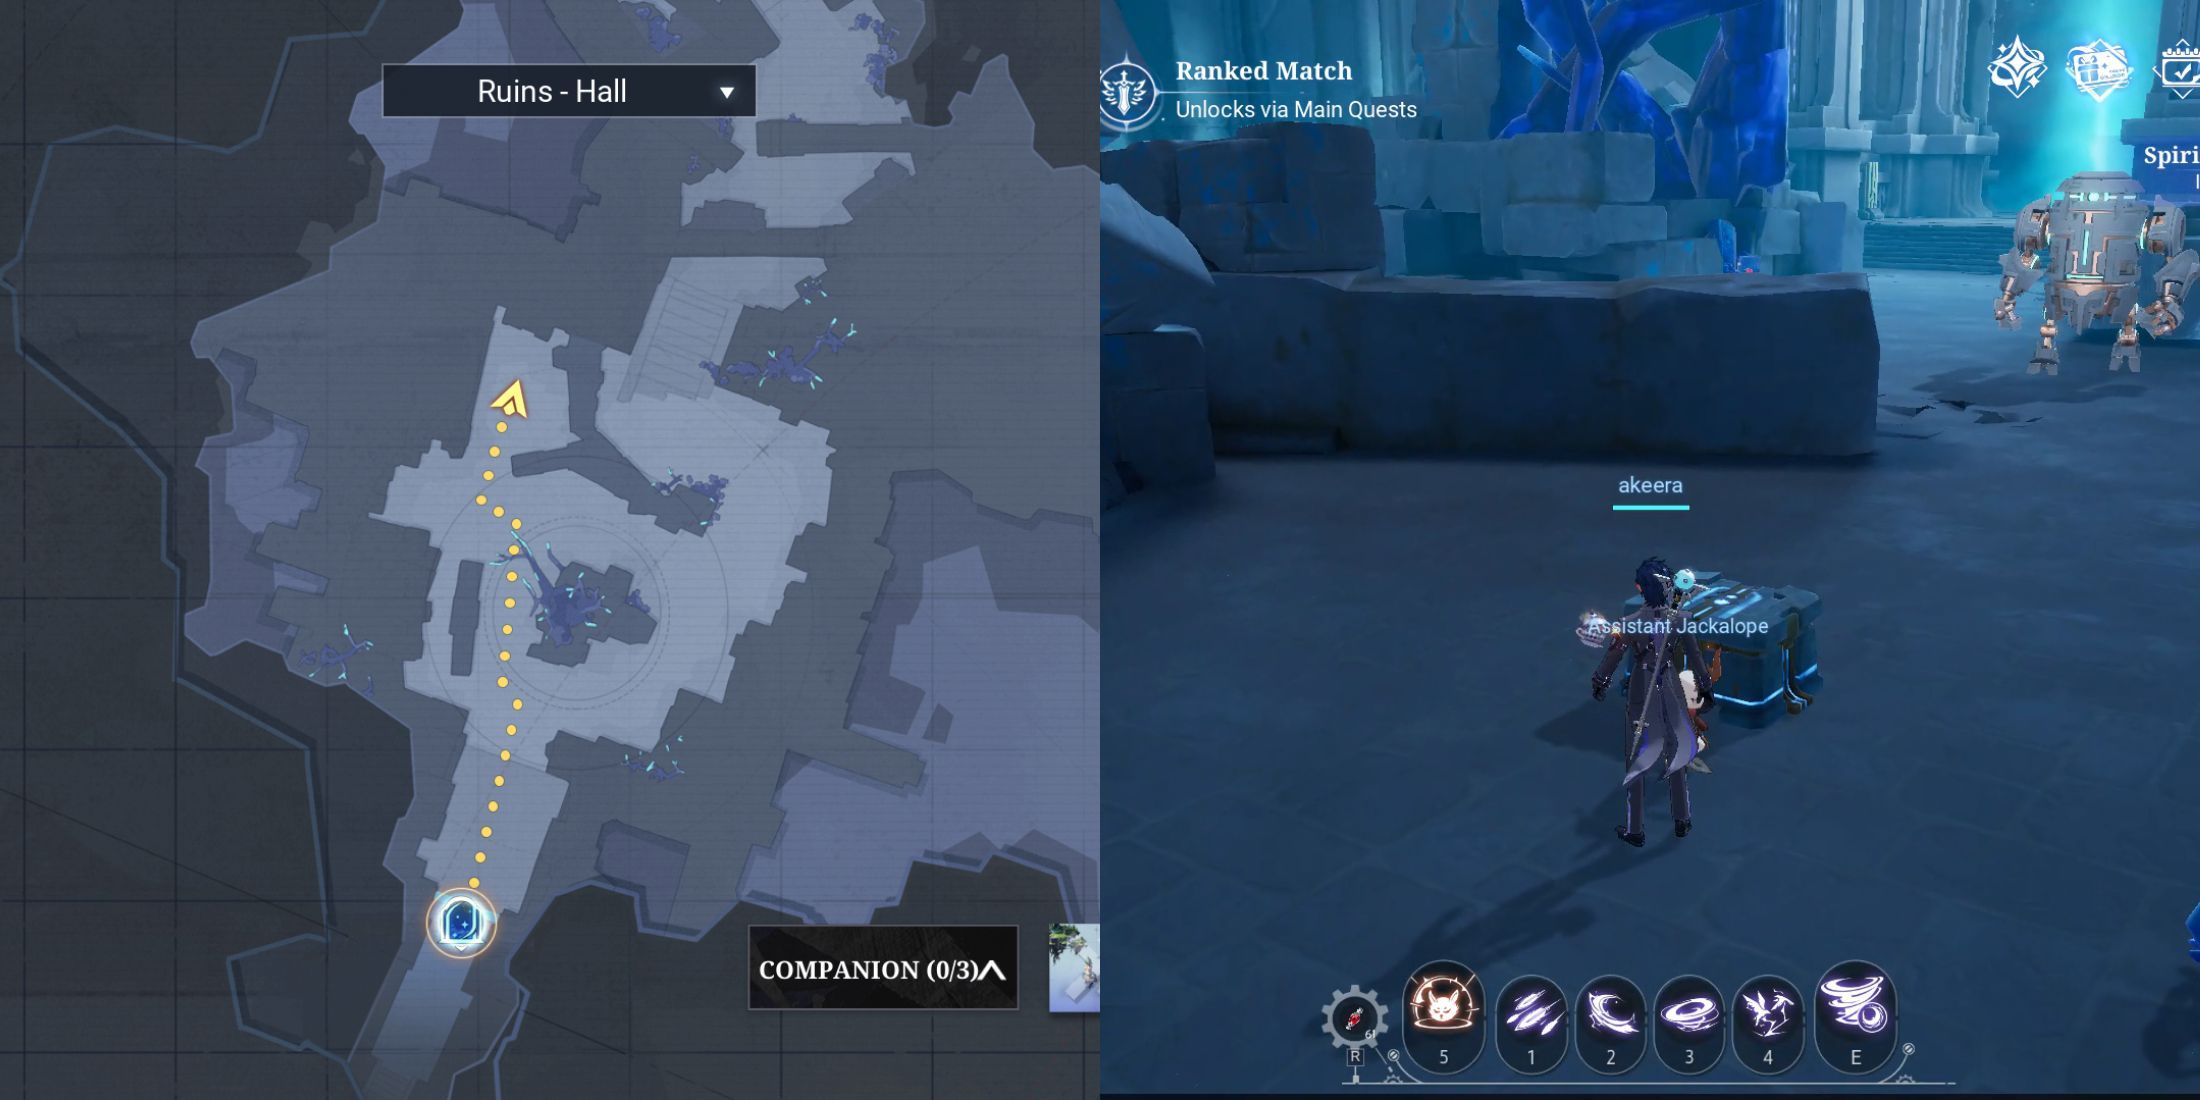
Oreton Treasure Chest Location 1
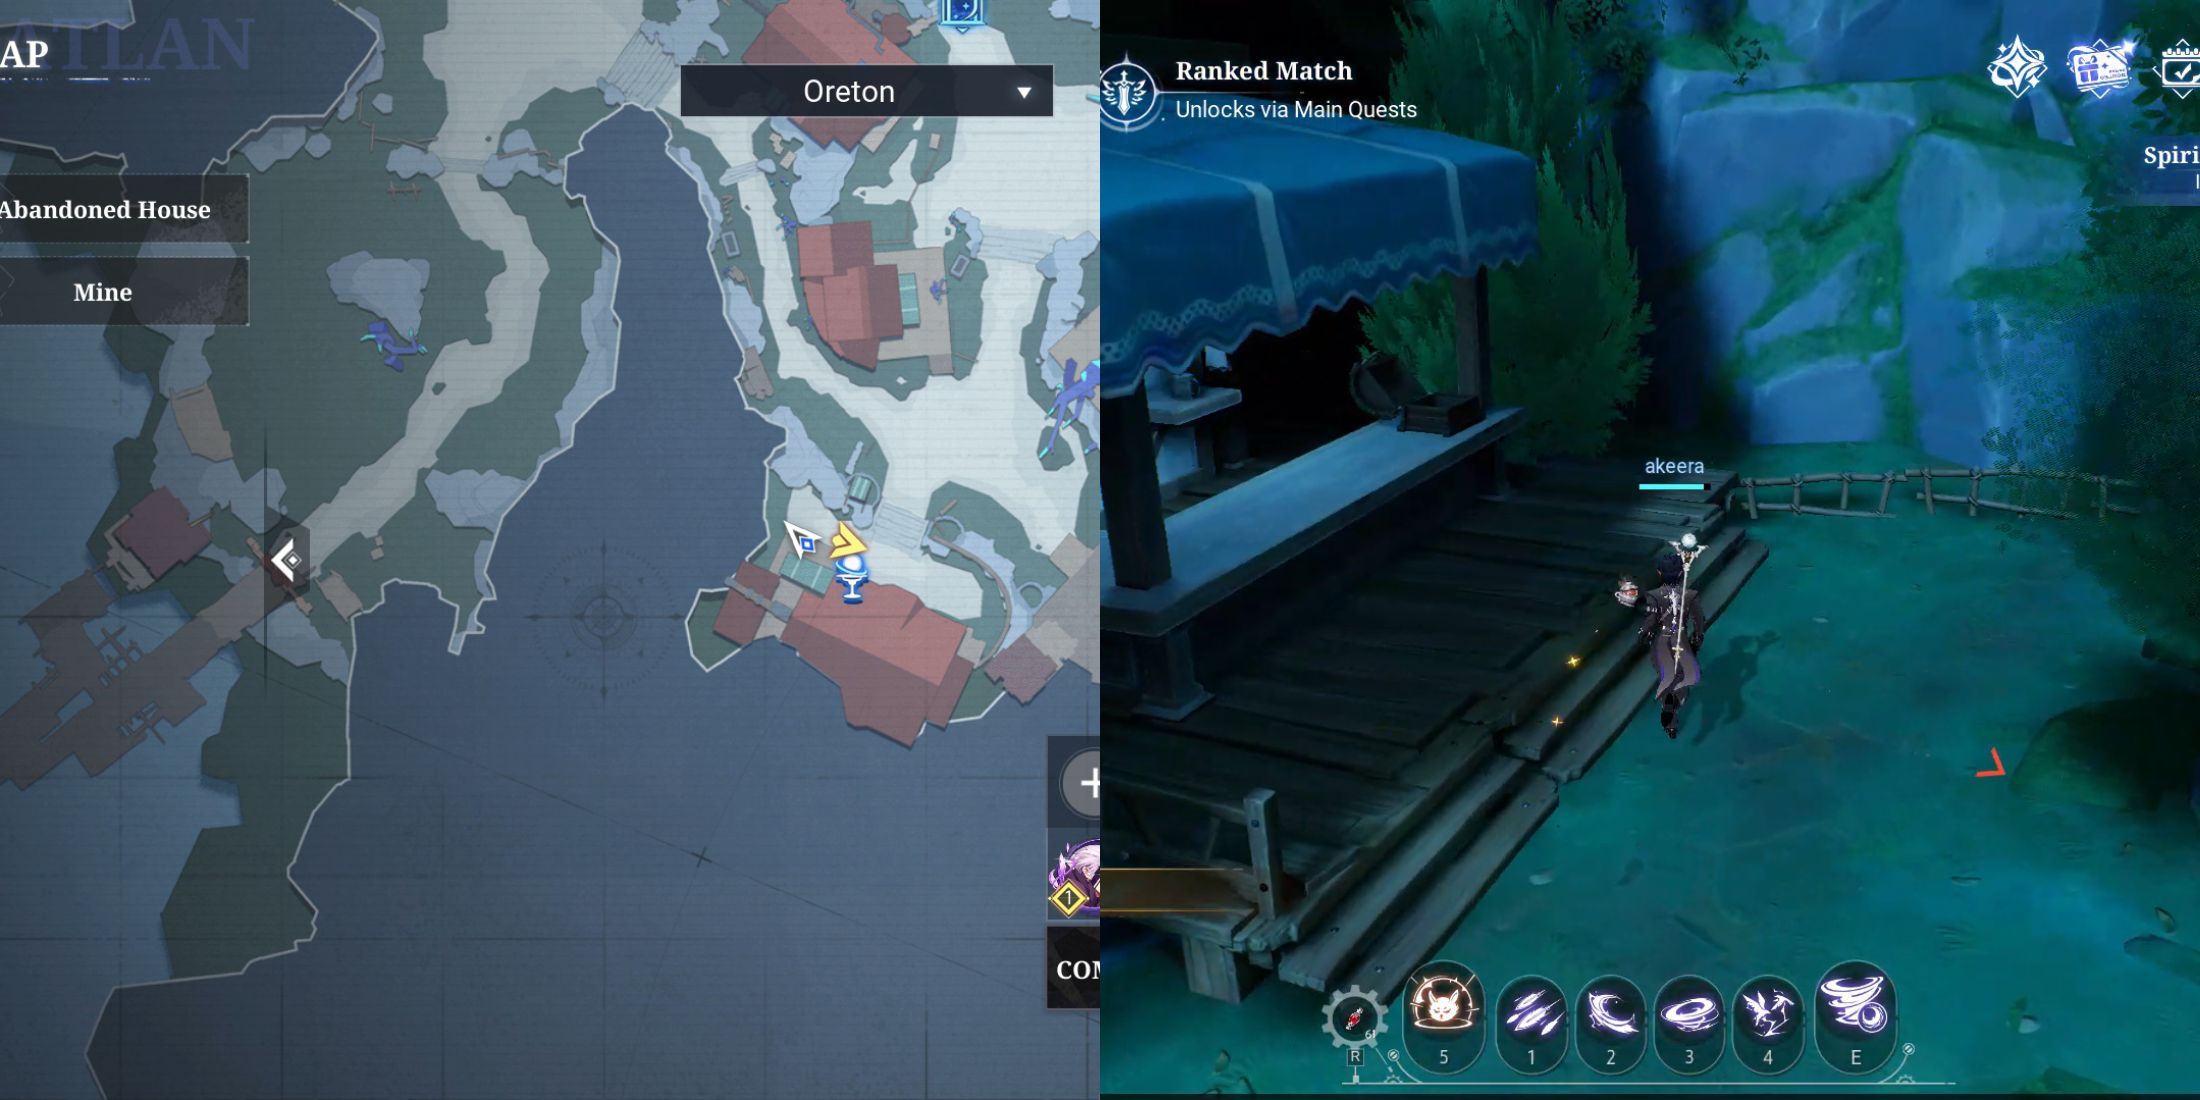
Here’s your clue for the next round: The hidden treasure is located in Oreton. To reach it, go to the Abandoned House teleport spot. If you look behind you, there’s a chest sitting on a table.
If you haven’t activated this teleportation spot yet, make your way to Oreton instead. After reaching Oreton, turn around and venture into the area known as Oreton Outskirts for exploration. Once inside this zone, proceed straight ahead past all the adversaries you encounter, and in the distance, you’ll find the Abandoned House teleport location.
Oreton Treasure Chest Location 2
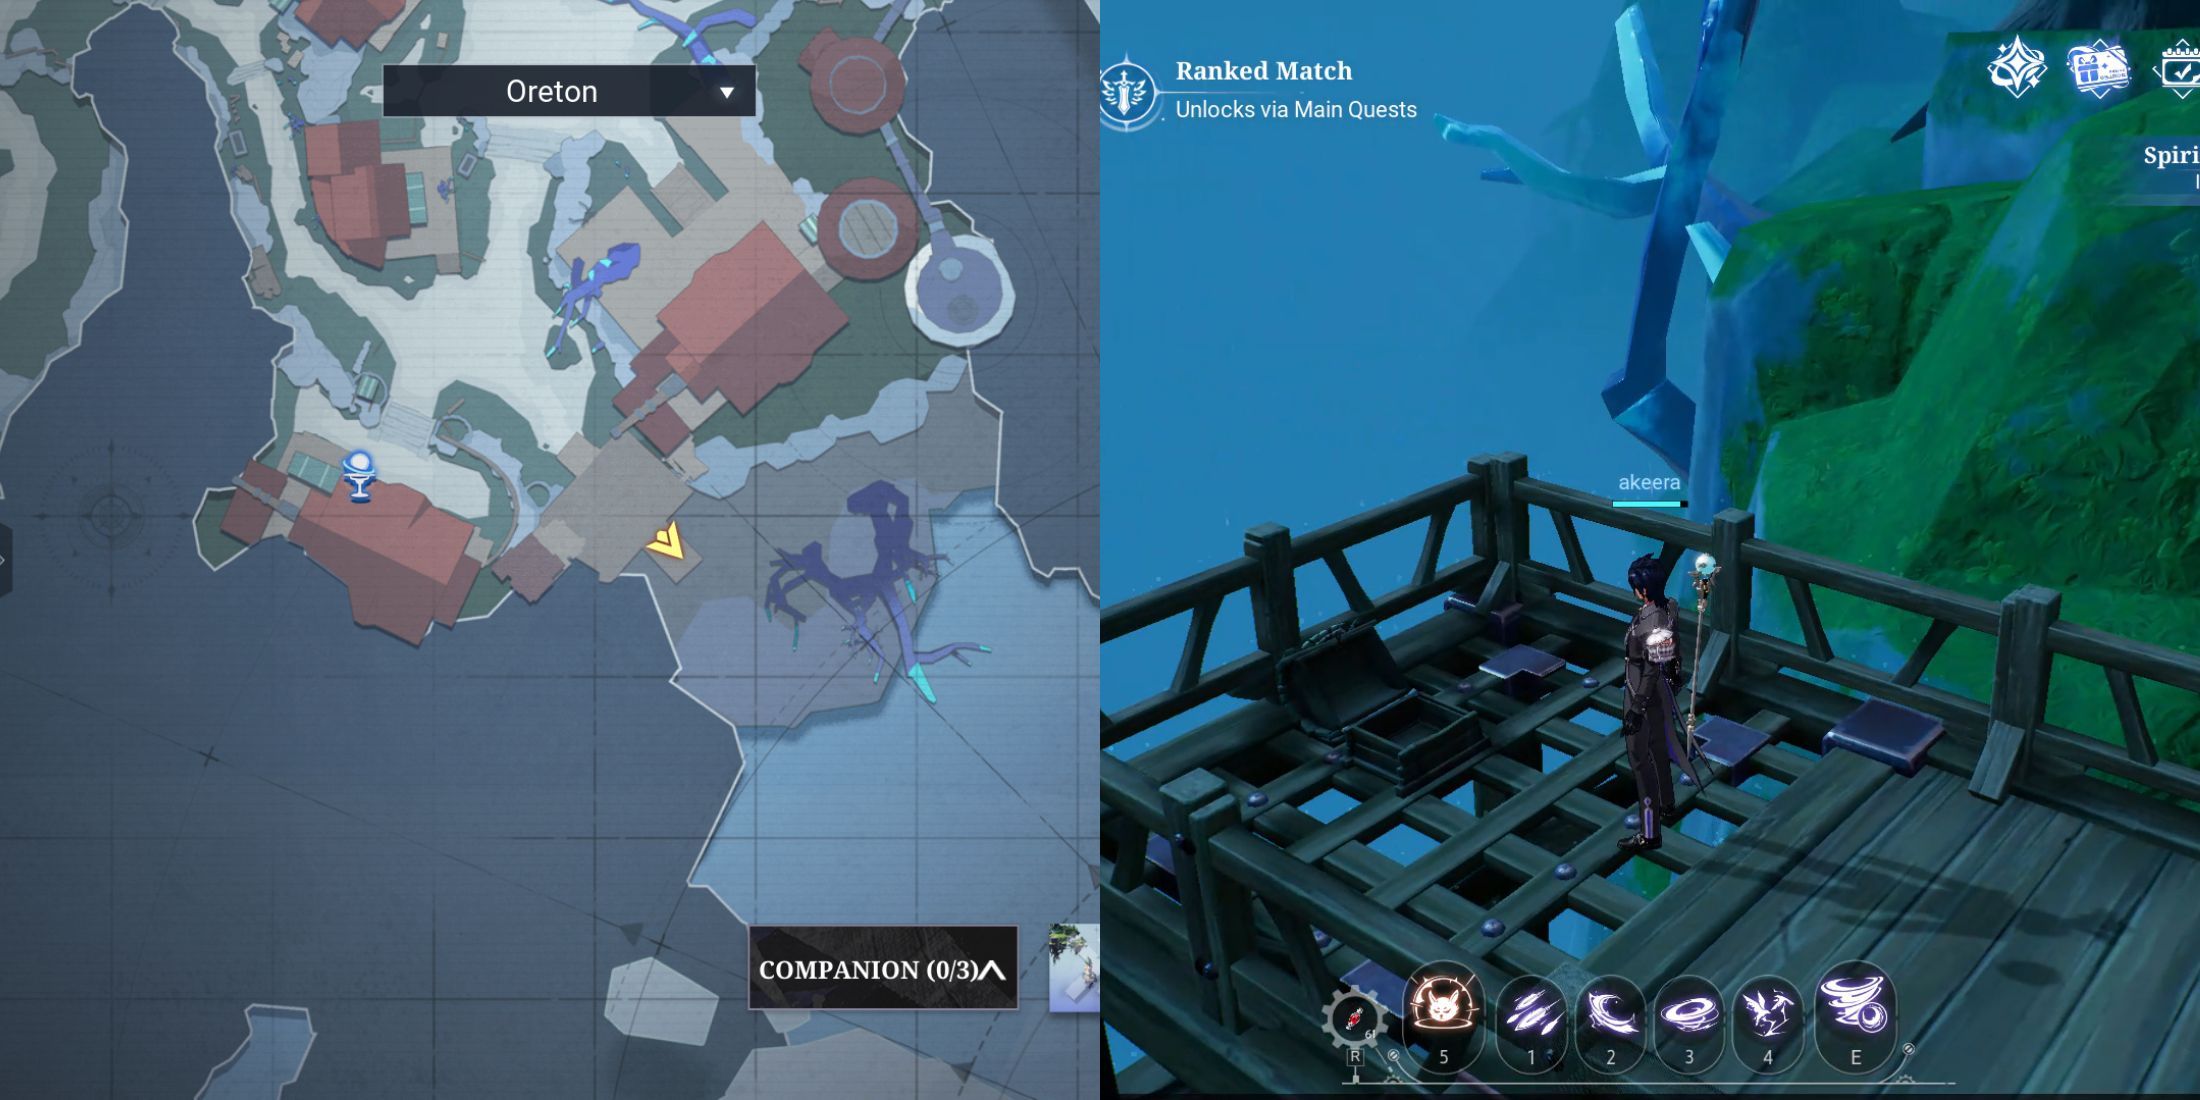
The following chest is very near the last one. Just spin around and make your way toward the distant wooden platform. You’ll find another chest at its end.
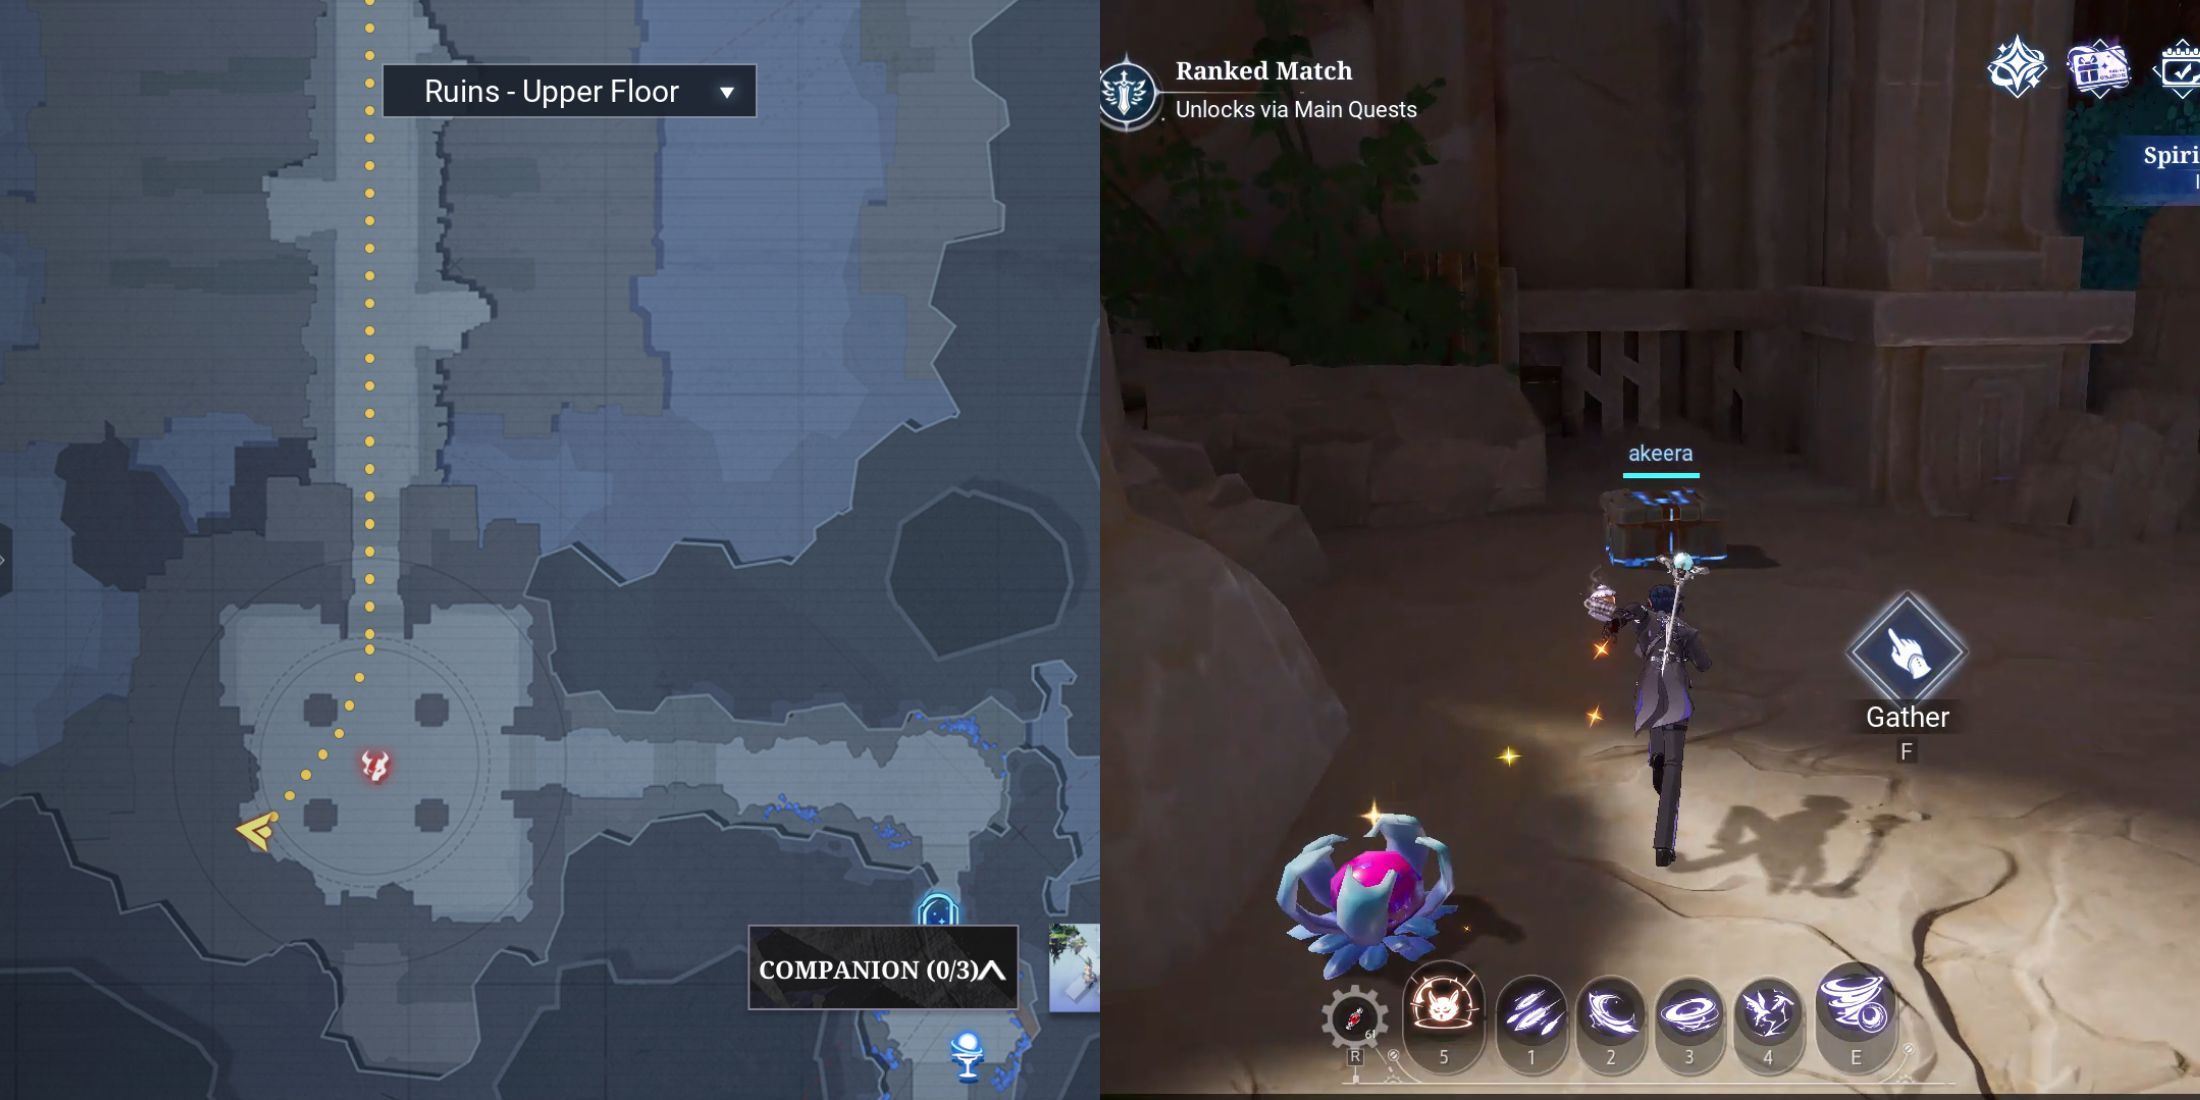
Oreton Treasure Chest Location 3
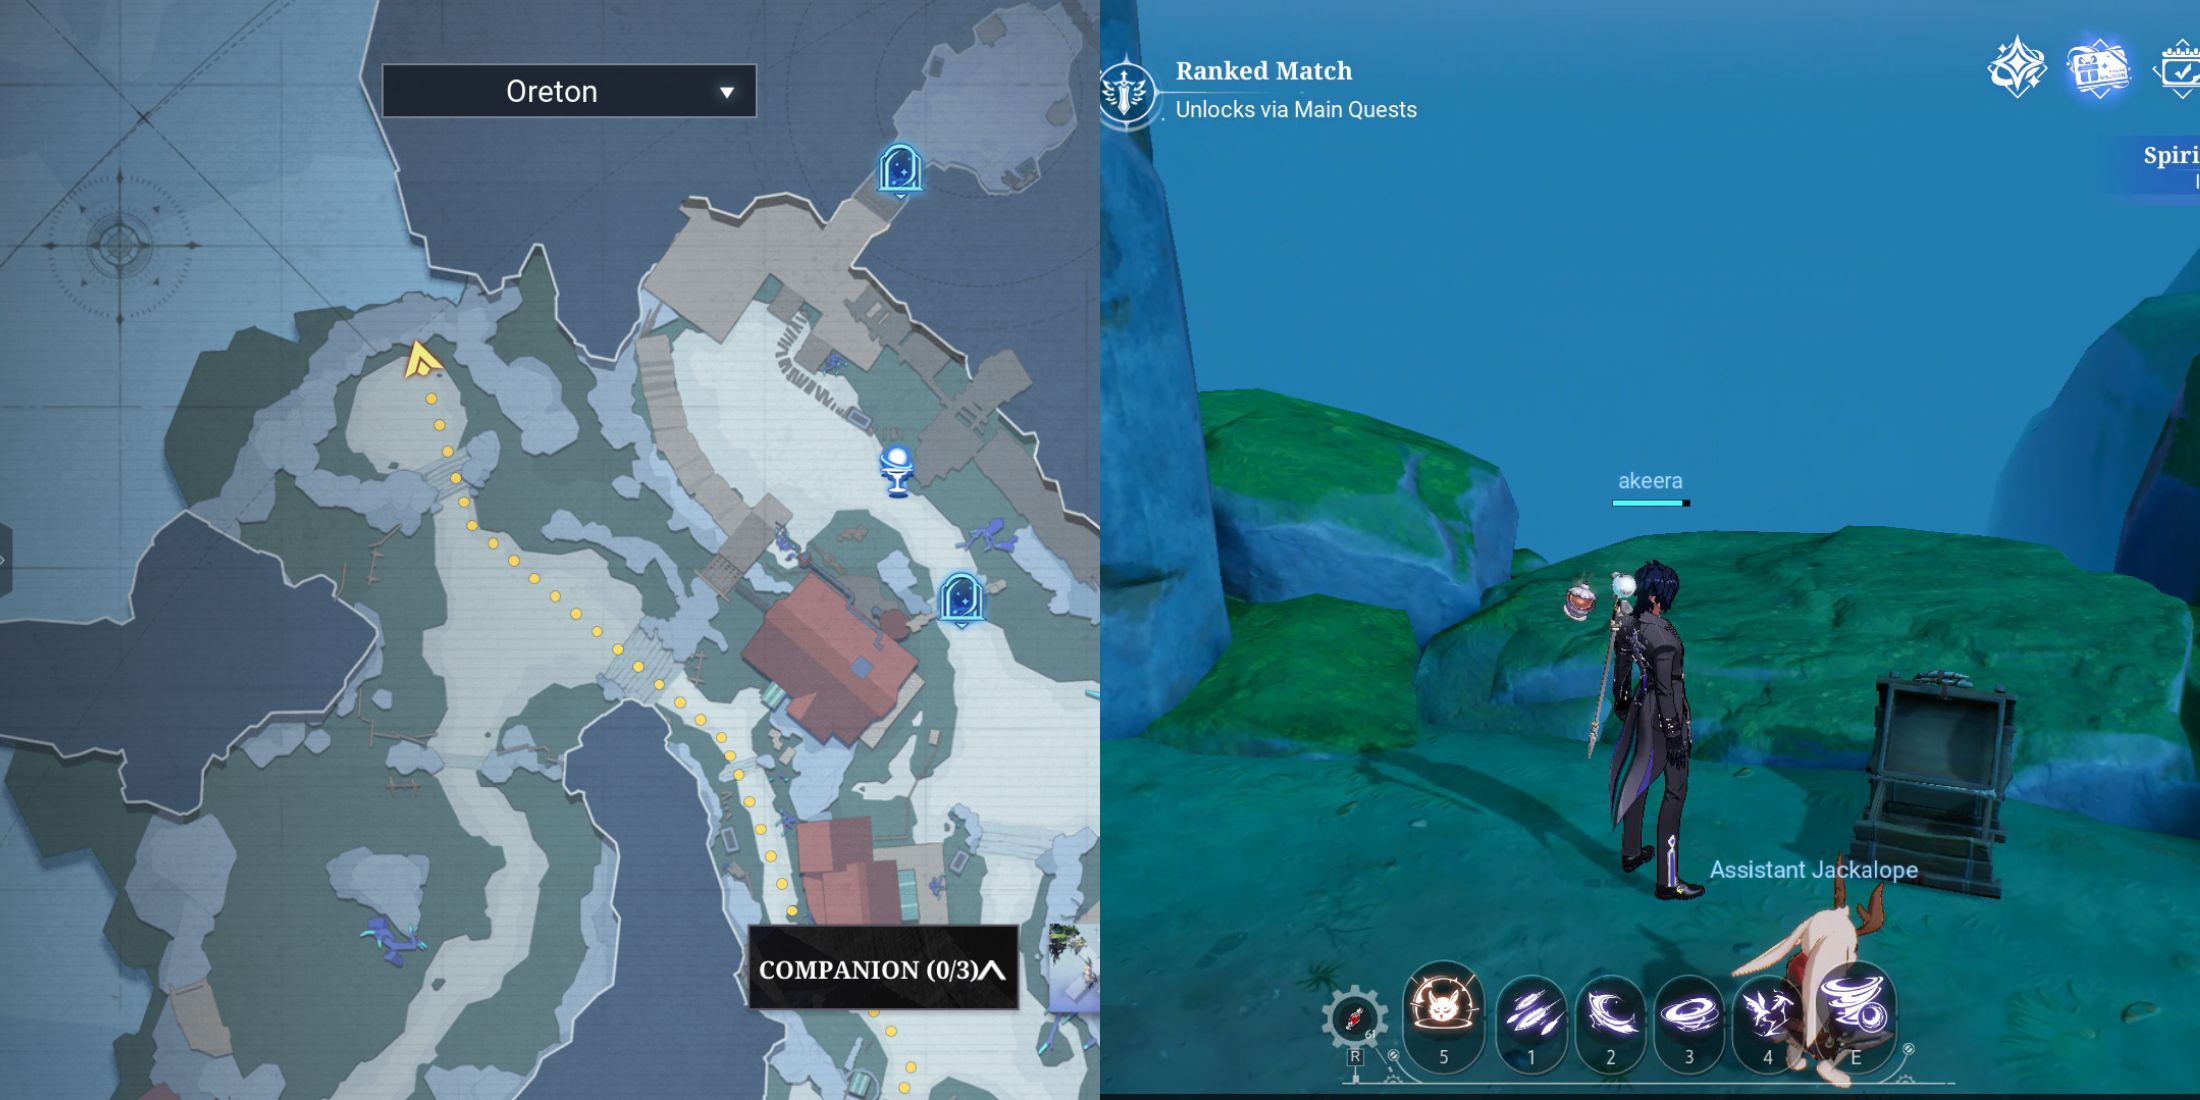
Moving on, the chest you’re looking for is located slightly further ahead and to your left. After you turn around, you’ll notice a path leading up to it. This path is narrow and lined with ore and adversaries. Overcome them and continue towards the distant stone pillar structure. The chest will be found right at its edge.
Oreton Treasure Chest Location 4
After grabbing the earlier discovered treasure, face the direction to your left, then proceed along the path ahead. You will spot a large rock with a blue-leafed tree atop it. Ascend this rocky formation to uncover another hidden treasure.
Oreton Treasure Chest Location 5
Moving forward, you’ll find yourself near the subsequent chest after passing by all the adversaries and heading towards the wooden construction. At the end of your journey, you’ll discover the chest hidden there. However, it’s possible that you may have already obtained this chest during the main storyline mission.
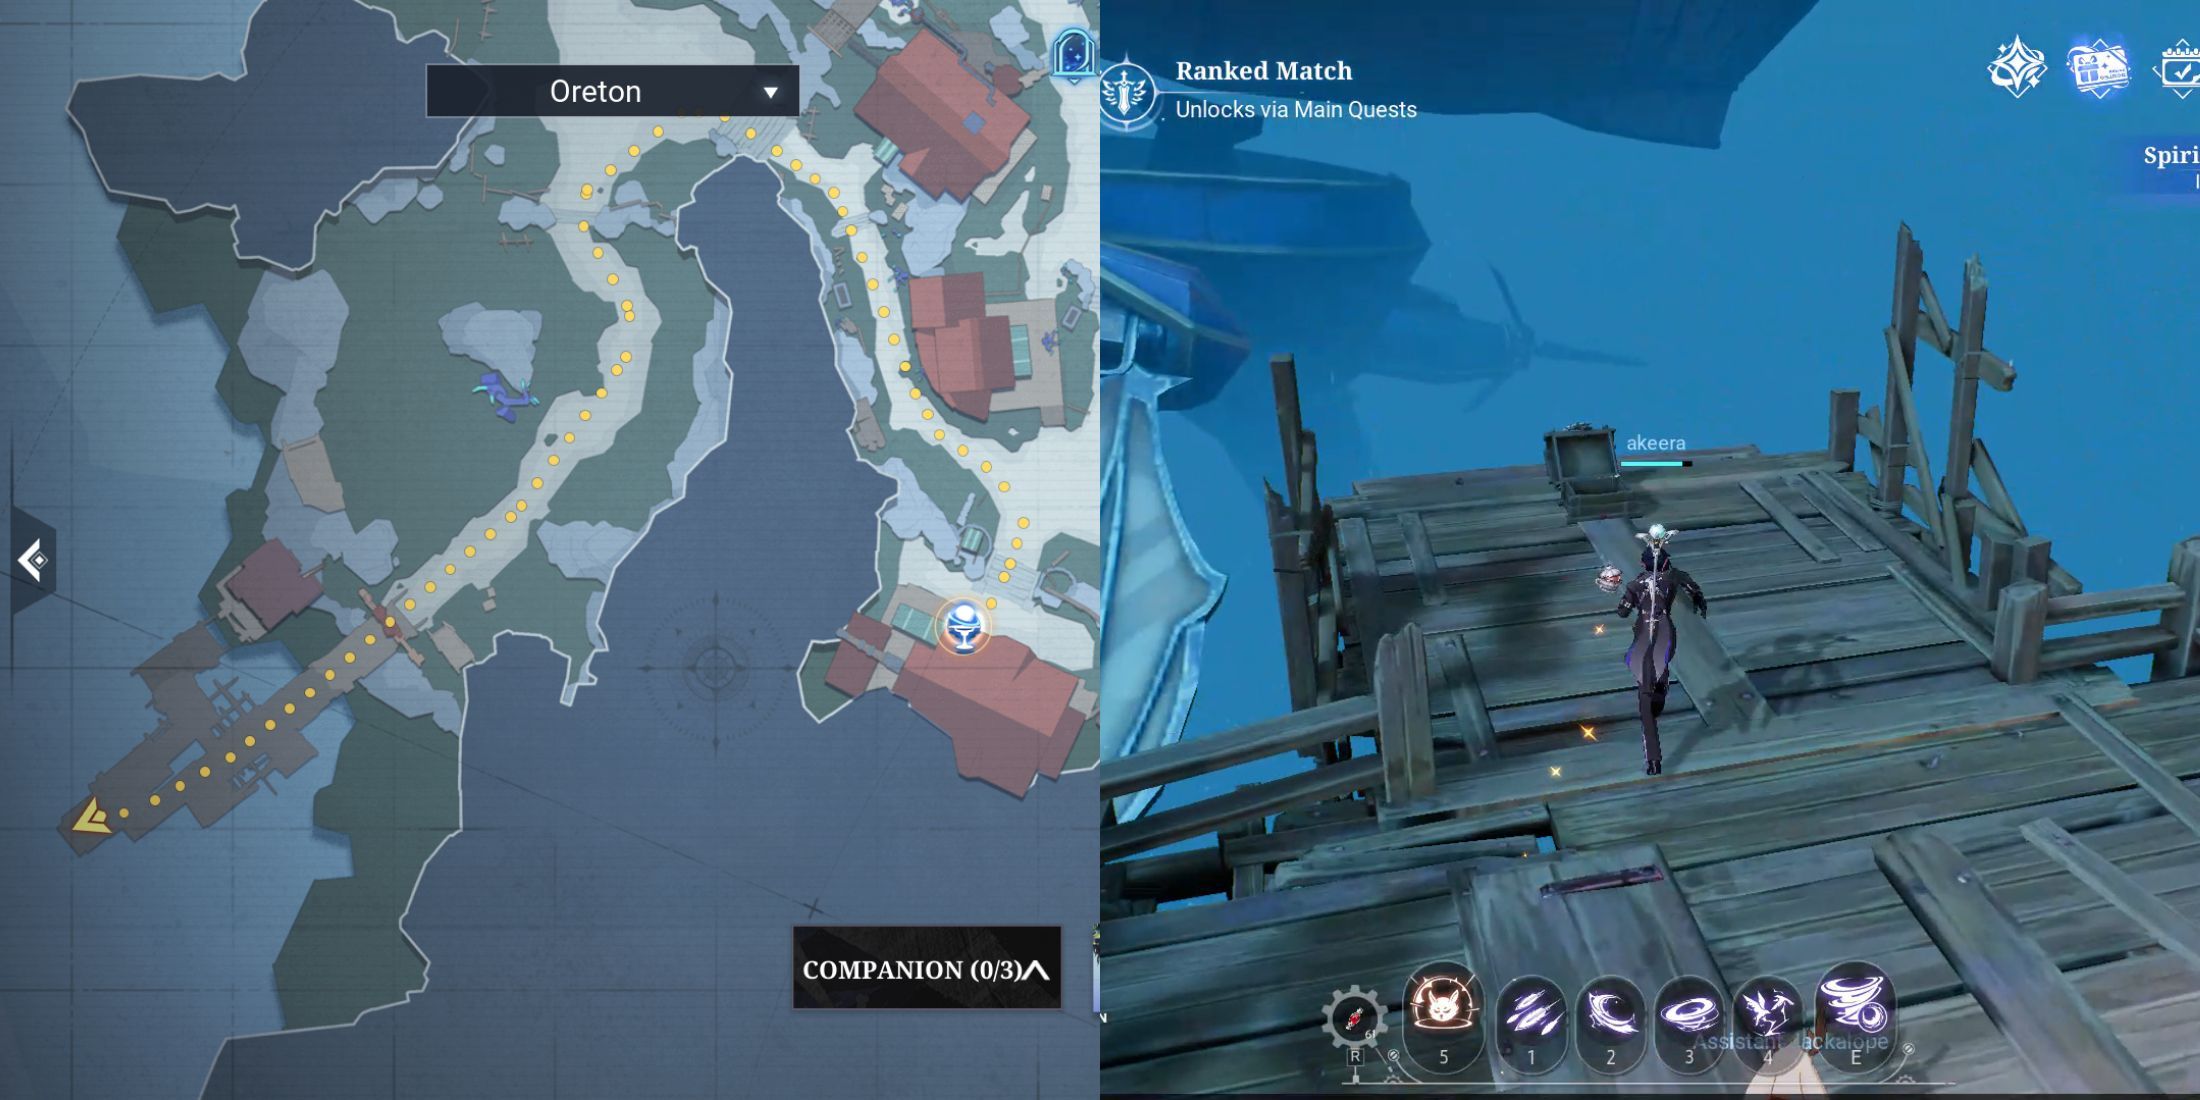
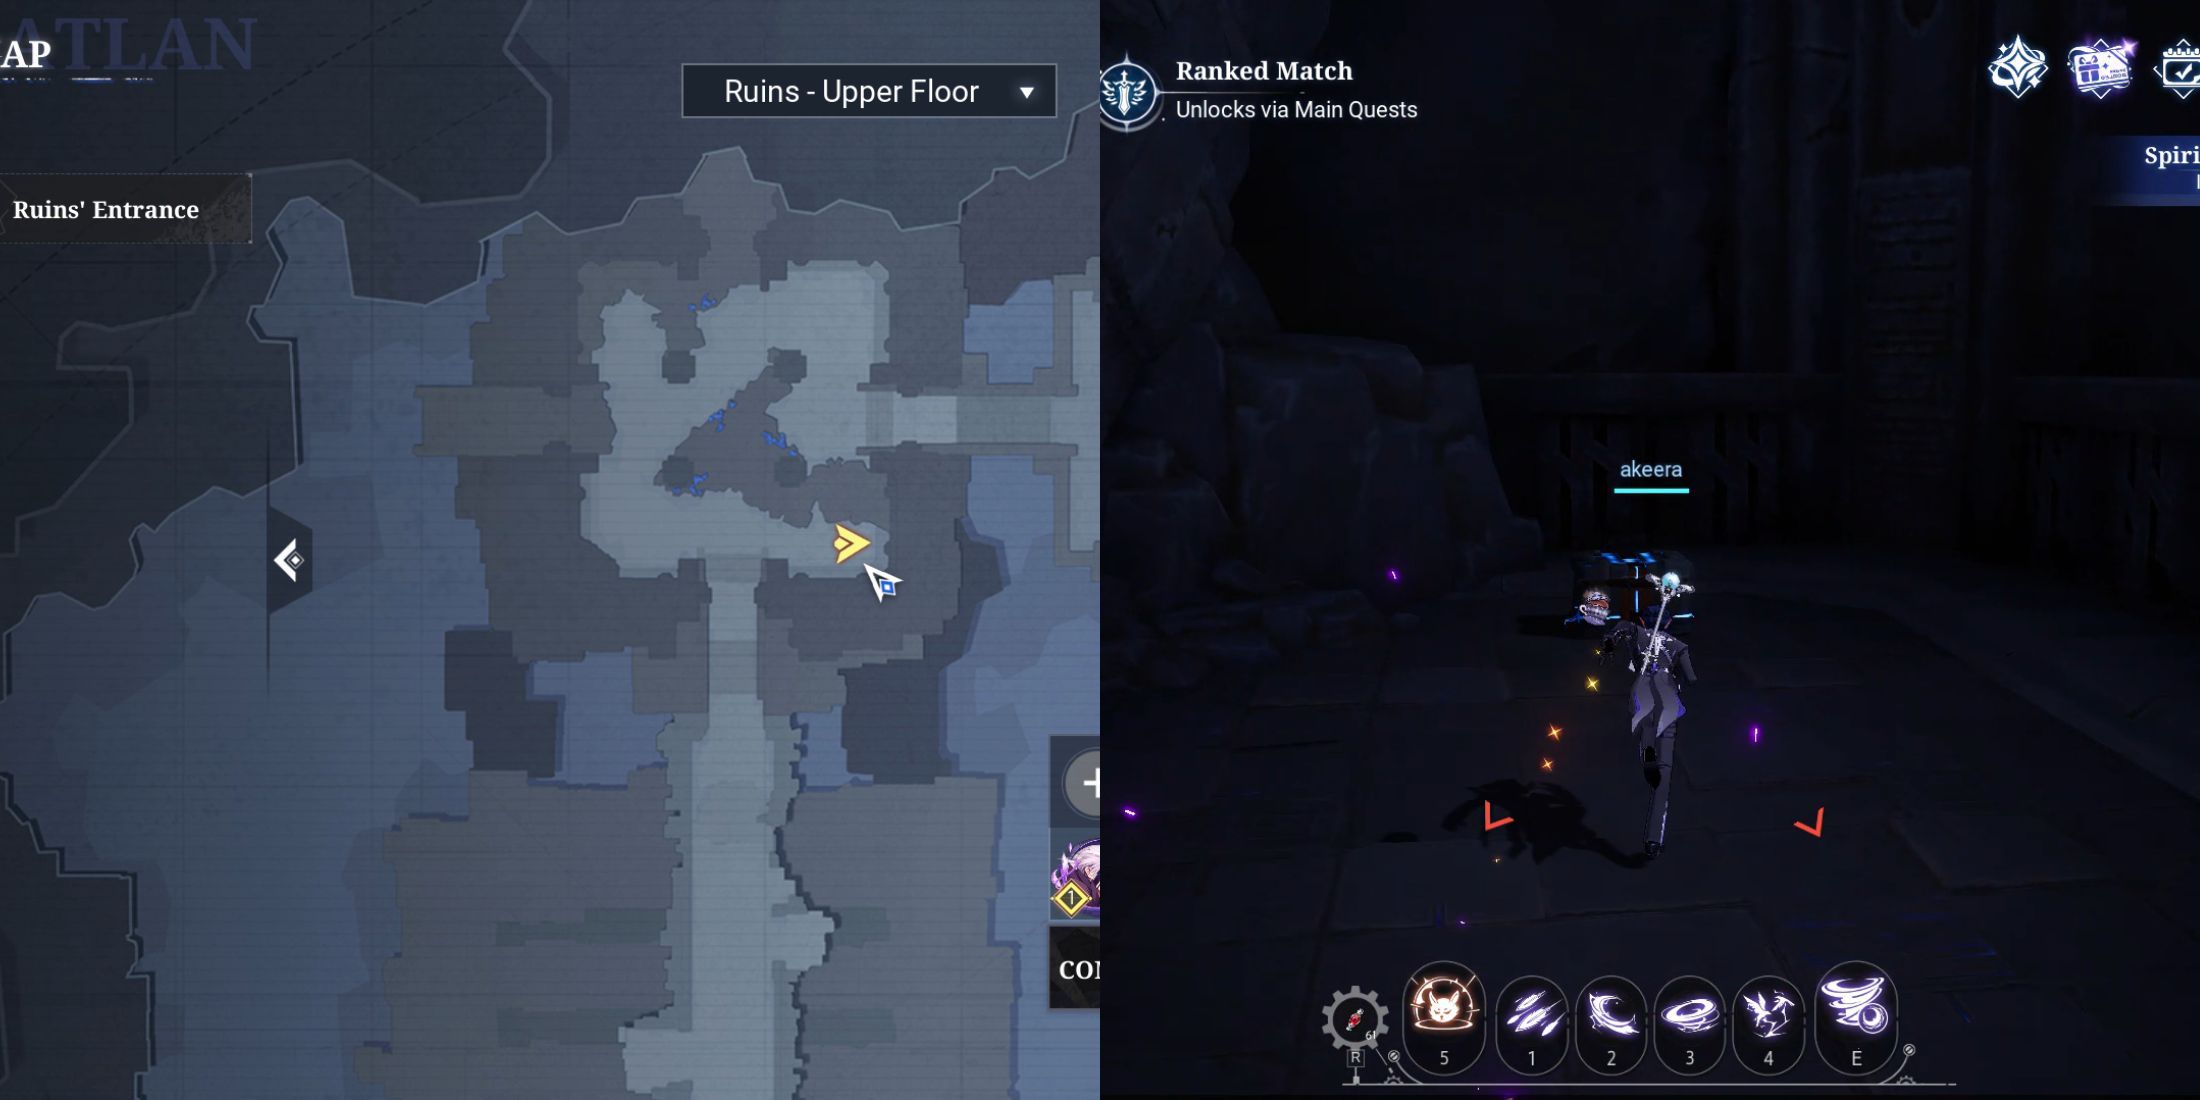
Oreton Treasure Chest Location 6
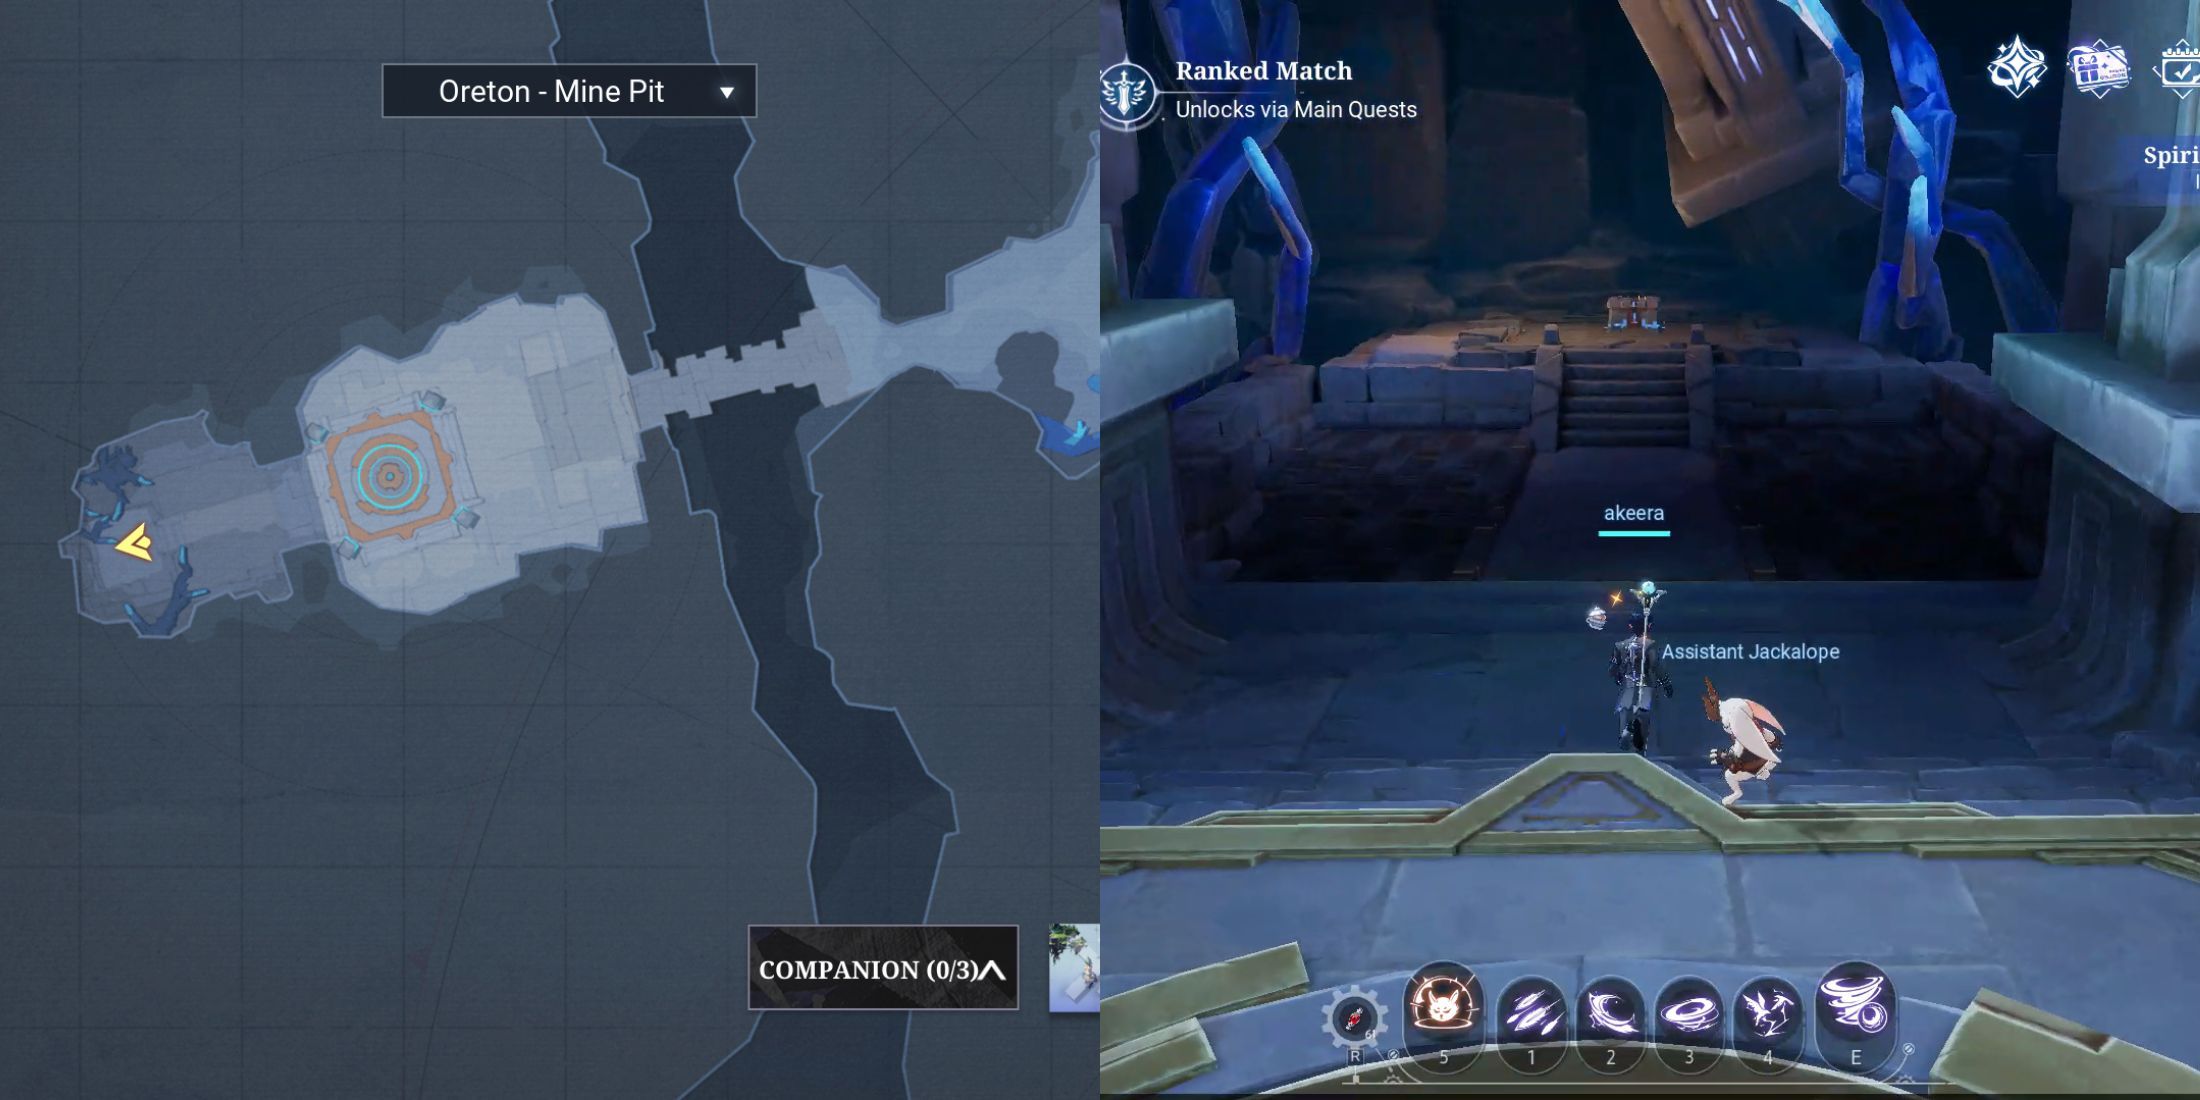
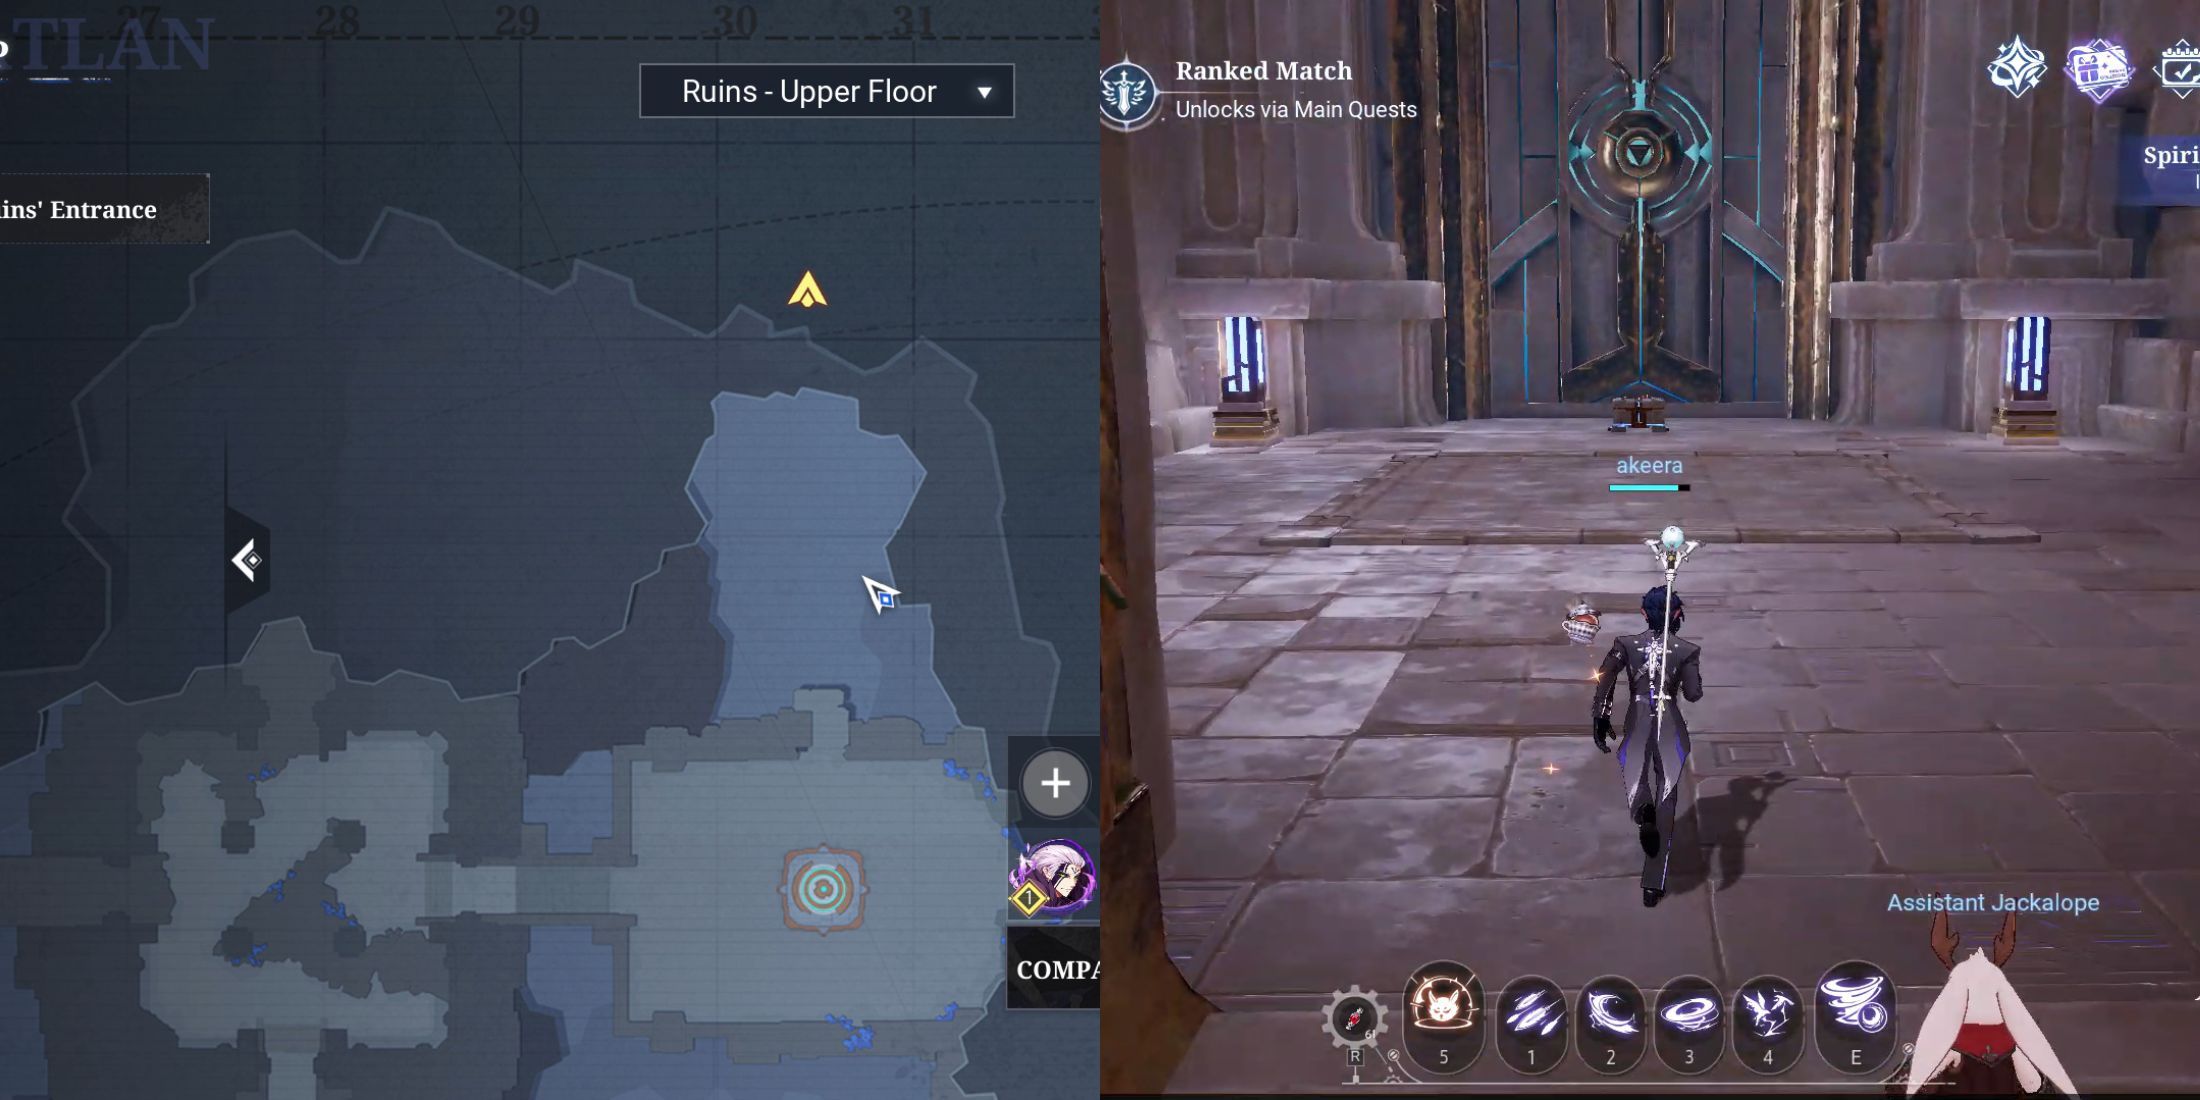
The treasure chest can be found within Oreton’s Mine Pit, a location that presents a minor enigma for unlocking. Reaching this spot is generally straightforward. Make your way towards the exploration zone at the entrance of the mine, which is situated close to the Ruin Entrance teleport point. Upon entering, continue straight and you’ll return to the boss arena. Pass through it and cross the bridge to delve further into the mine.
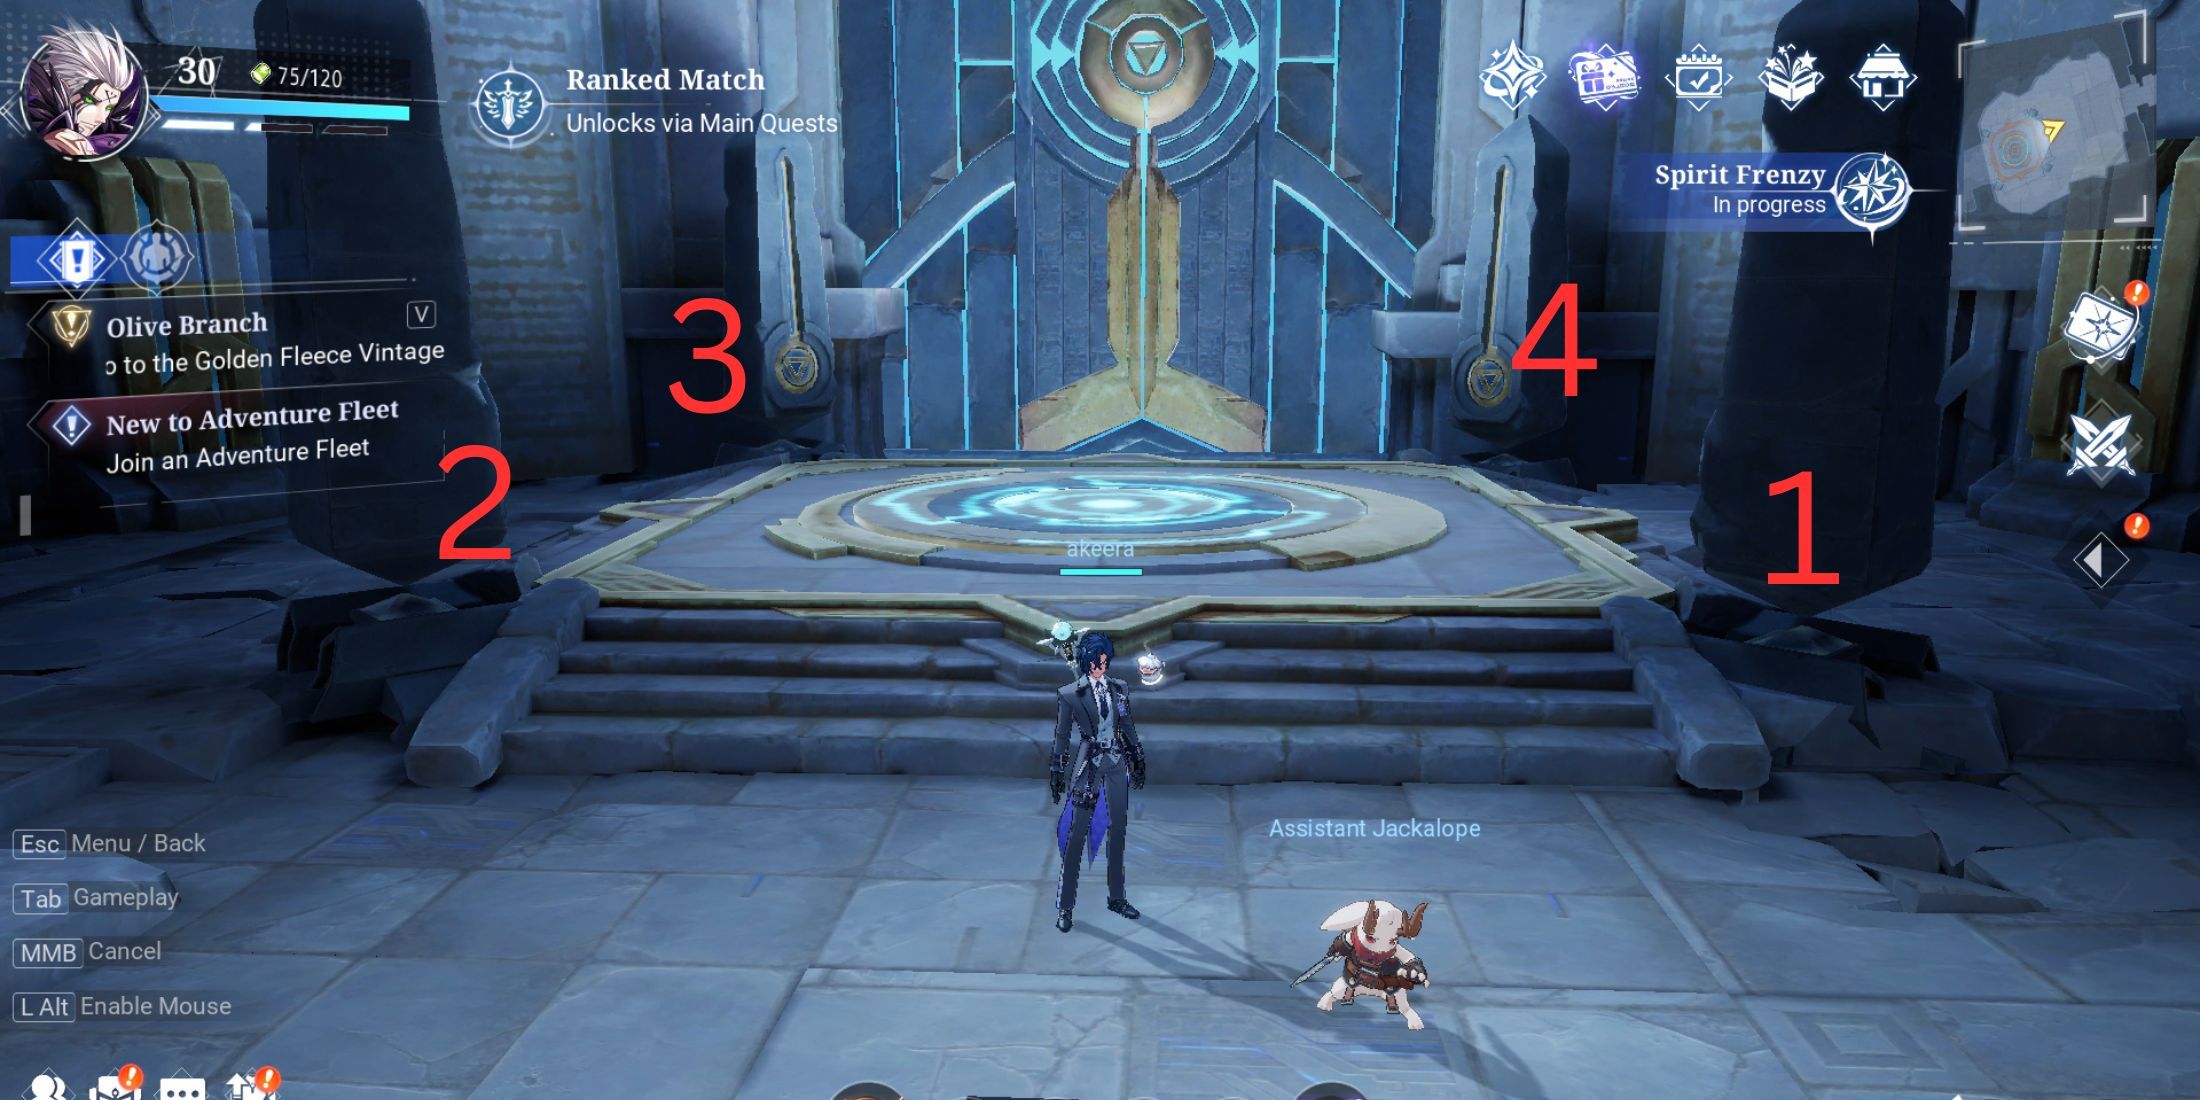
Now, you’ll see four pillars positioned in front of a large door, with an elevator situated among them. To unlock this door, you must follow the sequence of activating the pillars. Begin with the one right next to you and move counter-clockwise to activate each one in turn. Once activated correctly, the door will open, allowing you to enter and claim the chest sitting on the pedestal inside.
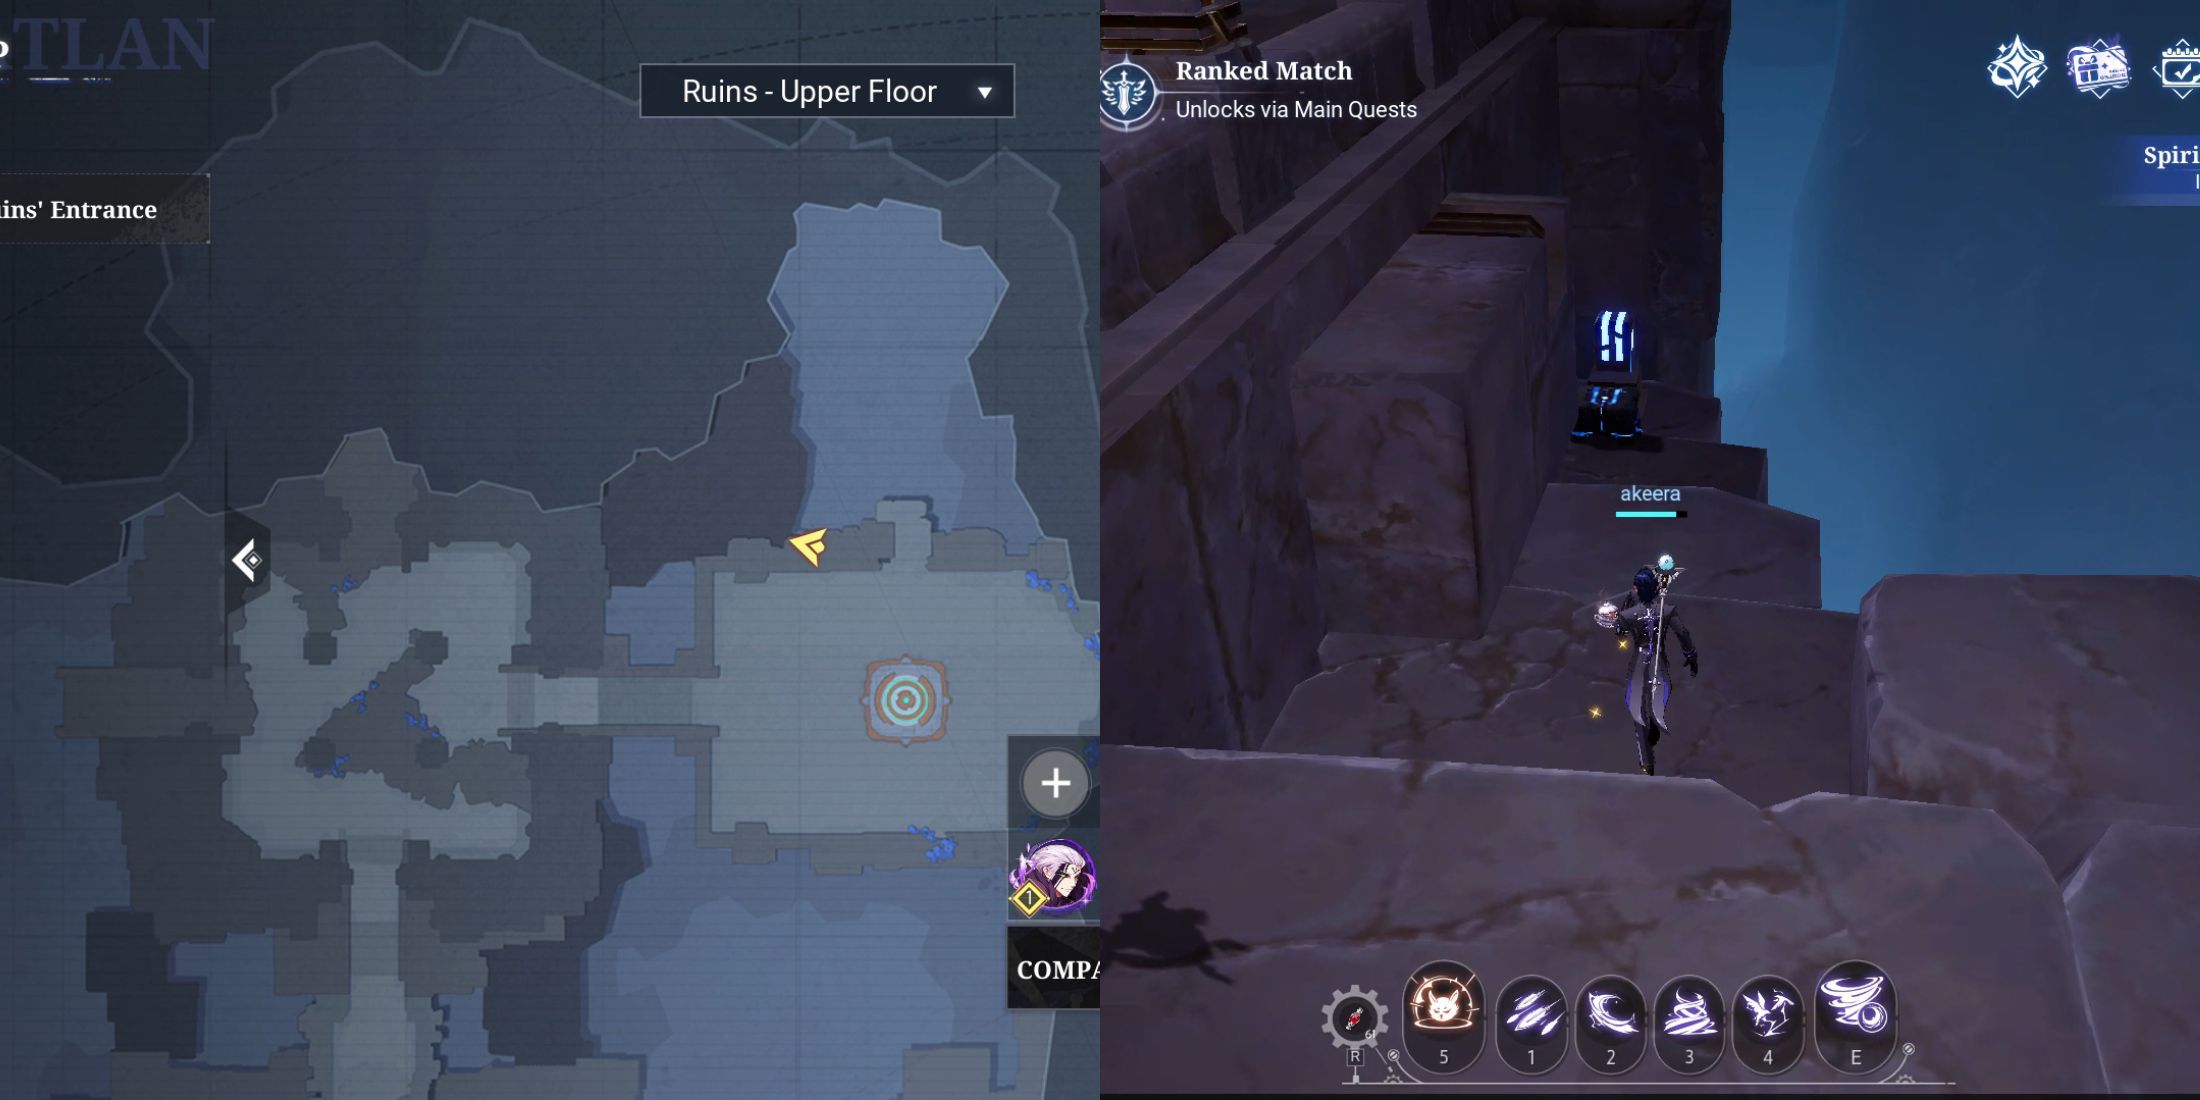
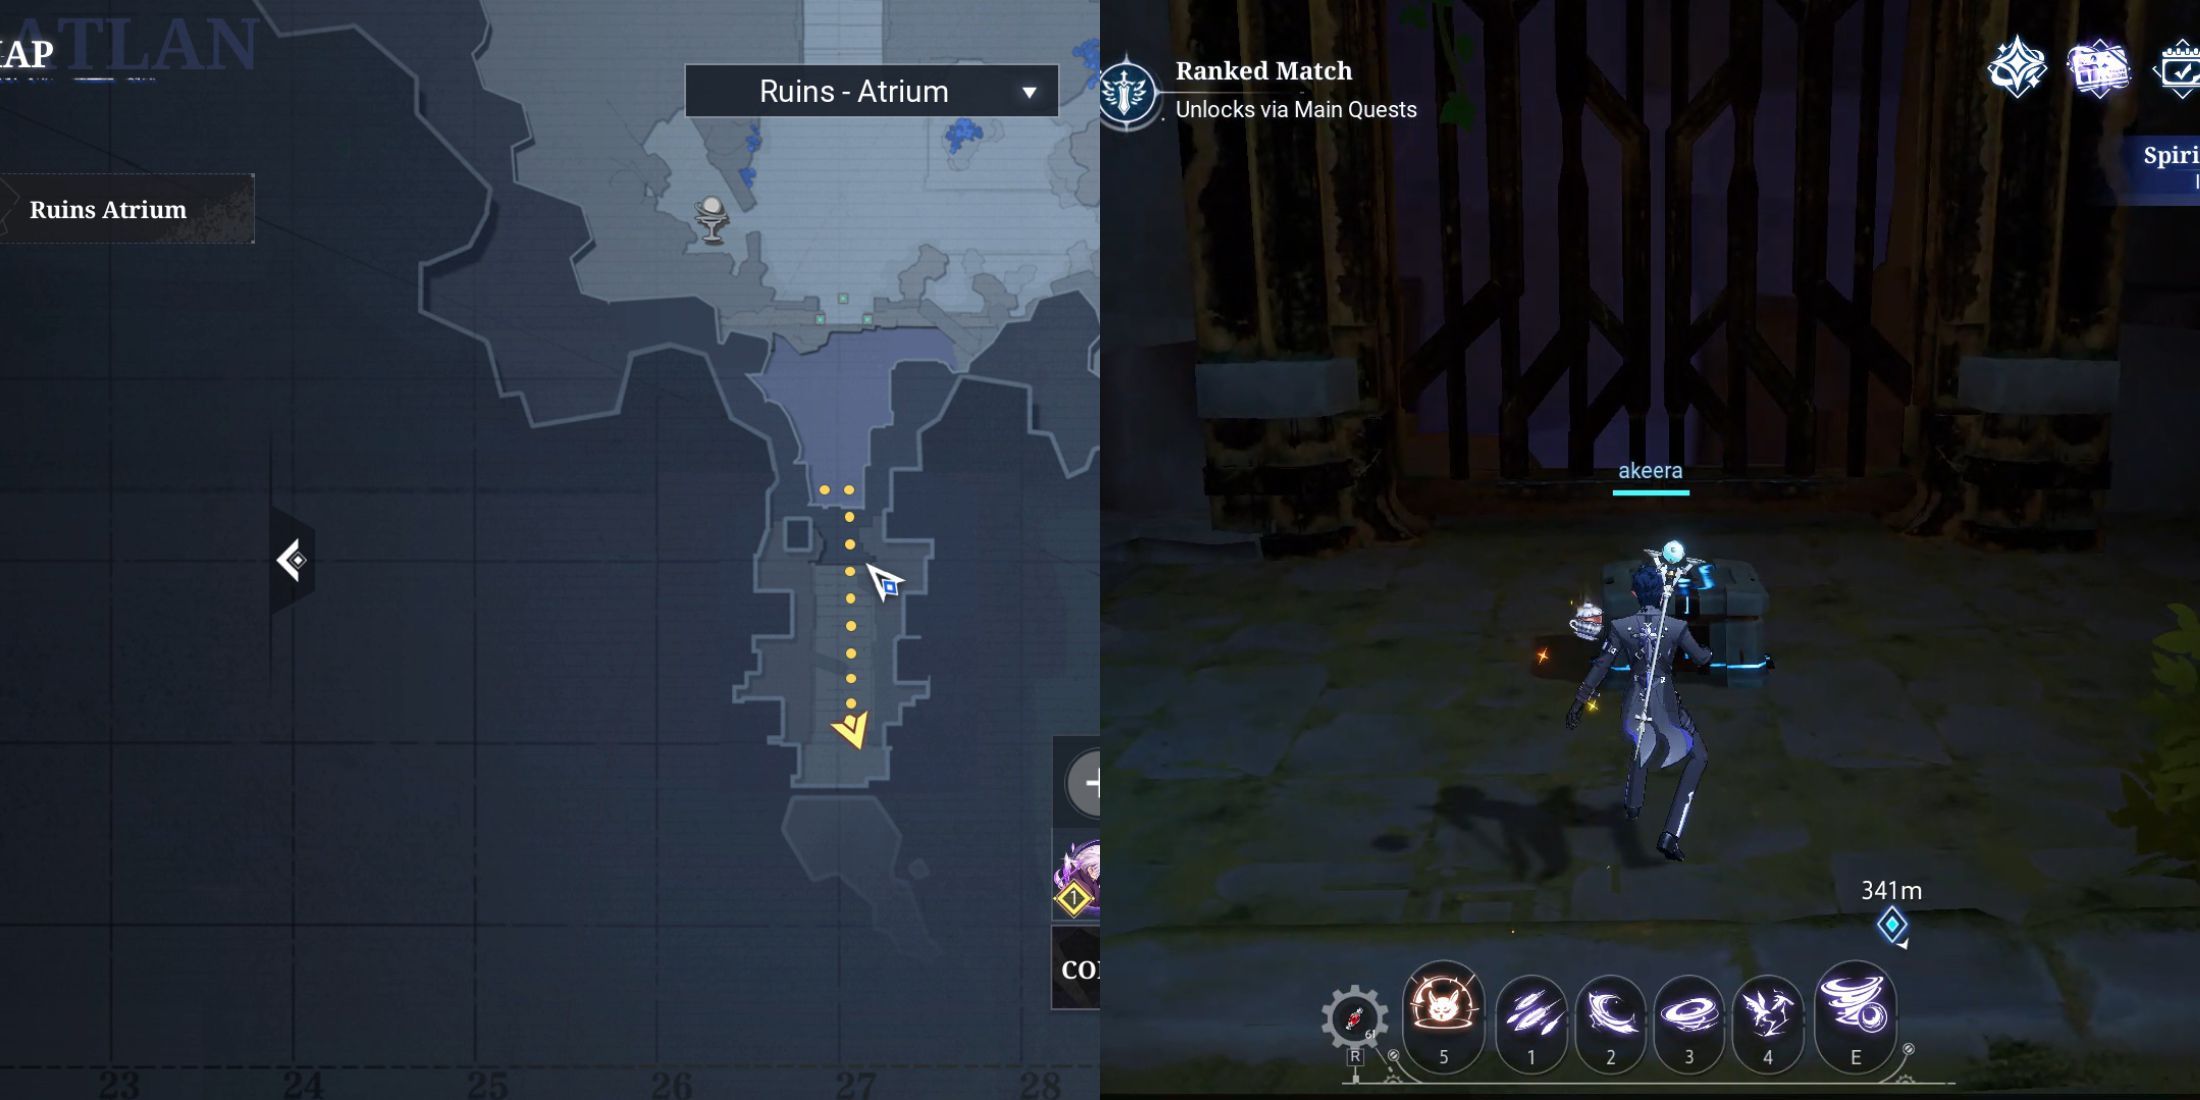
Oreton Treasure Chest Location 7
Once you’ve picked up the last chest, spin around and make your way back to the elevator. You’re headed for the lower part of the mine where this chest is hidden. Follow the corridor and you’ll eventually reach a winding area filled with mechanical adversaries. From the entrance, go straight initially, then right, down the stairs, left again, right once more, and finally take another right towards the enemy at the very end. The chest will be positioned behind it, so there’s no need to battle it. Just move swiftly and dodge their attacks.
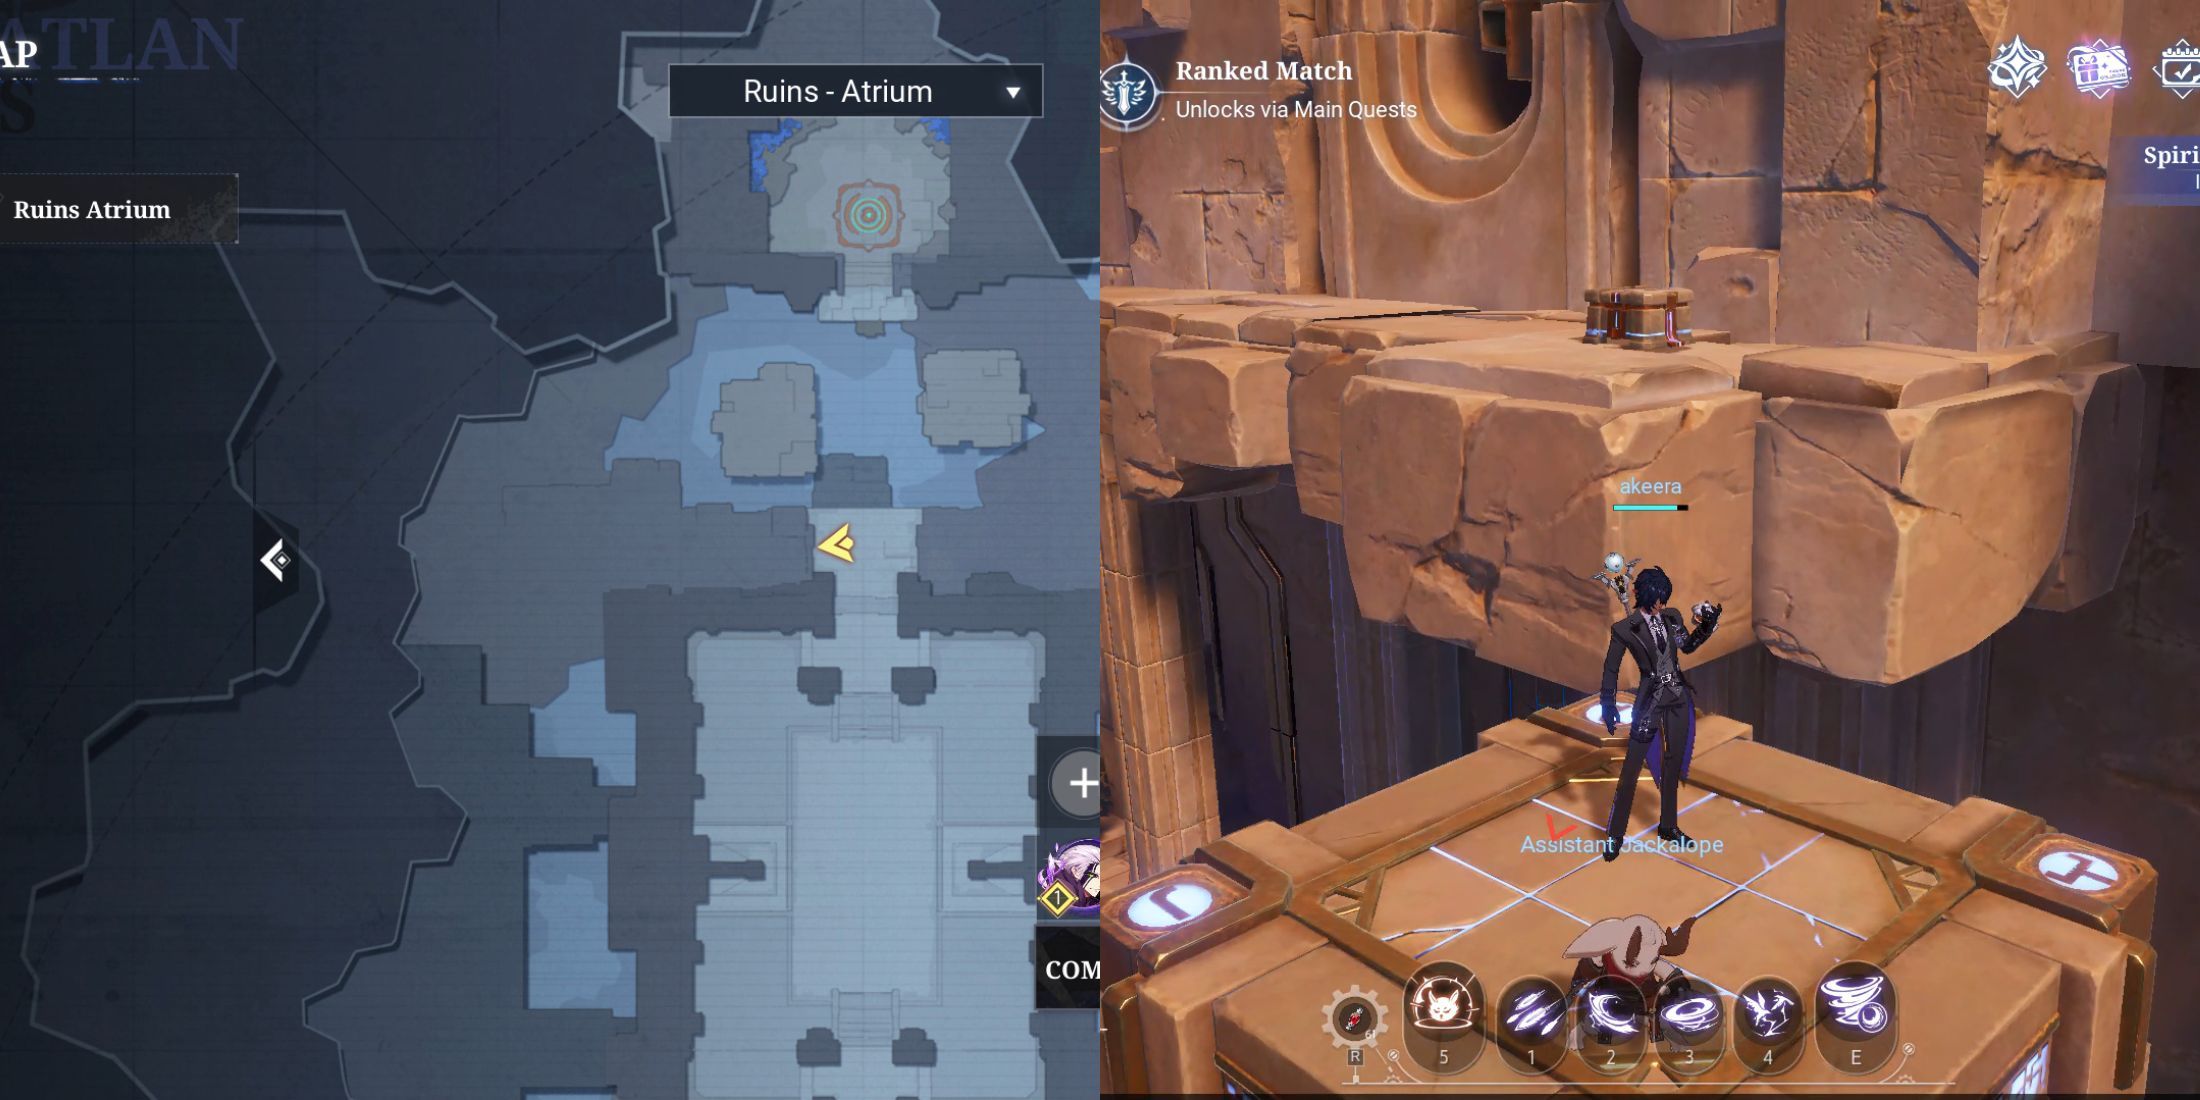
Oreton Treasure Chest Location 8
After obtaining the earlier treasure, make your way to the subsequent location known as the Mine Ruins. Advance forward and you’ll come across an exploration area located at the base of the staircase. Proceed until you reach the end, and you’ll spot a chest positioned on the left side.
Oreton Treasure Chest Location 9
The chest might blend in with the dark surroundings, so it’s important to stay vigilant while searching for it, as hostile forces will immediately appear upon entering the following room. To locate it, start by exiting the current room and making your way towards the enemy-infested bridge. Once you reach the other side and pass through the doorway, the chest will be directly on your right.
Oreton Treasure Chest Location 10
Once you’ve taken possession of the previous chest, spin around and proceed along the path in the newly discovered chamber until you find the exit. This will lead you into a vast arena. From here, make your way to the floating rocks on the left side which are located at the edge. The treasure chest you seek is nestled against the wall on that same side, so simply navigate towards it and claim your prize.
Oreton Treasure Chest Location 11
Afterward, utilize the drift stones nearby to navigate towards the subsequent chamber. To make progress swiftly, try jumping and dashing when needed. The treasure is located at the farthest end.
Oreton Treasure Chest Location 12
After acquiring the chest above, retrace your steps since your next destination is on a lower level. Utilize the same technique of jumping and dashing to propel yourself towards each floating stone. If you double jump, it will initiate a roll that can boost your movement forward. Once you reach the top, navigate to the center and ride the elevator down instead.
To reach your destination, proceed directly forward and then turn left. You’ll spot a blue panel on the floor. Stand on it to trigger the bridge, and then traverse it. After that, you’ll see some stairs ahead; climb them to uncover the treasure chest.
Oreton Treasure Chest Location 13
After reaching the north direction from the map, spin around and retrace your steps back. Continue straight ahead once you’ve reached the starting point, and you’ll find yourself at the opposite end of the area. The big door will open by itself, so keep moving forward until you come across an area with levitating platforms. Be patient and wait for a platform to lower to your level before jumping on it. This platform will carry you up to a wall parapet where you can find the chest waiting for you.
Read More
- All Shadow Armor Locations in Crimson Desert
- Dark Marksman Armor Locations in Crimson Desert
- Sega Reveals Official Sonic Timeline: From Prehistoric to Modern Era
- How to Beat Antumbra’s Sword (Sanctum of Absolution) in Crimson Desert
- Genshin Impact Dev Teases New Open-World MMO With Realistic Graphics
- Where to Pack and Sell Trade Goods in Crimson Desert
- Top 5 Militaristic Civs in Civilization 7
- The Limits of Thought: Can We Compress Reasoning in AI?
- Enshrouded: Giant Critter Scales Location
- Best Weapons, Armor, and Accessories to Get Early in Crimson Desert
2025-05-30 12:04