Title hunter: “Monster Hunter Wilds” by Capcom has been released globally as the latest installment of the Monster Hunter series. If you’re new to the game, this beginner’s guide is designed to help you make the most of your initial playtime in Monster Hunter Wilds. For seasoned players who have spent plenty of time with previous games, I’ve included some updates on changes Capcom has made to certain features in Wilds. Rest assured, there will be no spoilers in this guide.
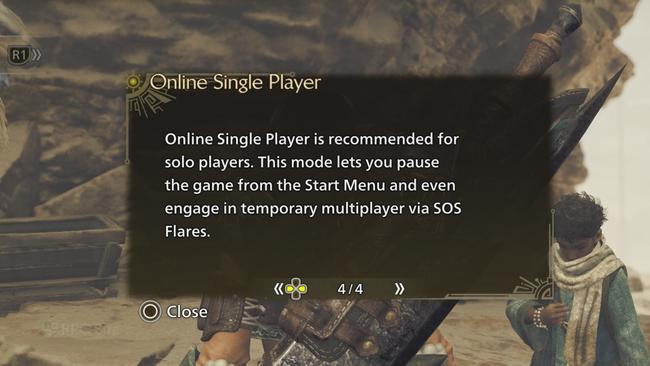
What mode to choose when starting Monster Hunter Wilds: Online Singleplayer or Lobby?
In Monster Hunter Wilds, when the servers are active, you’ll be given options to enter a game via Recommended Lobby, Private Lobby, search for a Lobby, or opt for Online Single Player. If you prefer playing alone but would like assistance in quests, choose Online Single Player. This mode keeps you connected online, allows you to pause the game (yes, it’s possible here), and lets you call for help from NPC hunters or real players using SOS. Select this mode if you want to explore most of what Monster Hunter Wilds has to offer on your own.
To enjoy a game with strangers, acquaintances, or specific friends, consider utilizing the Suggested Room, establishing a Personal Room, or locating a friend’s Room using the search feature. It is essential to note that Lobby IDs are case-sensitive, but they can be cross-platform compatible based on the settings applied during their creation.
Monster Hunter Wilds settings to change on PC and console
Although they aren’t mandatory, certain settings can significantly enhance your gaming experience based on your chosen platform. To start off, I advise visiting the Display Settings and tweaking the Brightness. The preset values could make the game appear overly dull on your monitor. I’ve found that this can differ quite a bit depending on the screen you’re using. This section also allows you to adjust the maximum frame rate, however, you cannot modify the game’s performance settings while you have a save active. You can only do so from the main menu.
It seems like the background music in Monster Hunter Wilds is somewhat quiet even with the default volume settings. To resolve this, I had to boost the BGM all the way up to 100, while keeping the other sliders between 75 and 80. Keep in mind that these settings may differ based on personal preference. Similarly, you should adjust the Master Volume according to your own taste.
– Adjust your camera speed, I prefer using 10 and 15 sensitivity.
– For dash controls, give both L3 and R1 a try.
– Set your Camera Distance to Zoom, I usually set it at 10.
– To activate the motion sensor, go to the fourth page in the Camera Options and toggle on the gyro feature.
The customization option I advise tailoring to your liking is the Button Layout in Controls. I’ve personally set it to Type 2, which isn’t a setting often talked about but can significantly enhance your gaming experience depending on whether you’re more accustomed to using a d-pad from past games or prefer the radial menu.

Create loadouts and use the radial menu in Monster Hunter Wilds
For seasoned players of the game, they might not find the radial menu appealing or preferable, but in my opinion, it significantly enhances the series. It allows for easy mapping of various items such as traps, health restoratives, recovery aids, flash bombs, and even multiplayer messages or stickers.
To customize your equipment setup, or loadouts, even if you don’t have enough desired items during the initial storyline in lower ranks, consider setting up a configuration for your items. You can accomplish this at any Tent (including temporary ones or at camps) by choosing ‘transfer items’, then ‘item pouch’, and lastly pressing the left analog stick. This is where you can save your current item pouch contents as a loadout. Additionally, you can replenish items from this menu. These features may not be explicitly explained in the game, but they can prove to be quite beneficial.
Don’t grind during the main story in Monster Hunter Wilds
In Monster Hunter Rise, my personal adventure unfolds almost entirely within the lower ranks. Once I’ve completed the game’s credits and moved up to high rank, that’s when the true heart of the game reveals itself. It may sound like a meme, but it feels more accurate than ever with this title. Immerse yourself in the story as much as possible, whether you’re going solo or teaming up with others using SOS (which I’ll discuss further below). However, unless you’re finding a specific quest particularly challenging and need outside help to complete it, I wouldn’t suggest spending too much time grinding for gear.
For the main storyline, focus on enhancing or crafting armor that offers maximum raw defense, and do the same with weapons for increased attack power.
In Monster Hunter Wilds, you can always revisit lower-rank monsters and hunts if your goal is to create everything. This approach can save you time since the game’s story progression doesn’t necessitate early grinding for specific gear. You’ll have plenty of opportunities (and need) to do so later on.
Use the SOS Flare system in Monster Hunter Wilds
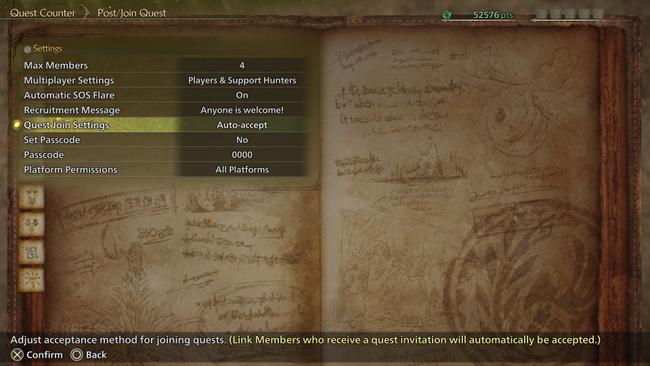
In Monster Hunter Wilds, similar to Monster Hunter World, it employs an SOS Flare system for multiplayer alongside its lobby, squad, and other features. To ensure others can join you during every hunt, adjust your settings after conversing with Alma (responsible for the Quest Counter). Then, choose if you’d like the SOS Flare to activate automatically when a quest begins, set the maximum number of players that can join, decide whether to include player and support hunters (NPCs), and even select whether you prefer crossplay or not.
As a fellow adventurer, I can tell you that if you configure it for players and hunter supports, the hunters will accompany you on your journey until real players show up. This is an excellent choice if you’re aiming to wrap up the story or any quest swiftly, as NPC hunters are quite formidable and beneficial during hunts. If you don’t have an online subscription, it’s a smart move to set this to just support hunters, so NPCs join you when you embark on a new quest.
Easy armor and weapons in Monster Hunter Wilds
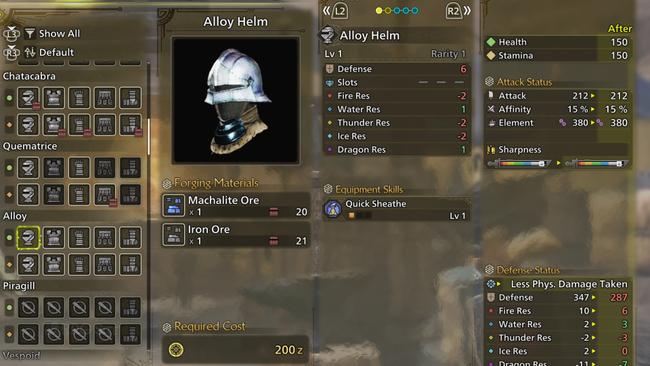
In Monster Hunter Wilds, you can effortlessly craft good initial armor and weapons by simply scouring the map for ores and bones. Fortunately, there are Ore and Bone trees available for crafting purposes, which can be collected easily even without killing large monsters during your early gameplay. This is a common practice among hunters in Monster Hunter games, but we’ll delve deeper into that when discussing potential expansions for Monster Hunter Wilds.
For instance, the progression tree for crafting the Great Sword reaches its peak rarity within the game, and it primarily requires large monster components later on. Additionally, there are separate trees for Bone and Ore (which we call ore) in relation to the Great Sword. Furthermore, there are both low-rank and high-rank sets of Bone and Alloy (or ore) armor available, so you can start using these early sets when you’re still in low rank, and upgrade to high-rank versions once you reach that level for a solid starting set.
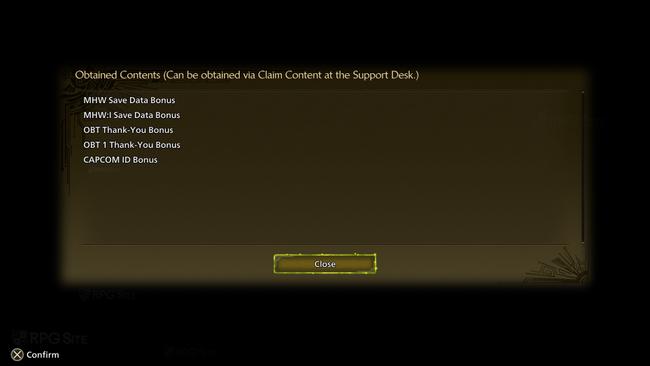
Claim all the save data bonuses you can in Monster Hunter Wilds
In Monster Hunter Rise: Sunbreak, you’ll receive special in-game rewards if you’ve participated in the beta test, linked your Capcom account, and own both Monster Hunter World and Iceborne save files. These items, which are particularly useful early on, might not be as significant later in the game, but they provide a helpful boost at the start. (GUIDE LINK)
The best Monster Hunter Wilds weapon is the one you like using
At the beginning of your Monster Hunter journey, you’ll encounter numerous guides and rankings emphasizing maximum damage or similar aspects. Initially, disregard such details. Instead, choose a weapon that catches your eye or simply feels appealing to you. Experiment with it while hunting monsters. Monster Hunter is not a game where you master one tool and move on; rather, you’ll find yourself becoming proficient in various weapons over time. I started out with Dual Blades years ago on the 3DS but now prefer using Great Sword, Hammer, and Hunting Horn extensively.

Spend time in the training area
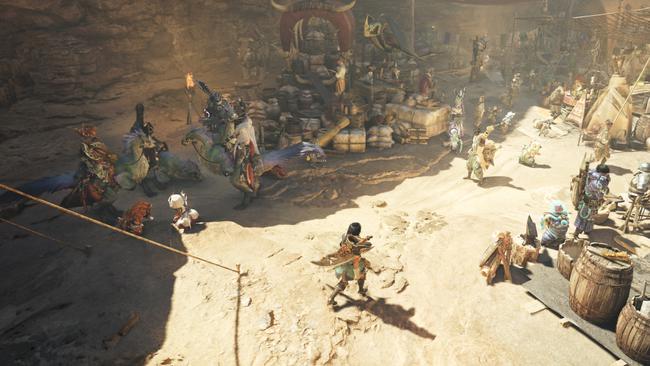
In Monster Hunter Wilds, the initial base camp offers you entry to a practice zone. This allows you to assess your attack efficiency, combos, and other details while sparring against a simulated monster within this training area. Additionally, you can converse with Luke, the manager of the Training Area, who can adjust settings or provide helpful suggestions.
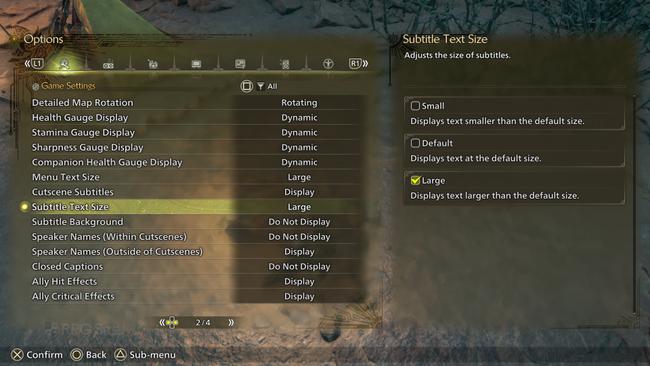
Monster Hunter Wilds UI customization tips
In recent times, Capcom has shown significant improvement in accessibility features. When you start the game, you’ll notice questions about issues like motion sickness. Delve into the Game Settings within the options menu and explore the four pages for adjustments such as text size, minimap scaling, rotation settings, visibility of hit effects, among others, to customize your gaming experience according to your preference.
Always talk to NPCs marked with a yellow symbol
Characters within the game may offer you additional tasks, treasures, and optional quests, so don’t forget to chat up those with a yellow quest indicator or a yellow exclamation mark over their head or on your map’s icon for them.
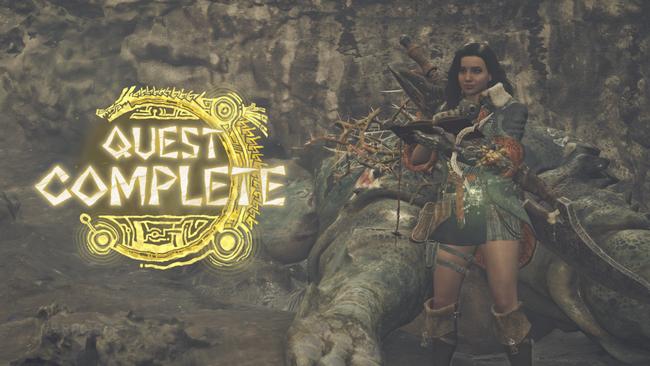
You can skip the quest complete animation in Monster Hunter Wilds
After finishing a quest, the game gradually circles the monster you’ve slain. If you prefer to bypass this, press (don’t hold as it ends the quest prematurely) the touchpad on PS5 or the View Button on an Xbox controller.
I trust these suggestions will prove useful for you, especially if you’re a novice to Monster Hunter or have recently dipped back into it with Monster Hunter Rise after some time away.
Monster Hunter Rampage has been launched globally on PlayStation 5, Xbox Series X/S, and personal computers via Steam. For a comprehensive guide to the game, please visit our Monster Hunter Rampage resources here.
Read More
- Invincible’s Strongest Female Characters
- Top 8 Weapon Enchantments in Oblivion Remastered, Ranked
- MHA’s Back: Horikoshi Drops New Chapter in ‘Ultra Age’ Fanbook – See What’s Inside!
- Nine Sols: 6 Best Jin Farming Methods
- Fix Oblivion Remastered Crashing & GPU Fatal Errors with These Simple Tricks!
- Top 8 UFC 5 Perks Every Fighter Should Use
- How to Reach 80,000M in Dead Rails
- Gold Rate Forecast
- USD ILS PREDICTION
- Master Conjuration Spells in Oblivion Remastered: Your Ultimate Guide
2025-02-27 14:57