Phasmophobia really shines with its detailed and easy-to-learn investigation system, making it enjoyable for everyone. The recent Nell’s Diner update adds even more spooky mysteries and secrets to the game. And just like at Point Hope, players can now tackle a brand new, challenging puzzle.
Want to unlock a secret in Phasmophobia? Here’s a guide to solving the Nell’s Diner Easter egg puzzle if you’re up for the challenge.
How to Complete the Nell’s Diner Easter Egg Puzzle in Phasmophobia

The Easter Egg puzzle at Nell’s Diner in Phasmophobia requires you to follow a series of steps throughout the diner. Completing them in the correct order will unlock a special, spooky surprise and a hidden reward.
Feel free to work on this puzzle as a team, sharing different parts with each other. You’re not stuck with a section once you begin it – anyone can jump in and help!
Step 1 – Shine UV Light On Note in Manager’s Office
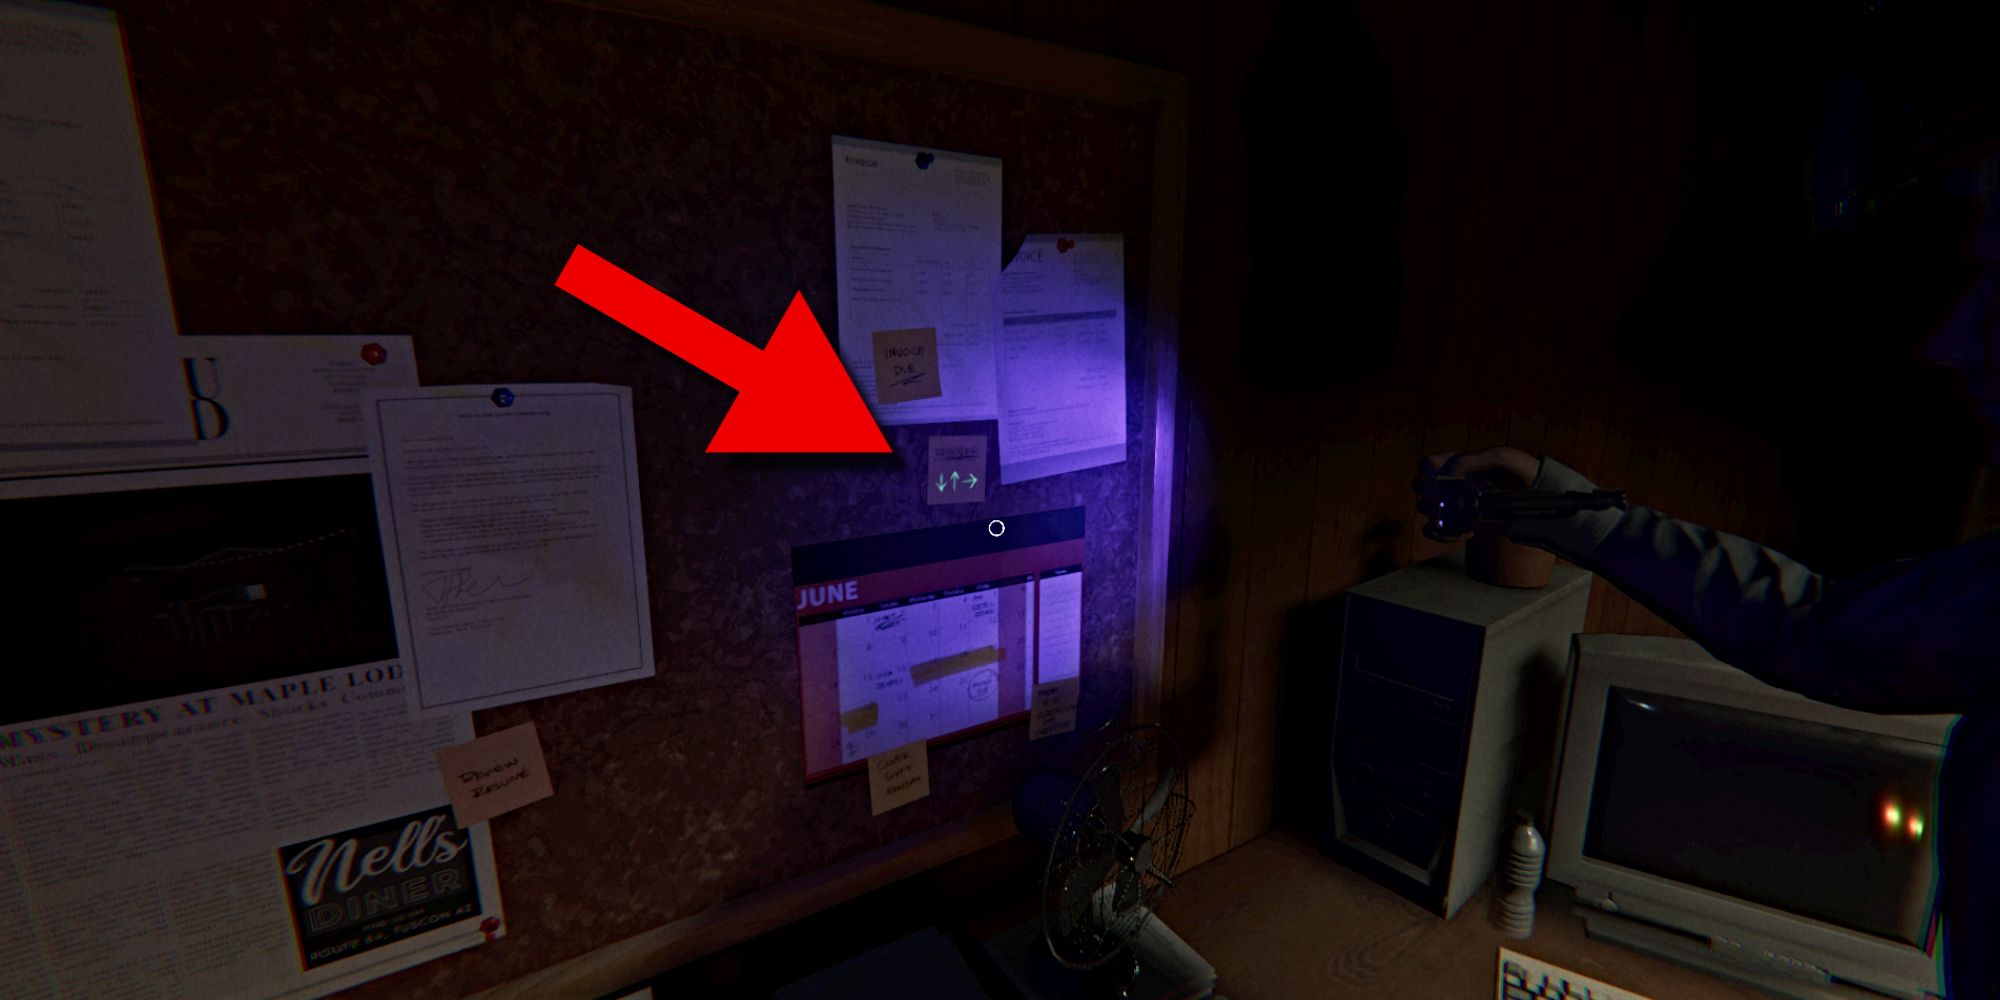
To begin the puzzle, grab a UV light from the van and go to the Manager’s Office, which is at the back right of the diner. Inside the office, look at the bulletin board in the back right corner. Turn on the UV light and shine it on the small yellow sticky note that says “Reminder”. You’ll then see a sequence of three arrows: down, up, and right – in that order.
Step 2 – Check Yellow Arrow Sign in Dining Area
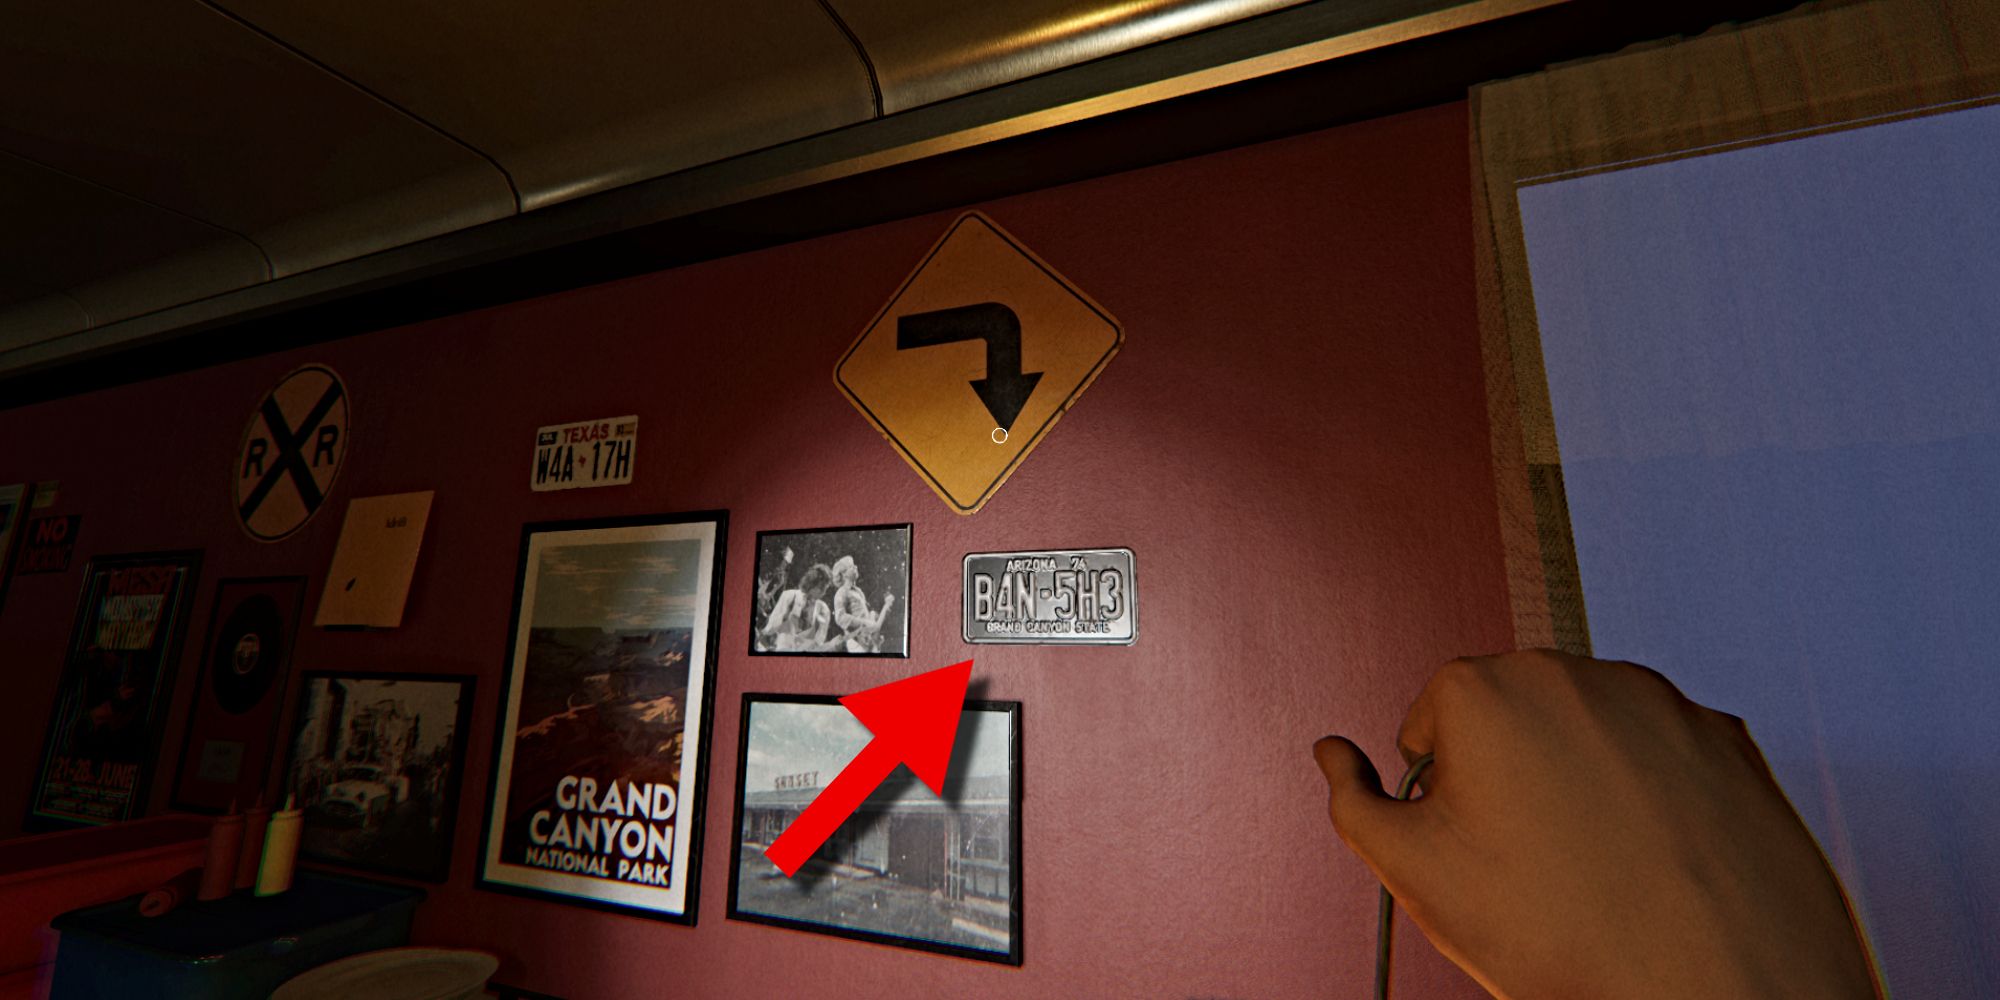
Now, go to the diner’s dining area near the front. Look at the large yellow road sign on the wall to the right of the entrance. It has an arrow pointing down to the first number – 4 – on the license plate underneath it.
Step 3 – Check Number Under Nell’s Diner Sign Outside
Now, go outside to the front parking lot and find the tall Nell’s Diner sign by the road. Walk up to the barrier next to the sign, and look down. You’ll see an arrow pointing to the number 1 on the ground.
Step 4 – Check Number At Trash Area Outside
Next, head to the right side of Nell’s Diner. You’ll see a row of dumpsters and trash cans. Look for a bright red arrow on the brick wall, on the far left – it might be partially hidden by a wooden pallet. The arrow is pointing to the right.
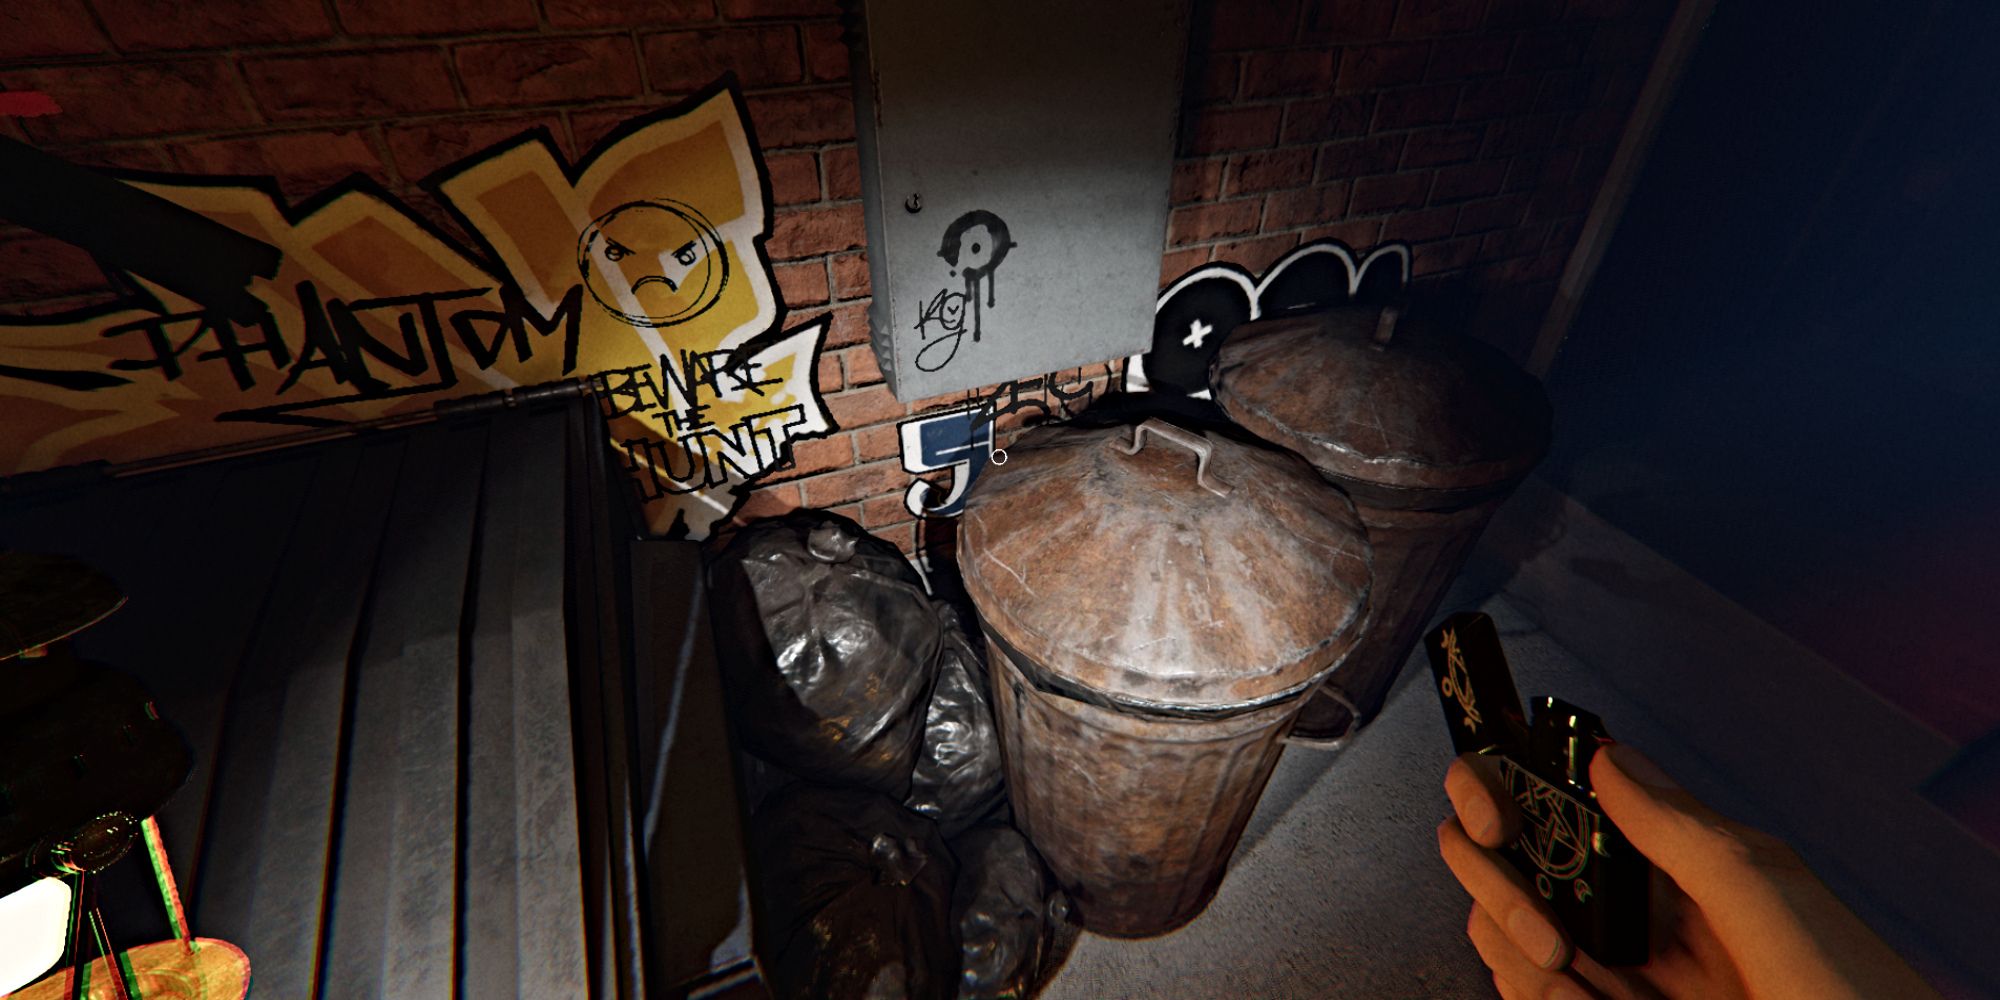
Go past the arrow, around the back of the dumpsters. You’ll find a blue number – 5 – painted on the brick wall.
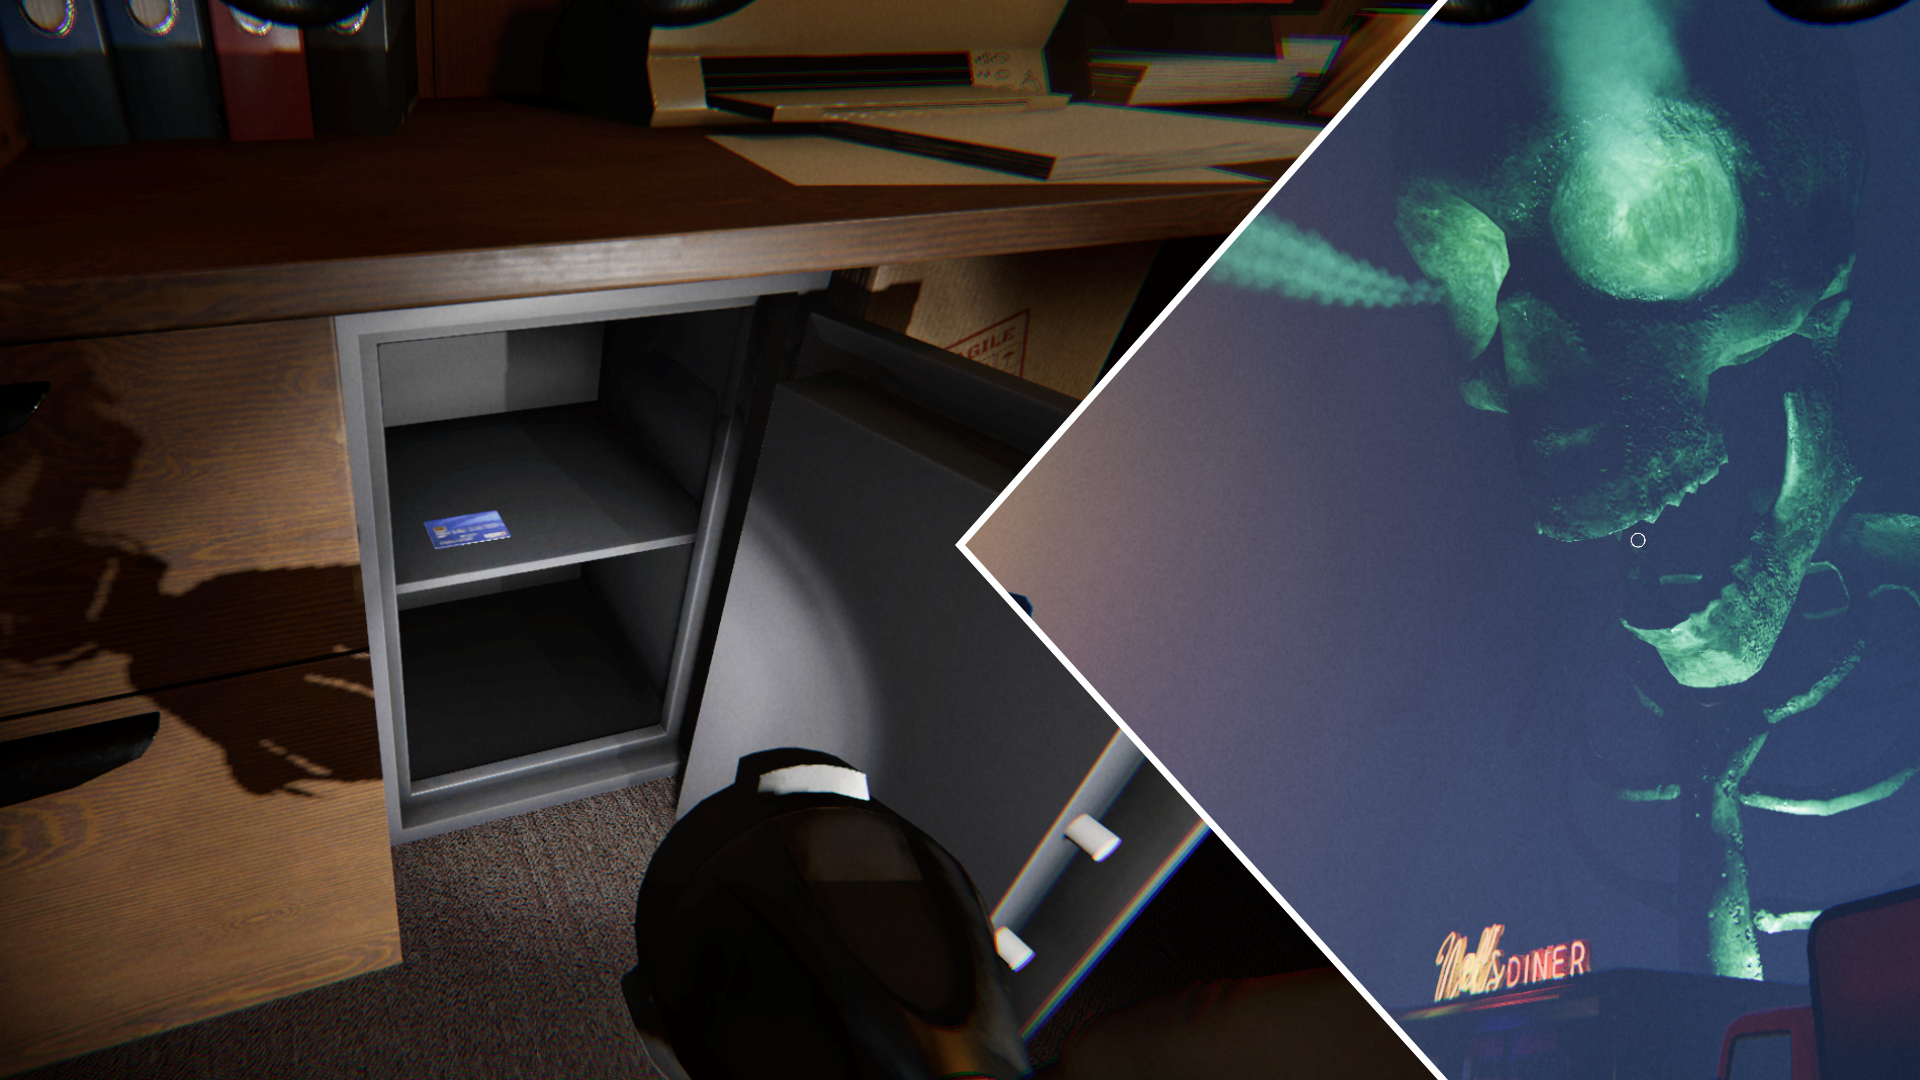
Step 5 – Type the Numbers On Safe Keypad in the Manager’s Office
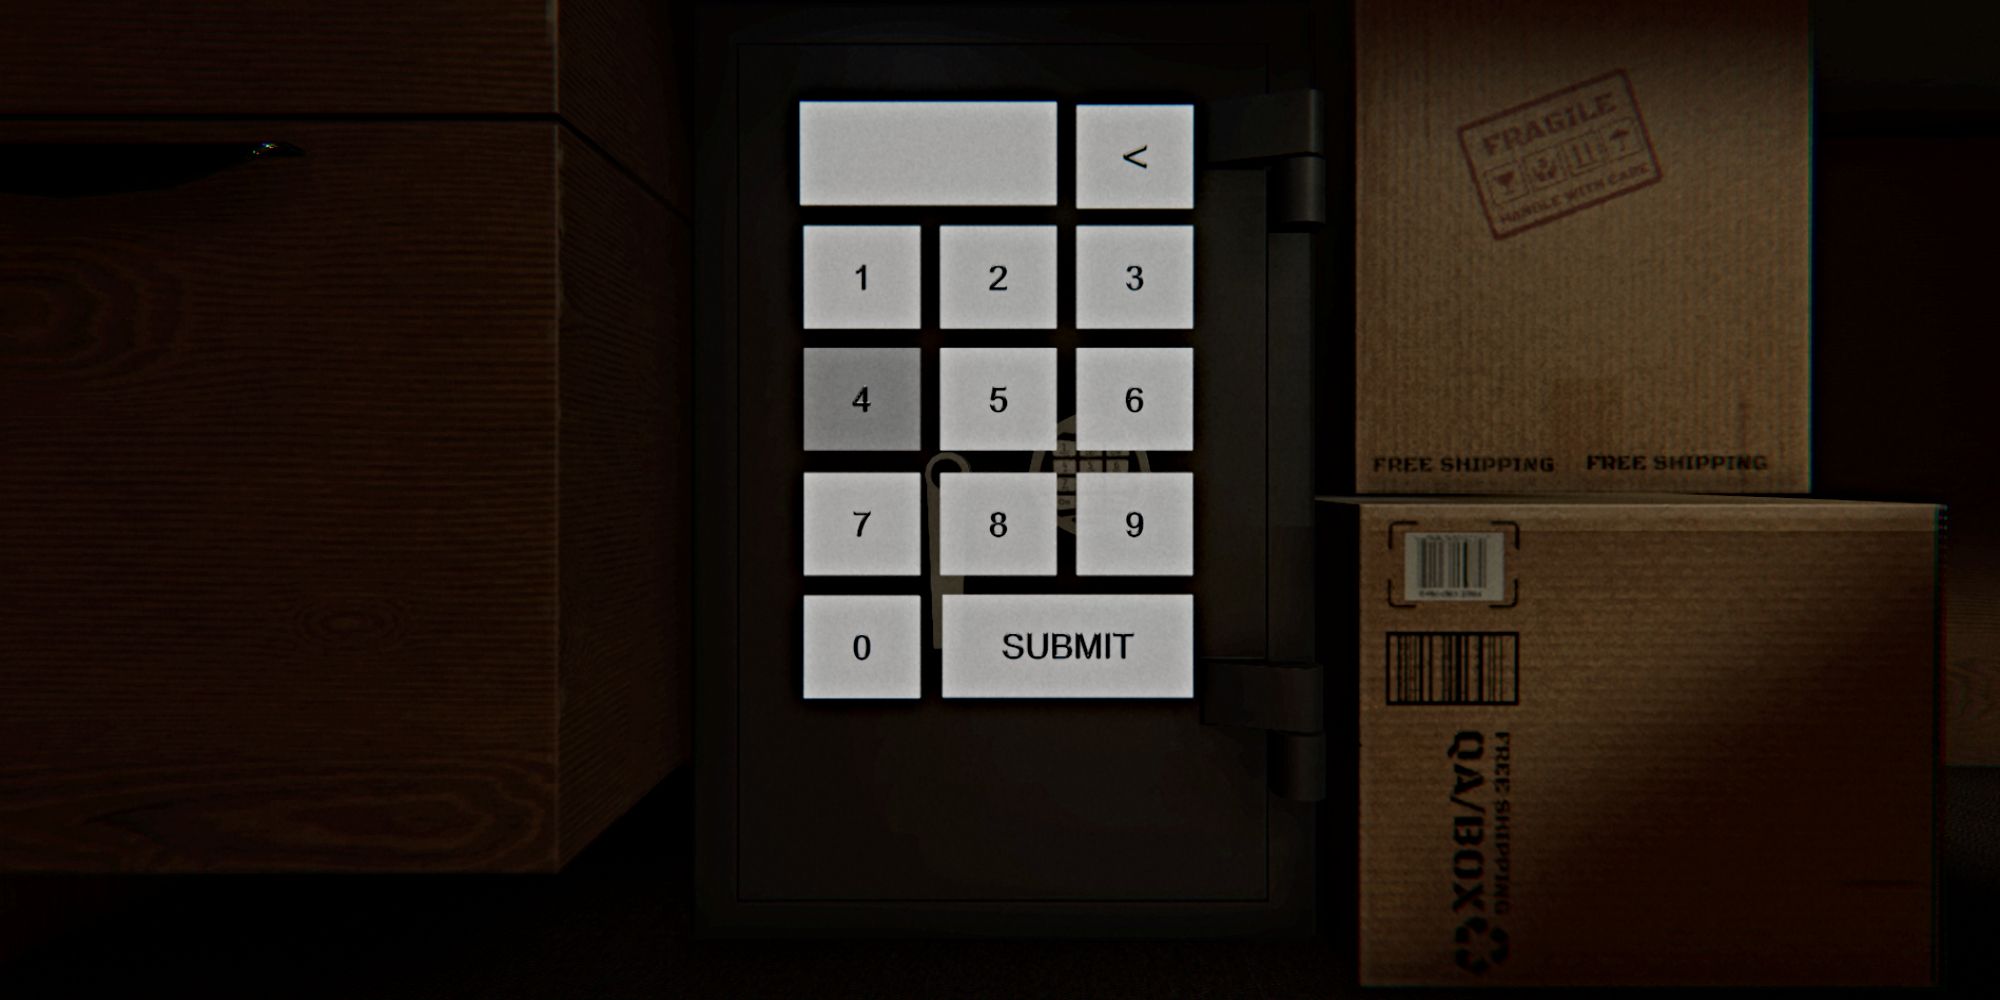
Okay, so remember those arrows I found with the UV light in the Manager’s Office? They actually give me the code to open the safe! I need to head back there now – the safe is on the floor, right under the desk where that bulletin board is. Hopefully, it’s full of goodies!
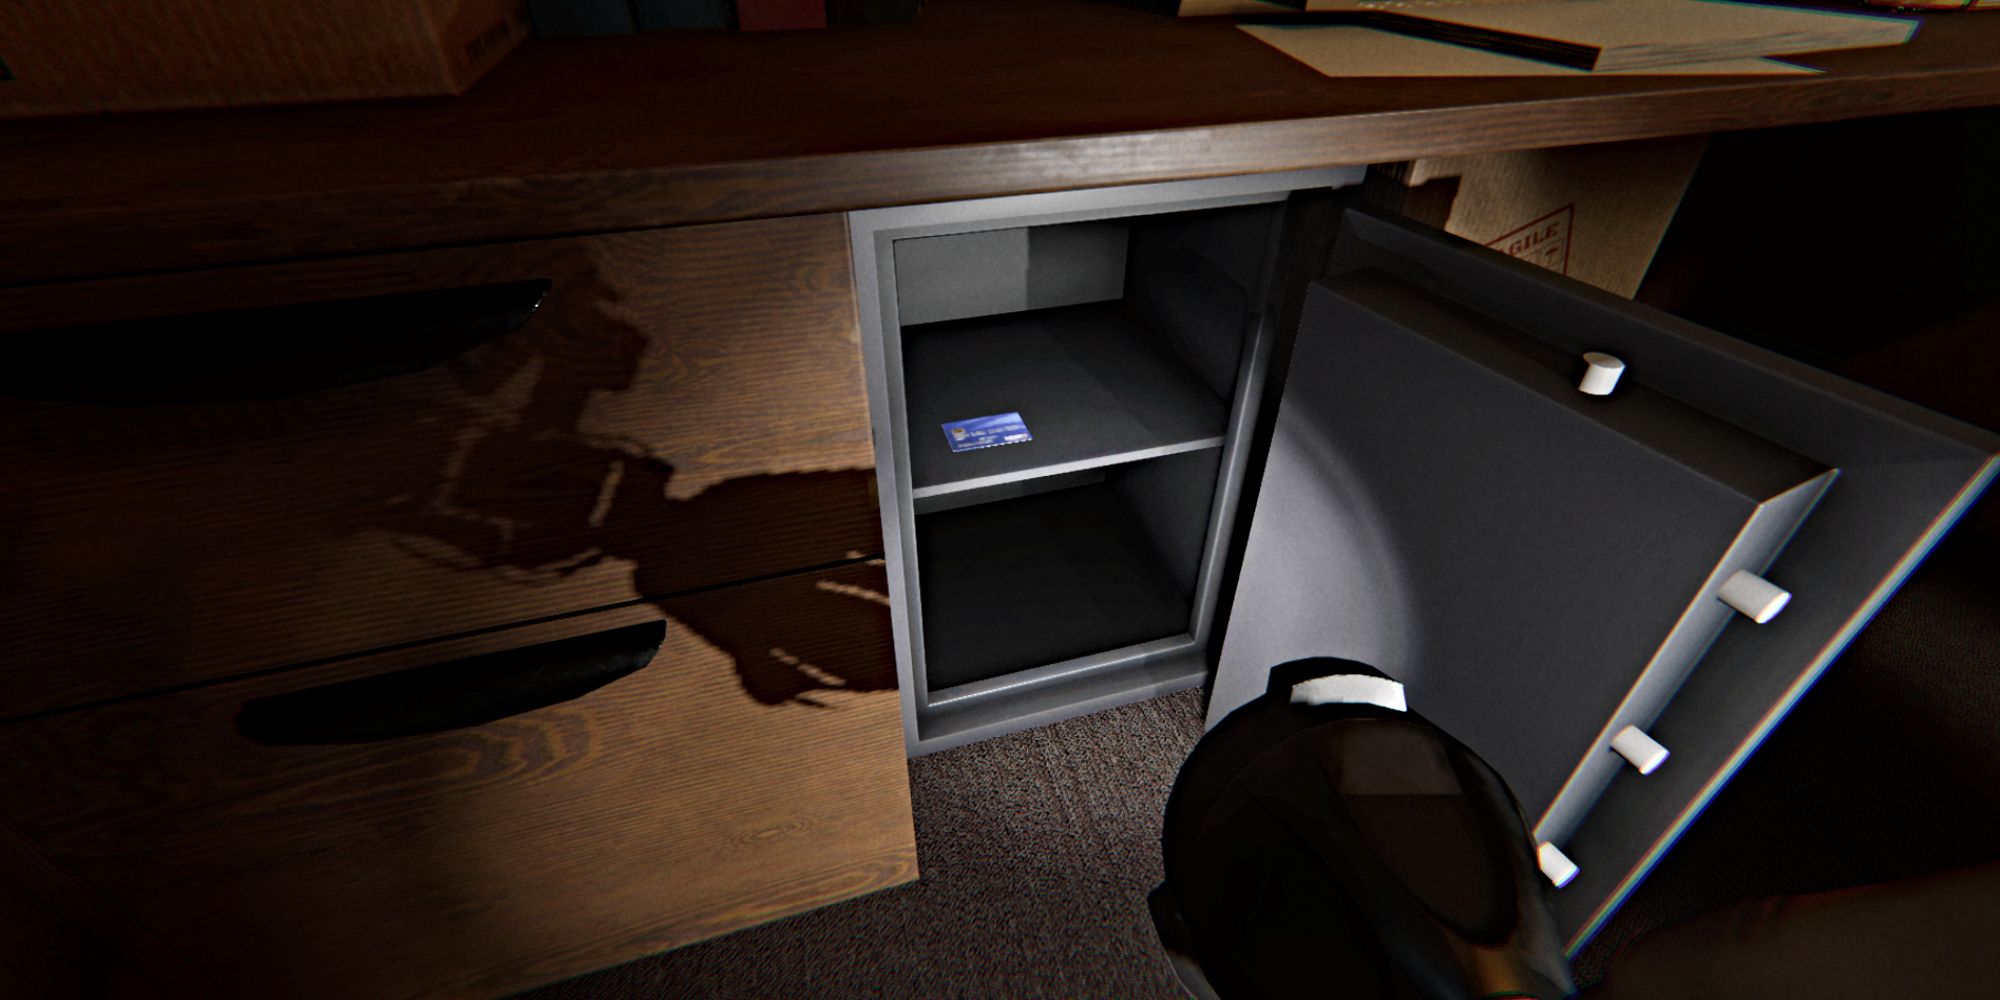
To open the safe, approach it and a keypad will appear. Enter the code 415, then press ‘Submit’. This unlocks the safe, allowing you to open the door and collect the Blue ATM Card inside. Pick up the card as you would any other item in the game.
Step 5 – Use ATM Card at ATM Machine in the Hallway
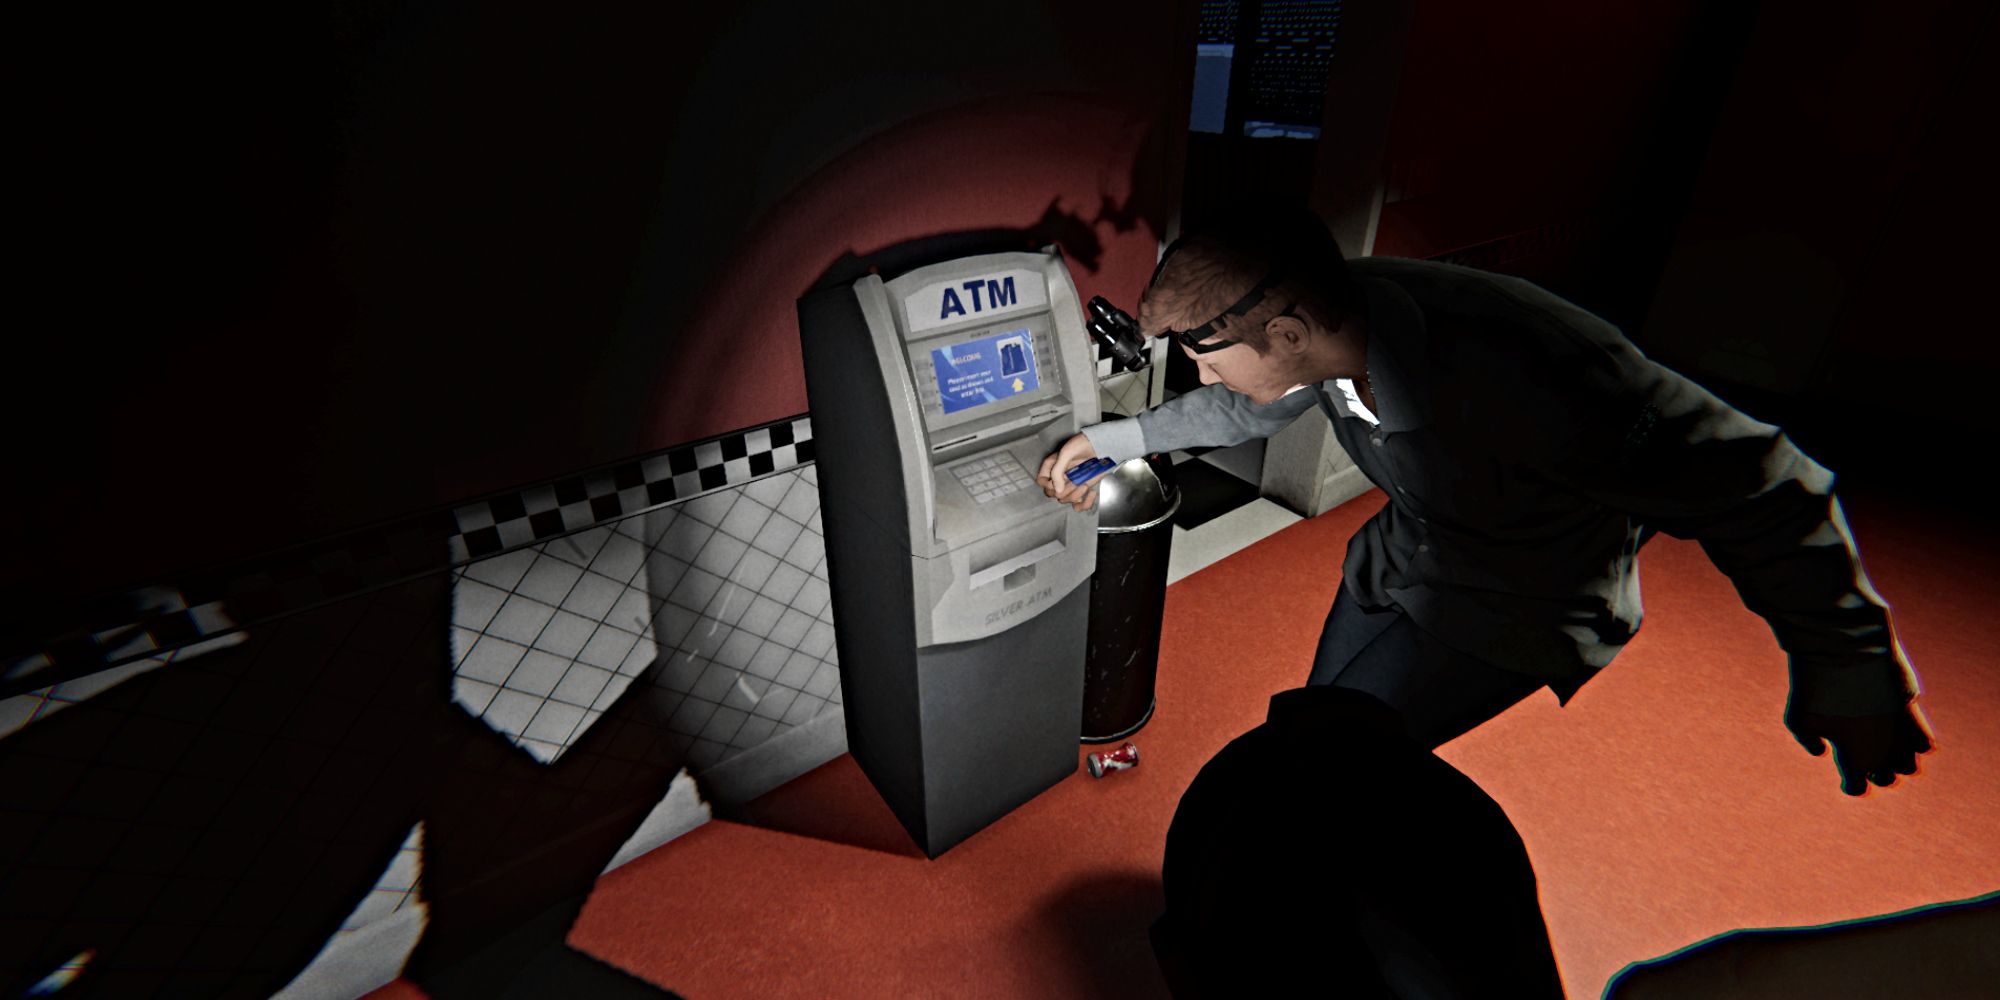
If you have the Blue ATM Card, go to the ATM located in the hallway. Exit the Manager’s Office and turn right, going through the door at the end of the hall near the restrooms. The ATM is close to the entrance to the Dining Area.
Okay, so to use the ATM, you first need to make sure your Blue ATM Card is equipped. Then, walk up to the machine and interact with it. Instead of just clicking on the screen, you actually use the button you normally use to select and place items – that’s how you’ll activate the ATM. It took me a minute to figure that out, but now it’s smooth sailing!
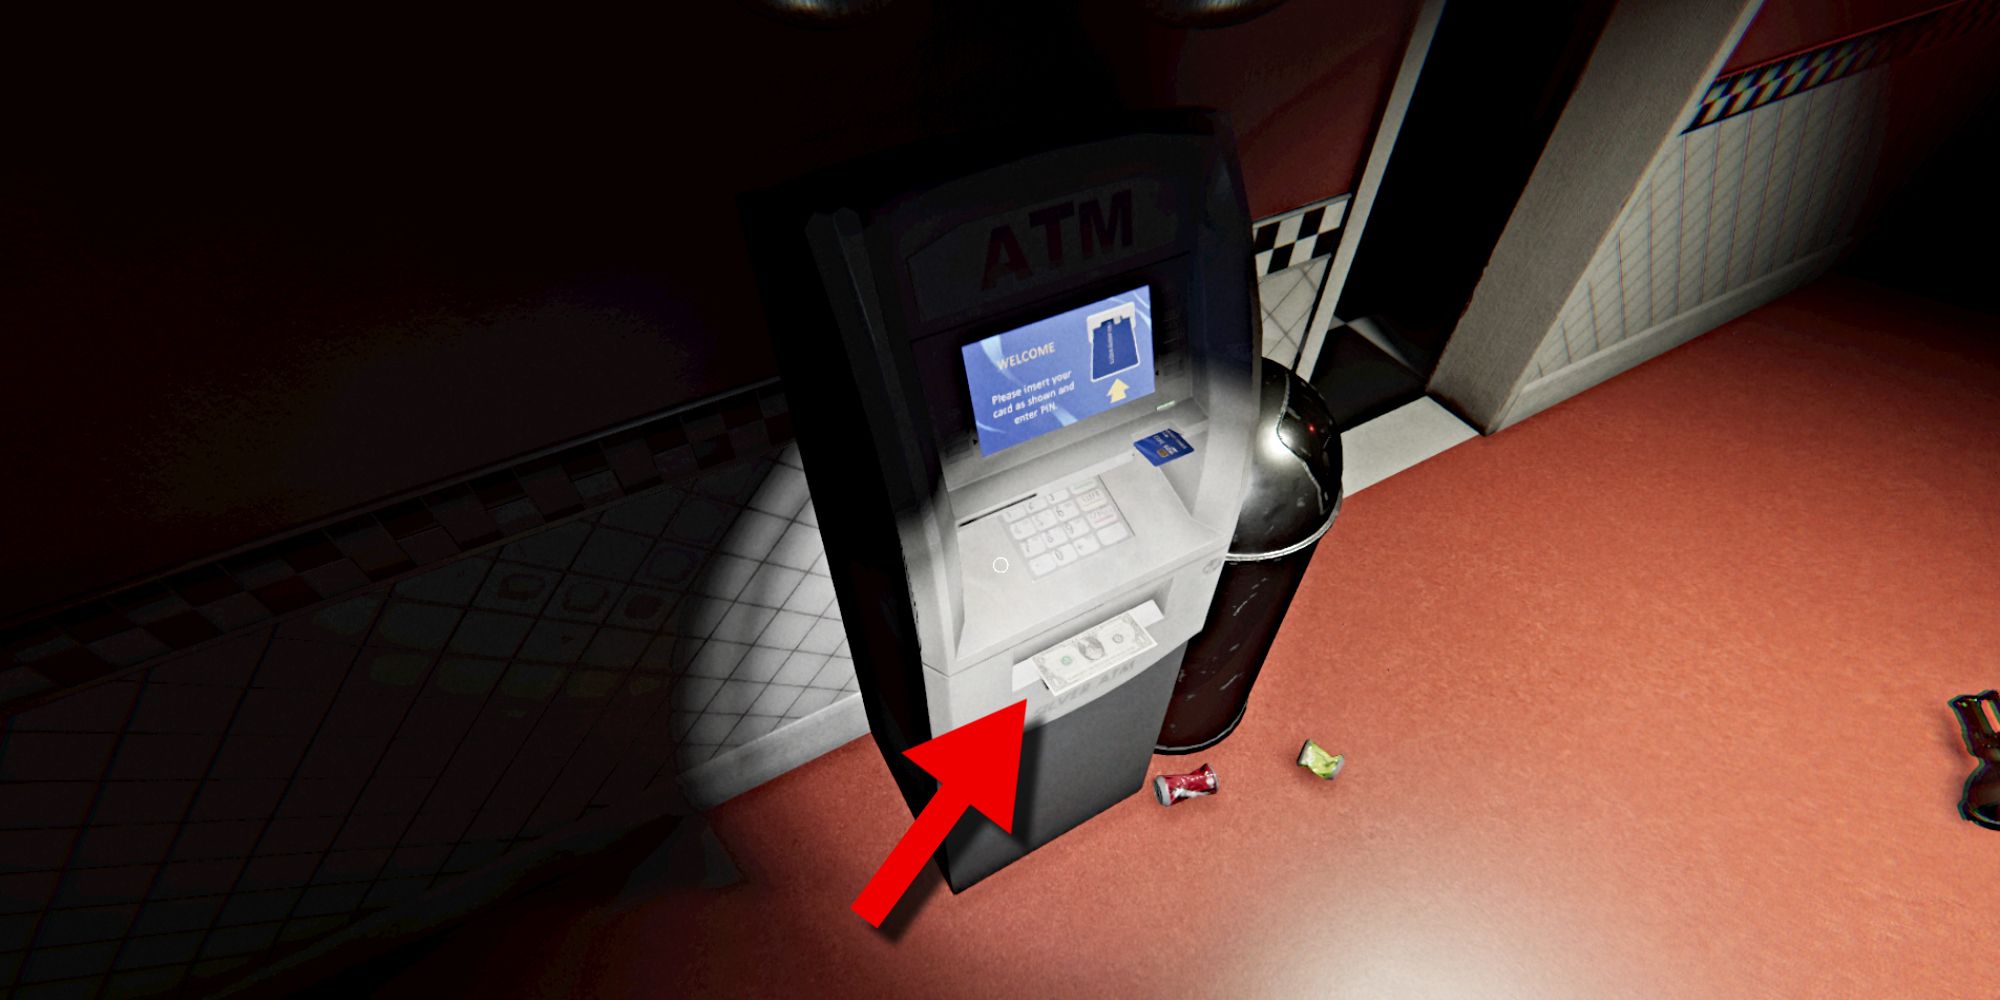
After the process is complete, the ATM will give you a dollar from the slot below. Take the dollar, and you can keep the blue card if you’d like, but it’s not necessary for solving the puzzle anymore.
Step 6 – Put Your Dollar Into Mr. Sprinkle Vending Machine

Then, head to the drink vending machines down the hall. Put a dollar into the Mr. Sprinkle machine – either one should work, but I’ve confirmed the red machine is working.
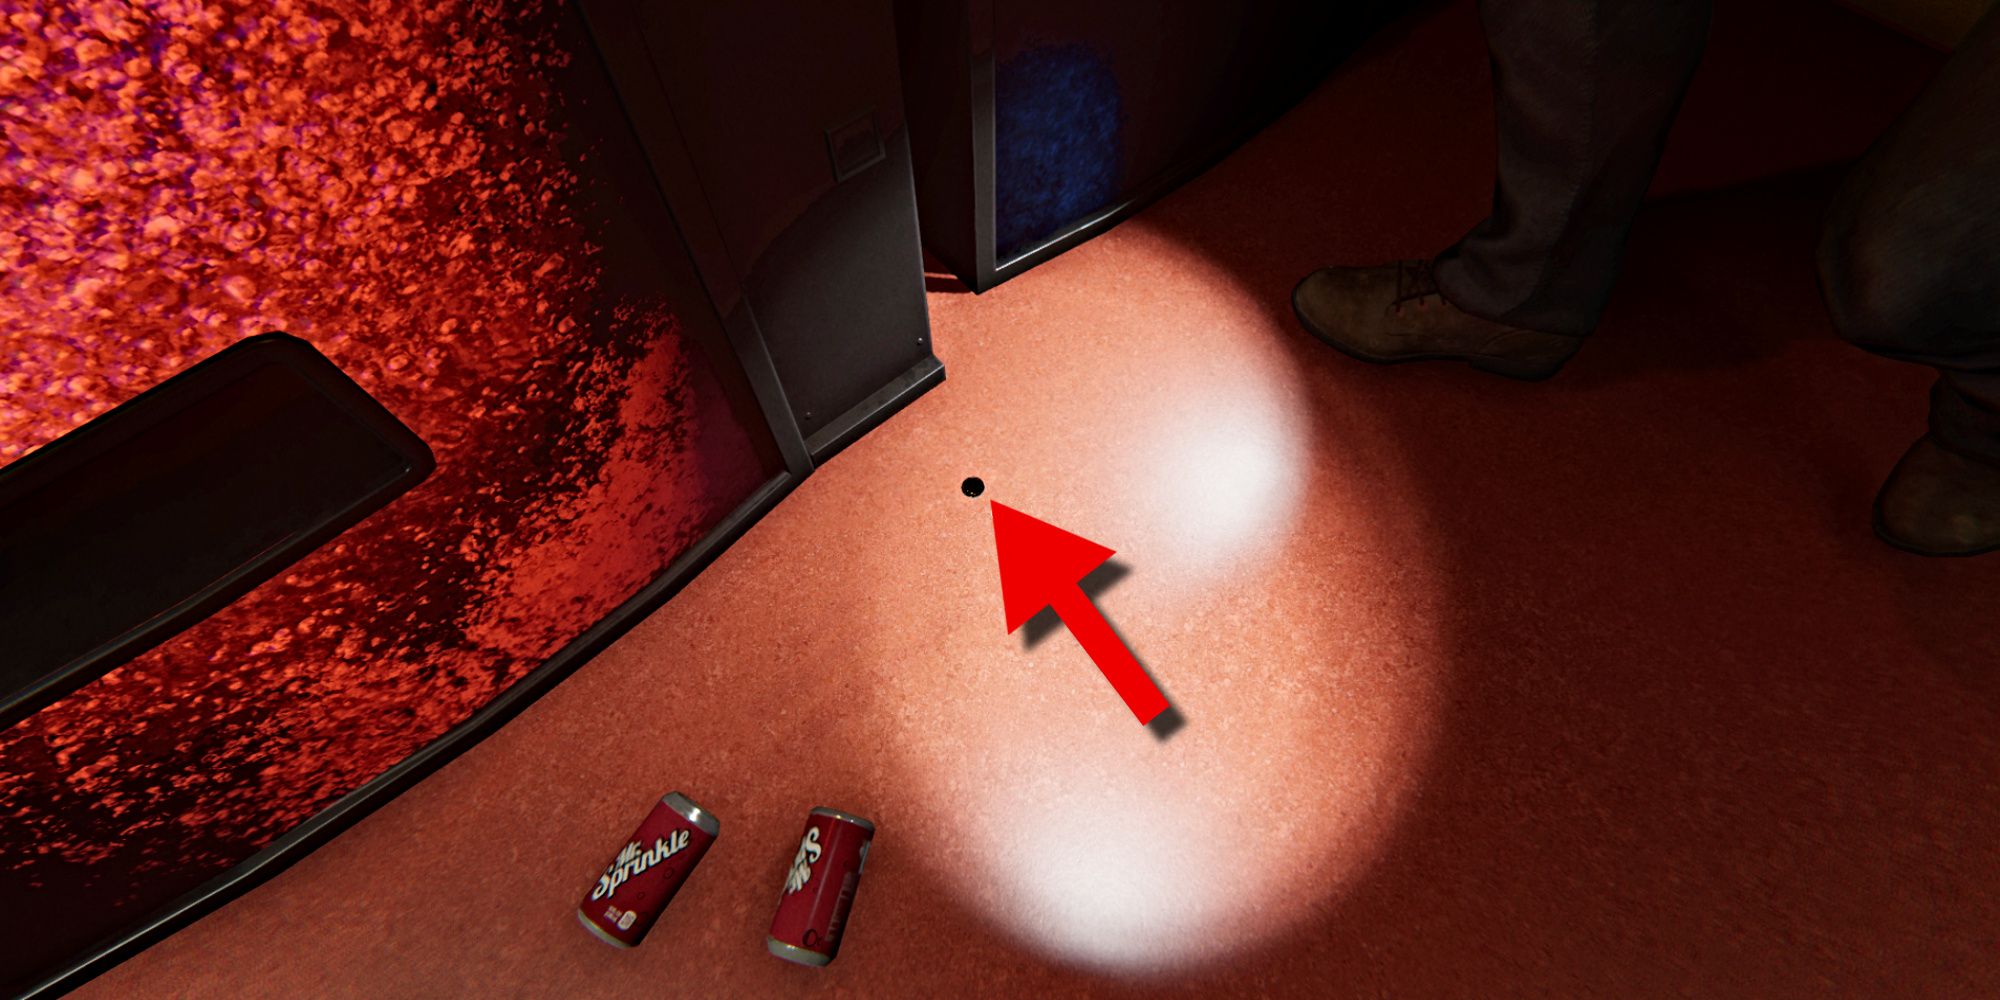
After completing the task, you’ll receive an Arcade Coin which will appear on the floor in front of the machine. It’s quite small, so it’s helpful to use a flashlight to find it. Once you see it, pick it up – you’ll need it for the next part.
Step 7 – Insert Coin in Arcade Machine in the Break Room

Okay, so I went back through the hallway, sticking to the left side, until I found the Break Room. Inside, there’s an old Arcade Machine. I popped an Arcade Coin into it, and it whirred to life – I could hear music start playing! Then, get this, a creepy human skull actually came out of the machine and flew right out the window behind me. It was pretty wild!
As for where that skull went, it’s time to head back outside to see the fruits of your labor.
Step 8 – Observe Skeleton Towering Over Nell’s Diner
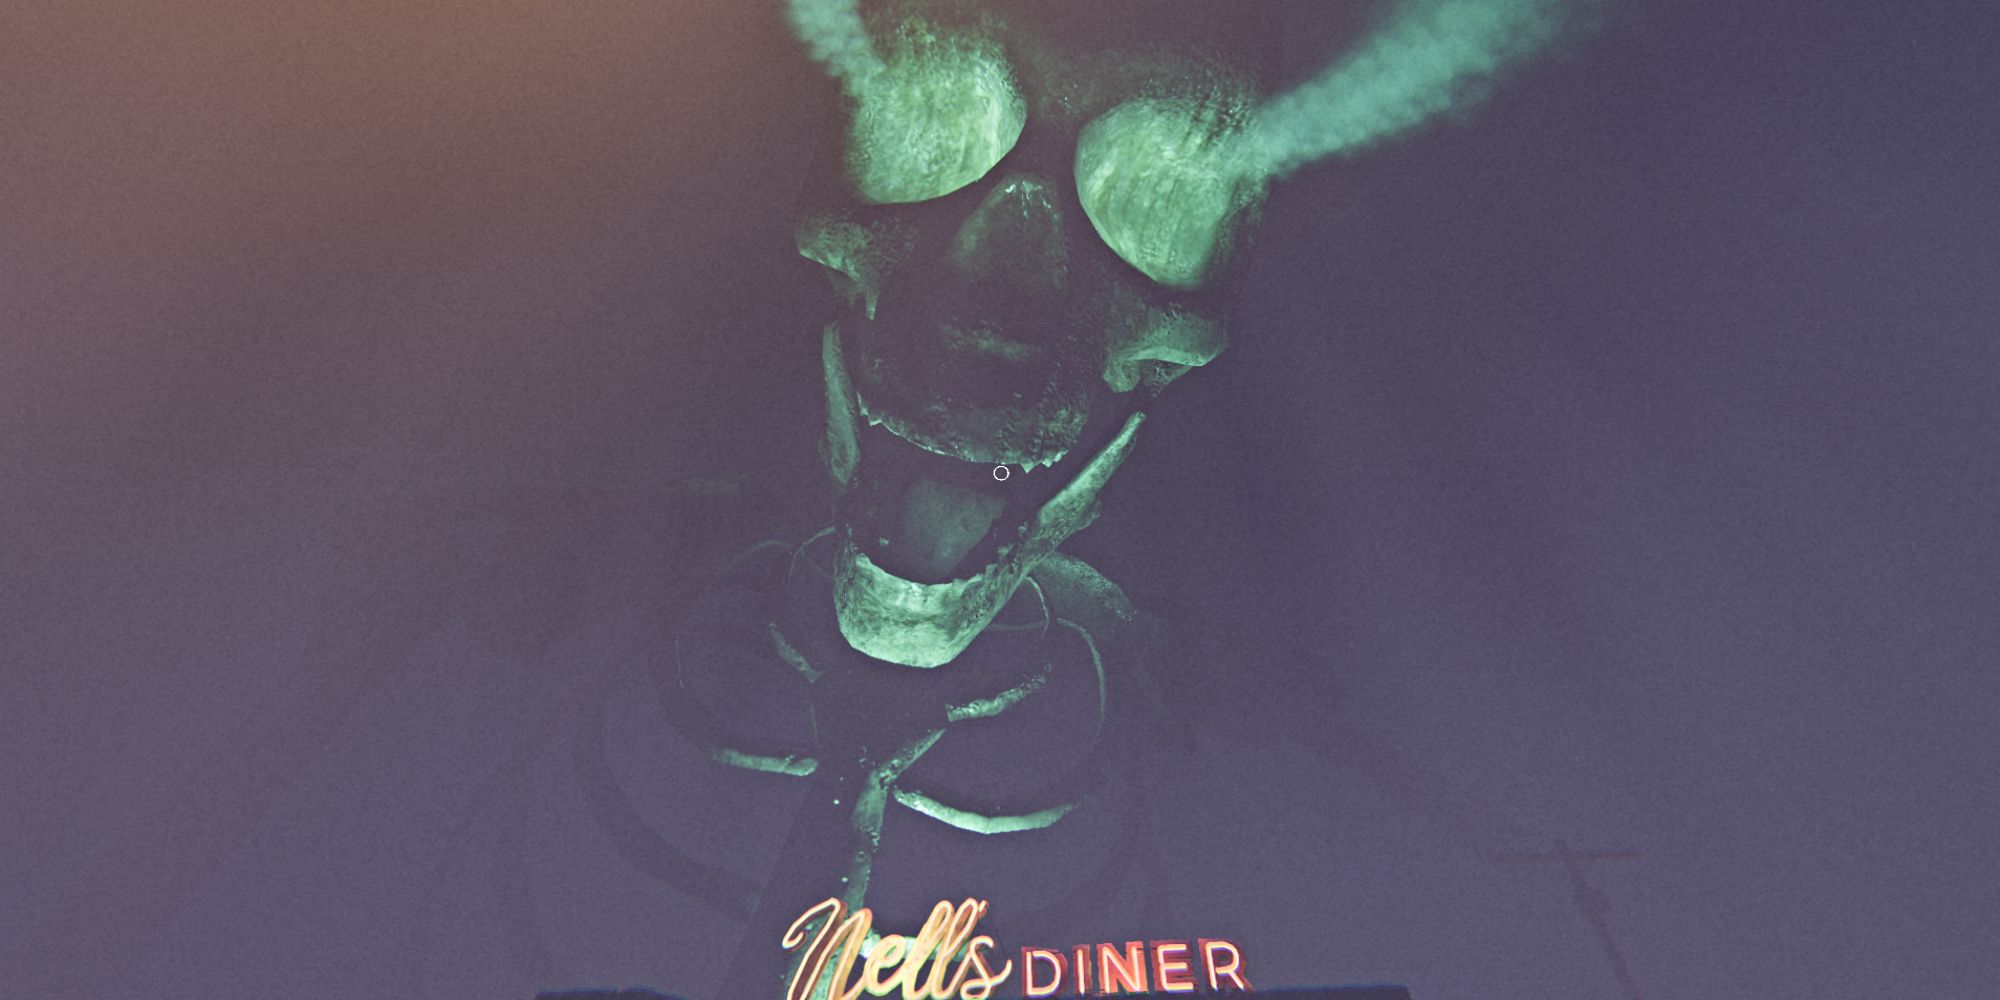
Head back to the parking lot by the diner, and you’ll see a massive skeleton—really, it’s enormous!—standing over the building. Smoke will be pouring out of its eyes, and you’ll hear spooky sounds all around.
You’ve successfully solved the puzzle! Now, head back to the van to finish the job and claim your reward.
All Nell’s Diner Easter Egg Puzzle Rewards in Phasmophobia
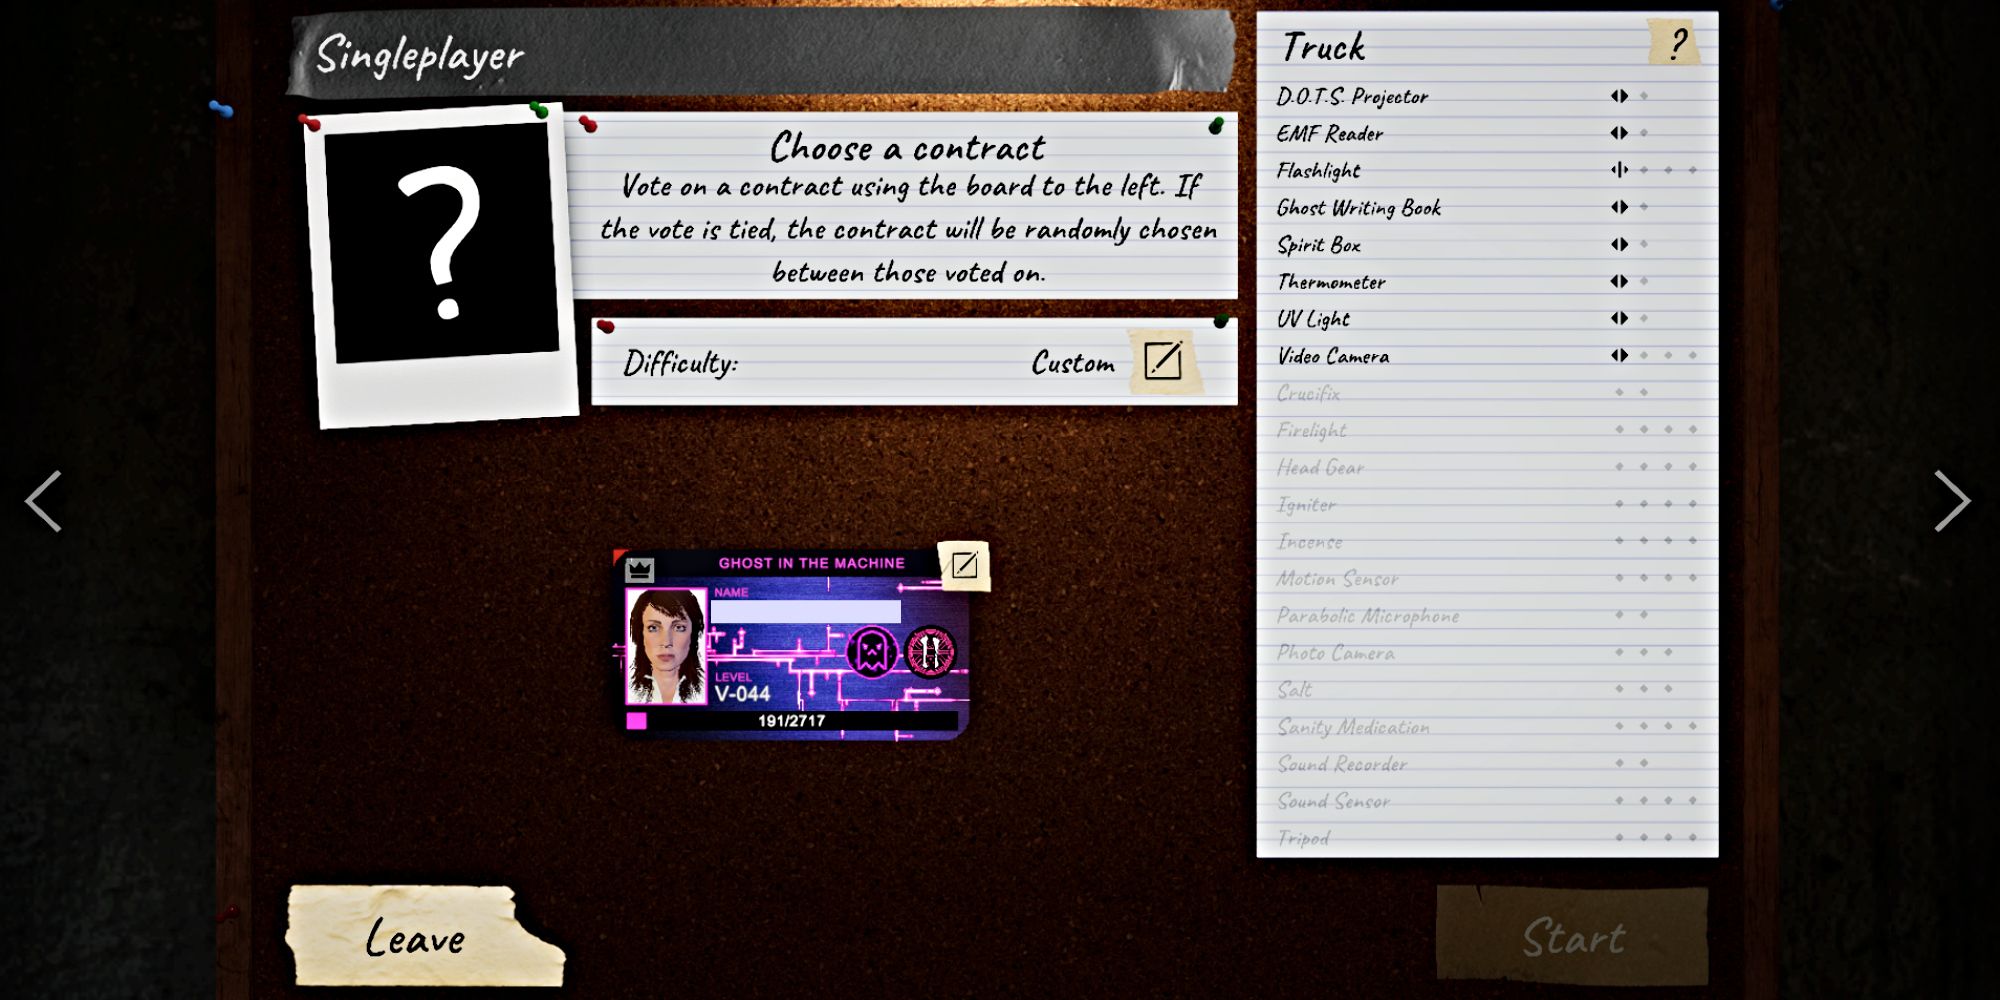
After you finish the puzzle and complete the contract, return to headquarters for your debriefing. You’ll then receive a notification that you’ve unlocked the Ghost In The Machine ID Card and Badge for your account.
Read More
- All Skyblazer Armor Locations in Crimson Desert
- How to Get the Sunset Reed Armor Set and Hollow Visage Sword in Crimson Desert
- All Shadow Armor Locations in Crimson Desert
- Marni Laser Helm Location & Upgrade in Crimson Desert
- All Golden Greed Armor Locations in Crimson Desert
- All Helfryn Armor Locations in Crimson Desert
- Best Bows in Crimson Desert
- Keeping Large AI Models Connected Through Network Chaos
- All Icewing Armor Locations in Crimson Desert
- How to Craft the Elegant Carmine Armor in Crimson Desert
2025-11-12 03:40