
In the town of Chorral within the game Oblivion Remastered, you’ll find the side-quest titled “Solve the Castle Theft for Countess Valga“. This quest involves helping the countess investigate a stolen precious heirloom. With various suspects and cleverly designed clues at your disposal, this mission is one of many that highlight why Oblivion continues to be cherished by RPG enthusiasts. In this walkthrough, we’ll offer a comprehensive guide to “Solving the Castle Theft,” including a complete list of all the clues and dialogues needed to crack the case.
How to Start Canvas the Castle in Oblivion Remastered
Visit Chorral Castle:
As a gamer, in the captivating world of Oblivion Remastered, to embark on the grand adventure “Canvas the Castle“, you’ll first want to traverse westwards from the Imperial City until you reach the charming town named Chorral. Once there, you can access the castle at any time post the initial tutorial. To initiate this quest, simply stride towards the east side of the town and locate the entrance to Castle Chorral. Upon finding it, step inside through the door leading to the grand Castle Chorral Great Hall.
Within the grand Great Hall, ascend the staircase and find yourself face-to-face with Many Arianna Valgas, seated regally on the throne. Engaging in conversation with her, she will disclose that she’s engrossed in an ongoing probe. Probing deeper, you learn that this investigation revolves around the recent theft of a painting from the castle grounds – a valuable artifact that also holds great sentimental value.
Countess Valga will request your assistance, and should you accept, it will set off a plan we refer to as “Explore the Fortress.
Regardless of who you suspect may have carried out the crime, it’s essential to gather proof before leveling any accusations. Premature or unfounded accusations can strain relationships and make it more challenging to question individuals effectively.
All Suspects in Canvas the Castle – Oblivion Remastered
Canvas for Clues:
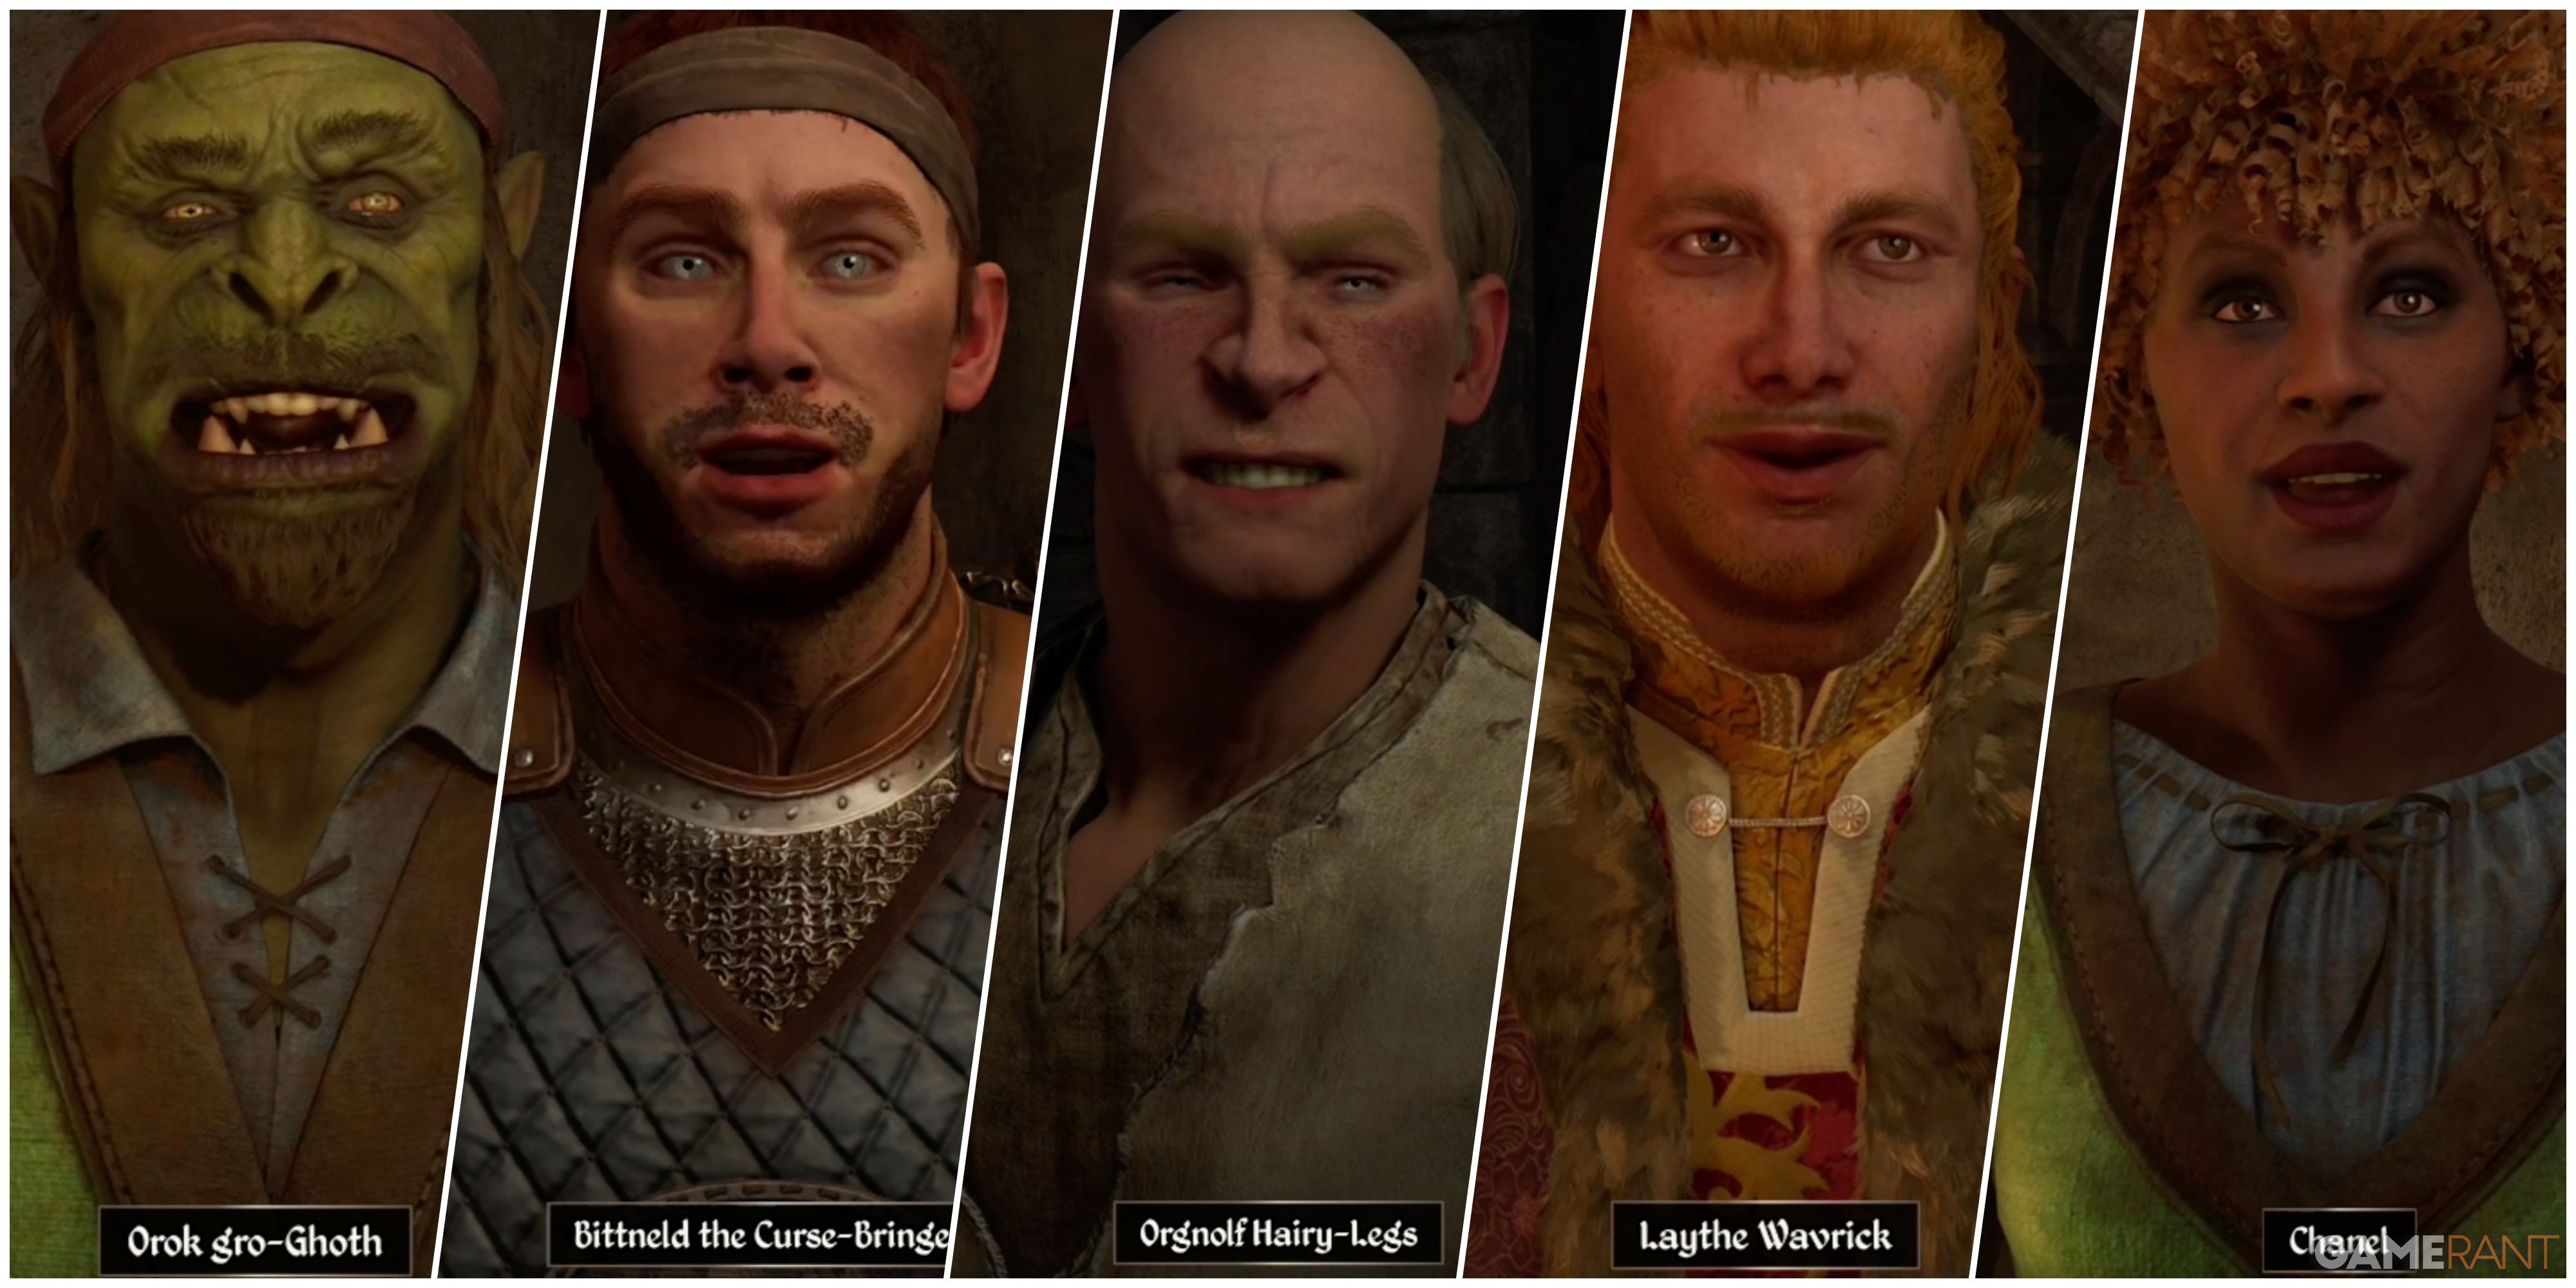
Countess Valga advises that it would be beneficial to chat with the castle inhabitants prior to searching for tangible evidence. Here are all the potential suspects, their locations within the castle, and what they will tell you if approached.
To get useful information from several of the suspects, you often need to enhance their cooperative level (Disposition) first, as they may initially refuse or become agitated if you try to question them before doing so.
| Suspect’s Name | Position | Suspect Location | Tips& Clues |
|---|---|---|---|
| Laythe Wavrick | Castle Herald | Found in the throne room, Laythe is found hovering near the throne. He has red hair and a purple robe. | Orgnolf has a drinking problem, cannot fund his drinking, asks others for money. |
| Chanel | Court Mage | Found in her chambers in the southern corner of the Castle’s Private Quarters area. | Chanel claims she was taking star readings, then to the dining hall, then to her quarters for sleep. |
| Orok gro-Goth | Steward | Found in his chambers in the northeast corner of the Castle’s Personal Quarters area. | Orok claims he didn’t see Chanel or Orgnolf at all. Saw Orgnolf in the West Tower recently, drinking. |
| Orgnolf | Castle Porter | Found on the first floor, in the corridor leading to the throne room. He is on the move. Balding man, unkempt clothing. | Orgnolf claims he argued with a delivery boy in Great Hall, and spent the rest of the night in his chambers. |
| Bittneld | Captain of the Chorral Guard | Found in his office in the Barracks. Across the outer courtyard. Better to speak in the evening, as he patrols Chorral during the day. | Says he was making his rounds, but claims he saw Chanel in the West Tower. She claimed it was spell research. |
Here’s a list of all potential suspects, along with what might be discovered through conversation. The two individuals who appear most notable are Chanel and Orgnolf, both of whom seem linked to the West Tower. Yet, there is no solid evidence suggesting either has any involvement in the crime. Let’s explore further.
Collecting All Evidence in Canvas the Castle – Oblivion Remastered
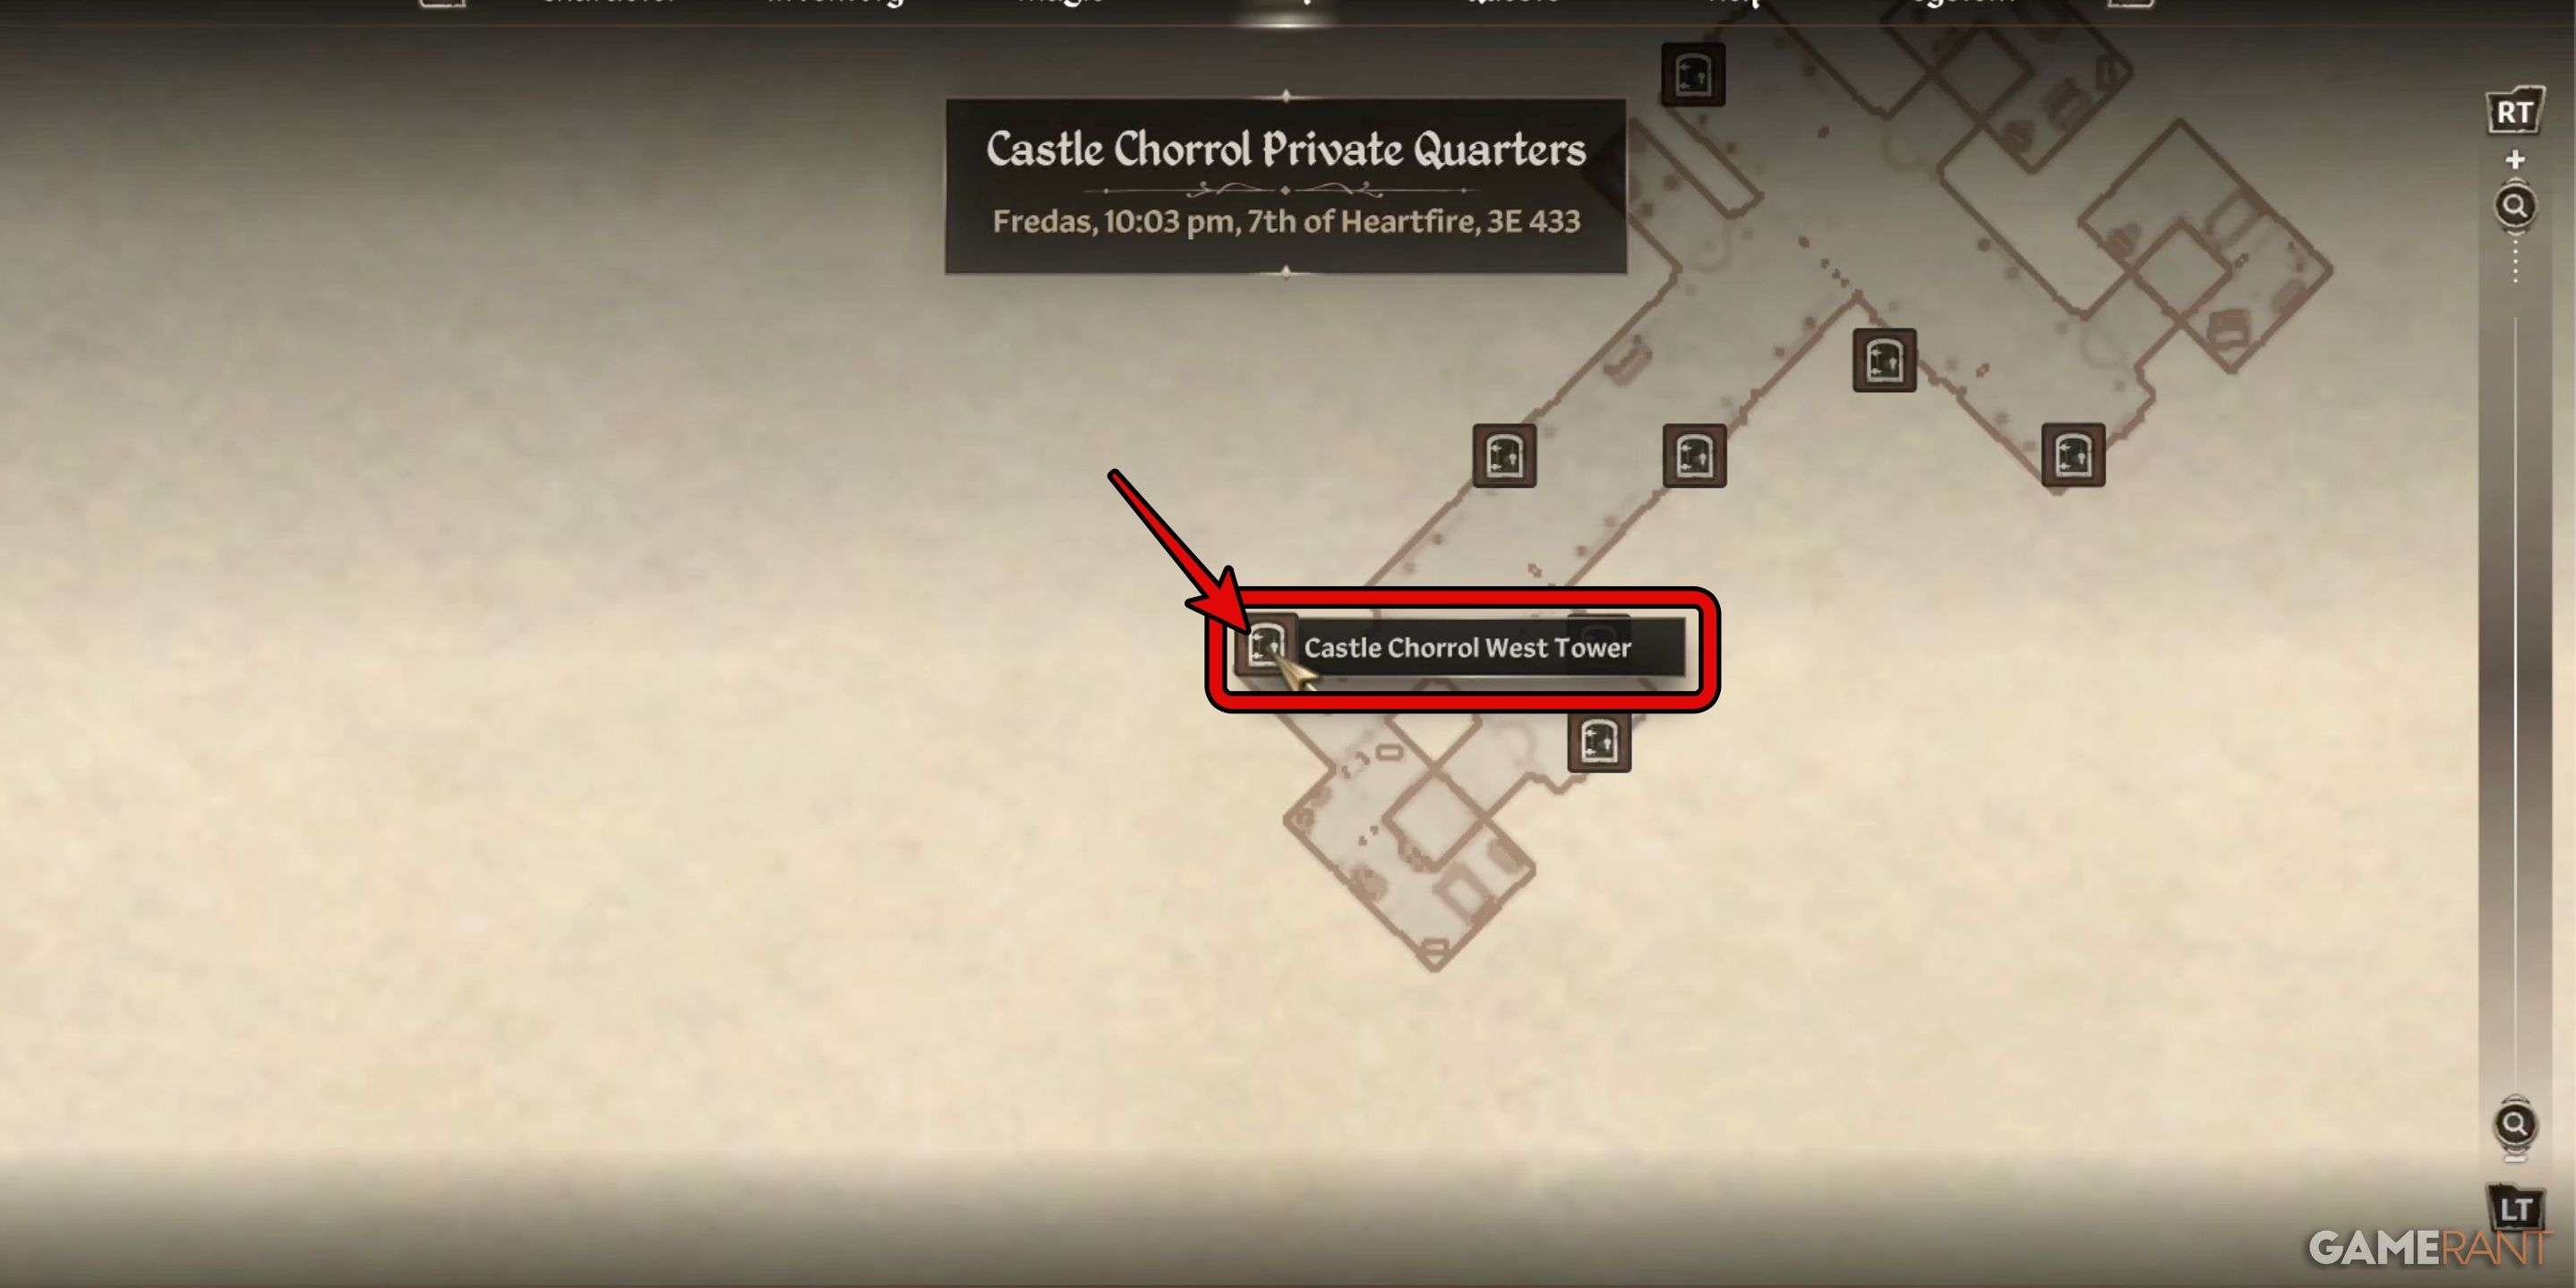
Location 1 – West Tower:
We’re set to kick off our probe right at the West Tower. You can access it by passing through the doorway situated at the southwestern corner of Castle Chorral’s Private Quarters.
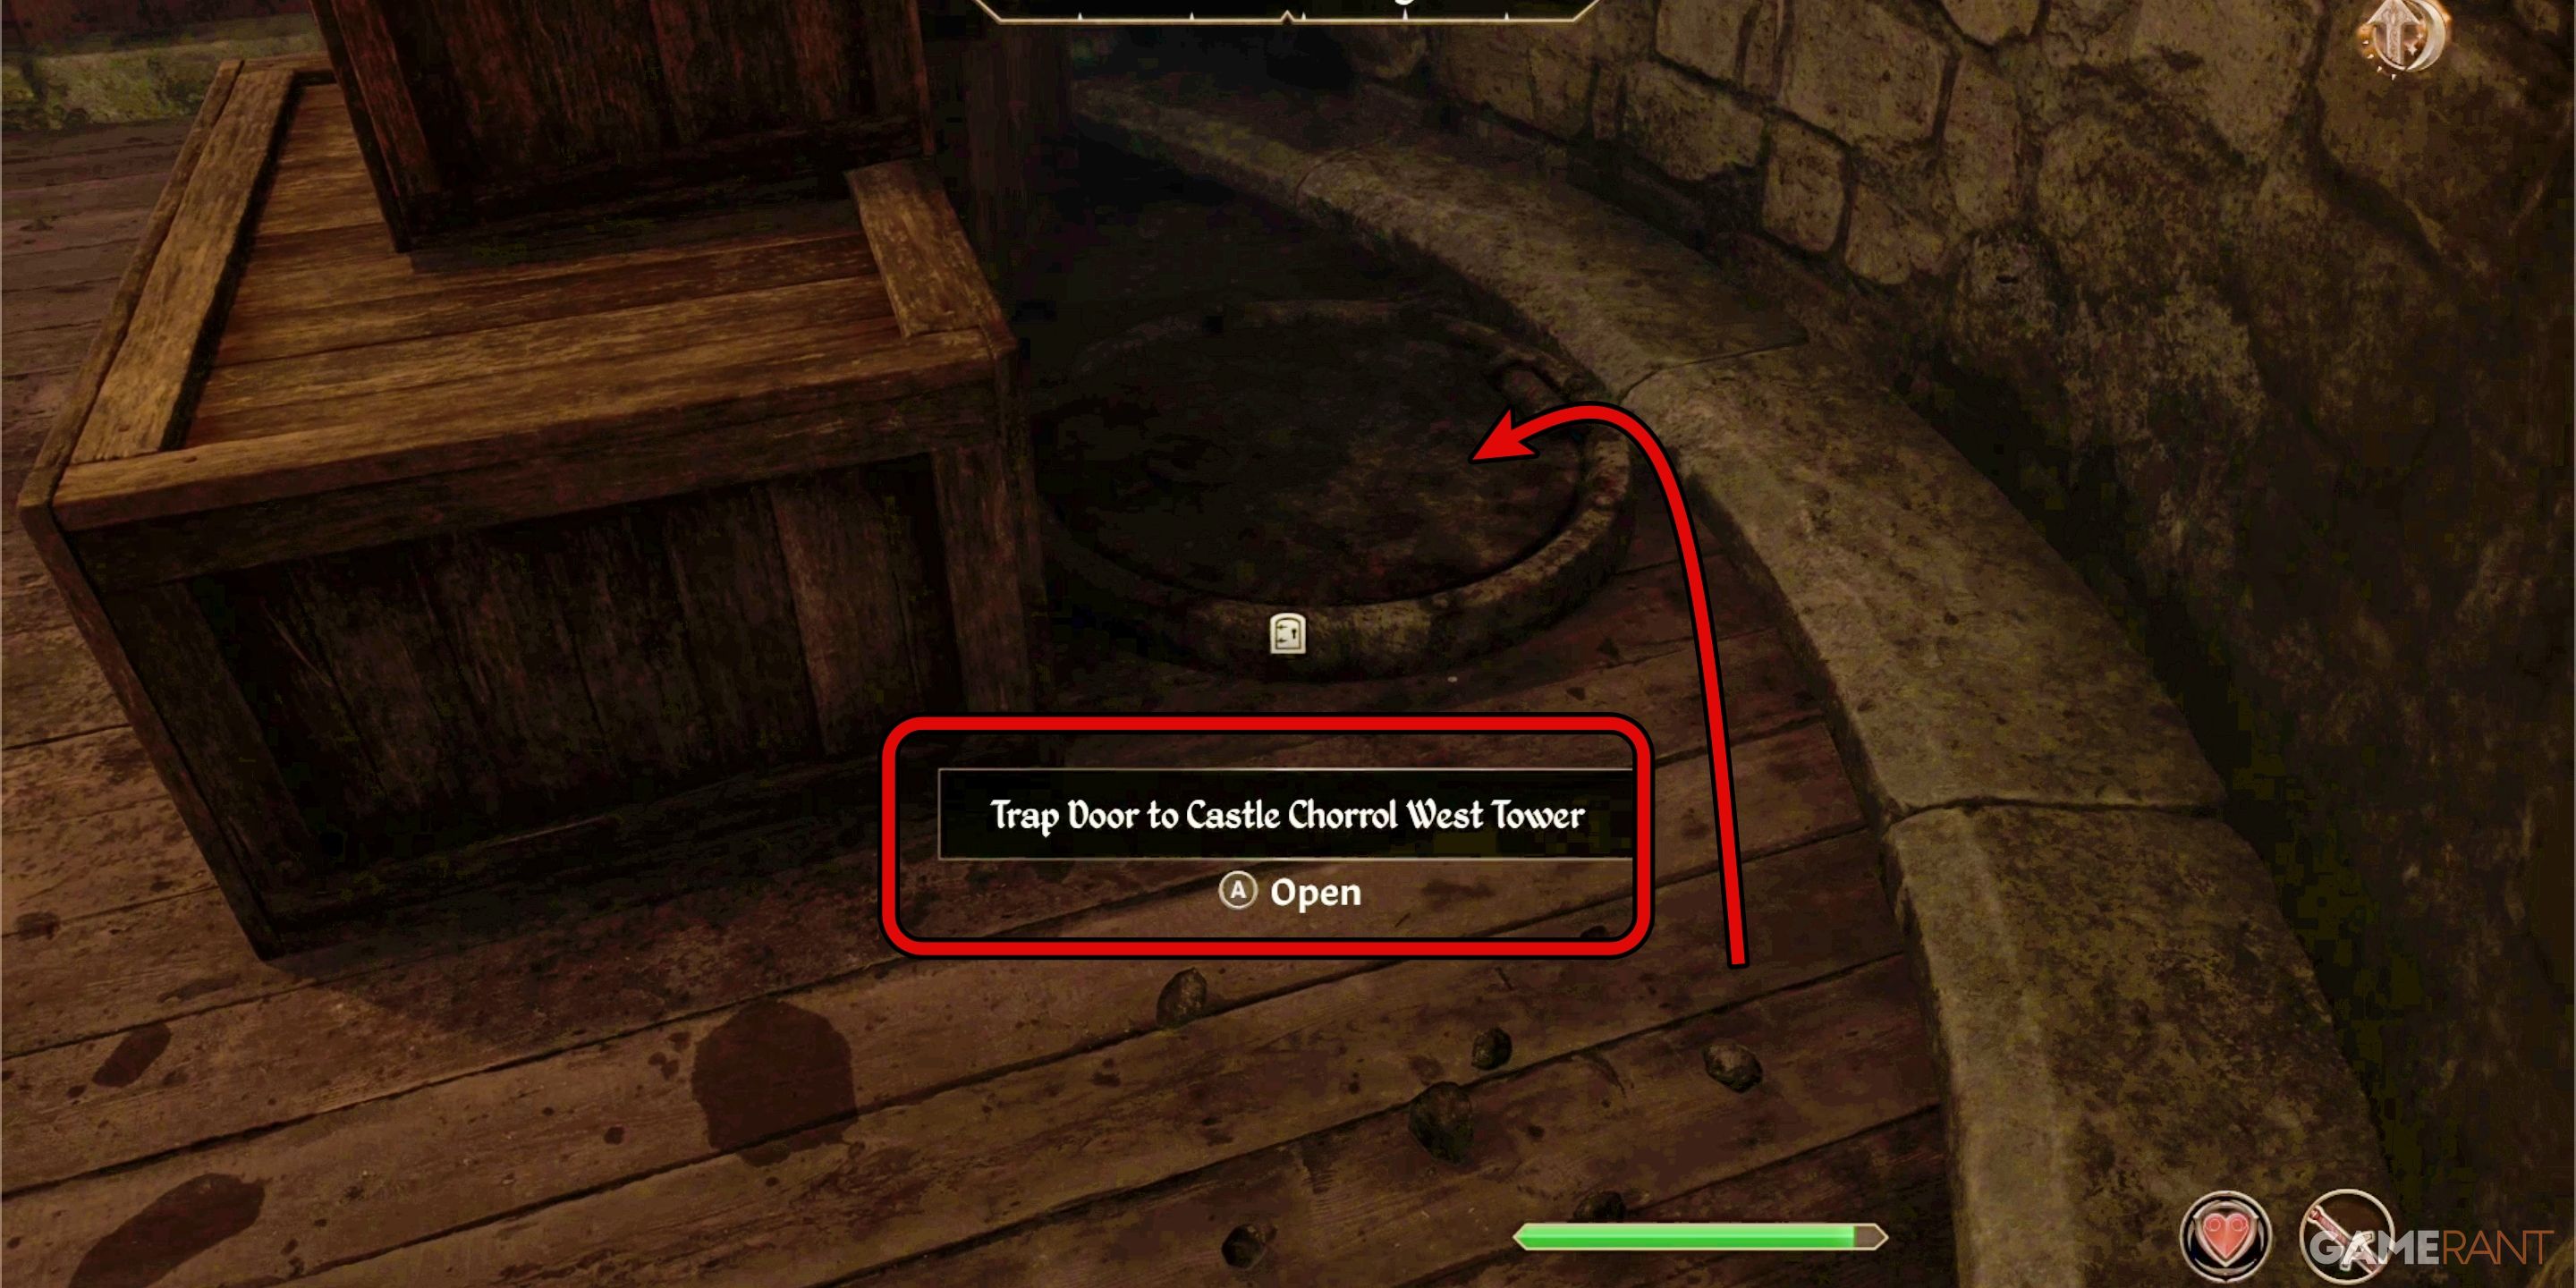
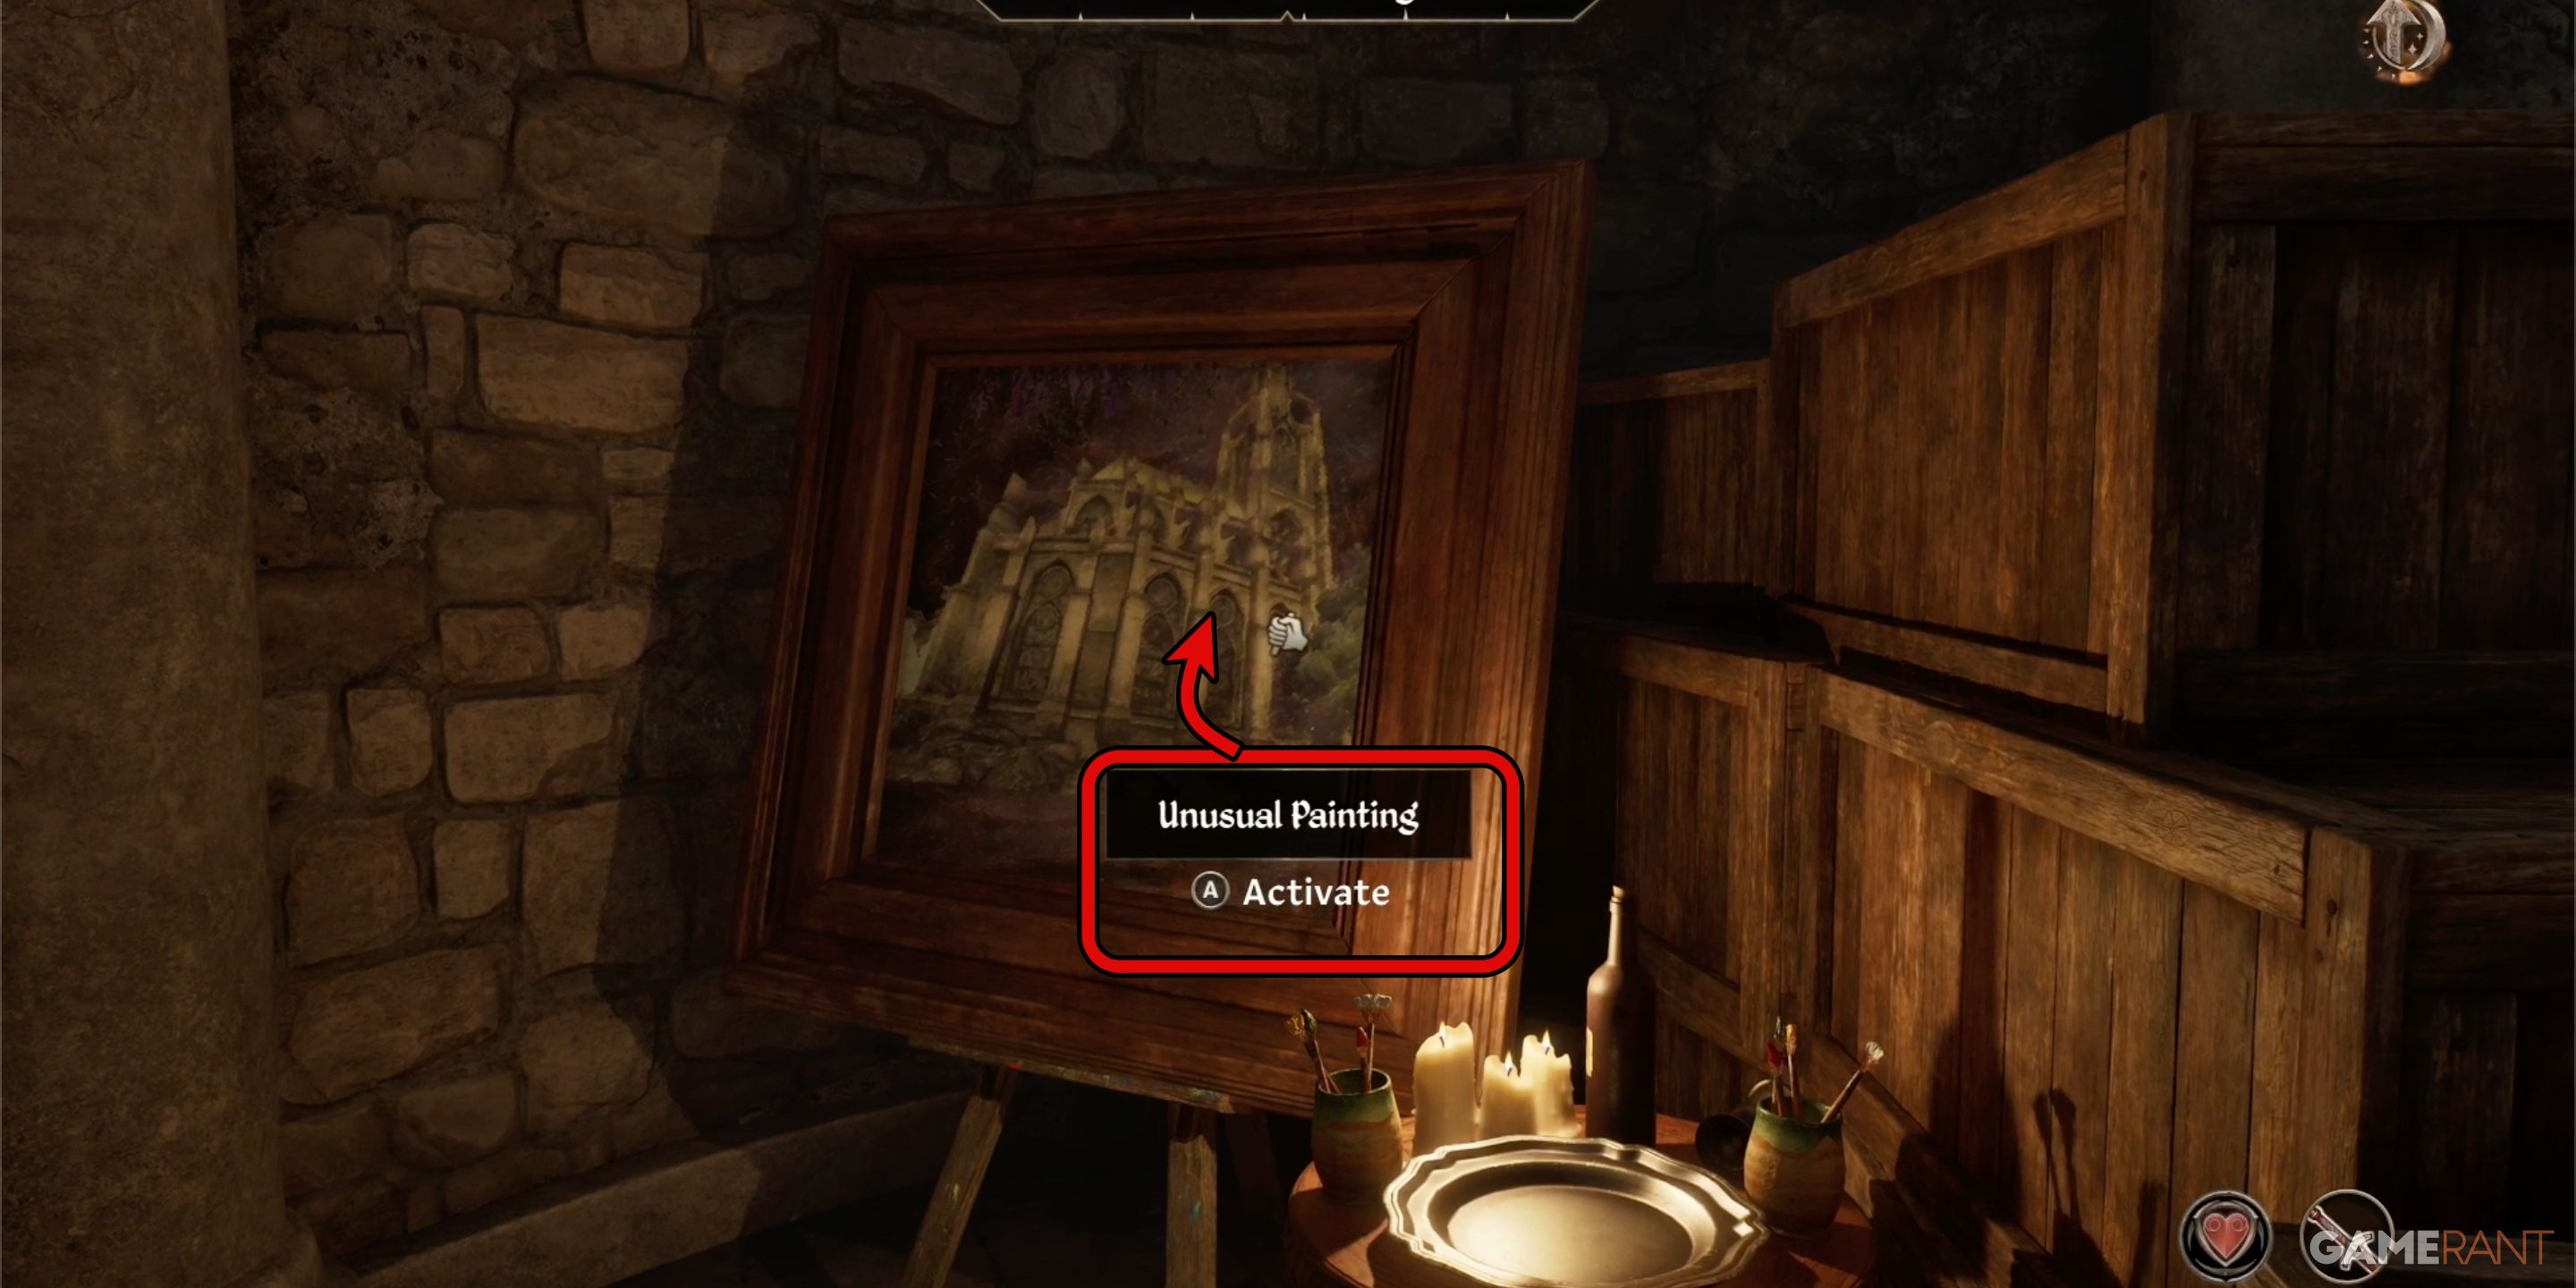
In the West Tower, take a peek beyond the stacked boxes, and you’ll stumble upon a concealed entrance – a hidden trap door. Step through this secret passage, and you’ll uncover a clandestine space where artwork is being created. Investigate the art to unearth your first hint. Although this finding doesn’t provide definitive proof, it serves as an essential starting point. The subsequent objective is to identify a potential suspect with some sort of link to the painting process.
Location 2 – Chanel’s Chamber:
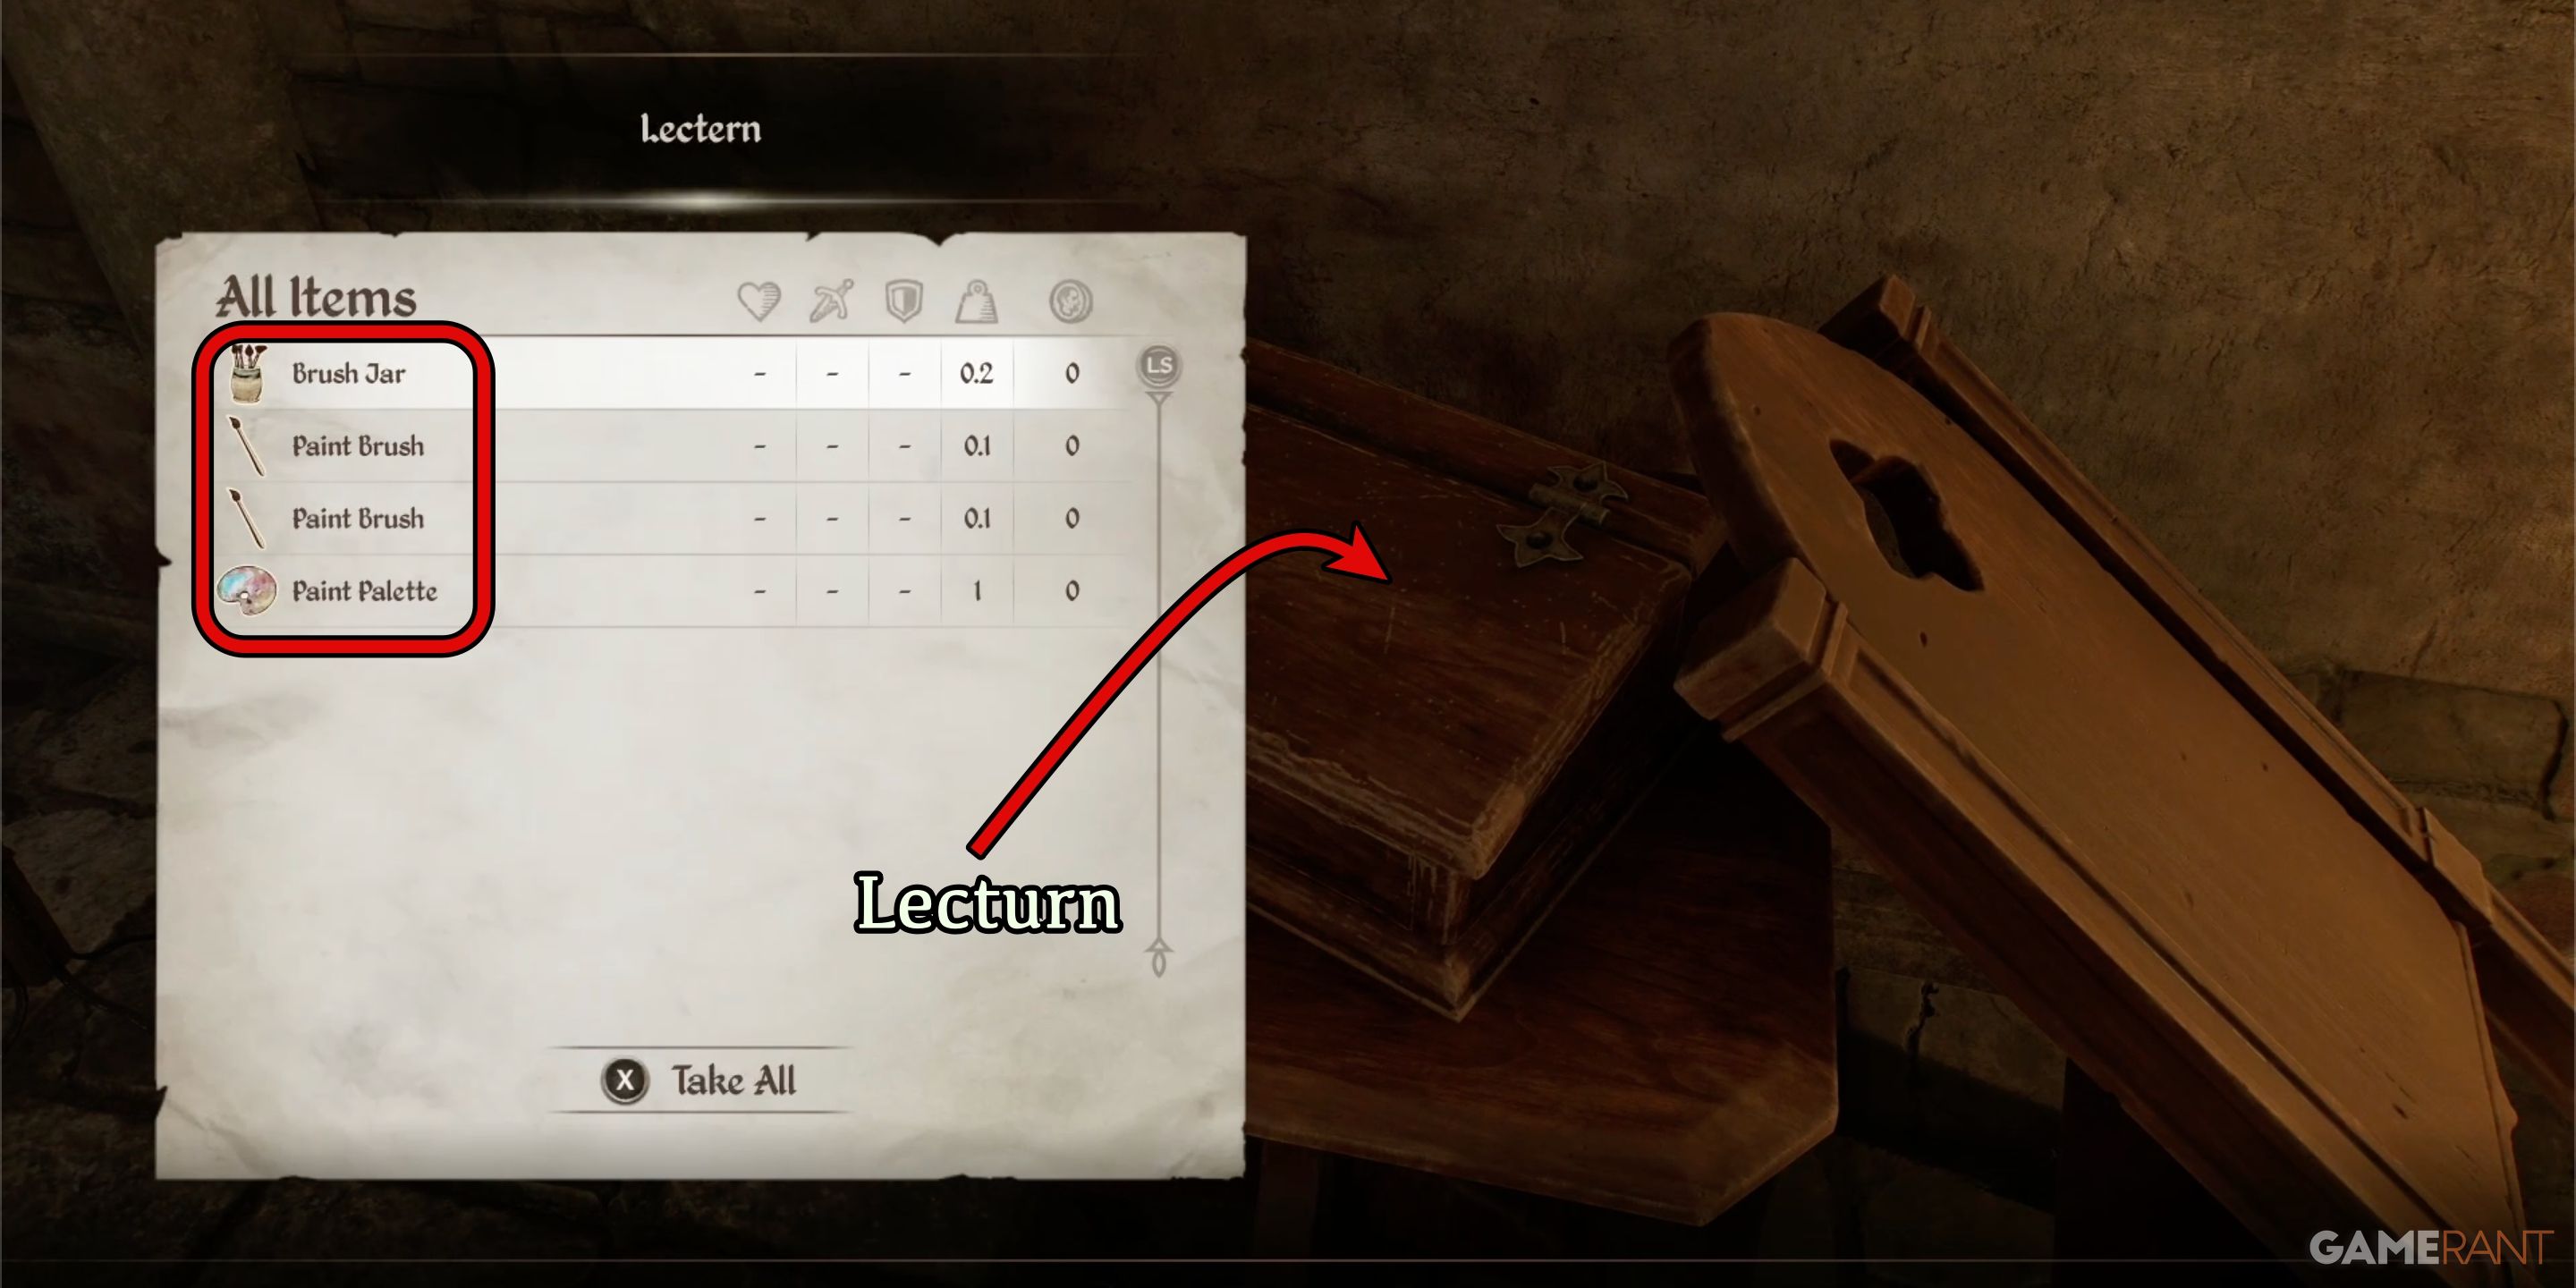
Following a thorough search of all suspects’ living spaces, only one area – Chanel’s Quarters – shows any link to painting. Upon investigation of her study table (lectern), you will discover highly incriminating painting materials. Now, a clearer picture is emerging. Examining the remaining evidence, we can observe that Channel was also seen frequenting the Dining Room.
Location 3 – Dining Hall:
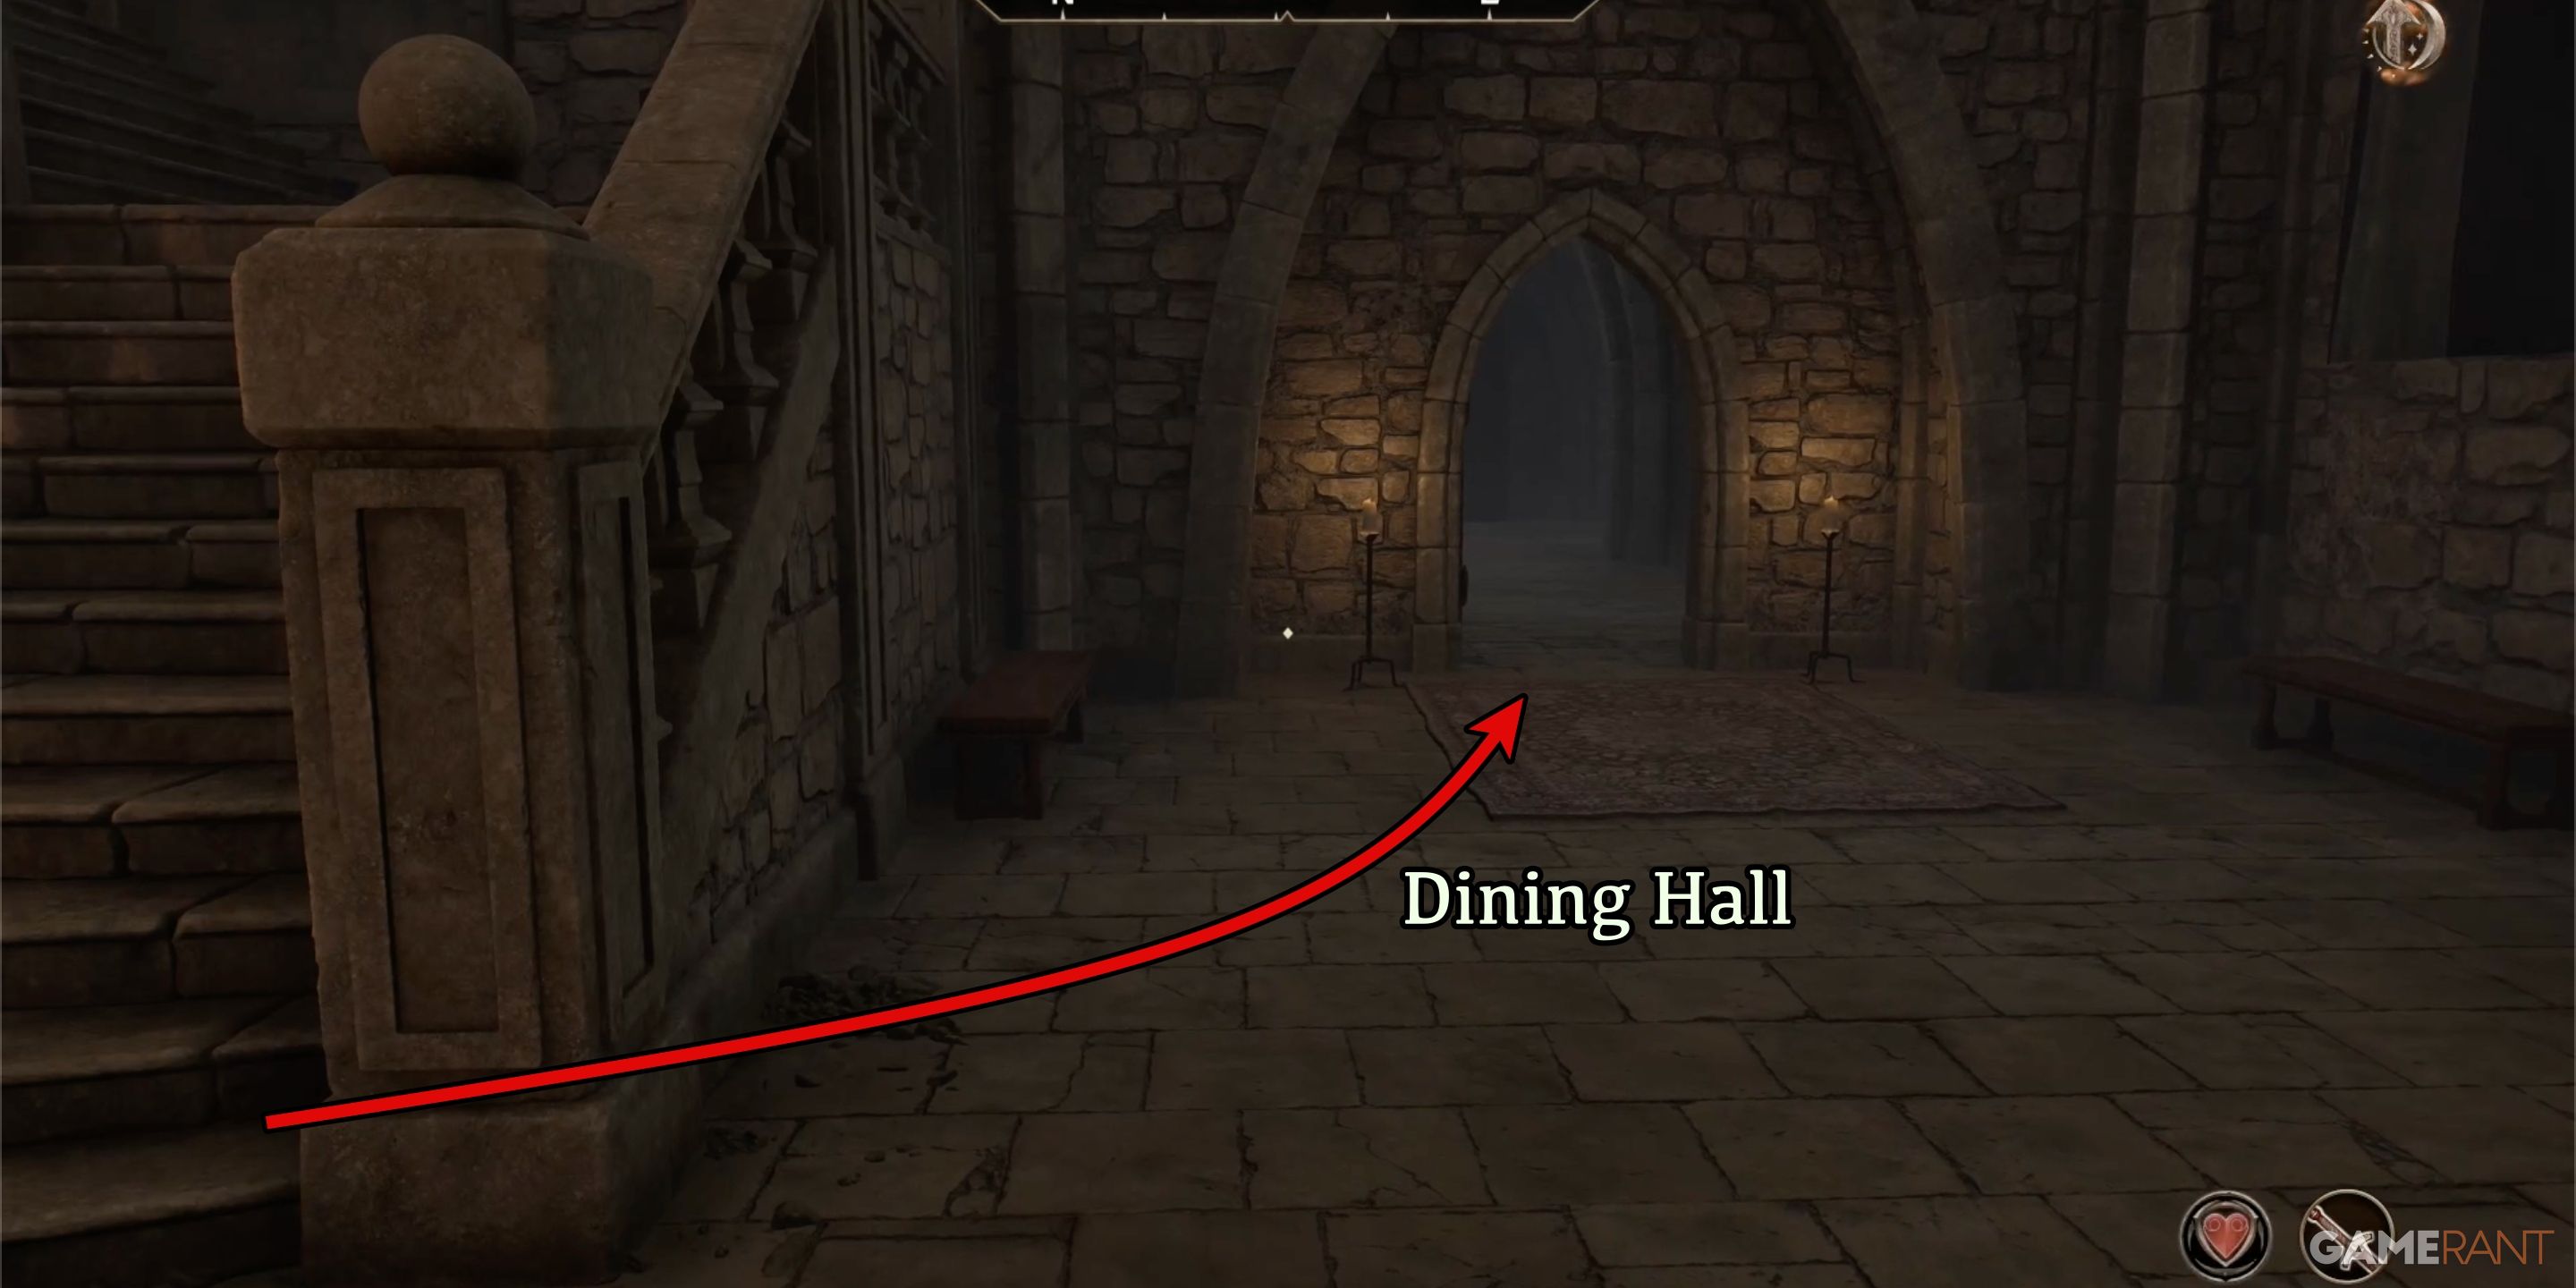
The last spot you should go to is the Dining Room, situated next to the Throne Room. Take a look at the floor towards the end of the carpet under the table, specifically where the person sitting in the last seat was positioned.
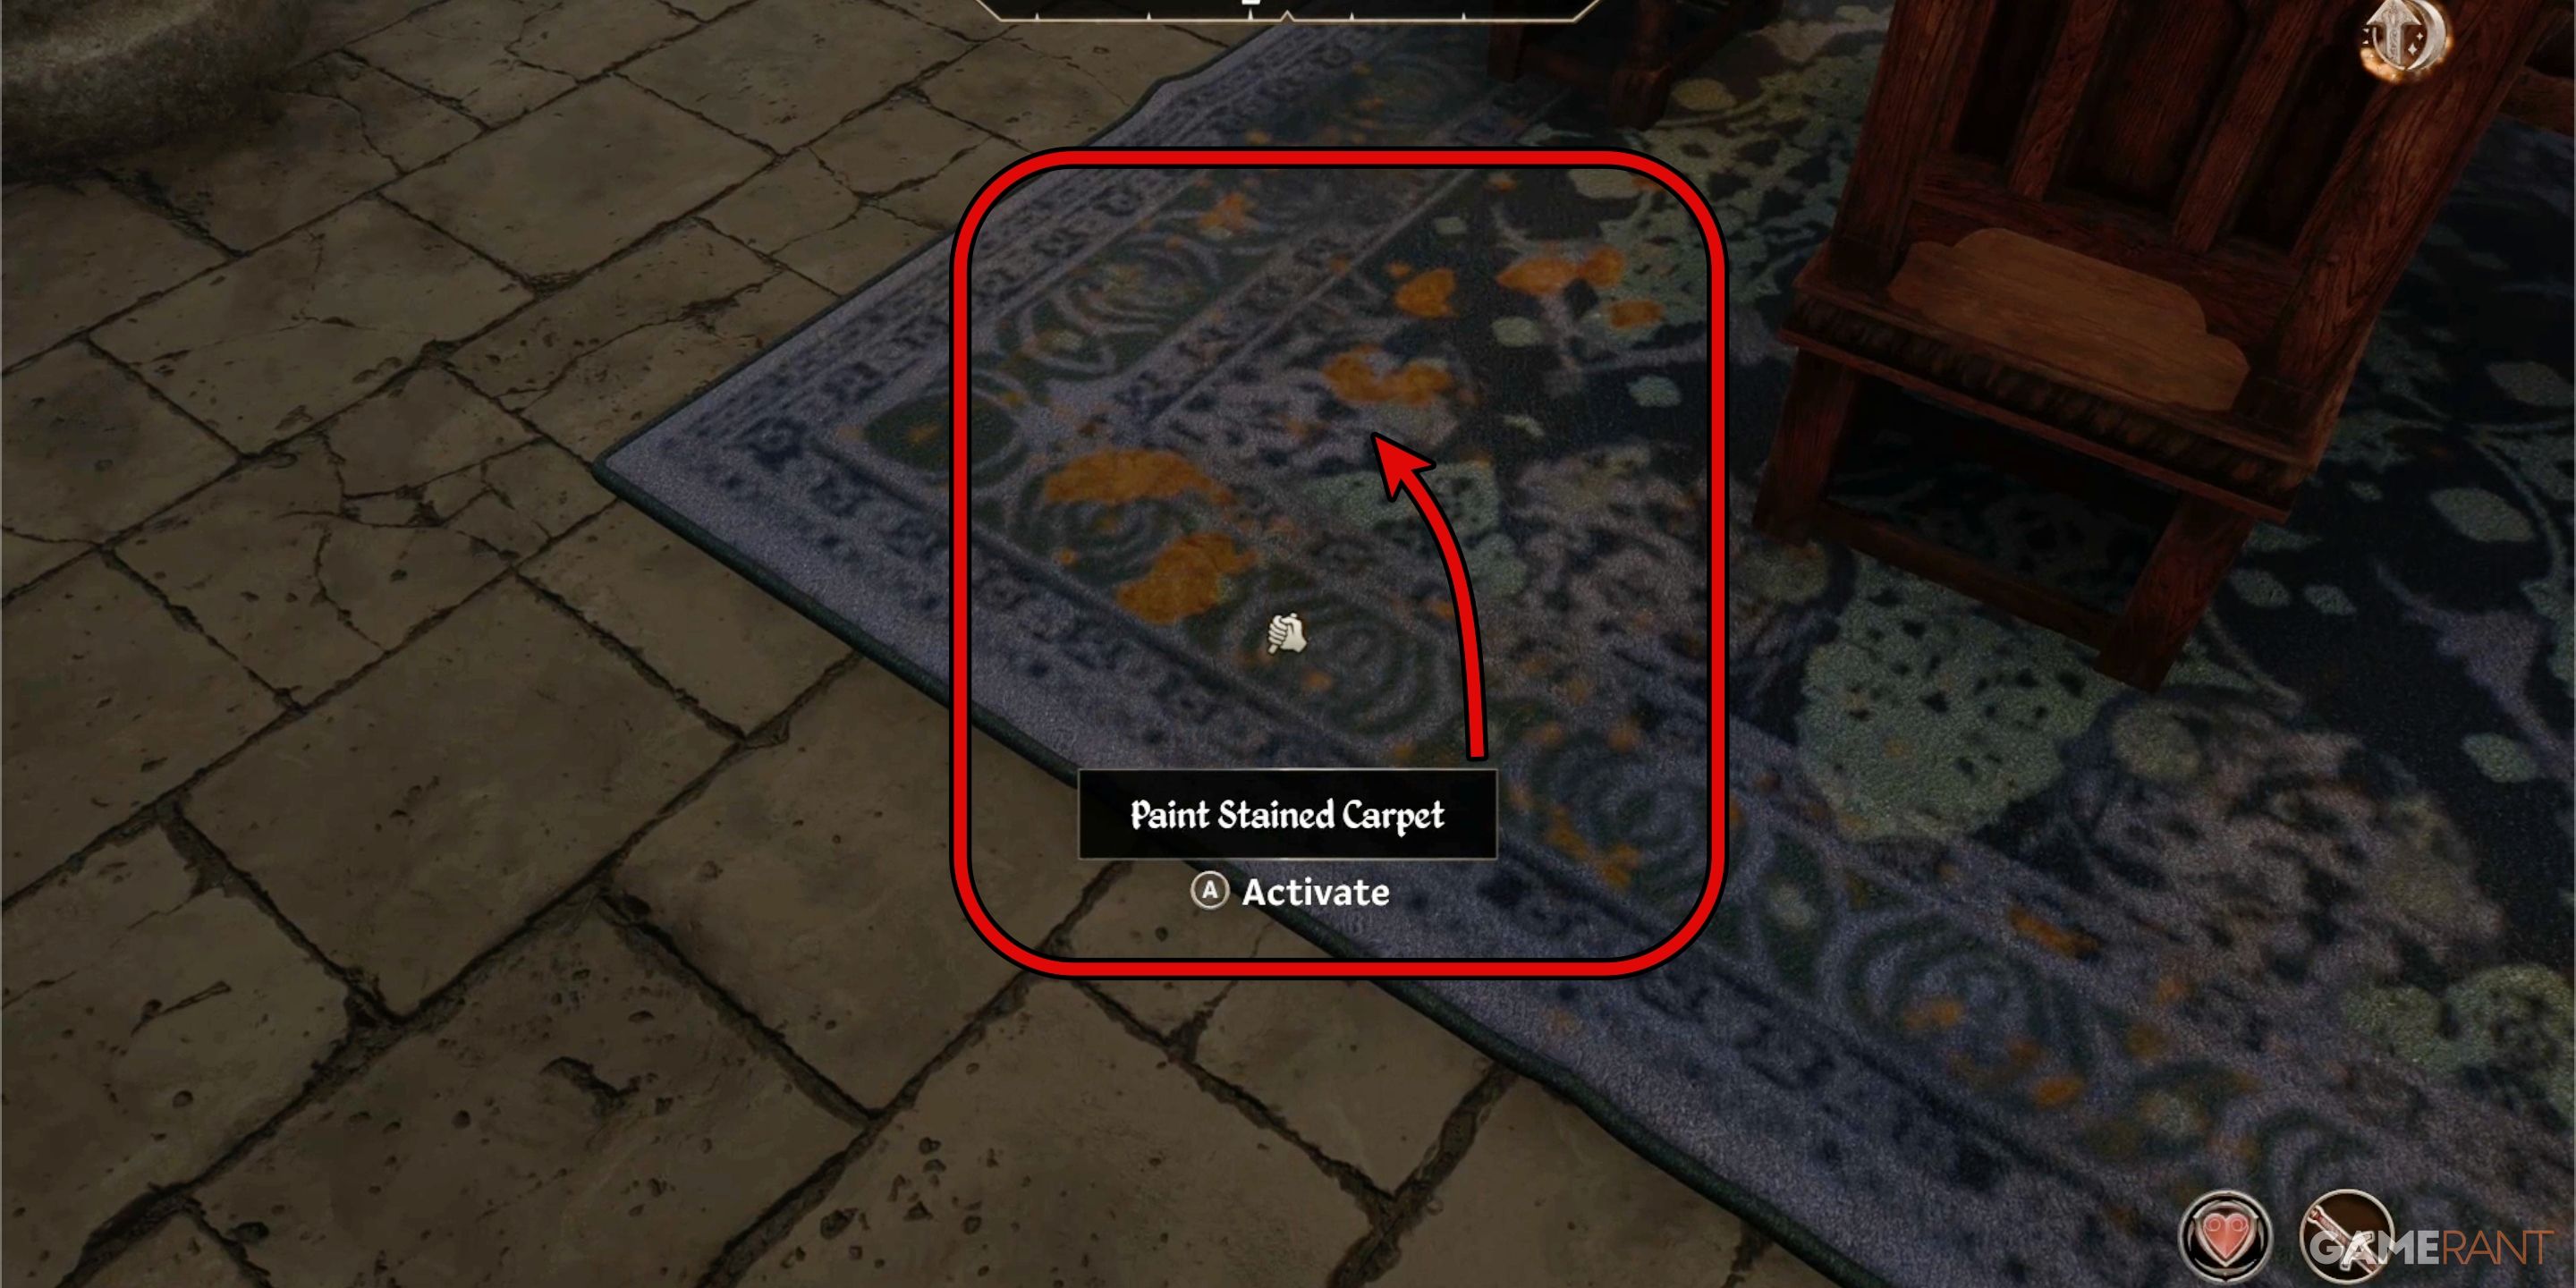
You’ll notice a smear of paint on the carpet, which, in combination with other hints related to the artwork, indicates that this is the last missing piece of evidence. Once you’ve found it, the game will signal that you now possess sufficient proof to bring an accusation.
Canvas the Castle All Endings – Oblivion Remastered
Chanel stole the painting, and is the suspect you should accuse.
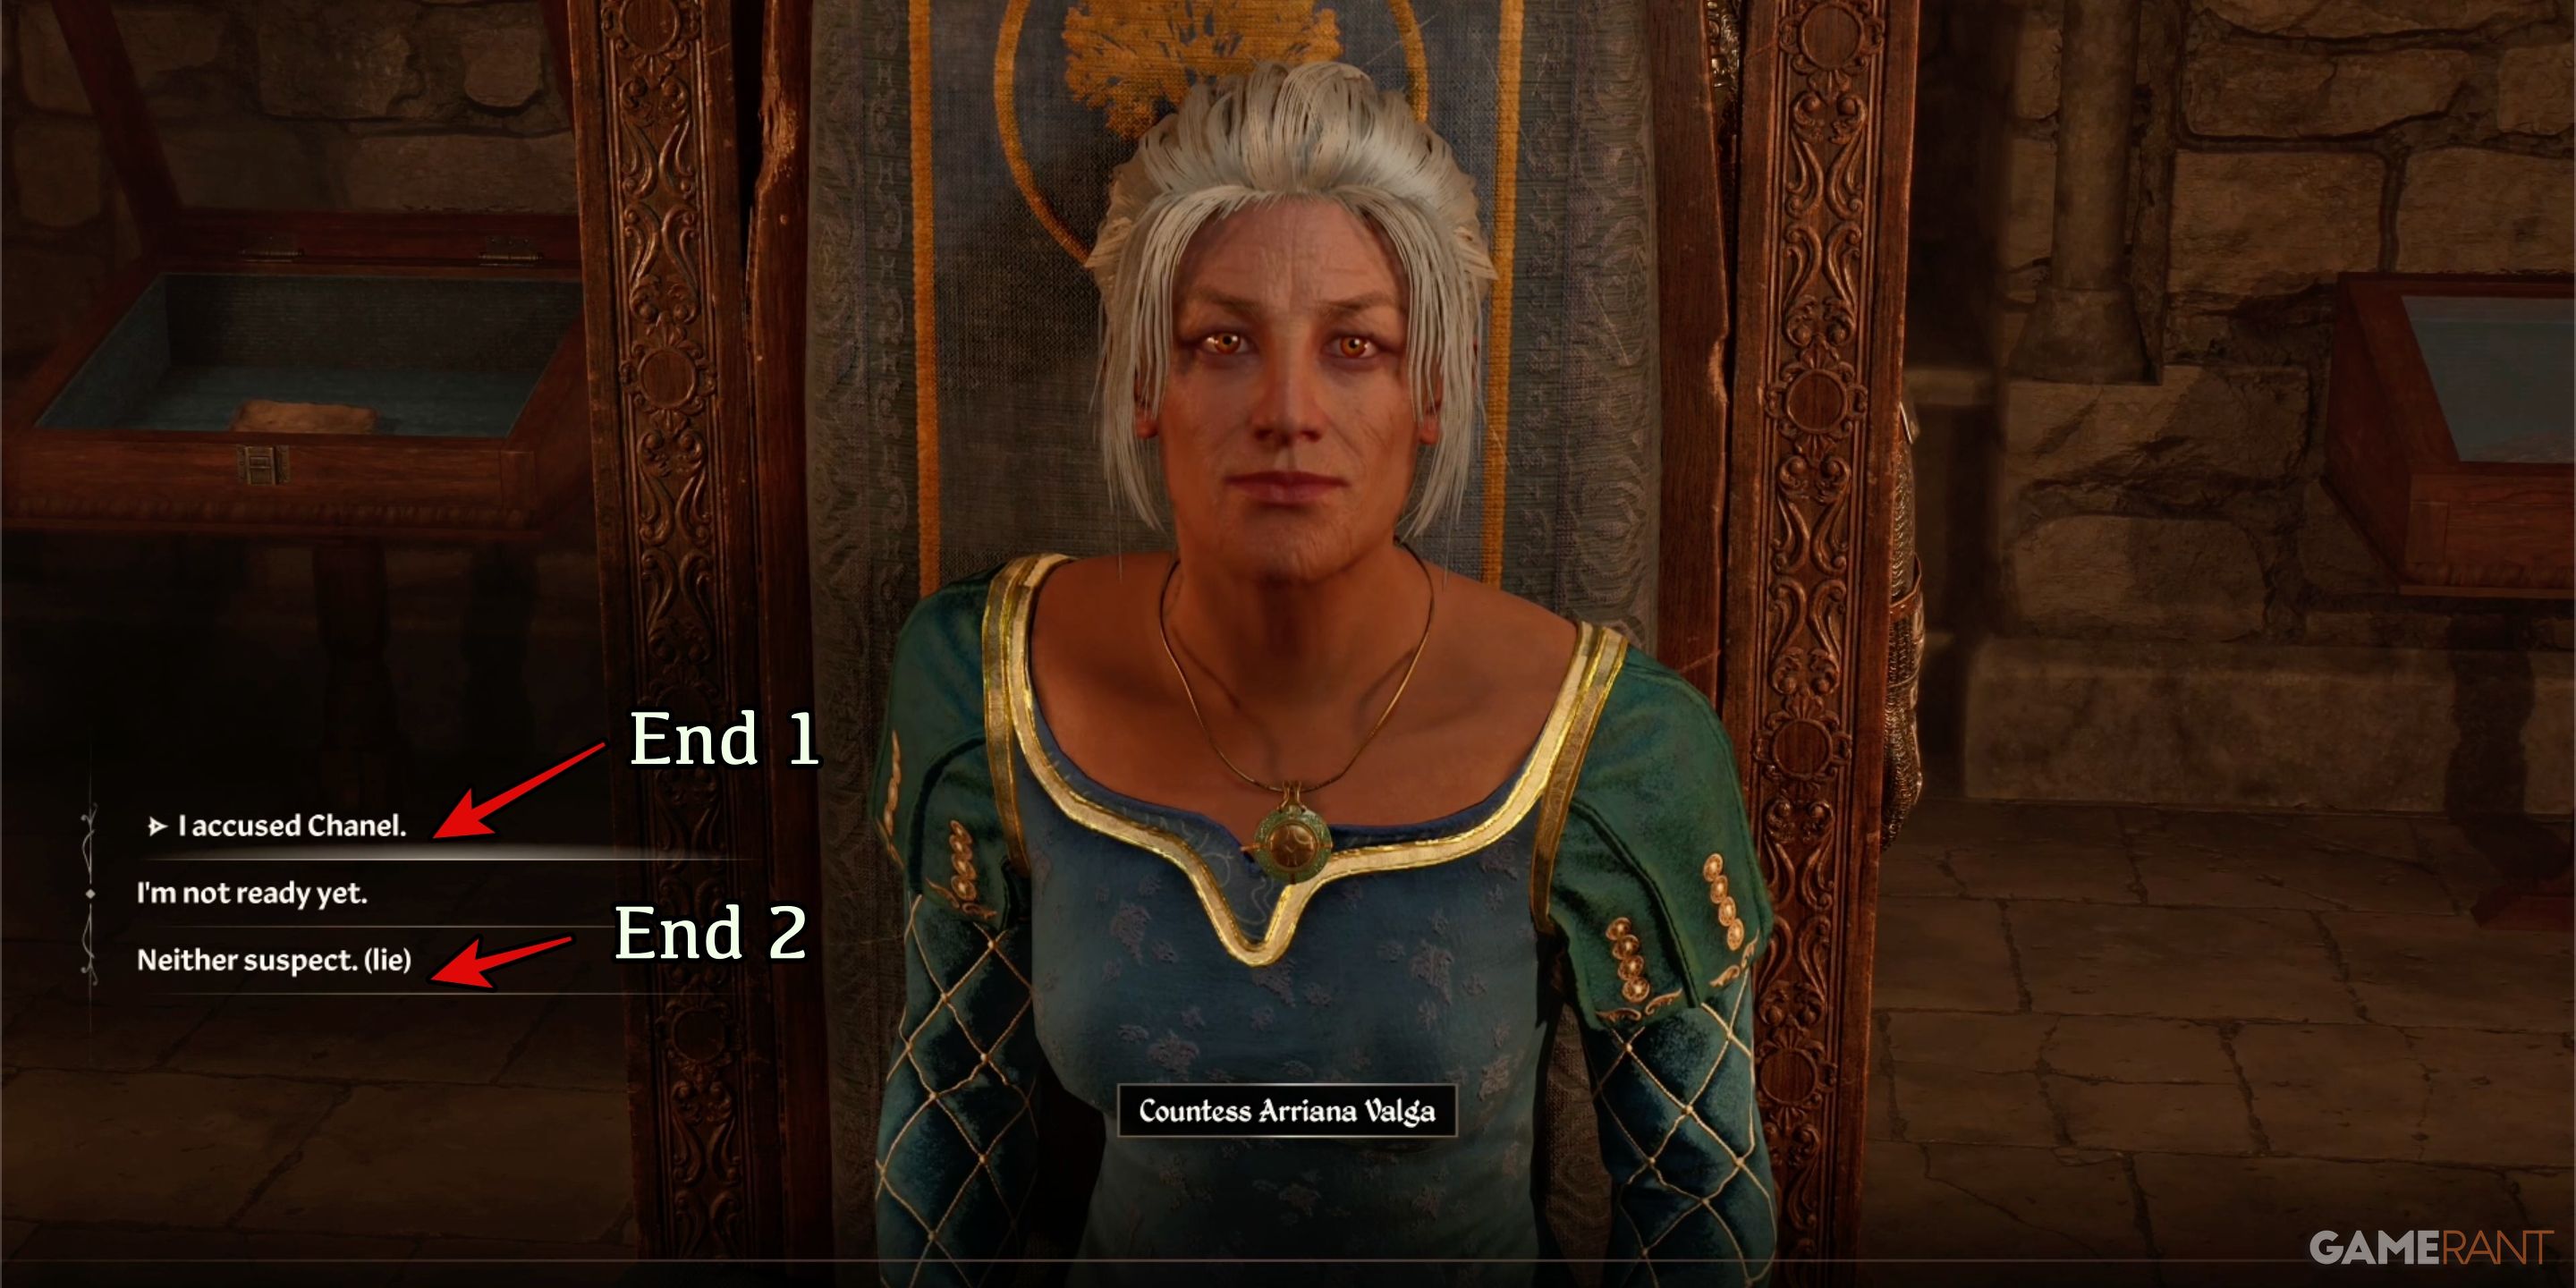
In the game “Canvas the Castle,” there are two distinct conclusions, each offering different results and prizes. The dilemma many players face is whether or not to inform the Countess about Chanel. This decision determines which of the game’s endings you will reach.
After you accuse Chanel of being the thief, it’s revealed that she is indeed the one who created the portrait of Count Valga. It turns out that she harbored affection for the Count and desired the painting for her own collection. Although her reasons might seem understandable to some, the Countess still has a valid reason to be angry, as she wants the painting returned.
Like so many things, it will likely come down to the rewards you wish to collect.
Ending 1 – Turn in Chanel:
In the initial scenario, it was necessary to deliver the painting to Chanel. If you choose this path, the Countess will appreciate your efforts immensely. Even if she doesn’t punish Chanel, the Court Mage will find himself unwelcome in Chorral.
Rewards for Ending 1:
- 200 Gold
- 2x Flawed Topaz
Ending 2 – Lie to the Countess:
In the second scenario, you’re asked to mislead Countess Valga by stating that neither of the primary suspects took the painting. This seemingly suggests that you couldn’t locate the artwork at all. Interestingly, the Countess seems relieved that a staff member didn’t steal it. As a reward for your diligent work, she offers you 25 Gold.
Afterward, go back to Chanel. She’ll appreciate your decision not to betray her, and her painting is now back in her possession. She requests you to come back in three weeks, and she promises a unique painting for you then. This wraps up the current quest. Spend the required time within the game, and return to Chanel later. In return, she’ll reward you with a portrait of your character which can be displayed at home. Once this task is accomplished, the mission will officially come to an end.
Read More
- All Skyblazer Armor Locations in Crimson Desert
- One Piece Chapter 1180 Release Date And Where To Read
- How to Get the Sunset Reed Armor Set and Hollow Visage Sword in Crimson Desert
- All Shadow Armor Locations in Crimson Desert
- Marni Laser Helm Location & Upgrade in Crimson Desert
- All Golden Greed Armor Locations in Crimson Desert
- All Helfryn Armor Locations in Crimson Desert
- How to Beat Stonewalker Antiquum at the Gate of Truth in Crimson Desert
- All Icewing Armor Locations in Crimson Desert
- Black Sun Shield Location In Crimson Desert (Buried Treasure Quest)
2025-04-25 06:57