Quick Links
- Behind Enemy Lines
-
Dead Drop
-
Sonderzüge Sabotage
-
Collision Course
-
Devil’s Cauldron
-
Assault On Fort Rouge
-
Lock, Stock, and Barrels
-
End of the Line
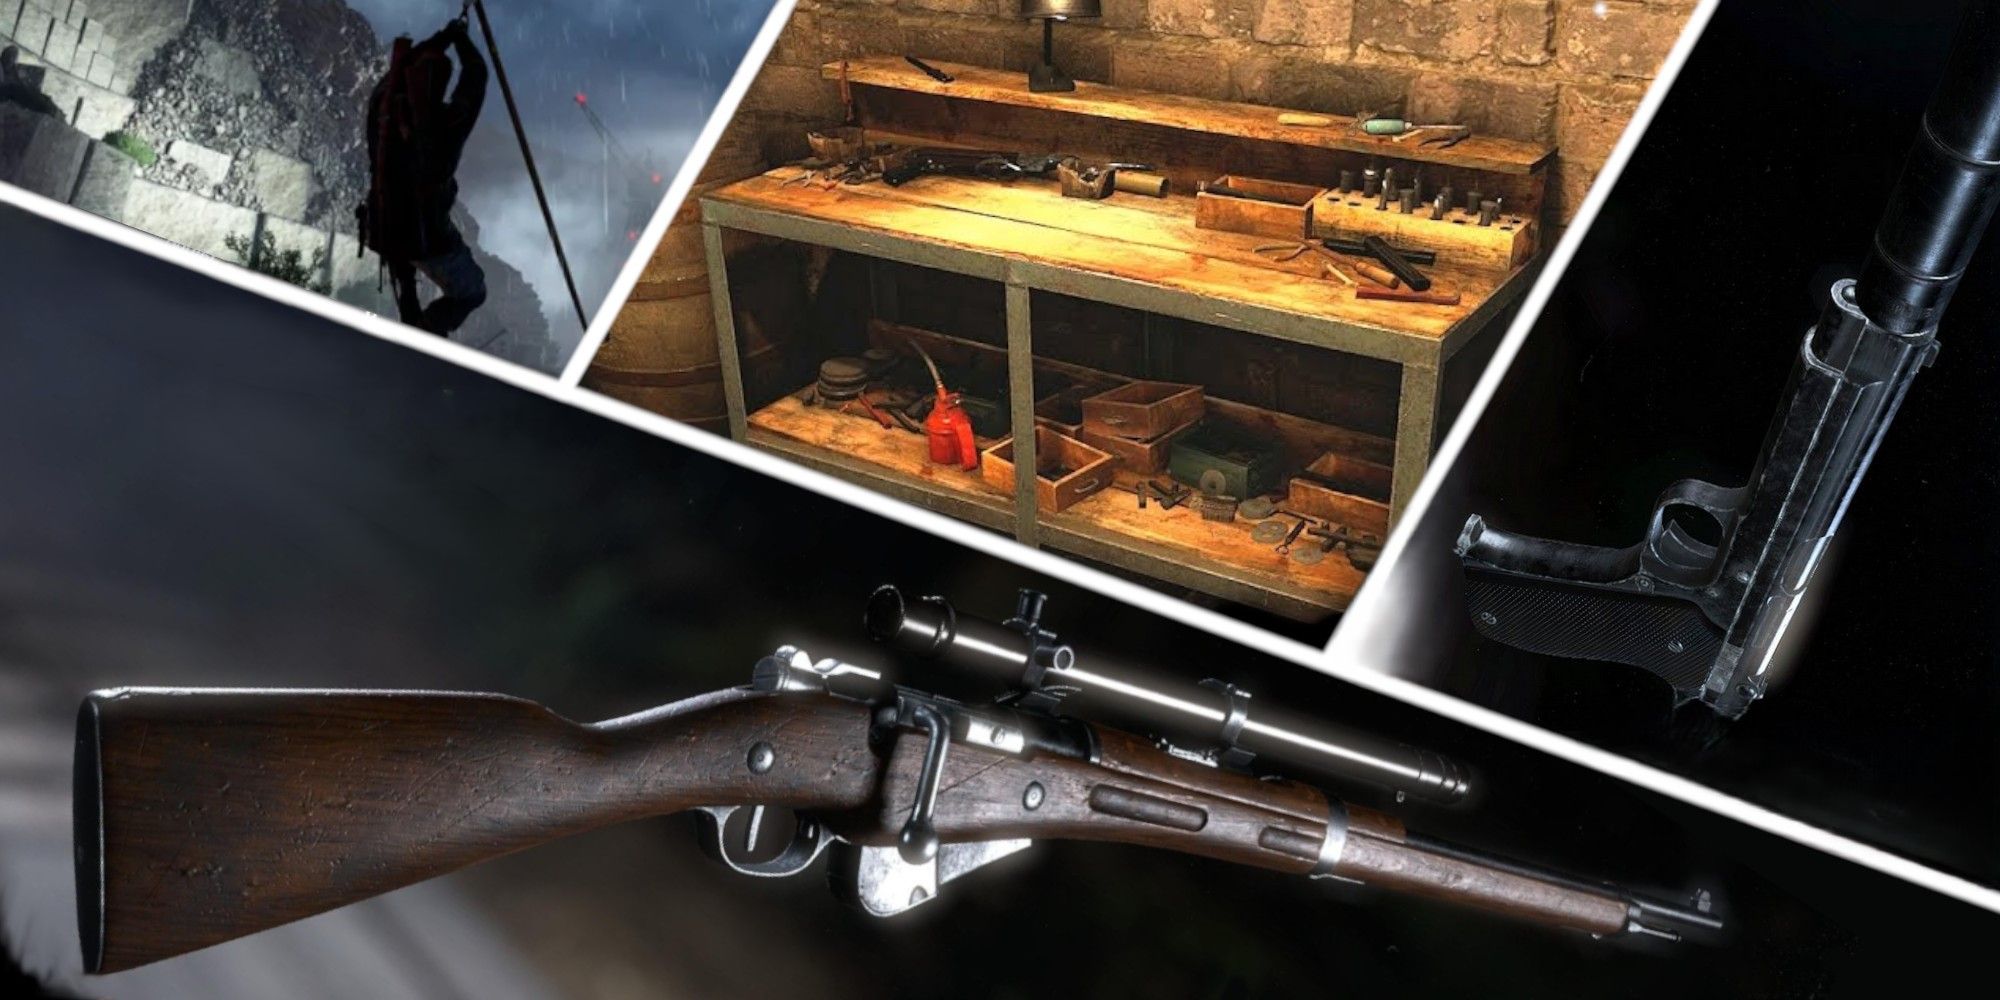
In the game “Sniper Elite: Resistance,” locating workbenches serves as a means to advance your equipment inventory.
In every mission within Sniper Elite: Resistance, excluding the introductory level in Behind Enemy Lines, you’ll find that there are three workbenches.
As a gamer, every workbench I stumble upon offers enhancements tailored to various types of weapons or even introduces entirely new firearms. Some times, these upgrades don’t make much difference and aren’t really worth the time; other times, the loot I discover can drastically change my gameplay experience for the rest of the campaign.
The majority of workstations described in this manual are surrounded by several adversaries, yet they pose no challenge for a courageous Special Operations Executive operative.
To ensure a smooth gameplay experience, be sure to adhere to the instructions provided in the Sniper Elite: Resistance Workbench Locations Guide while completing missions. This will help you prevent the need to retrace your steps and repeat levels for the sake of acquiring your upgrades.
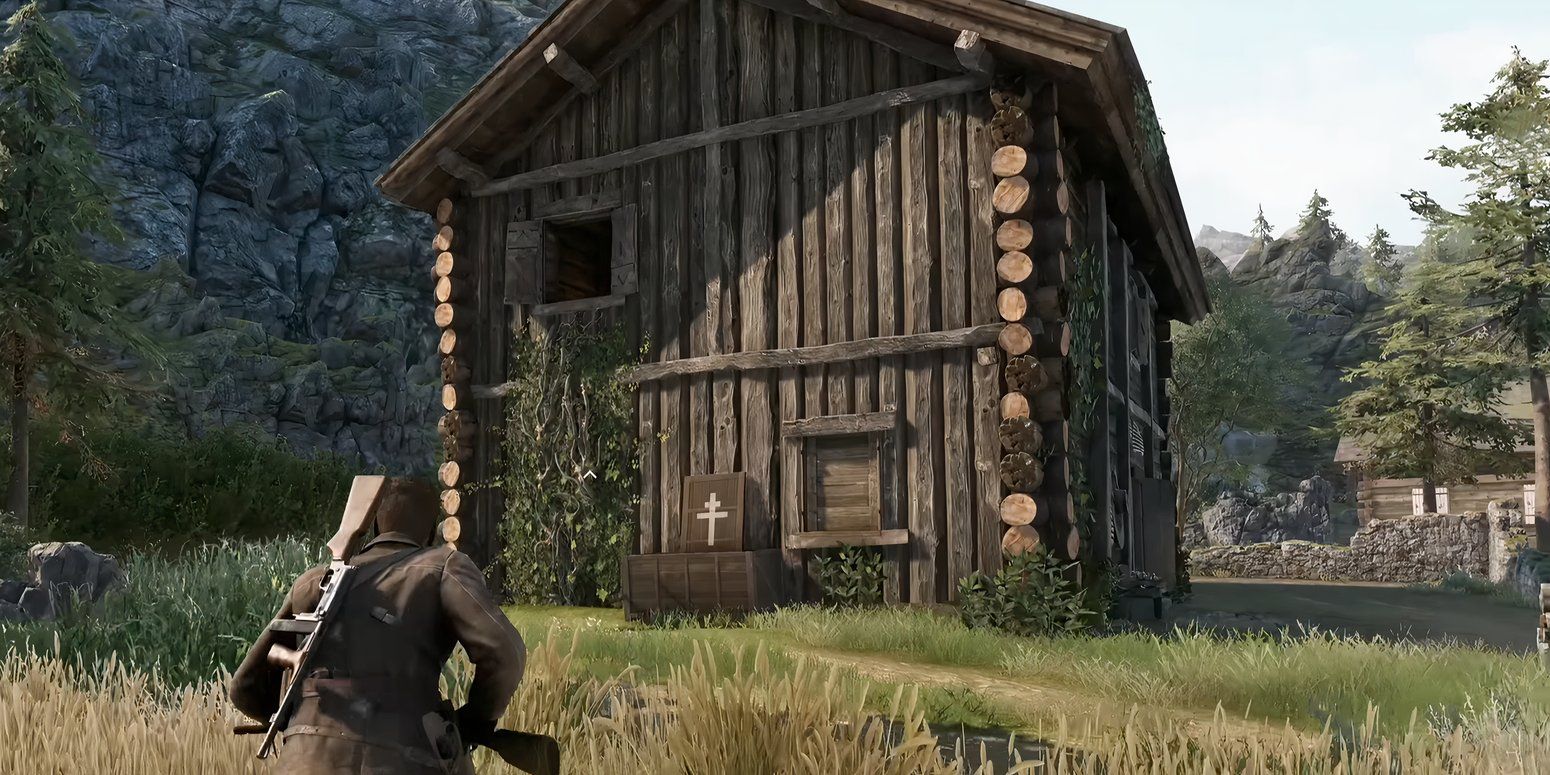
Behind Enemy Lines
Pistol Workbench: Various Attachments
Unlike most maps, “Behind Enemy Lines” doesn’t offer spots for SMGs or rifles. Instead, the usual progression of the mission leads you to the workbench location.
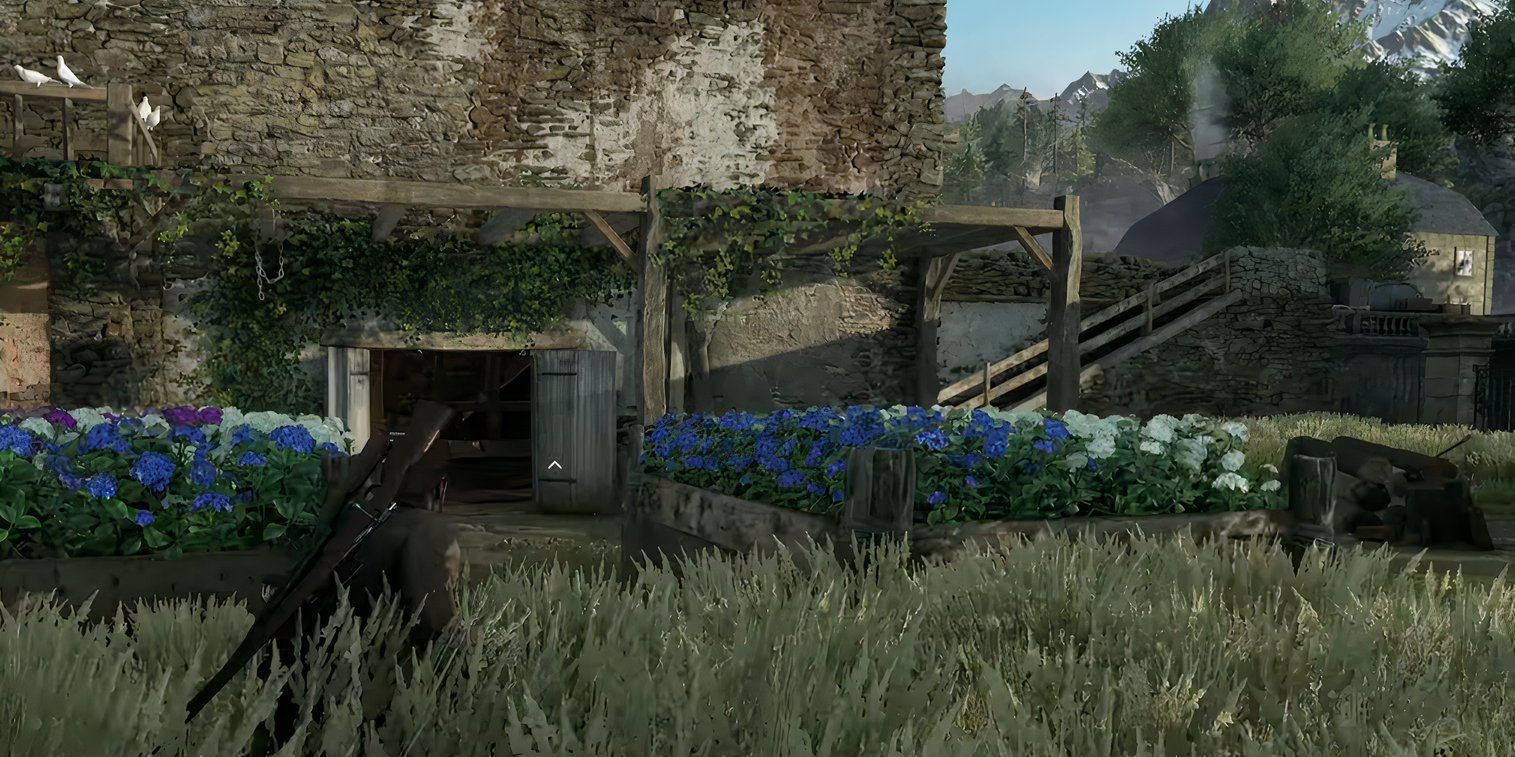
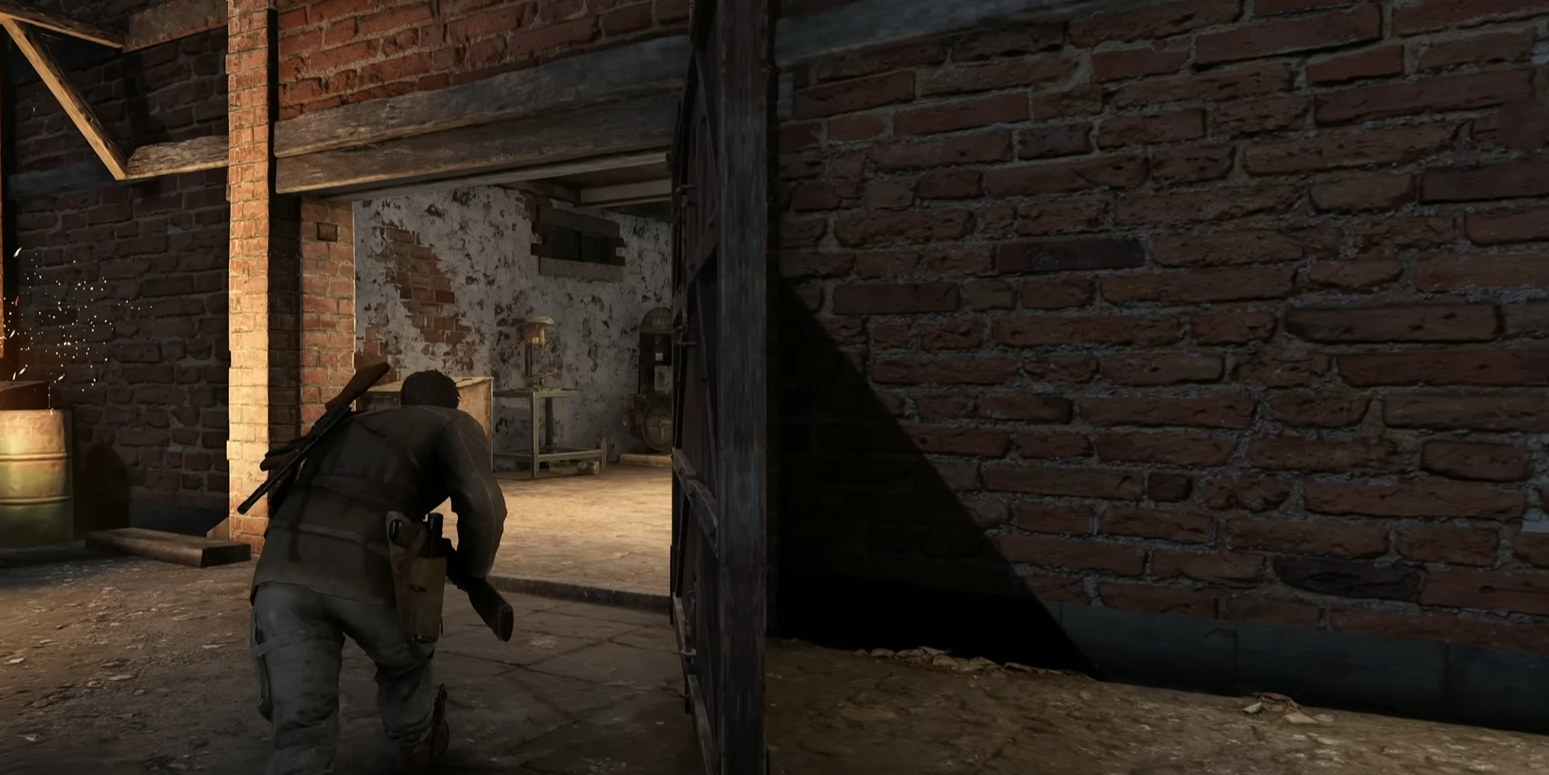
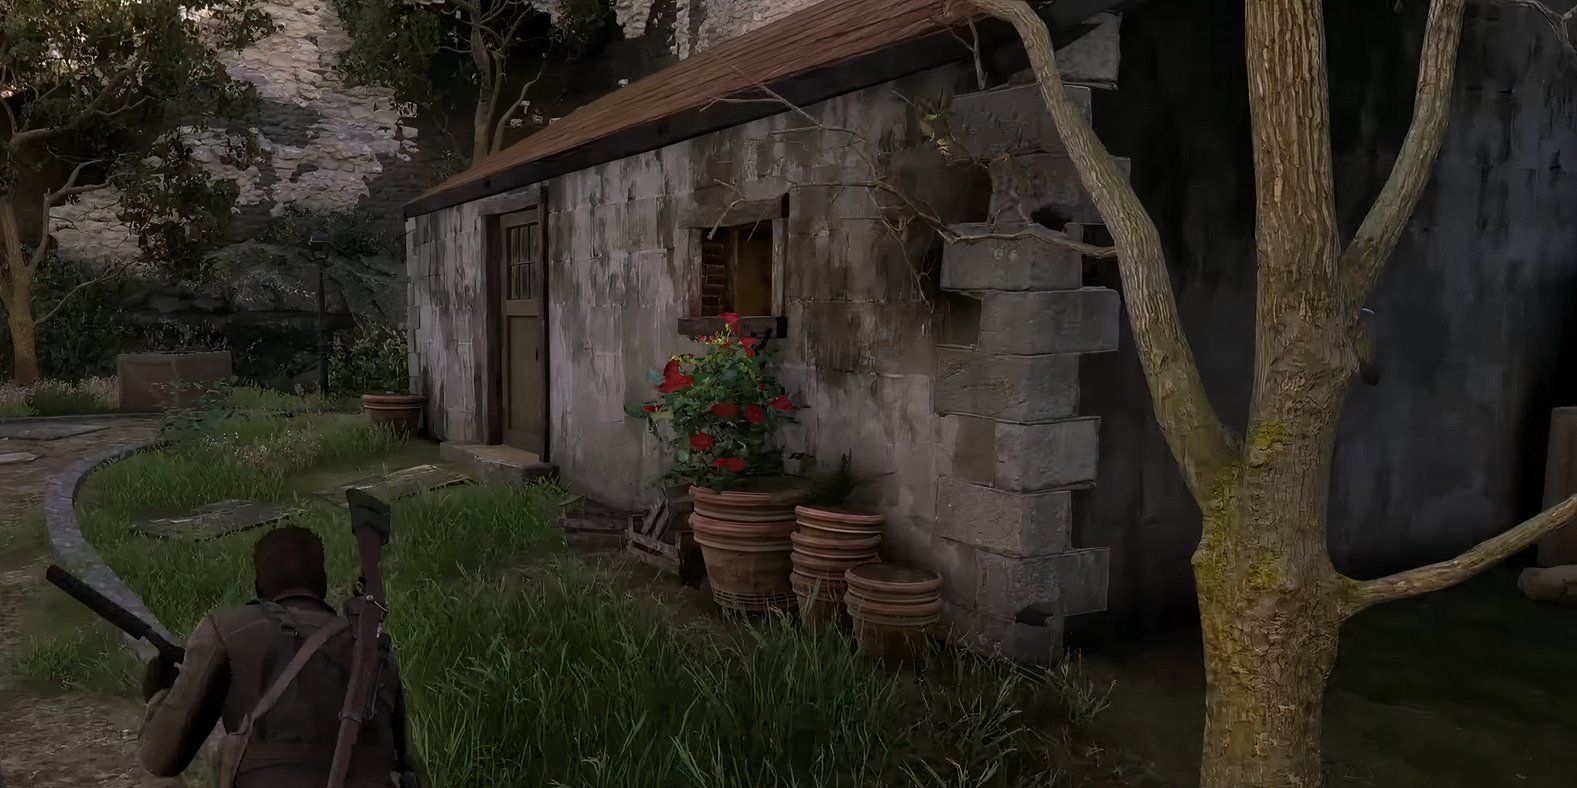
After firing the shot to pressure the dam prior to the Lancaster’s assault run, position yourself in the flower-adorned barn made of bricks.
To your left, you’ll spot boards filling a gap in the wall. After removing these, the workbench will be located all the way at the opposite end of the barn.
Dead Drop
Rifle: Marksmanship Mods
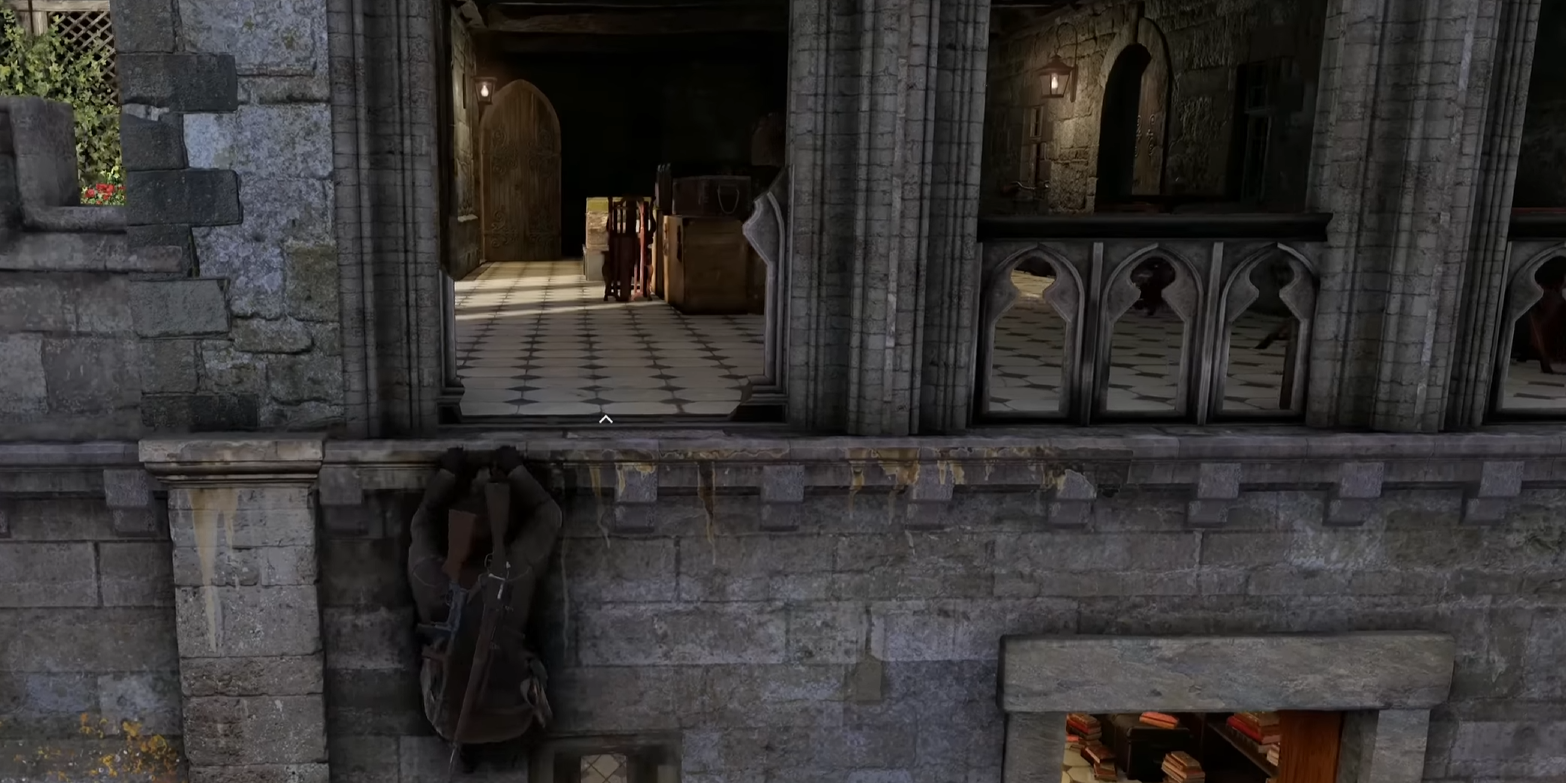
In the southwest part of the map, you can find a structure near the church with street-side crates. You’ll be able to ascend to the second floor using these crates.
Be certain to include bolt cutters among your supplies, since they’ll be essential for cutting open the gate that conceals the workbench within the structure.
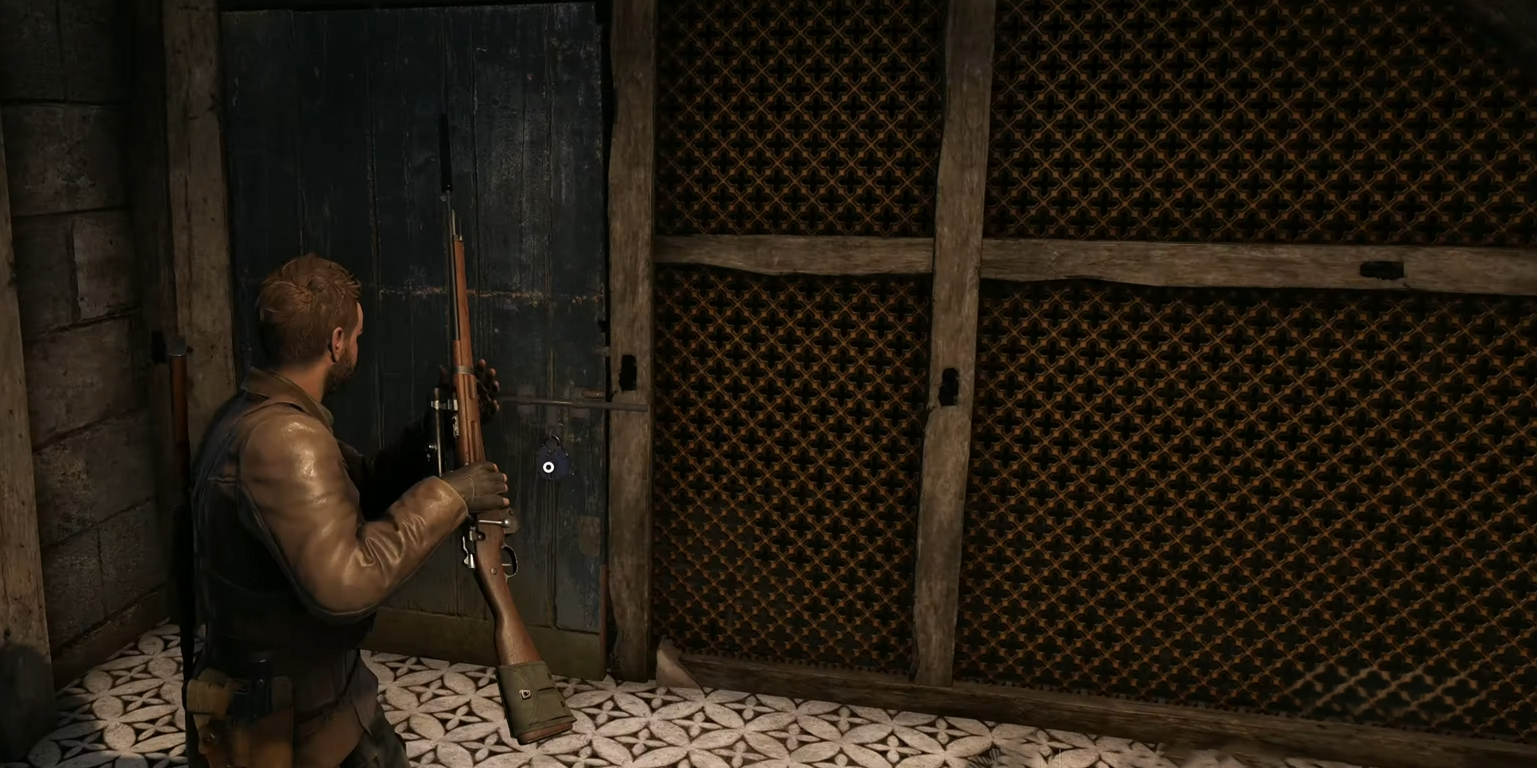
SMG: Control Mods
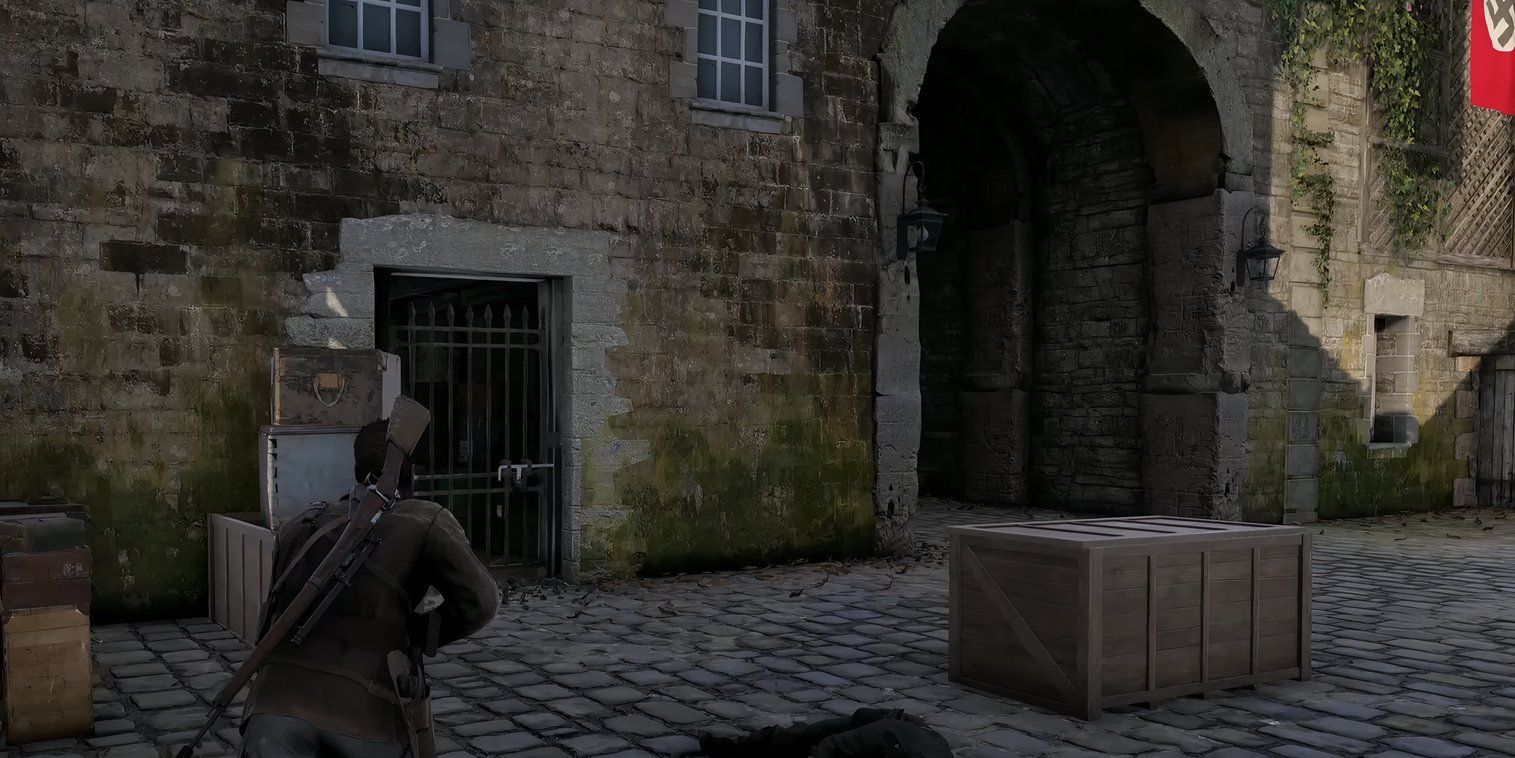
Among all workbenches in Dead Drop, this one is most conveniently located near one of the primary mission targets. Consequently, engaging in combat to reach it will be necessary.
To locate Vertigo’s office in the castle, search for the door set into the wall to your left as you stand at the main entrance. Use the bolt cutters to unlock it and discover a workbench beyond.
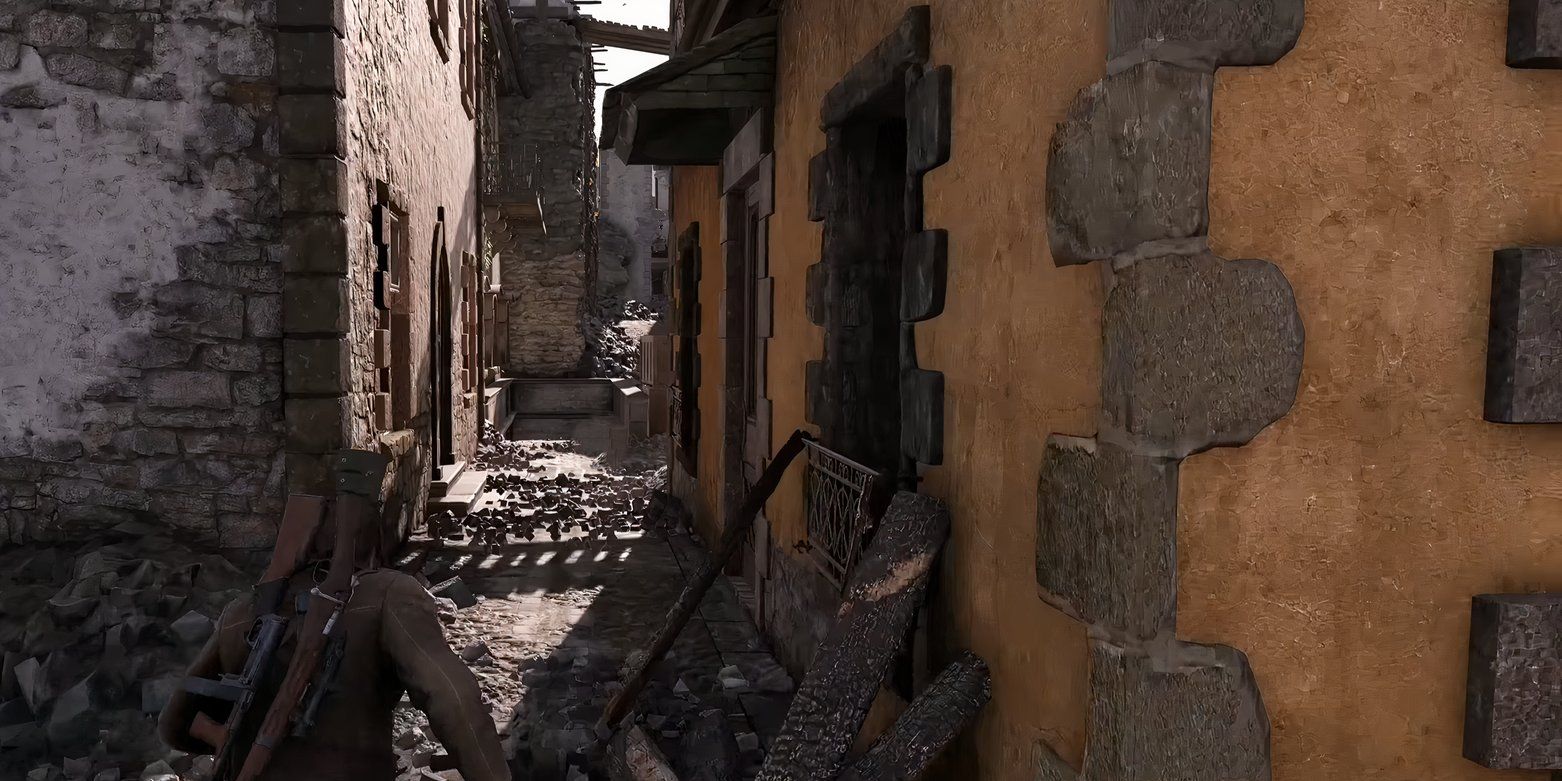
Pistol: Carbine Mods
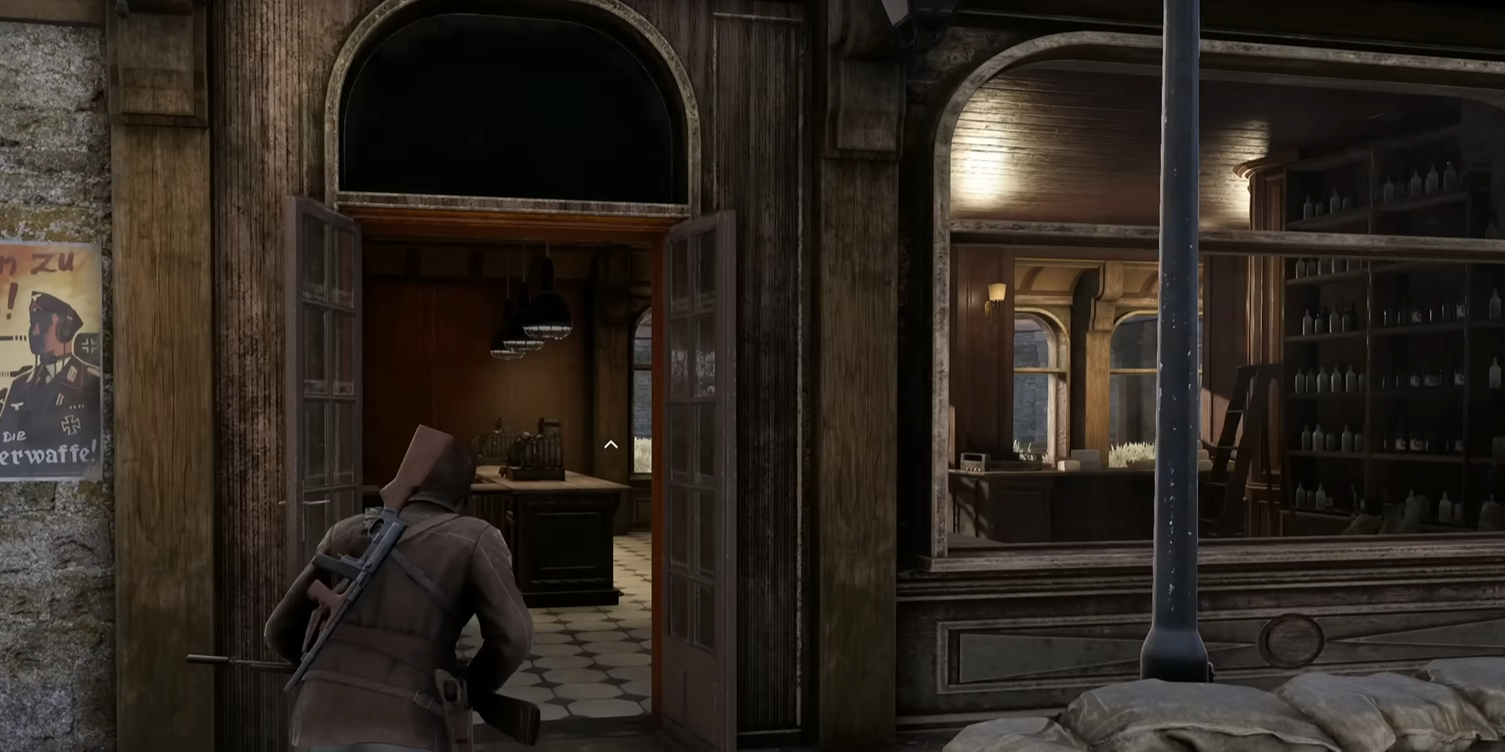
Move to the northeastern corner of the map, and enter the shop adjacent to the large building.
As a gamer, I step out through the back door on the right side of the store, then tread along the tunnel. I manage to bypass the gate’s lock and push it open, revealing a room where a workbench awaits me up front.
Sonderzüge Sabotage
Rifle: Assault Mods
In this game, this workbench stands out as crucial because it’s where you initially get the chance to acquire a silencer for your rifle.
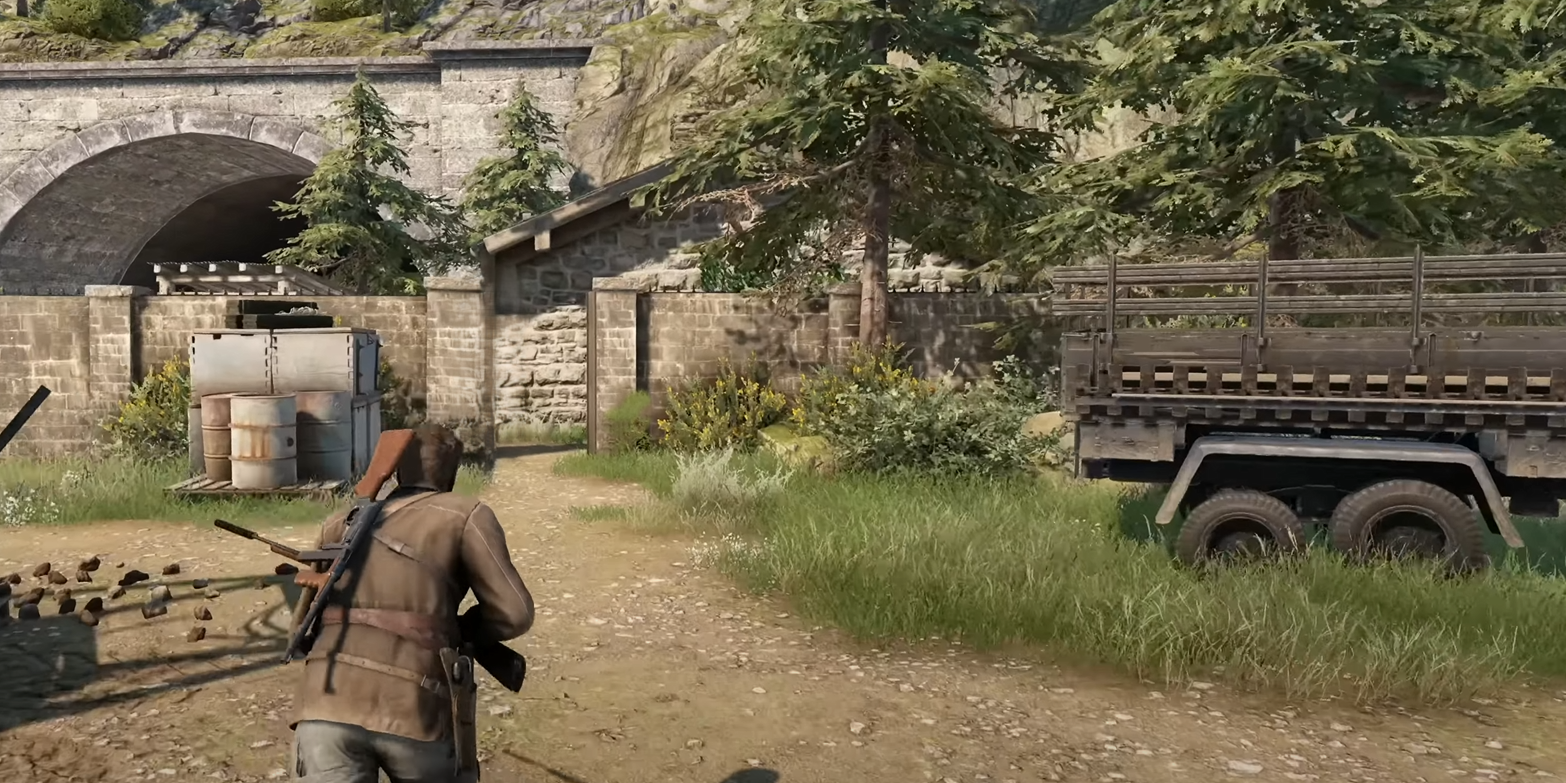
Once you’ve navigated the river via the eastern railroad (it’s quite convenient, really), make your way to the docks located between the two bridges.
Keep an eye out for the biggest structure located on the western part of the region, that’s where you’ll find the workbench. Also, take note that there’s a French collaborator there whom you should neutralize to earn extra points, so be precise in your actions.
SMG: Capacity Mods
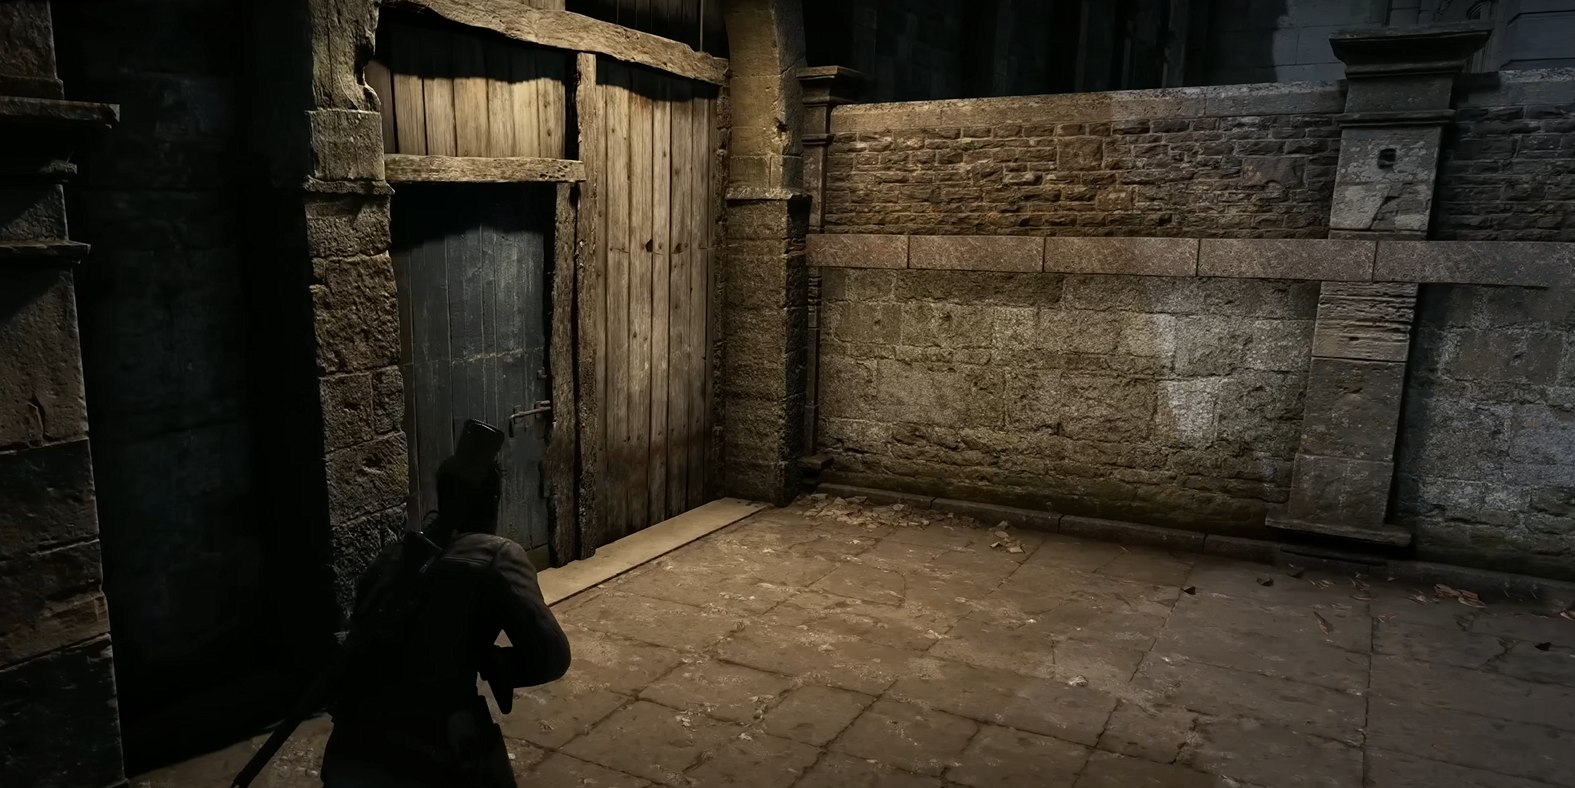
In Sonderzüge Sabotage, you’ll quickly discover a workbench situated nearby. Start by navigating along the curving path, keeping to your left, until you spot a group of buildings with an adjacent stairway.
As a sneaky gamer, I tip-toed towards the fountain, keeping my eyes peeled so as not to attract the attention of those Gestapo officers. Once I reached, I carefully scanned to the right, and there it was – a locked wooden gate hidden away. With a quick flick of my fingers, I managed to pick the lock and discovered a workbench behind it.
Pistol: Capacity Mods

Make your way to the eastern part of the map via the southern route, and once there, move towards the sheltered or shaded section.
Following the break of the lock using bolt cutters, proceed towards the building on your left as your initial destination. Subsequently, ascend to the second level where you’ll find the workbench and a good spot to survey from.
Collision Course
Rifle: Mobility Mods

To find the group of buildings on your map, move towards the northern direction starting from the location on the dam’s east side.
Head indoors, take a left turn at the end of the hallway, and subsequently force open the door to the room on your left following the elimination of the German soldier near the desk, to locate the rifle workstation.
Or more casually:
Enter the building, turn left at the end of the hall, then bust through the door to the room on your left after taking care of the German soldier by his desk, to find the gun-mending station.
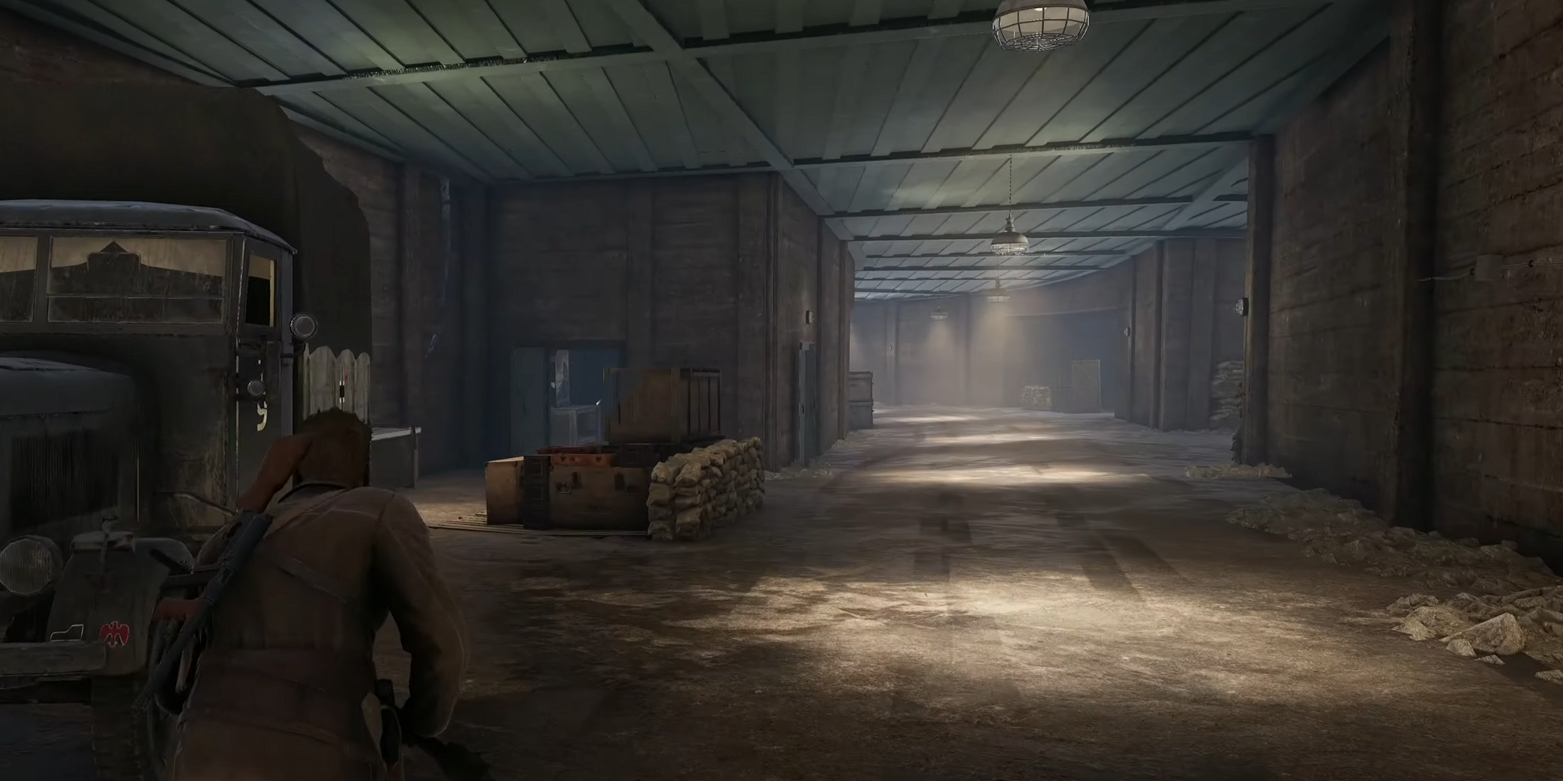
SMG: Stability Mods
Once you’ve destroyed the Nazi technology at the far west of the map, near the railway, search for a gate positioned towards the left side of your next objective.
Open it, slide down the ladder, and enter the bunker to find the SMG workbench.
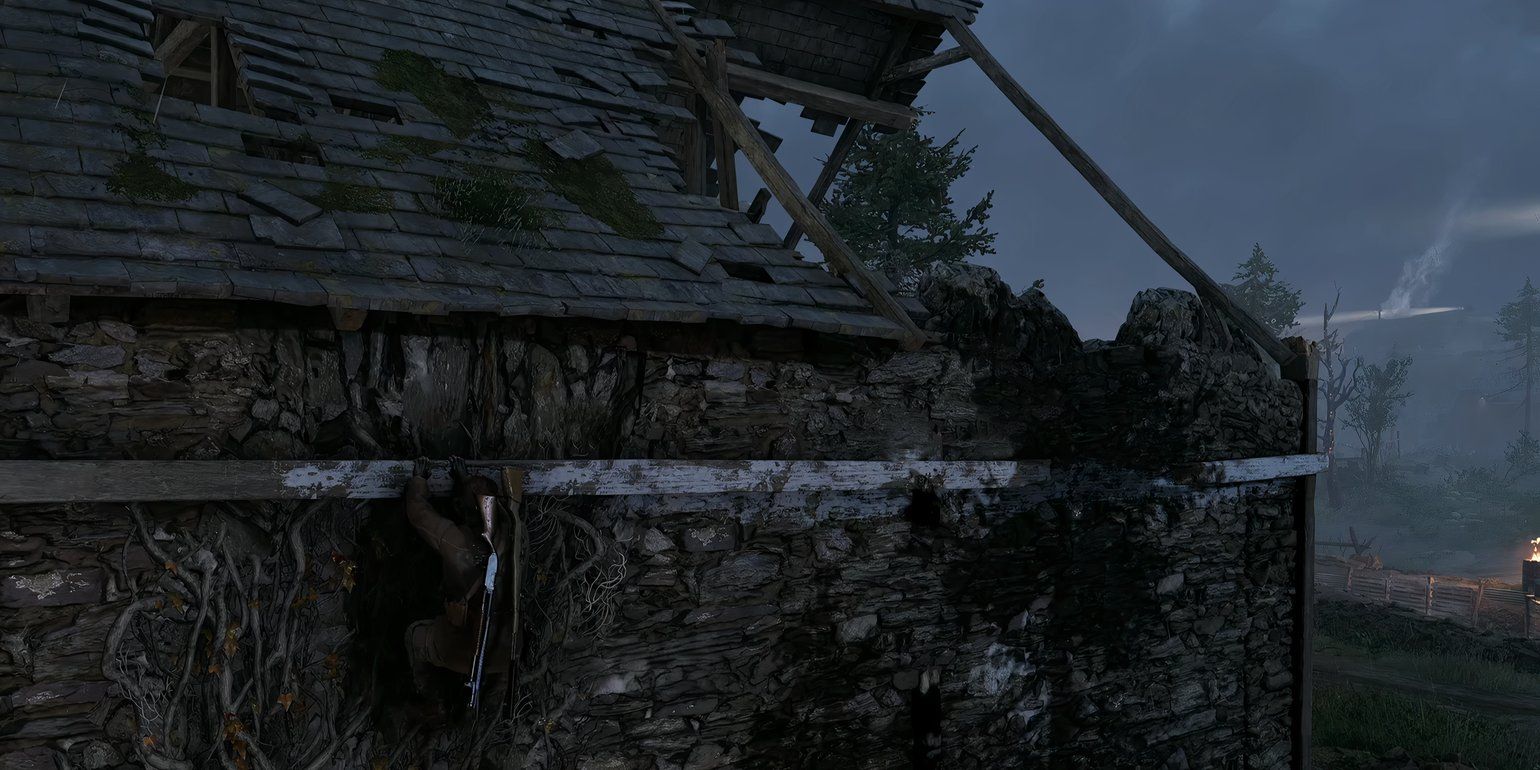
Pistol: Power Mods
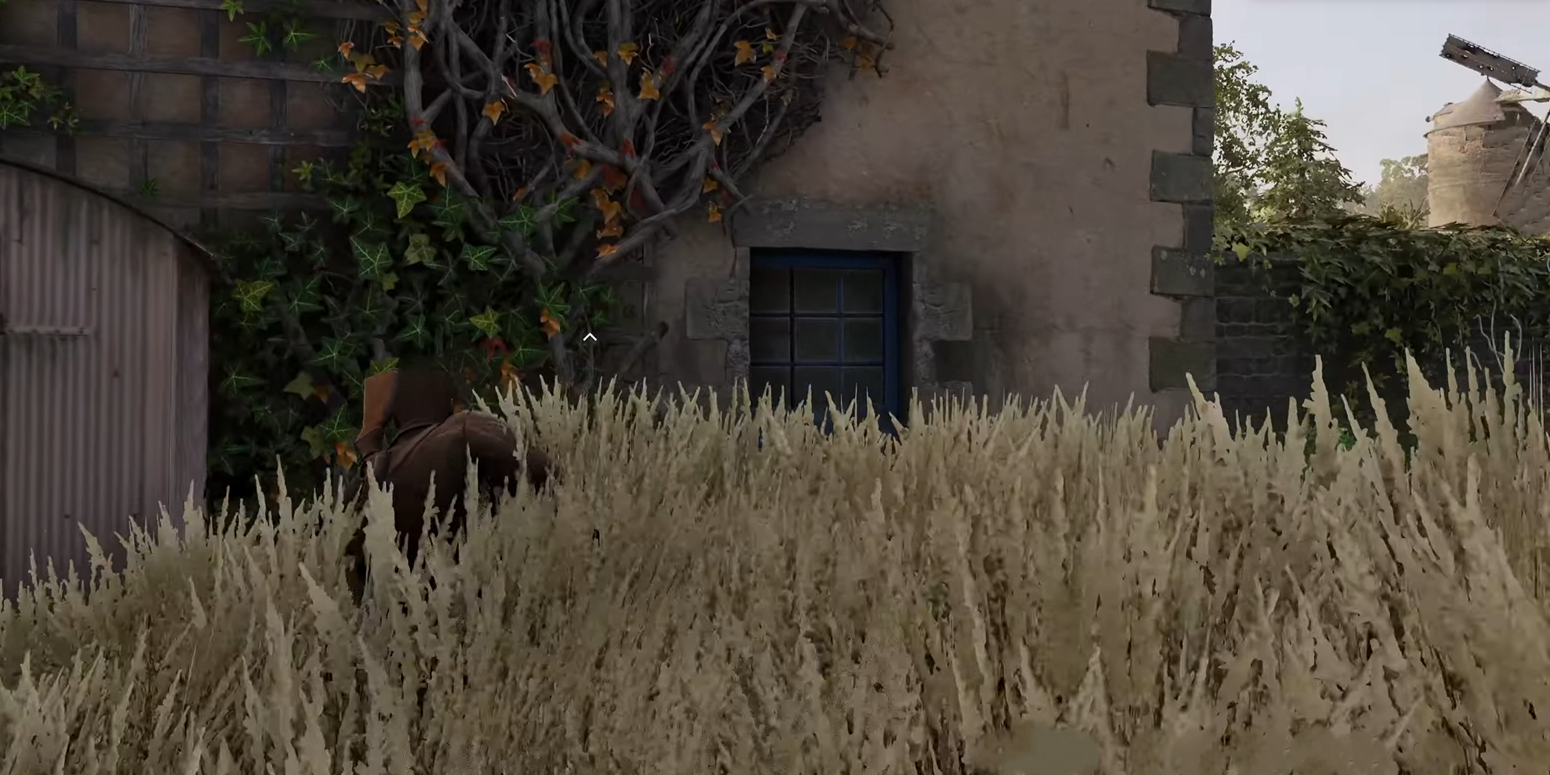
To reach the farmhouse marked by the Lorraine cross, head south from the western part of the map until you reach its southernmost point, where you’ll find the farmhouse located on the eastern edge.
Make your way up by grasping the vines, afterwards, scan the north-eastern part of the structure to locate the spot where the pistol workbench is hidden.
Devil’s Cauldron
Rifle: Upgrade Materials
Head to the church on the southwestern corner of the map, then search for the staircase.
Beneath it is a lock you can pick, leading to a basement that holds this mission’s rifle workbench.
SMG: Barrel Mods
Head to the extremely southernmost part of the map, and then take the primary route leading into an enemy-infested tunnel.
Clear them, then head into the room to your left side for the workbench with SMG barrel upgrades.
Pistol: Stealth Mods
Heading north beyond the map’s edge, I follow the railway lines towards an imposing factory, where towering Nazi banners guard the tunnel entrance like sentinels.
Enter the workshop on your left side, then climb to the second floor using the stairs to your left.
As a devoted enthusiast, I find myself face-to-face with a door that seems to be securely fastened and too heavy to lift. However, there are two ways to access this mystery beyond its current state: either by using the right key or employing a satchel charge, should such a situation arise.
Assault On Fort Rouge
Rifle: Caliber Conversion
The workbench is located in the sweltering part of the map; ensure you’ve got plenty of ammo prior to heading over there.
Go to the northeastern corner of the map, then climb down the bunker entrance.
As a keen enthusiast, I’d guide you through my personal adventure. Start by tracing the blue-painted trail that winds down a spacious staircase, leading you right above the principal hangar. Continue your journey until you find yourself in the heart of the central room.
Disregard the ladder; instead, make your way along the corridor to exit the hangar. Maintain a position with the zip line on your left side.
When the hallway becomes bright white, take a left and continue along until you reach the end. The door there, which can either be unlocked using a key or blown open with a satchel charge, leads to a workspace.
SMG: Assault Mods
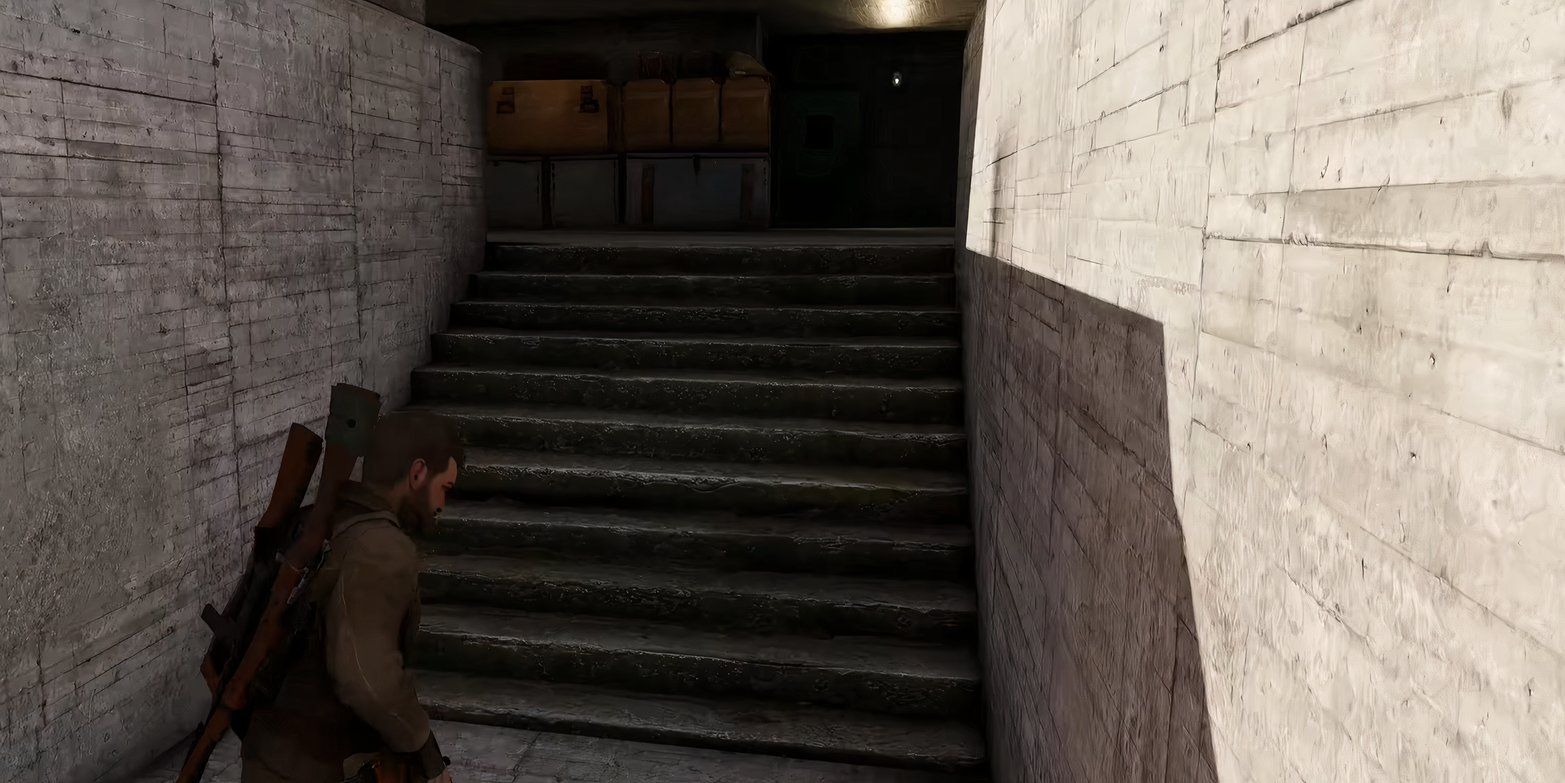
Traverse the eastward-running, debris-laden path on your map until you come across a set of stairs descending into the earth.
1. Descend the stairs, take out the boards obstructing the pipe, then proceed through the hallway to locate the workbench.
2. Make your way downstairs, clear away the barriers in front of the chute, then move along the passageway to discover the workbench.
3. Go down below, dismantle the blocks at the opening of the tunnel, then advance into the aisle to find the workbench.
4. Step down, get rid of the obstructions covering the pipe’s entrance, and then follow the pathway to uncover the workbench.
5. Take a step downwards, eliminate the hindrances obstructing the funnel, and then journey along the walkway to find the workbench.
Pistol: Weight Reduction
Based on the kill zone’s coordinates, make your way towards the upper corner of the abbey that lies to the north-east from where he is currently positioned.
Locate the structure at the northeastern part of the area, open its locked door, and then discover the table designed for work that is positioned across from the entrance.
Lock, Stock, and Barrels
Rifle: Muzzle Mods
Keep an eye out for the farmhouse situated at the southwest corner of the map, located near a road fork, and it’s close to the riverbank.
Climb through the second floor using the vines to find the workbench inside the room.
SMG: Recoil Mods
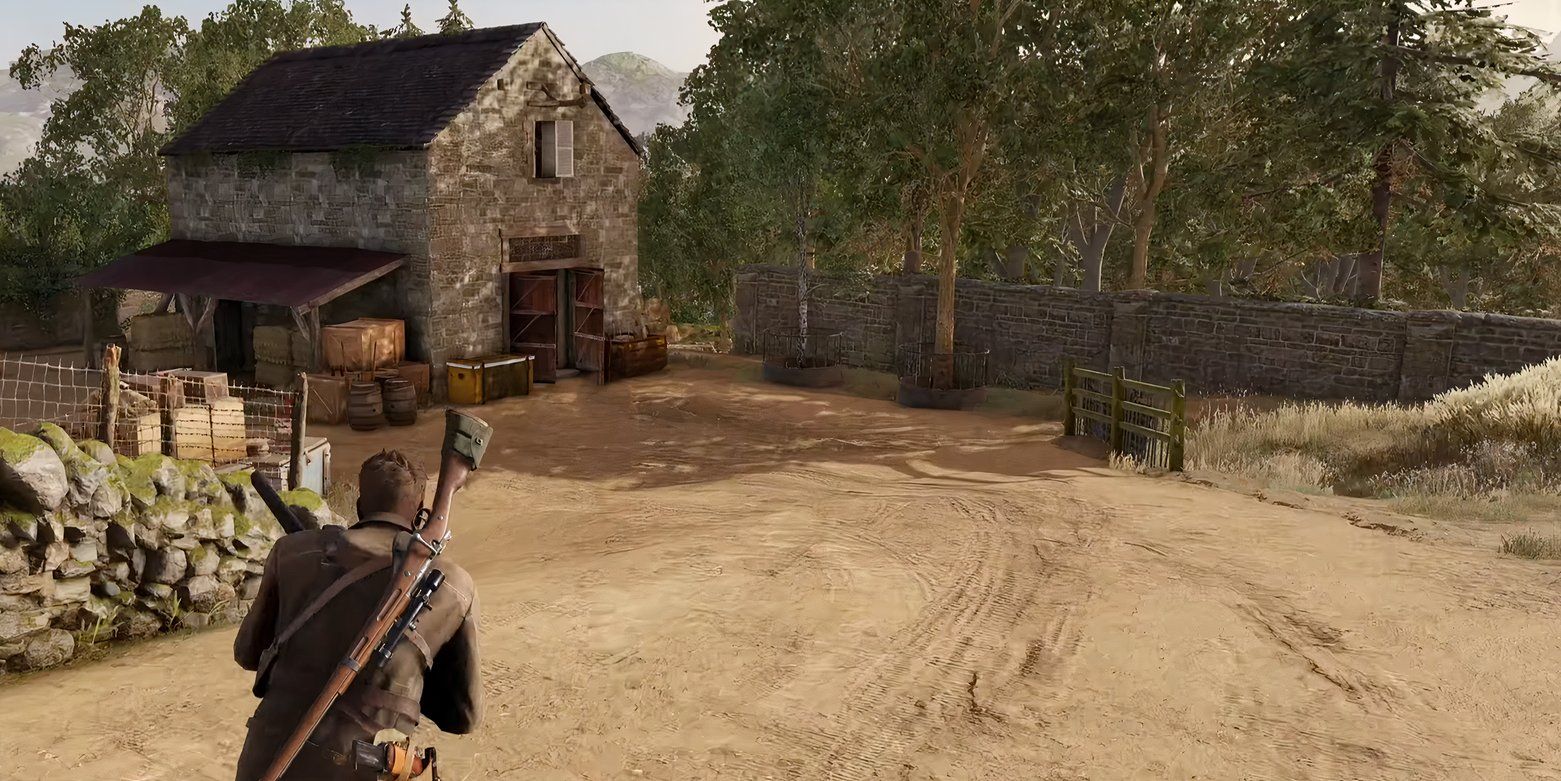
To find the primary target, start by moving east. Then continue along the road heading south until you reach the final structure just before the wooded region.
Go inside the barn and climb up to the second floor to find the workbench.
Pistol: Caliber Conversion
Head towards the northwestern part of the map. Once there, you’ll find a building situated next to two curved black paths. This structure is located to the south of an optional objective that features straight-edged paths.
Near the entrance, you’ll discover a green staircase leading up to the second level. Once inside, go to your left to locate the workbench.
End of the Line
Rifle: Recoil Mods
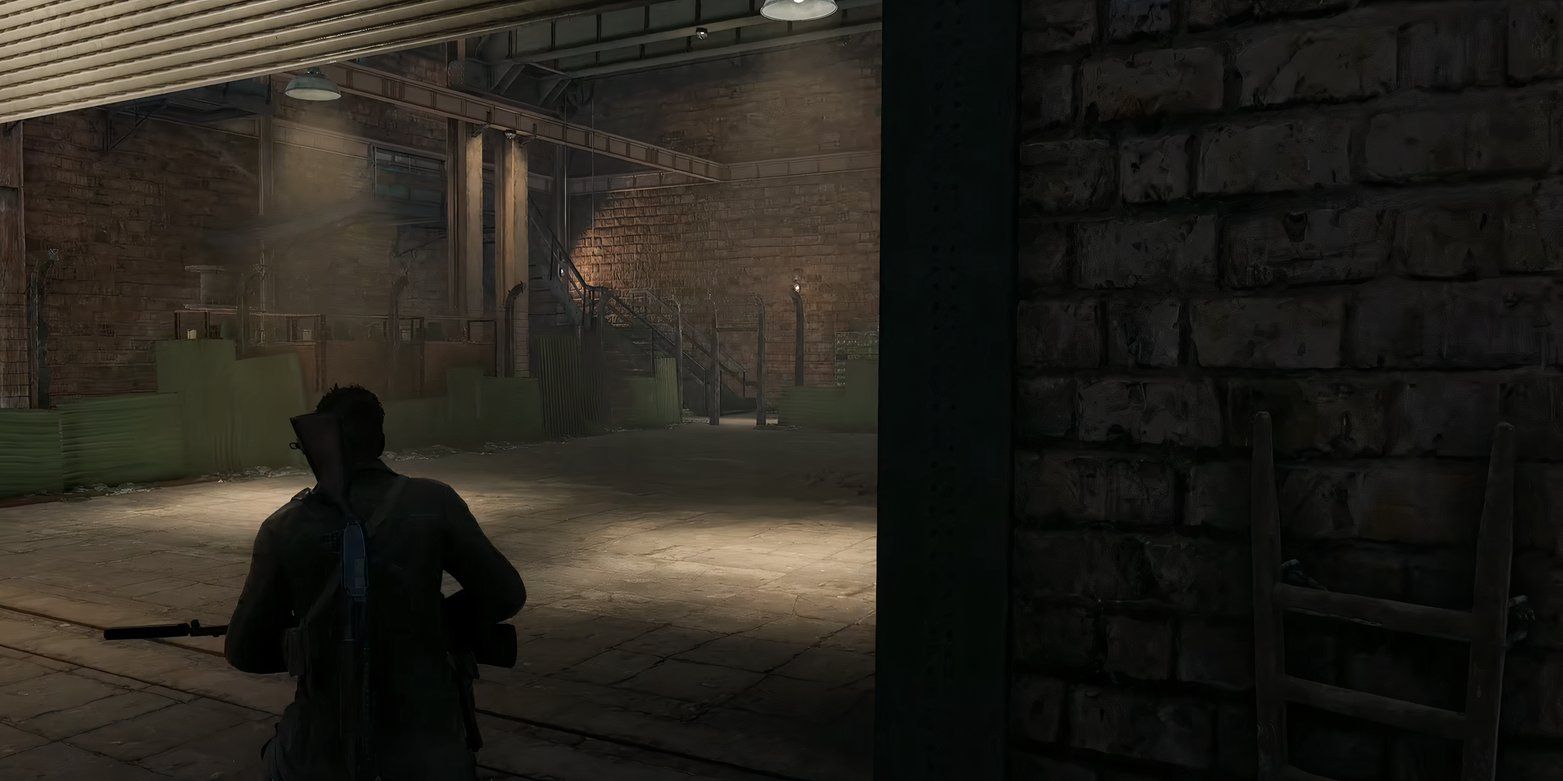
The workbench, which stands out, can’t be overlooked since it resides within the primary working zone of the factory.
Follow the path by climbing the central staircase, pass by the control room along the way. Continue straight ahead and take a right until you spot a locked room nestled in the building’s corner. You can either unlock it using a key or force your way in by blasting open the door to reach the workbench.
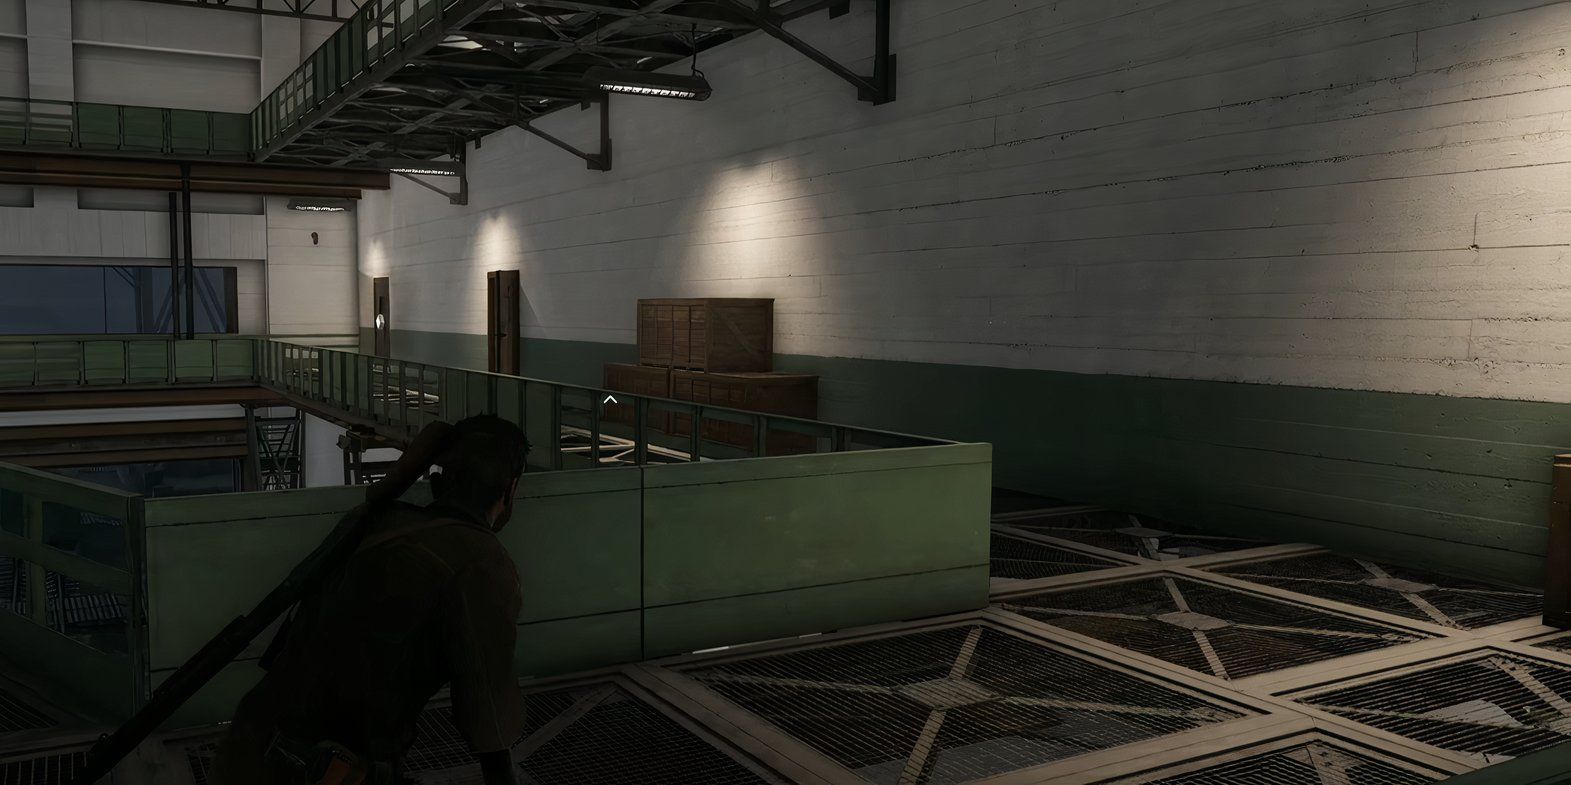
SMG: Handling Mods
Go to the railway located at the northwest part of the map, and as you walk, maintain a position along the map’s edge to your right. Continue this path until you reach the warehouse positioned at the west end of the map.
Enter the building, then head up the stairs to find the workbench by the Nazi flag.
Pistol: Marksmanship Mods
Look for a house close to one of the anti-aircraft artillery pieces within the possible target zone, situated along the southwestern part of the map.
Traverse the ivy-covered walls leading up to the second level of the structure, and after gaining entry, proceed towards the internal stairway which will eventually bring you to the workbench.
Read More
- Nine Sols: 6 Best Jin Farming Methods
- How to Unlock the Mines in Cookie Run: Kingdom
- MHA’s Back: Horikoshi Drops New Chapter in ‘Ultra Age’ Fanbook – See What’s Inside!
- Top 8 UFC 5 Perks Every Fighter Should Use
- Top 8 Weapon Enchantments in Oblivion Remastered, Ranked
- Invincible’s Strongest Female Characters
- USD ILS PREDICTION
- Link Click Season 3 Confirmed for 2026—Meet the Mysterious New Character Jae Lee!
- How to Get 100% Chameleon in Oblivion Remastered
- How to Reach 80,000M in Dead Rails
2025-02-19 01:40