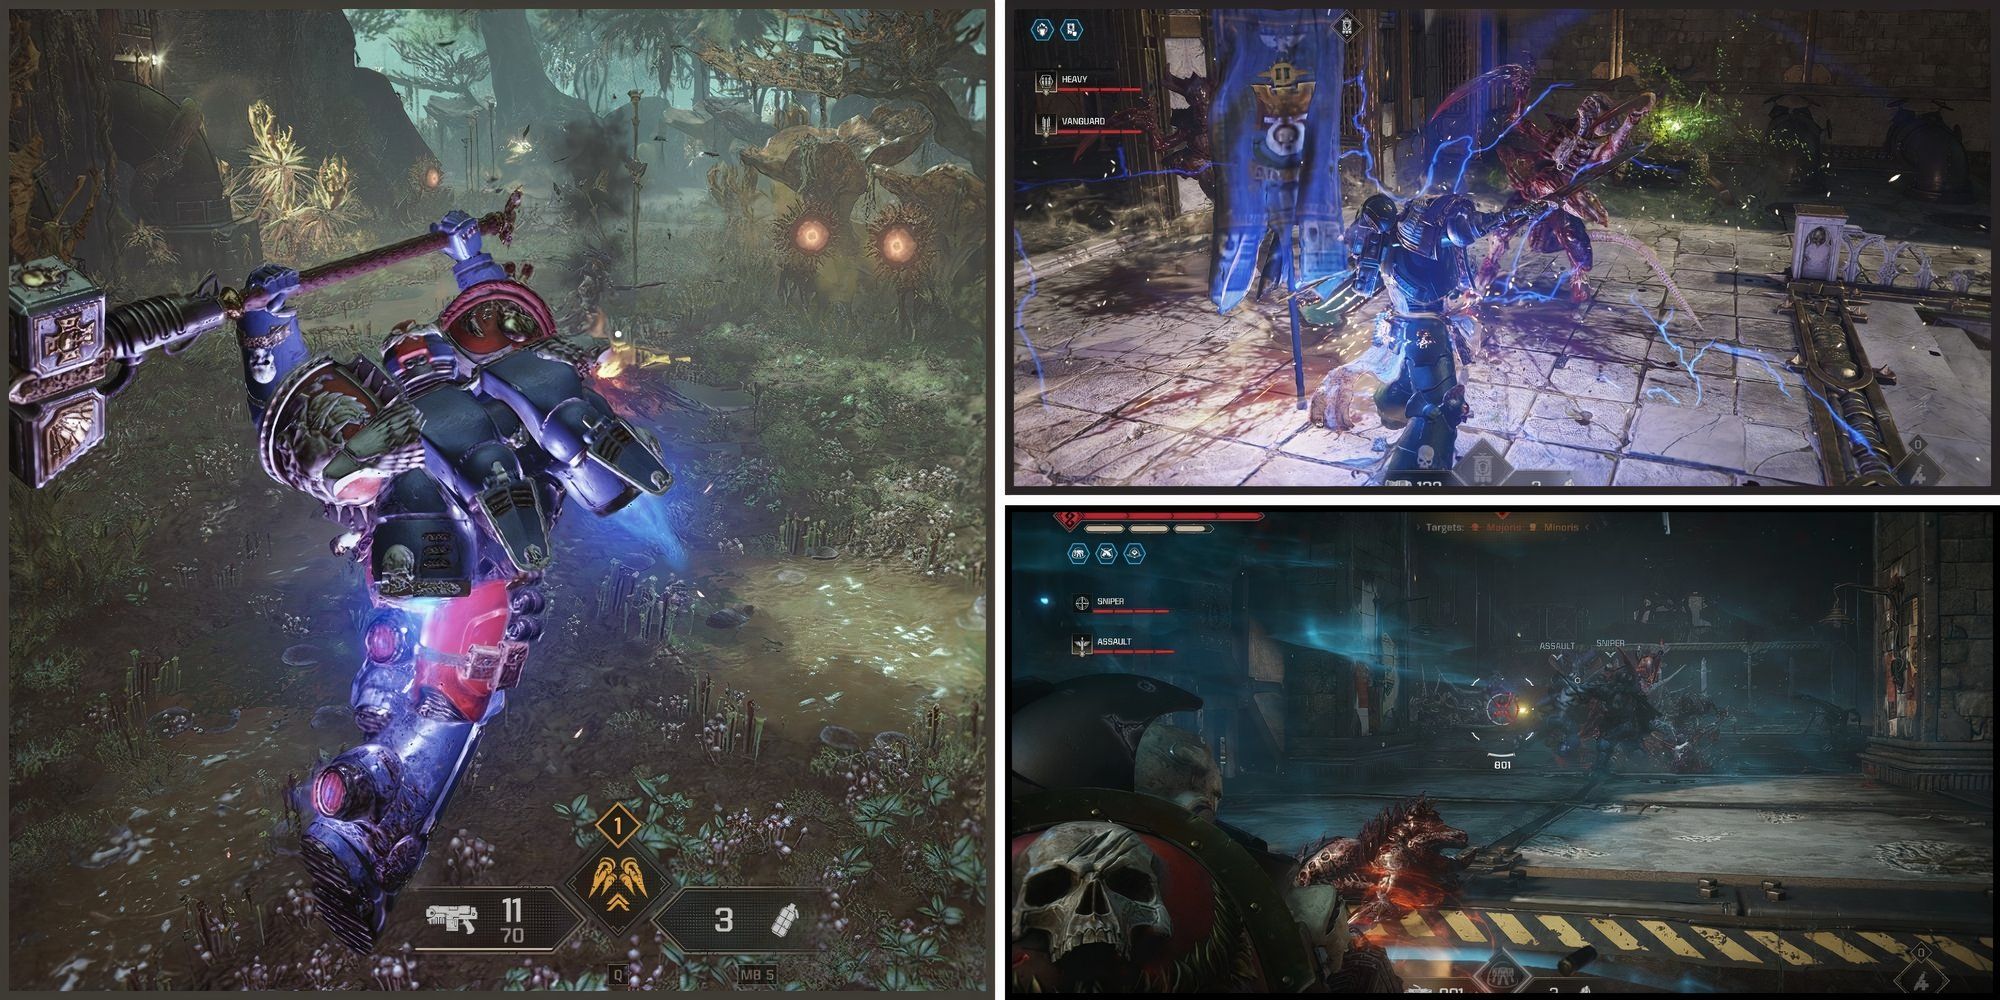
As a seasoned veteran of countless soul-like games, I can confidently say that the Bulwark is my go-to champion when I want to stand as a beacon of resilience for my teammates. This Space Marine tank, with his unyielding shield and swift power sword, thrives in the heart of battle.
In the sequel titled “Space Marine 2“, you assume control of six distinct Space Marines across numerous Operations, which represents the game’s cooperative mode. Each character boasts a unique playstyle and specialized combat role. Developers have hinted at future class releases, and I can hardly wait to test them!
In contrast to other conventional shooter games with overpowered classes, Space Marine 2 stands out by not having any one class that’s excessively strong or unplayable. Instead, the effectiveness of each class is determined by a player’s expertise, chosen equipment, and skill level. These classes each provide a distinct playstyle, and it takes trying them all to discover which one fits you perfectly.
We’ll be ranking each class on how fun they are to play and how hard it is to master them. After 100 hours in-game, I’ve taken to grind out the levels for each character and figure out their role in any given activity, particularly PVE.
I’ll only touch on PVP a little, as your class choice doesn’t factor too much into the success of your matches (also a skill issue on my part–I’m not great at PVP).
In this analysis, we’ll focus on the performance of these classes under the most challenging setting, Ruthless Difficulty, while they wield the top-tier Relic equipment.
6 Heavy
Bigger, But Not Better
| Class Ability | – Front-facing shield that blocks frontal damage and provides buffs |
|---|---|
| Great At | Ranged support and defense |
| Struggles With | Melee range, low mobility when in Heavy Stance |
| Best Weapons | , |
In the role of The Heavy, it’s your mission to shower your adversaries with a hailstorm of bullets for maximum damage, simultaneously shielding your allies from long-range attacks and bestowing them with the Iron Halo advantage, which provides beneficial effects.
In simpler terms, the sturdier constructions prioritize defense and continuous firing, essentially transforming you into a movable battle station.
In this strategy, the Heavy primarily depends on teammates to attract foes, giving him the opportunity to offer protective gunfire and inflict significant damage on opponents from a comparatively secure position. Picture the character from Team Fortress 2 amplified by steroids in terms of his role.
The Heavy is great at dealing sustained damage. But while the Iron Halo provides a front-facing shield, the downside is that he doesn’t use any melee weapons, putting him at a disadvantage against swarms of enemies.
Additionally, when you assume the Heavy stance, your movement becomes noticeably sluggish and you find it difficult to evade potential threats.
| Recommended Build | |
|---|---|
| Perk | Description |
| Killing 10 enemies in rapid succession restores 1 Armor Segment. 15-second cooldown | |
| When a Ranged Weapon is 50% Overheated, Ranged Damage increases by 15% | |
| When Iron Halo is active, all Squad Members within 10 meters deal 10% more damage | |
| Ammo Capacity for all Squad Members’ Weapons increases by 25% | |
| When Iron Halo expends all its energy, 1 Armor Segment is restored for all Squad Members | |
| Iron Halo loses energy 15% more slowly | |
| When Iron Halo is in cooldown, Ranged Damage increases by 15% | |
| When Iron Halo is active, all Squad Members within 100 meters regenerate Ability Charge 50% faster | |
From my perspective, this construction significantly increases the ammo reserve of the Heavy and boosts its rate of fire through features like “Thermal Boost” and “Extra Ammunition,” enabling you to remain engaged in combat for extended periods. This enables you to alternate between the Heavy Bolter and Plasma Pistol as one cools down.
Regarding keeping Iron Halo operational, abilities such as “Power Regulator” and “Conversion Field” serve not only to maintain the halo’s uptime but also offer beneficial effects to your teammates. Meanwhile, the increased damage from “Brute Force” helps offset its cool-down period.
“The issue I have with the Heavy weapon is that although blasting my opponents with ammo provides enjoyment, my shooting hand eventually tires, and I frequently yearn for a more active role in the battle.
In competitive multiplayer scenarios, the Heavy character performs quite effectively within team situations, but when it comes to close encounters with Vanguards or Assaults, things can quickly become challenging for you.
5 Sniper
Boom. Headshot.
| Class Ability | – Turn invisible; attacks break camo but have increased damage |
|---|---|
| Great At | Ranged DPS, escaping enemy aggro |
| Struggles With | Dealing with hordes, not great at close range, squishy |
| Best Weapons |
At a distance, the Sniper character excels with one of the highest damage-inflicting primary weapons in the game, notably the Las Fusil. Unlike the Heavy who relies on his teammates to help him chip away at large groups, the Sniper performs a similar function but inflicts devastating critical damage on bigger enemies like elites.
However, due to having just two armor reserves and a limited melee ability, the Sniper character is remarkably vulnerable when faced with large groups of enemies.
An effective sniper typically doesn’t stay put for extended periods. Instead, he offers protective cover for his fellow team members from a distance, and whenever feasible, he steers clear of drawing unwanted enemy attention.
Engaging targets from a distance is incredibly rewarding when you’re playing the role of a Sniper. Personally, I like to focus on taking out bigger opponents initially, giving my team a chance to handle the smaller foes.
At times, I’d deal additional harm to the elites, making it easier for my teammates to finish them off.
| Perk | Description |
|---|---|
| You revive Squad Members 30% faster | |
| The maximum amount of Ammo you can carry increases by 10% | |
| Killing more than 1 enemy with one shot from a Las Fusil restores its charge by 1 | |
| Headshot Damage increases by 10% for all Squad Members | |
| A Headshot kill restores Camo Cloak’s charge by 5% | |
| The first Ranged Attack that breaks Cammo Cloak deals 75% more Damage | |
| After performing an attack that breaks Camo Cloak, you remain hidden for 2 seconds | |
| When you receive Lethal Damage, Camo Cloak automatically activates without spending Charge and you become Invulnerable for 5 seconds. 180 second cooldown |
Because the Sniper has low durability, this setup primarily relies on the Camo Cloak’s talent to dodge enemy attention. The “Medicae Adept” trait facilitates quicker revival of teammates, while “Emergency Override” ensures you can continue fighting if you find yourself overpowered. Furthermore, “Renewal” helps keep the Camo Cloak active more frequently, as long as you consistently land headshot kills.
As a stealth enthusiast, I’d highly recommend this build for a shadowy experience. The Sniper thrives in open environments and elevated spots, offering an unobstructed view of the terrain. Keep calm and deliberate in your actions, and before you know it, your adversaries won’t even detect your presence.
As a gamer, I find myself excelling when it comes to taking down enemies unawares with my stealthy sniping skills. So far, I haven’t delved too deep into Player vs Player (PVP) battles, but let me tell you, there have been times where I get caught off guard by an elusive sniper who seems to be hiding somewhere across the map, their camouflage making them virtually invisible. And when they close in on me, it’s like trying to hit a ghost – they’re nearly impossible to spot!
4 Tactical
The Jack of all Trades
| Class Ability | – reveals enemies and makes them more vulnerable |
|---|---|
| Great At | Wide selection of weapons, well-rounded, burst damage |
| Struggles With | Master of none, lack of perks that improve survivability |
| Best Weapons | , |
Just like a skilled marksman, the Space Marine 2 character embodies a classic soldier archetype, making him adaptable for any combat situation. He offers a diverse selection of ranged weapons, which makes him a versatile choice at the start, excelling in various gameplay styles you might prefer.
This class is an excellent pick for virtually any scenario due to its remarkable adaptability. Regardless if you’re battling against Tyranids or Chaos cultists, the Tactical’s arsenal and Auspex Scan can provide a significant advantage in dishing out heavy, rapid-fire damage against your adversaries.
But the Tactical class isn’t a master in one specific thing. He doesn’t have the Assault or the Vanguard’s mobility, nor does he have an immense ammo count like the Heavy.
One advantage of using the Tactical is that his Auspex Scan allows for significant opportunities to inflict massive burst damage on opponents. Moreover, it even has the ability to neutralize a Lichtor’s annoying invisibility.
| Perk | Description |
|---|---|
| Your Primary Weapon deals 10% more Damage, but your Secondary Weapon deals 10% less Damage | |
| After a Gun Strike, Ranged Damage increases by 25% for 5 seconds | |
| Killing a Majoris-level or higher enemy restores your Primary Weapon’s Ammo by 1 magazine. Cannot exceed maximum Ammo capacity. 30-second cooldown | |
| All Squad Members restore 30% more Contested Health | |
| Scanning an Extremis or Terminus-level enemy restores Auspex Scan’s Charge by 50% | |
| Enemies marked by Auspex Scan take an additional 75% Damage, but Auspex Scan’s radius is reduced by 25% | |
| Enemies marked by Auspex Scan take an additional 100% Damage, but the mark’s Duration is reduced by 4 seconds (base: 8) | |
| A Headshot will instantly kill a Majoris or Extremis-level enemy marked by Auspex Scan. 120-second cooldown |
Managing ammo resources becomes smoother with the use of “Emperor’s Vengeance,” as it not only simplifies the handling of your ammunition but also restocks your Bolt Rifle’s grenade launcher, ensuring a steady stream of explosives at your disposal. Additionally, you can upgrade your Auspex Scan with “Precise Calibration” and “Expert Timing,” but be mindful to schedule your scans more strategically for optimal results.
As a gamer, I’ve got to admit, the Tactical class leaves me craving more thrill. Don’t get me wrong, nailing headshots and tossing grenades is a rush, but the limited melee options make gaming with the Tactical feel a bit clunky.
In player versus player scenarios, tactical play remains consistent. A strategically used Auspex Scan can significantly aid you and your team by providing visibility of opponents, particularly in hidden or secluded spots like corners.
3 Assault
Death from Above
| Class Ability | – enhanced dashes and powerful jumps |
|---|---|
| Great At | Close range damage, add clearing |
| Struggles With | Ranged damage, especially when the enemy is out of reach |
| Best Weapons | , |
Among all the classes in Space Marines 2, Assault is undoubtedly my preferred one to engage in battles. Notably, it’s the first class I’ve fully upgraded since I joined the game. What makes this class appealing to me is its combat style that heavily relies on close-quarters combat, leaping into the air and slamming foes with a devastating ground strike.
Using the Thunder Hammer, the Assault transforms into a formidable force, swiftly crushing large groups of enemies. It can also swiftly rescue a teammate in peril at a moment’s notice.
Apart from his other abilities, he’s incredibly agile thanks to the Jump Pack, which includes a quick dash and an aerial boost. This means you can choose when to withdraw or return to the fight based on your strategy.
If you find yourself surrounded, leap into the air and shatter them all! If an elite foe is chasing, simply disengage or dodge using your Jump Pack. An effective Assault player won’t get trapped by multiple opponents and can frequently be spotted soaring in the sky, readying for a powerful area-of-effect melee attack.
The problem I find with the Assault is that its Jump Pack sometimes functions inconsistently and could use some additional refinement.
At times, you may find yourself inadvertently dashing instead of jumping, and the reach of your ground slam attack might not be as extensive as expected. Moreover, the dash doesn’t offer much use, since the Assault’s movement already includes a short dodge.
| Perk | Description |
|---|---|
| Non-Finisher Gun Strikes also restore Armor | |
| Secondary Weapon’s Damage increases by 15% | |
| Melee Damage increases by 15% against Majoris or Extremis-level enemies | |
| All Squad Members’ Abilities recharge 10% faster | |
| Ground Pound’s Damage increases by 10% | |
| A Ground Pound kill restores Jump Pack’s Charge by 10% | |
| After a Finisher, Ground Pound deals 25% more Damage for 10 seconds | |
| Jump Pack Leap deals damage to all enemies in the takeoff area |
With “Armor Reinforcement,” you’re able to continue battling powerful enemies without running out of armor charges. Additionally, the abilities “Smiting Angel” and “Zealous Blow” boost your Jump Pack’s jump range; if you ground pound into a sizable group, you could recharge all of your Jump Pack energy stores. This build is ideal for keeping you both mobile and alive in combat.
In PVE, Assault is quite potent, but in PVP, he might not hold up so well. Firing at an enemy from mid-air exposes you to attacks, and despite melee attacks bypassing shields, it often results in a back-and-forth of kills with your opponent.
2 Vanguard
Zip Around In Style
| Class Ability | – Latch onto an enemy from a distance and deliver a flying kick |
|---|---|
| Great At | Close-ranged DPS, mobility, stunning |
| Struggles With | Melee damage, ranged damage |
| Best Weapons |
In a smoothly functioning group, the Vanguard serves as the spearpoint, initiating encounters with a well-timed Grapnel Launch, followed by a forceful dive kick. Just like the Sniper, your role is to target and eliminate significant enemies, but instead of being the one who pulls the trigger, you are the projectile itself.
Equipped with a top-tier Melta that boasts an impressive ammo capacity and an effective close combat Fencing sword, the Vanguard becomes a formidable threat against both Major adversaries and hordes of enemies.
In simpler terms, your goal is to move around groups of people and fire intermittent shots, focusing on inflicting high damage on powerful enemies (elites) while also eliminating lesser threats (Minors).
Besides this, the Grapnel Launcher has the ability to momentarily disable most opponents, rendering them incapable of summoning additional reinforcements, particularly those persistent Majors. This feature makes the Grapnel Launcher incredibly valuable.
Keep in mind: The Vanguard has low durability; boasting just two armor bars and restricted survivability, this character type caters to players seeking an action-packed, potentially lucrative gameplay experience with inherent risks.
| Perk | Description |
|---|---|
| Each Melee Attack you land reduces the Ranged Damage you take by 1% (up to 15%). If you do not land a Melee Attack for 3 seconds, the effect ends | |
| Perfect Parry window increases by 50% | |
| When your Health is less than 50%, your Perfect Dodge window is doubled | |
| All Squad Members can restore Ability Charge by 15% by performing Finishers | |
| Diving Kick additionally deals Damage in a 5-meter radius | |
| Enemies hit by Diving Kick take 15% more Ranged Damage for 10 seconds | |
| When Grapnel Launcher is in cooldown, Weapon Damage increases by 10% | |
| Taking Lethal Damage restores all Armor instead of Incapacitating you. 180 second cooldown |
This construction performs optimally when equipped with the Melta Rifle. The skills “Tip of the Spear” and “Grim Determination” allow you to grapple an adversary and discharge several rounds from your Melta Rifle into them. Additionally, “Emperor’s Blessing” enhances your survivability; however, remember to exercise caution to avoid unnecessary risk.
Vanguard is incredibly fun to play. I often use him in Tyranid missions, and it’s satisfying to burn dozens of Xenos scum before I finish off a nearby elite. I highly recommend the Vanguard for anybody who loves to run and gun. Of course, this isn’t the only viable build for Ruthless.
In player versus player combat, I’ve encountered numerous Vanguard enemies, and they are incredibly frustrating to battle against. Their Grapnel Launcher temporarily incapacitates me, which means I’m vulnerable to their swift Chainsword assaults before I can fully comprehend the sequence of events.
As a gamer, let me tell you, this feature allows my enemies to cling onto walls, making their appearance unpredictable. To this day, these moments keep me awake in the dead of night with chilling memories creeping into my dreams.
1 Bulwark
The Immovable Object
| Class Ability | – regenerates armor and boosts contested health |
|---|---|
| Great At | Add clearing and melee, drawing enemy aggro, shield blocks all ranged damage |
| Struggles With | Ranged damage, lack of primary weapon |
| Best Weapons |
The Bulwark, essentially, is Space Marines 2’s nearly indestructible battlefront soldier. Unlike other characters, he may not excel in long-range or burst attacks, but instead thrives in the heat of the battlefield. His shield deflects any ranged assaults, and the Power Sword grants him the ability to either slice through hordes of enemies or engage in one-on-one battles with elites.
The Bulwark isn’t just a top-notch tank, it’s also highly effective at offering close-quarter assistance, thanks to its Chapter Banner. This feature boosts contested health and armor restoration, making it beneficial, even when used in its simplest form.
Mastering the Bulwark takes patience and careful timing, unlike the Assault or Vanguard. Being overly aggressive could lead to tricky predicaments that are tough to extricate from.
Deflect, deflect, deflect: This technique isn’t just about restoring your armor, but with the right setup, it can also harm nearby adversaries or even instantly disable elites. Timing your parry against melee attacks could very well save your life, so stay vigilant, observe your enemies as they charge, and retaliate when they get too close.
| Perk | Description |
|---|---|
| A perfectly timed Parry deals area-of-effect Damage within a 5-meter radius | |
| Enemies in a Shock area take 25% more Damage | |
| A perfectly timed Parry creates a Shock area for 5 seconds. 30 second cooldown | |
| Contested Health fades 50% more slowly for all Squad Members | |
| Shield Bash knocks enemies back and makes them lose control for a longer period of time | |
| When the banner is activated, all Squad Members regain maximum Contested Health | |
| All Squad Members within the banner’s area of effect take 10% less damage | |
| If you have Armor remaining, you do not lose control upon taking Heavy Hits and you cannot be knocked back |
As a player, mastering parries is key to my success. The Intimidating Aura and Defensive Advantage abilities let me retaliate against swarms of Minoris foes who close in on me, all the while zeroing in on an elite enemy for a strategic advantage.
As a gamer, I always keep in mind that “Invigorating Iron” not only revives my team’s health but also encourages us to seek out enemies before activating the Chapter Banner. Manually attacking enemies might be slower, but it’s crucial for us to deal damage and finish them off first, ensuring a smoother progression in our game.
When I wish to act as a resilient protector for my teammates, and intimidate any high-tier opponents who dare approach within striking distance, I engage with Bulwark. Frequently, I position myself in the heart of a group, biding my time until an adversary strikes, at which point I parry. My countless hours spent playing games similar to Souls have proven invaluable.
As a gamer, let me tell you, in player versus player combat, a solid Bulwark is next to impossible to take down. Their shield soaks up every ranged attack, making it tough for me to break through their defenses. And when I finally manage to do so? They’re usually well on their way to finishing me off.
Read More
- LUNC PREDICTION. LUNC cryptocurrency
- BTC PREDICTION. BTC cryptocurrency
- USD PHP PREDICTION
- USD ZAR PREDICTION
- BICO PREDICTION. BICO cryptocurrency
- USD COP PREDICTION
- SOL PREDICTION. SOL cryptocurrency
- USD CLP PREDICTION
- RBX PREDICTION. RBX cryptocurrency
- Best 6-Star Characters In Bleach: Brave Souls
2024-10-10 16:40