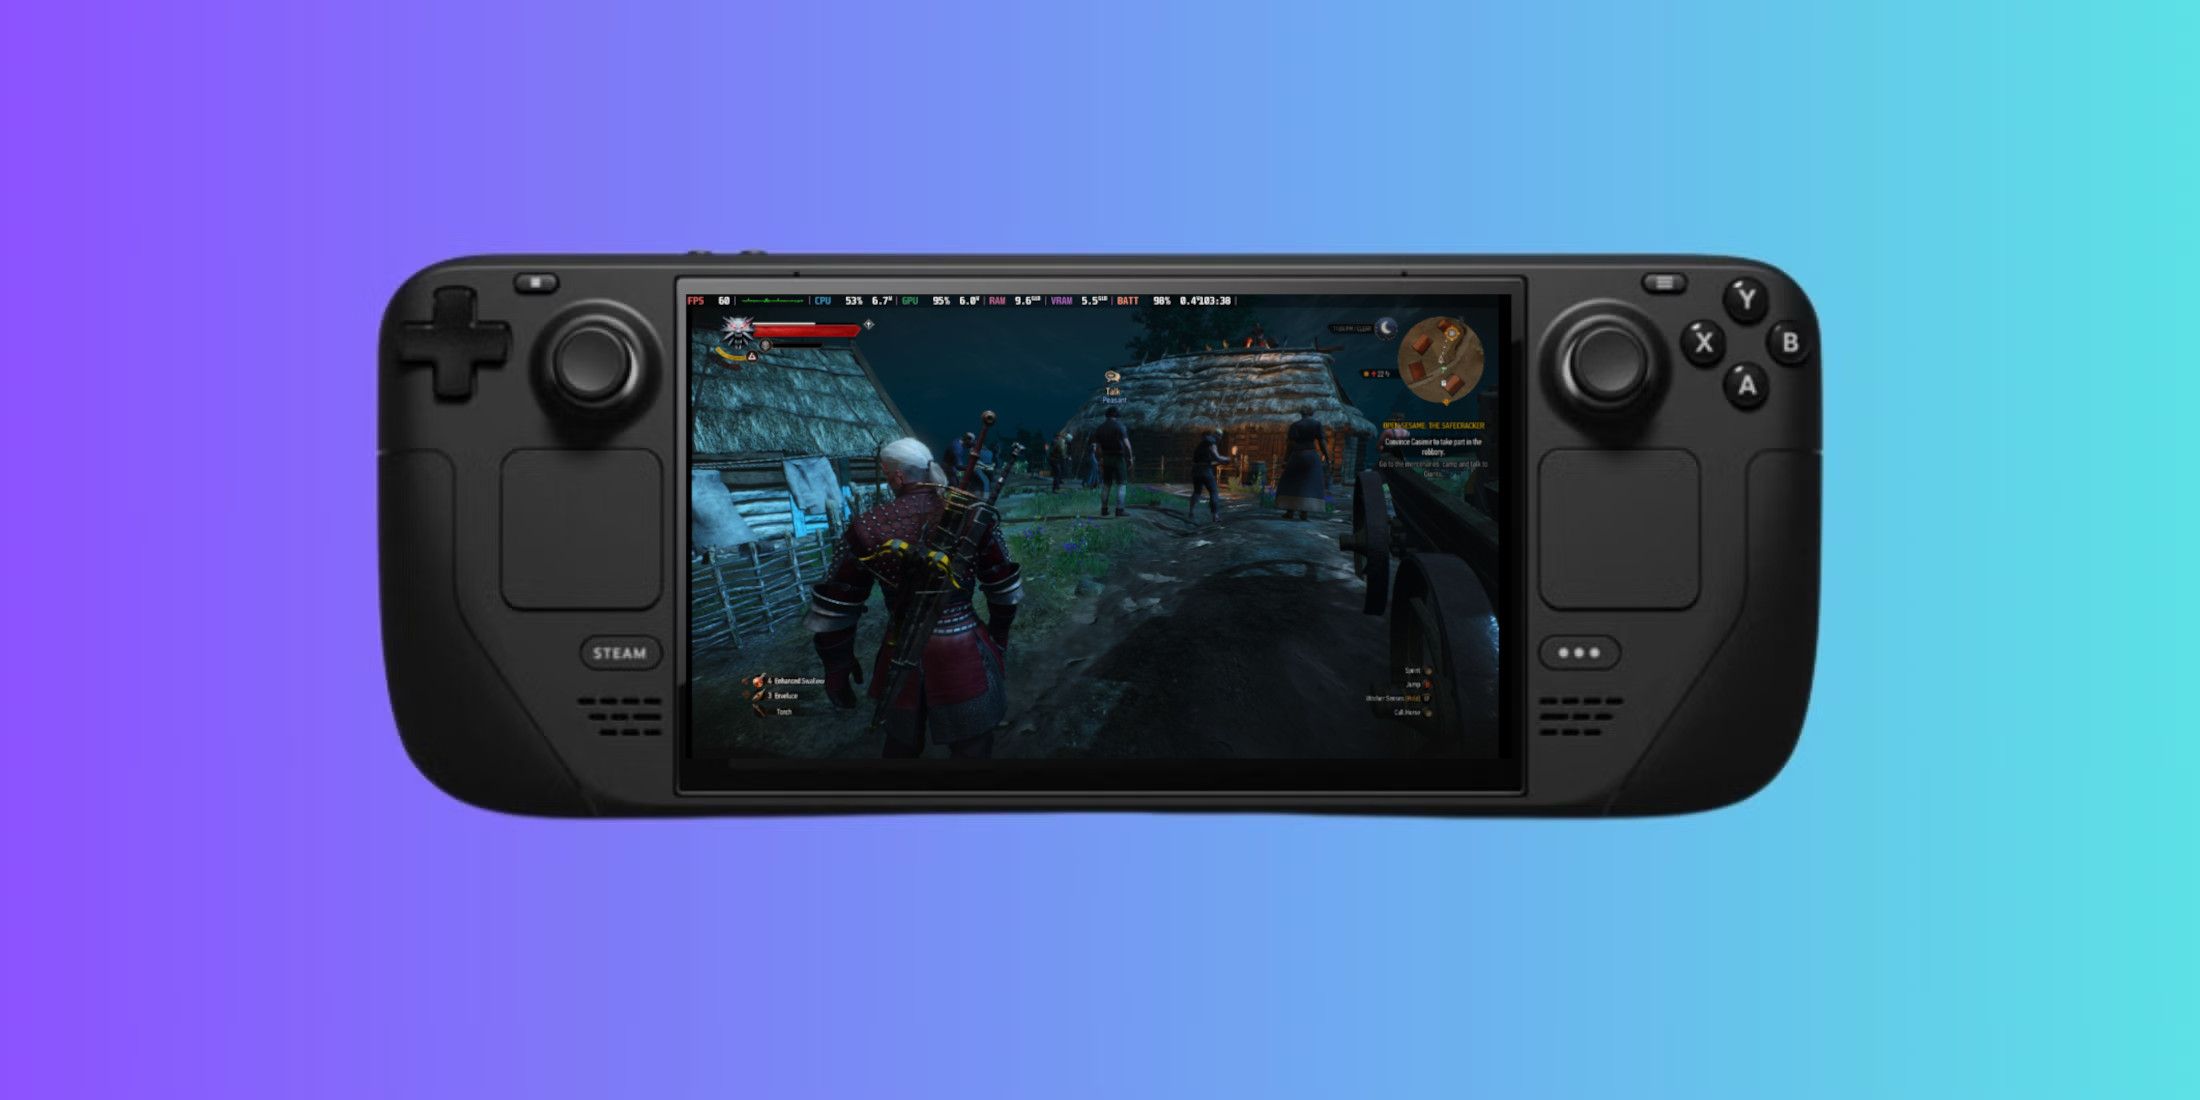
The FrameGen add-on leverages the strength of DLSS, making it possible for FSR 3 to boost your game’s frame rates significantly. Although outcomes might fluctuate and occasionally reduce visual sharpness, it’s a great option if speed is your main concern rather than resolution detail. Earlier, installing and activating the FrameGen mod was a complex and inconvenient process, but Decky Loader has made it simpler. This tutorial will walk you through setting up Decky Loader and enabling the FrameGen mod.
Install Decky Loader
To get the FrameGen app, first, you should download and set up the Decky Loader software. This program is necessary for installing additional tools like FrameGen. Furthermore, there are numerous community-developed plugins that can enhance your Steam Deck’s functionality and gameplay. Follow these steps to install Decky Loader:
1. Visit the official Decky Loader website to download the software.
2. Install the downloaded program on your device.
3. Once installed, locate FrameGen in the list of available plugins within Decky Loader and select it for installation.
4. After installing FrameGen, you can explore other community-created plugins to further optimize your Steam Deck’s performance.
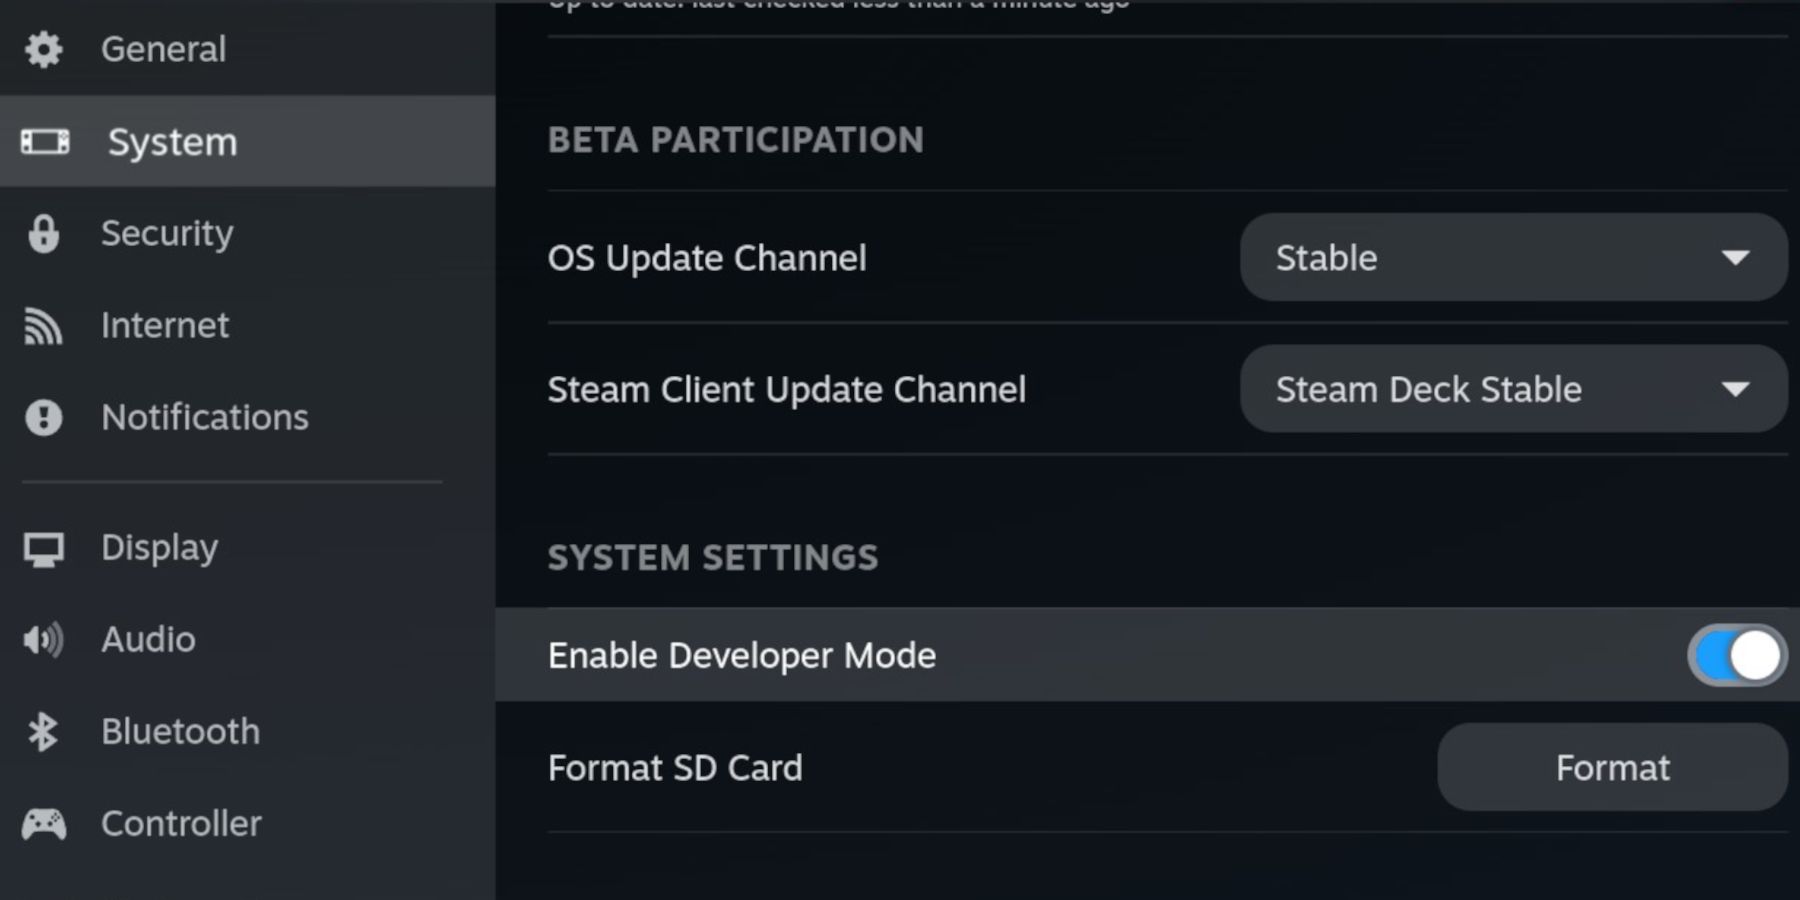
Enable Developer Mode
- Press the Steam button and click System.
- Switch Developer Mode on.
- Scroll through the left menu panel and locate the Developer menu.
- Make sure that CEF Debugging is on and restart the Steam Deck.
- With the Steam Deck on, press the Steam button.
- Open the Power menu and switch to Desktop Mode.
Install Decky Loader
- In Desktop Mode, click the Discovery Store icon at the bottom left of the screen. Type “Google Chrome” or another browser of your choice in the search bar, then install it.
- With a browser launched, open the GitHub page and download Decky Loader.
- After downloading, open the Downloads folder, double-click the Decky Loader installer icon, and select the Recommended Install option.
- Enter your sudo password if required. If not open your Konsole and type passwd in the command box.
- Then type your new password twice to confirm.
- After the installation has finished, click the Return to Gaming Mode icon on your desktop.
Access Decky Loader’s Testing Store
To find the FrameGen application, you’ll have to gain access to the Testing Store. Here’s how you can enable Testing Mode:
1. Navigate to the Testing Store.
2. Locate the FrameGen app within this store.
3. Follow the instructions to switch on Testing Mode.
- Press the QAM button.
- Open the plugin icon at the bottom of the menu.
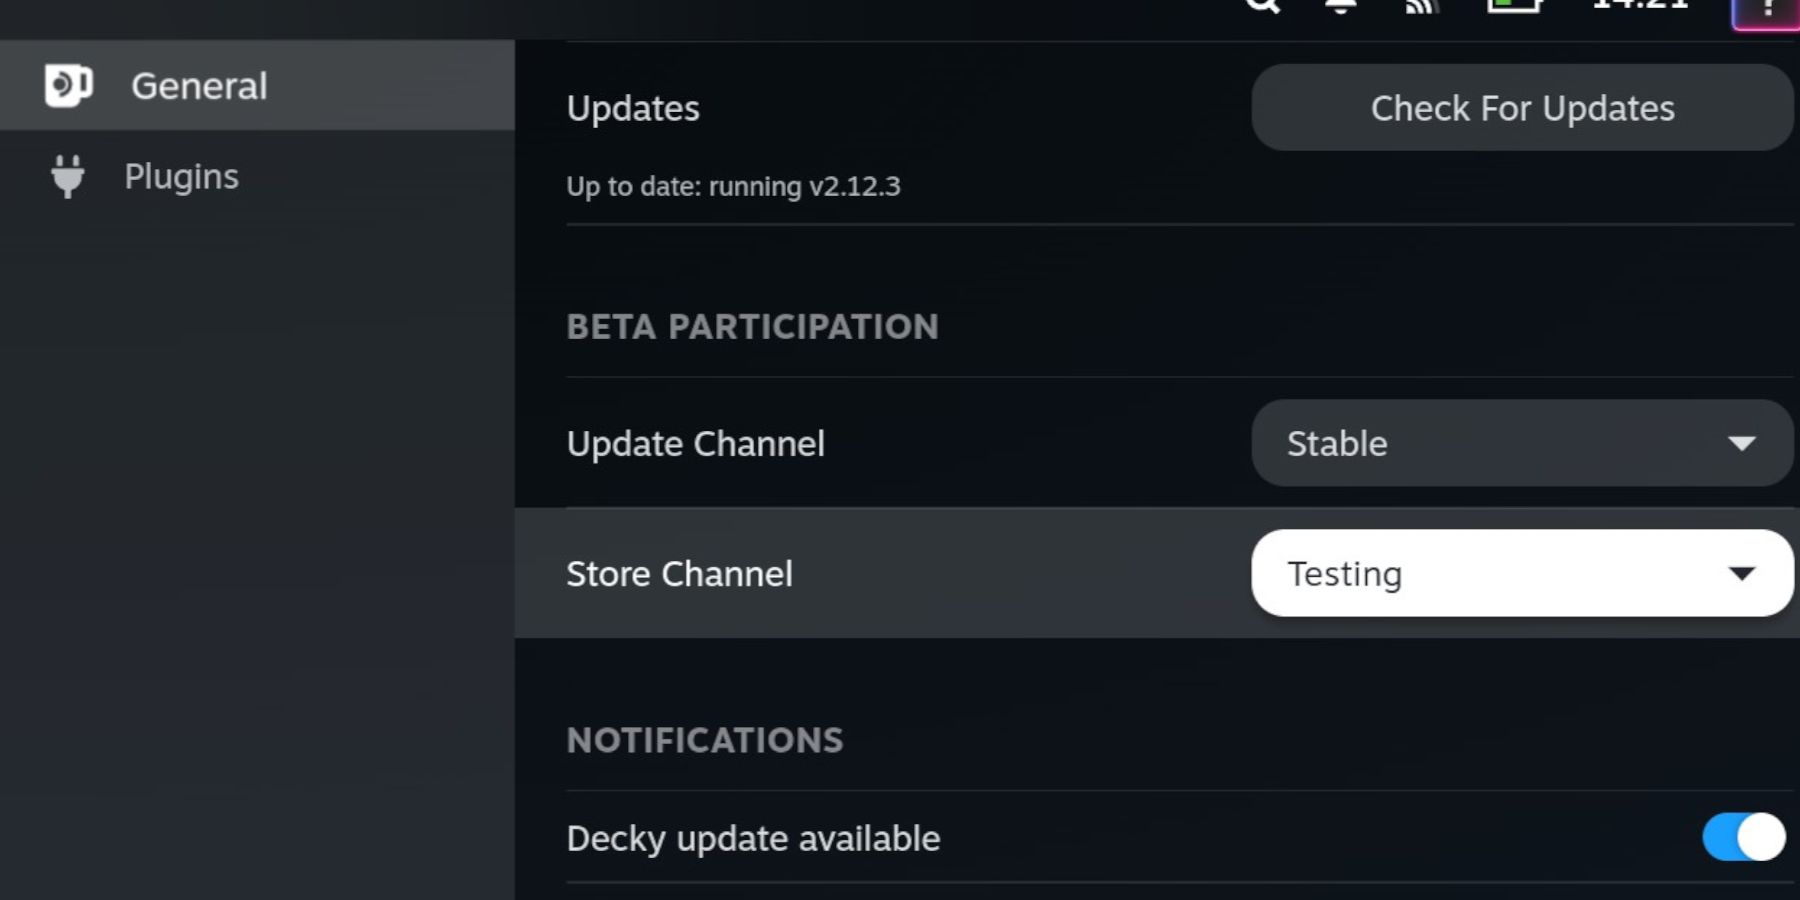
- With Decky Loader open, click on the Settings cogwheel.
- Highlight the General menu and click the Change the Store Channel dropdown to switch on Testing.
- Leave the General menu and click the Store icon. The Decky Loader’s Testing Store will open.
- Locate Decky FrameGen and install it.
FrameGen only works with Direct X12 games.
Running FrameGen On Steam Deck
1. Make sure FrameGen is properly installed on your system.
2. After that, proceed with the following steps to set up the mod for DirectX12 games you play:
3. Locate the directory where your game files are stored.
4. Find and open the folder named “mods” or “addons” (depending on the game).
5. Create a new folder inside this mod/addons directory with the name of the game you want to modify.
6. Copy the FrameGen mod files into the newly created folder.
7. Launch your DirectX12 game and navigate to the display or graphical settings within the game.
8. Enable or activate the FrameGen mod by selecting it from the list of available options.
9. Save your changes and start enjoying the enhanced gaming experience with FrameGen!
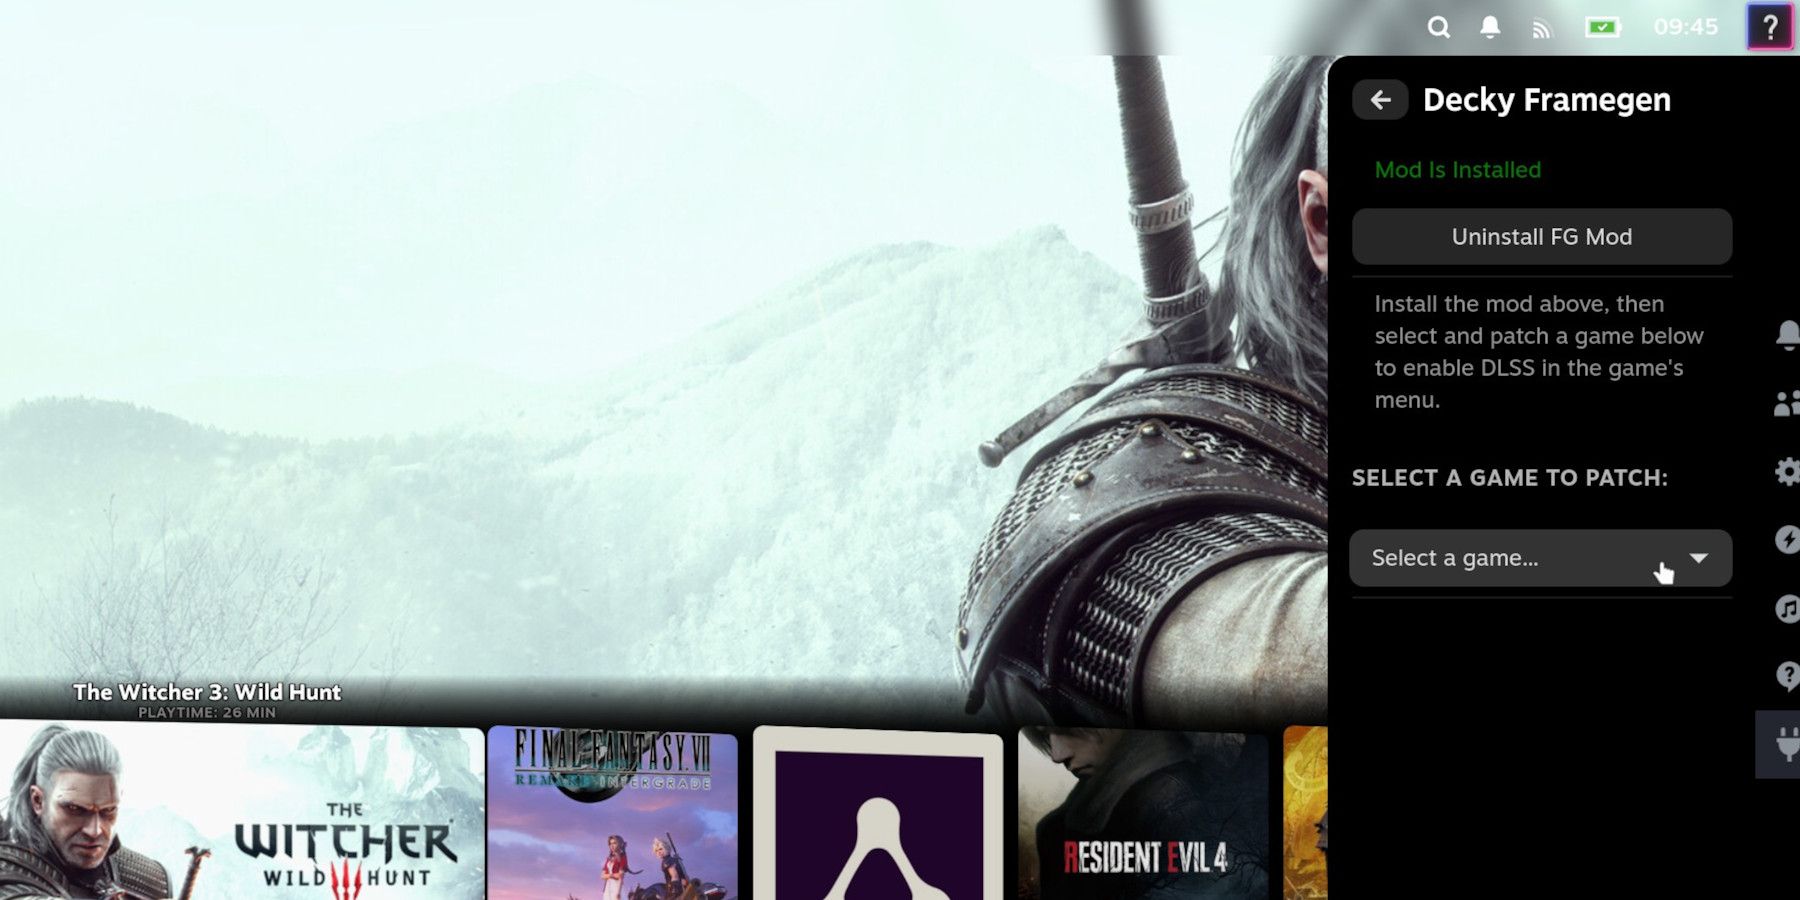
FrameGen Plugin
- Ensure the Steam Deck is in Gaming Mode.
- Press the QAM button, which is located under the right trackpad with three dots.
- Select the new plugin icon.
- Open the Decky FrameGen plugin.
- Select Install FG Mod.
- Then select your DX12 game like The Witcher 3 from the dropdown menu and select Patch.
- Wait for the Patch to install install and launch your game.
Enable DLSS Frame Generation
- Launch your game, open the game’s Options, and select the Display settings to enable DLSS Frame Generation.
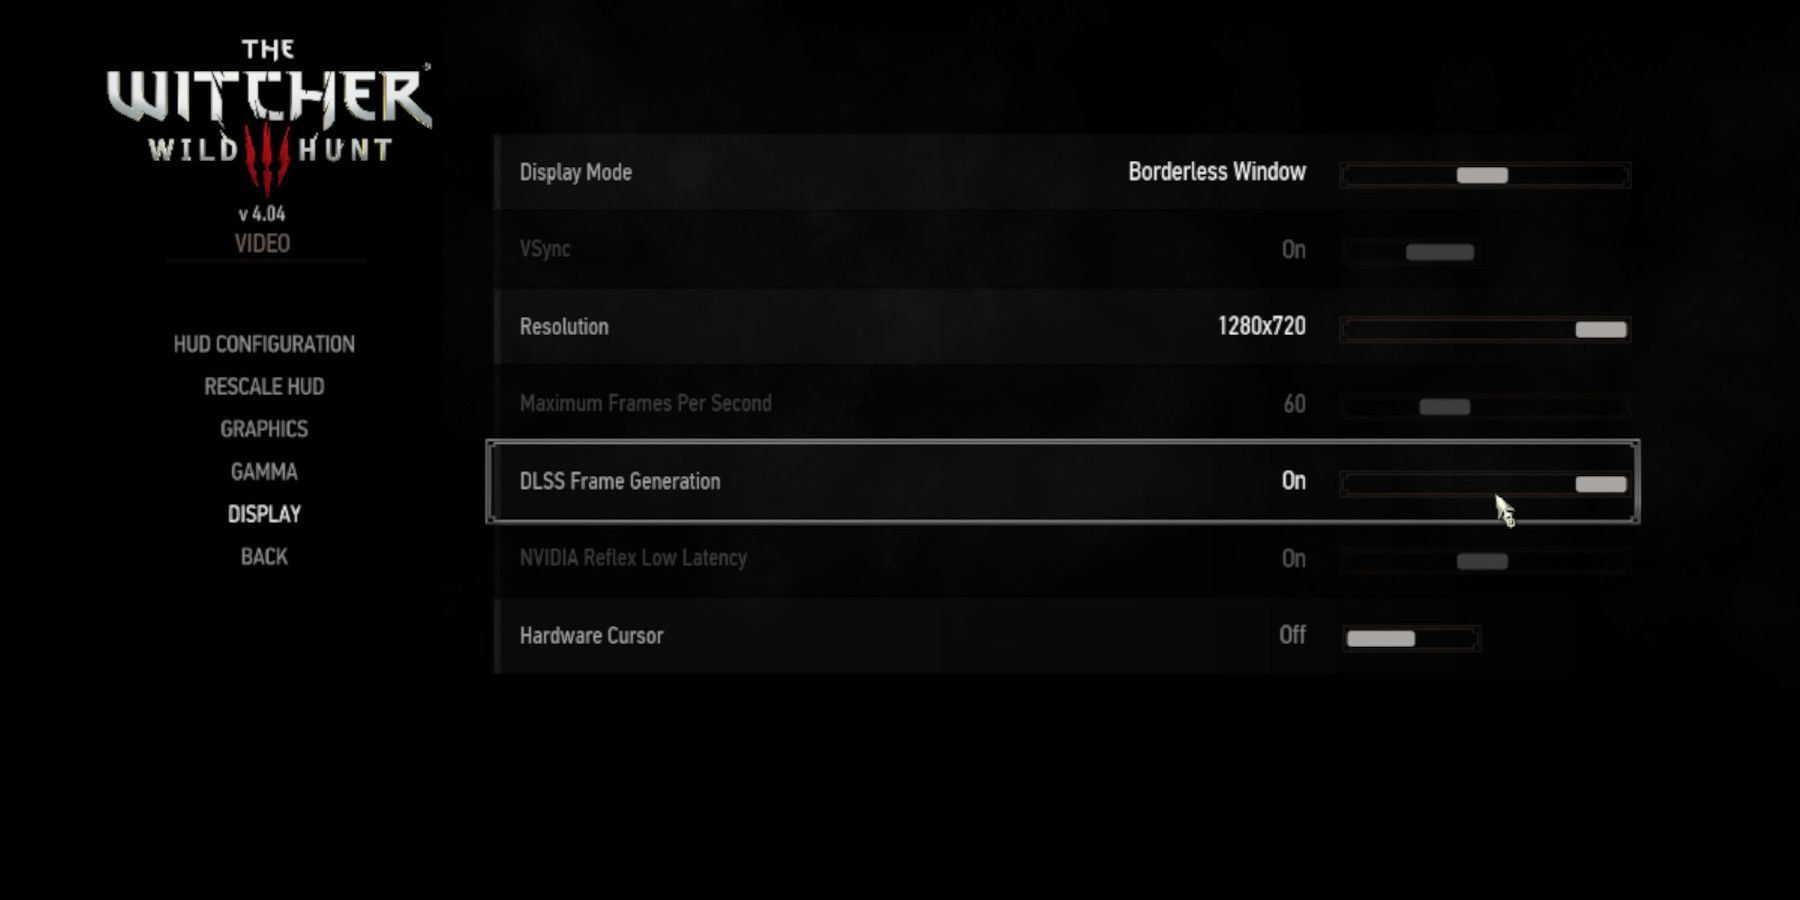
- Then open the Graphics menu.
- Look for the Anti-aliasing option and switch DLSS on.
As a game enthusiast, I’ve found that the performance of certain games can fluctuate. However, for optimal results, I recommend giving lower to moderate graphics settings a spin.
Read More
- Unlock the Magic: New Arcane Blind Box Collection from POP MART and Riot Games!
- Top 8 UFC 5 Perks Every Fighter Should Use
- How to Reach 80,000M in Dead Rails
- Unlock the Best Ending in Lost Records: Bloom & Rage by Calming Autumn’s Breakdown!
- Unlock Roslit Bay’s Bestiary: Fisch Fishing Guide
- Jujutsu Kaisen Shocker: The Real Reason Gojo Fell to Sukuna Revealed by Gege Akutami!
- Unaware Atelier Master: New Trailer Reveals April 2025 Fantasy Adventure!
- How to Unlock the Mines in Cookie Run: Kingdom
- REPO: How To Fix Client Timeout
- MHA’s Back: Horikoshi Drops New Chapter in ‘Ultra Age’ Fanbook – See What’s Inside!
2025-02-20 05:05