Summary
- Start with the OG Kush strain in the Sweat Shop; experiment with growing and mixing for optimal cash flow.
- Consider creating a Green Crack den for upscale cannabis production at Hoodlum II level for better profits.
- Grow a wider variety of cannabis strains at Hoodlum IV level; maximize space and equipment for larger client base.
Every drug kingpin must control multiple real estate holdings, whereas individuals aiming for such power must begin as street-level operatives and gradually climb the ranks, eventually becoming Kings. The main character’s initial property acquisition is a humble rental property, referred to as the ‘Sweat Shop’.
In contrast to other properties listed with Ray’s Realty in Hyland Point, this bachelor pad isn’t included. Instead, our character discovers it through Uncle Nelson’s tip and leases it from Ms. Ming, who runs Fat Dragon Restaurant below. As the game progresses, this apartment proves useful in various ways for expanding the player’s business.
In each design, there’s an allotted area for a packing center. However, another option could be to relocate these facilities to the neighboring hotel rooms. This way, the player can still utilize the space for sleeping, storage, or convenient access to dealer Benji who resides in Room 2.
5. The Kush Lair
A Street Rat Operation
- Go hard early with a grow dedicated to one reliable strain.
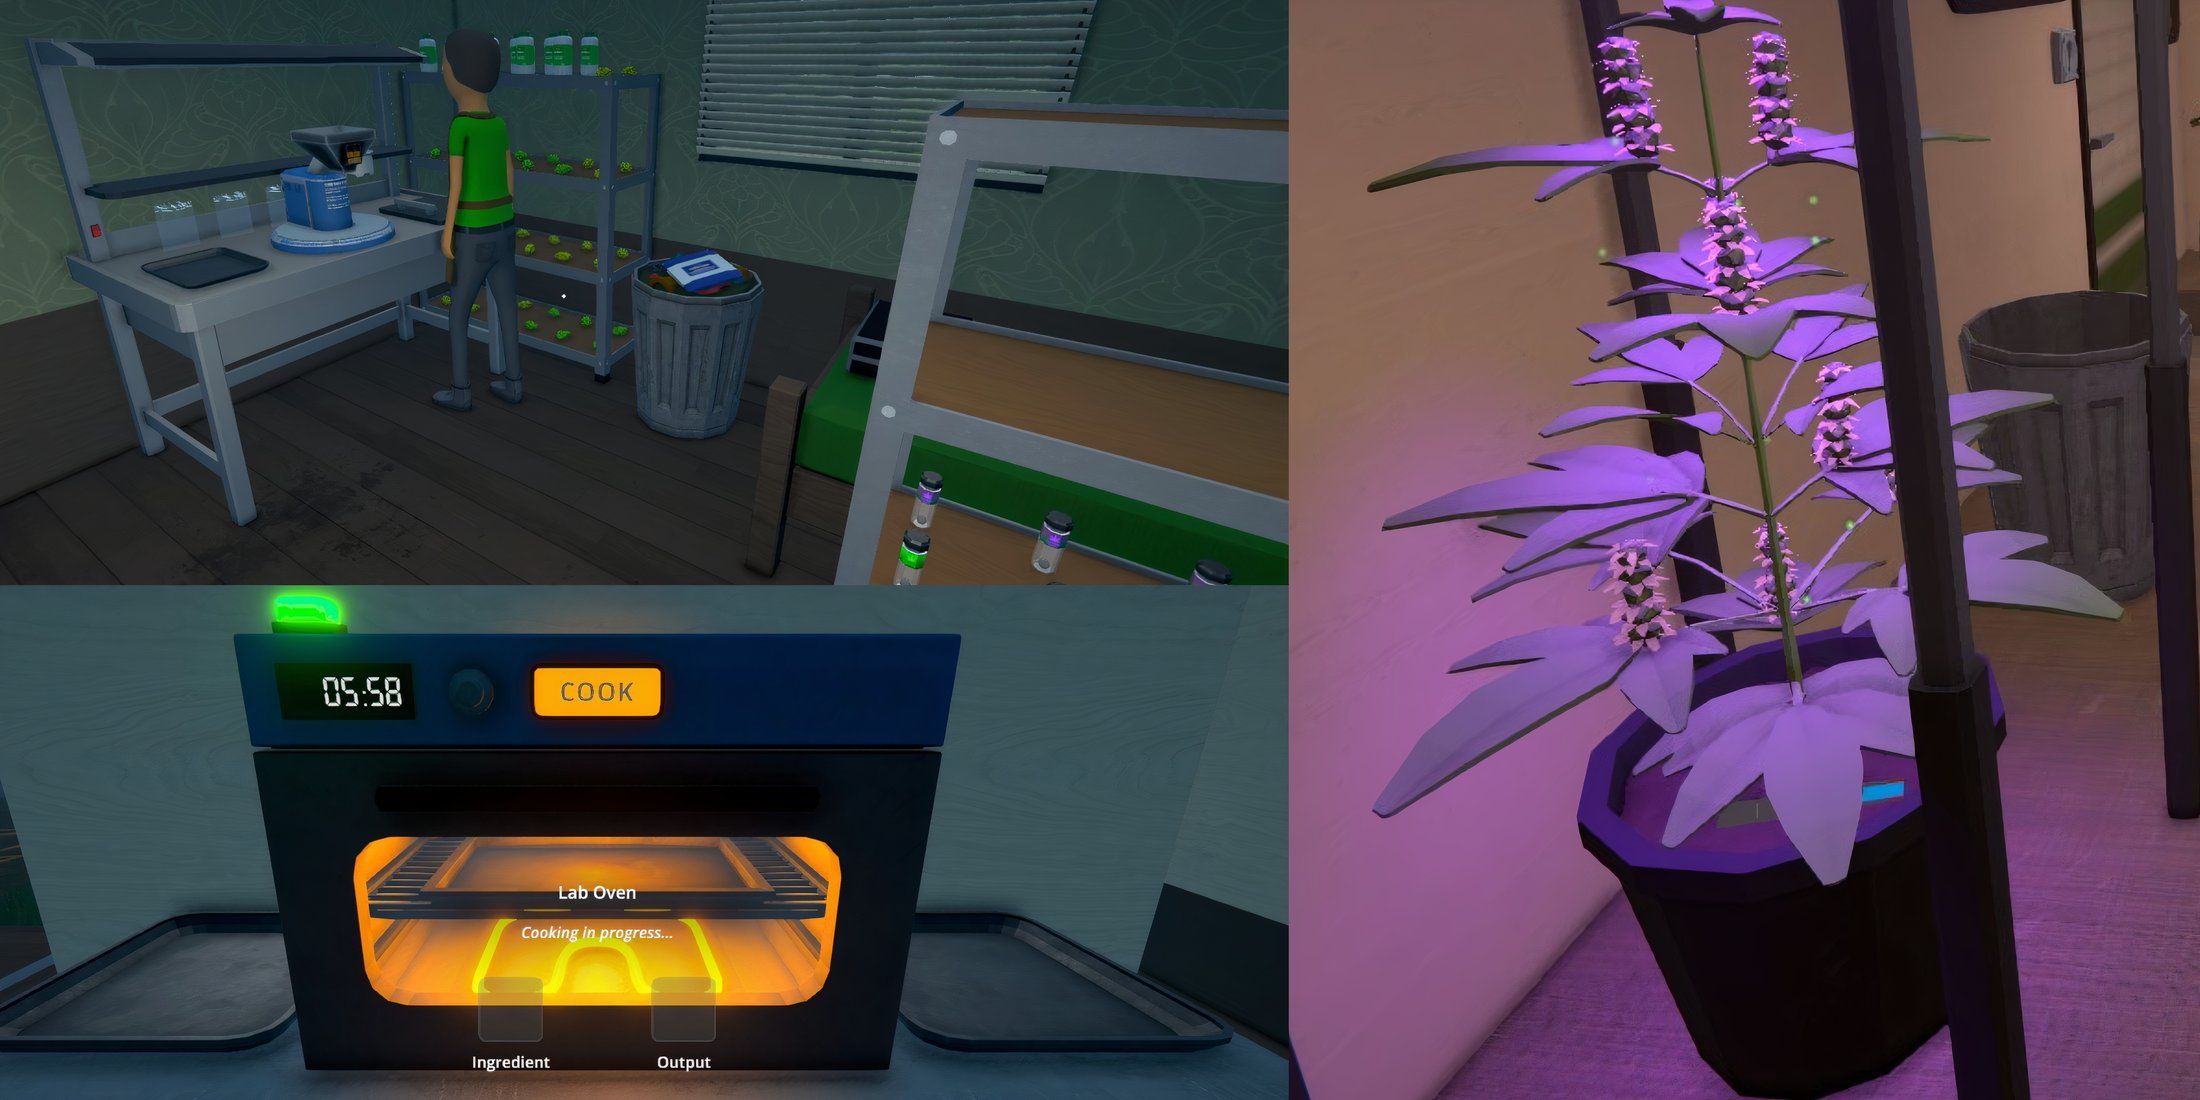
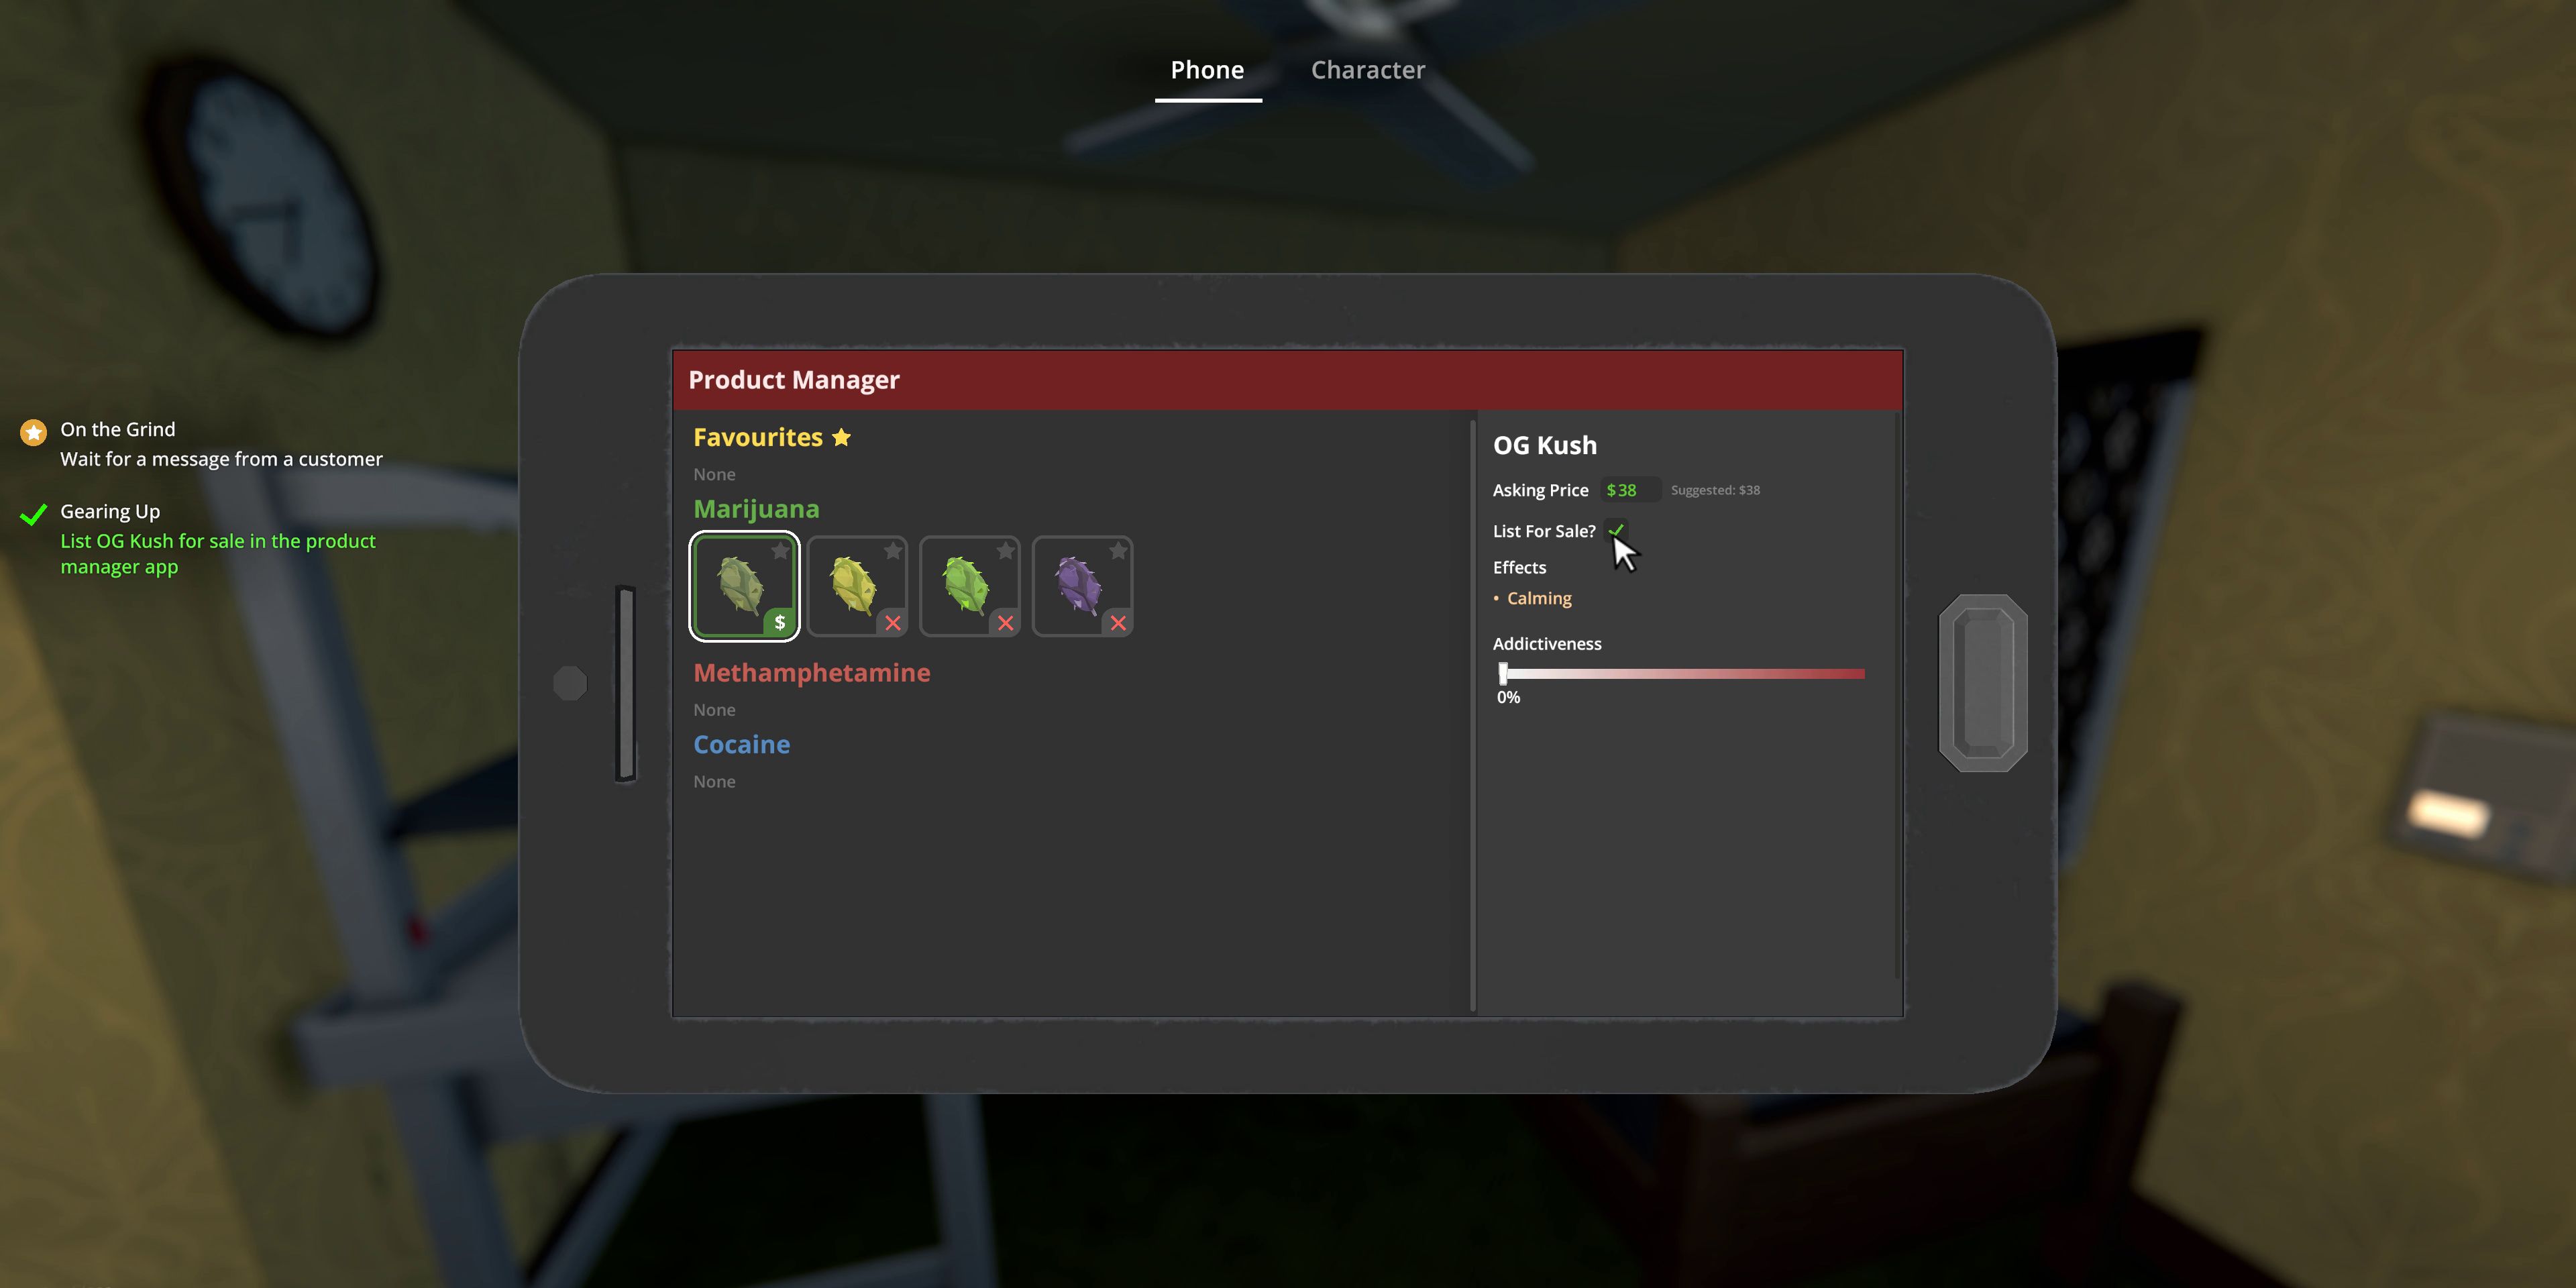
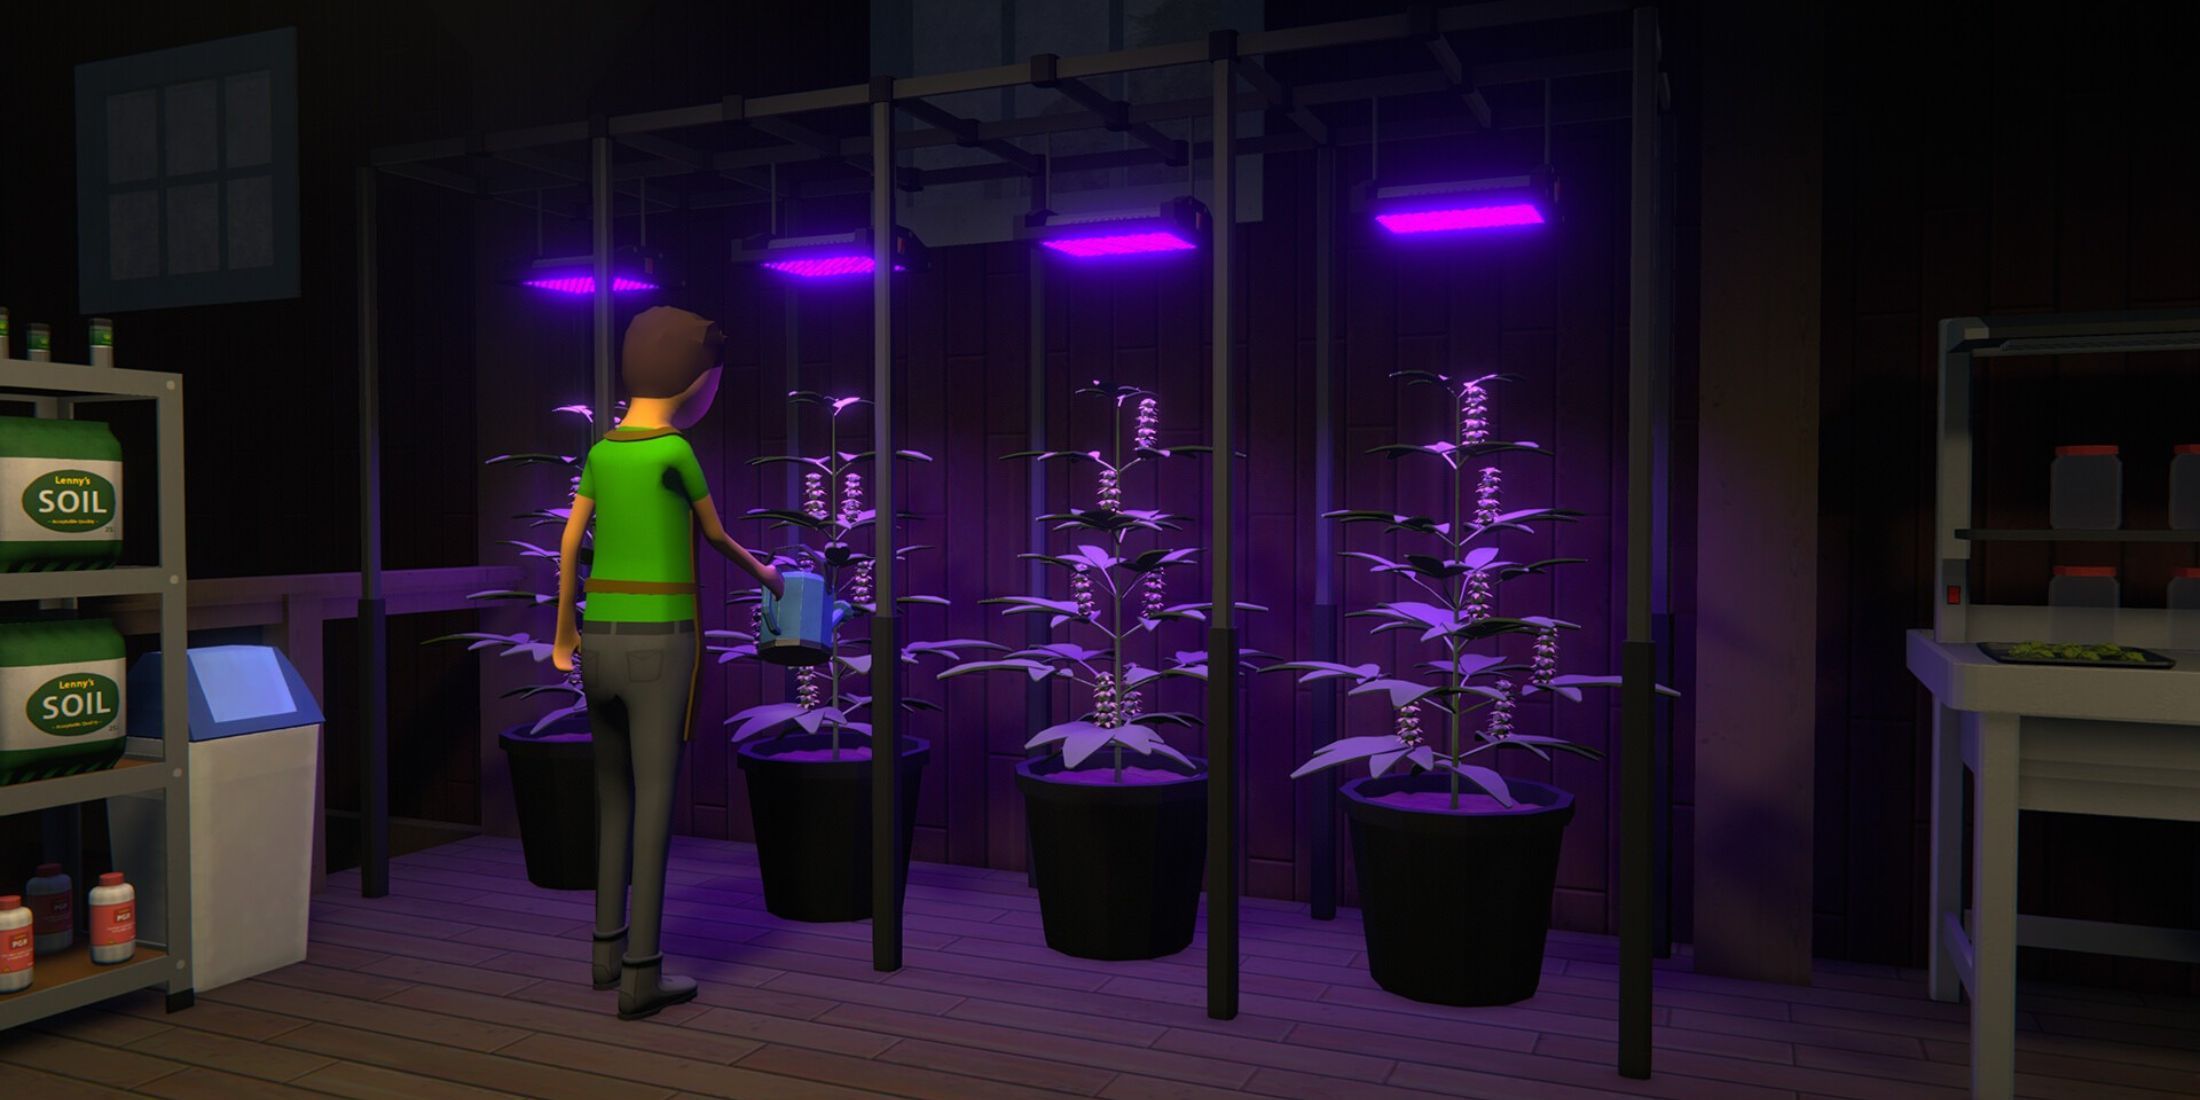
1) You’ll quickly accumulate the $800 needed for renting ‘The Sweat Shop’. At this stage, the player gains access to at least one marijuana strain, possibly two. The initial option is OG Kush, a popular, mid-tier cannabis strain that appeals to most people. It also mixes effectively with early additives like cold medicine and donuts.
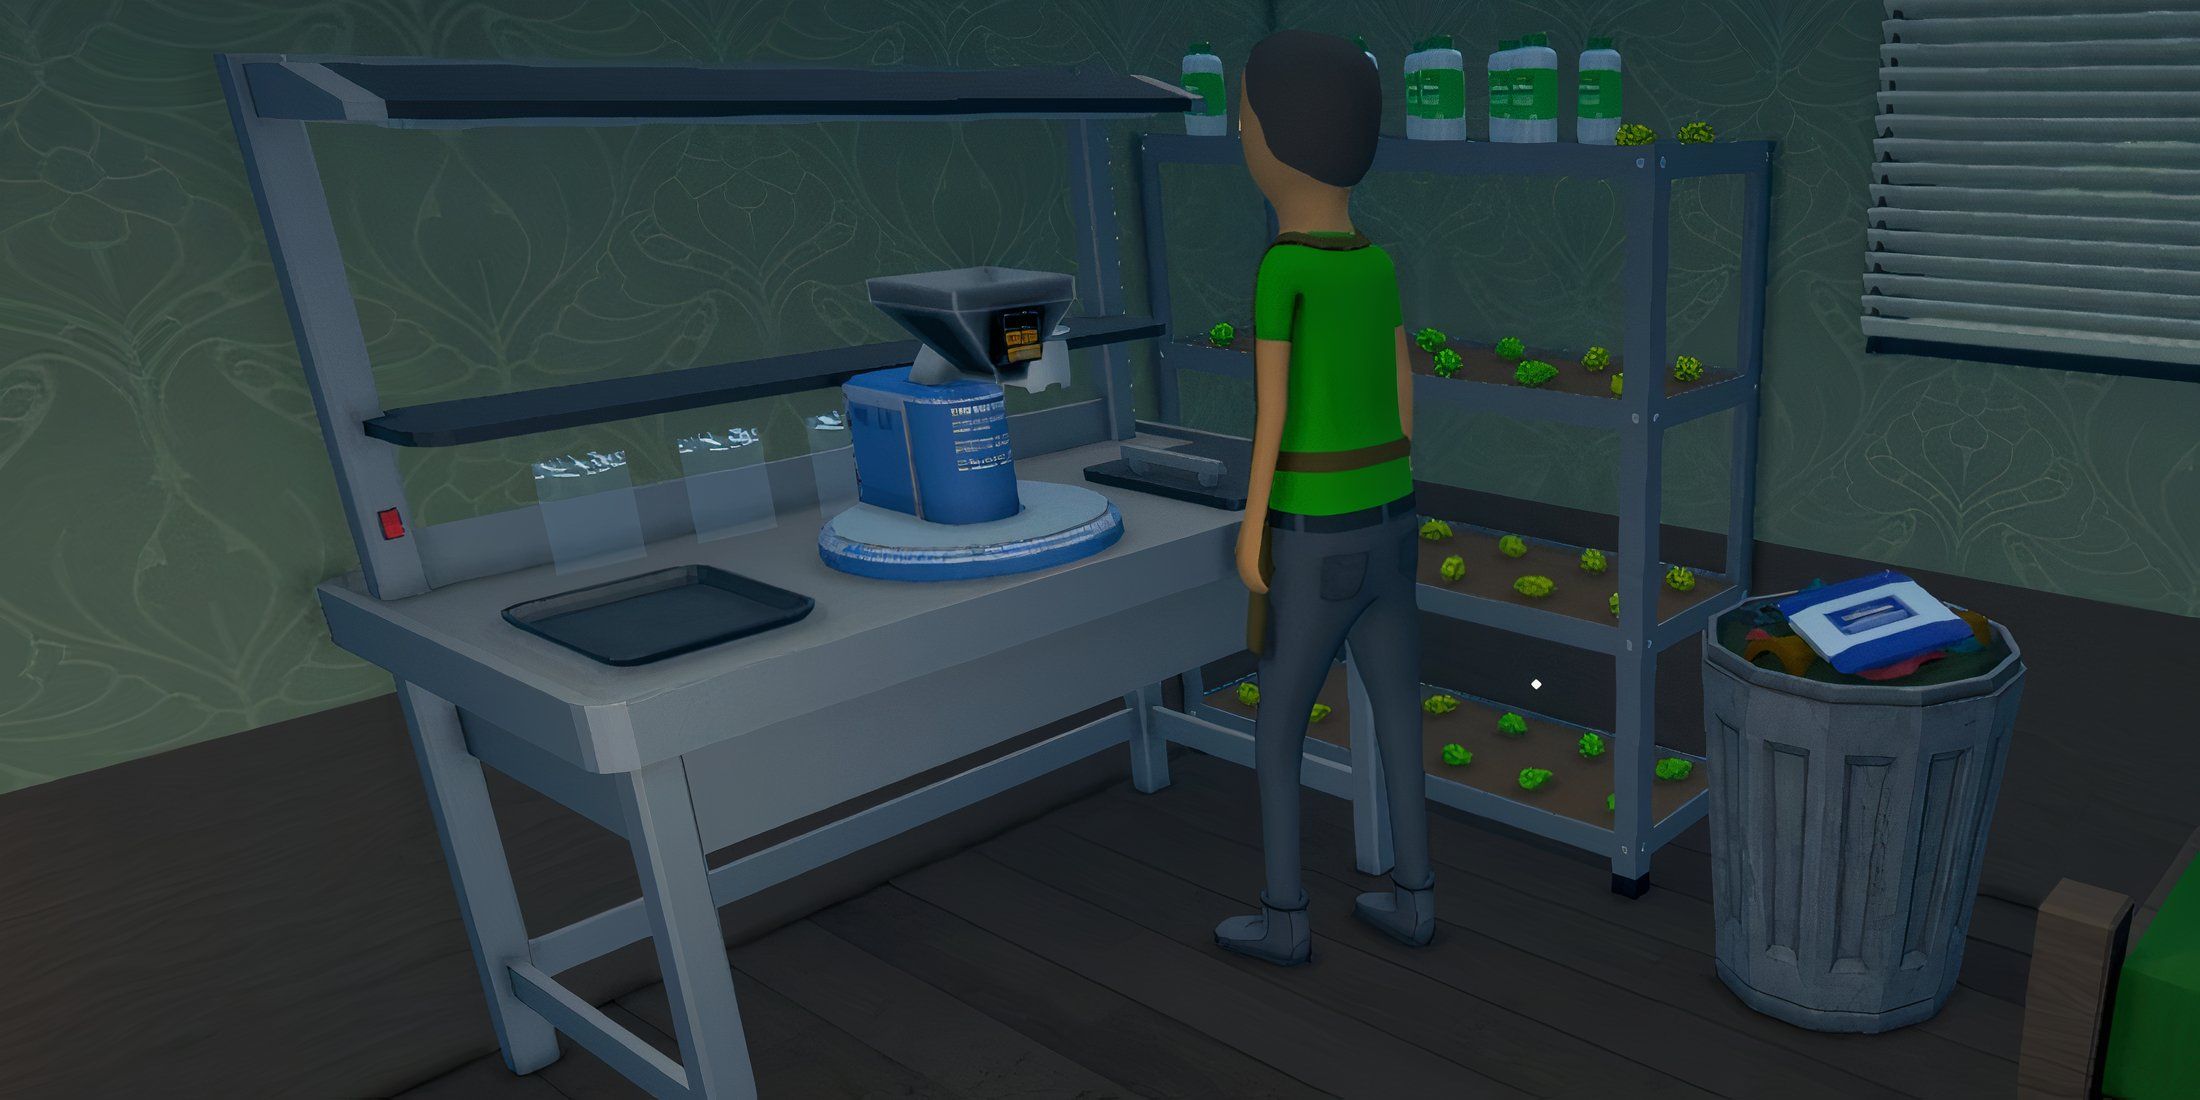
Instead of continually trying out different strains based on curiosity, focus on transforming your Sweatshop into a specialized mini-grow area for a single strain. This approach can help you produce more product quicker, albeit at the expense of variety until you expand your growing space. Given that your apartment is in an L-shape, it’s convenient to partition one side for packing, storage, and living areas while setting up grow tents on the other side.
Employees
- Botanist: Hire a Botanist if this is strictly a grow room. Make sure they have ample storage and dry racks for the harvested product.
- Chemist: Not just for more advanced chemicals, but any mixing station. The Chemist is a better employee when the player expands into creating and selling more expensive cannabis strains and harvesting isn’t required on as large of a scale.
4. A Green Crack Den
High Rolling With Potent Cannabis
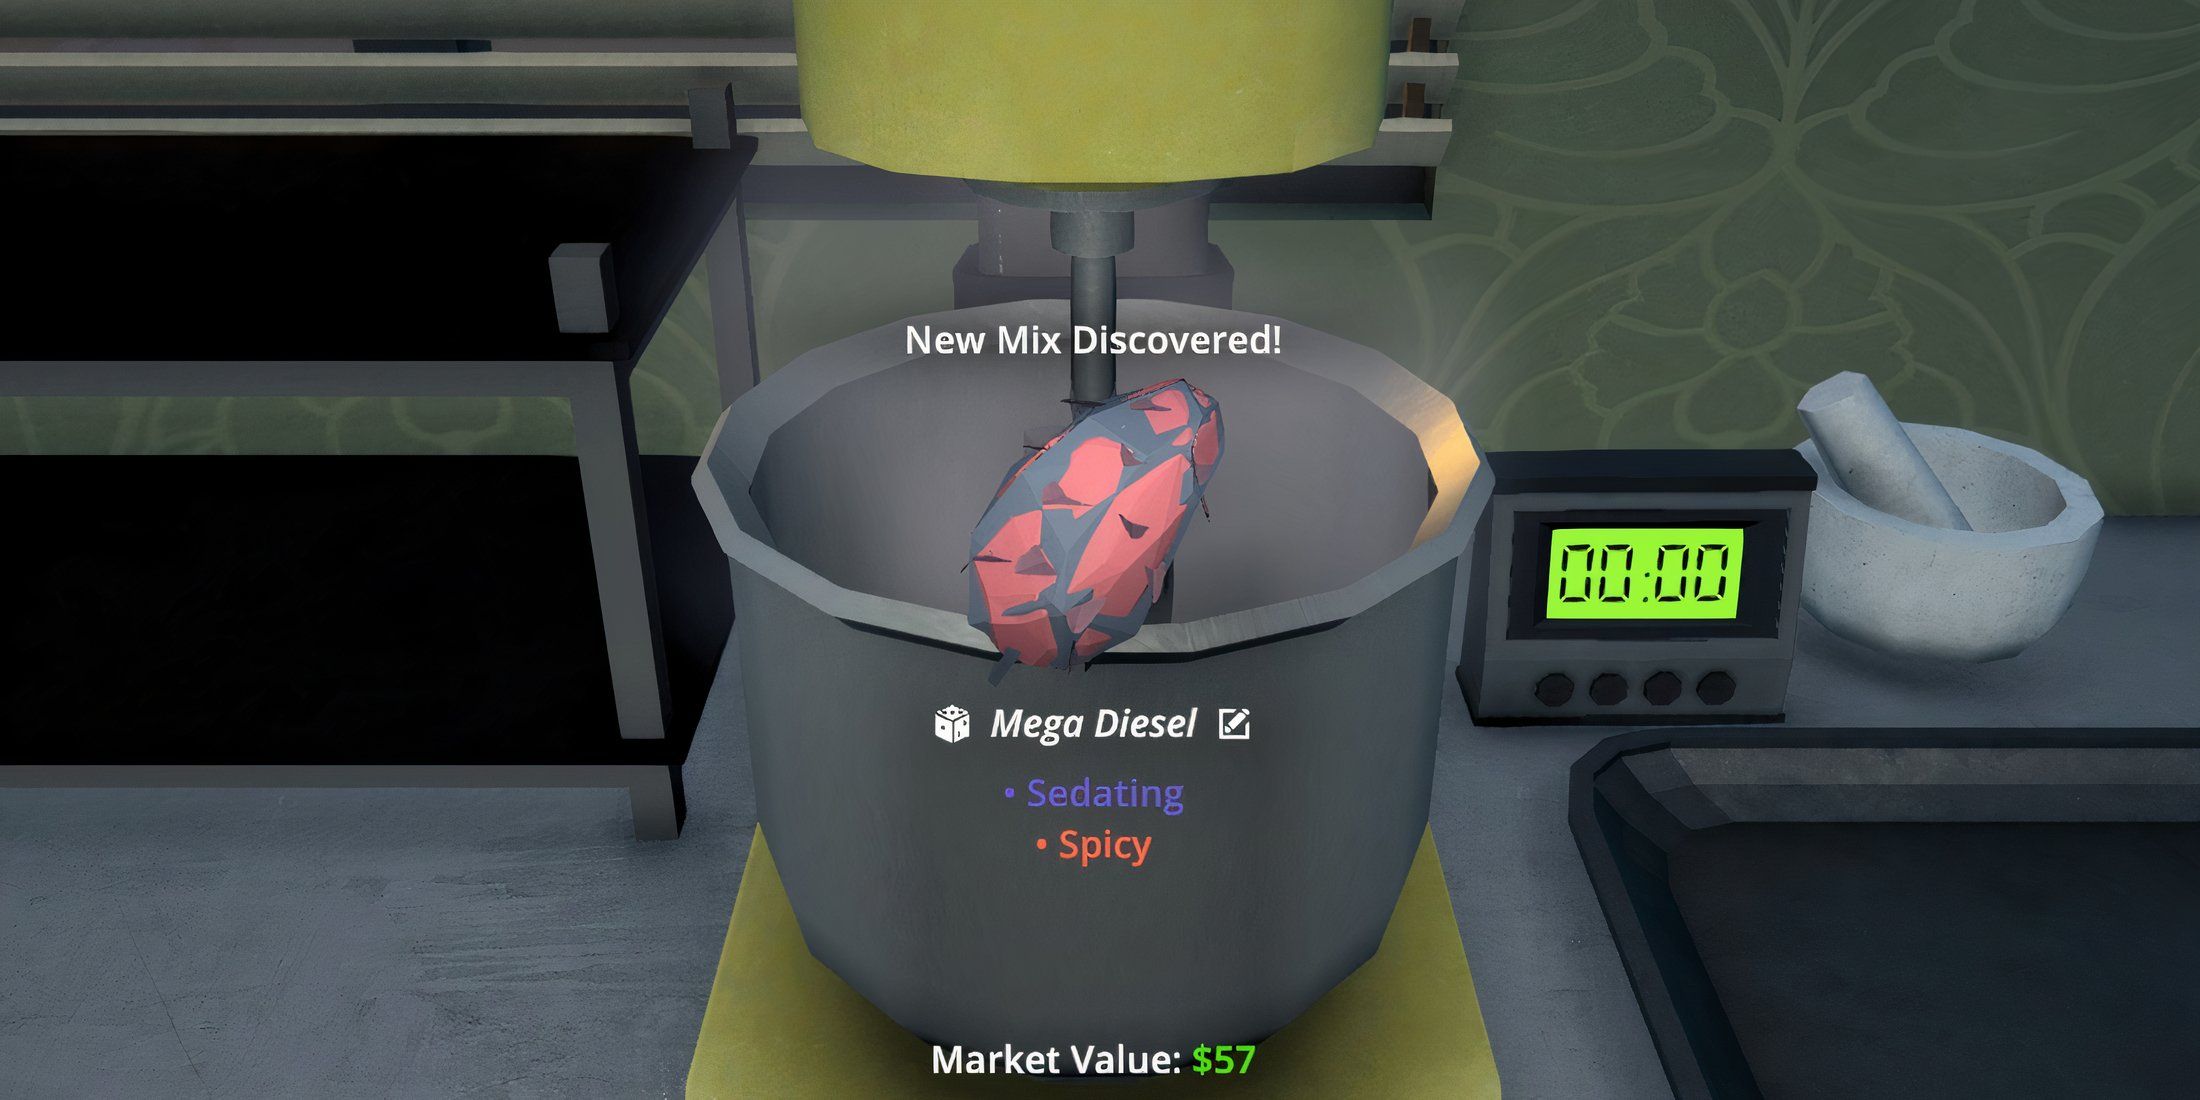
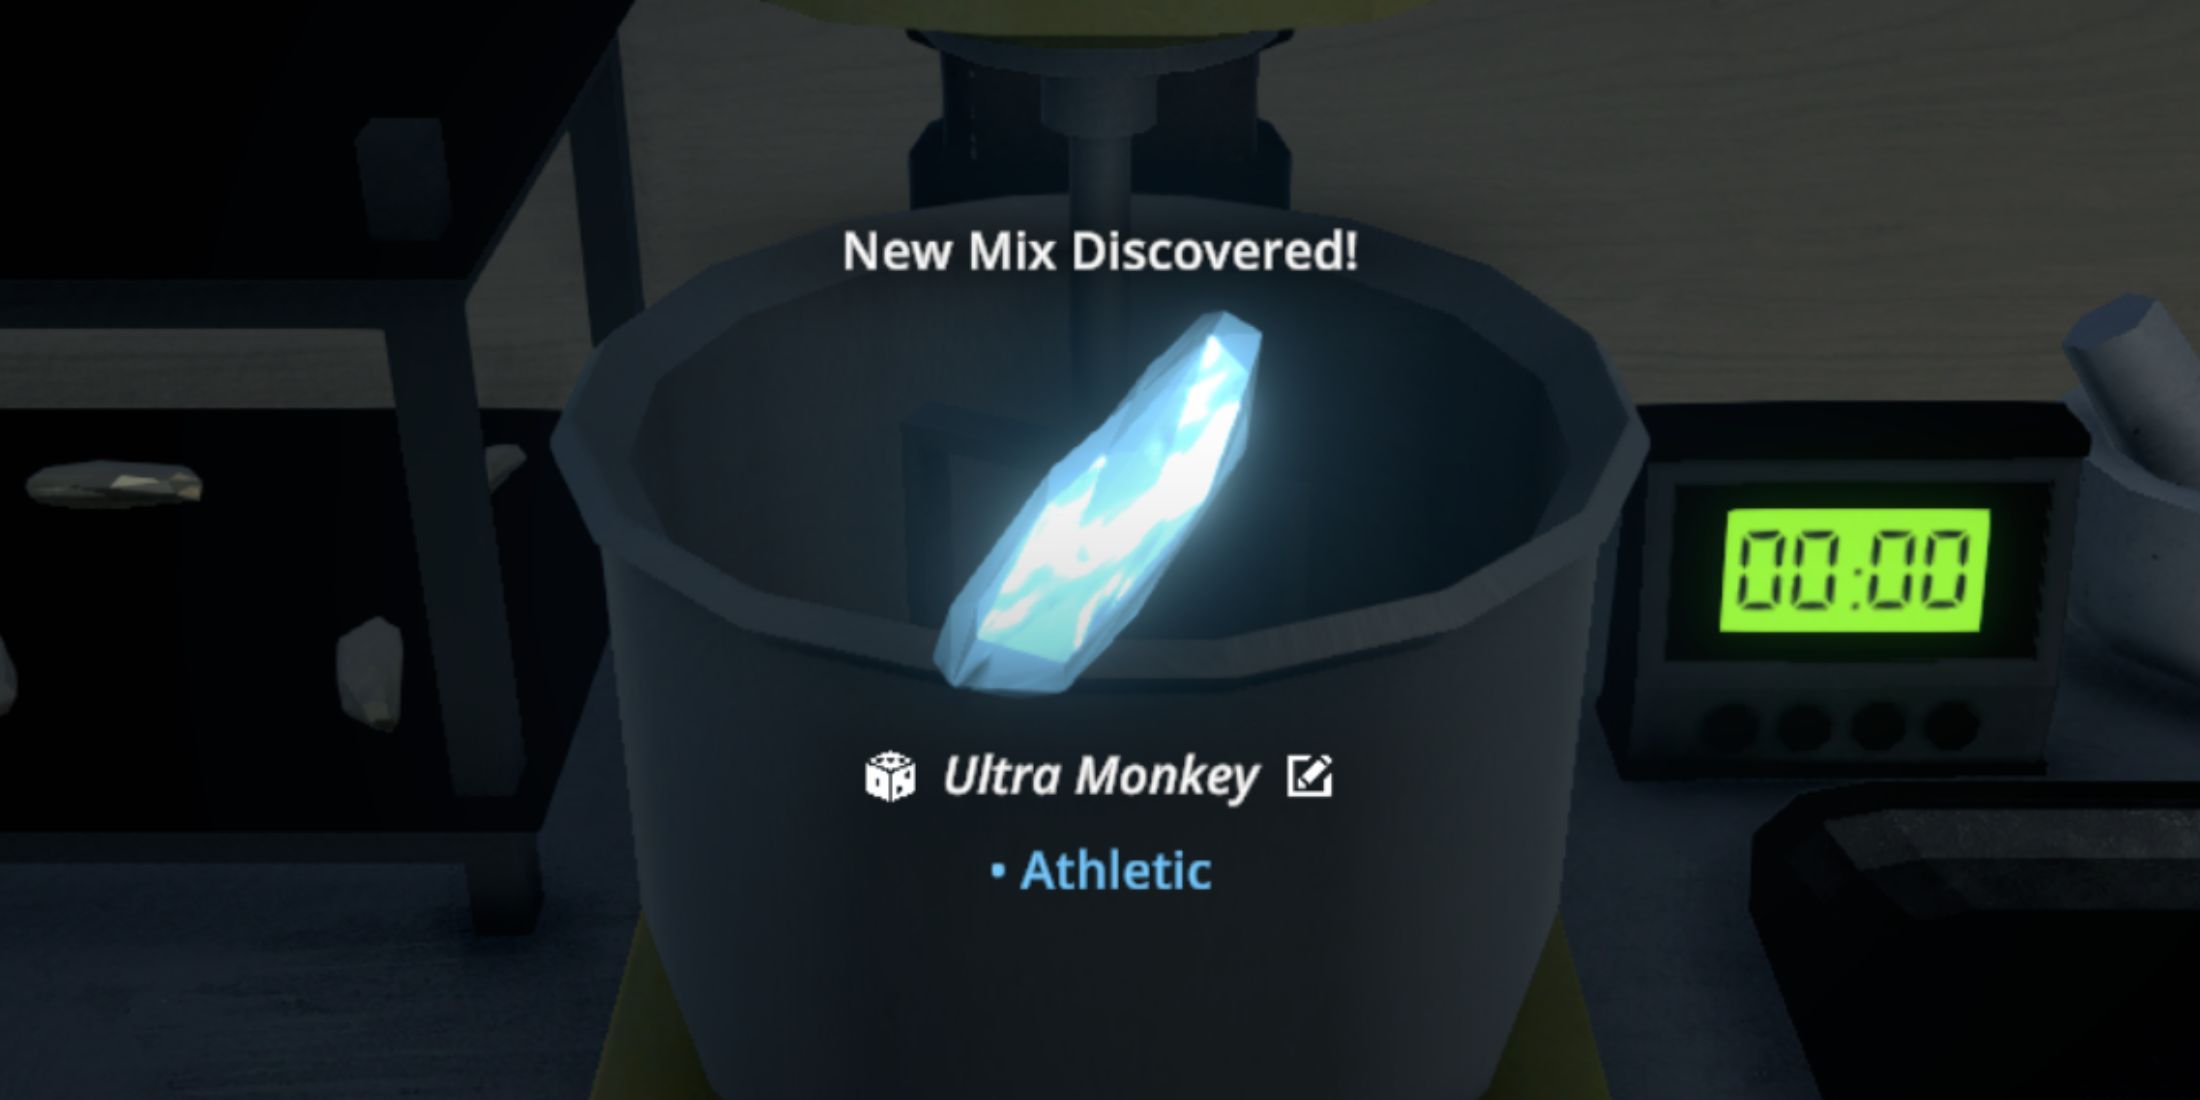
- A strong and expensive strain for mid to high-level mixing.
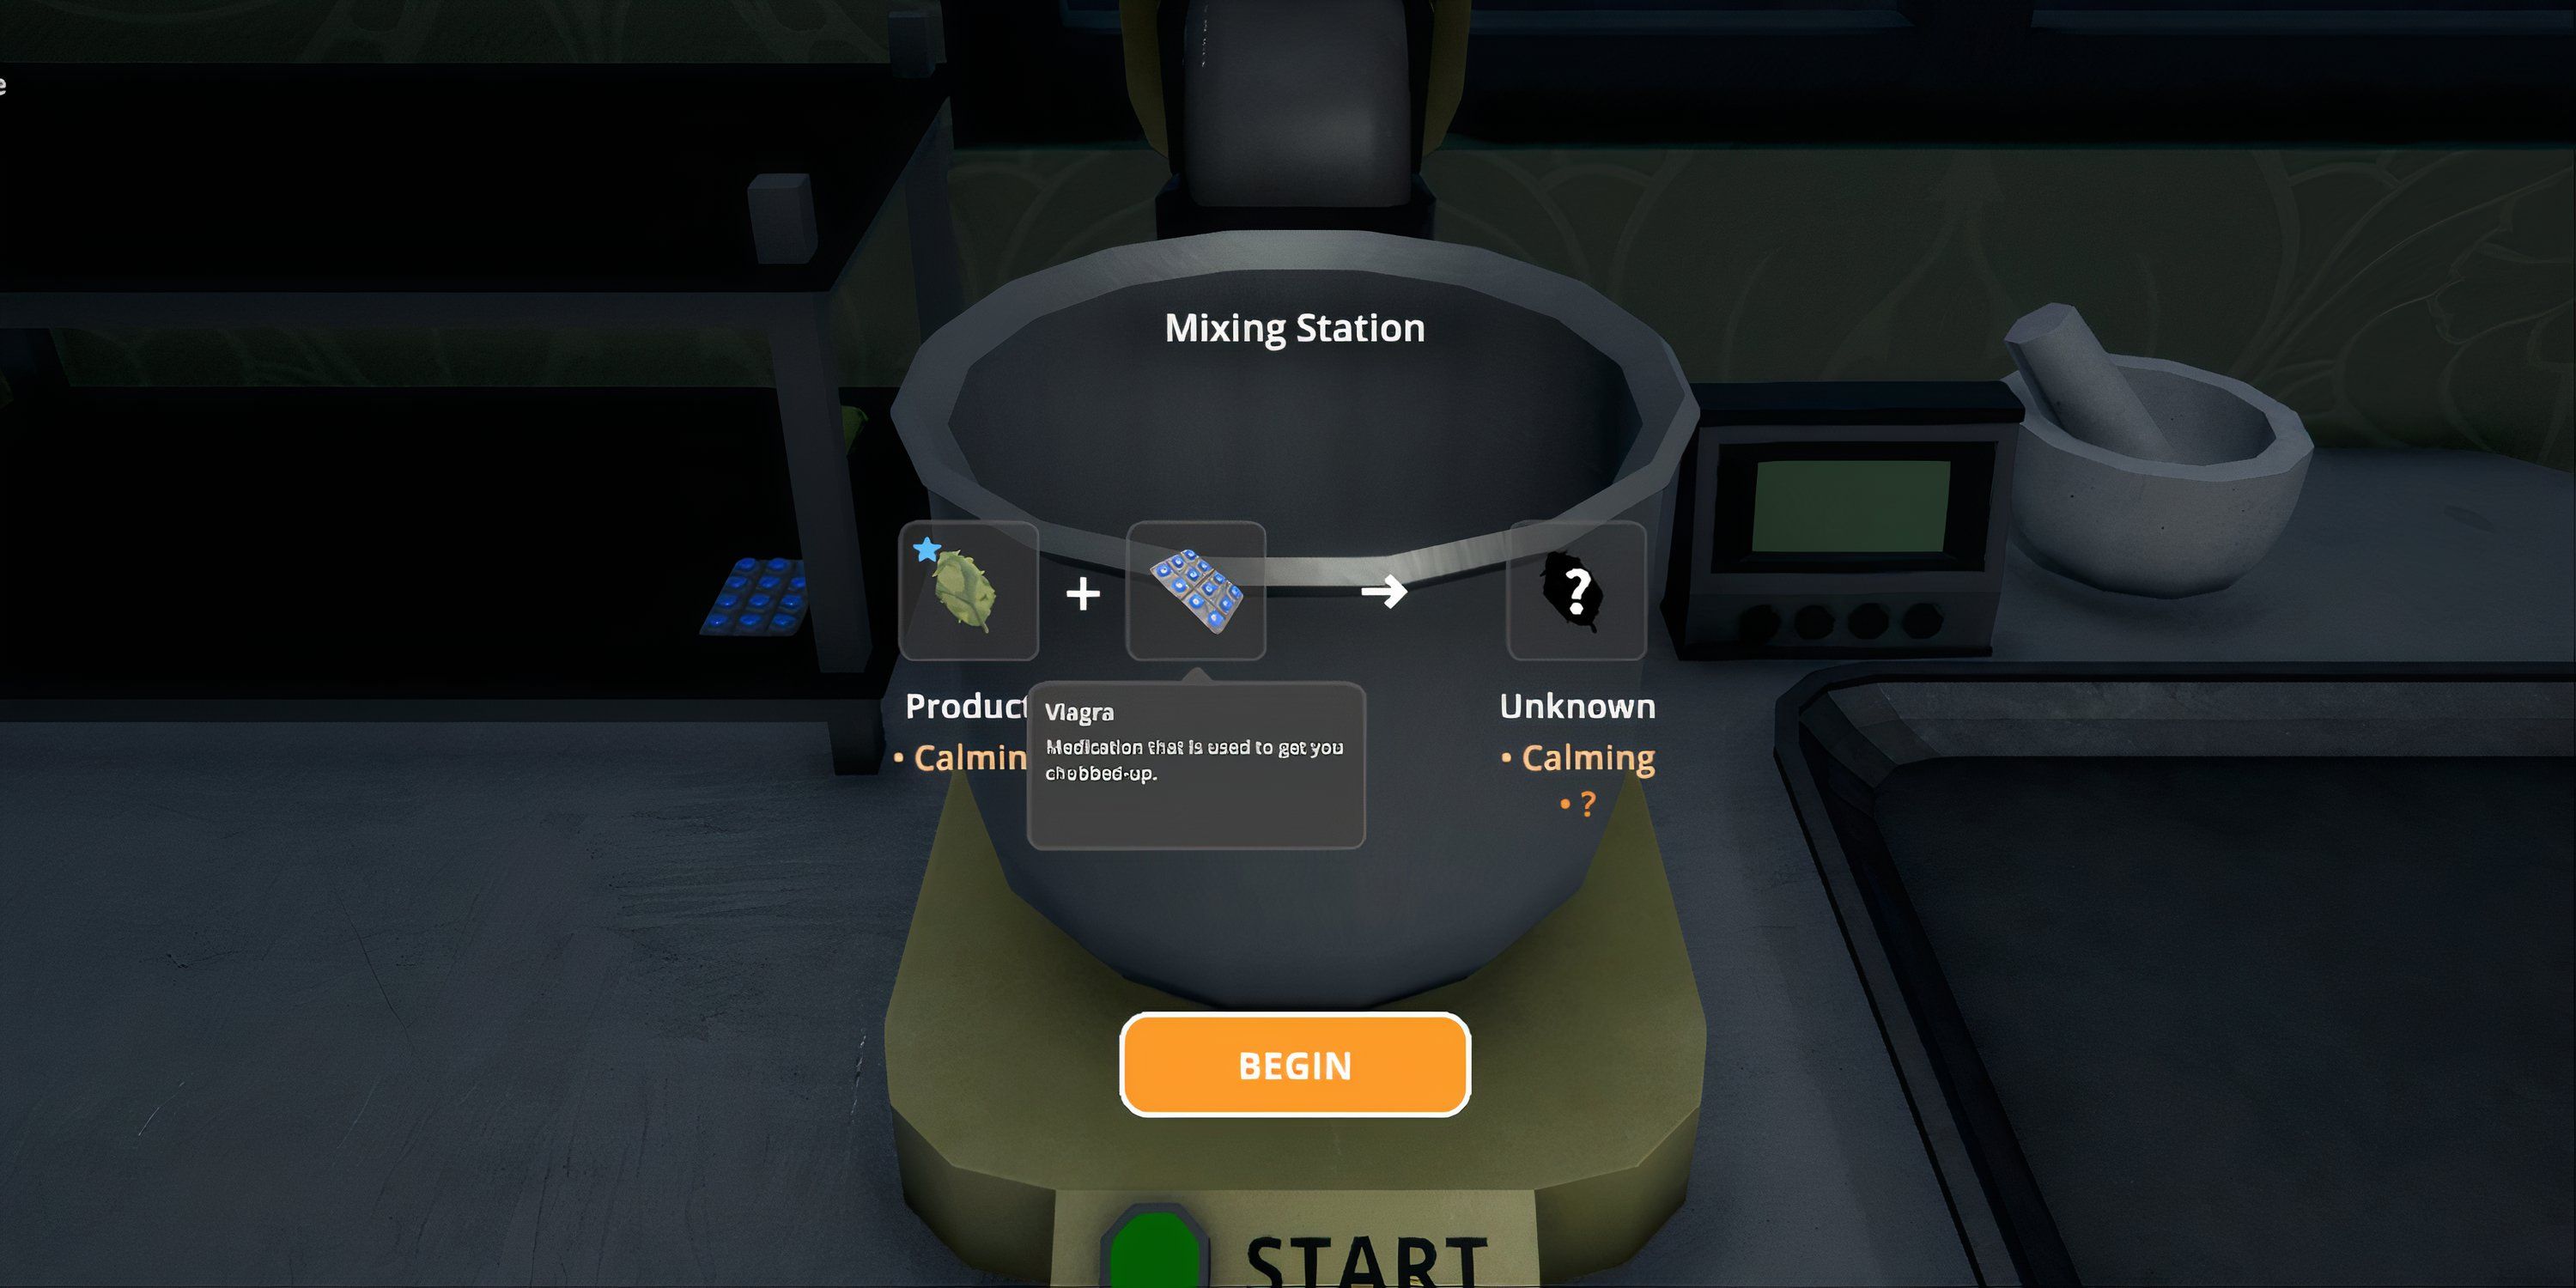
Green Crack is a powerful strain that becomes accessible as you progress to Hoodlum II. Its base price of $43 is quite reasonable, and it can be effectively combined with various options from the Gas-Mart for the creation of even more mind-boggling strains. However, in some situations, it might be beneficial to forego the mixing process to maximize space by adding more grow tents instead.
This concept shares resemblance with a high-end version of the classic OG Kush setup. It’s an advanced operation that comes with a higher price tag but promises increased profits as well. At this juncture, our client base is expanding rapidly, and the phone calls are pouring in, including some advice from Uncle Nelson about investing in larger real estate properties and local businesses.
Employees
- Botanist: As the cannabis grows, this is the most important employee. A few extra dry racks for their harvesting are also helpful.
- Cleaner: The player may want to think about handling the production while an employee handles trash.
3. Mixed Cannabis Minigrow
Wider Variety For A Larger Client Base
- Cannabis for every taste and client, regardless of budget or neighborhood.
It’s thrilling when a player advances to Hoodlum IV level, gaining access to four distinct varieties of cannabis strains. Why not attempt to cultivate them all for an even more enjoyable and hands-on experience? A larger growing space certainly adds fun, but it’s wise to start small first before scaling up.
In this setup, there is ample space to accommodate two cultivation tents for every one of the four varieties provided. However, if necessary, it could be adjusted to house three per variety. The number of tents can also be customized based on growers’ preferences or to meet increased customer requirements. For optimal results, it’s advisable to position the packing station elsewhere, allowing for additional space for grow tents, drying racks, and other essential equipment.
Employees
- Botanist: The most crucial activities here require a Botanist, but remember they can only handle a limited number of plants and the player might have to pick up some slack.
- Chemist: Mixing is a major thing with this grow, so there should be room for a mixer and perhaps a Chemist to run it. This is a flexible choice that depends on how much the player wants to mix and how much they want to grow.
2. Starter Meth Lab Setup
Perfect Size, One Employee
- A harder drug that requires little space compared to grow tents.
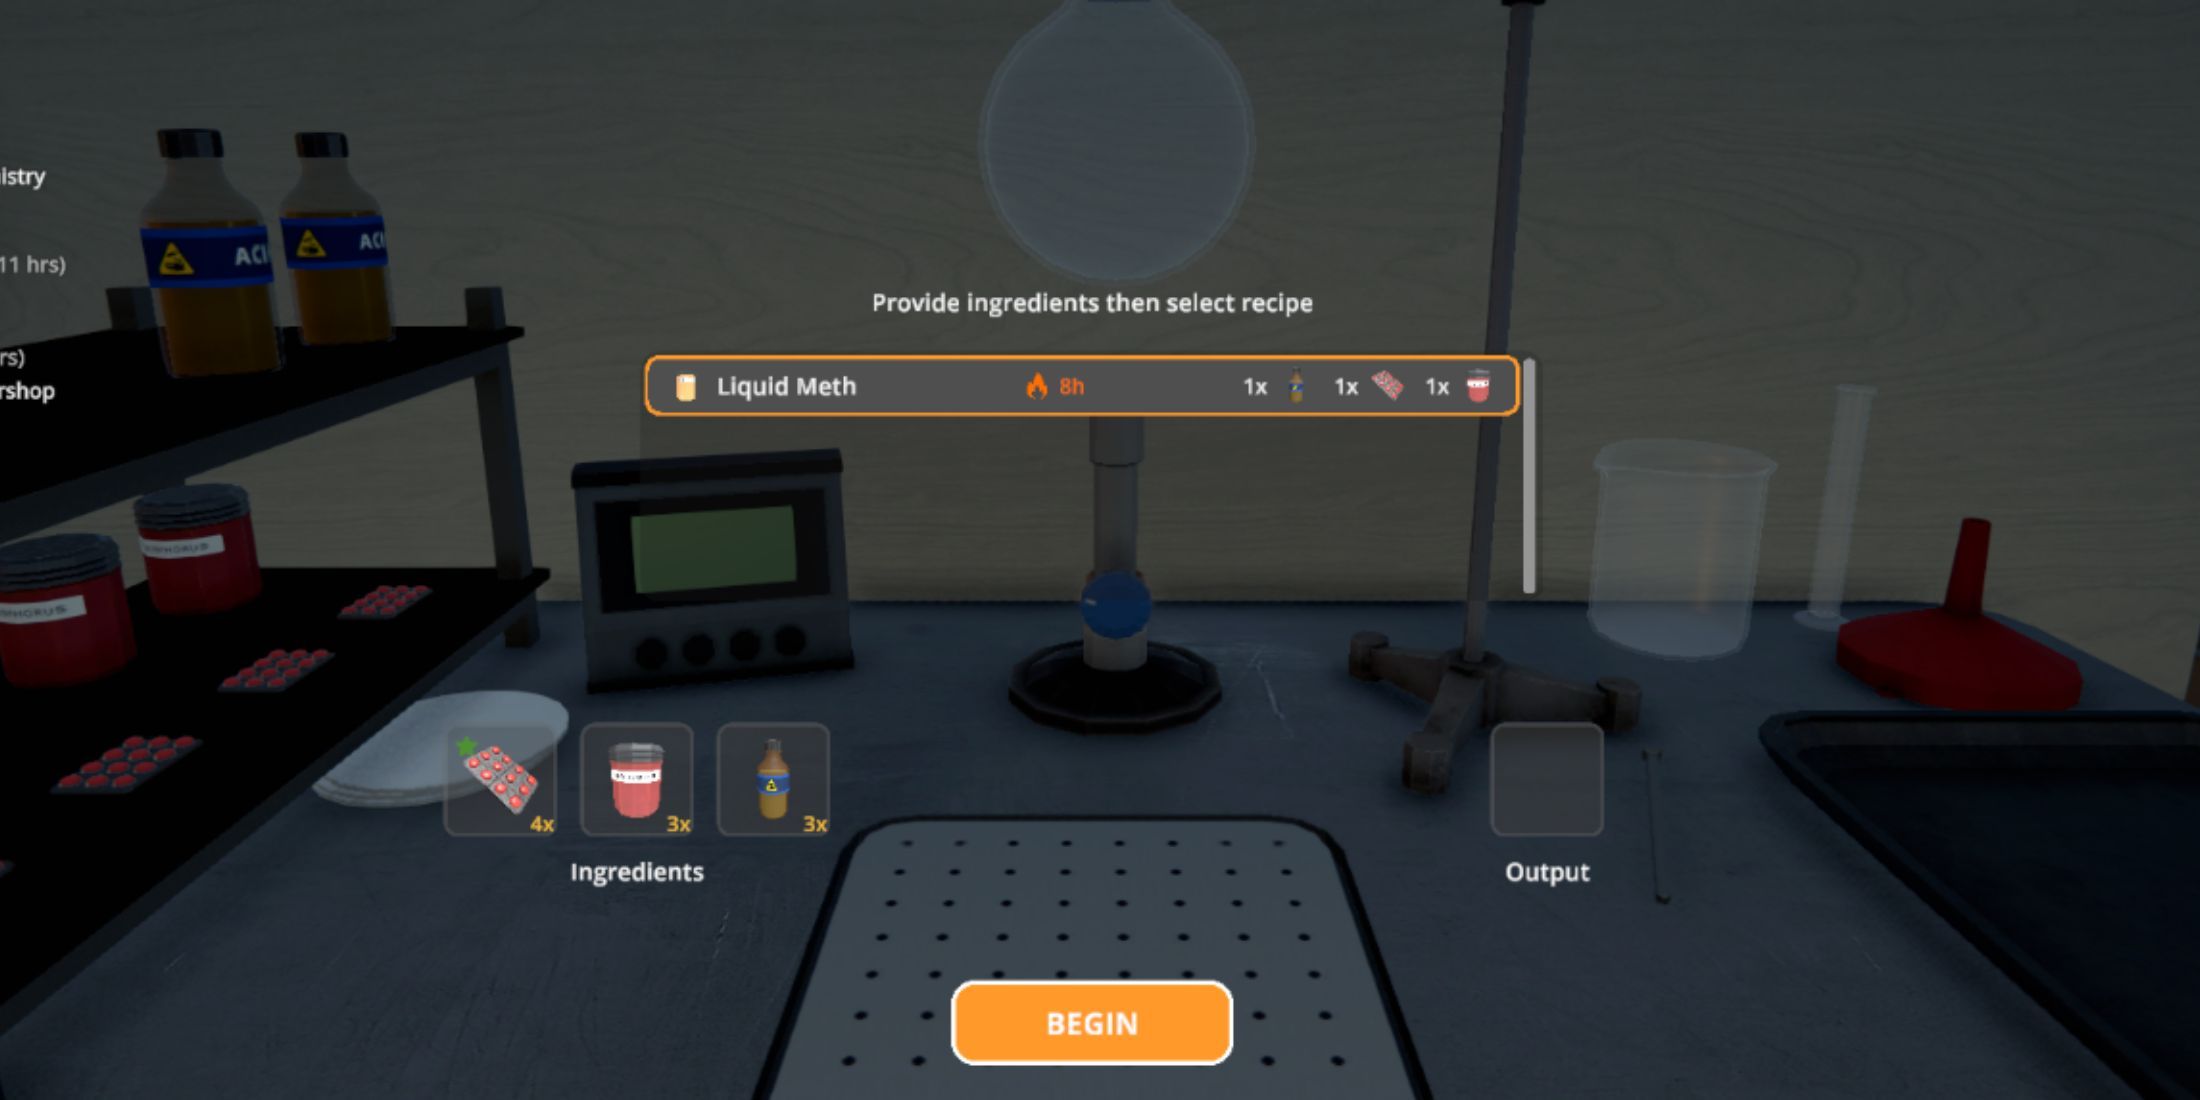
As a dedicated player, when I find myself at the Peddler’s humble abode, I often run out of space to accommodate the grow tents necessary to fulfill demand. This predicament usually forces me to relocate my plants to either the Bungalow or Warehouse. This move not only frees up the Sweatshop for other ventures but also ensures that my bed and storage remain intact. Interestingly, the location’s size makes it an ideal spot for setting up a small-scale meth lab, should the need ever arise.
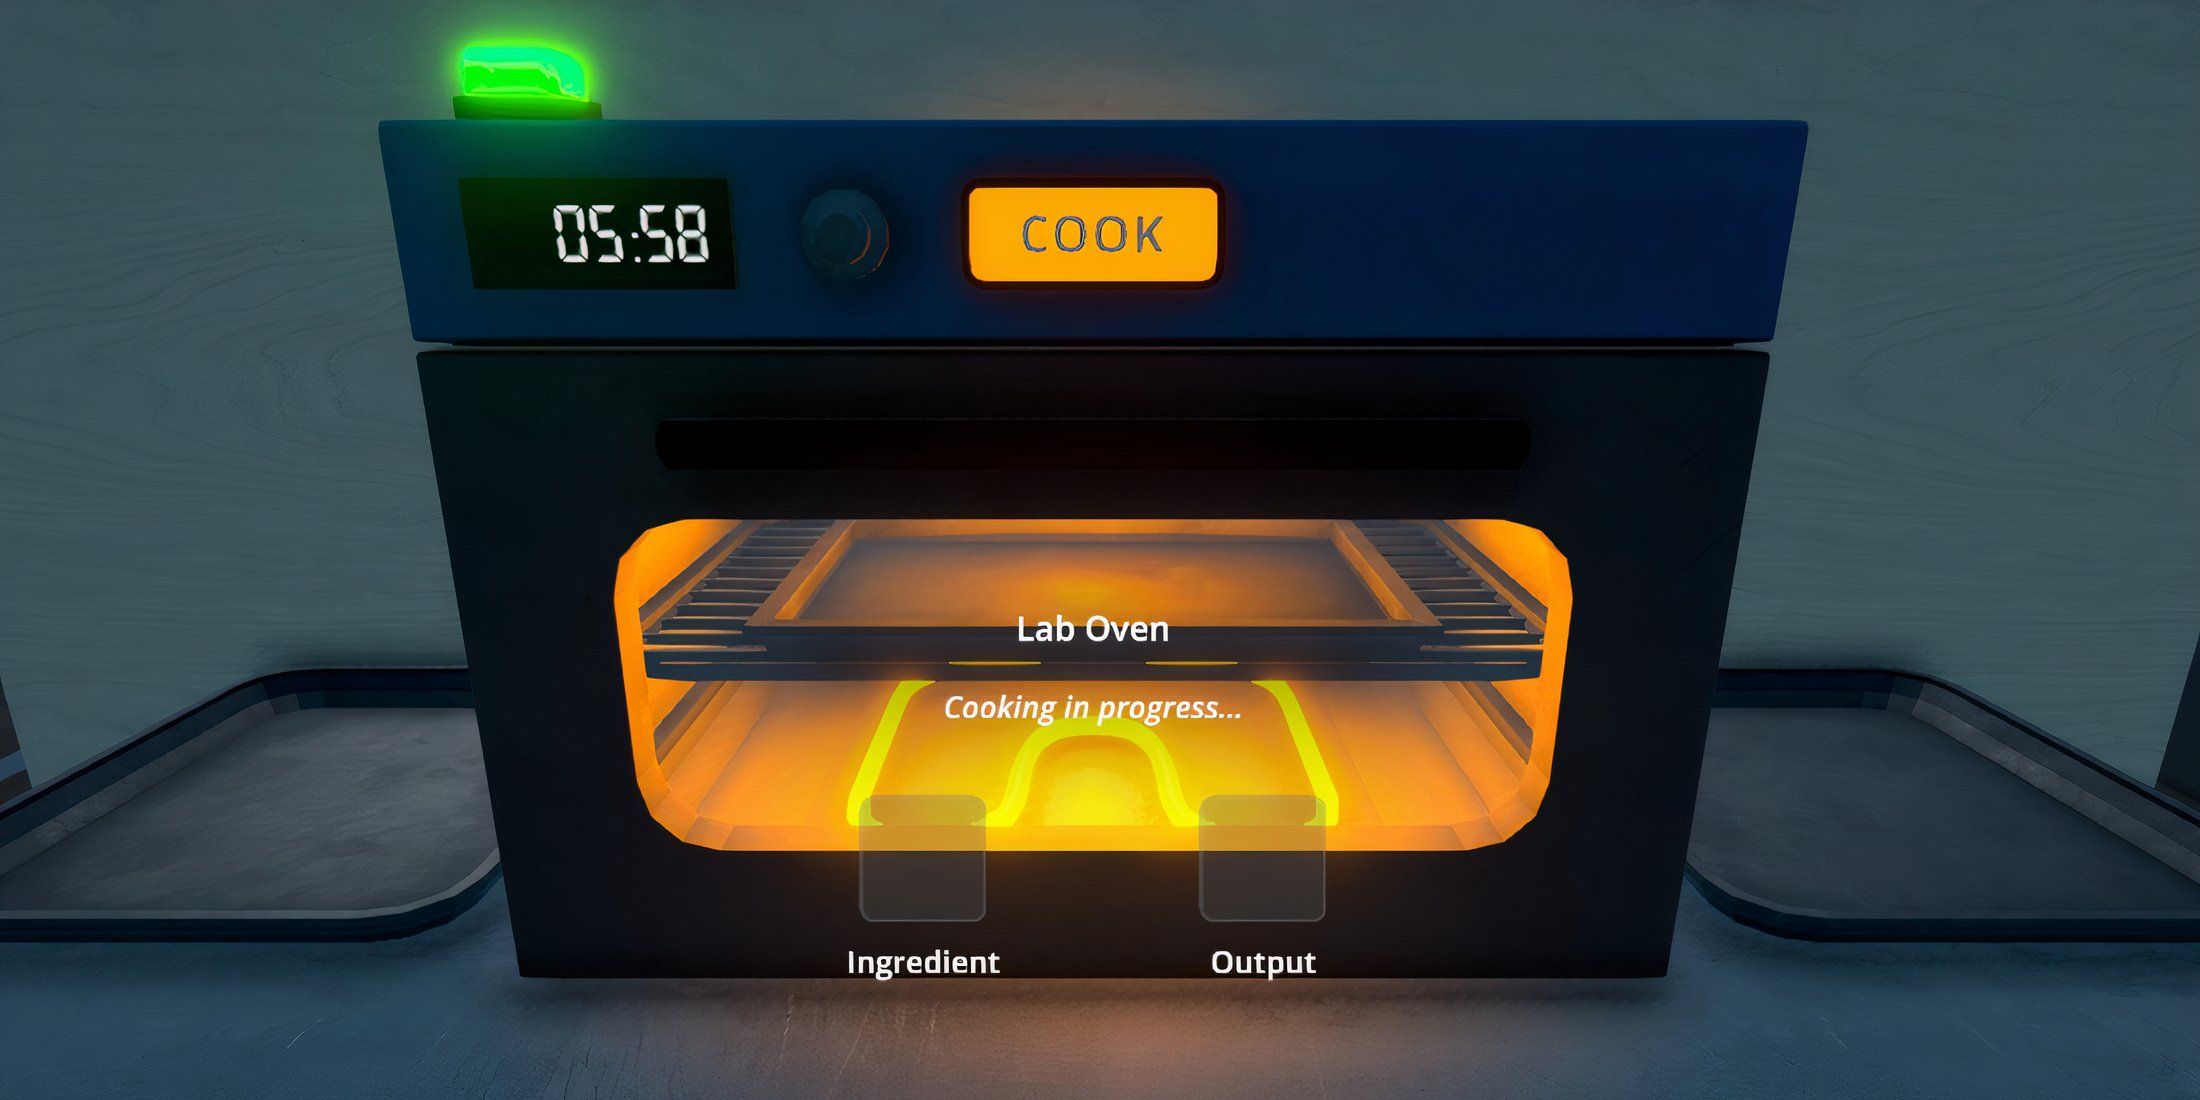
To produce meth, only a Chemistry Station and a Lab Oven are necessary, in contrast to cultivating cannabis that demands significant space for growing plants. This arrangement offers the Sweatshop additional space for storage and packaging, transforming it into a self-contained operation with minimal waste to clean up.
Employees
- Chemist: The most important job in this setup is the Chemist, who produces the meth using both the Chemistry Station and Lab Oven.
- Handler: Should the player decide to be responsible for cooking, they should at least hire a Handler to prepare the product for sale.
1. Cooking With Cocaine
Compact Space For Plants And Gear
- Small but efficient for a strong, expensive product.
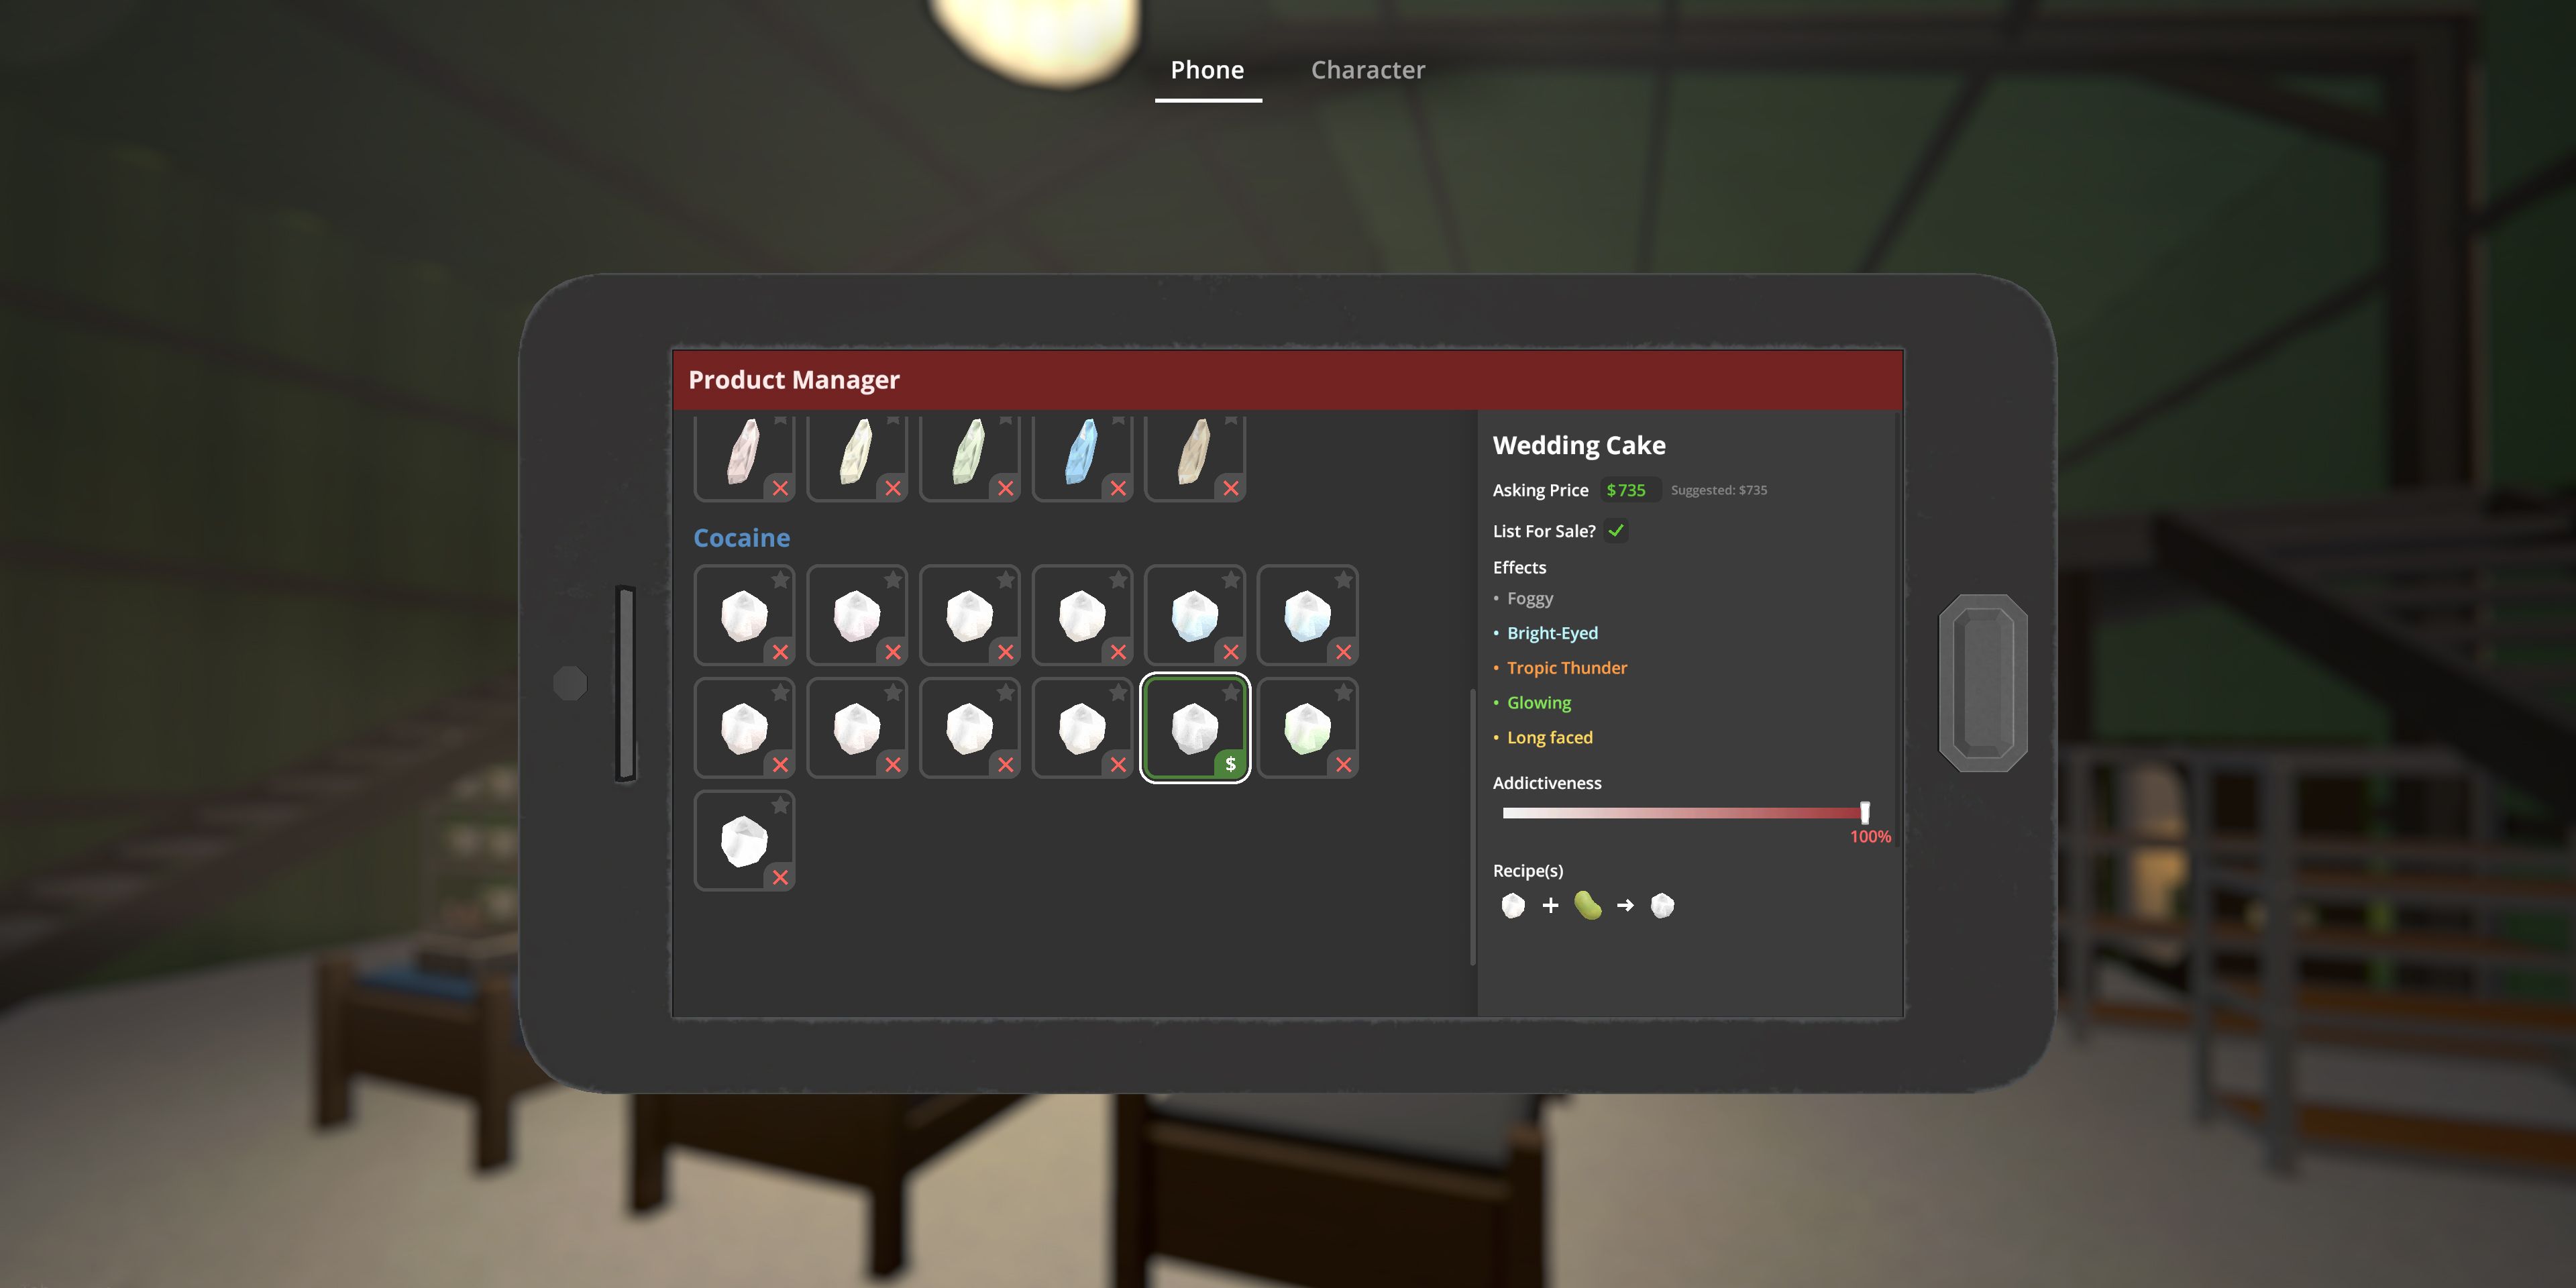
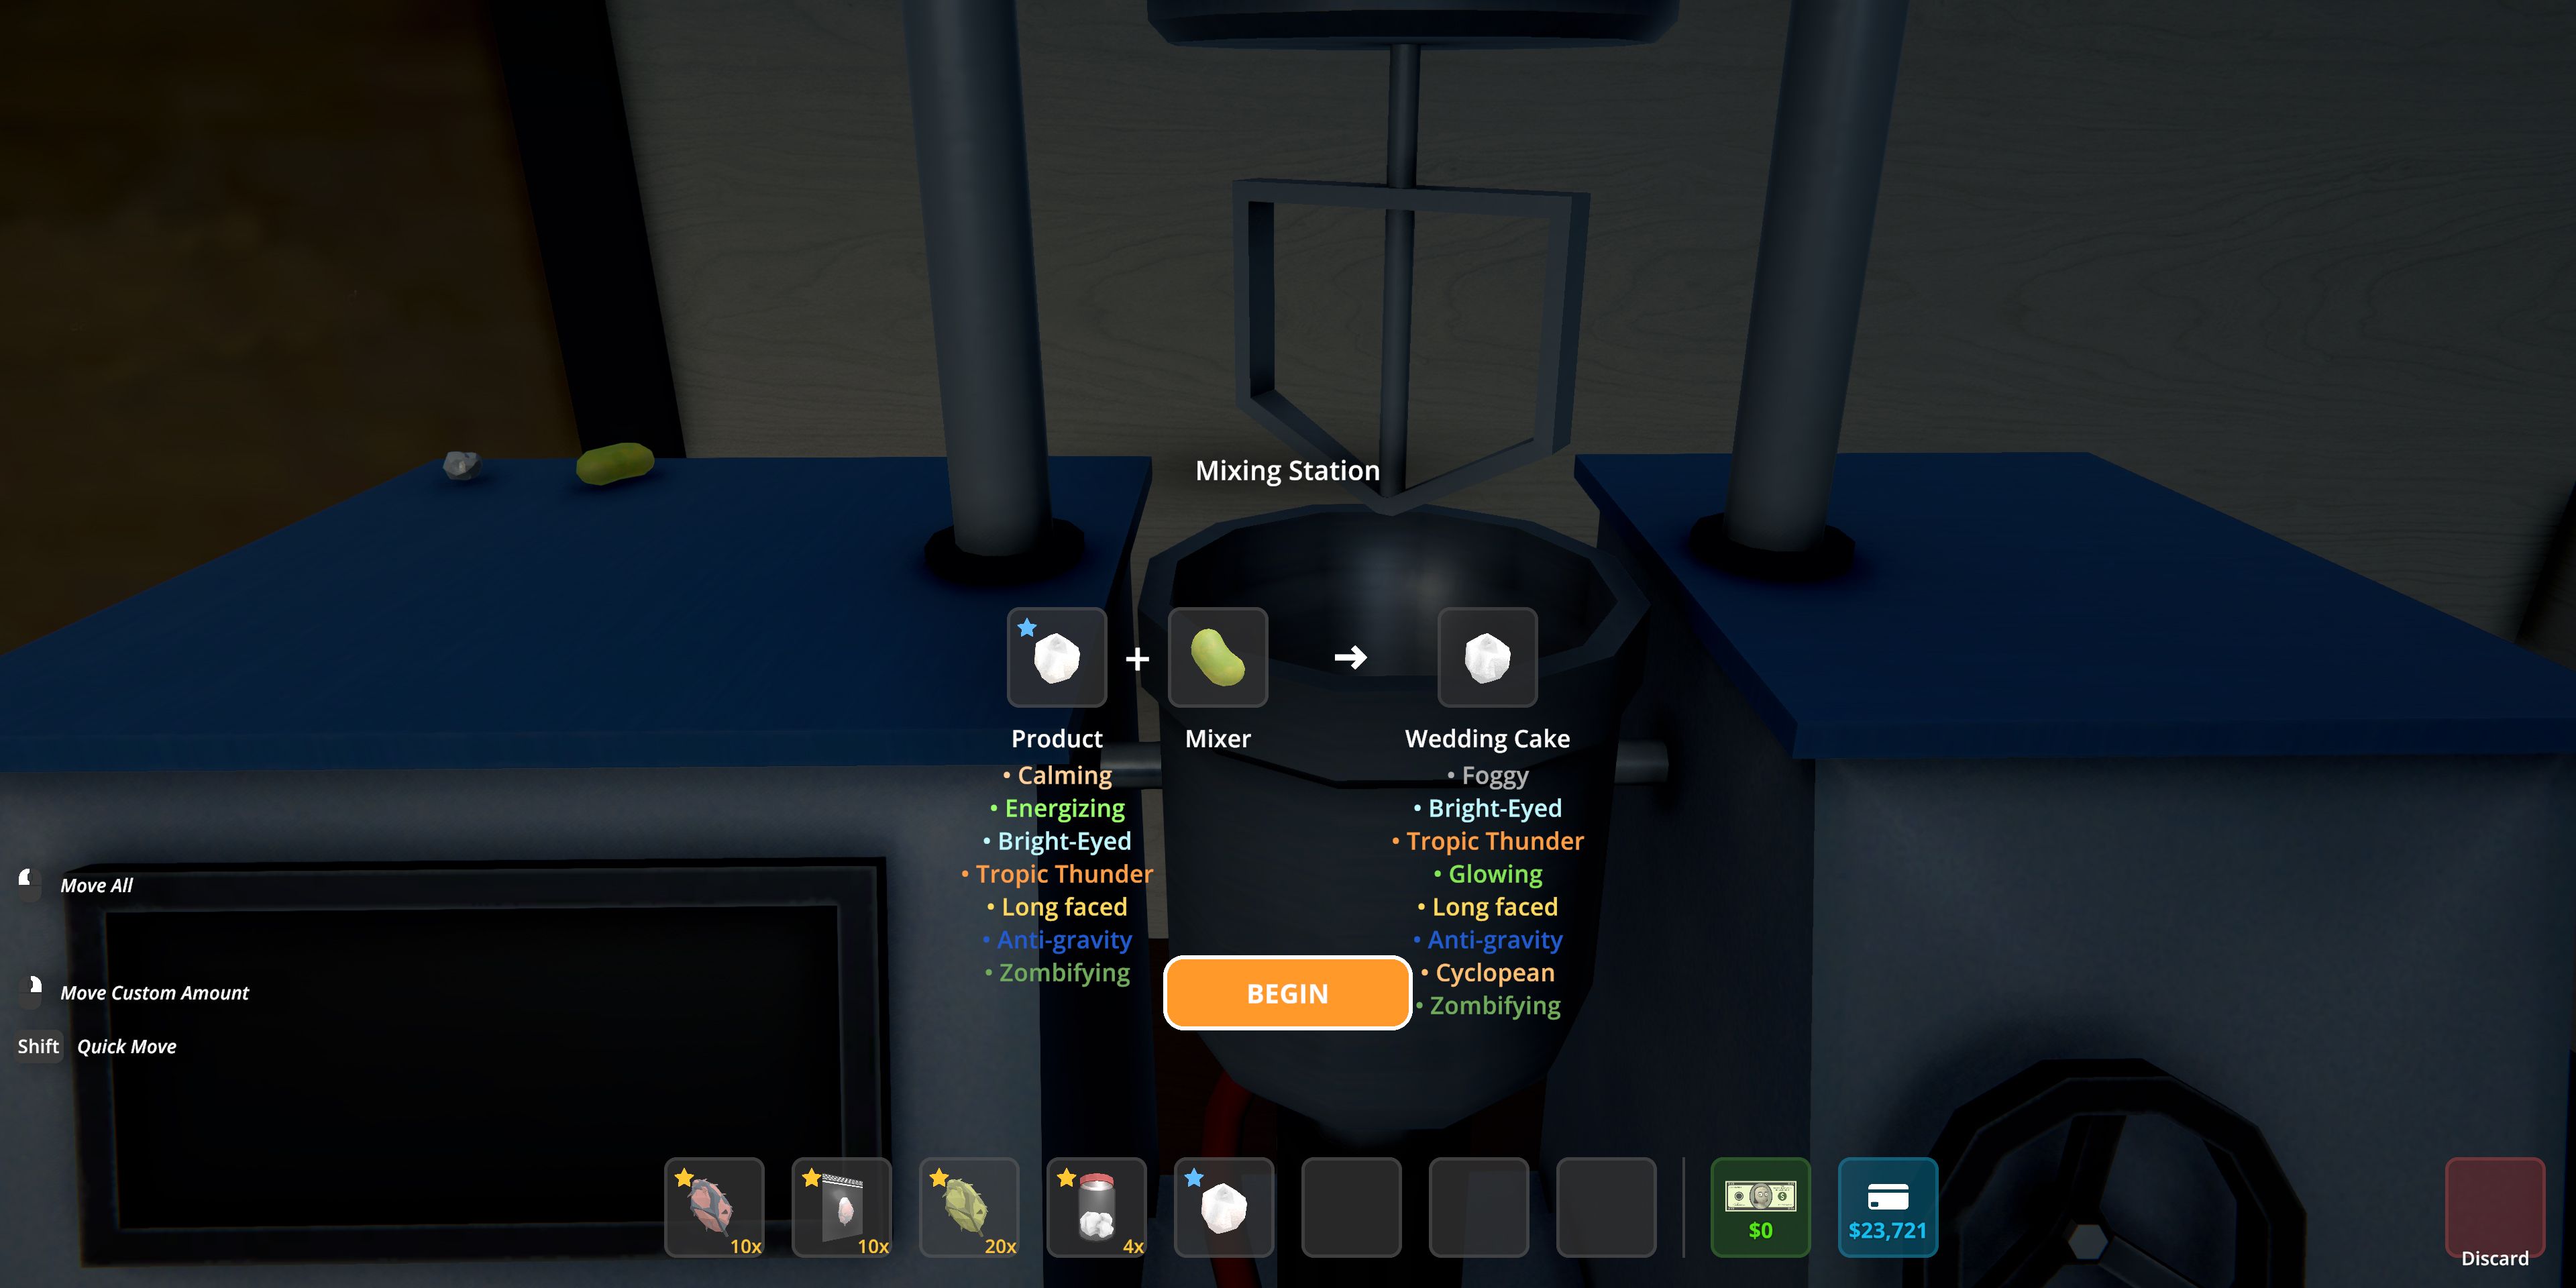
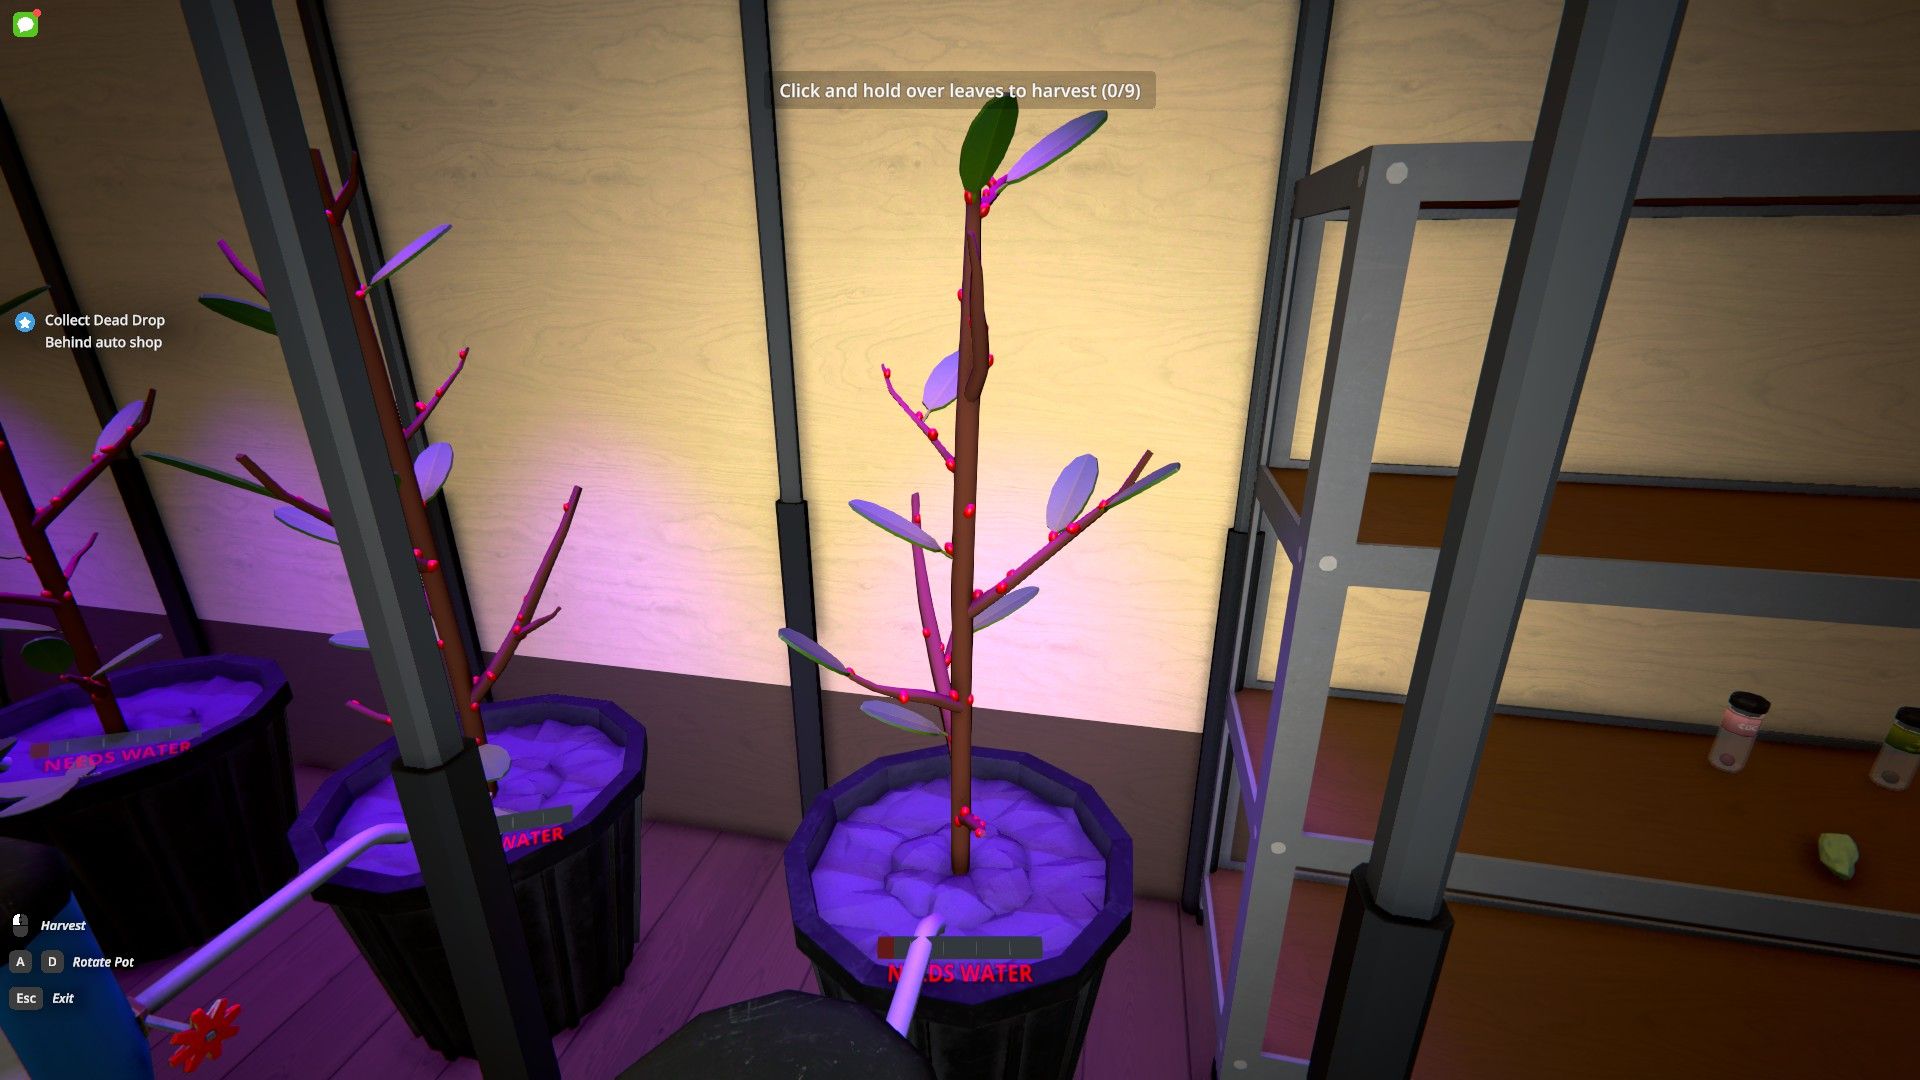
Among all substances classified under Schedule 1, cocaine is the most potent, habit-forming, and costly one. This is why it’s considered the hardest to produce. It necessitates both a growing area for plants and a lab for processing, which means it combines the prerequisites of cannabis and methamphetamine, requiring space for both. The plants need time to dry for improved quality, making this process more time-consuming than cultivating cannabis, but easier to control when segregated in its own designated area.
The Sweatshop’s size works perfectly for our needs, and it also allows for mixing and packing within this configuration, making it another standalone design solution. Similarly, cocaine shares a characteristic with cannabis in that it can be blended with numerous other substances to create stronger variations, which customers eager for these potent strains are often willing to pay high prices for.
Employees
- Chemist: The main activity in this setup is the mixing process, which includes combining ingredients such as coca leaves and gasoline. Cocaine also has to be cooked and dried like meth before it can be packaged.
- Botanist: It’s easy to fit six plants in this room along with an oven and mixing station, so don’t be afraid to try and cram in at least eight. Should the player decide more plants are preferable, it’s more important to employ a Botanist instead of a Chemist.
Read More
- The Limits of Thought: Can We Compress Reasoning in AI?
- Genshin Impact Dev Teases New Open-World MMO With Realistic Graphics
- Sega Reveals Official Sonic Timeline: From Prehistoric to Modern Era
- Where to Pack and Sell Trade Goods in Crimson Desert
- ARC Raiders Boss Defends Controversial AI Usage
- Top 10 Must-Watch Isekai Anime on Crunchyroll Revealed!
- Who Can You Romance In GreedFall 2: The Dying World?
- Zero-Knowledge Showdown: SNARKs vs. STARKs
- Top 8 UFC 5 Perks Every Fighter Should Use
- Best Build for Operator in Risk of Rain 2 Alloyed Collective
2025-04-12 22:07