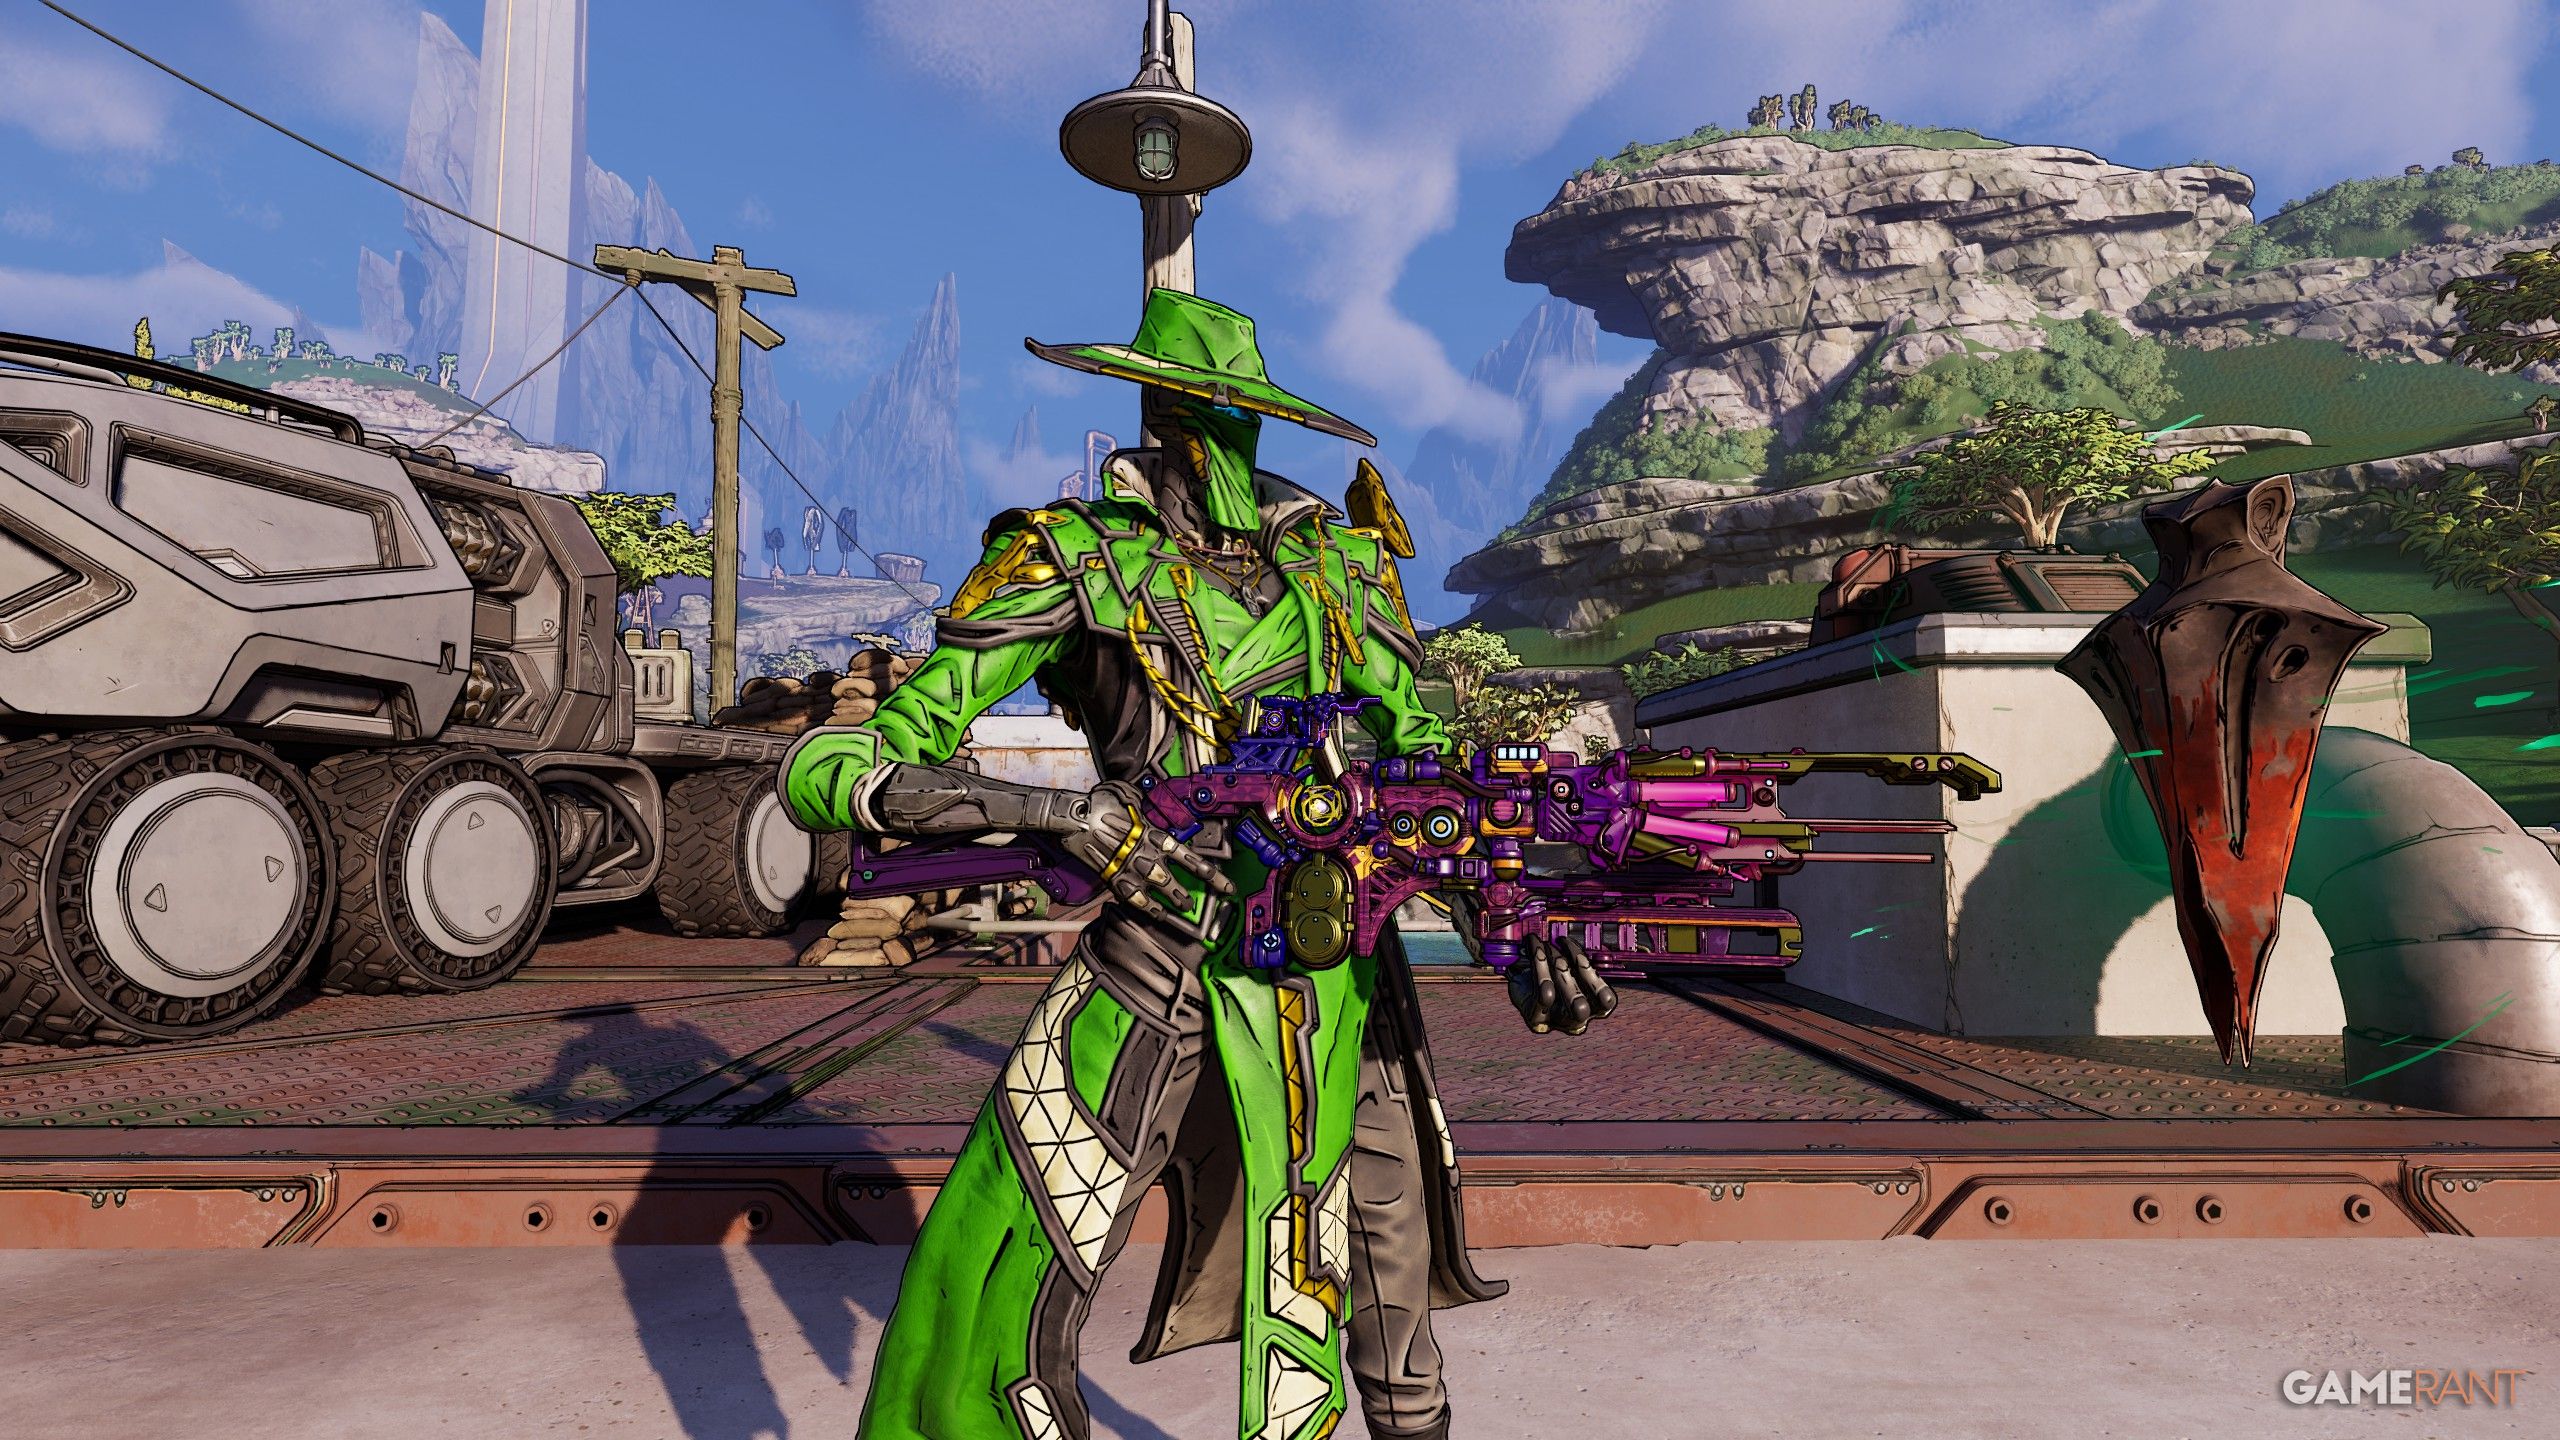
C4SH is a powerful and enjoyable character added in Borderlands 4 Story Pack 1: Mad Ellie and the Vault of the Damned. He has a lot of different ways you can build him, and we’re focusing on the Cleromancy (green tree) build, which lets you deal massive damage and constantly maintain a full overshield.
Here’s a complete guide to our powerful Level 60 build. We’ll cover the skills we chose and why, plus a full gear and weapon setup to maximize its effectiveness.
This Borderlands 4 build is based on the game version released on March 30, 2026. If you’re looking at this after that date, be aware that some skills might have changed. We’ve also made sure to avoid any gear that could be considered an exploit, as that’s likely to be adjusted in future updates.
How Does the C4SH Cleromancy Build Work?
- The Cleromancy Build is designed around both Mobbing and Bossing.
- The build is all about gaining Fortune Stacks, and losing them so that your Guns deal Bonus Damage equal to your Overshield.
- By using the Skills and Class Mod we’ve listed, you’ll be gaining Fortune Stacks and intentionally losing them for more damage and Overshield.
- You’re going to roll Totems with your Action Skill, kill enemies for Fortune Stacks, and convert said stacks into Damage/Overshield.
- It’s essentially infinite Dice, infinite Totems, infinite Action Skill, infinite Fortune Stacks, and infinite damage/shields.
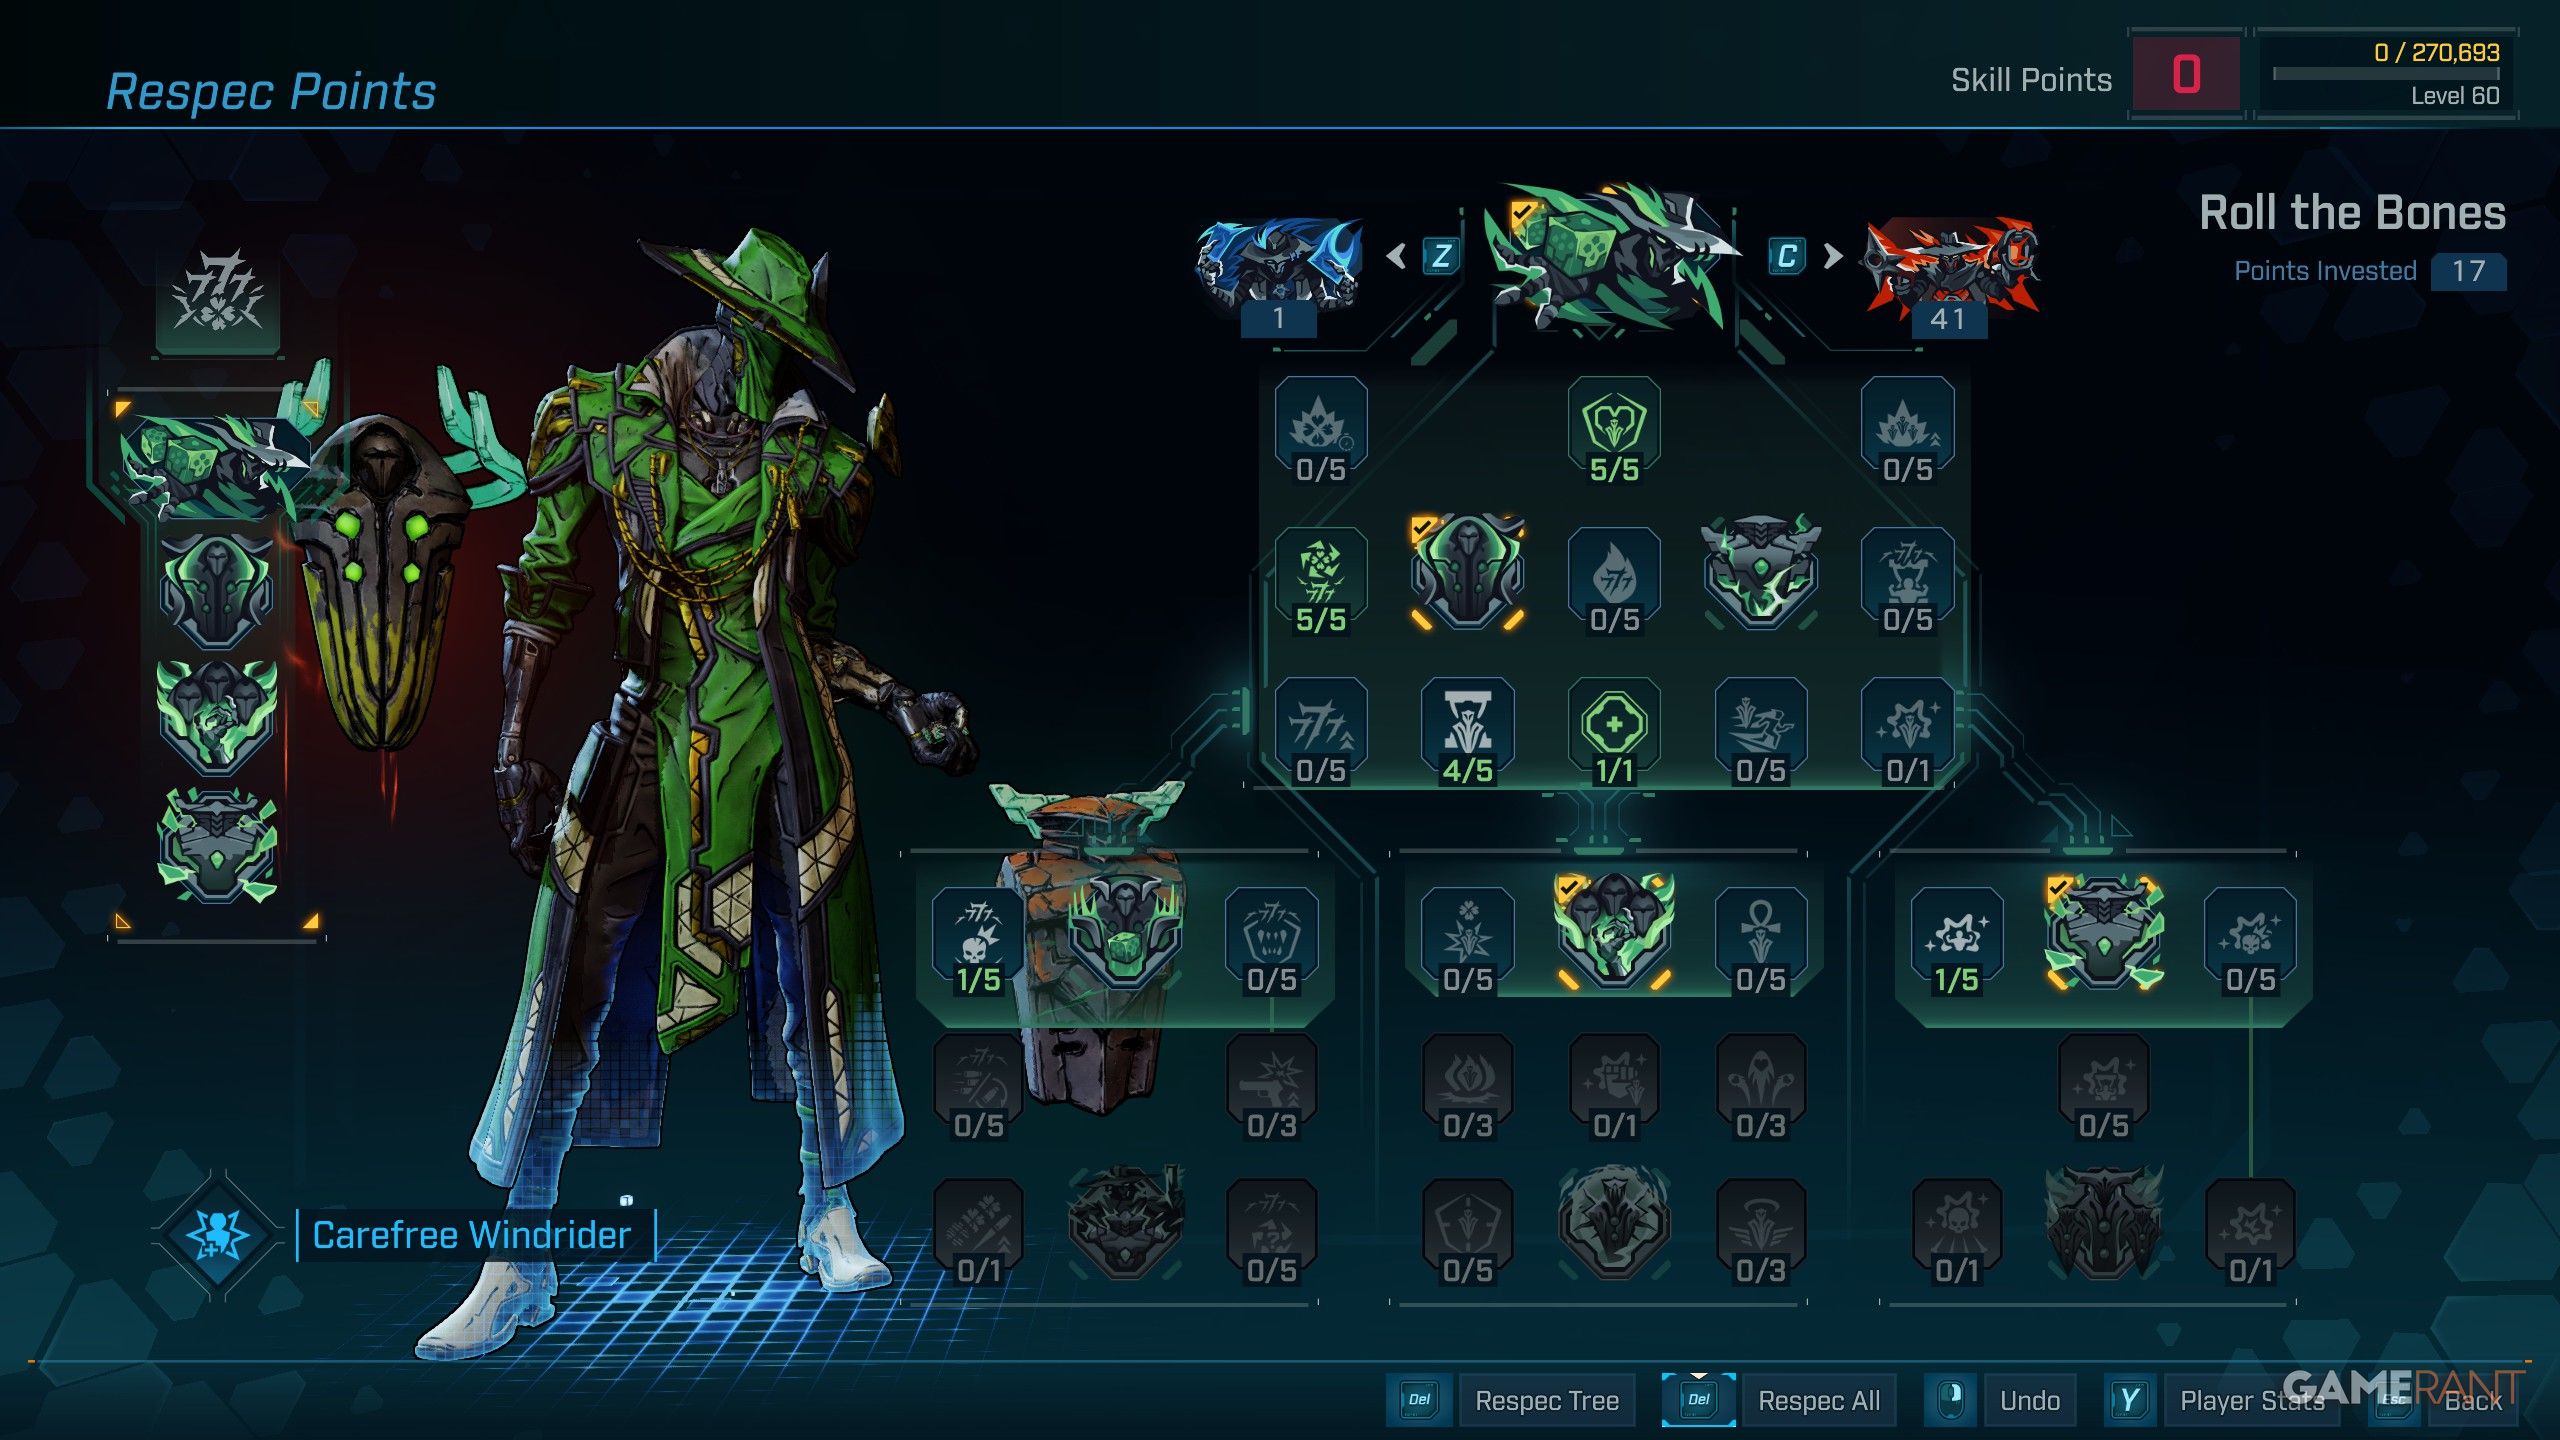
Best Skill Tree for the C4SH Cleromancy Build
Cleromancy Skill Tree
| Skill | Description | How it Works |
|---|---|---|
| Sweet Roll (5/5) | C4SH gains increased Max Health. Whenever he spawns a Bone Totem, restore a portion of his Max Health. Excess Health is added as Overshield. | More Health for tankiness, and generate Overshield manually. |
| O Fortuna (5/5) | Fortune Stacks gain increased Windfall Chance. Fortune Skill. C4SH gains increased Elemental Effect Chance and Elemental Effect Damage. The more Fortune Stacks C4SH has, the greater the bonus. | More Damage thanks to Fortune Stacks. |
| Bonemeal Ticket (4/5) | Kill Skill. Whenever C4SH or one of his Bone Totems kill an enemy, restore Action Skill Duration with diminishing returns and Bone Totem Health. | Allows your Bone Totems to stick around for longer. |
| Devil’s Tines (1/1) | C4SH gains an additional Augment Slot. | Allows for a second Augment slot. |
| Can’t Stop Winning (1/5) | C4SH gains a Chance to Critically Hit with Guns and Action Skills. Whenever C4SH Critically Hits an enemy with a Guns or Action Skill, he gains a Chance to enter Windfall. | Essential and easy, as a Critical Hit means Windfall, which means Damage. |
| Accursed Bones (1/5) | Whenever C4SH deals Action Skill Damage to an enemy, that enemy becomes Jinxed. Jinxed enemies take increased Damage from all sources and deal decreased Damage. C4SH gains Lifesteal against Jinxed enemies. | Jinxed Enemies deal less damage, take more damage, and grant lifesteal for bonus health. |
| Heavenly Sevens (Augment) | C4SH’s Bone Totems gain increased Duration. Protector Totem: Roll 7’s to spawn a Protector Totem that grants C4SH and his allies Overshield when it spawns. C4SH’s Protector Totem grants him and his allies increased Fire Rate and Reload Speed based on how much Shields they have. | A decent Totem that rewards Overshield, Fire Rate, and Reload Speed. |
| Mighty Nine (Augment) | If C4SH would enter Fight For Your Life while he has an active Bone Totem, instead gain a Free Second Wind, a Free Cleromancy Charge, and destroy a Bone Totem. This skill has a cooldown. Tough Totem: Whenever C4SH rolls 9’s spawn a Tough Totem that causes his Guns and Ordnance to also deal Bonus Incendiary Melee Damage for every enemy killed. Whenever C4SH kills an enemy, Restore Duration to all other active Totems. | Not only will you help to restore Totem Duration with kills, but you will also have a free way to get revived instantly. |
| Dirty Dozen (Augment) | C4SH’s minimum Fortune Stack Count is based on how many active Totems he has. Chaos Totem: Roll 12’s to spawn a Chaos Totem that draws and throws Cards from C4SH’s Deck. Whenever C4SH rolls his dice, the next Card thrown can be any Card. | More Fortune Stacks simply for having active Totems. |
Sleight of Hand Skill Tree
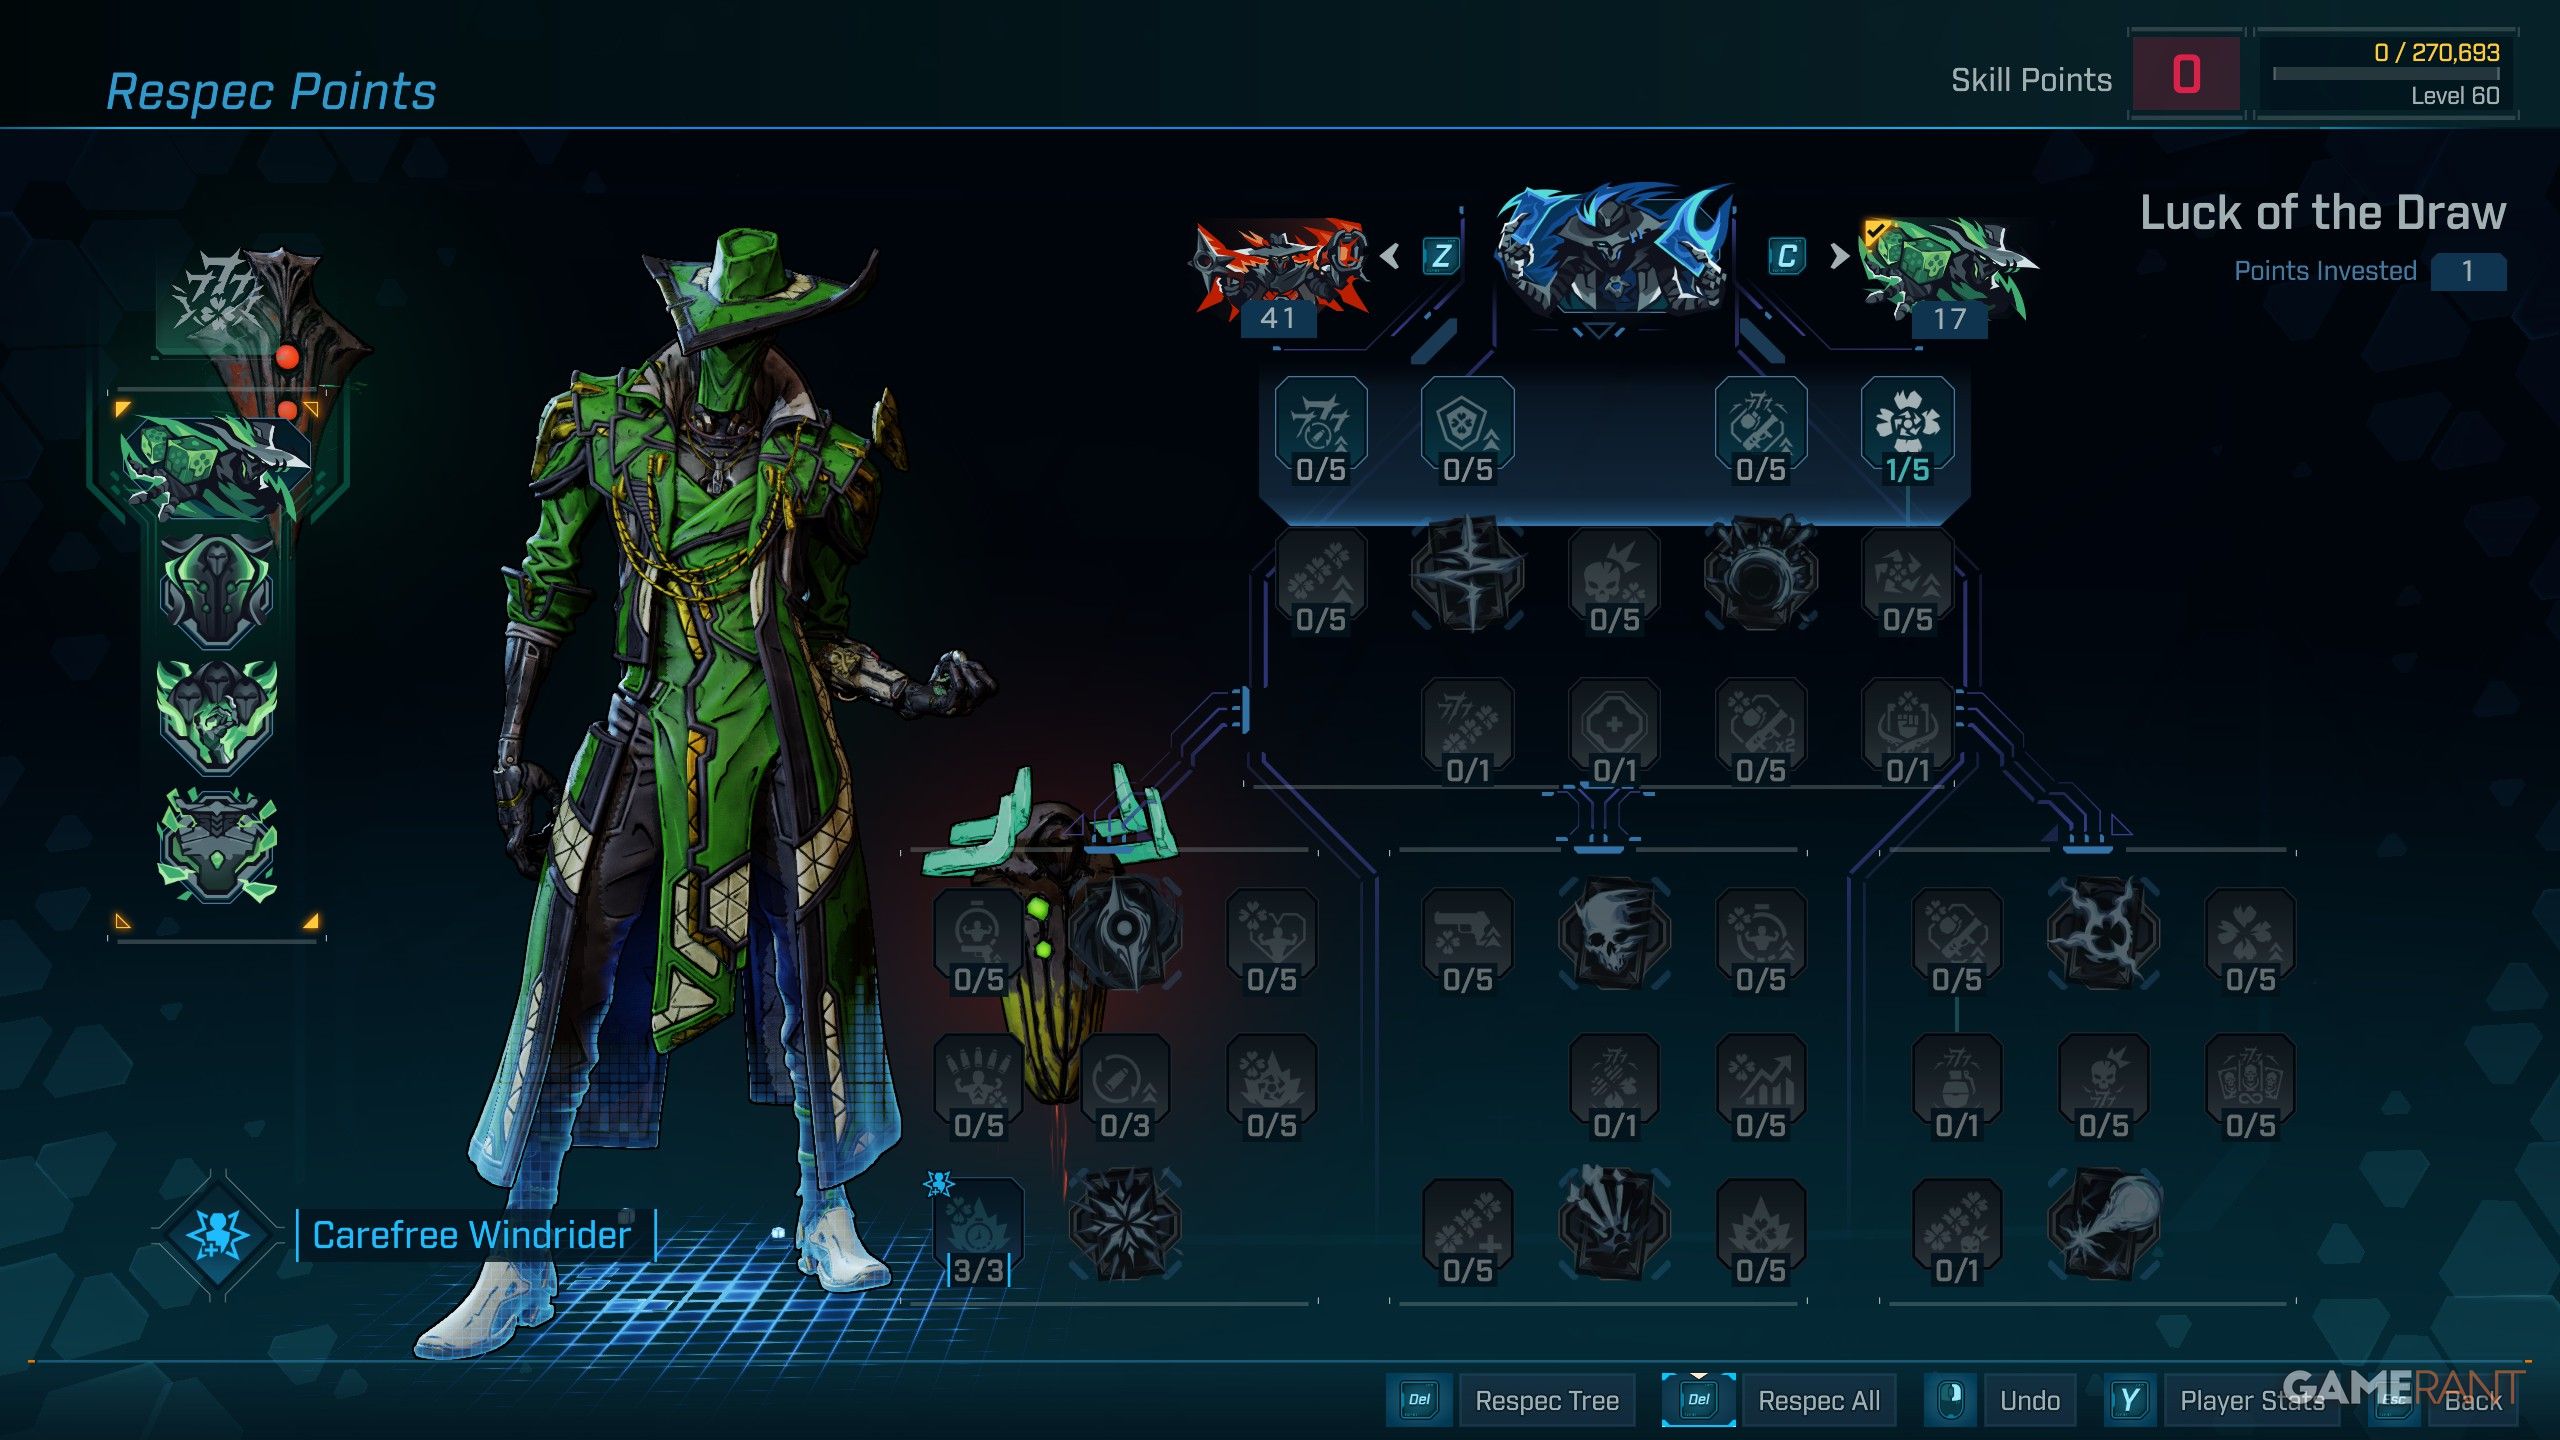
| Skill | Description | How it Works |
|---|---|---|
| Alchemy | C4SH gains increased Elemental Effect Chance. Whenever C4SH applies an Elemental Effect he gains a Stack of Fortune. | Simply gain a Stack of Fortune by applying Elemental Damage. |
Cross-Fire Skill Tree
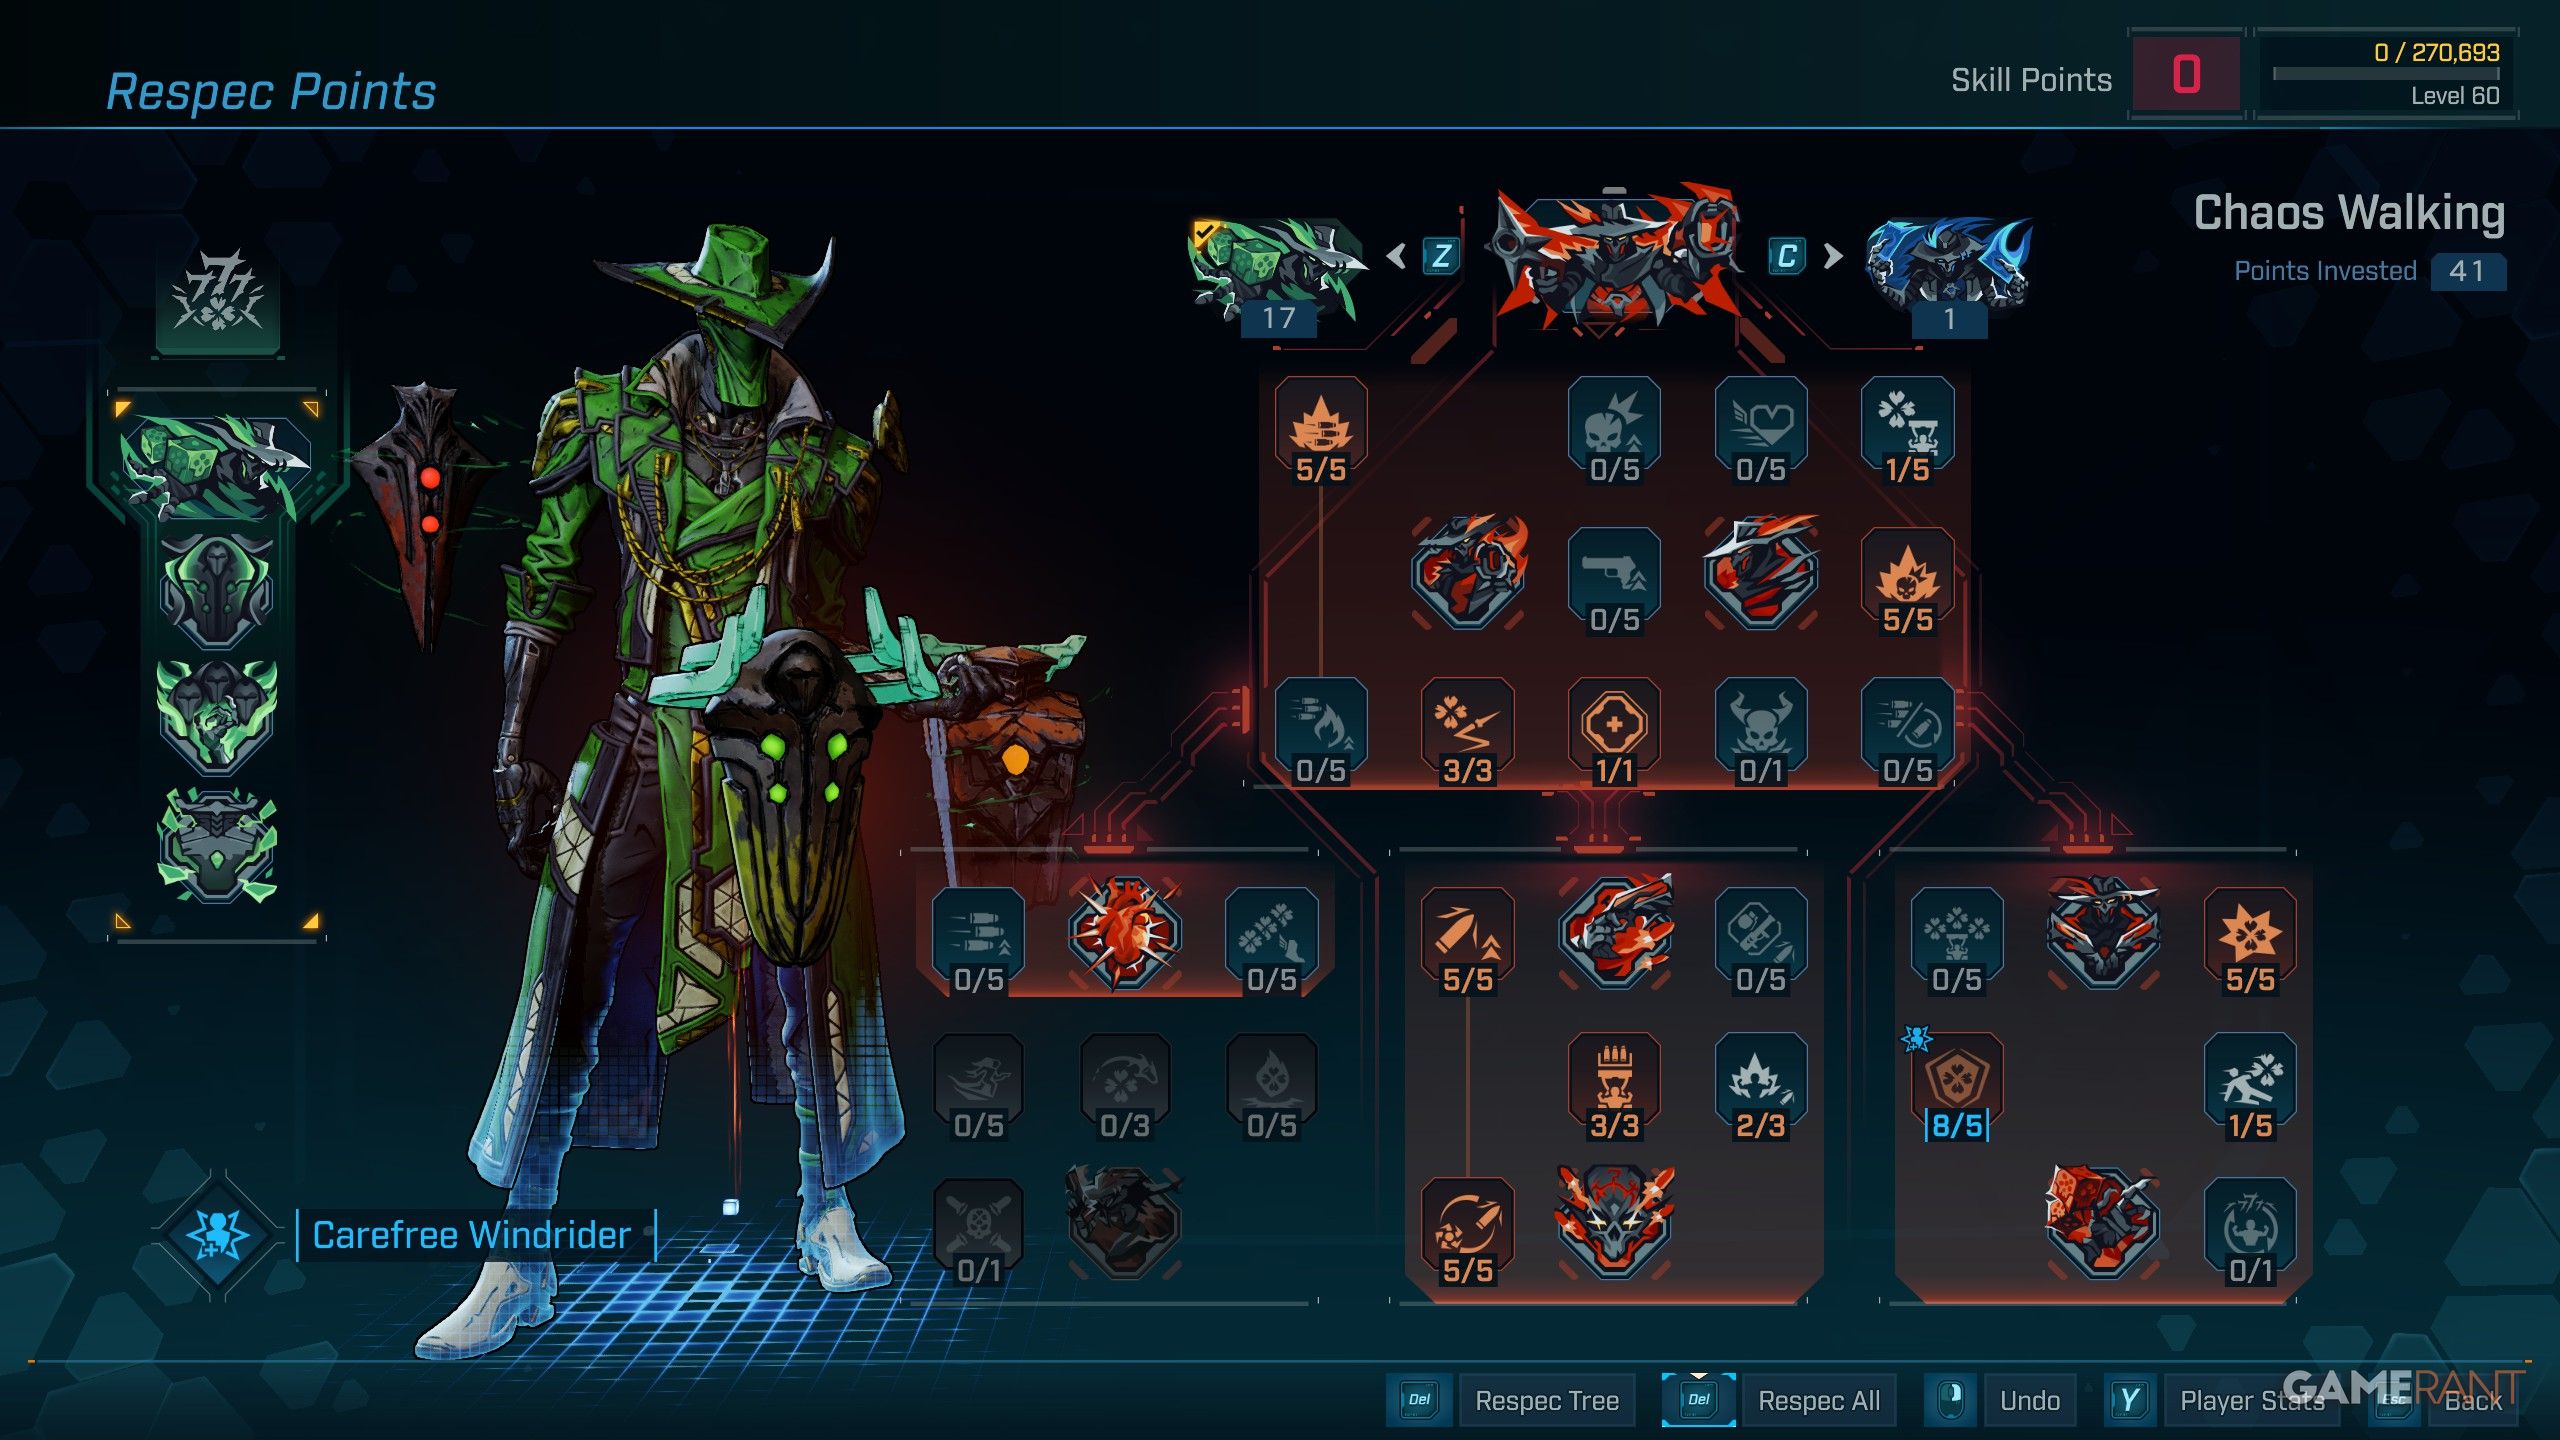
| Skill | Description | How it Works |
|---|---|---|
| Unleashed (5/5) | C4SH gains increased Fire Rate with Guns and Action Skills. | More Fire Rate means more DPS. |
| Hard-Boiled (1/5) | Fortune Skill. Whenever C4SH gains a Stack of Fortune, he restores his Action Skill Duration with diminishing returns. | Helps to restore Action Skill. |
| Stand and Bleed (5/5) | C4SH gains a Chance to Critically Hit with his Action Skills and Guns. | Increasing Crit Chance means more Damage. |
| Trick Shot (3/3) | Fortune Skill. C4SH gains Ricochet Chance with his Guns. Shots that Ricochet this way are turned into Bone Shards. When Bone Shards damage an enemy, they create Bone Splinters that converge around them. Dealing Kinetic Damage. Enemies damaged by Bone Shards take increased Damage from all sources. The more Fortune Stacks C4SH has, the greater the Chance. | Enemies will take far more damage with Bone Shard Ricochet. |
| Devil’s Tines (1/1) | C4SH gains an additional Augment Slot. | Allows for a third Augment slot. |
| Lawless (5/5) | C4SH deals increased Kinetic Damage. | This depends on whether you like Kinetic Weapons, but it’s also needed for War Wagon. |
| War Wagon (3/3) | Whenever C4SH deals Kinetic Damage to an enemy, he gains a Chance to refill Ammo into his Guns and restore Action Skill Duration with diminishing returns. | Essentially infinite ammo. |
| Pale Rider (2/3) | C4SH’s Action Skill deals Bonus Kinetic Damage. | Needed to reach Nothing Beats Lead, but also gives more Kinetic Damage. |
| Nothing Beats Lead (5/5) | A portion of all Elemental Damage C4SH deals is Converted into Kinetic Damage. Damage converted in this way is increased. | Elemental Weapons now deal Kinetic Damage, which means Elemental Weapons deal more damage and have infinite ammo. |
| Unshaken (5/5) | C4SH gains increased Damage from all sources for every Fortune Stack he loses. | Losing Fortune Stacks is part of the build, and this means more Damage when losing them. |
| From Gloam to Glow (5/5) | A portion of all Damage C4SH is dealt from enemies is converted into Overshield. Whenever C4SH loses a Fortune Stack, shots from his Guns deal Bonus Damage equal to his Overshield. | Gain Overshield by getting hit, and gain Damage by losing Fortune Stacks. This is a core part of the build. |
| Dusty Trail (1/5) | As C4SH slides he loses Fortune Stacks. For every Stack he loses, he gains increased Gun Damage, Reload Speed, and Fire Rate. | Manually and quickly lose Fortune Stacks just by sliding. |
Best Loadout for the C4SH Cleromancy Build
Best Guns
- Convergence
- Asymptotic – When pellets hit a target, three extra projectiles will home in on other targets.
- How to Get – Bramblesong, the Bittervein Auger Mine in the Fadefields.
- Flash Cyclone
- Flash Freeze – Chance on Hit to Explode and Spawn additional projectiles
- How to Get – The Penitent Steel, Windswept Wastes in the Mad Ellie and the Vault of the Damned DLC.
Best Repkit
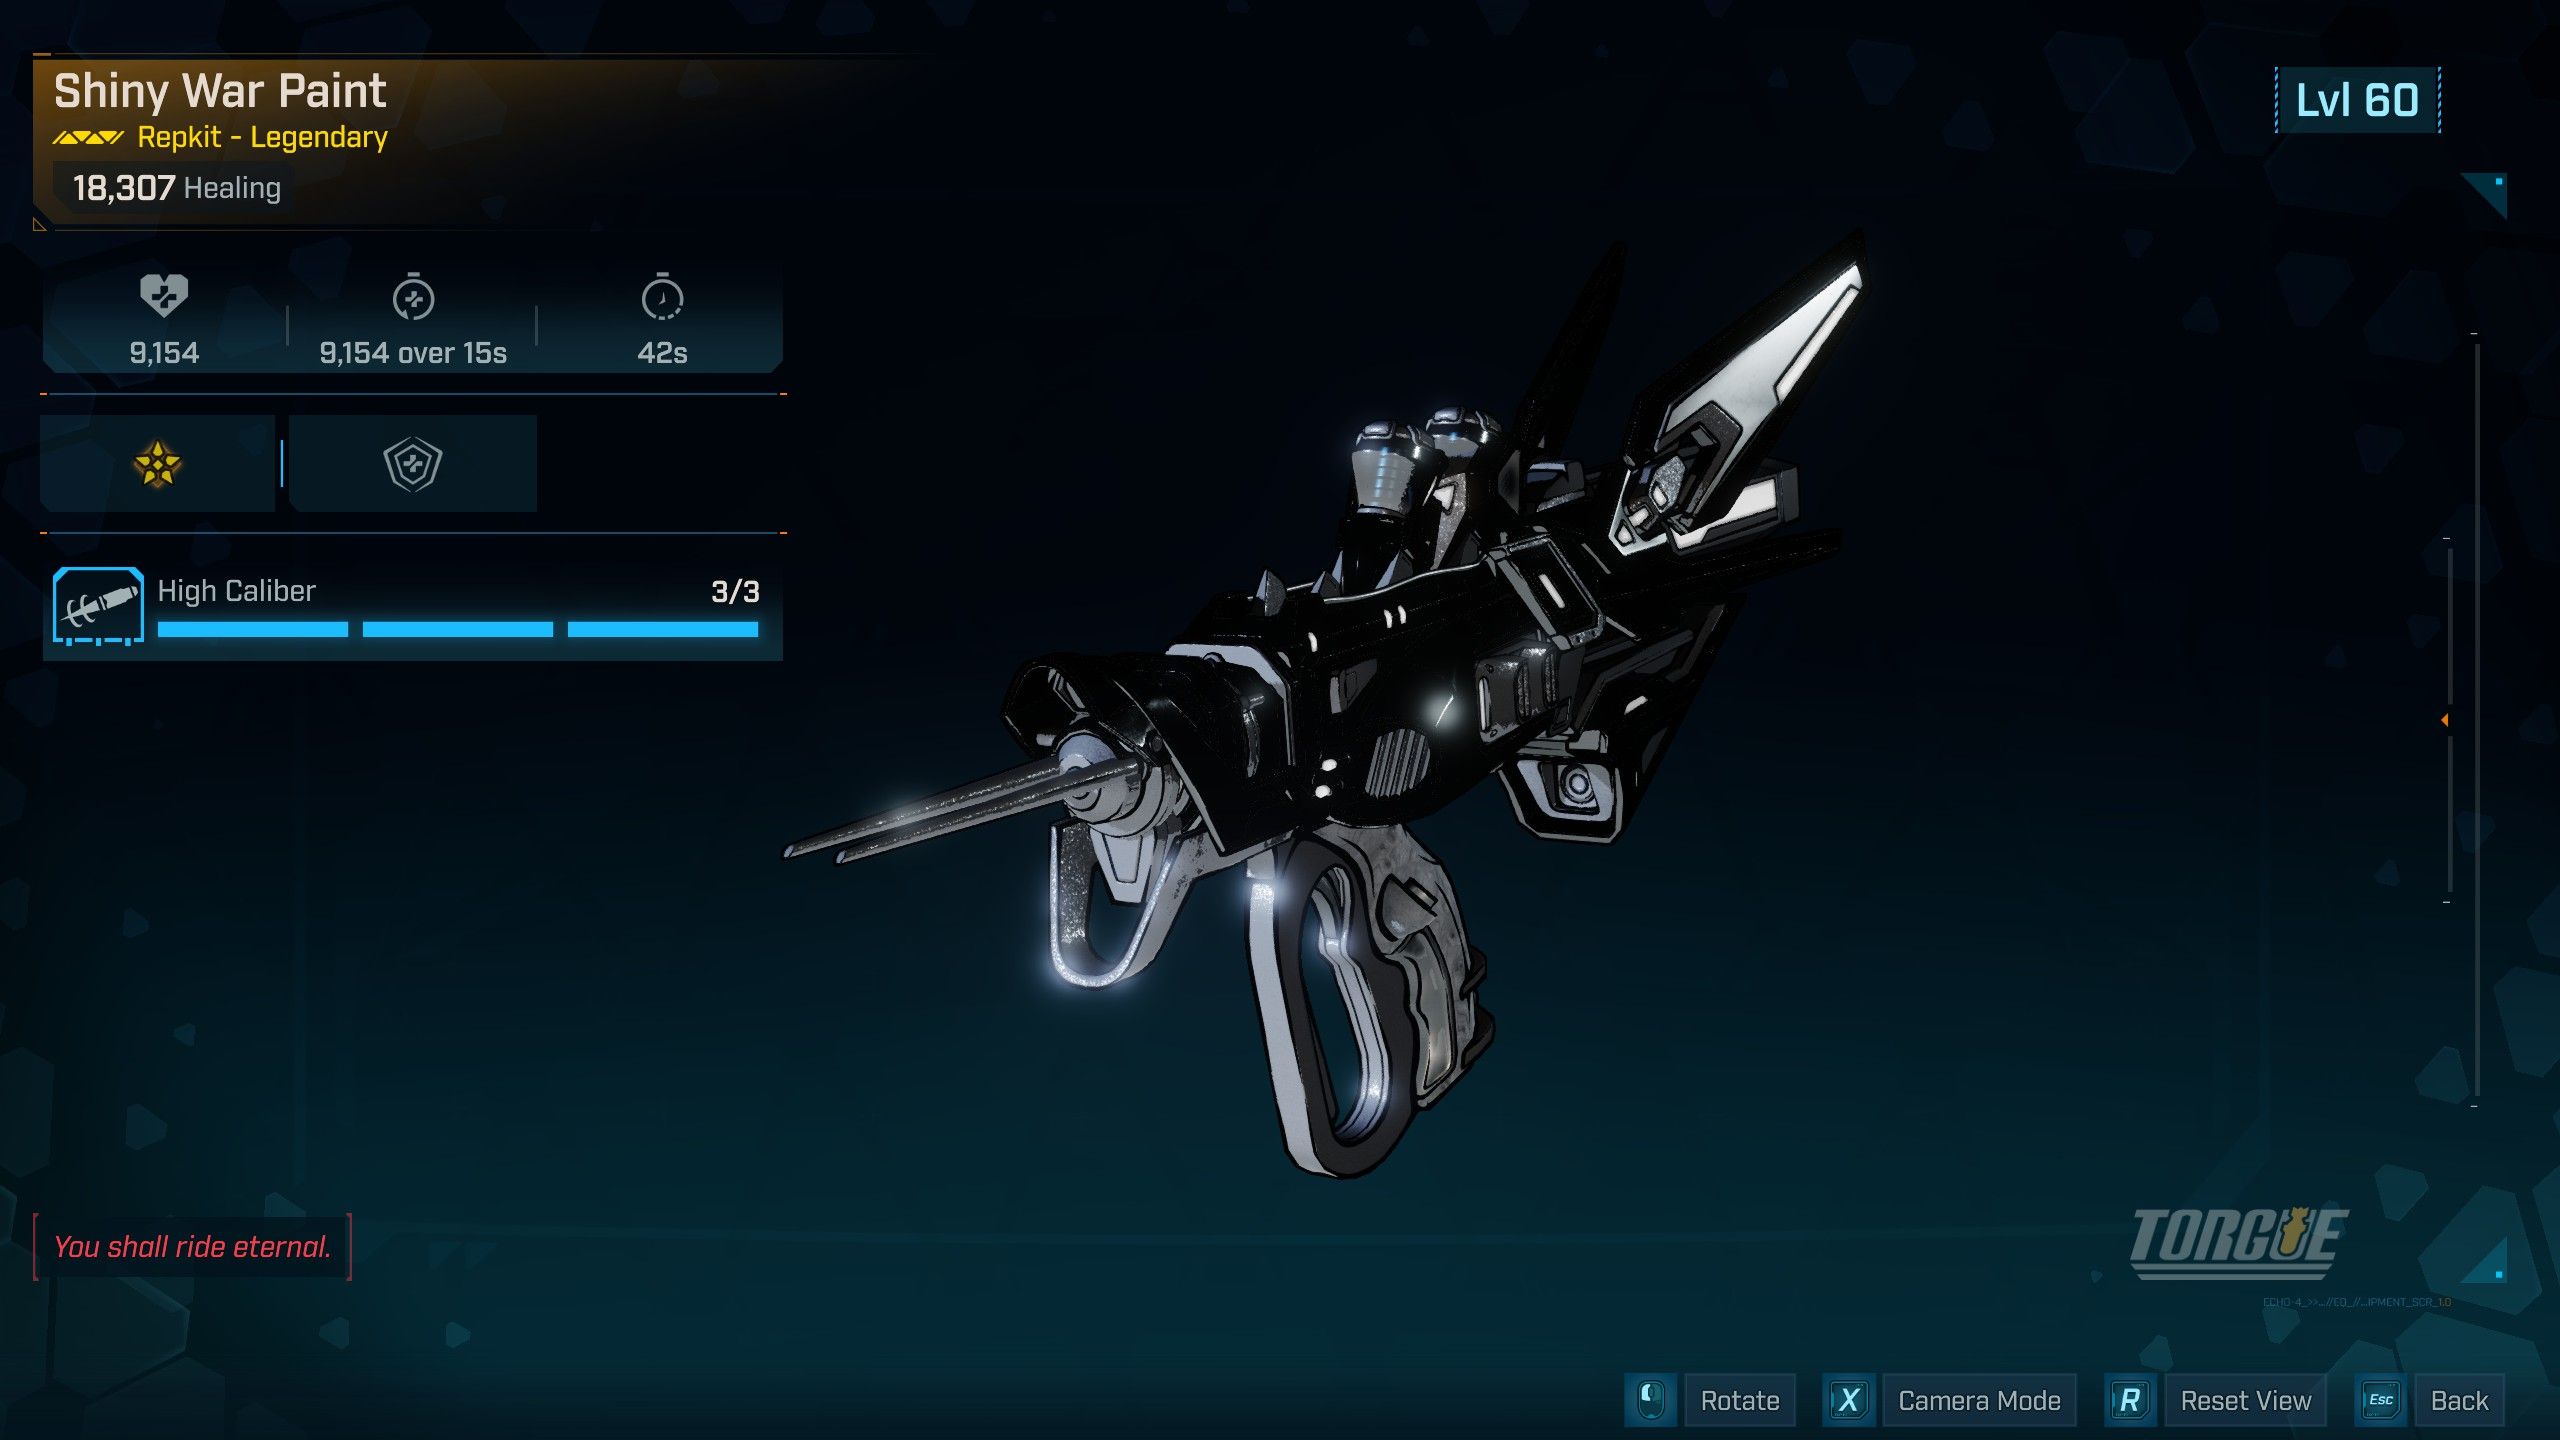
- Shiny War Paint
- Chrome – On use, grants +30% Fire Rate and +30% Movement Speed for 15 seconds, and reduces Repkit Cooldown by 2 seconds each time Damage is taken.
- How to Get – Saddleback, the Old Scrape Drill Site in Terminus Range.
Ordnance
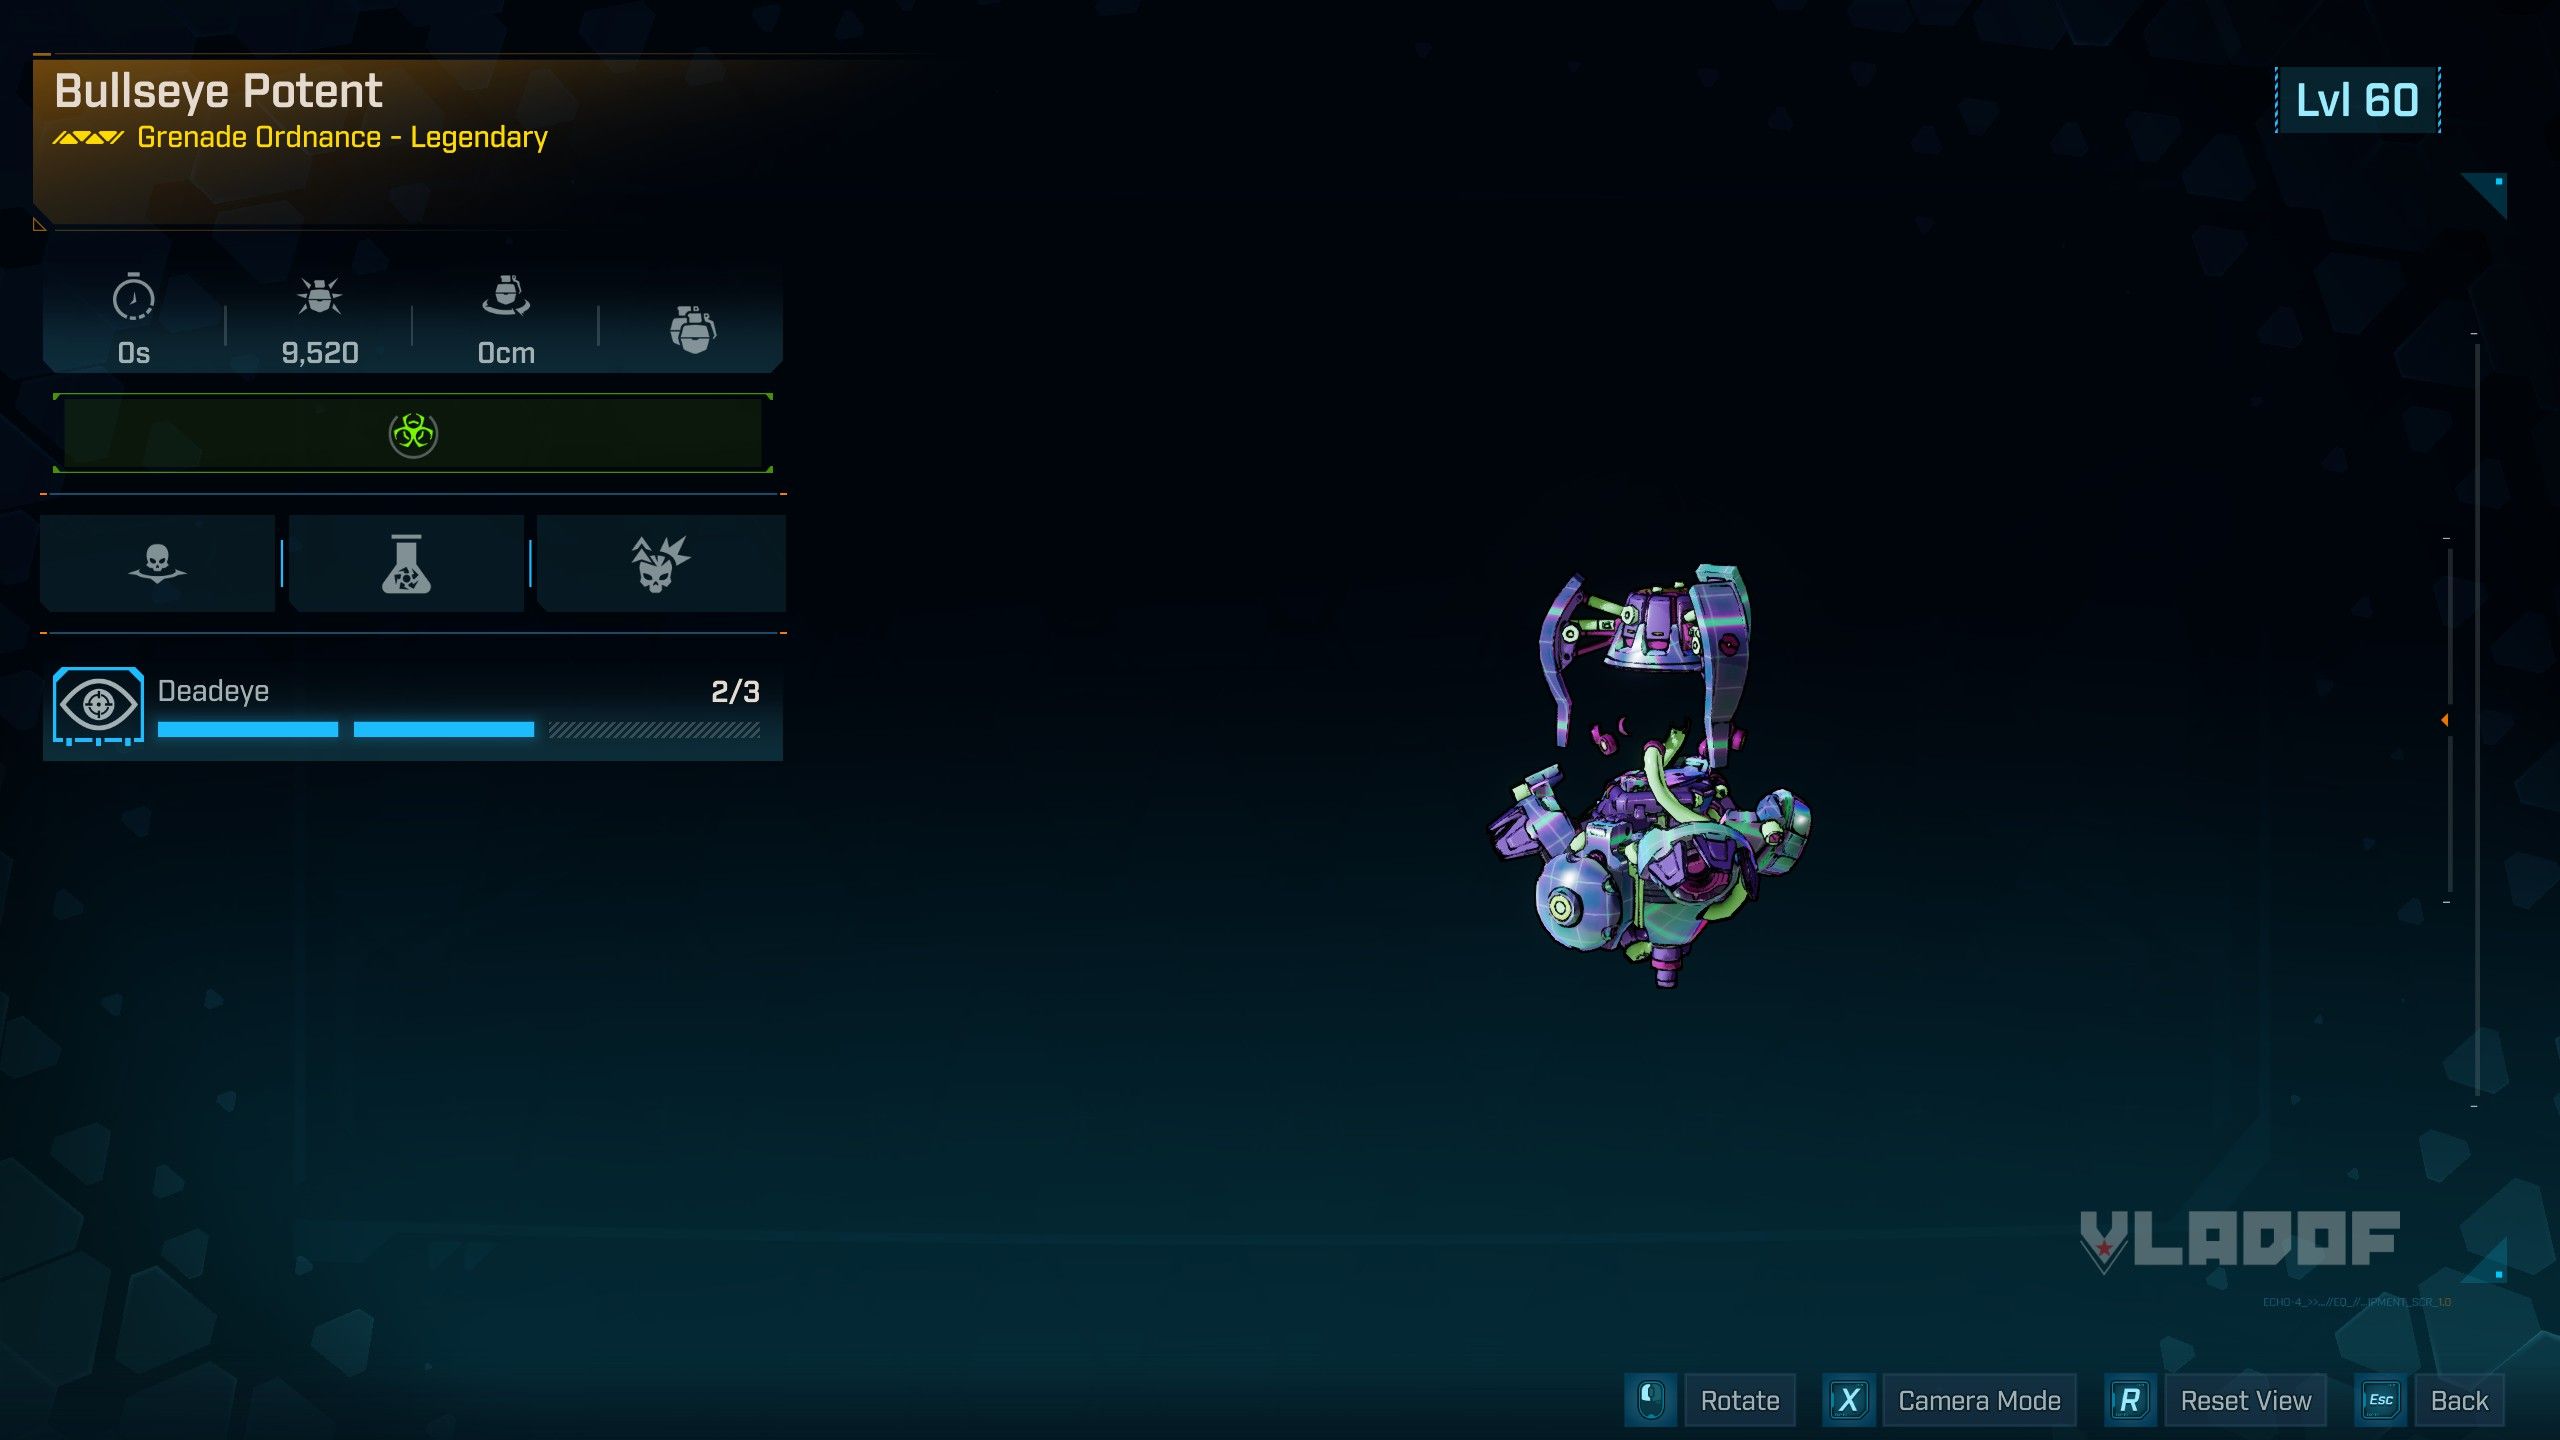
- Waterfall
- Waterfall – Causes additional explosions when damaging targets.
- How to Get – Bio-Bulkhead, in the Dissected Plateau.
Although not covered in this guide, a Crit Knife from Jakobs is always a solid choice when taking on bosses. When it comes to grenades, prioritize those that deal significant damage over time.
Class Mod
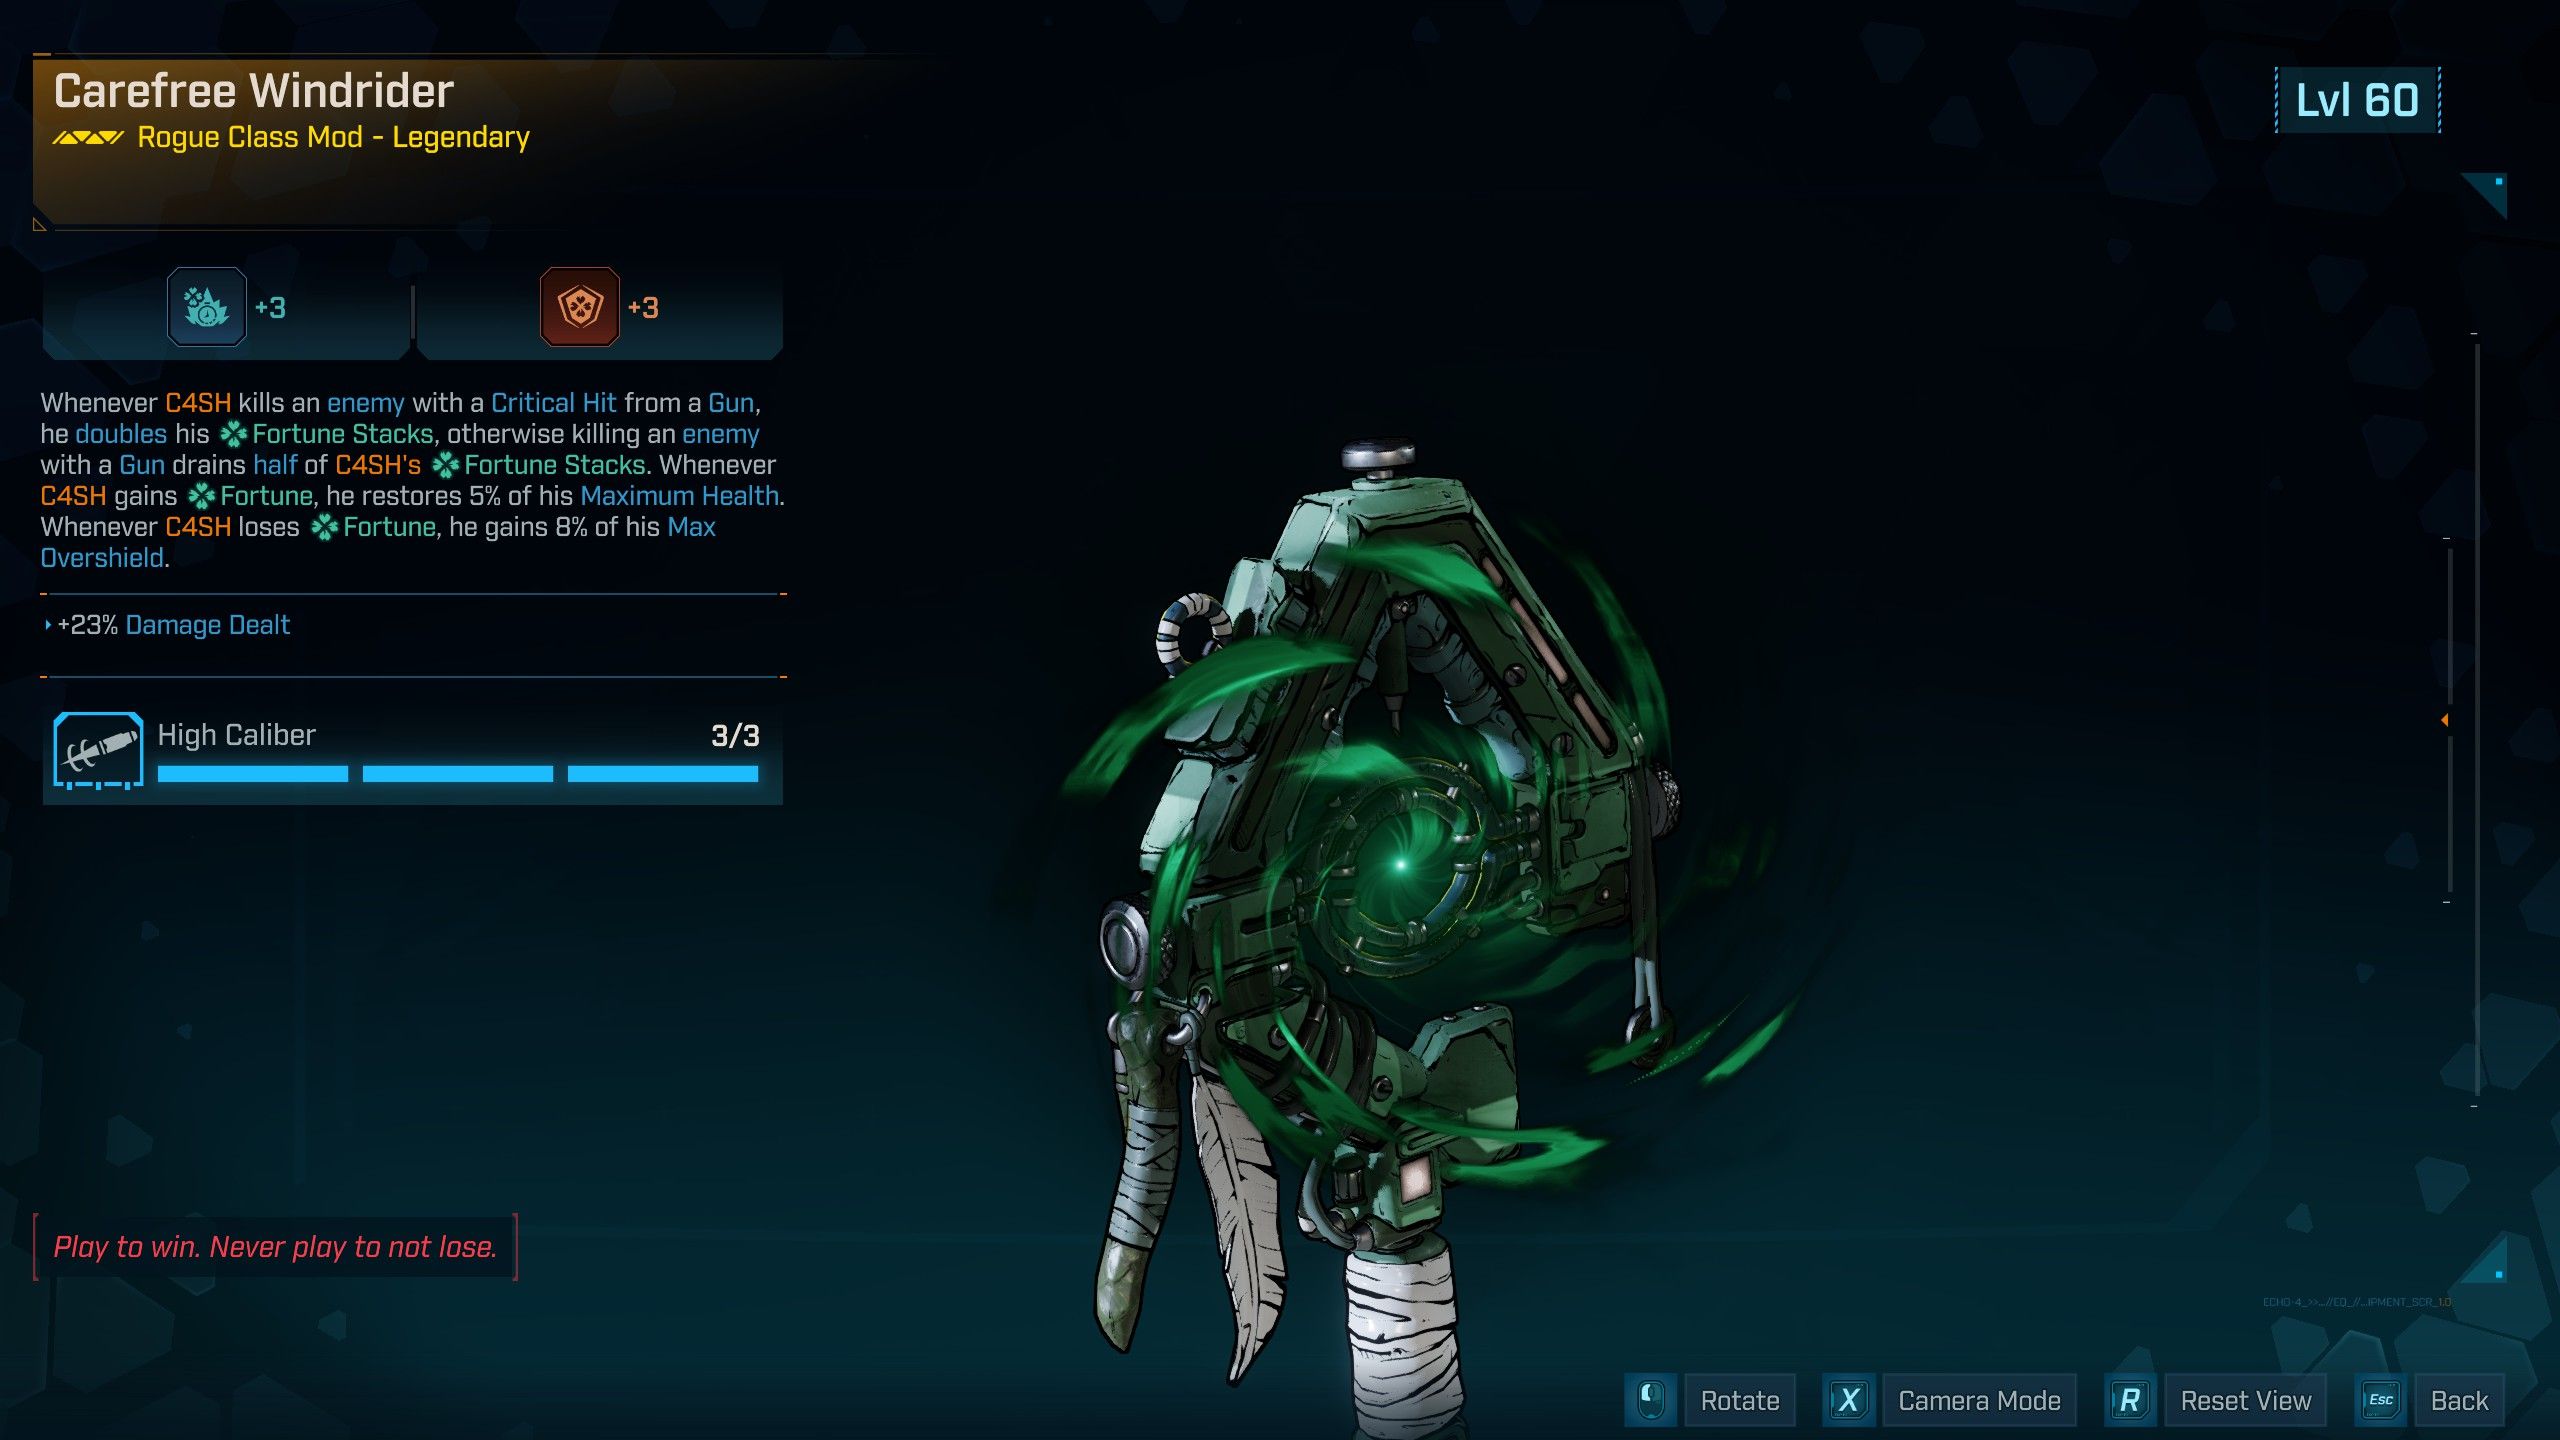
- Windrider
- Whenever C4SH kills an enemy with a Critical Hit from a Gun, he doubles his Fortune Stacks, otherwise killing an enemy with a Gun drains half of C4SH#s Fortune Stacks. Whenever C4SH gains Fortune, he restores 5% of his Maximum Health. Whenever C4SH loses Fortune, he gains 8% of his Max Overshield.
- How to Get – Radix, in the Vault of Radix.
Windrider is especially effective when combined with the Dealer’s Bluff passive, letting you quickly recharge your Action Skill by earning Fortune stacks – you won’t even need to spend points in the blue skill tree. And don’t forget From Gloam to Glow, which provides a solid damage boost.
Shield
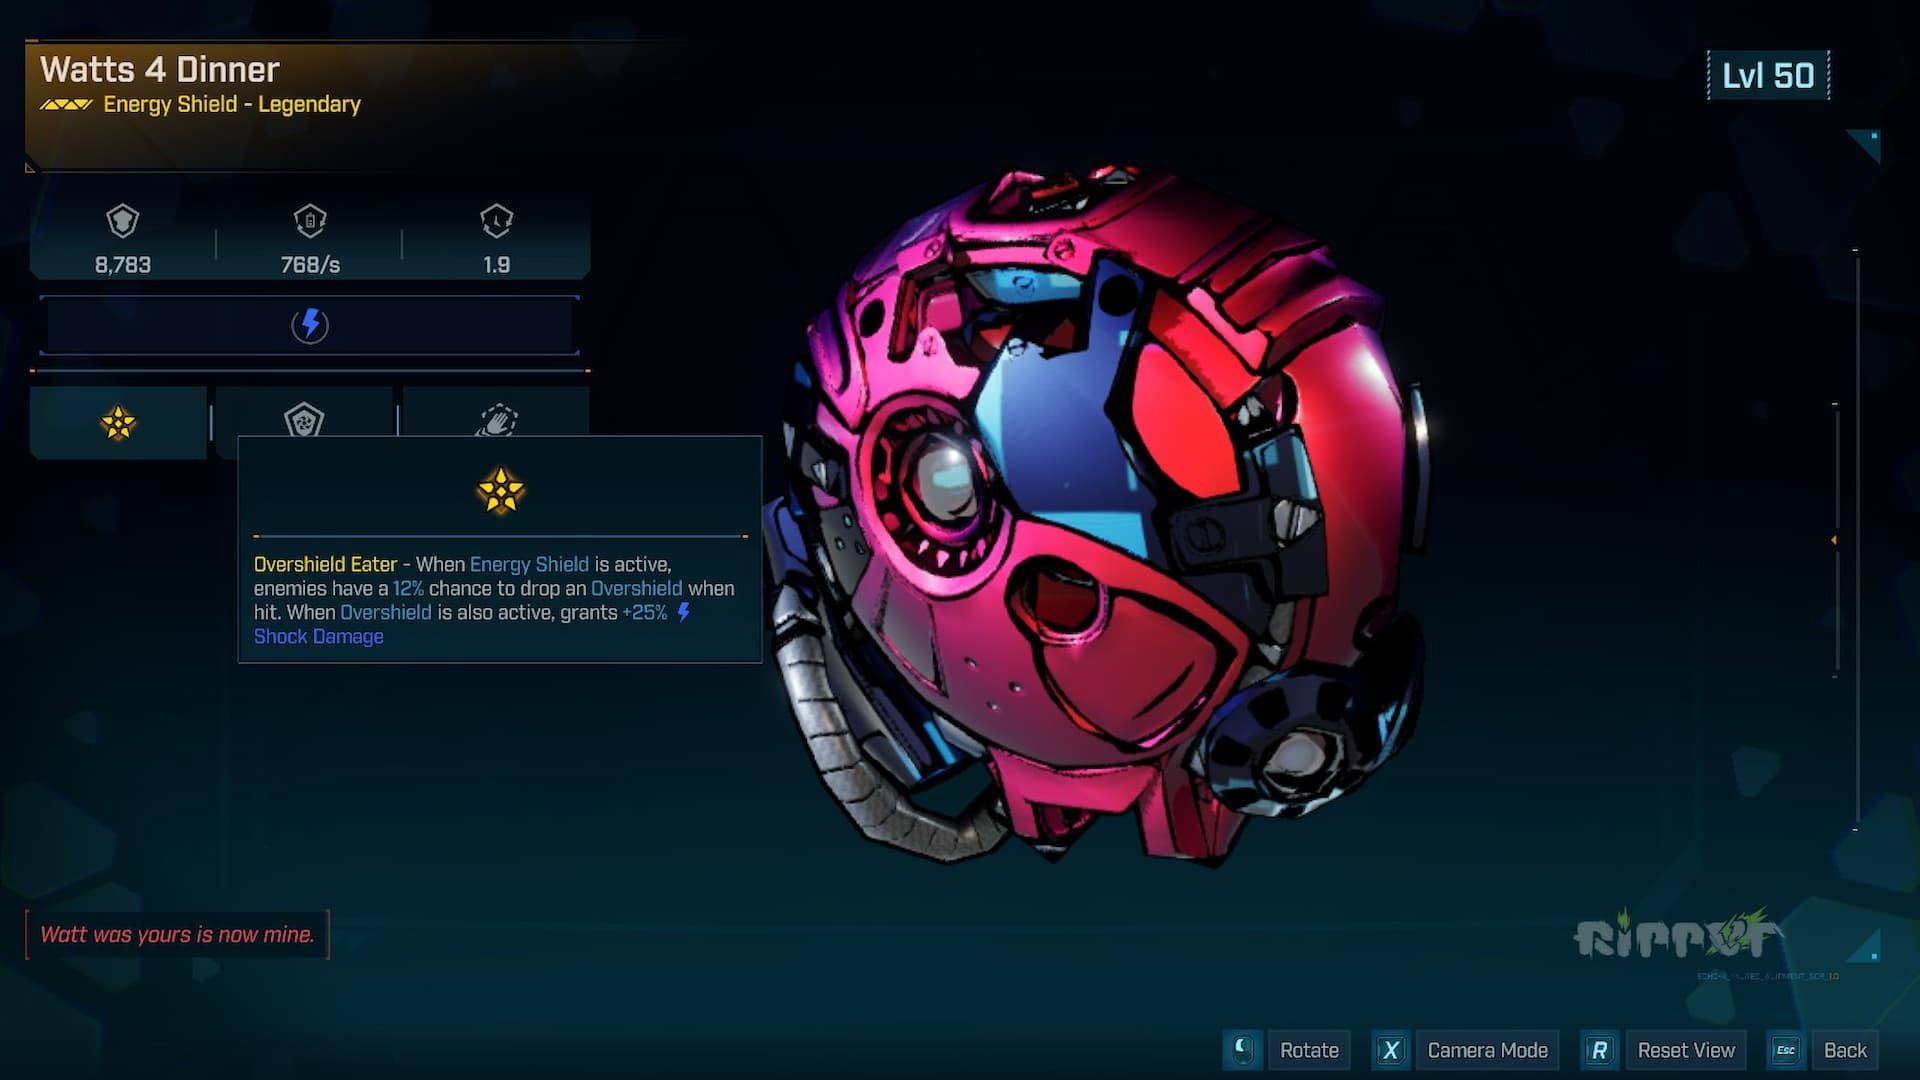
- Watts 4 Dinner
- Overshield Eater – When Energy Shield is active, enemies have a 12% chance to drop an Overshield when hit. When Overshield is also active, grants +25% Shock Damage.
- How to Get – Origo, Vault of Origo
Any shield with both Siphon and Amp abilities is ideal. These shields will restore more overshield when you inflict damage, and when your shields are full, they’ll also boost your damage output.
Enhancement
How you upgrade your weapons is really up to you and how you like to play. But, Jakobs and Ripper upgrades are generally good choices, as they can both increase damage and give your bullets a chance to bounce to new targets.
Firmware
- Deadeye (3/3)
- Increases Gun Accuracy, Critical Damage, and Critical Damage Stacks.
- High Caliber (2/3)
- Projectile Speed is increased, and Gun Damage is increased.
Best Specializations for the C4SH Cleromancy Build
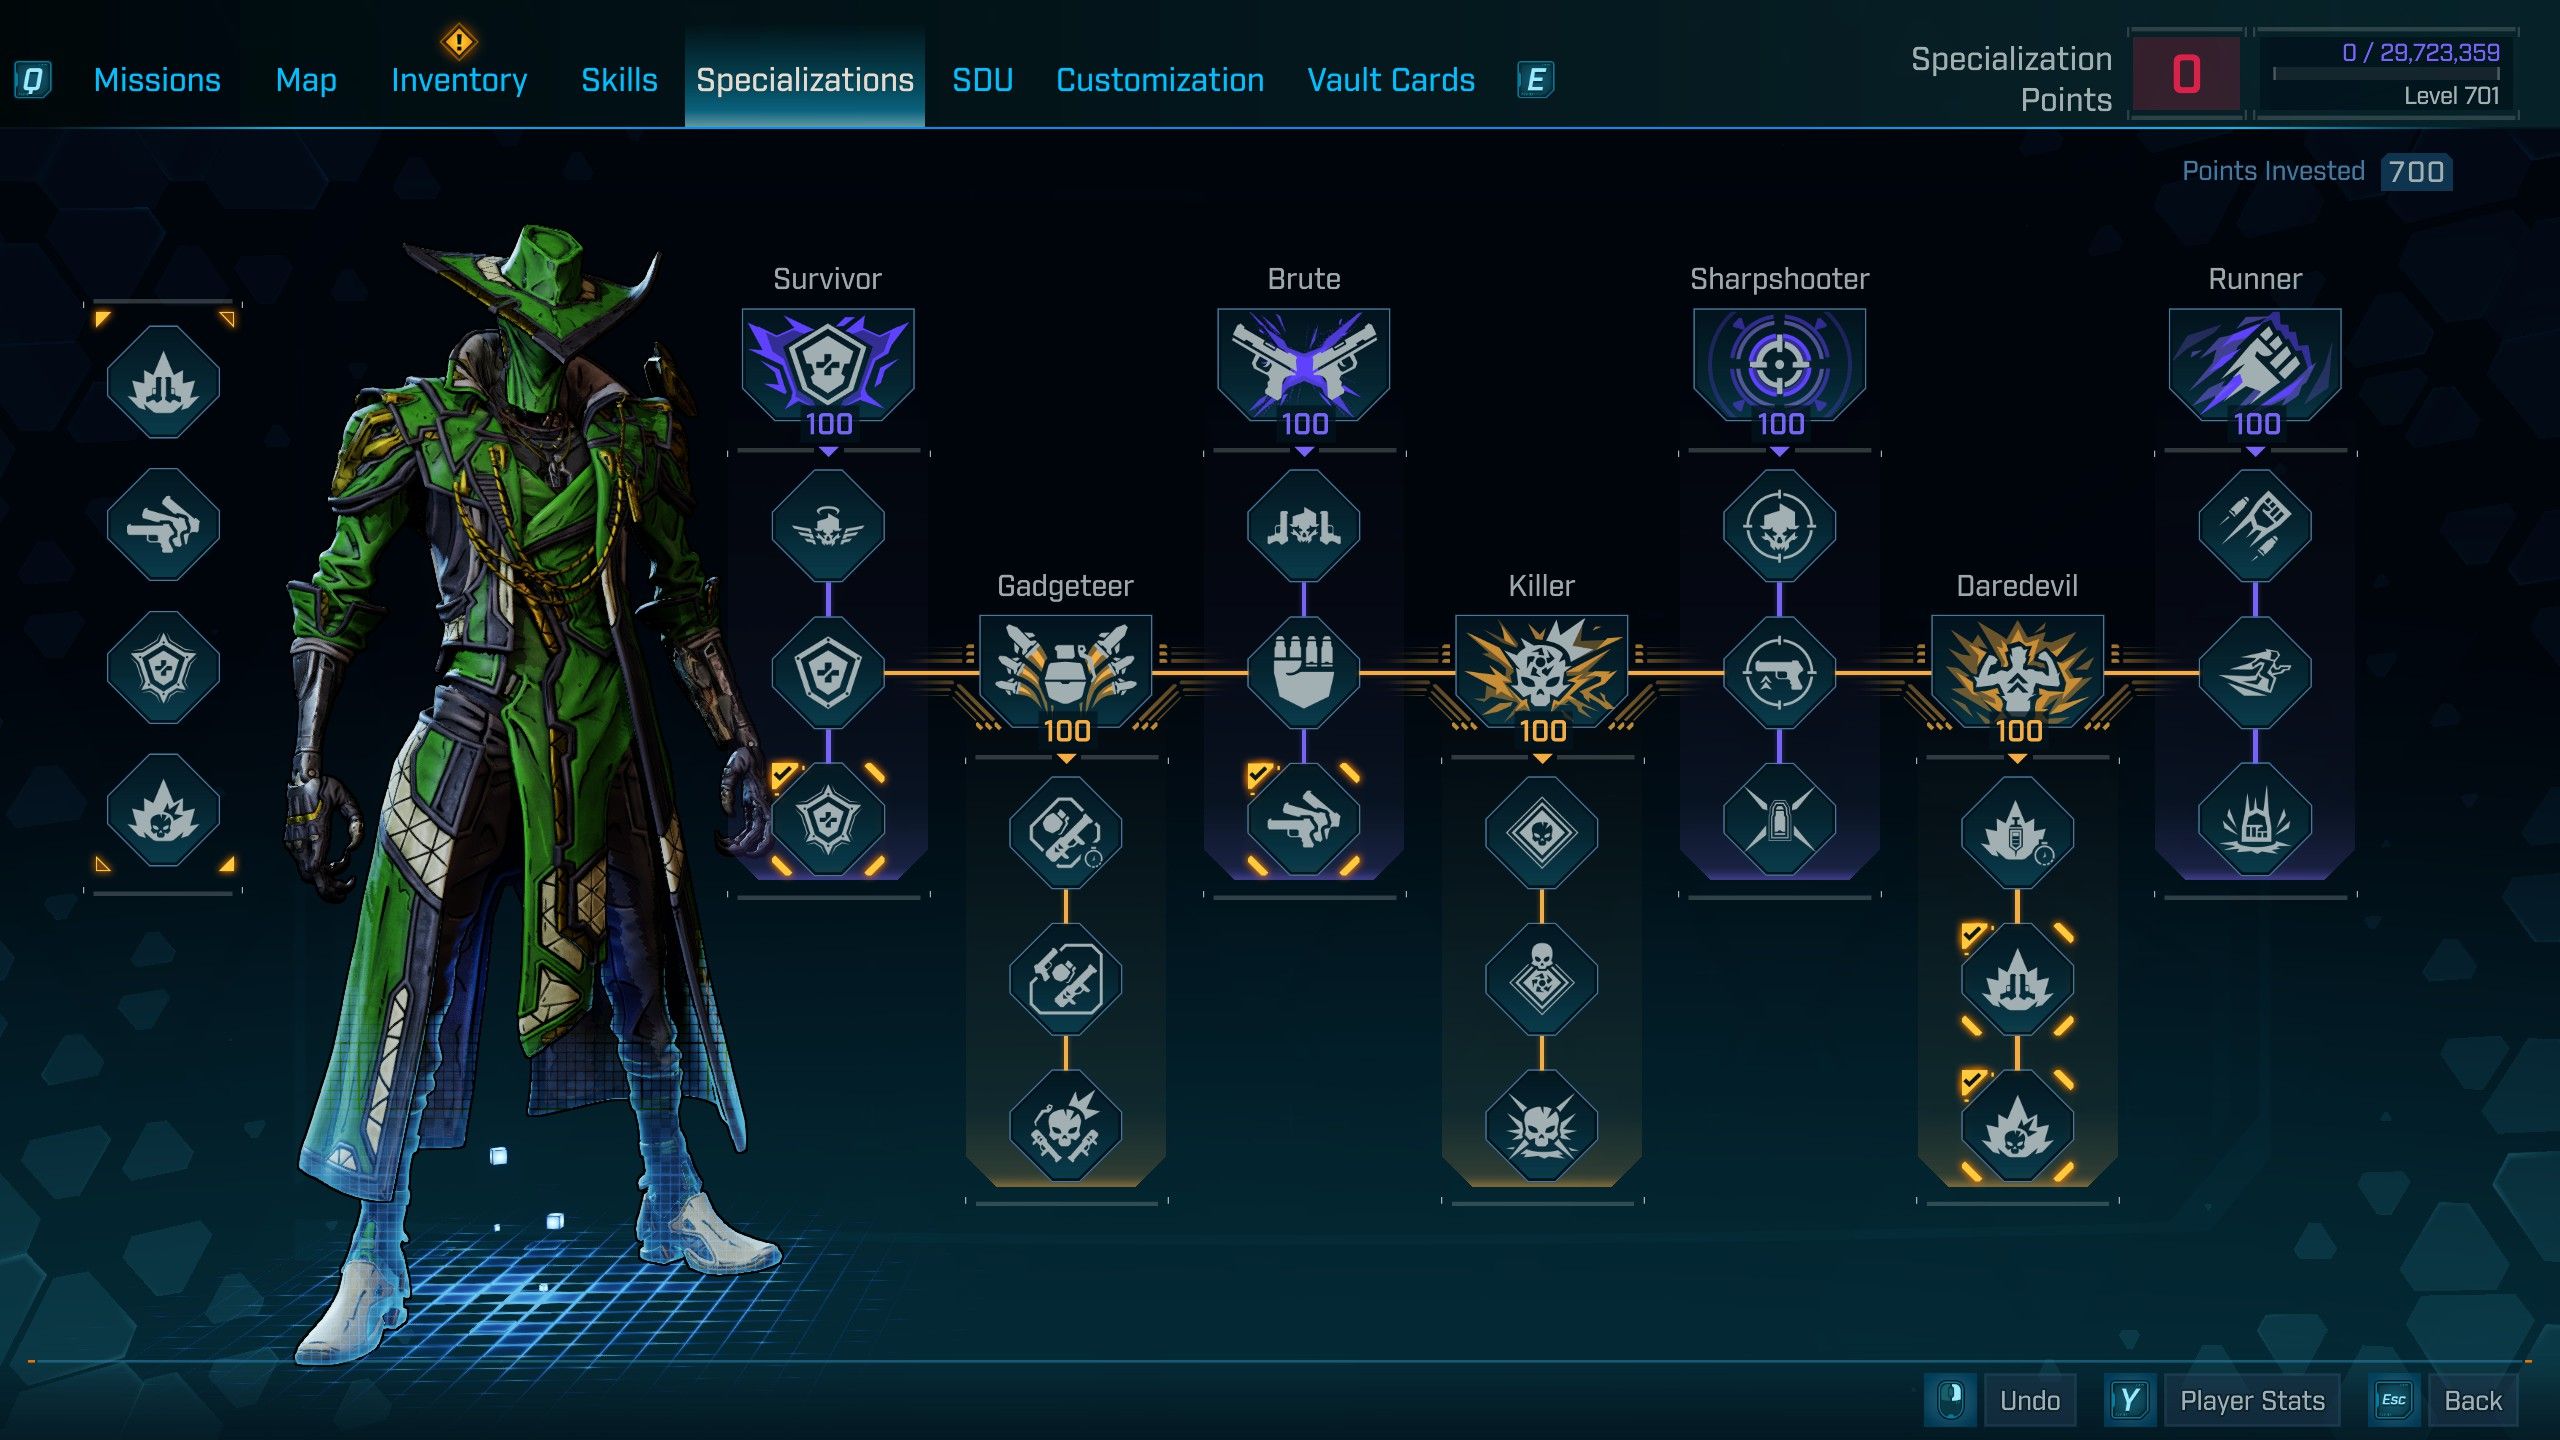
- The Best Defense (Survivor 20 Points)
- The Vault Hunter gains increased Damage Dealt based on the fullness of their Shield or Health, whichever has higher Maximum Capacity.
- I Am A Gun (Daredevil 10 Points)
- Action Skill Damage now benefits from increases to Gun Damage.
- A Honed Mind (Daredevil 20 Points)
- Action Skills gain a chance to Critically Hit enemies, and also gain increased Action Skill Critical Hit Damage.
- Riddle You This (Brute 20 Points)
- Whenever the Vault Hunter deals Gun Damage, gain a Stack of Riddle You This, increasing Gun Damage. Stacks are lost if a new Stack has not been gained for a Duration.
Read More
- All Shadow Armor Locations in Crimson Desert
- How to Get the Sunset Reed Armor Set and Hollow Visage Sword in Crimson Desert
- Best Bows in Crimson Desert
- All Golden Greed Armor Locations in Crimson Desert
- Wings of Iron Walkthrough in Crimson Desert
- All Skyblazer Armor Locations in Crimson Desert
- All Helfryn Armor Locations in Crimson Desert
- How to Craft the Elegant Carmine Armor in Crimson Desert
- How To Beat Ator Archon of Antumbra In Crimson Desert
- Keeping Large AI Models Connected Through Network Chaos
2026-04-02 18:17