In the underground area of Blue Prince lies a treasure trove of mysteries, ancient tales, conundrums, and treasures yet undiscovered. Upon gaining entry to the Antechamber, you’ll be given a key that opens up the basement location, unveiling sights and experiences previously unknown to you.
In the game “Blue Prince,” the Reservoir is an underground area brimming with fascinating artifacts waiting for your personal discovery. However, to explore it, you’ll have to master adjusting the water level and find multiple entry points to the basement.
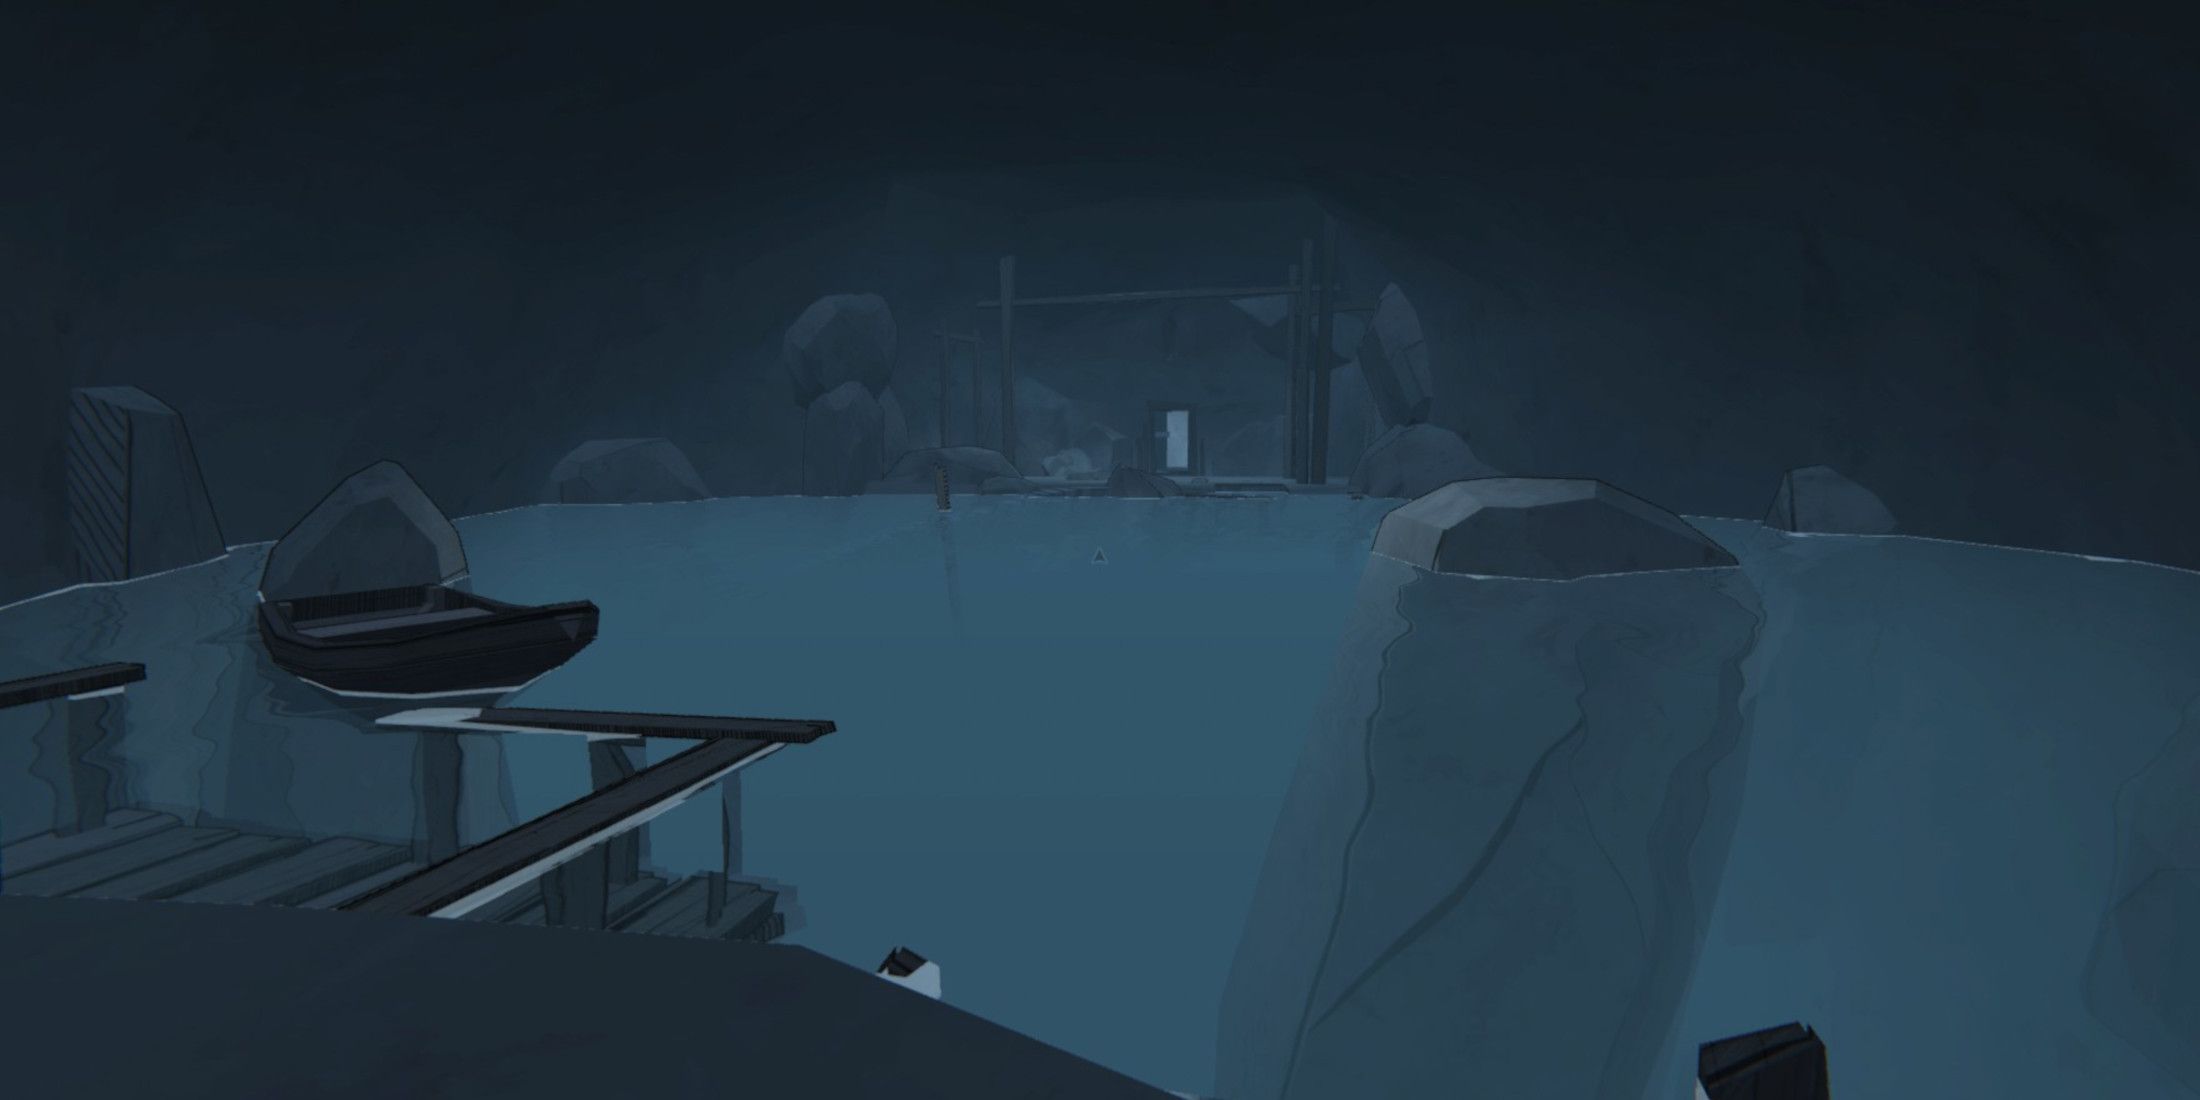
The Reservoir Room, Explained
Based on various documents found throughout the house, it appears that the Reservoir is an underground storage facility designed to hold water. This stored water can be used to supply different wet areas within the house, such as the pool in the game Blue Prince, the front yard fountain, and even the Greenhouse for watering plants. Additionally, when necessary, water can be drained from this reservoir.
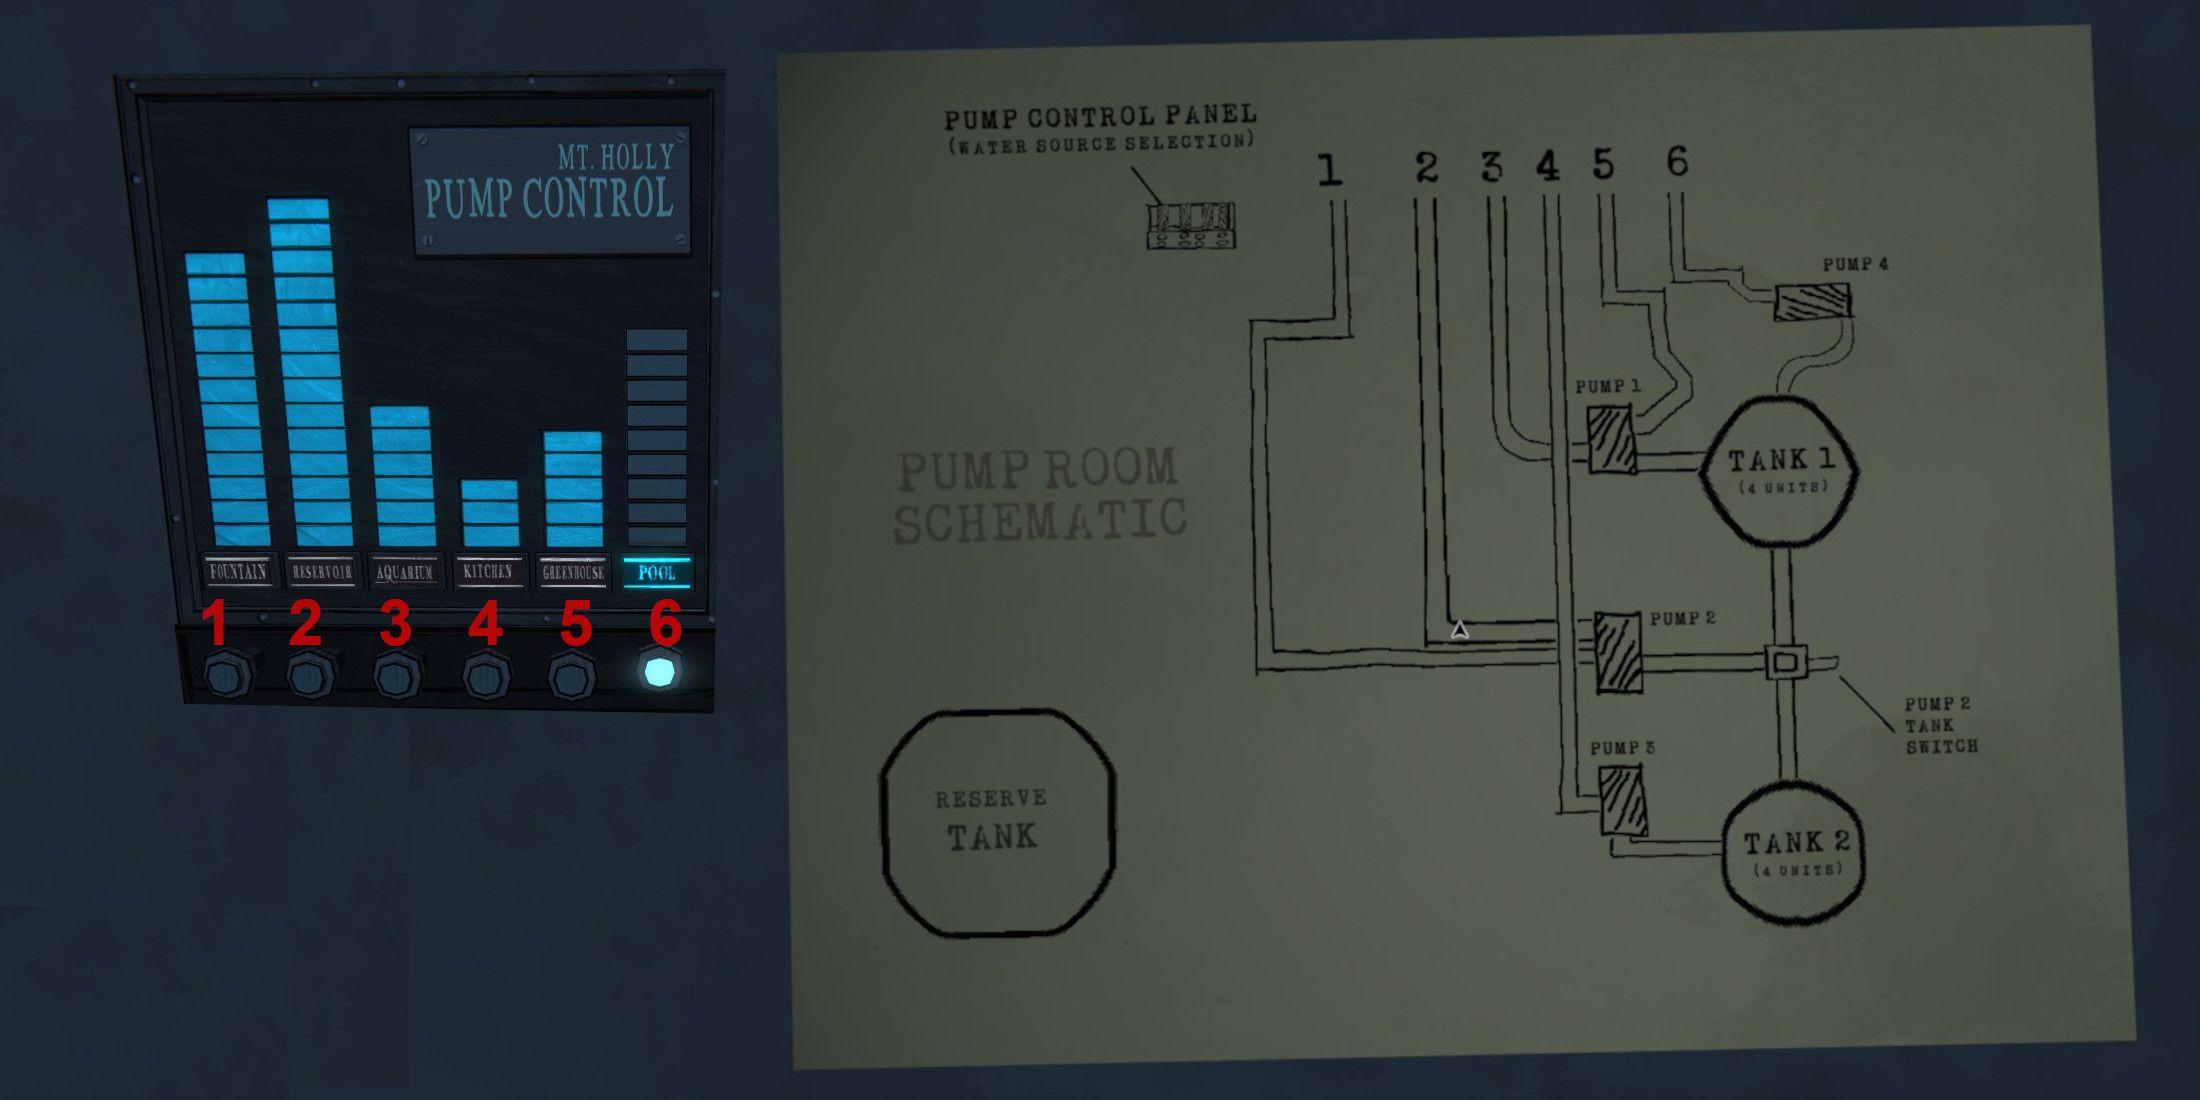
To adjust the water level in the Reservoir or empty it, you’ll need to visit the Pump Room located in Blue Prince. This room, among several blue rooms that can be modified within the house, is equipped with four pumps. These pumps enable you to transfer water between rooms and locations as needed. Additionally, there’s a chart you can find on an underground window that will guide you on the required water levels to access all the Reservoir has to offer.
How to Empty All the Water From the Reservoir in Blue Prince
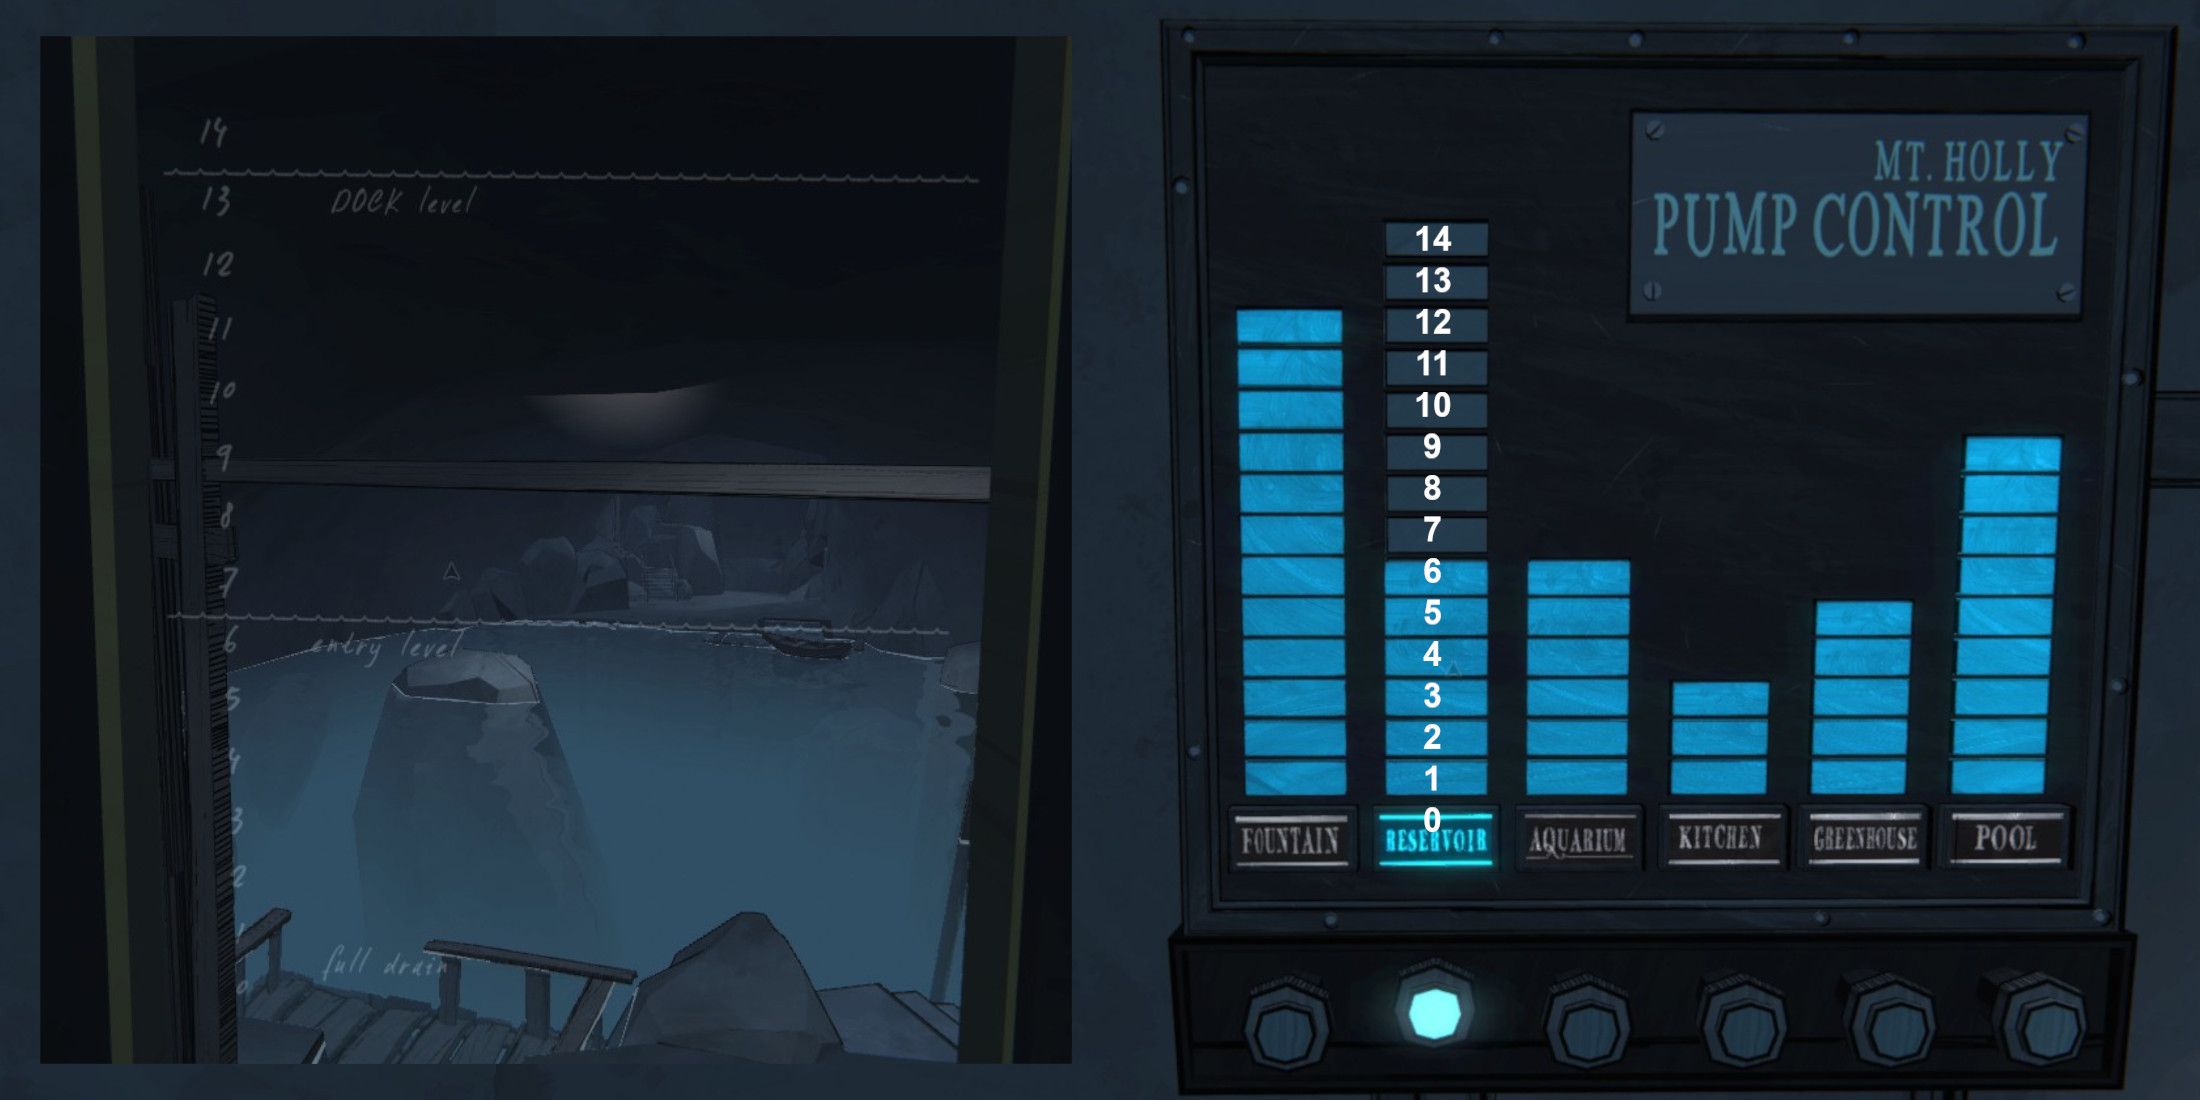
As a gamer, I find myself standing by the towering Reservoir, its fourteen tiers looming above me. To reach the boat at the sixth level, I must lower the water level – just one block is all it takes for me to board. To get there, I need to descend all the way to zero, reaching the very bottom of this colossal structure.
To accomplish this feat, I’ll first have to draft a Pool in my house – an action that mysteriously adds the Sauna, Pump Room, and Locker Room belonging to the enigmatic ‘Blue Prince’ to my daily construction plans. Quite the intriguing twist!
By employing the pumps situated in the Pump Room, you can shift the water accumulated in pumps 1 and 2 into other rooms. Notably, each of the two tanks is capable of storing up to four units of water. A simple calculation will reveal that you can accommodate all but one square unit of water from the Reservoir in the alternative locations, with the tanks included. Therefore, it’s apparent that additional measures are required to entirely drain the Reservoir.
To transfer water from the tanks to the Reserve Tank in the Pump Room, you’ll first have to connect an energy source to the Pump Room. Unfortunately, it currently isn’t functioning without one. In your building layout, a Power Source can be found in areas marked as such, similar to the Electric Eel upgrade for the Aquarium and the Boiler Room.
Looking up at the Pump Room’s ceiling reveals vent-like structures stretching across it. These aren’t vents, but power lines. To supply power to the Pump Room, you need to link these power lines between rooms. There are numerous rooms adorned with power lines on their ceilings, such as the Archive, Weight Room, Dark Room, and many more. Additionally, there are several other spaces that would benefit from having electricity routed through them, like the Laundry.
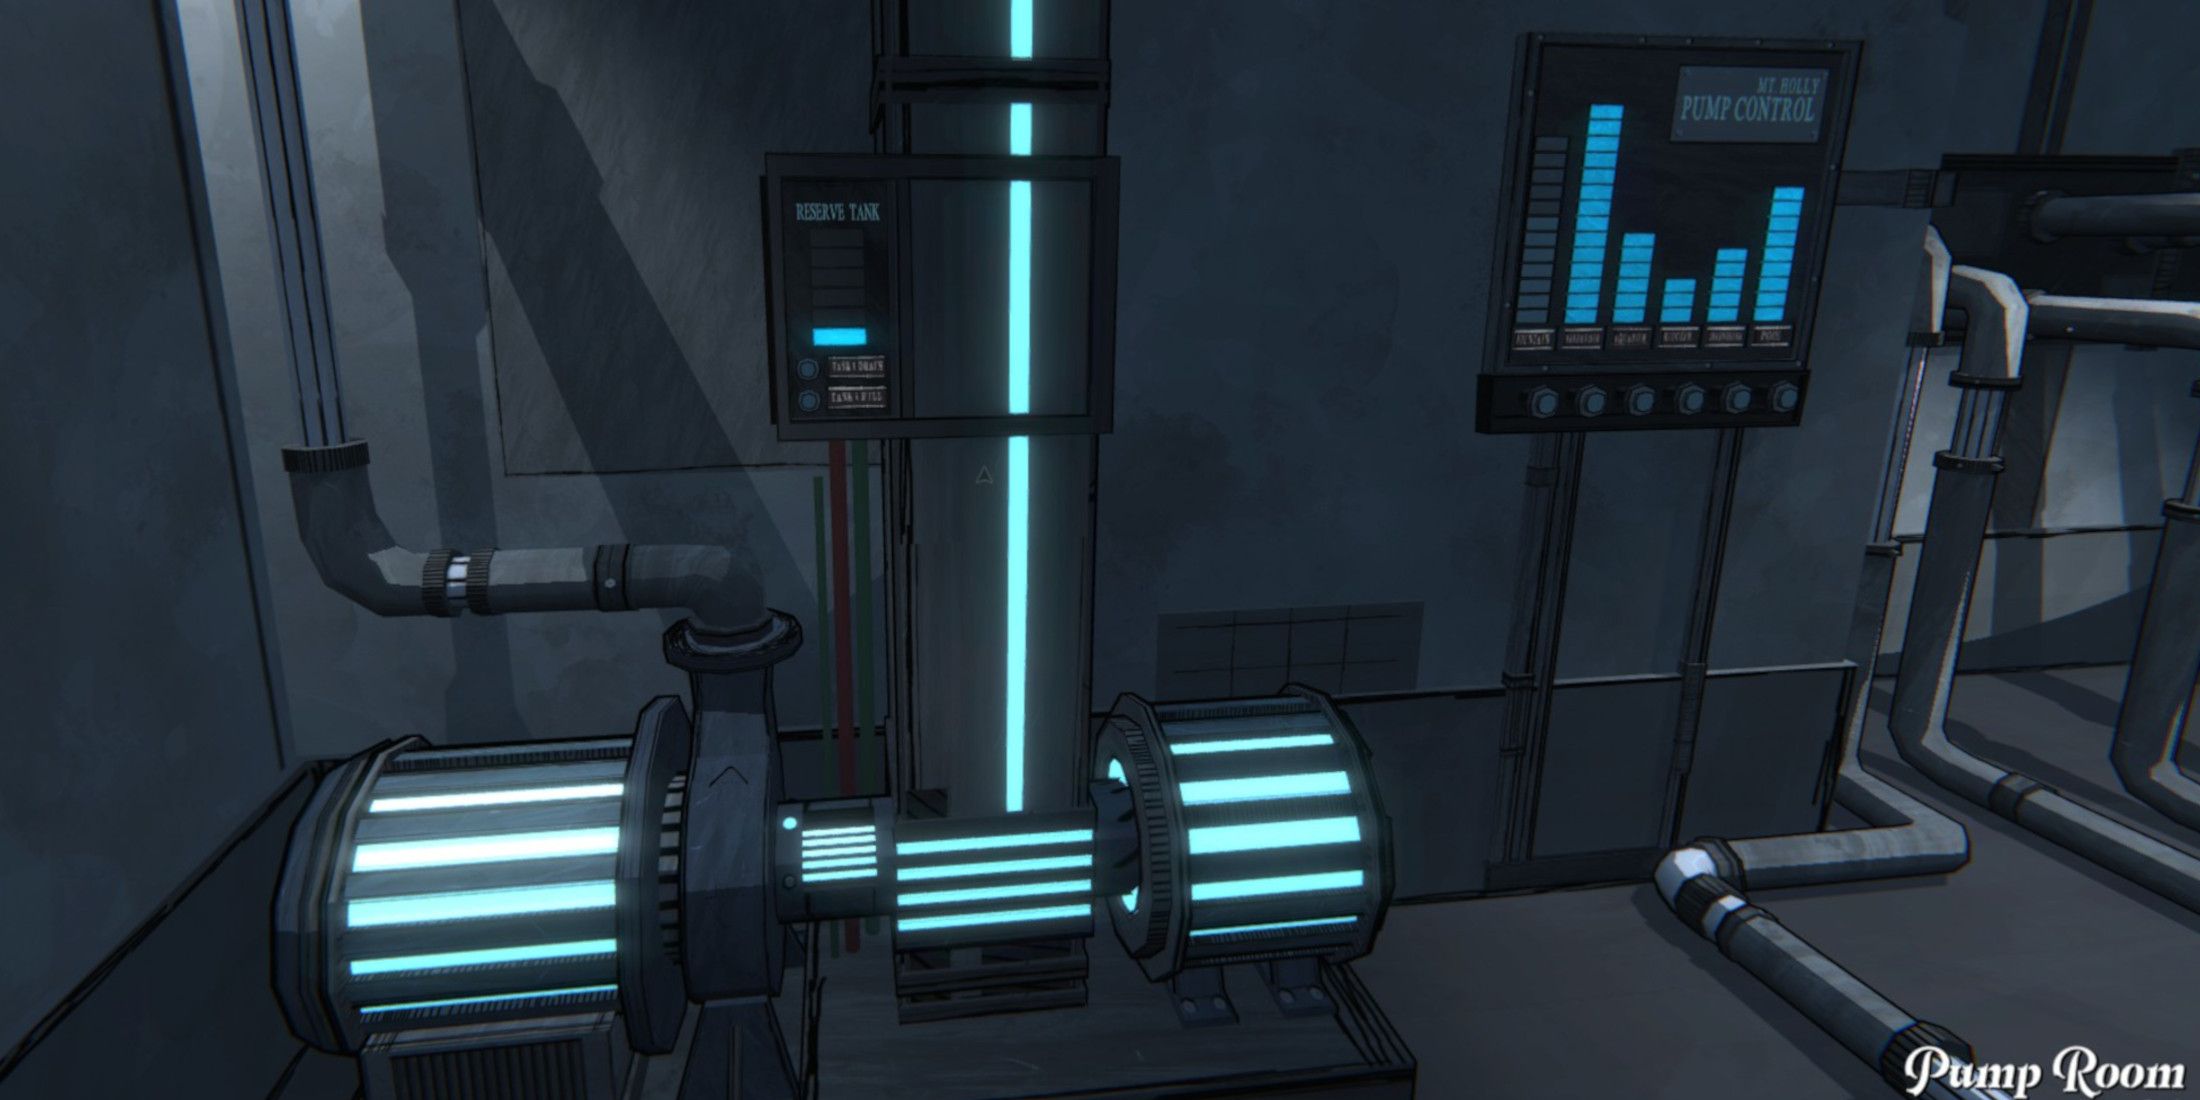
To ensure the Reserve Tank in the Pump Room receives power, it’s essential to link the Power Source room with these power lines or directly for a direct connection. This will allow the Pump Room to function properly and enable you to drain up to six units of water into the Reserve Tank. Once filled, the Reserve Tank can help in draining the entire Reservoir completely.
Level 13 Water in the Reservoir (Dock Level)
To travel across the Reservoir using the boat, first, fill a tank with three units of water to drain one square from the Reservoir. Once you’ve drained an additional unit from the Reservoir, you can sail the boat, connecting both sides of the waterbody. This method offers a swift means of traversing between the two sides, especially if needed frequently. Notably, other access points around the house connect to both sides as well, but this route provides a quick trip specifically between them. Initially, the boat is stationed on the northern side of the Reservoir.
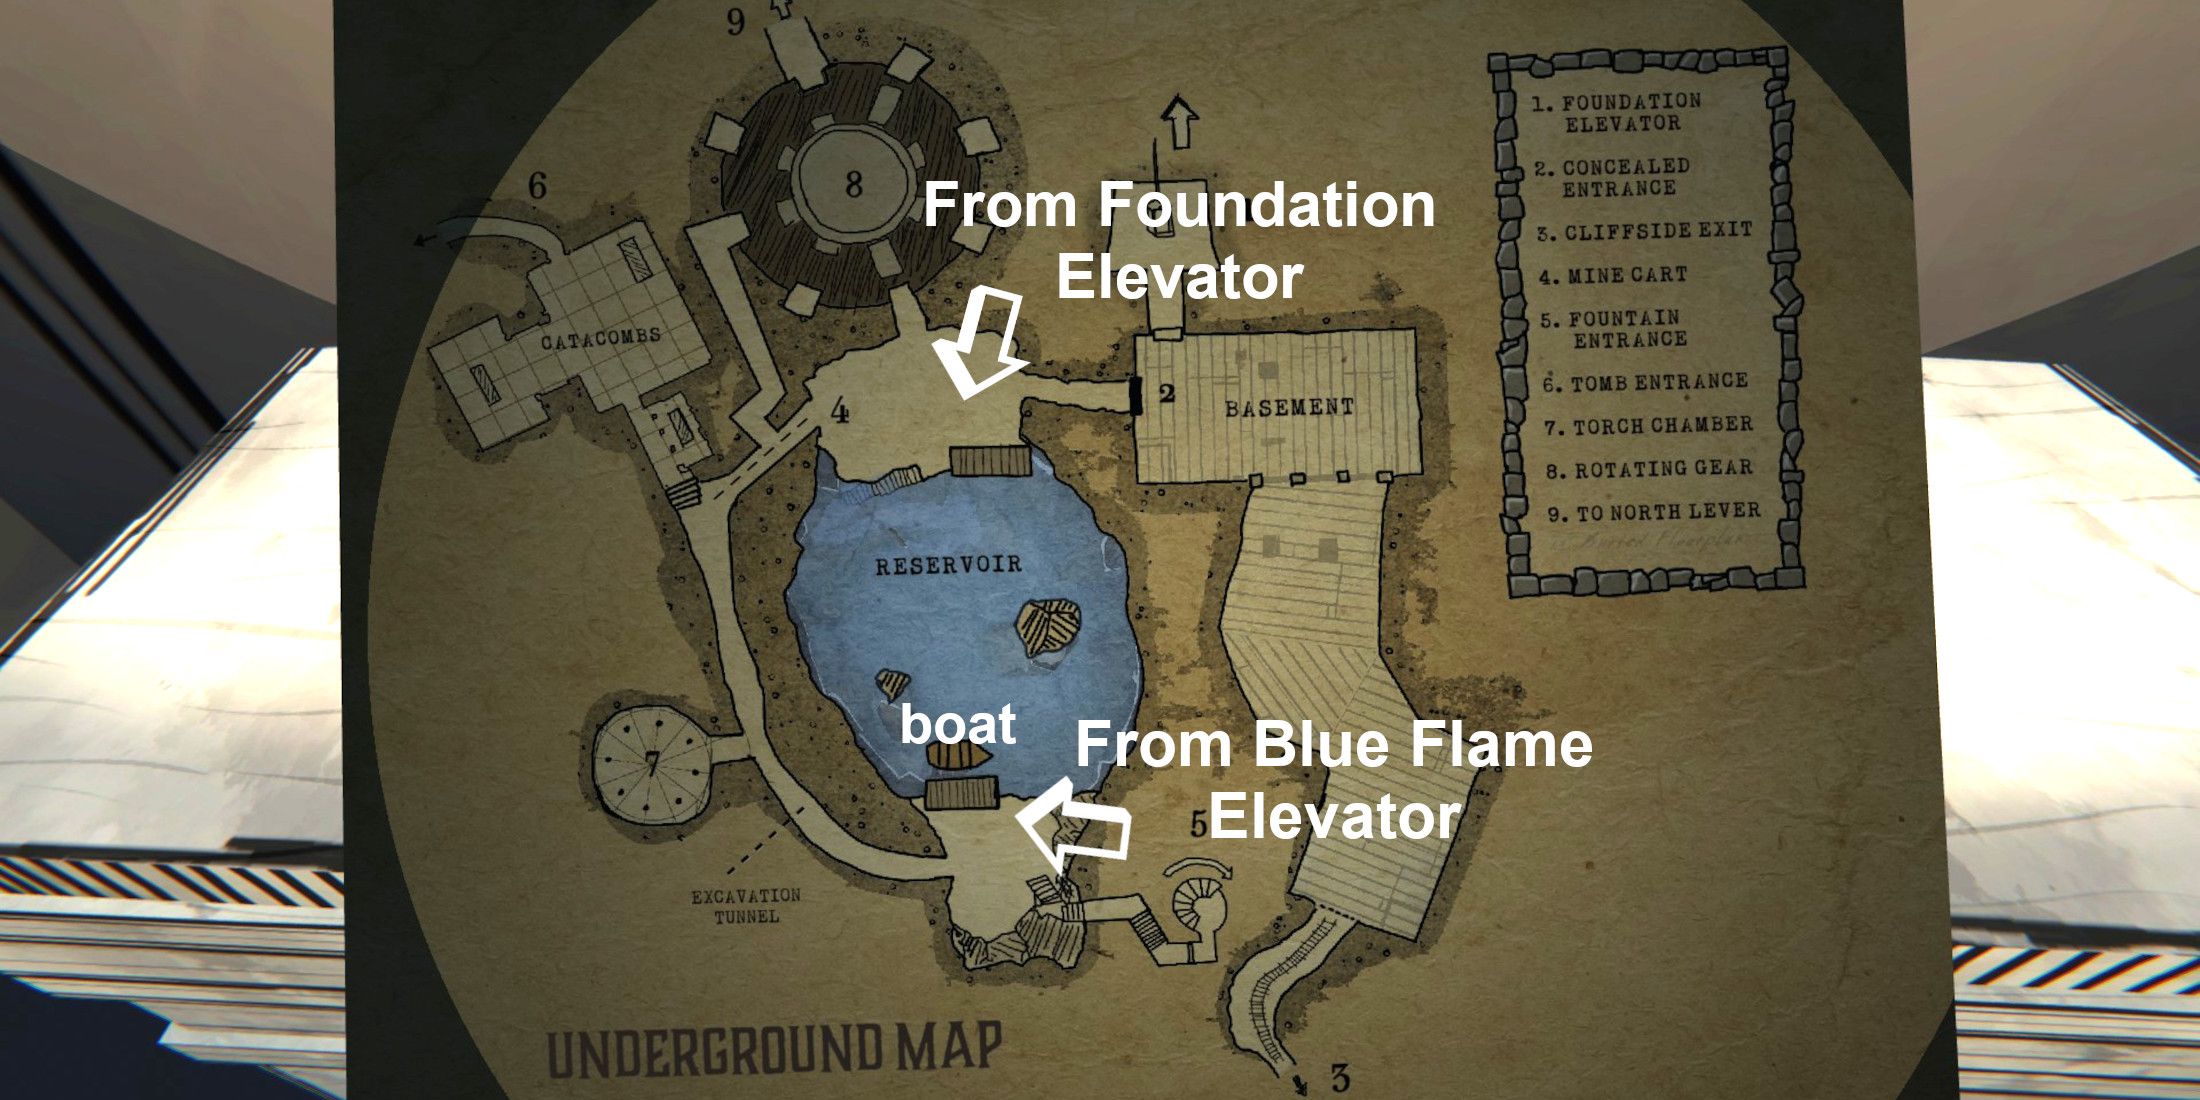
| Basement Entry Point | Side of Reservoir |
|---|---|
| The Foundation elevator | North |
| The Basement tunnel | North |
| The Blue Flame elevator | South |
| The circular candle room | South |
Level 6 Water in the Reservoir (Entry Level)
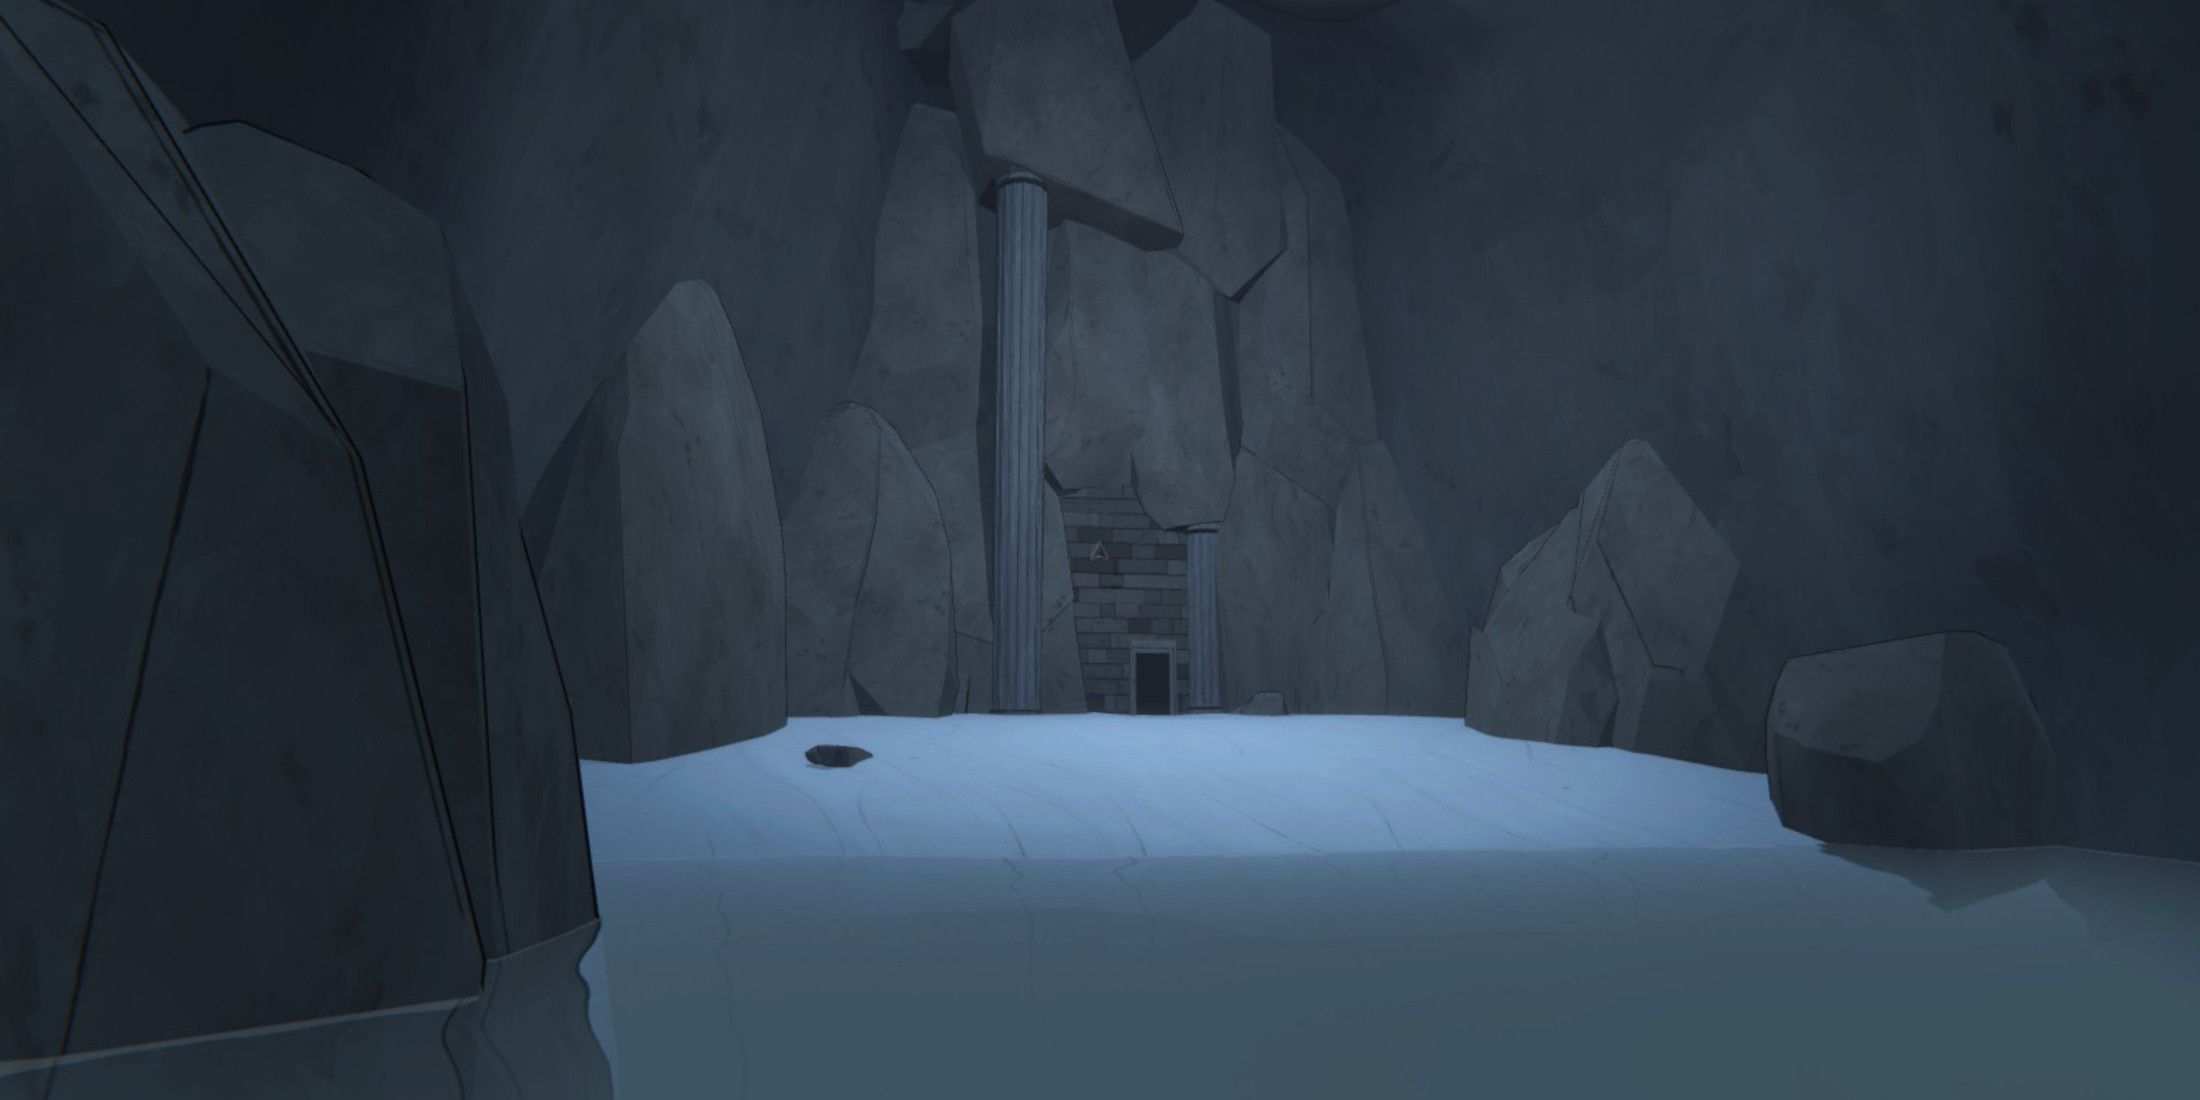
Once you lower the water to level 6 or reduce it by 6 units on the same side of the Reservoir where you previously docked your boat, step back into the boat. Then, a cutscene will guide you to a white beach with a door in a large rock wall. This beach leads to the Safehouse.
Level 0 Water in the Reservoir (Full Drain)
After following the provided instructions to empty the Reservoir completely, you’ll discover a collection of chests at its base. In total, there are 23 locked chests and they cannot be opened with a lockpick. Instead, you will require a total of 23 keys to unlock them all. However, luckily for you, only two specific keys can open the Blue Prince’s locked trunks that actually contain treasure. The rest merely serve as hints pointing towards which boxes hold the desired items.
Big Spoilers ahead for the locked trunk puzzle at the bottom of the Reservoir.
Locked Trunk with the Allowance Tokens

You have two options: either examine enough boxes to determine which colors of containers, notes, and labels on the boxes are accurate or trust that this article will provide you with the answer. One of the containers holds three Allowance Tokens, each increasing your daily Blue Prince Allowance by two gold coins. In the diagram above, you’re viewing the Reservoir’s bottom from the north side, so the map is flipped upside down. The Allowance Tokens are found in box A.
Locked Trunk with the Sanctum Key
Inside another box lies a prize – it could be the Sanctum Key. You can either figure out which box holds this key by examining the notes or you can find the clue here: The Sanctum Key is hidden in the box marked with an ‘I’ on the map above.
Read More
- All Skyblazer Armor Locations in Crimson Desert
- One Piece Chapter 1180 Release Date And Where To Read
- How to Get the Sunset Reed Armor Set and Hollow Visage Sword in Crimson Desert
- All Shadow Armor Locations in Crimson Desert
- Marni Laser Helm Location & Upgrade in Crimson Desert
- All Golden Greed Armor Locations in Crimson Desert
- All Helfryn Armor Locations in Crimson Desert
- How to Beat Stonewalker Antiquum at the Gate of Truth in Crimson Desert
- All Icewing Armor Locations in Crimson Desert
- Black Sun Shield Location In Crimson Desert (Buried Treasure Quest)
2025-04-28 12:08