The fourth chapter of Poppy Playtime significantly enriches the series’ backstory in an impactful manner. It delivers an enjoyable gaming experience, yet the true genius of the series lies in its creative world-building, which is evident both in the main narrative and collectible artifacts.
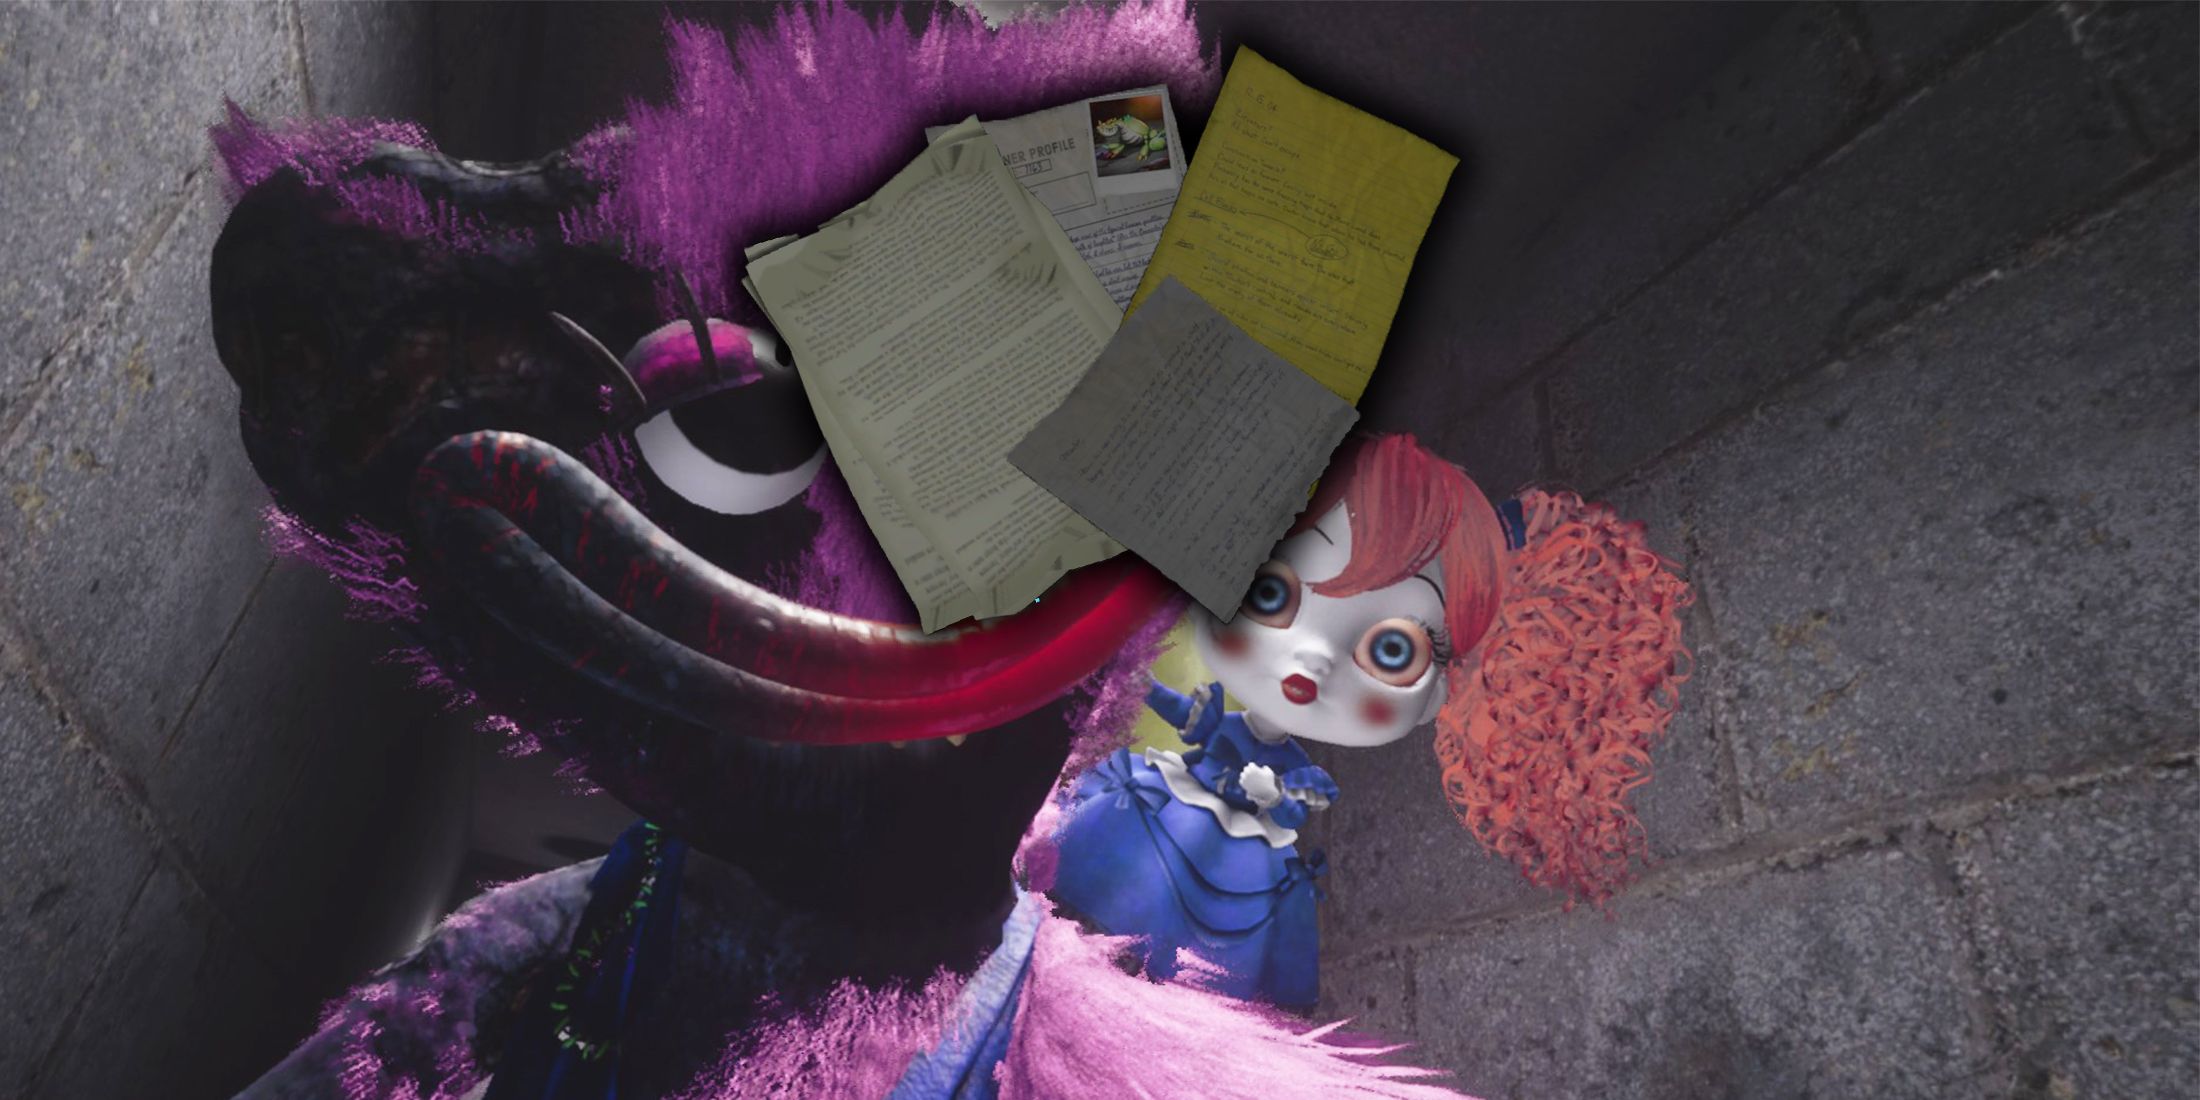
VHS tapes scattered throughout the storyline offer insight into the various characters, yet the notes provide a comprehensive overview of events within the secret underground base. In chapter 4 alone, there are over 20 notes, but locating them all can be challenging.
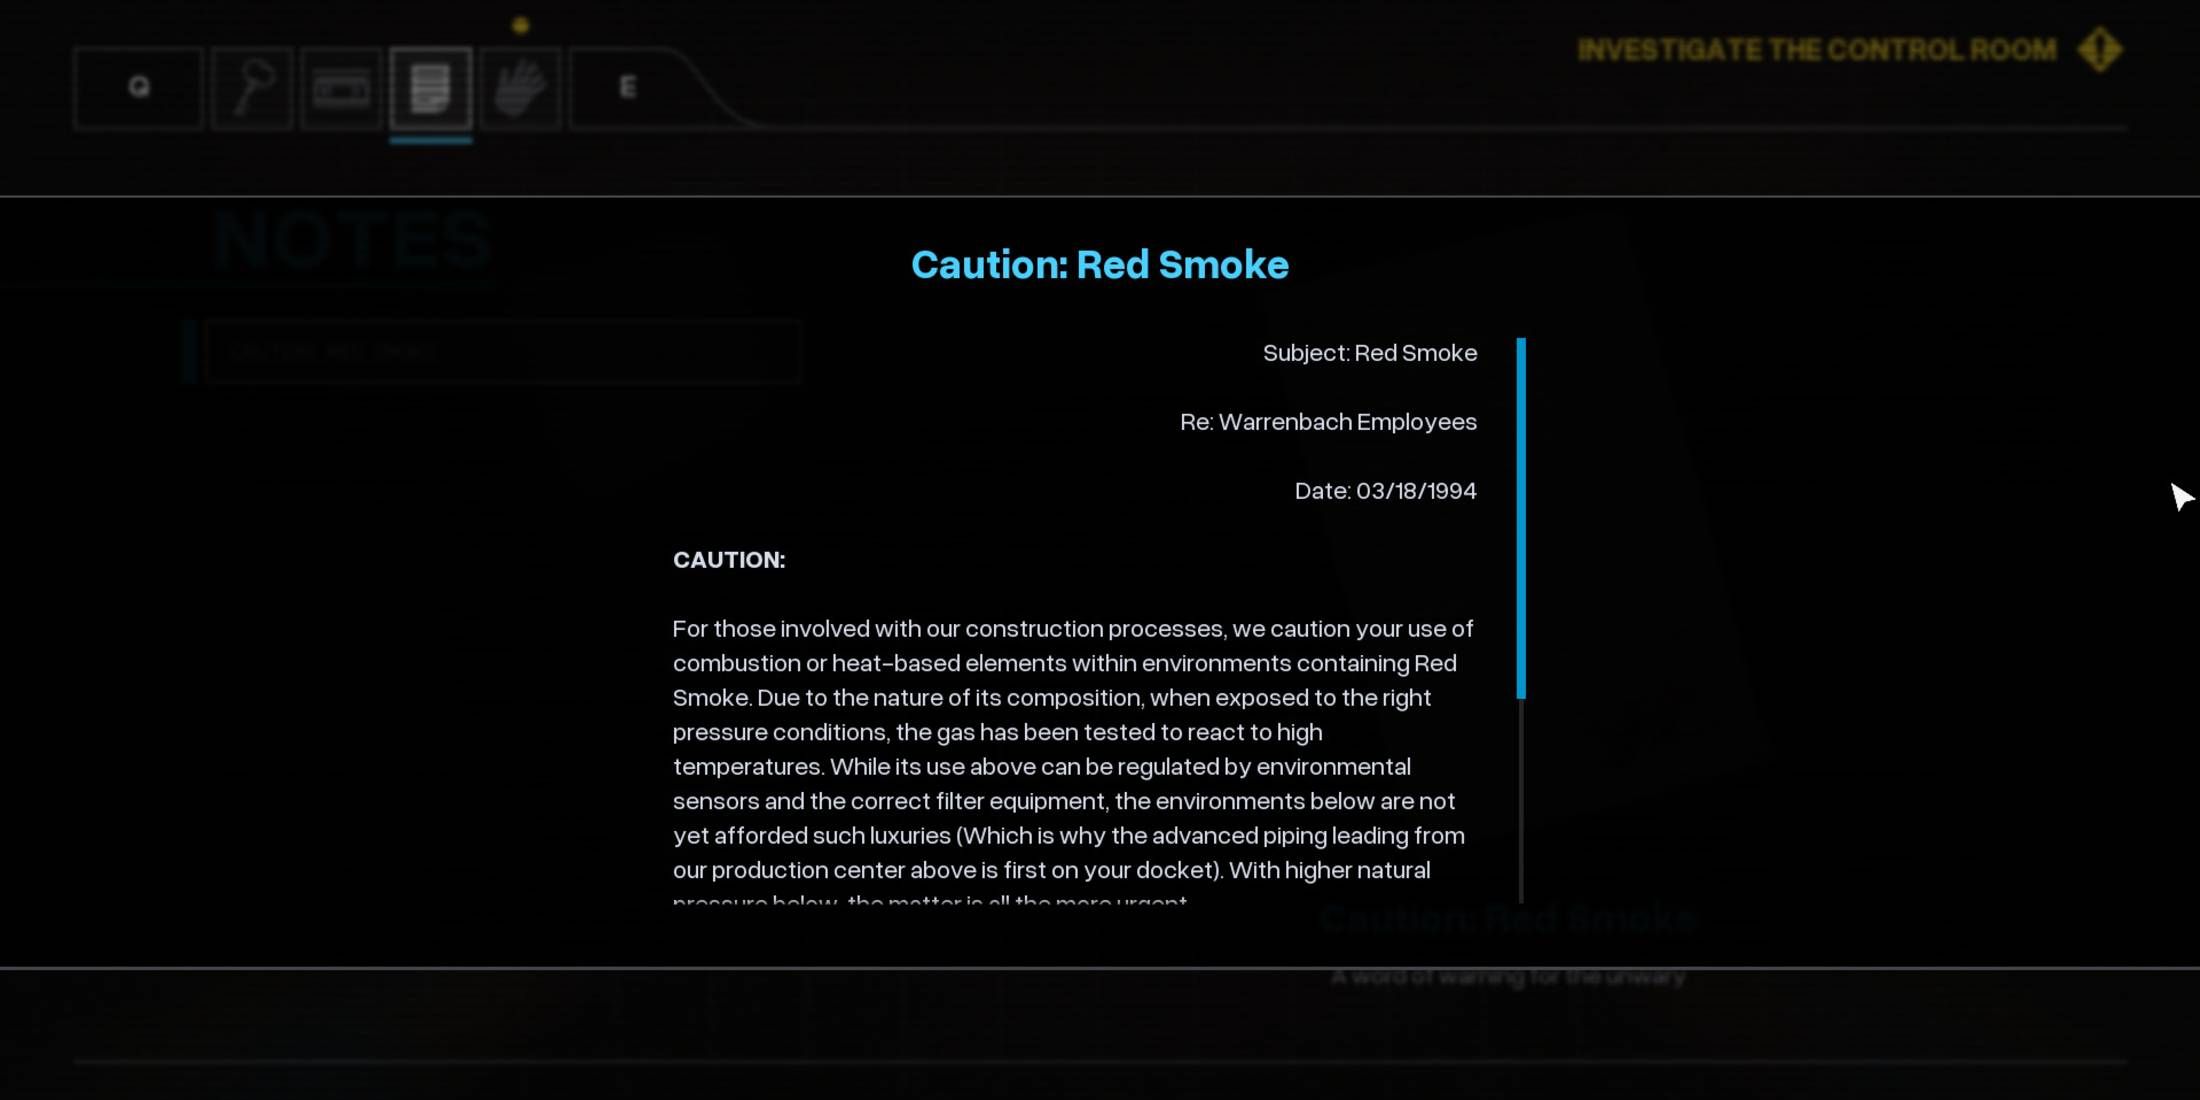
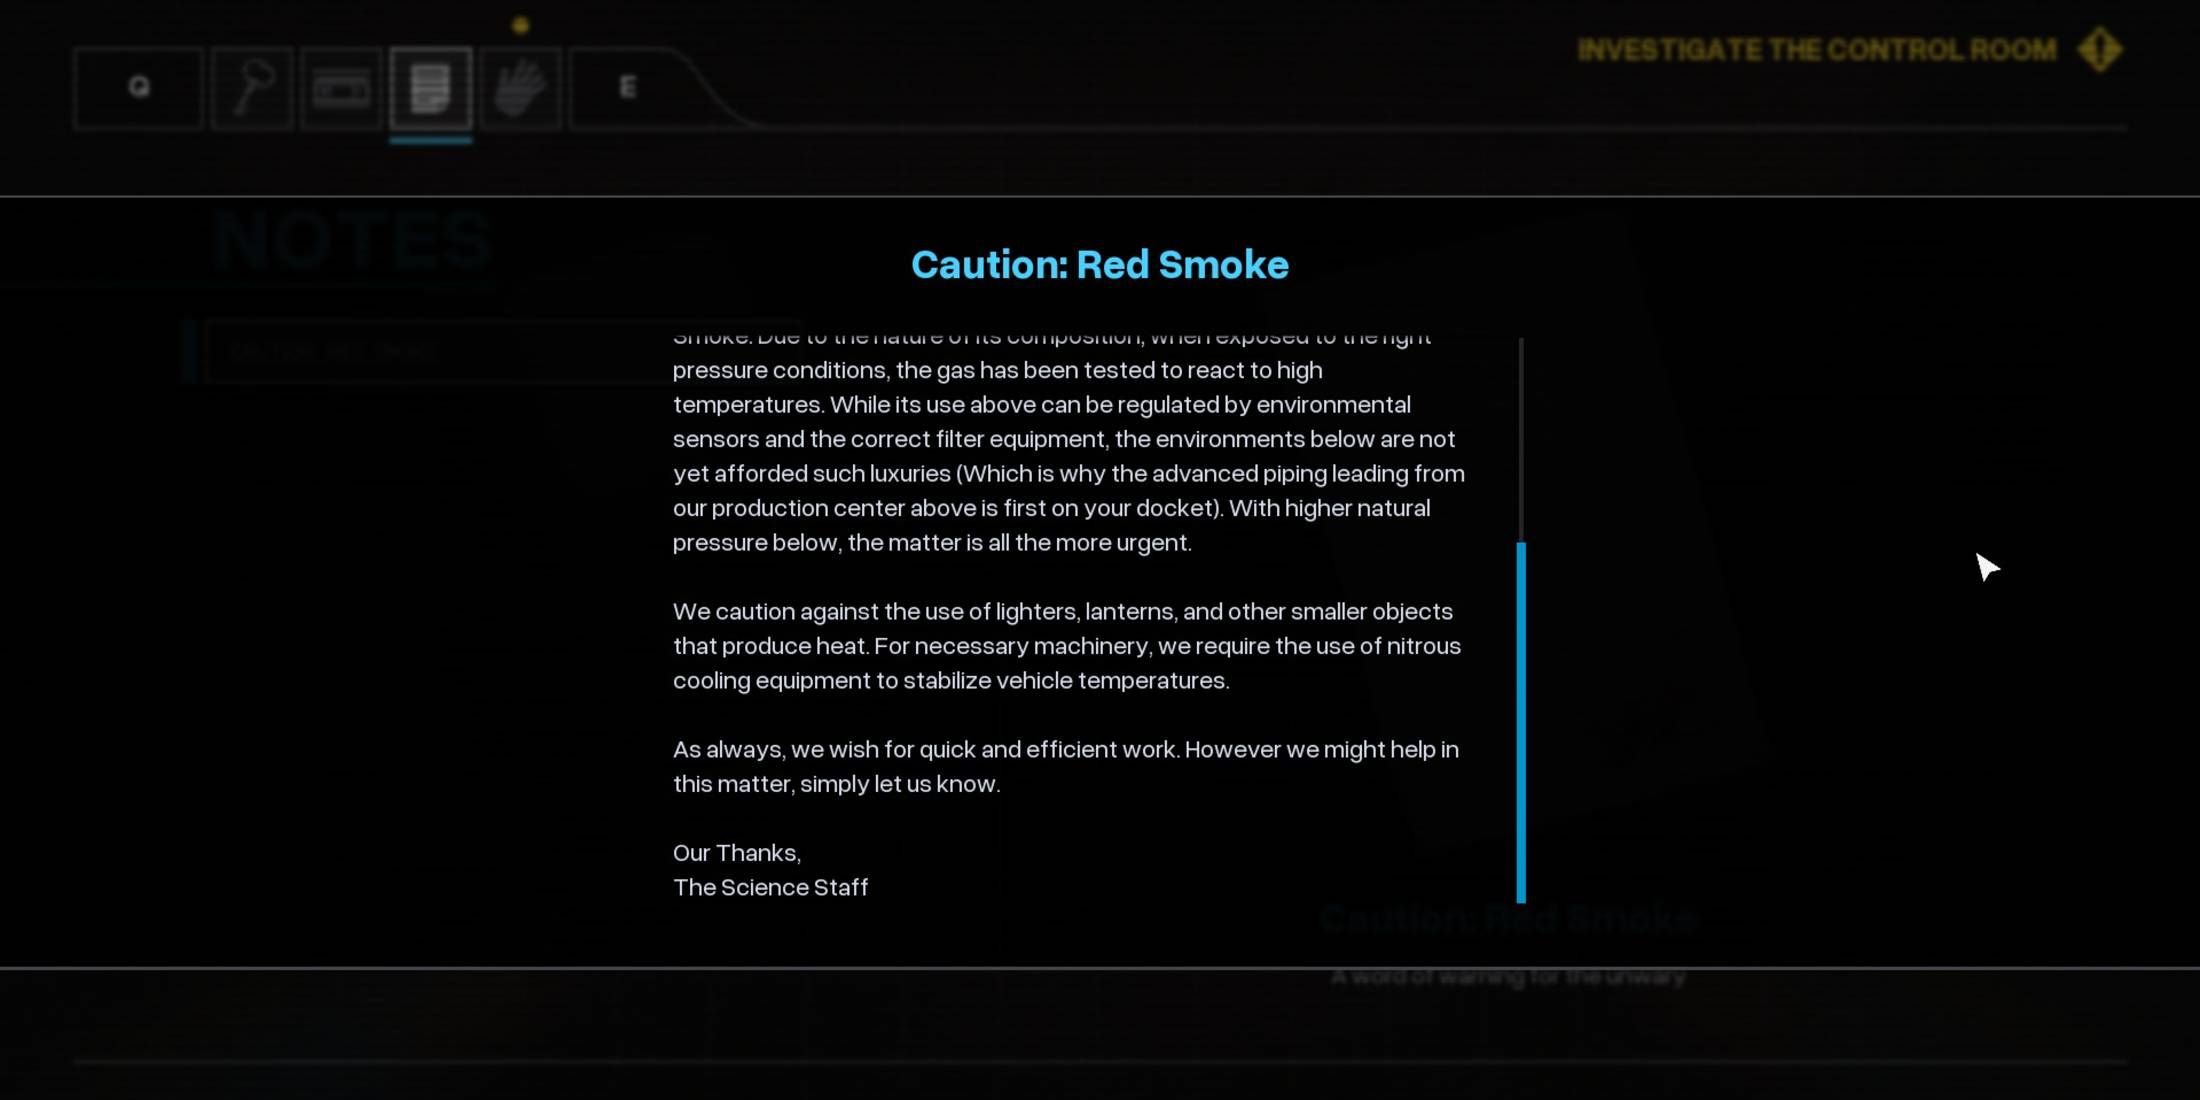
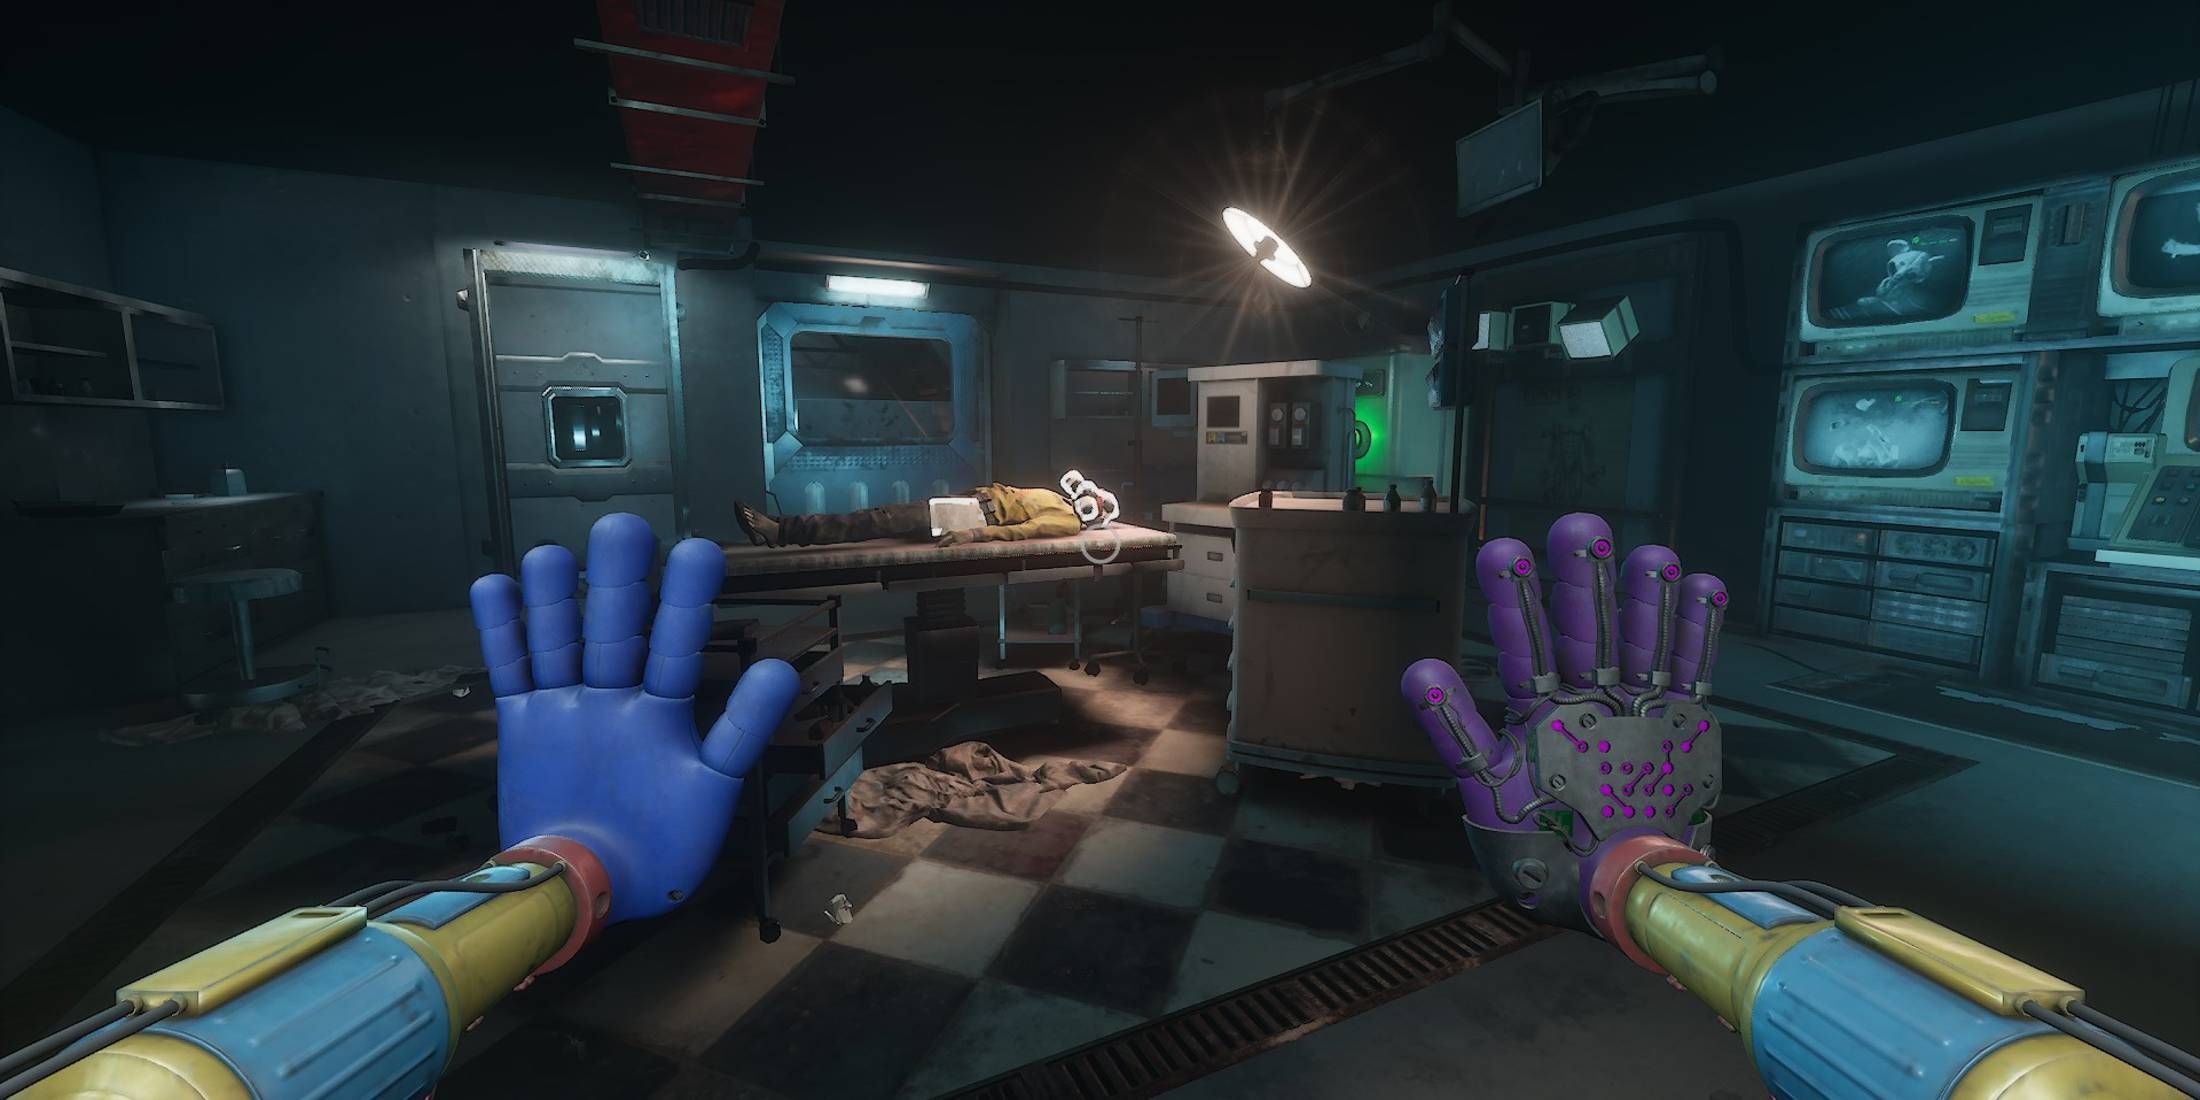
Caution: Red Smoke
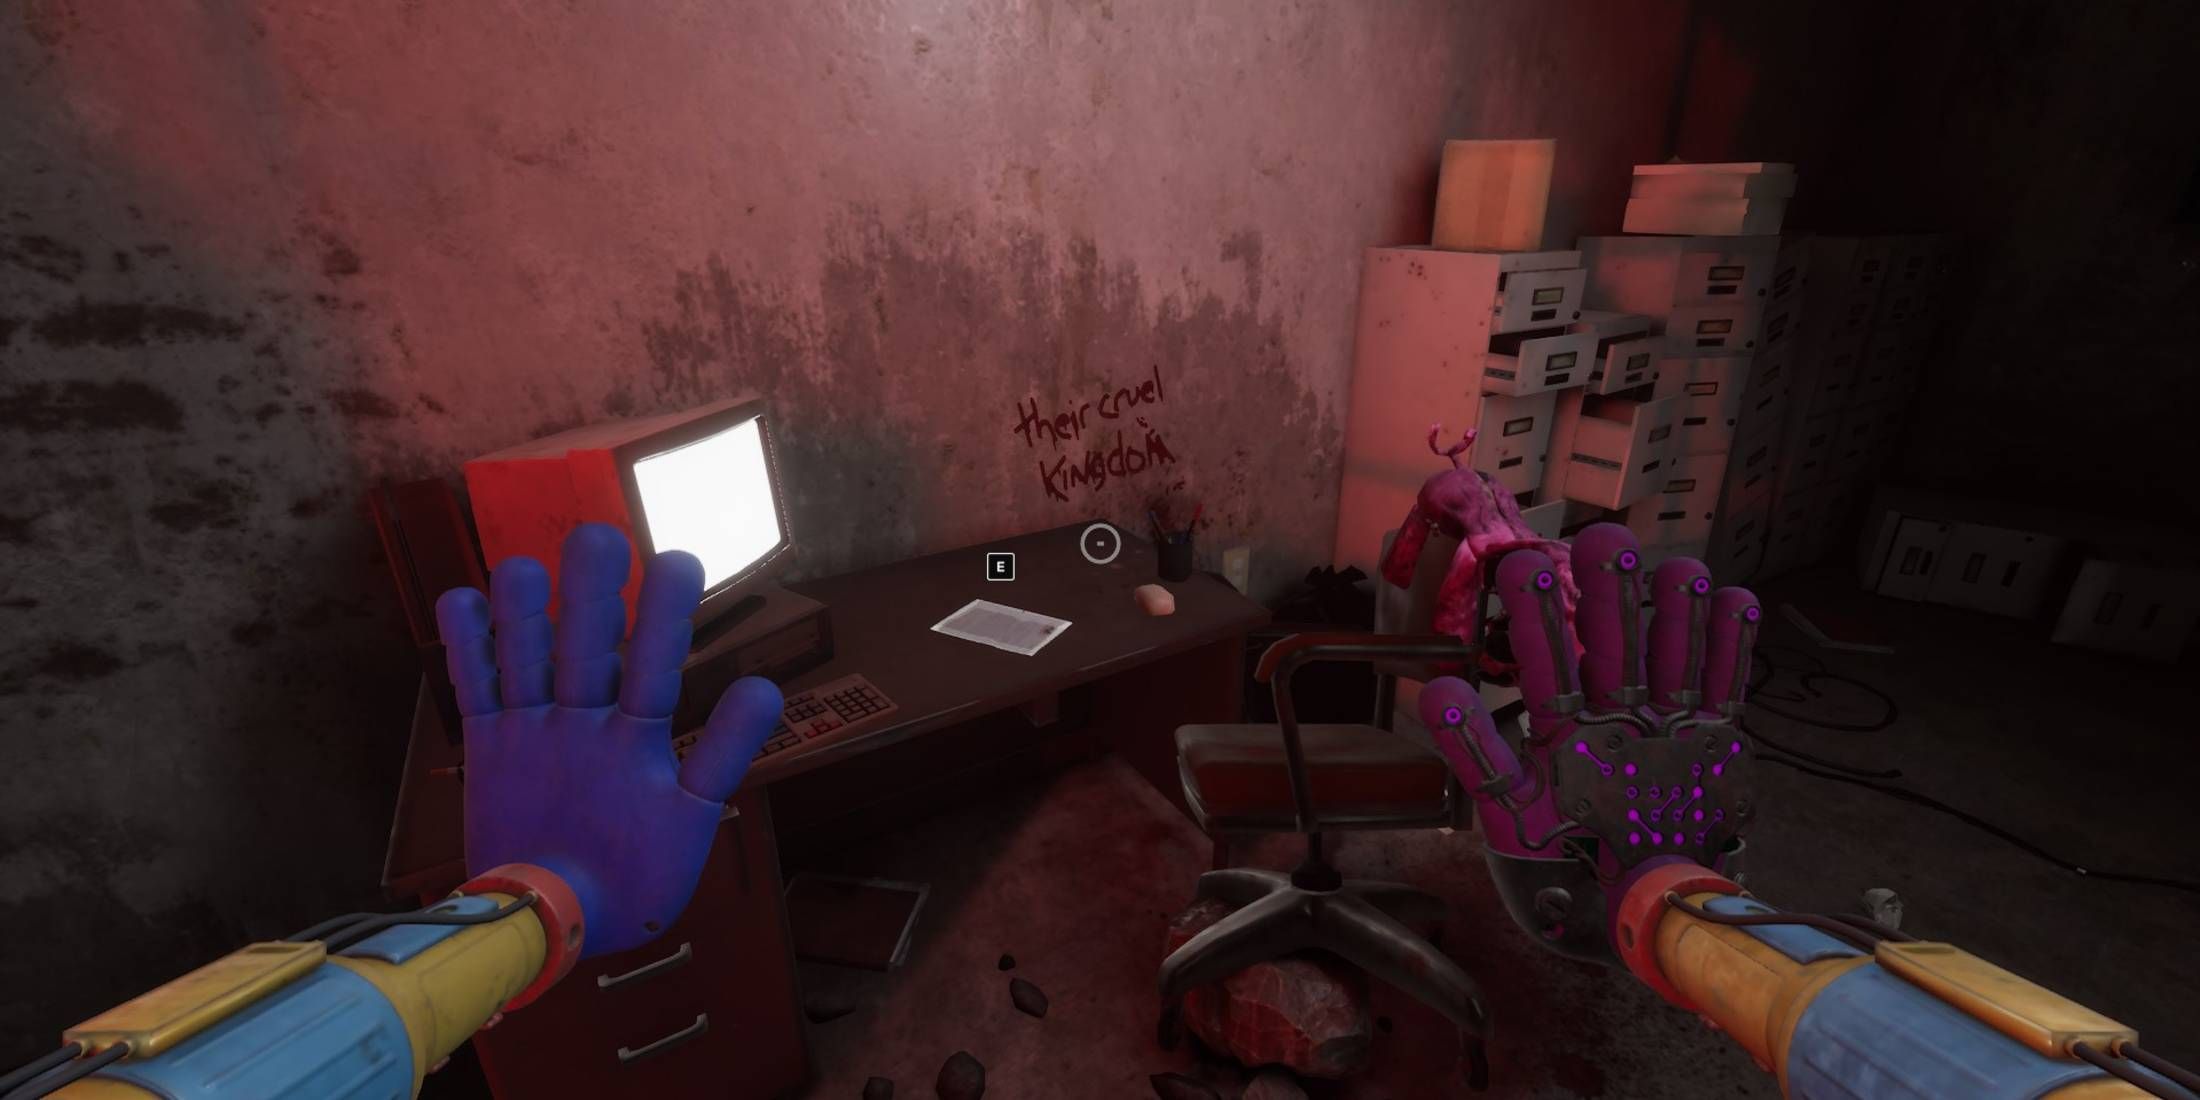
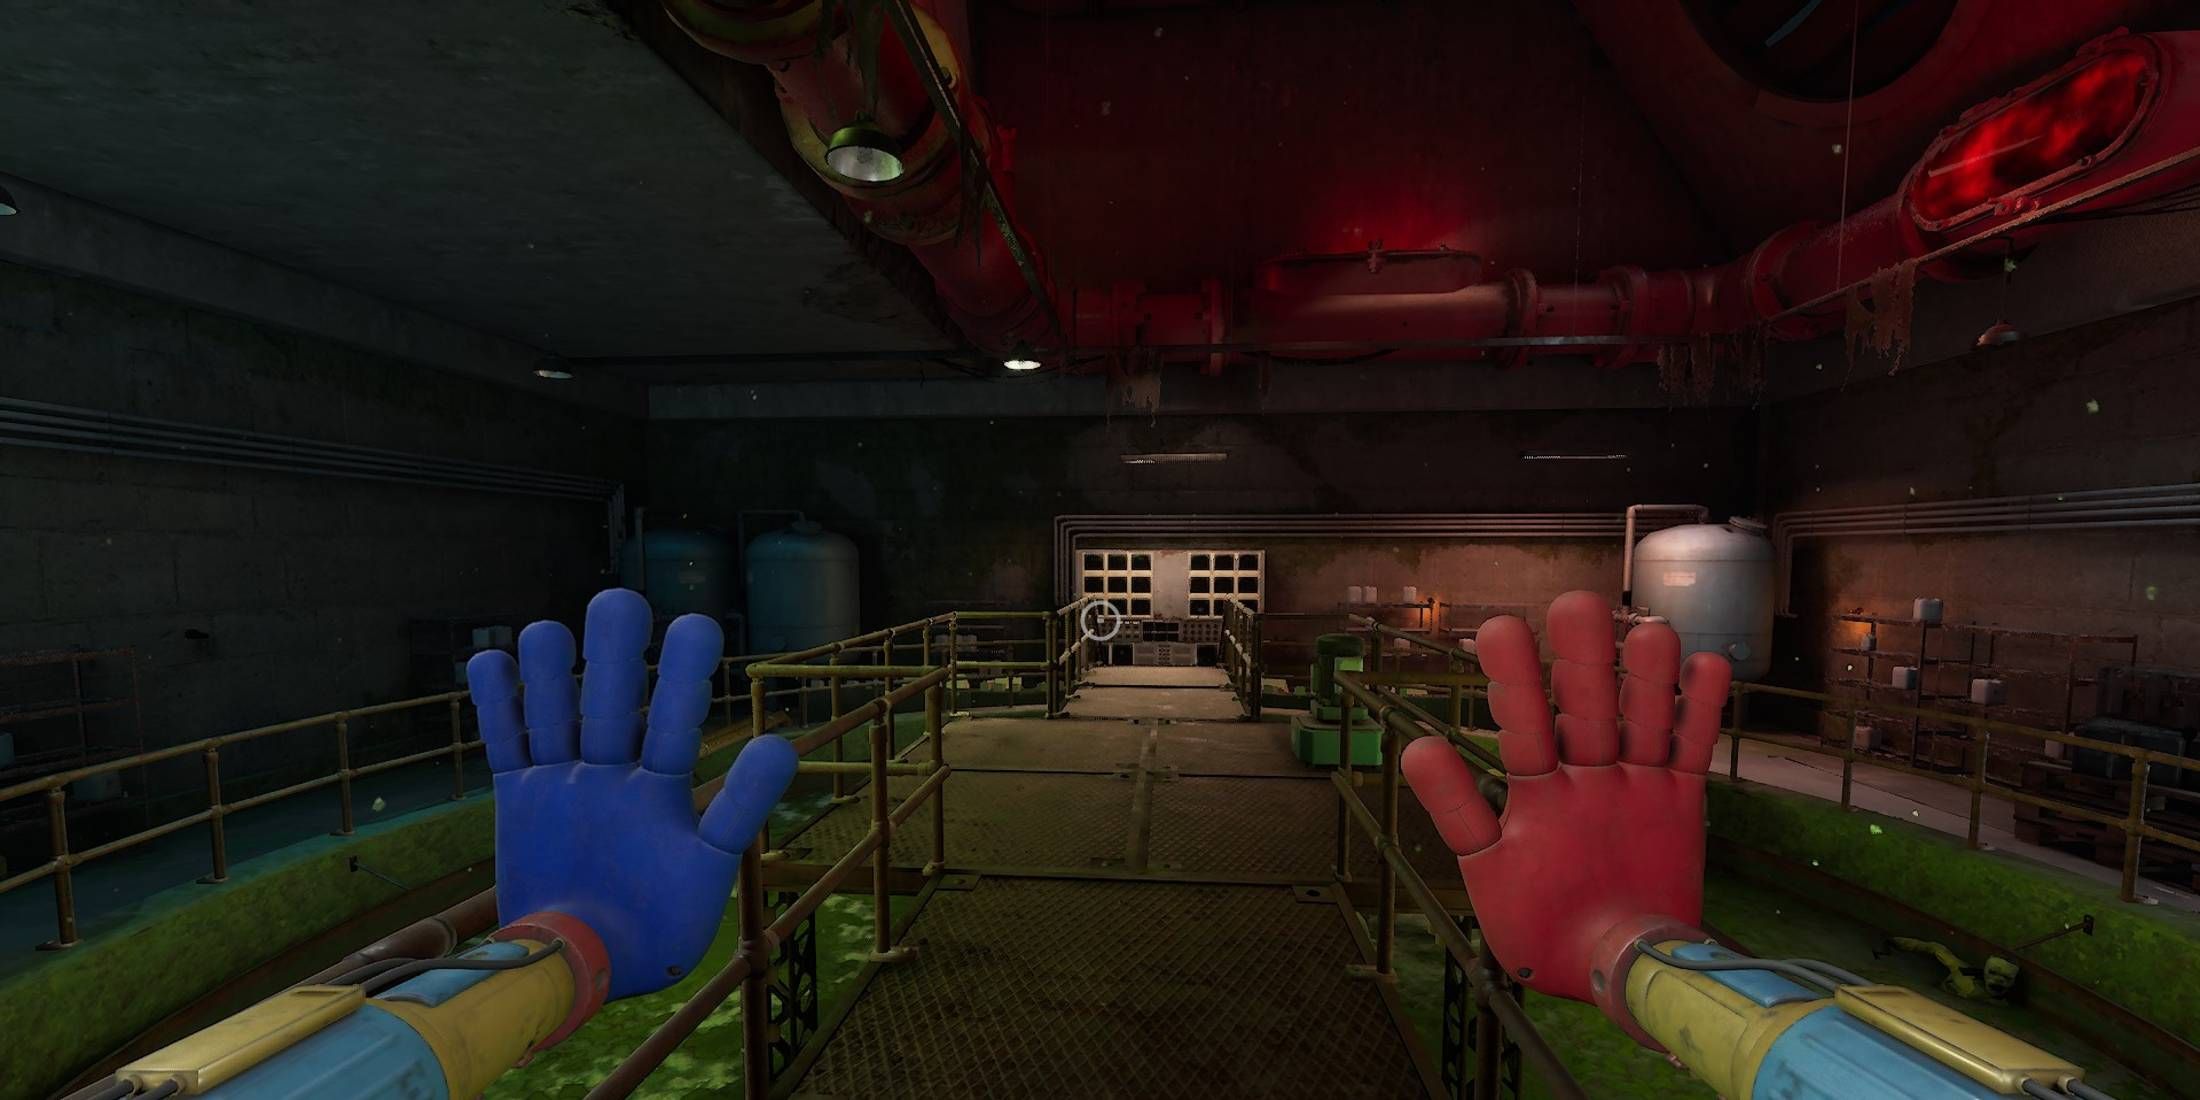
- Auto Save File: Lift Control Room
- Objective: Investigate the Control Room
As you launch into Chapter 4, you begin with a tutorial segment. The initial puzzle is designed to be straightforward, serving as a guide. To navigate a small chasm, employ your grab pack to swing, collect a battery, insert it in a slot beside a scanner hand, and then use the scanner to unlock the door. Instead of entering Caves 1A via the path that opens up, veer into the room on your left. Inside this room, you’ll discover a note near a TV resting on a table.
This memo, sent by our productive workplace, concerns a safety matter about red-colored smoke. They remind employees that this substance is extremely flammable. However, it’s important to clarify that if you encounter red smoke while using a flare gun in video games, the player character won’t die from it, contrary to what the memo suggests.
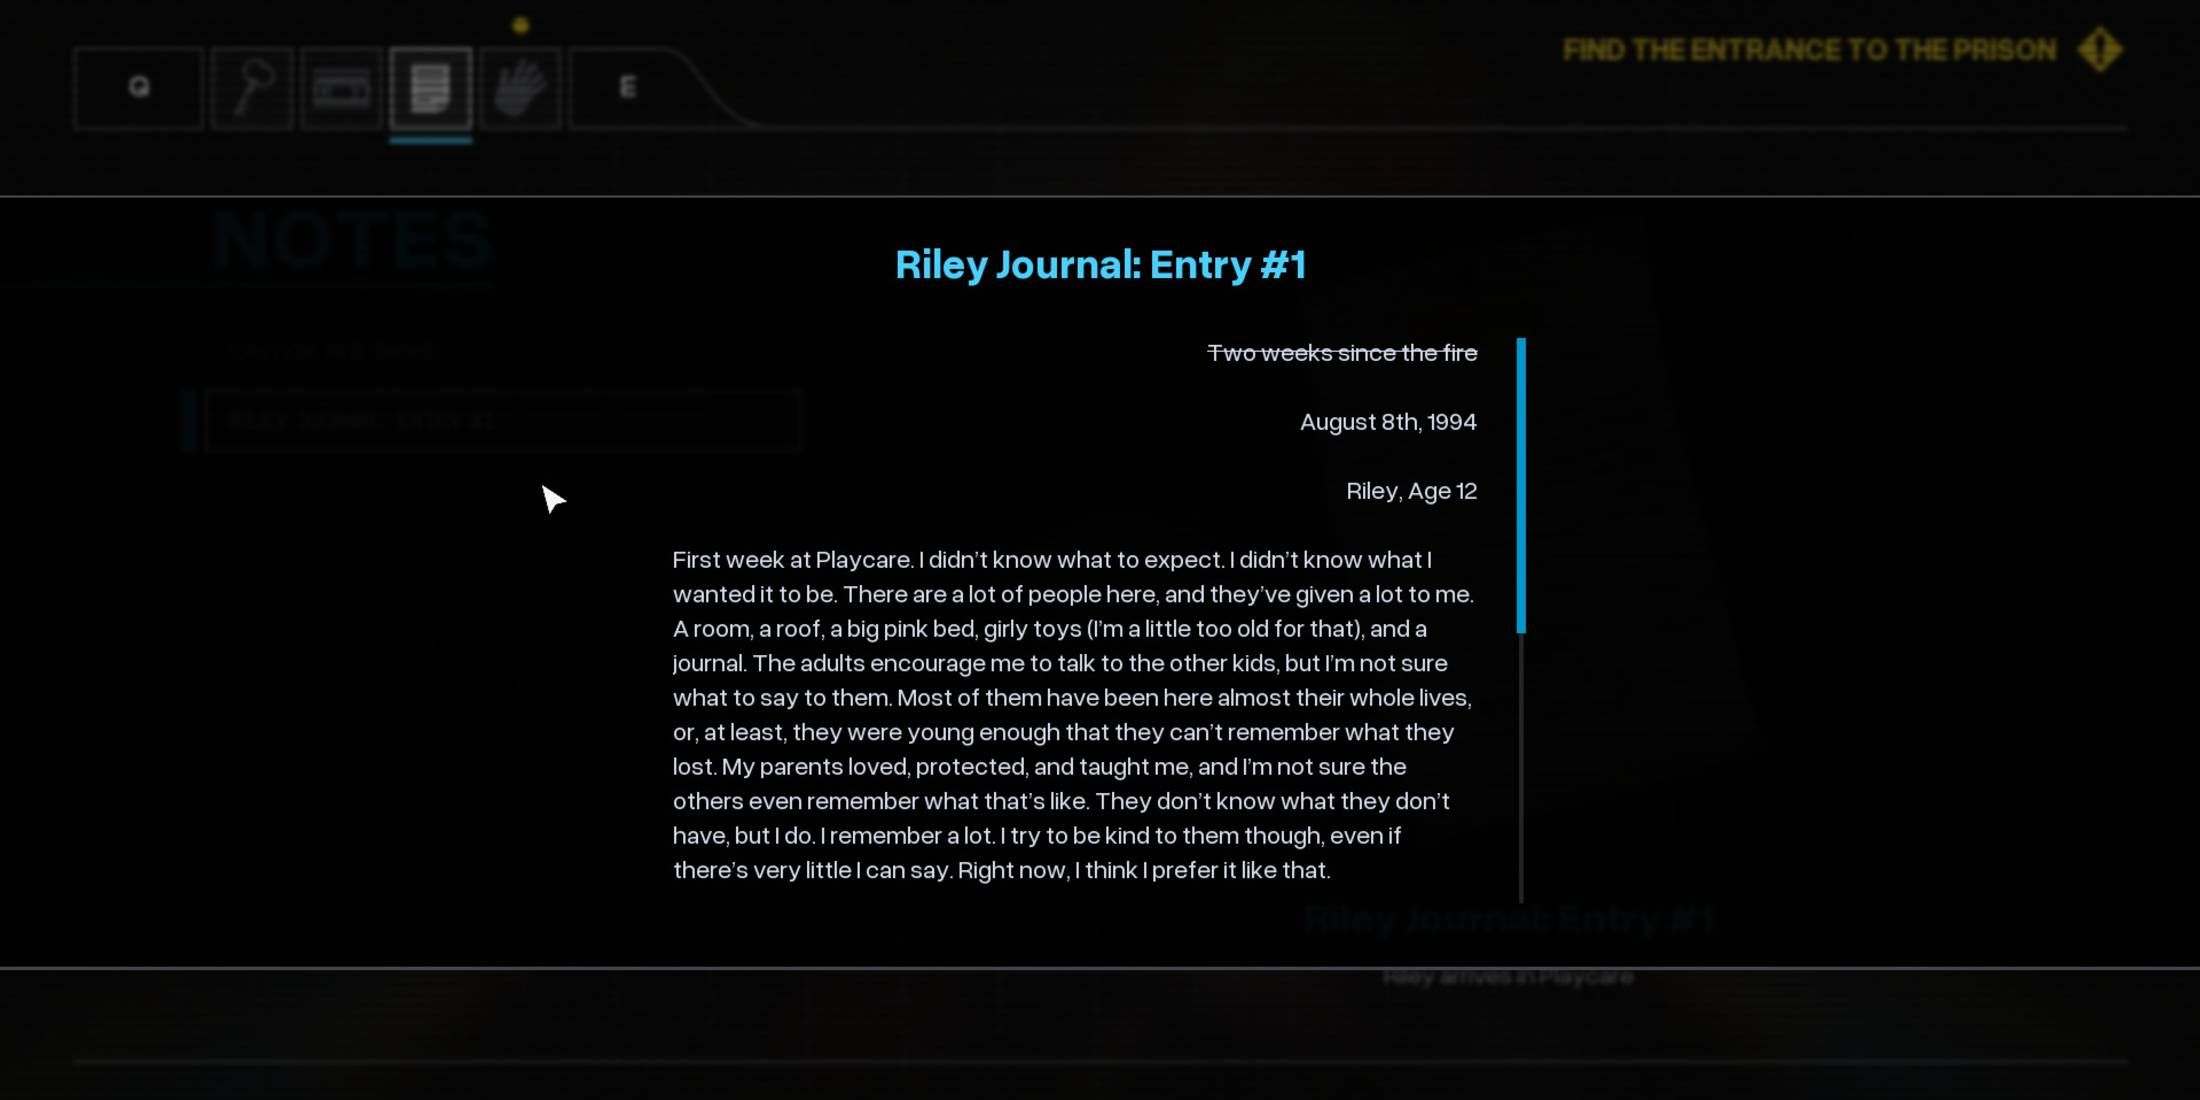
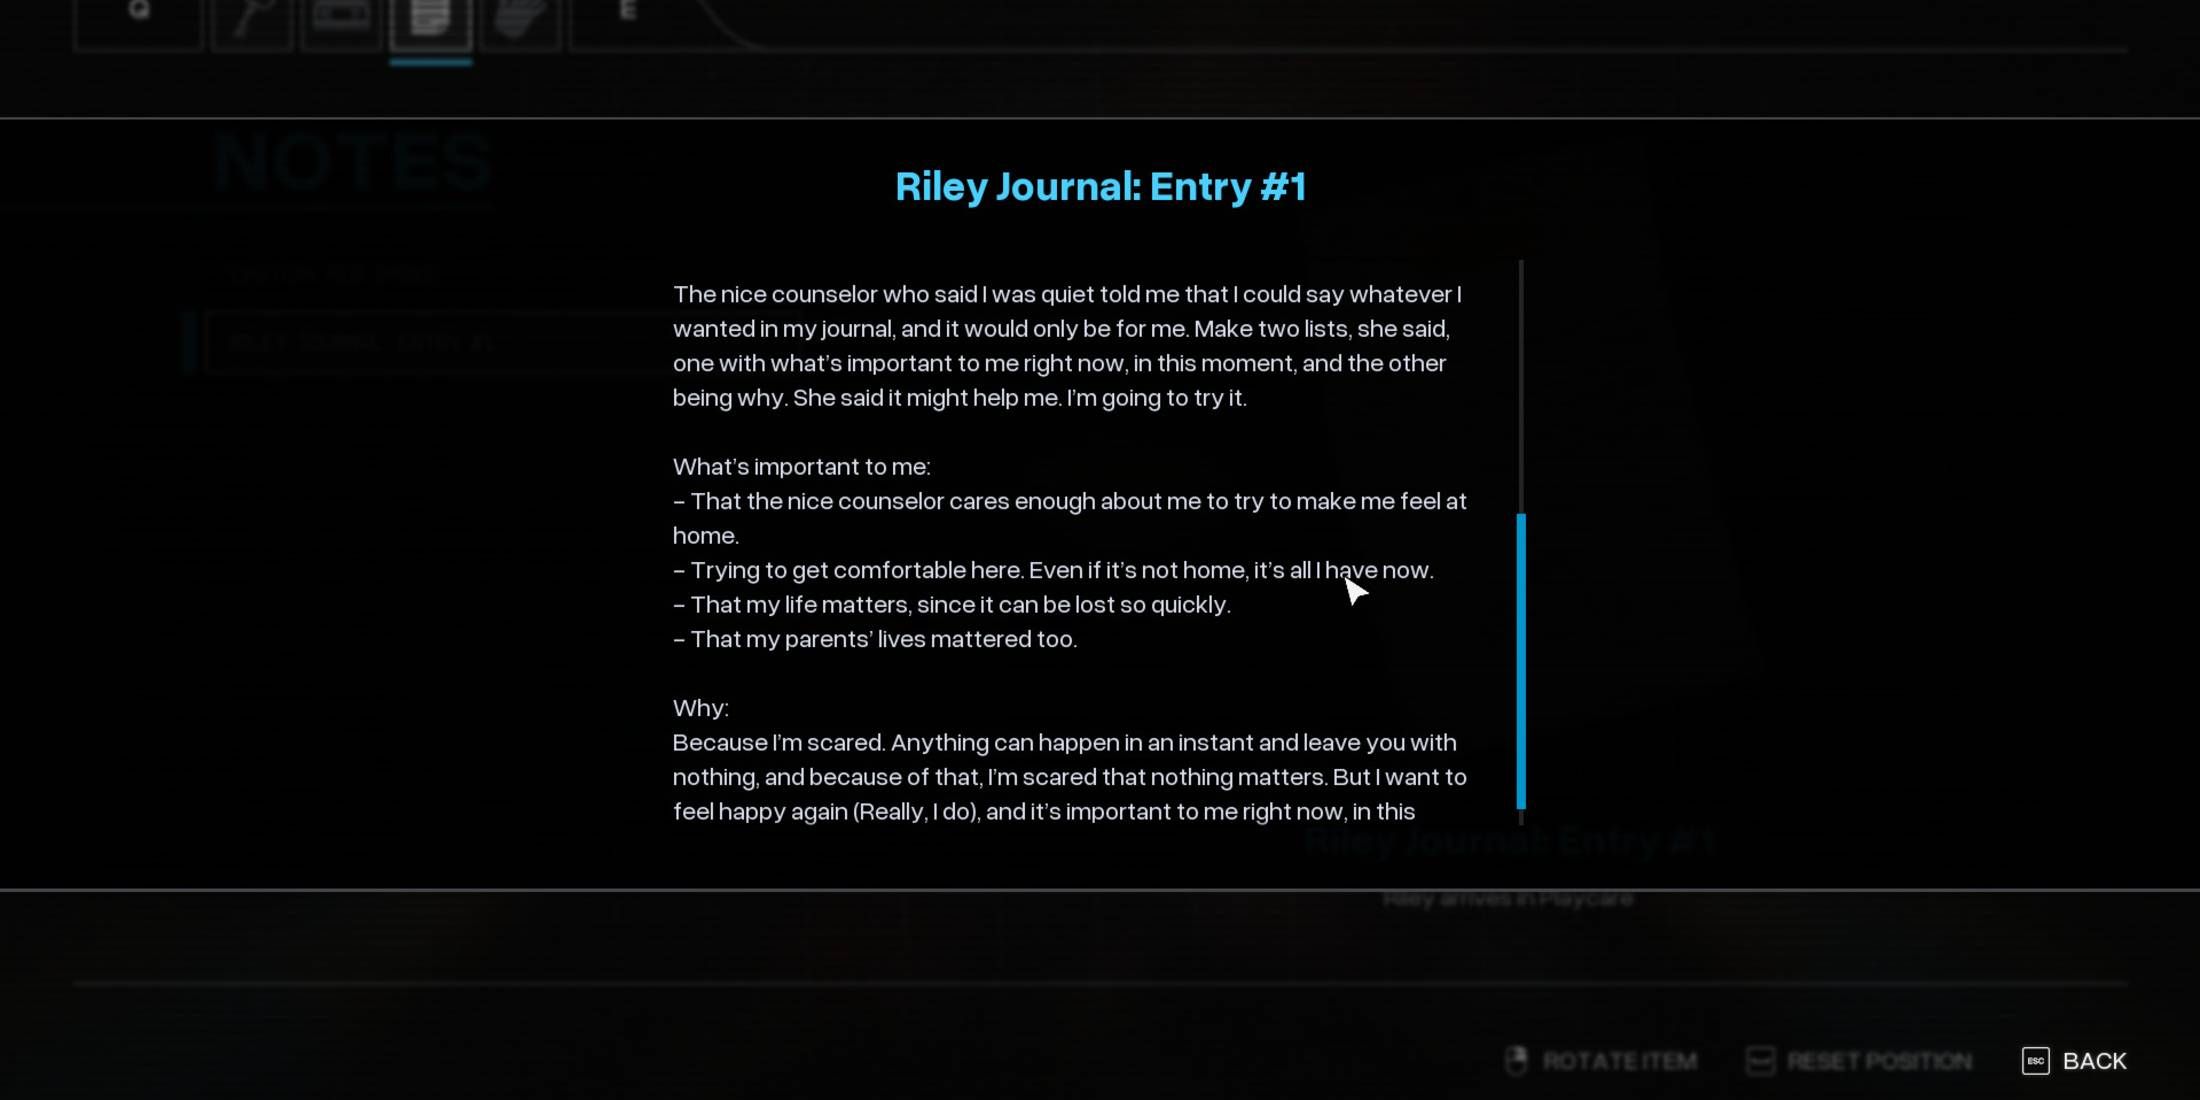
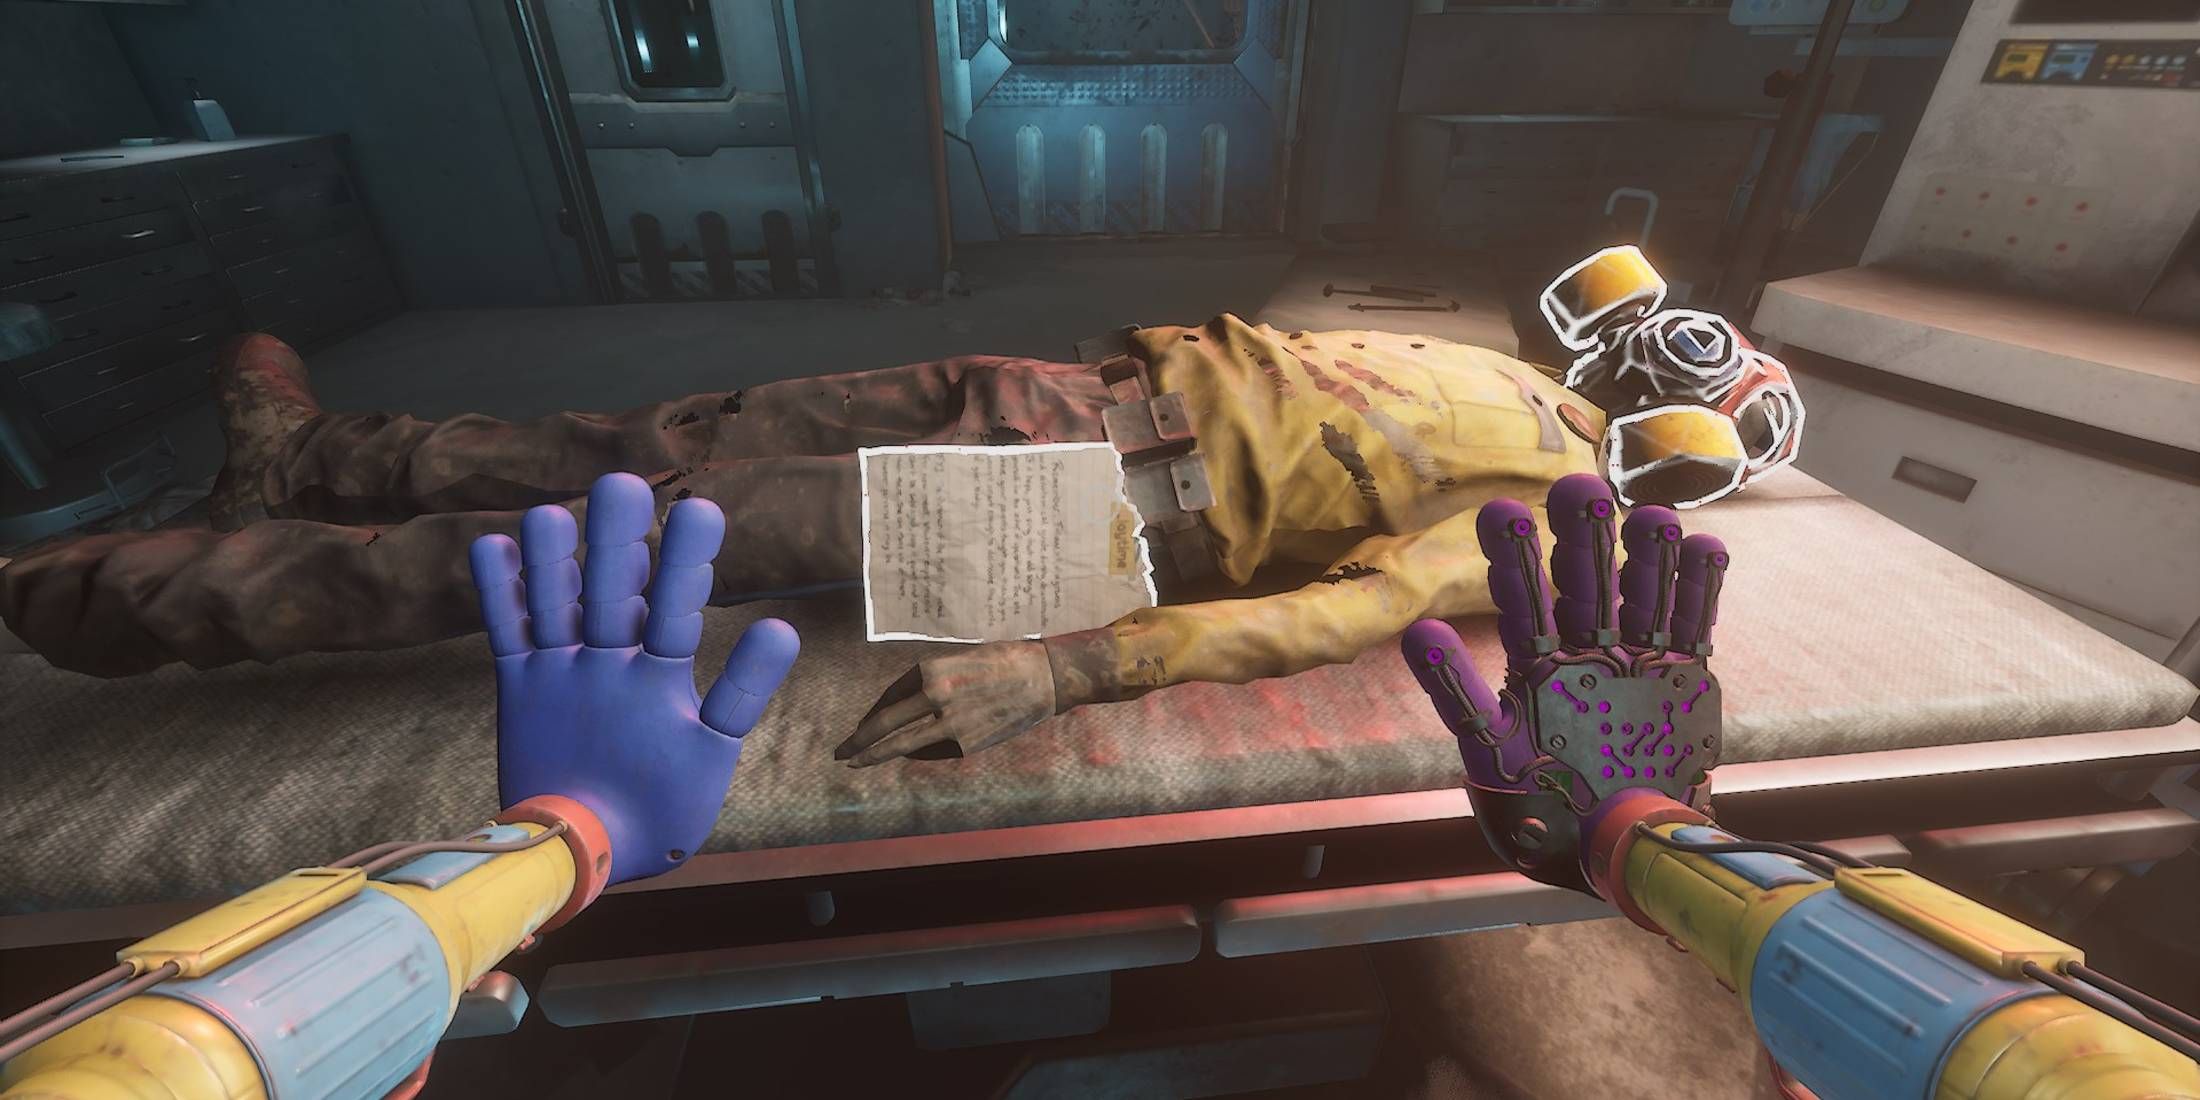
Riley’s Journal: Entry #1
- Auto Save File: Toy Graveyard
- Objective: Find another way into the Prison
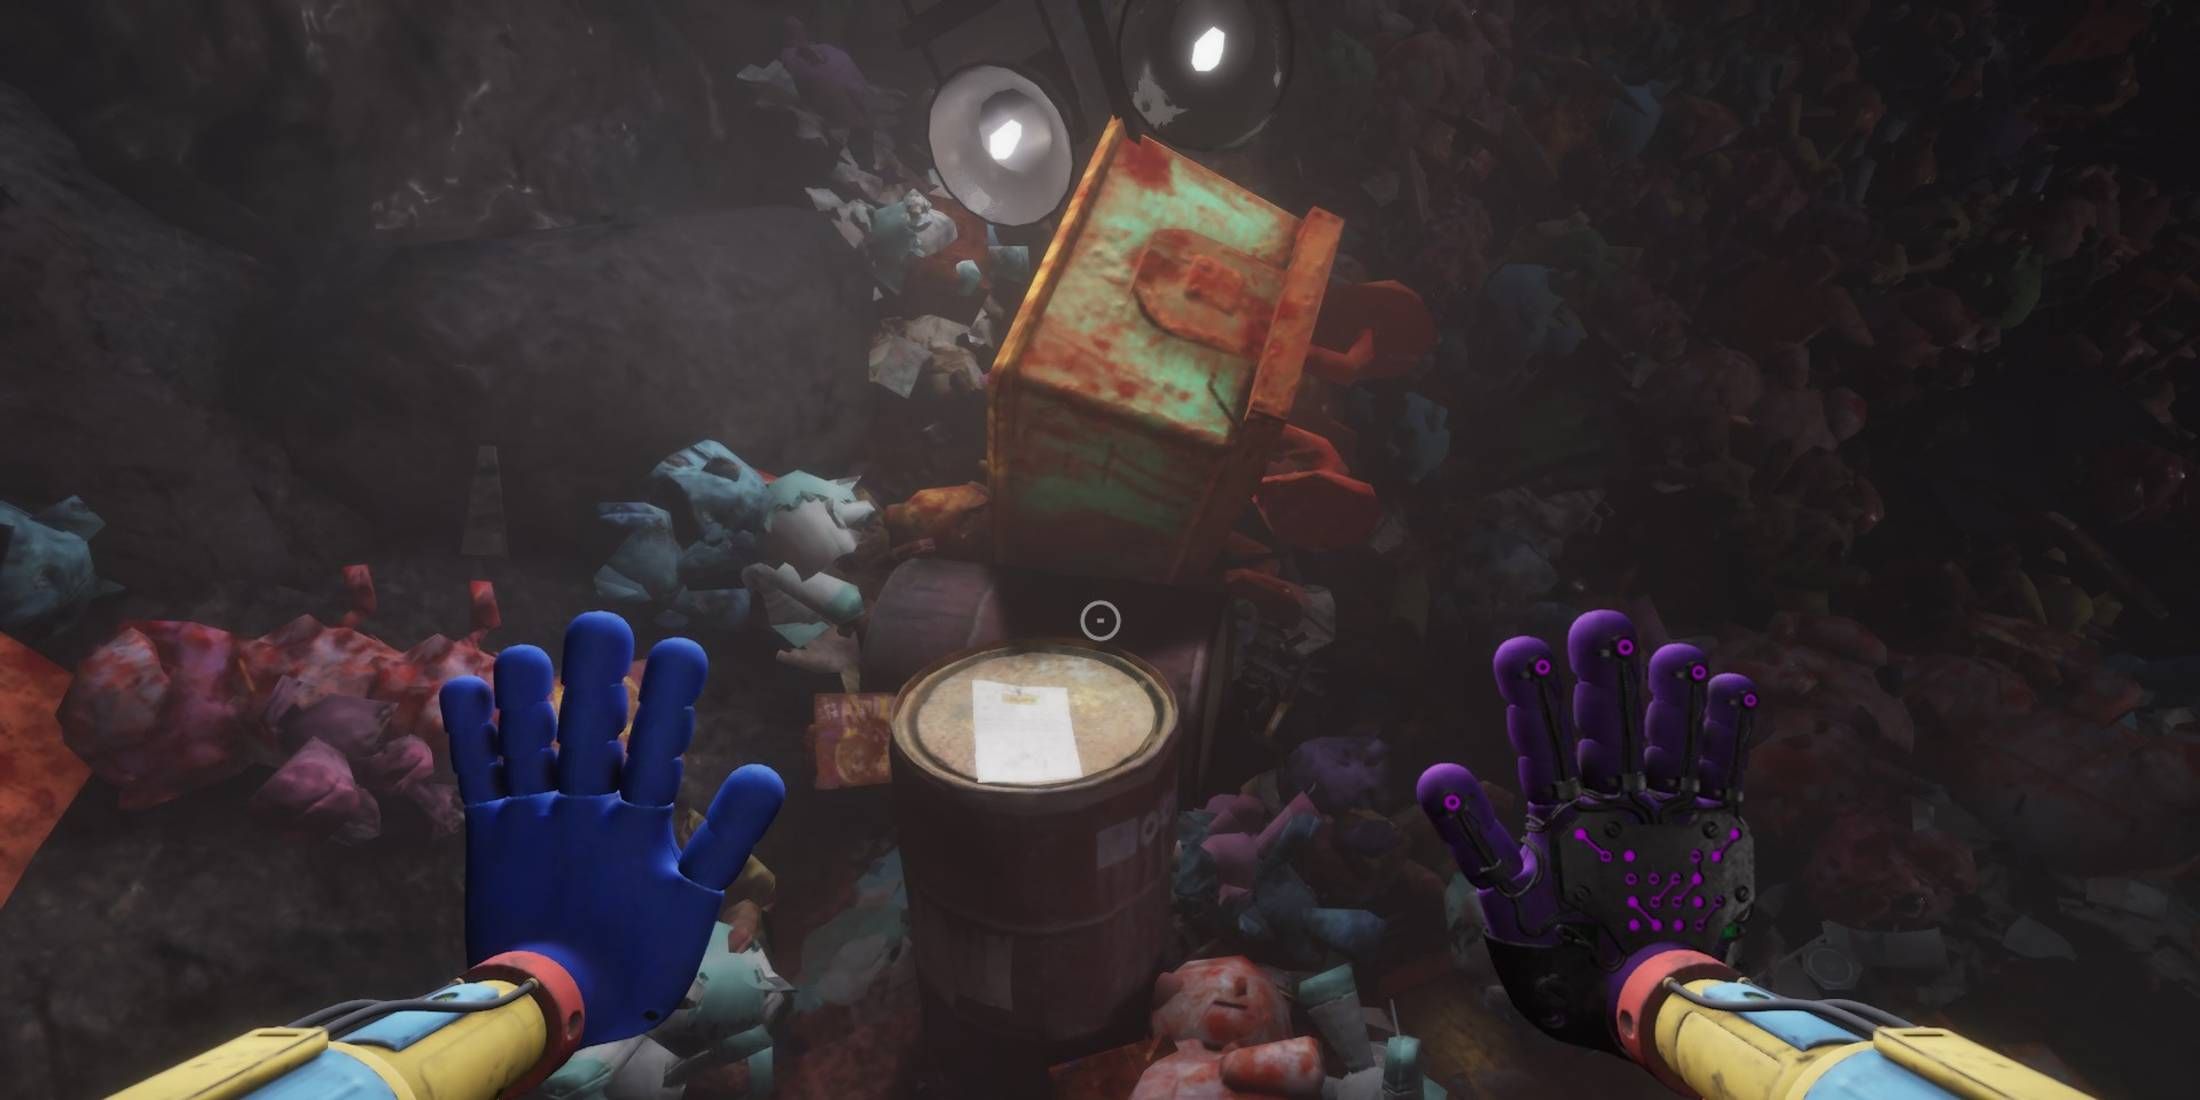
At the beginning of the game, you’ll find yourself in Cave 1A, where you’ll discover a vast chamber overflowing with piles of what appear to be discarded playthings. This toy-filled cemetery, shrouded in darkness, is partially illuminated by intermittent lights that guide your way. The first flickering light reveals a barrel, on which the initial entry of Riley’s Journal can be found.
I, a resident at the Playcare orphanage, found myself here under the care of this institution. In my personal journal, I share my journey leading up to this point, guided by a kind counselor’s advice to organize my thoughts. Among the pages, you’ll find a list of priorities that hold significance for me at present, and the reasons behind their importance.
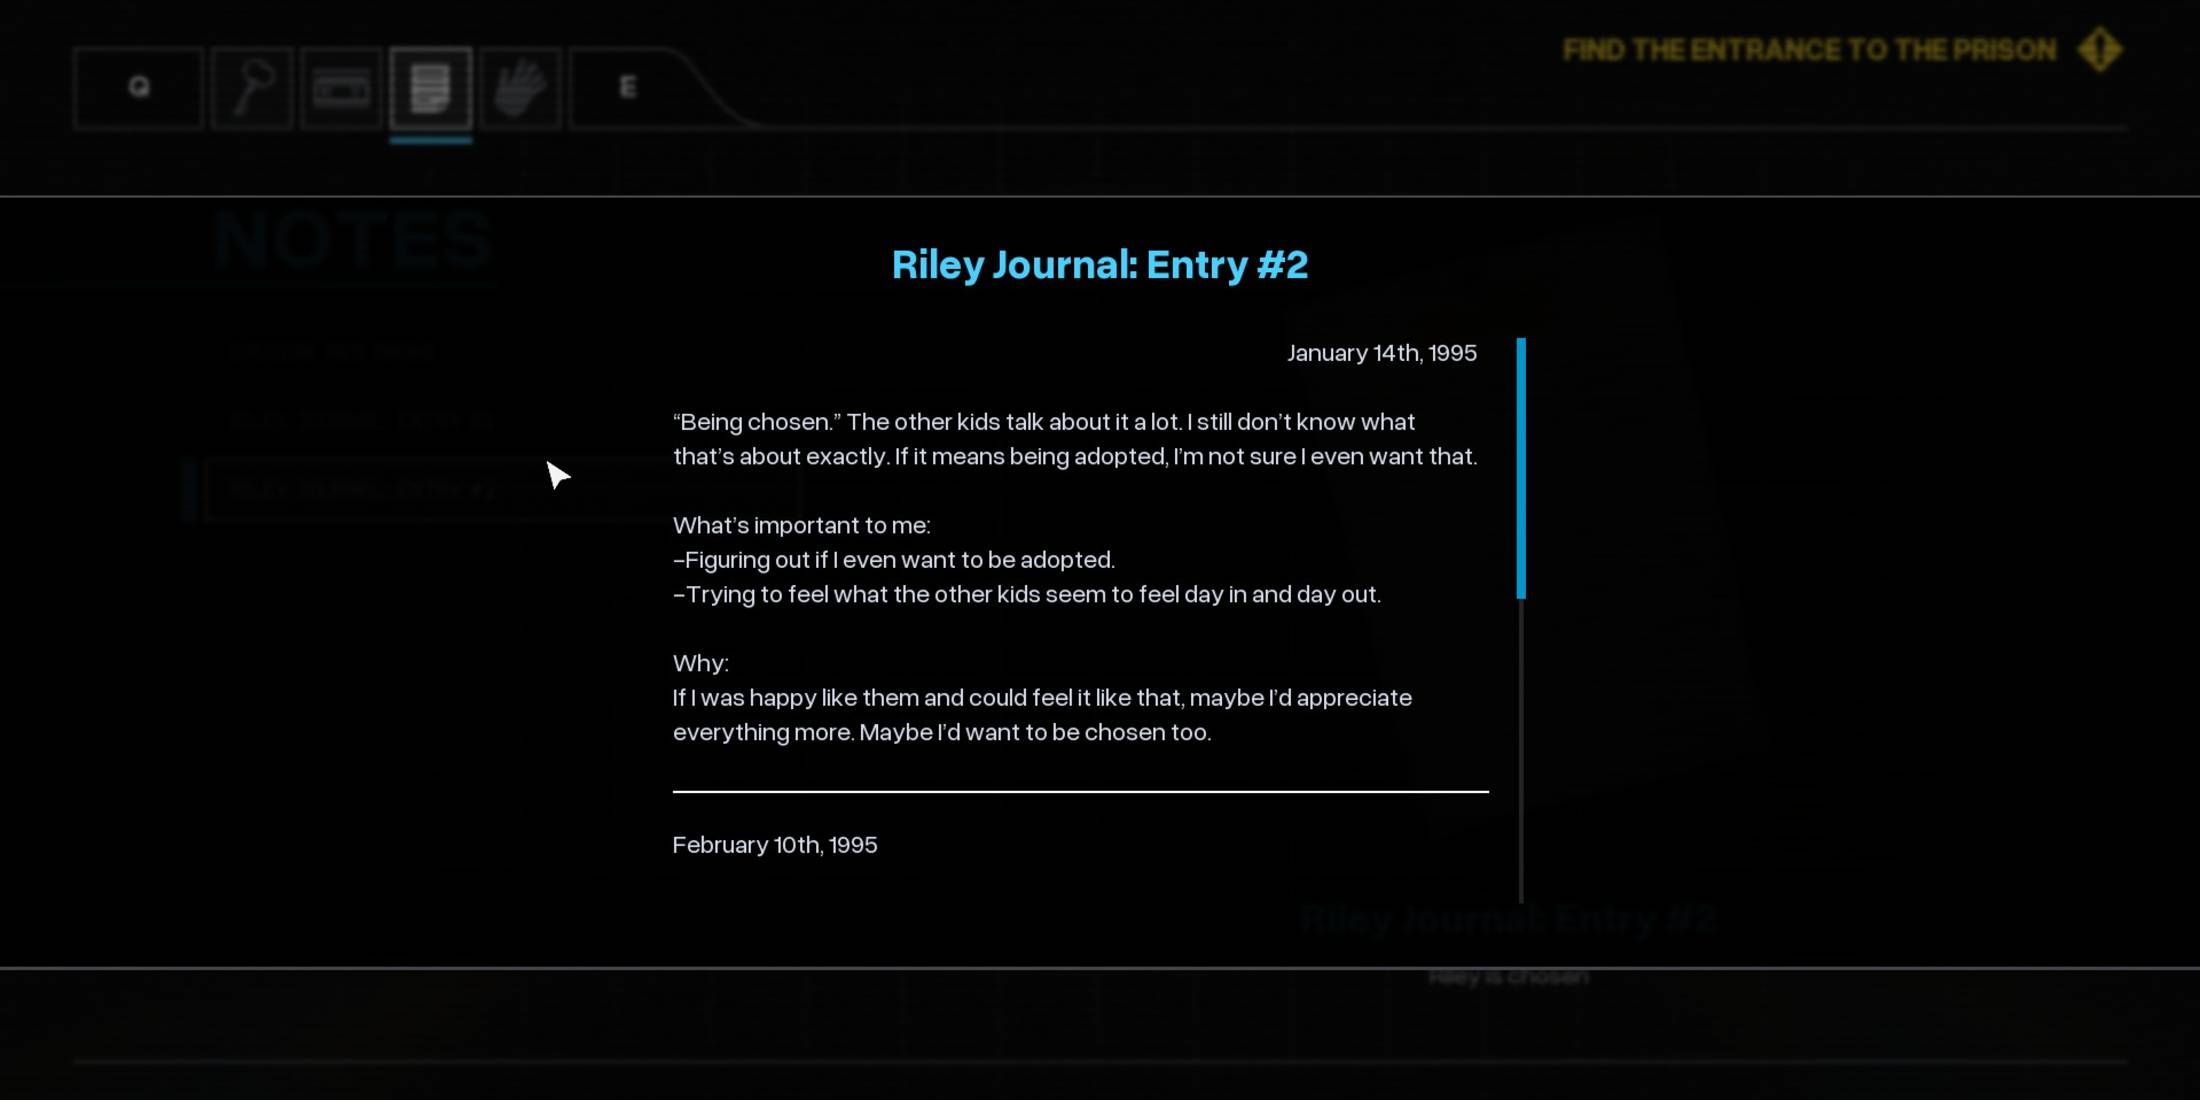
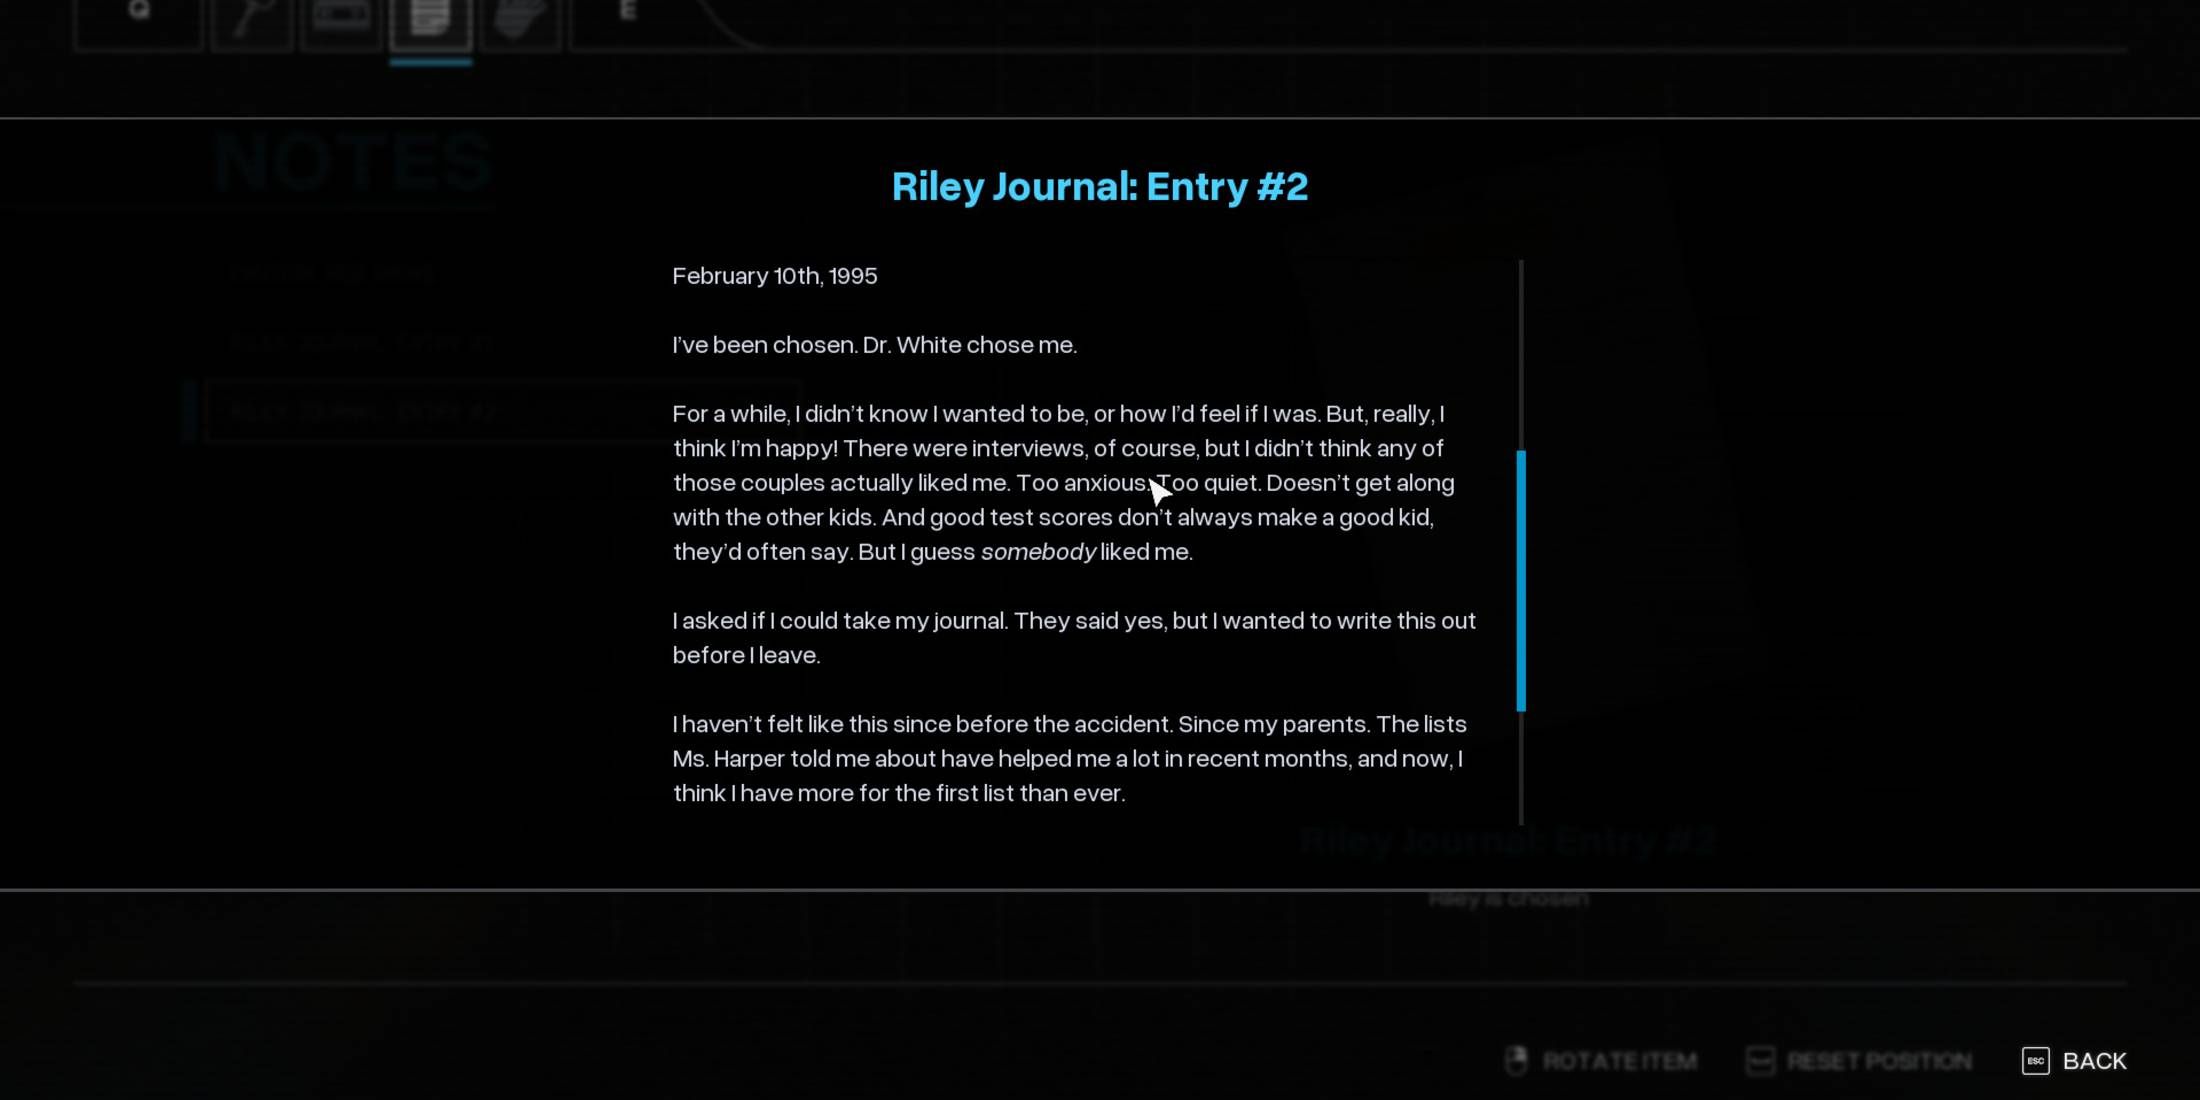
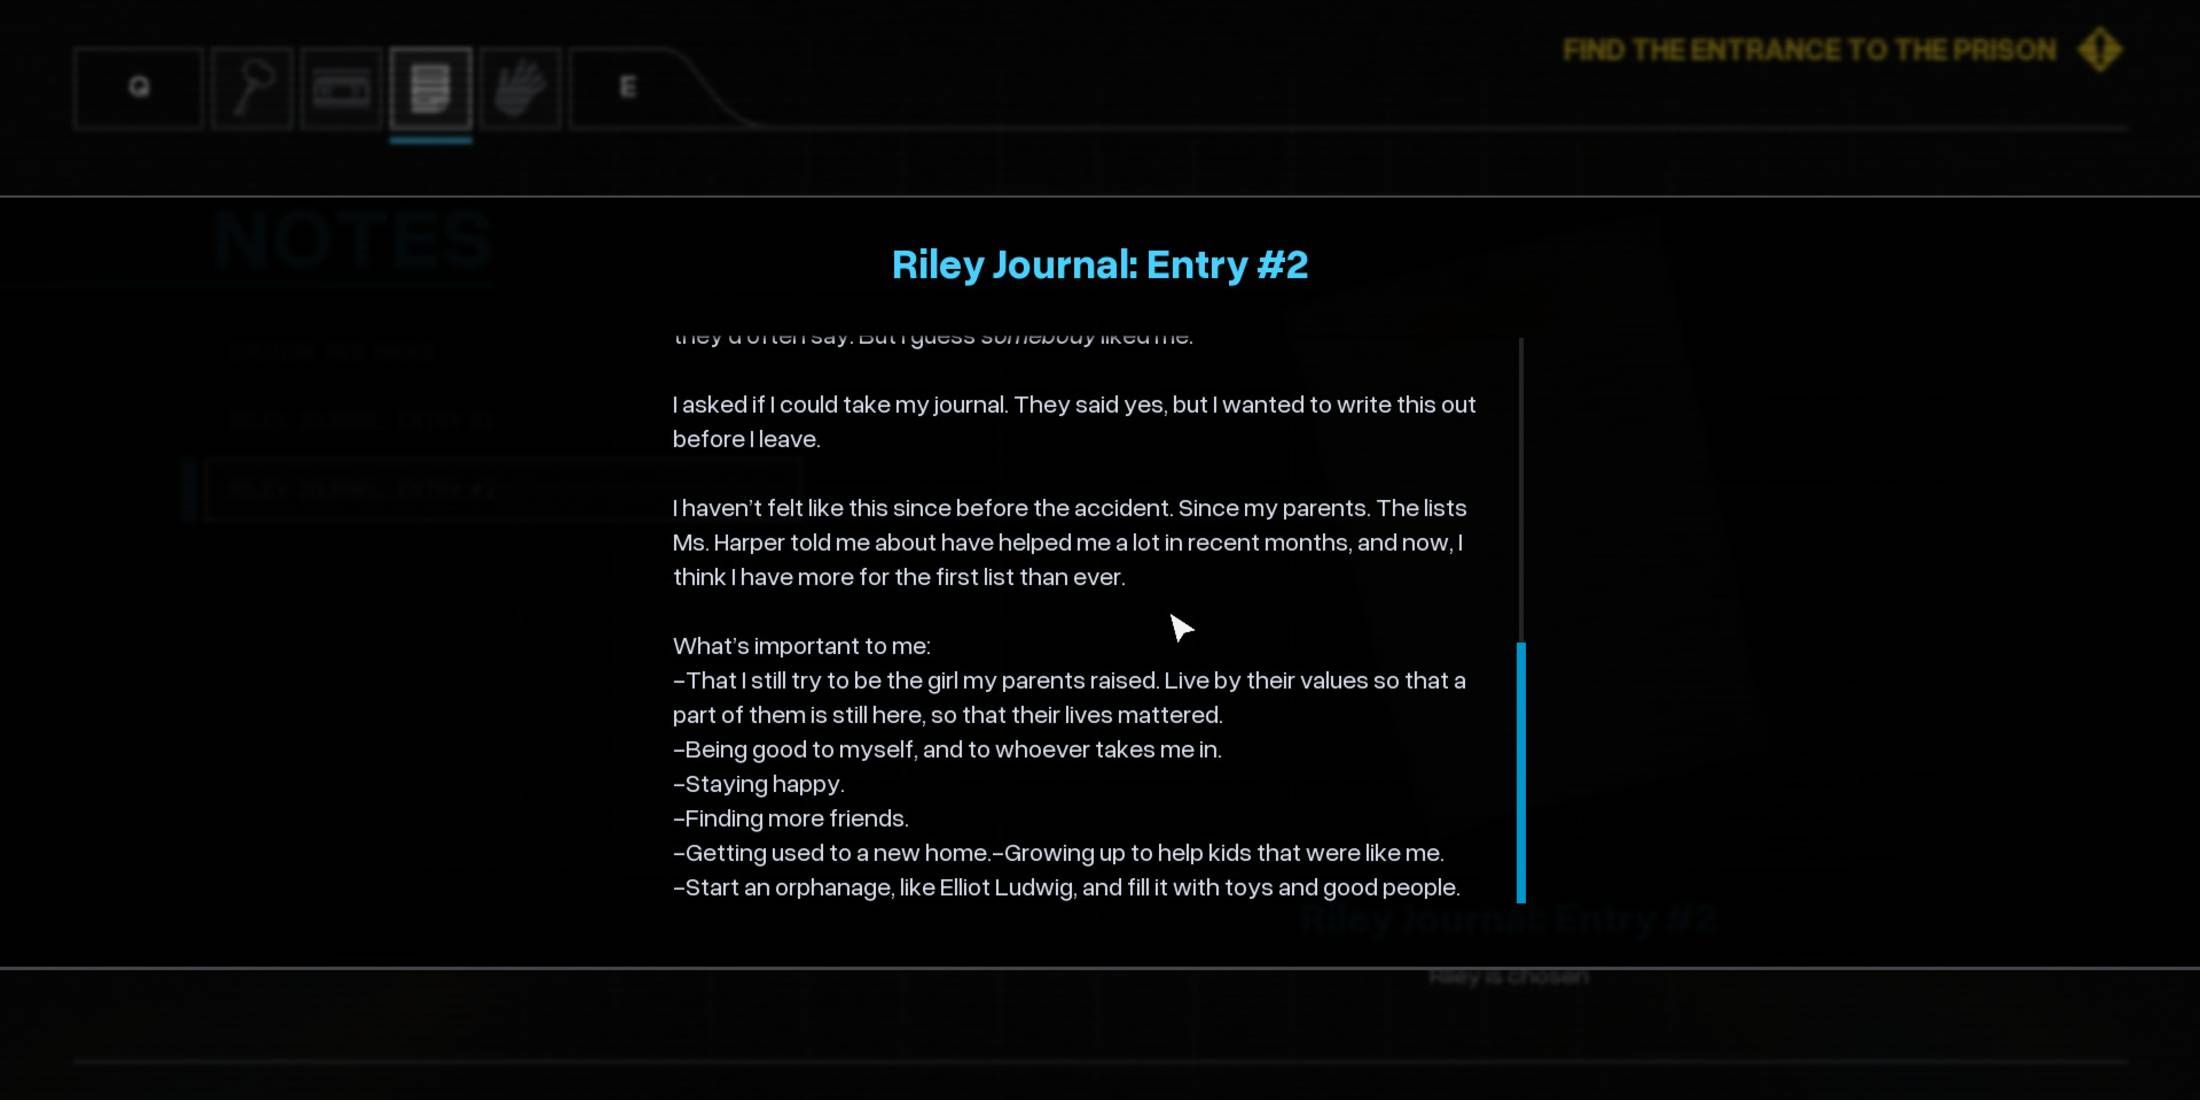
Riley’s Journal: Entry #2
- Auto Save File: Toy Graveyard
- Objective: Find another way into the Prison
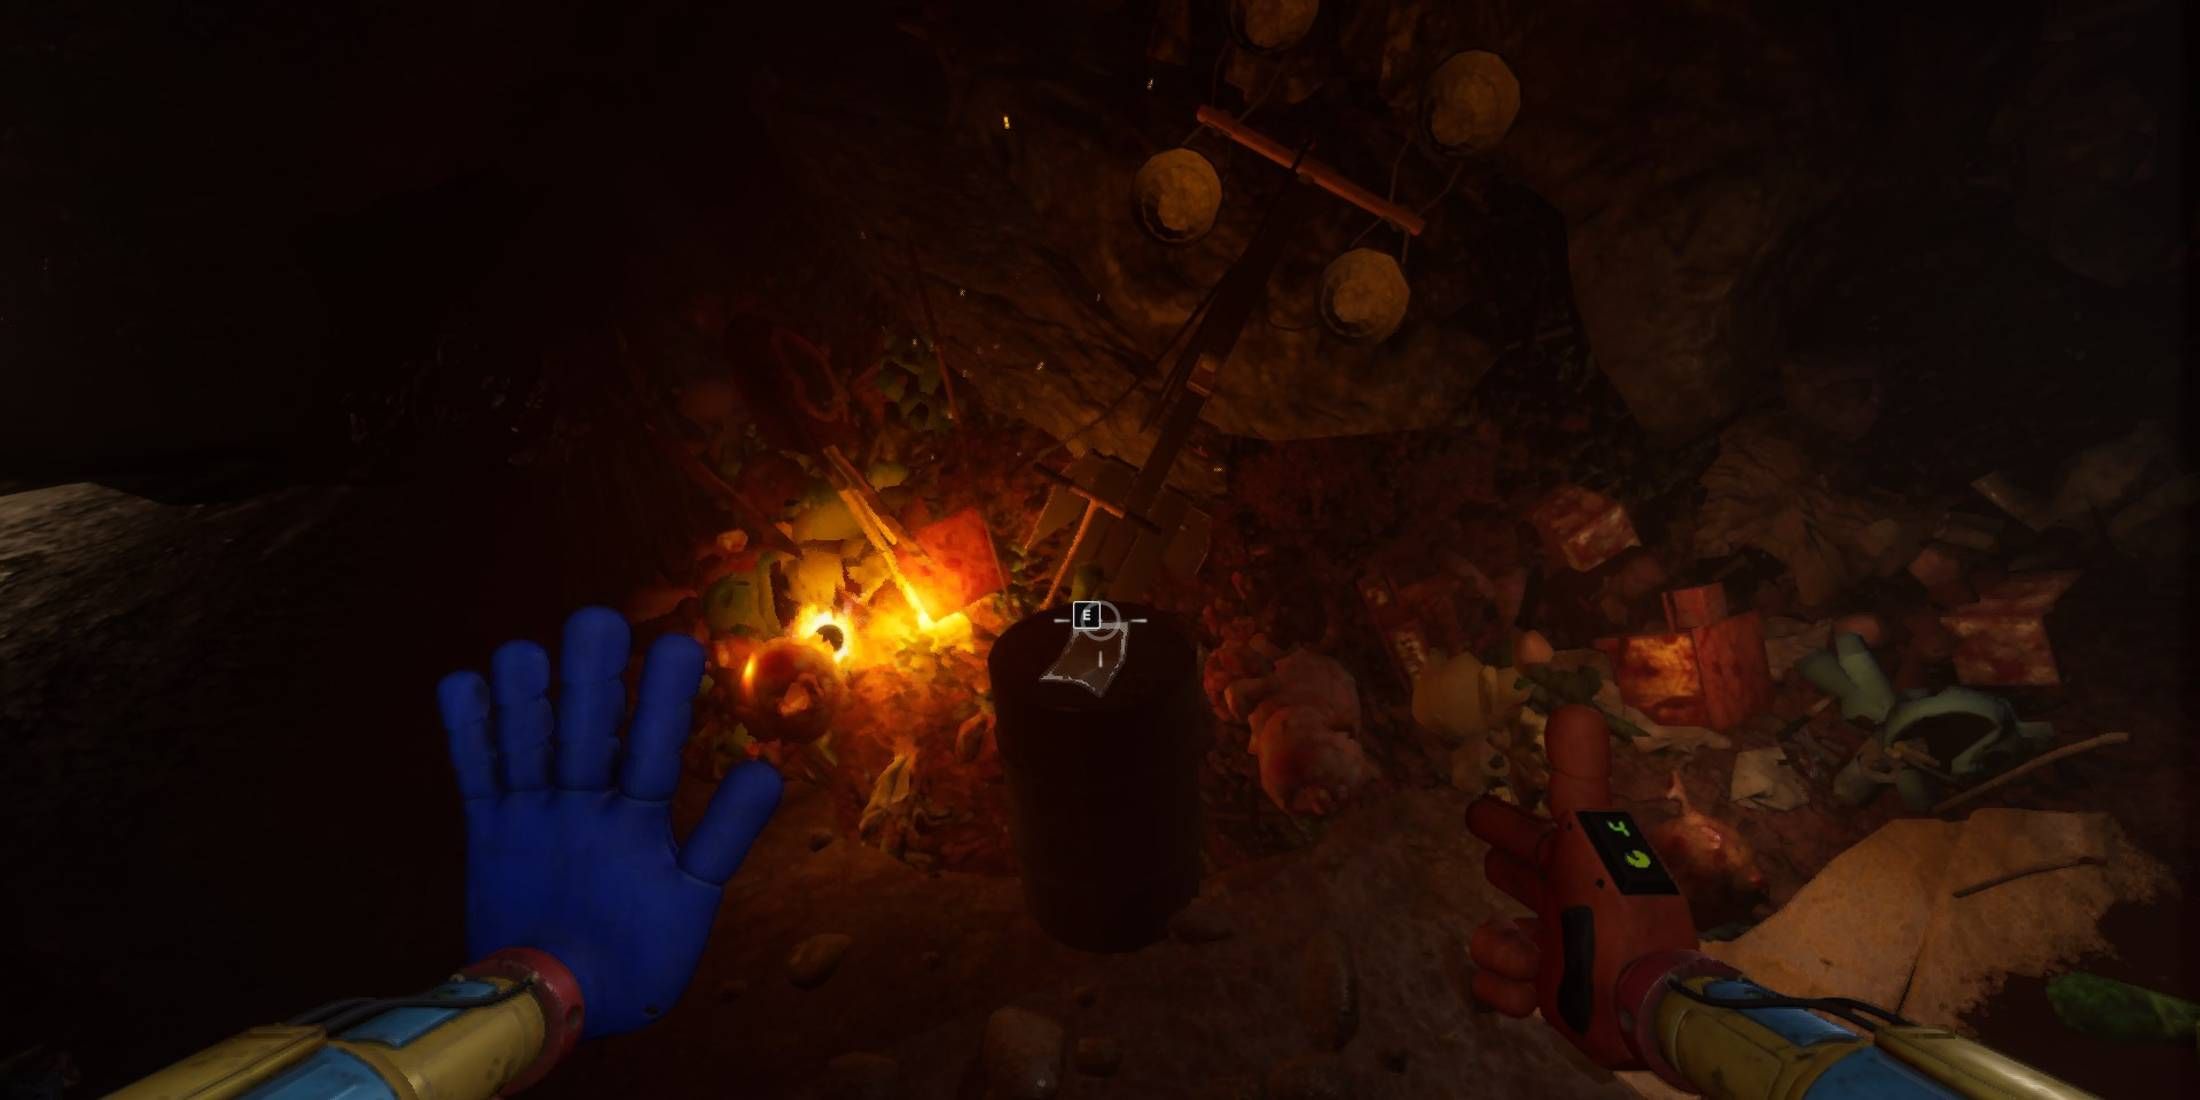
Continue along the path in the Toy Cemetery, and you’ll find another barrel marked with a note. This second note is an entry from Riley’s journal, detailing her adoption journey and the circumstances that lead to her being picked by the Doctor. Filled with anticipation for the future, she expresses her wish to embody the girl her parents raised so that a piece of them can persist within her.
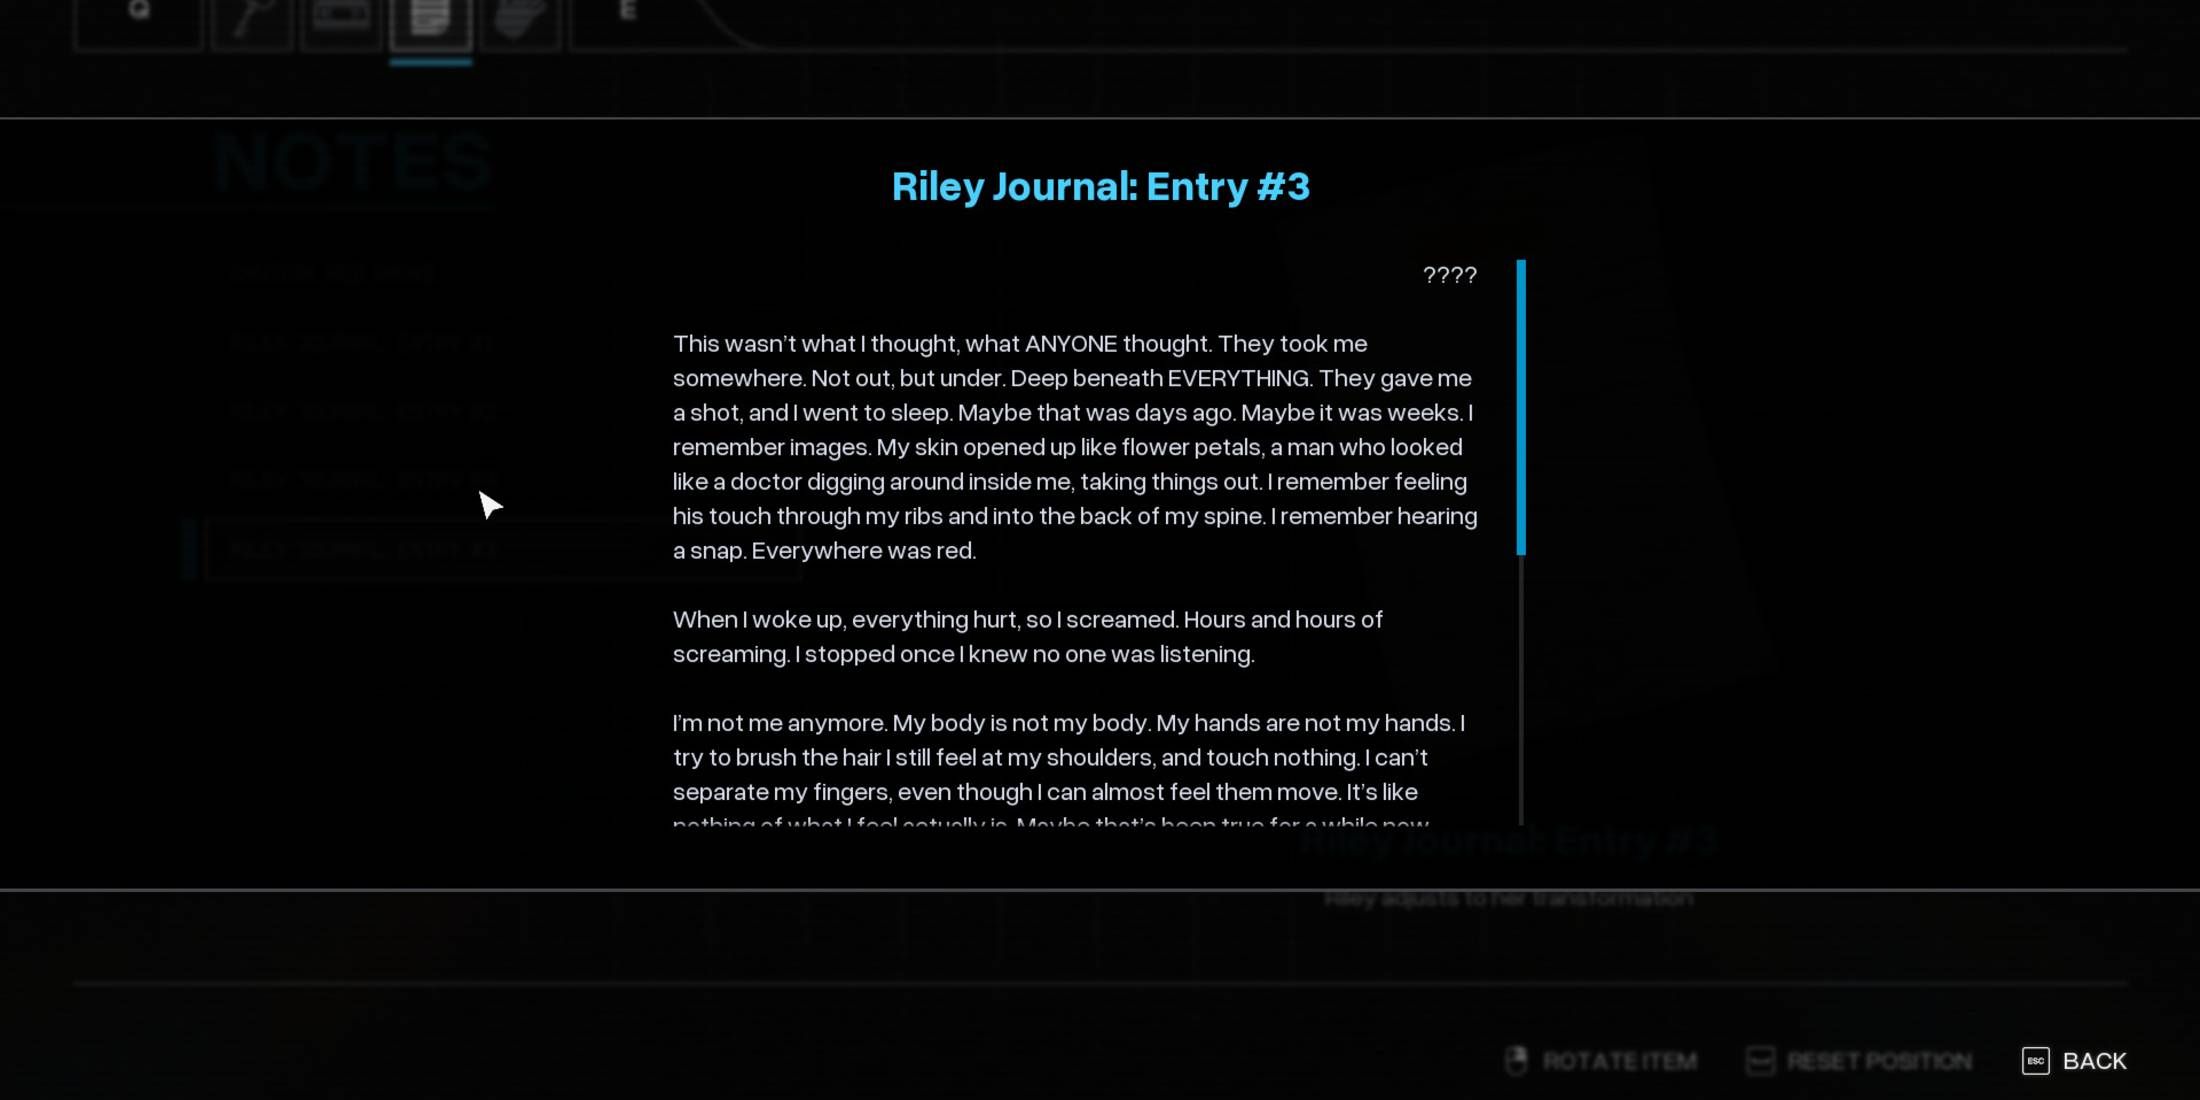
Riley’s Journal: Entry #3


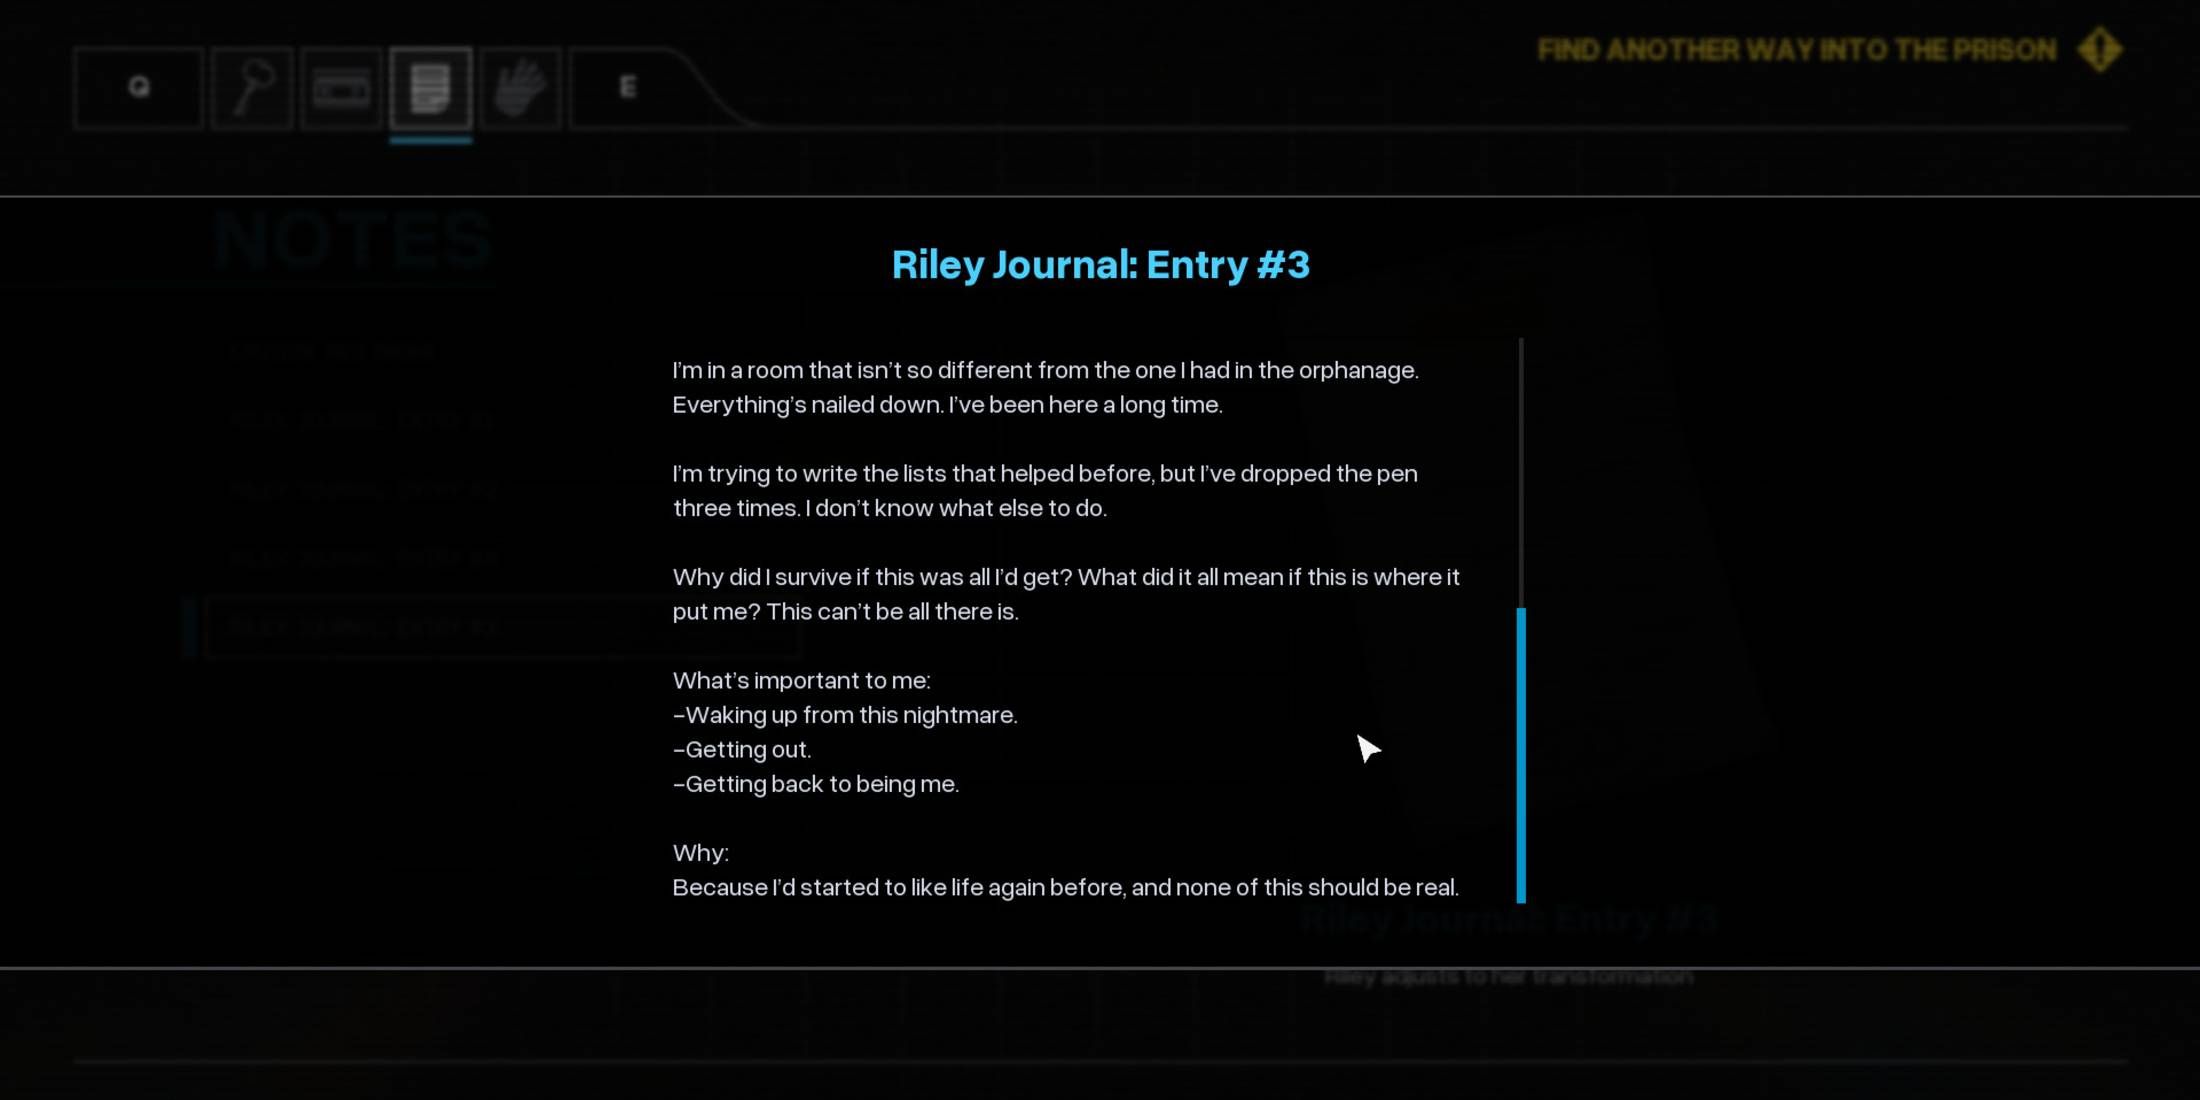
- Auto Save File: Toy Graveyard
- Objective: Find another way into the Prison
Heading towards Riley’s Journal, I must warn you that the third entry is hidden on a less-trodden, clandestine route. After crossing the Toy Graveyard and passing through the prison section’s gate, bright lights will flicker on, and an army of miniature toys will emerge. Brace yourself for this toy tidal wave, as it can be quite overwhelming. Once the chaos subsides, take a path opposite to the gate to find a wrecked truck. Nearby, you’ll discover a note left next to it. Good luck on your journey!
Here, Riley’s narrative takes a grim twist as she shares her harrowing metamorphosis with us. She found herself unconscious, underwent surgery, and upon regaining consciousness, she was in agony and not in her familiar physical form.
Riley’s Journal: Entry #4

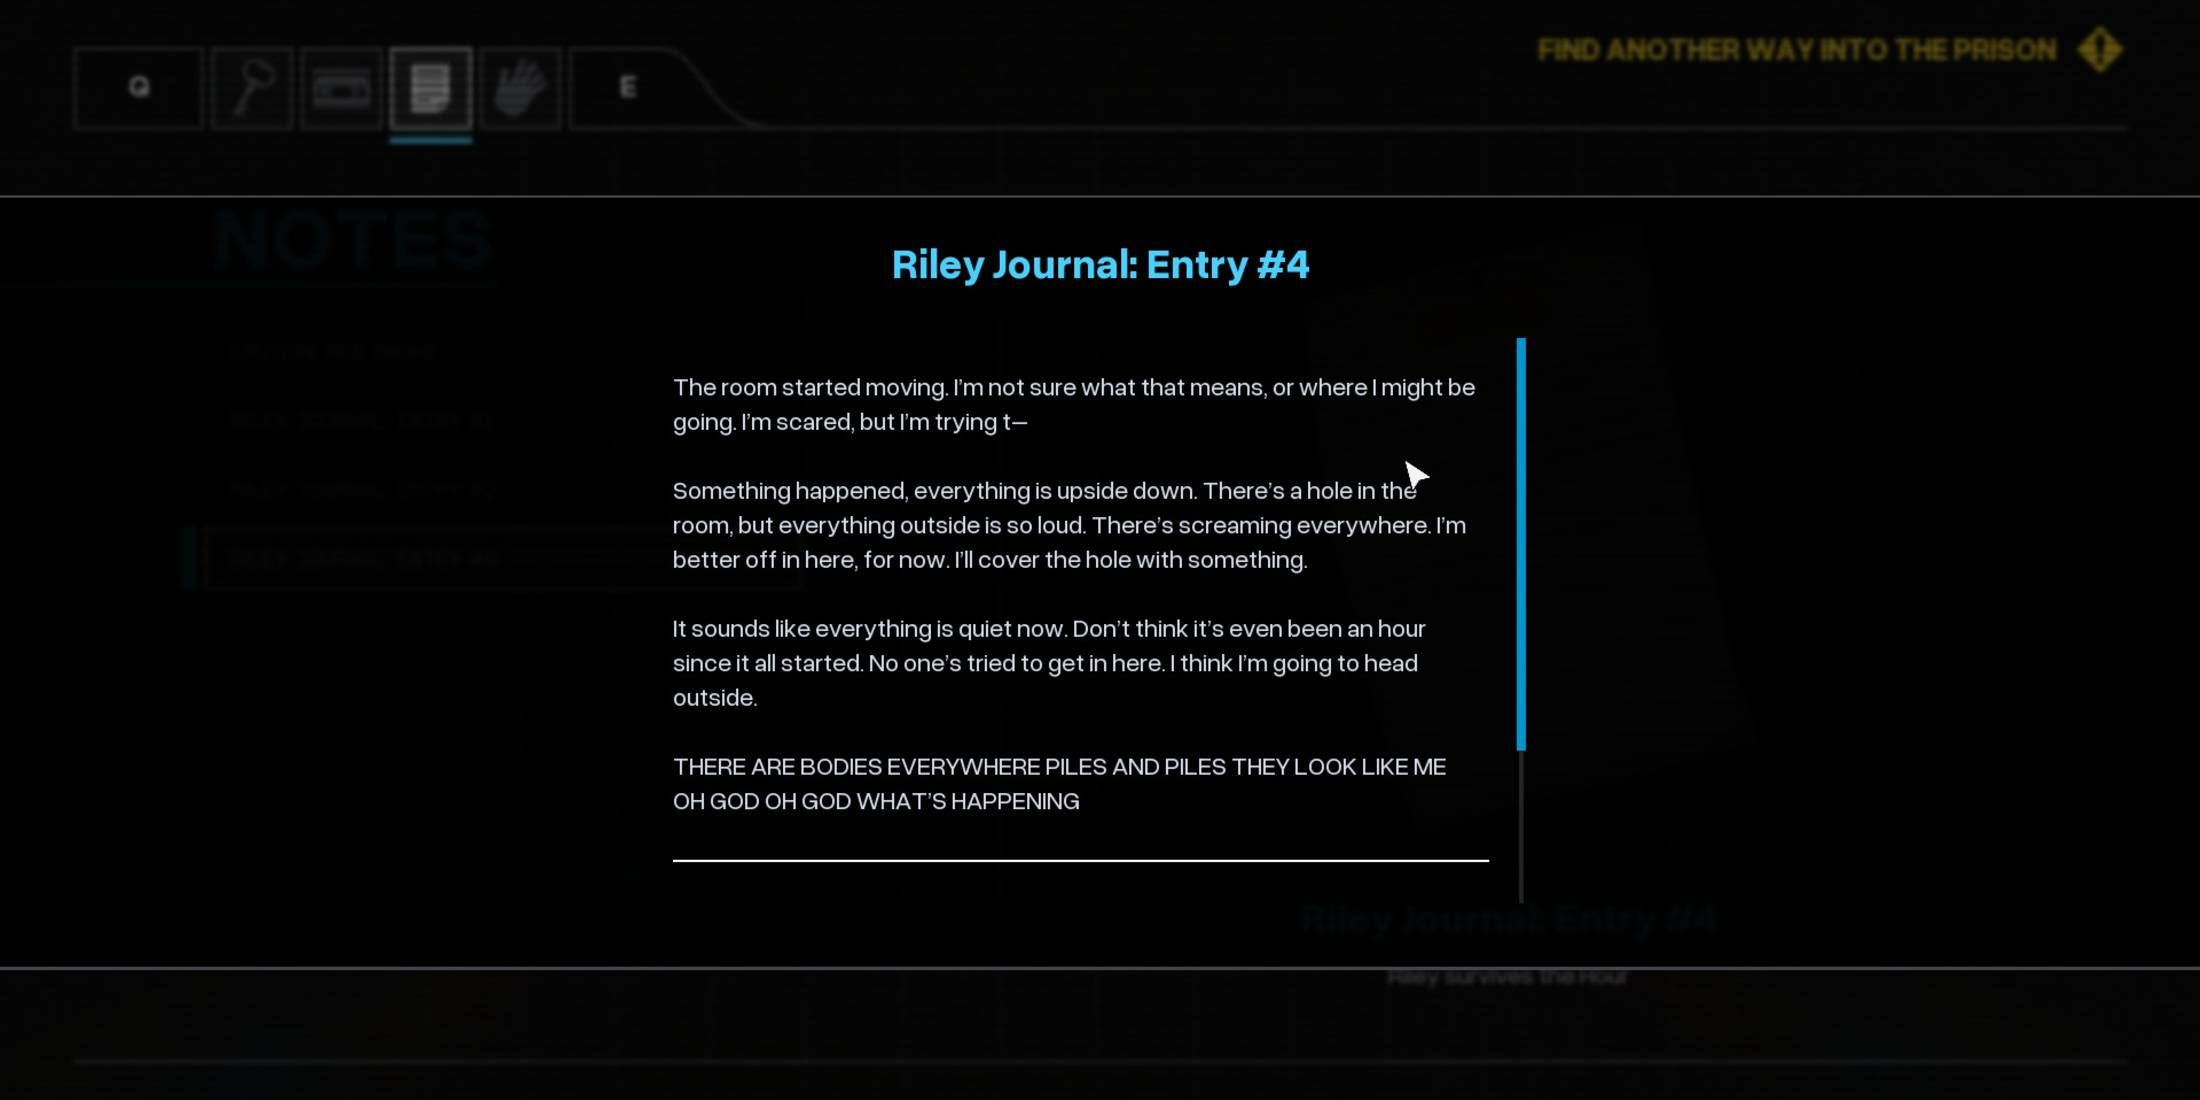
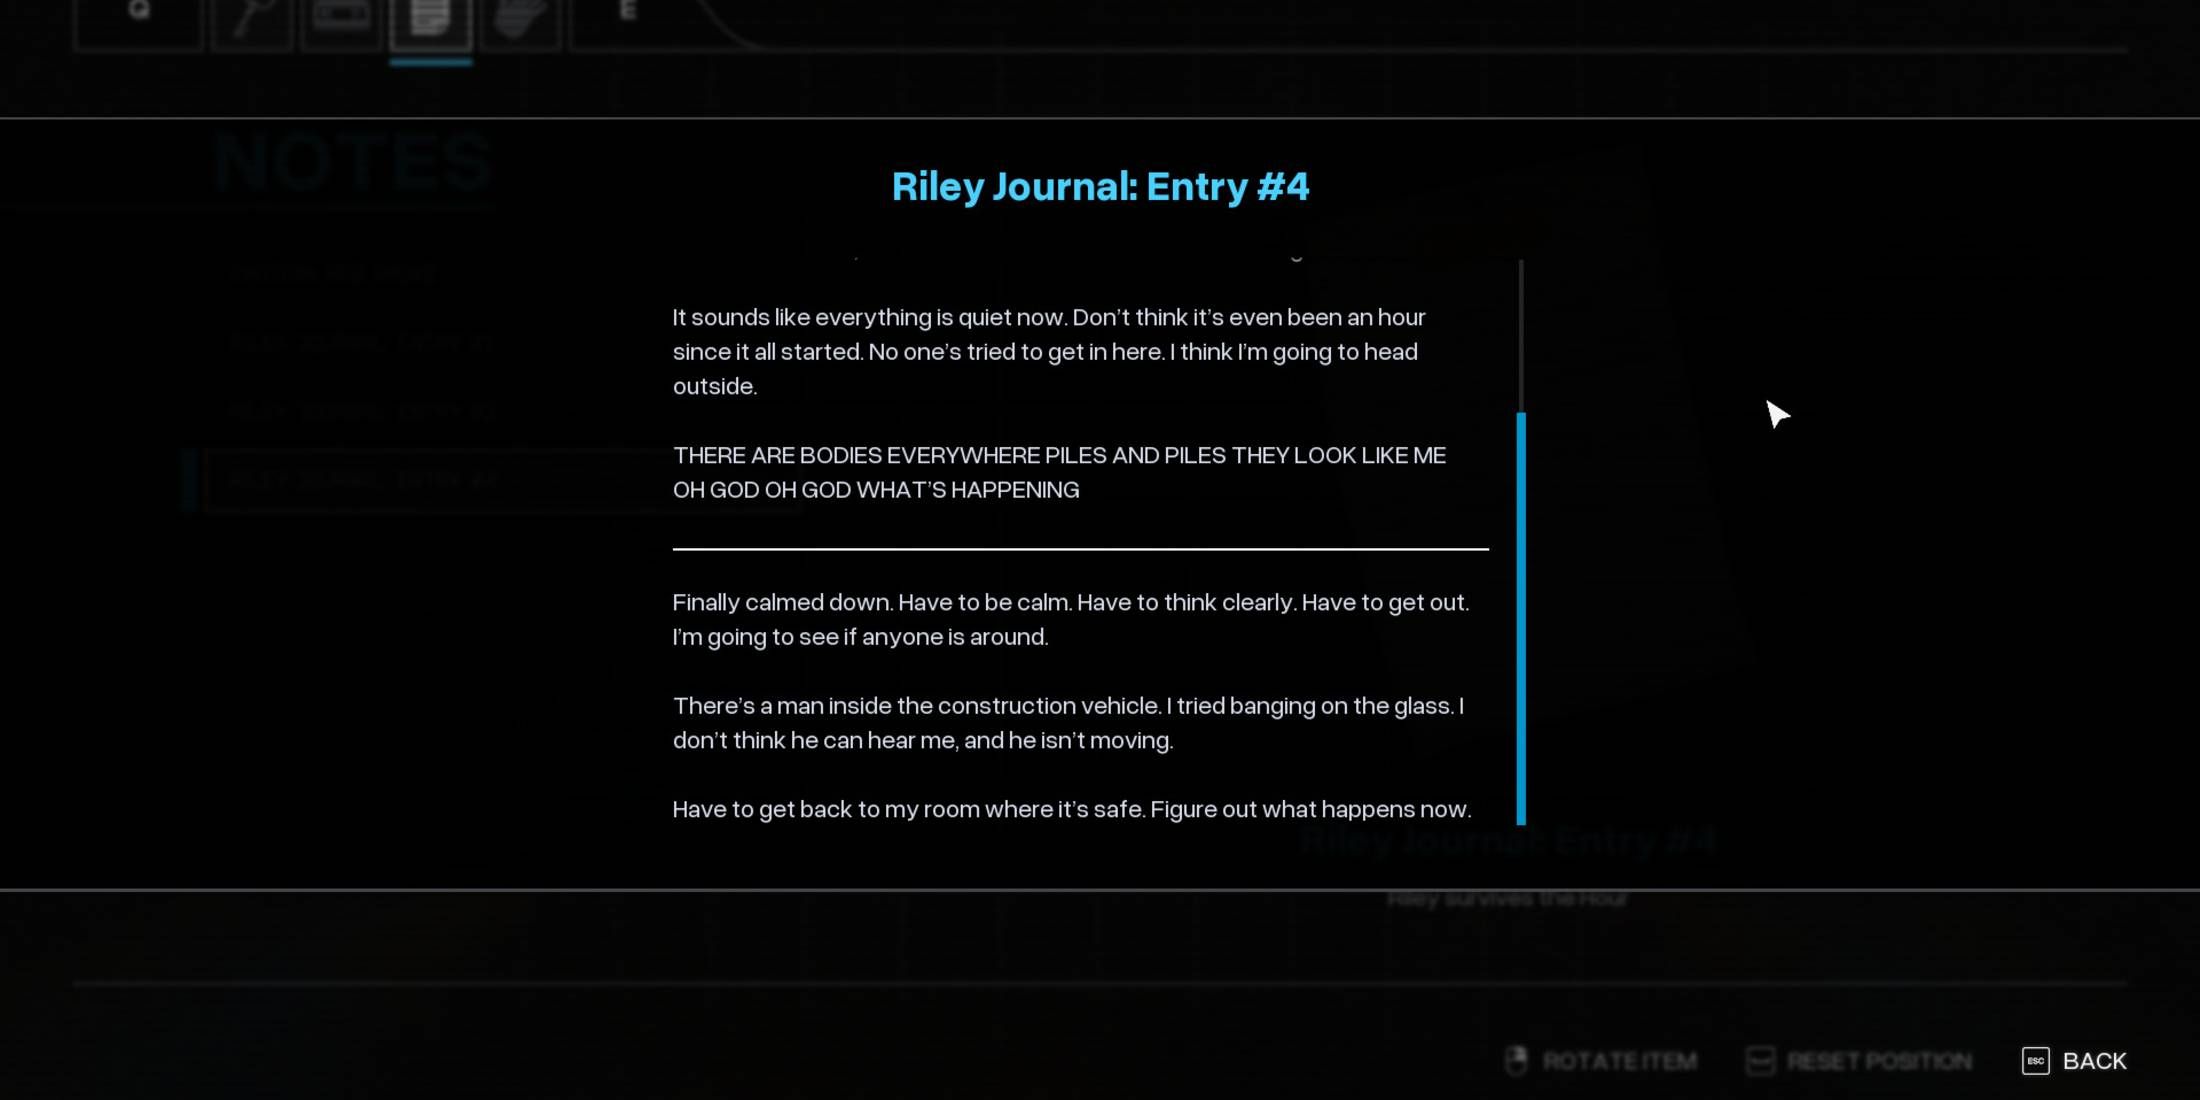
- Auto Save File: Toy Graveyard
- Objective: Find another way into the Prison
In Riley’s journal, you’ll find the fourth entry located by the main prison entrance, right at the end of the Toy Graveyard. This section seals off when the game character approaches. The entry is perched on a box near a short set of steps.
In this account, Riley shares her ordeal during the Hour event. Initially, her room appeared to shift, then violently collapsed. After a moment’s pause, she exits, only to be shocked by the multitude of people nearby. Later, she returns to what she believes is her safe haven, her room.
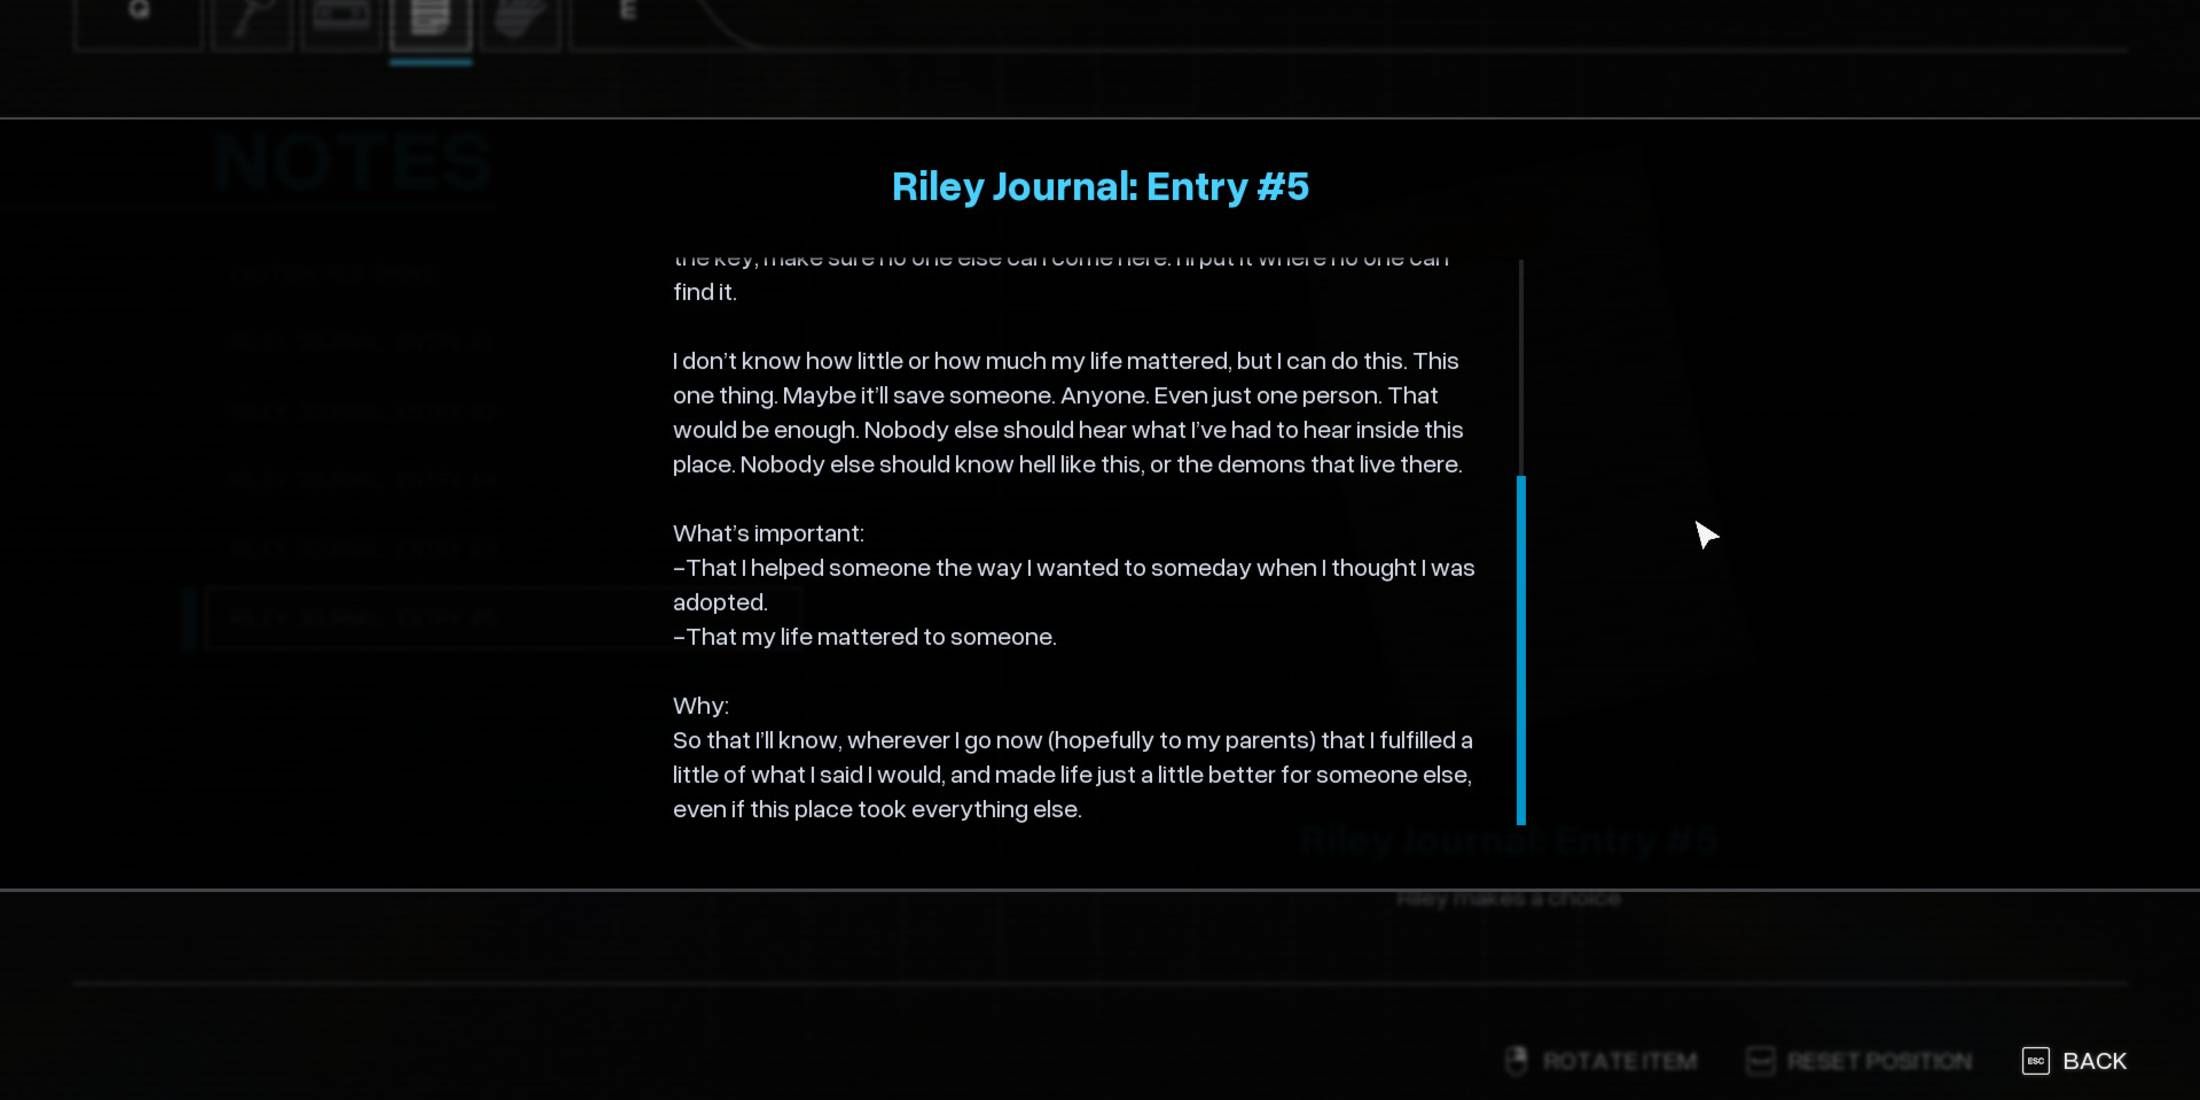
Riley’s Journal: Entry #5
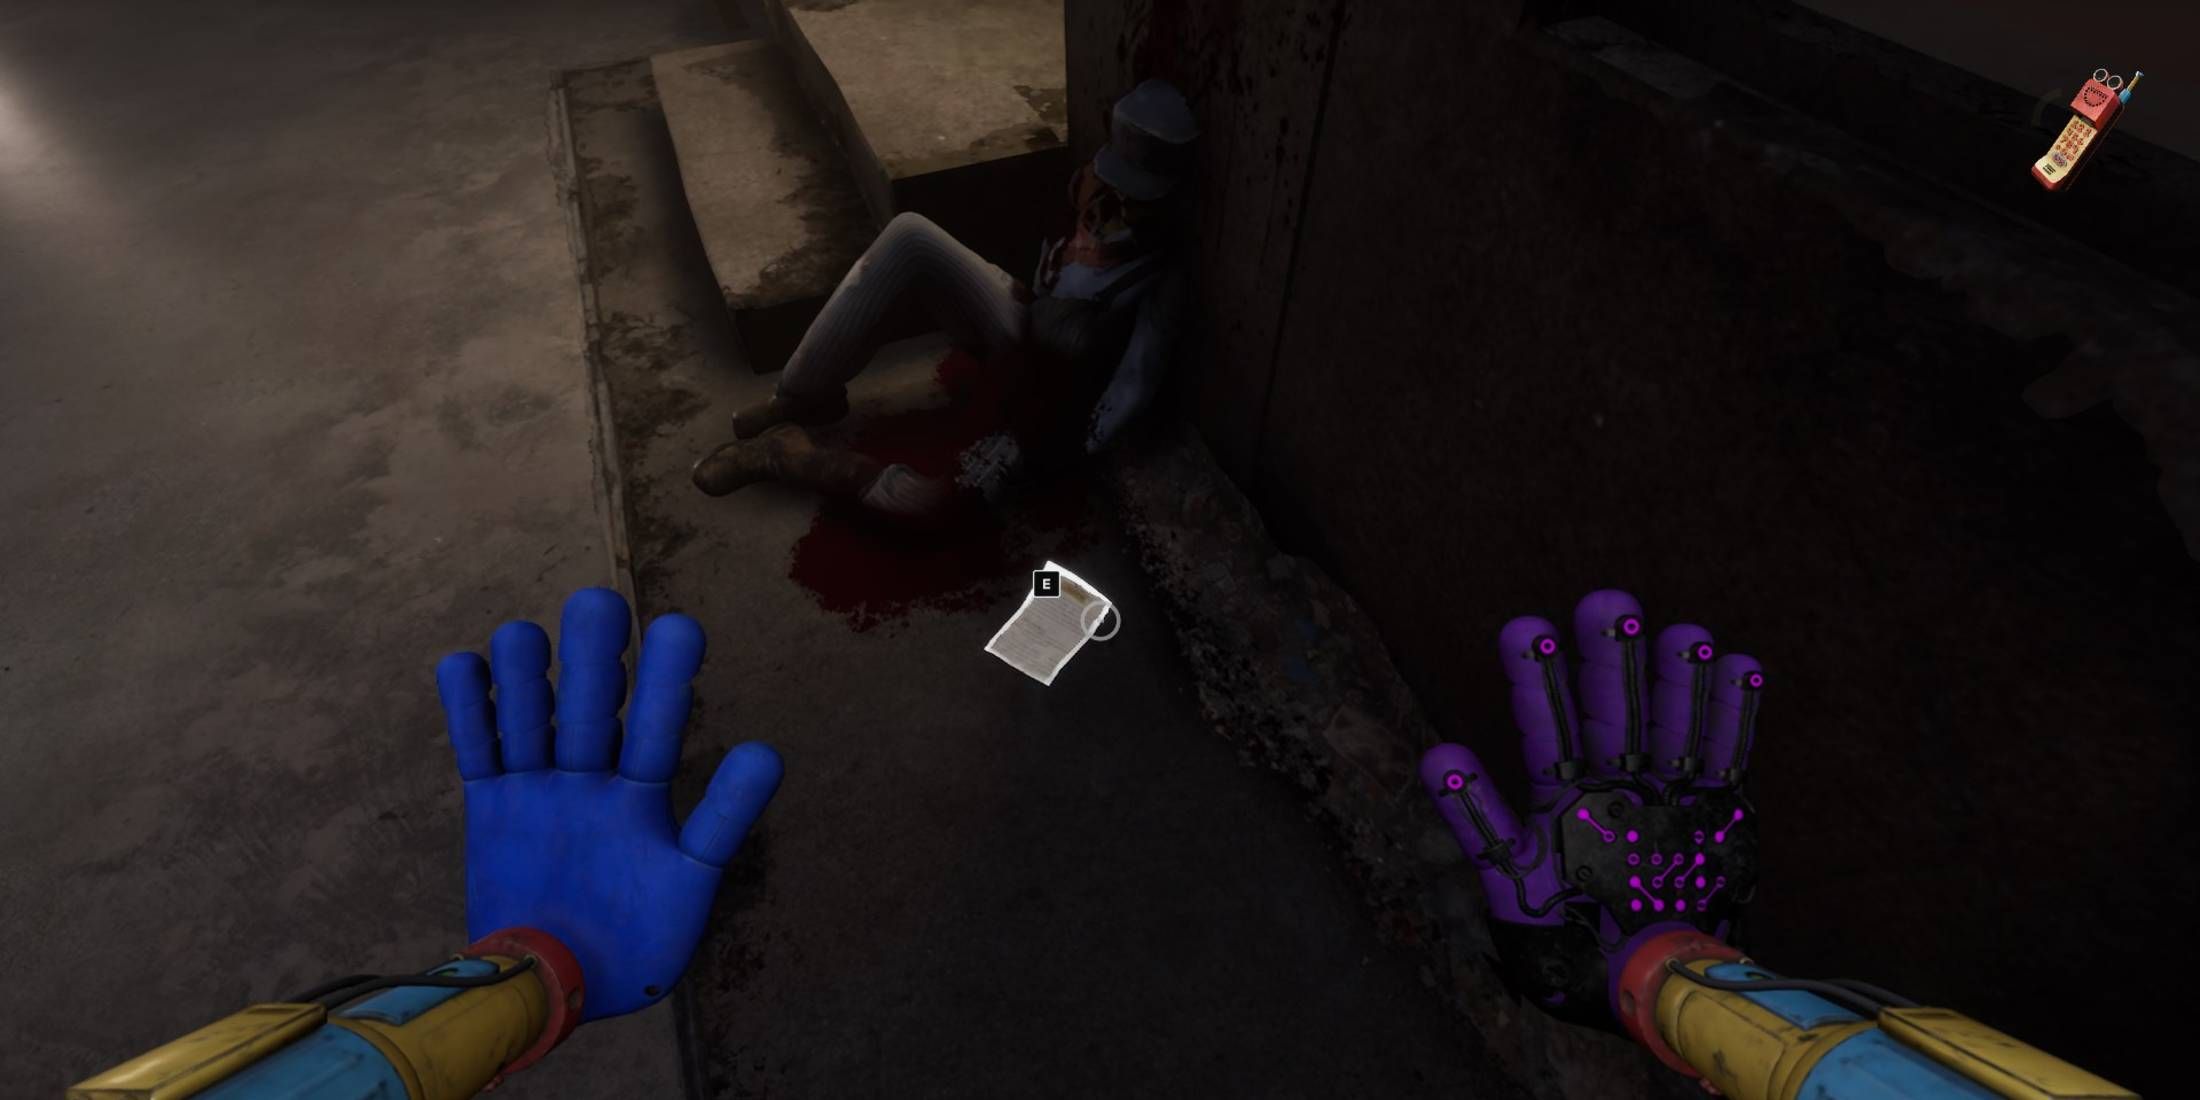

- Auto Save File: Toy Graveyard (3)
- Objective: Find another way into the Prison
In simple terms, Riley’s Journal’s final entry was found near the fallen body of a security guard by the entrance of the security room for the prison blocks in the train station area. The journal was on the ground and could be effortlessly picked up, providing players with a clue about their next steps.
In this log, Riley expresses that there’s no edible food around, only decaying bodies which she won’t consume. She plans to steal the key from the conductor and conceal it where it cannot be located, thus preventing anyone from running the train. This action would halt the transportation of children, putting a stop to these cruel scientific experiments.
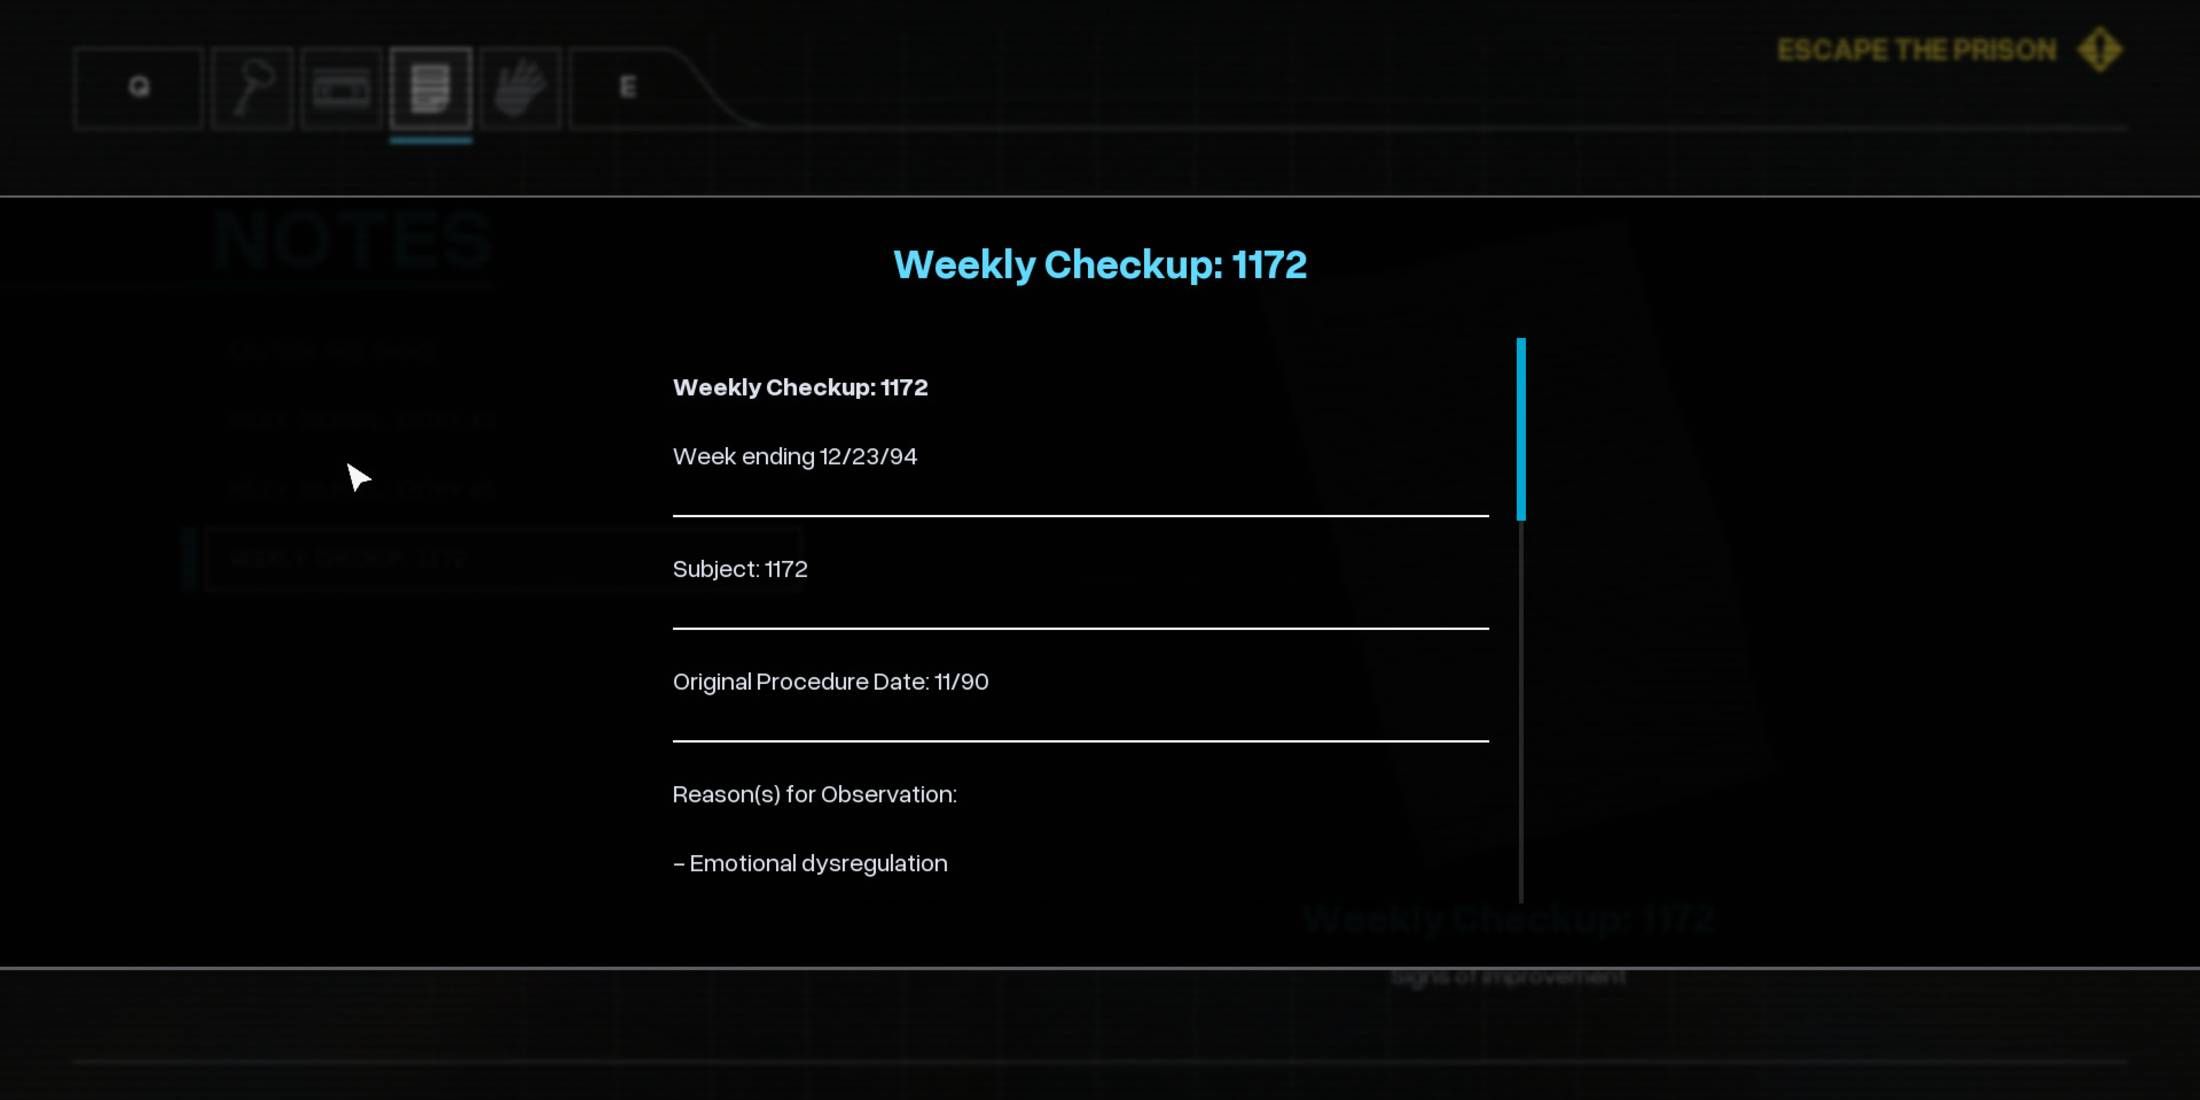
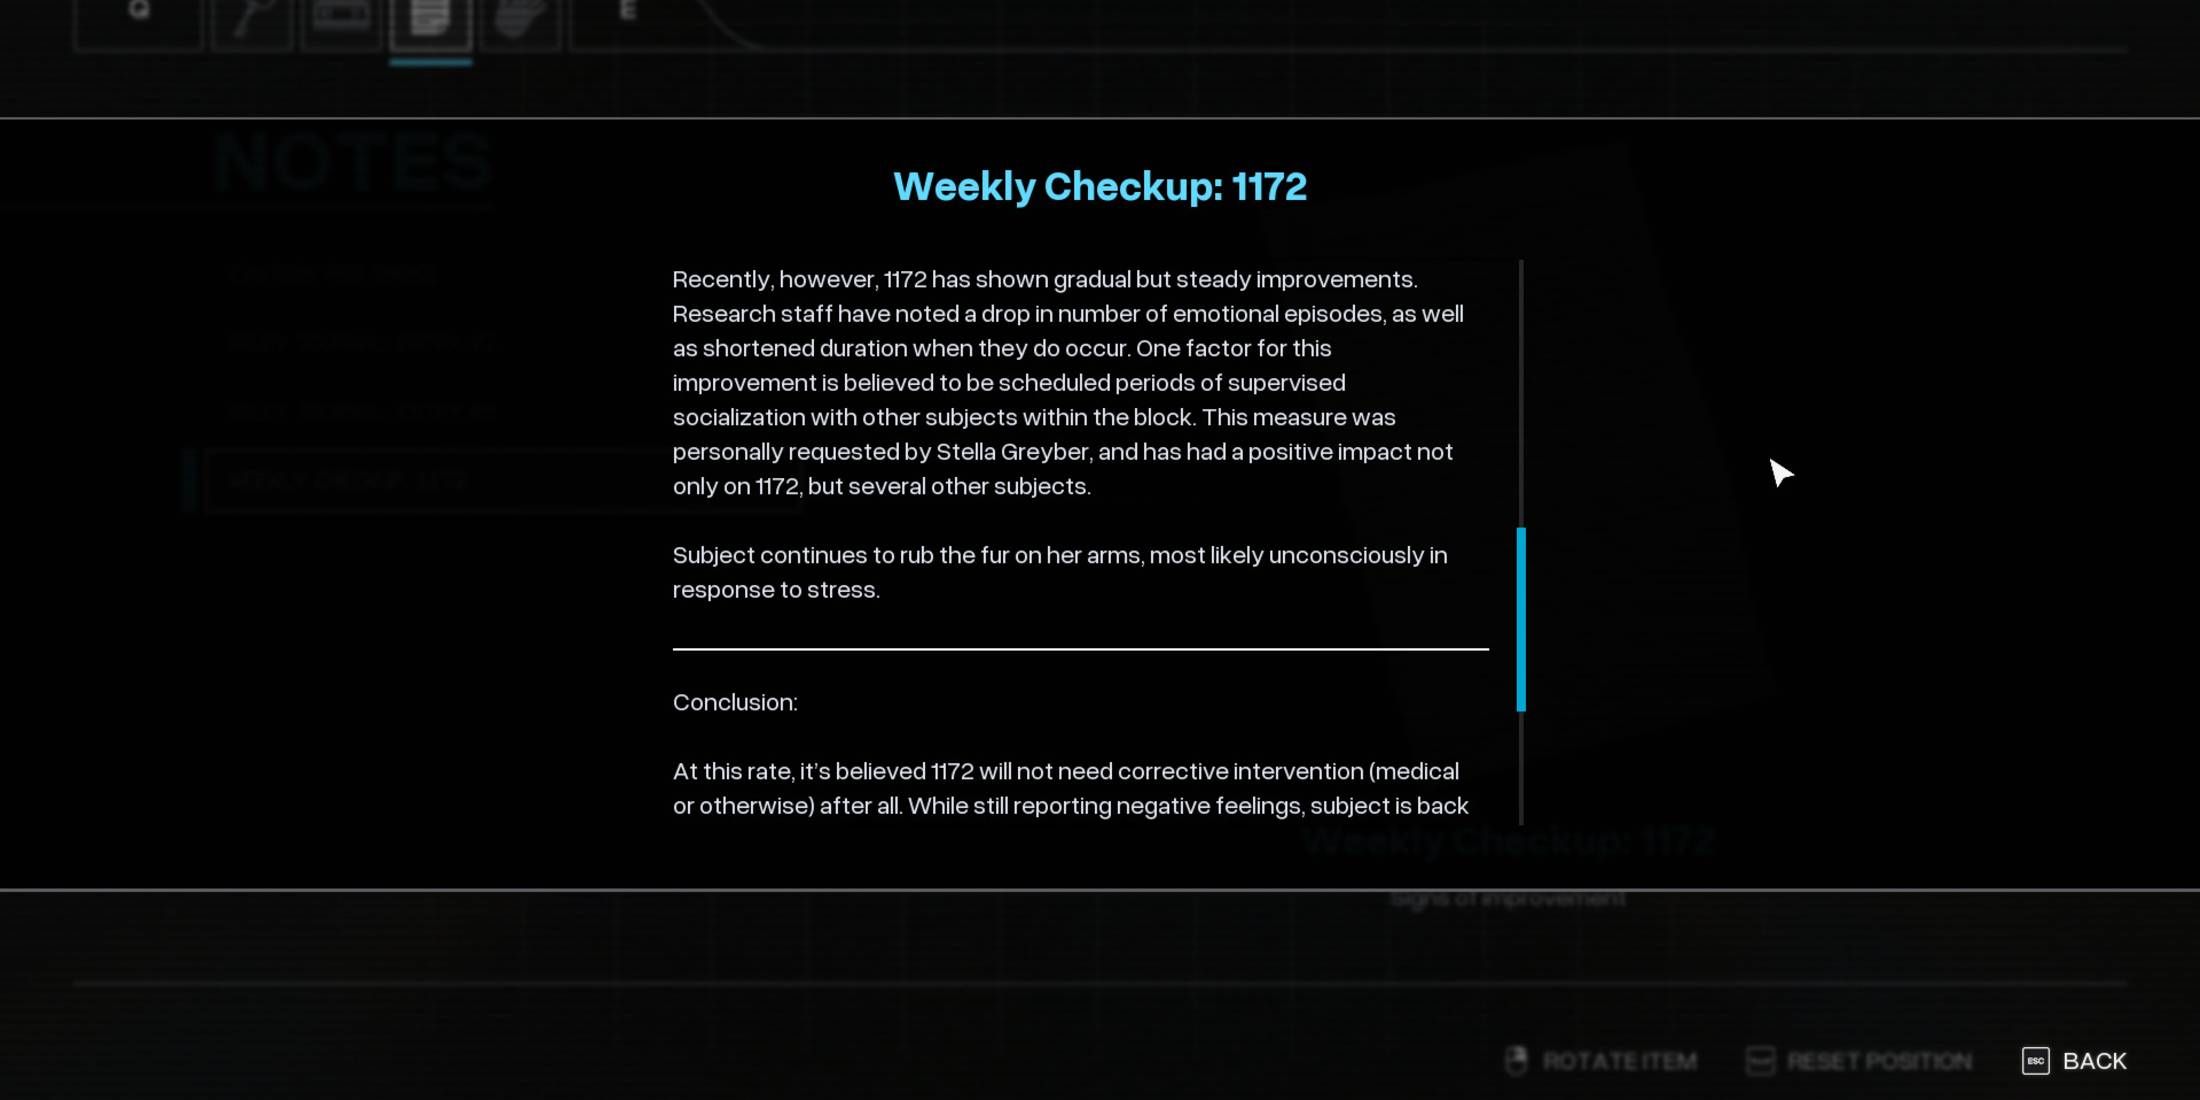
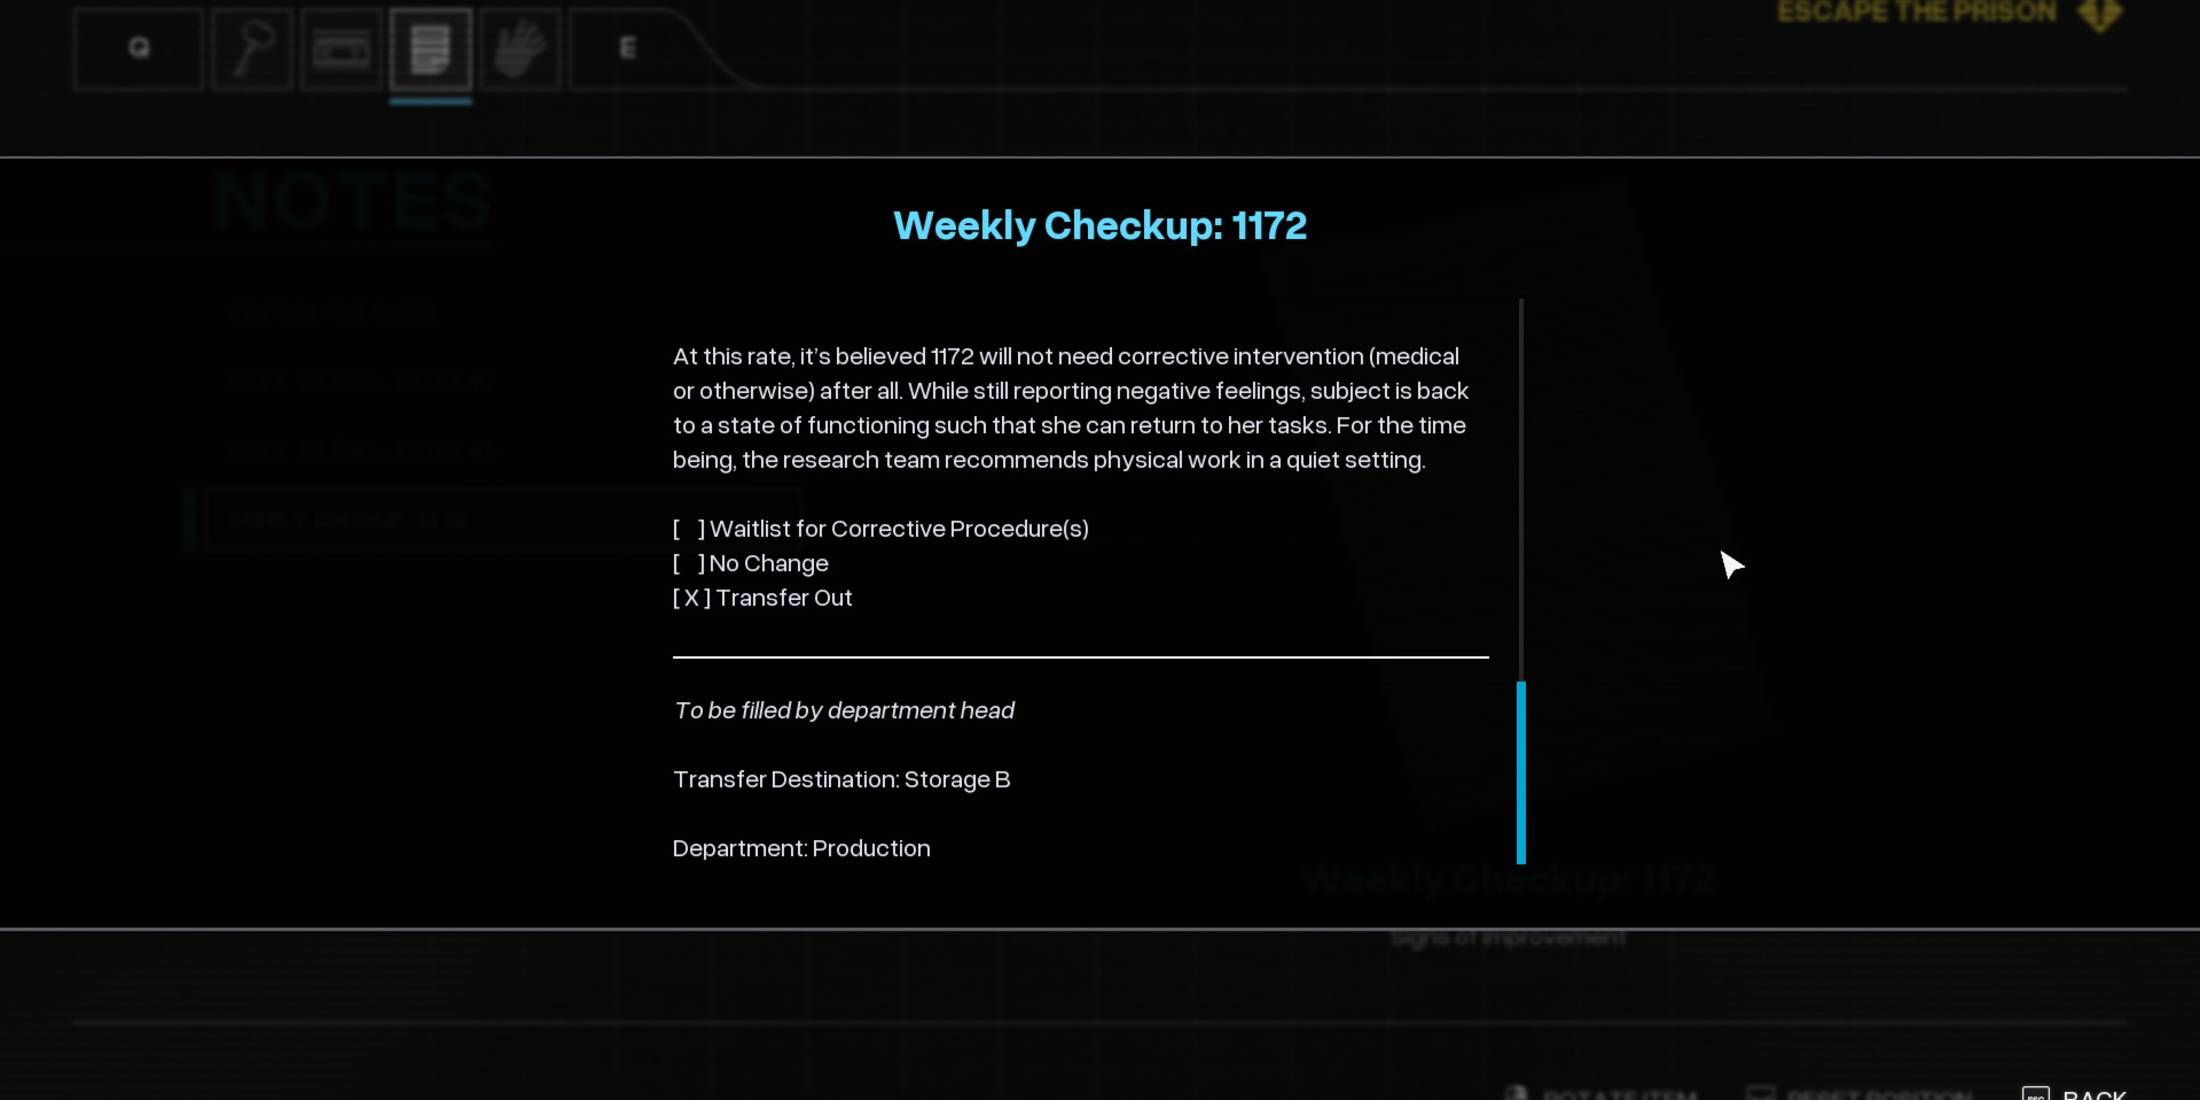
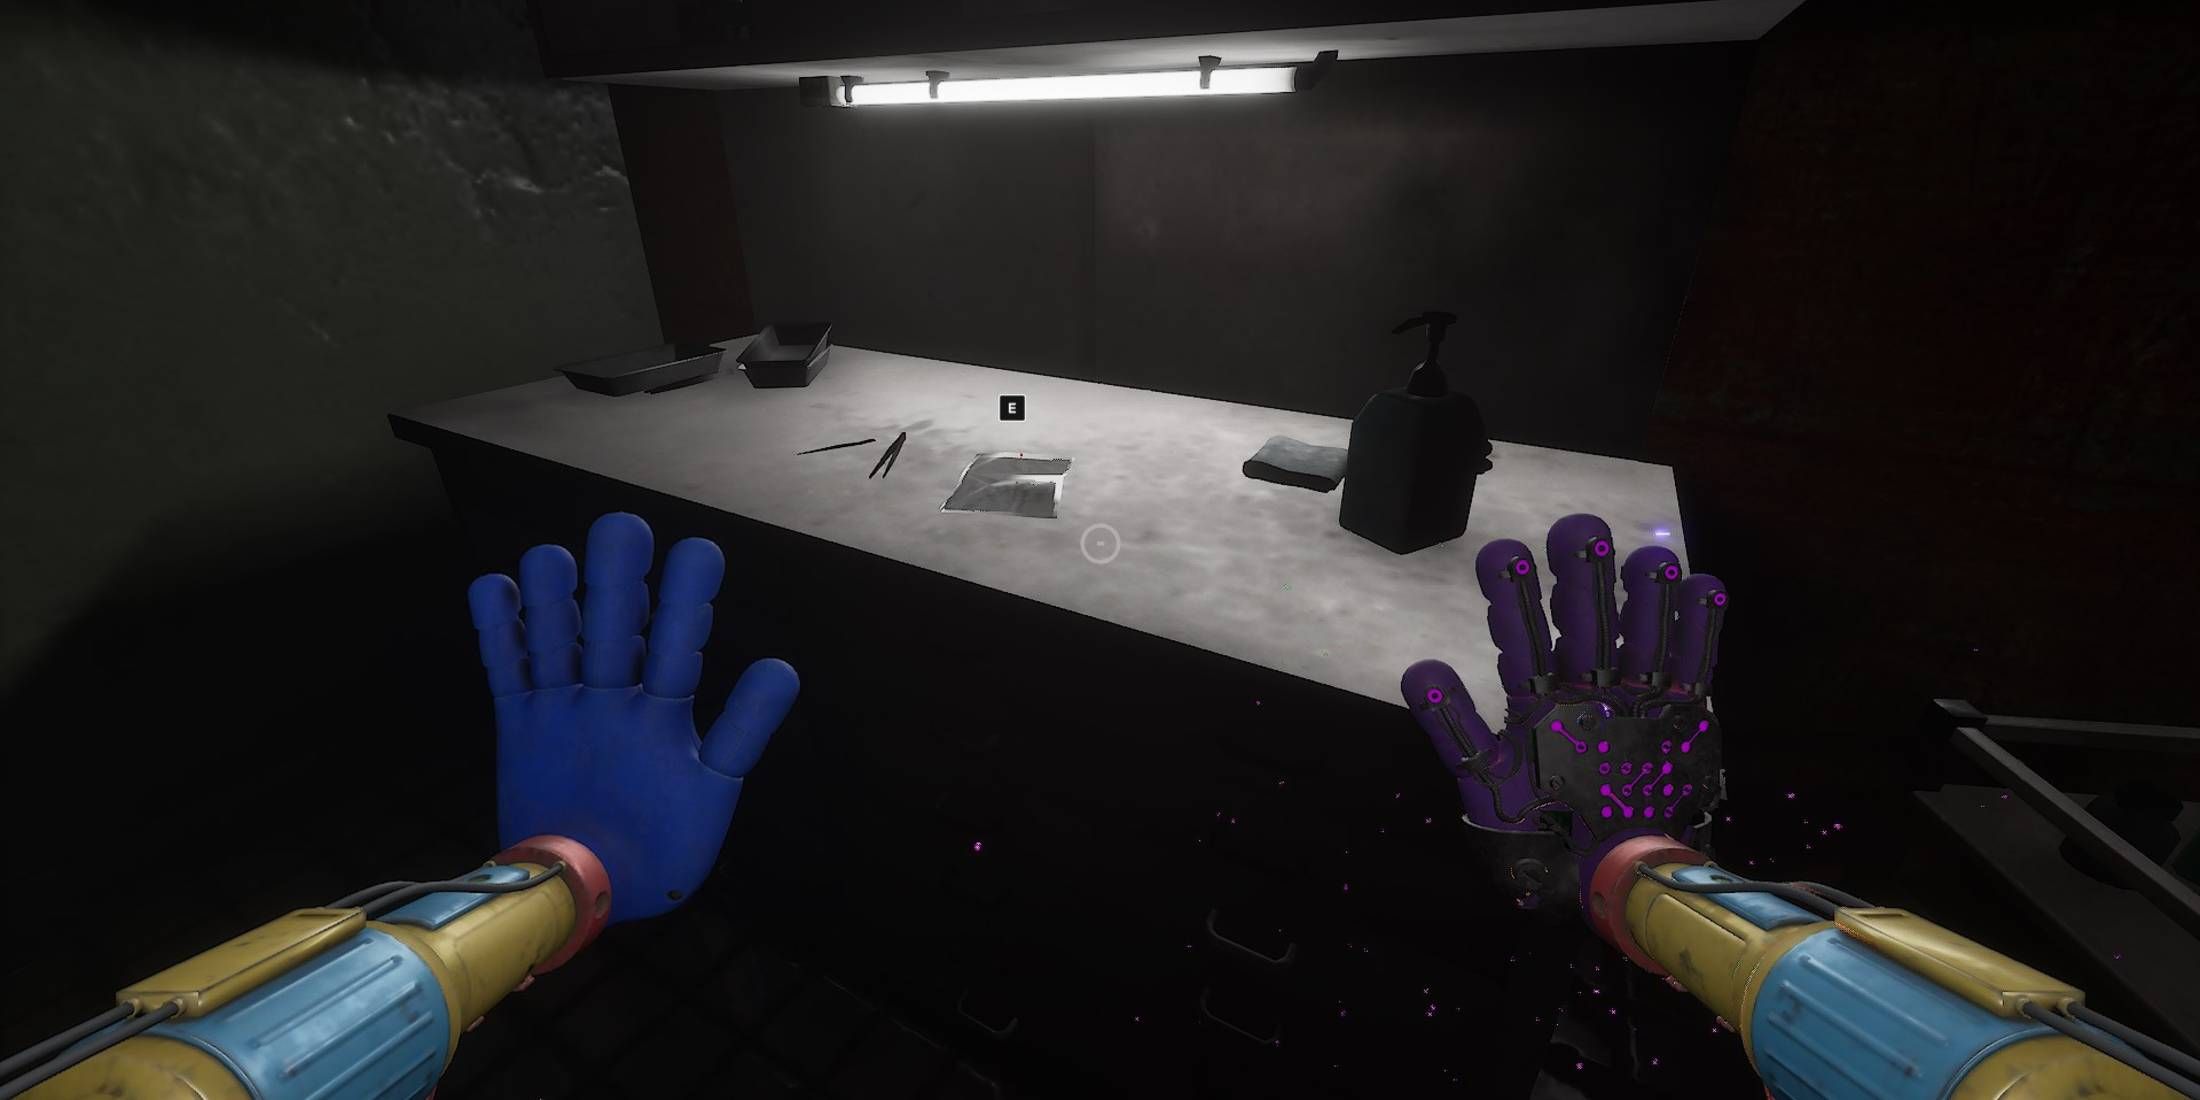
Weekly Checkup: 1172

- Auto Save File: Prison Cell Blocks (1)
- Objective: Escape the Prison
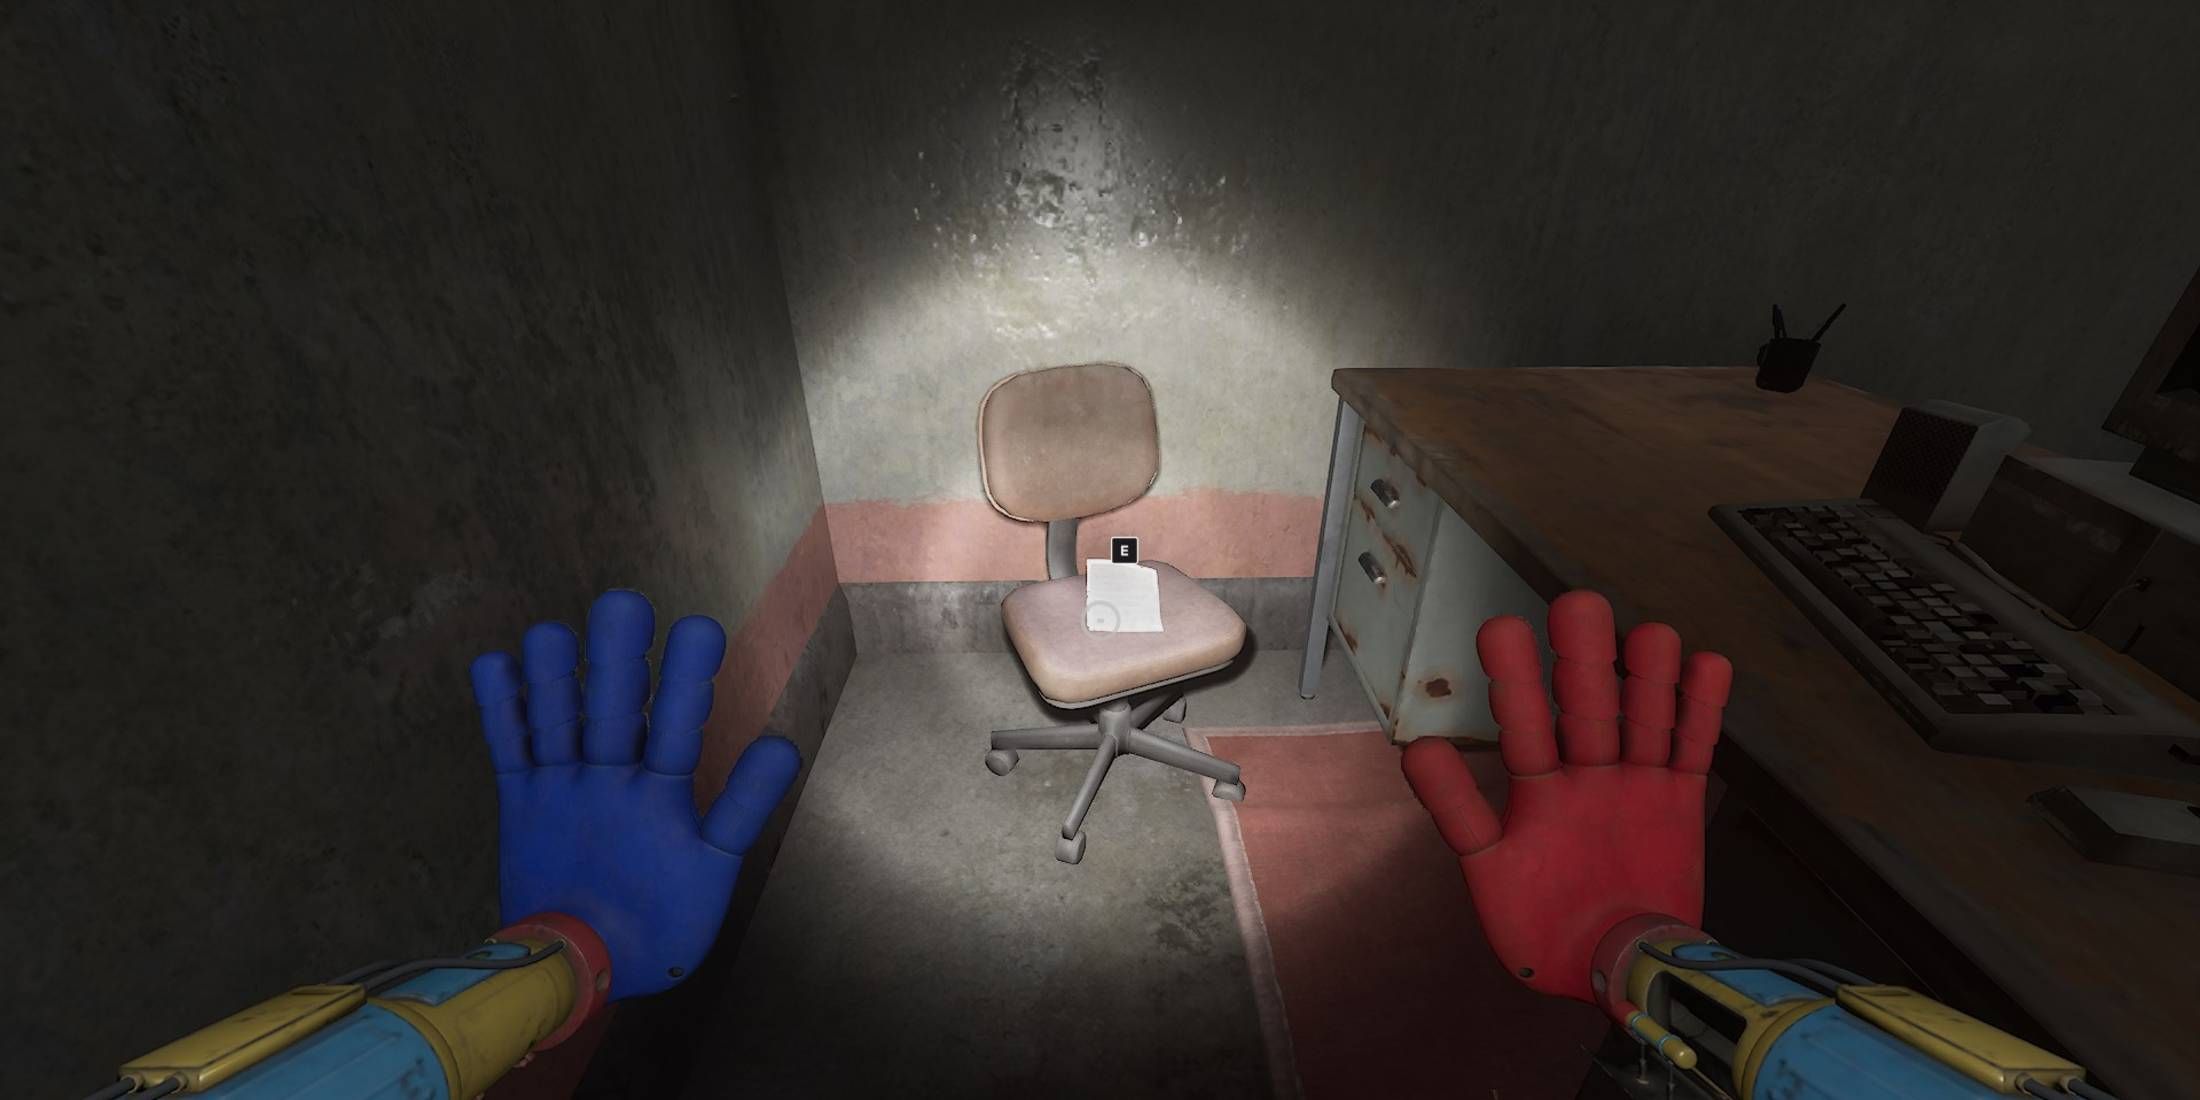
The Weekly Checkup Report for Inmate 1172 is located on an upper level in the prison block, specifically in a cell close to the blinking red light. As you approach the cell, it slightly swings open. However, it appears that the cell doesn’t open after the player obtains the red key from the lower floor.
The report delves deeply into the state of Subject 1172. Initially, the doctor noted a poor emotional reaction, but there were indications of progress. They credit this recovery to the subject’s interaction with other subjects in their group.
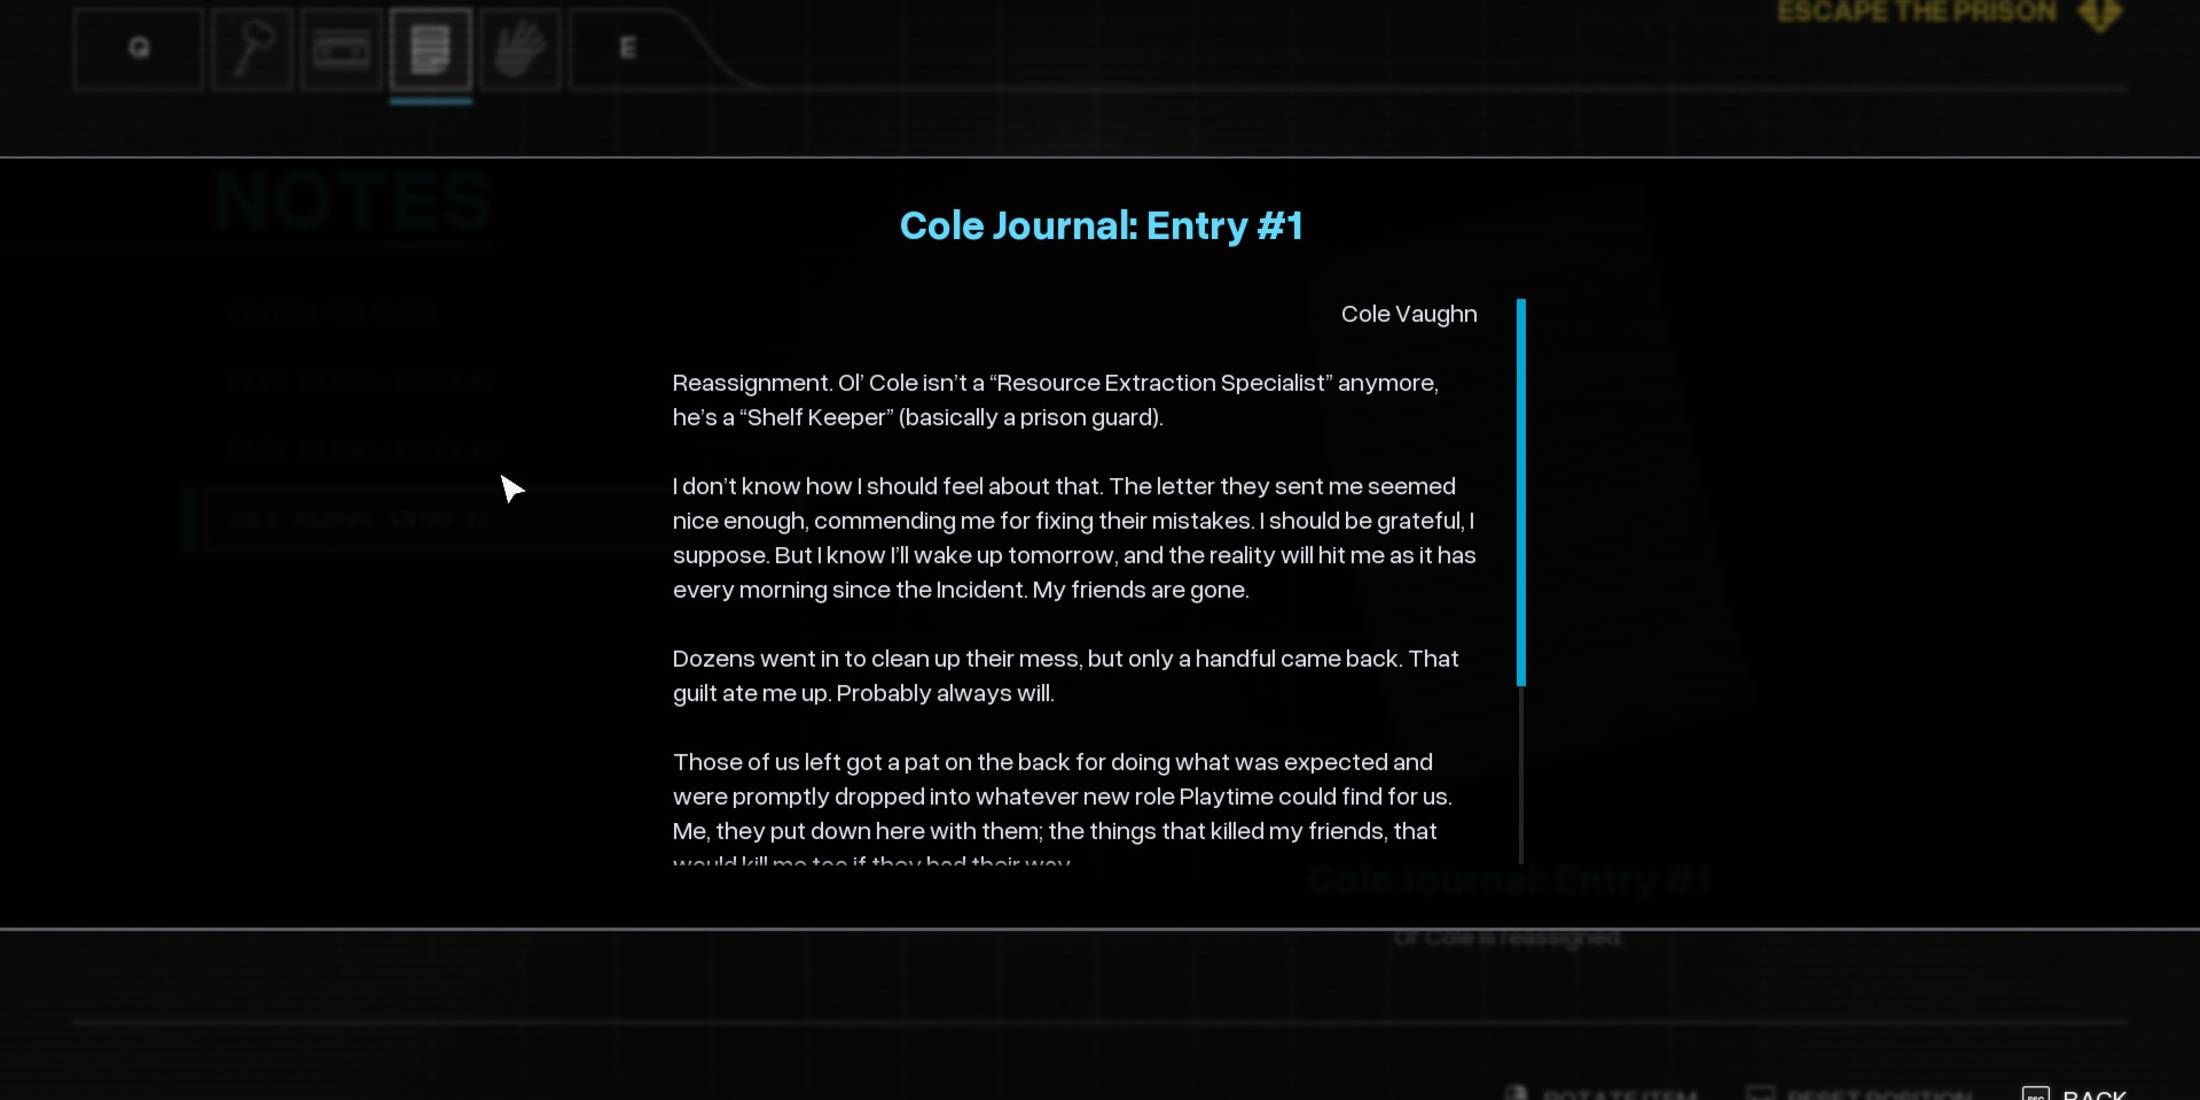
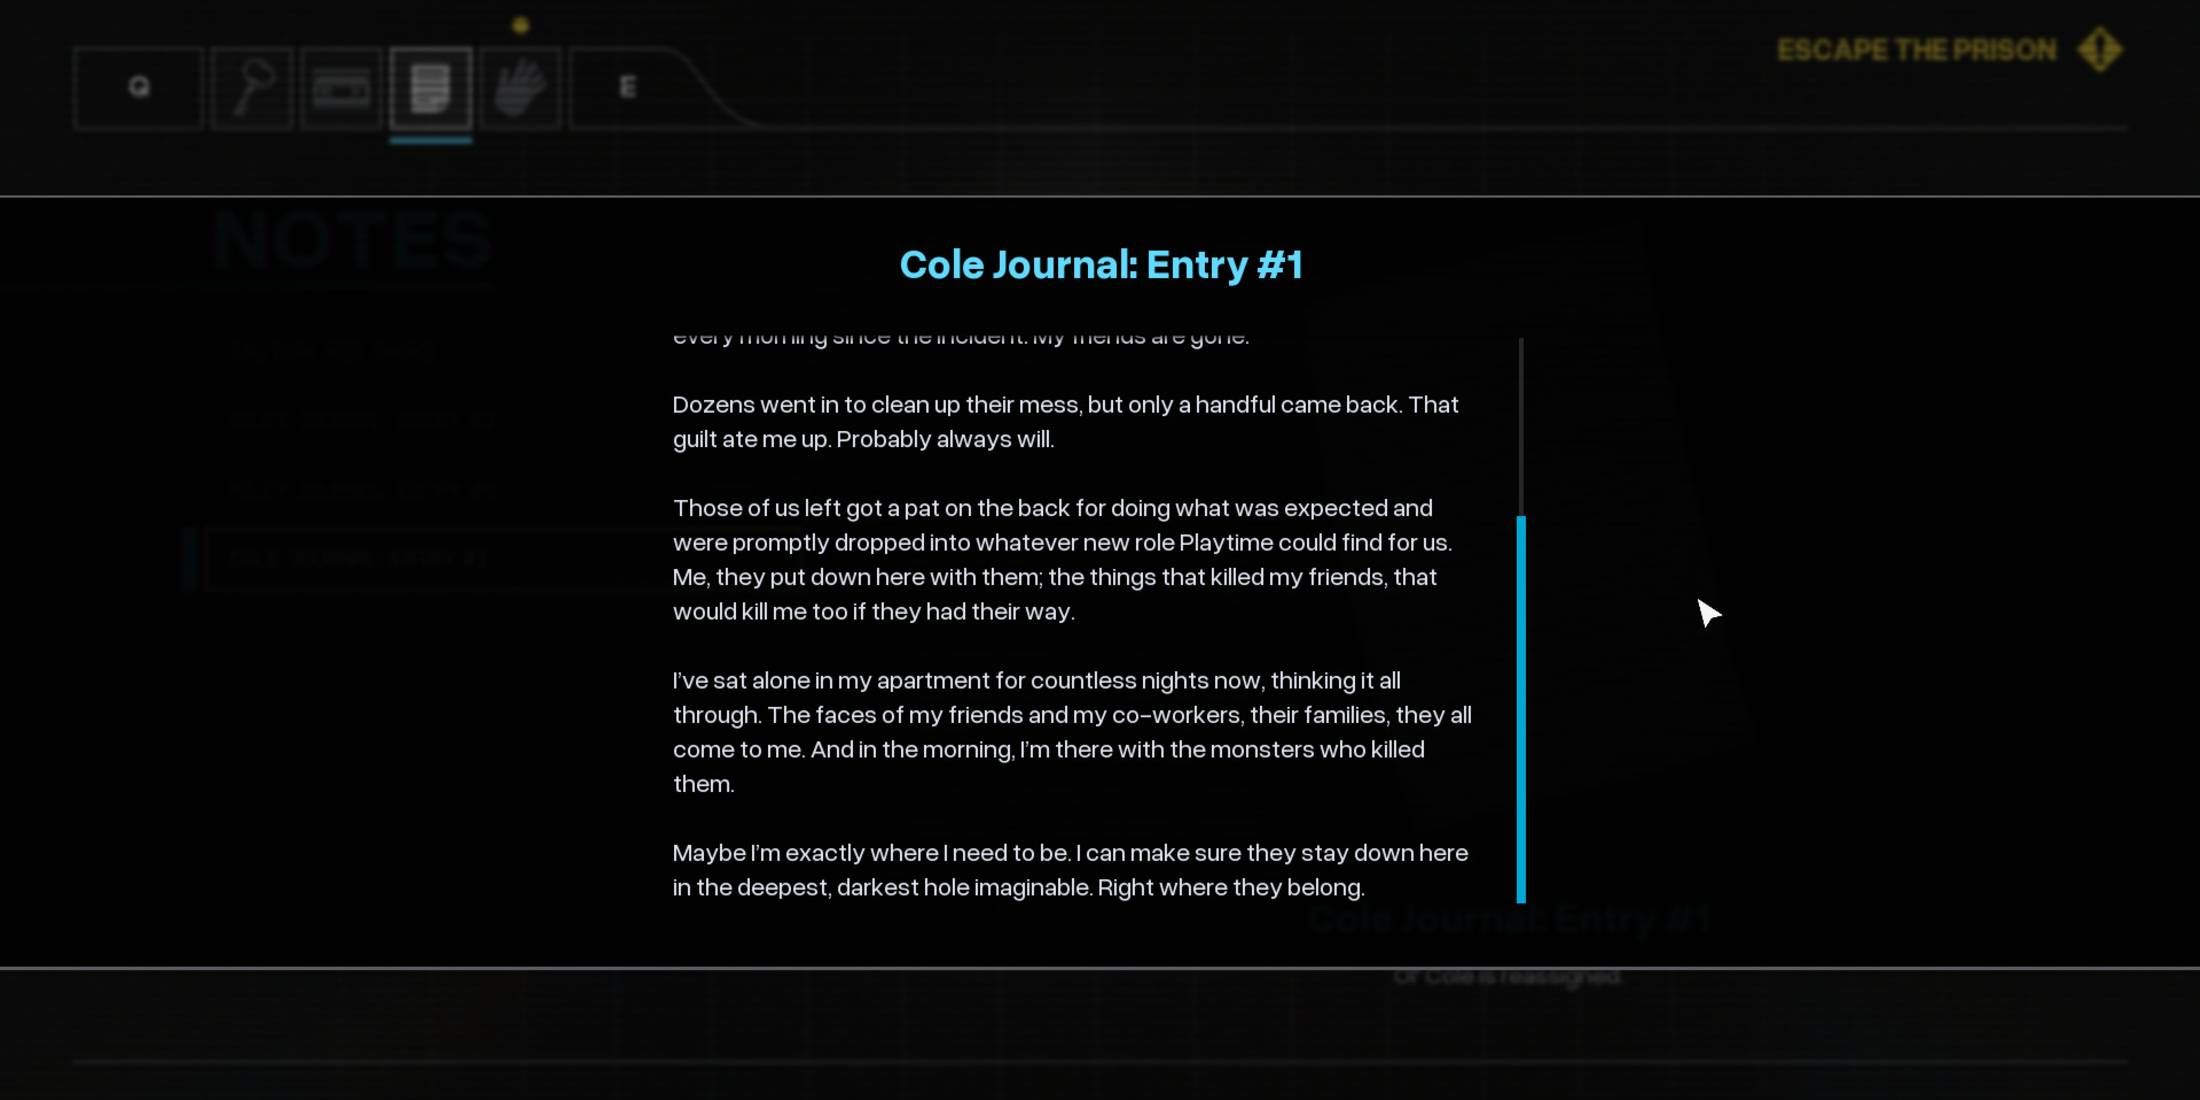
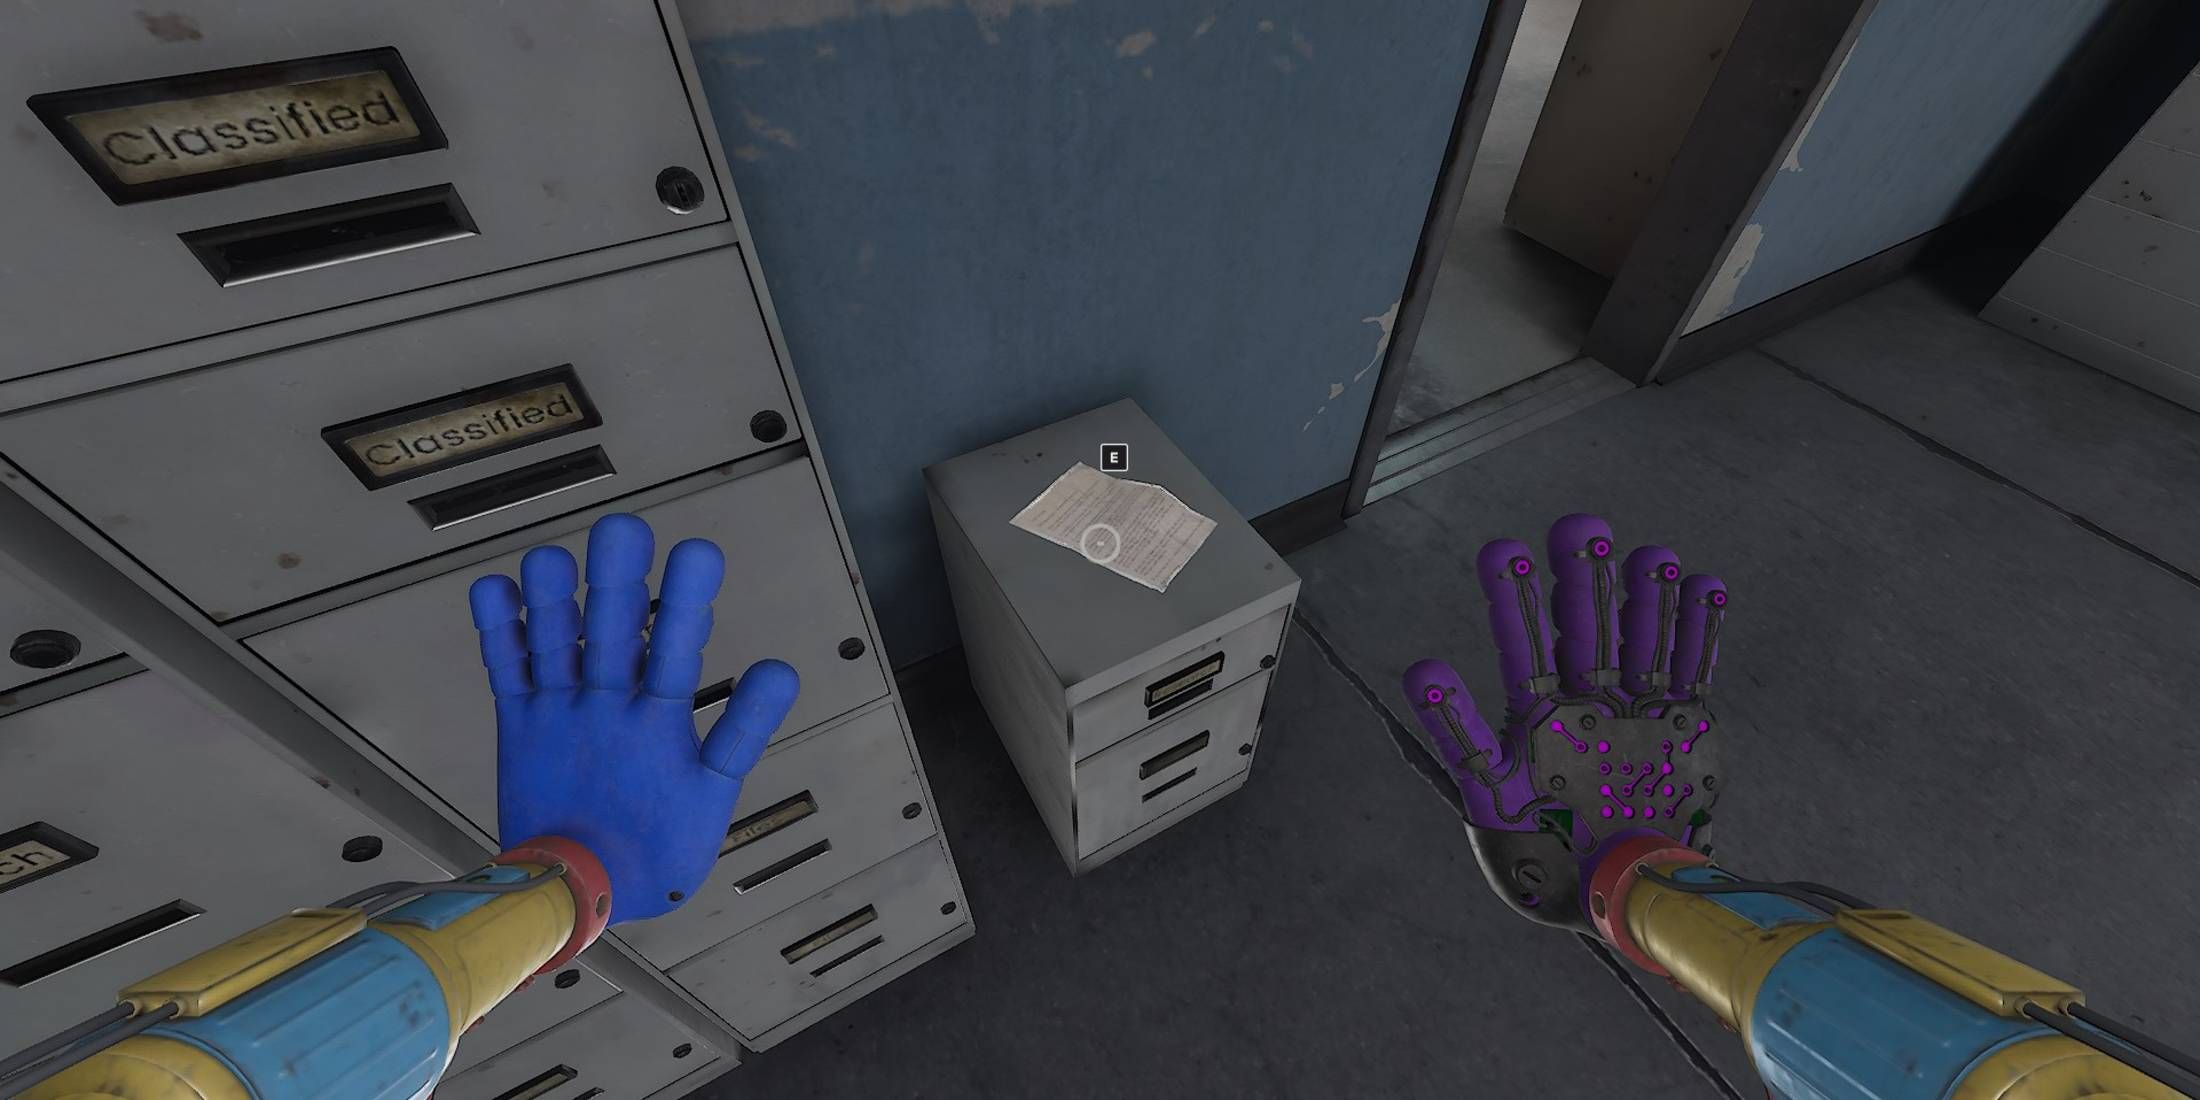
Cole’s Journal: Entry #1

- Auto Save File: Prison Cell Blocks (3)
- Objective: Escape the Prison
In this game, you’ll discover Cole’s Journal for the first time when you navigate through a spacious yet mostly vacant room following your acquisition of the Red Hand and resolution of the initial puzzle within the prison cell blocks section. The note is situated in the room, specifically on a chair to the right side of the warden’s office.
The note is from Cole, a security guard who’s been transferred lately. In this account, he shares an experience where his friends were brutally killed by toys during playtime, an incident he miraculously survived.
Weekly Checkup: 1424
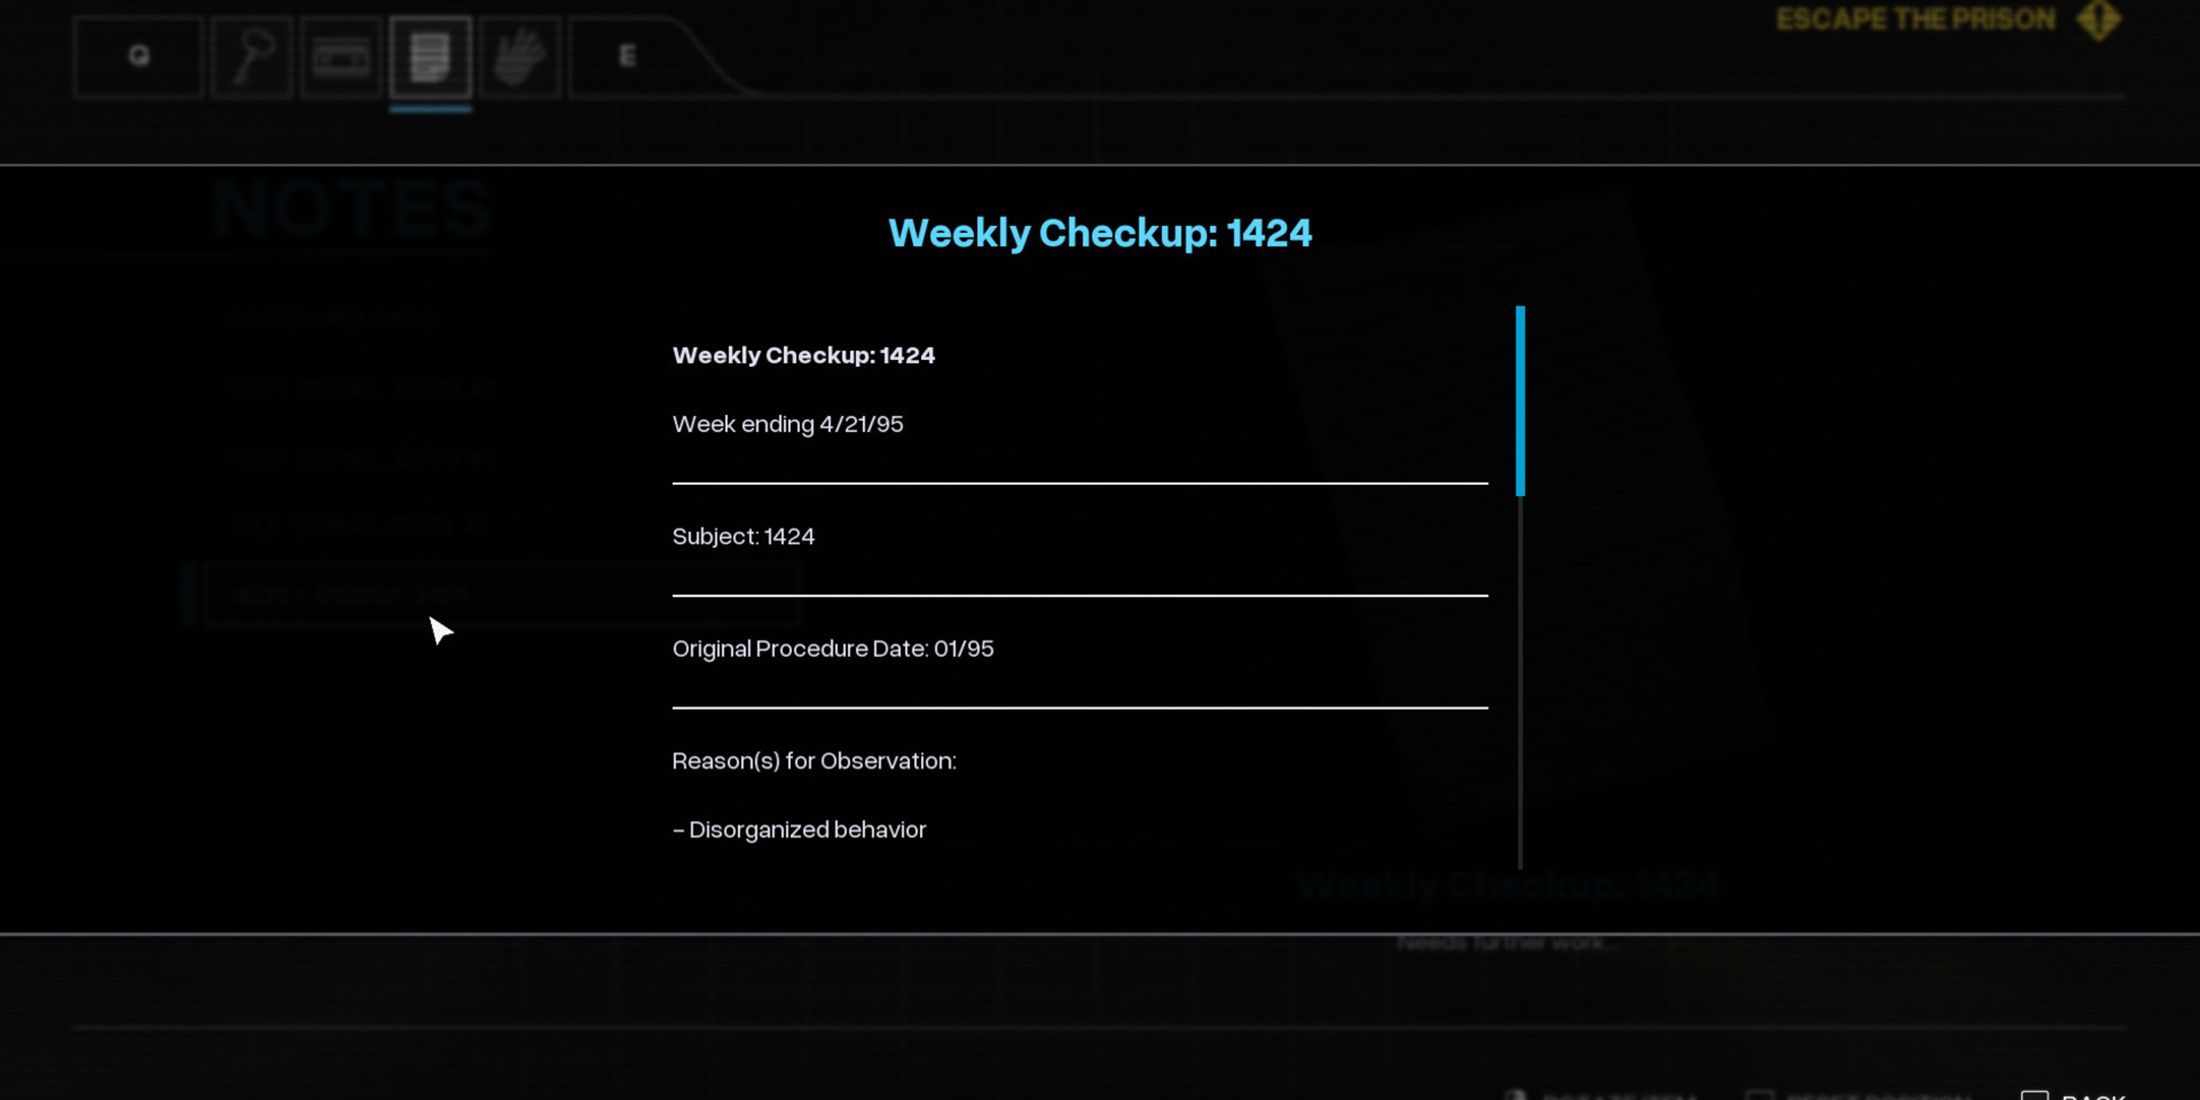
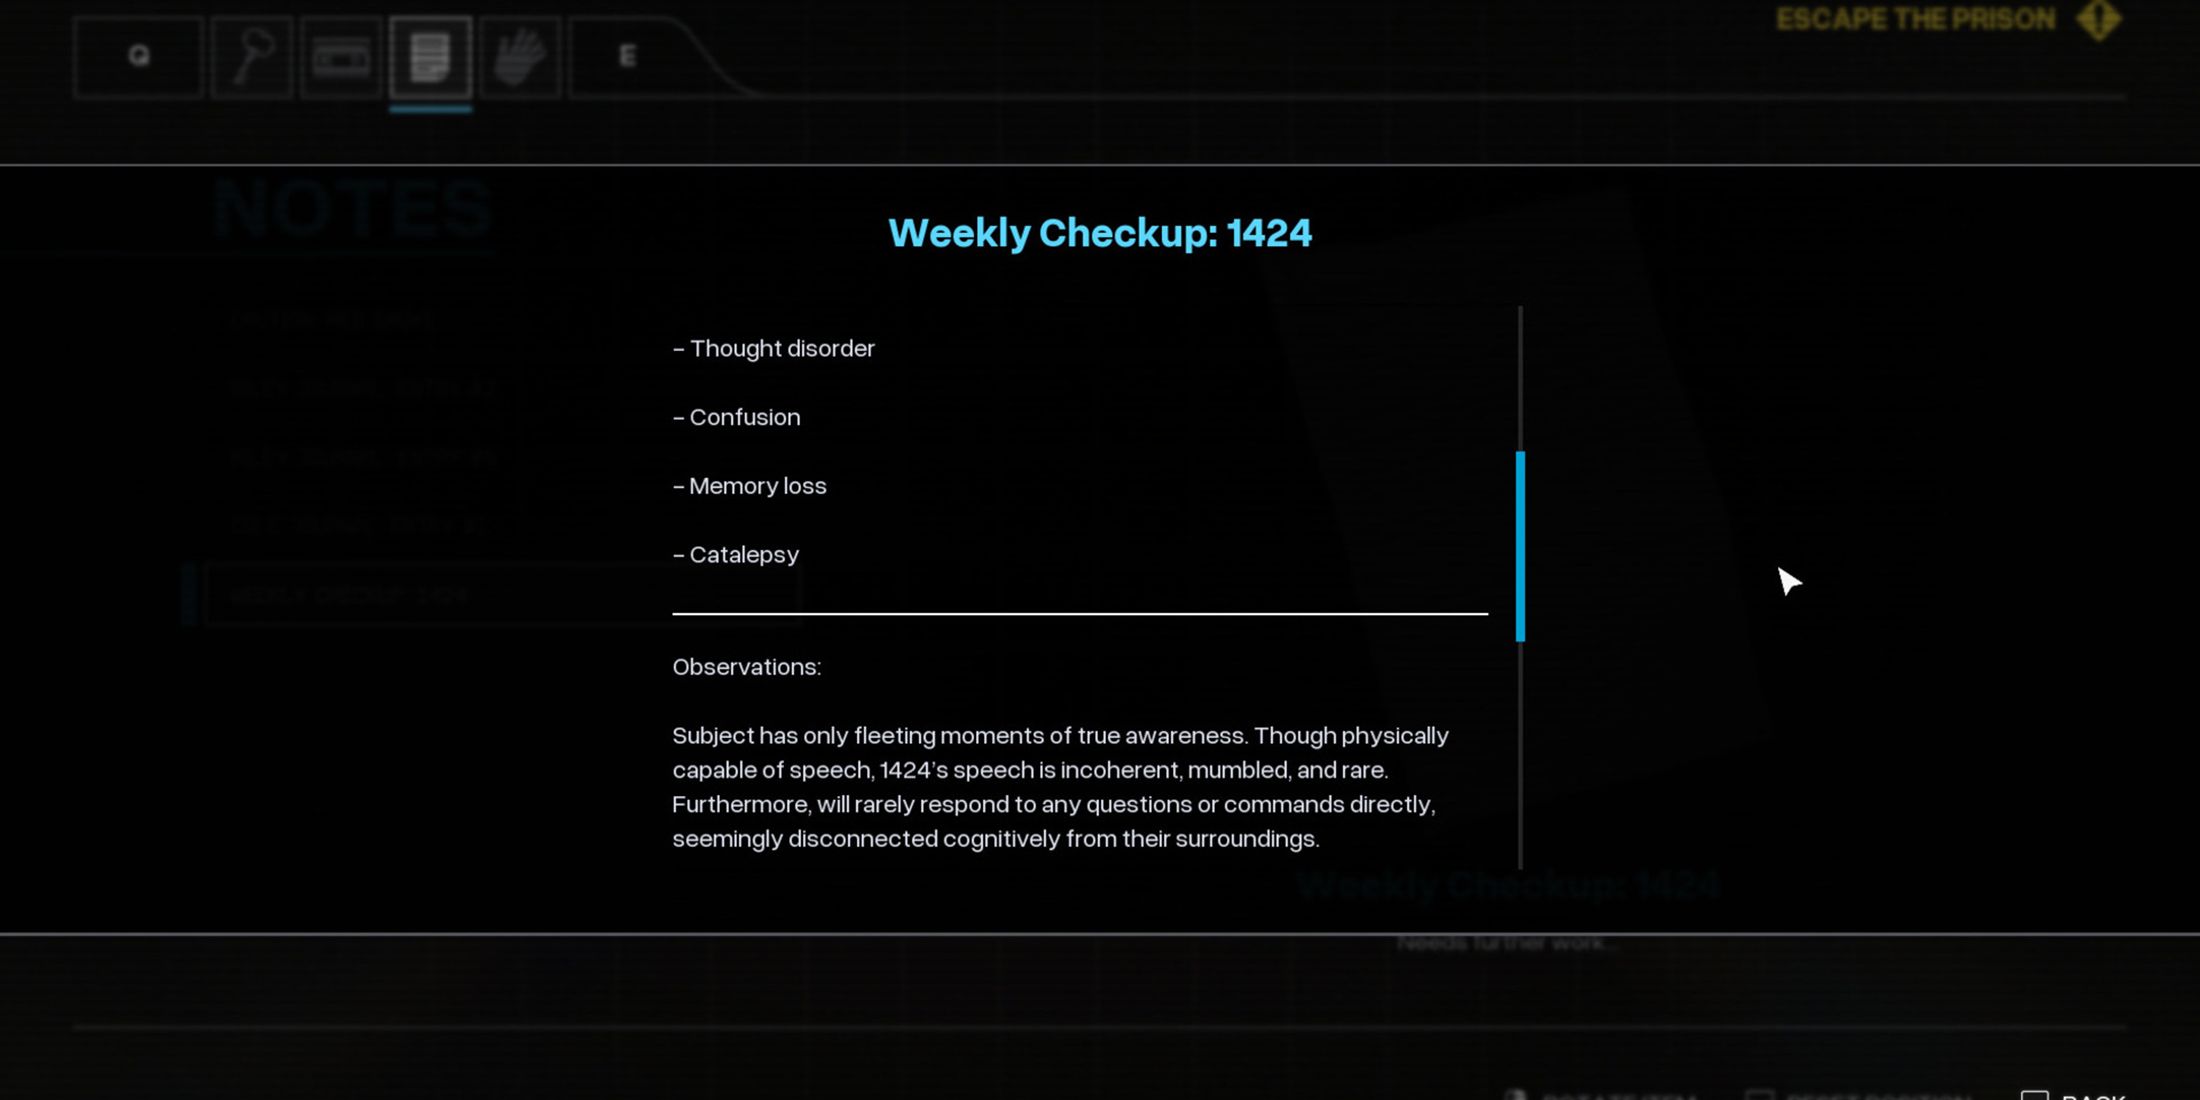
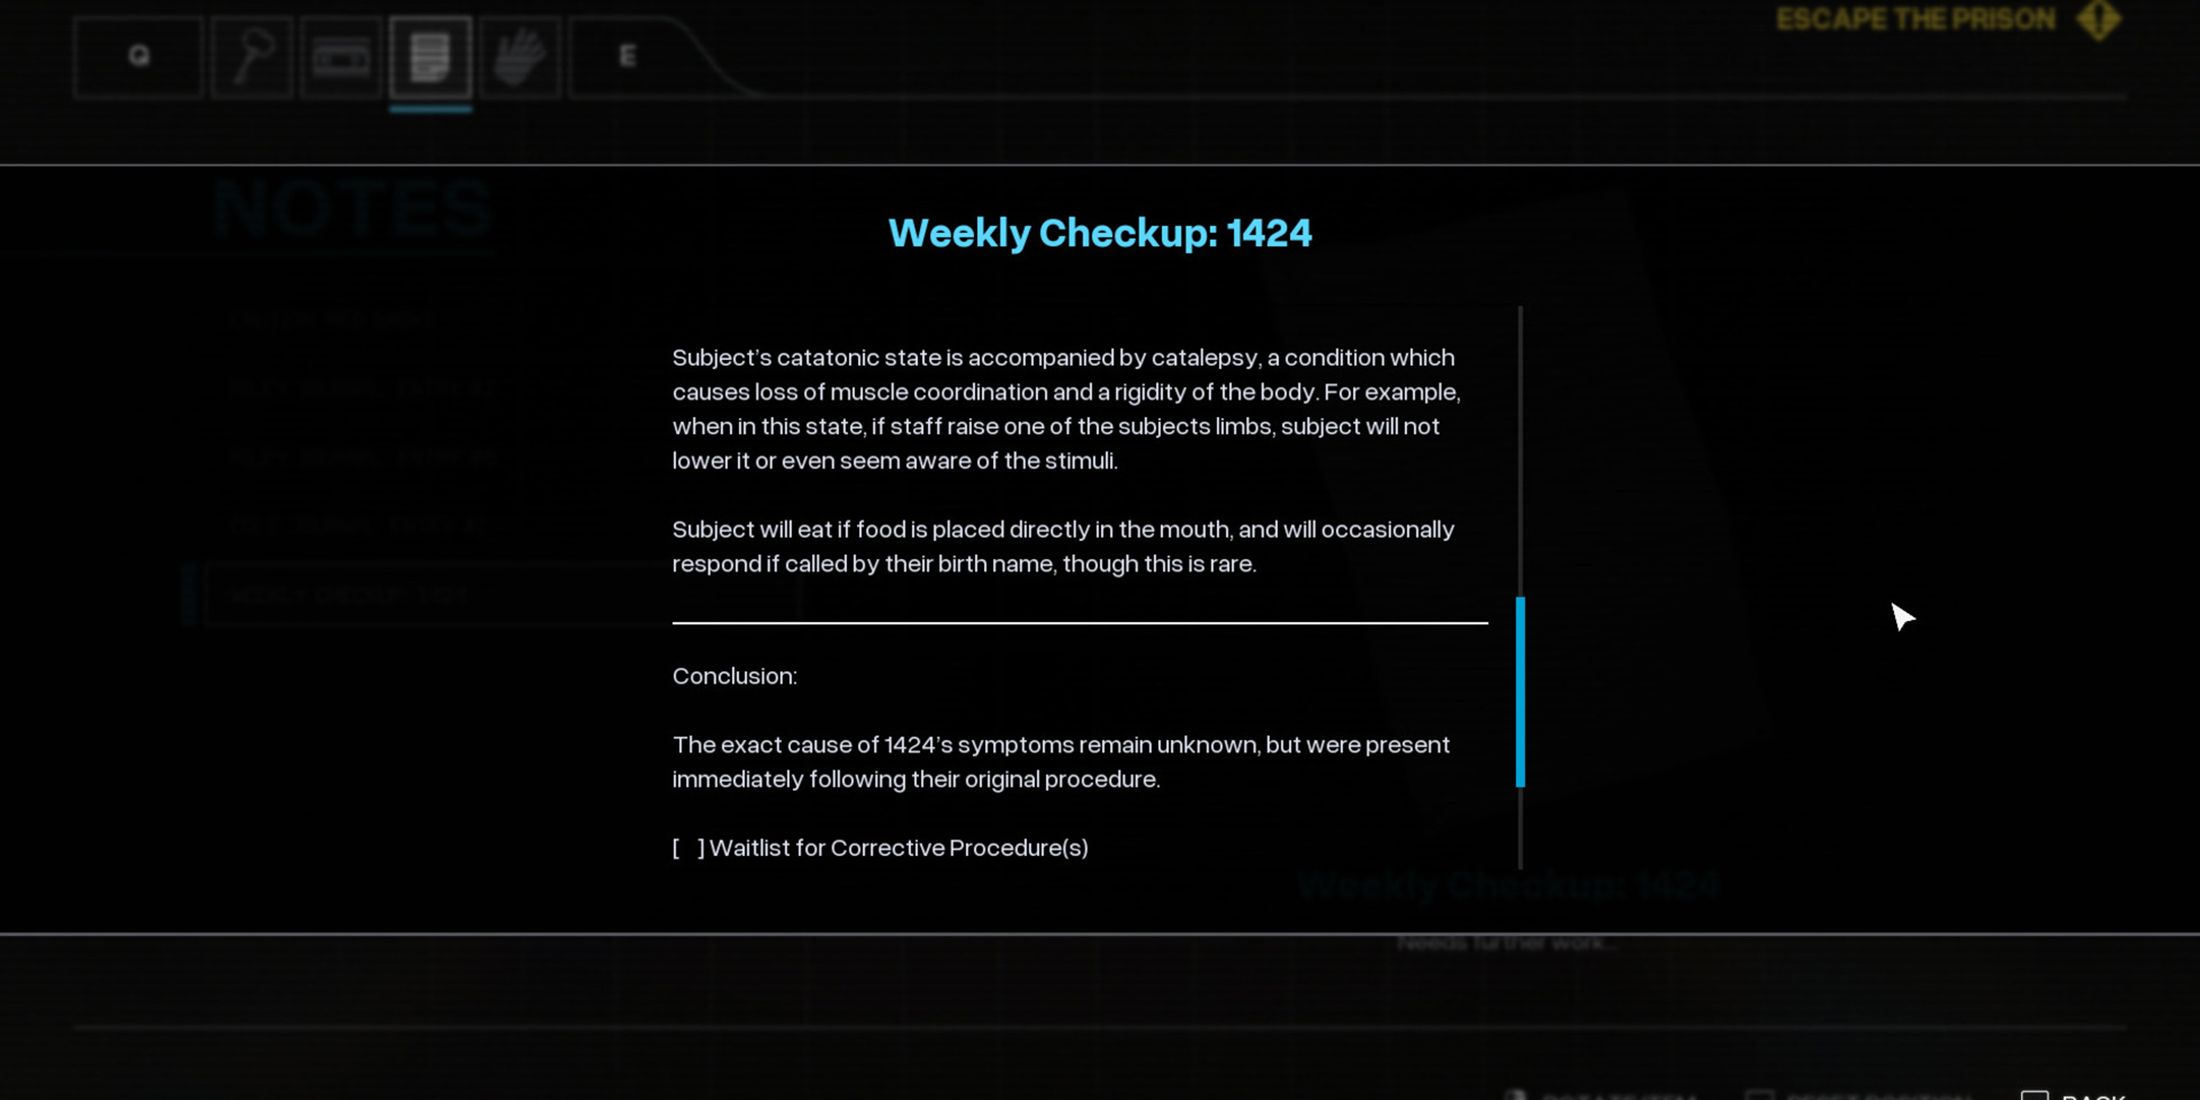
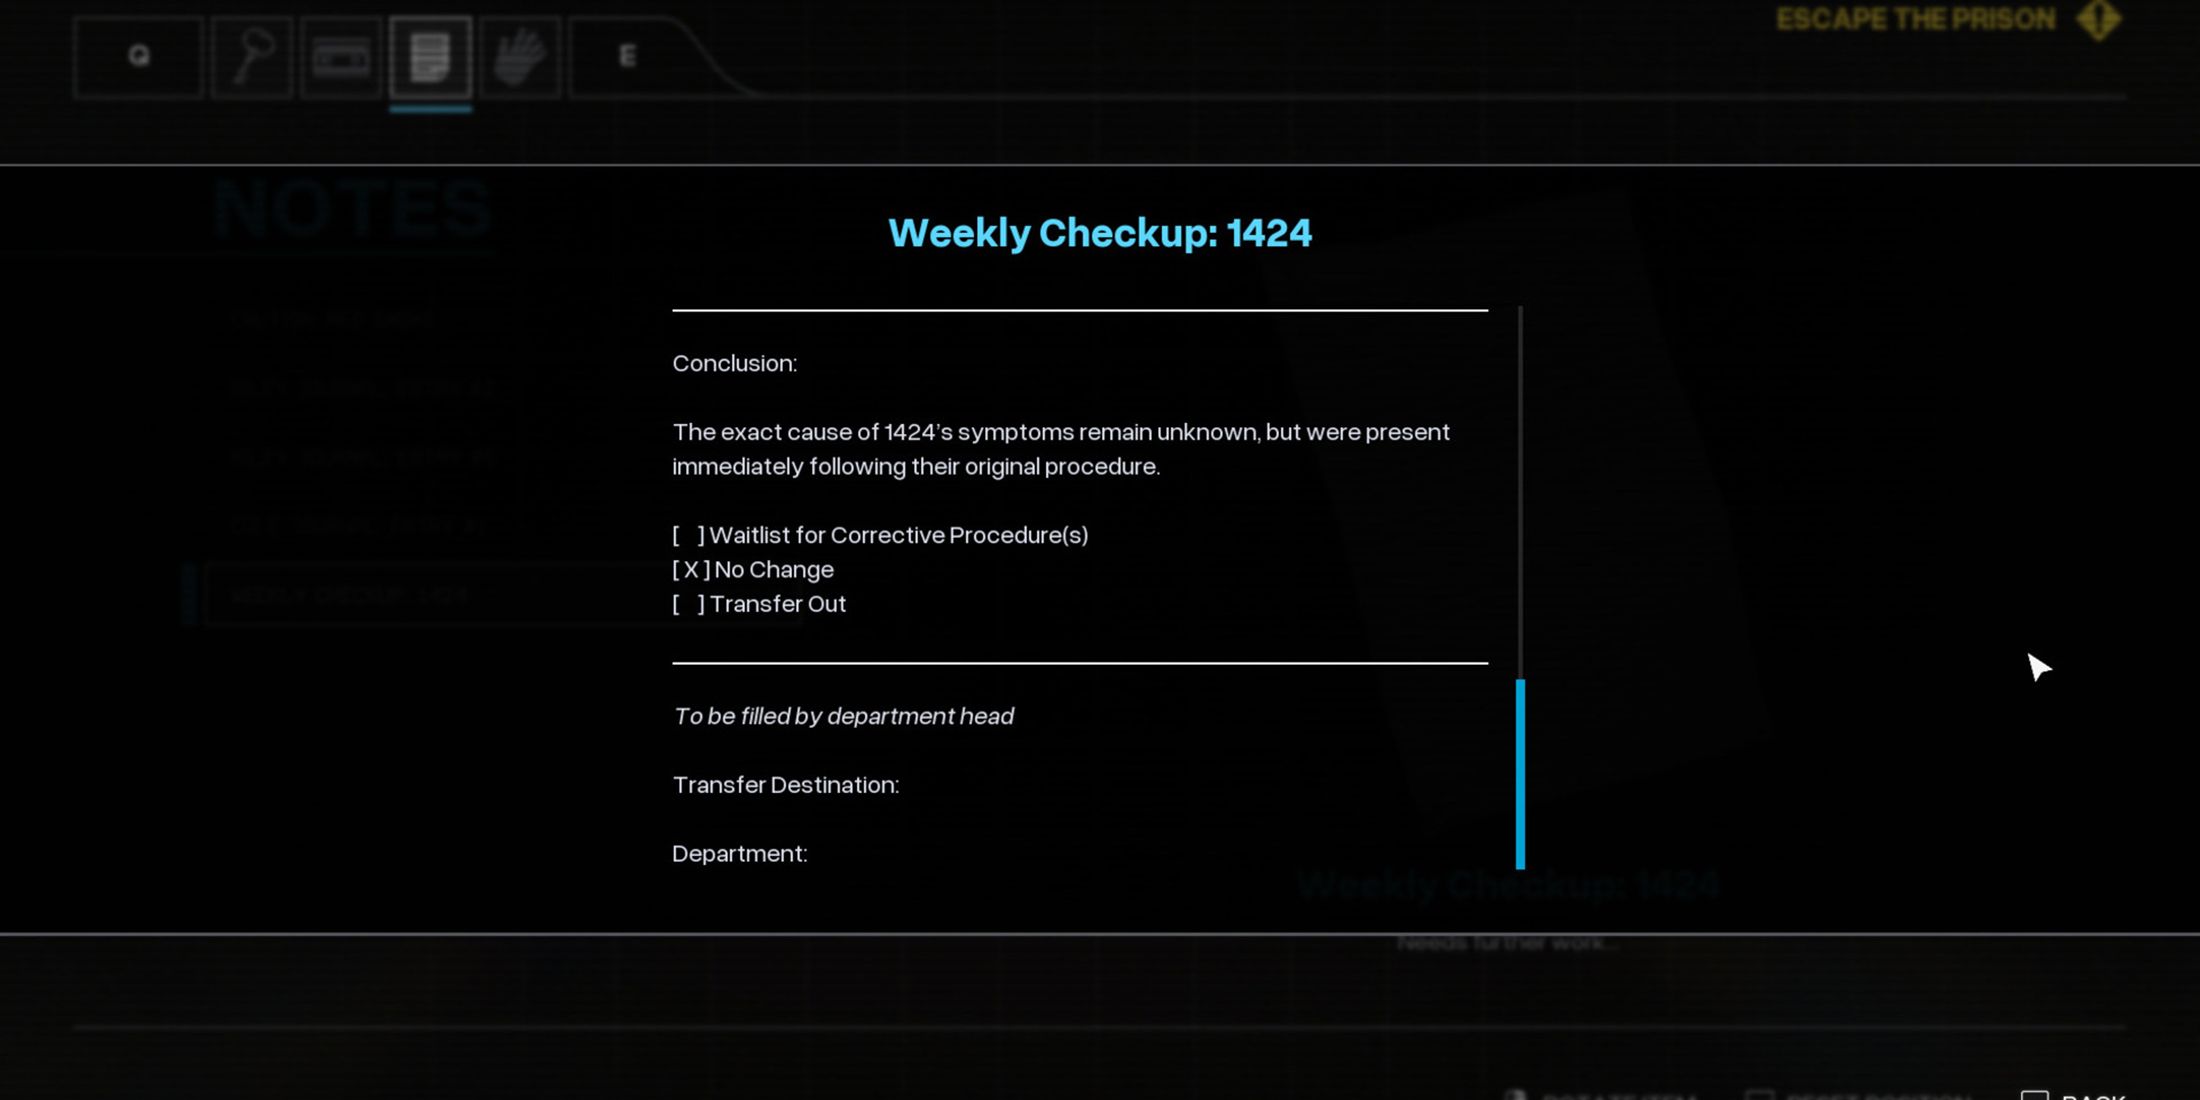
- Auto Save File: Prison Cell Blocks (6)
- Objective: Escape the Prison
If you come across the red gas in the bottom sections of the jail cell blocks, you’ll have to retrieve a yellow handle device from the opposite side of the block. A memo can be found at the workstation near this tool.
This document outlines a weekly assessment for patient 1424, who is critically ill with no muscle control, emotional volatility, and memory problems. The physician suspects these issues may stem from a mistake during the treatment process.
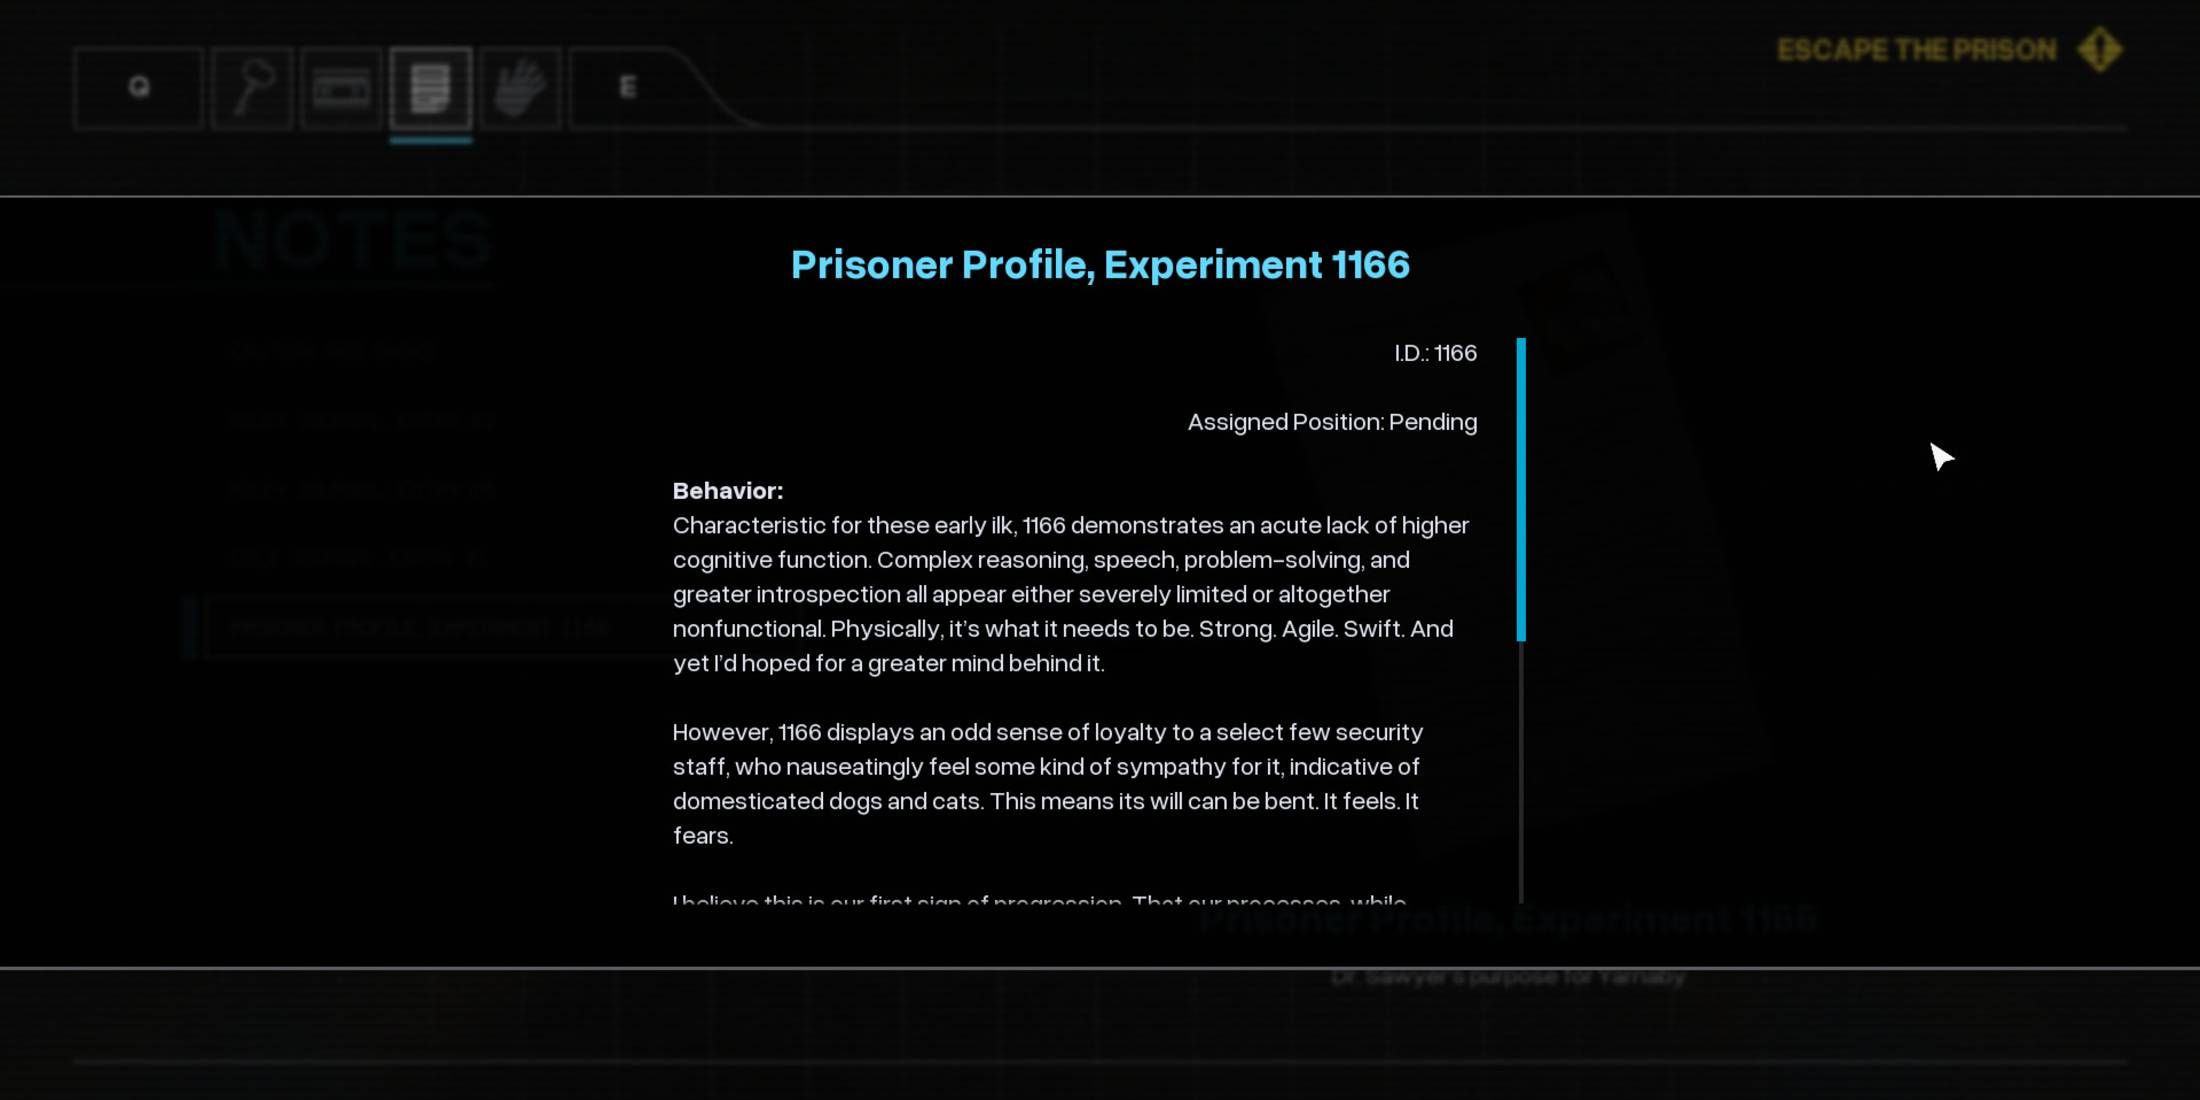
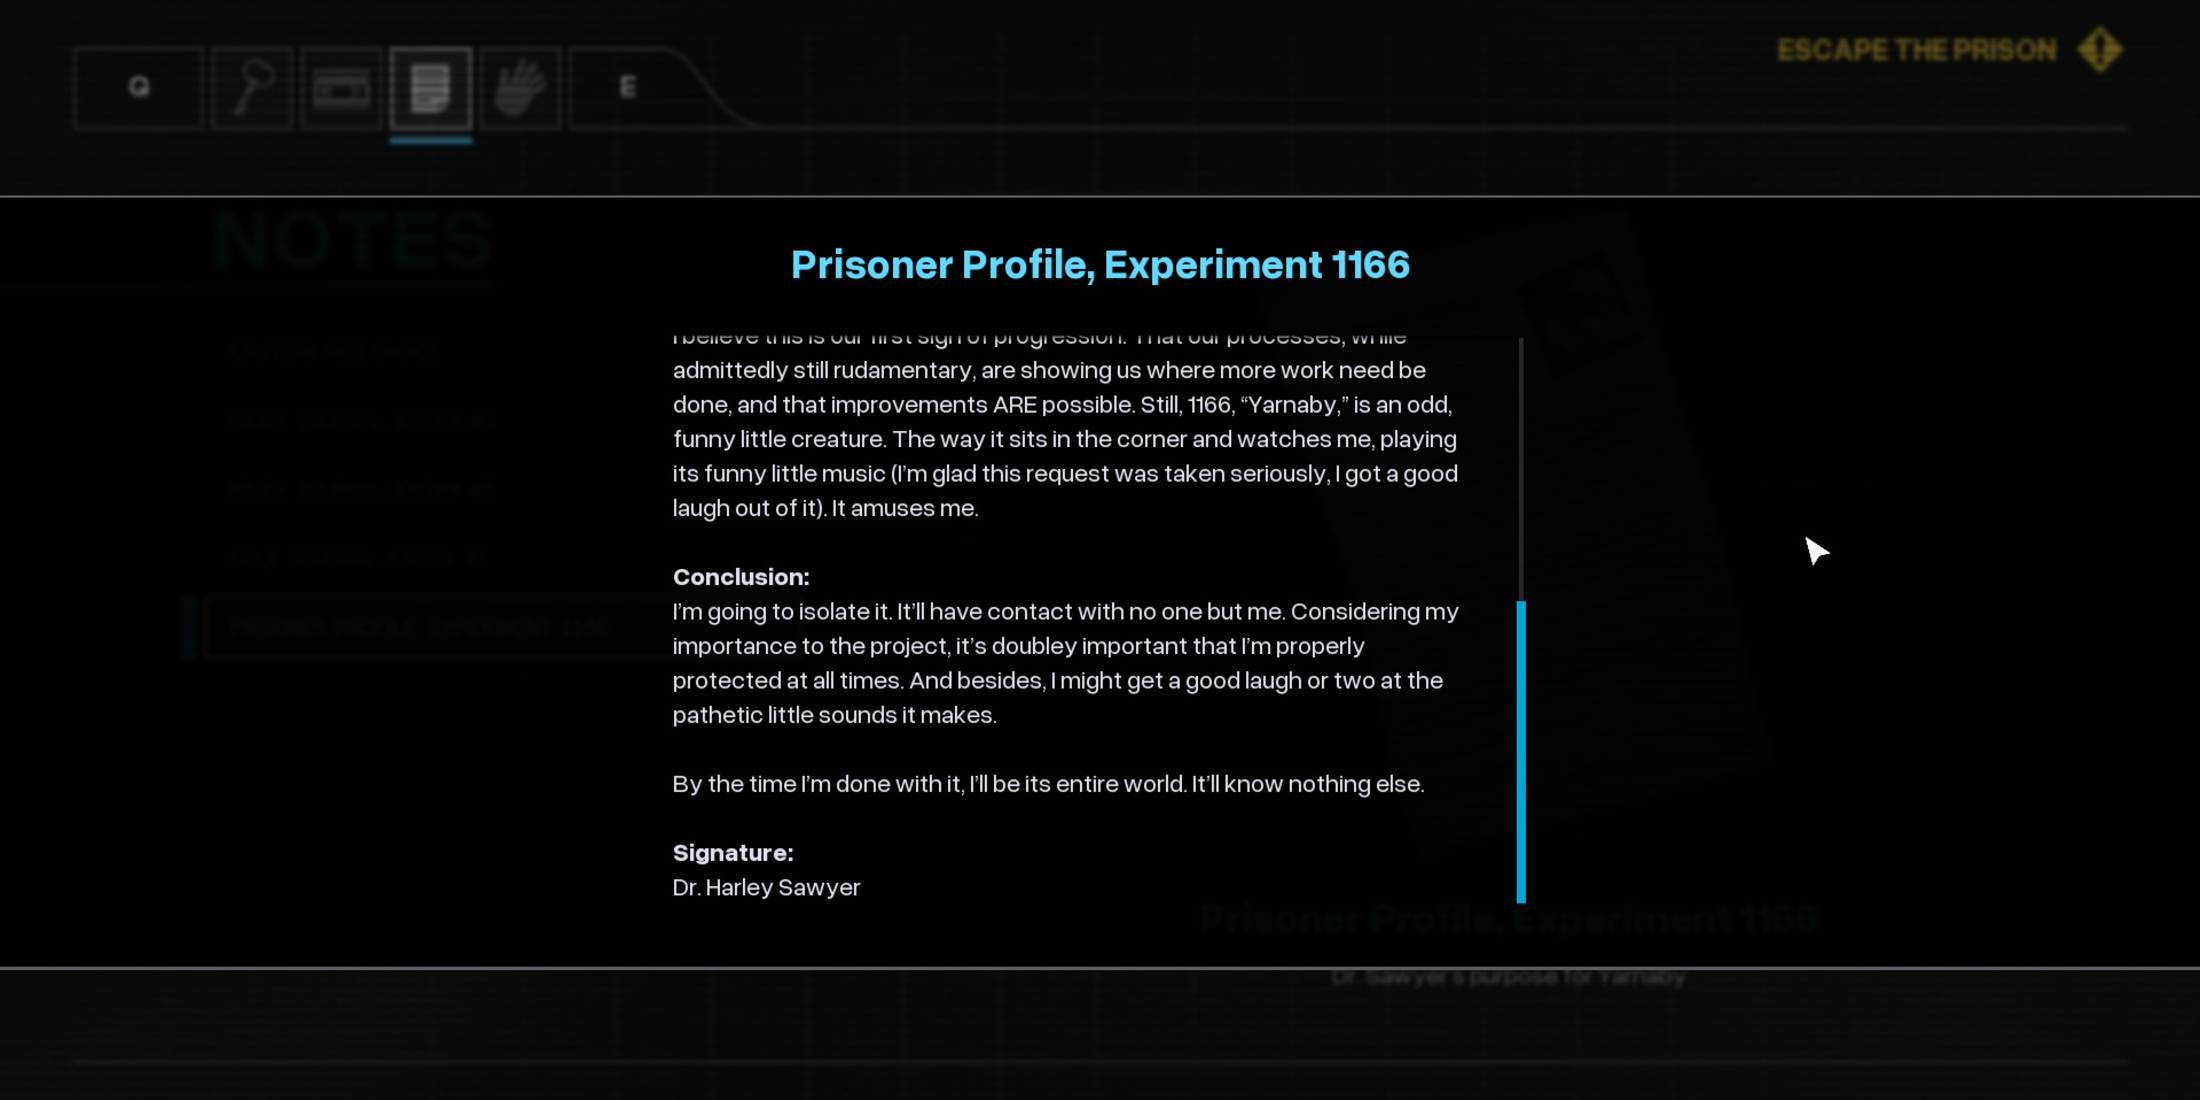
Prisoner Profile, Experiment 1166

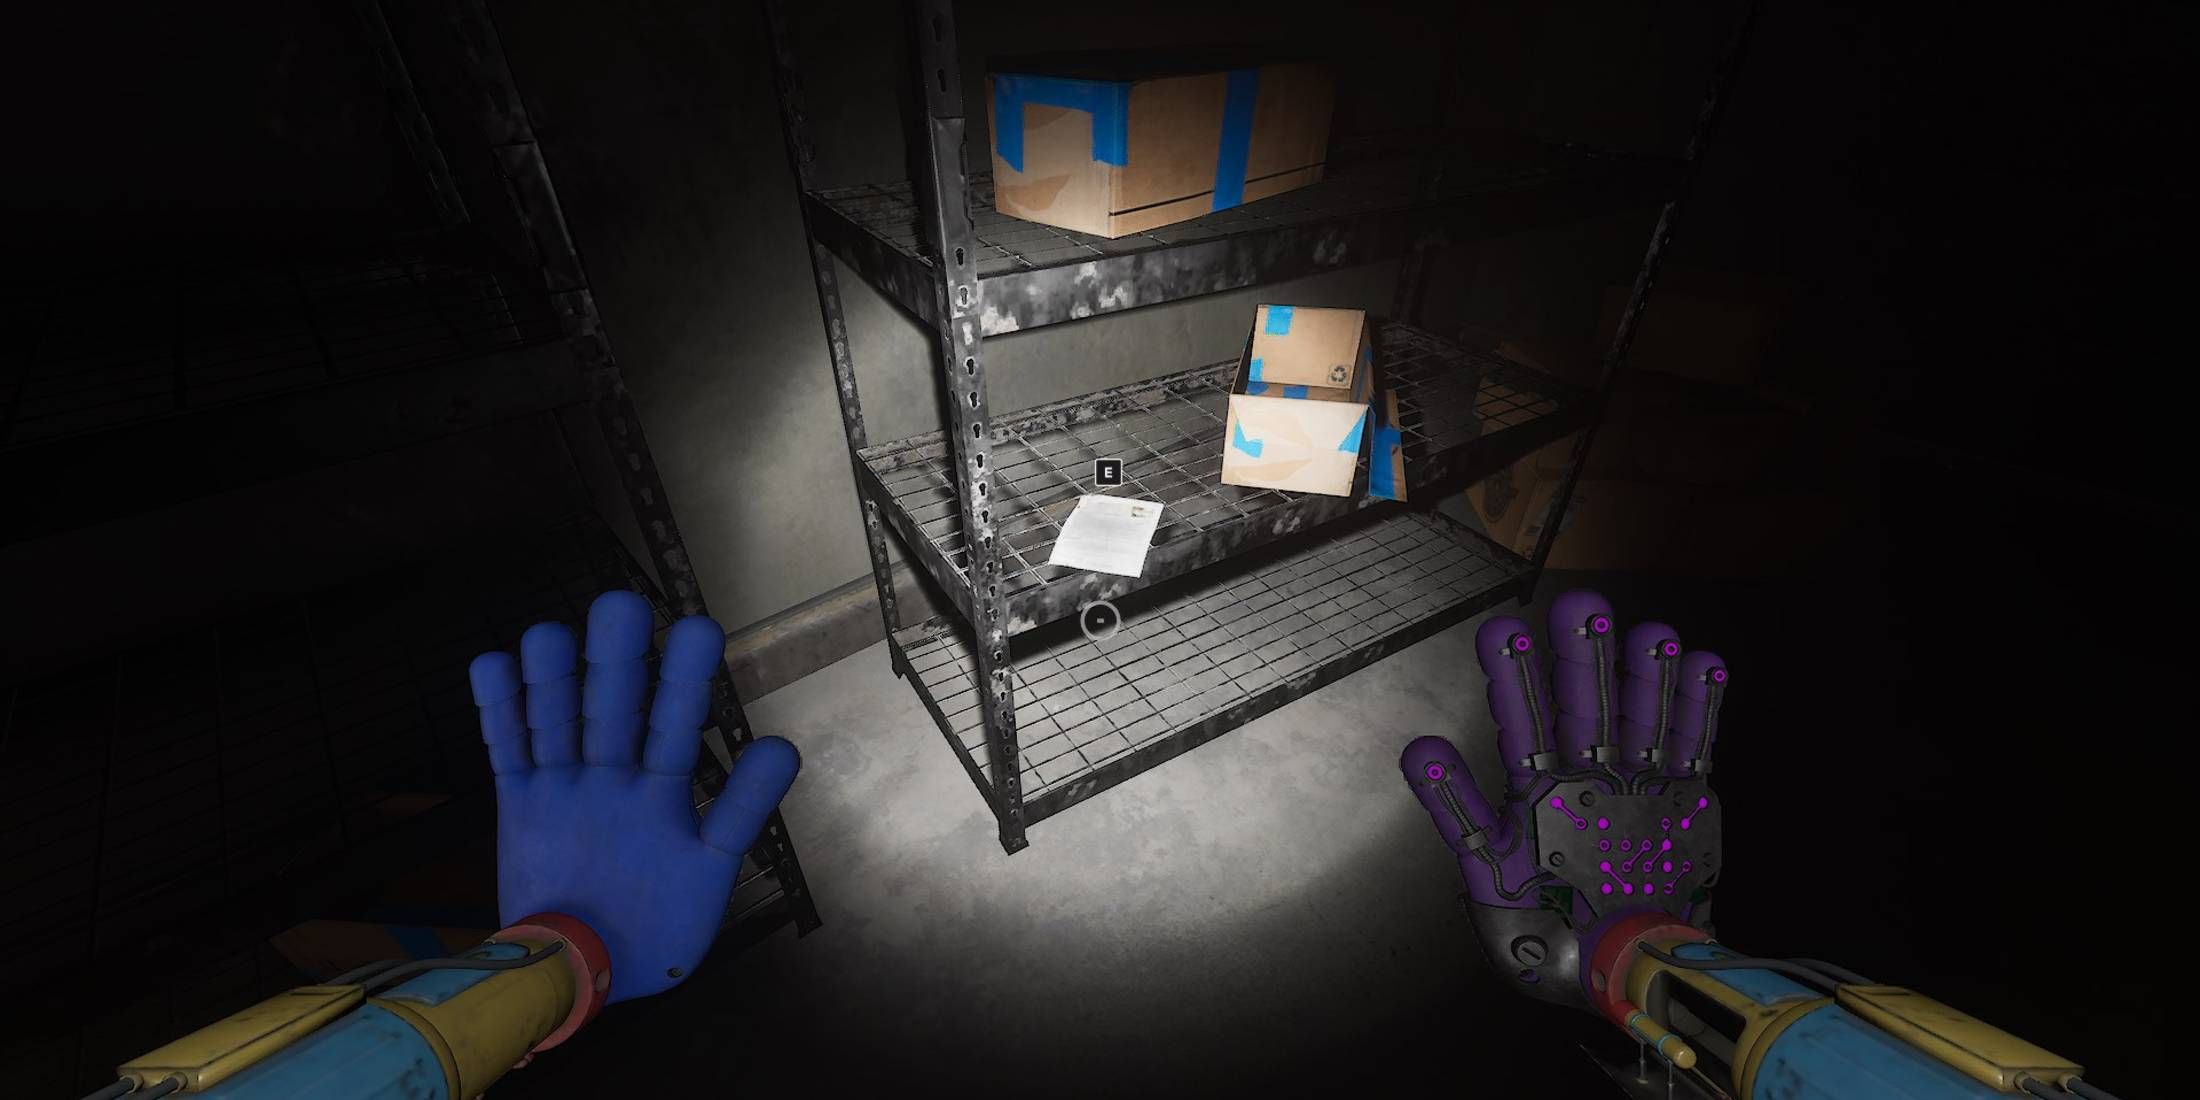

- Auto Save File: Prison Cell Blocks (7)
- Objective: Escape the Prison
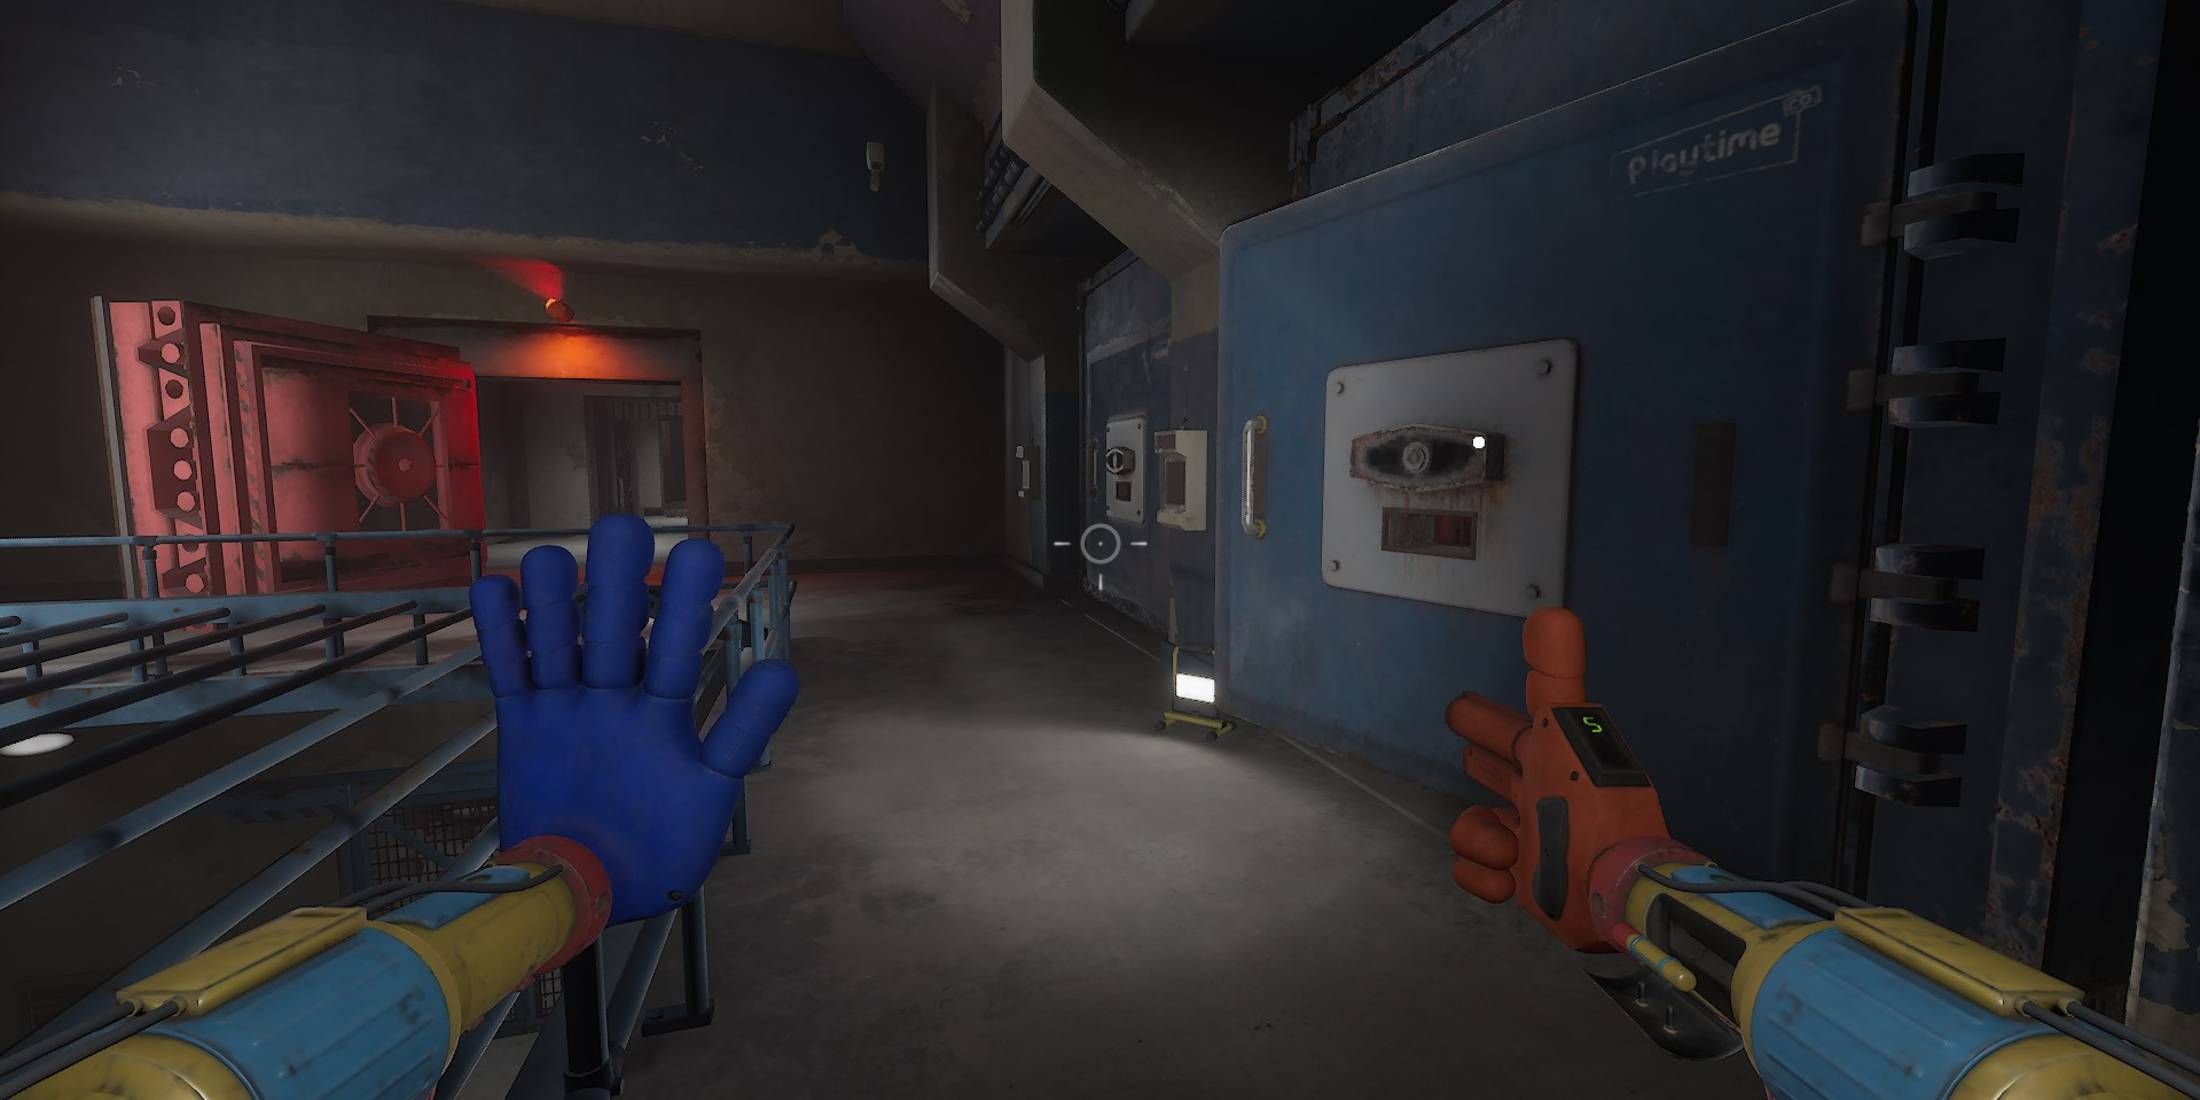
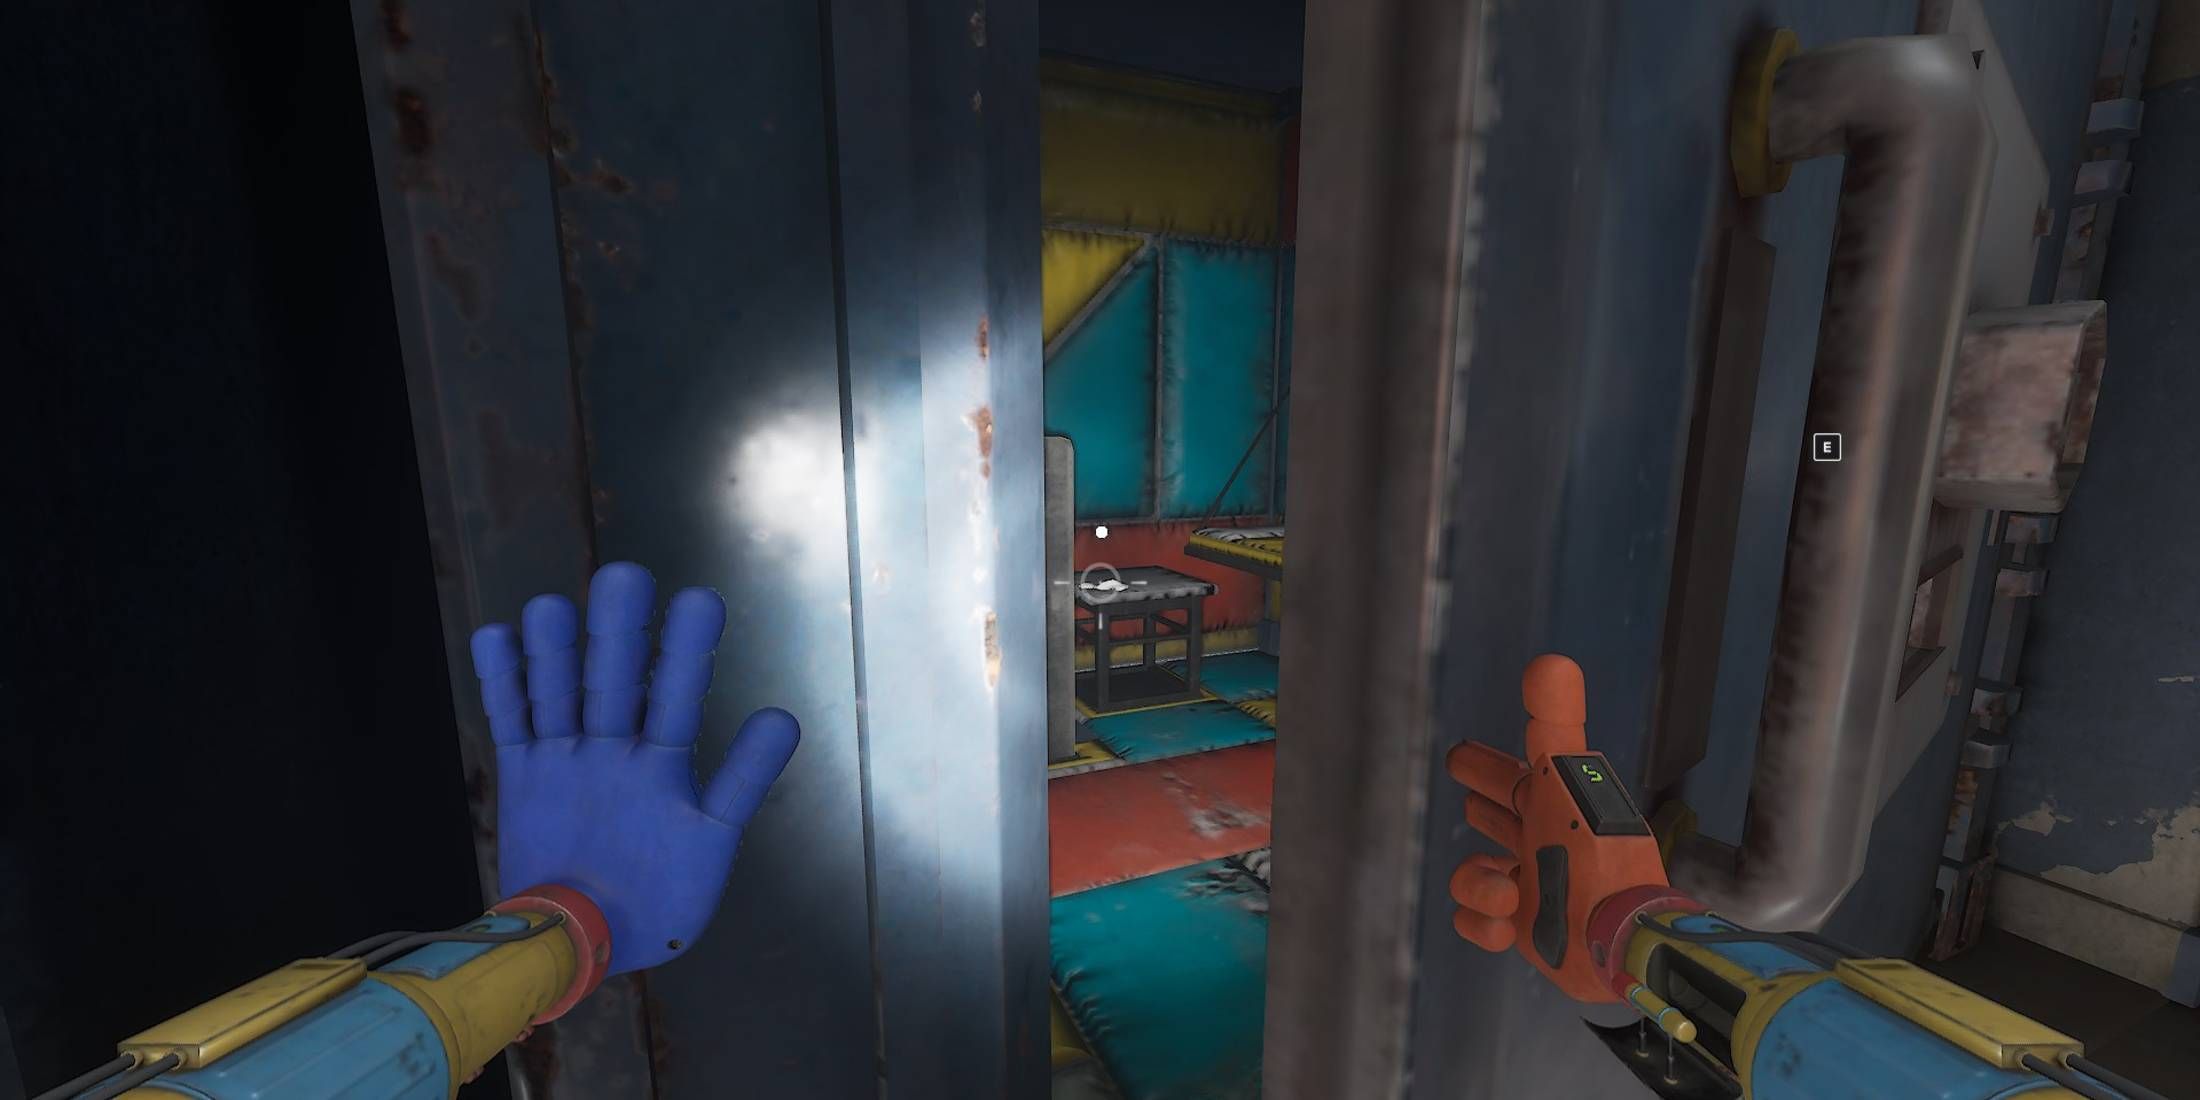
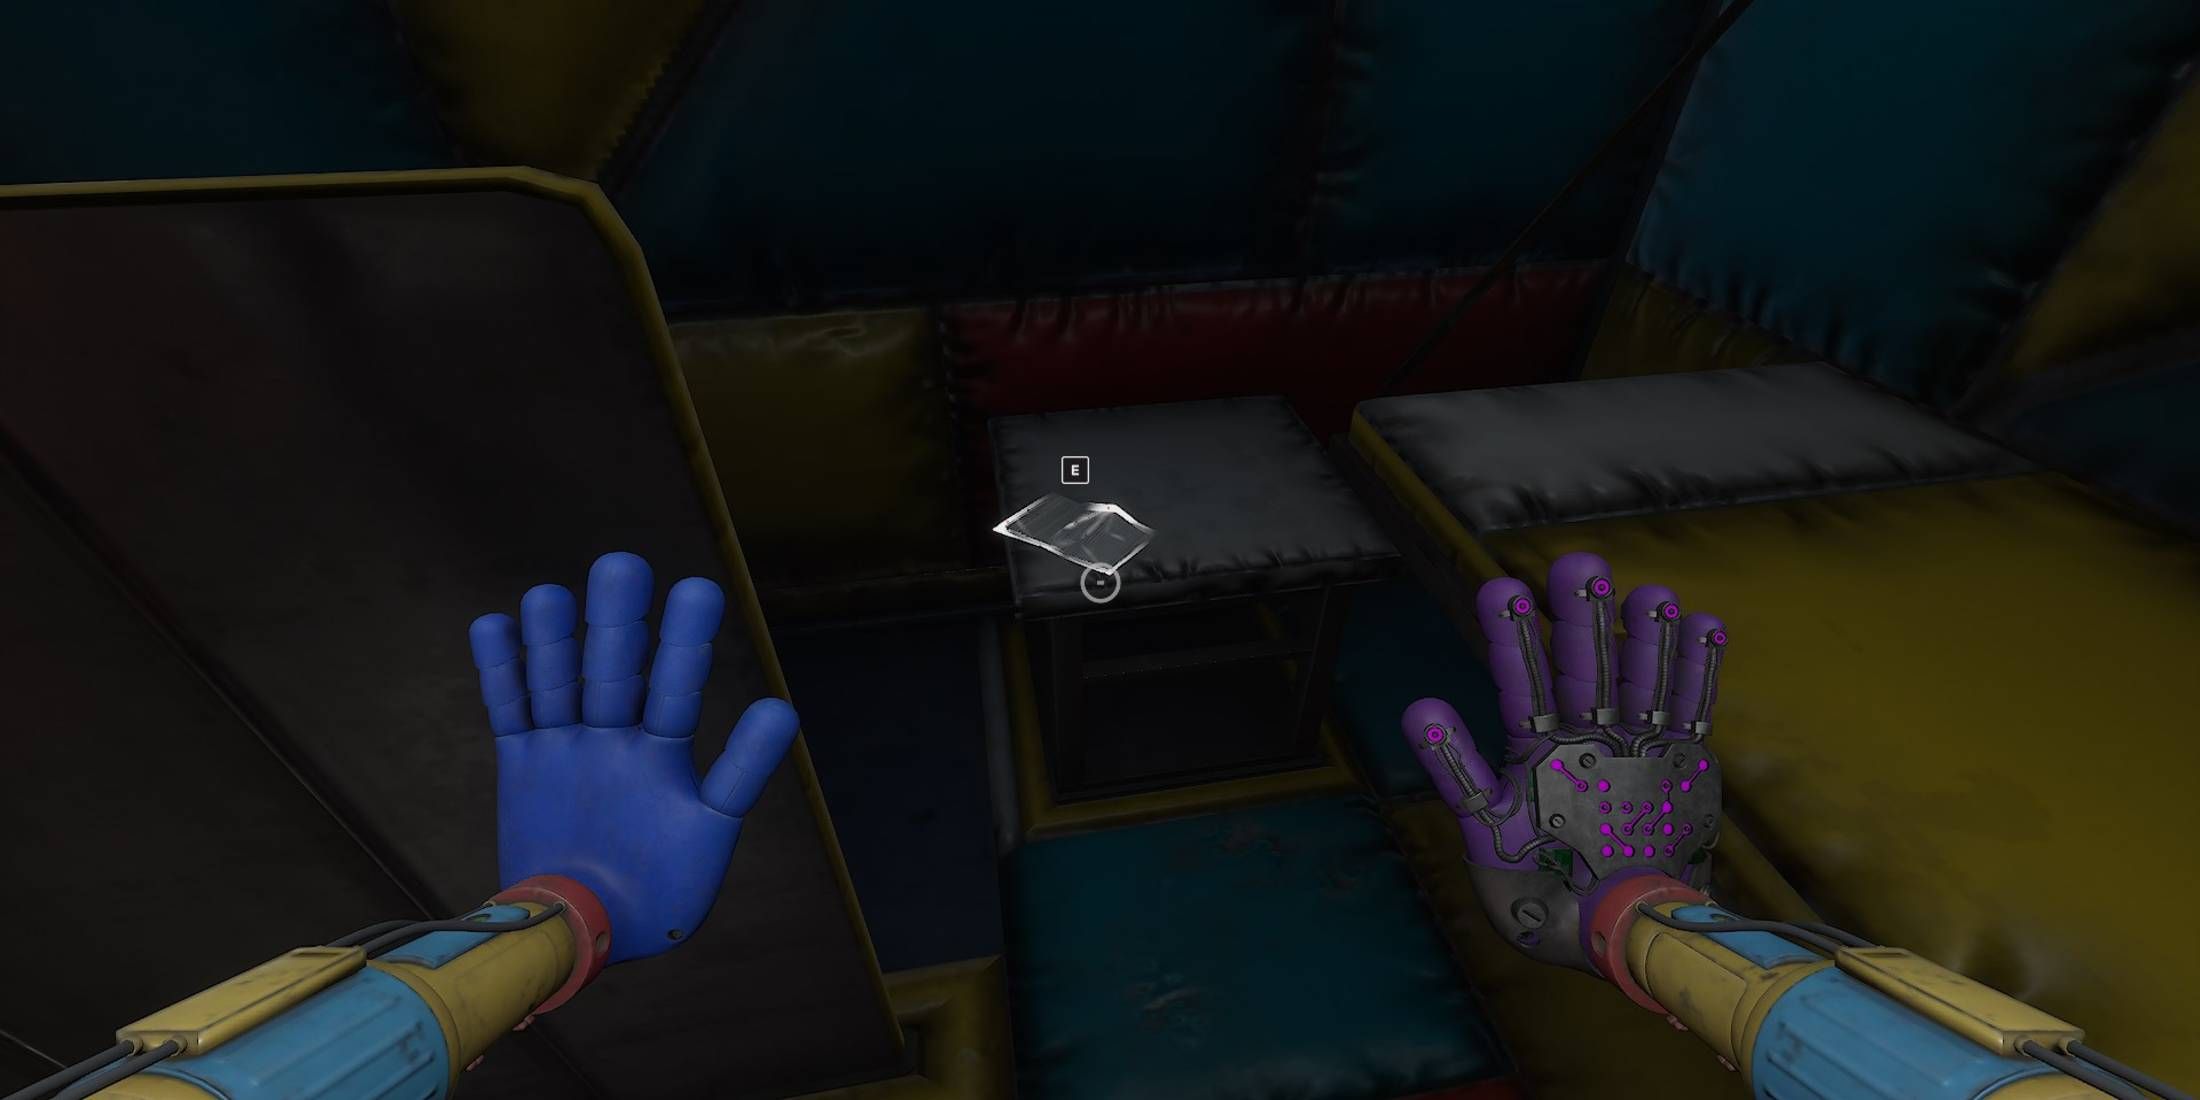
Following the solution to the CAGE code riddle, smashing the glass pane, and employing an electric lifting device for advancement, gamers will encounter a chamber featuring two curtains supported by bulky crates. Inside this space, you’ll find a storage cupboard with a message tucked underneath on its lowest shelf.
This note was penned by Dr. Harley Sawyer, who refers to Subject 1166, who the character eventually discovers is Yarnaby. He notes that 1166 lacks advanced cognitive abilities, behaving more like a tamed pet. Sawyer then chooses to train 1166 and utilize it as a kind of protector or bodyguard.
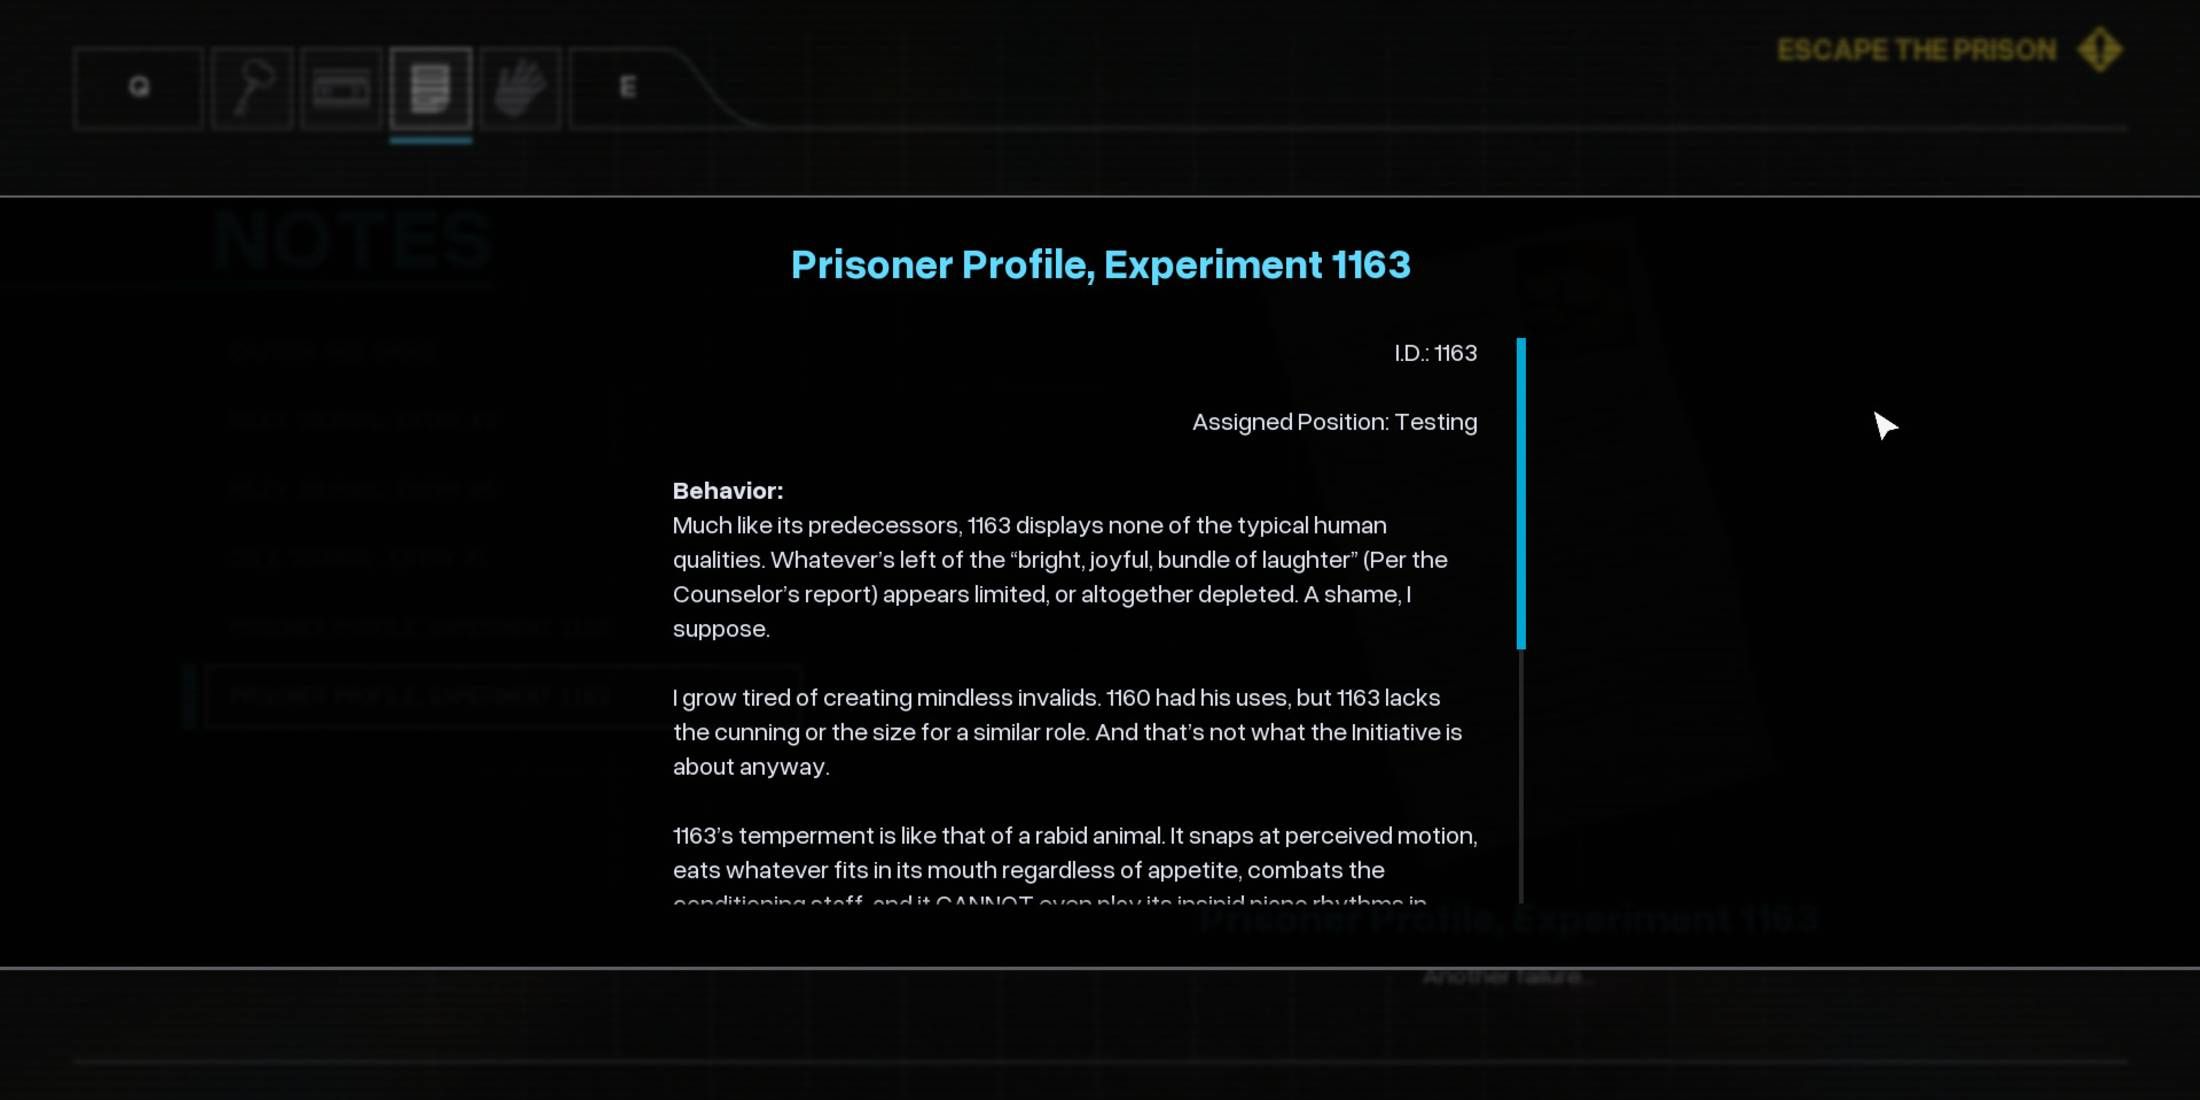
Prisoner Profile, Experiment 1163
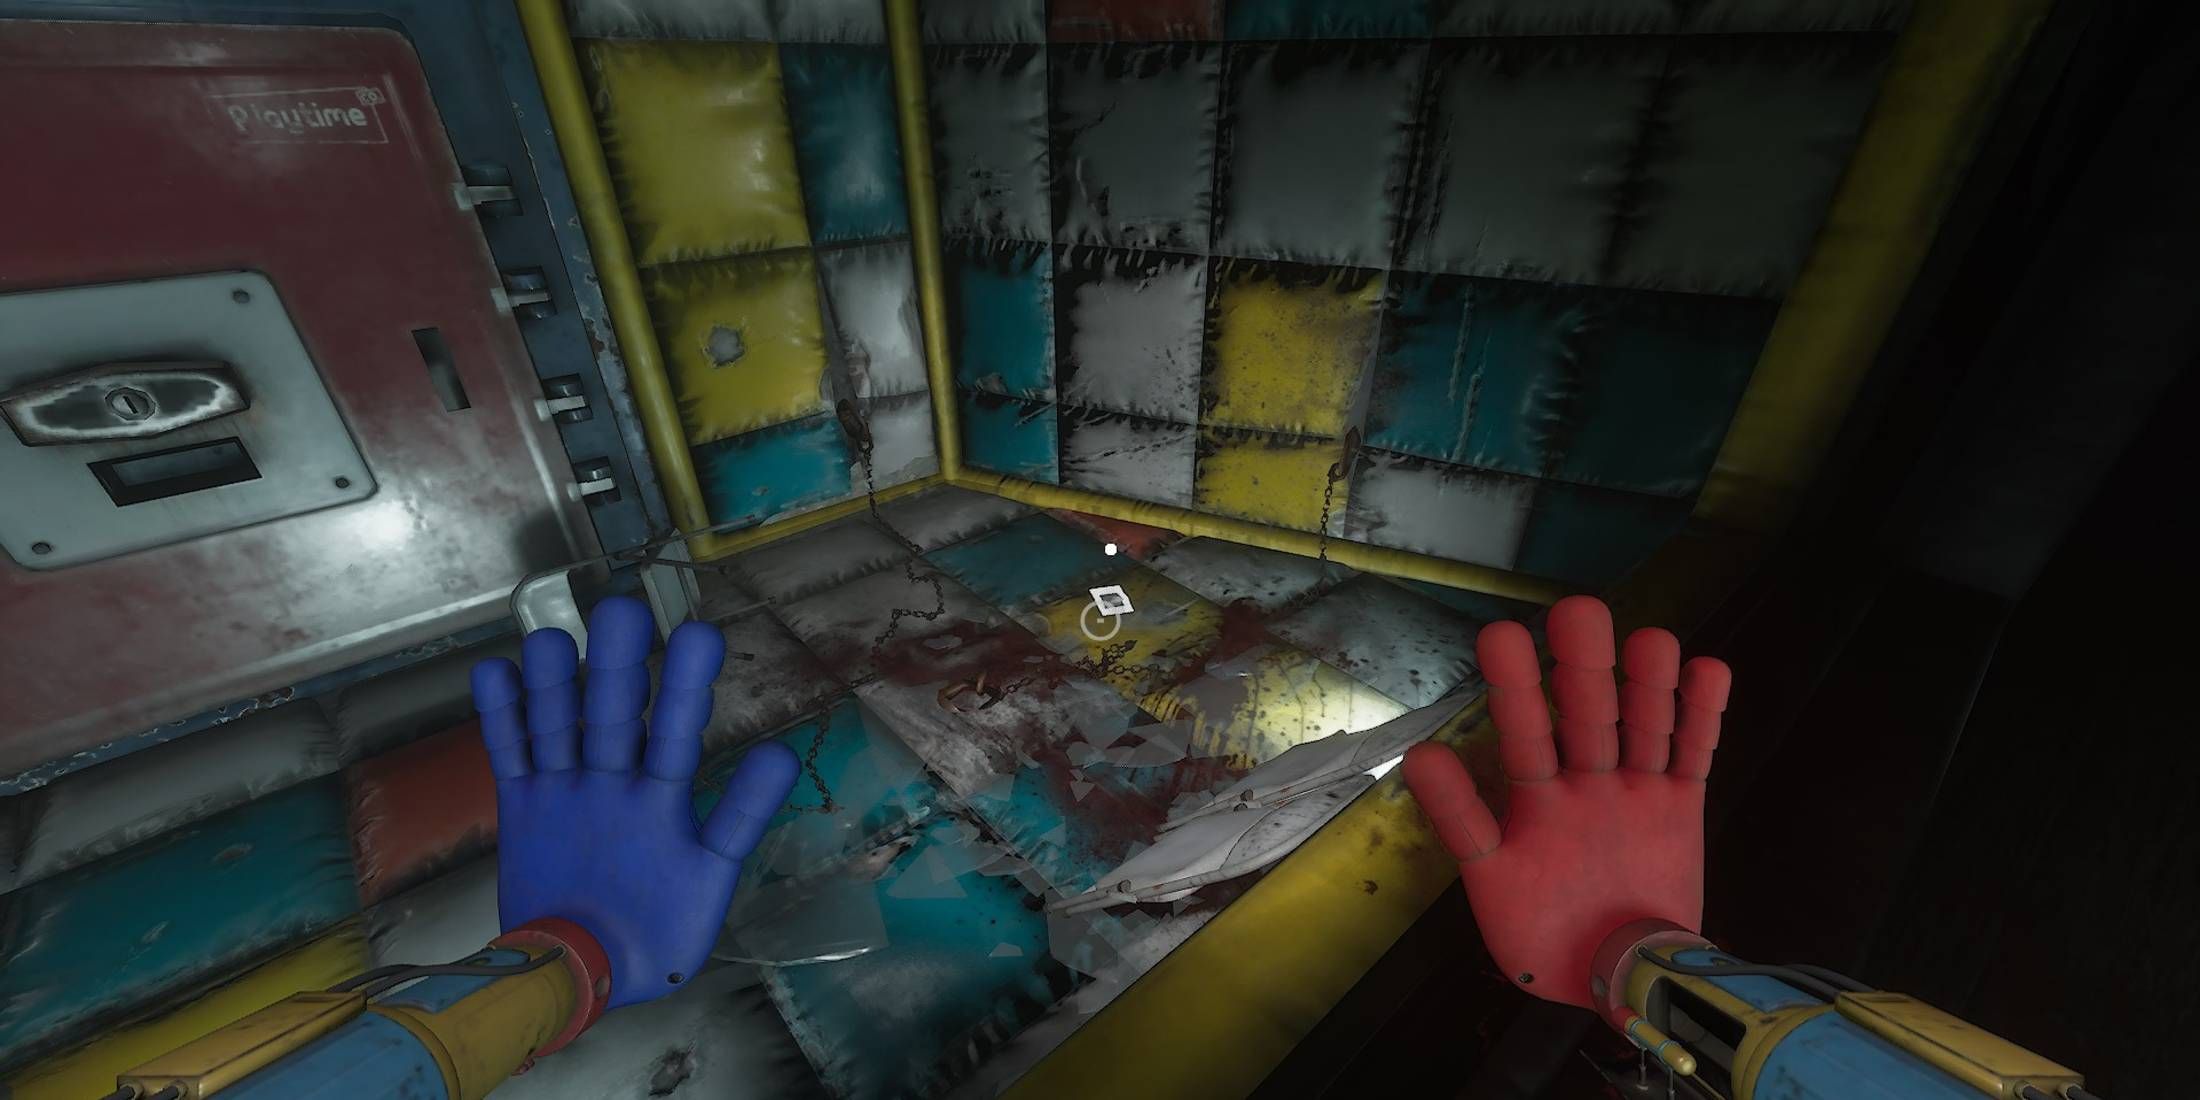

- Auto Save File: Containment Zone (3)
- Objective: Escape the Prison
The following note for players is located within the Containment Zone, specifically within a jail cell marked ‘6’. Notably, the observation window to this particular room is shattered.
This document, too, is penned by Dr. Sawyer and discusses his issues with Subject 1163. It’s clear from the details that Dr. Sawyer refers to Pianosaurus in this context, labeling it as another failure due to its absence of advanced cognitive abilities.
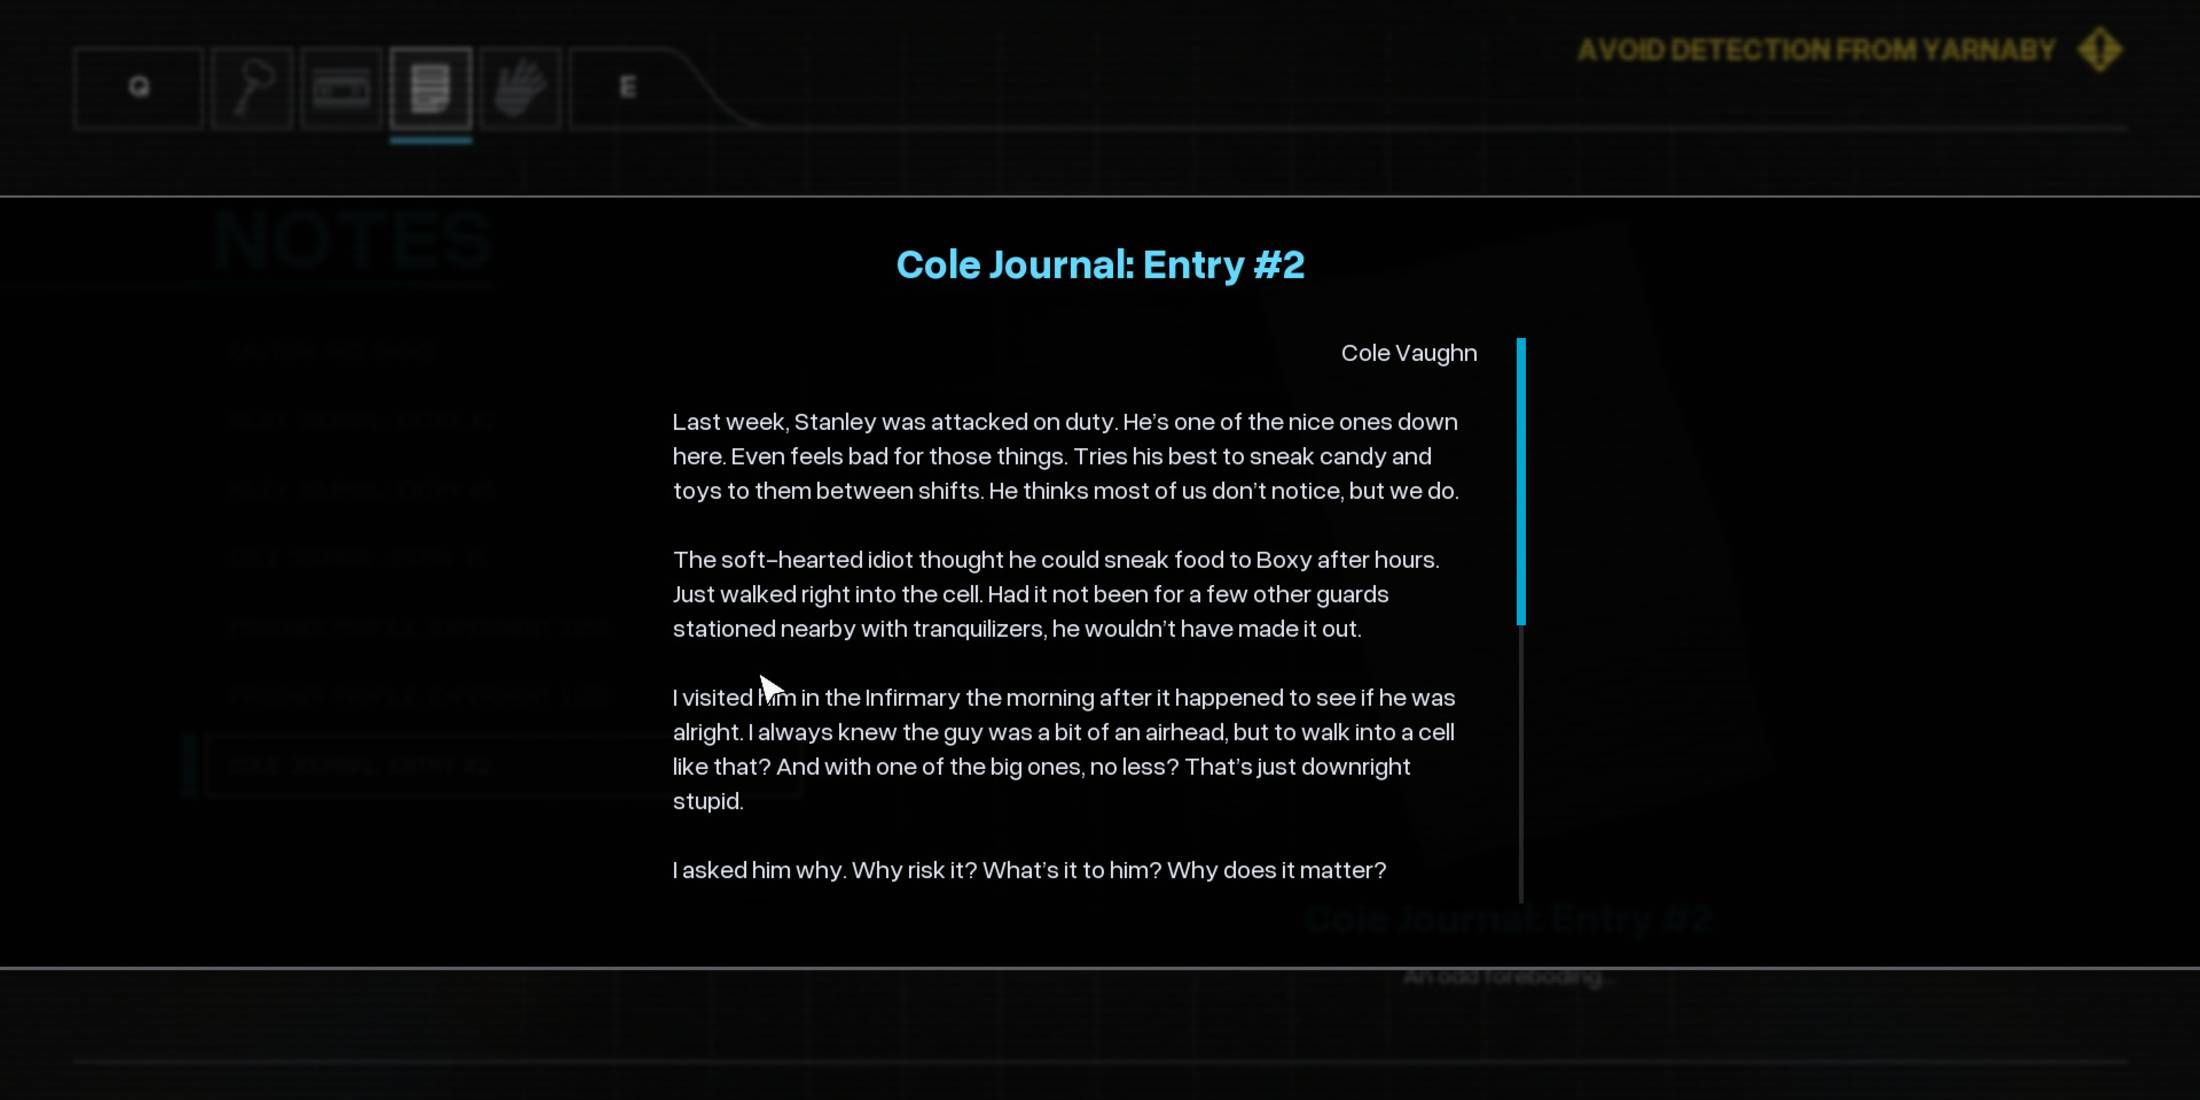
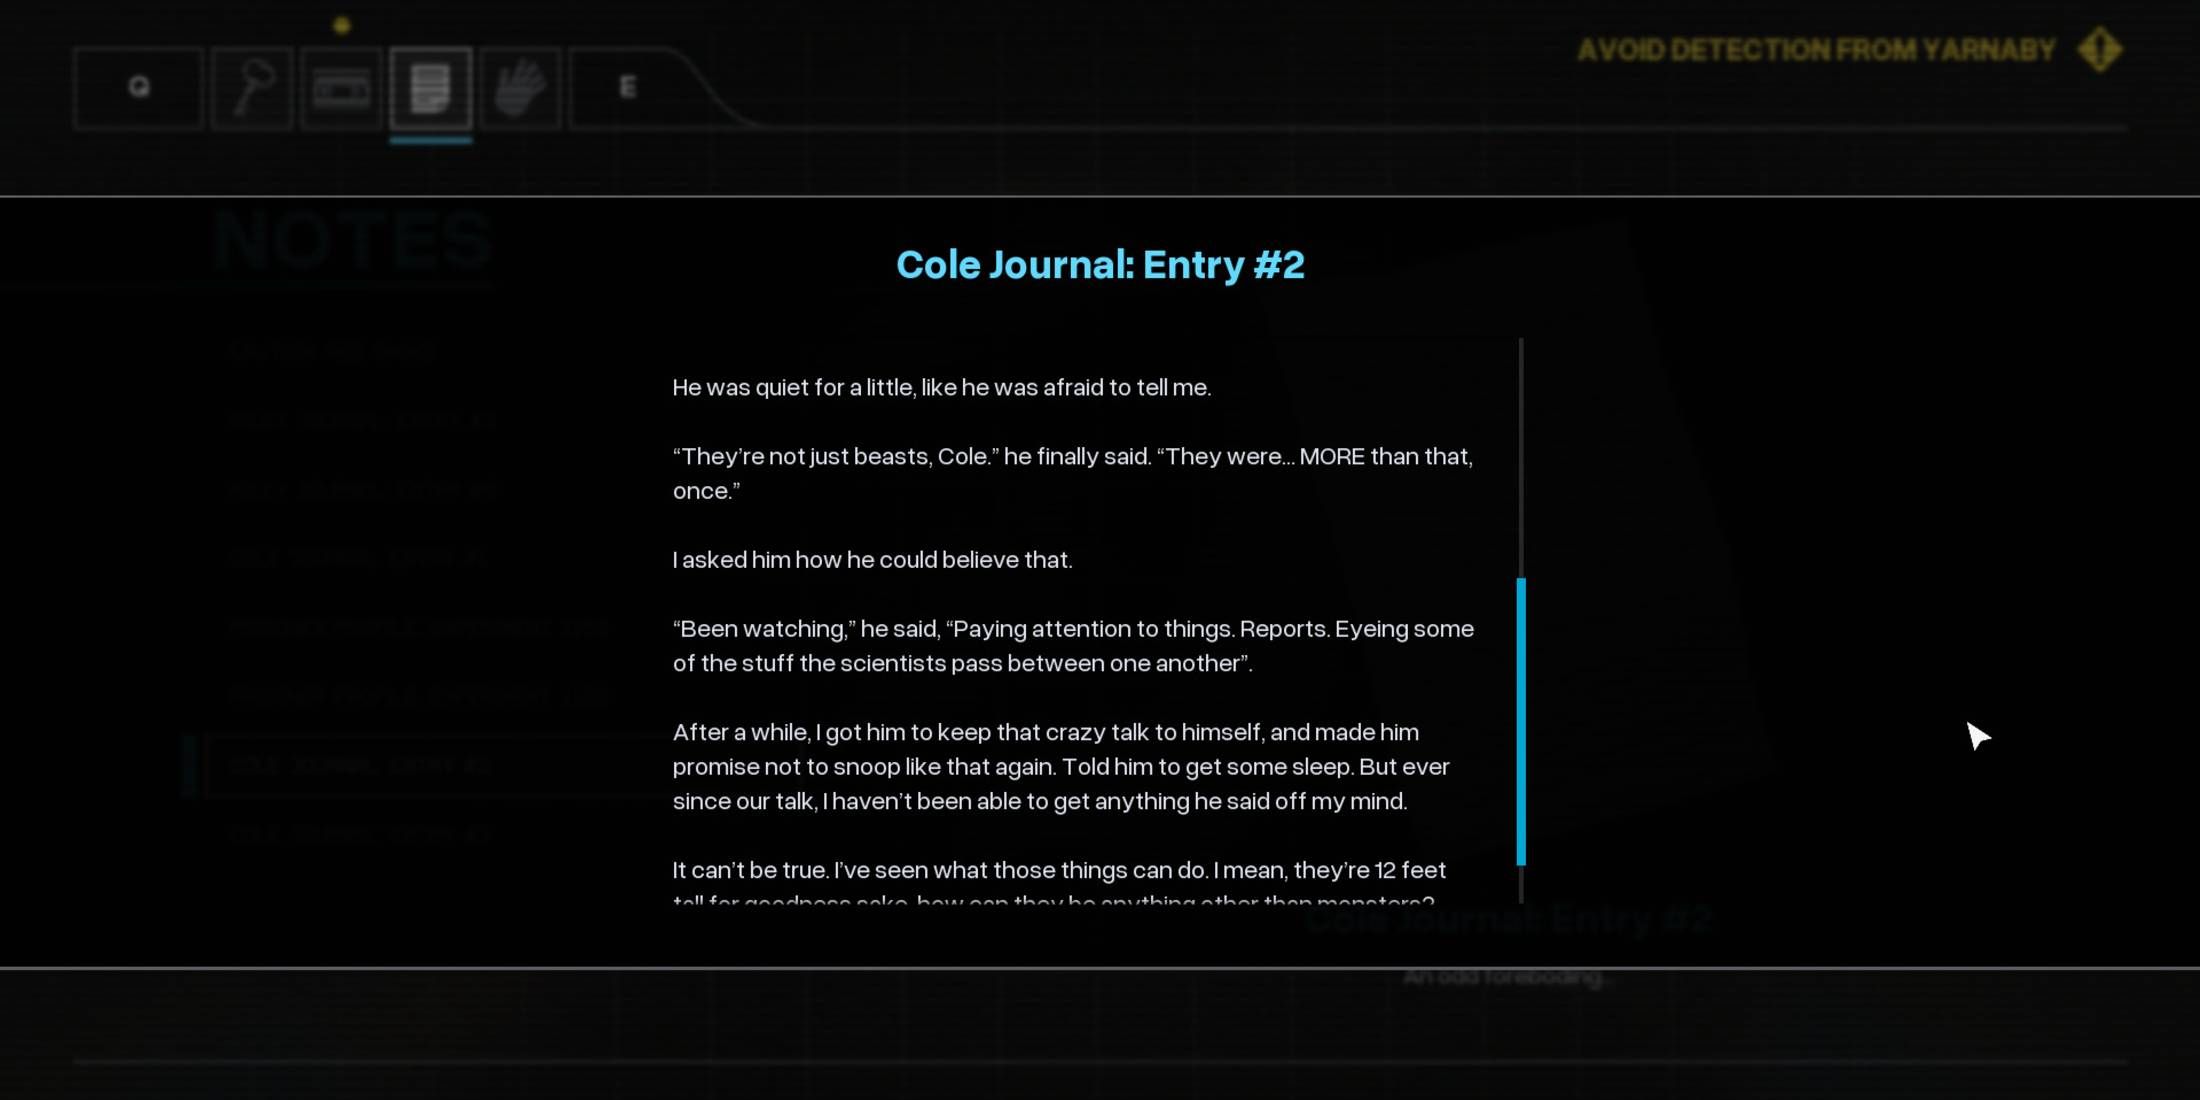
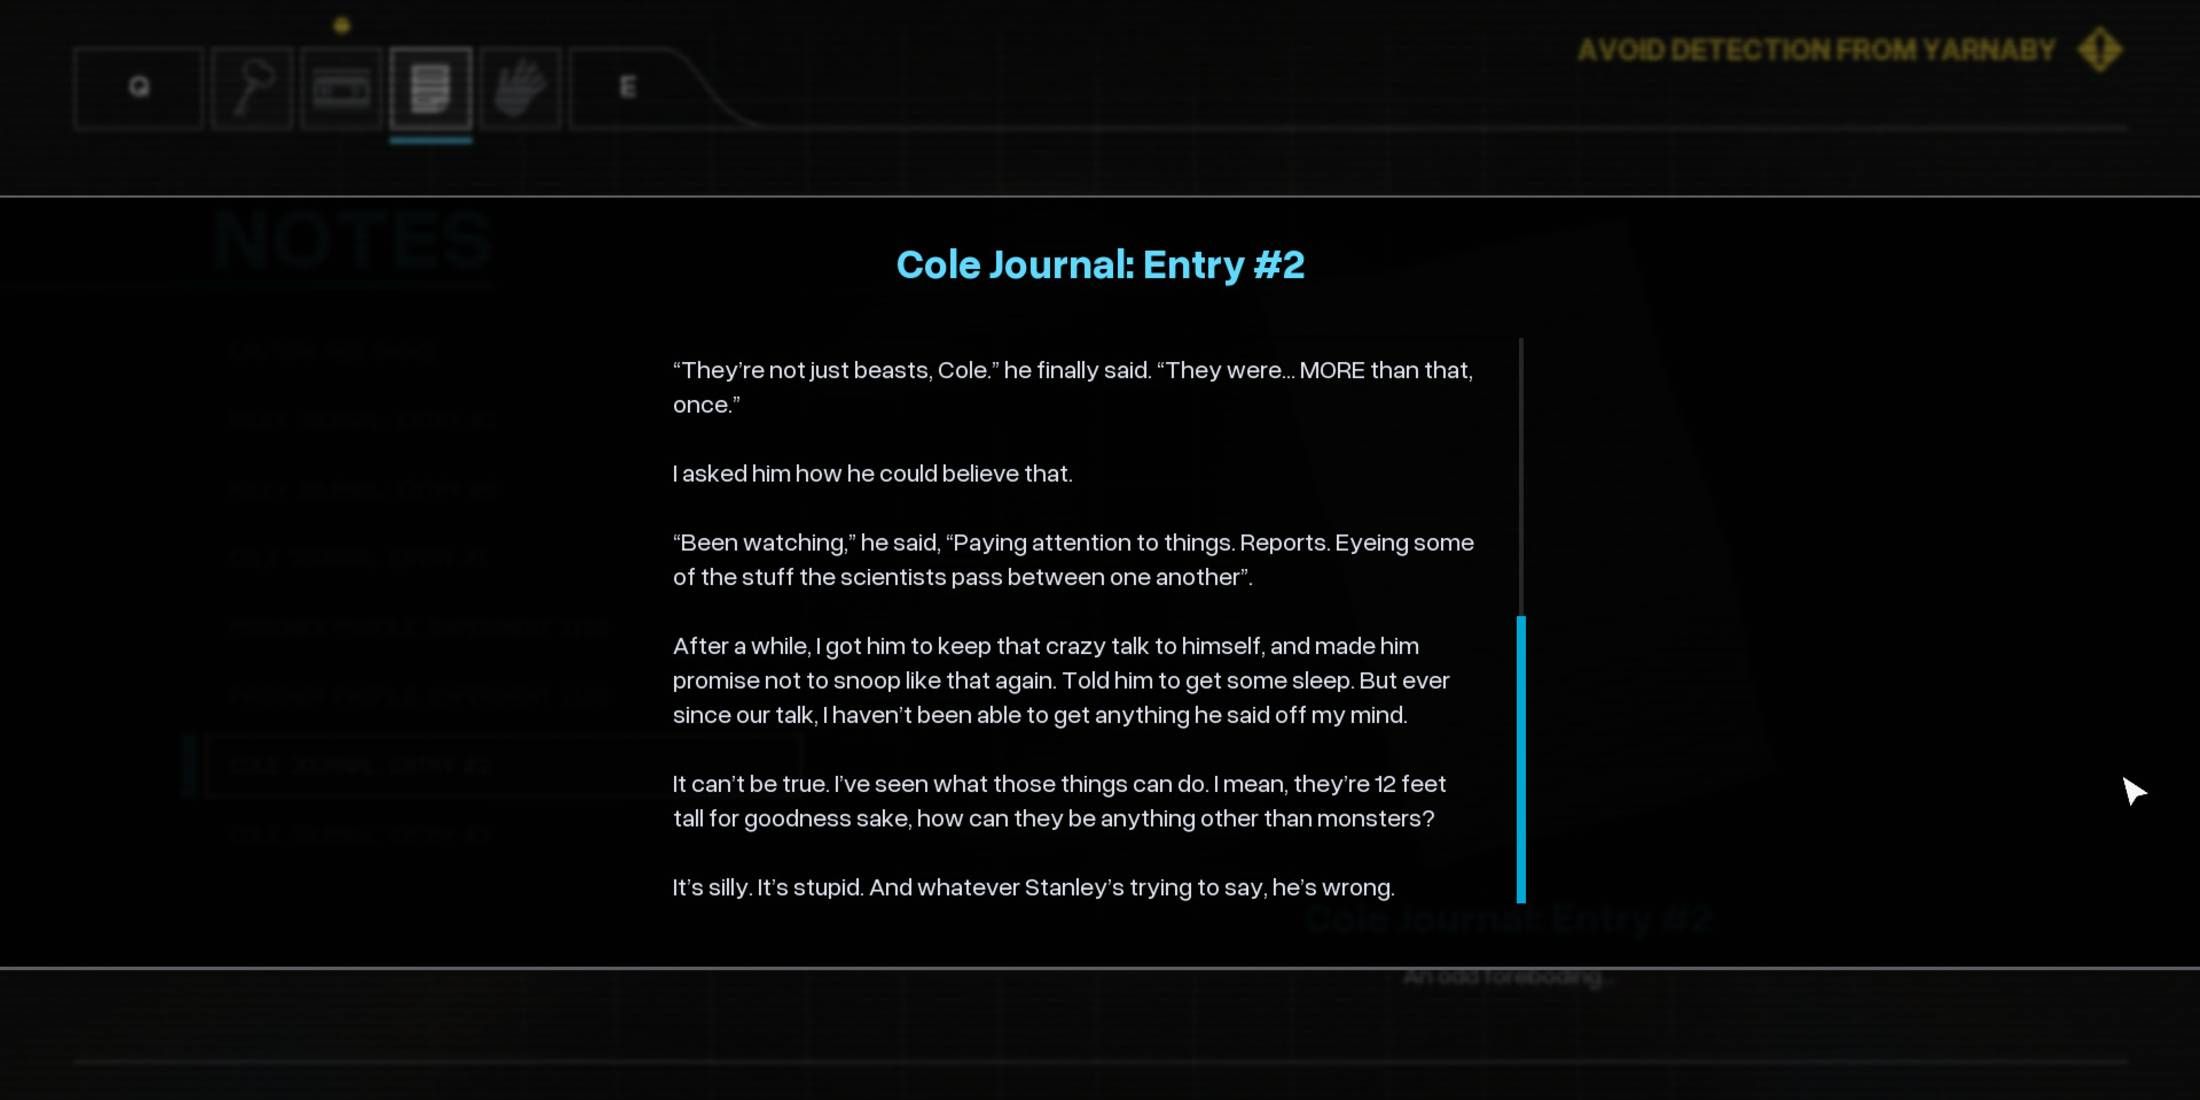
Cole’s Journal: Entry #2
- Auto Save File: Containment Zone (5)
- Objective: Avoid detection from Yarnaby
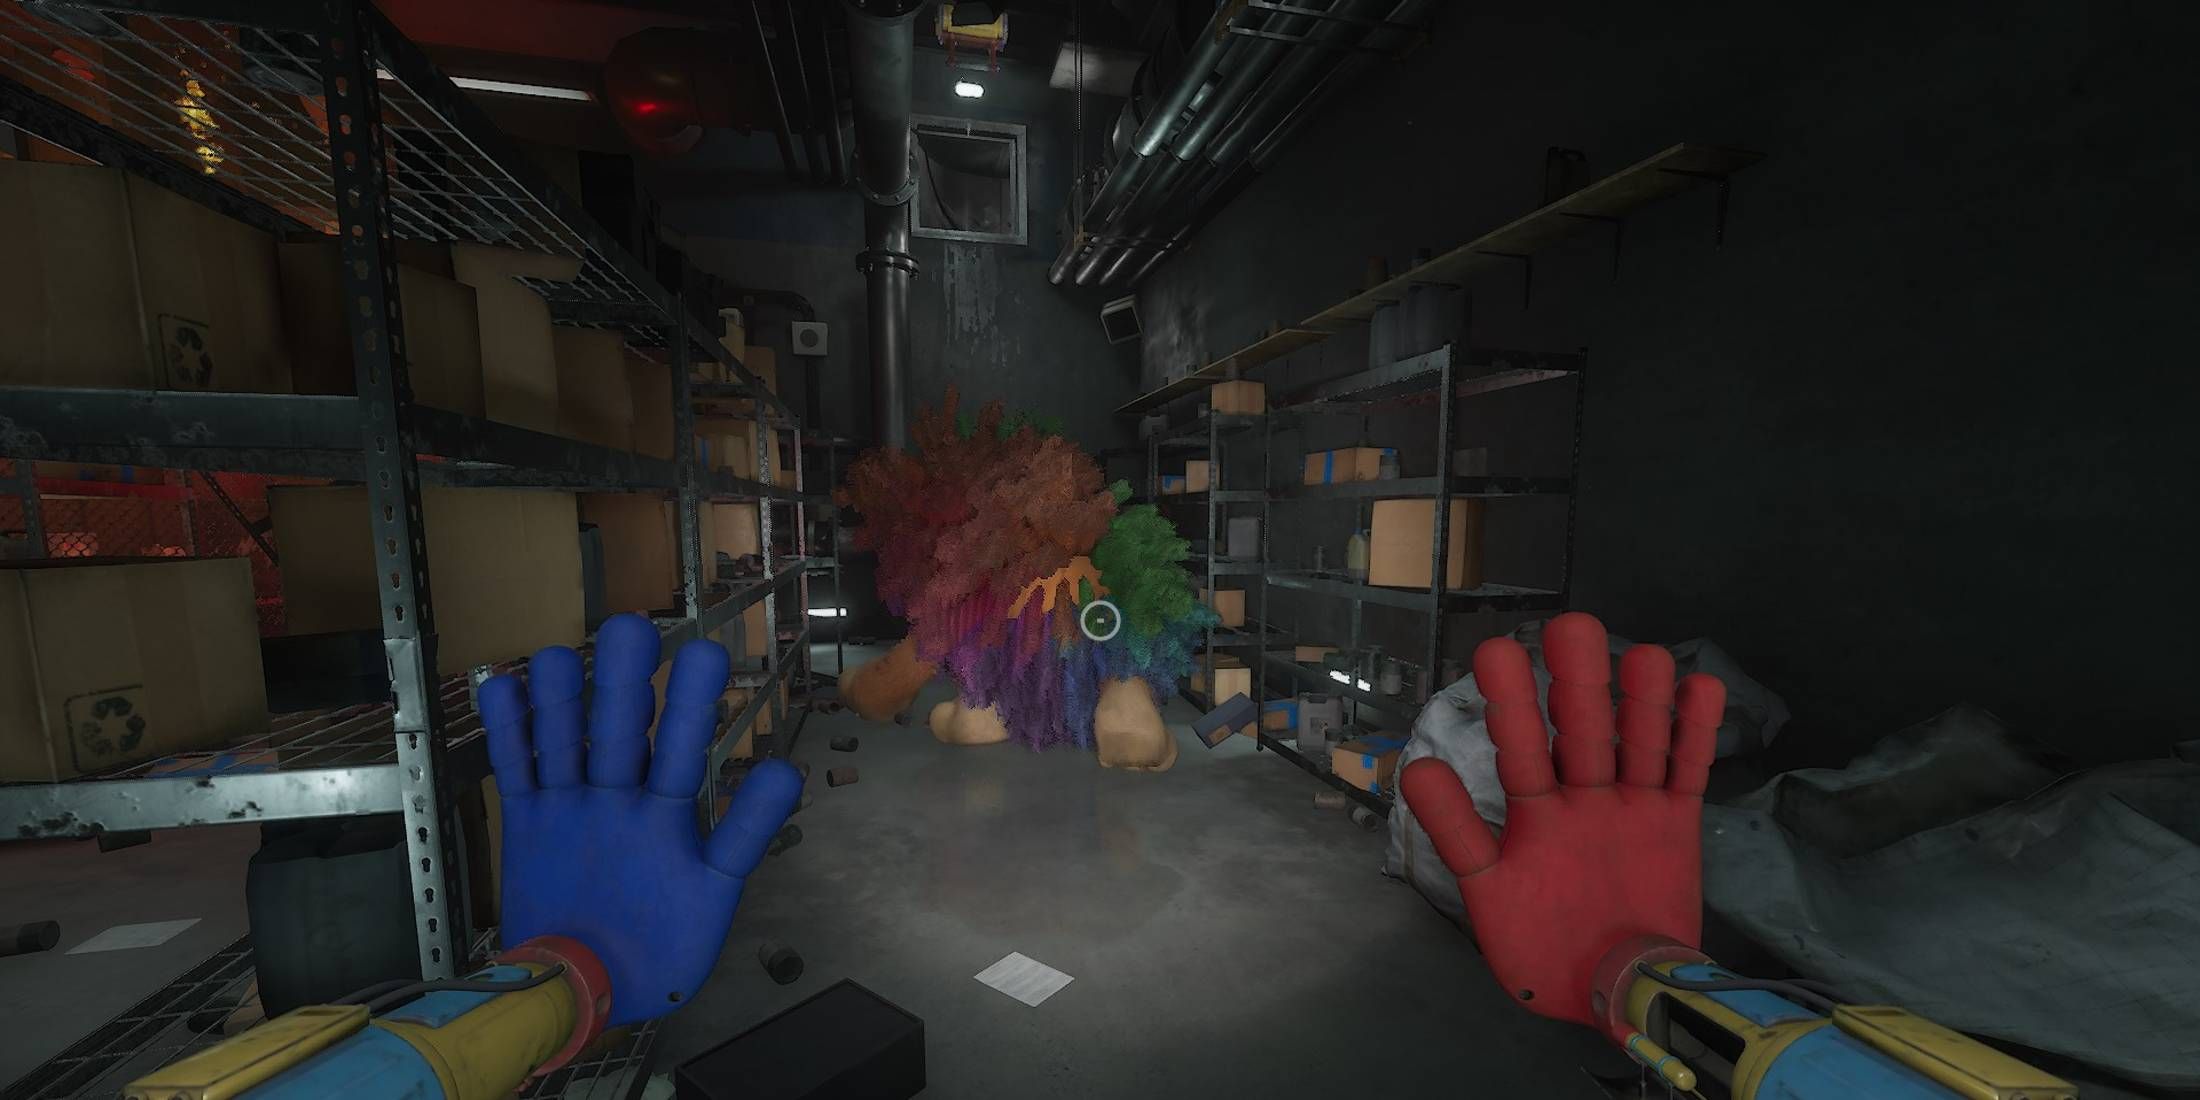
For the very first instance in Chapter 4, you’ll come across Yarnaby. At this point, Doey manages to divert its attention using fire. As Yarnaby scoots off, take the opportunity to snatch a note from the storage cabinet on your right before making your way into the vent.
In Cole’s Journal, entry number two, Cole shares his thoughts on a colleague who believes the intelligent toys confined within prisons are not merely monstrous creatures, but something more complex. Cole initially dismisses this idea, but it subtly sows a seed of uncertainty in his mind.
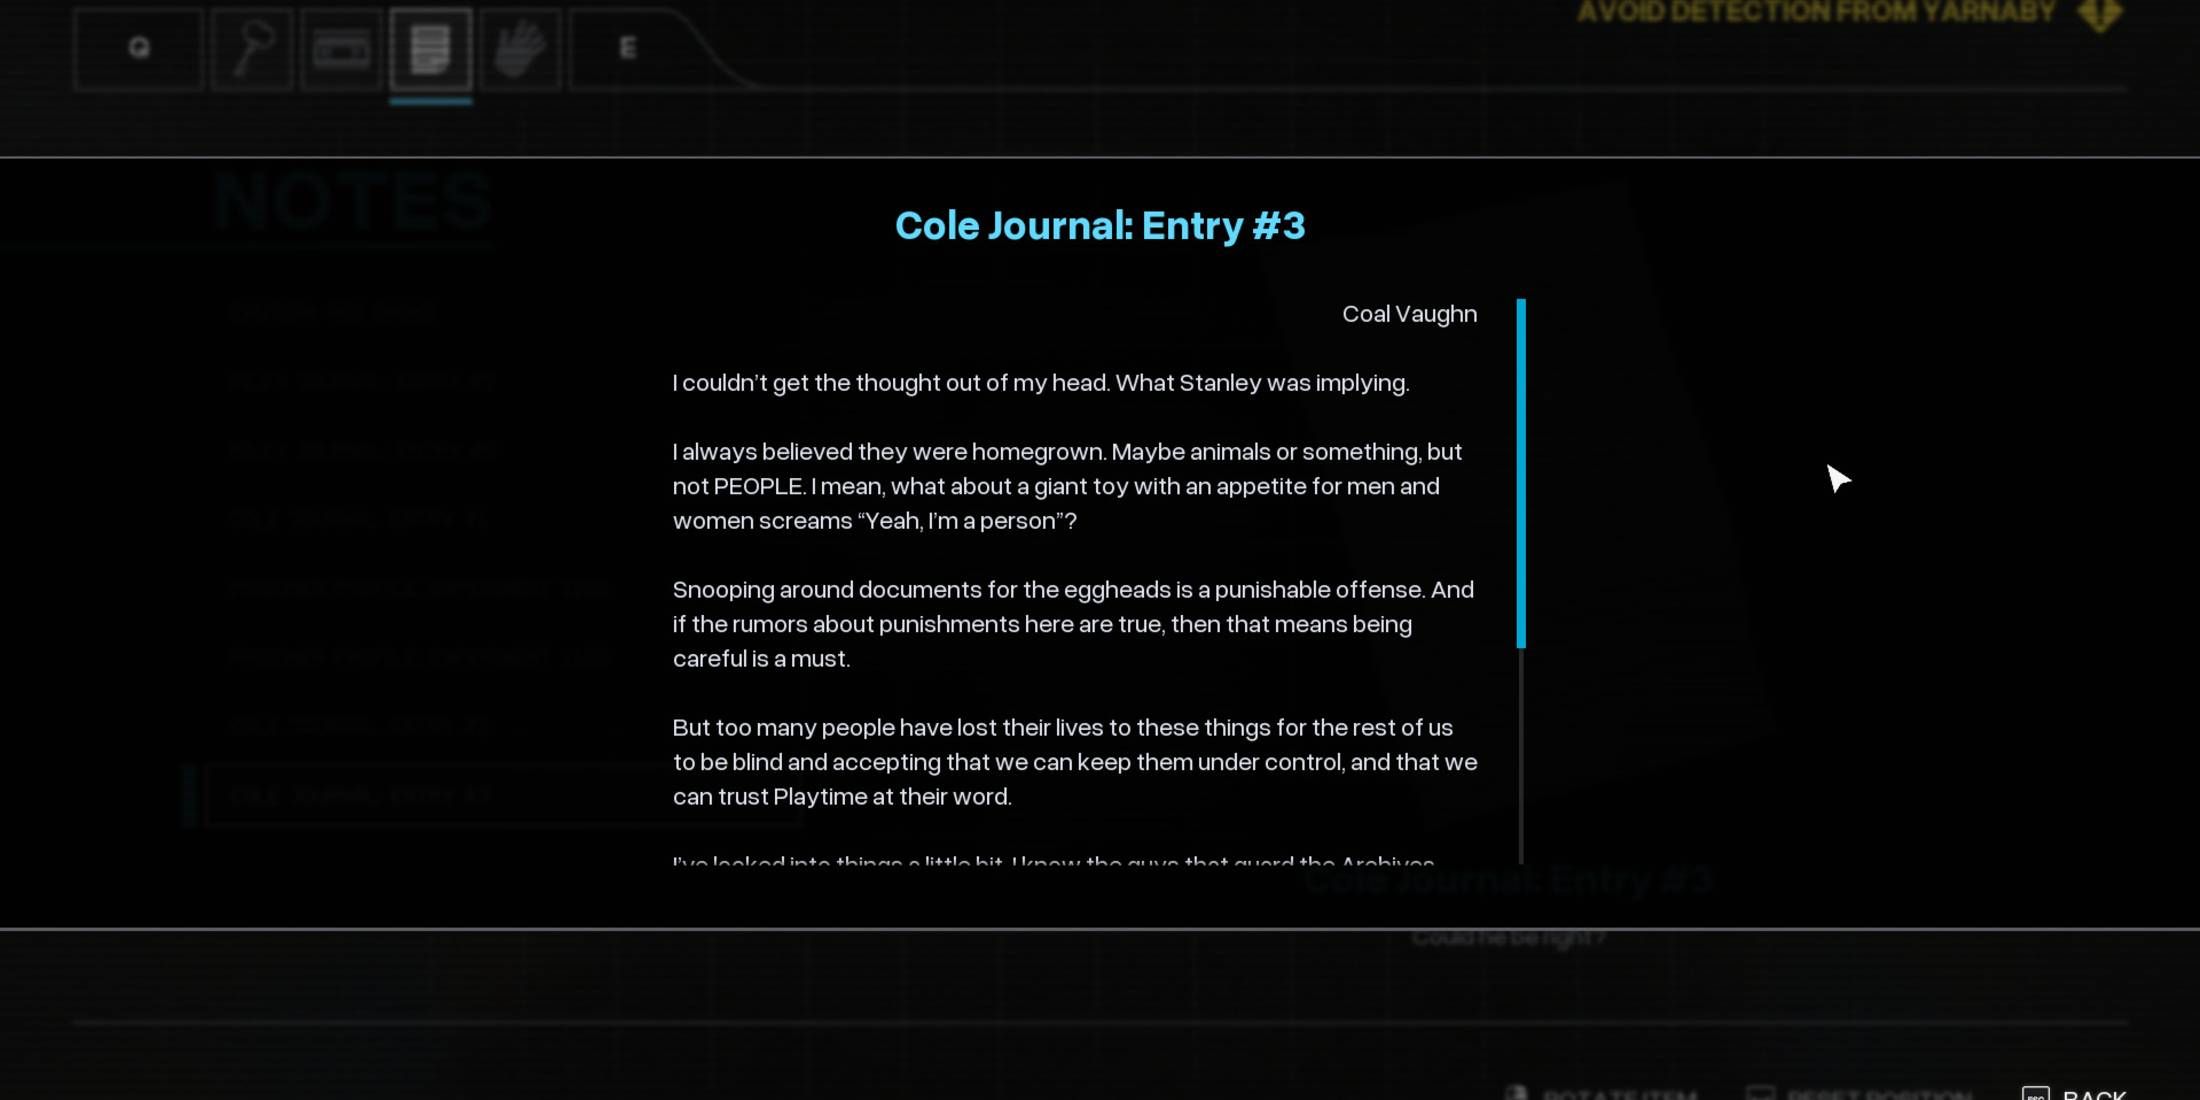
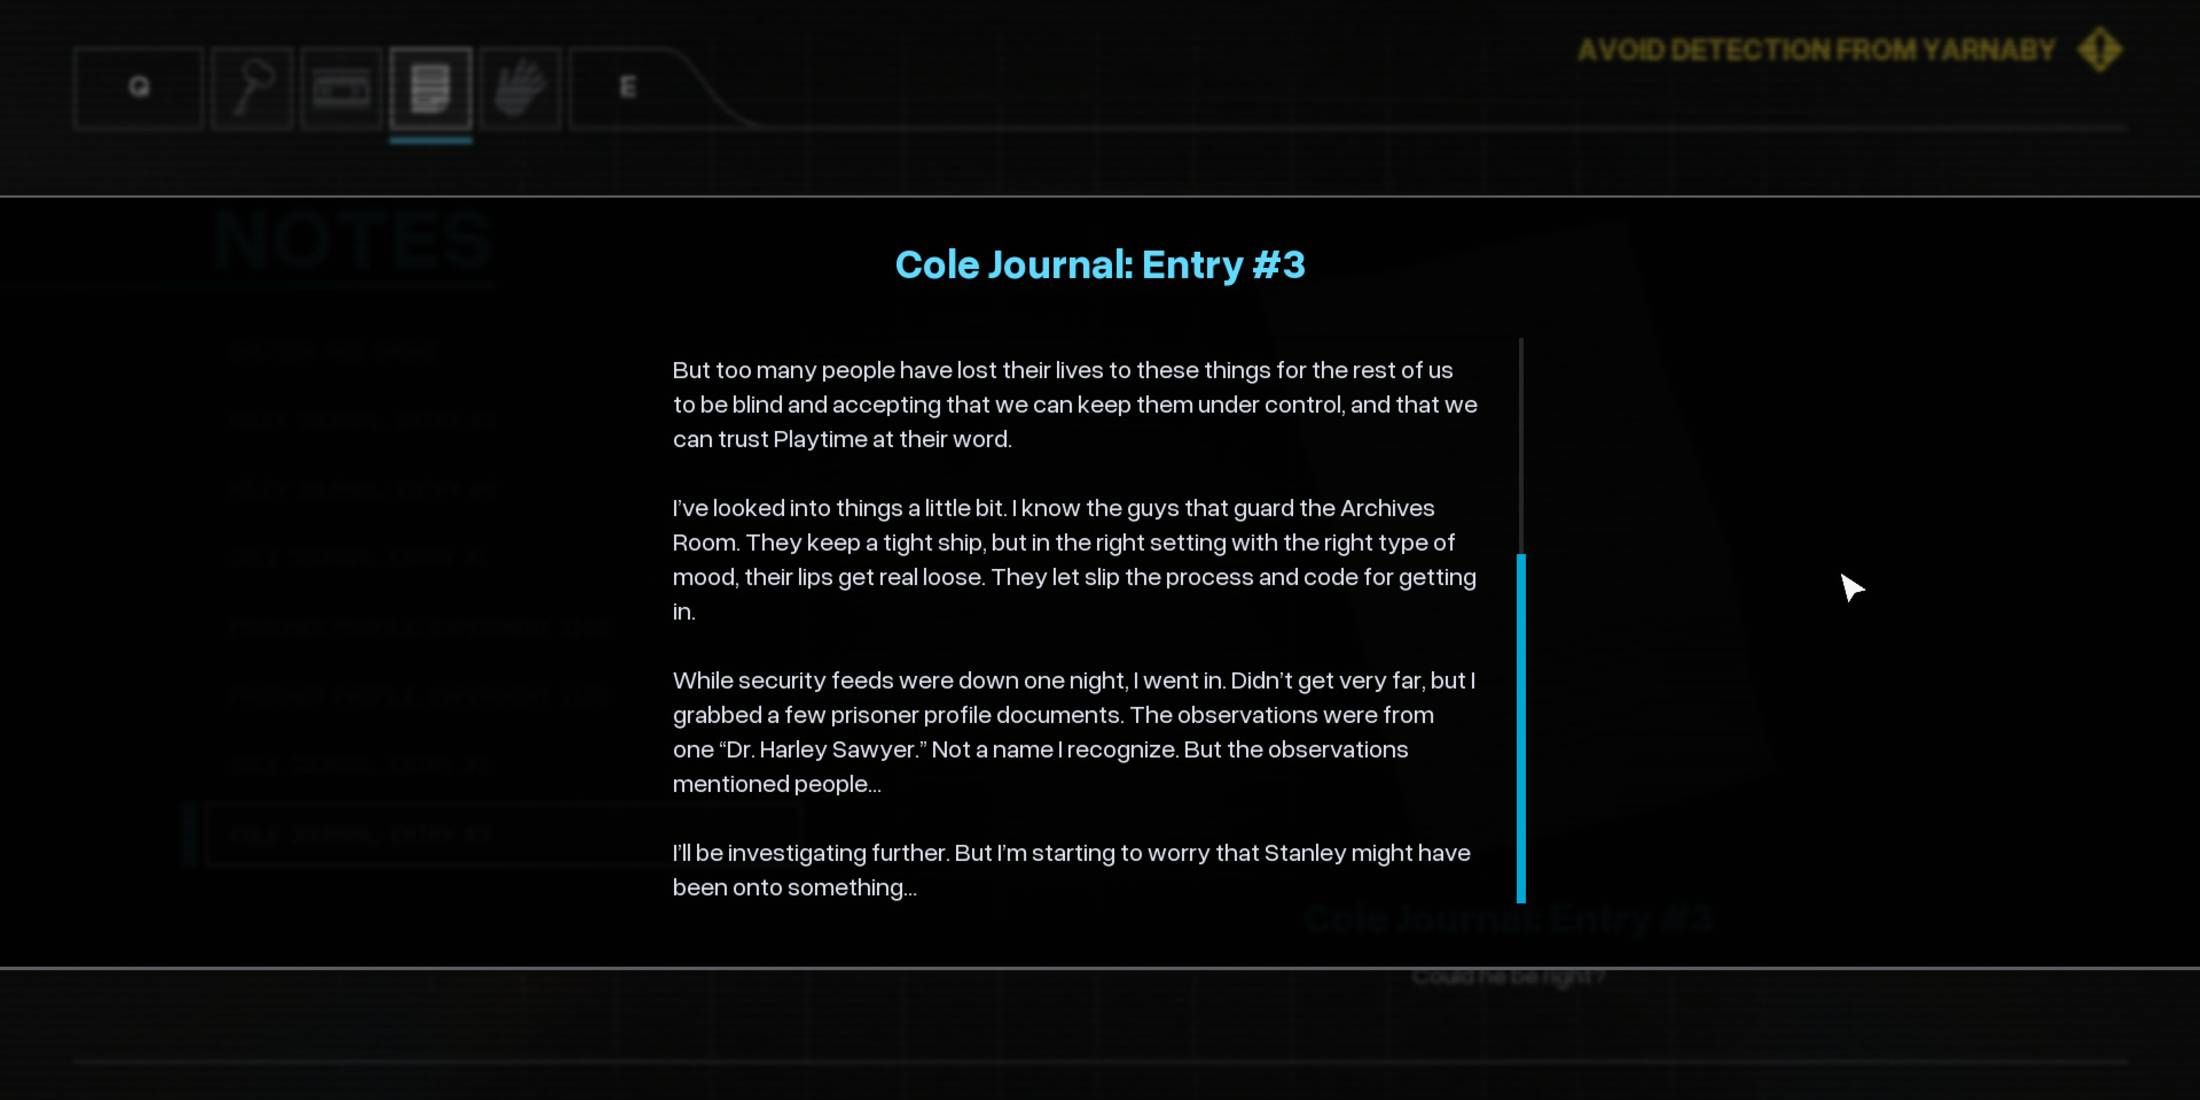
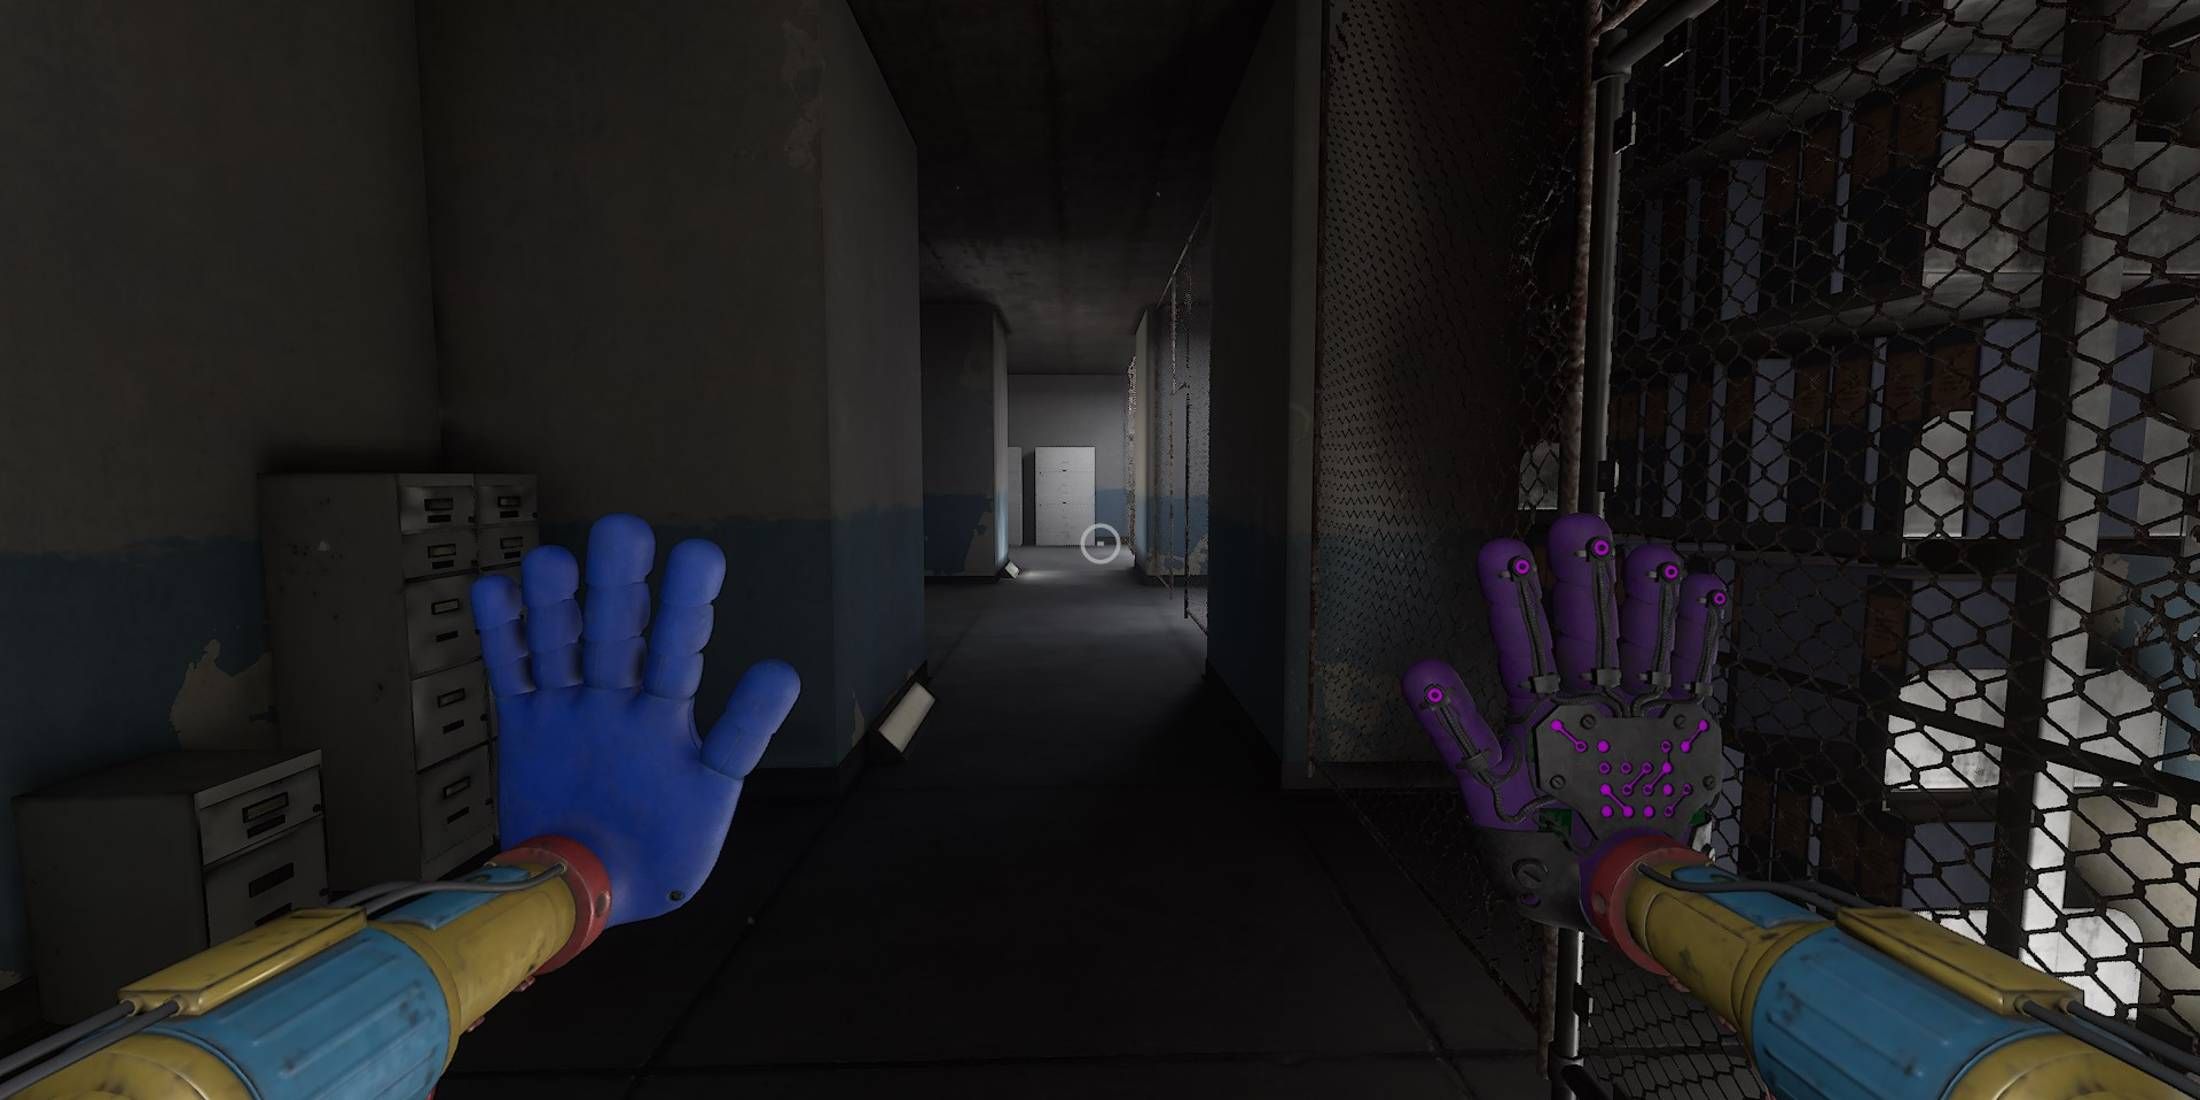
Cole’s Journal: Entry #3
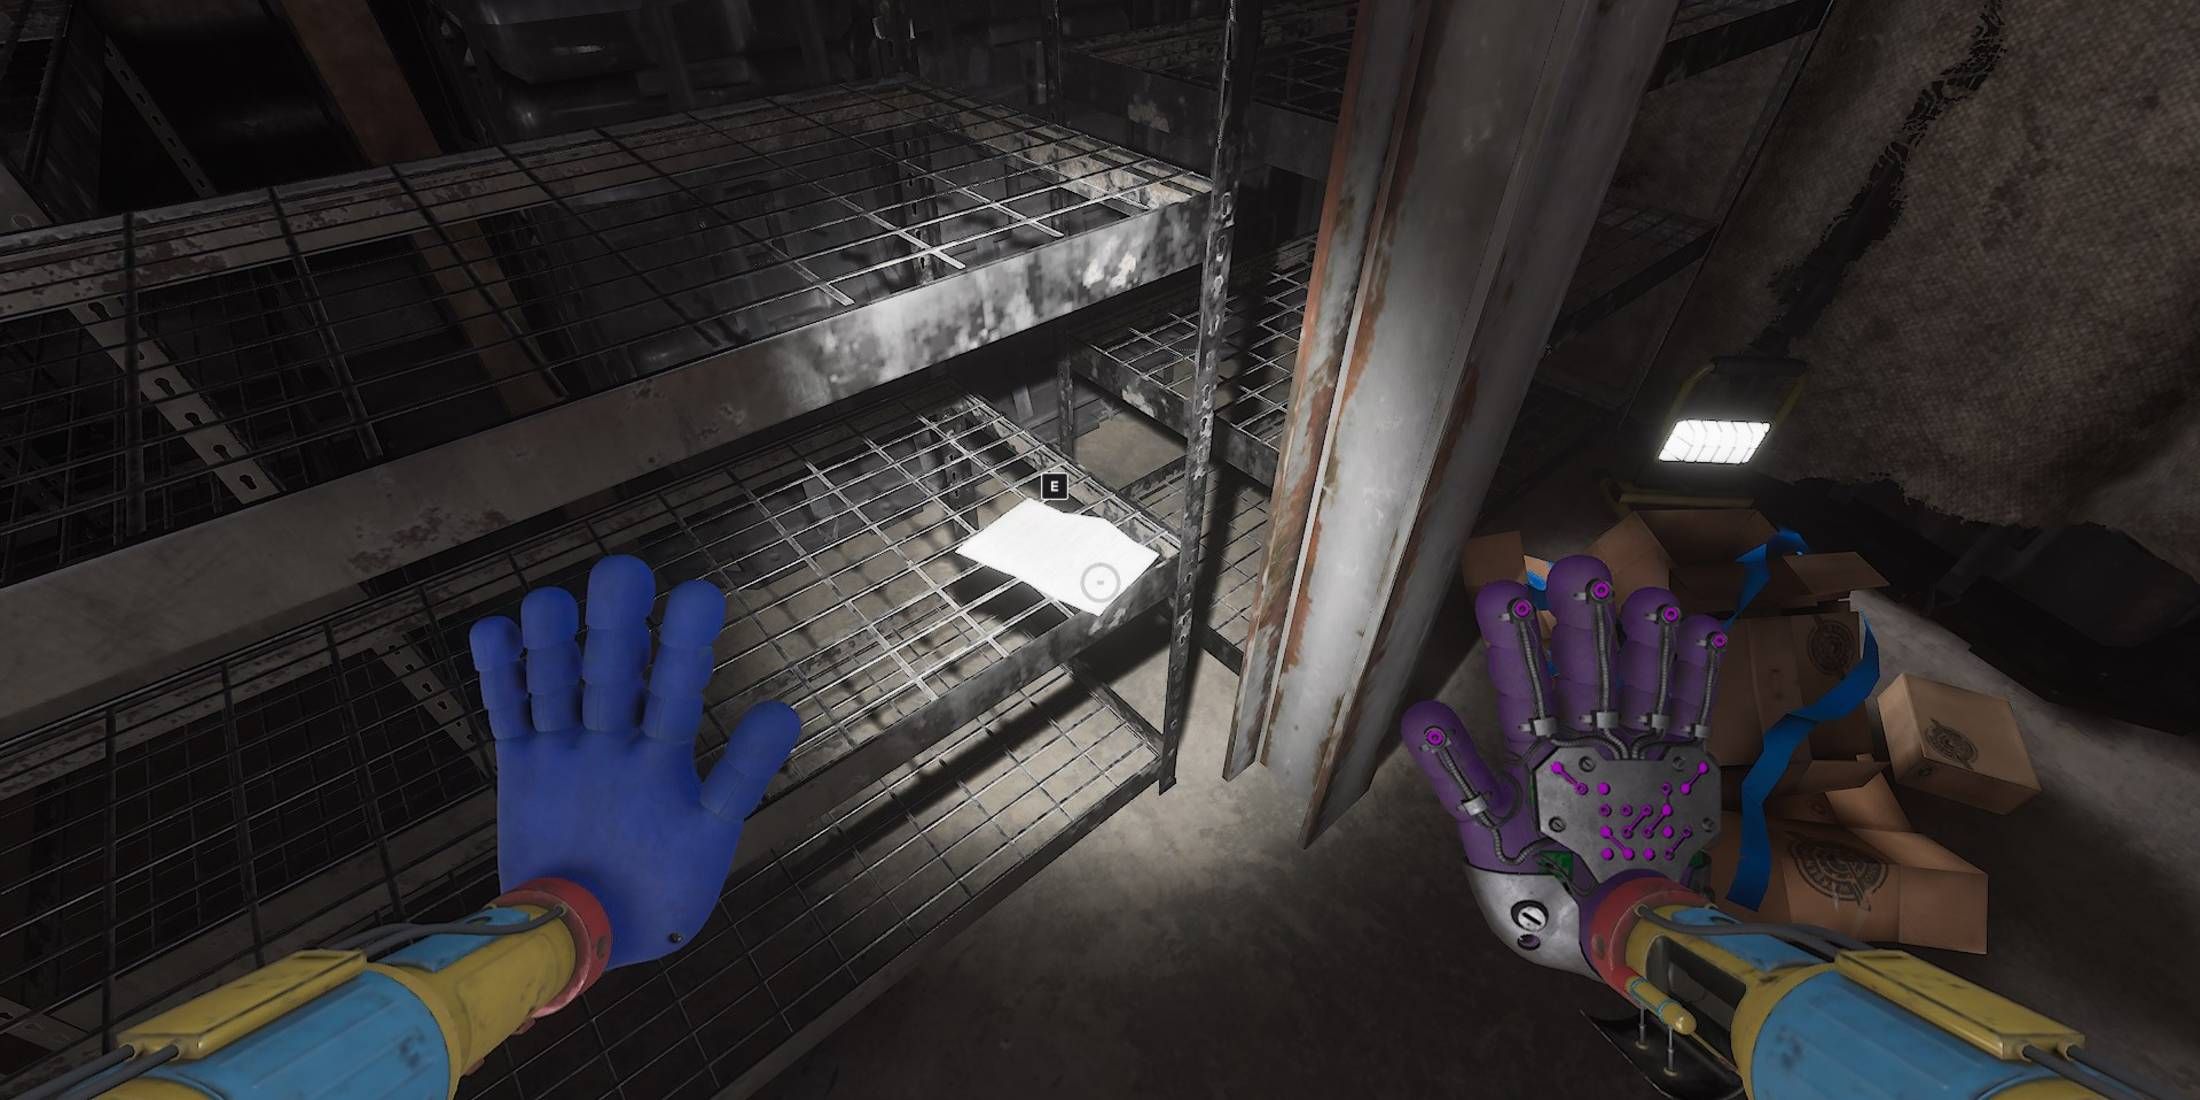
- Auto Save File: Containment Zone (7)
- Objective: Avoid detection from Yarnaby
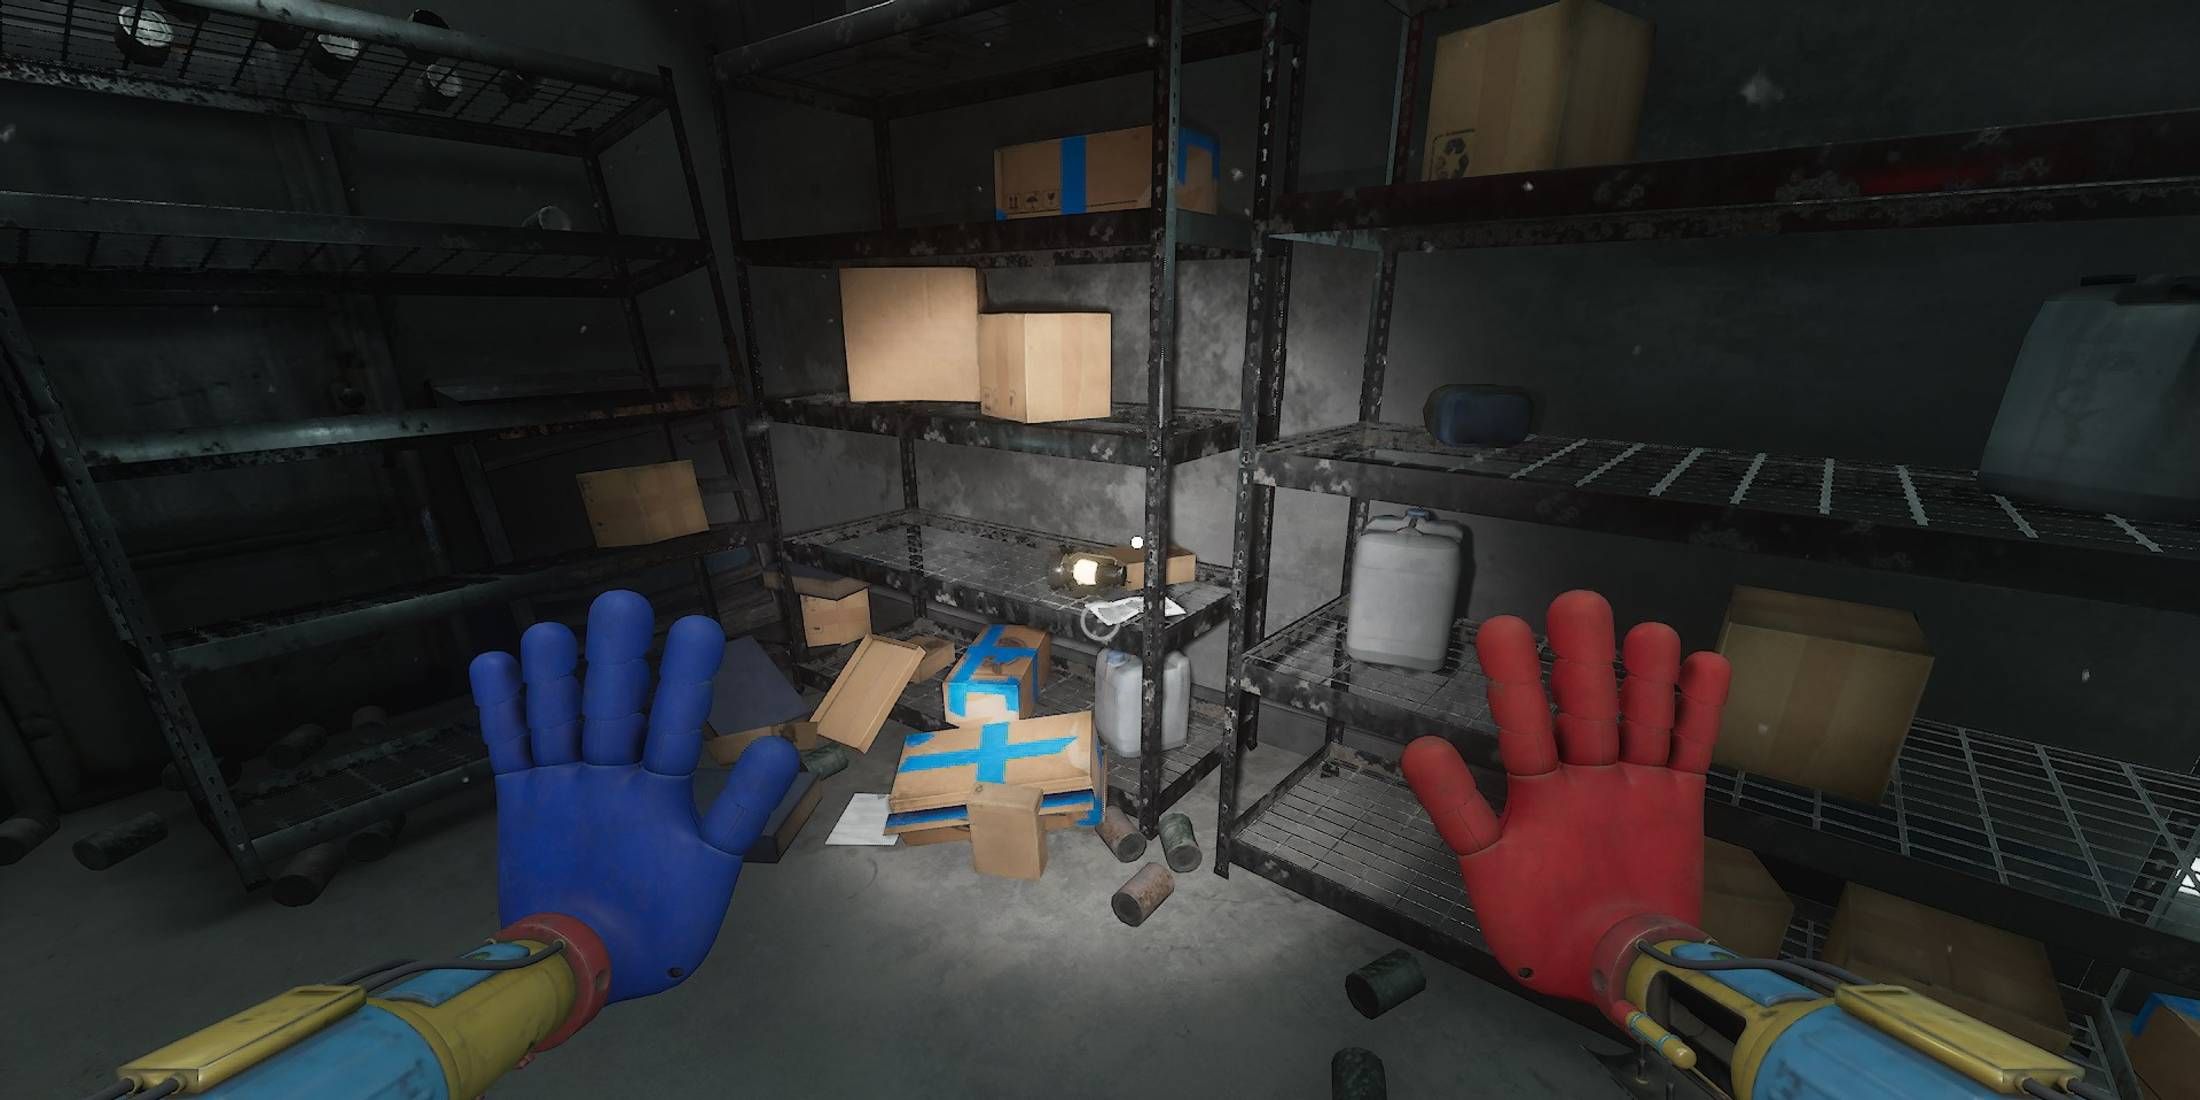
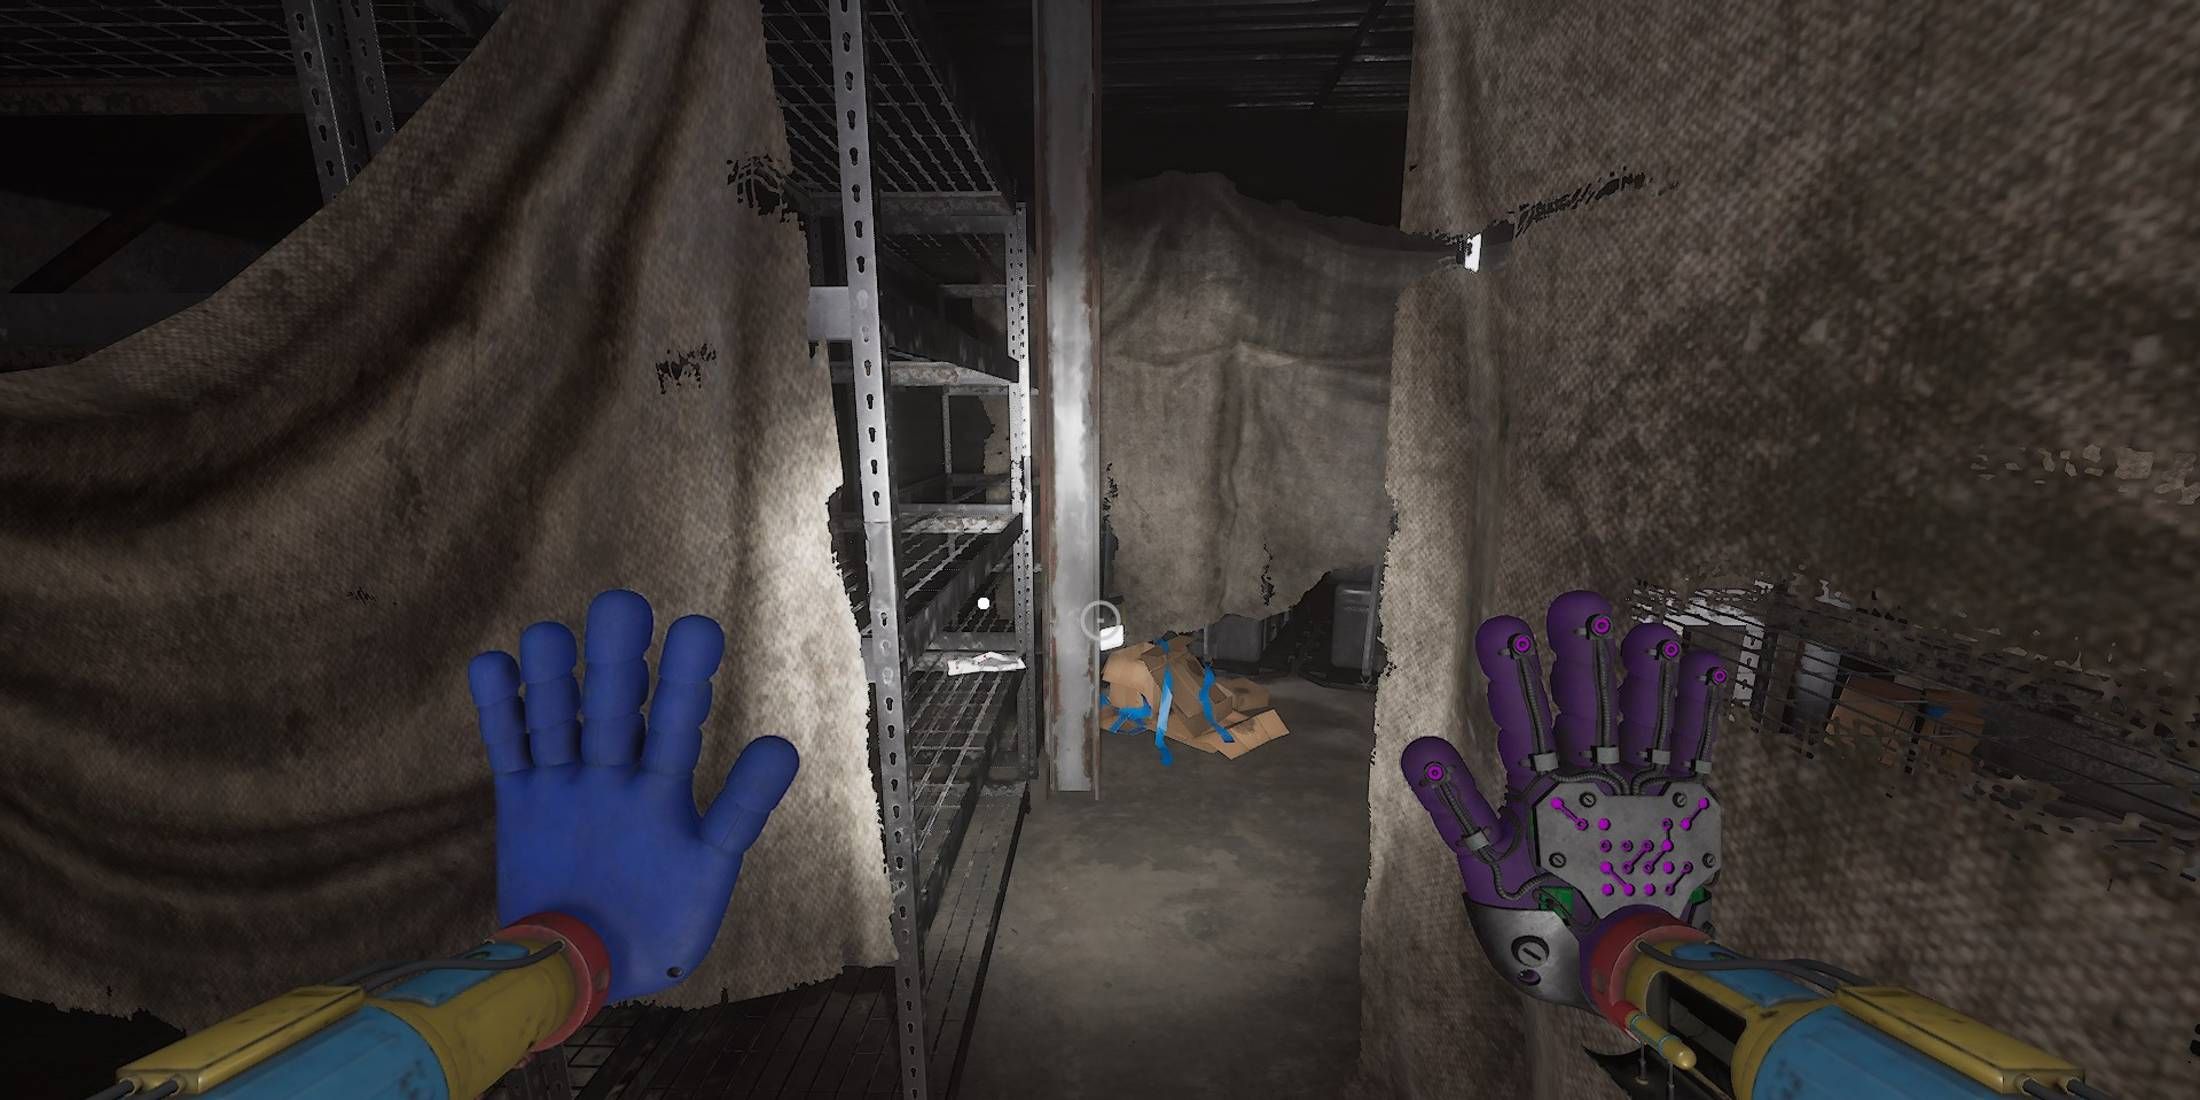
Upon exiting the vents while evading Yarnaby, players will discover a tranquil chamber filled with spacious cabinets. On the bottom shelf of an unoccupied cabinet, they’ll notice a message left by Cole.
Cole expresses his uncertainties. The repercussions of prying into these matters are far from appealing, yet he chooses to take the risk, acquiring several files containing details about prisoners. All of these records refer to people.
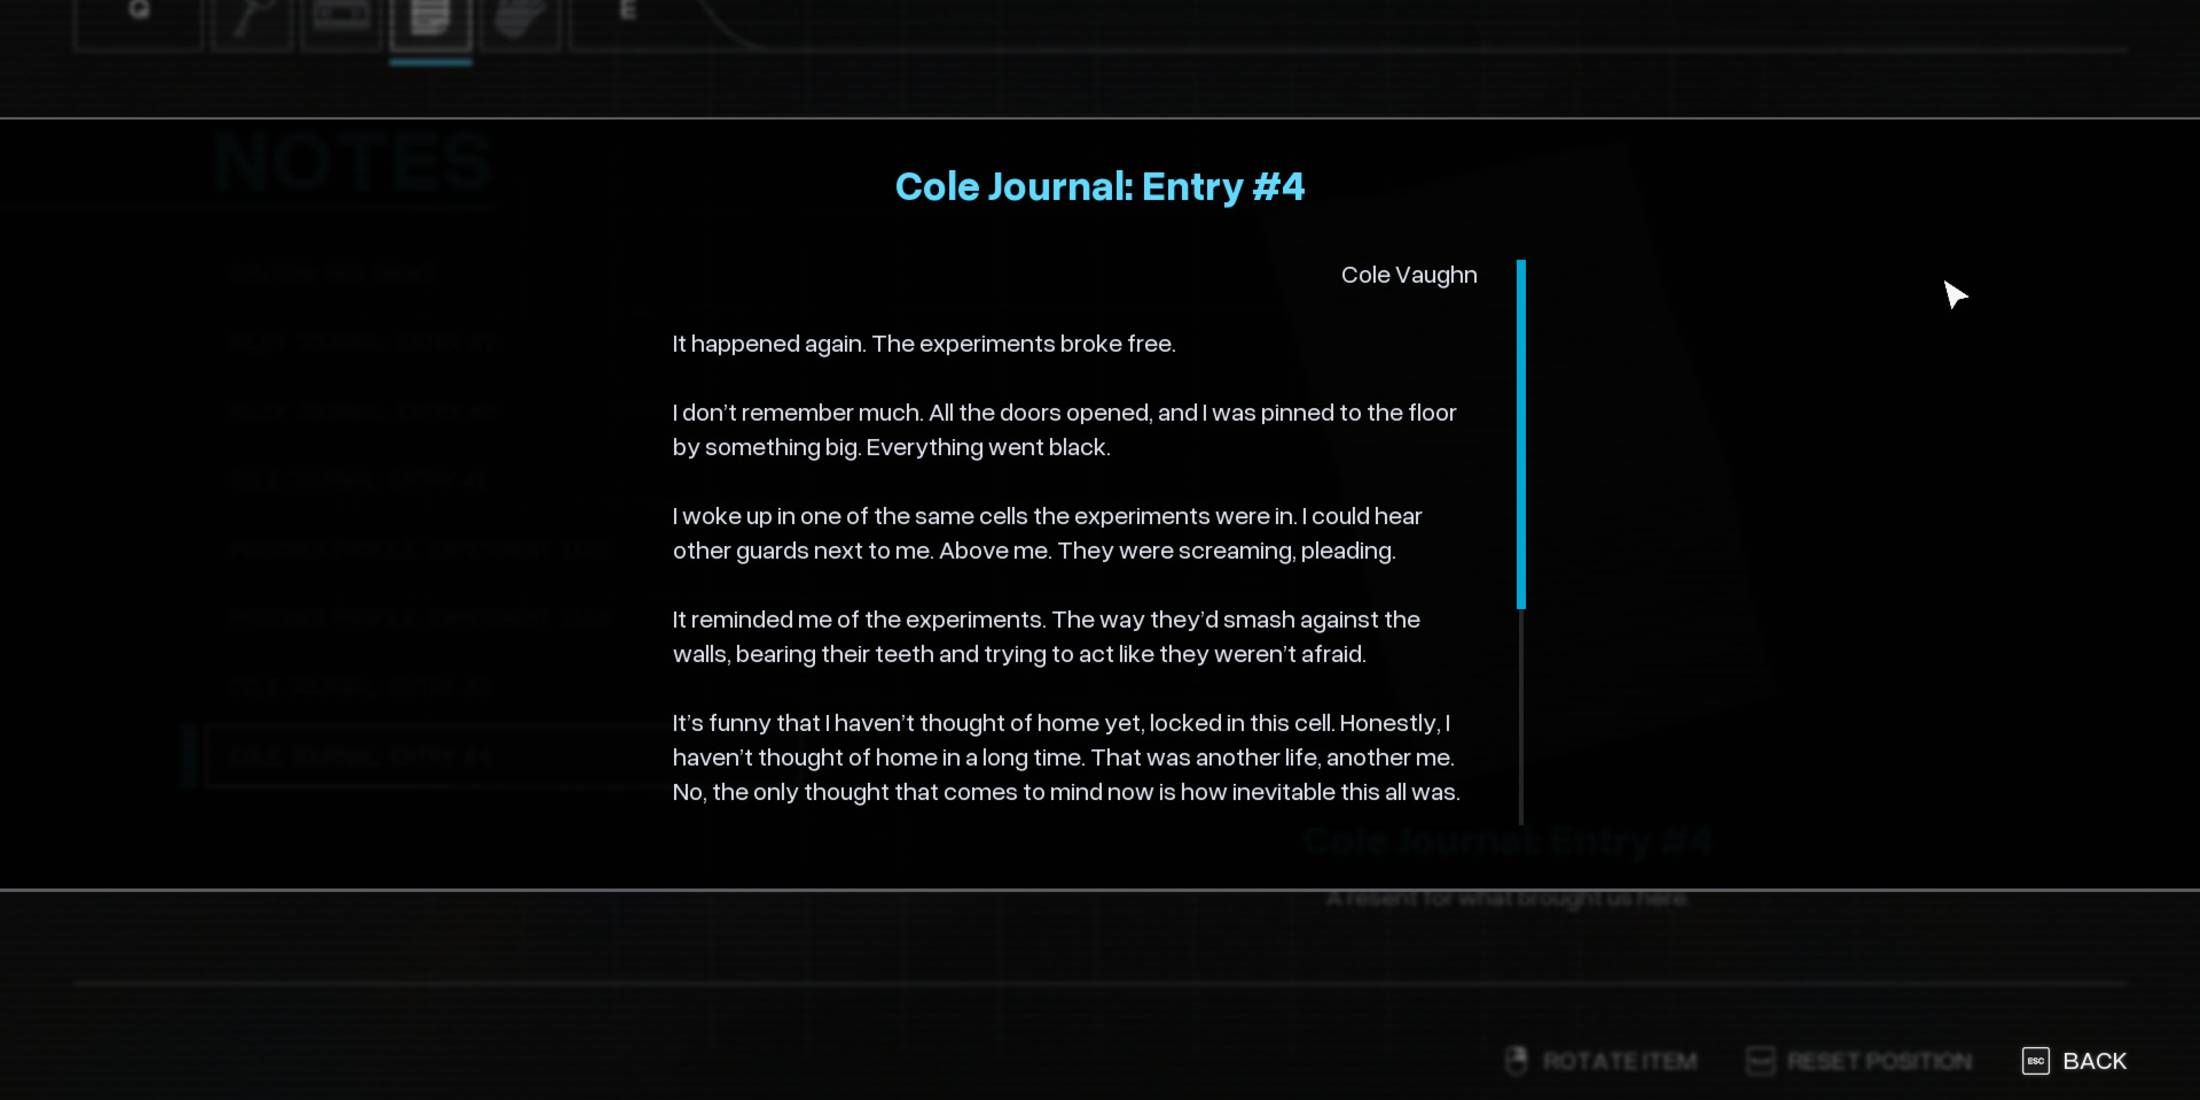
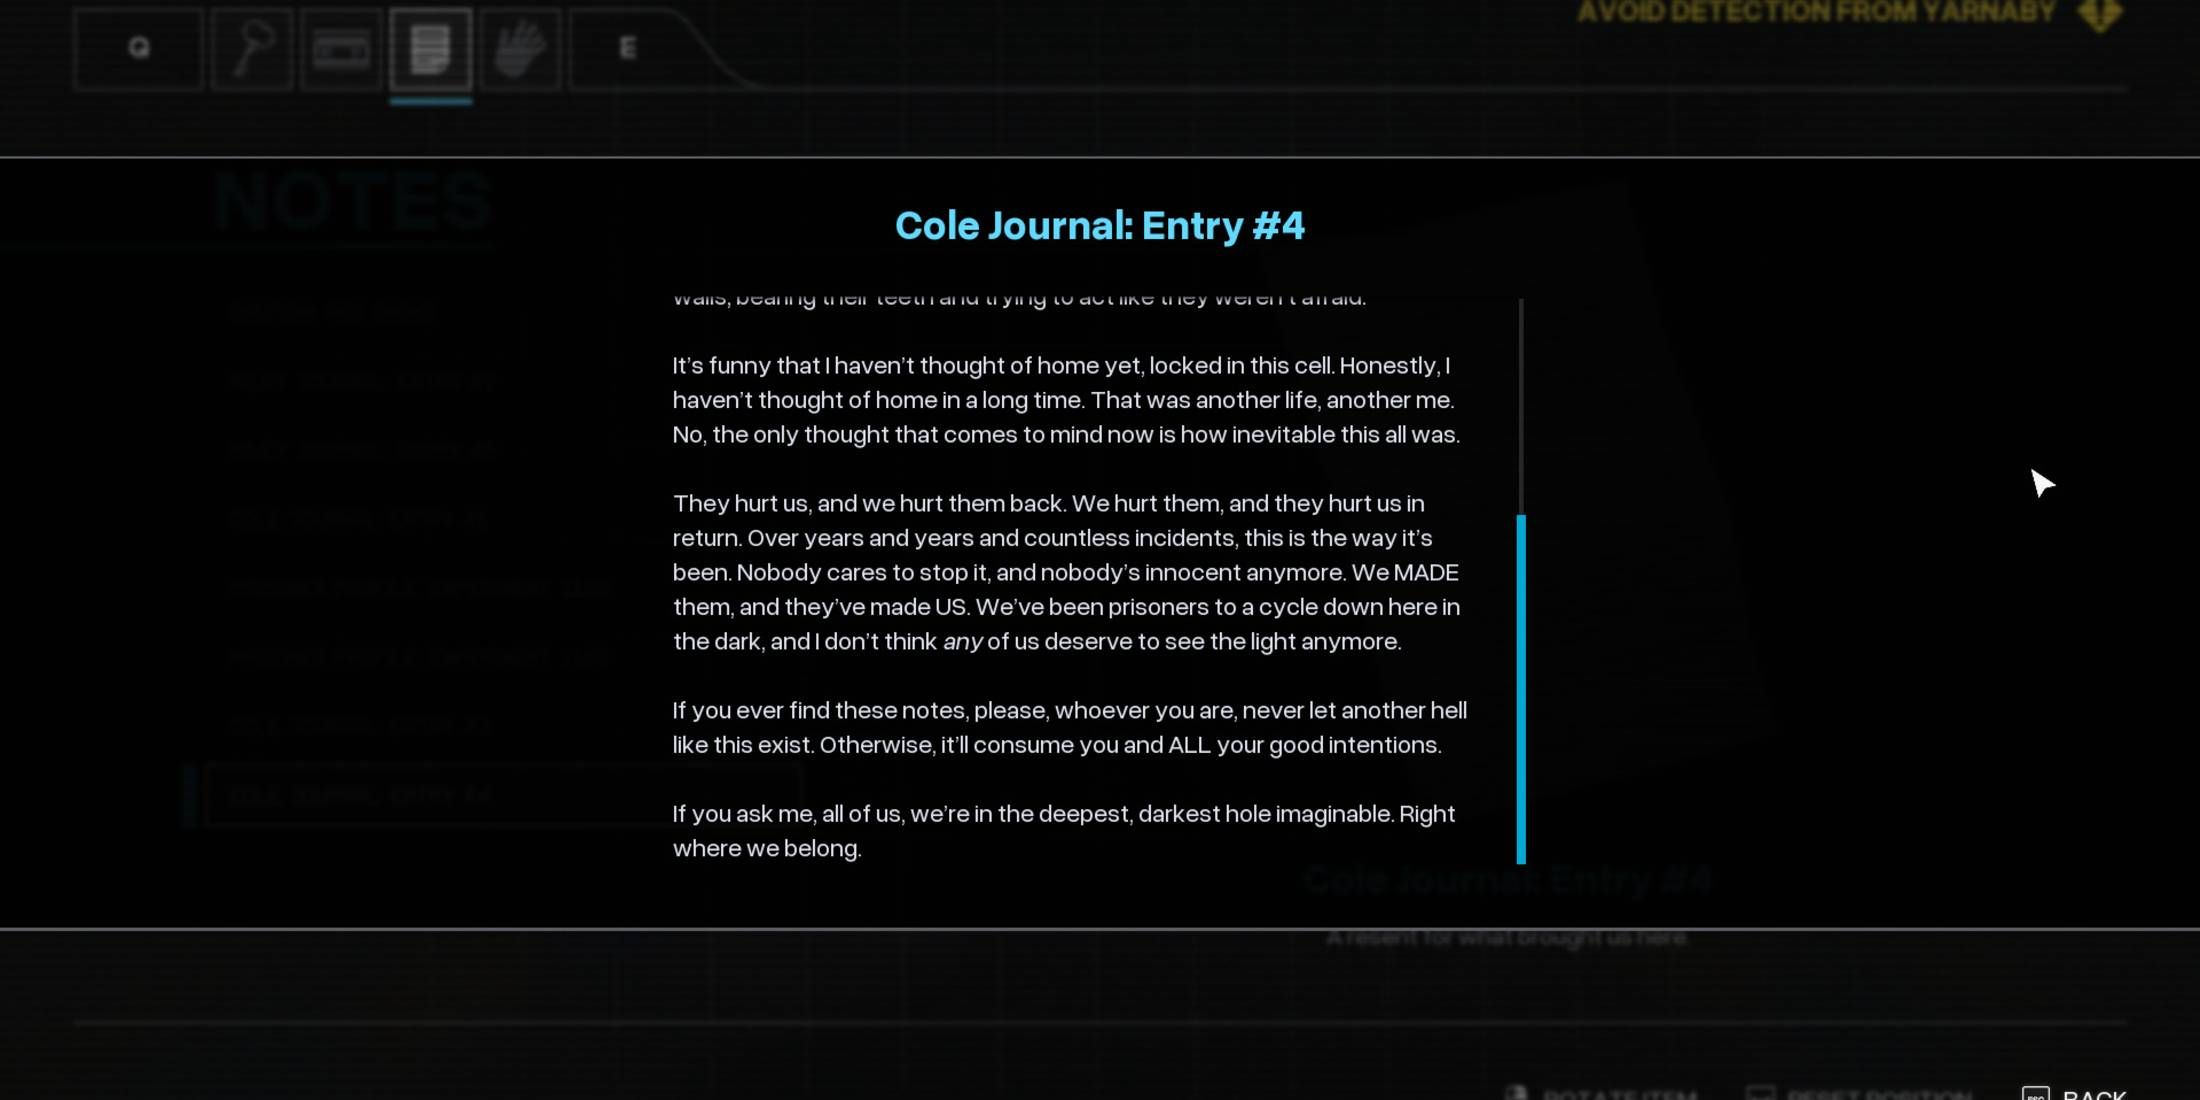
Cole’s Journal: Entry #4
- Auto Save File: Containment Zone (8)
- Objective: Avoid detection from Yarnaby
Upon escaping Yarnaby, I make a beeline for the storage room. There, to my left, you’ll spot the third door. Nestled among some file organizers near it, I discovered Cole’s final journal entry.
Cole addresses the reader directly, urging them to prevent such incidents from recurring in the future. Along with all the other guards, he has found himself incarcerated within the very same cells that once housed the toys. However, an interesting twist unfolds as the toys themselves manage to seize control and detain their tormentors instead.
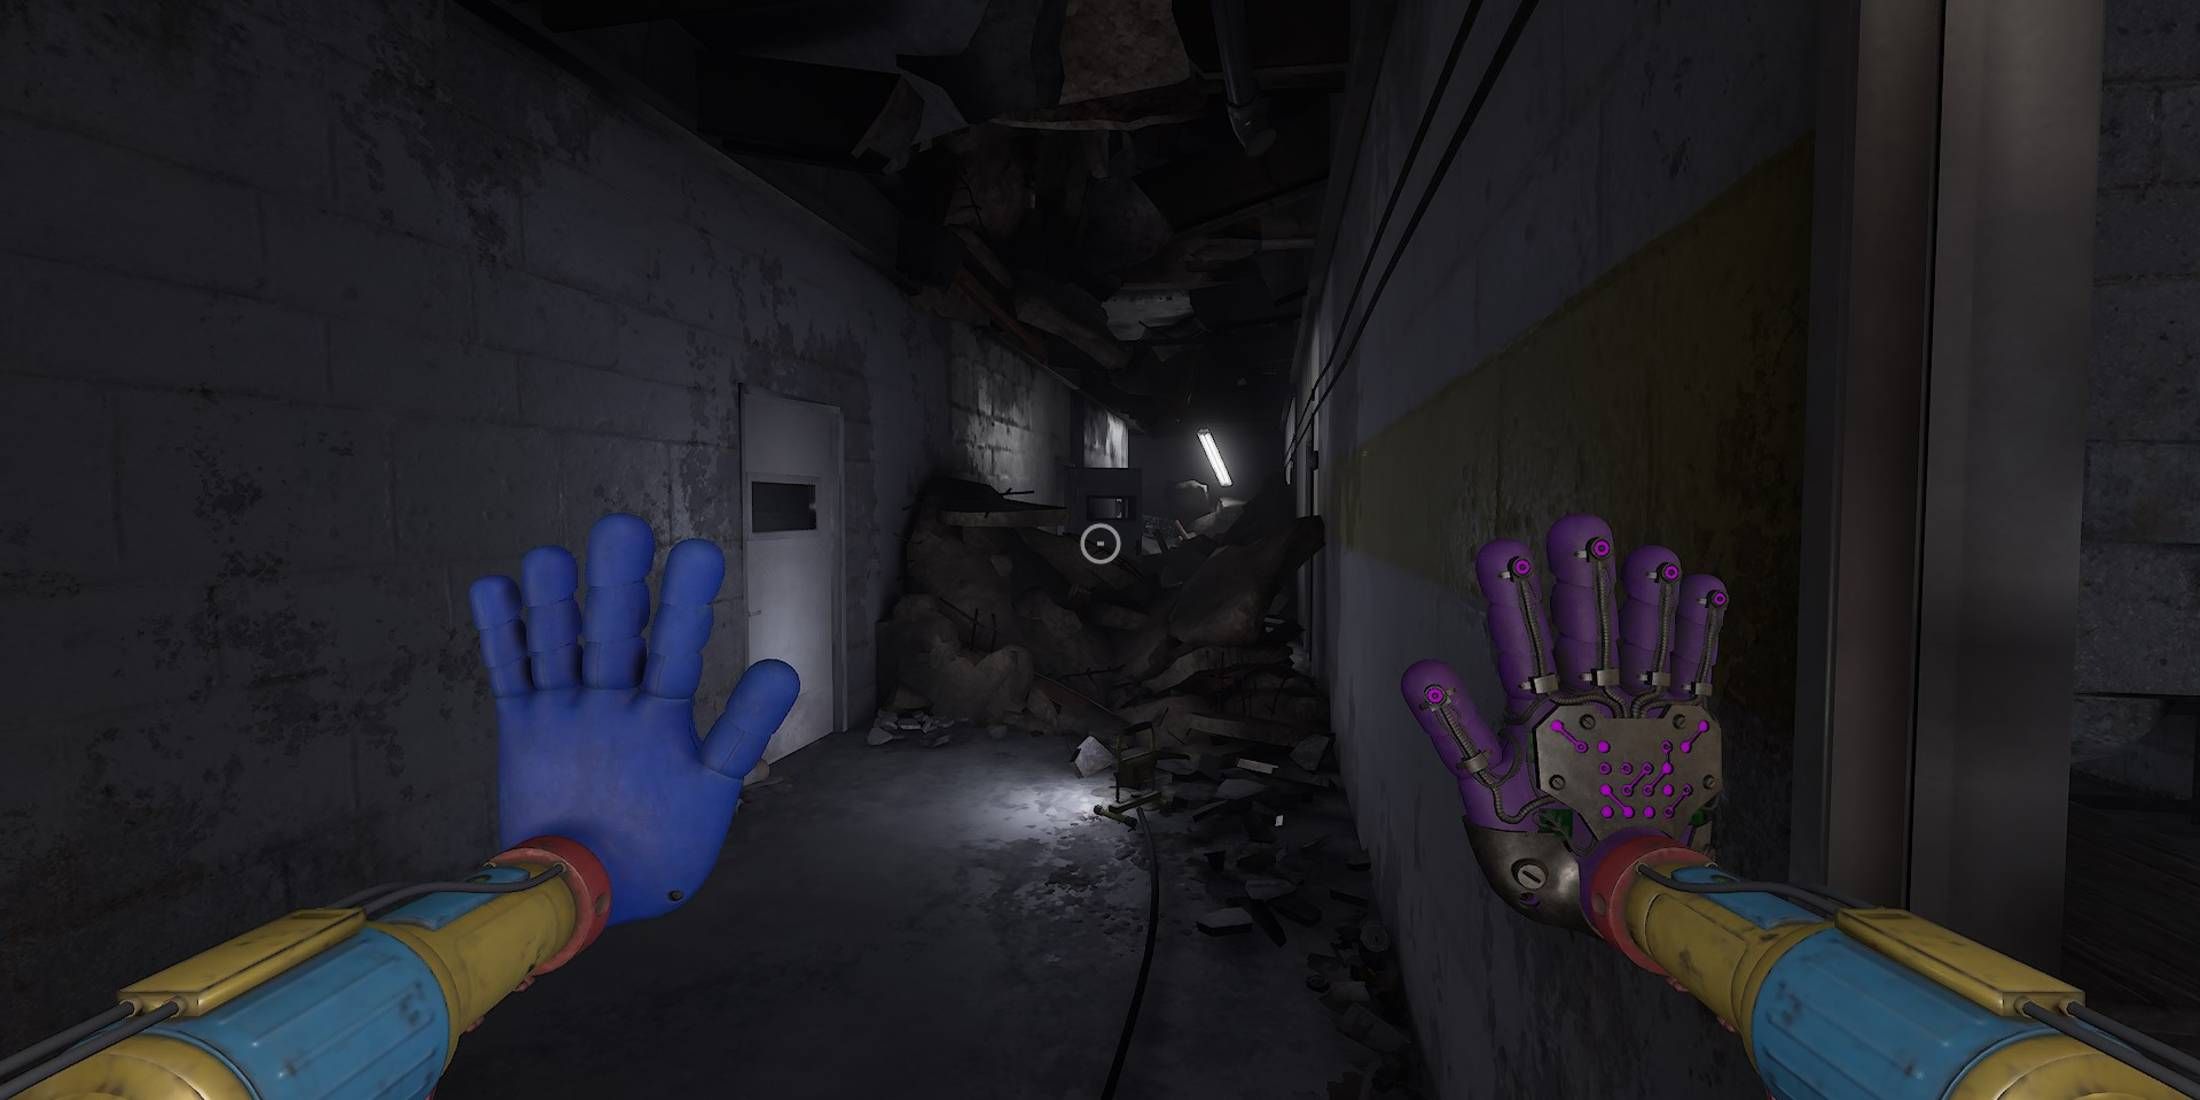
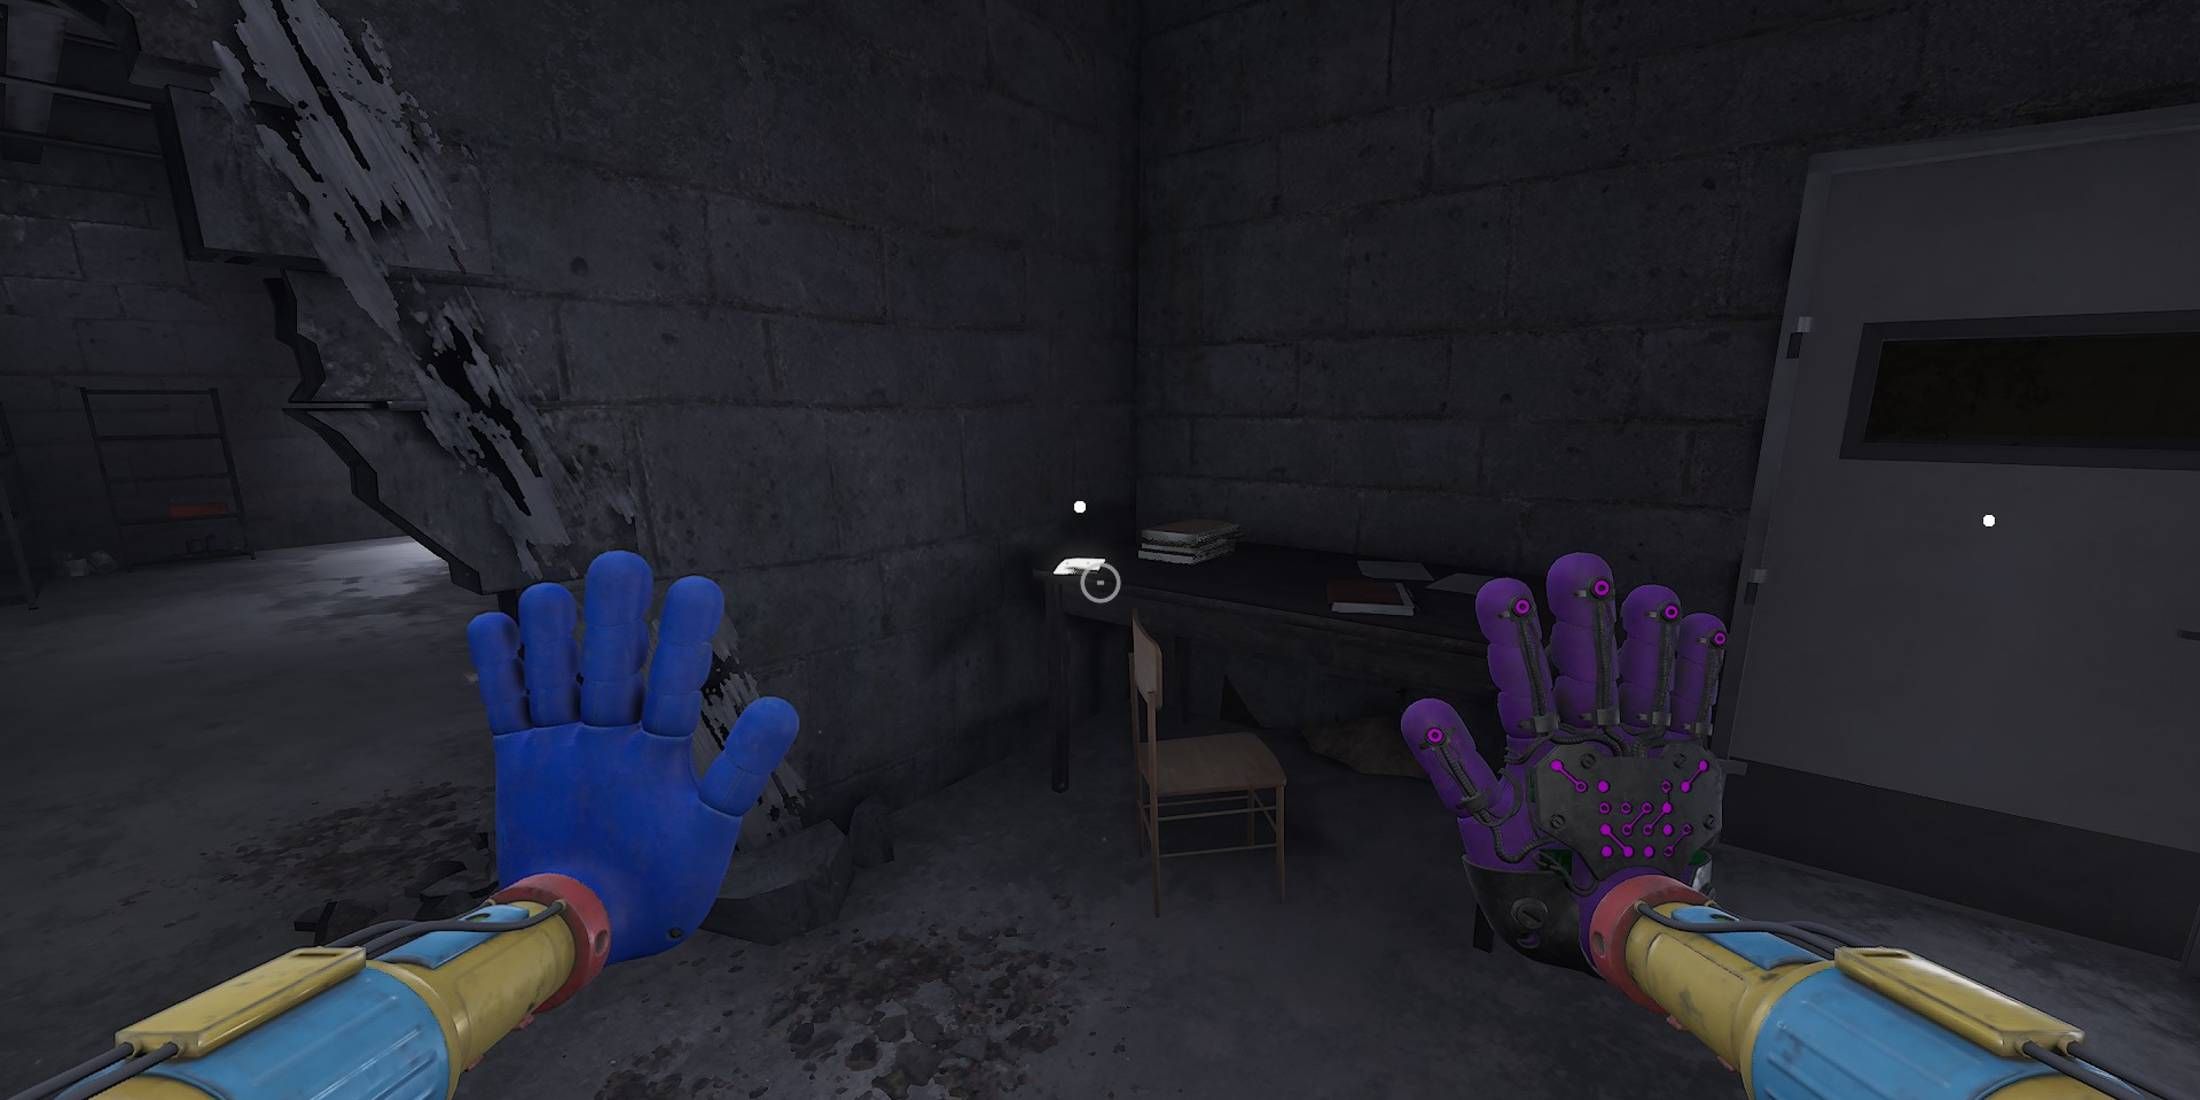
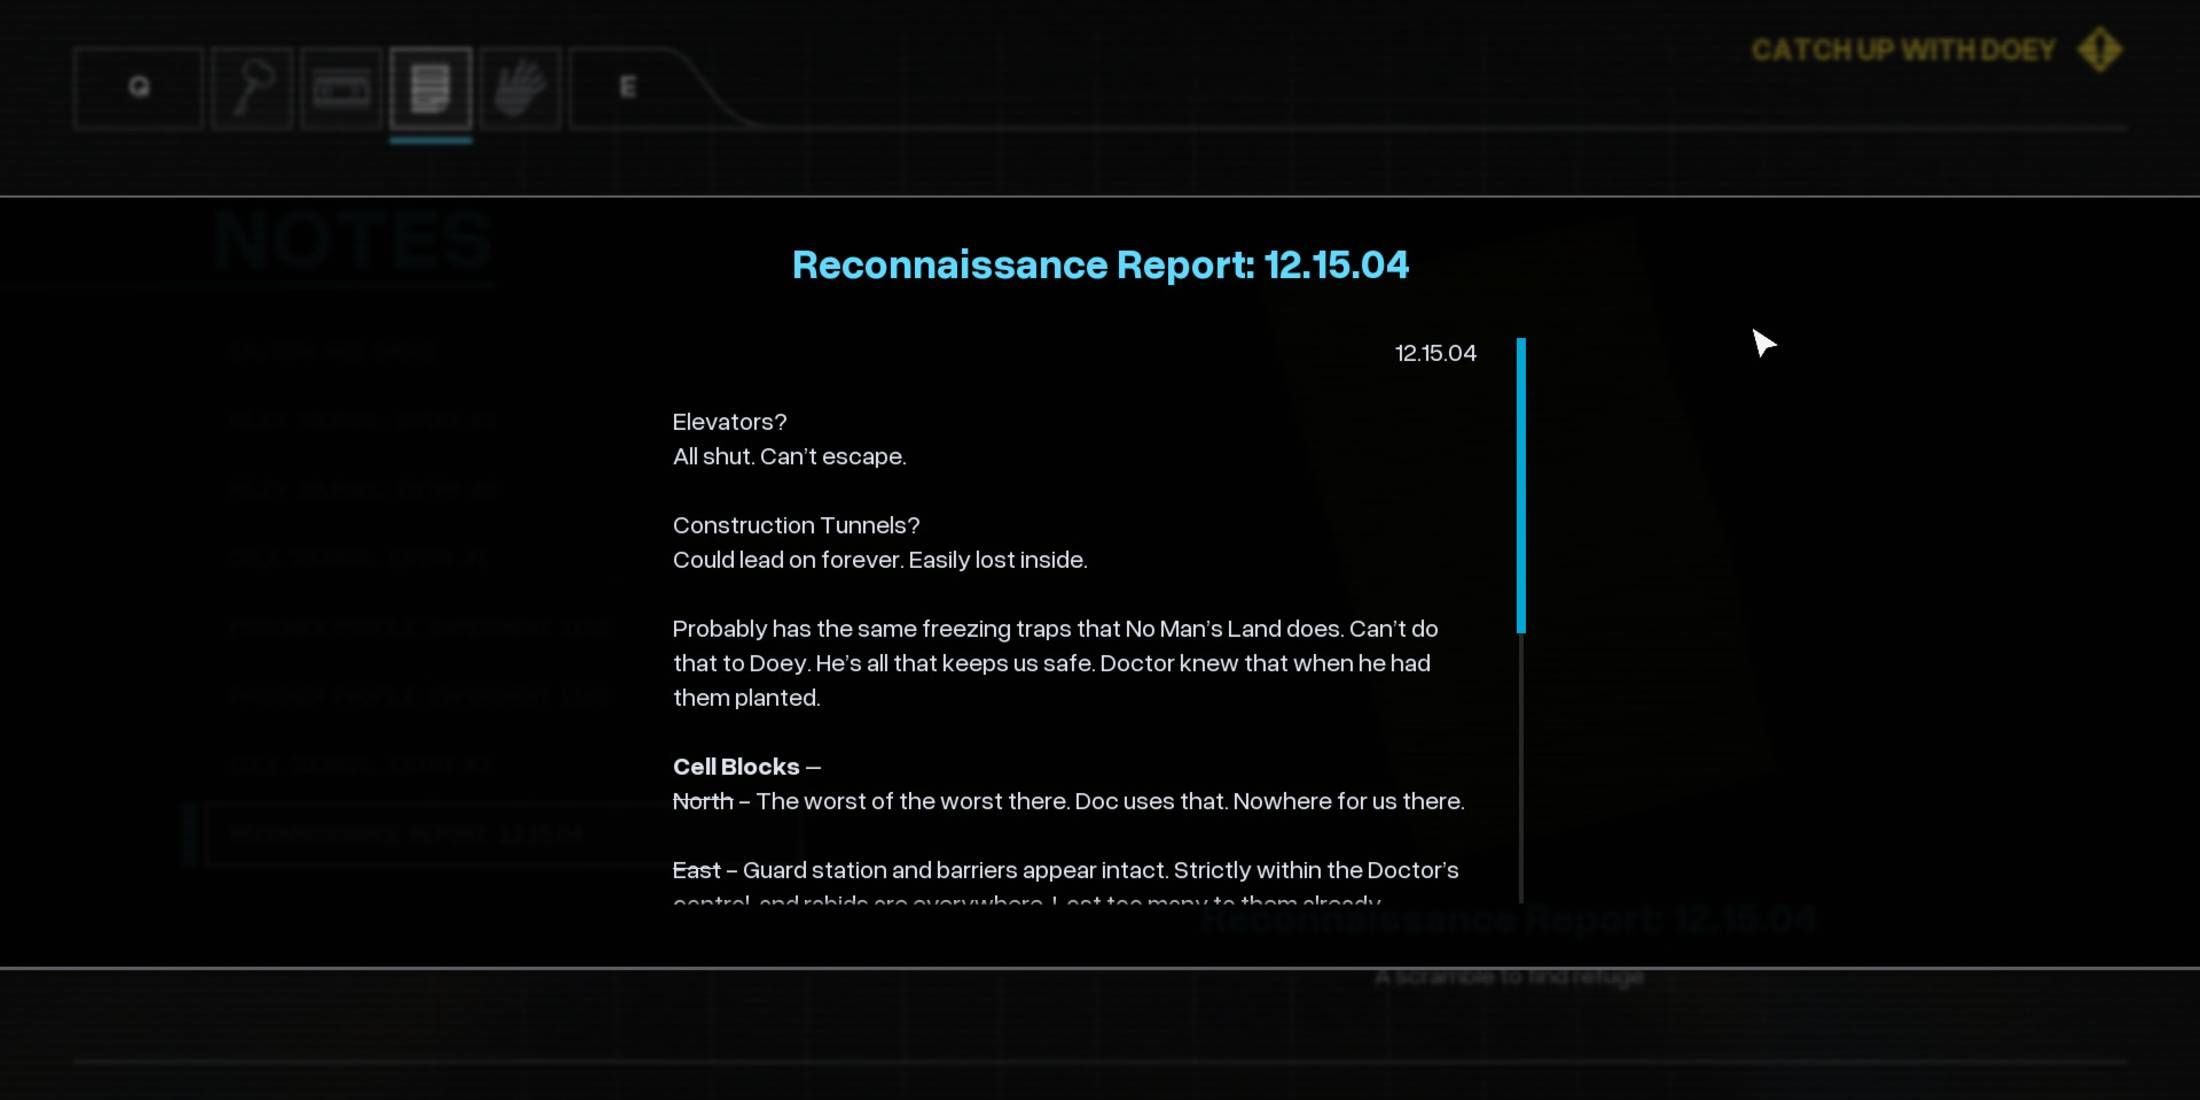
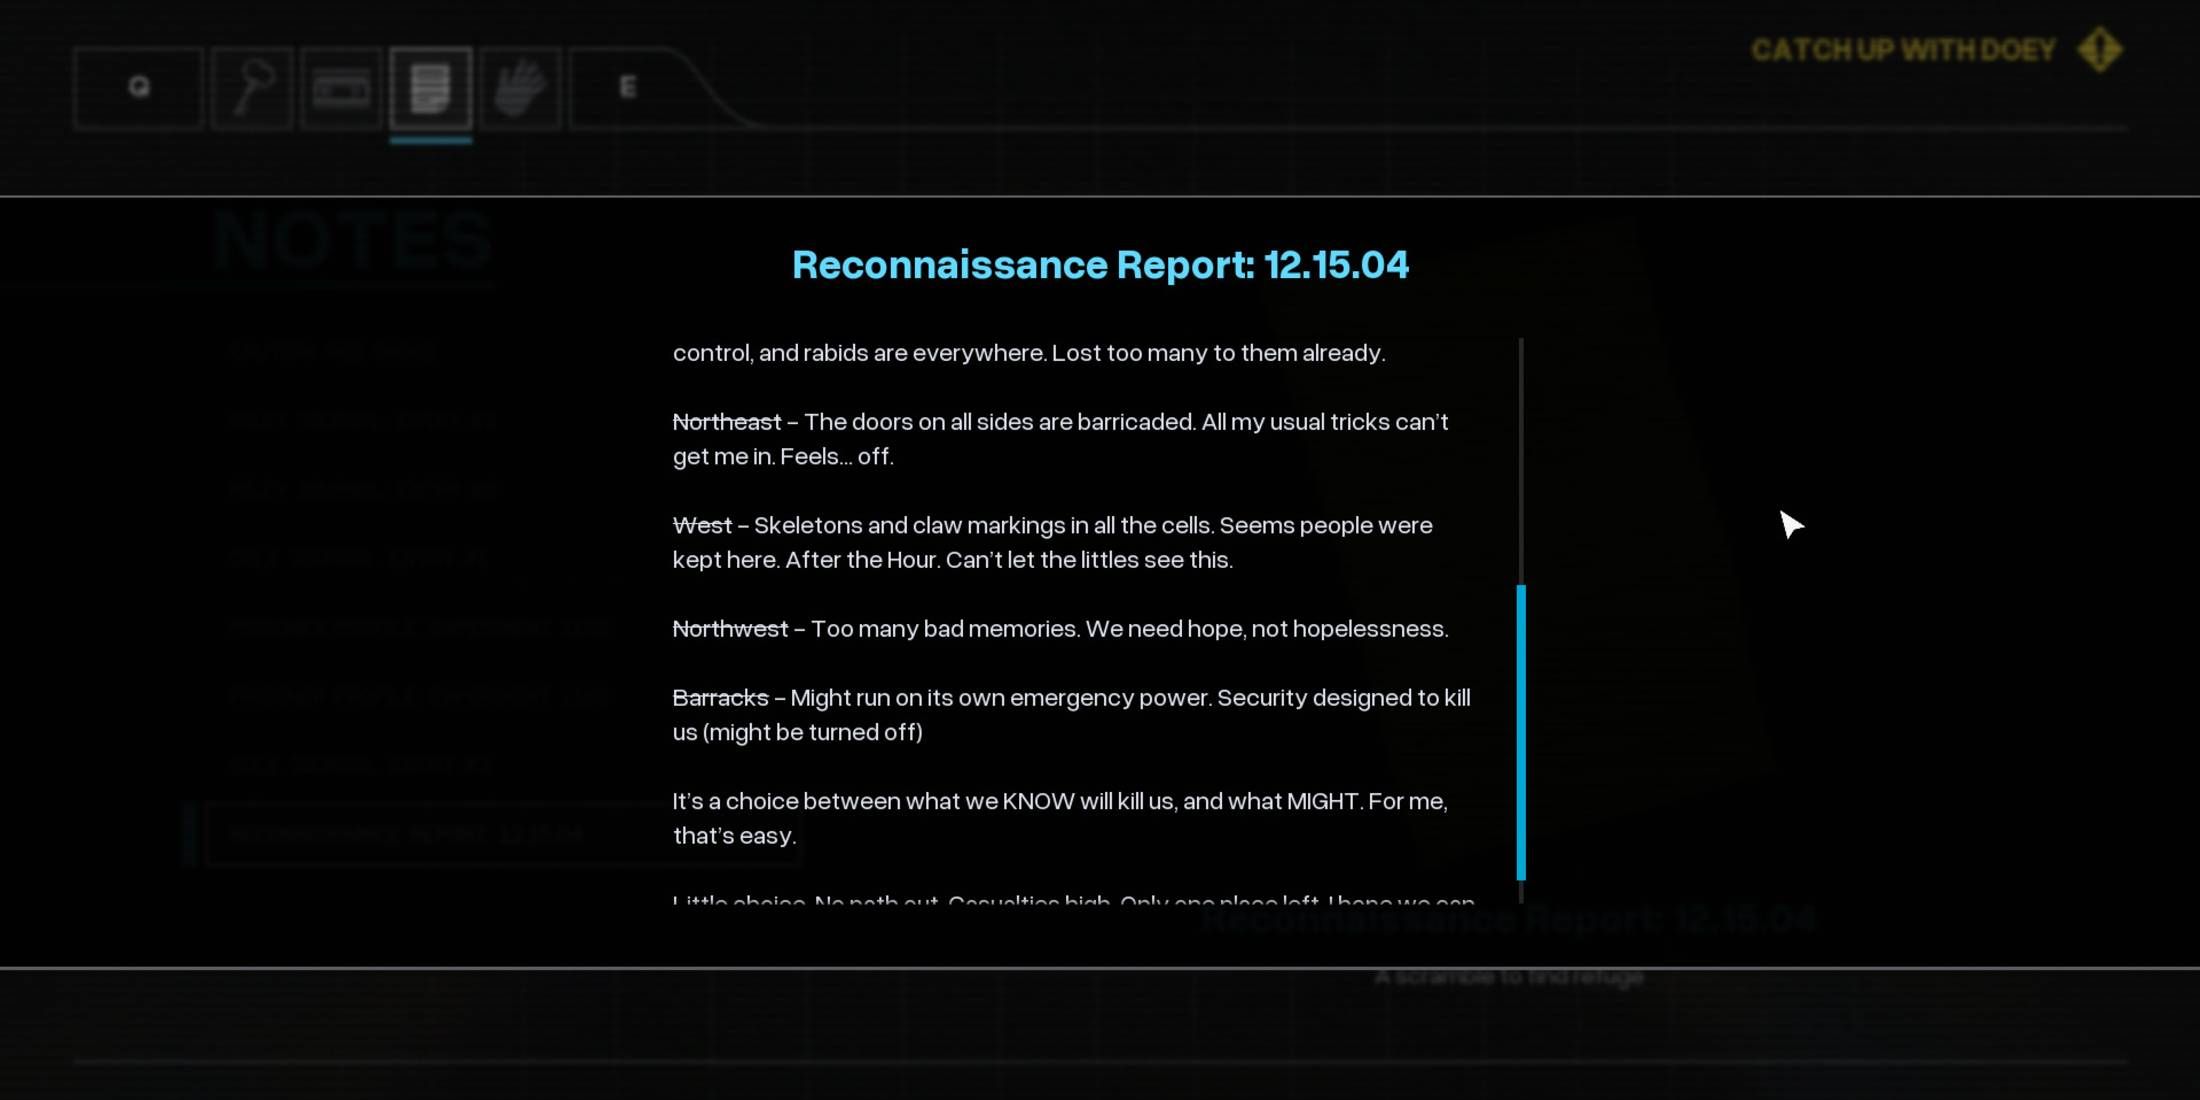
Reconnaissance Report: 12.15.04
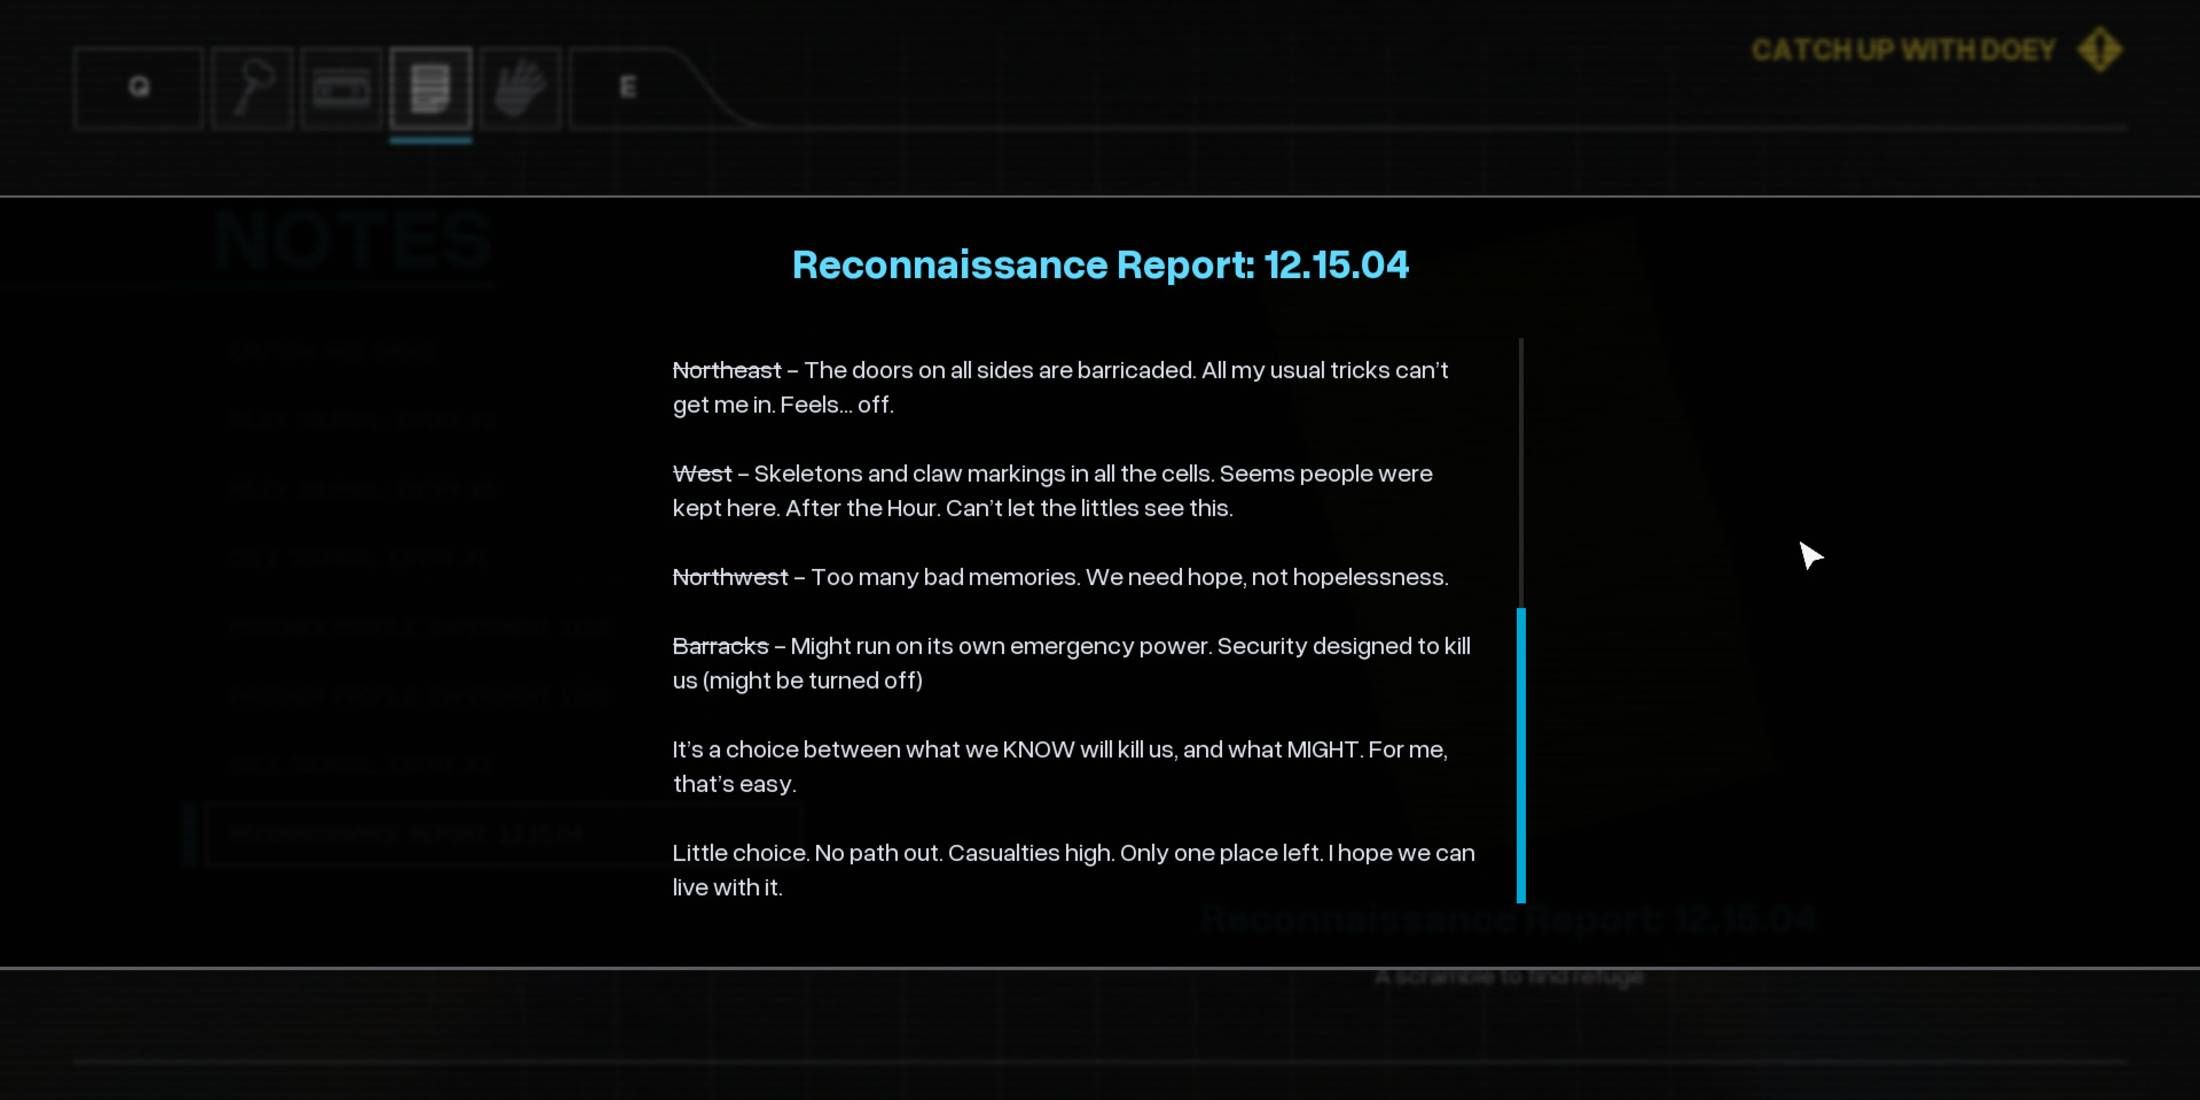
- Auto Save File: Prison Utility Zone (2)
- Objective: Catch up to Doey
As soon as you begin tracking Doey, you’ll encounter a hallway with a caved-in roof obstructing your way forward. To bypass this obstacle, move into the room on your right and locate the gap in its wall. Use that opening to advance to the next room. Instead of proceeding where Doey did, enter the room directly in front of you, and use the hole in its wall to access the adjacent room. In this room, you’ll discover the Reconnaissance Report.
I’m finding myself drawn to this account, penned by an unidentified scribe who bears the unmistakable mark of having weathered The Hour. They are not just any survivor; they’re a seeker, tirelessly exploring every potential escape route. Yet, with a keen eye for danger, they dismiss each possibility as too risky.
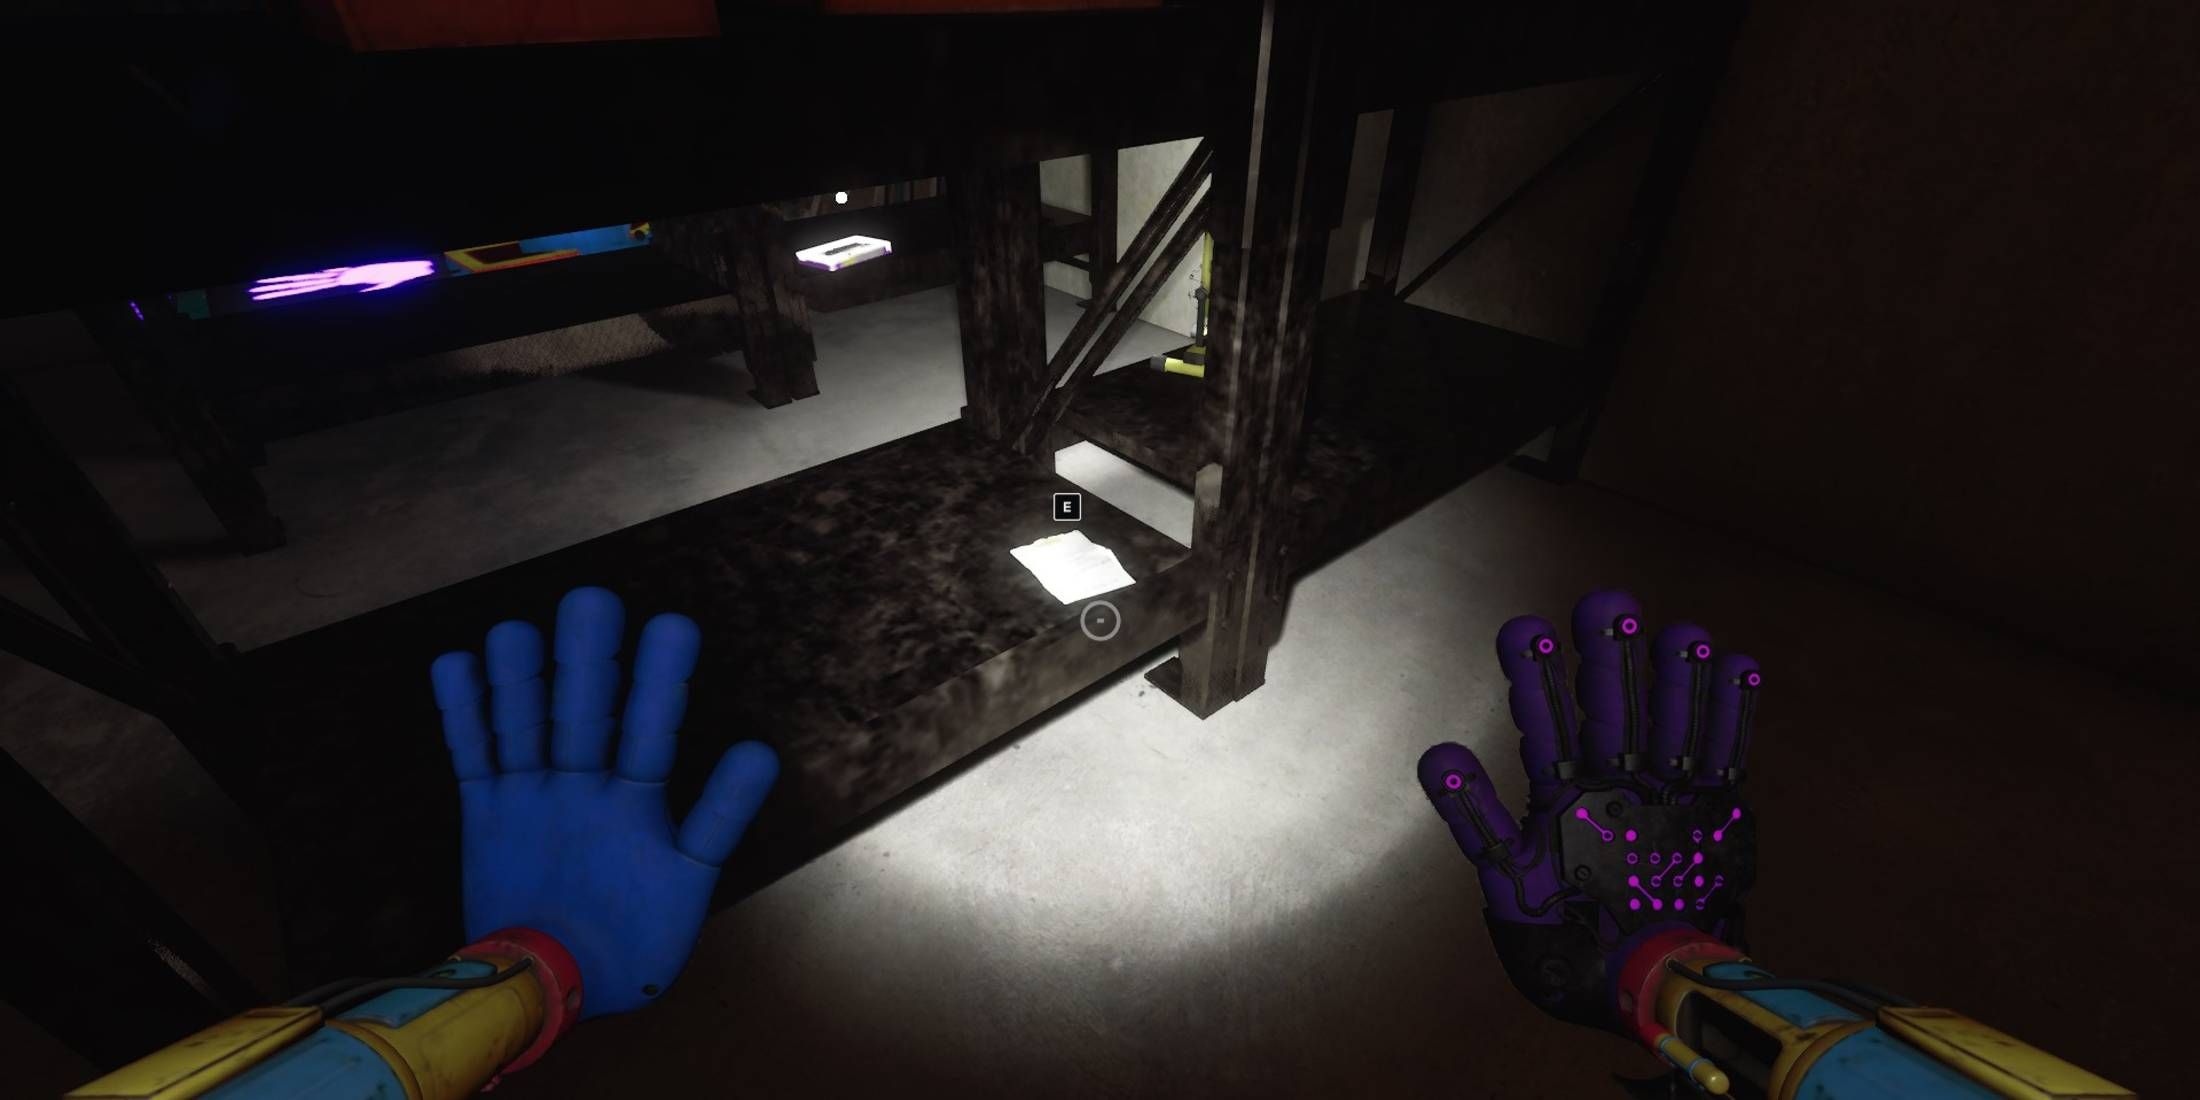
A Cryptic Letter
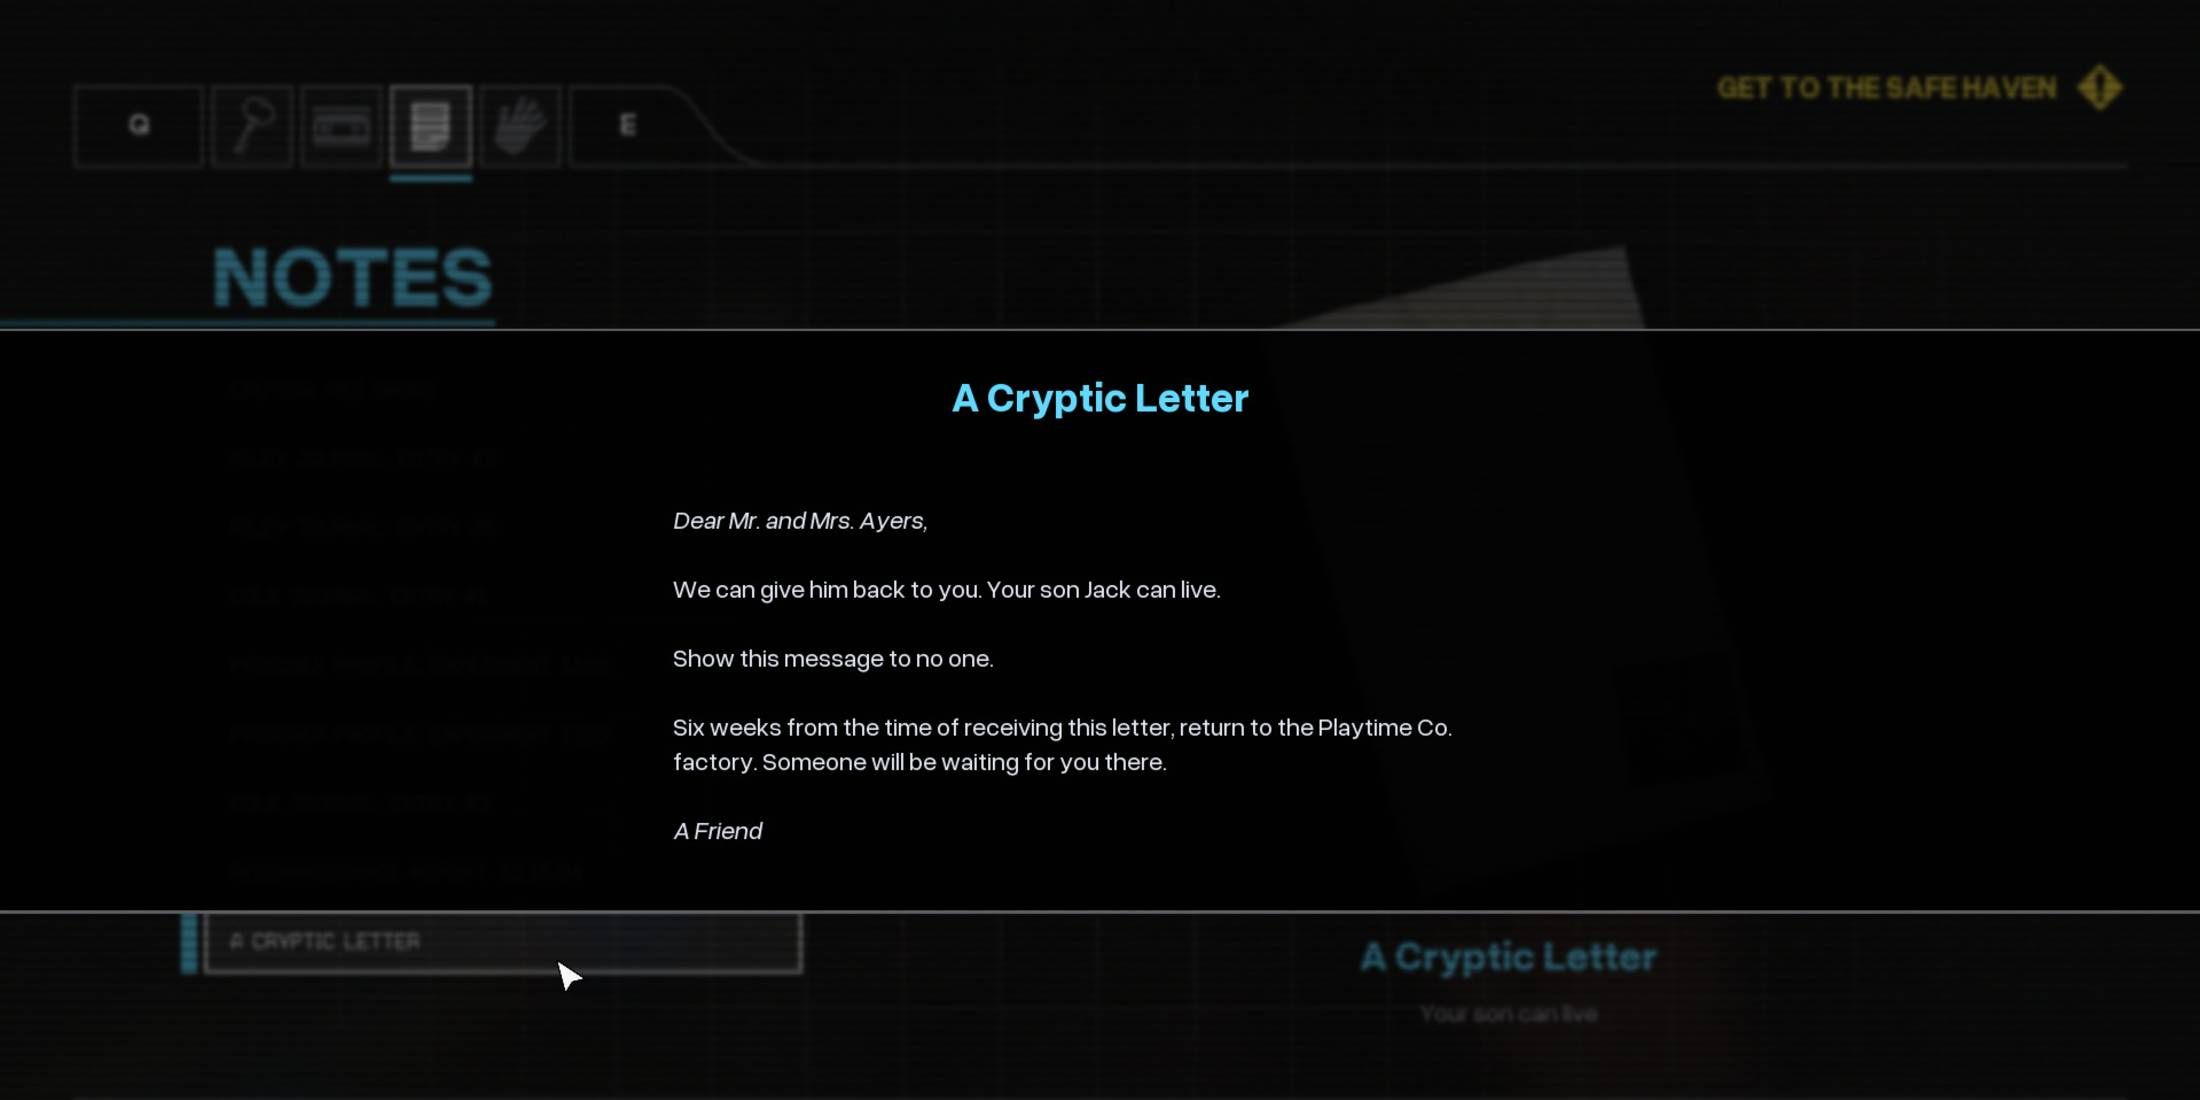
- Auto Save File: Safe Haven (1)
- Objective: Get to Safe Haven
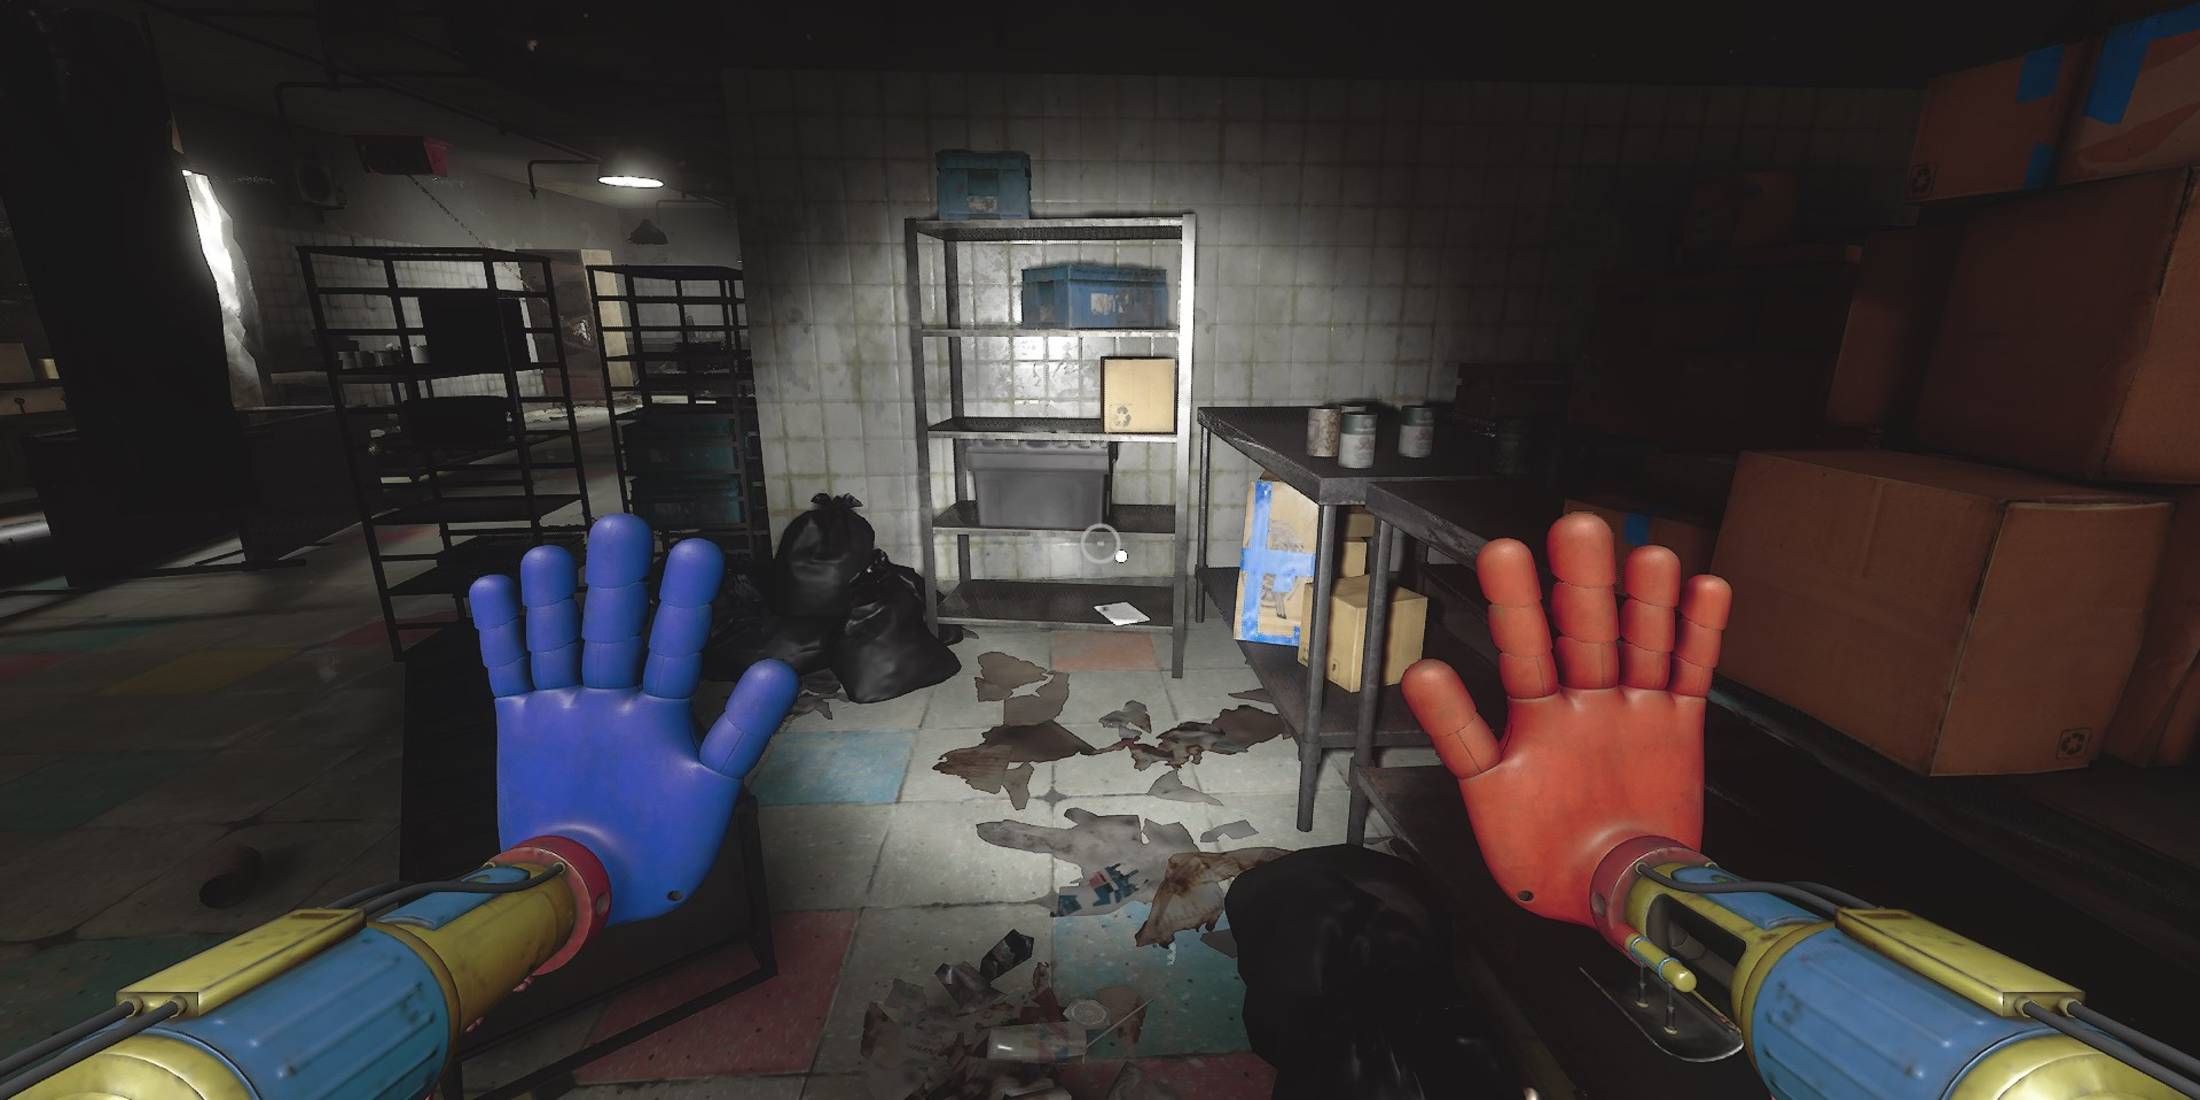
Here’s the next clue for you: The upcoming hint is located in the room where the body bags are stored and features a tricky lever puzzle. Upon entering this room, look for some overturned cabinets and crawl beneath them. You will discover the note on your right side, nestled at the bottom of a standing cabinet shelf.
The note, seemingly penned by an individual from Playtime, extended an invitation to Mr. and Mrs. Ayers for a possible reunion with their son at Playtime. It’s requested that they keep this letter confidential, as the “1322 Report: Jack” provides additional details.
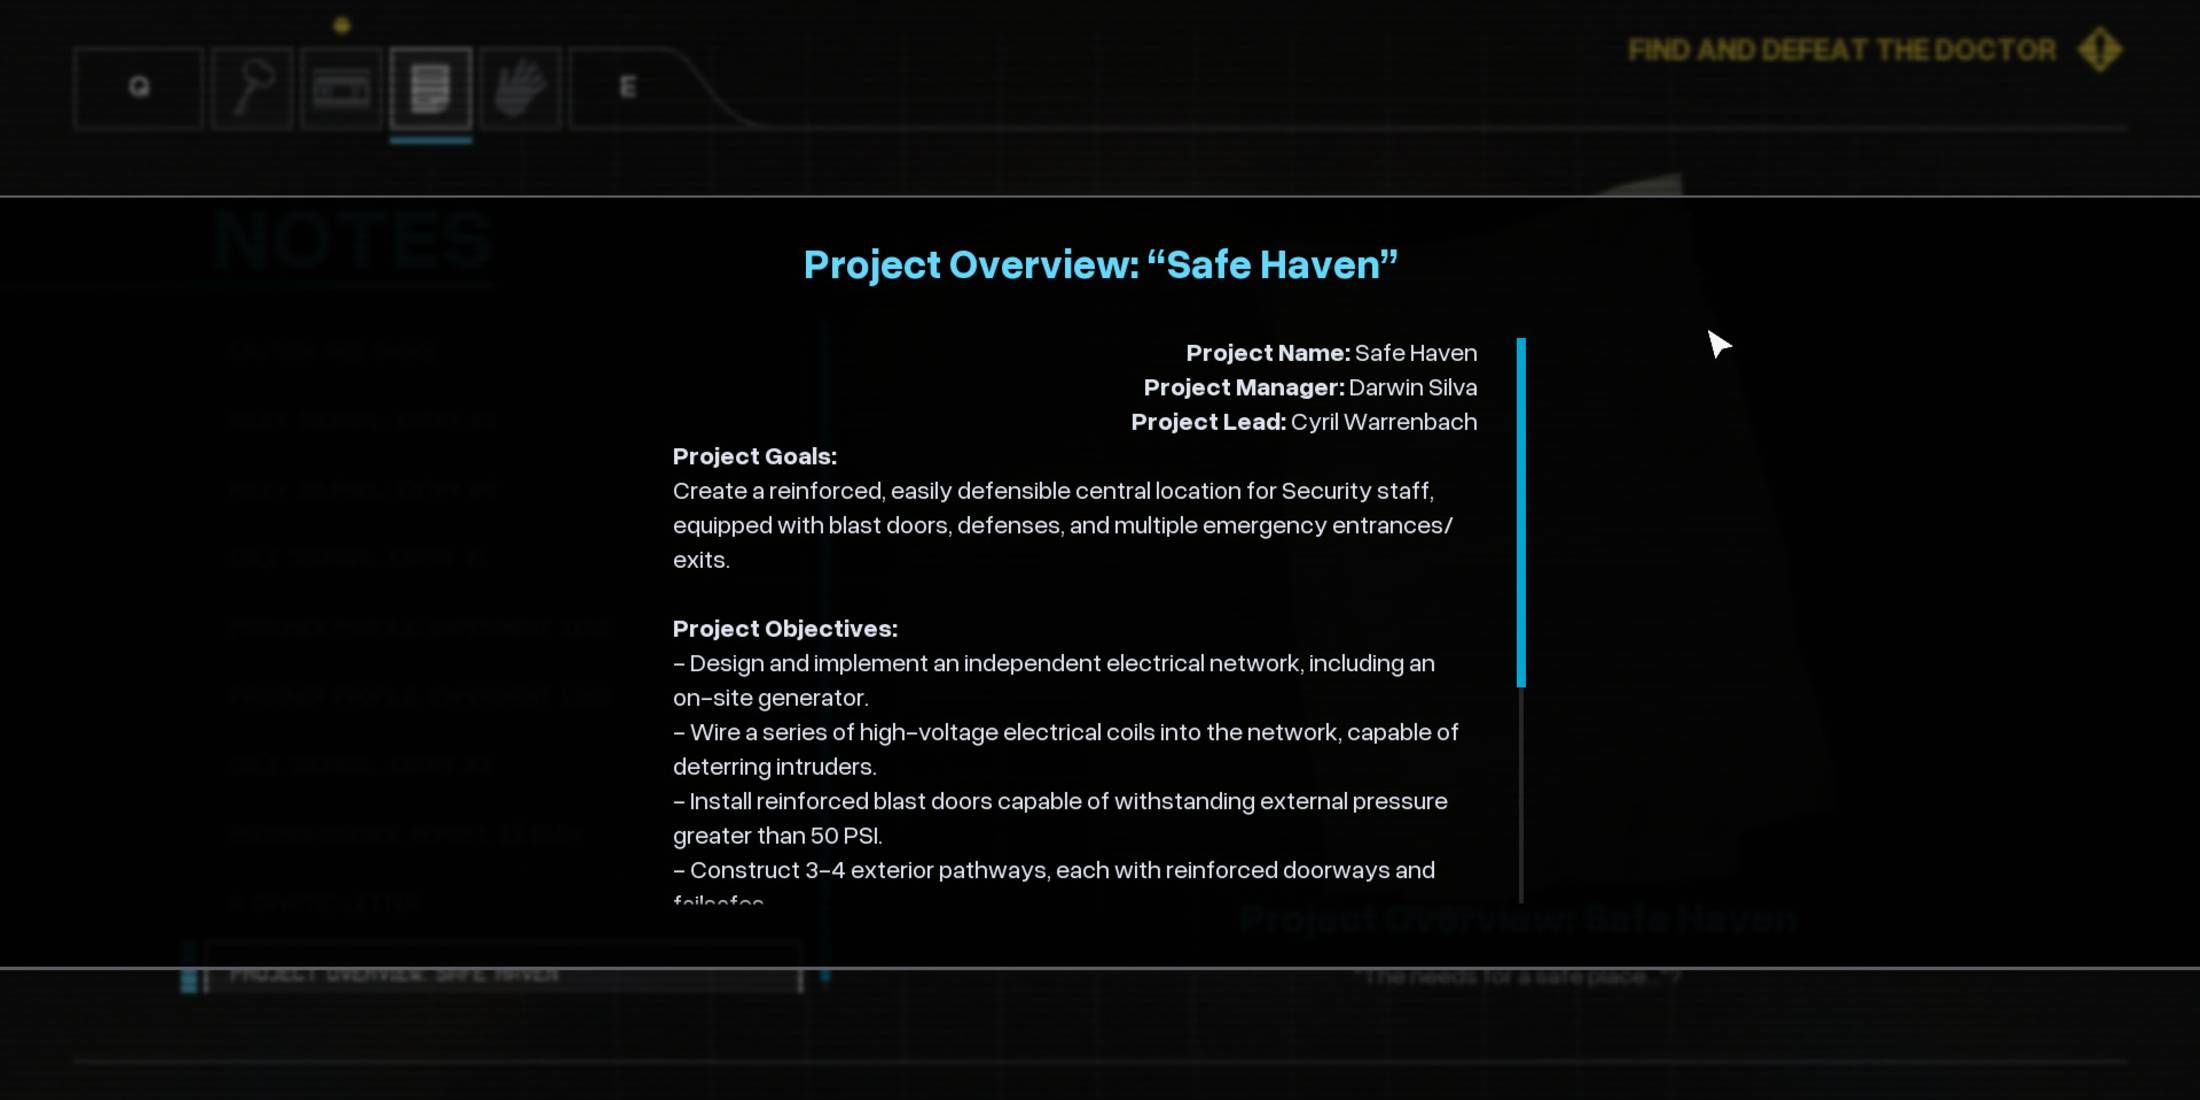
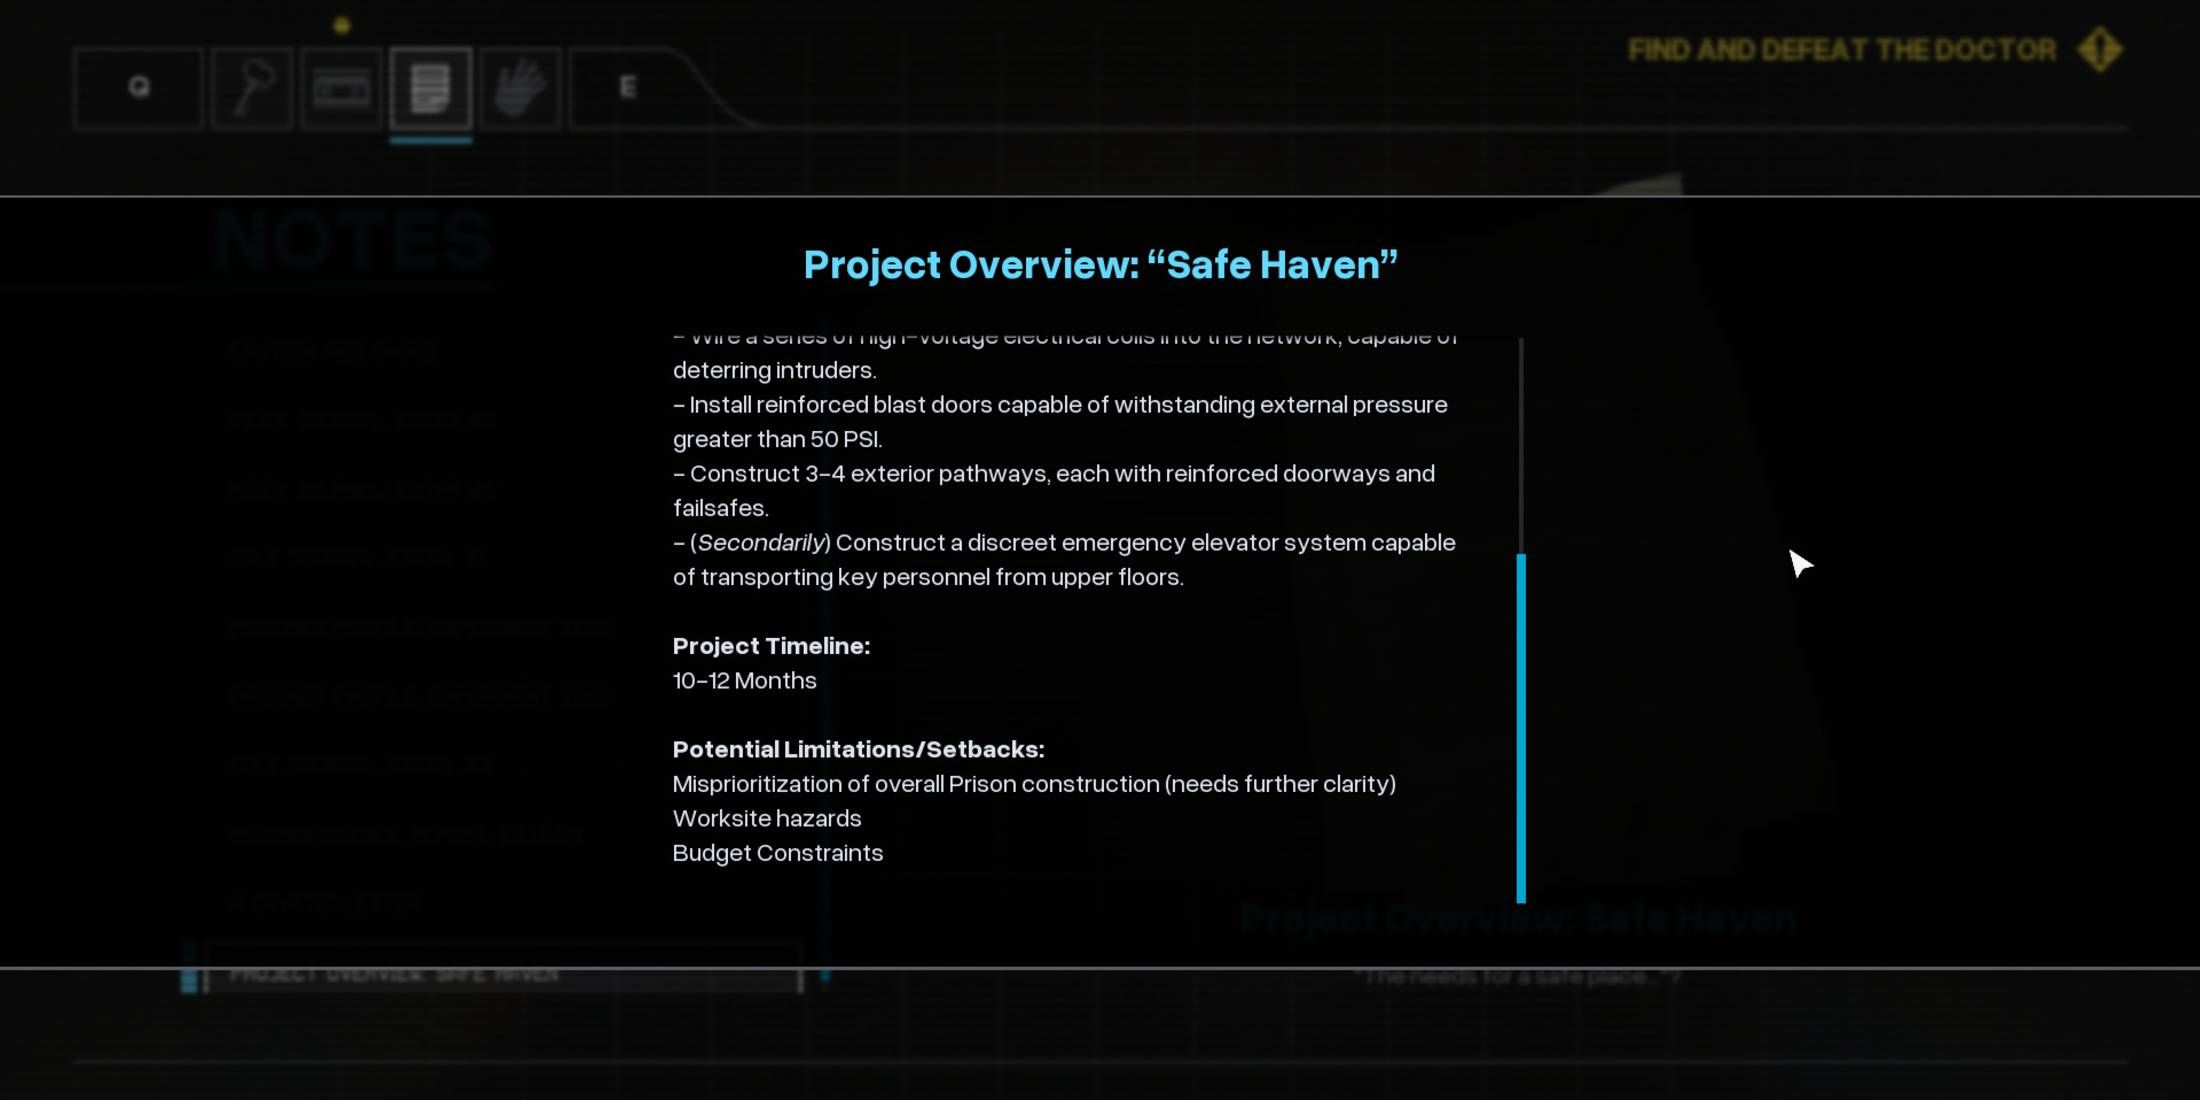
Project Overview: Safe Haven
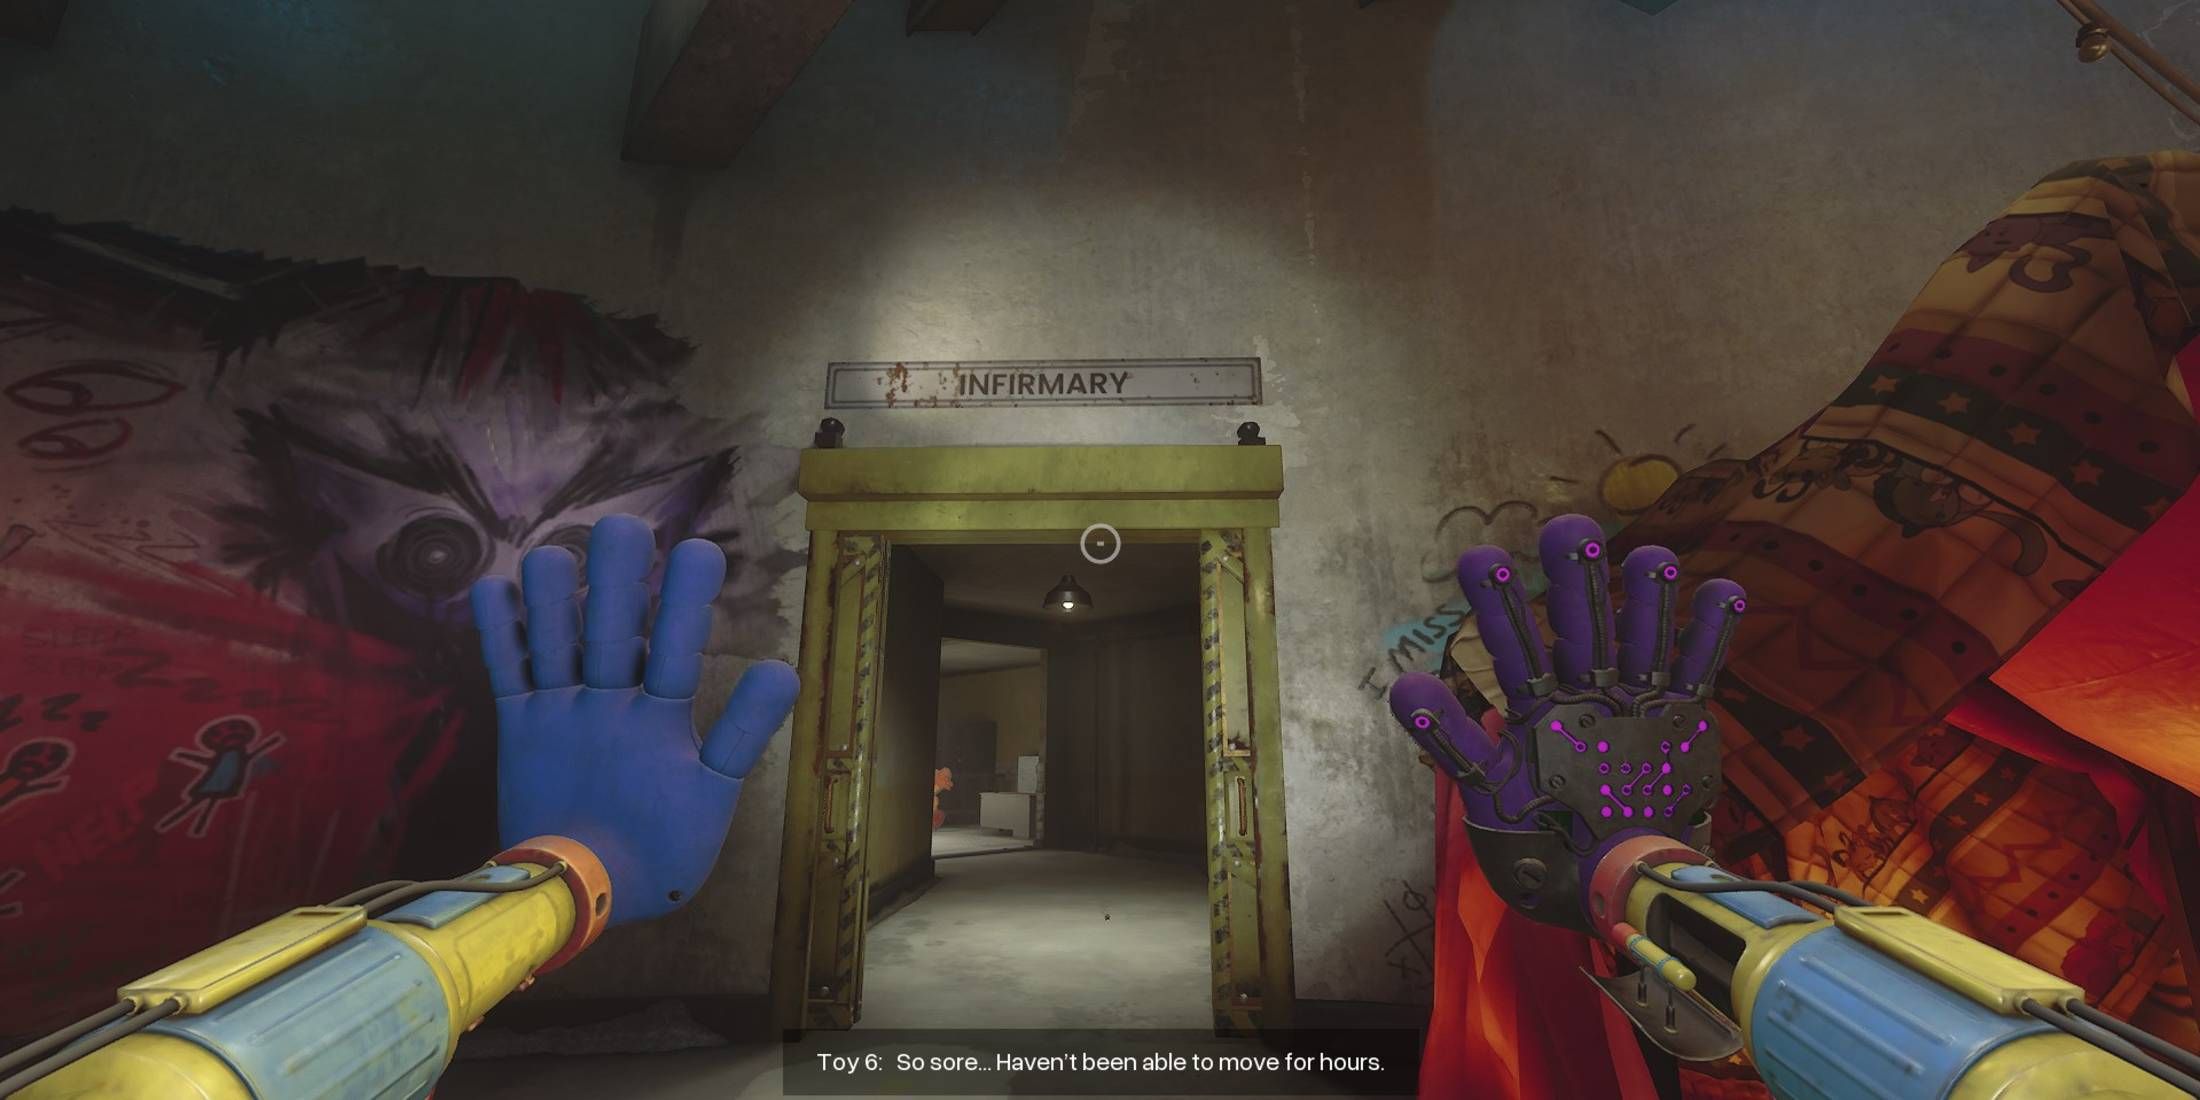
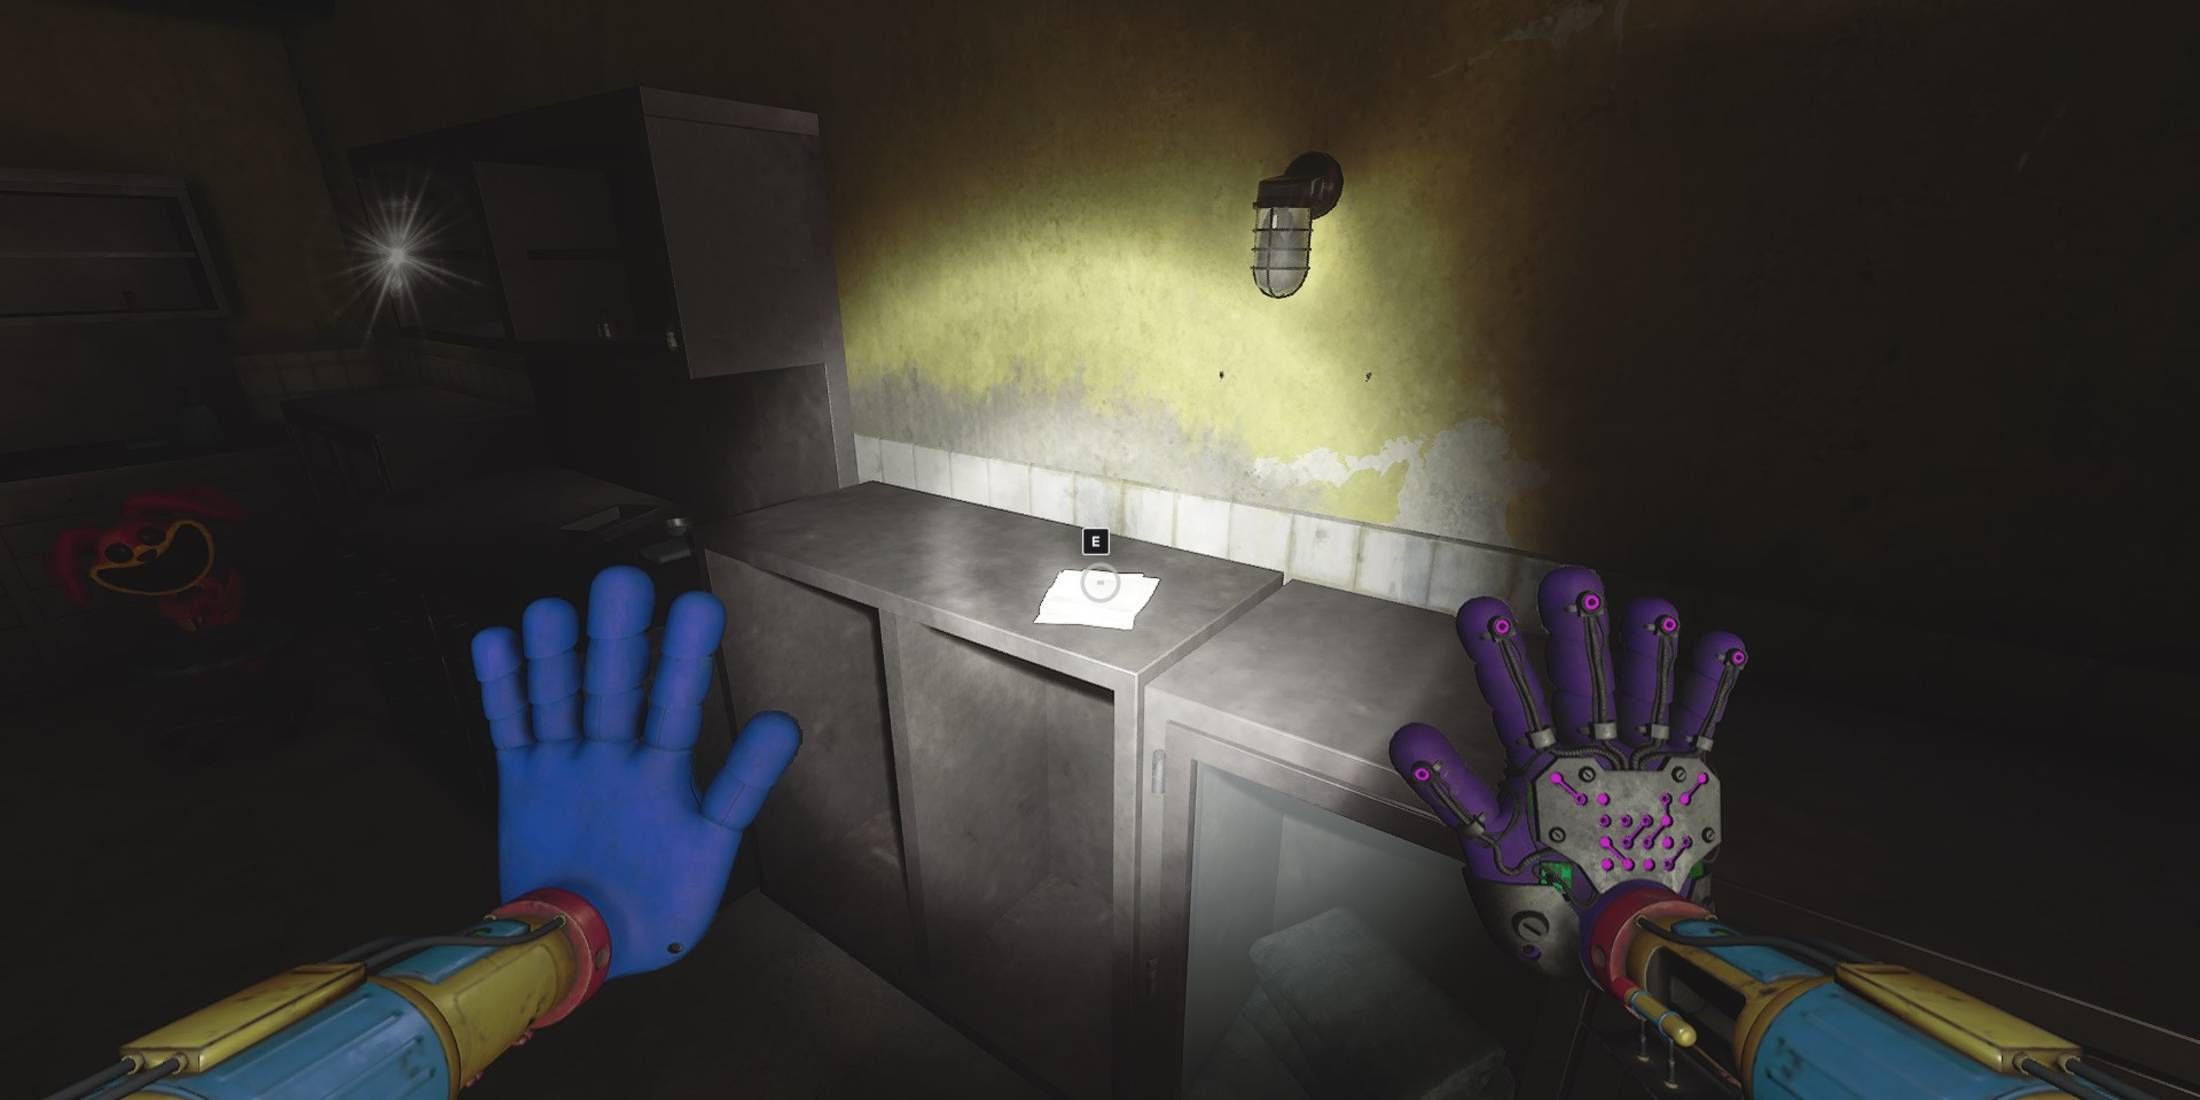
- Auto Save File: Sewers
- Objective: Find and defeat The Doctor
Visitors will encounter this message scattered throughout their journey, as it’s hidden within the Infirmary area of Safe Haven. The note can be found on the highest shelf of a medicine cabinet that’s positioned to your right upon entering the Infirmary, and moving towards the large opening at the rear.
It appears that the document is a construction company’s outline detailing the needs for building Safe Haven, but the contractor believes this allocation of resources might be misguided or improperly prioritized.
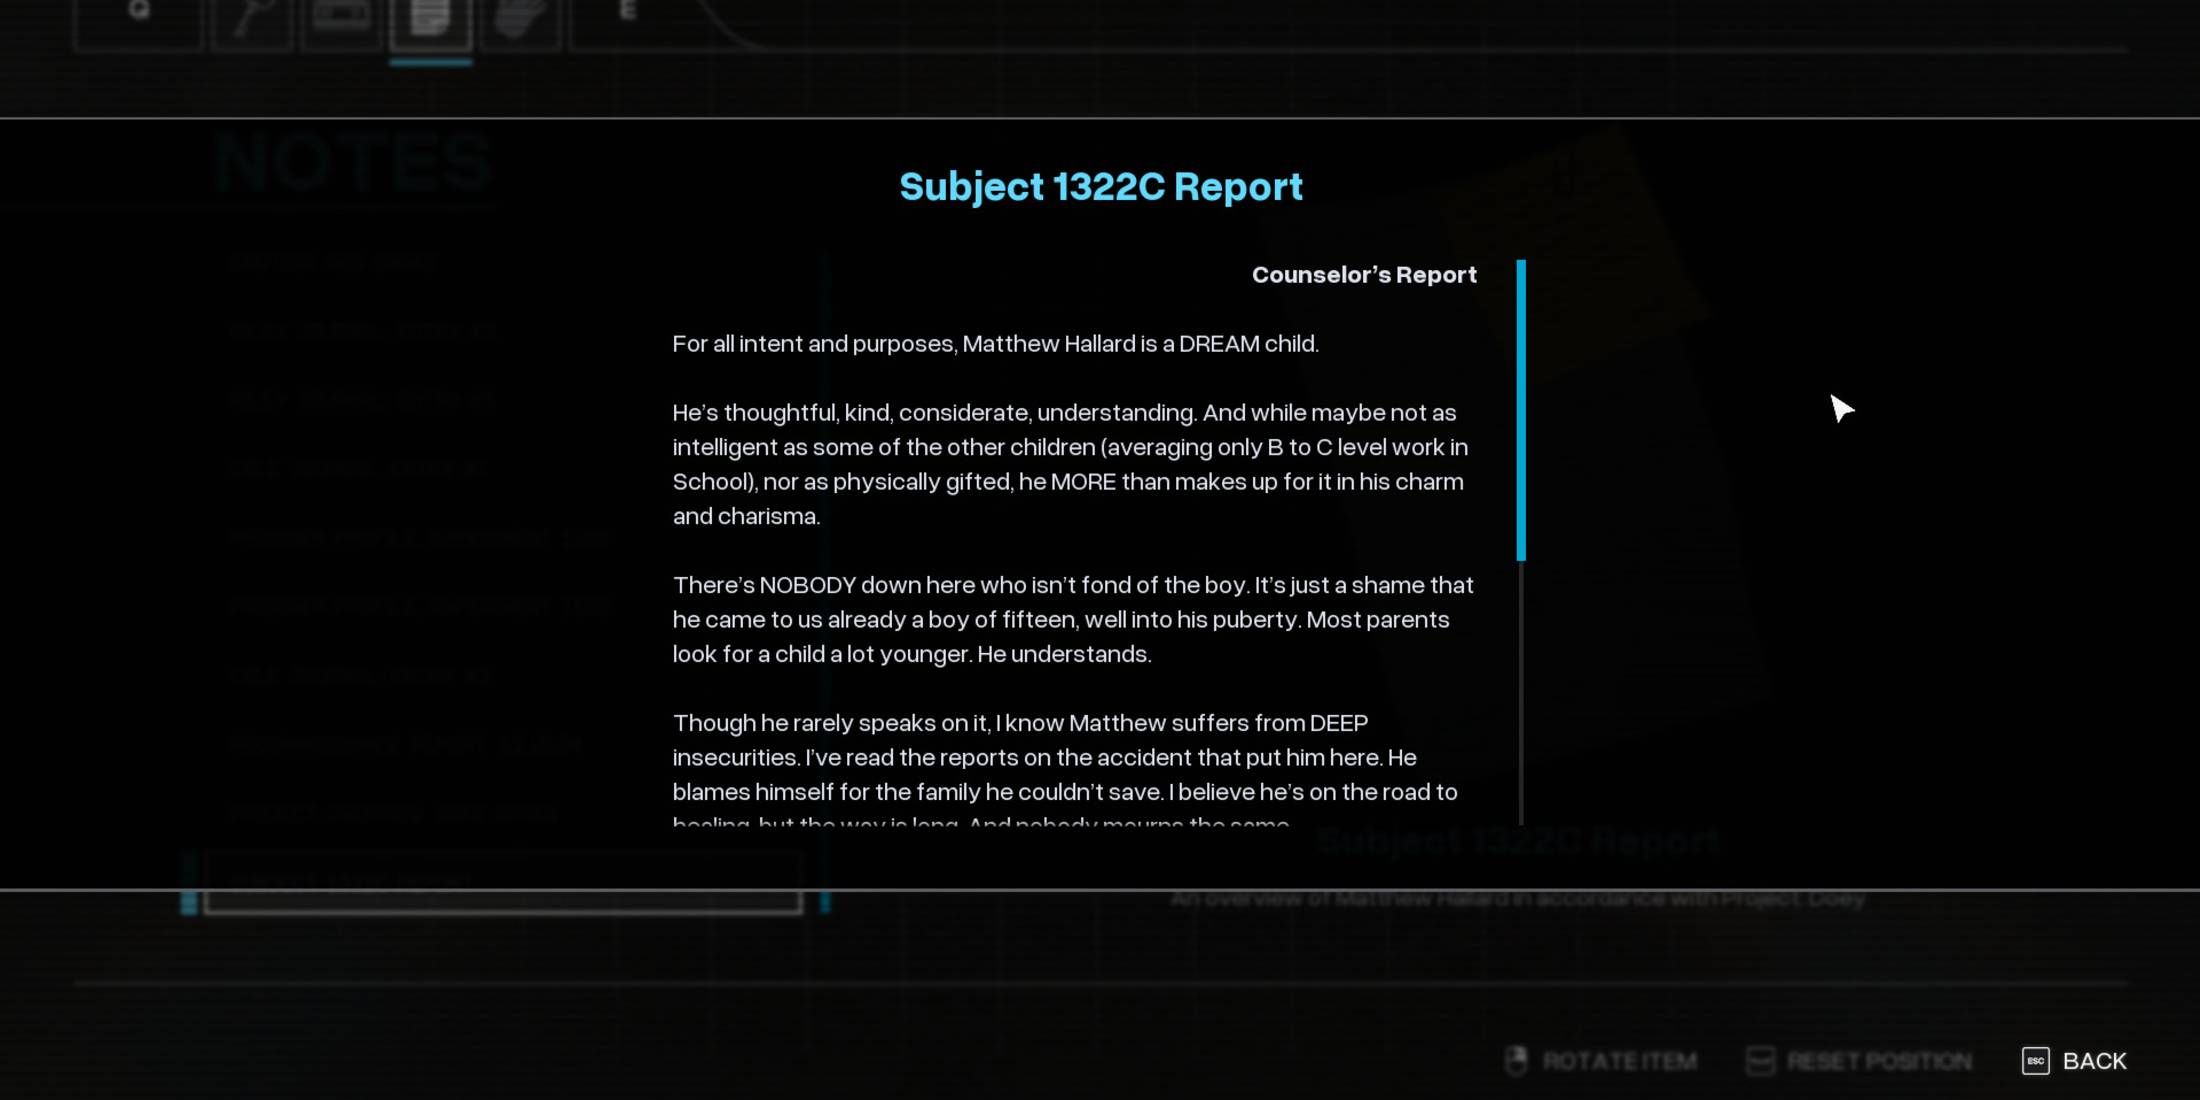
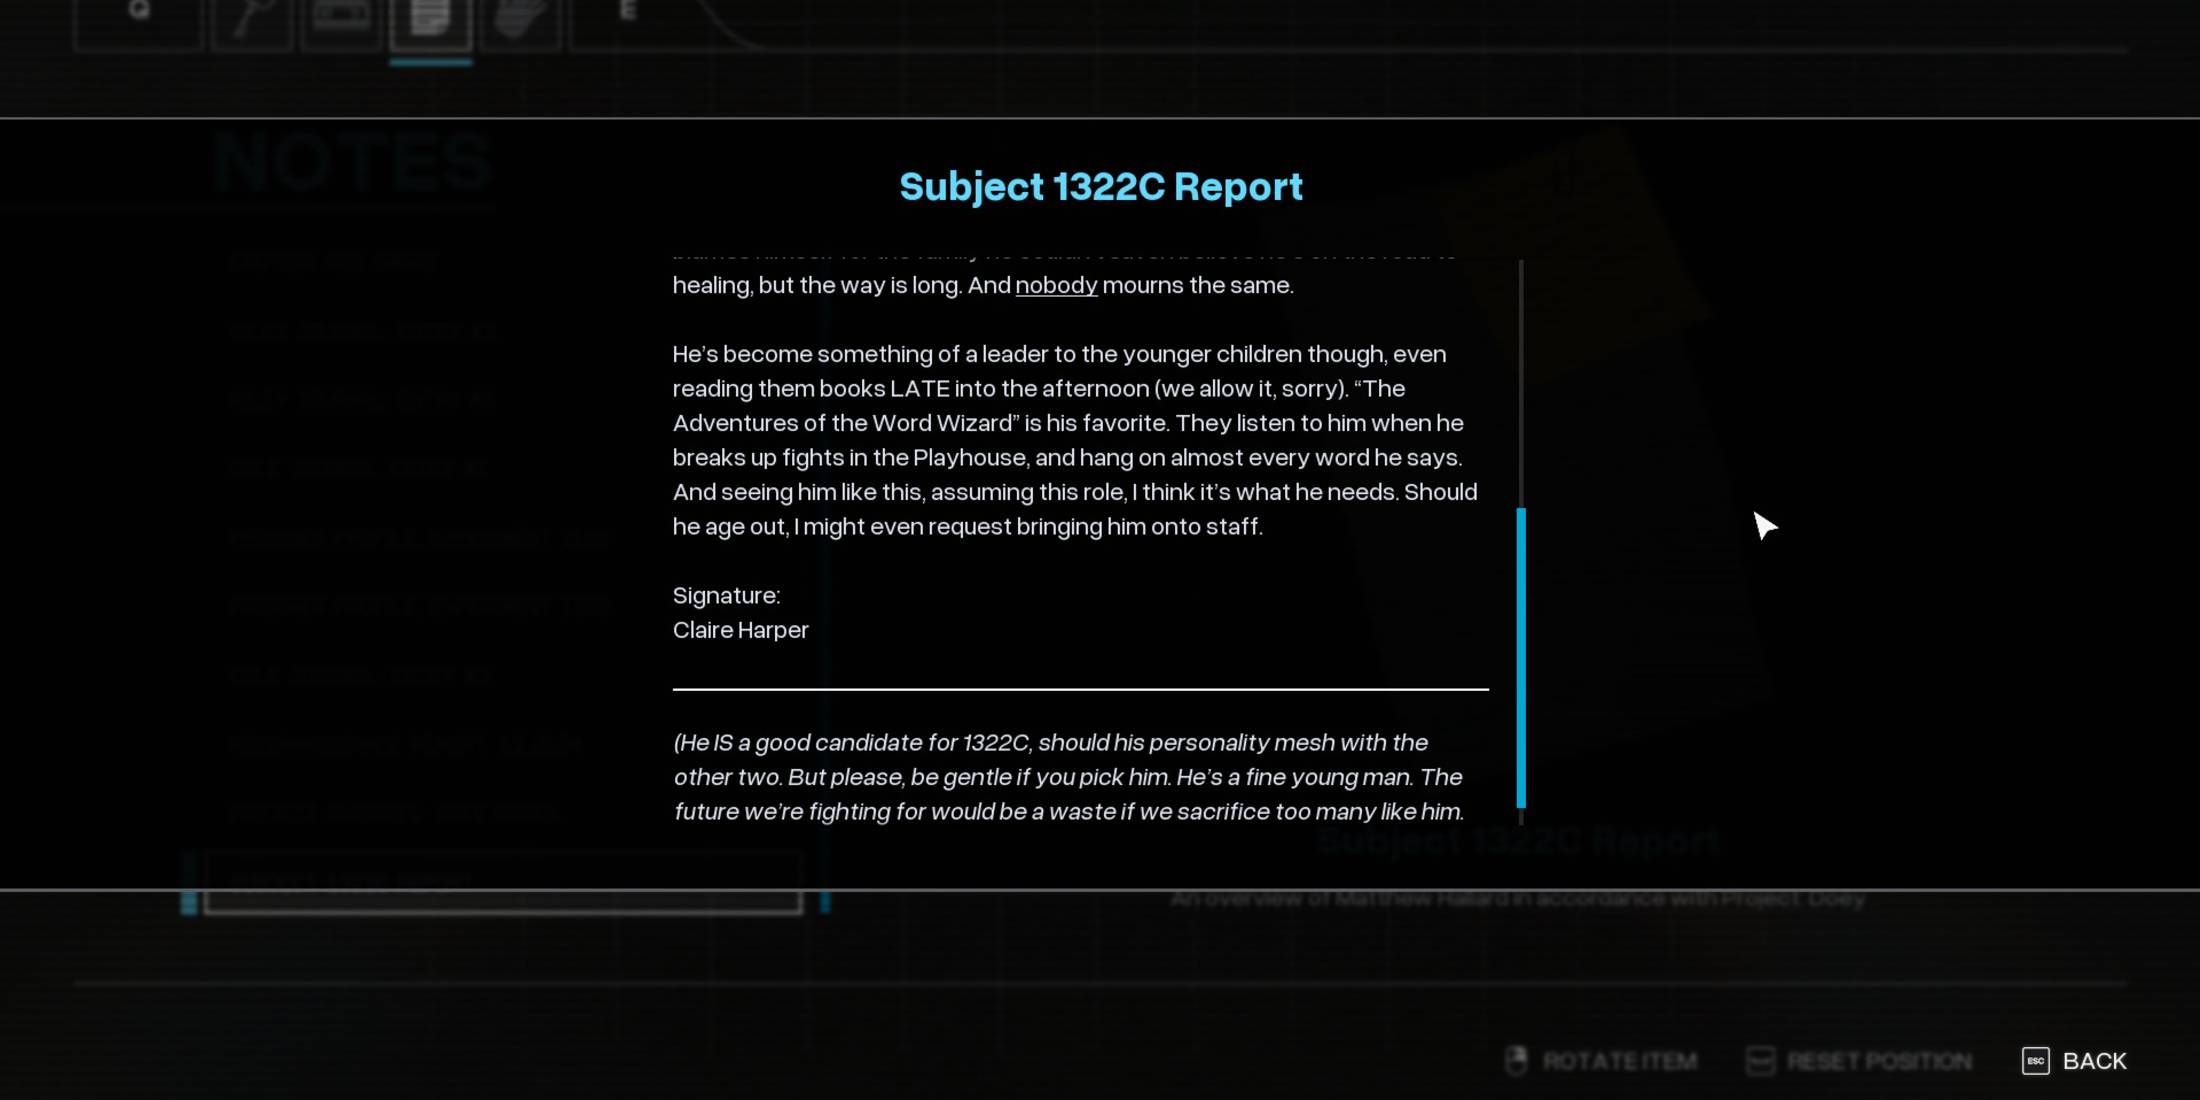
Subject 1322C Report
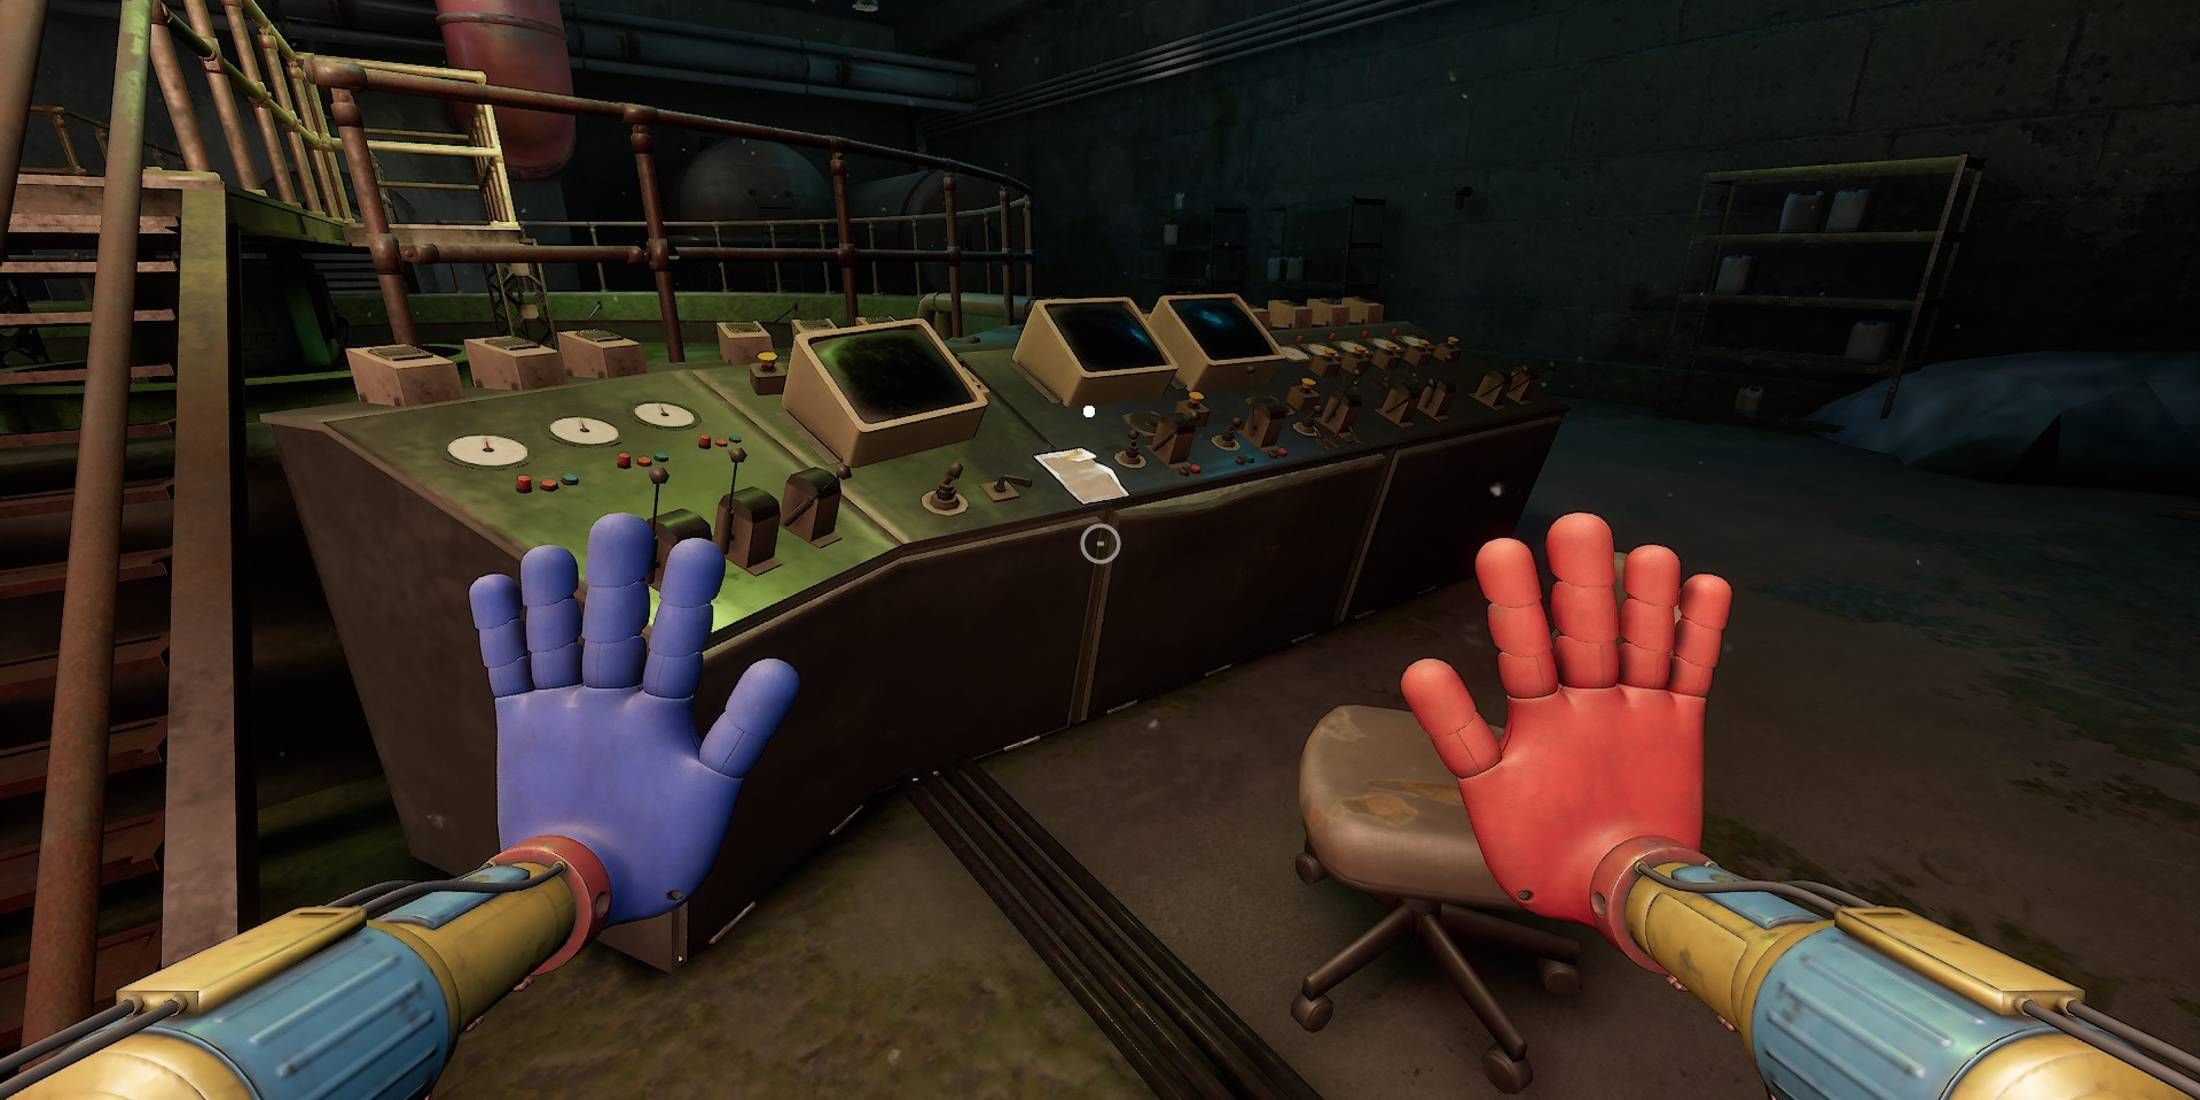
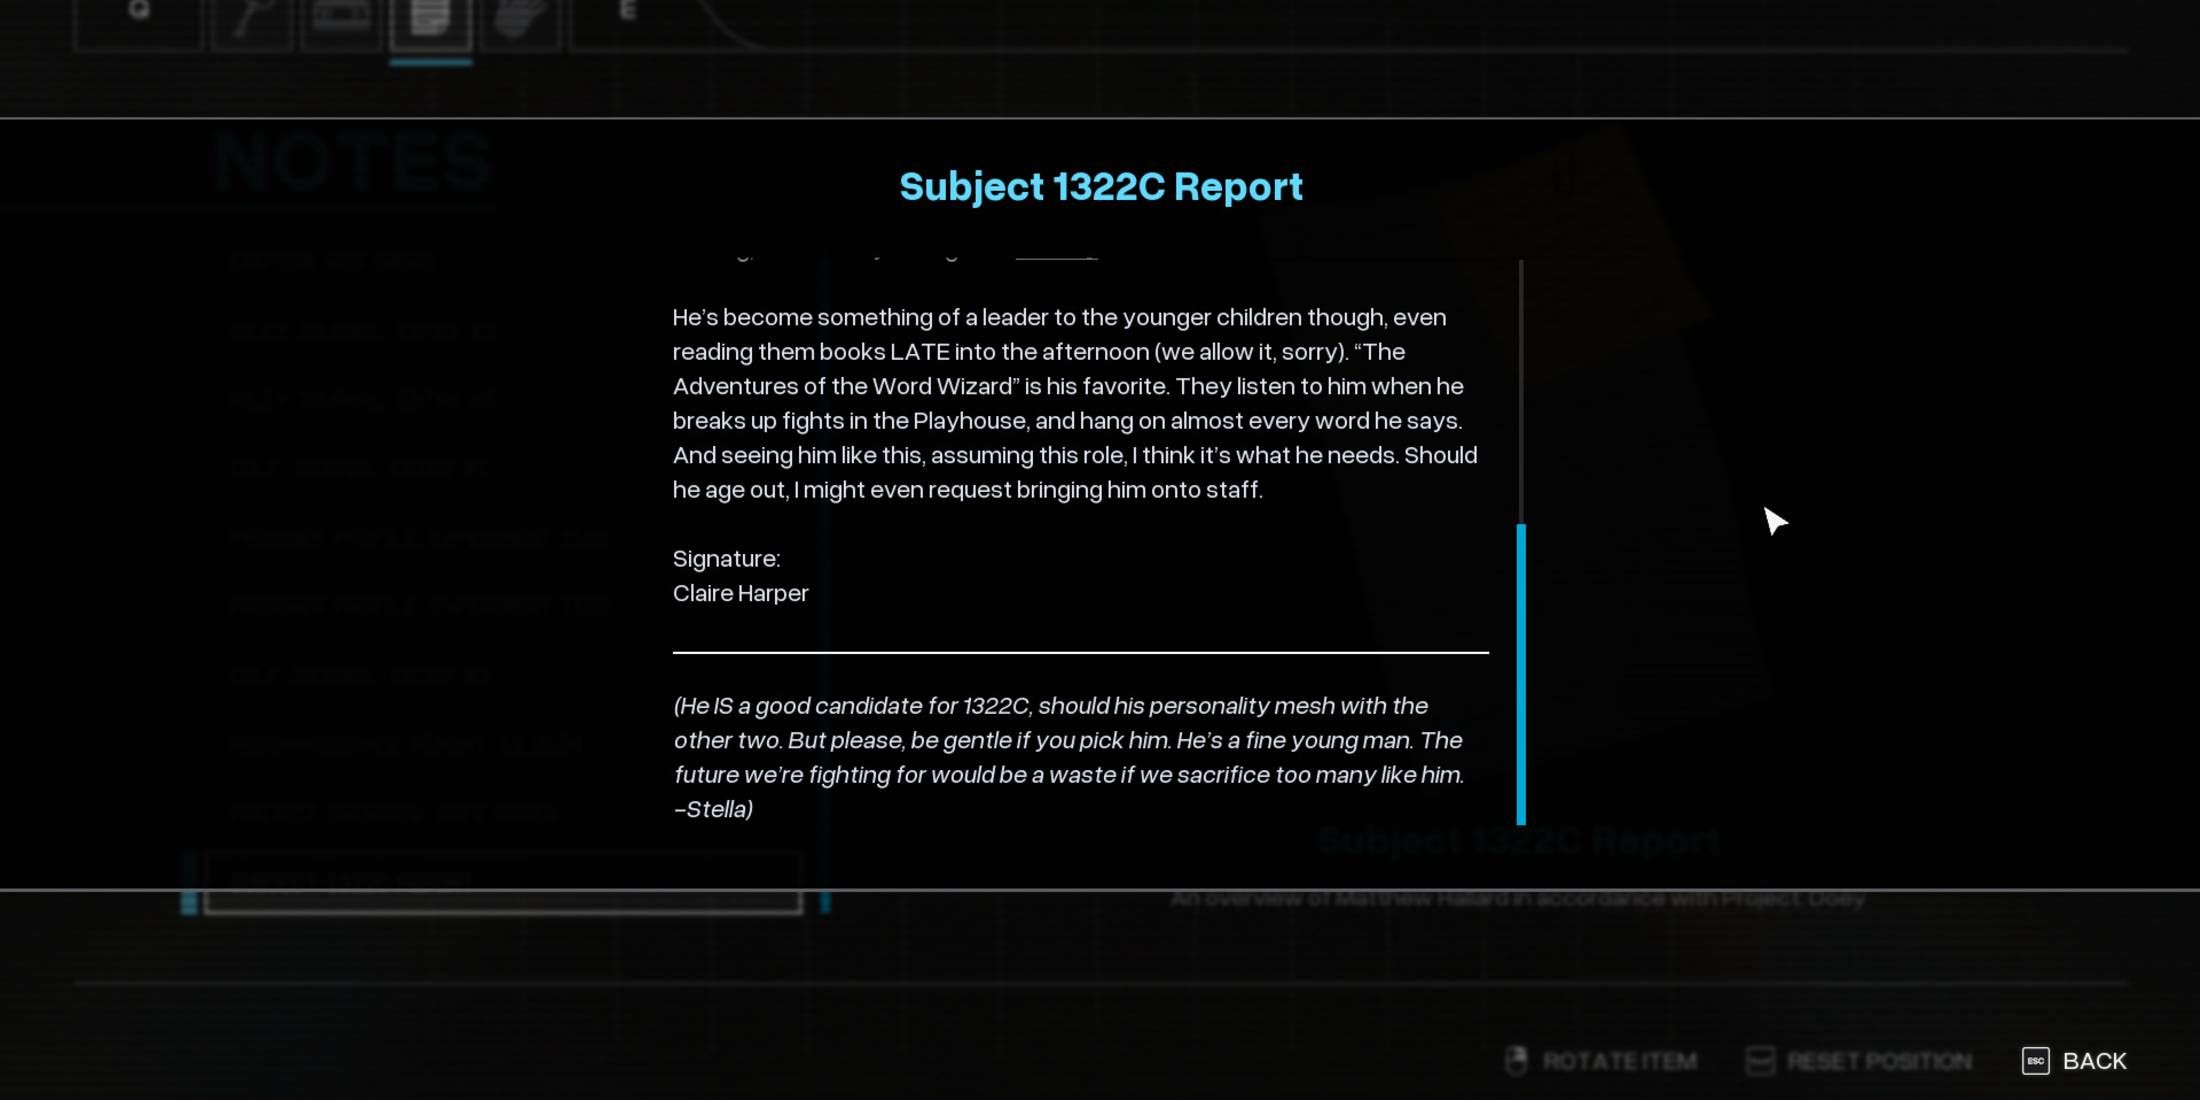
- Auto Save File: Waste Water Plant
- Objective: Find and defeat The Doctor
1322C, a prospective construct for Doey, is detailed in the water treatment facility located deep within the sewers of Safe Haven, accessible via a significant opening in the Infirmary. Upon traversing the bridge in the plant, players will discover this report on the control panel to their left.
The document in question is an assessment by a counselor regarding Subject 1322C, a 15-year-old named Matthew Hallard, who is exceptionally well-behaved and gifted. The counselor goes so far as to propose that Matthew could be a valuable asset if he leaves the orphanage when he turns 18.
Reconnaissance Report: 01.10.05
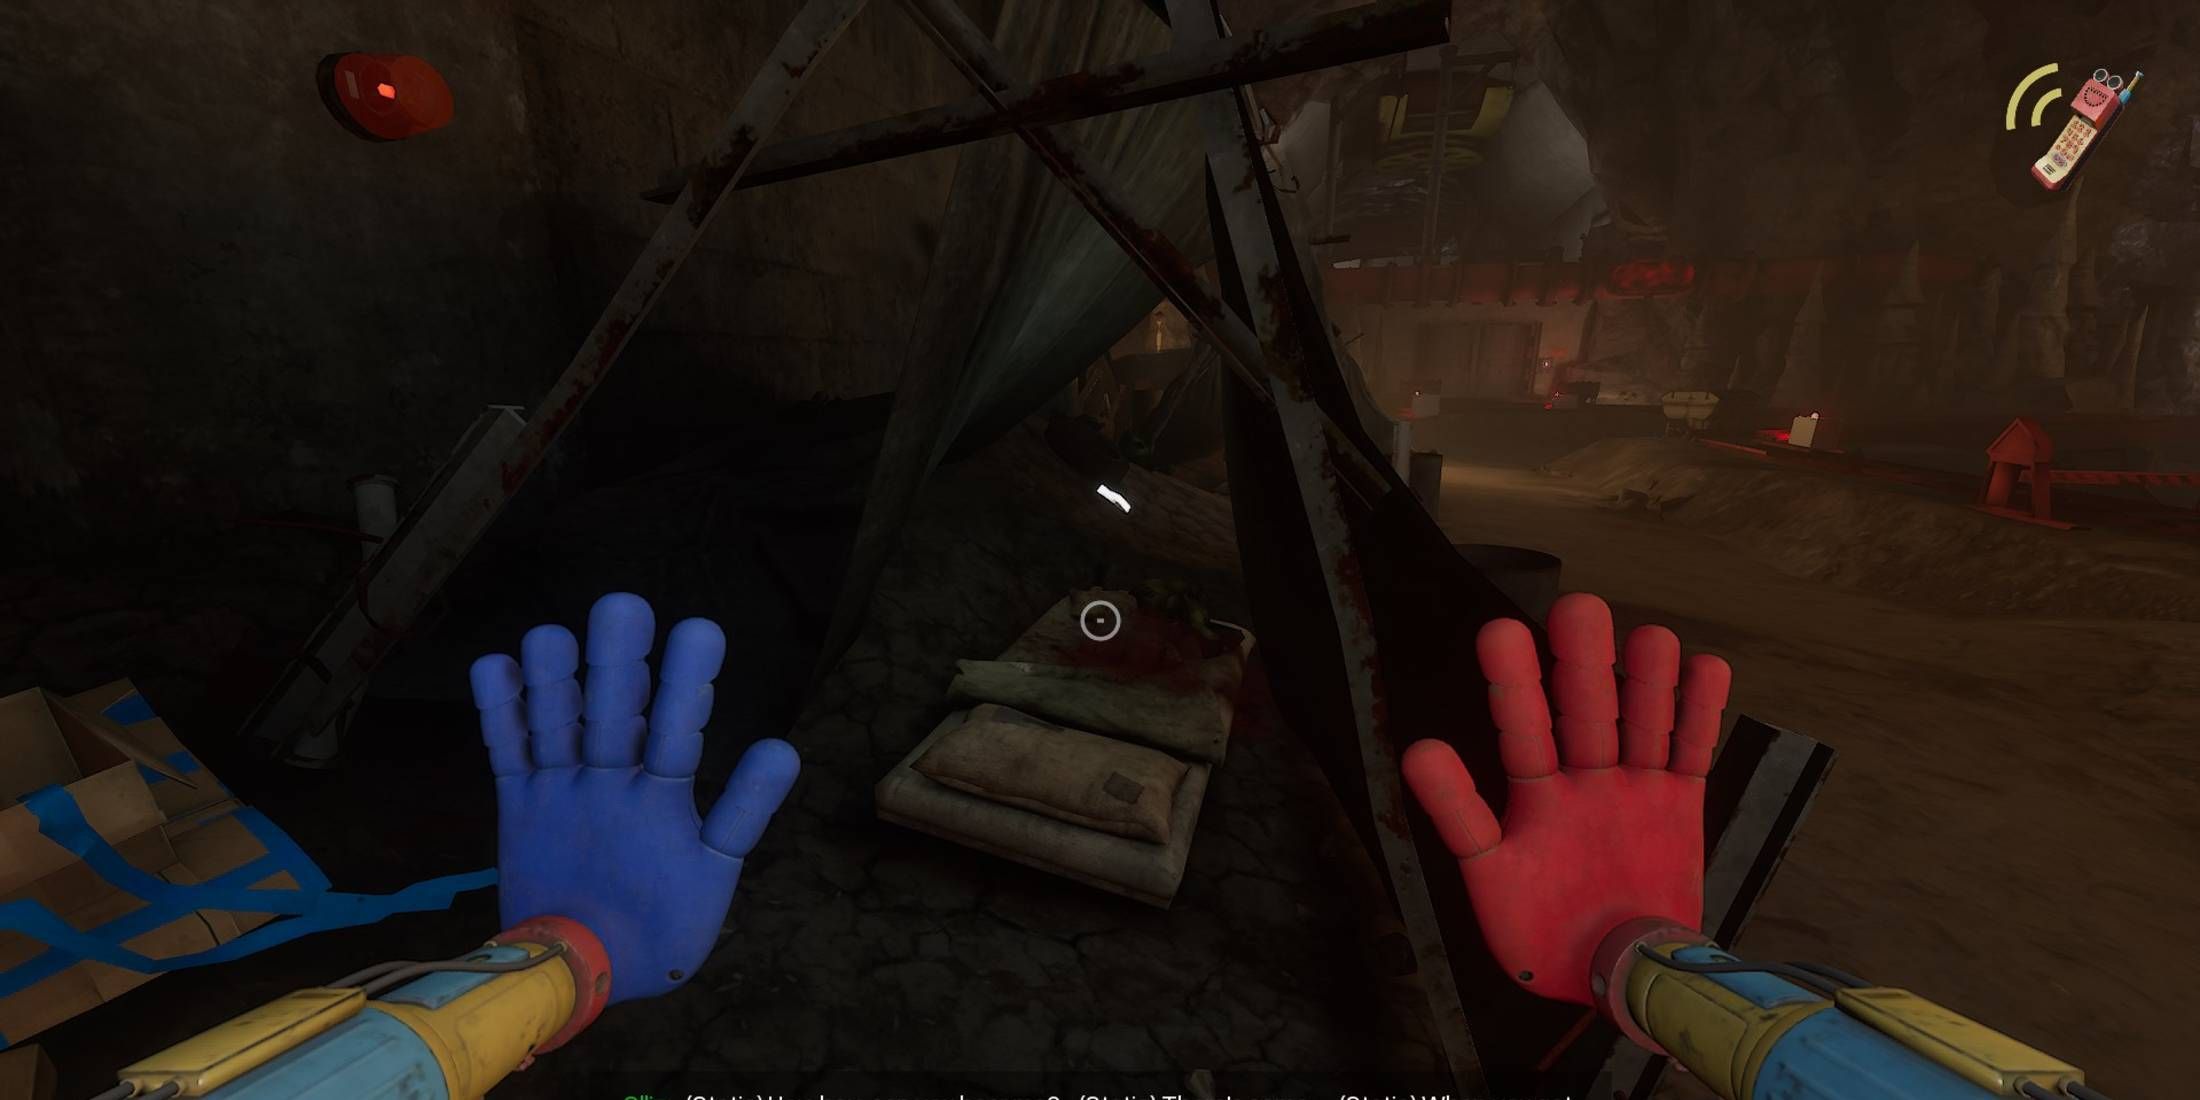
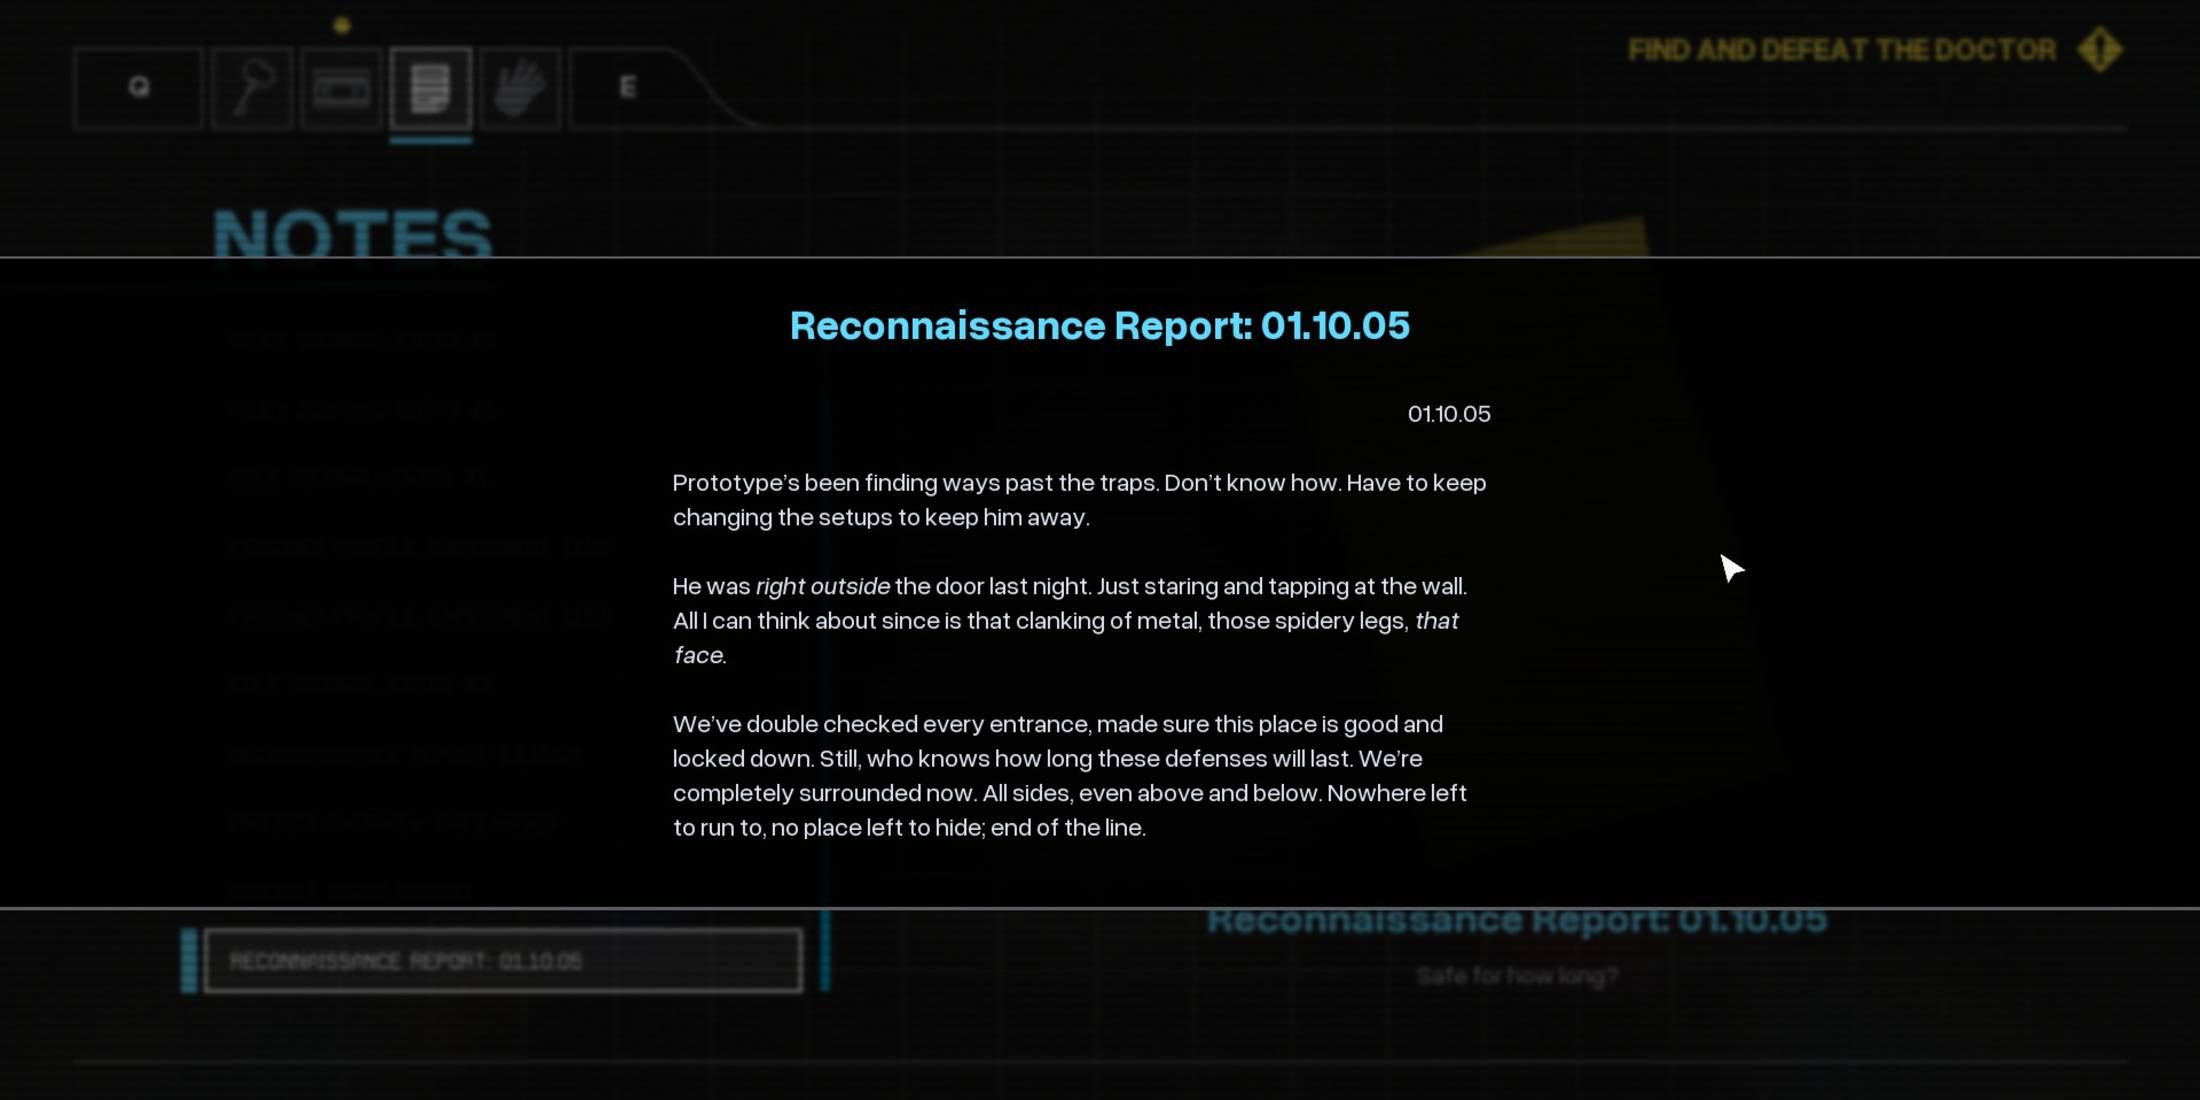
- Auto Save File: Sewers
- Objective: Find and defeat The Doctor
Outside the water treatment plant, players may discover another message hidden under some tents to the right of the facility entrance, nestled against the wall. The note was penned by someone from Safe Haven, revealing that the Prototype has been managing to evade their traps. Remarkably, it even reached the door and knocked persistently before departing.
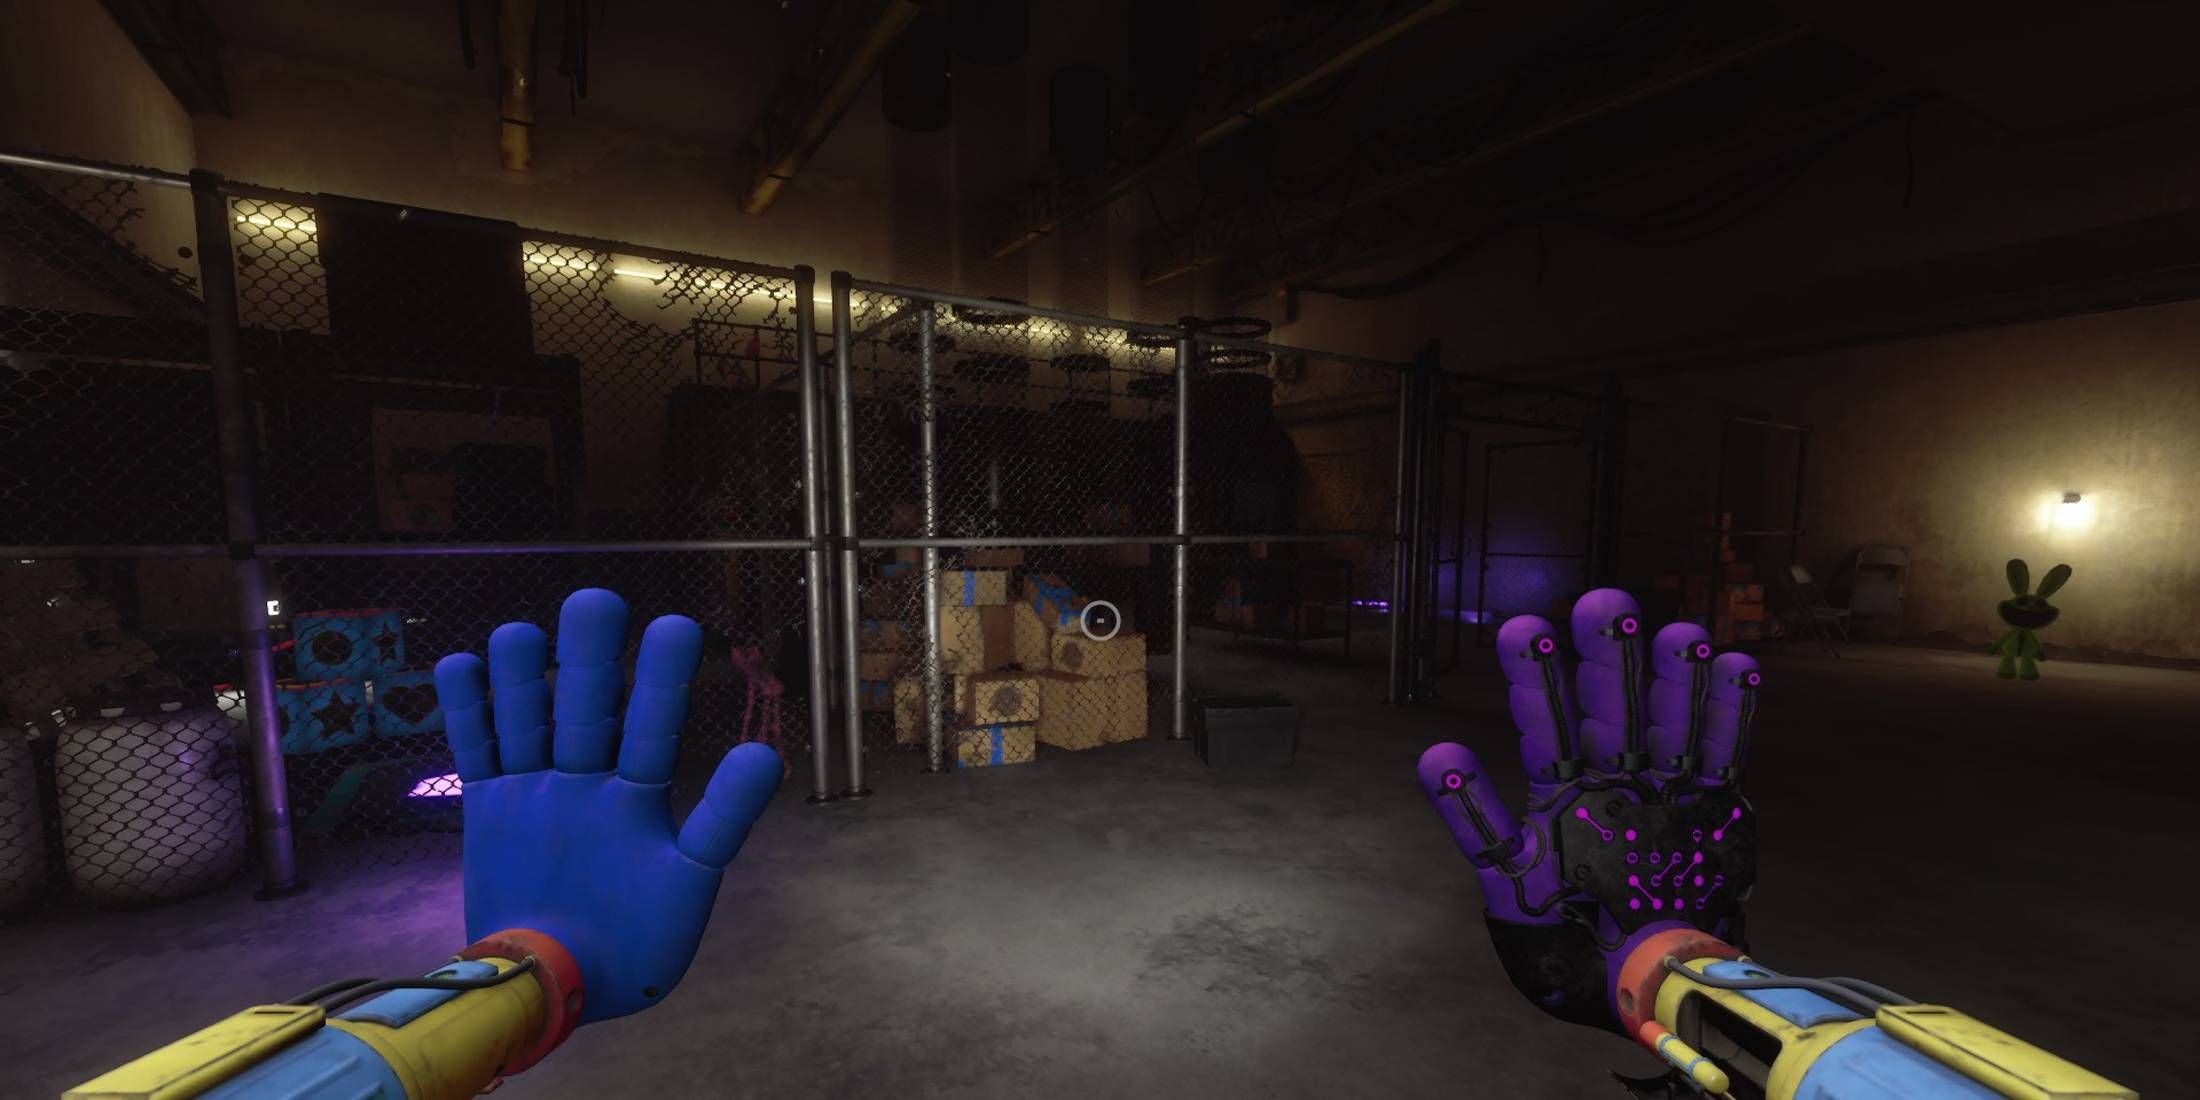
Propaganda Flier
- Auto Save File: No Man’s Land (7)
- Objective: Power Up the Machine Stations Via Hand Scanners
Once you restore power and set the hand scanners in motion, take advantage of the brief respite before Yarnaby chases you again. This moment is ideal for locating the Propaganda Flier hidden to the right of the main exit in No Man’s Land, where the pair of hand scanners stand. To access it, flip the switch by the marked container to divert power and uncover the grate. Follow the path to its end, then turn left into the room bathed in red light. The note is tucked away on some boxes behind a pillar next to several large cabinets.
The flyer appears to be a covert tactic aimed at mental manipulation, possibly originating from either the Doctor or the Prototype. It’s intended for the toys dwelling in Safe Haven who are defying the Prototype, warning them that adhering to Poppy will result in their demise. If they surrender within the next 24 hours, their lives will be preserved.
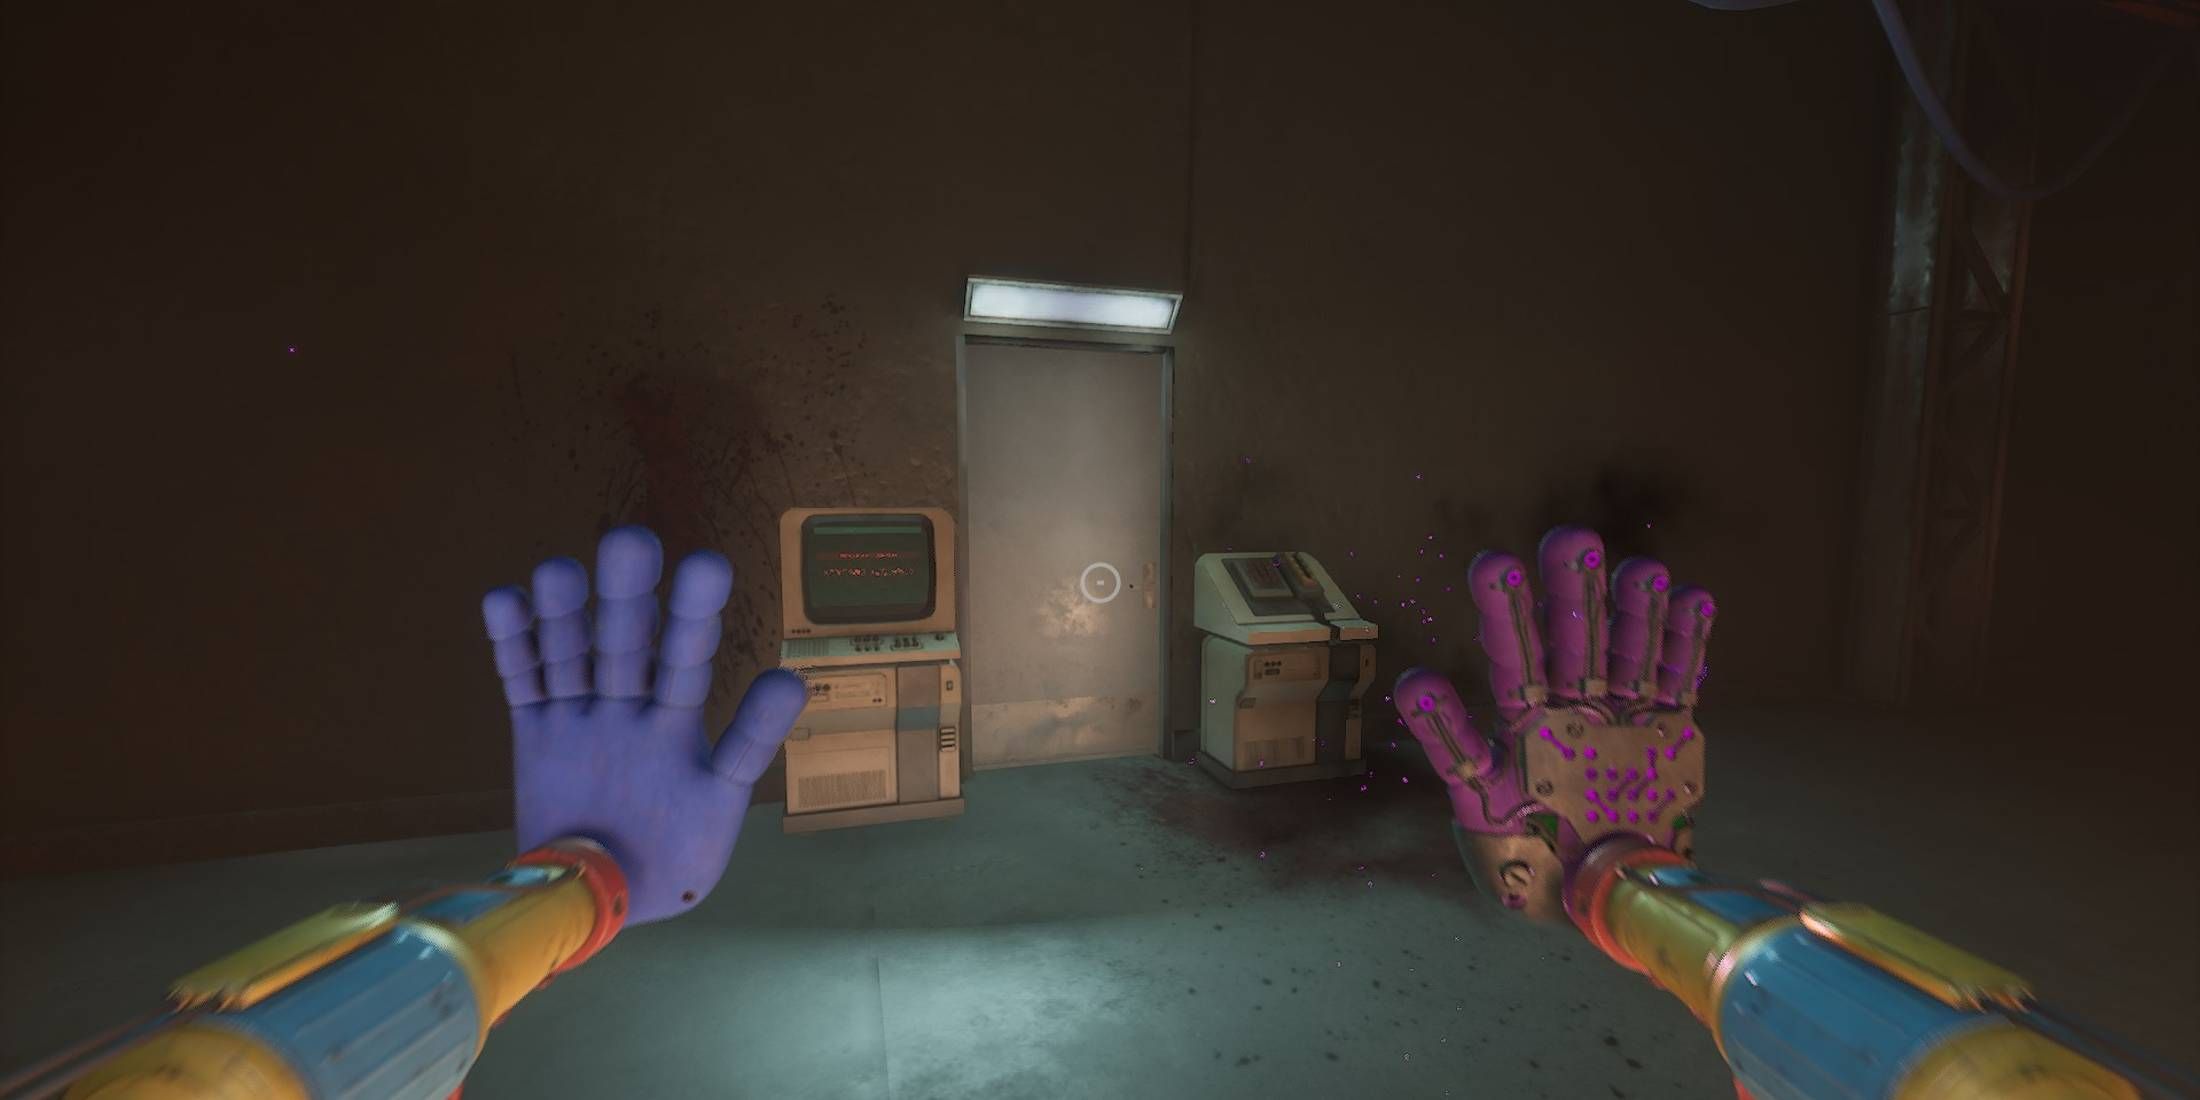
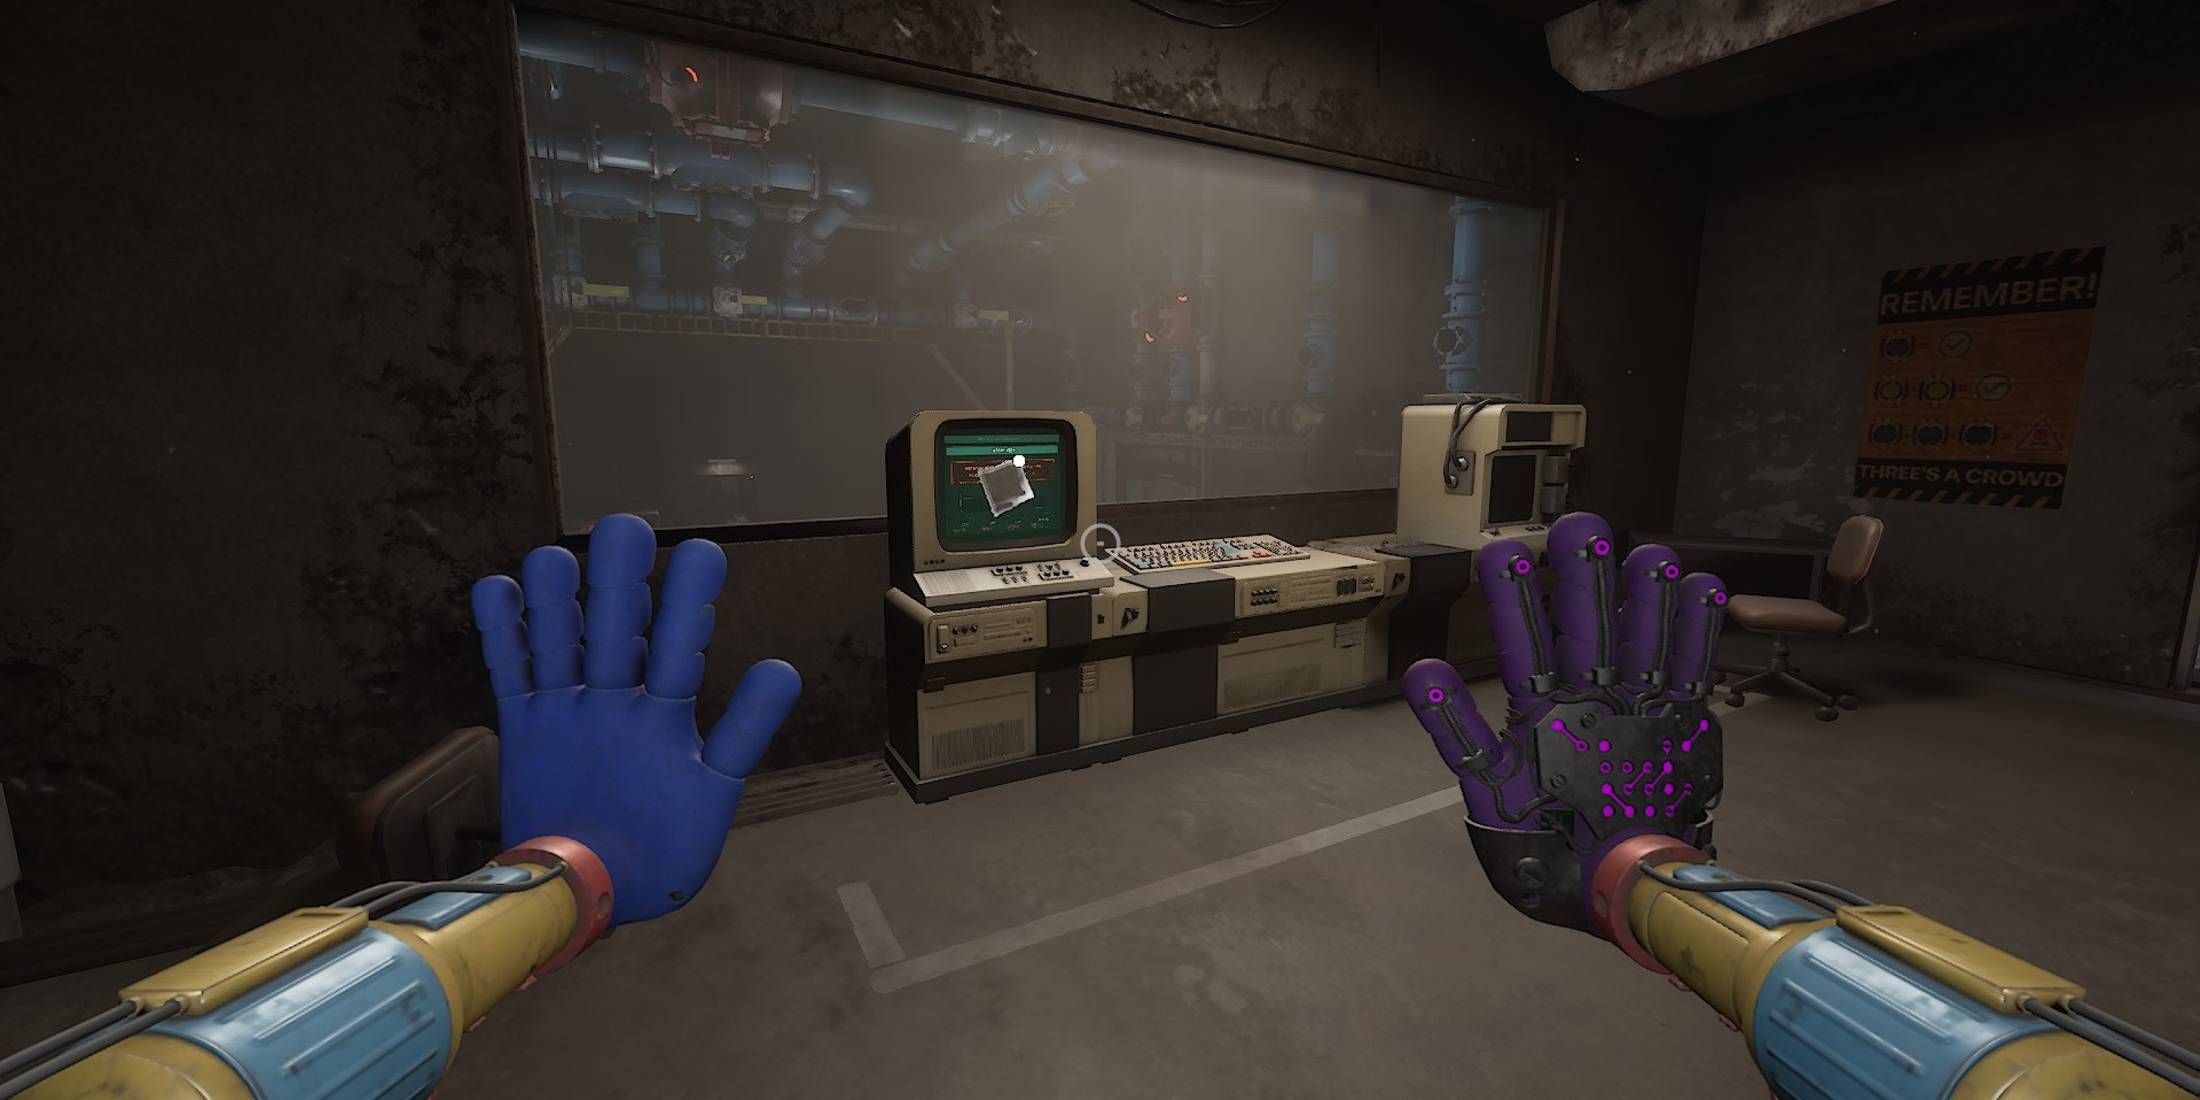
Secondary Lab Instructions

- Auto Save File: Doctor’s Domain (5)
- Objective: Make your way to The Doctor
In the initial location within the Secondary Lab, where a labyrinth saturated with red vapor resides, you’ll find the first clue. This clue is positioned on a deceased body resting atop an operating table right in the heart of the room within the primary operating suite. Primarily, this clue functions as a riddle for players to decipher and acquire the necessary code. However, it also introduces a character known as “The Foreman of the Misfit Pit.” The Misfit is one of the playable maps in PROJECT: PLAYTIME, a prequel cooperative game that unfolds prior to the occurrences depicted in Poppy Playtime.
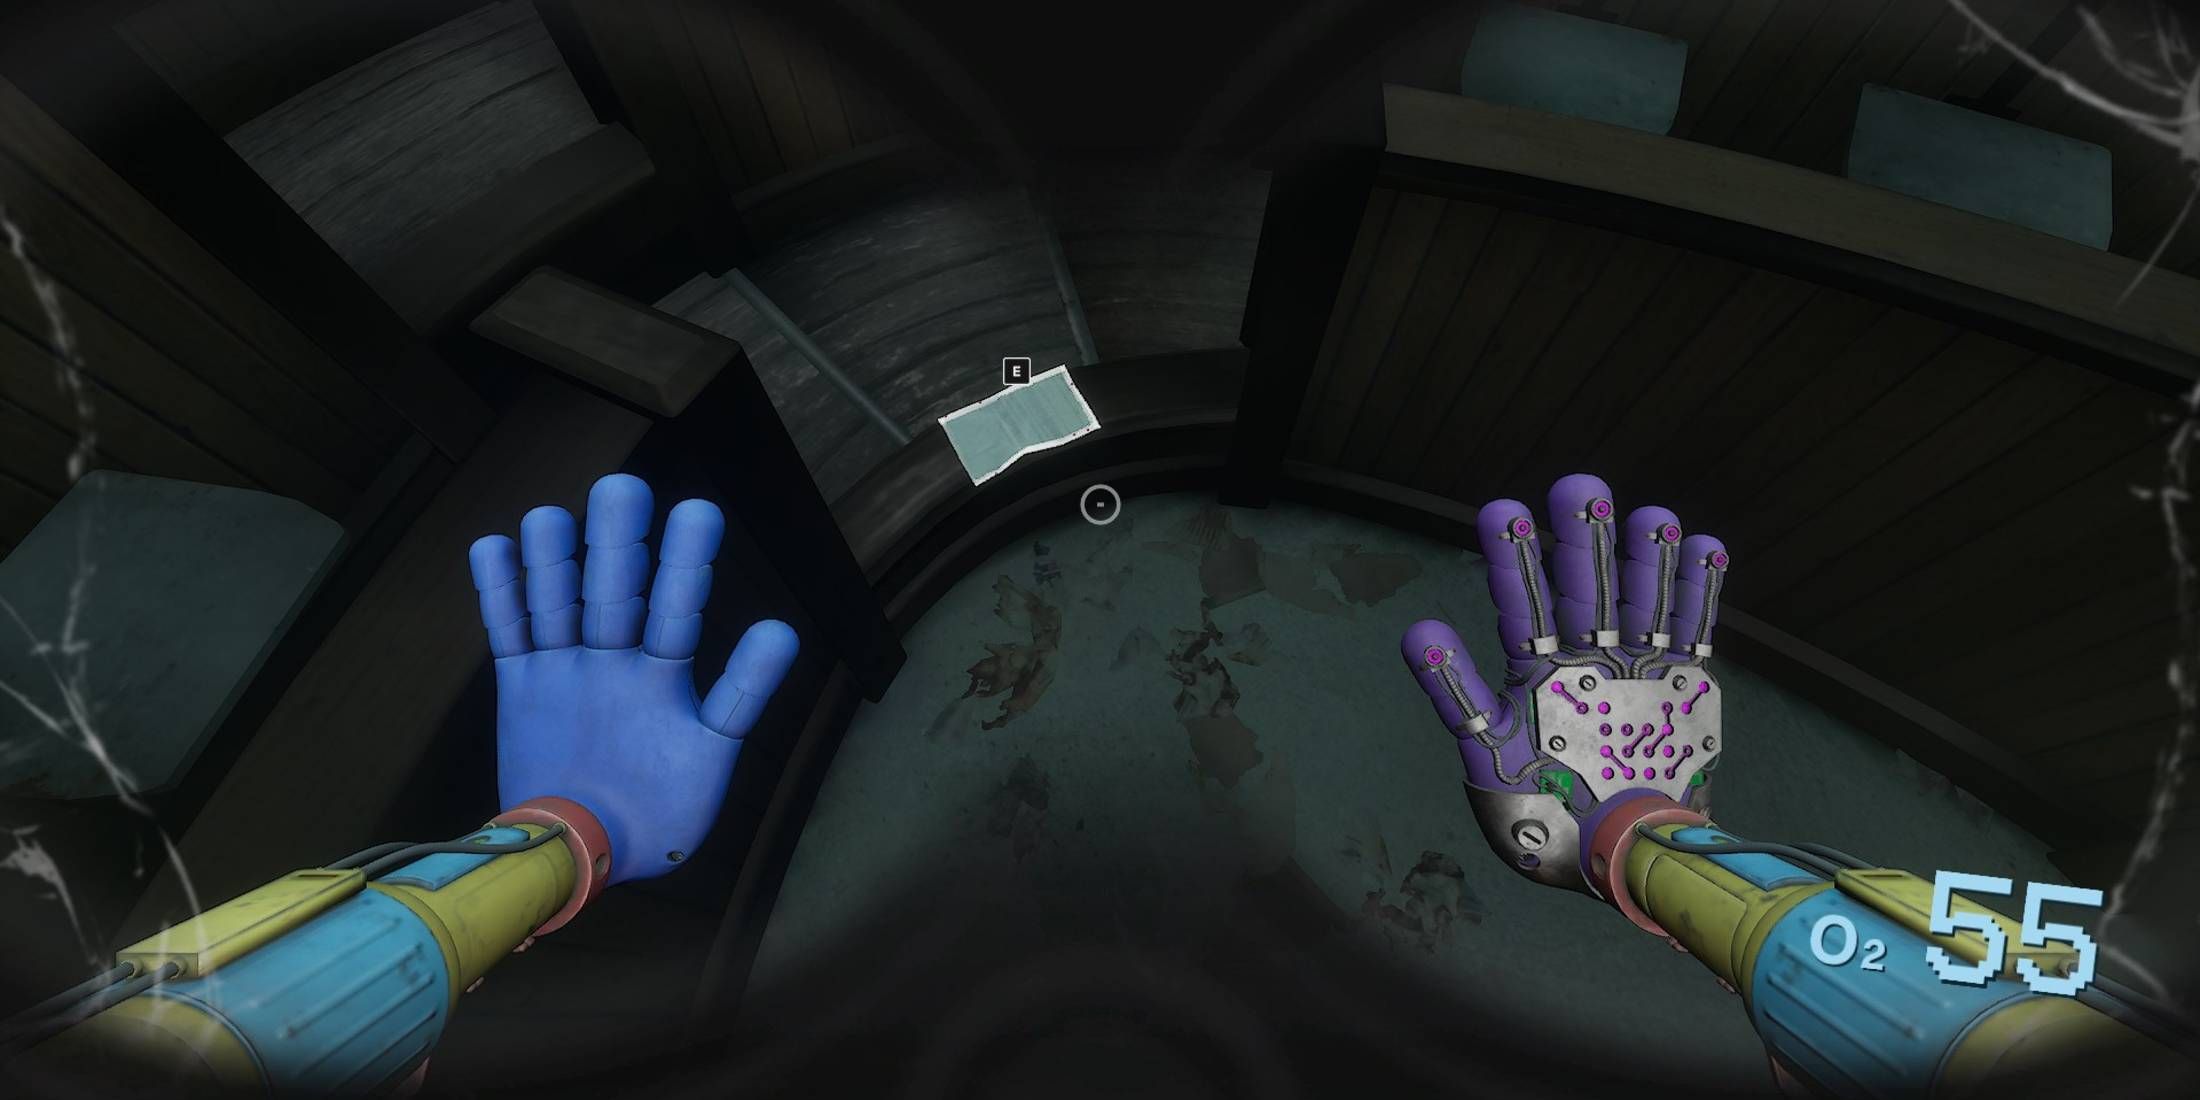
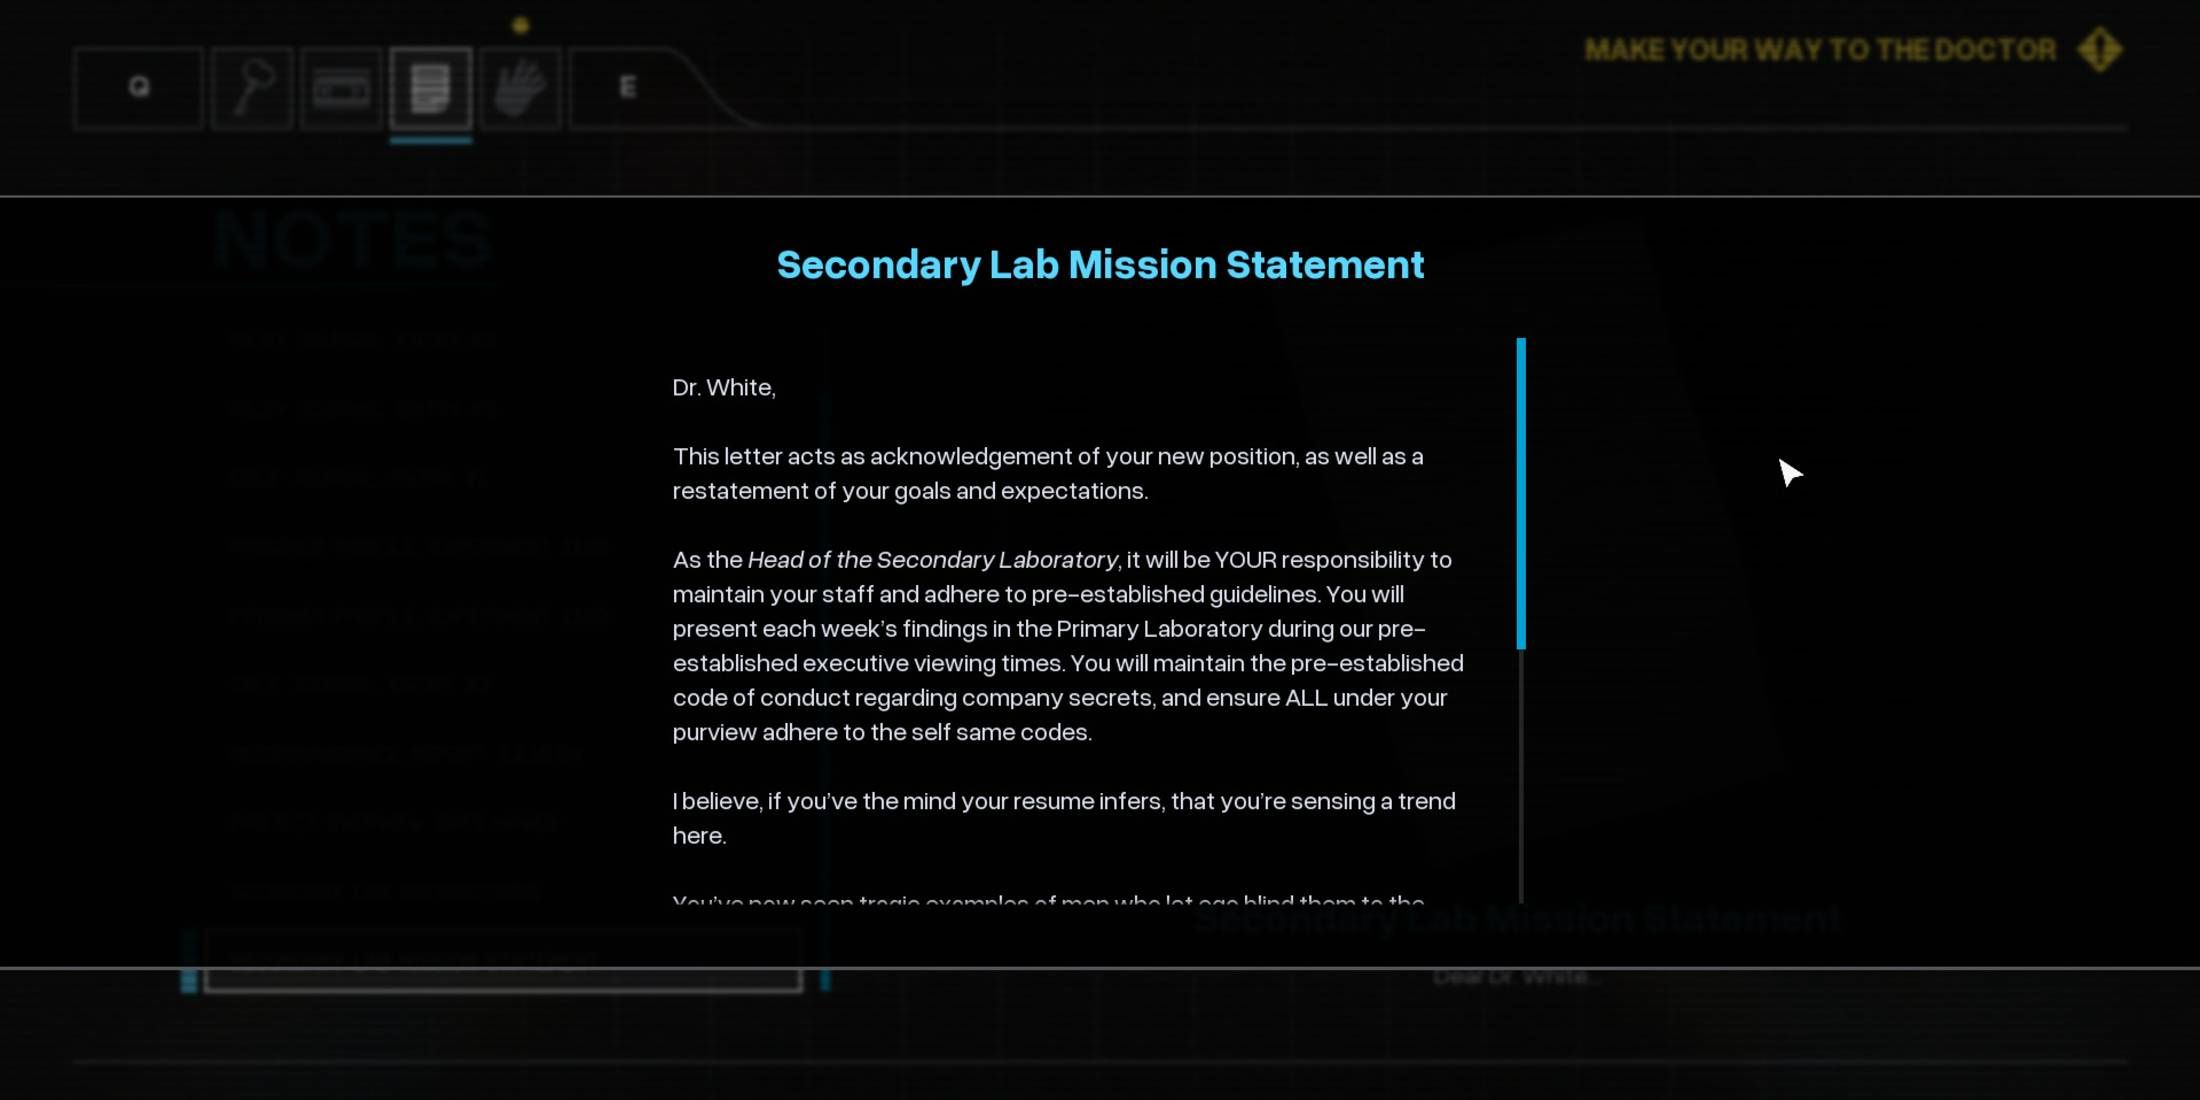
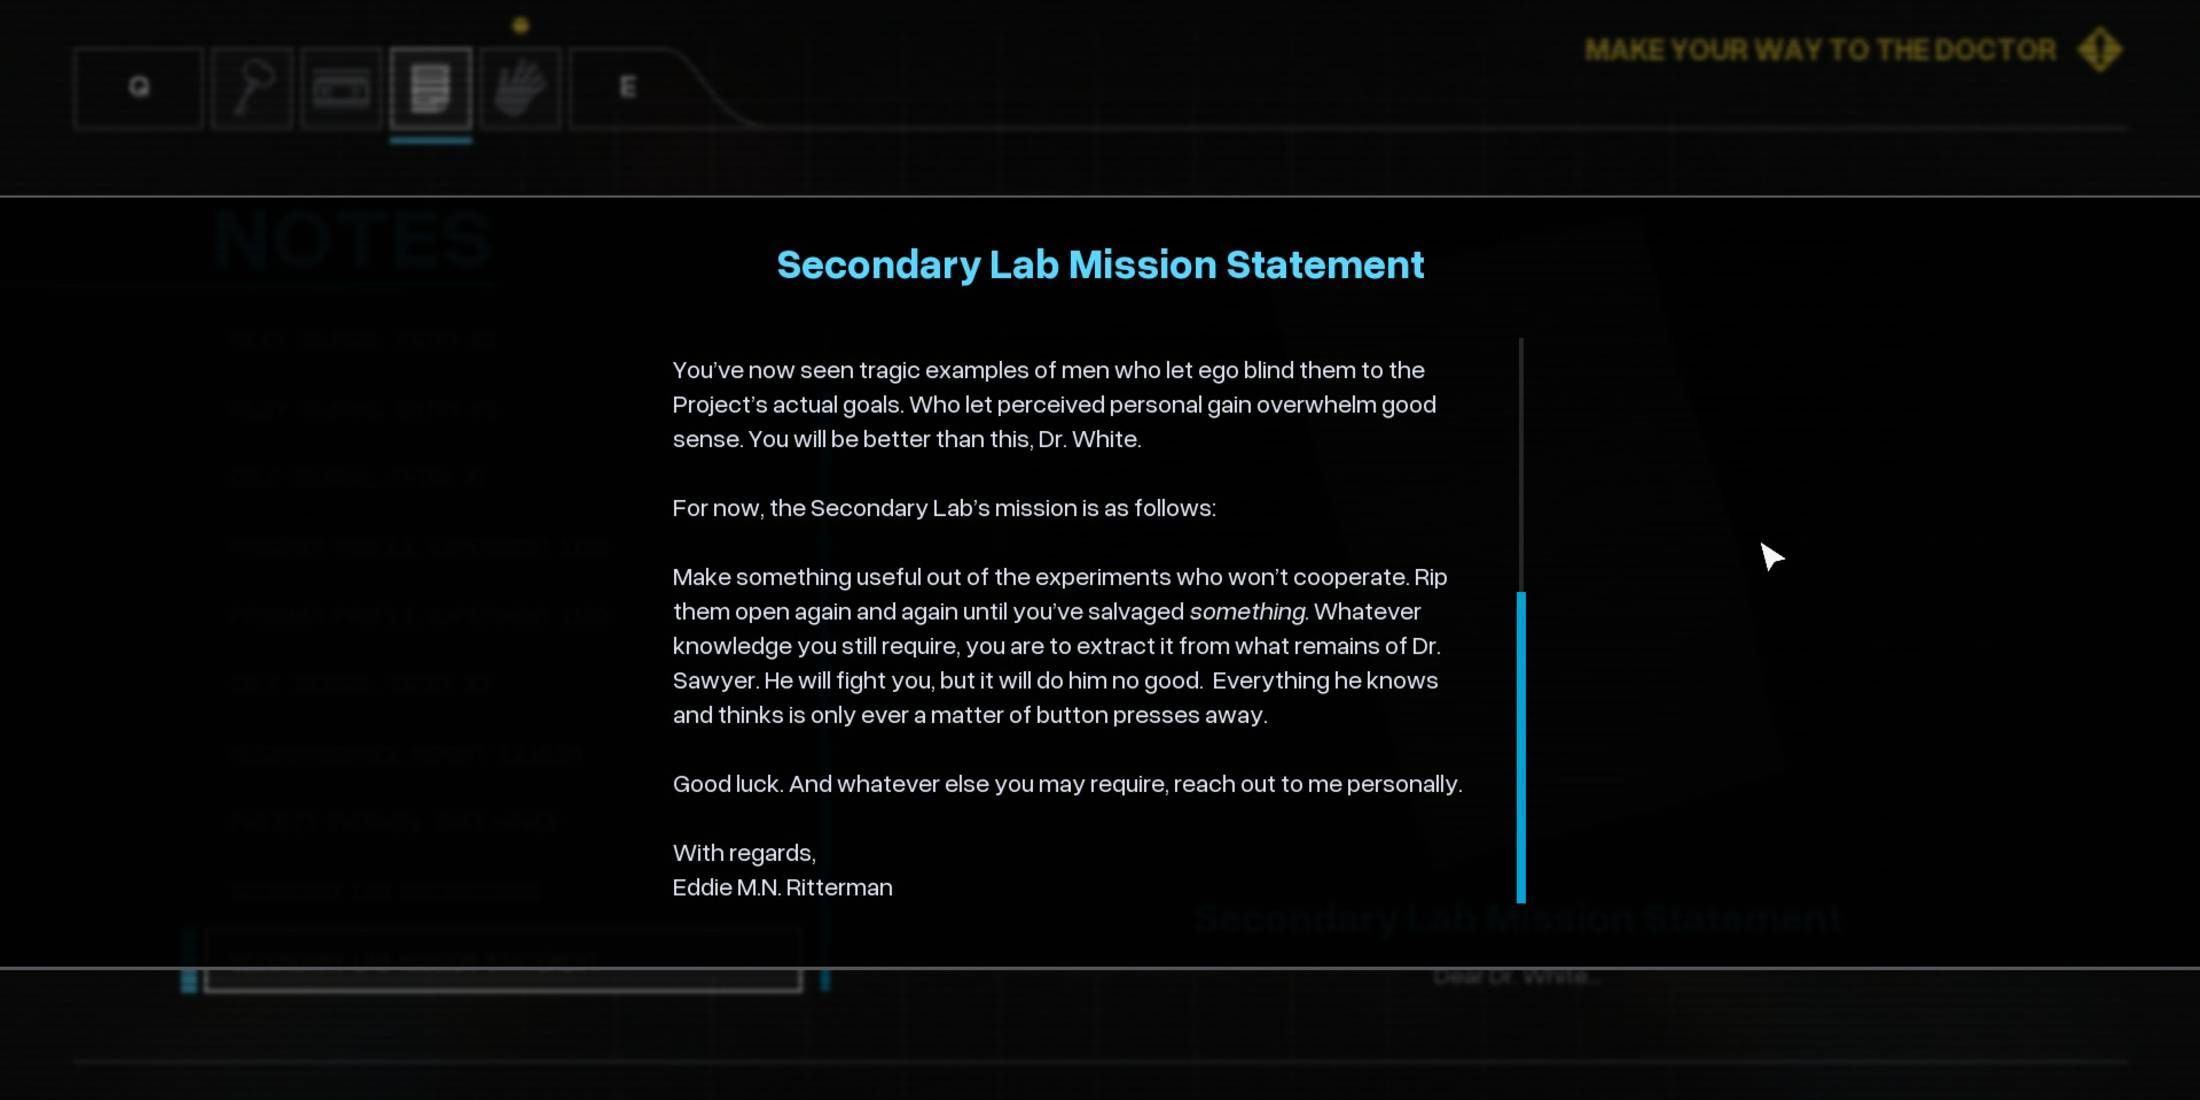
Secondary Lab Mission Statement
- Auto Save File: Doctor’s Domain (5)
- Objective: Make your way to The Doctor
they can access this room through a vent using their backpacks, which allow them to grab and move items. Once inside via the vent, players will find the note on their right side, situated in a lofty space adorned with circular seating arrangements on an upper level.
From a devoted cinema enthusiast’s perspective, the memo unveils a shocking truth about Dr. Sawyer. Overwhelmed by his own pride, he veered off course and acted independently, leading to his replacement by another doctor whose mission was to extract all that could be gained from Dr. Sawyer. Regrettably, it seems this new doctor didn’t meet the mark in his objective.
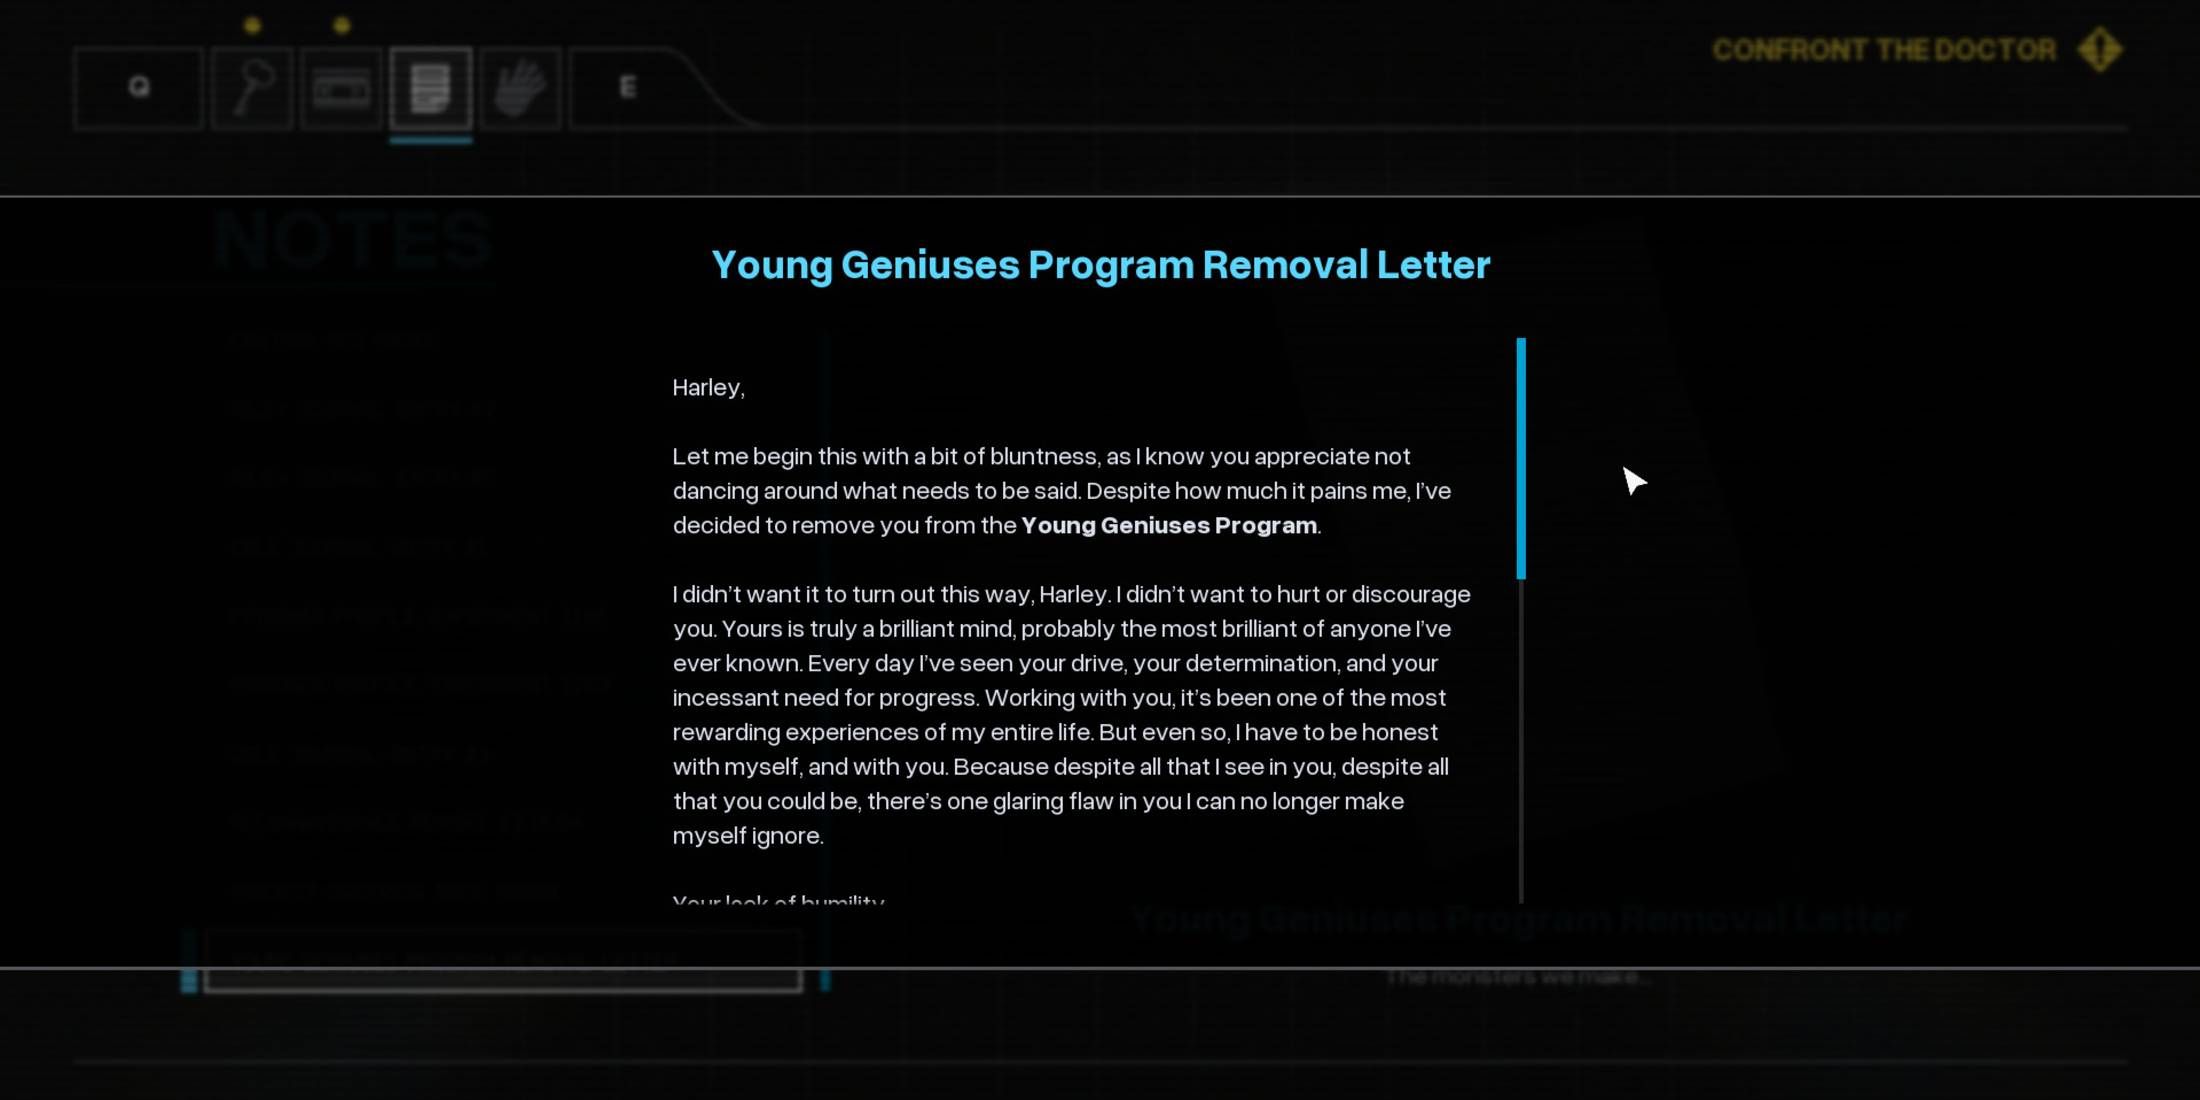
Young Geniuses Program Removal Letter


- Autosave File: Doctor’s Headquarters (4)
- Objective: Confront The Doctor/Get the Omni-Hand Upgrade
First, solve the puzzle necessary to access the doctor. Then, overpower him by grabbing his console’s keycard and deactivating the system while keeping him alive. Subsequently, secure the Omni-Hand upgrade for your Red Hand. Note that there’s a hidden area behind the doctor which holds a tape and note; you’ll need a special key card to gain access to it.
To obtain the key card, exit the doctor’s chamber and head in the opposite direction you arrived. Just beyond the door, you’ll notice a narrow part of the corridor where two TV-like creatures are gathered around a key card. Grab it. If you can’t locate the key card, make your way back to the control room and proceed to the right side. As you go, follow the illuminated pipes, but instead of ascending the stairs at the end of the labyrinth, continue straight ahead to find the key card.
The note is a letter penned by Elliot Ludwig, the previous proprietor of Playtime Co., addressed to Dr. Harley Sawyer. In this correspondence, Ludwig declines Dr. Sawyer’s participation in the young geniuses program, stating that he seems to lack humility.
An Untitled Poem
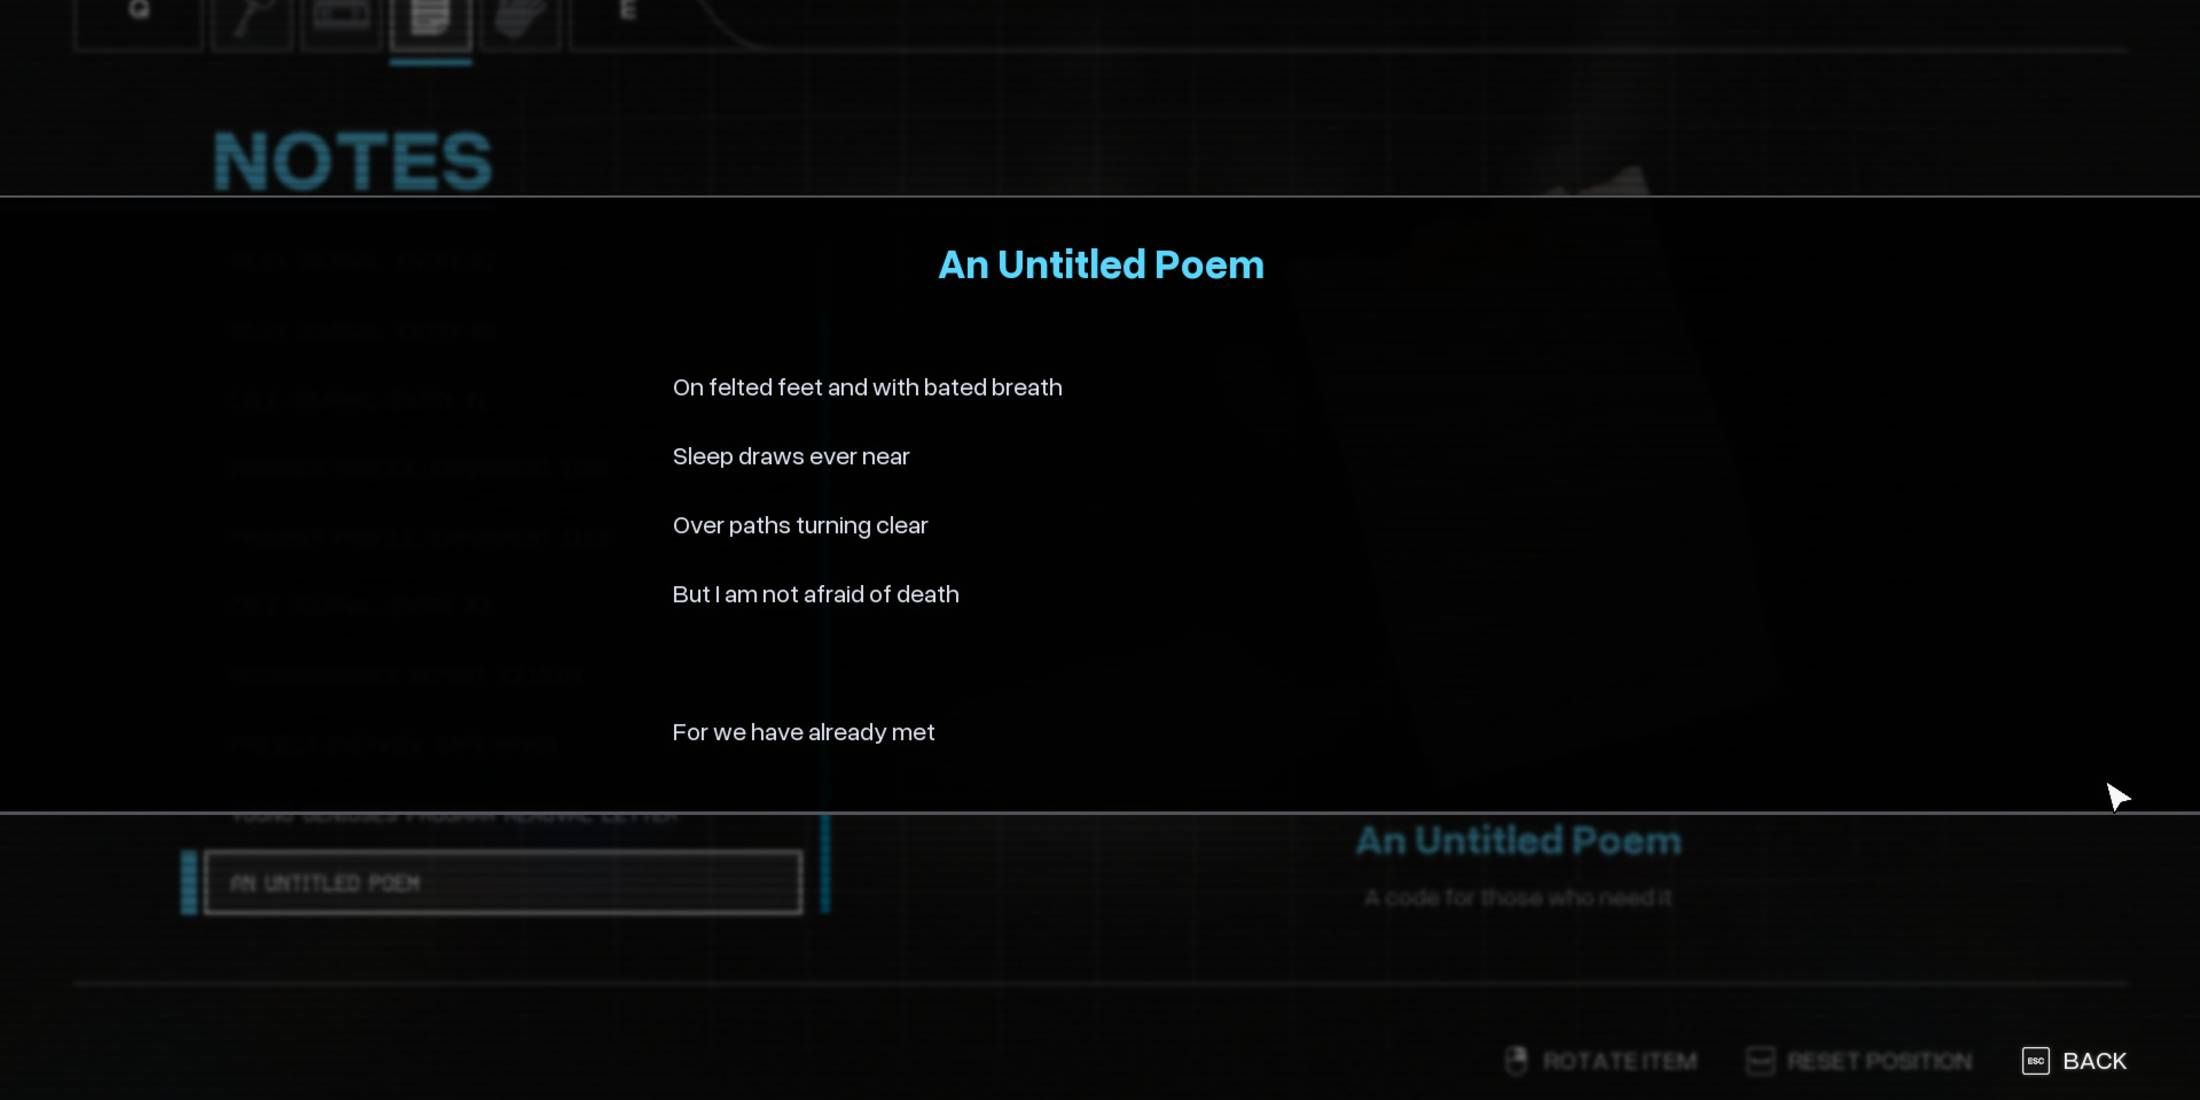
- Auto Save File: Safe Haven (2)
- Objective: Return to Safe Haven
In the secluded corner at Safe Haven, enclosed within a fenced area, is an untitled poem. Players can reach it by utilizing the electric hand after their return from the doctor’s domain. On one of the lower shelves in a nearby cabinet, you will discover a mysterious note. This note contains a coded poem that reads:
[Here goes the actual poem]
This way, the passage maintains its natural flow while providing clear instructions on where to find the untitled poem and the cryptic note containing it.
With soft-soled steps and held breath, Death approaches subtly, Smoothing out the way before it, Yet I stand unfazed by death, For it and I have shared a moment before.
Foundation Operator Note
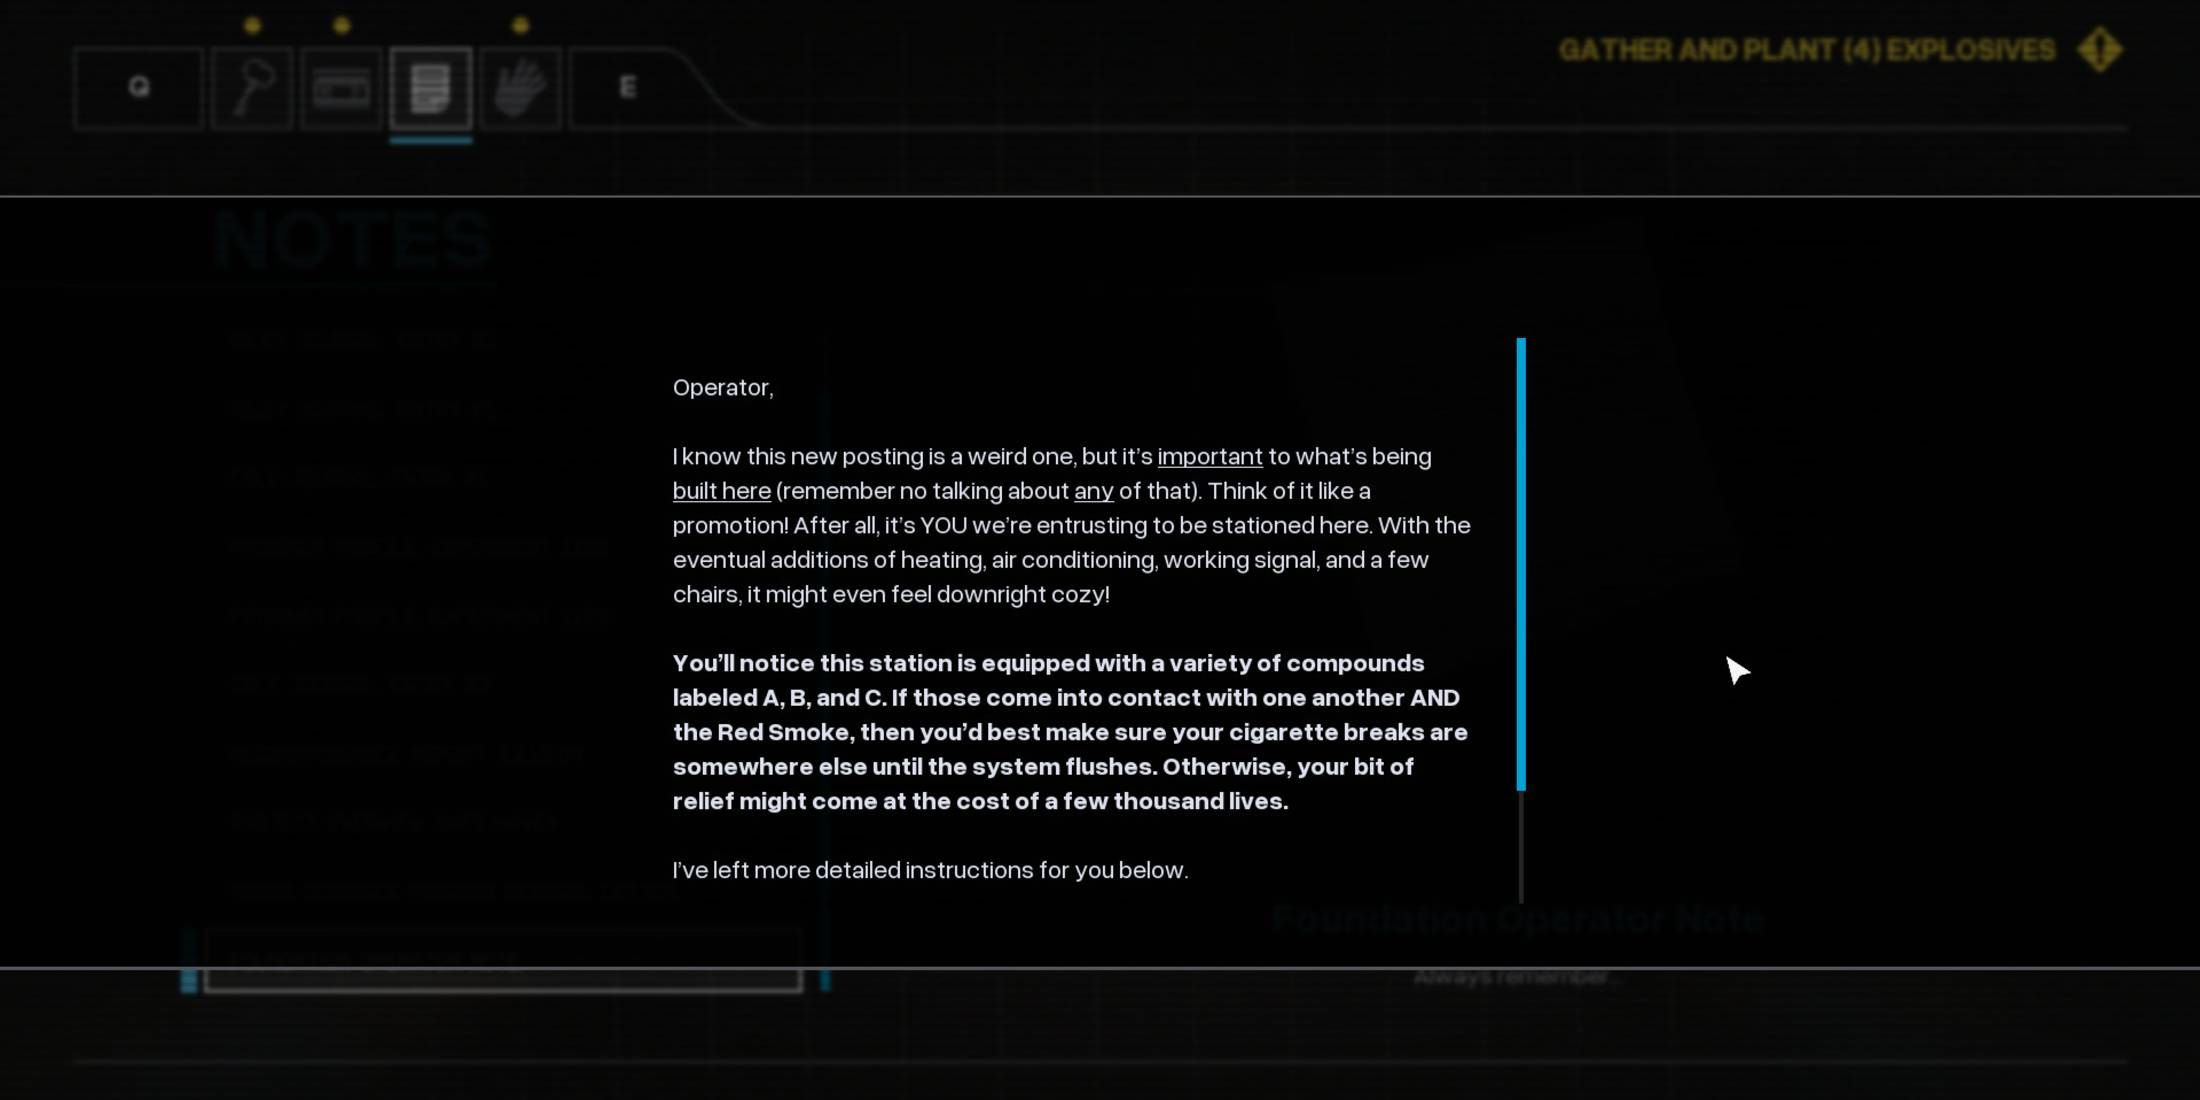
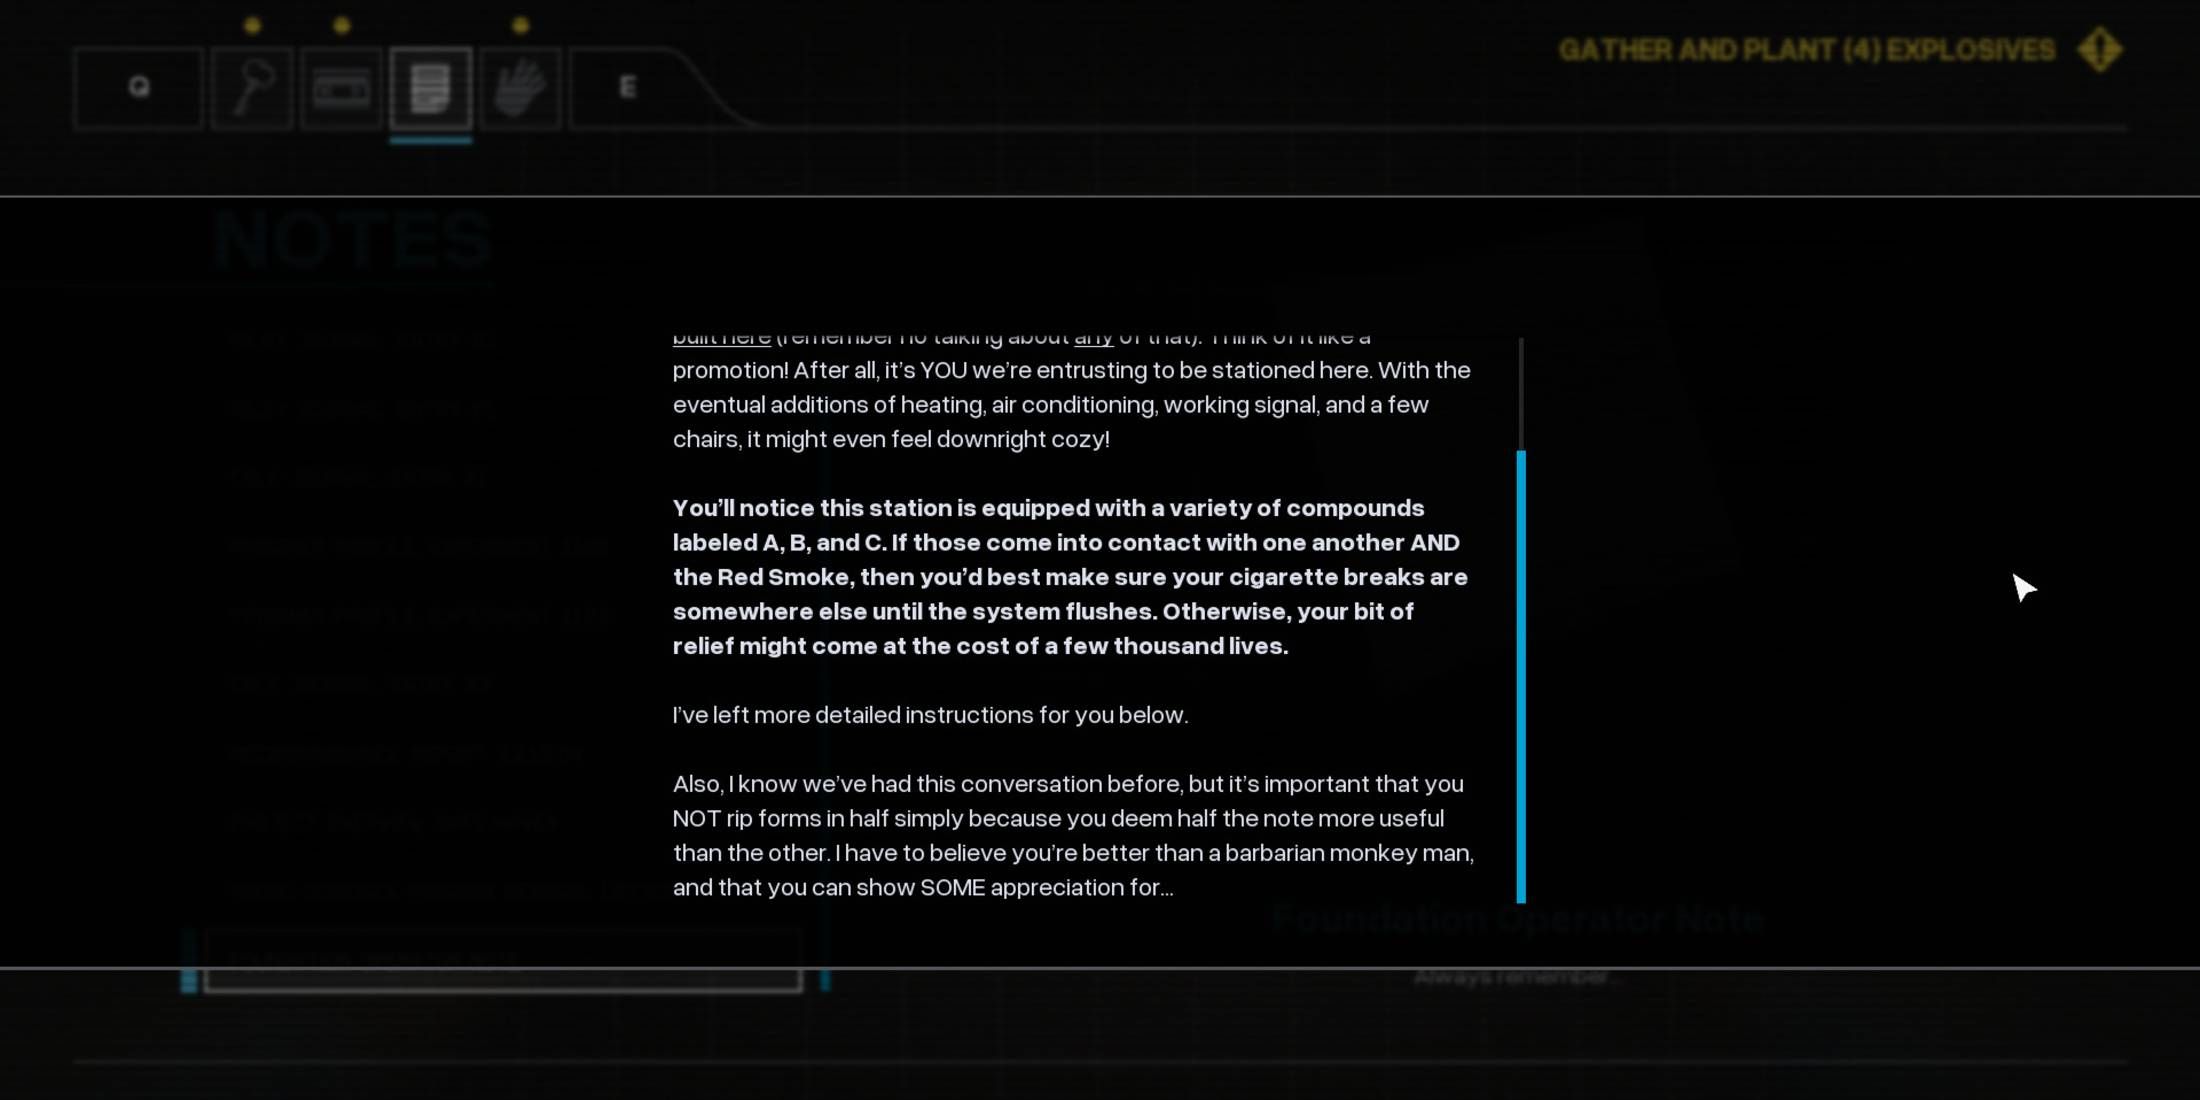
- Auto Save File: Foundation (2
- Objective: Find and plant (4) explosives
Towards the end of Chapter 4, gamers must complete the mission of setting off four bombs to destroy the base’s foundation. Inside the central control room of the base, they will discover a note attached to the computer monitor.
This guide offers the worker guidelines on their conduct for the new position, stressing confidentiality. Much like a sign found in the vicinity indicates, combining the three gases in the base together with the red one creates a highly explosive mixture capable of detonating the entire facility.
Read More
- Unlock the Magic: New Arcane Blind Box Collection from POP MART and Riot Games!
- Top 8 UFC 5 Perks Every Fighter Should Use
- How to Reach 80,000M in Dead Rails
- Unlock Roslit Bay’s Bestiary: Fisch Fishing Guide
- How to Unlock the Mines in Cookie Run: Kingdom
- Unlock the Best Ending in Lost Records: Bloom & Rage by Calming Autumn’s Breakdown!
- Jujutsu Kaisen Shocker: The Real Reason Gojo Fell to Sukuna Revealed by Gege Akutami!
- Unaware Atelier Master: New Trailer Reveals April 2025 Fantasy Adventure!
- REPO: How To Fix Client Timeout
- MHA’s Back: Horikoshi Drops New Chapter in ‘Ultra Age’ Fanbook – See What’s Inside!
2025-02-09 06:06