
In the game “Red Dead Redemption 2“, you’ll come across numerous Treasure Map clues to help you gather Gold Bars and other valuable loot, enabling you to amass wealth and establish yourself as one of America’s wealthiest outlaws. To make your search easier, all treasure map locations within “Red Dead Redemption 2” are provided below, along with the exact position of the hidden treasure itself. This way, you won’t have to struggle with solving complicated puzzles or deciphering enigmatic maps.
In Red Dead Redemption 2, all hidden Treasure Maps lead players on an exciting journey through numerous states. However, the effort is always worthwhile for the fantastic reward at the end – a treasure chest filled with so much gold that Arthur Morgan could visit Tahiti a thousand times!
21. Jack Hall Gang Map 1
- Loot: Pearl Necklace, Jack Hall Gang Map 2
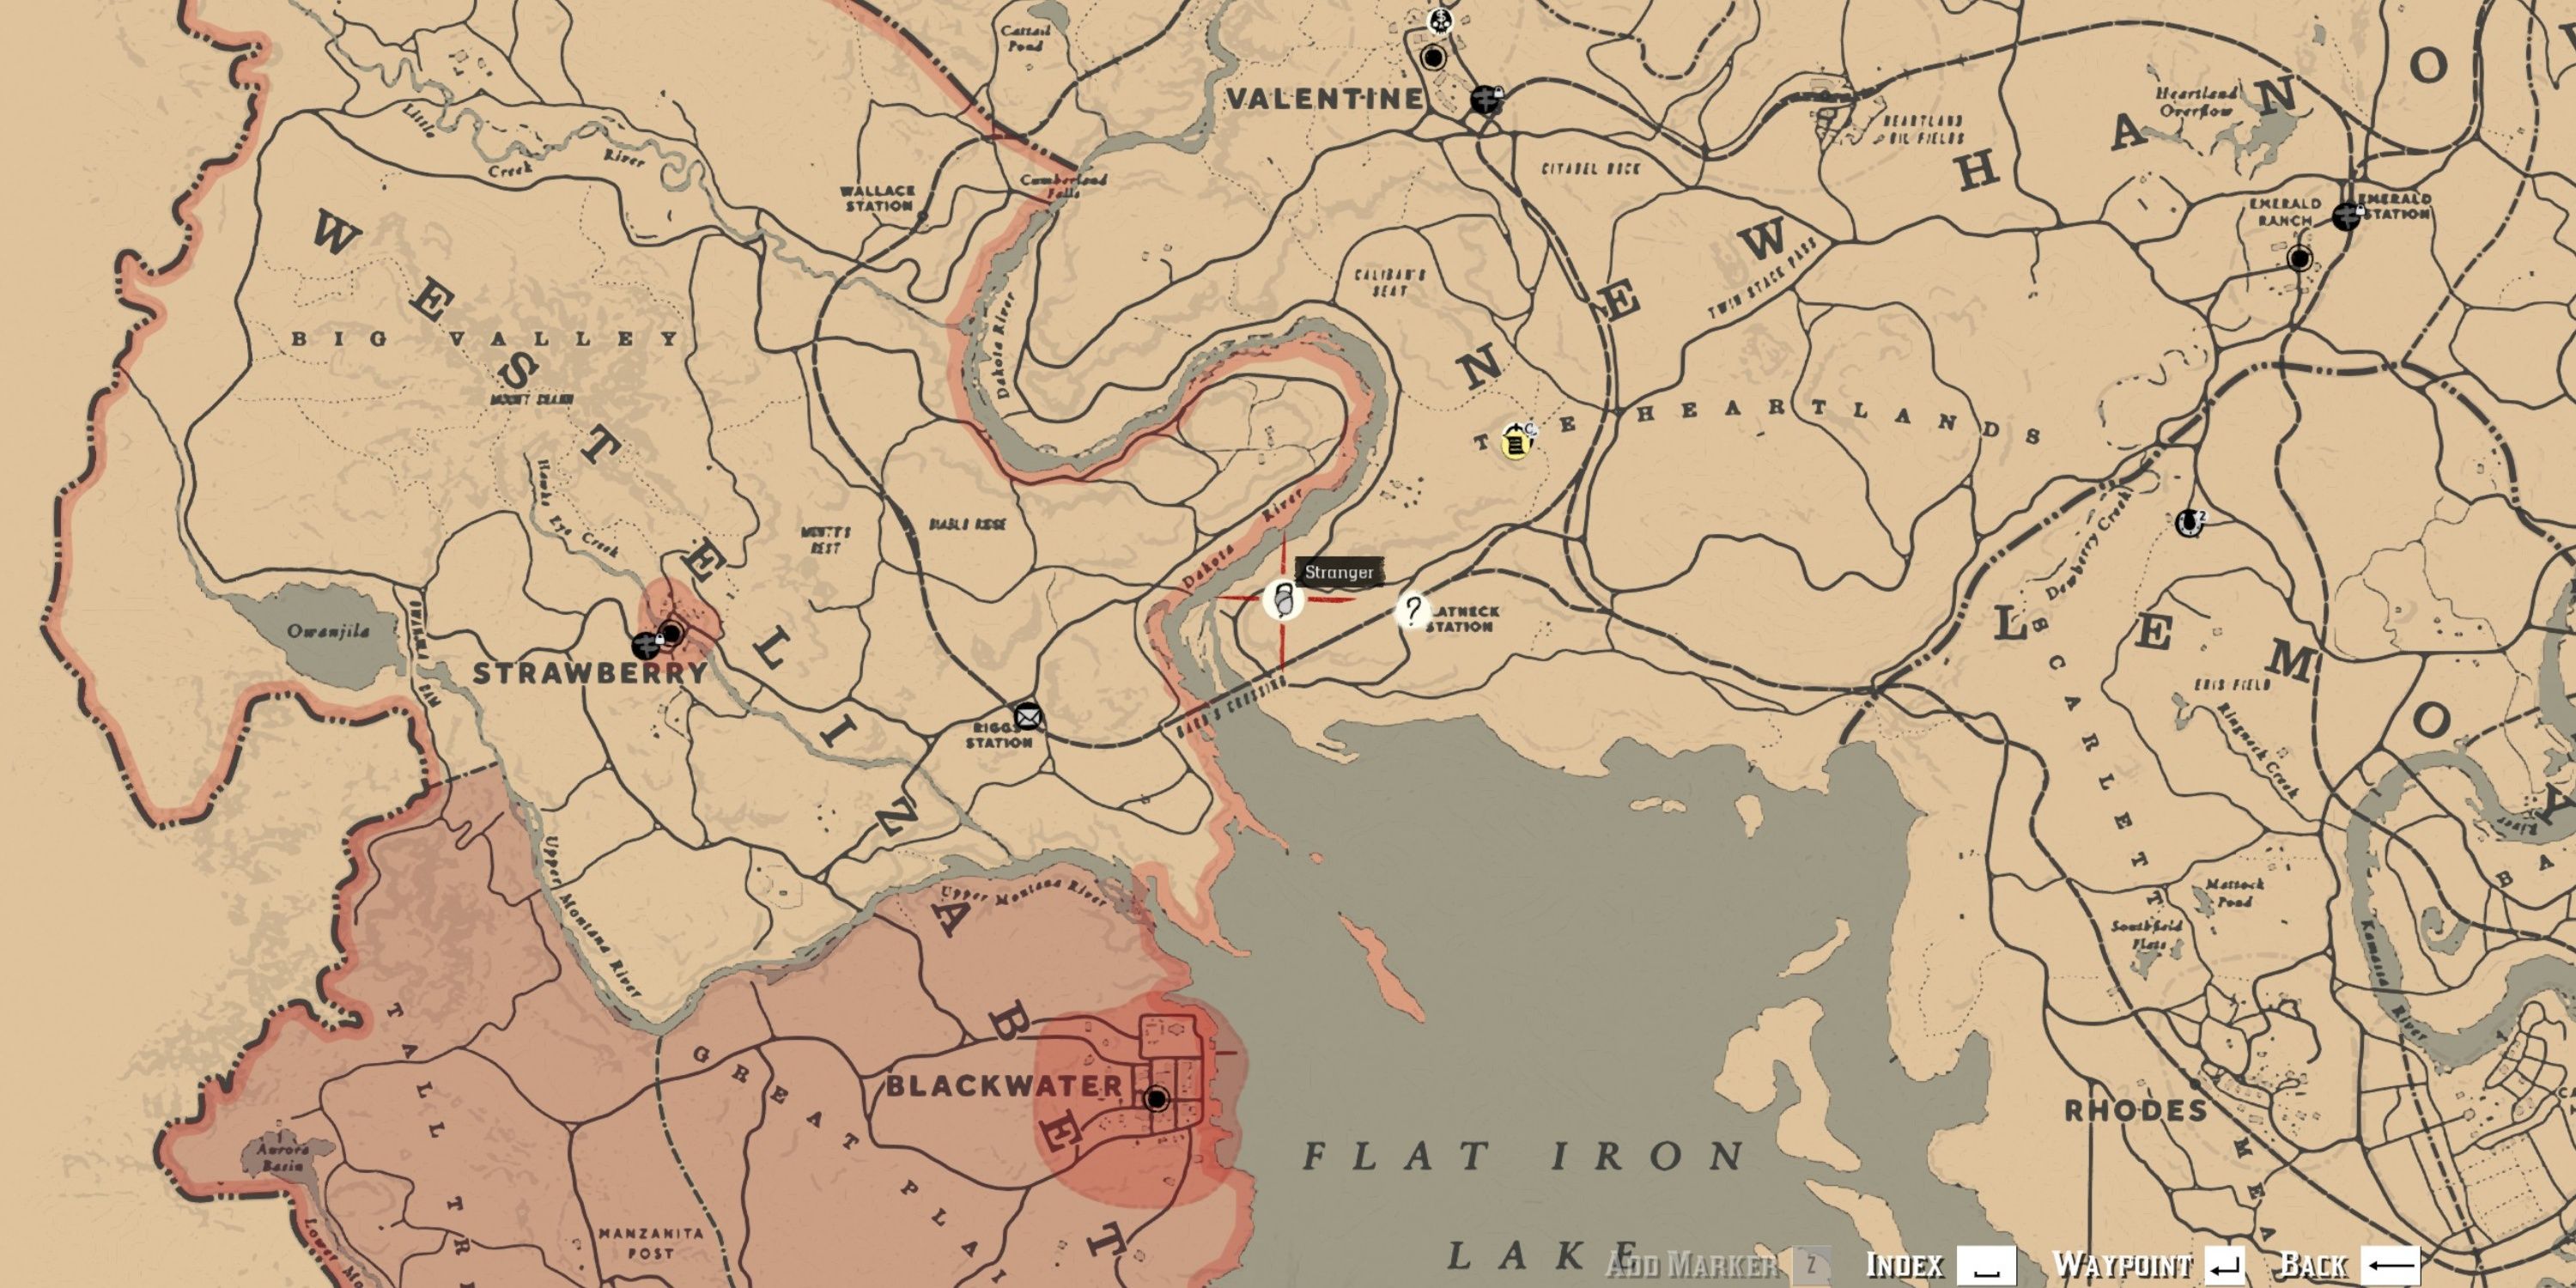
To get Map 1 of the Jack Hall Gang, players initially need to encounter Maximo Cristobal Valdespino within the All That Glitters side-mission. You’ll find Maximo to the west of Flatneck Station, in the Heartlands region. He carries this map, which can either be bought from him for $10 or obtained by means other than purchase (implying theft).
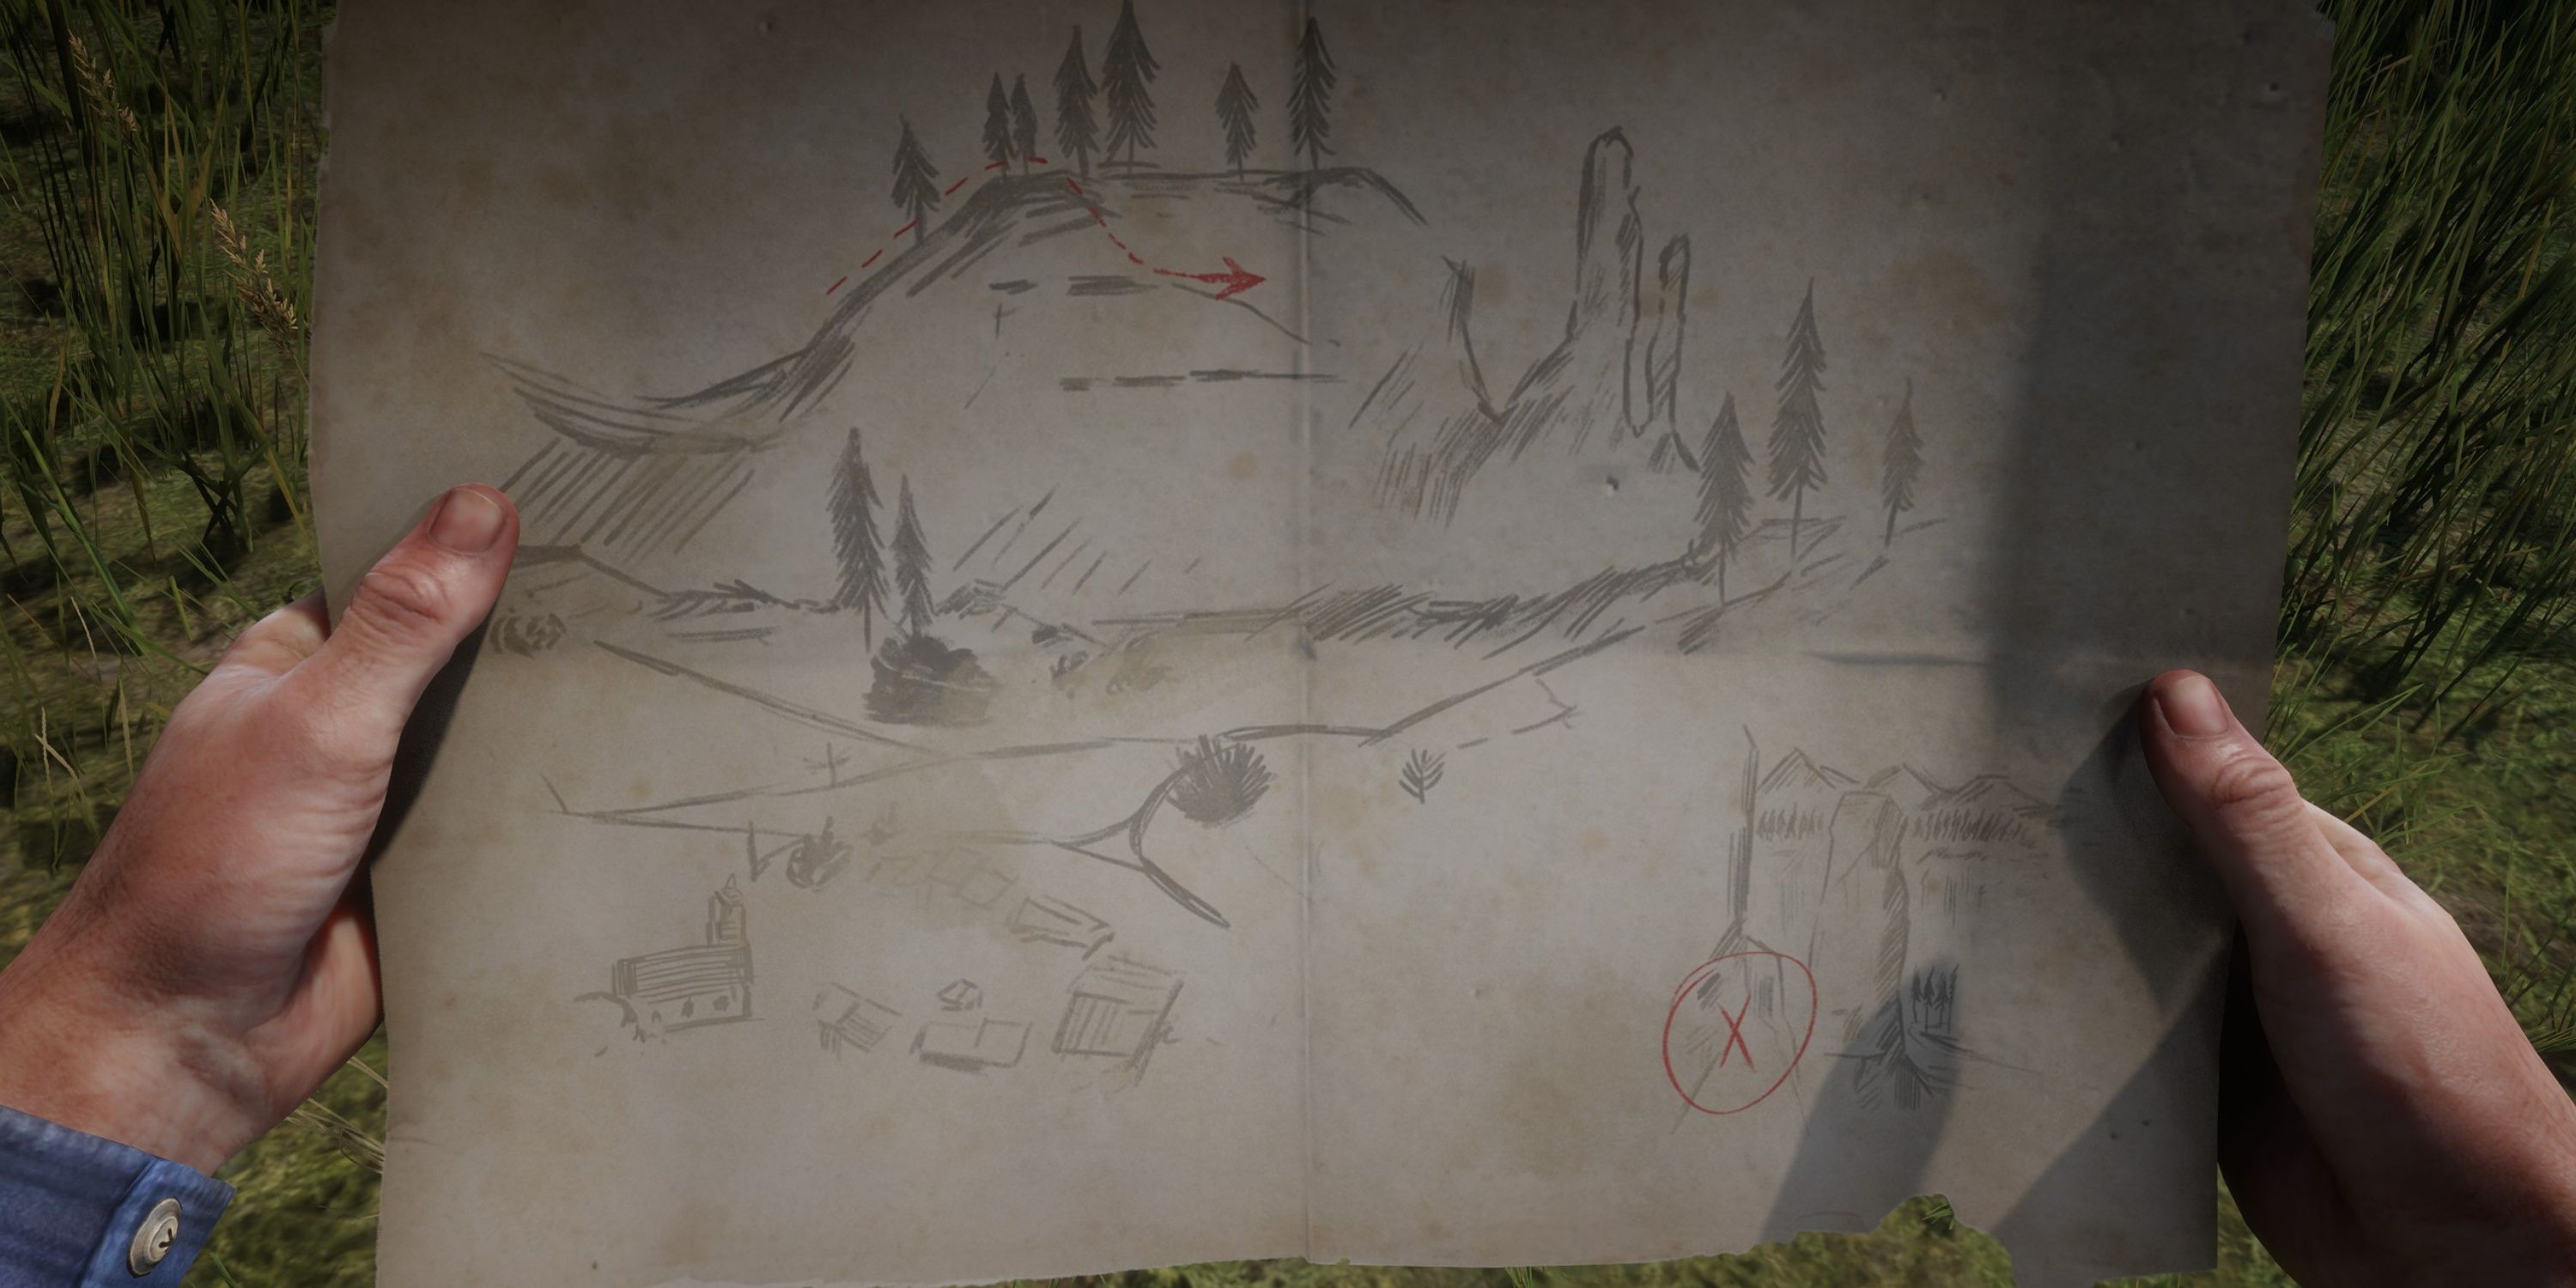
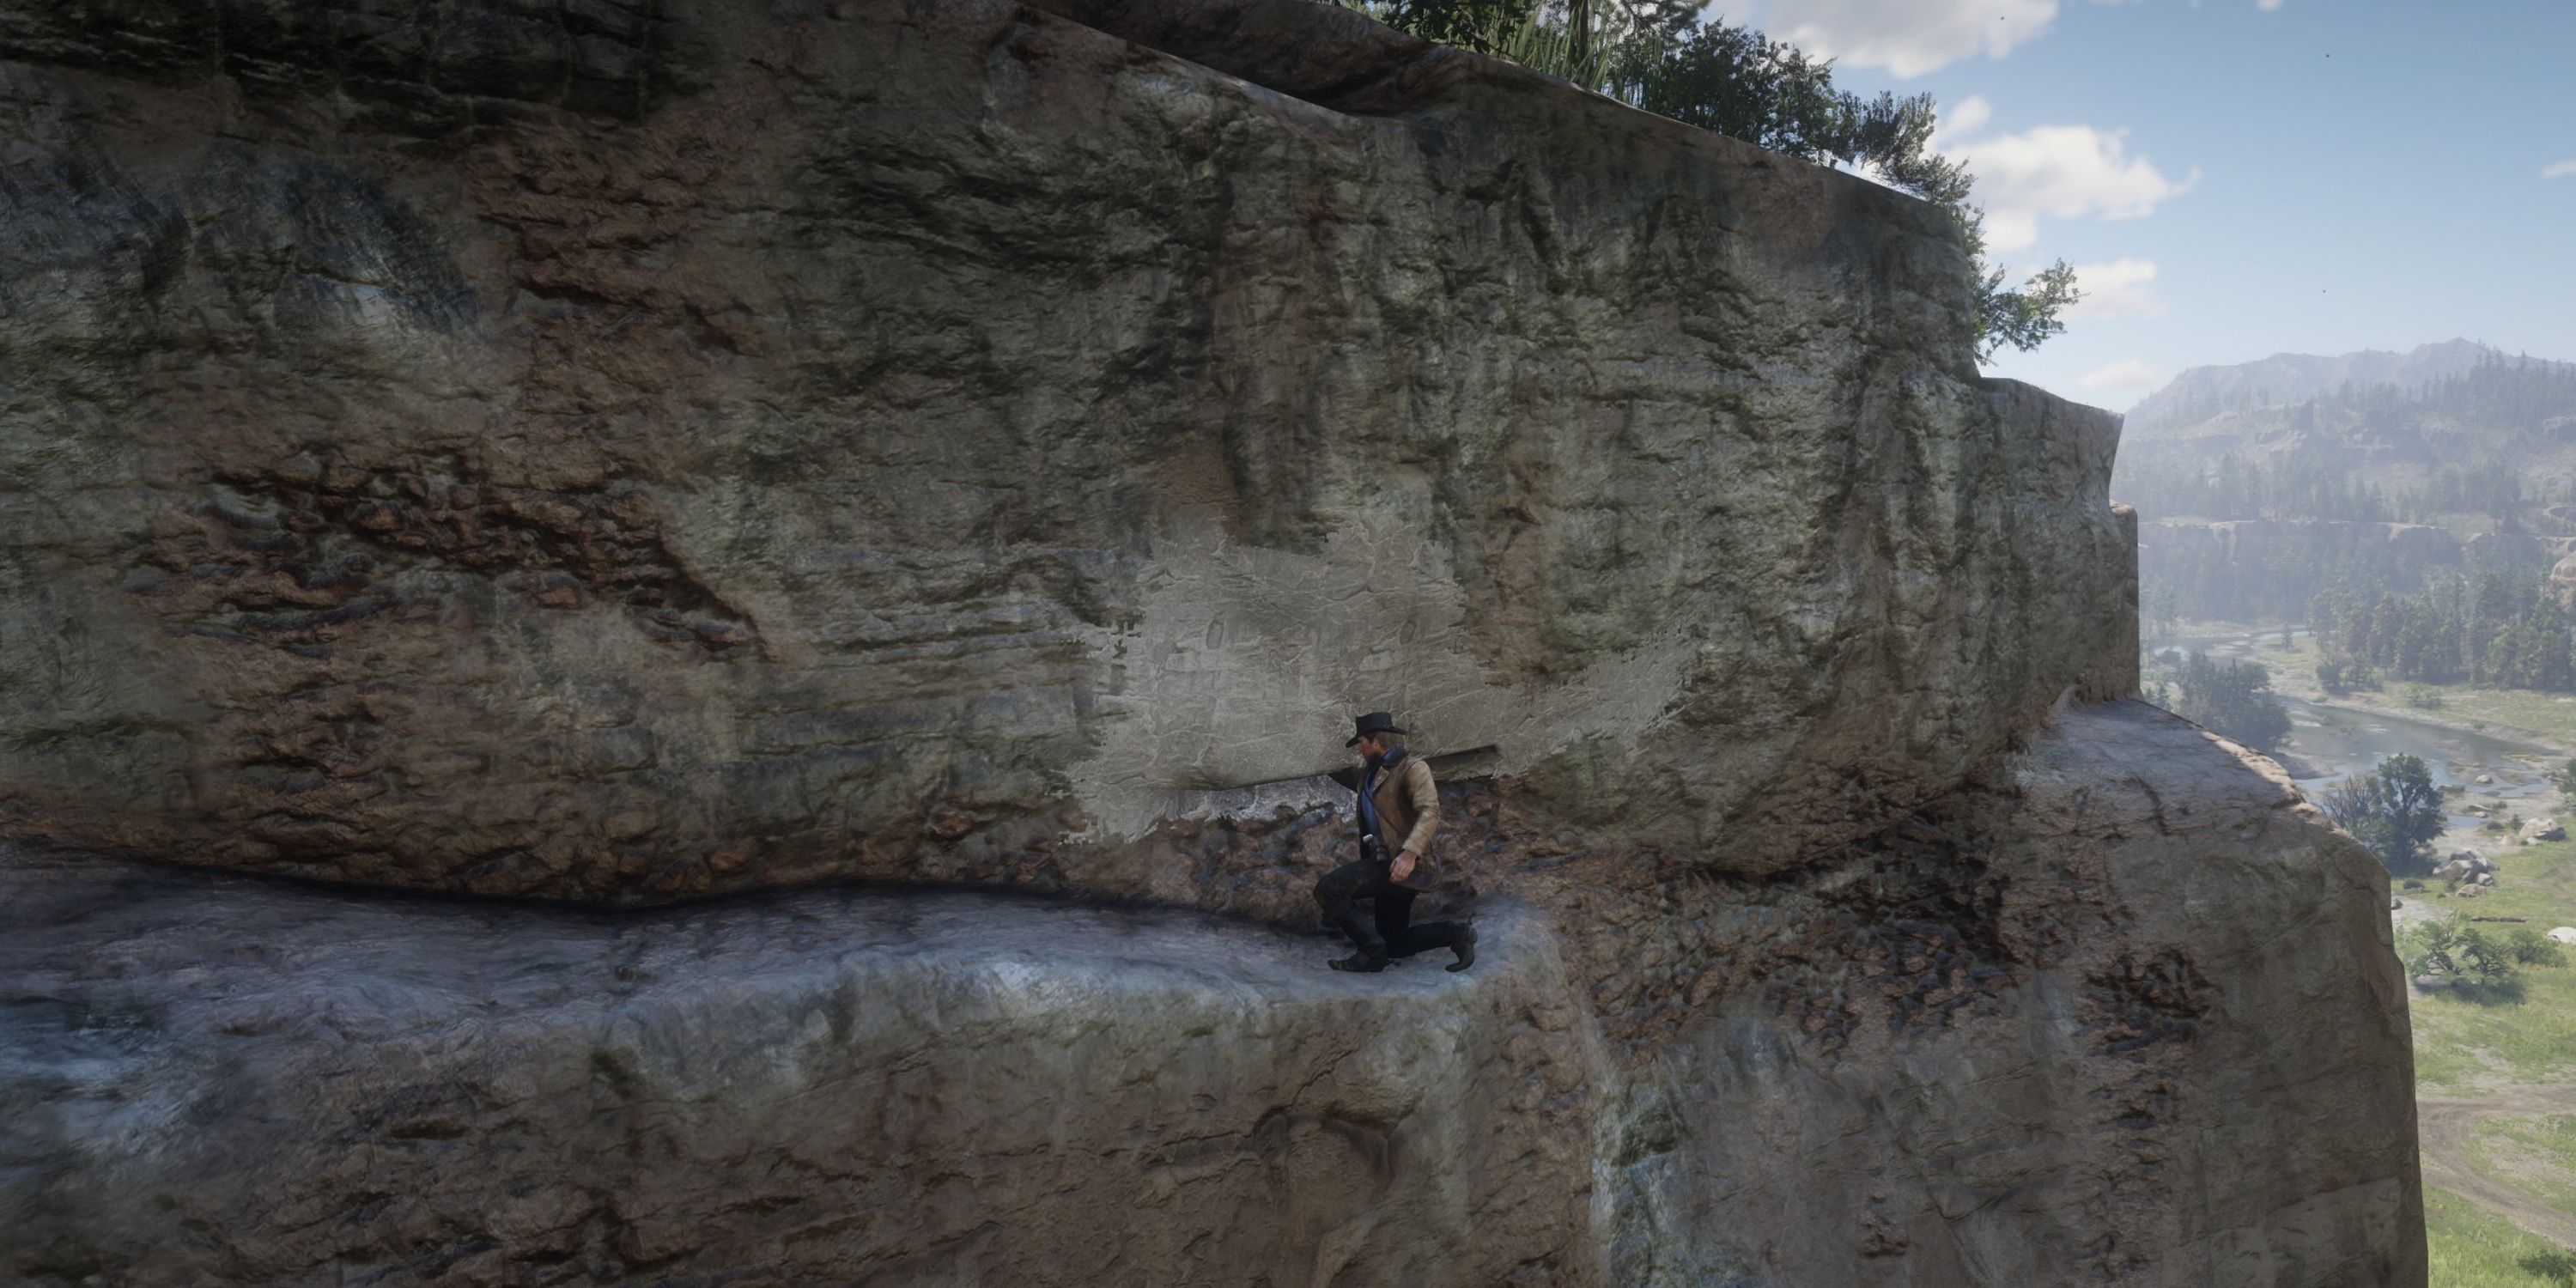
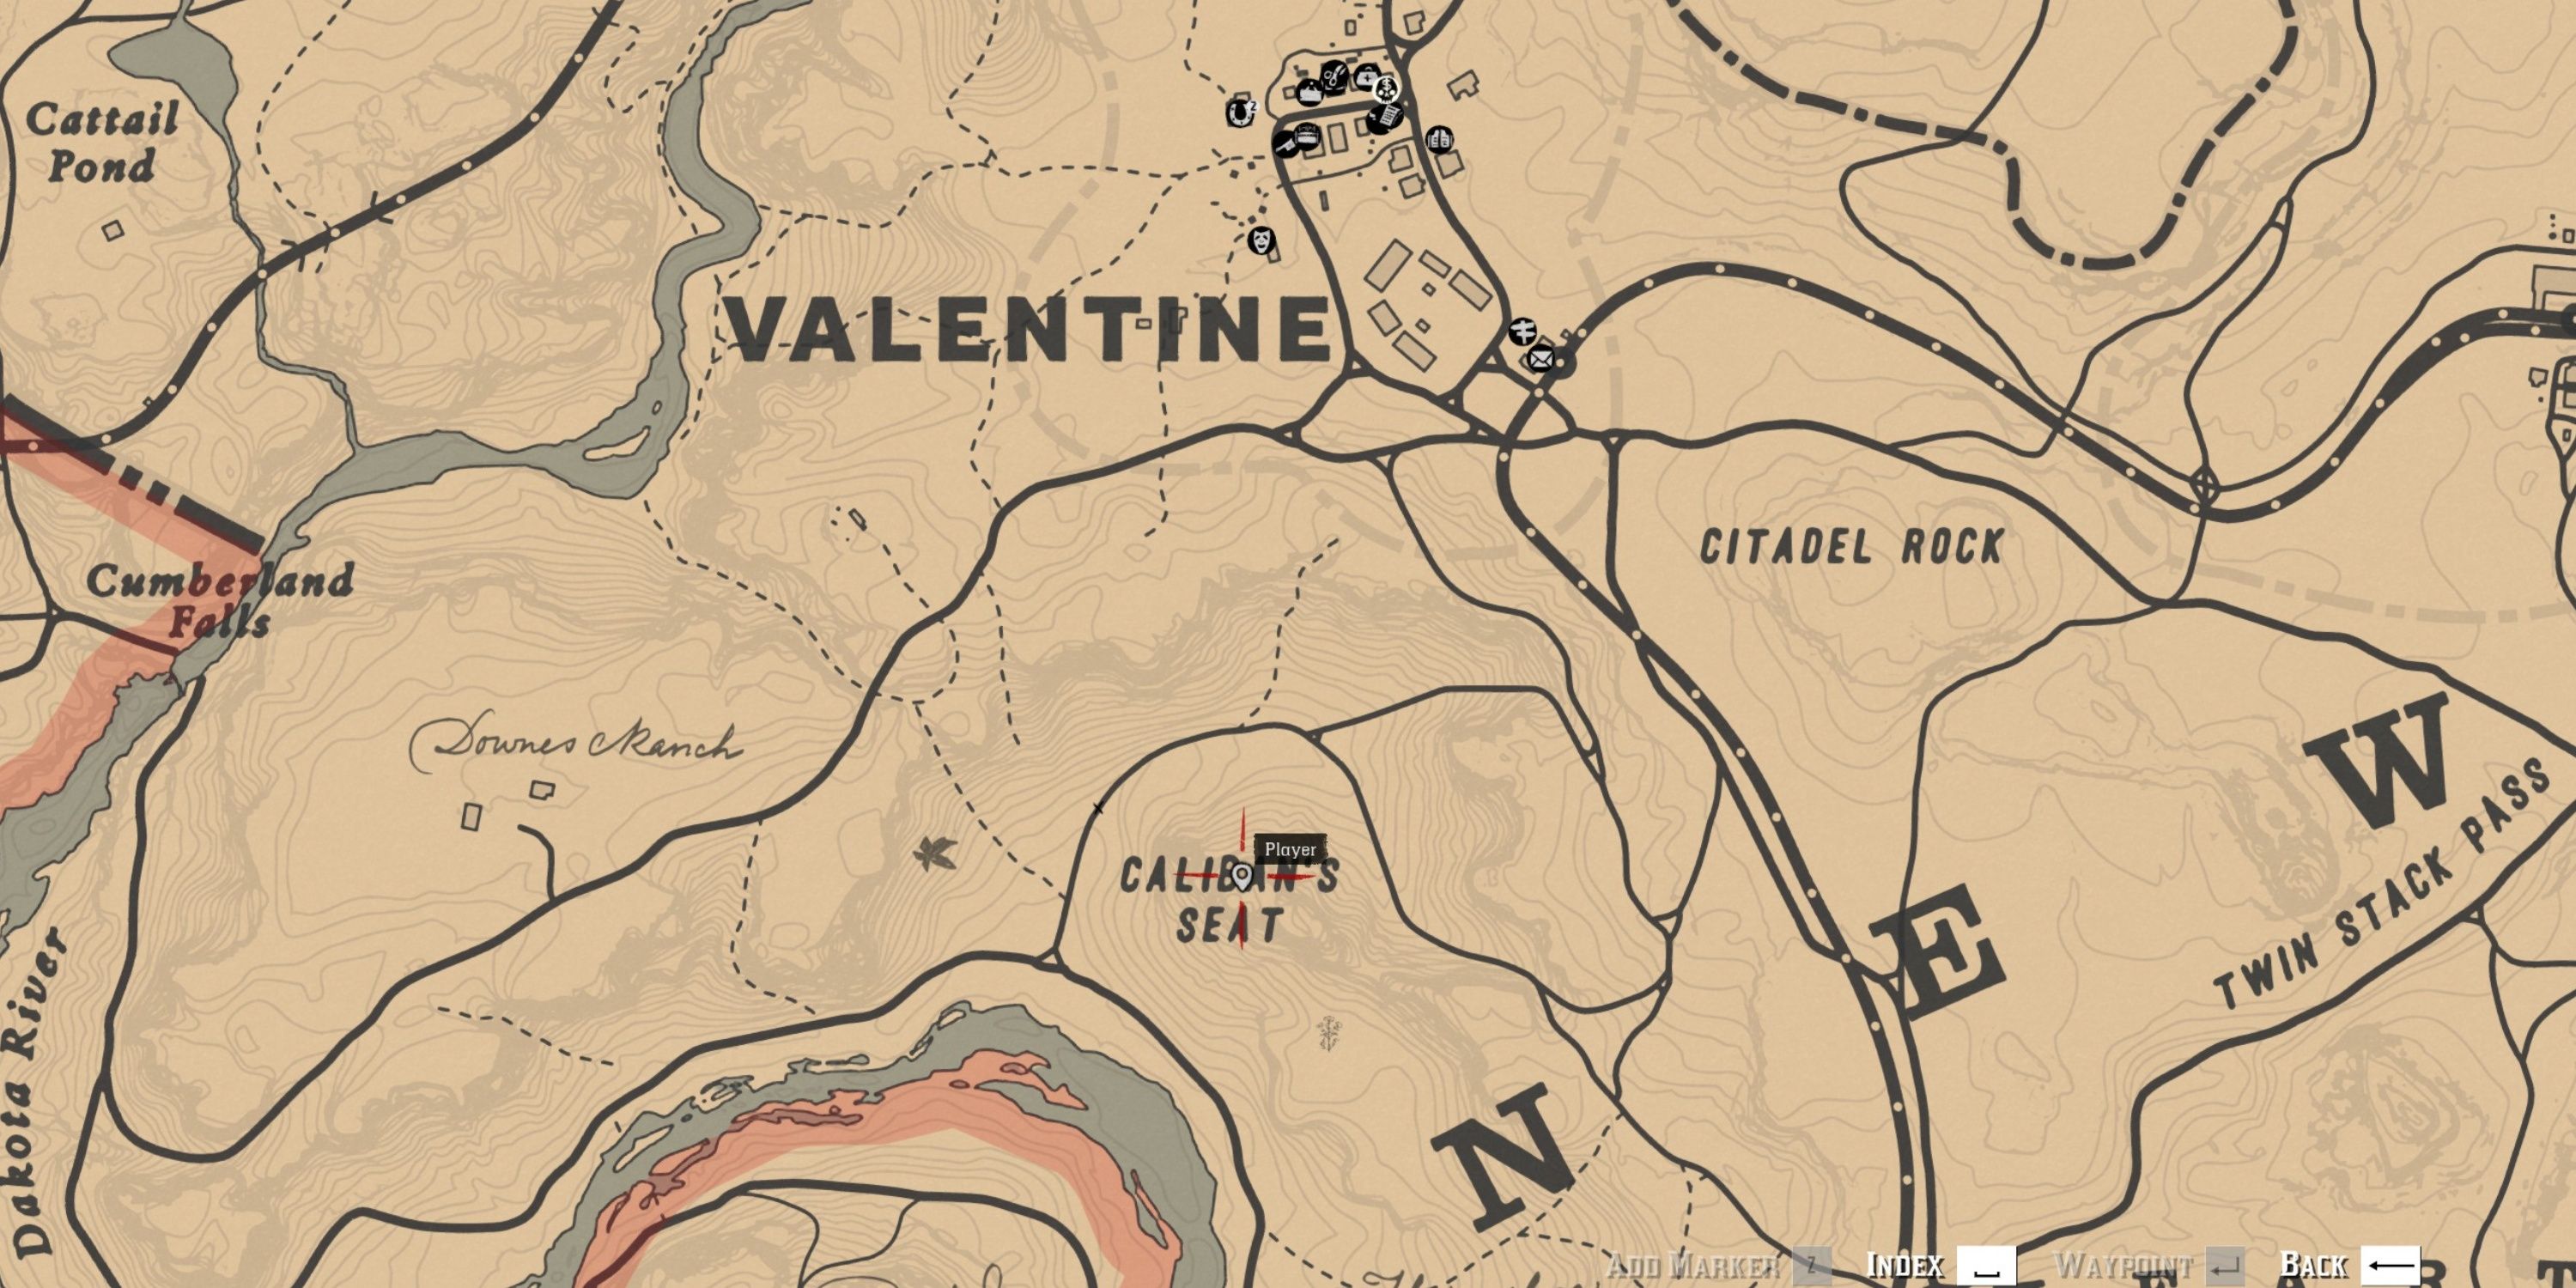
To locate the Jack Hall Gang Map 1, make your way to Caliban’s Seat, south of Valentine. Follow the rocky trail that passes through several openings and jumps, ultimately leading you to a granite cavern where players can discover the Jack Hall Gang Map 2.
20. Jack Hall Gang Map 2
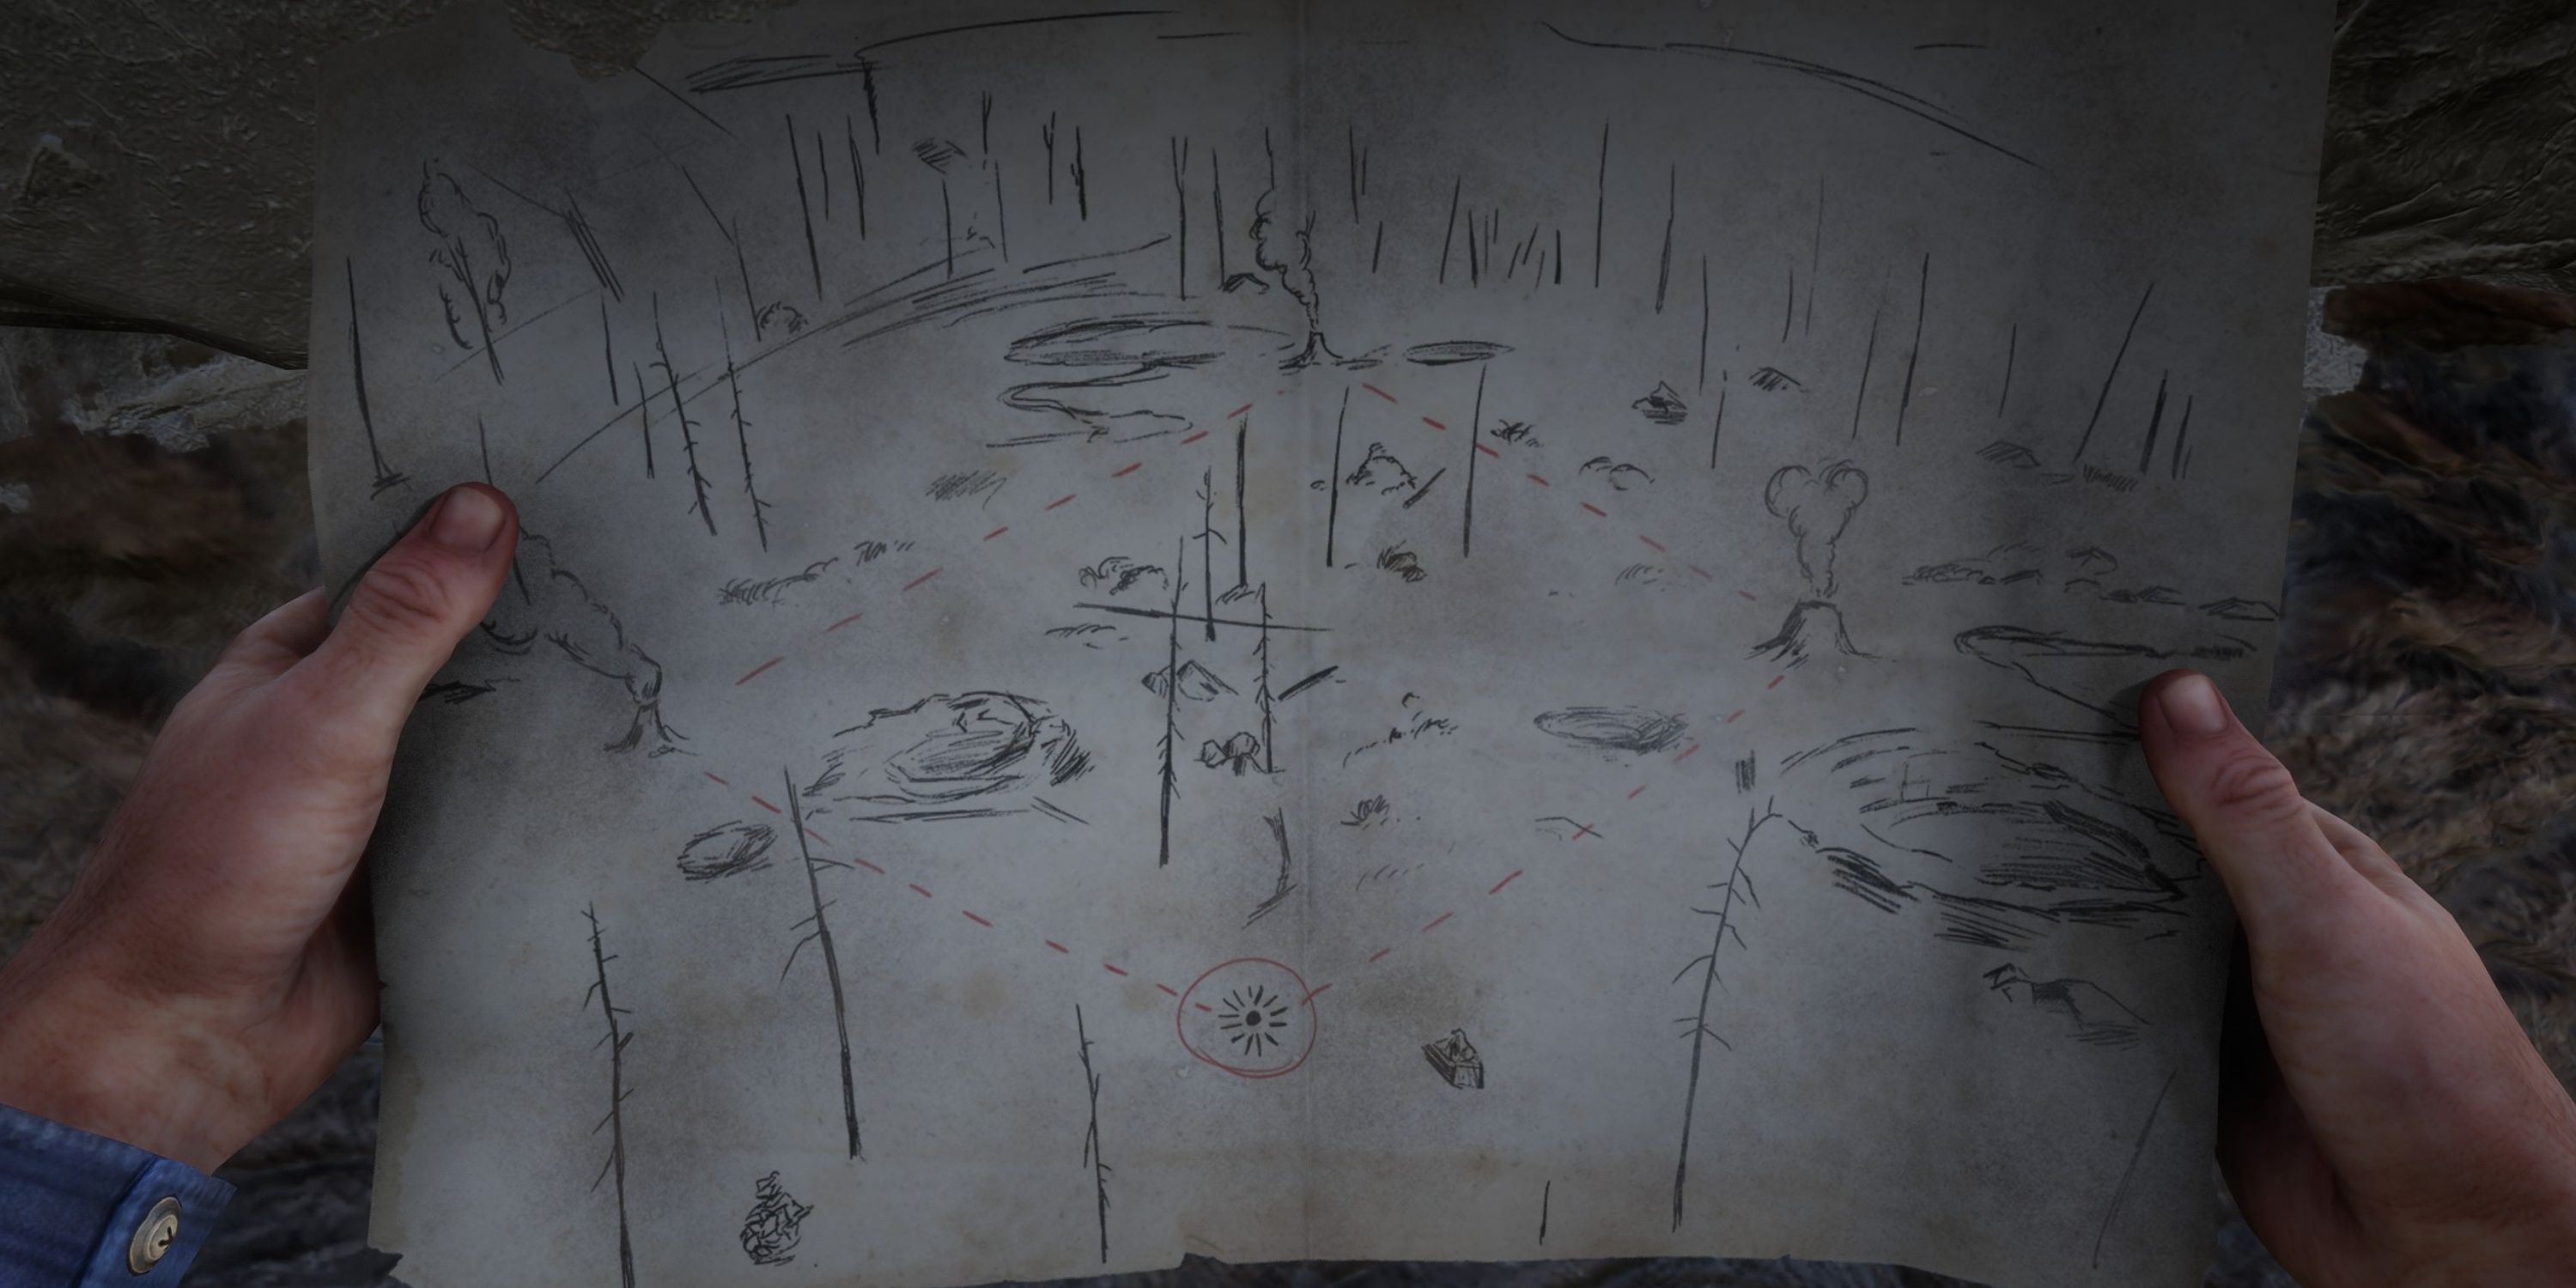
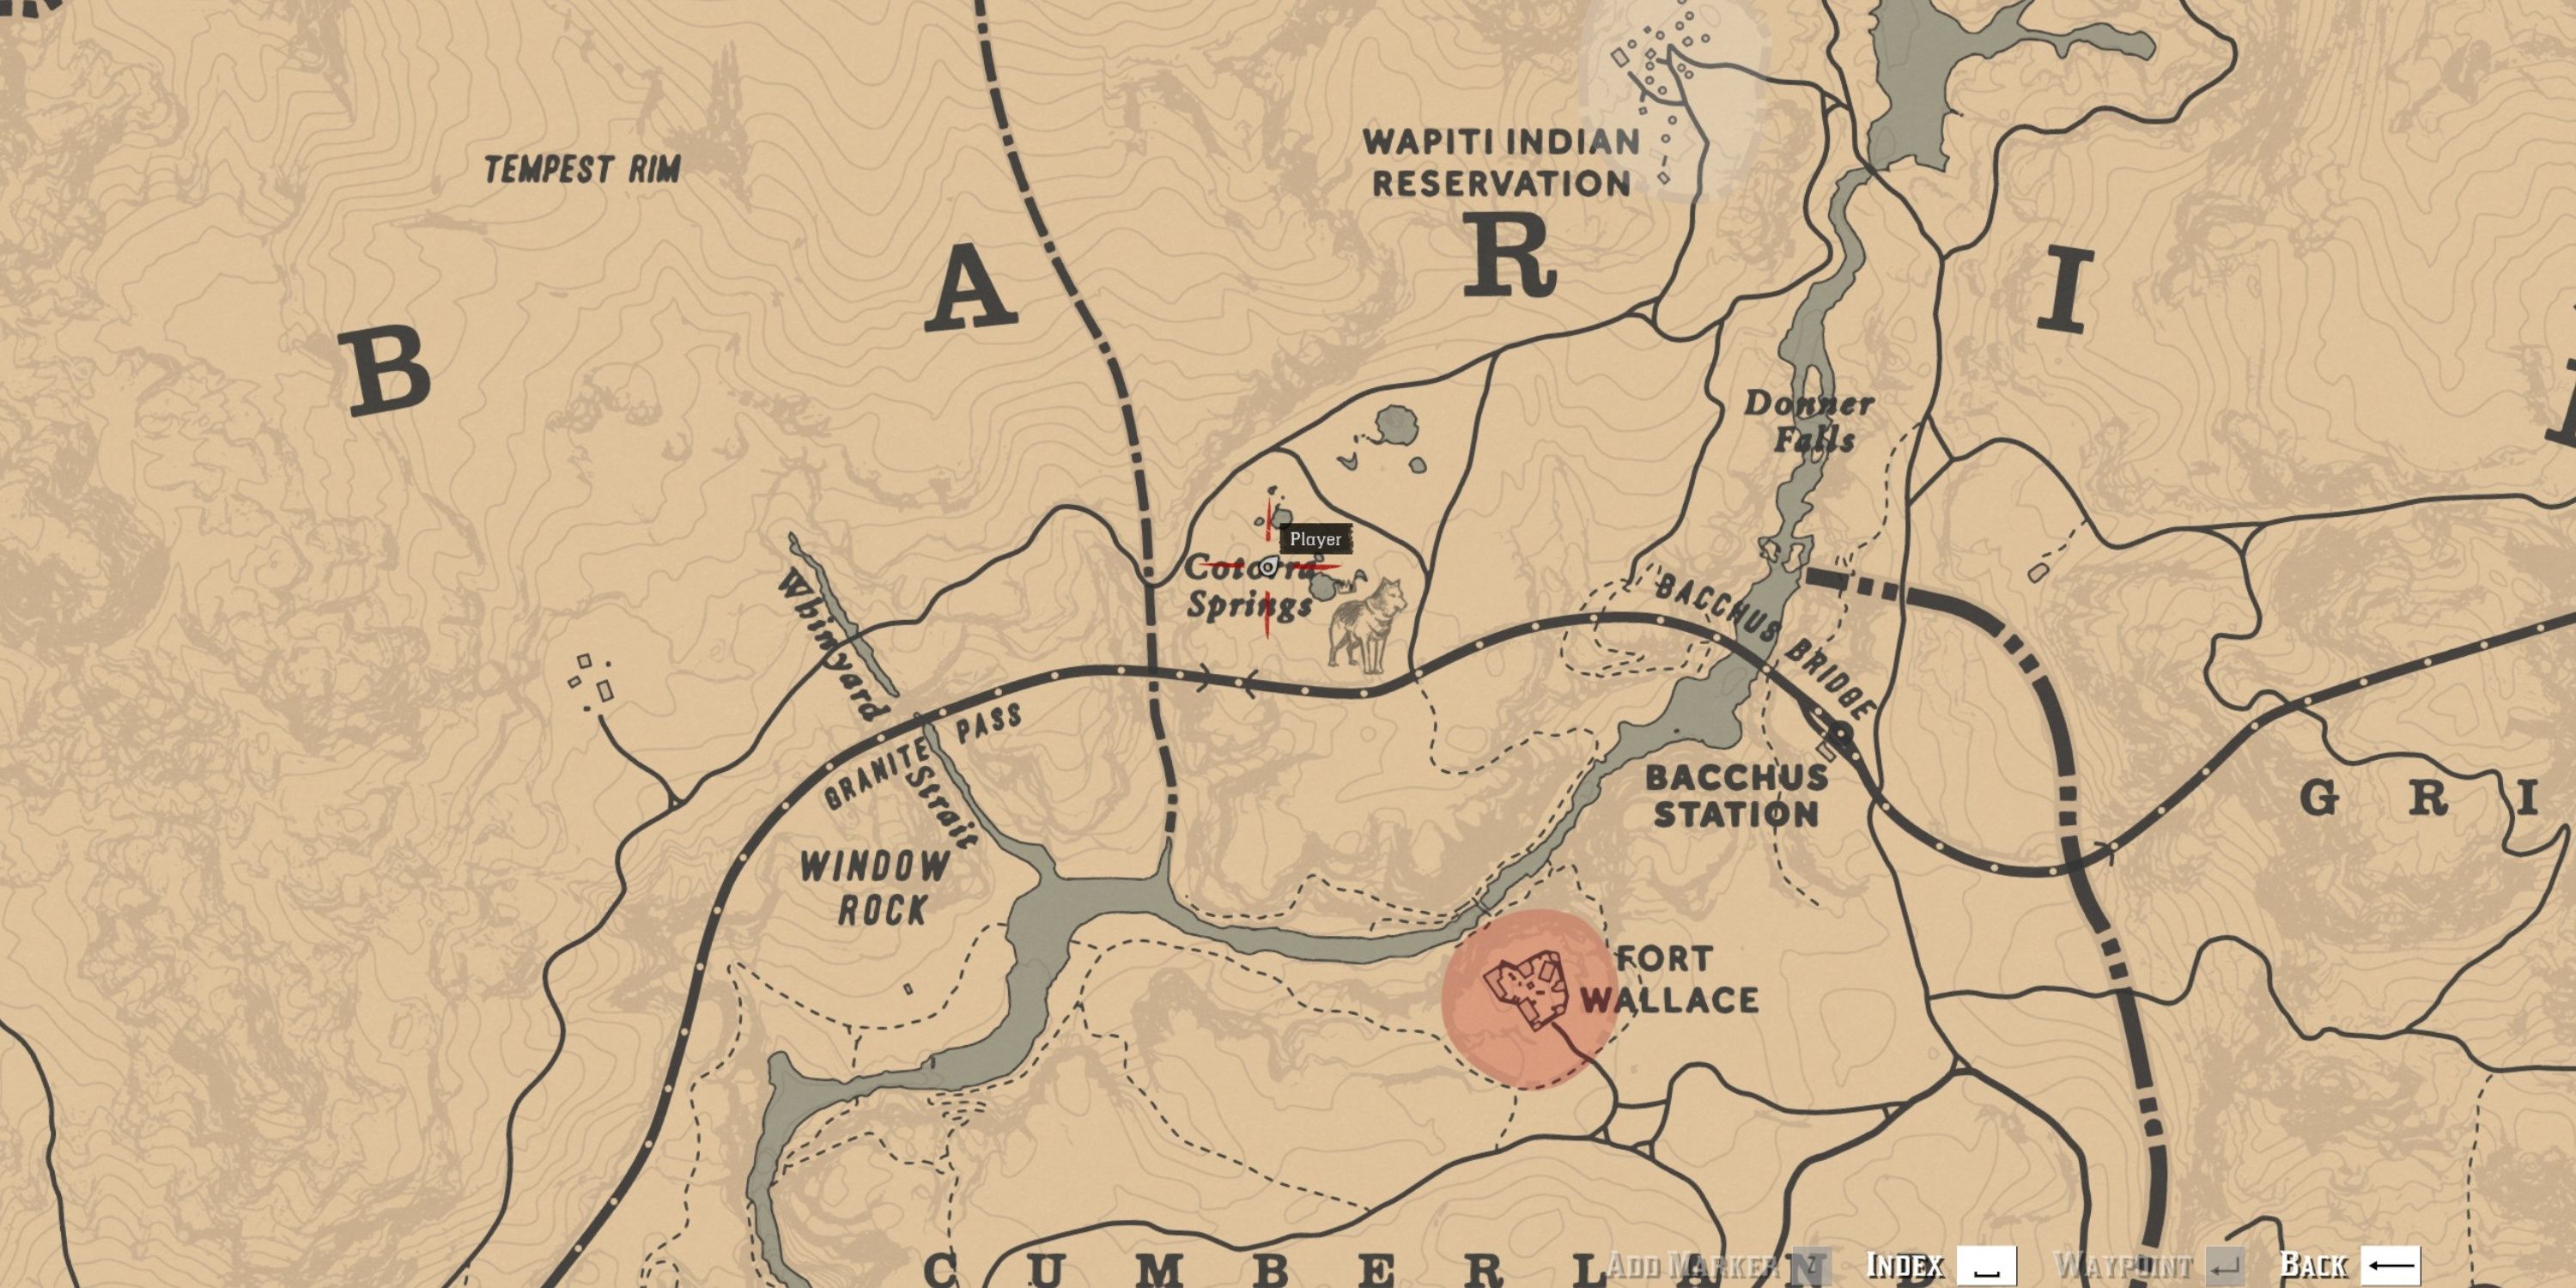
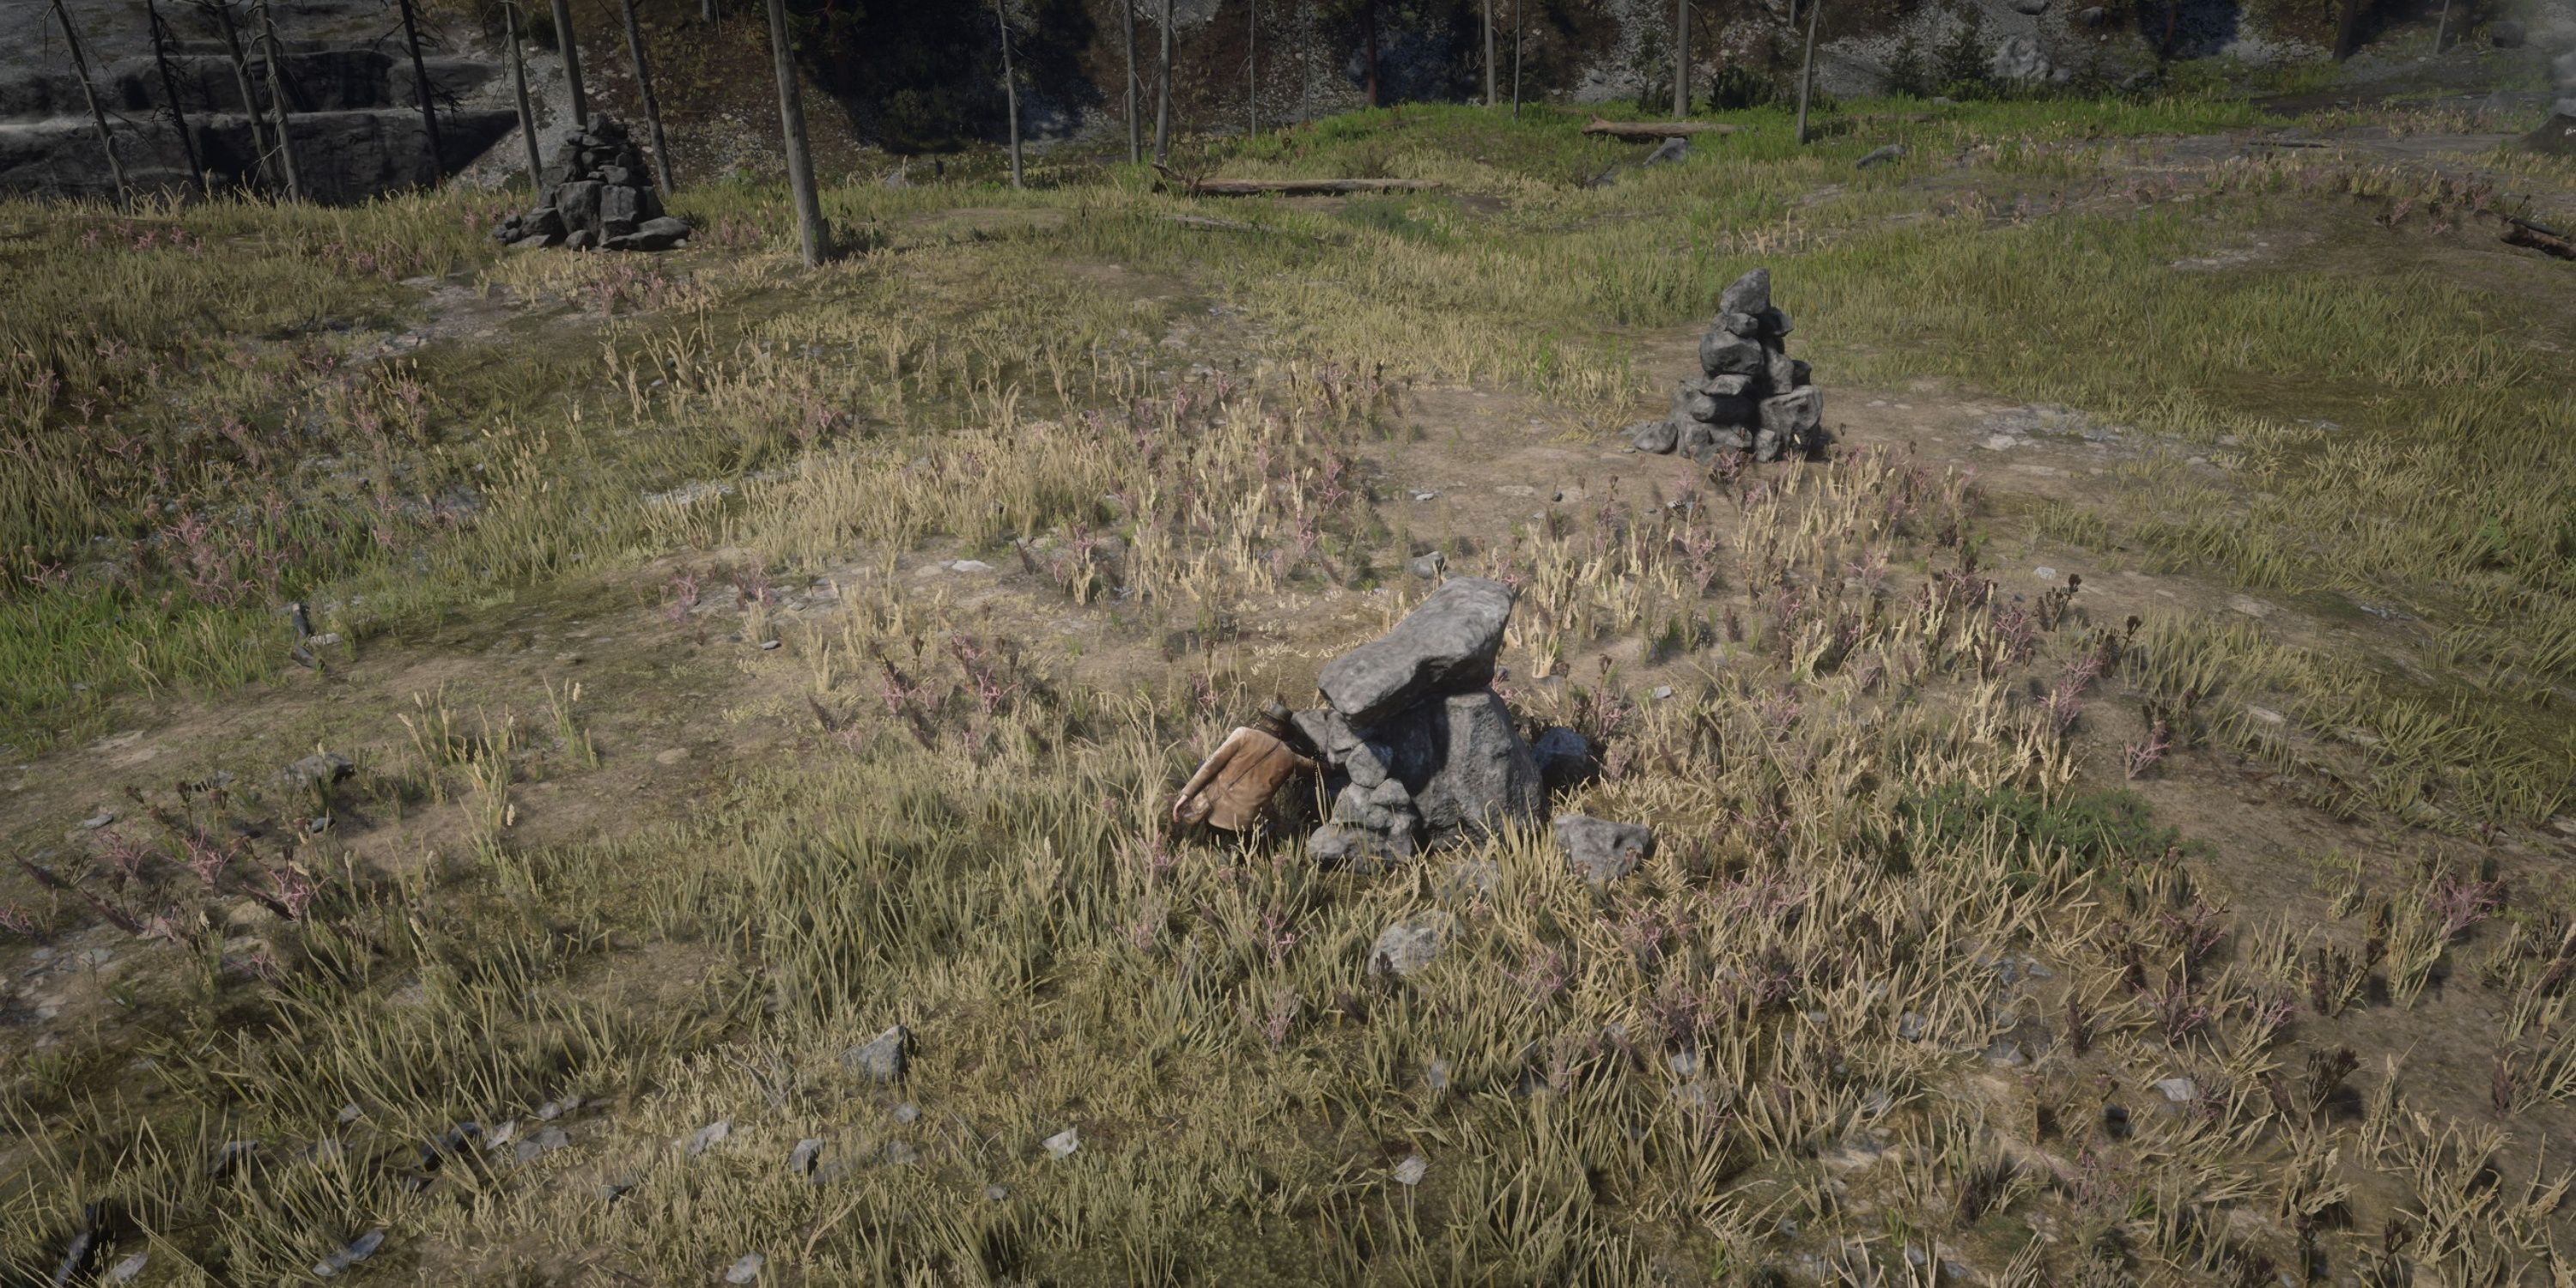
- Loot: $15, Jack Hall Gang Map 3
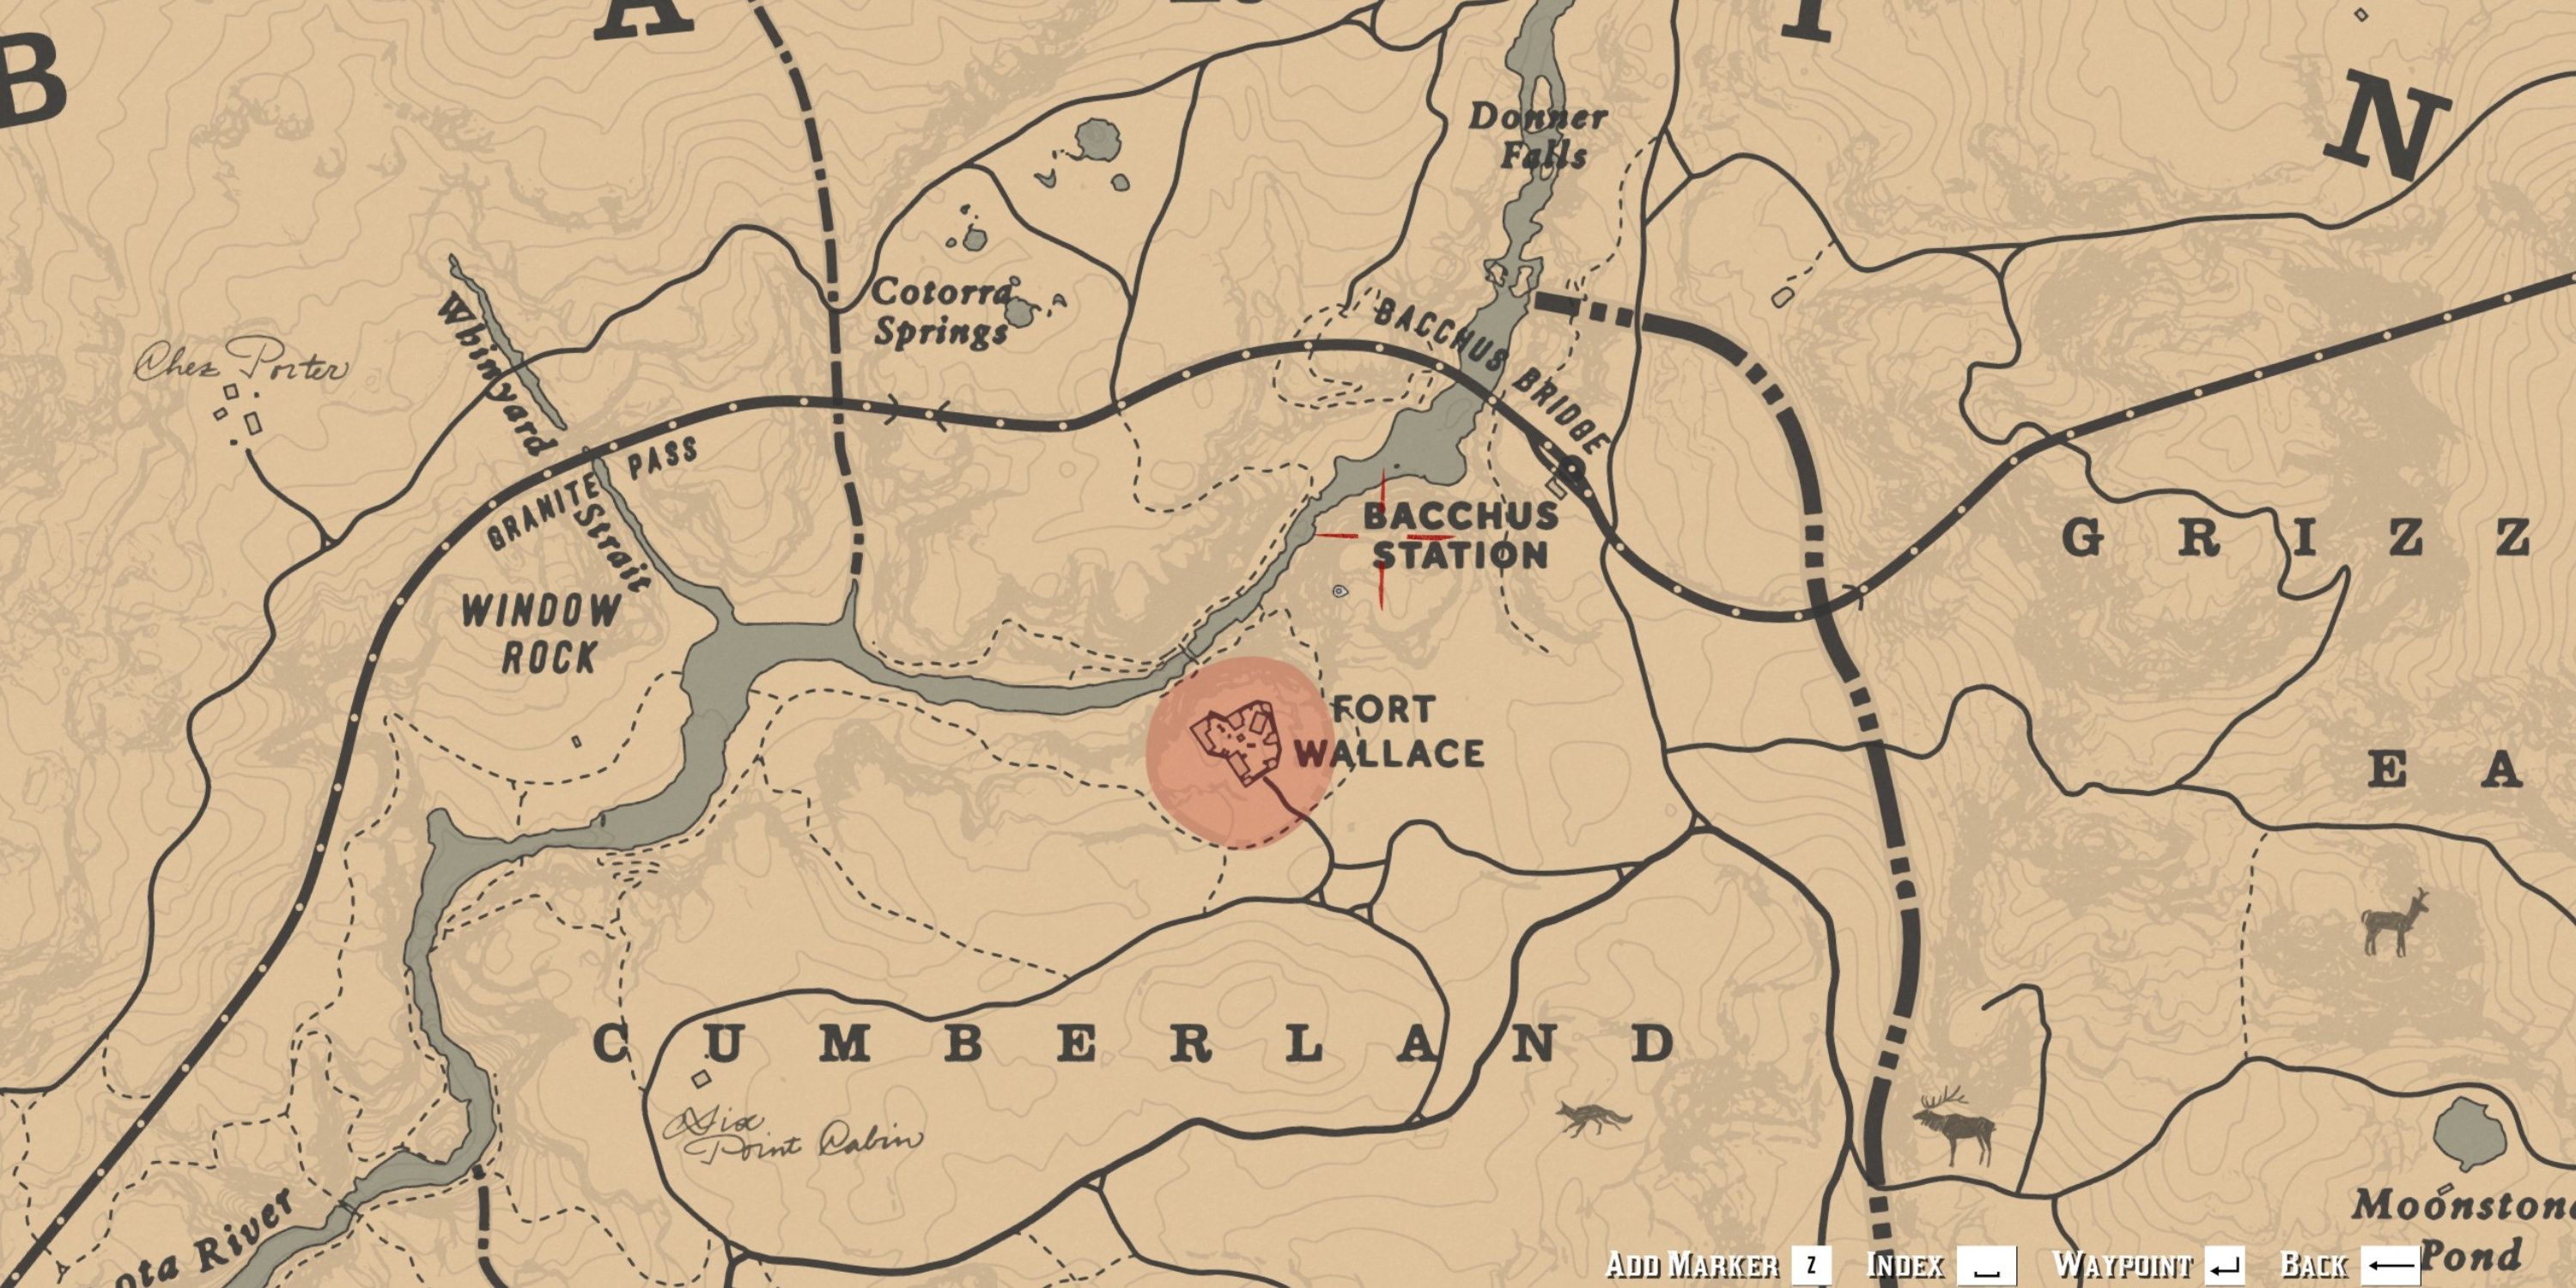
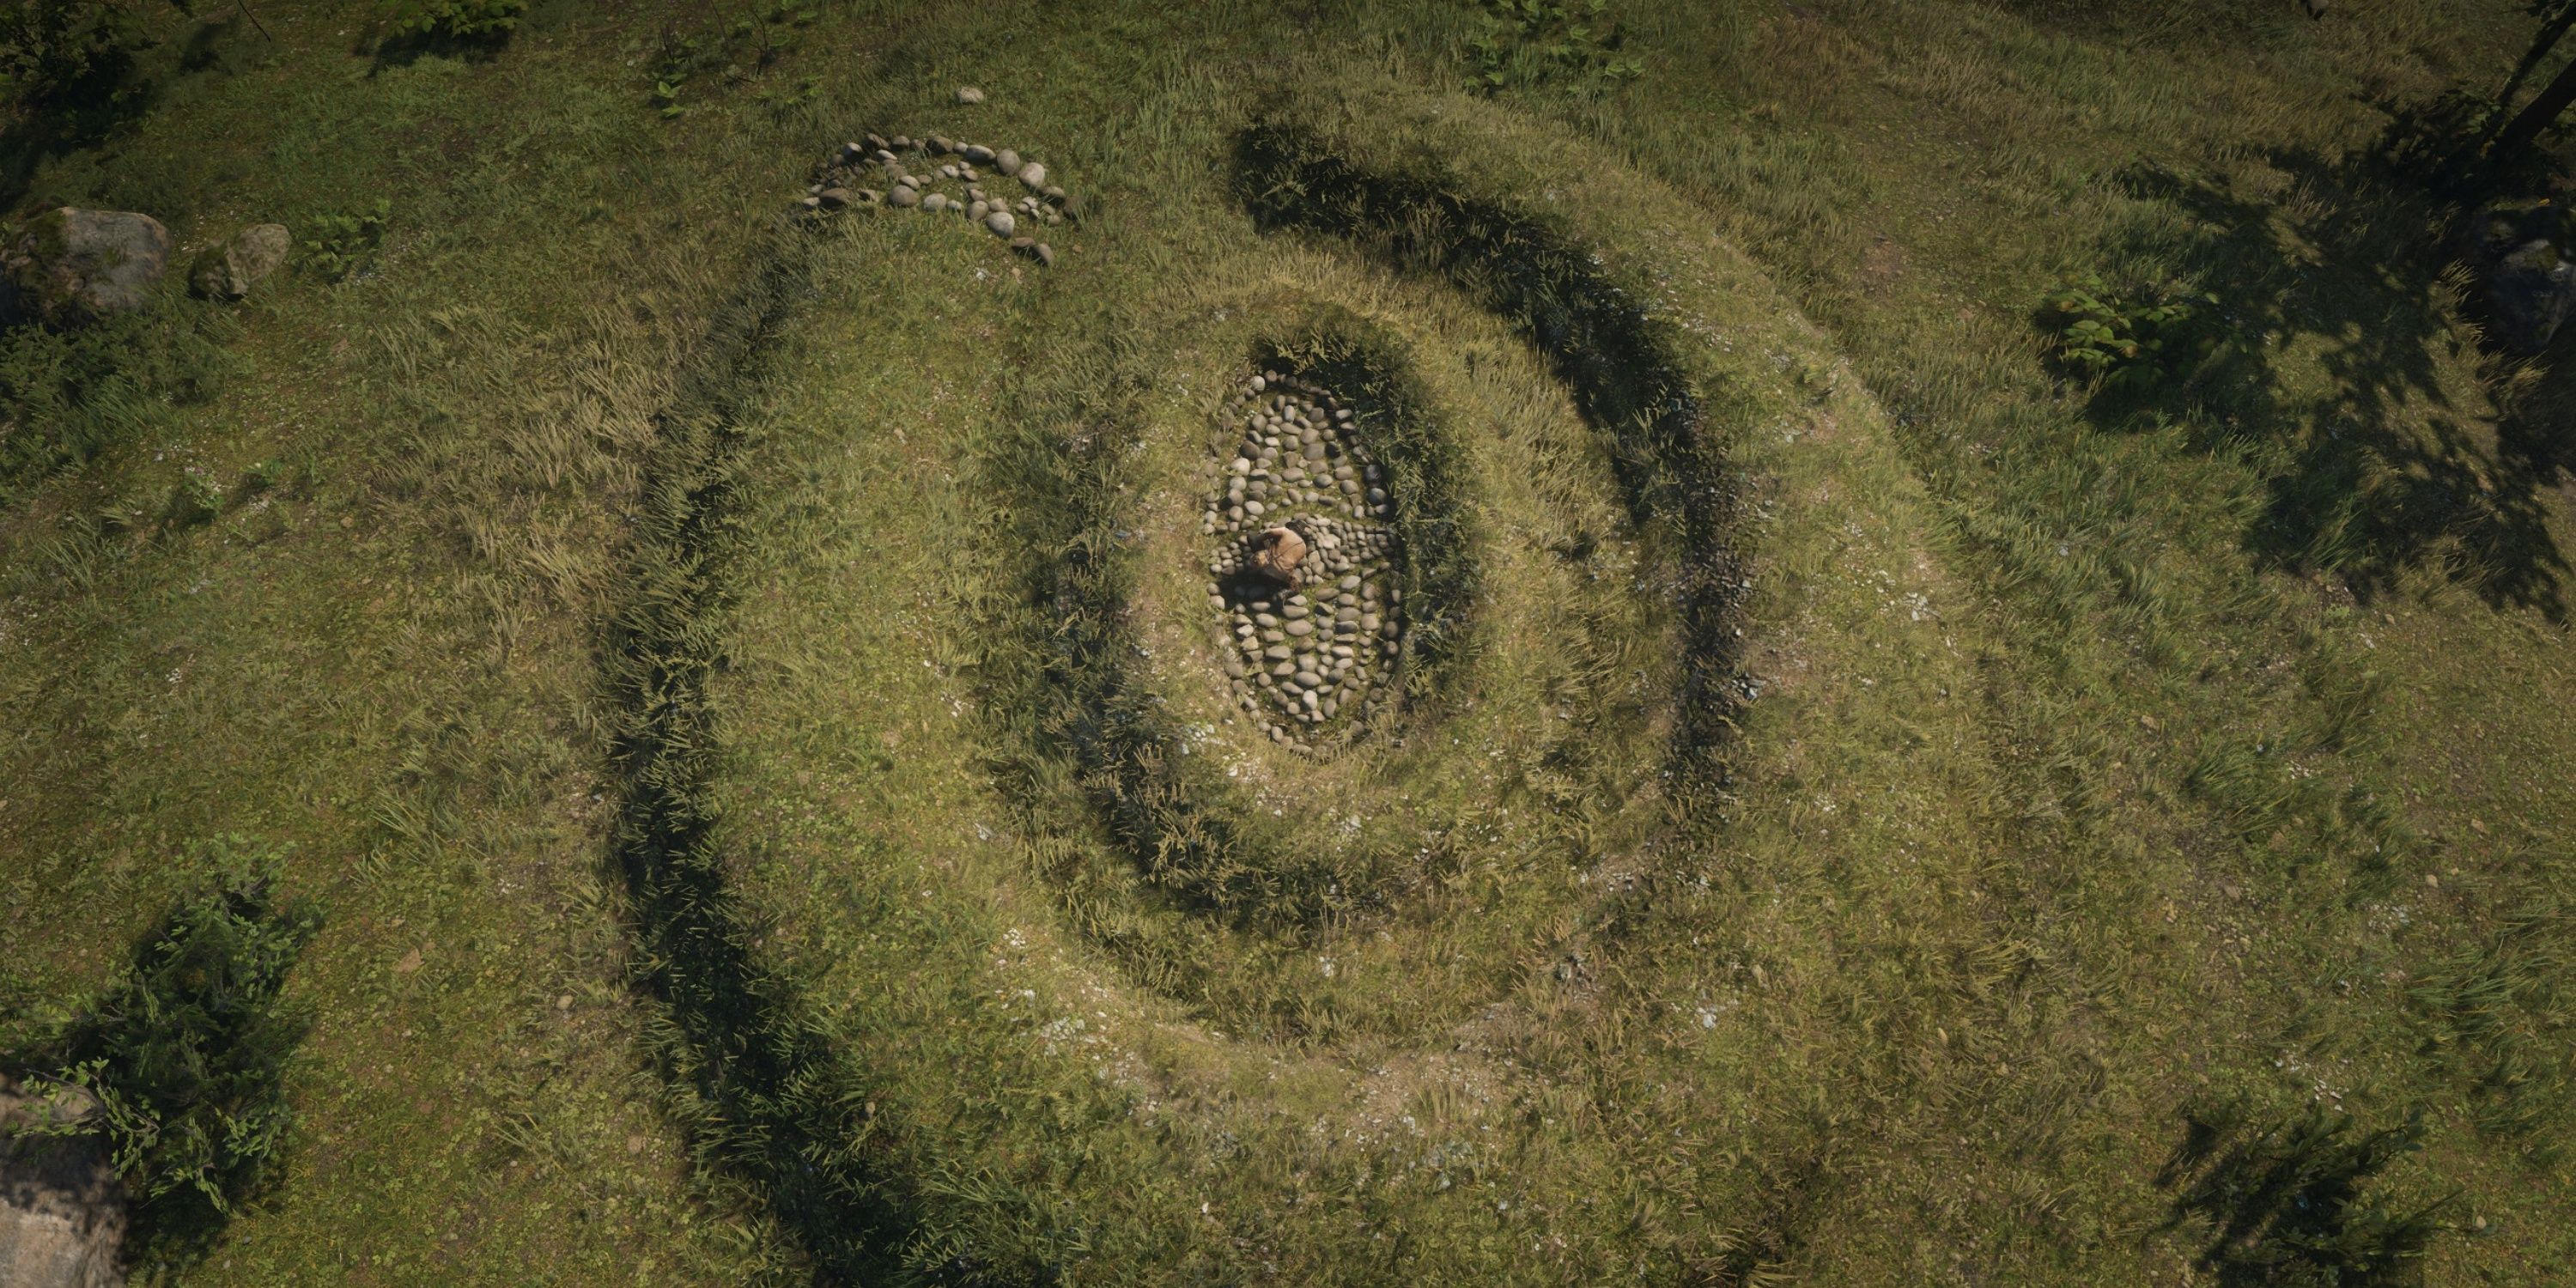
After cracking the code on Jack Hall Gang Map 1, I, as a player, will unlock Map 2. To tackle this next map, I need to make my way to Cotorra Springs, which lies north of Fort Wallace. Once there, the treasure I’m seeking can be found nestled within a central rock, encircled by a ring of other rocks. This hidden gem is easily spotted by looking at the map and zeroing in on the first ‘r’ in ‘Cotorra Springs’. Successfully locating this treasure will grant me access to Jack Hall Gang Map 3.
19. Jack Hall Gang Map 3
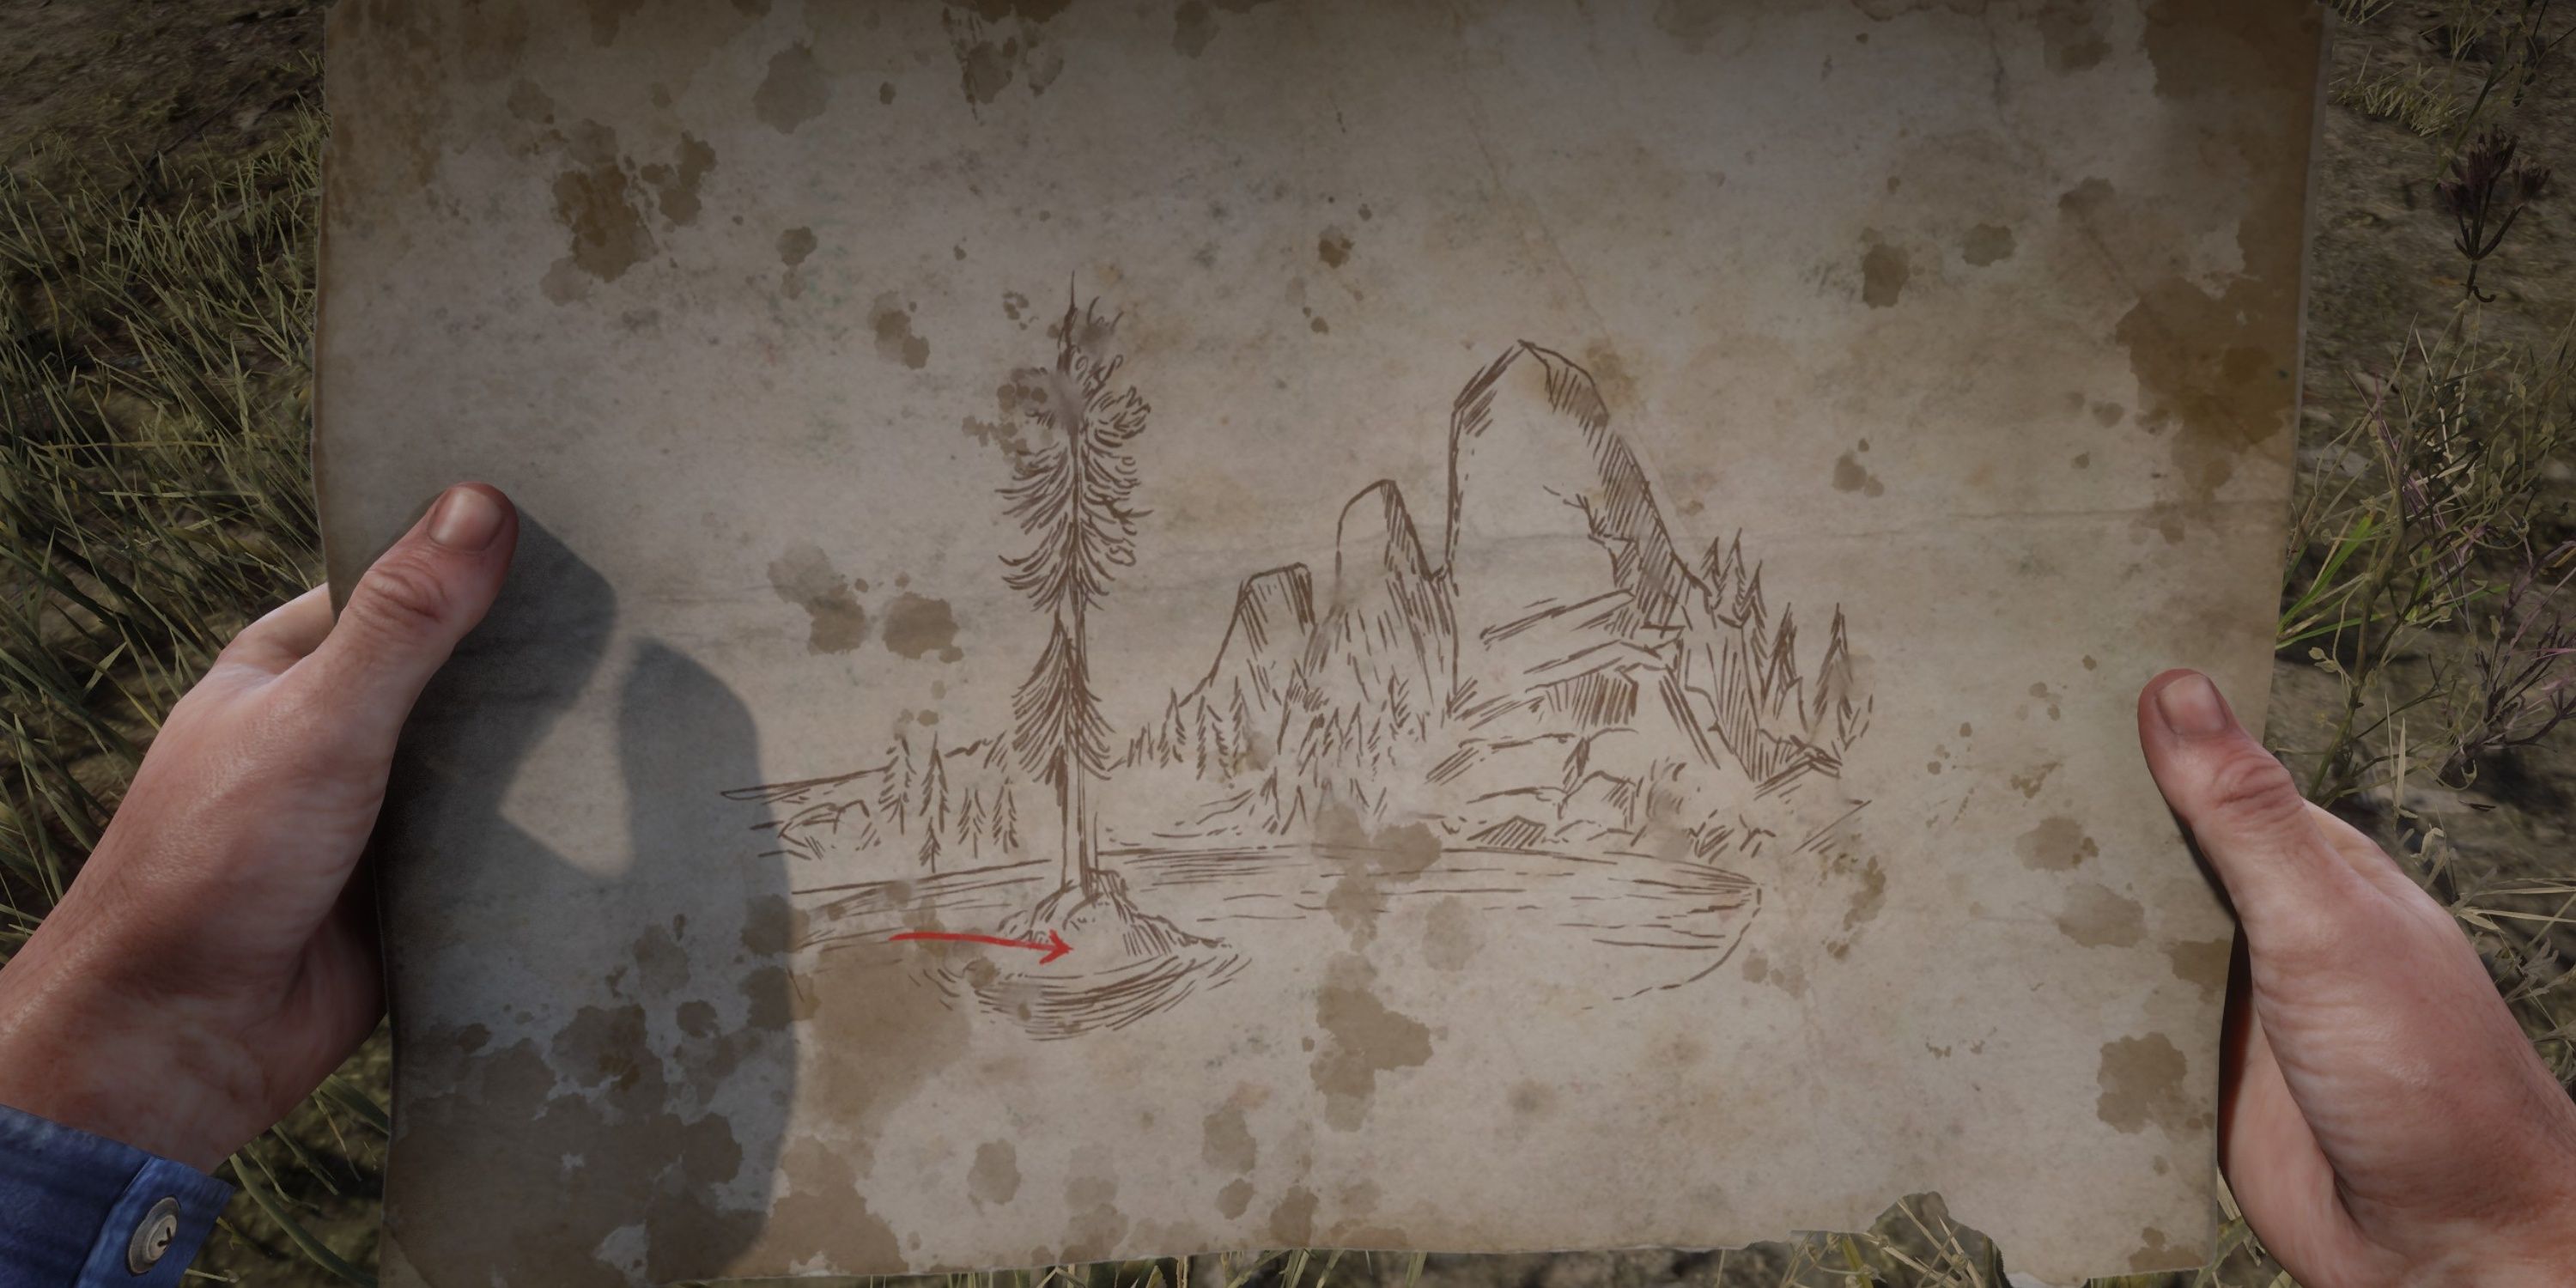
- Loot: 2x Gold Bars
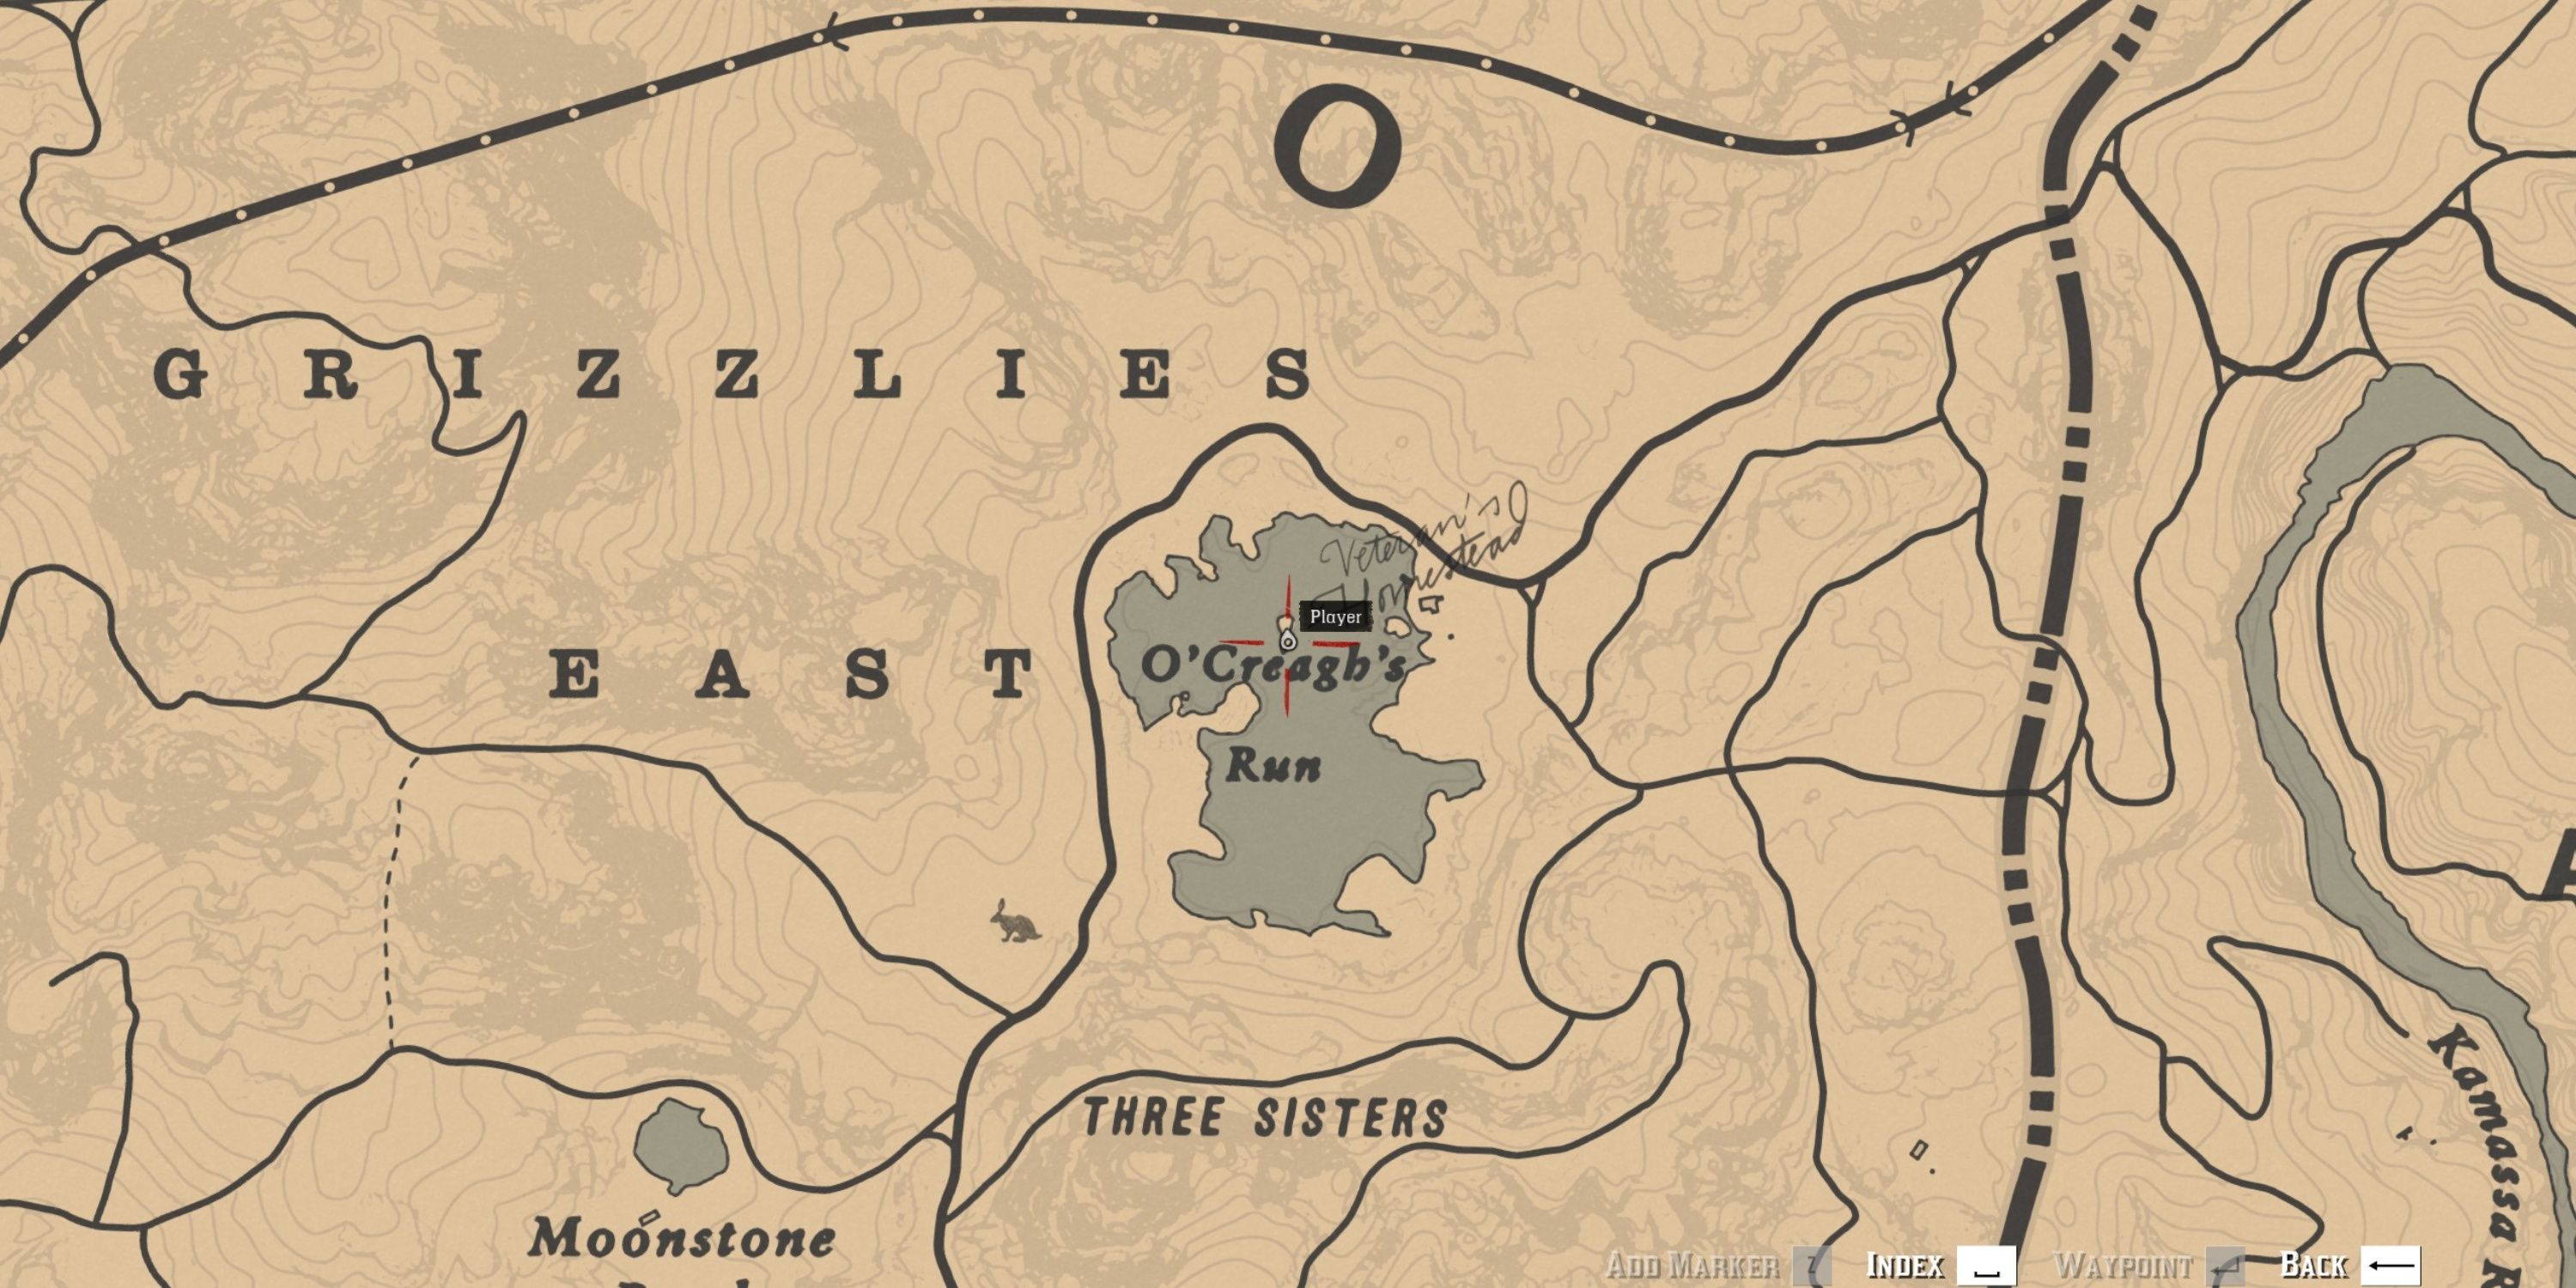
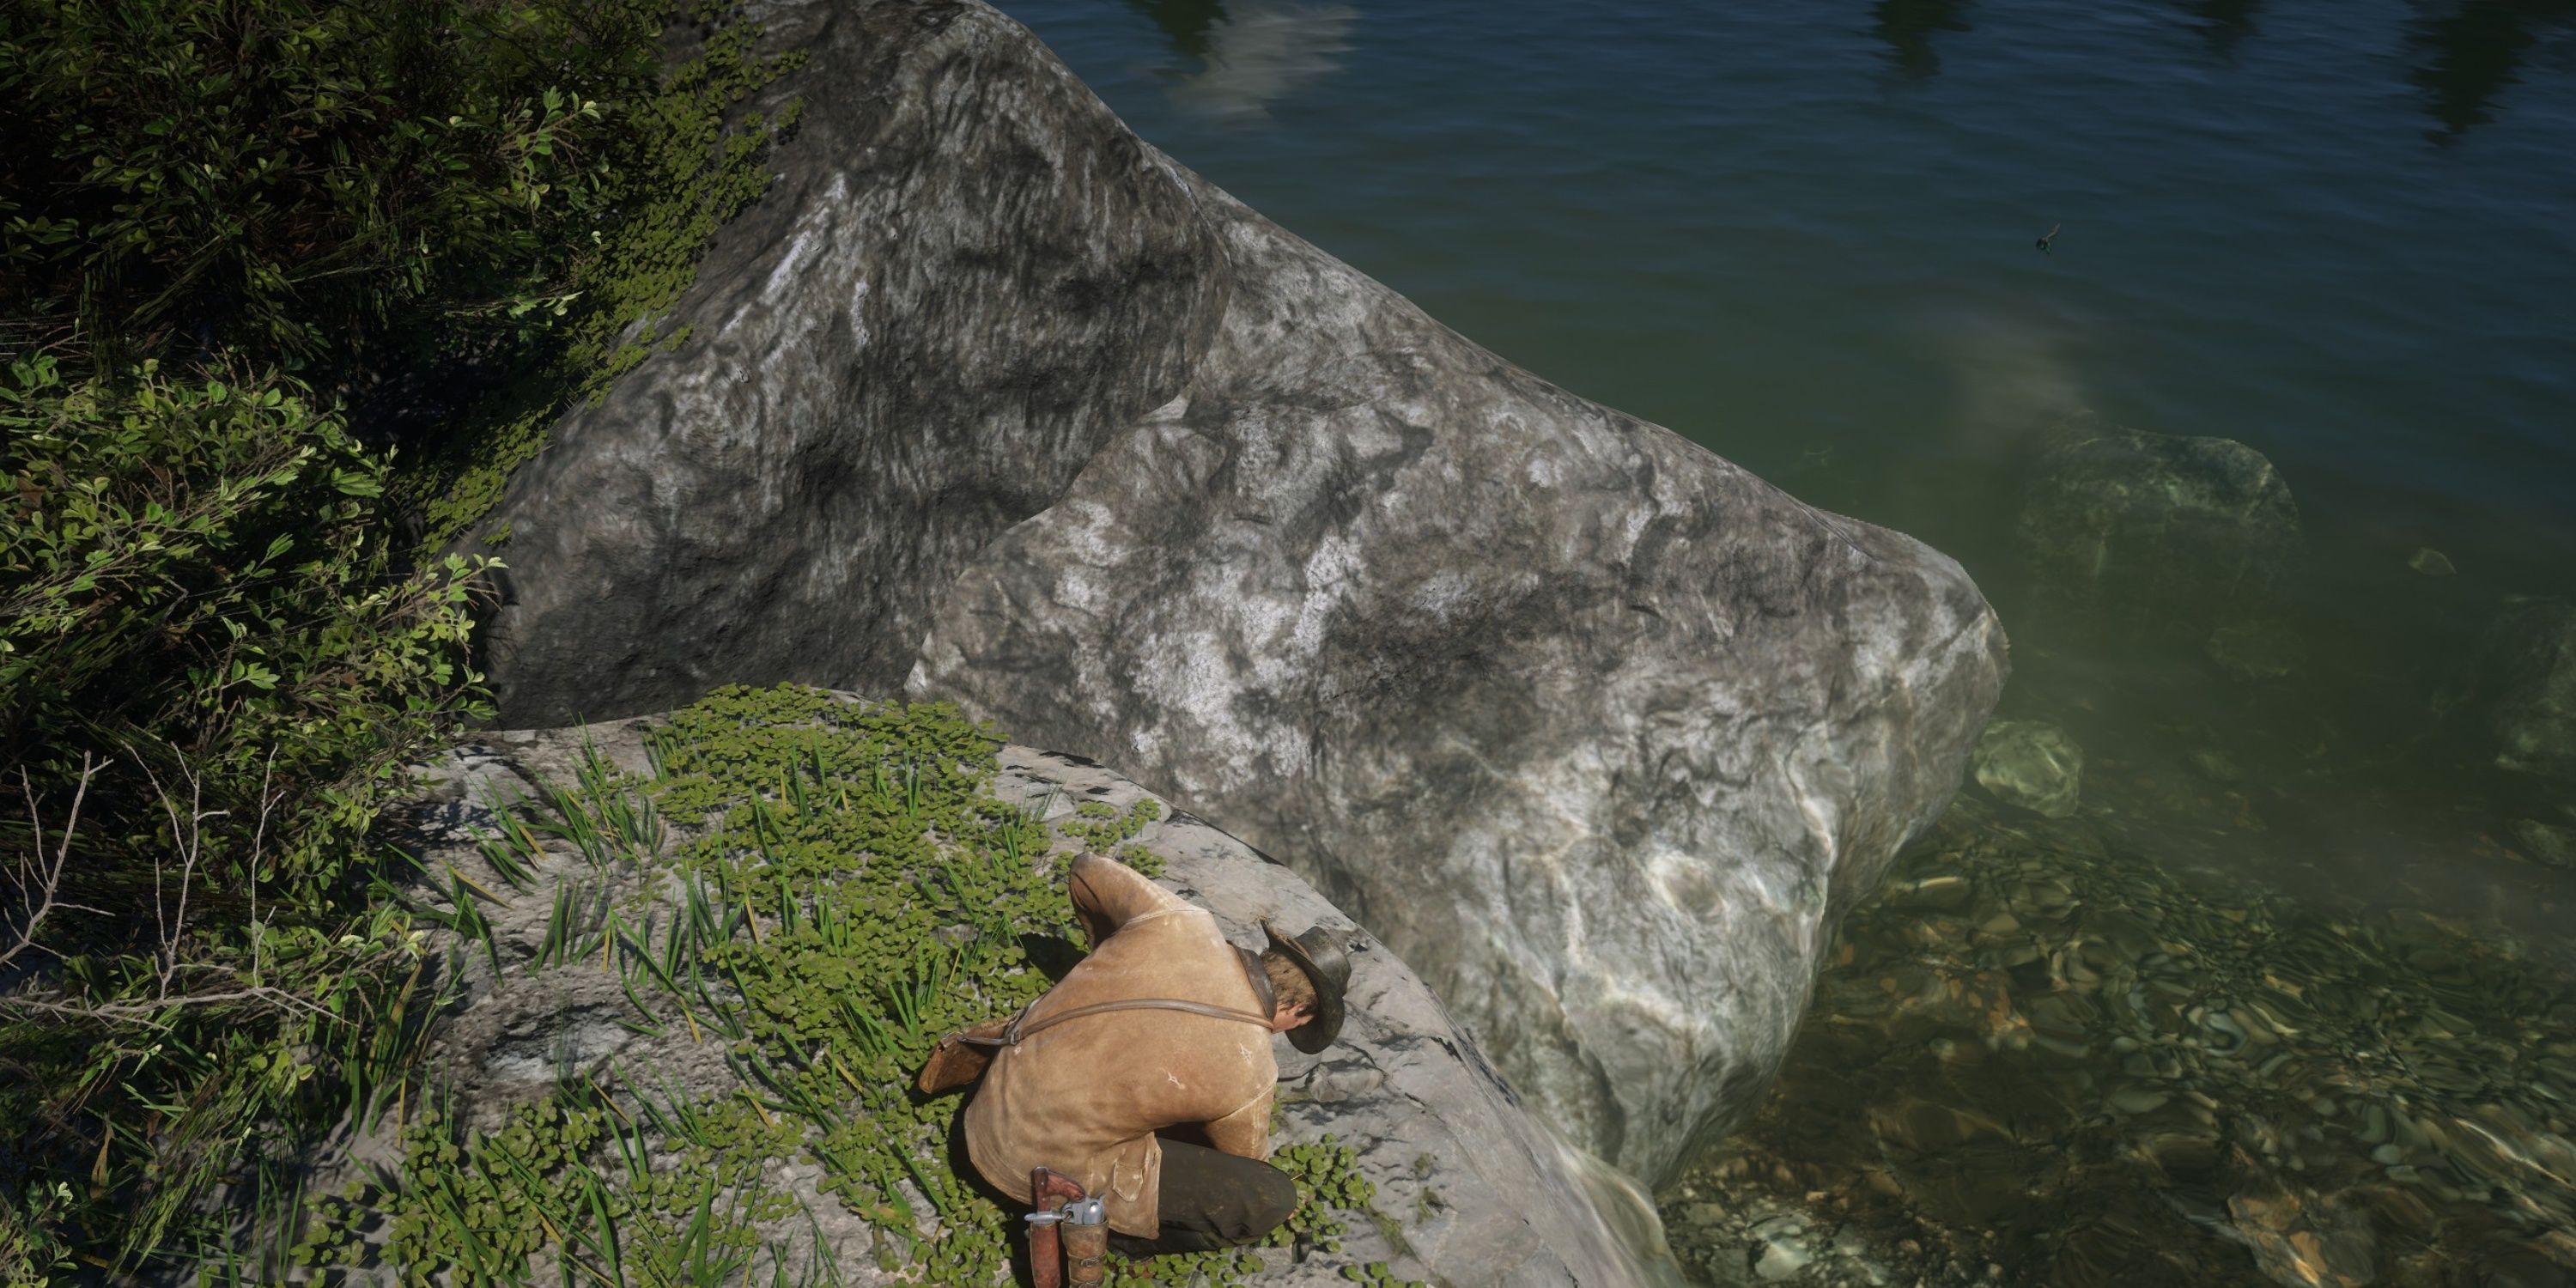
As a die-hard fan, I can tell you that the climactic Jack Hall Gang Map 3 is the concluding piece in the series! The key to cracking this map lies at the central isle in O’Creagh’s Run within the Grizzlies East. You can either swim or gallop your steed to reach the heart of the island. Upon arrival, search for the treasure you yearn for under a conspicuous rock situated in the north region of this very isle. Good luck on your adventure!
18. High Stakes Treasure Map 1
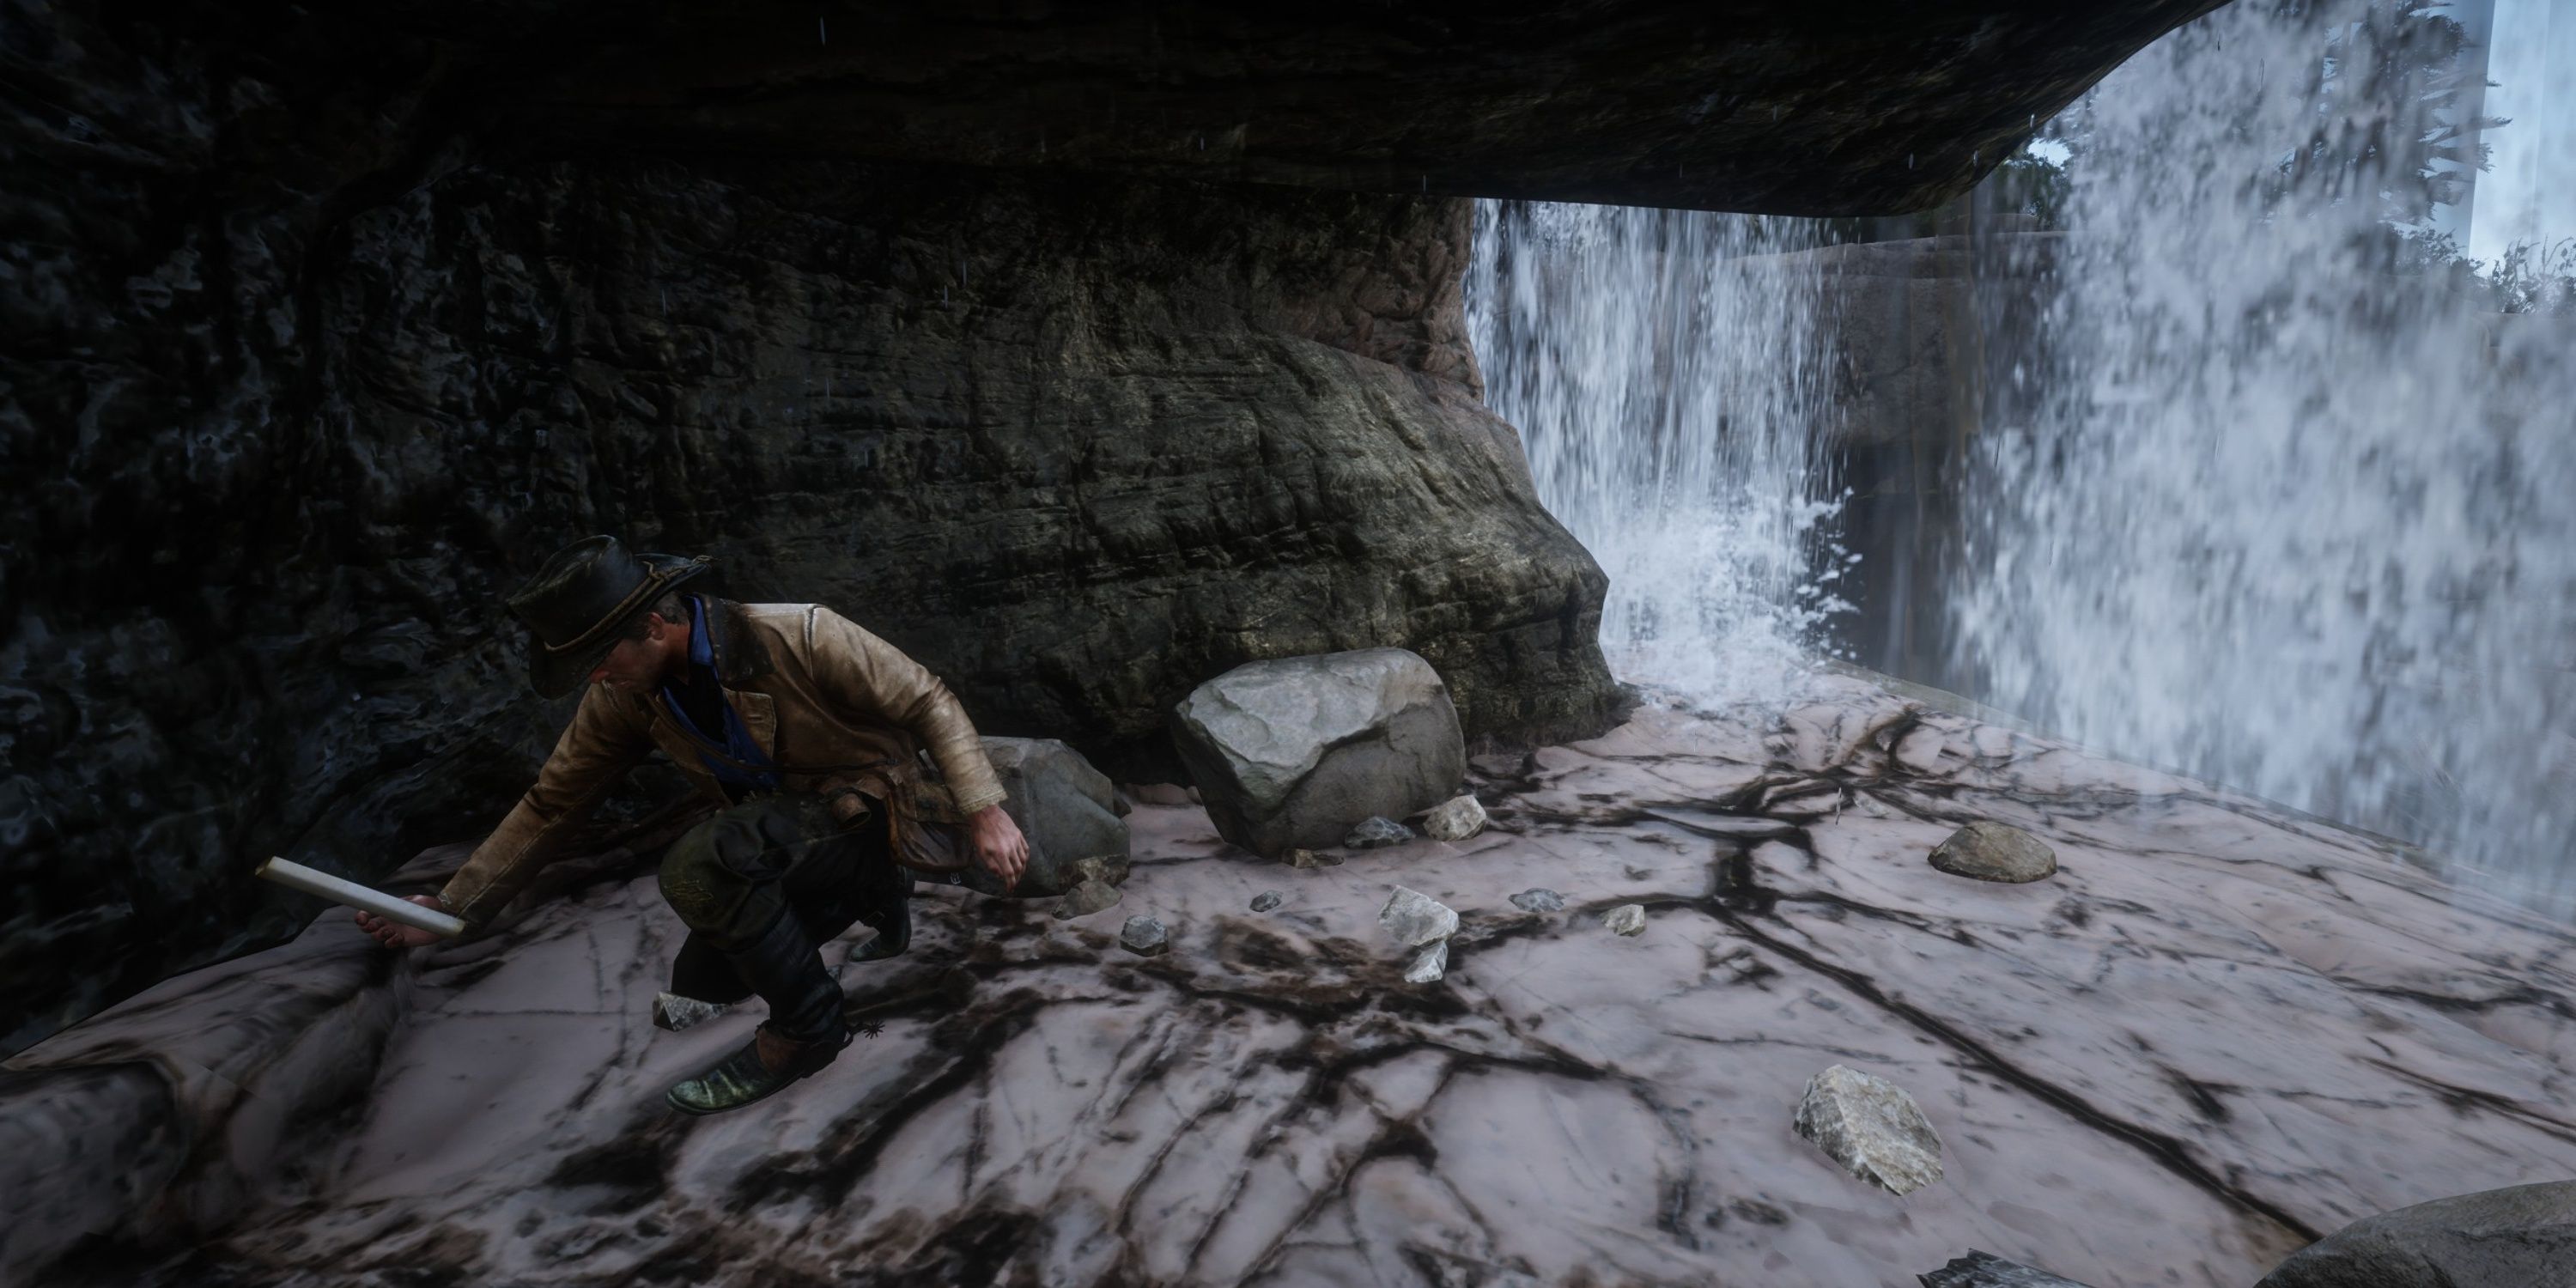
- Loot: $5, High Stakes Treasure Map 2
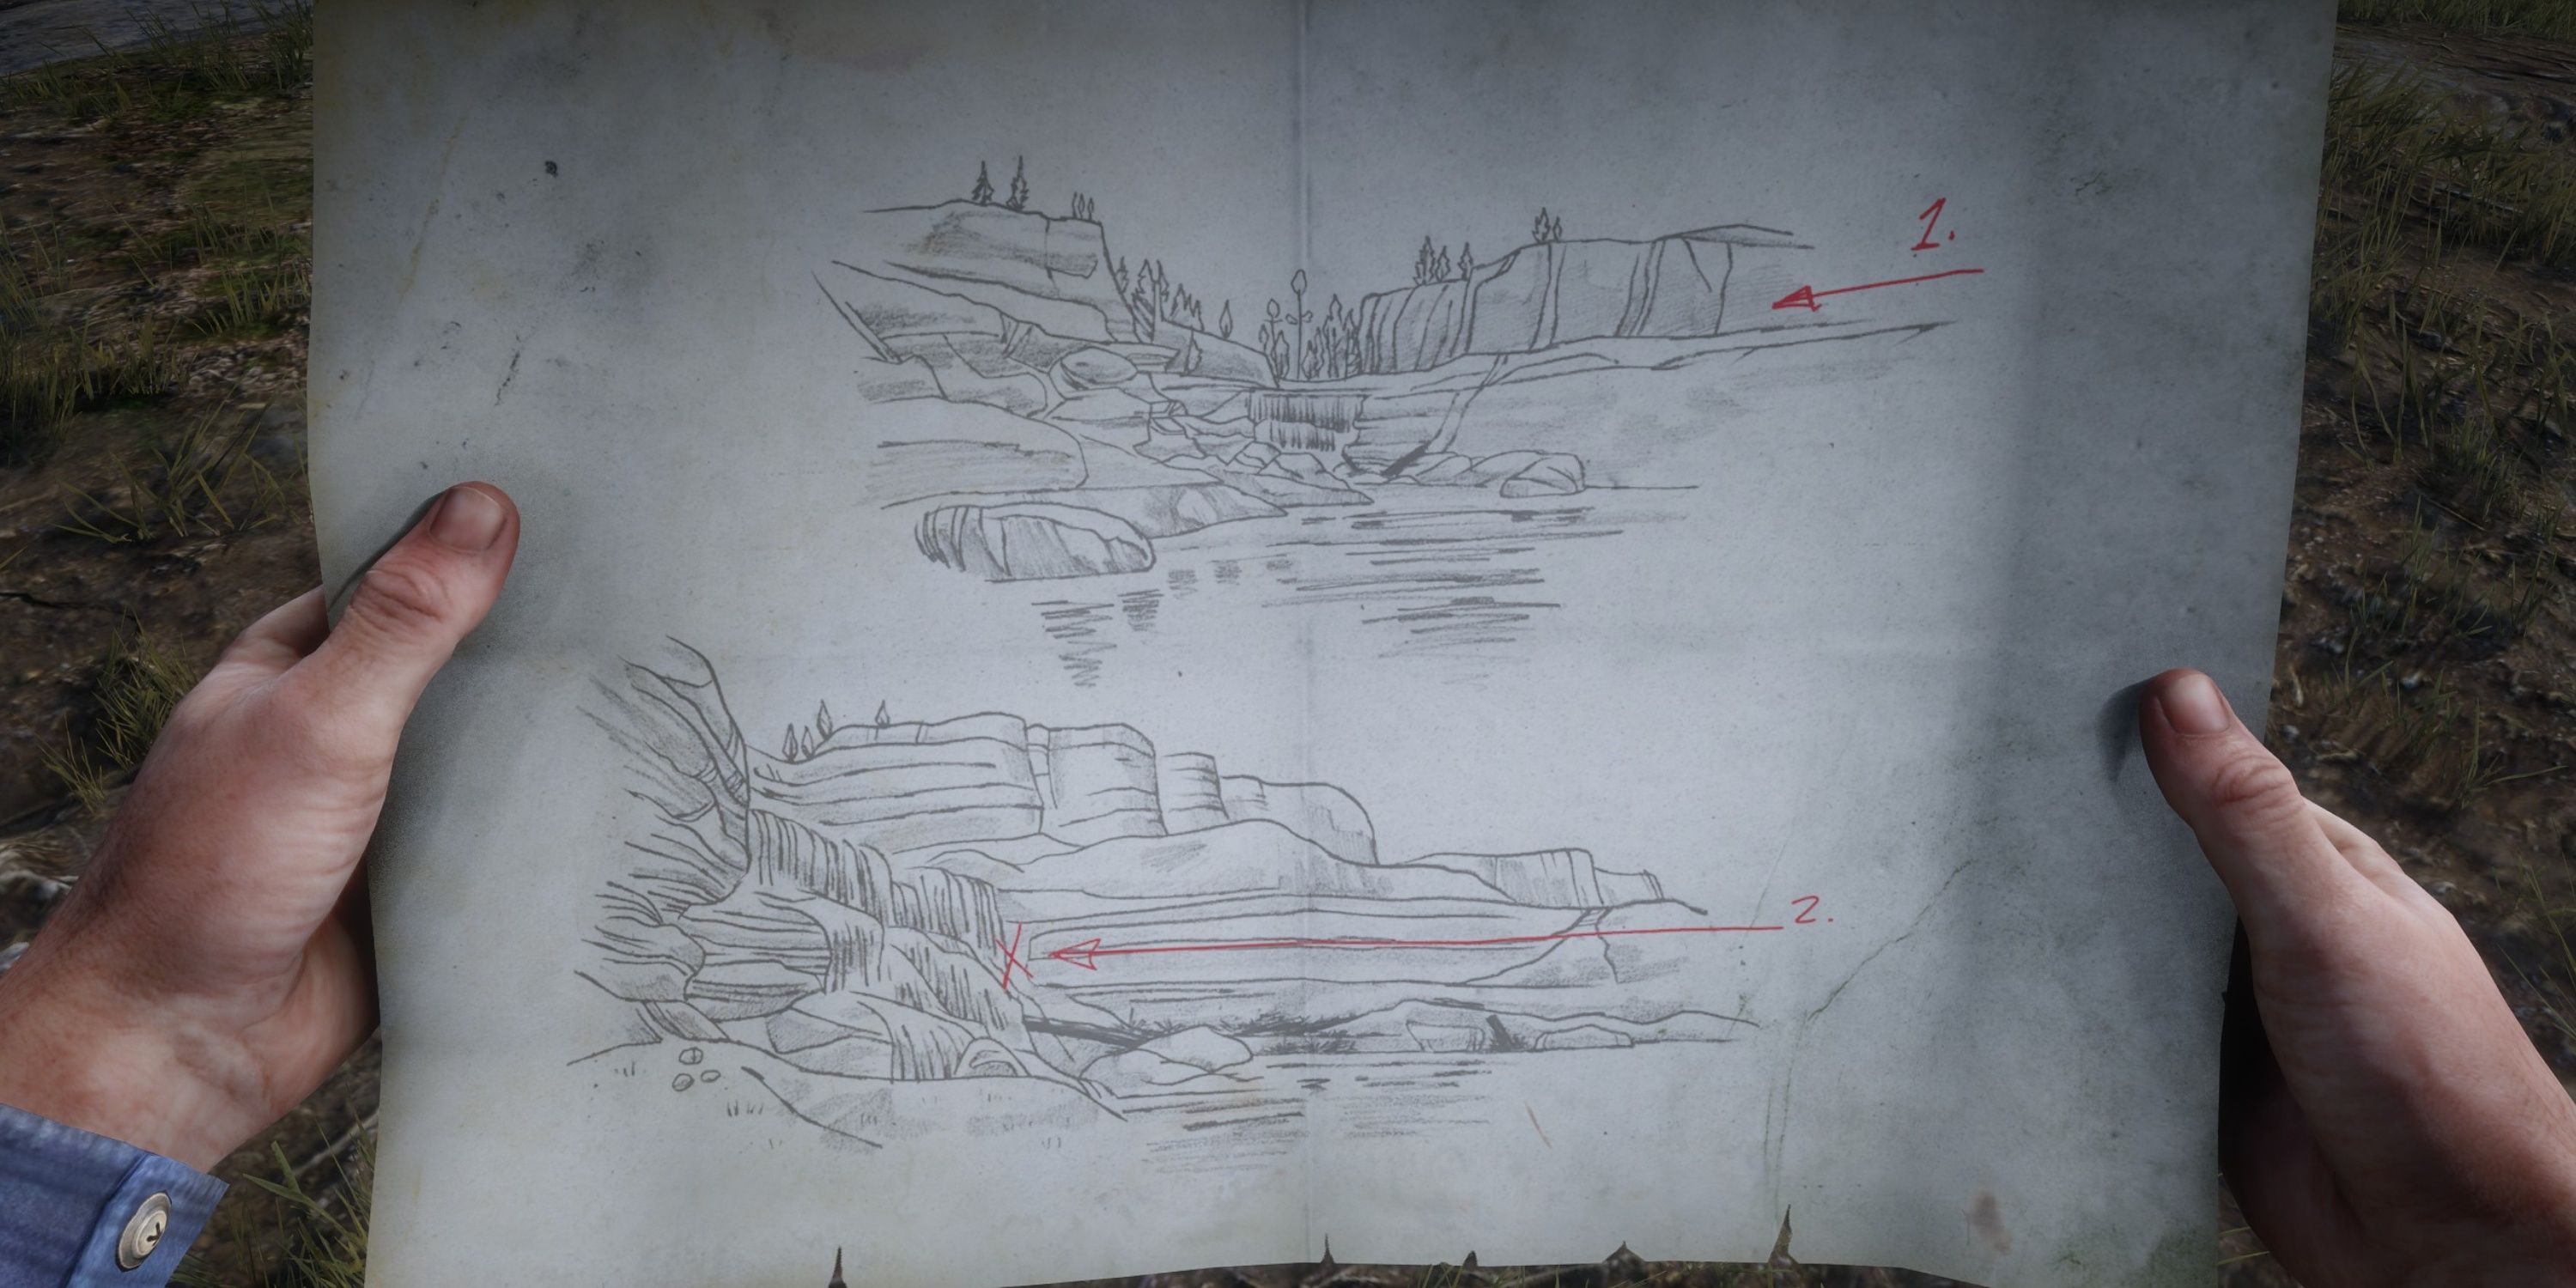
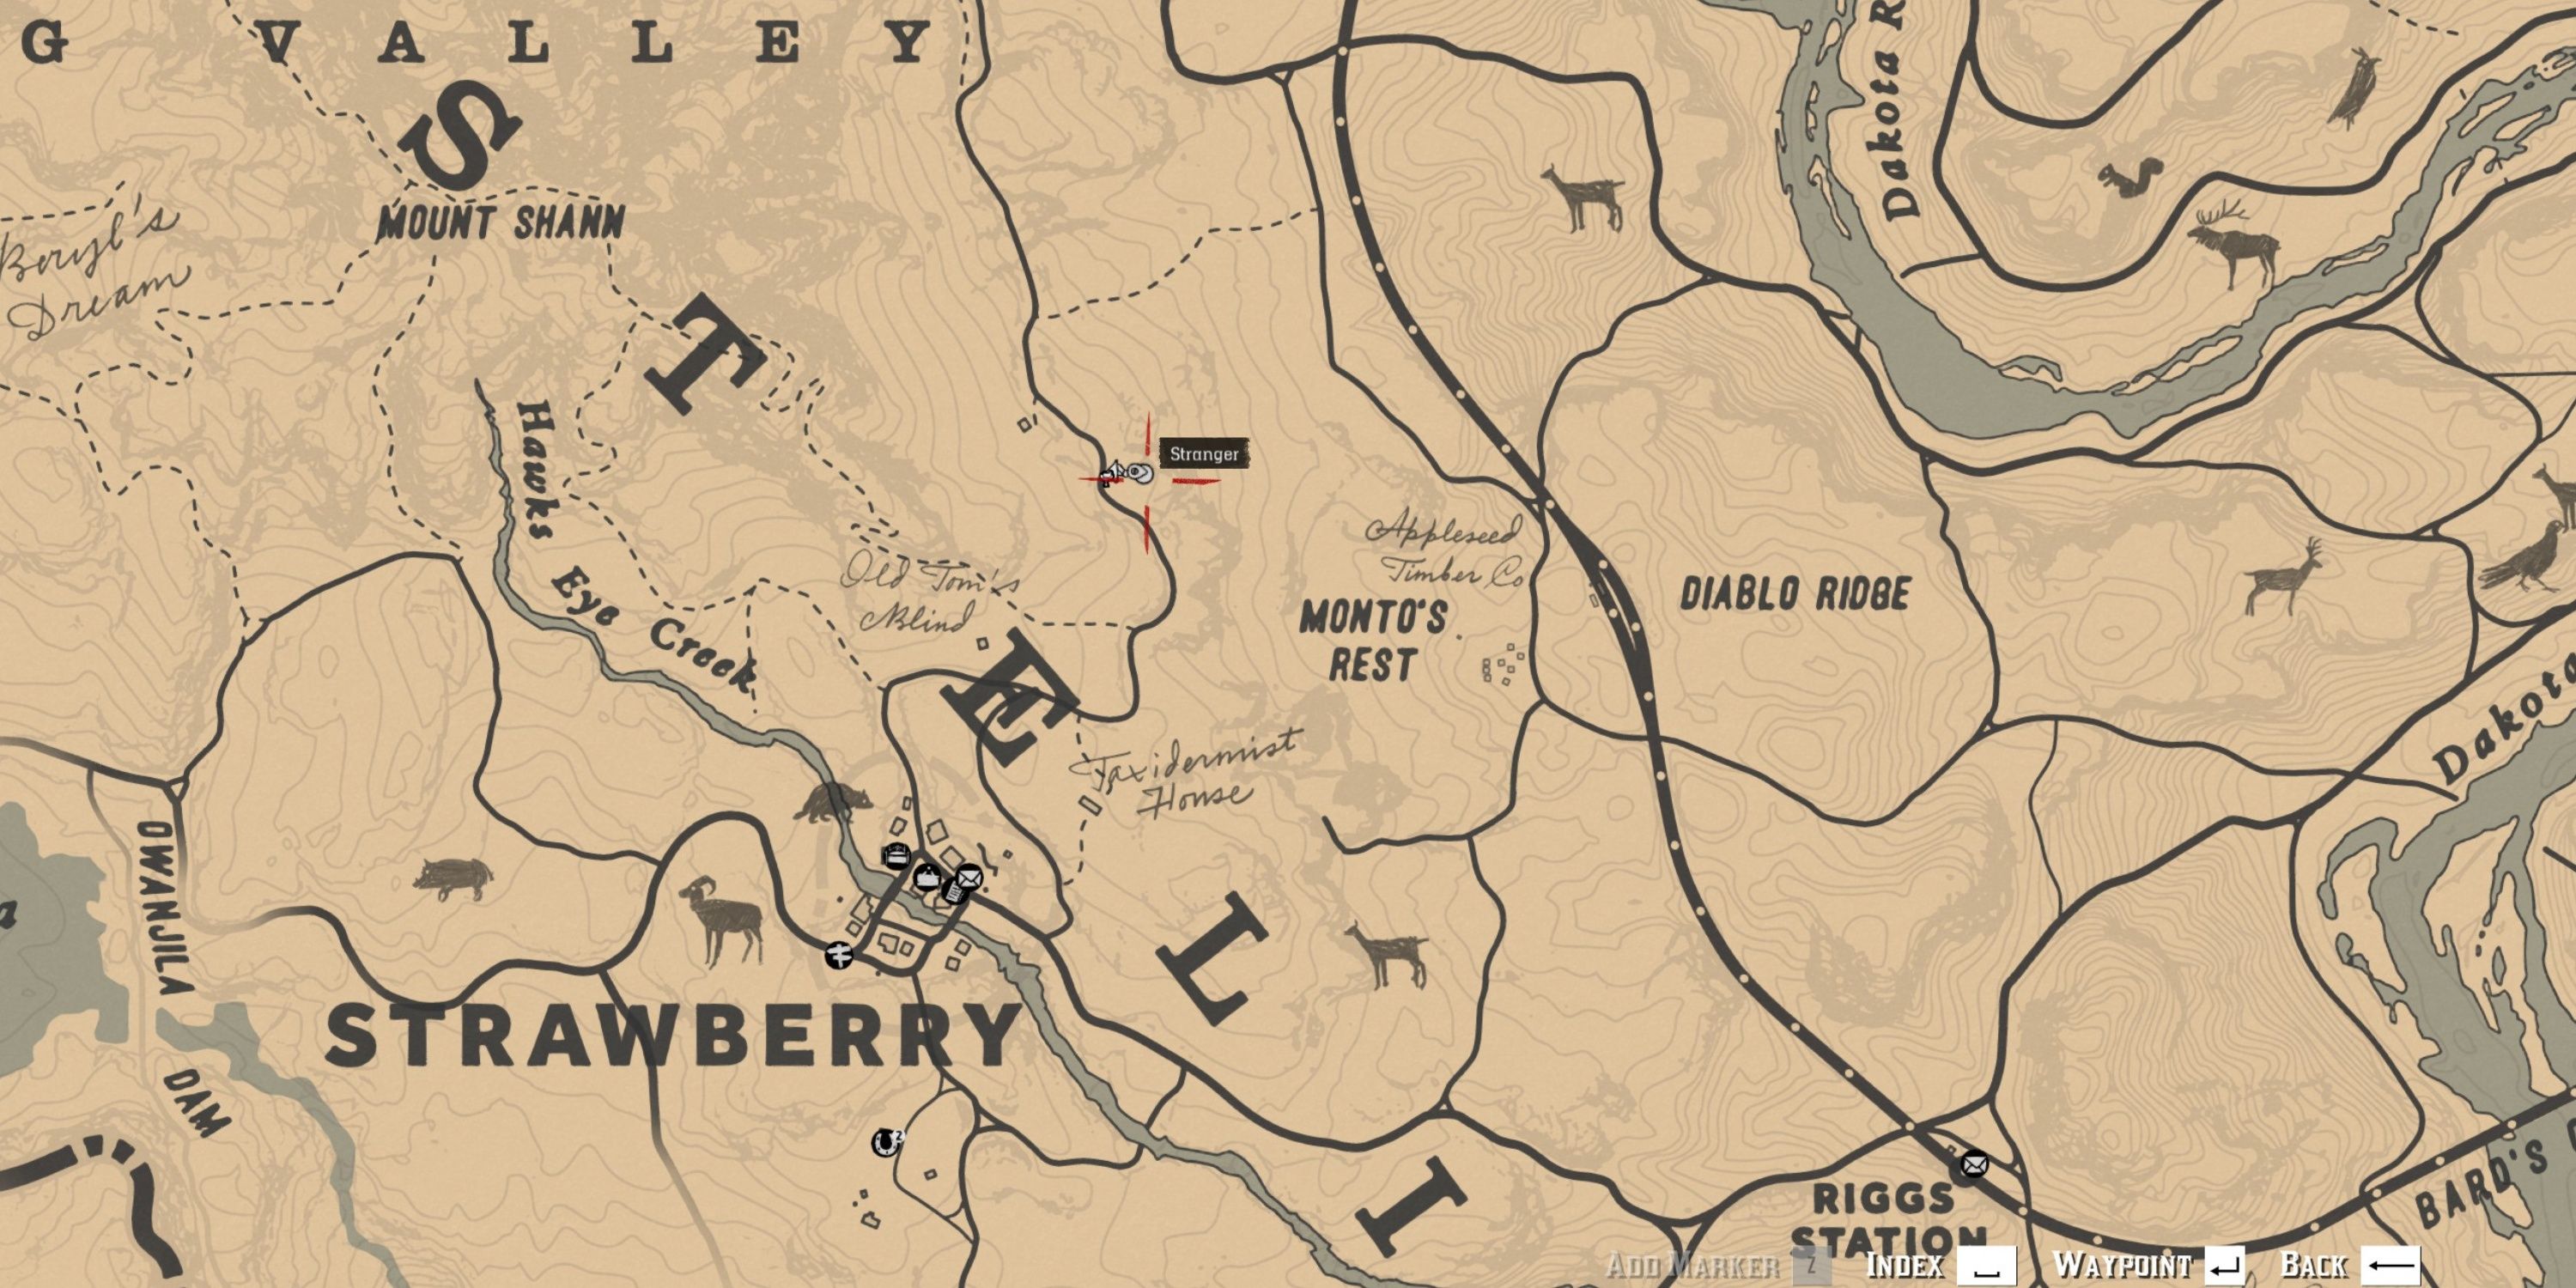
As I wandered the wilds of West Elizabeth, I stumbled upon an intriguing encounter near Lenora View, specifically at a blue shack up north from Strawberry. There, an old treasure hunter stood by a cliff’s edge, holding a mysterious map. To claim the High Stakes Treasure Map 1, I had to make a choice – either engage him in conversation and snatch it from his grasp during our interaction, or wait for him to die (hopefully naturally) and loot the treasure from his body. The thrill of the hunt was intense!
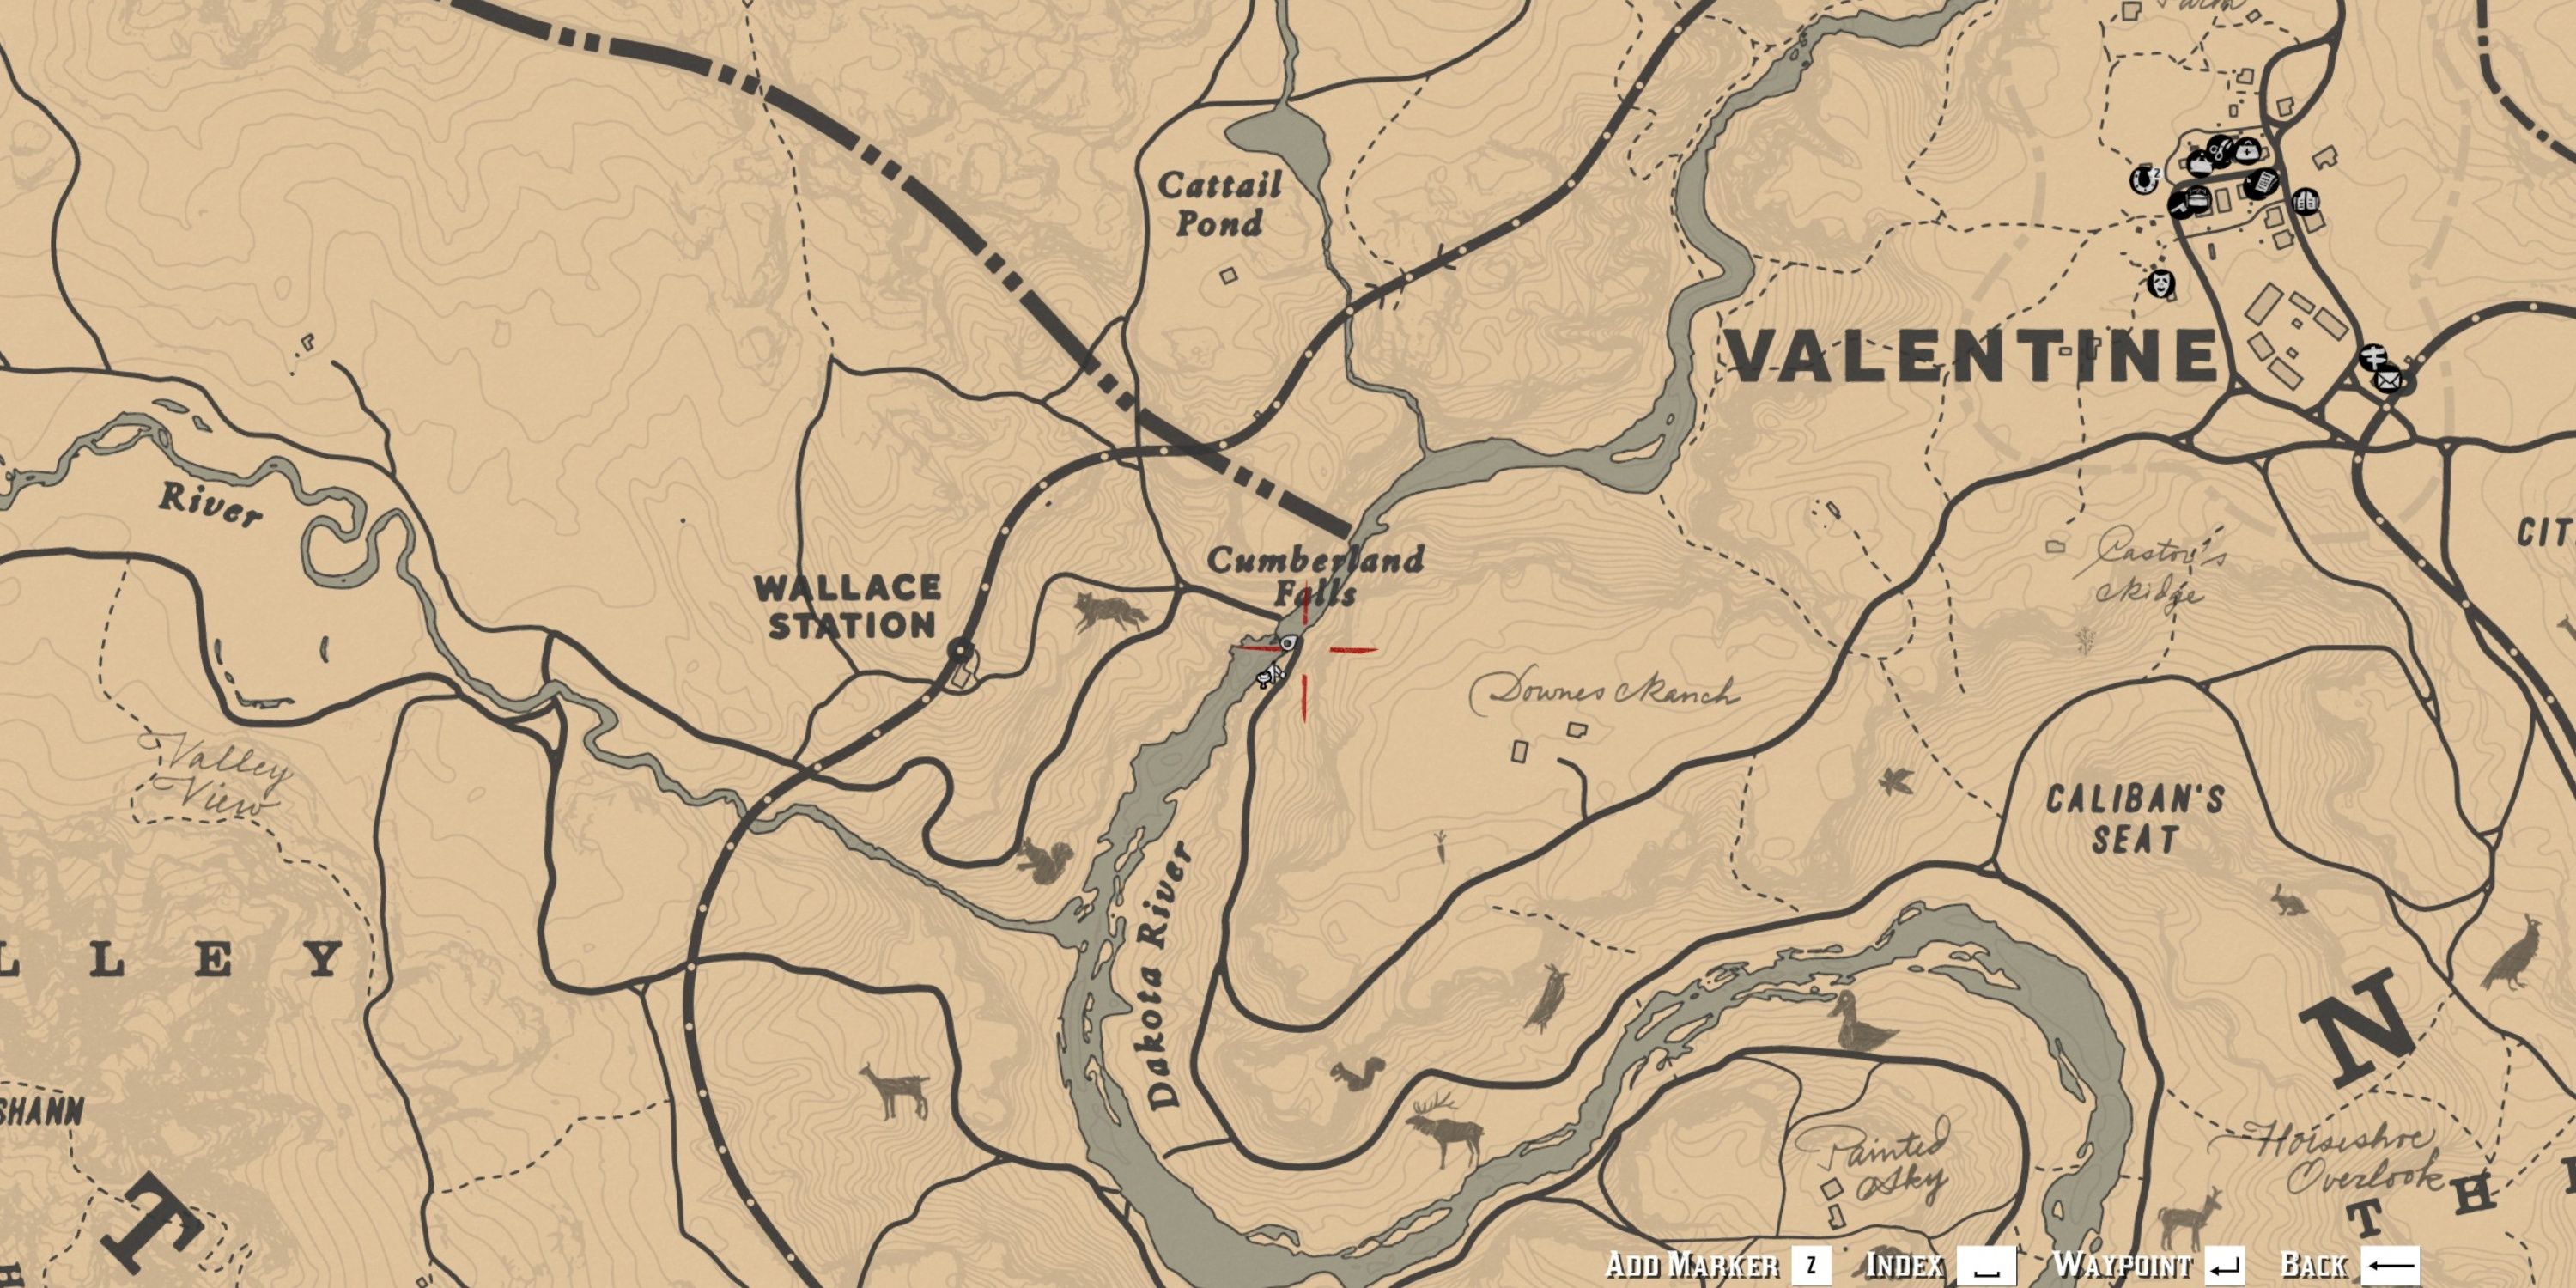
After someone claims the First High-Value Treasure Map, navigate your way to Cumberland Falls, situated east of Wallace Station and west of Downes Ranch. To continue your quest for the treasure, simply go behind the waterfall at Cumberland Falls, where you’ll find the Second High Stakes Treasure Map.
17. High Stakes Treasure Map 2
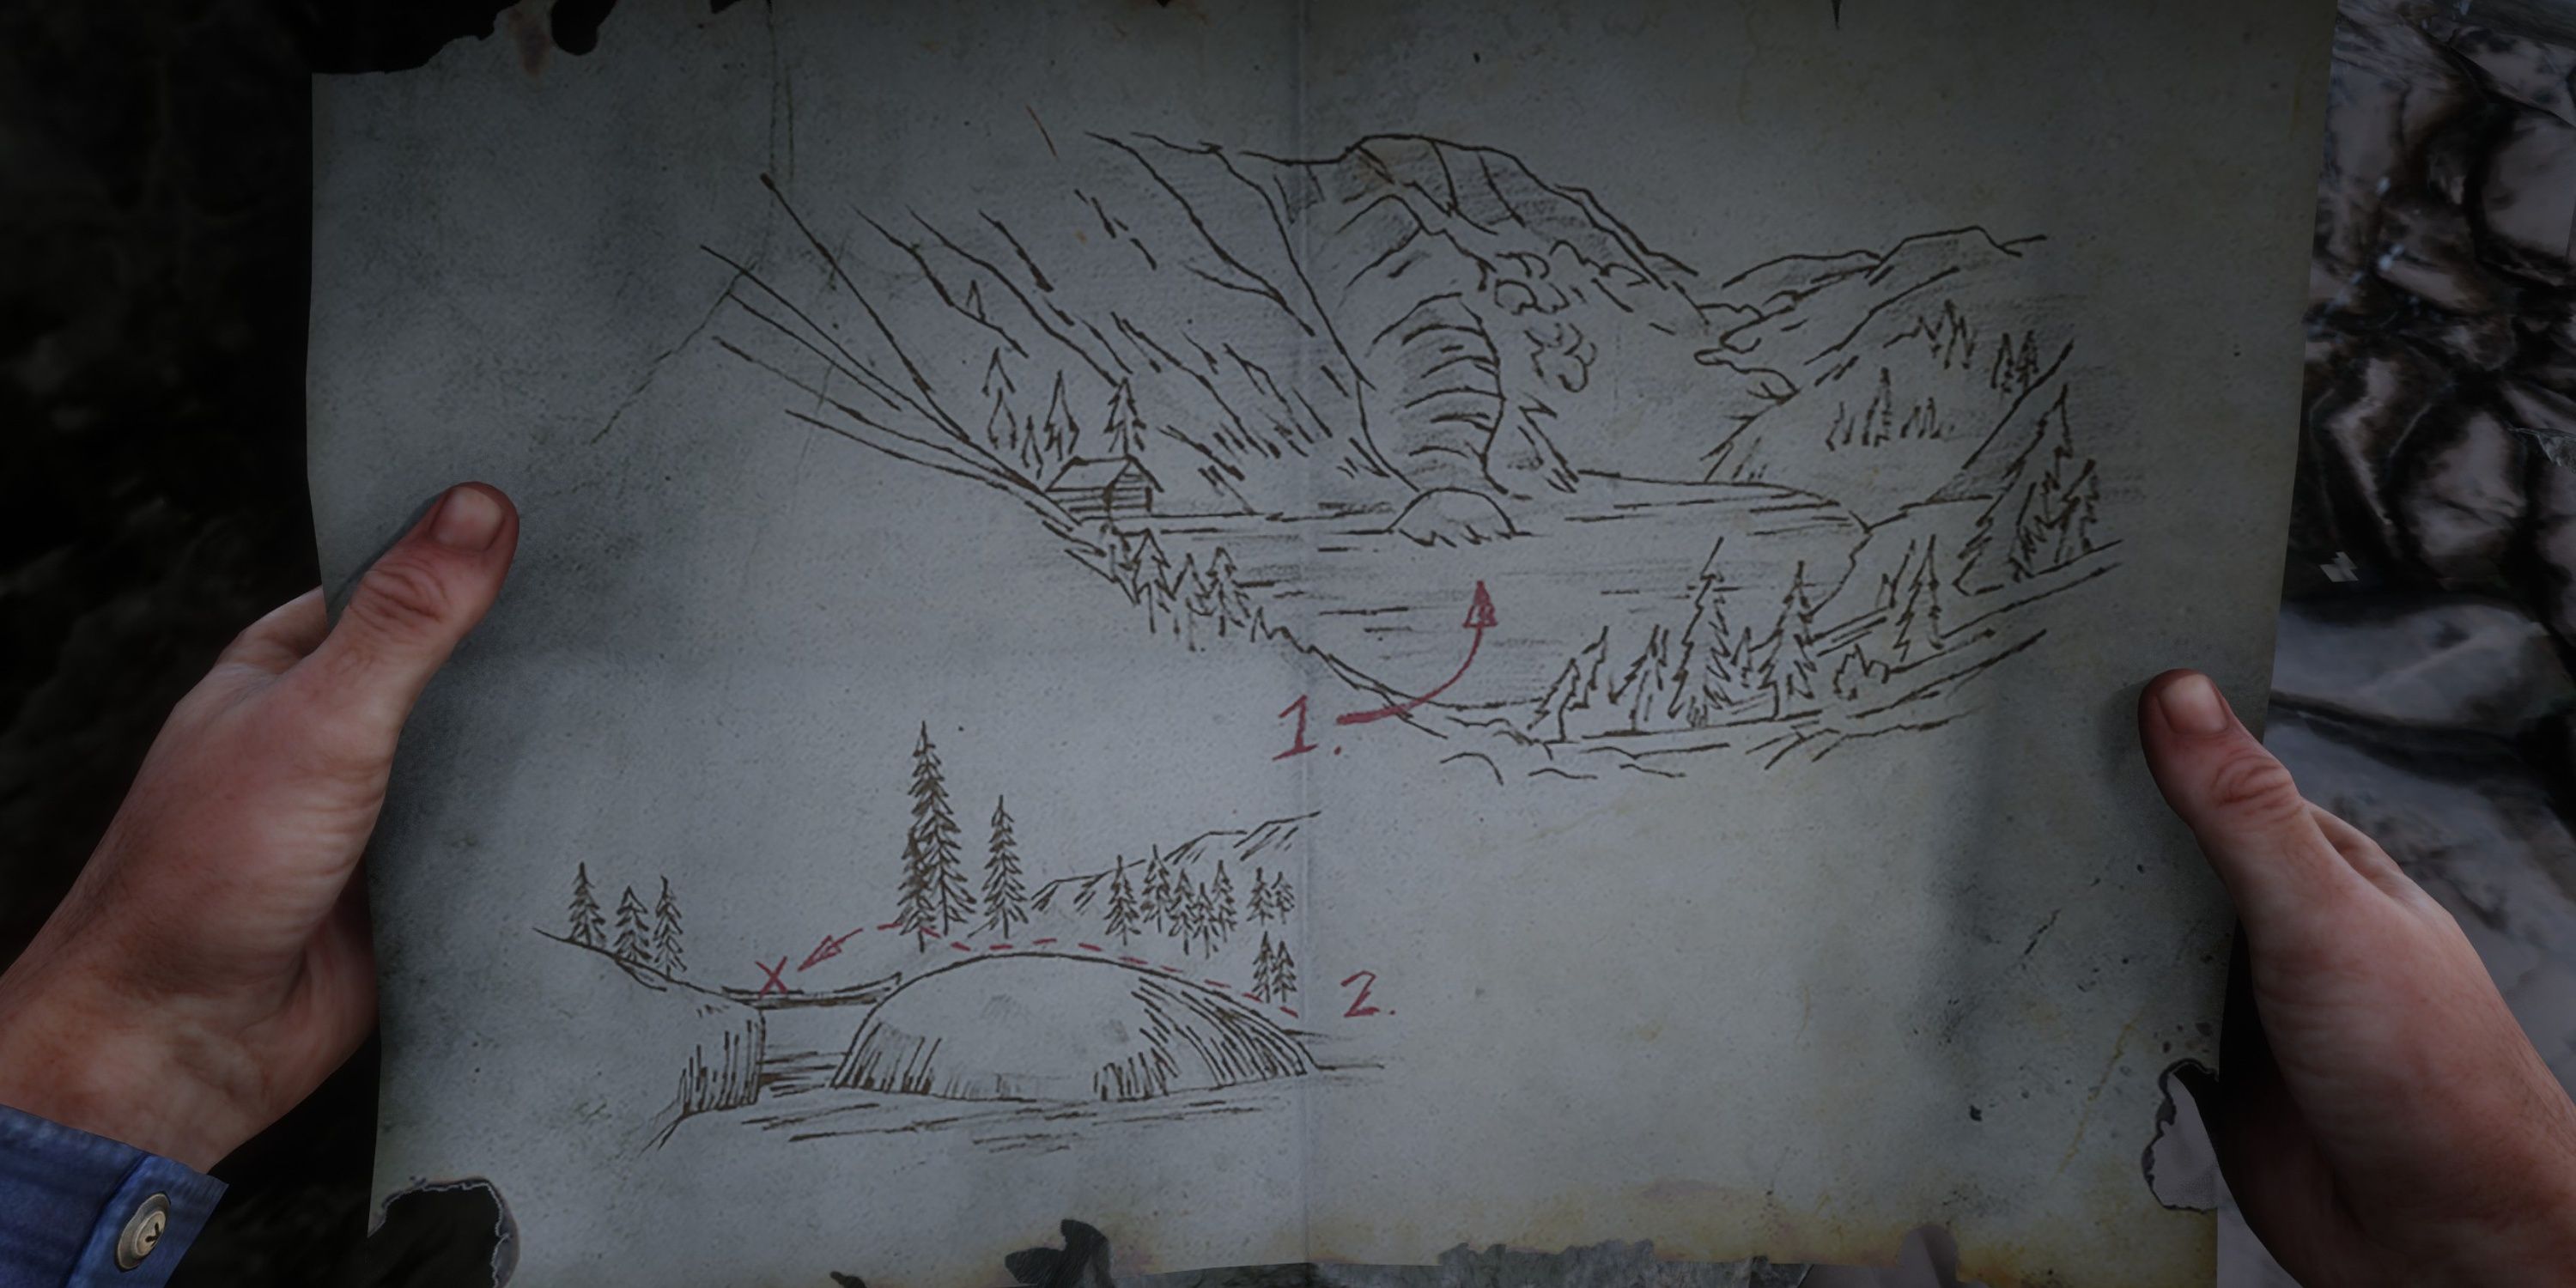

- Loot: $15, High Stakes Treasure Map 3
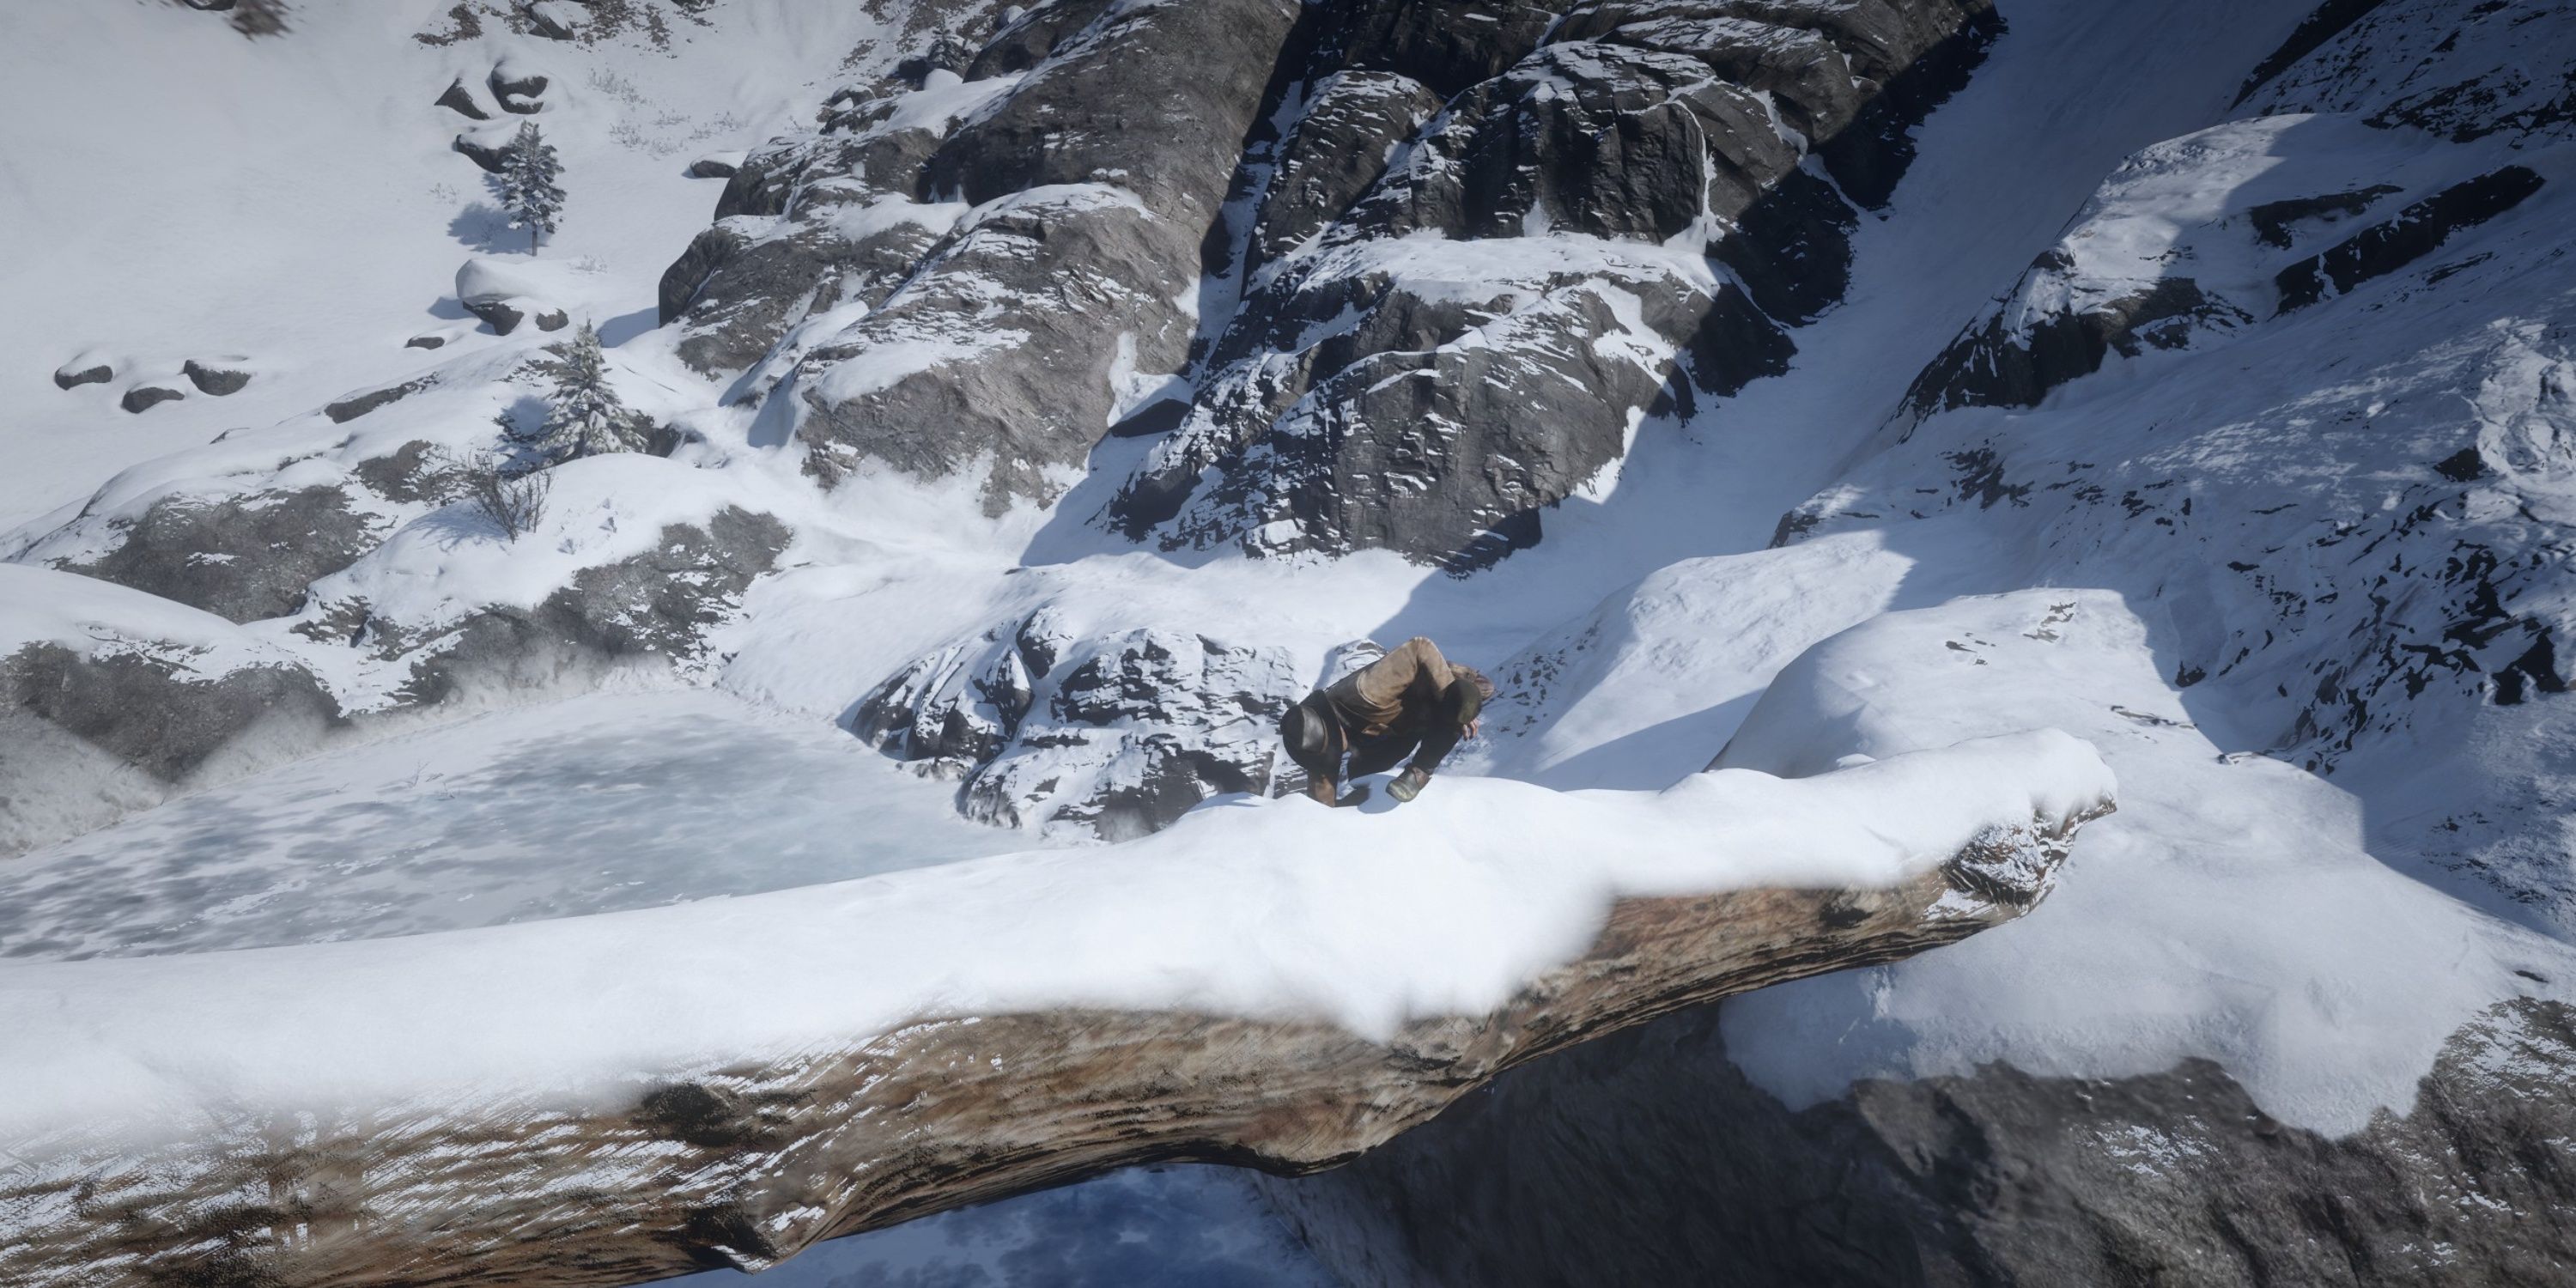
After securing the High Stakes Treasure Map 2, head towards Barrow Lagoon, located in the northern part of Grizzlies West, Ambarino. To retrieve the treasure, ascend the fallen tree that links the two rock formations on the frozen lake’s summit. The treasure is hidden inside a hole within this tree bridge itself.
16. High Stakes Treasure Map 3

- Loot: 3x Gold Bars
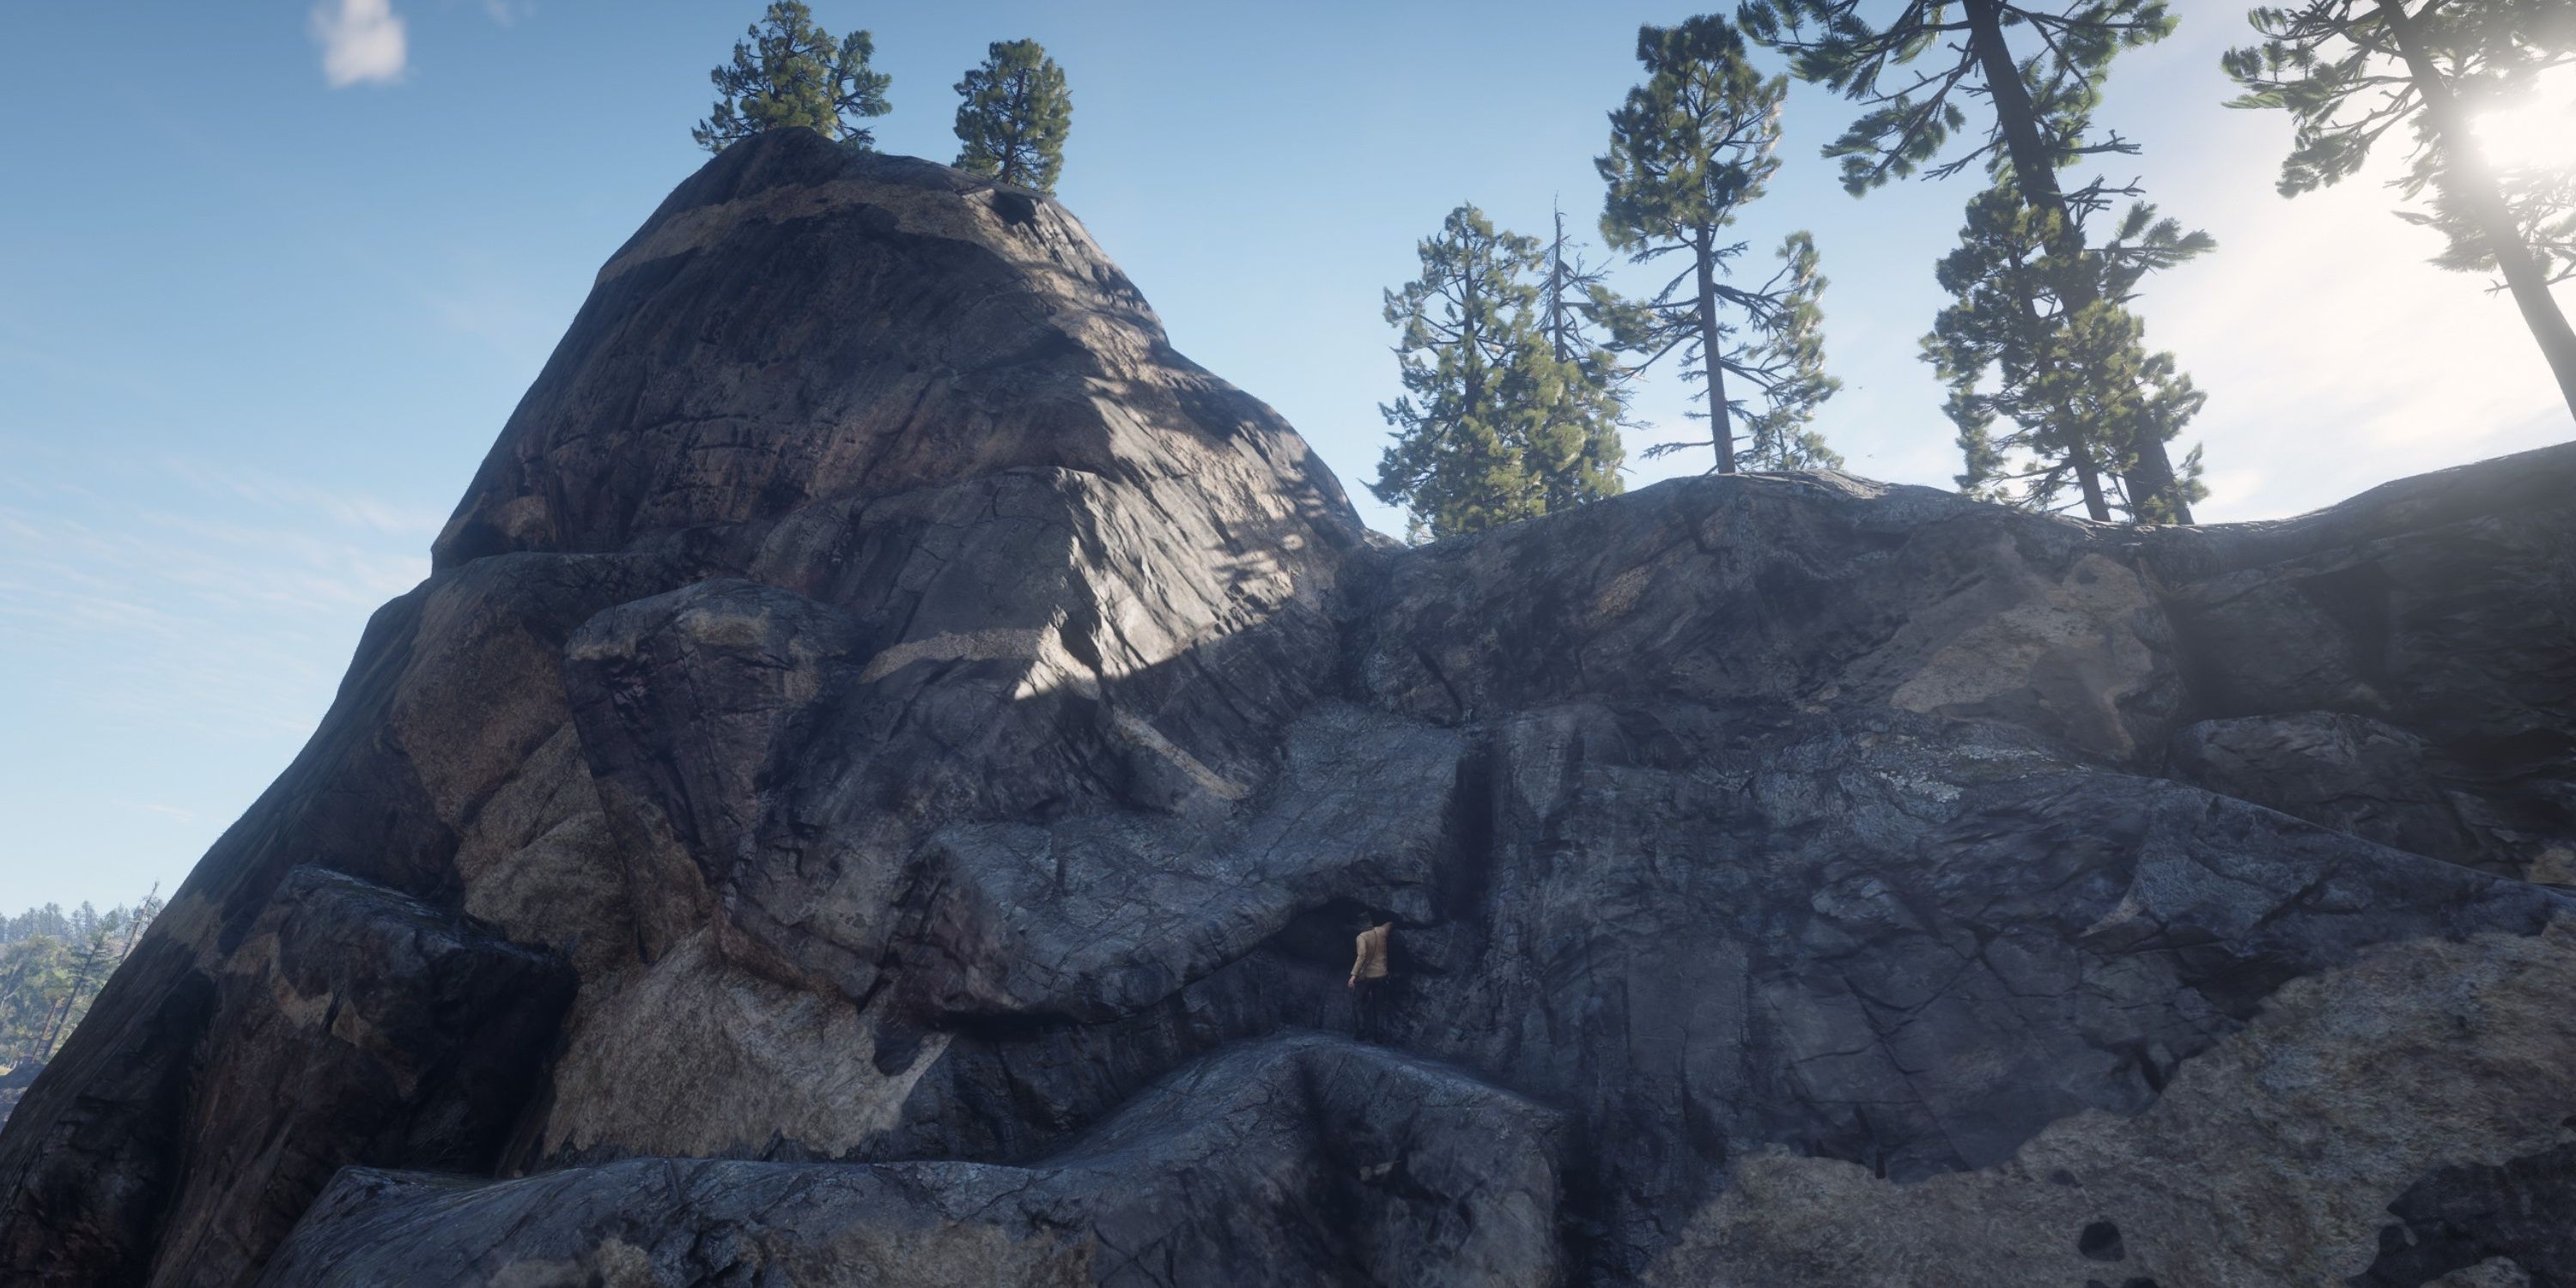
In summary, the ultimate High-Risk Treasure Map is unveiled upon finishing High-Risk Treasure Map 2. This secret location lies merely a brief walk north of Fort Wallace nestled in Cumberland Forest. To reach the treasure, players should veer around the cliff and traverse the rocky path beneath it. The final prize will be hidden within a wall crevice. However, remember to tread carefully as the trail can be quite steep, which might cause Arthur to lose his footing and possibly tumble down.
15. Landmarks of Riches Map 1

- Loot: Gold Earring, Silver Earring, Landmarks of Riches Map 2
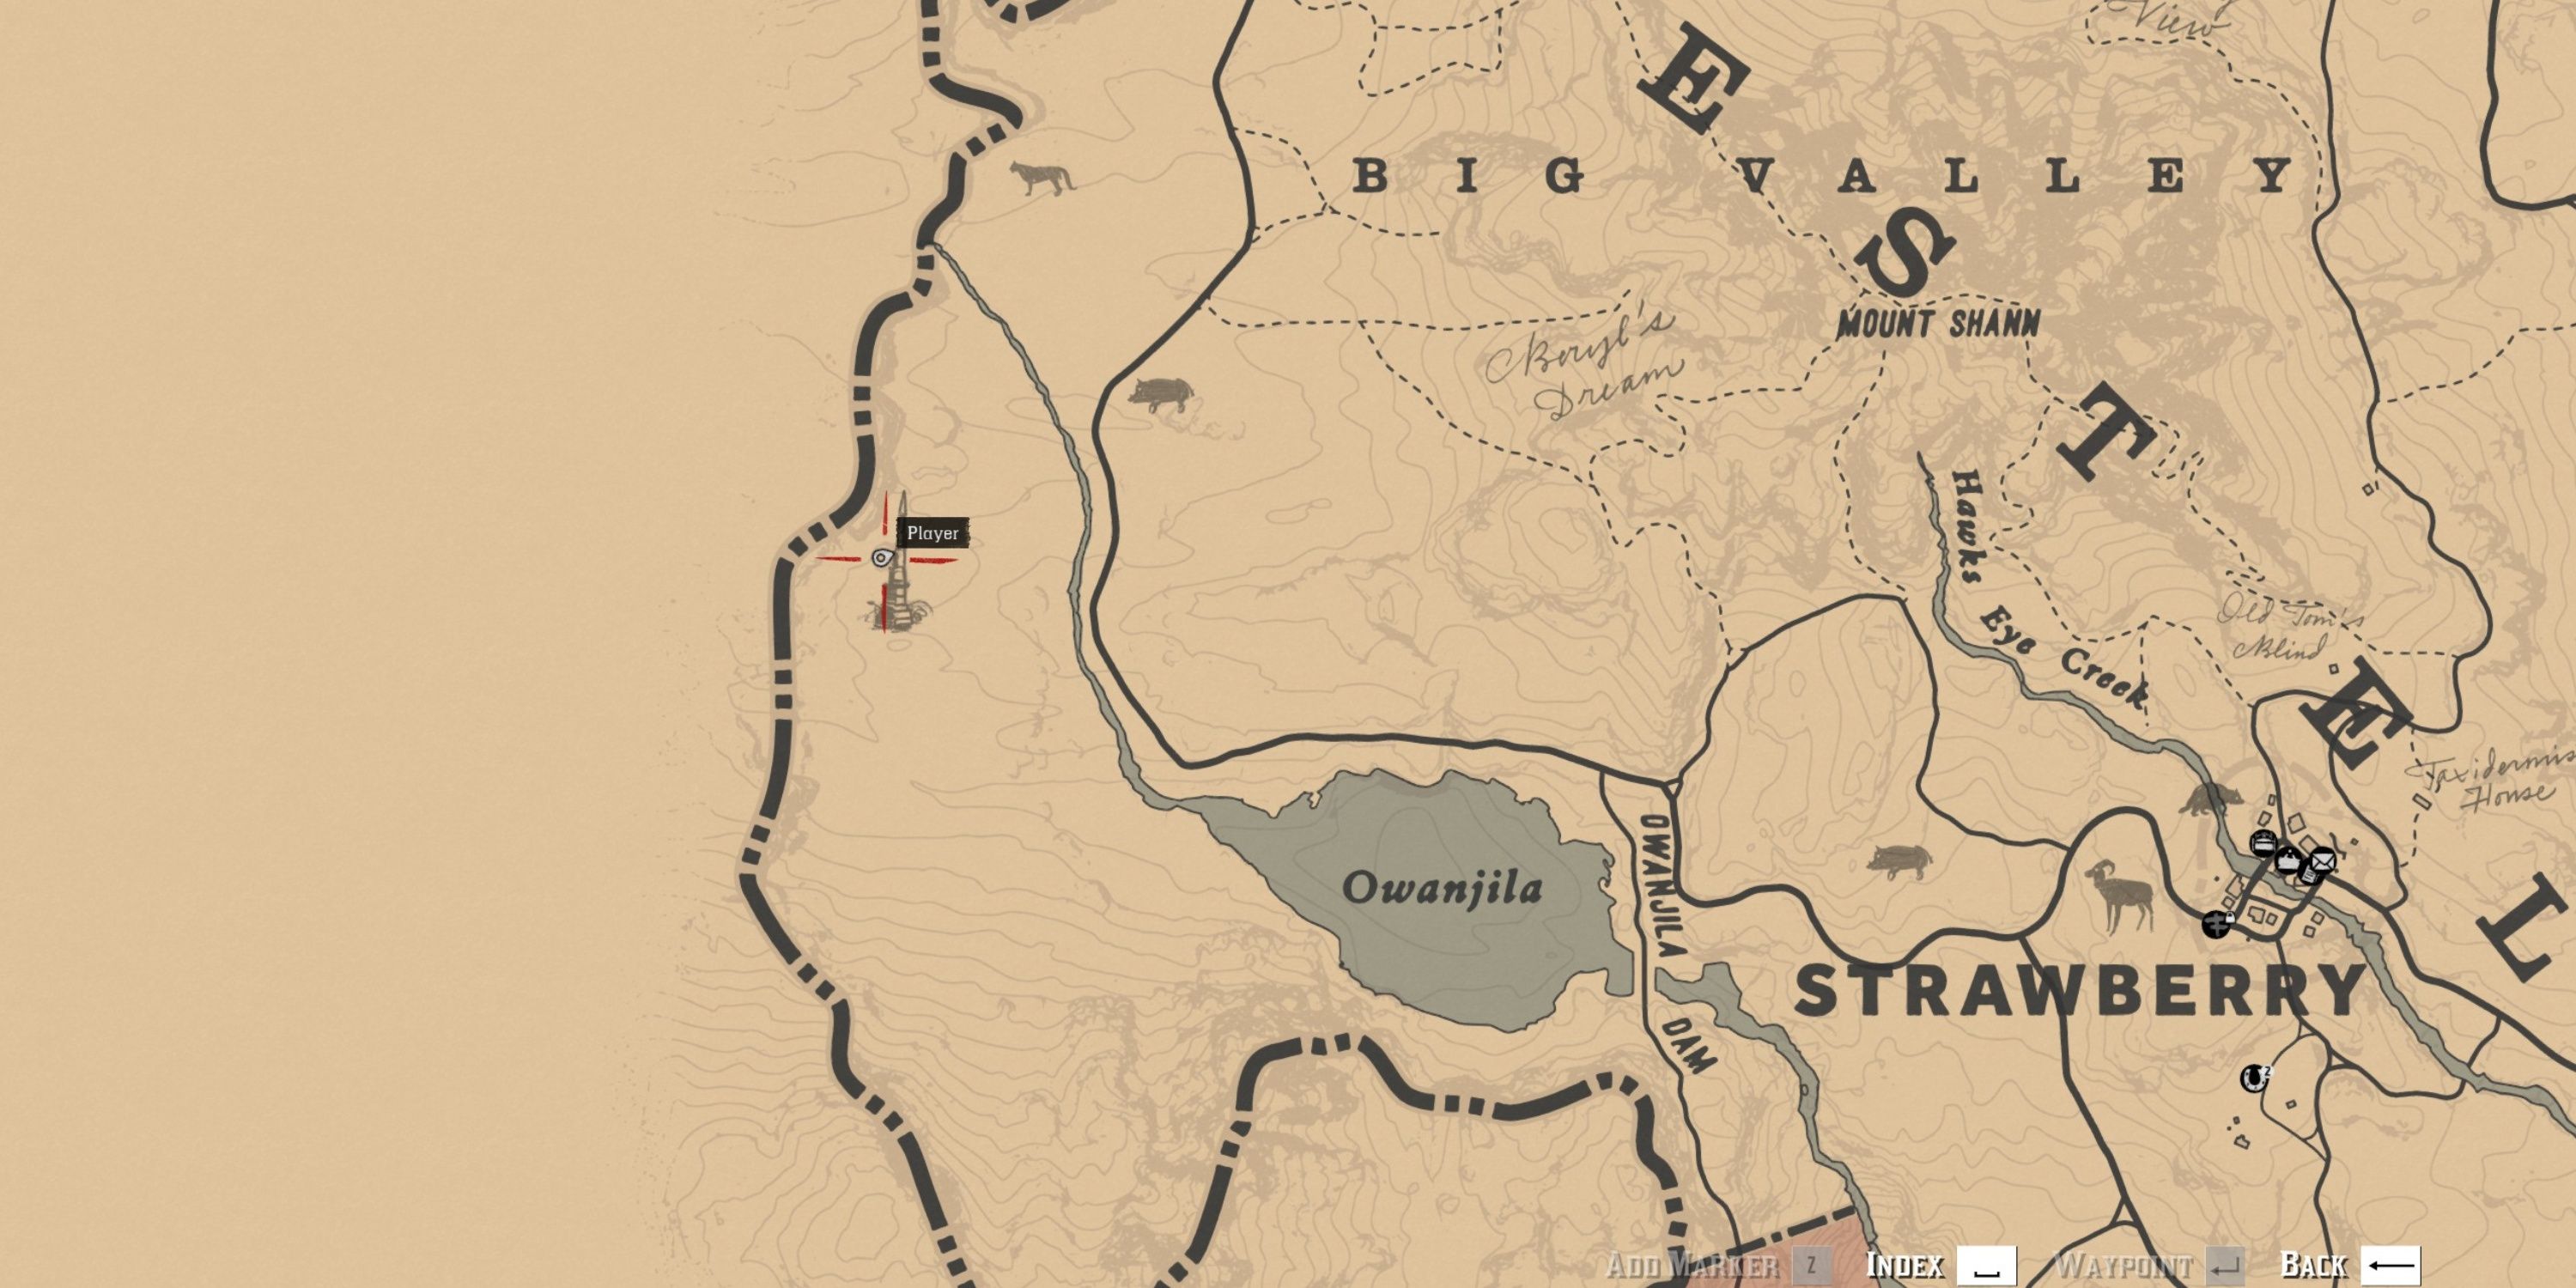
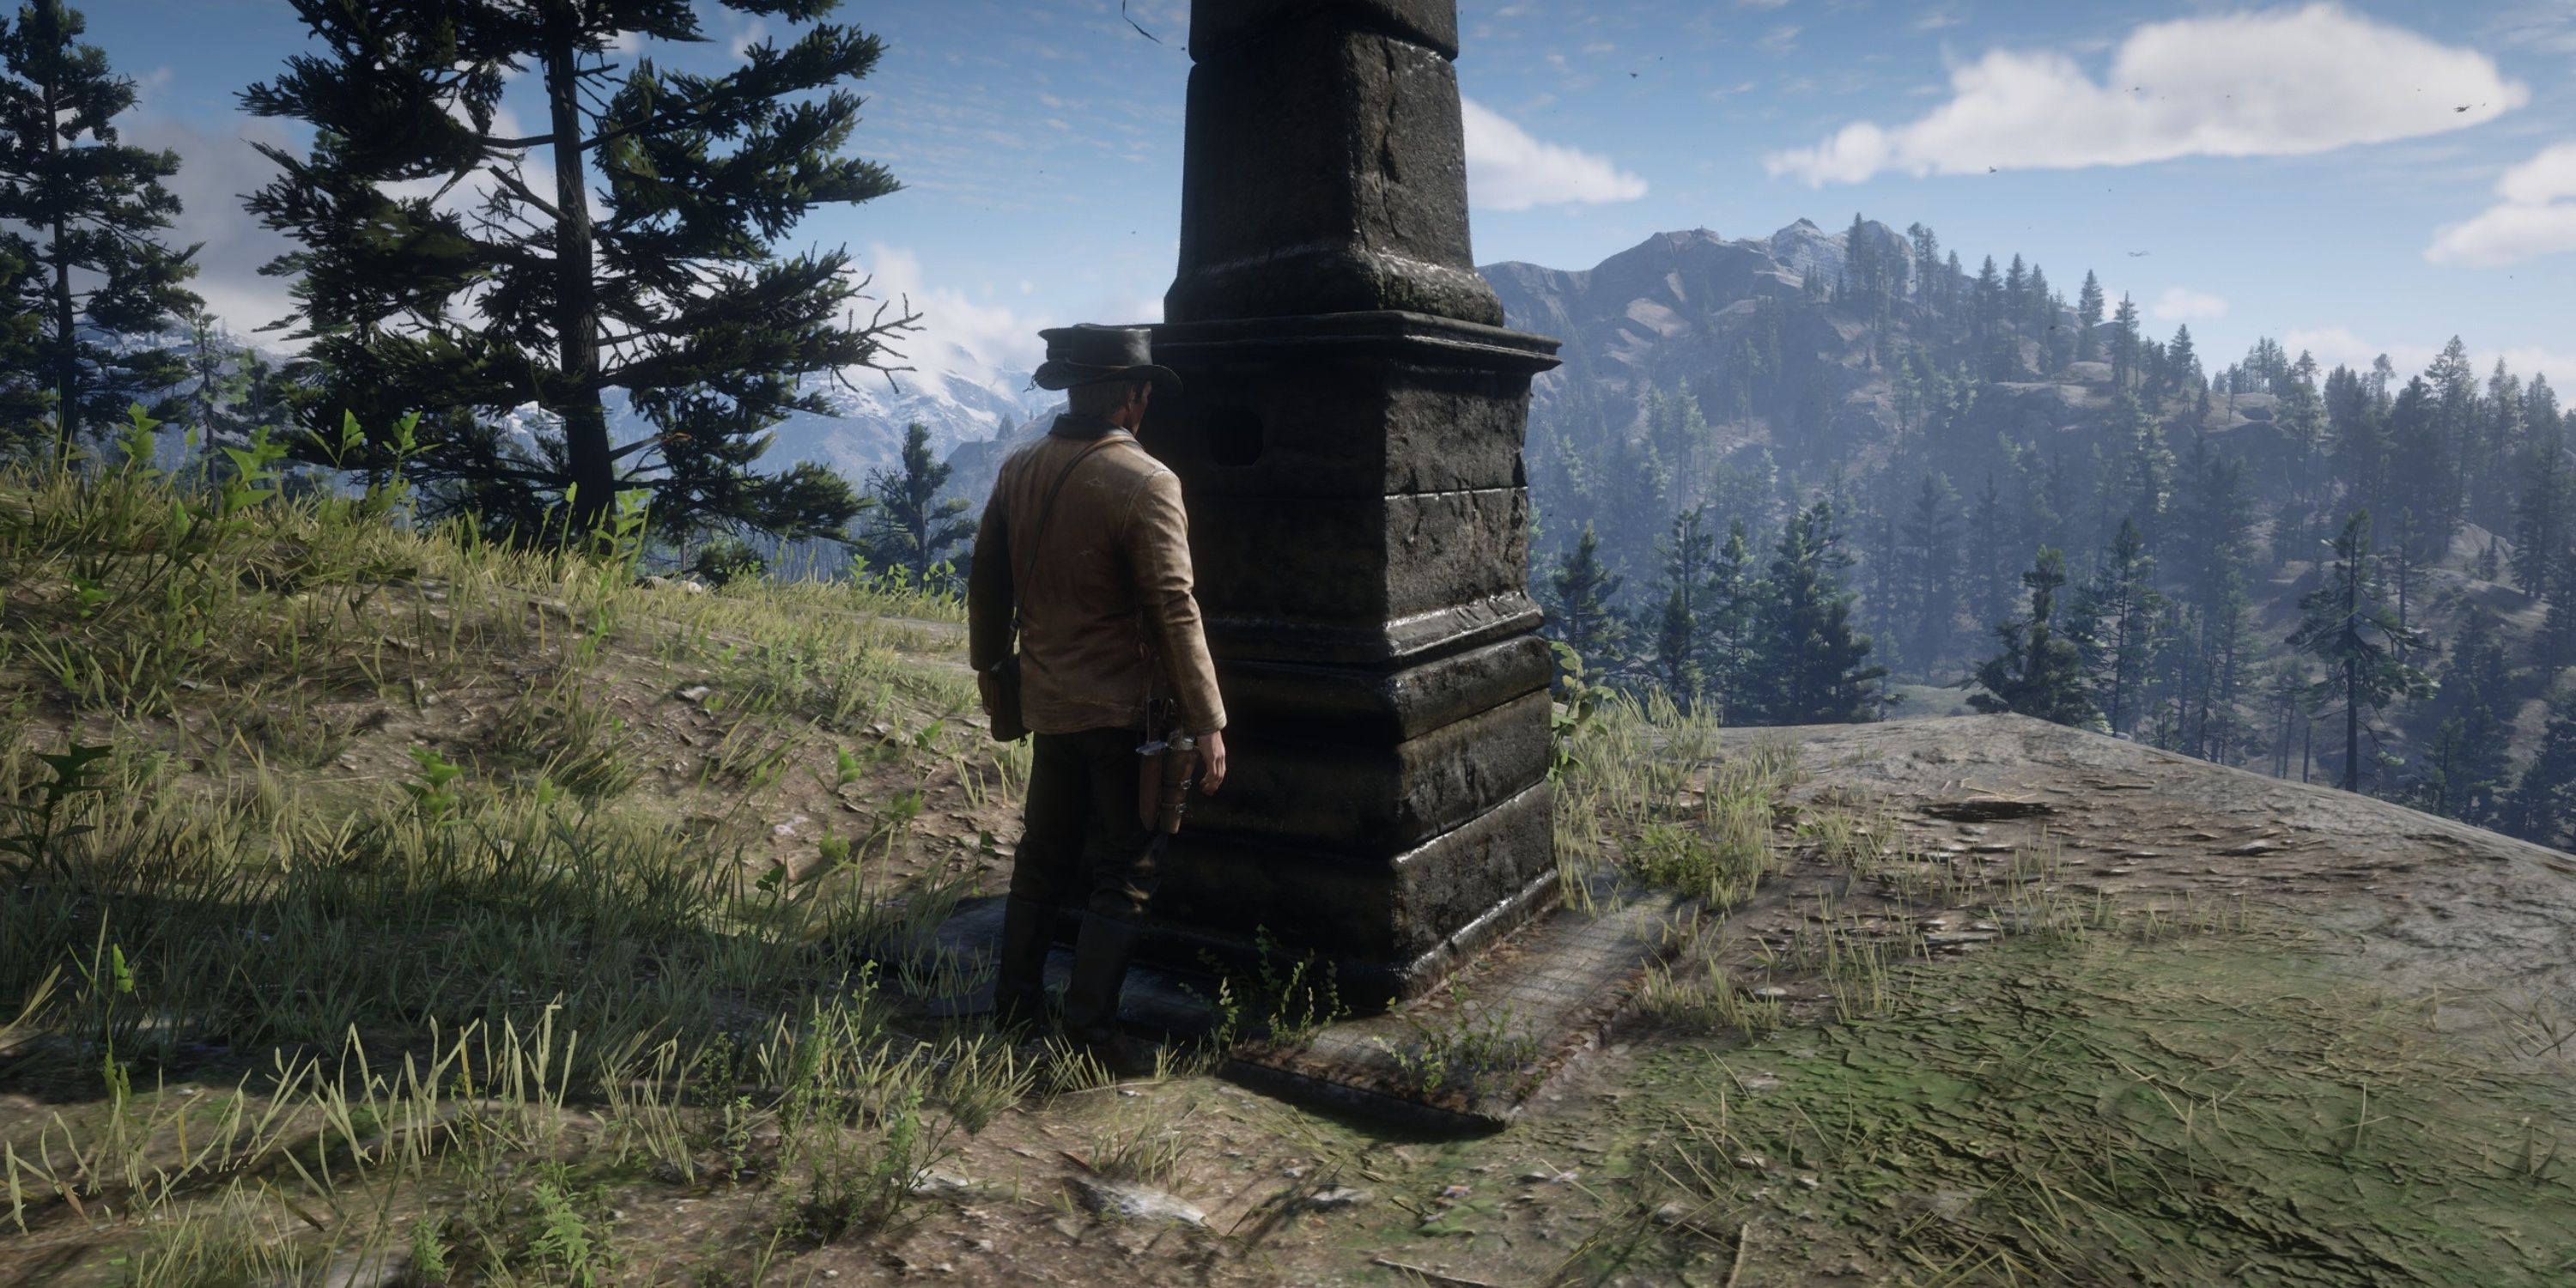
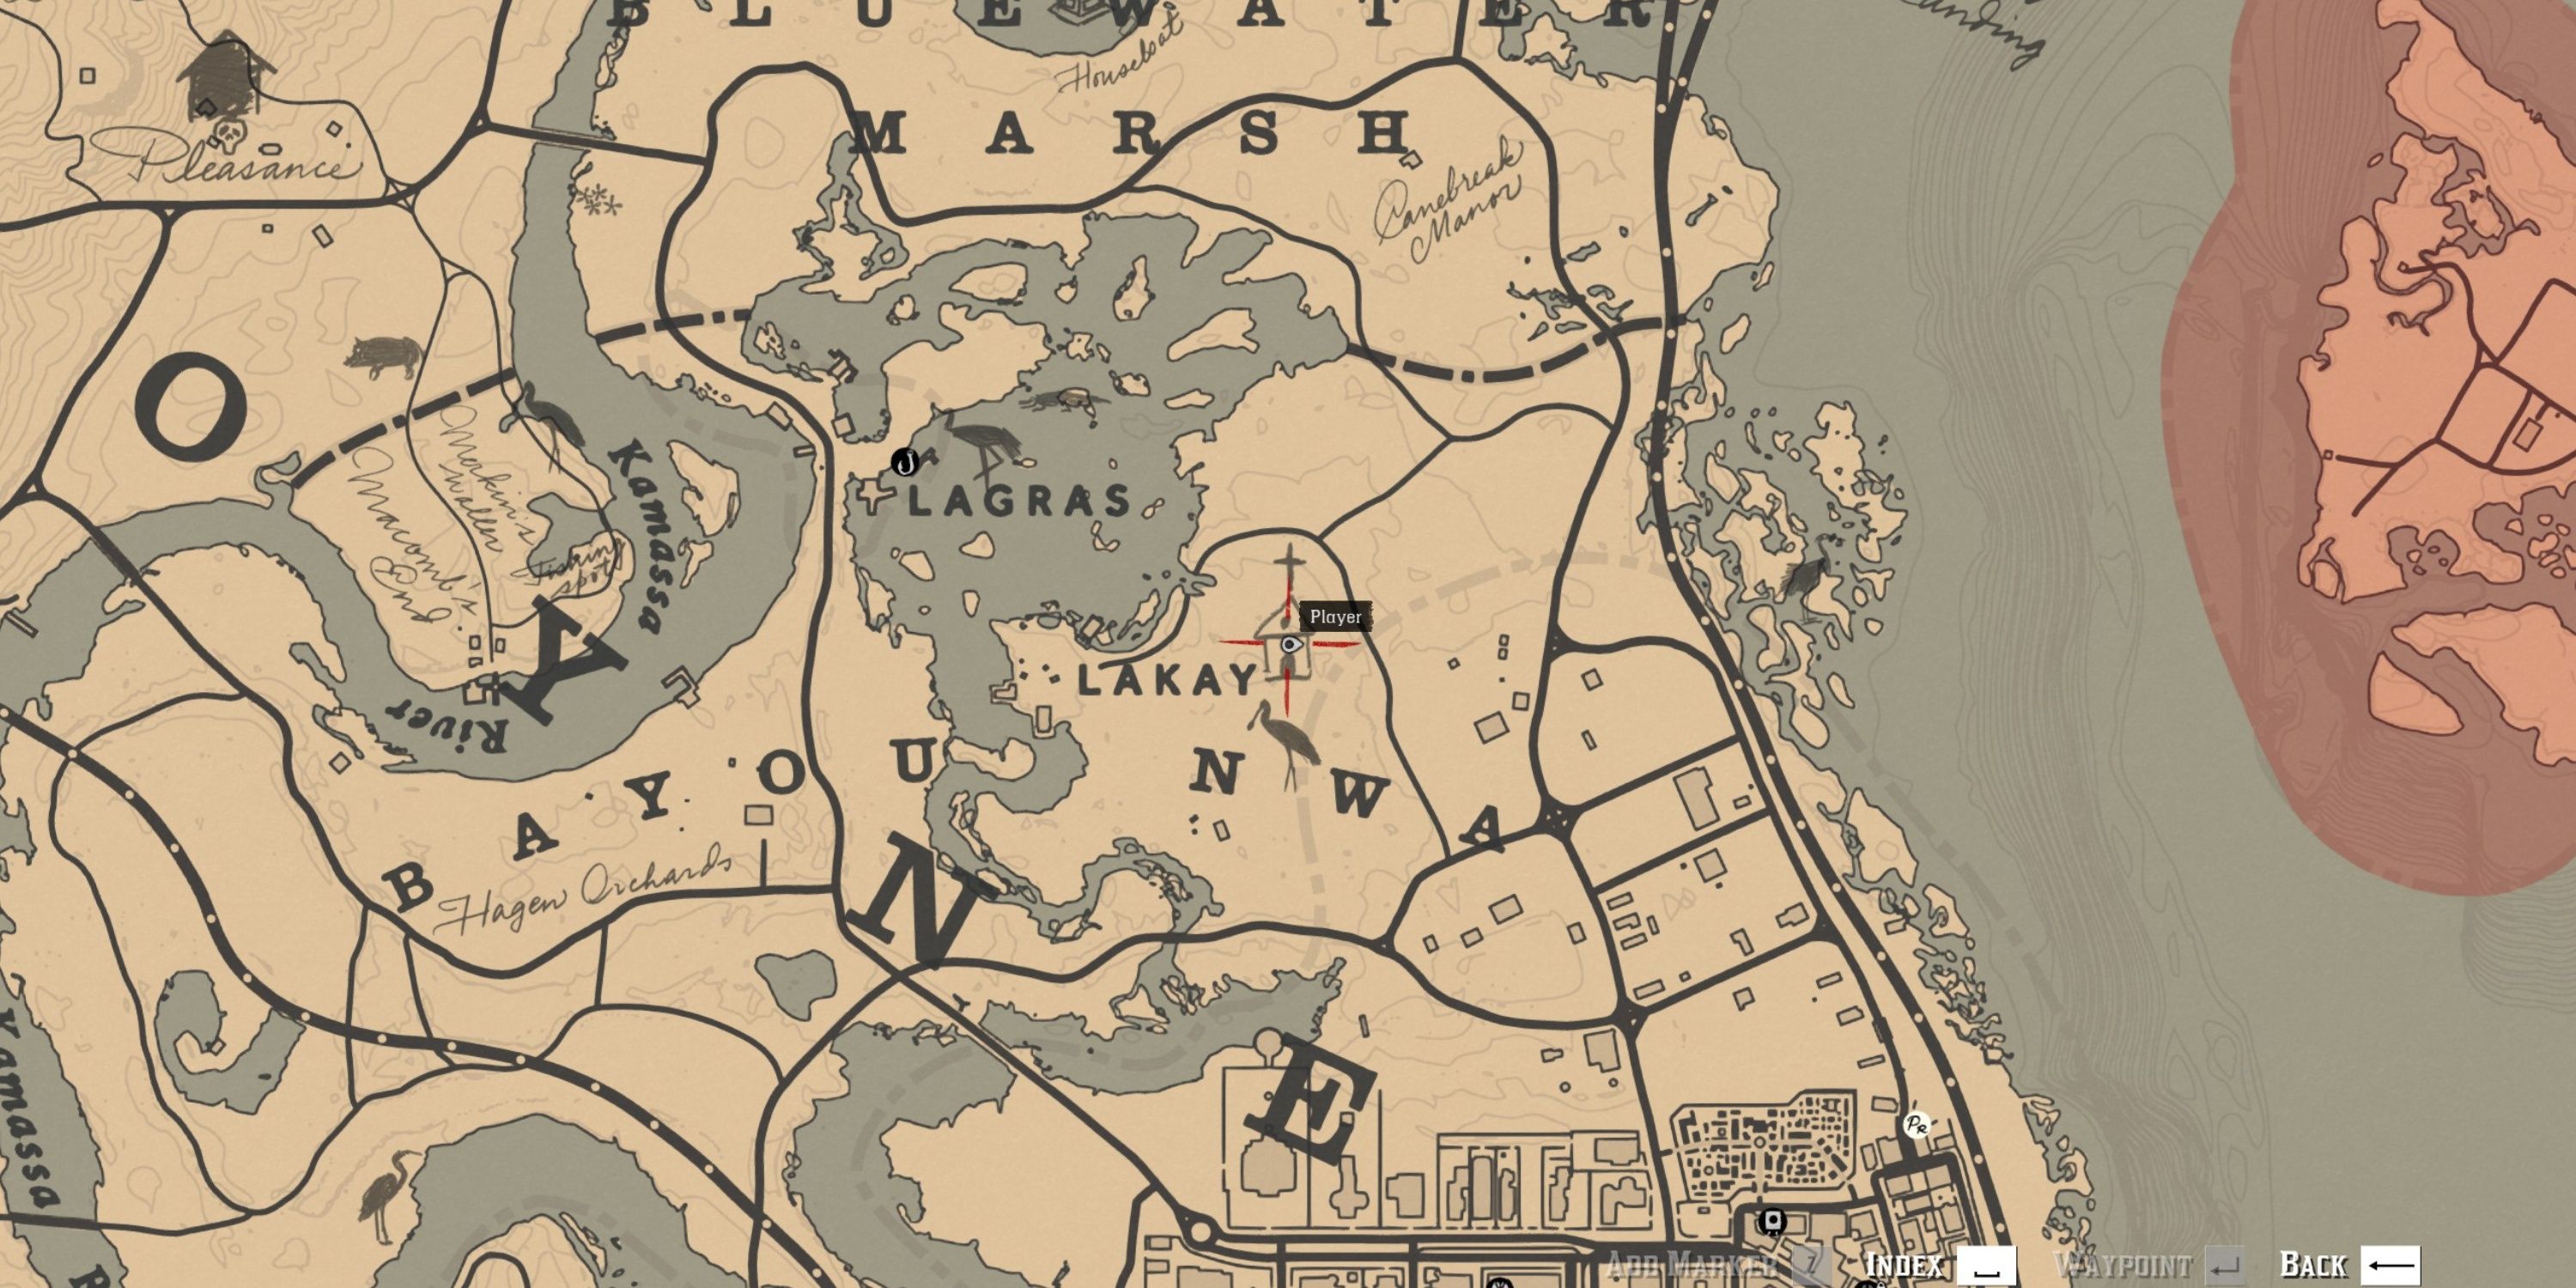
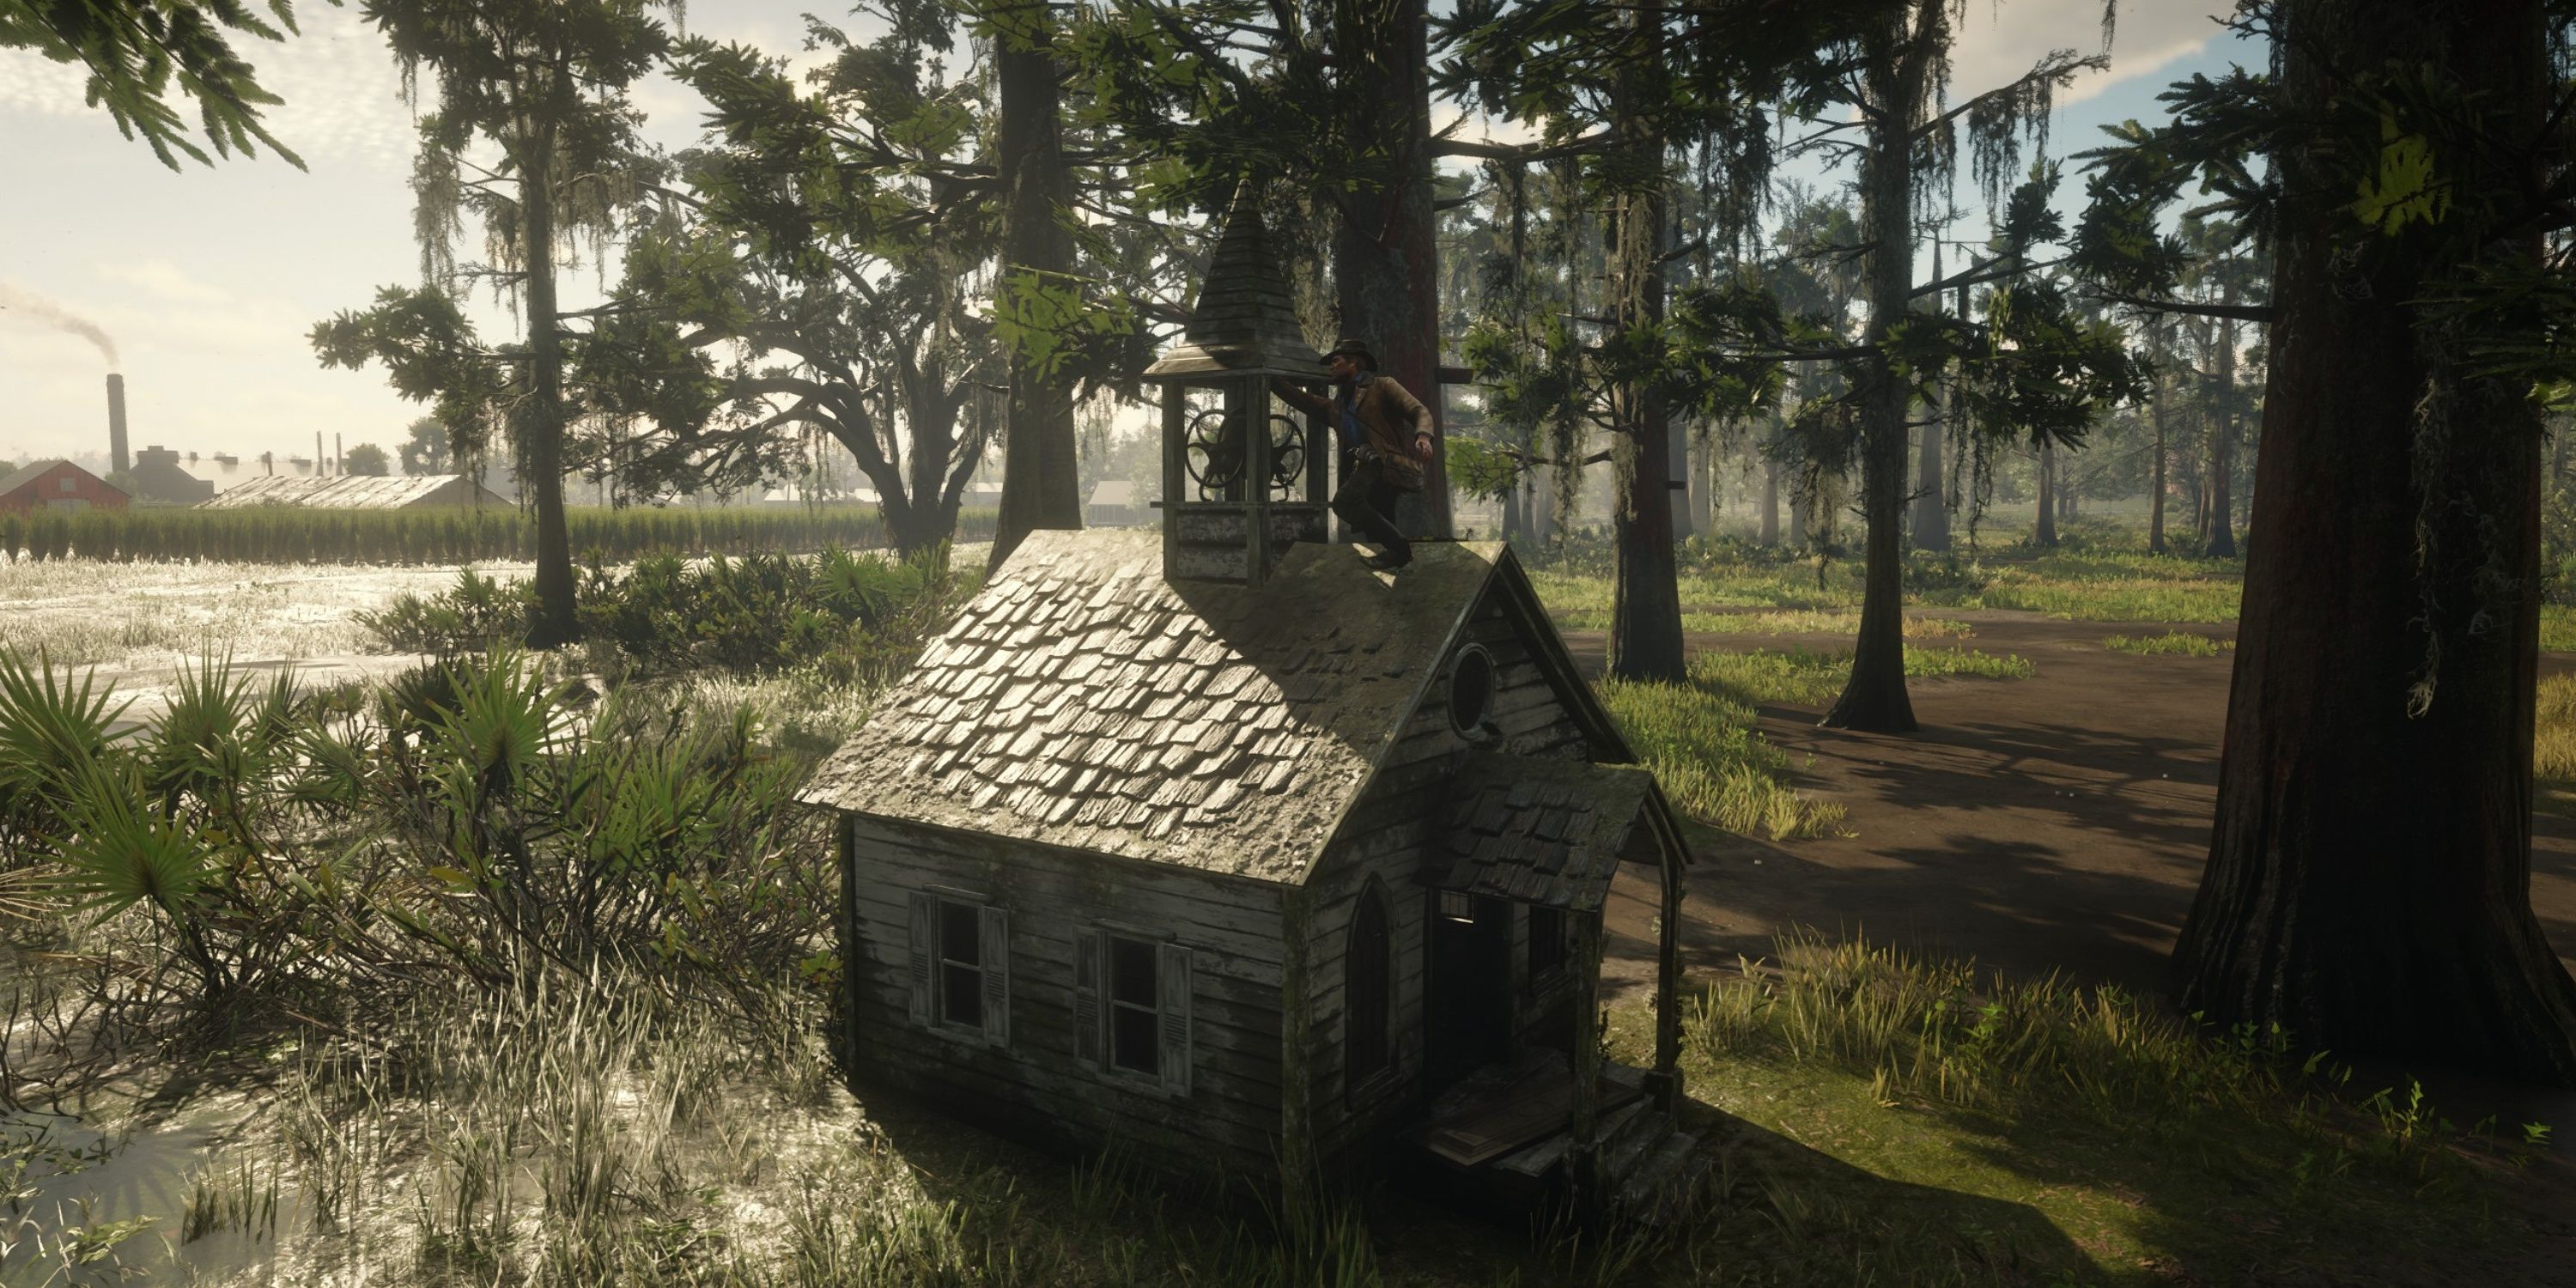
Map 1 of Wealthy Landmarks is located northwest of Owanjila, a lake situated west of Elizabeth’s Strawberry region. To find the map, explore the Obelisk landmark at the westernmost edge of the map. Solving it involves journeying towards the Tiny Church in Lakay, Bayou Nwa, which can be identified by examining the church bell on the roof of a small building there.
14. Landmarks of Riches Map 2
- Loot: Gold Jointed Bracelet, Landmarks of Riches Map 3
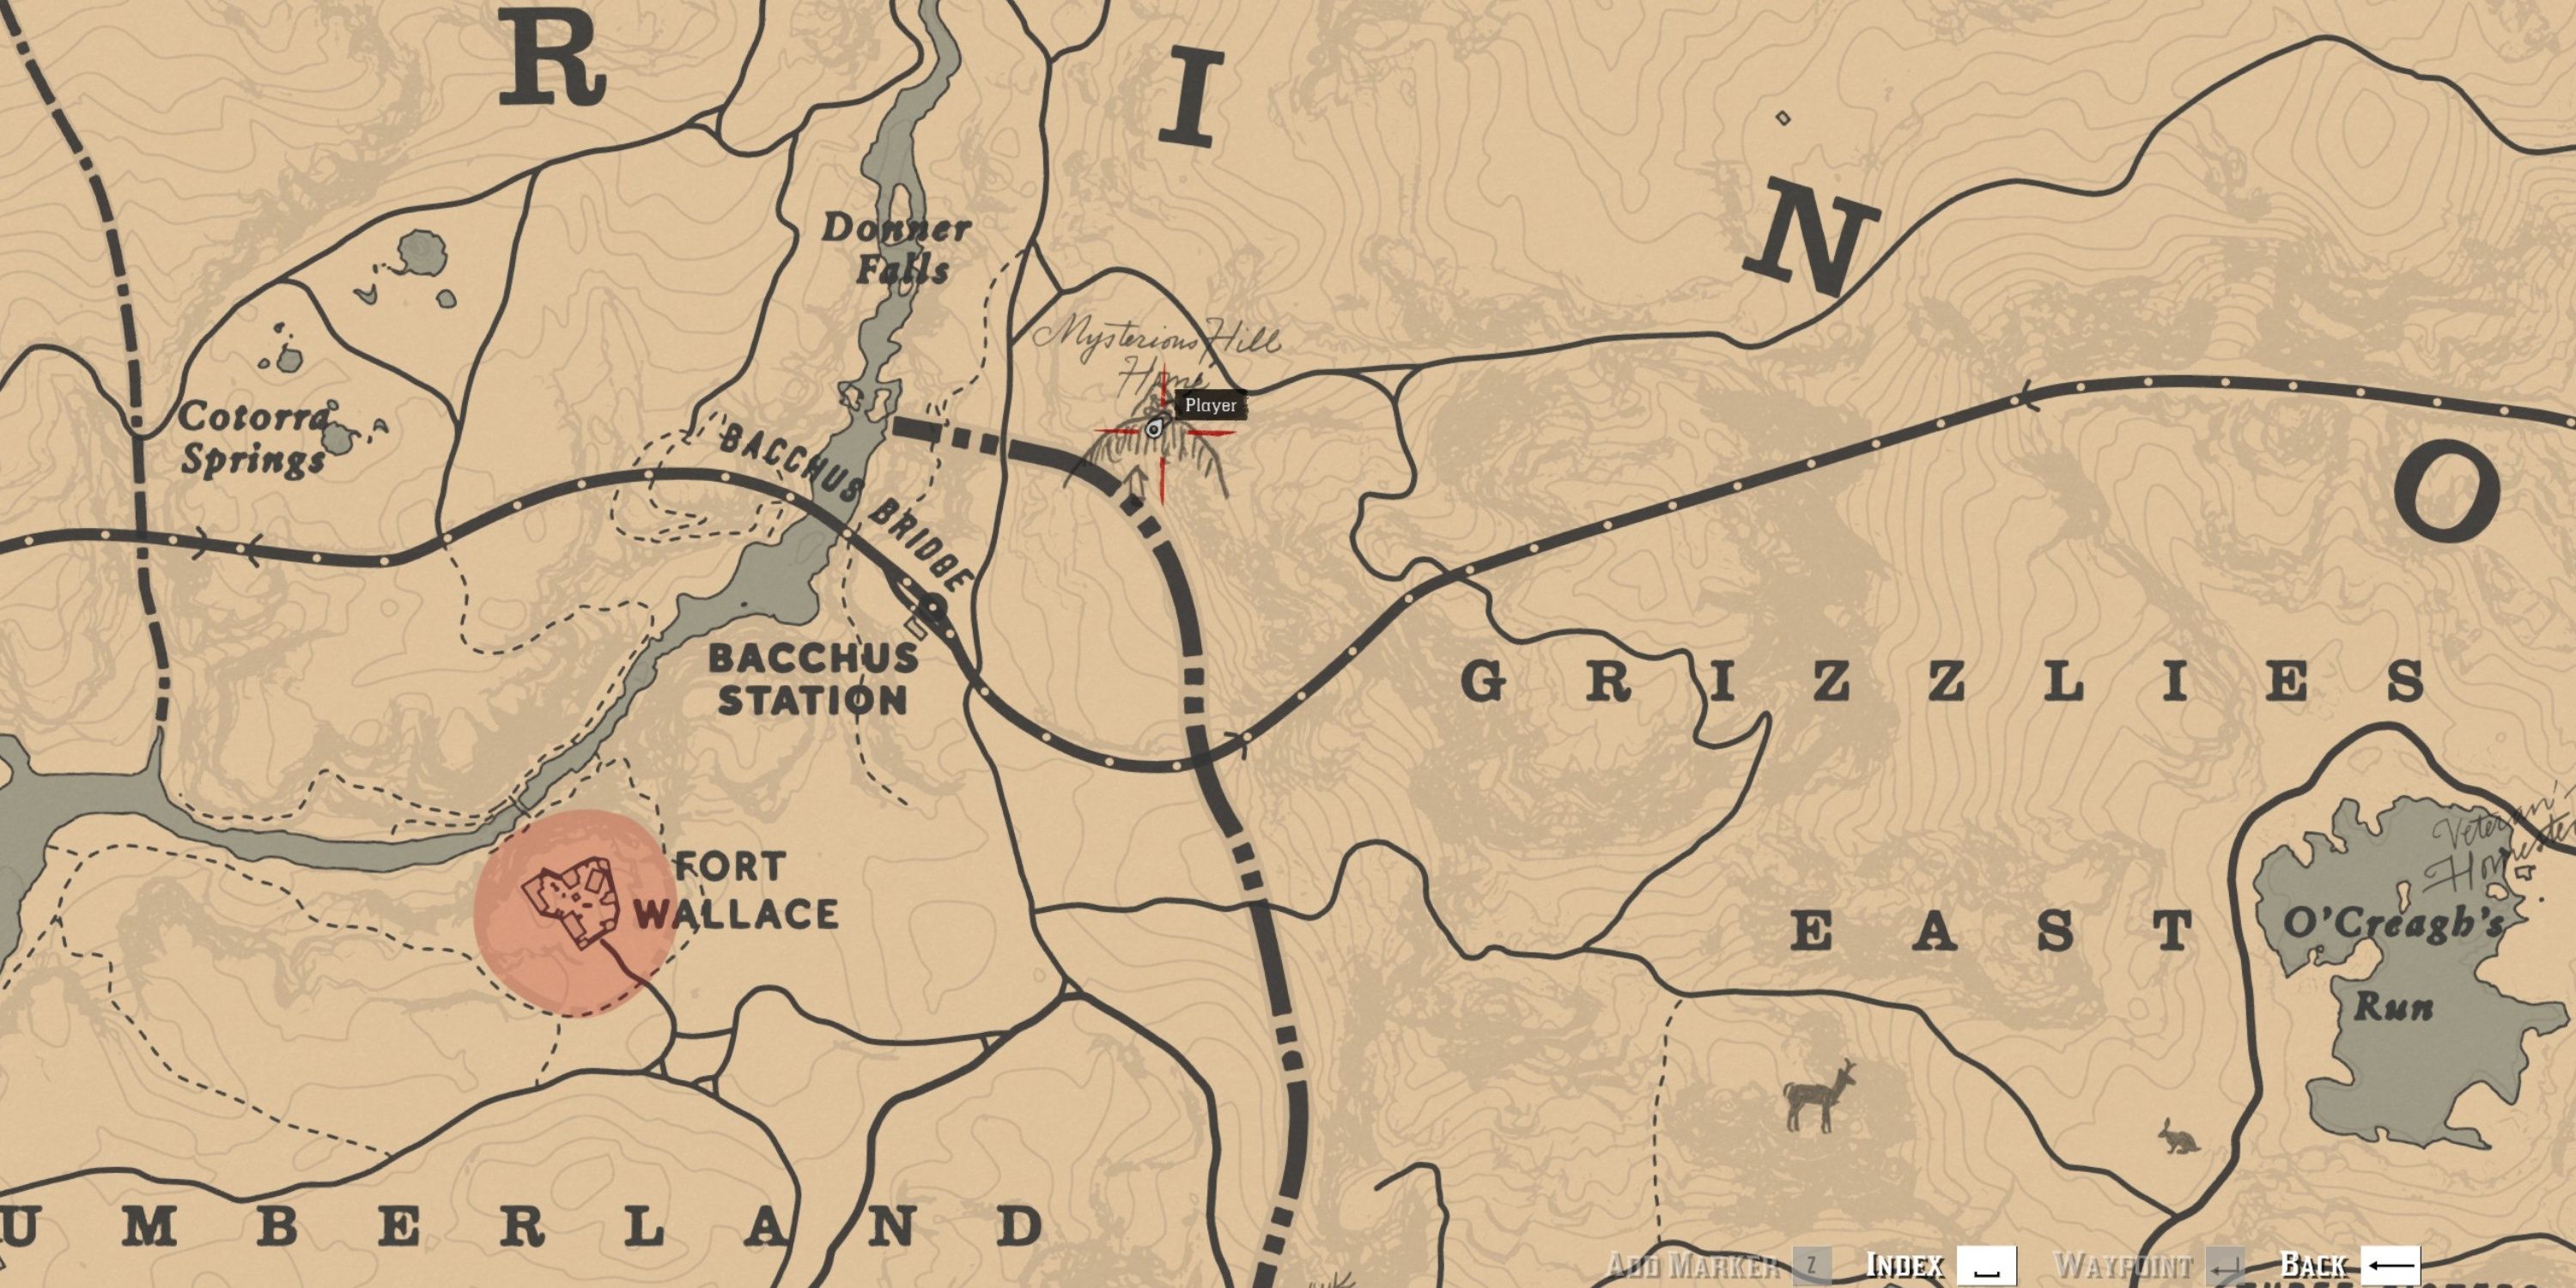
As an enthusiastic player, I can’t wait to embark on the adventure with Landmarks of Riches Map 2! This time, we’re heading northward from Bacchus Station, straight into Ambarino, where the enigmatic Hill Home awaits us. Atop this mysterious dwelling lies a crack in the rooftop window that beckons our investigation. By scaling the hill and peering through this intriguing opening, we’ll uncover the hidden reward this map has in store for us!
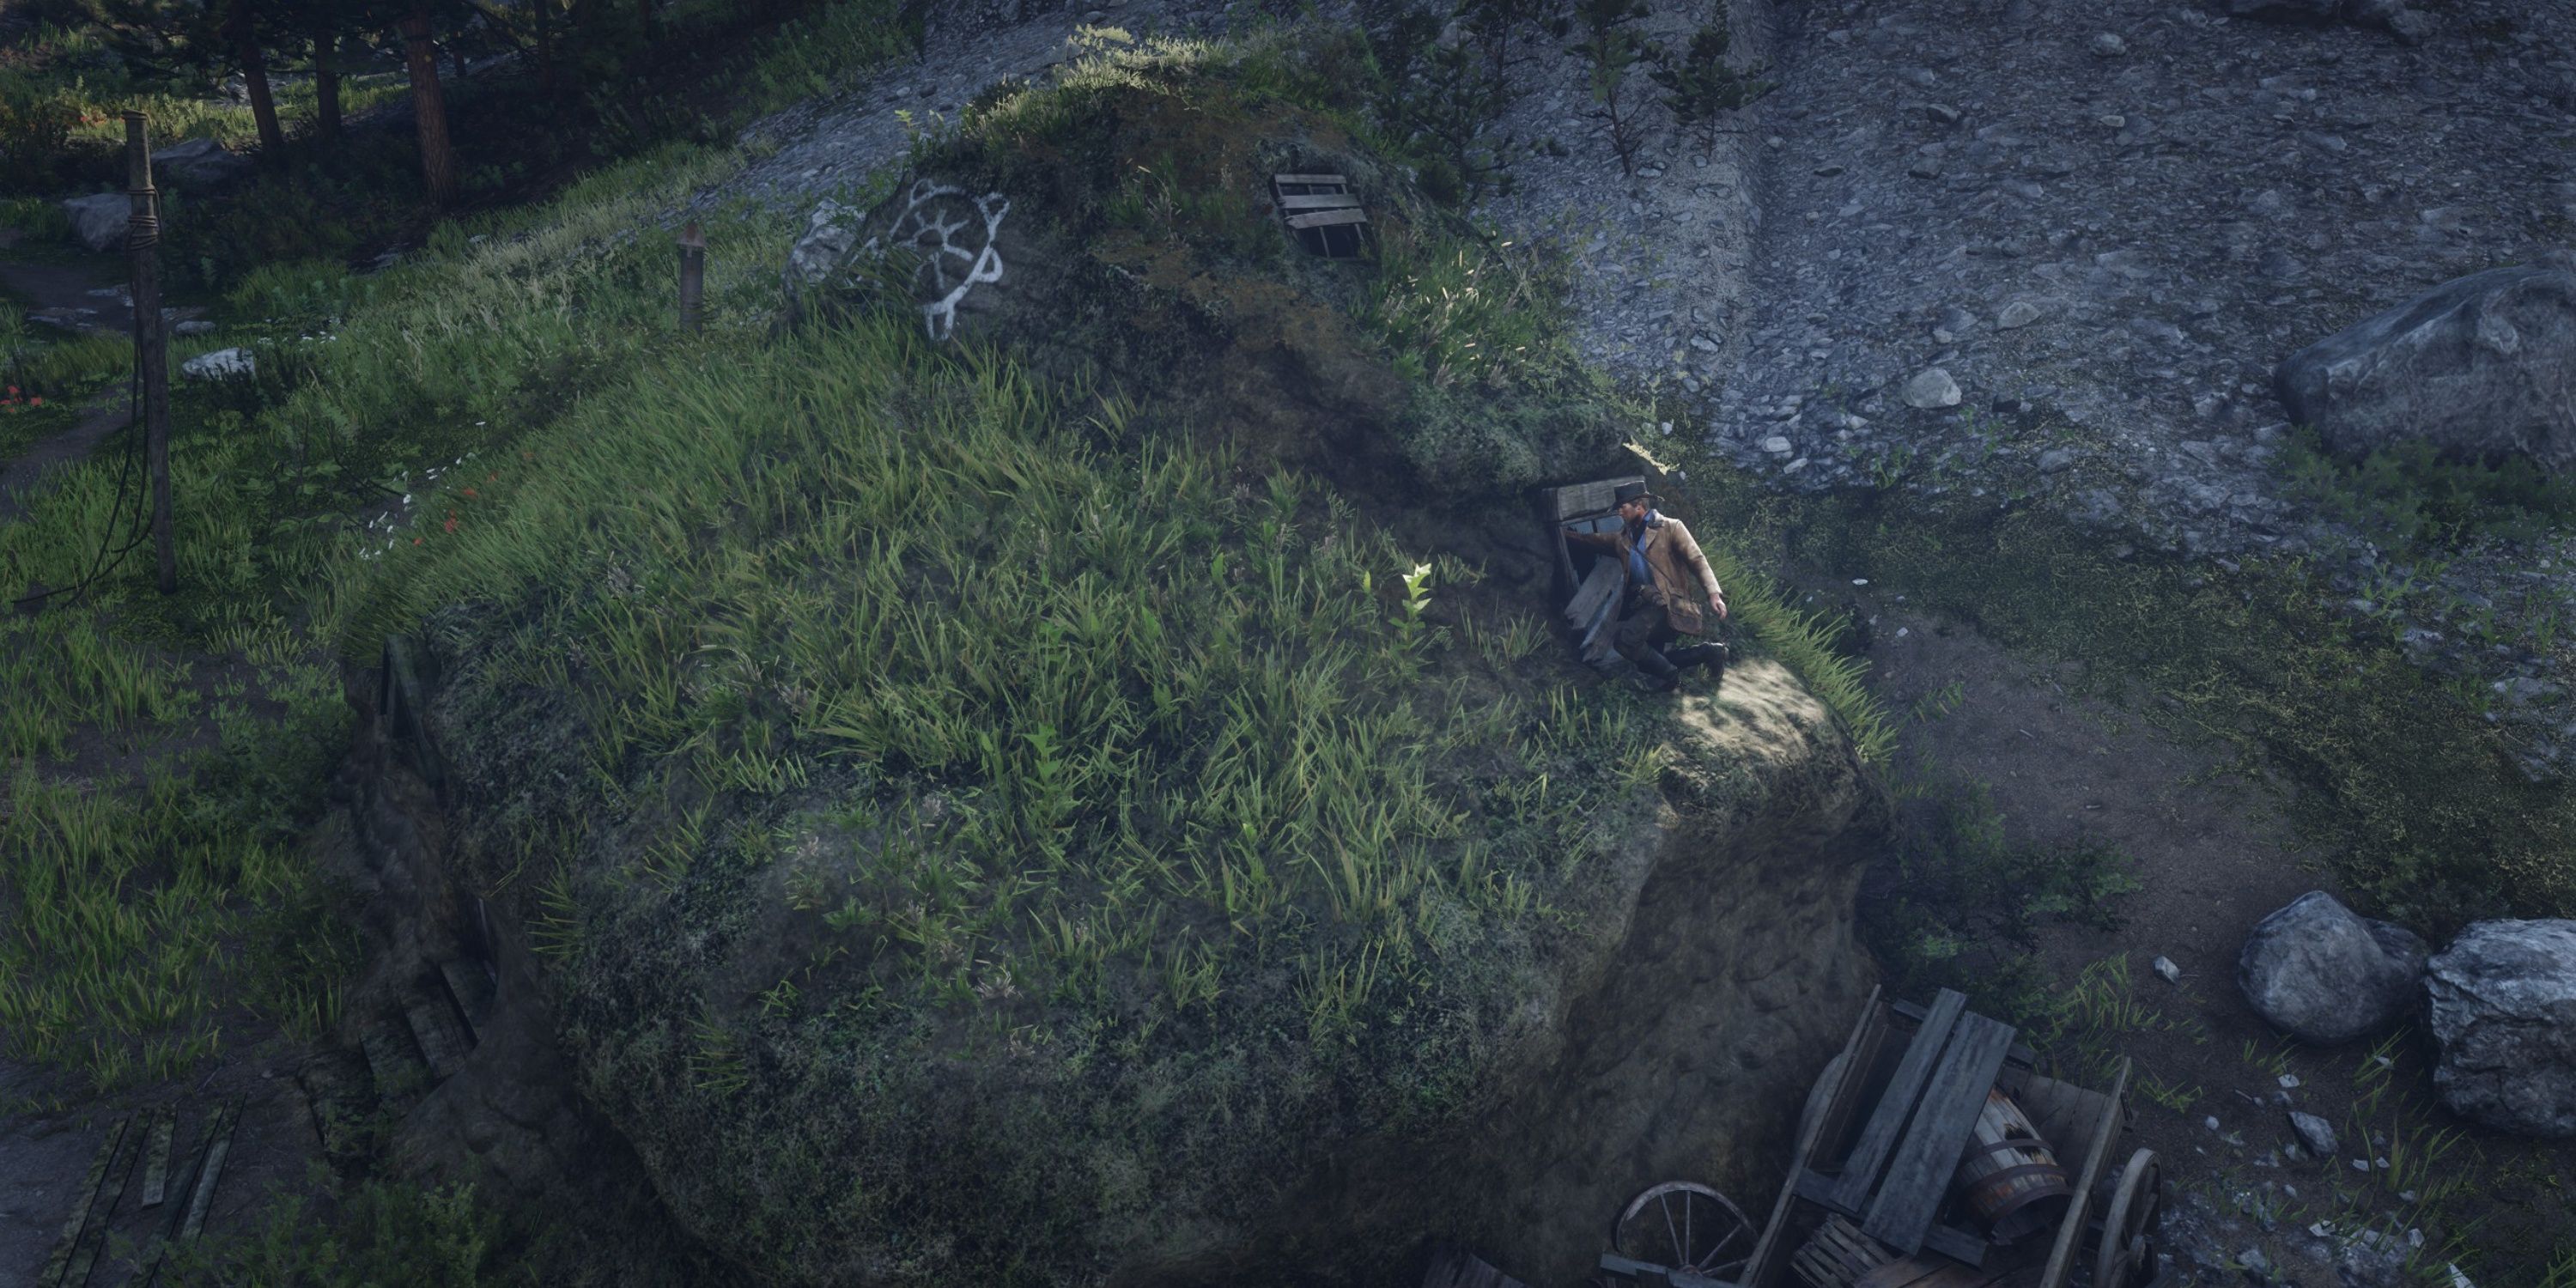
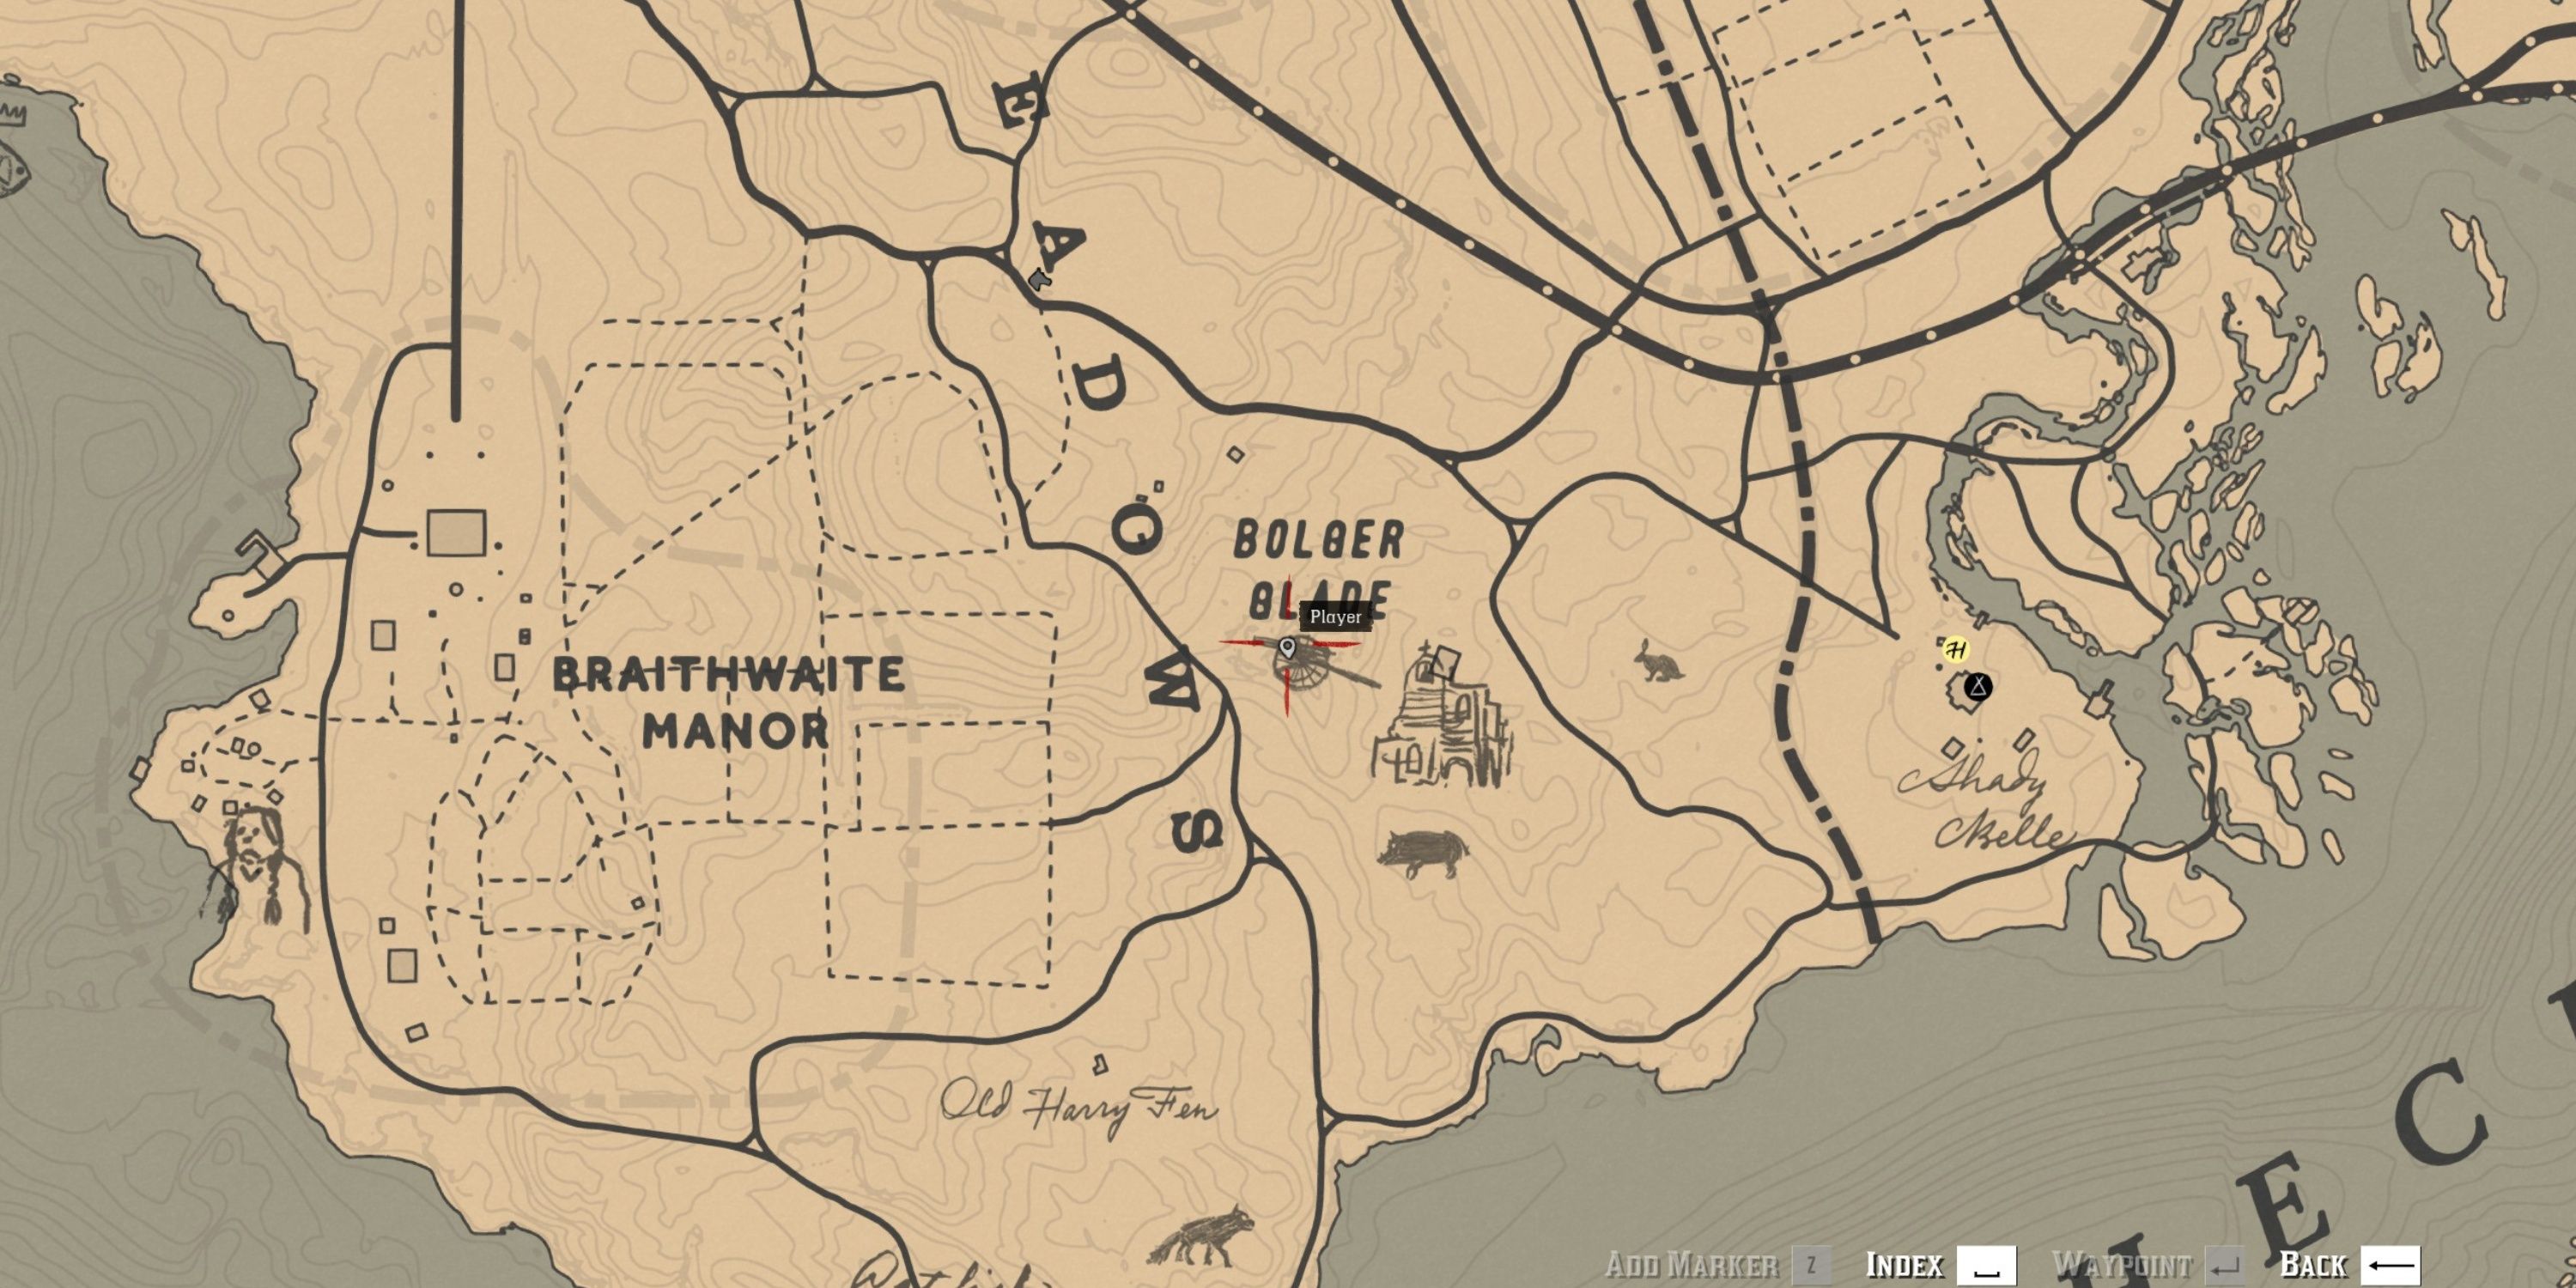
13. Landmarks of Riches Map 3

- Loot: Silver Chain Bracelet, Landmarks of Riches Map 4
Adventurers navigating Landmarks of Wealth Map 3 will find themselves at Bolger Blade within Scarlett Meadows, situated to the east of Braithwaite Manor. The hidden loot is located on a decayed and lifeless tree, separated from both the military outpost and the dilapidated church.
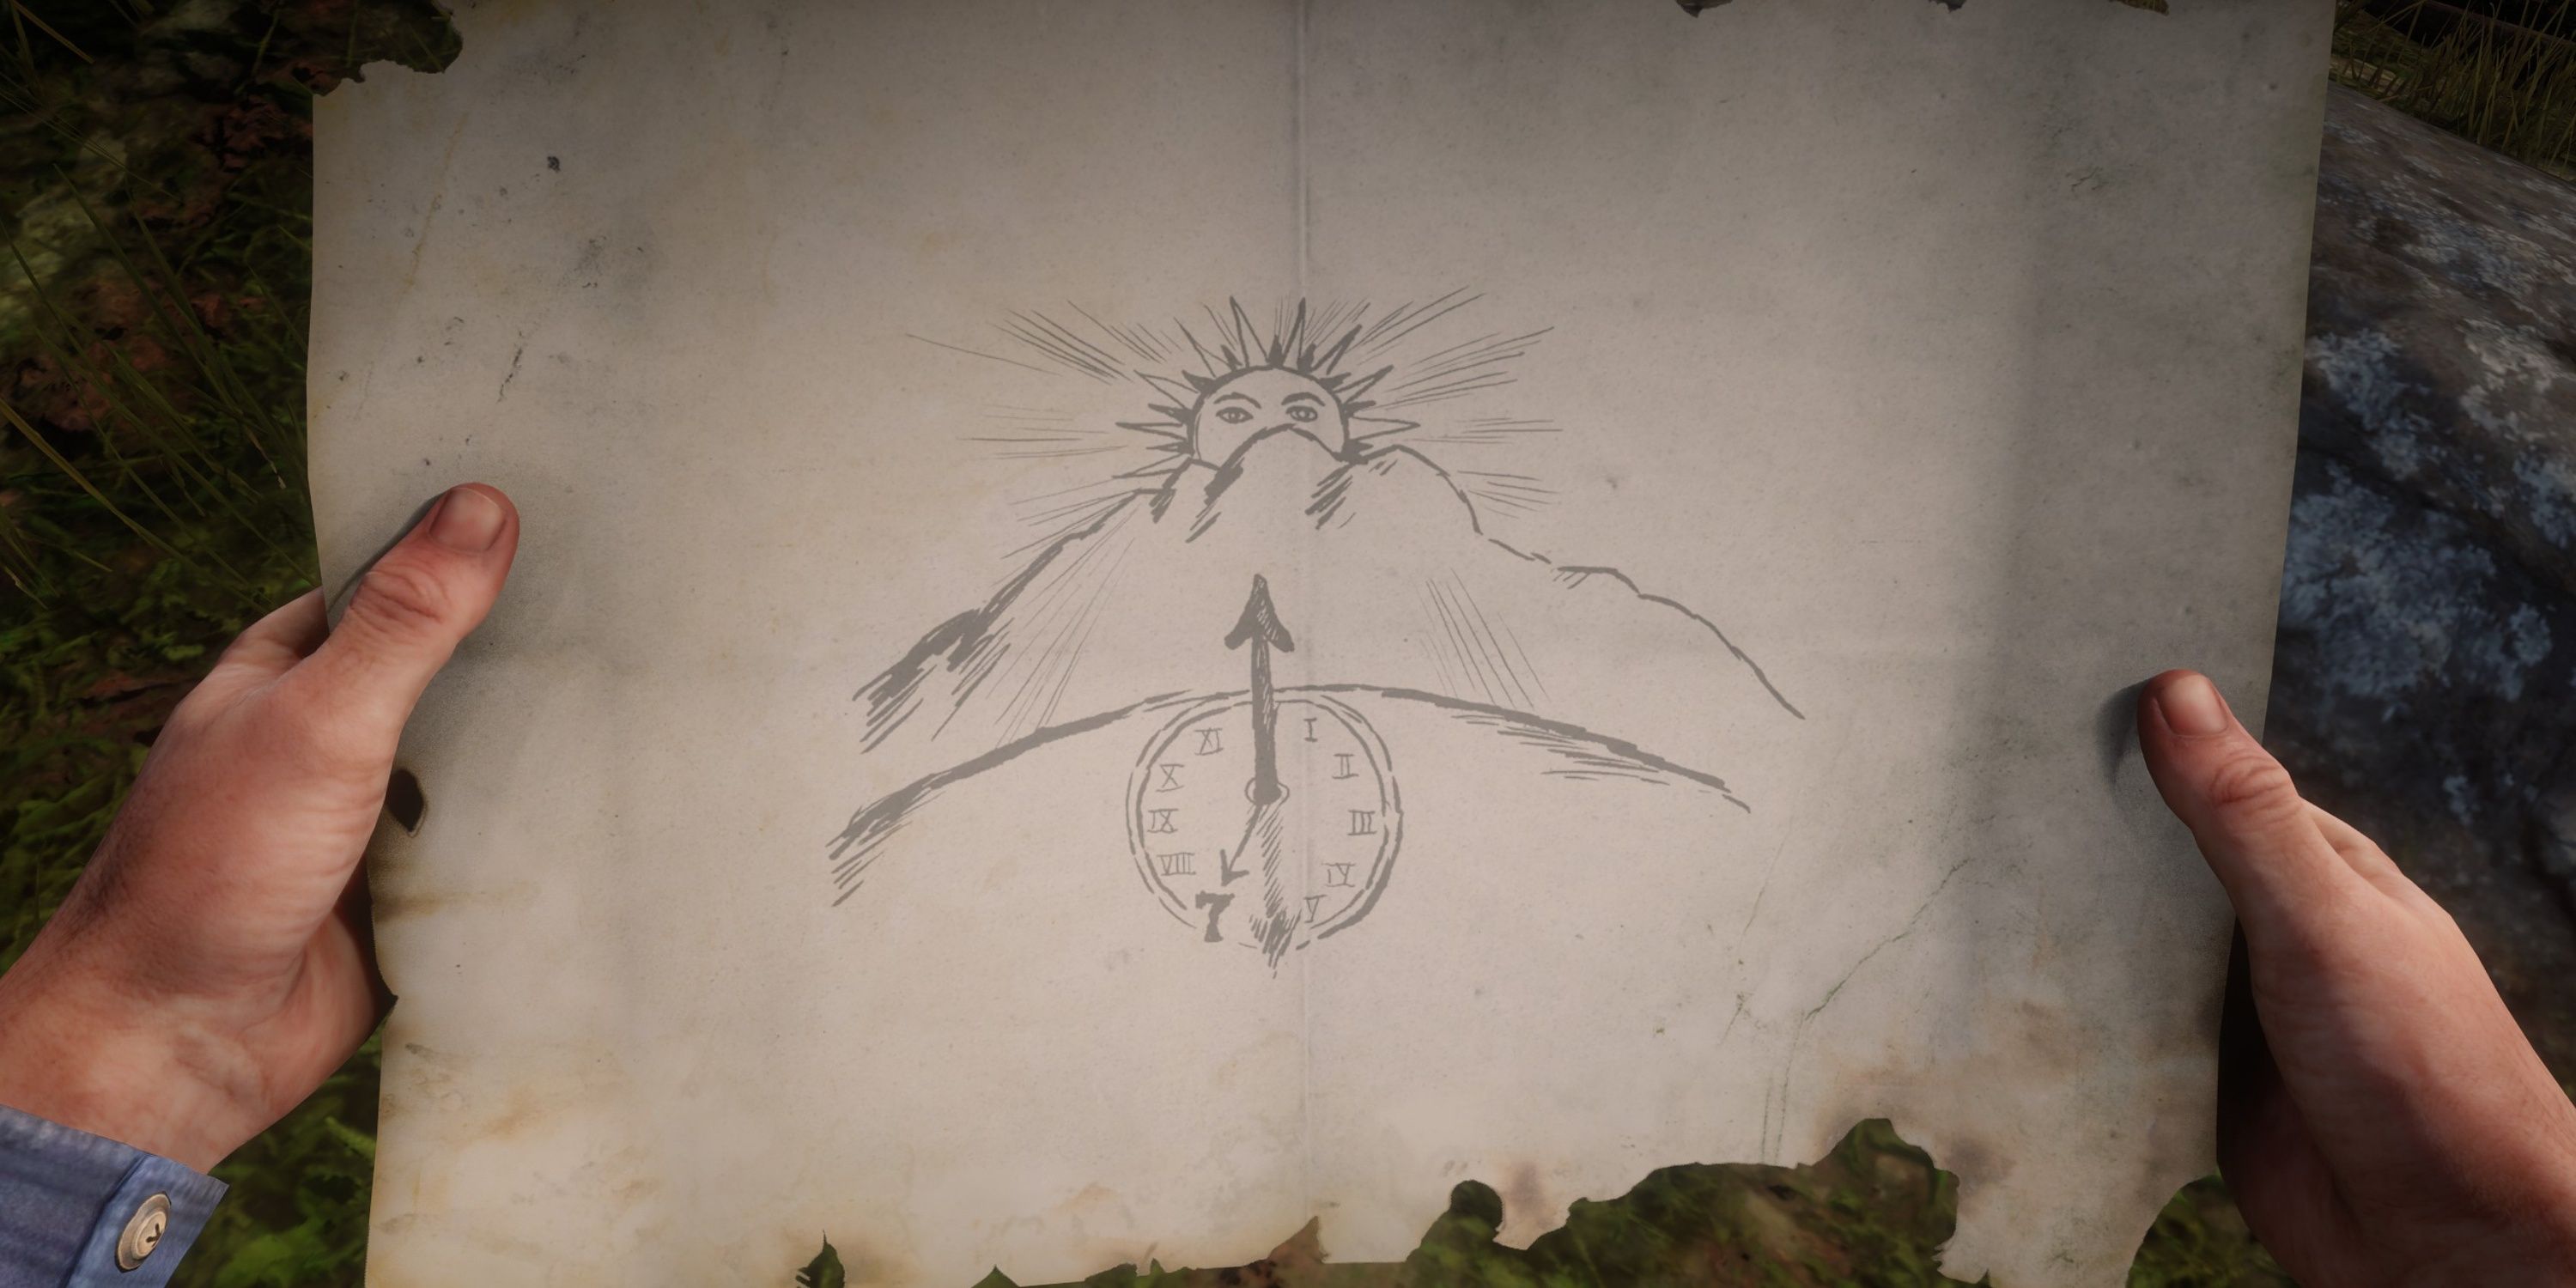
12. Landmarks of Riches Map 4
- Loot: 6x Gold Bars
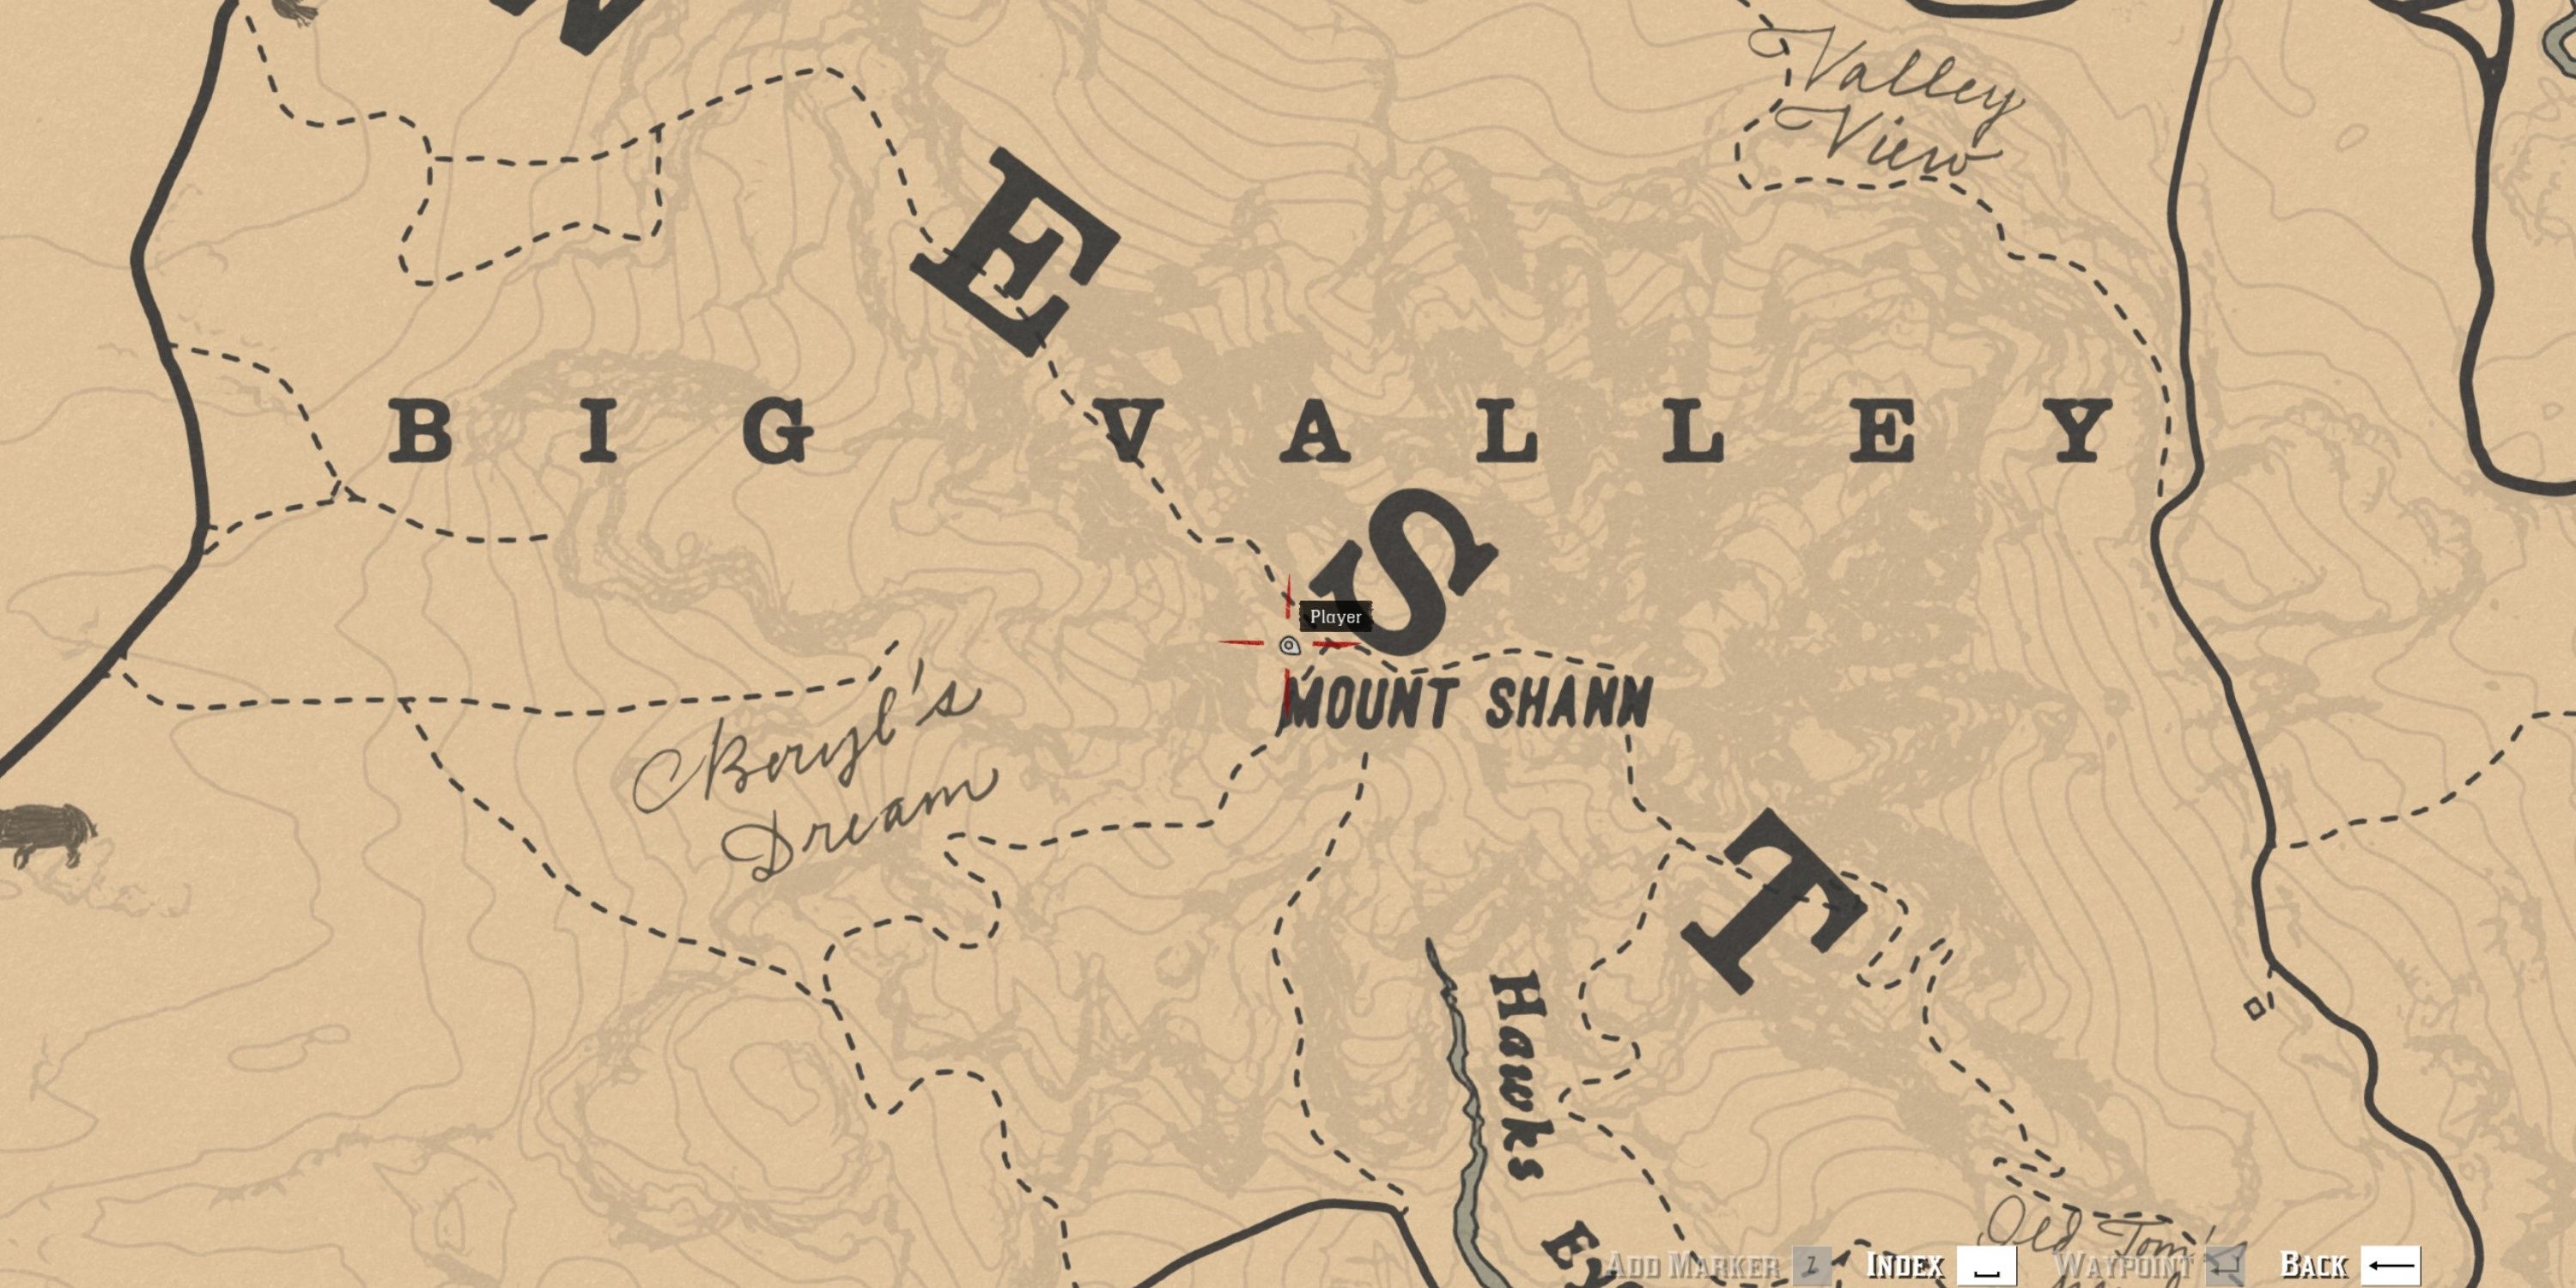
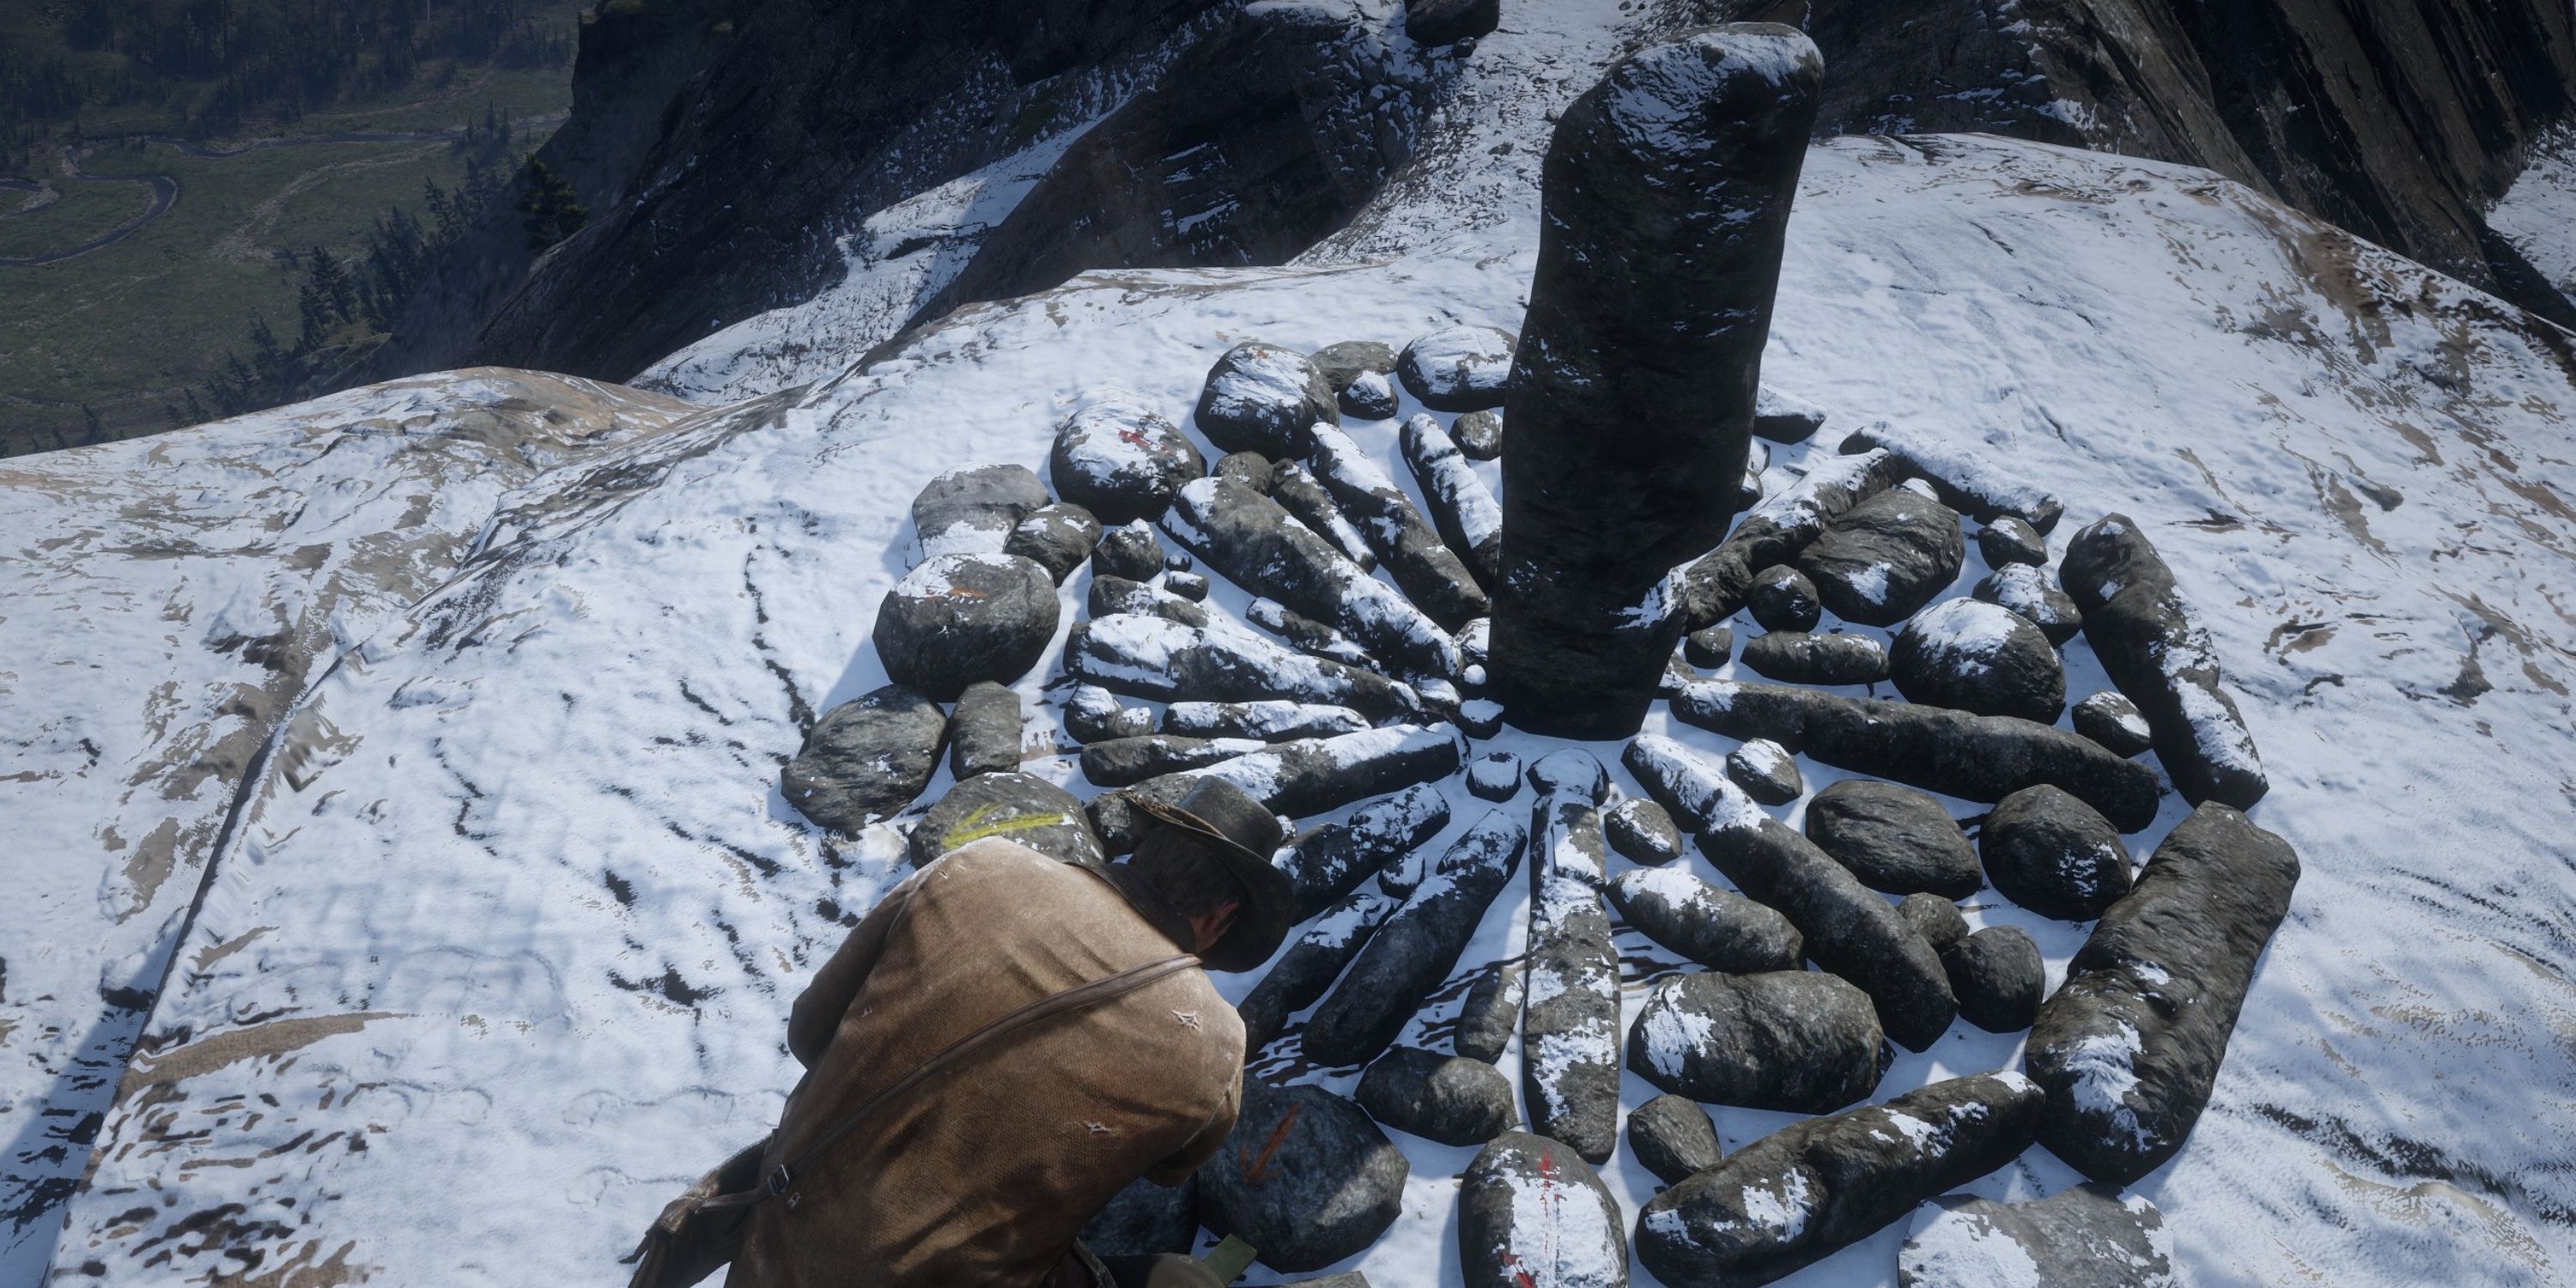
To complete the Landmarks of Wealth Map, gamers must scale Mount Shann located in Big Valley, West Elizabeth. Atop this snow-capped mountain, they’ll discover an ancient sundial. Beneath a rock resembling the seventh hour hand on a clock, they can uncover the hidden treasure stashed there.
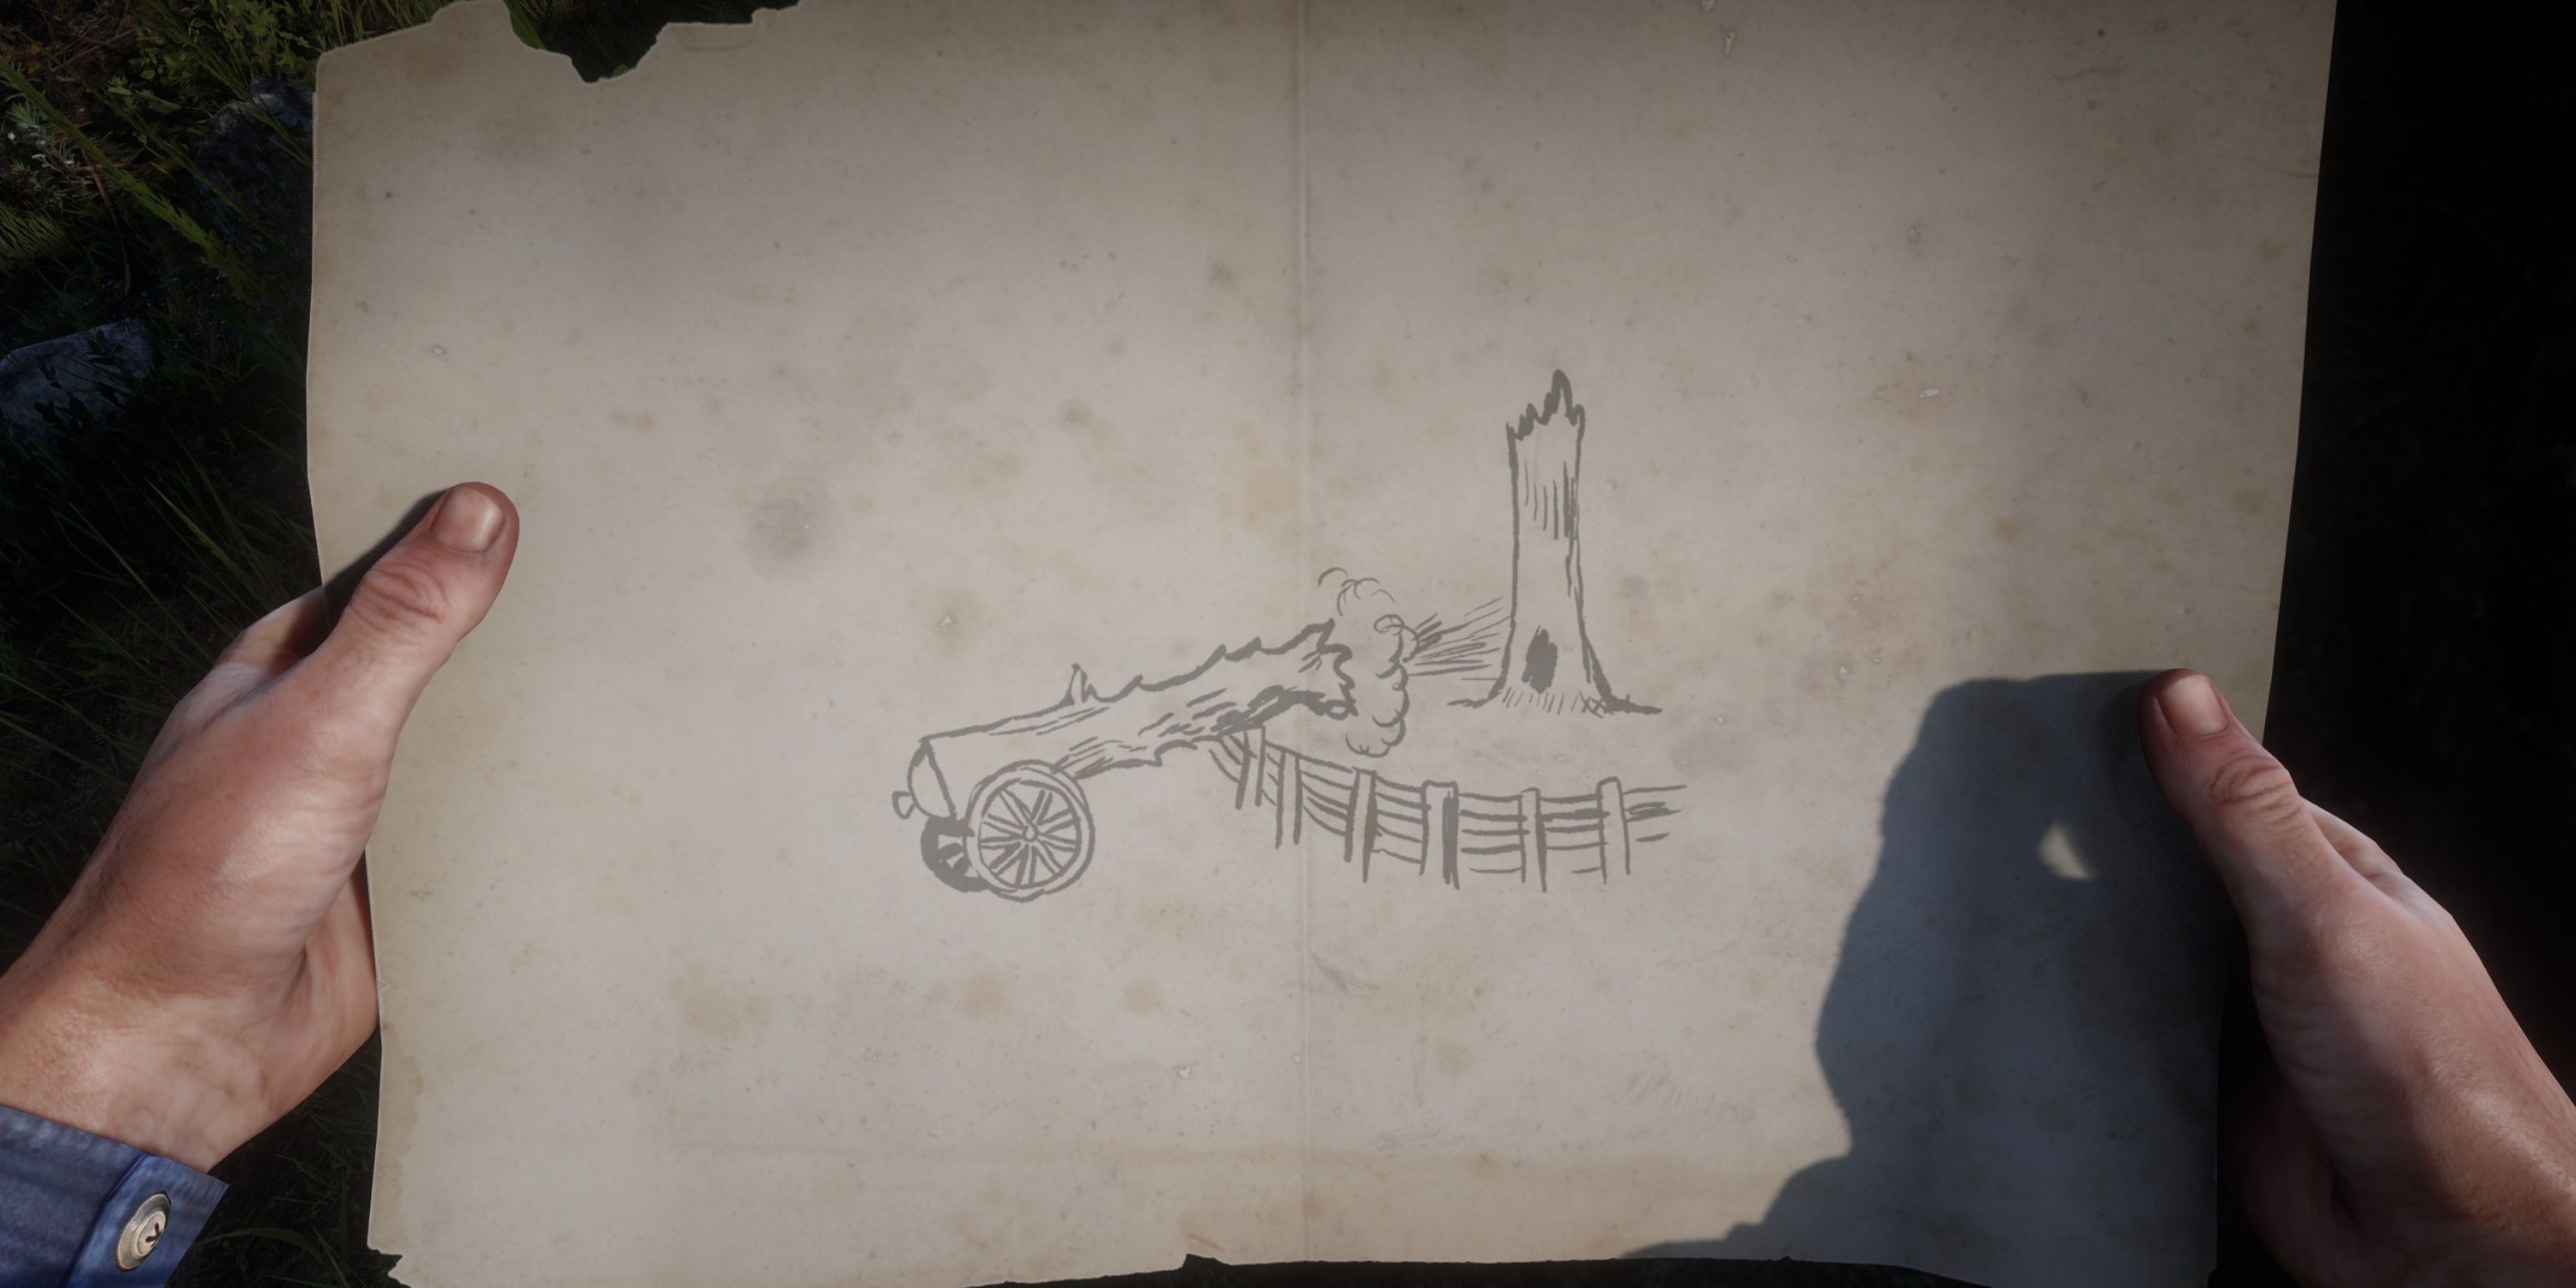
11. The Poisonous Trail Map 1
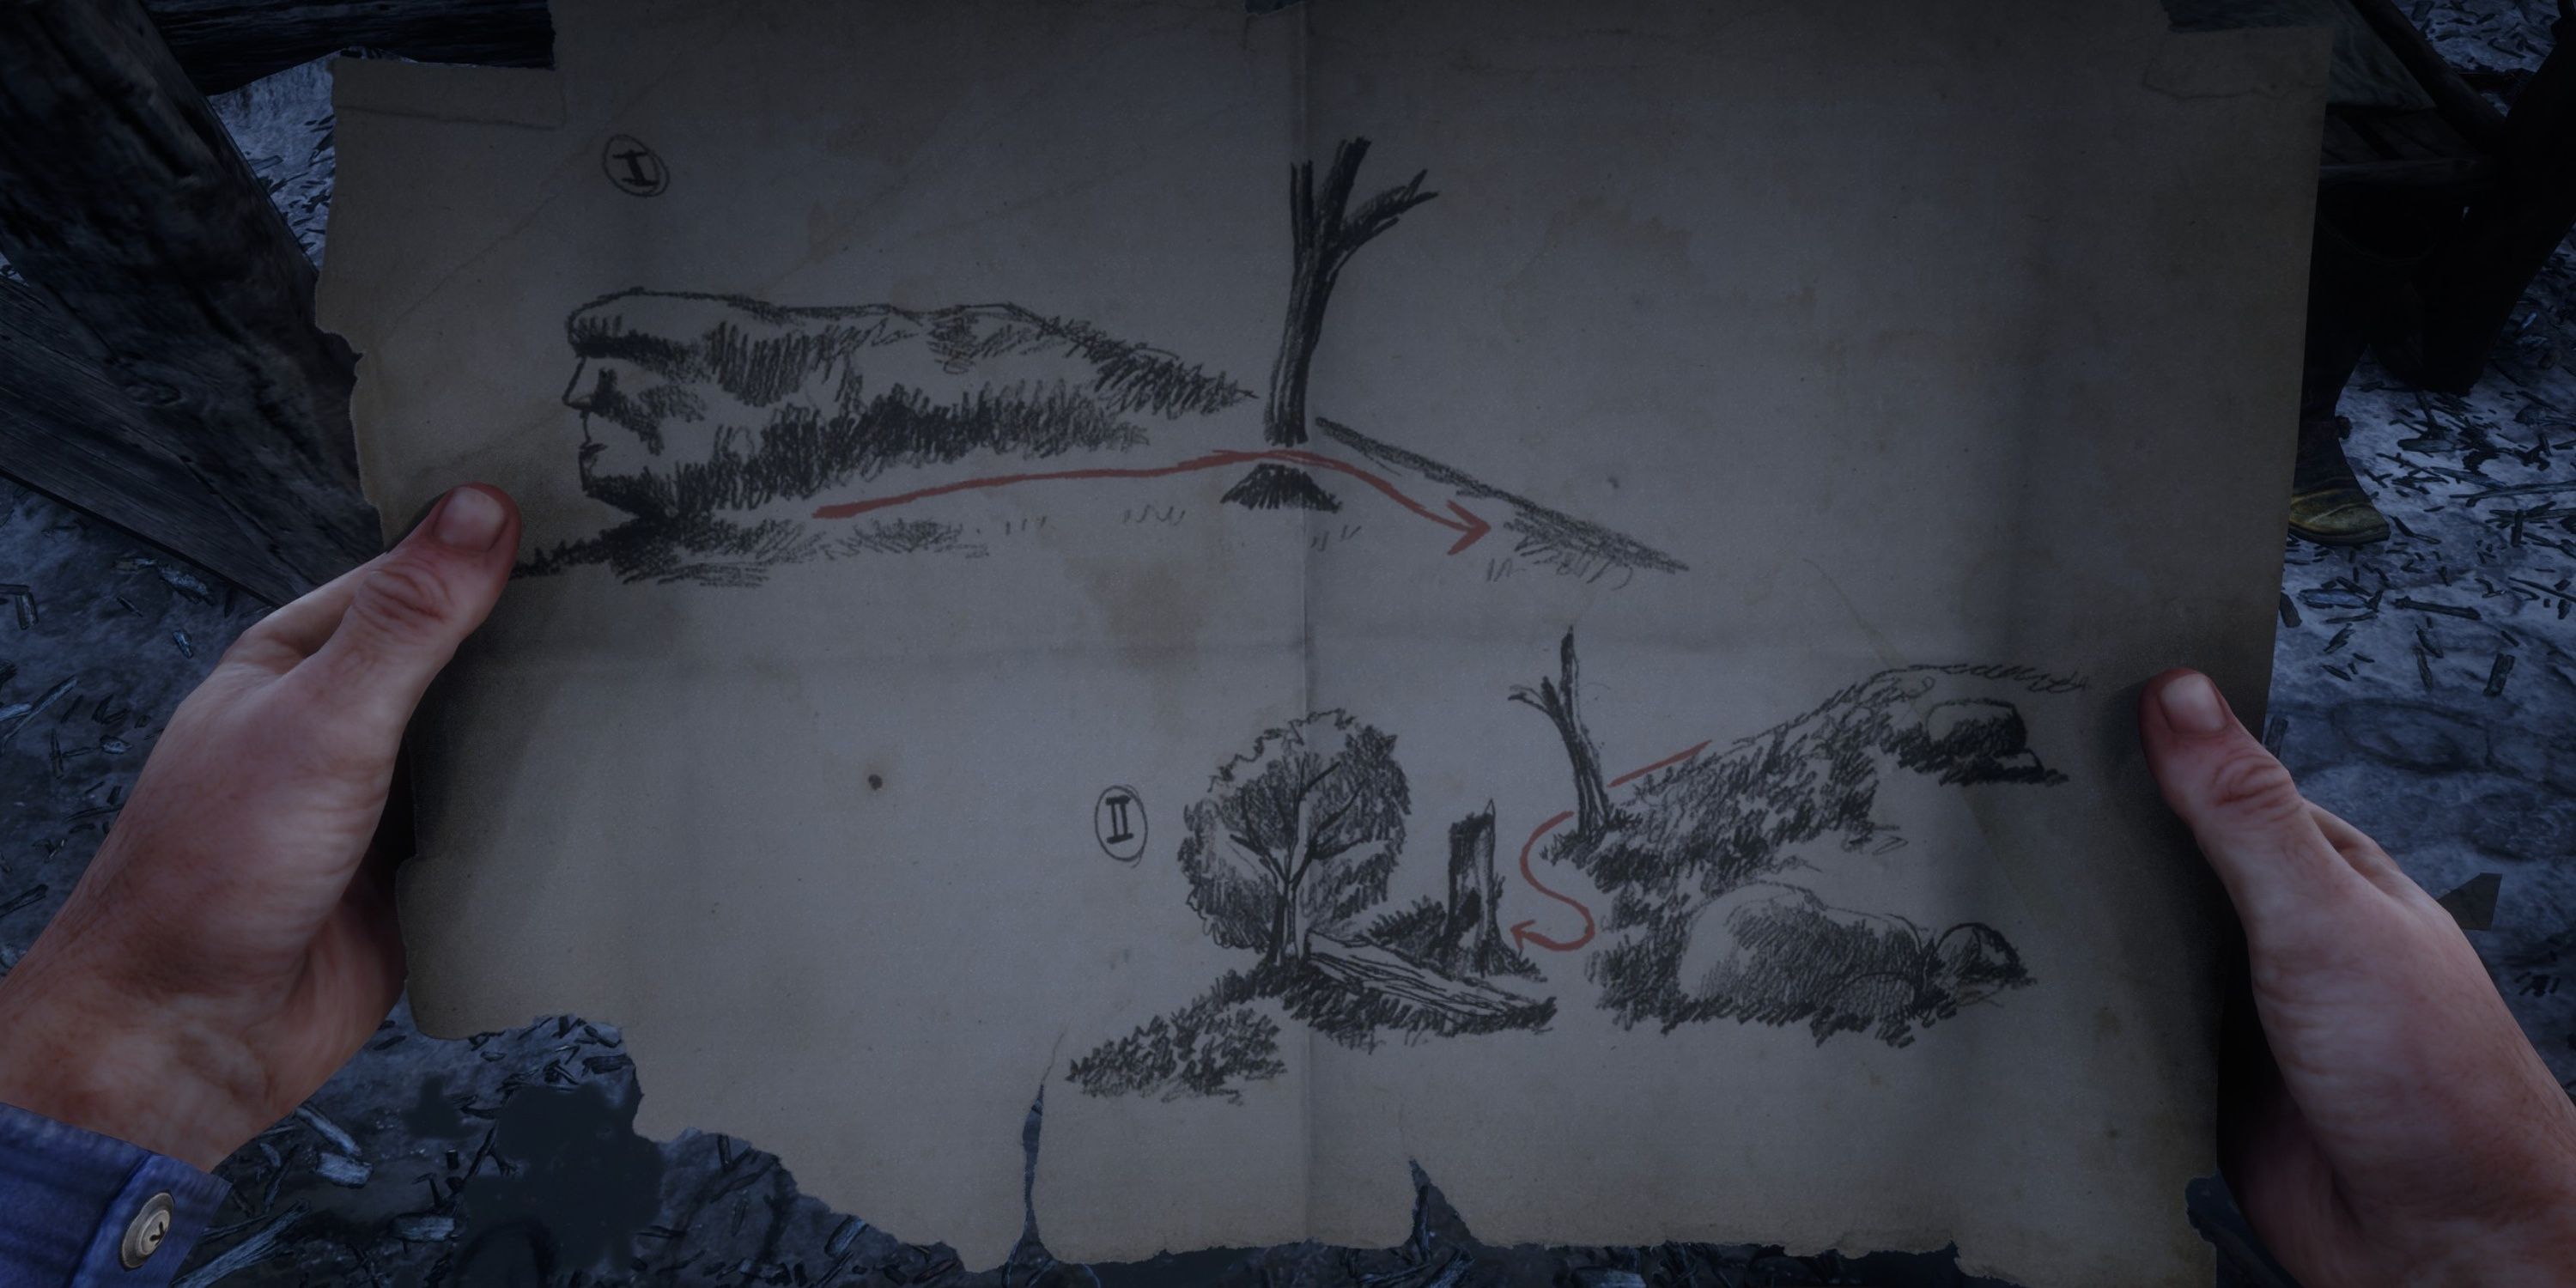
- Loot: $10, The Poisonous Trail Map 2
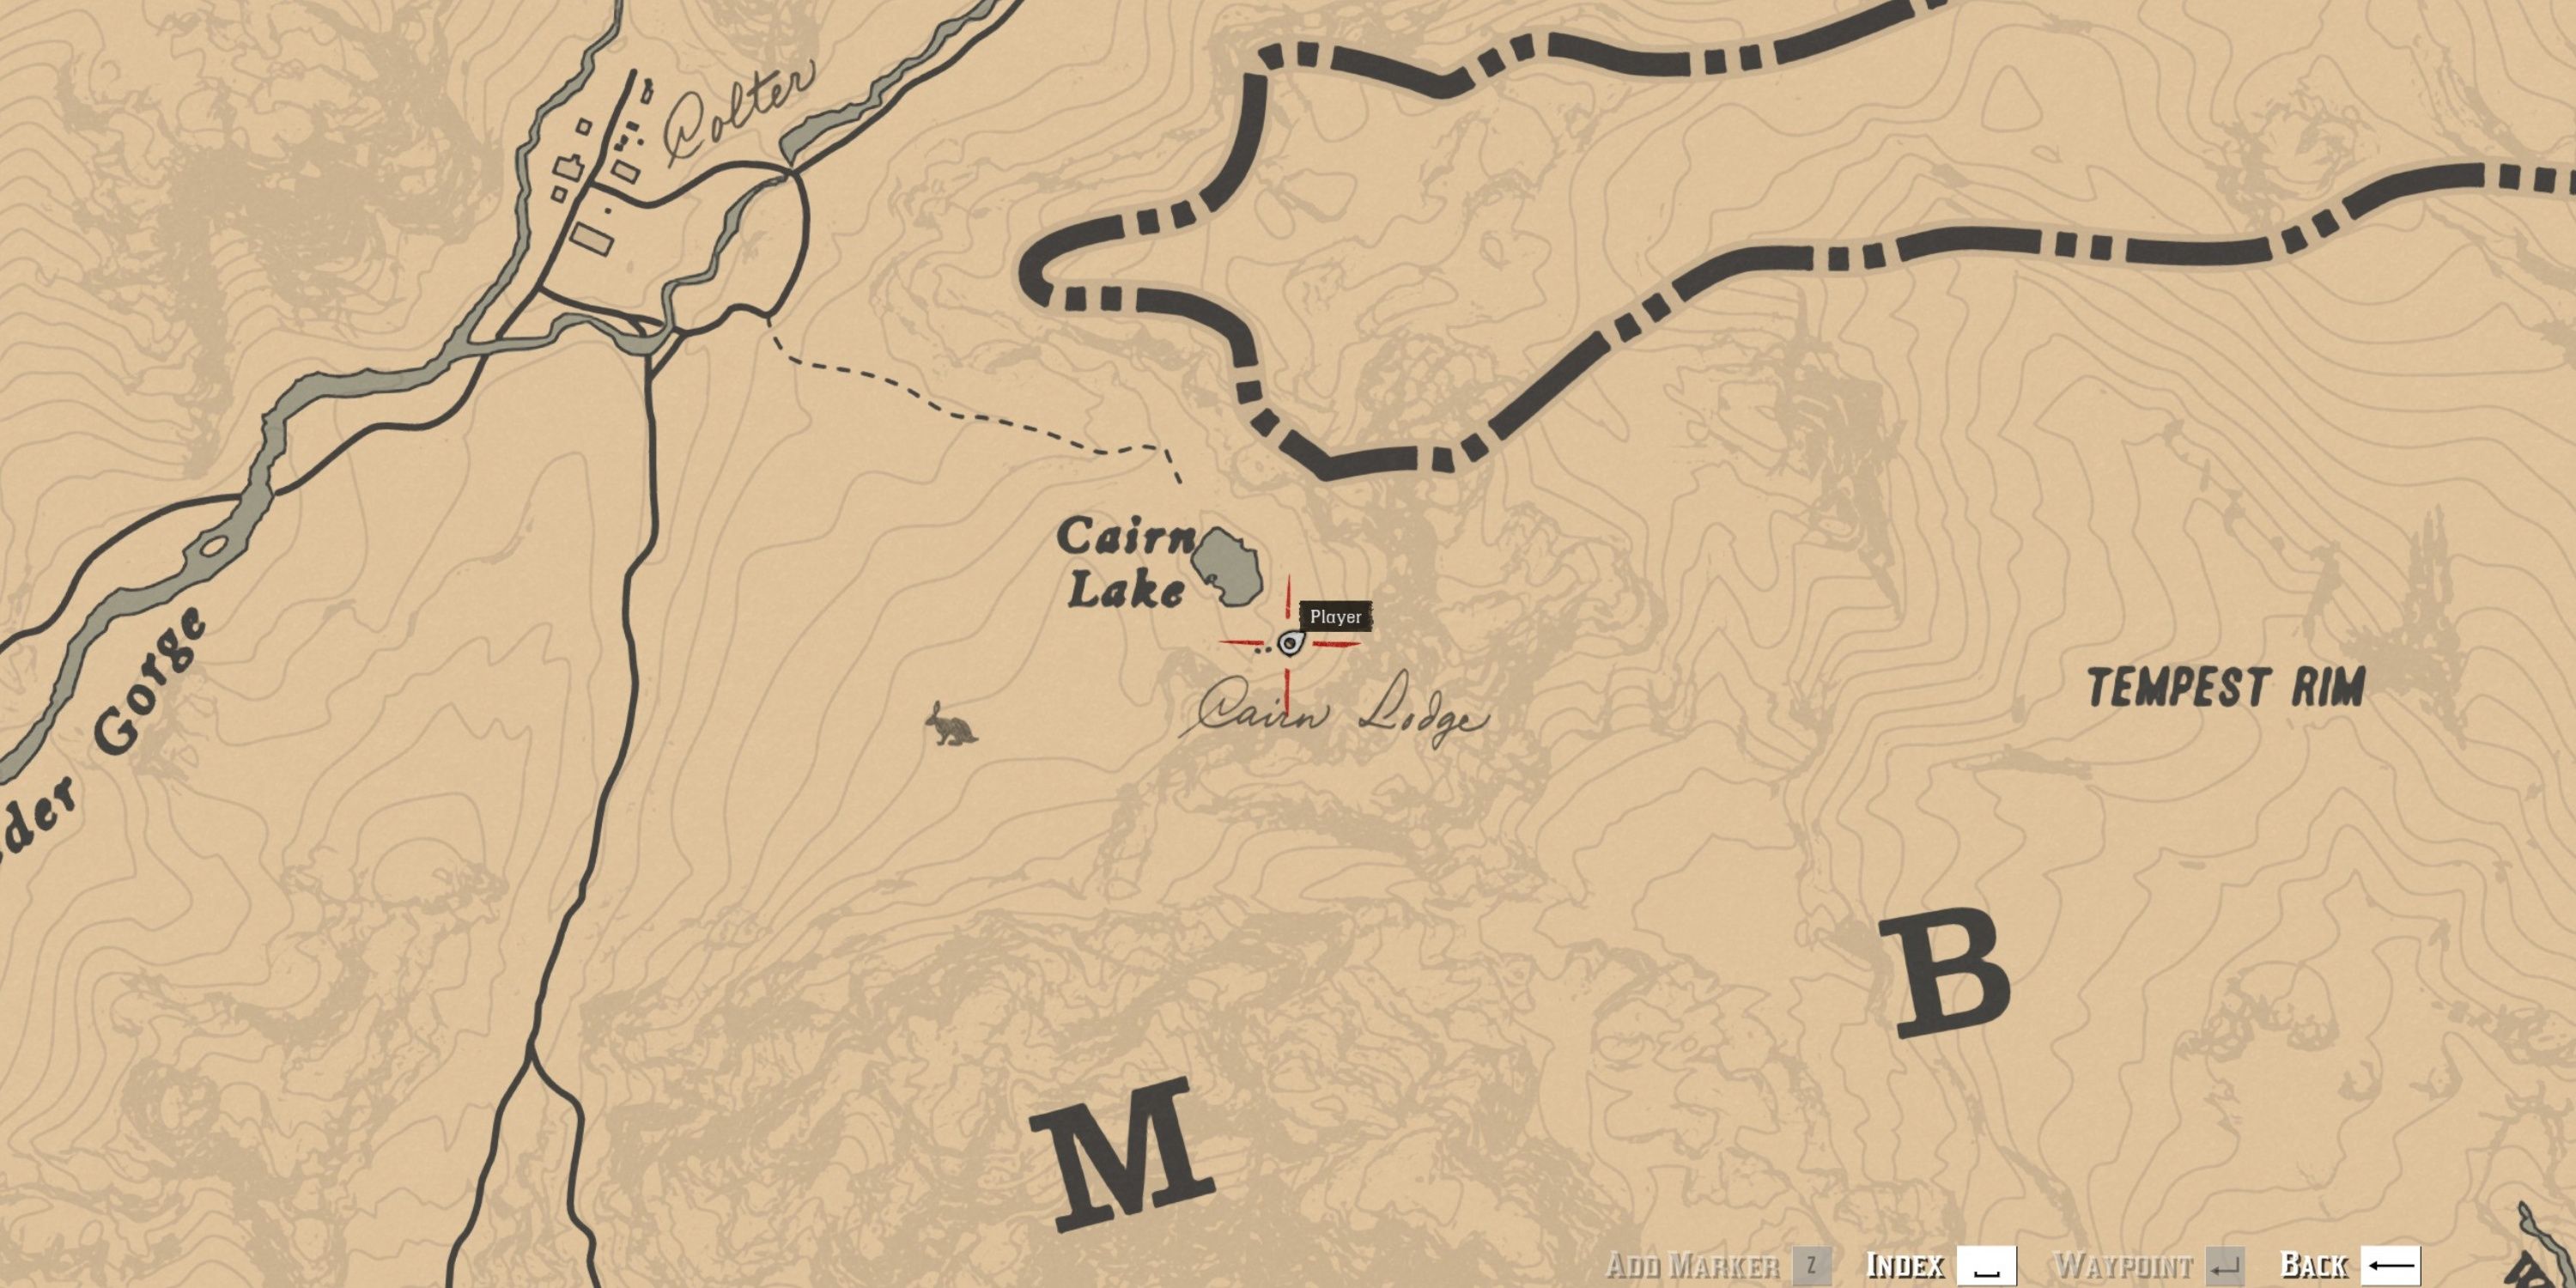
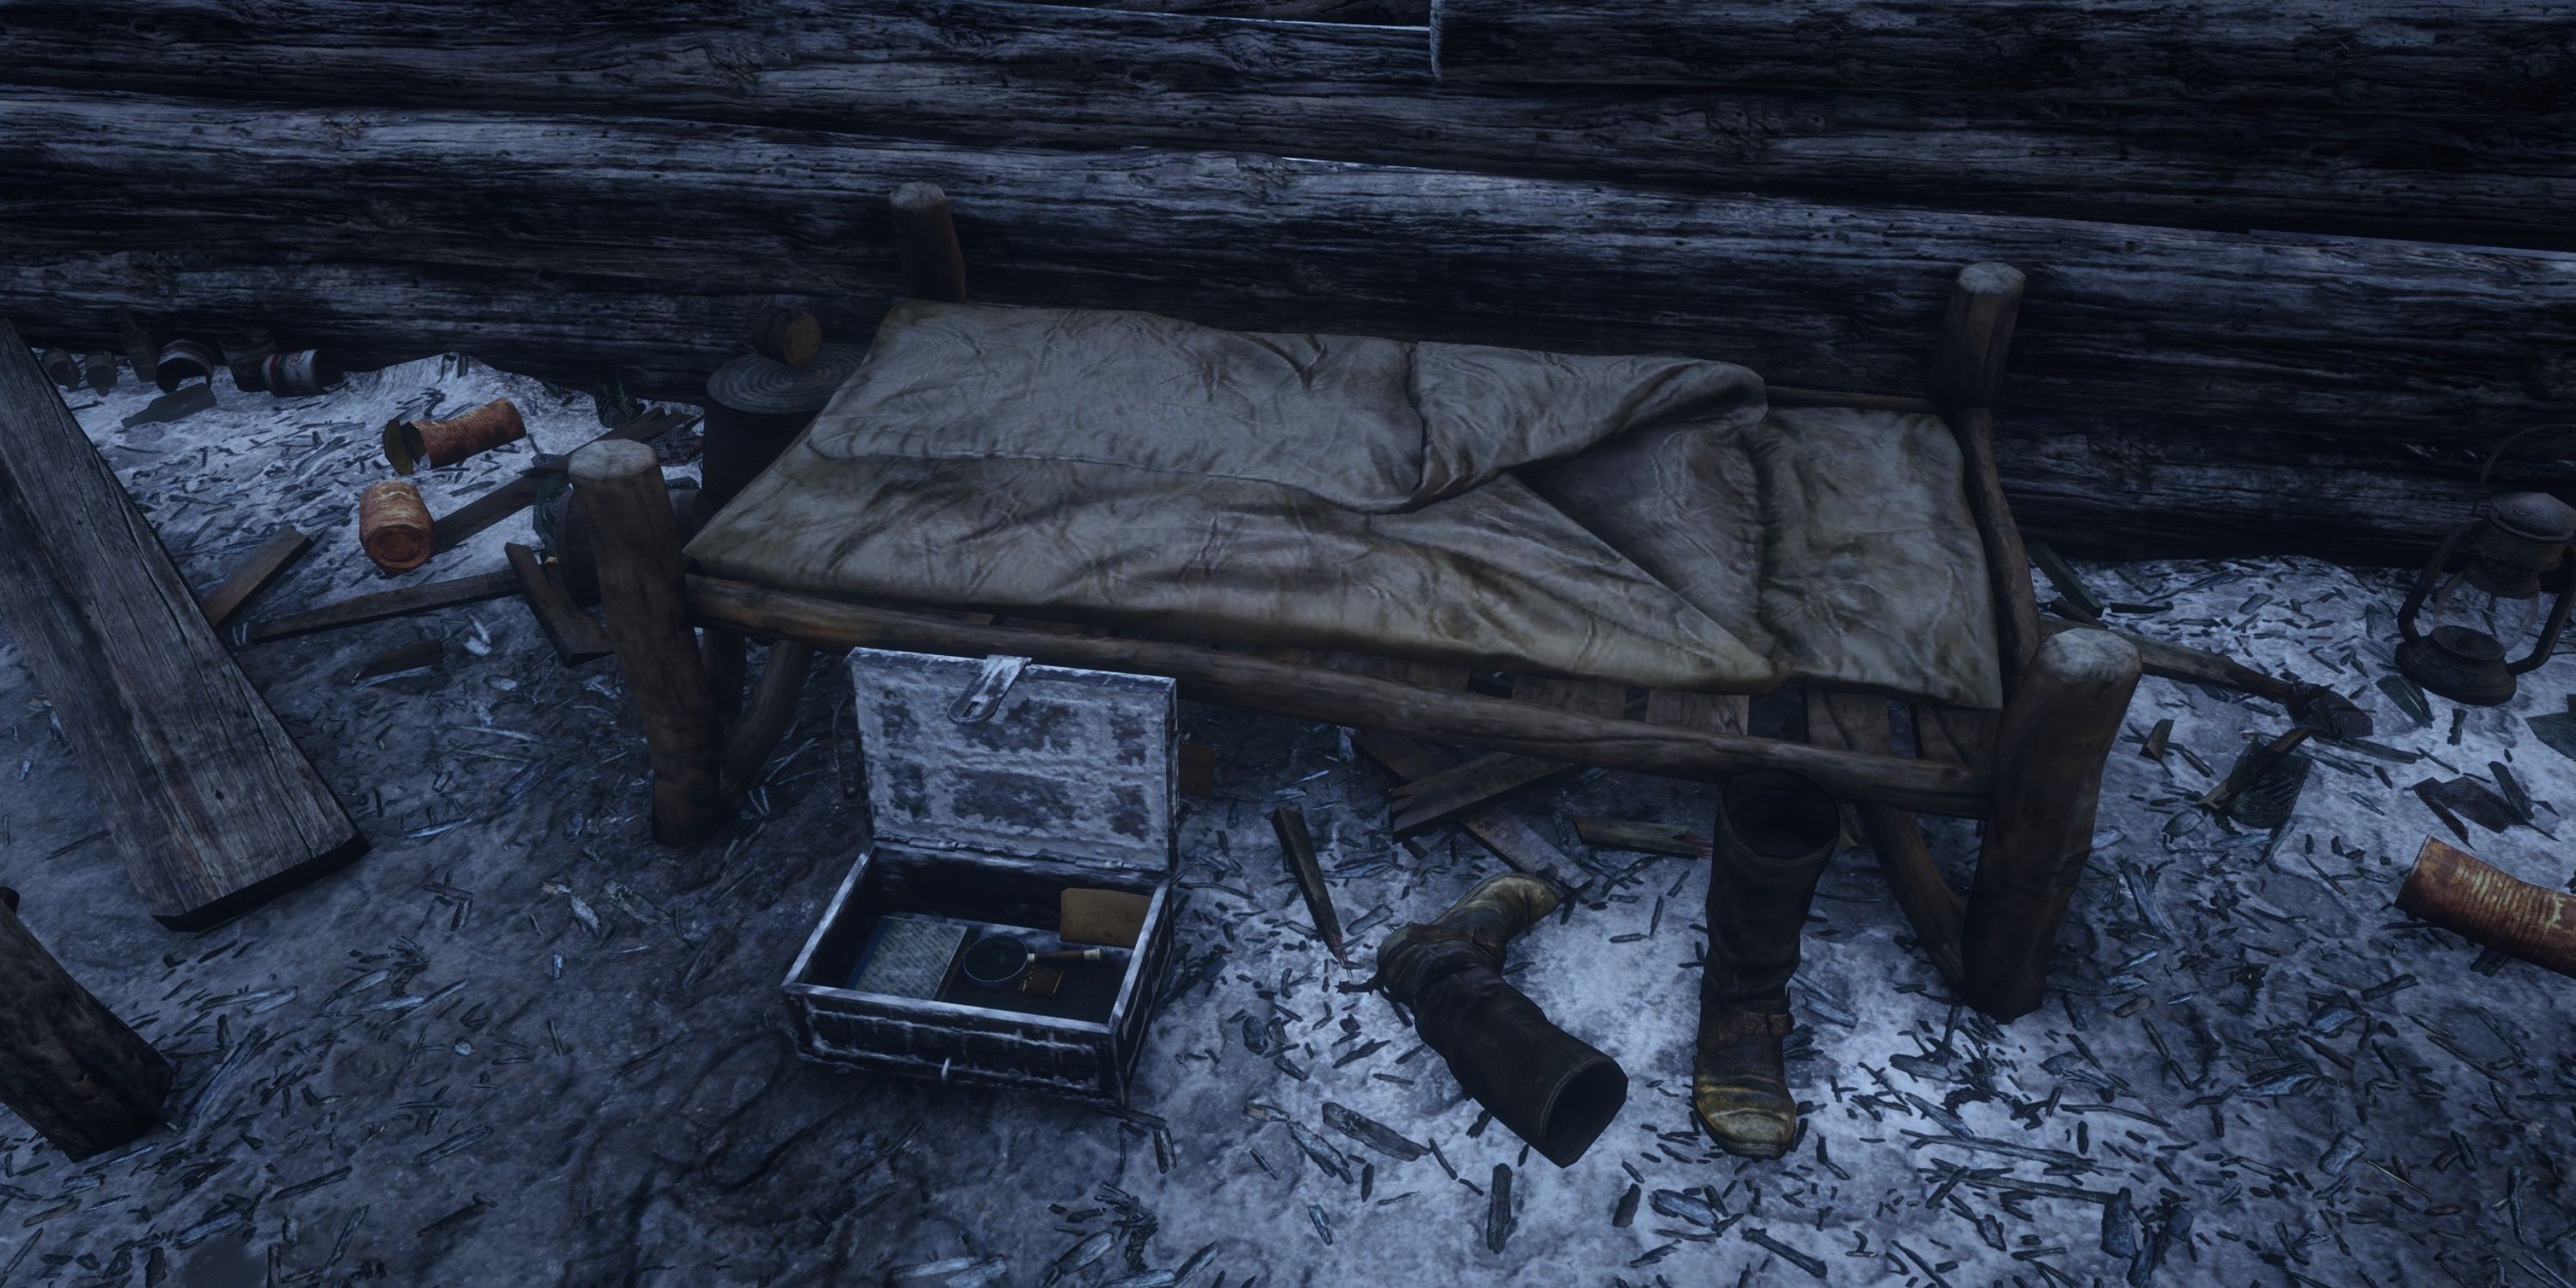
1. To obtain the Toxic Trail Map Number 1, make your way to Cairn Lodge situated at Cairn Lake, eastward from Colter in Ambarino. Upon entering the cabin and lifting the bed, you’ll discover a hidden lockbox that contains the Toxic Trail Map Number 1.
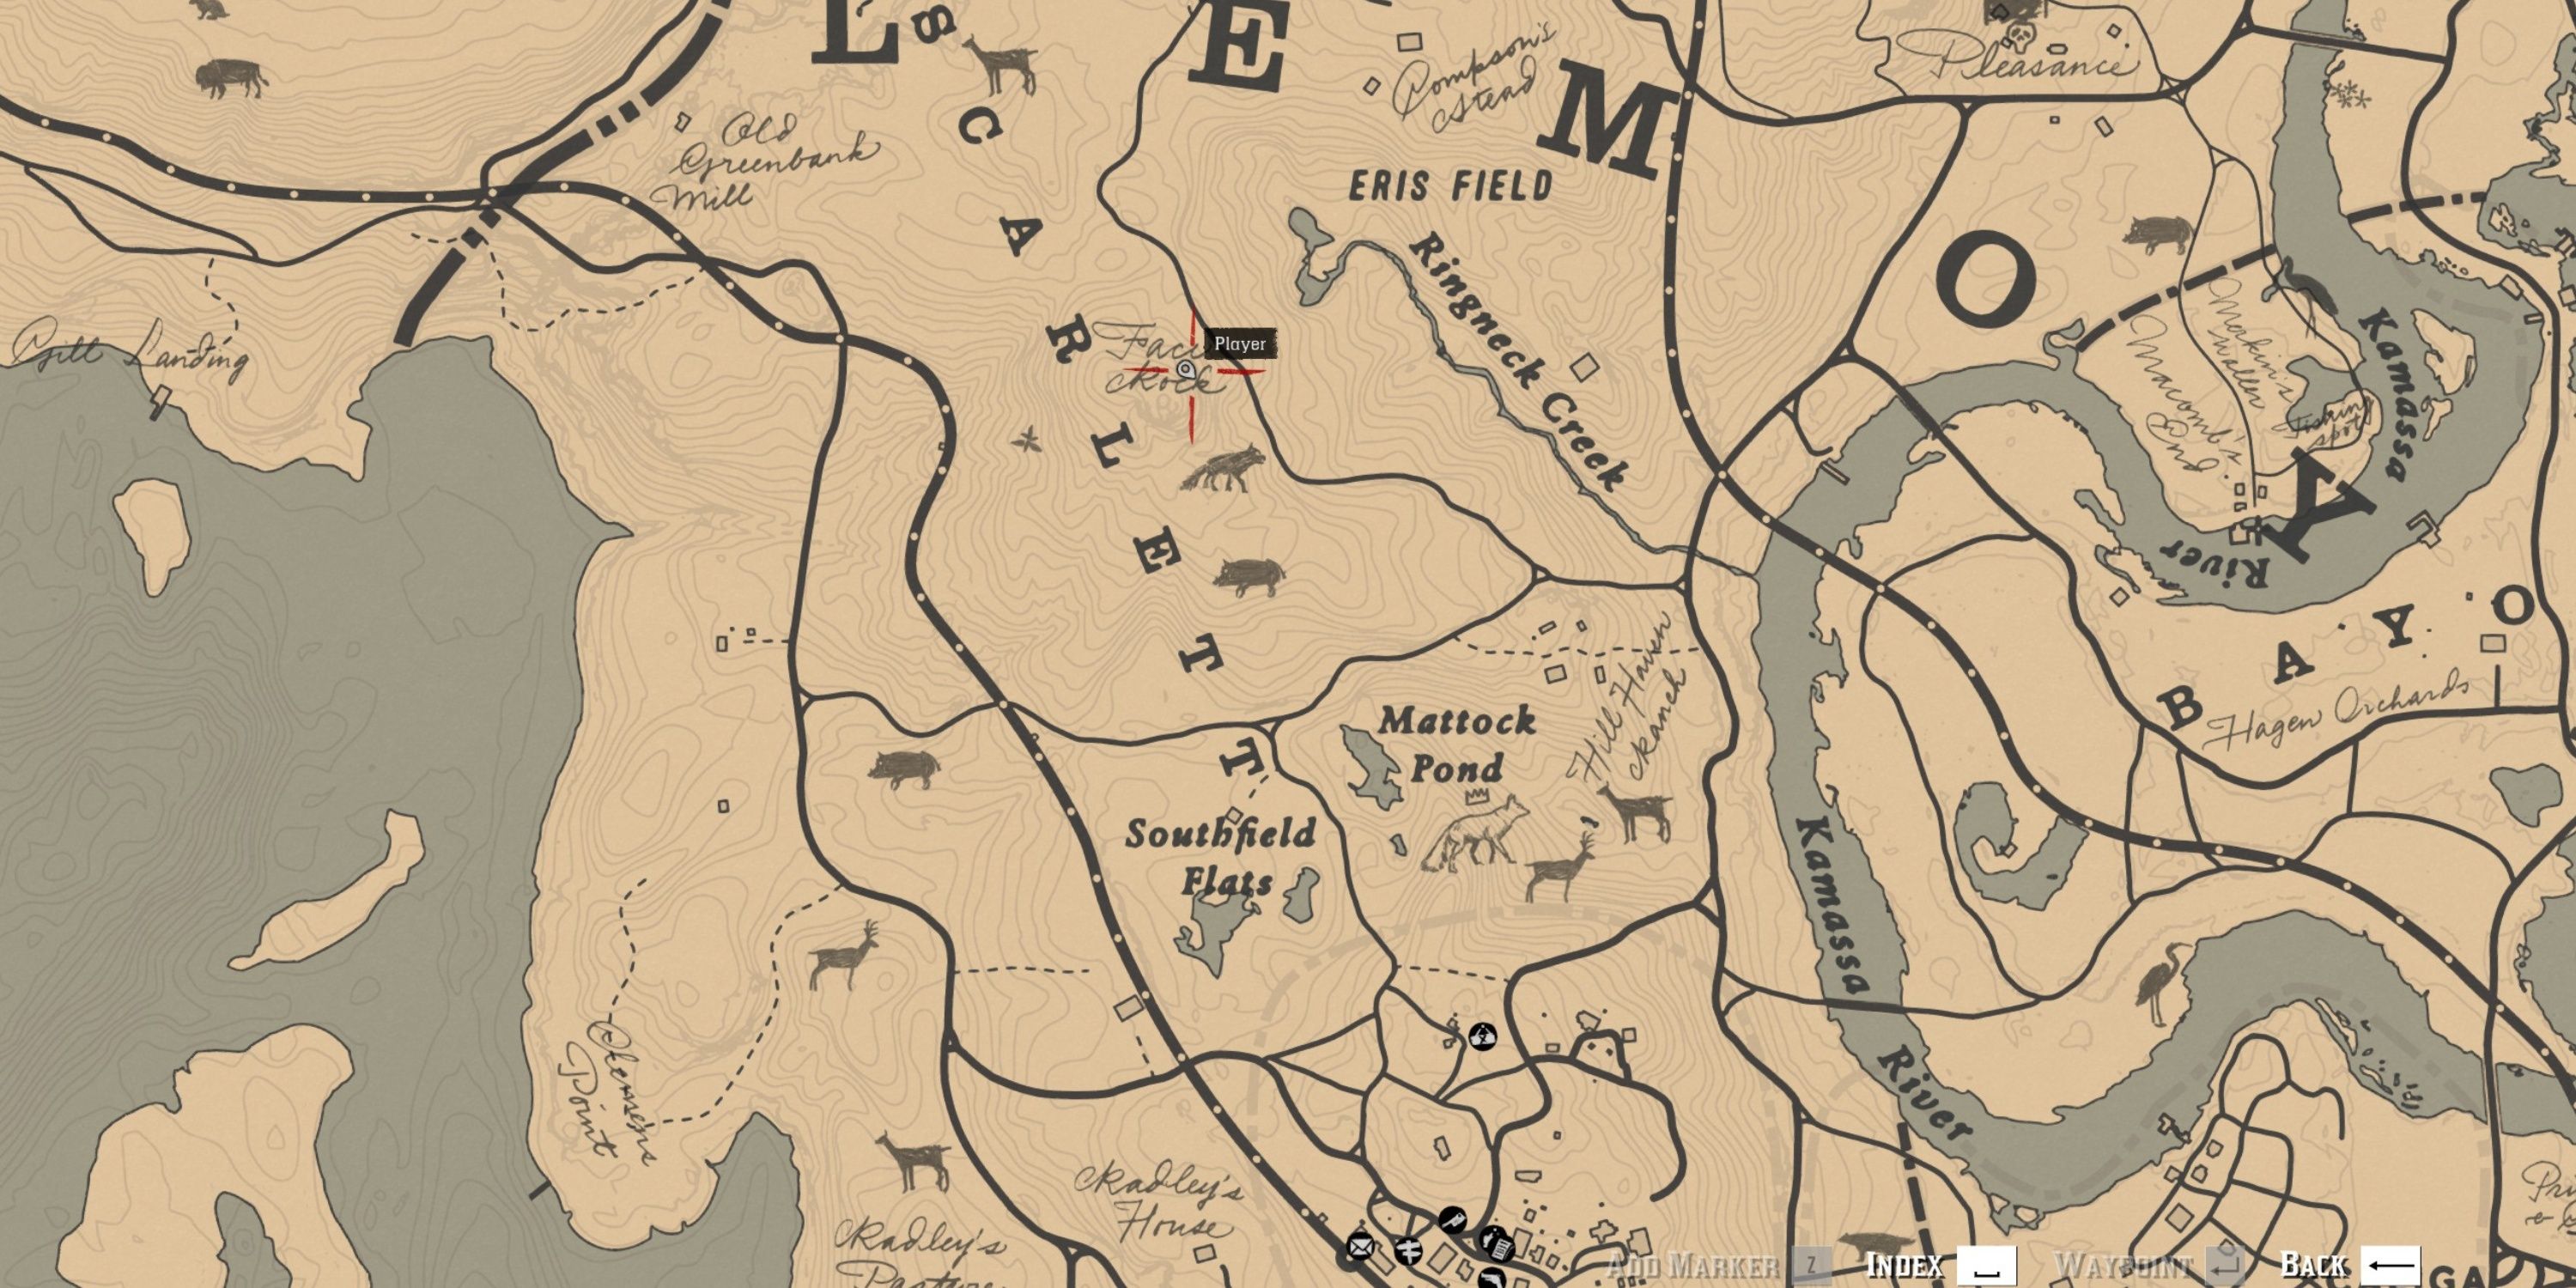
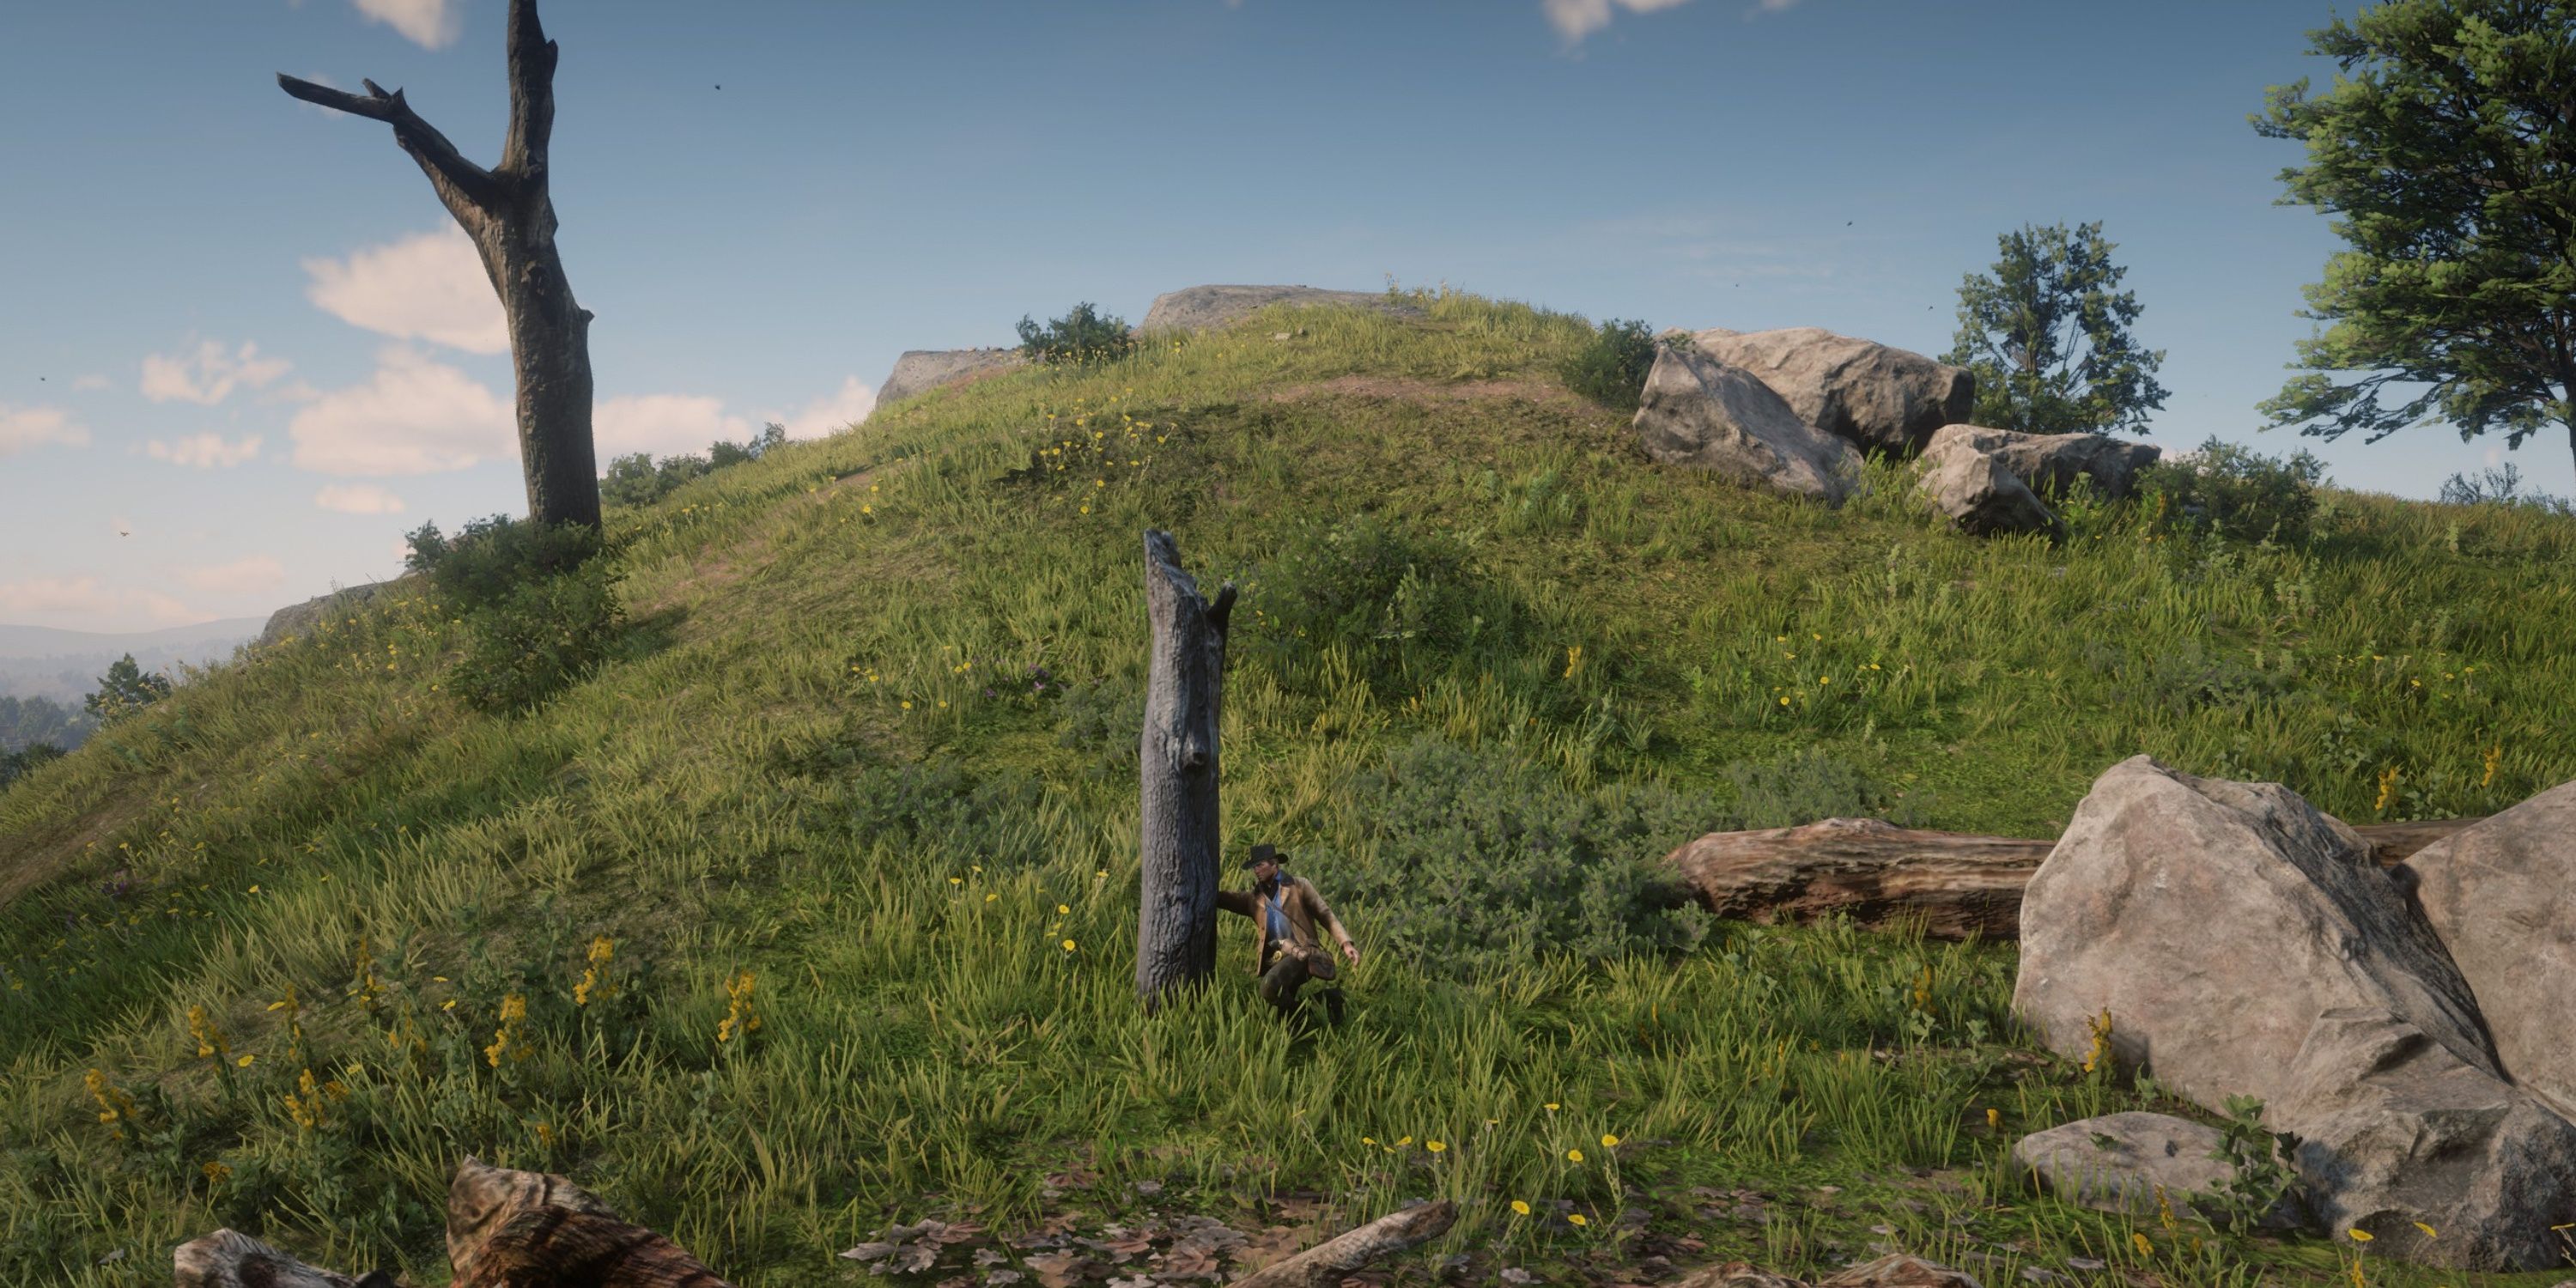
2. To decipher the secrets of Toxic Trail Map Number 1, journey to Face Rock in Scarlett Meadows, located north of Rhodes. There, you should examine a deceased tree stump nestled between two fallen trees for further instructions.
10. The Poisonous Trail Map 2

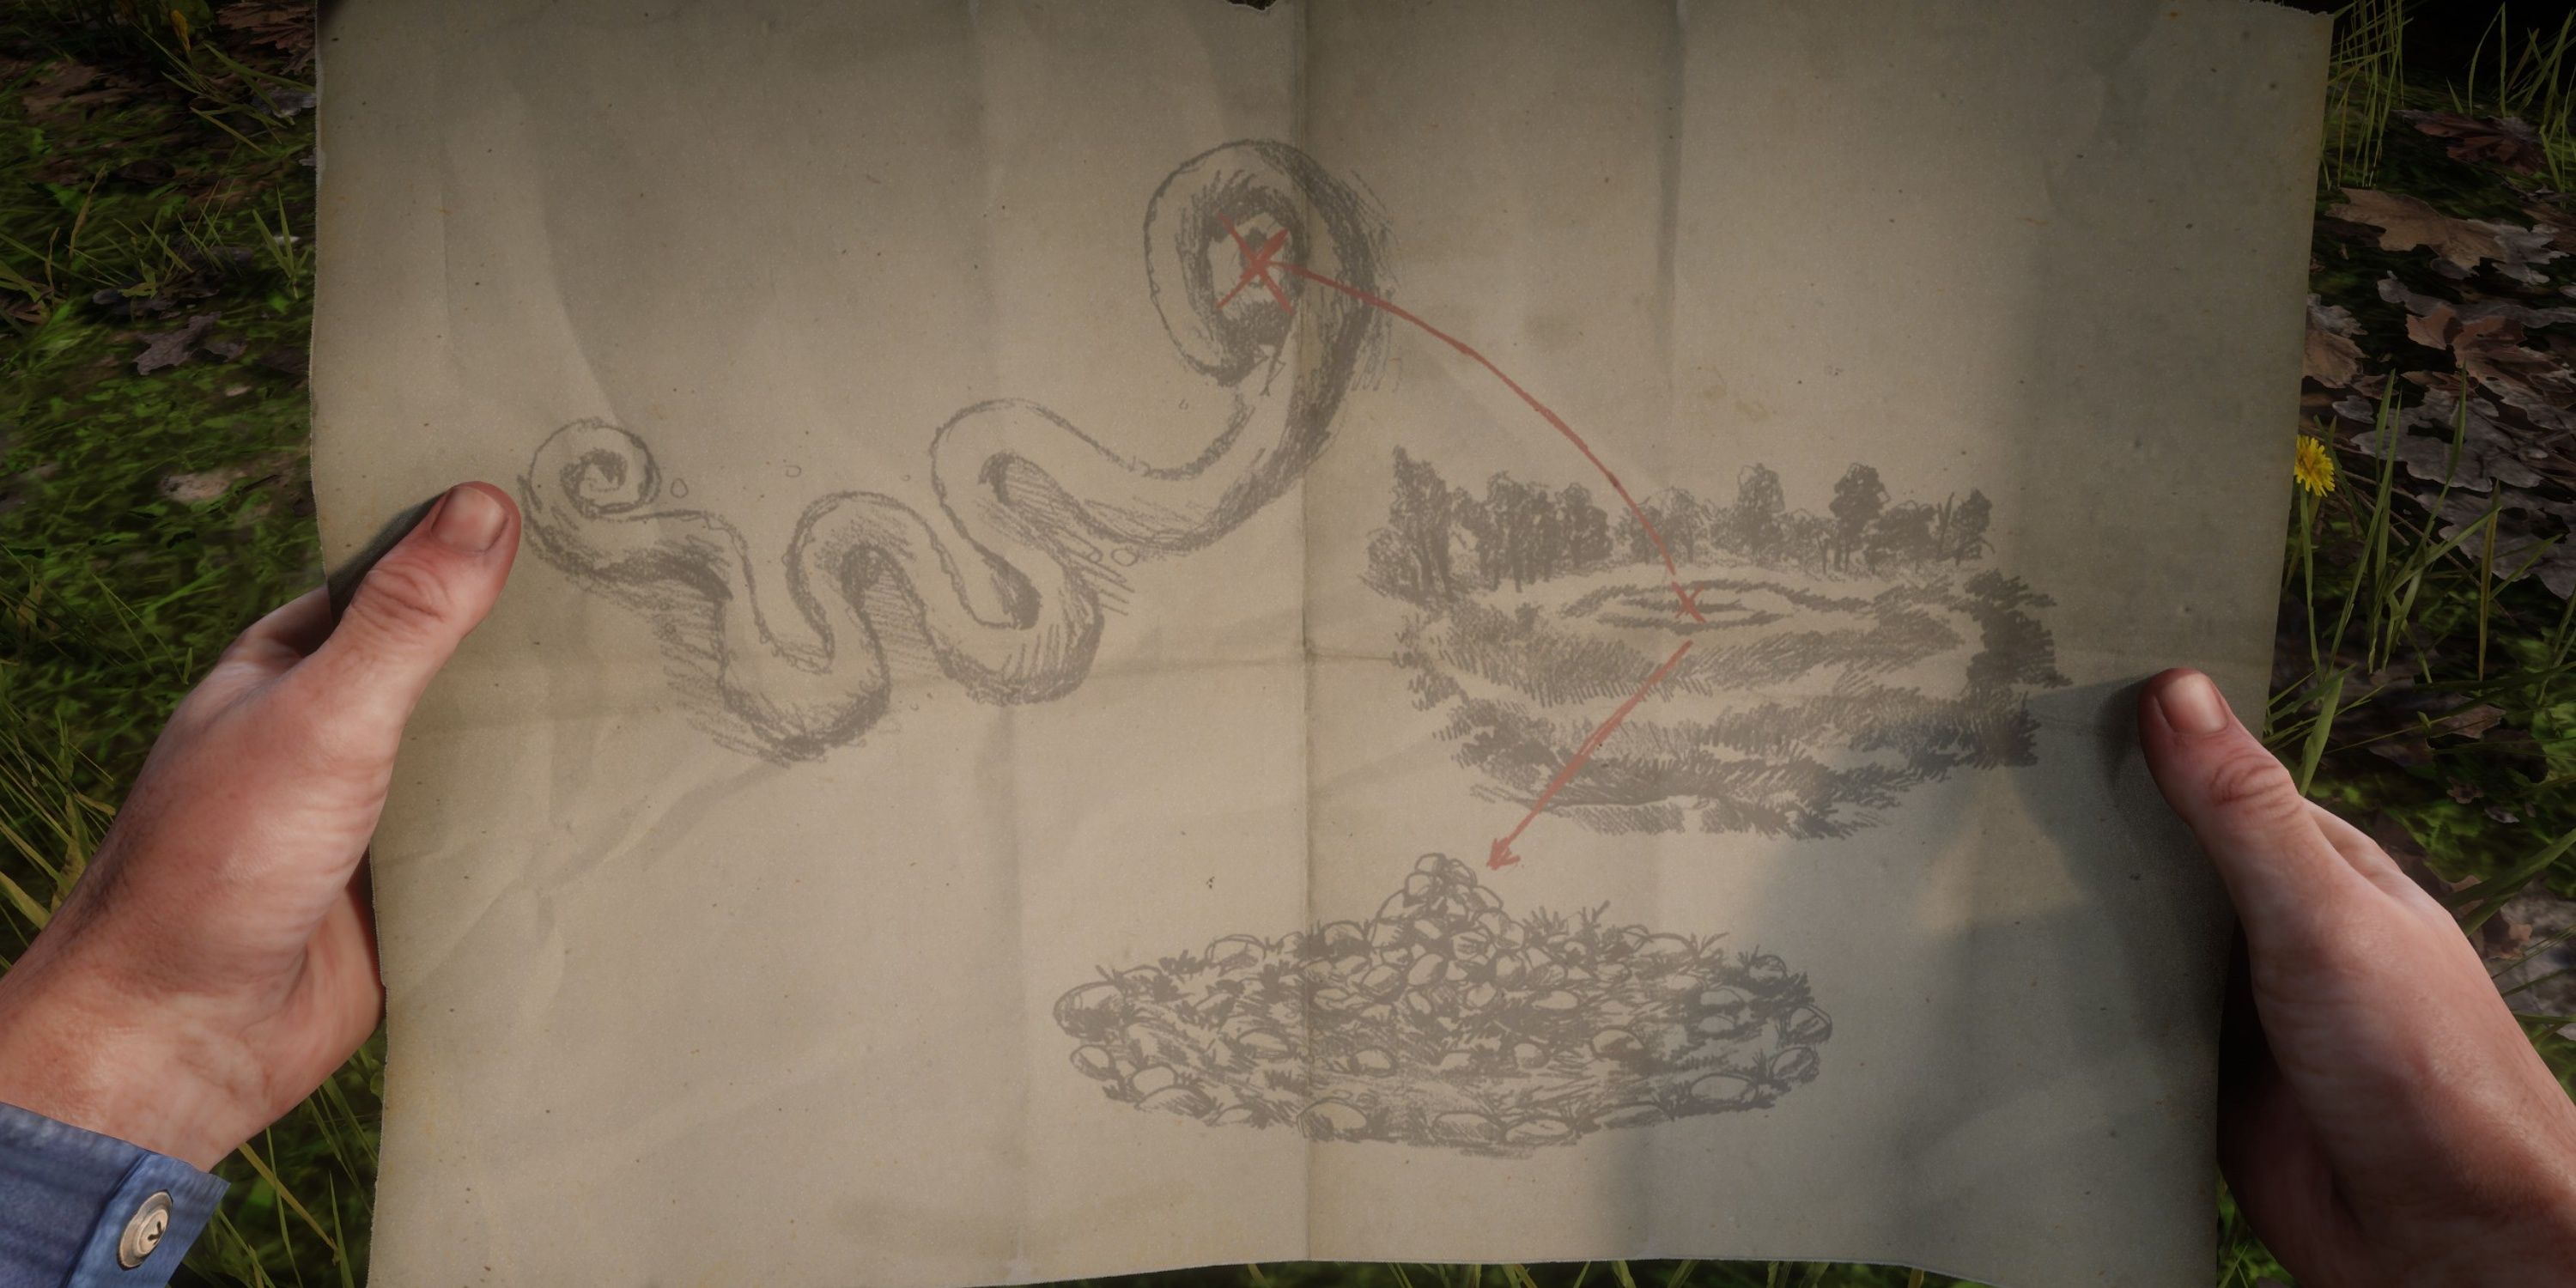
- Loot: Platinum Spring Bracelet, The Poisonous Trail Map 3
You can find the answer to Poisonous Trail Map 2 by traveling southward from Van Horn Trading Post. The resolution to this treasure map is hidden at the center of a rocky mound or hillock situated between Fort Brennard and the Van Horn Mansion.
9. The Poisonous Trail Map 3
- Loot: 4x Gold Bars
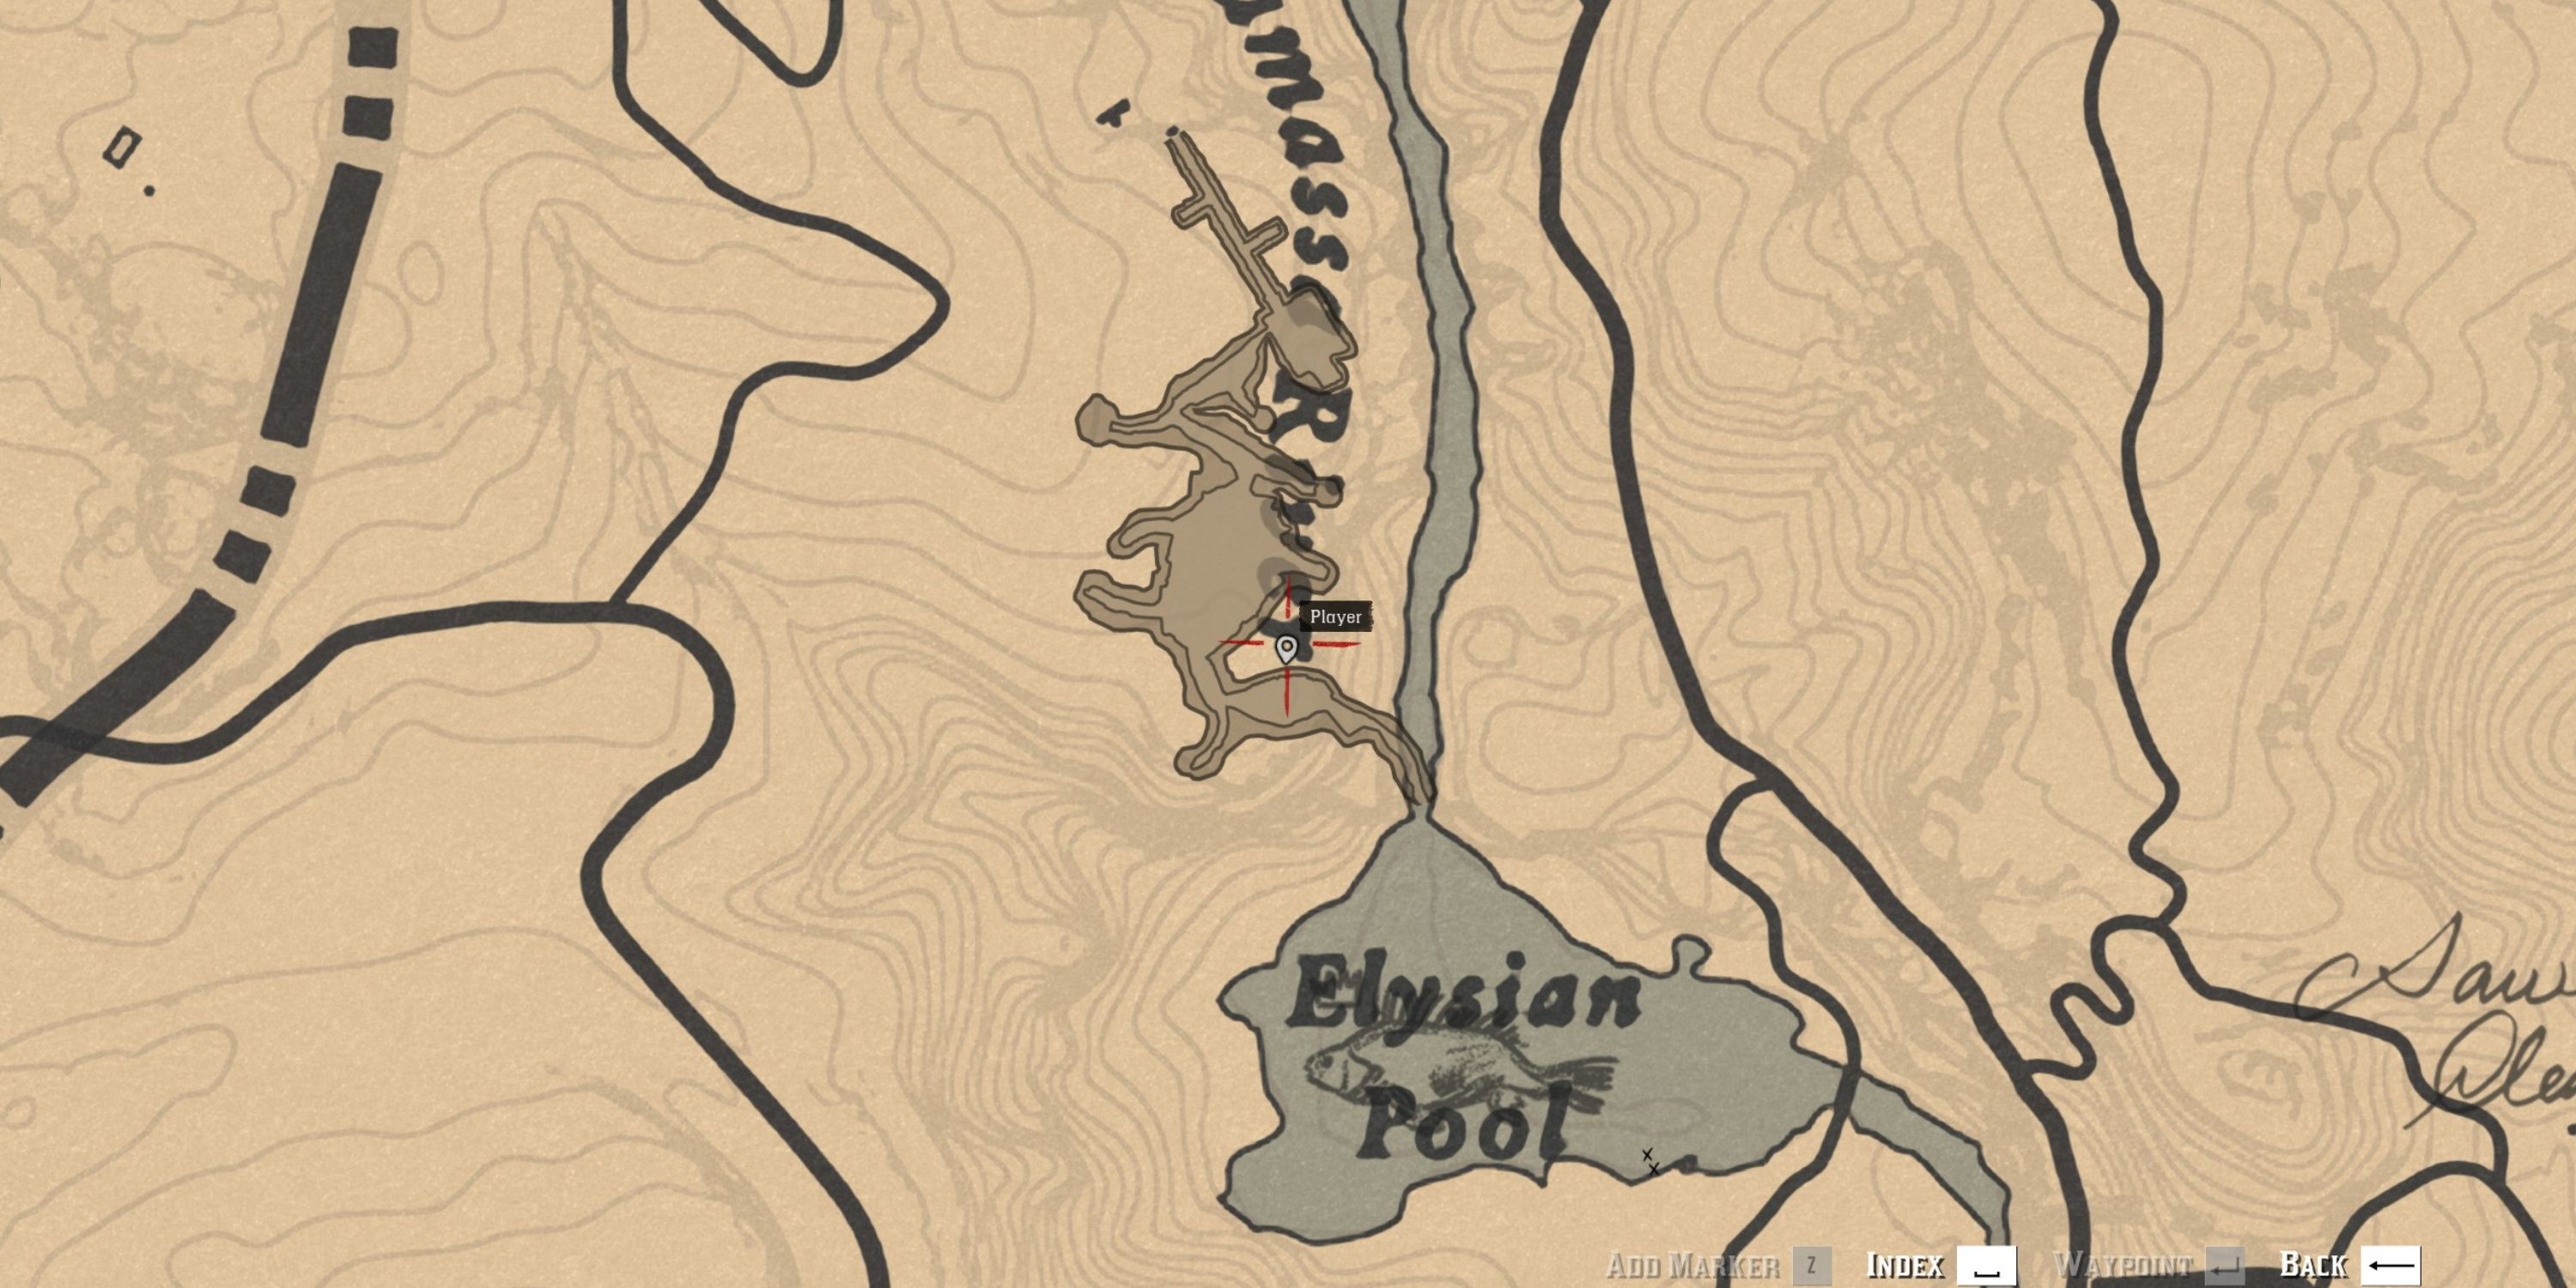
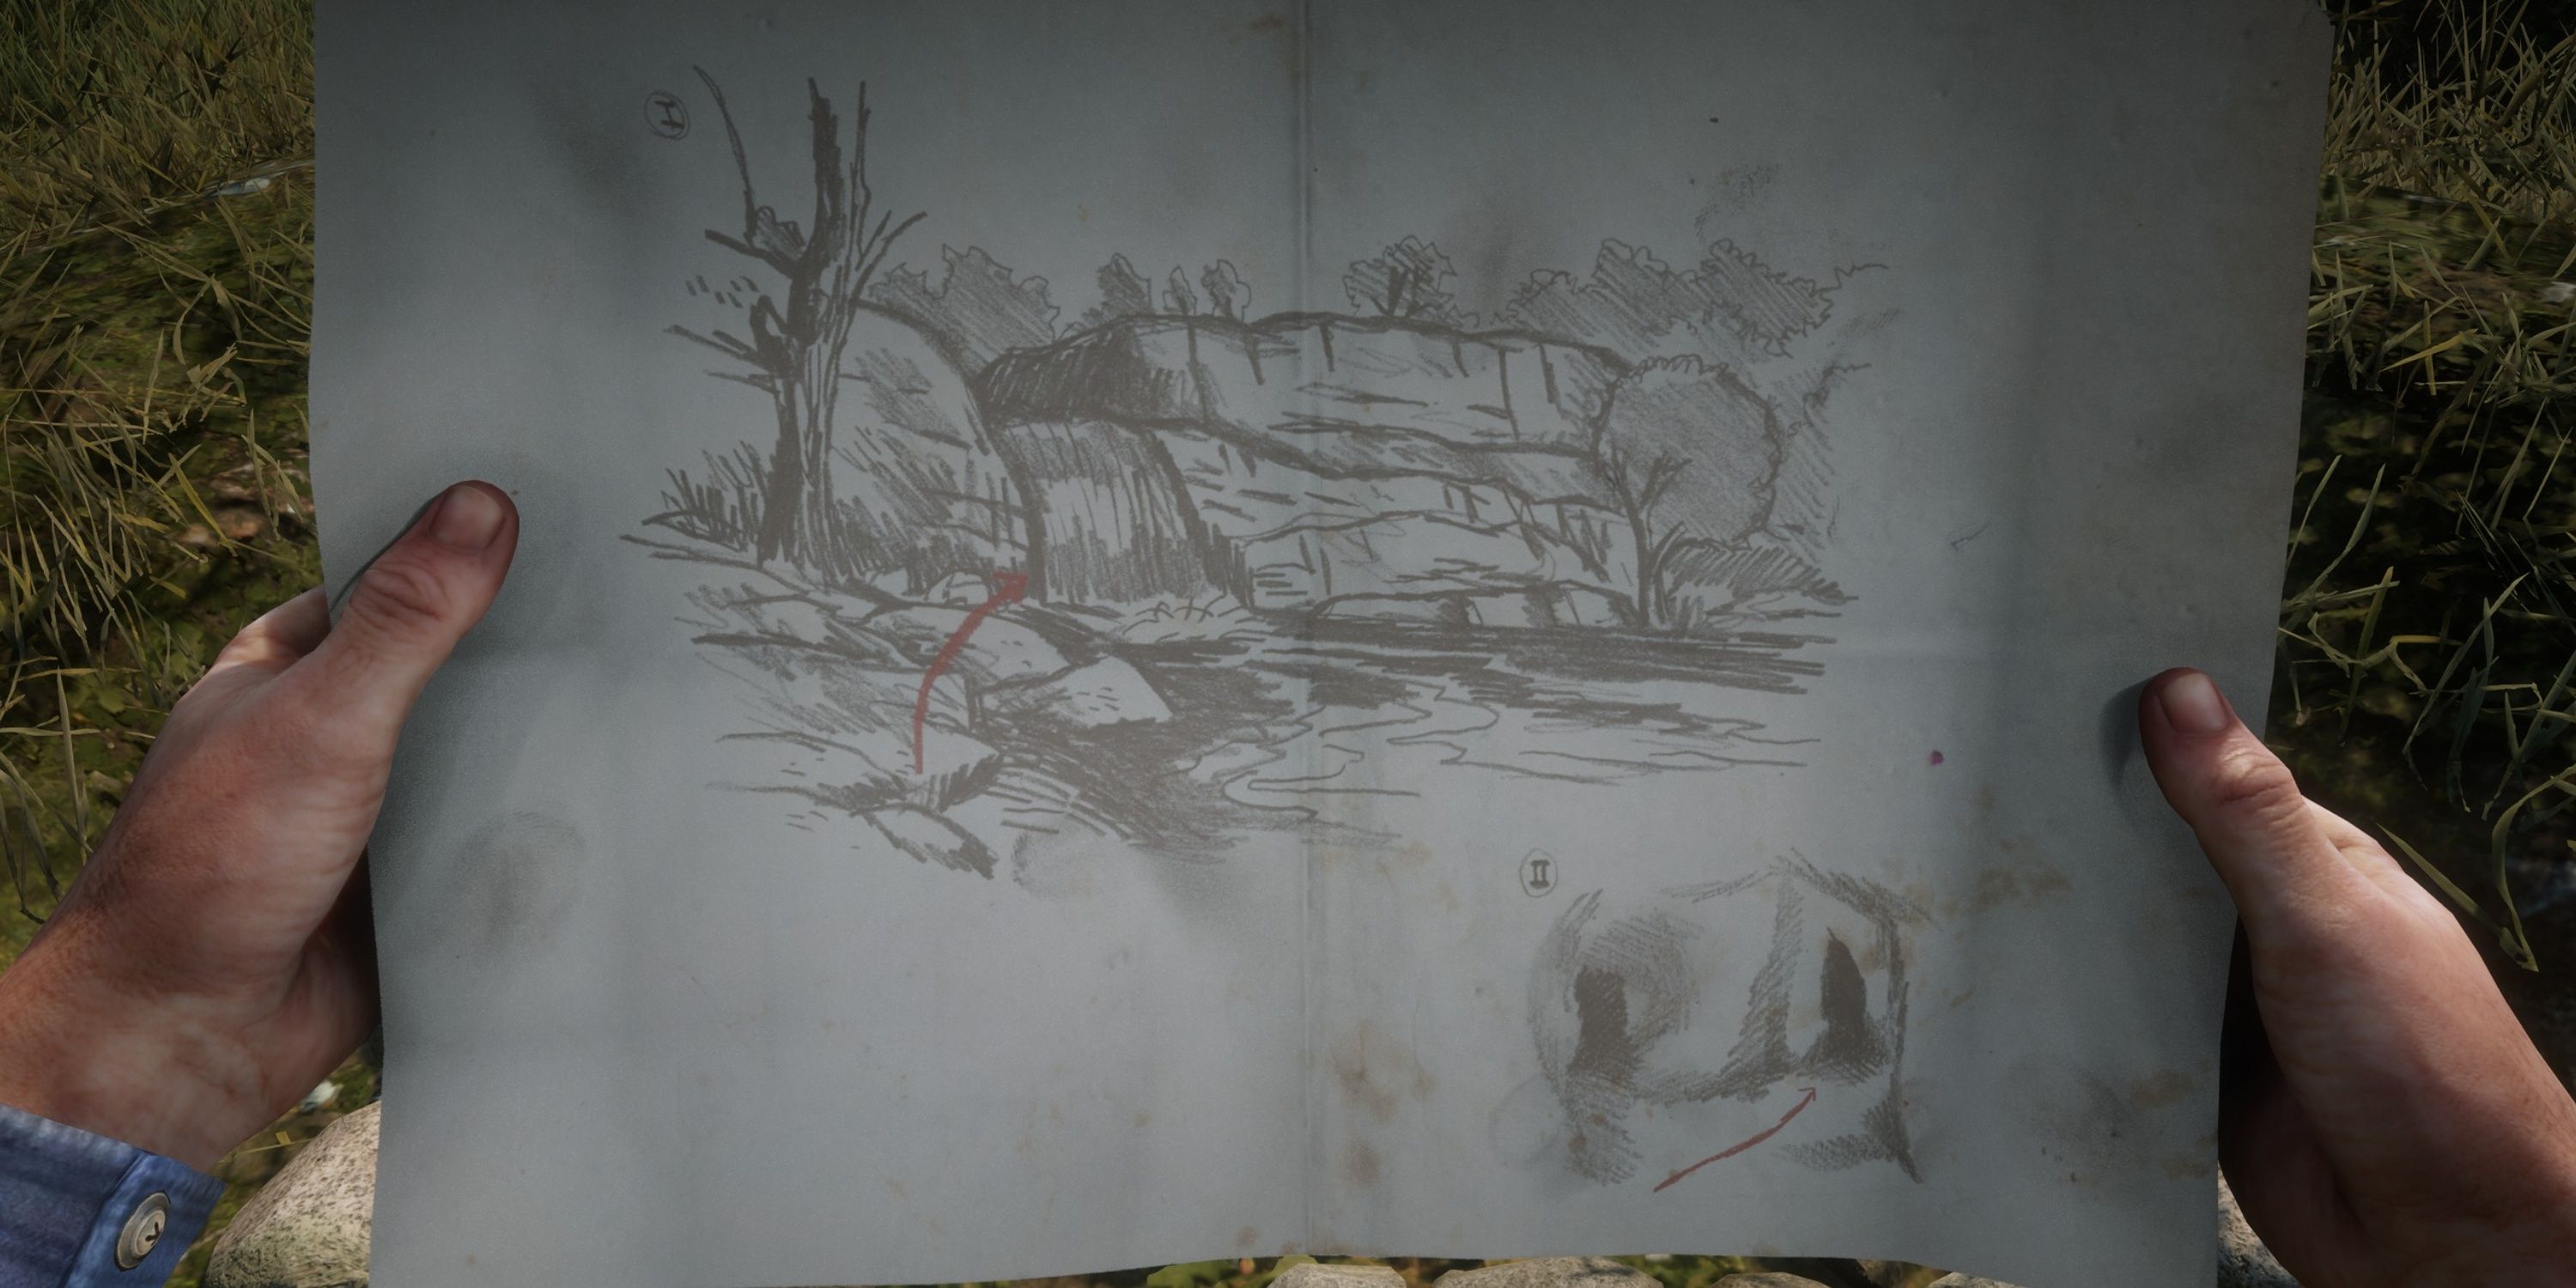
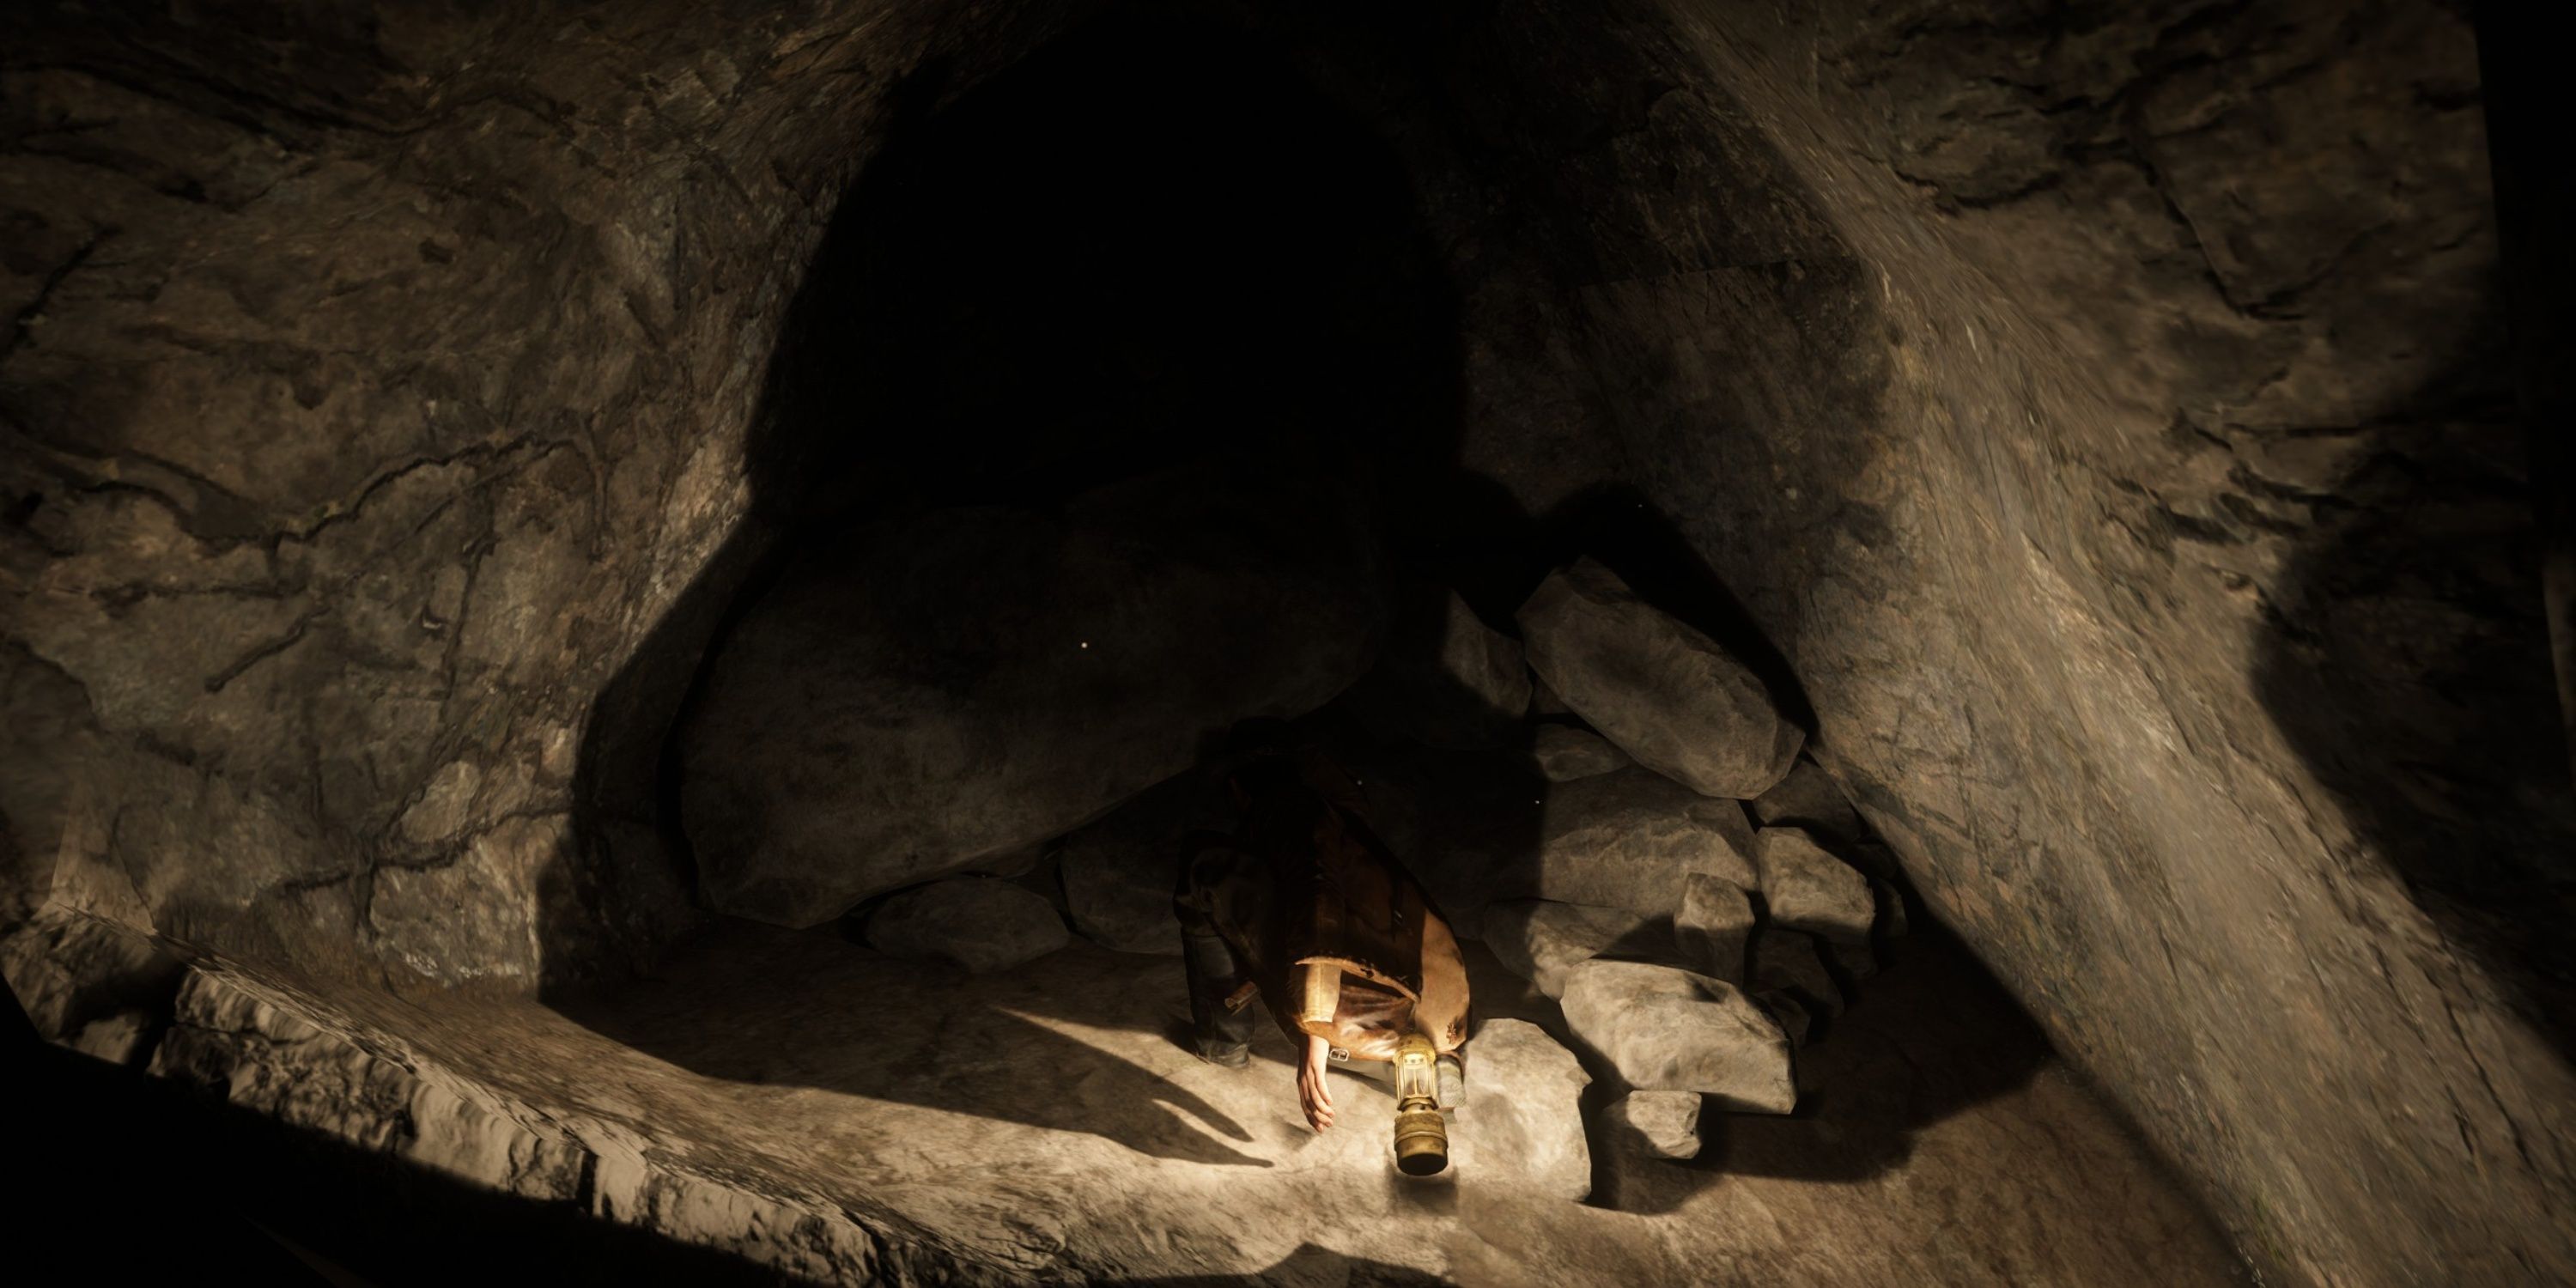
For the concluding part of “The Poisonous Trail Map”, navigate your way to the Elysian pool situated in Roanoke Ridge and locate the waterfall behind it. Entering the pool, you’ll find yourself inside a cave, so remember to carry a Lantern for illumination. Ascend further up within the cave, then follow the trail while moving to the right, keeping close to the wall as you delve deeper into a narrow cave entrance. At the fork in the road, take a right turn and an immediate left, continuing along the left path until you encounter a drop. Leap across the drop on the left side and proceed along the inner part of that cave to land in a water pool. Climb up from this pool to find a stack of rocks that can be searched for the rewards associated with “The Poisonous Trail Treasure”.
Follow the final part of The Poisonous Trail Map to the Elysian pool in Roanoke Ridge, then climb behind the waterfall. Inside the cave, bring a Lantern for light. Climb higher up and follow the trail to the right while hugging the wall. At the fork in the road, take a right, then an immediate left, and keep going until you reach a drop. Jump across the drop on the left side and move along the inner part of that cave to land in a water pool. Climb up from this pool to search for rewards associated with “The Poisonous Trail Treasure” within a stack of rocks.
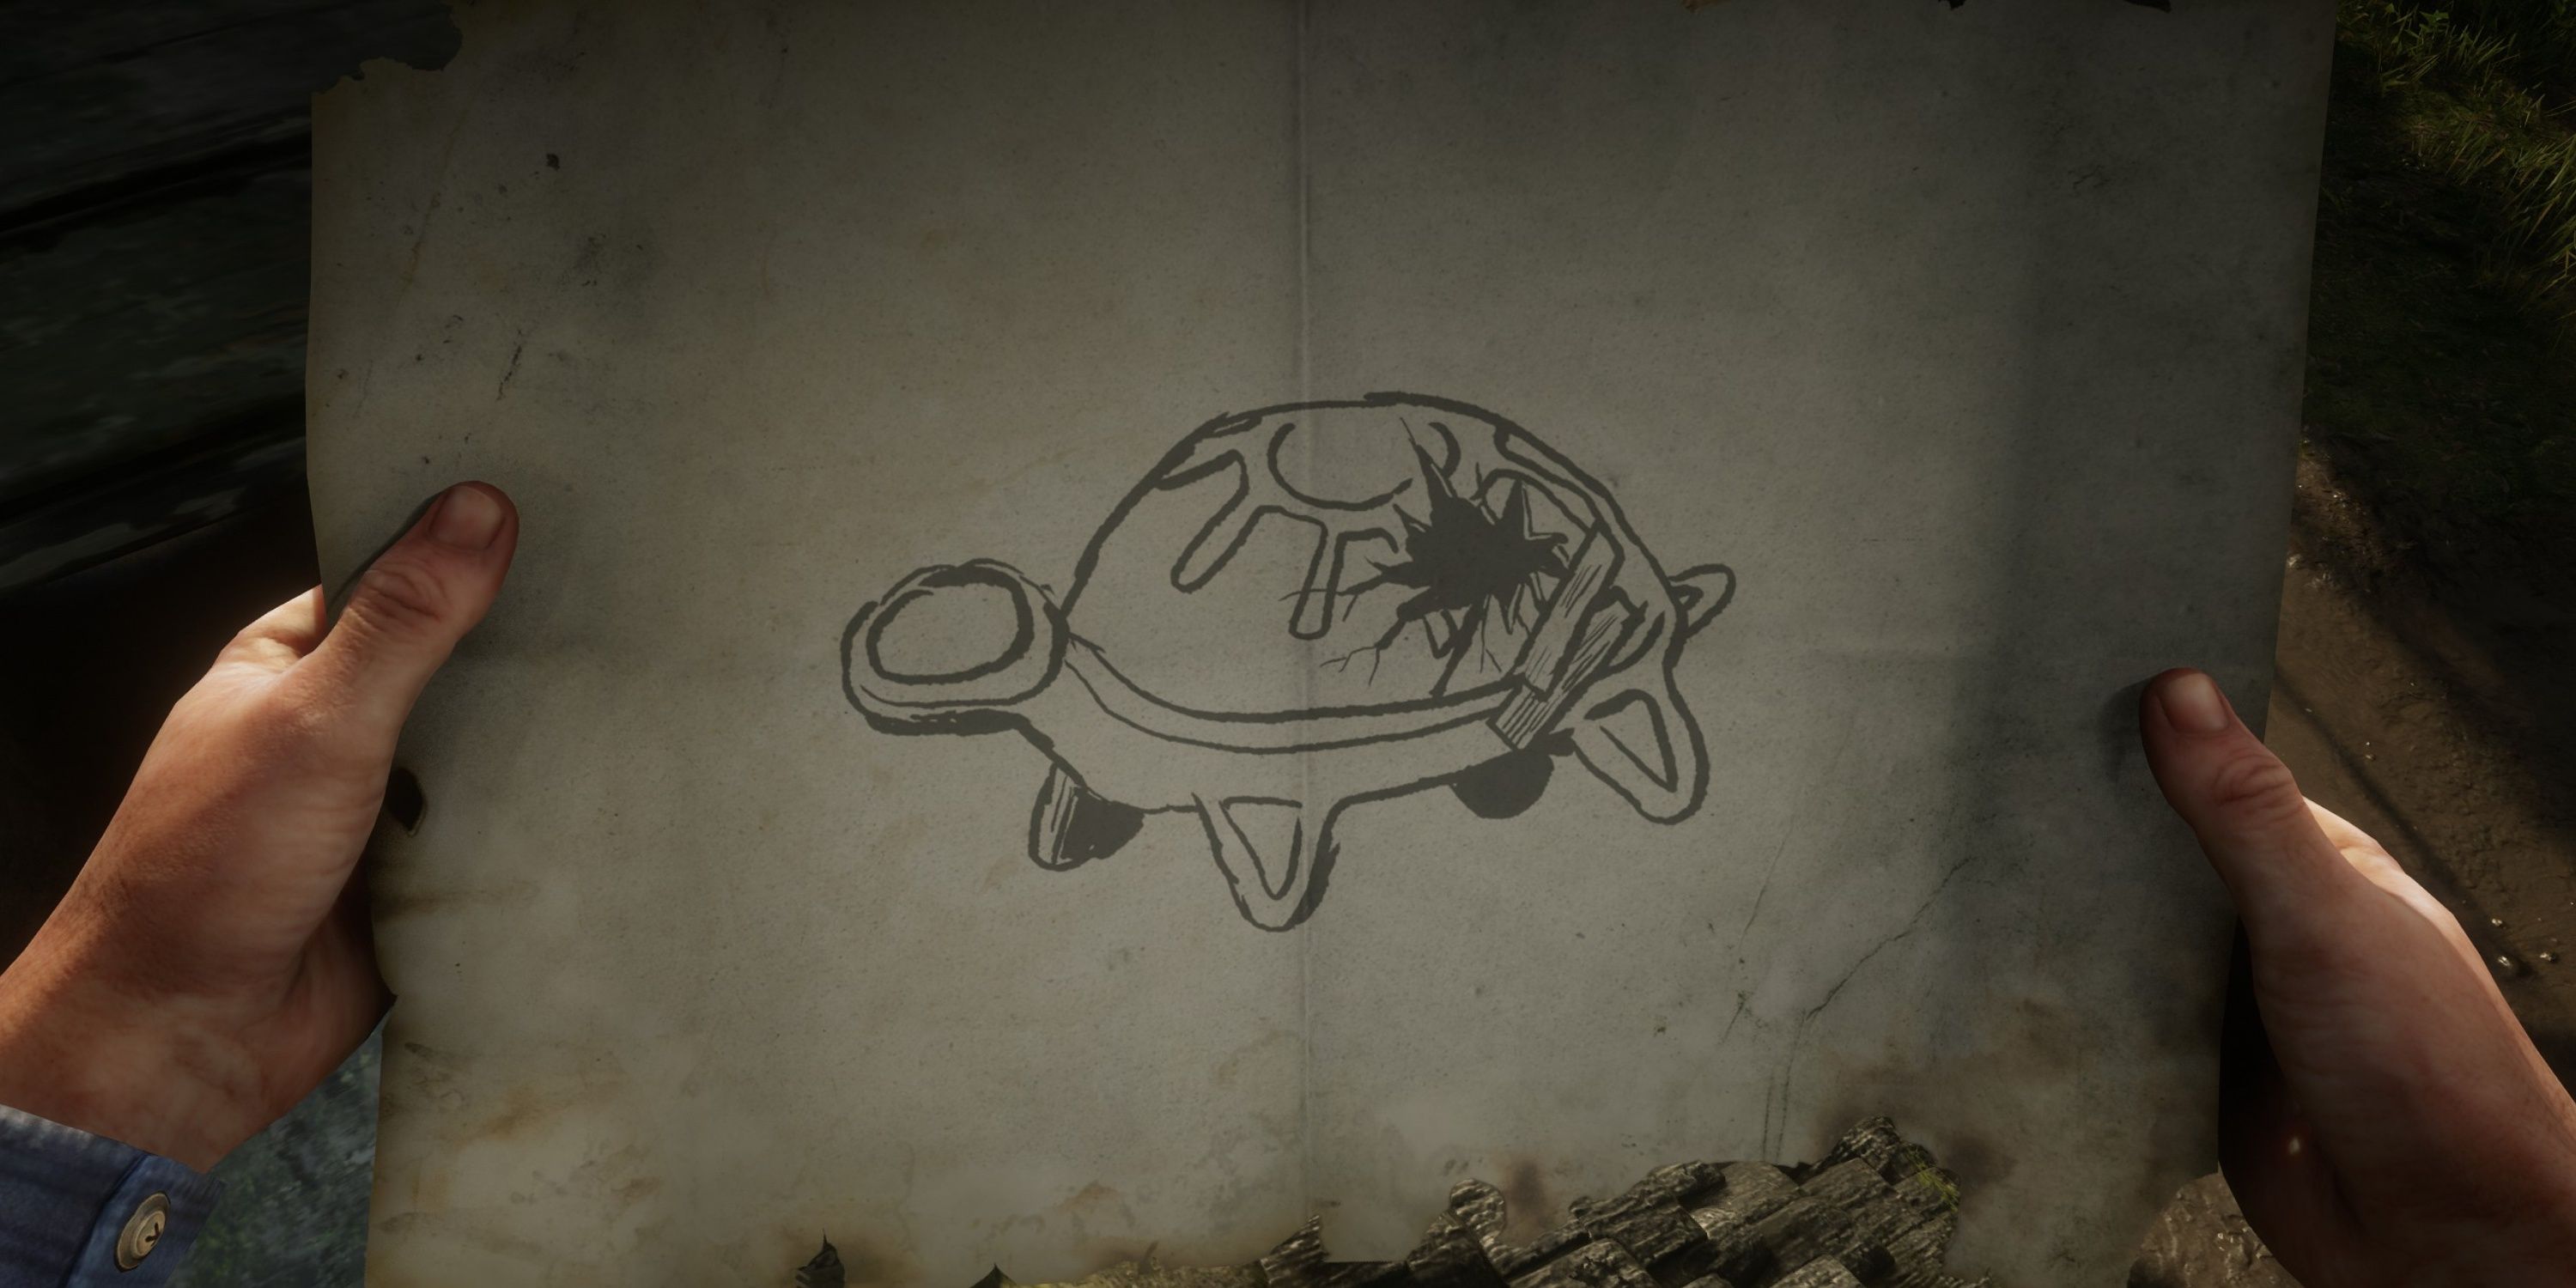
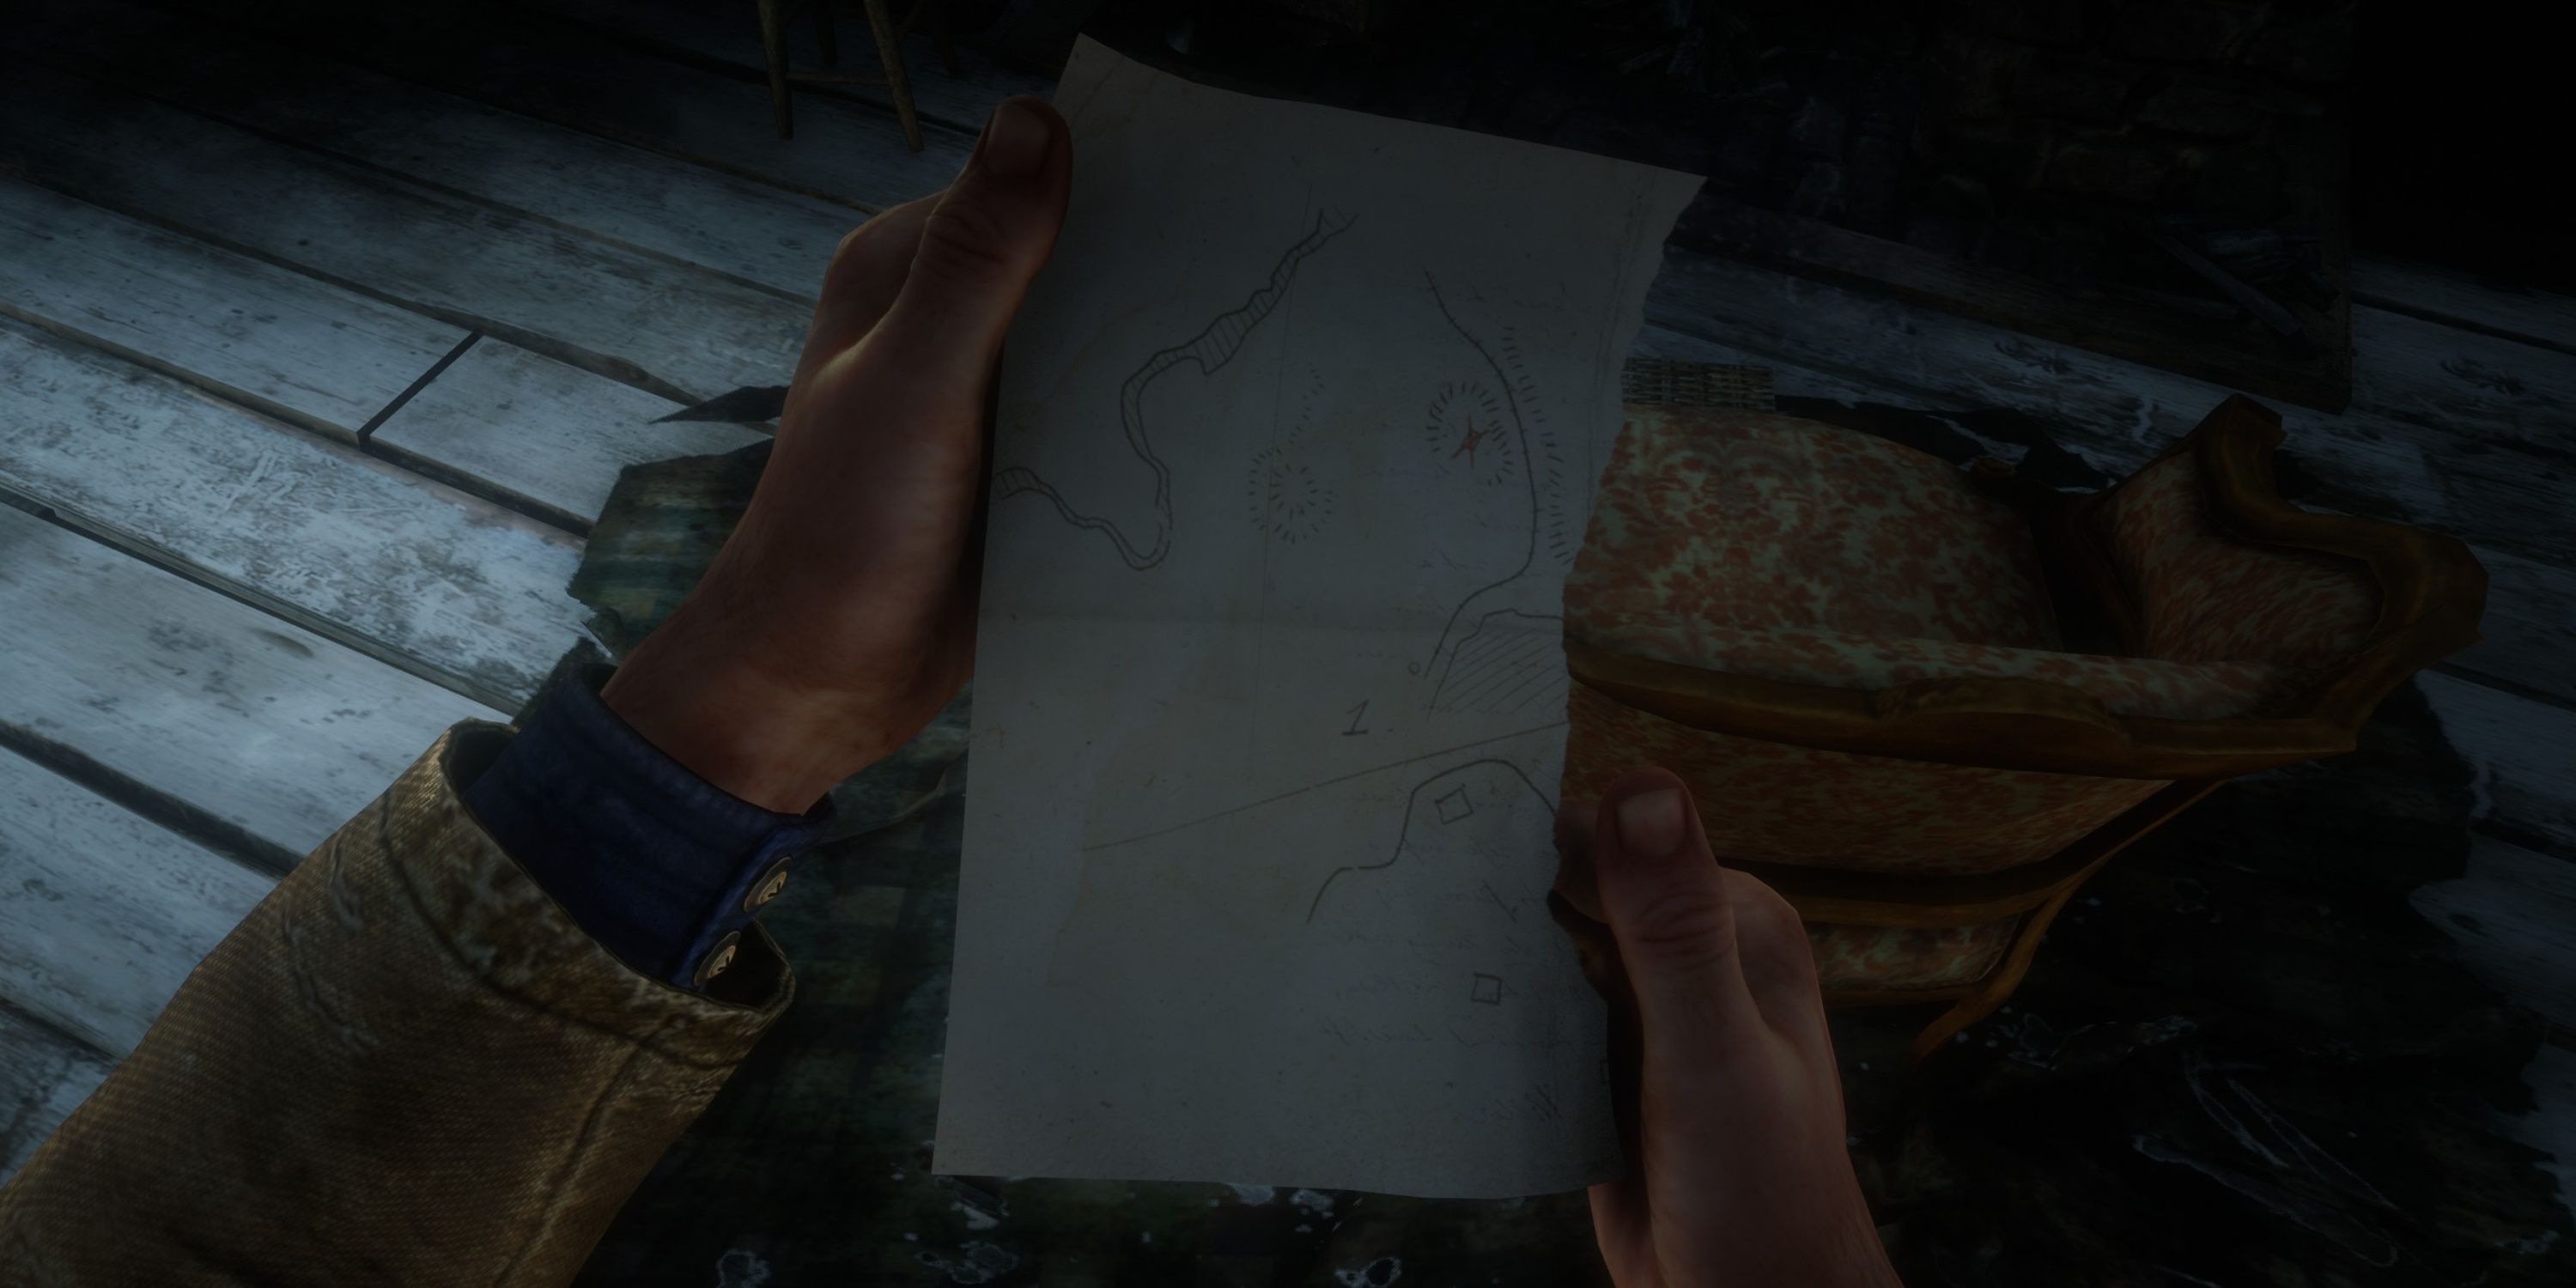
8. Sketched Map
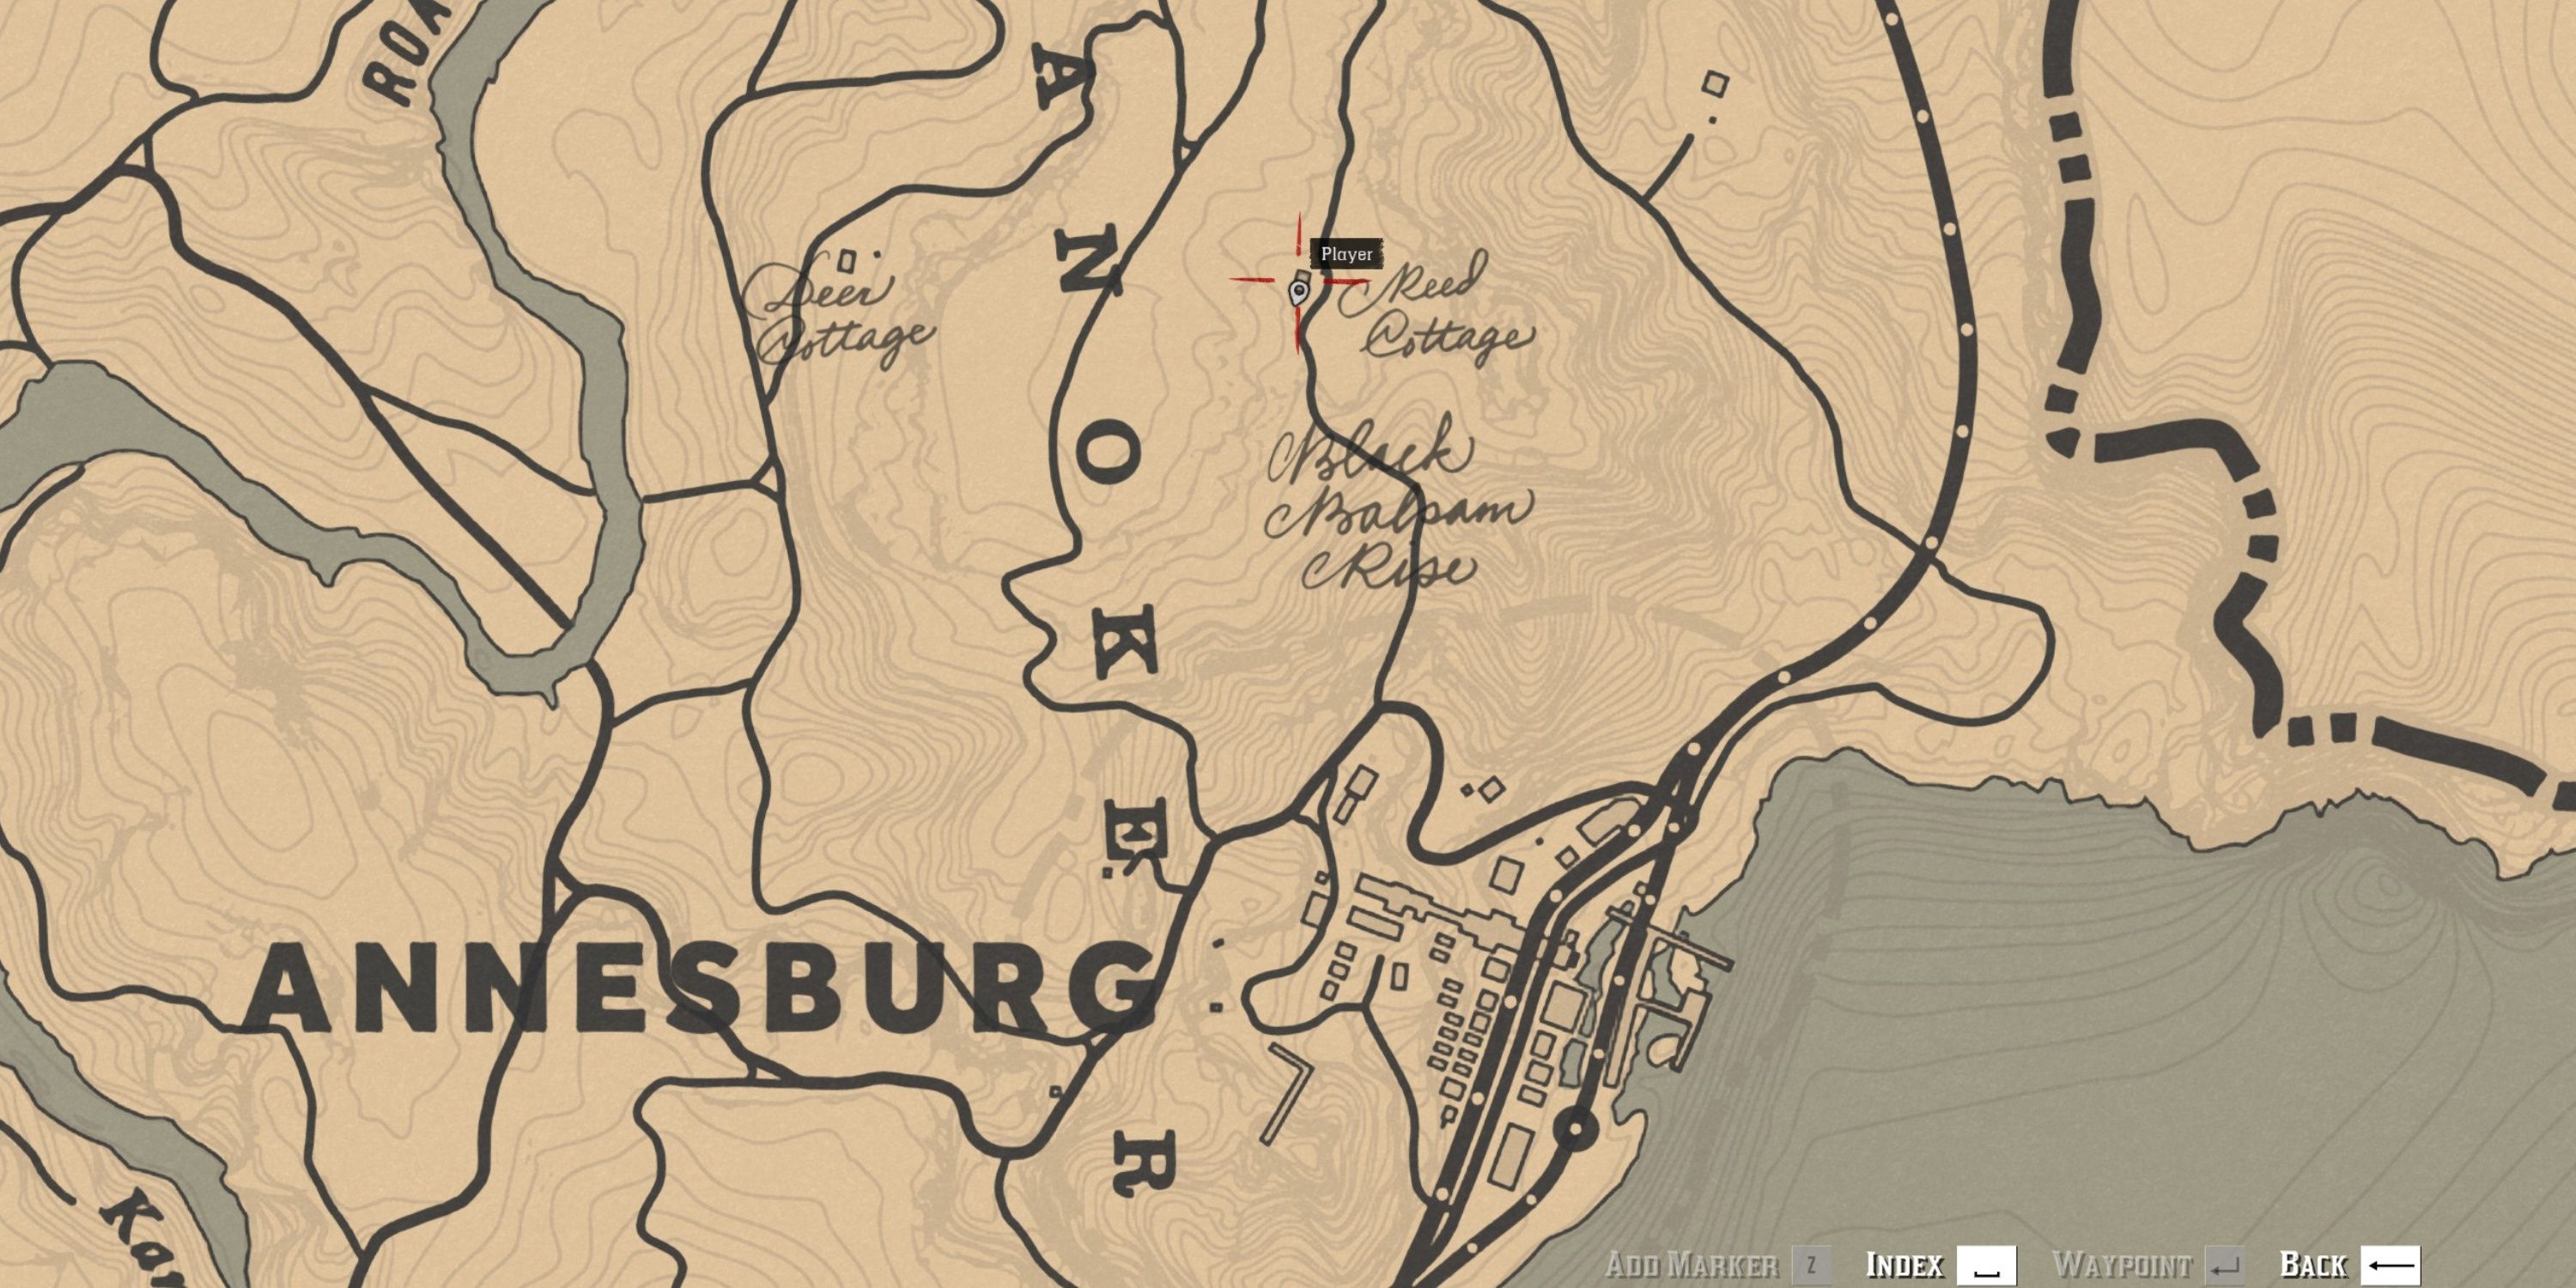
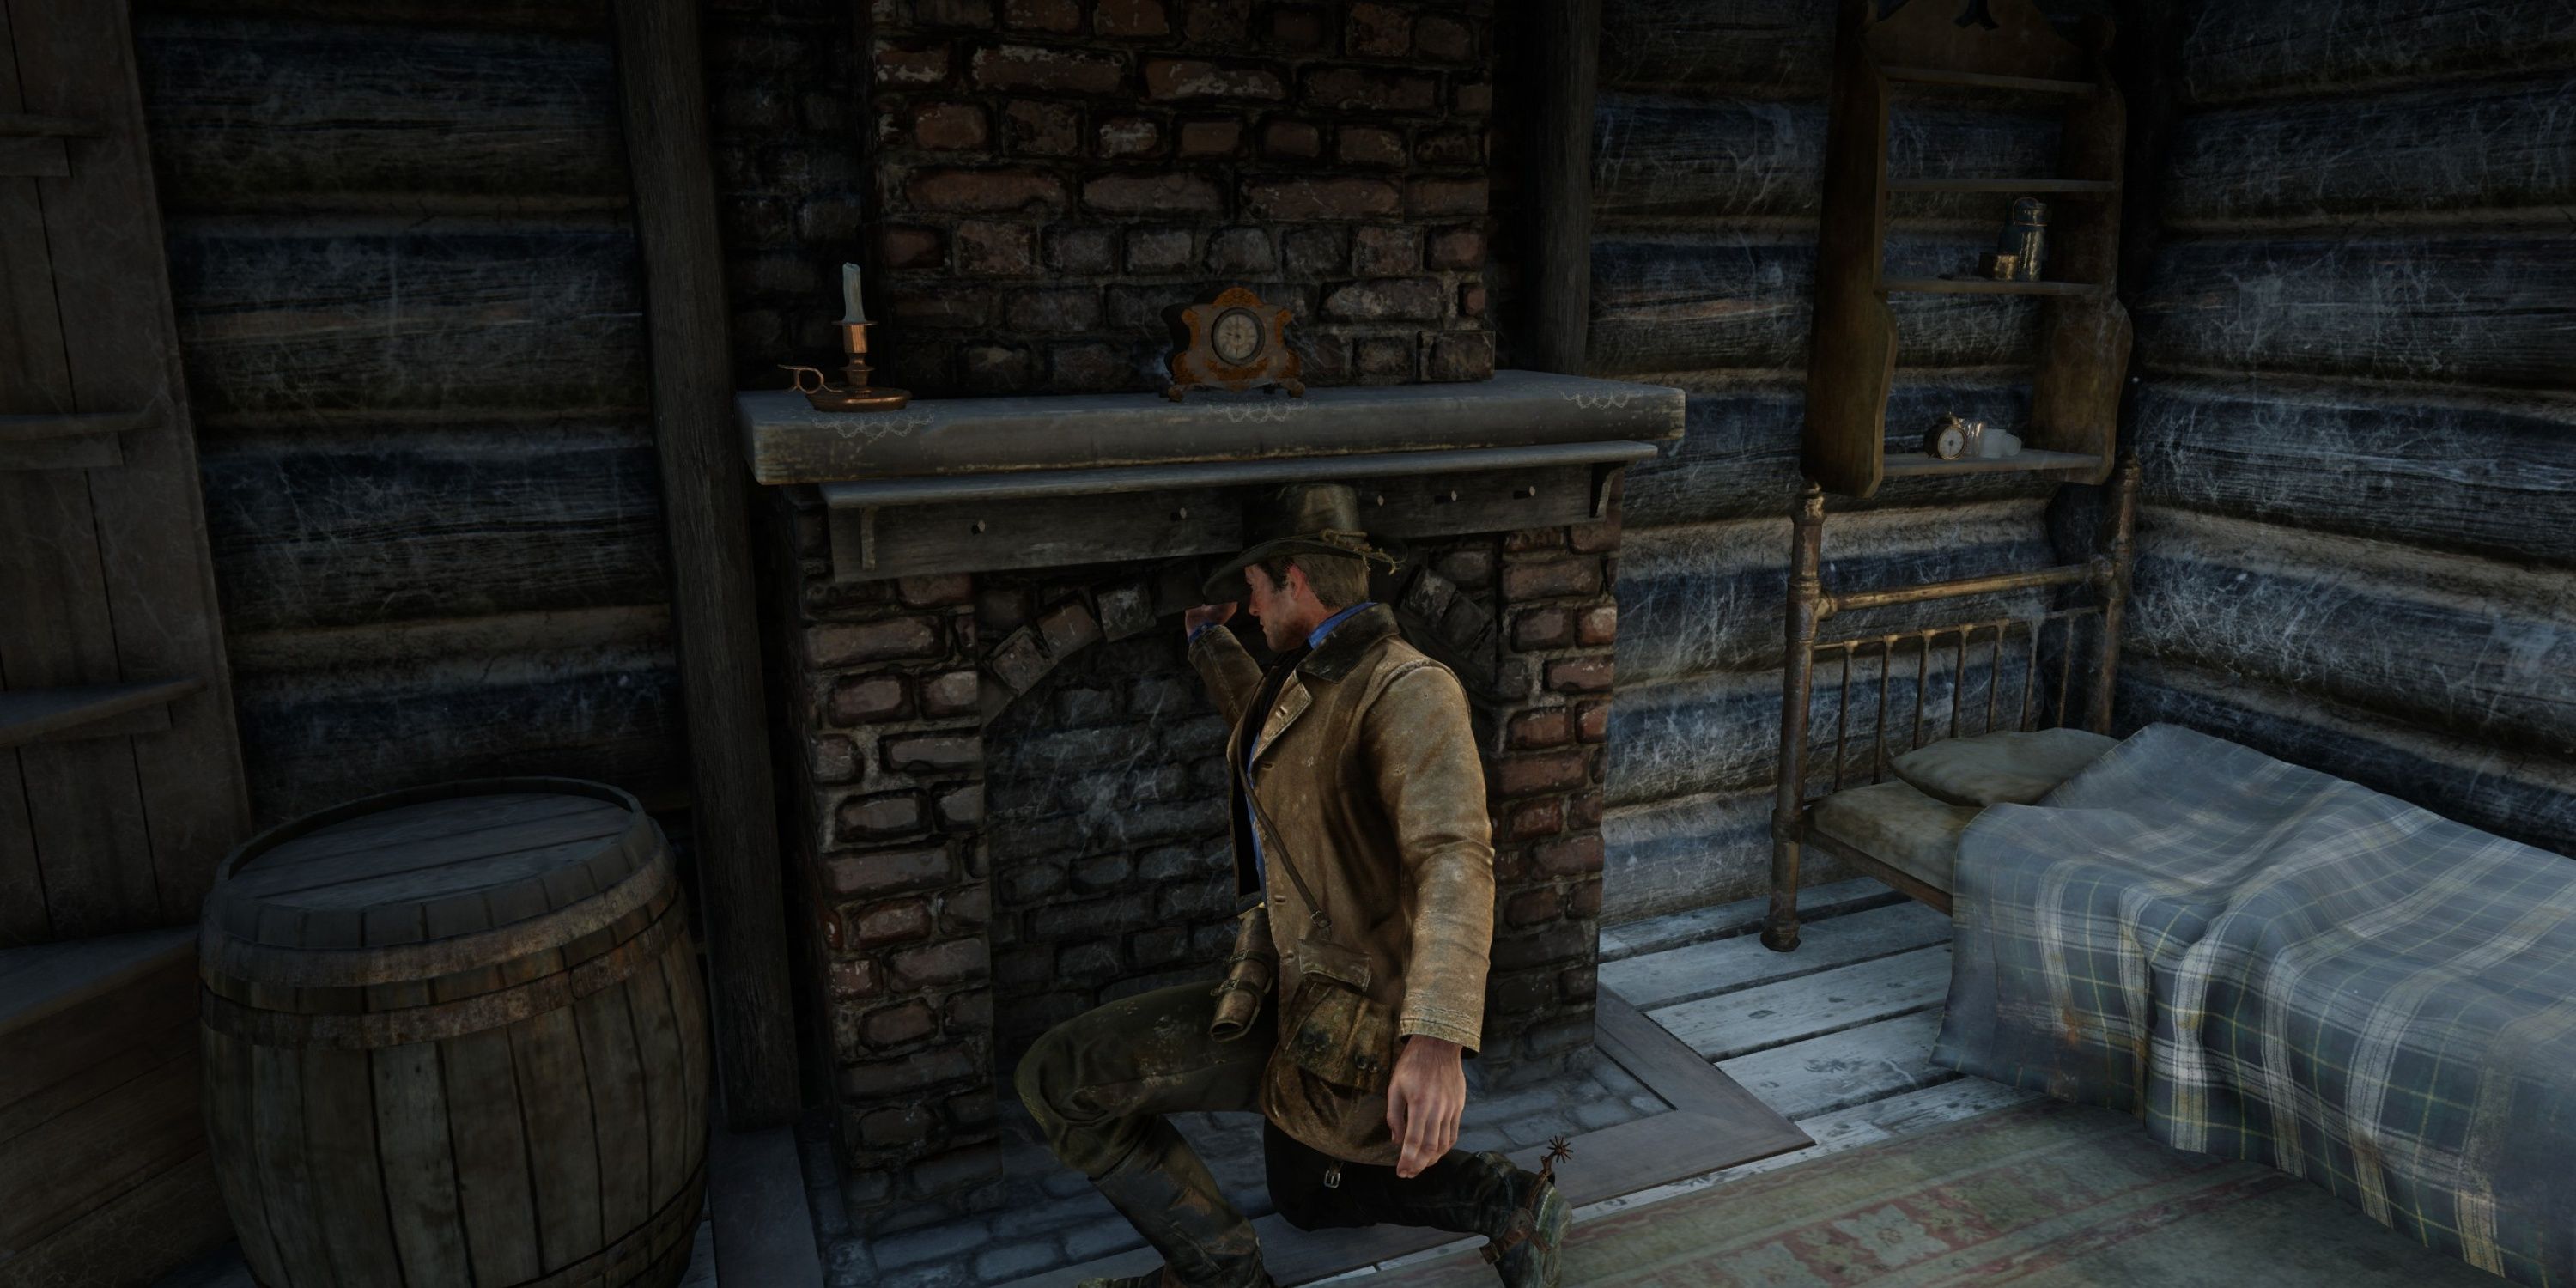
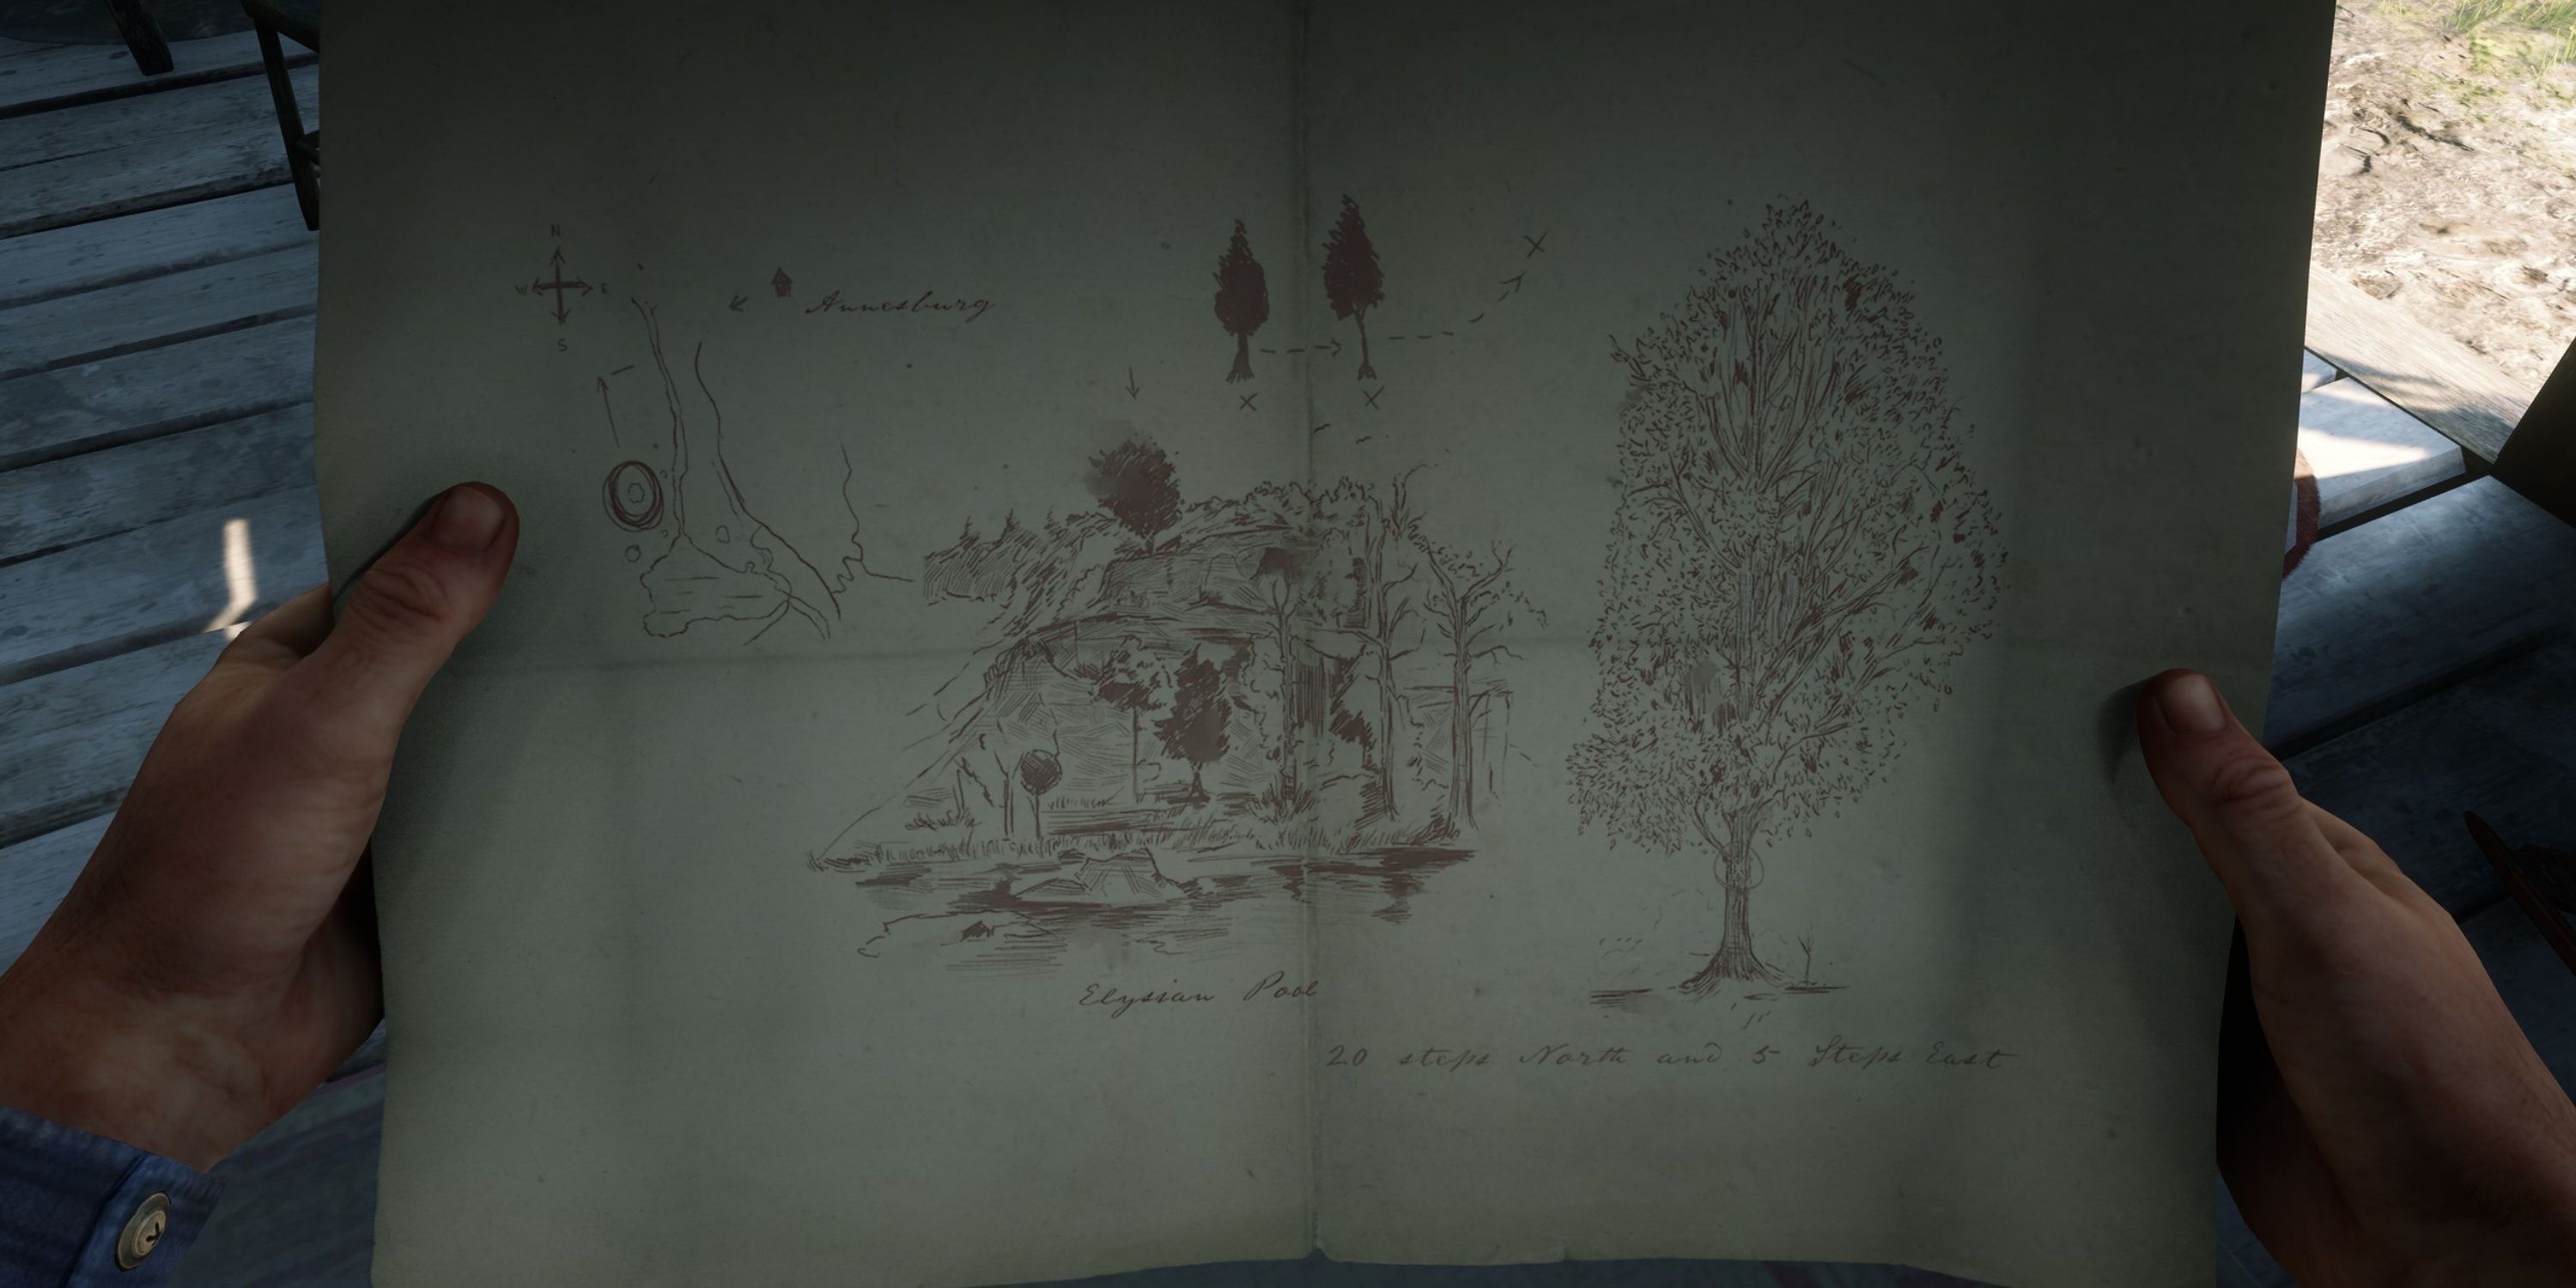
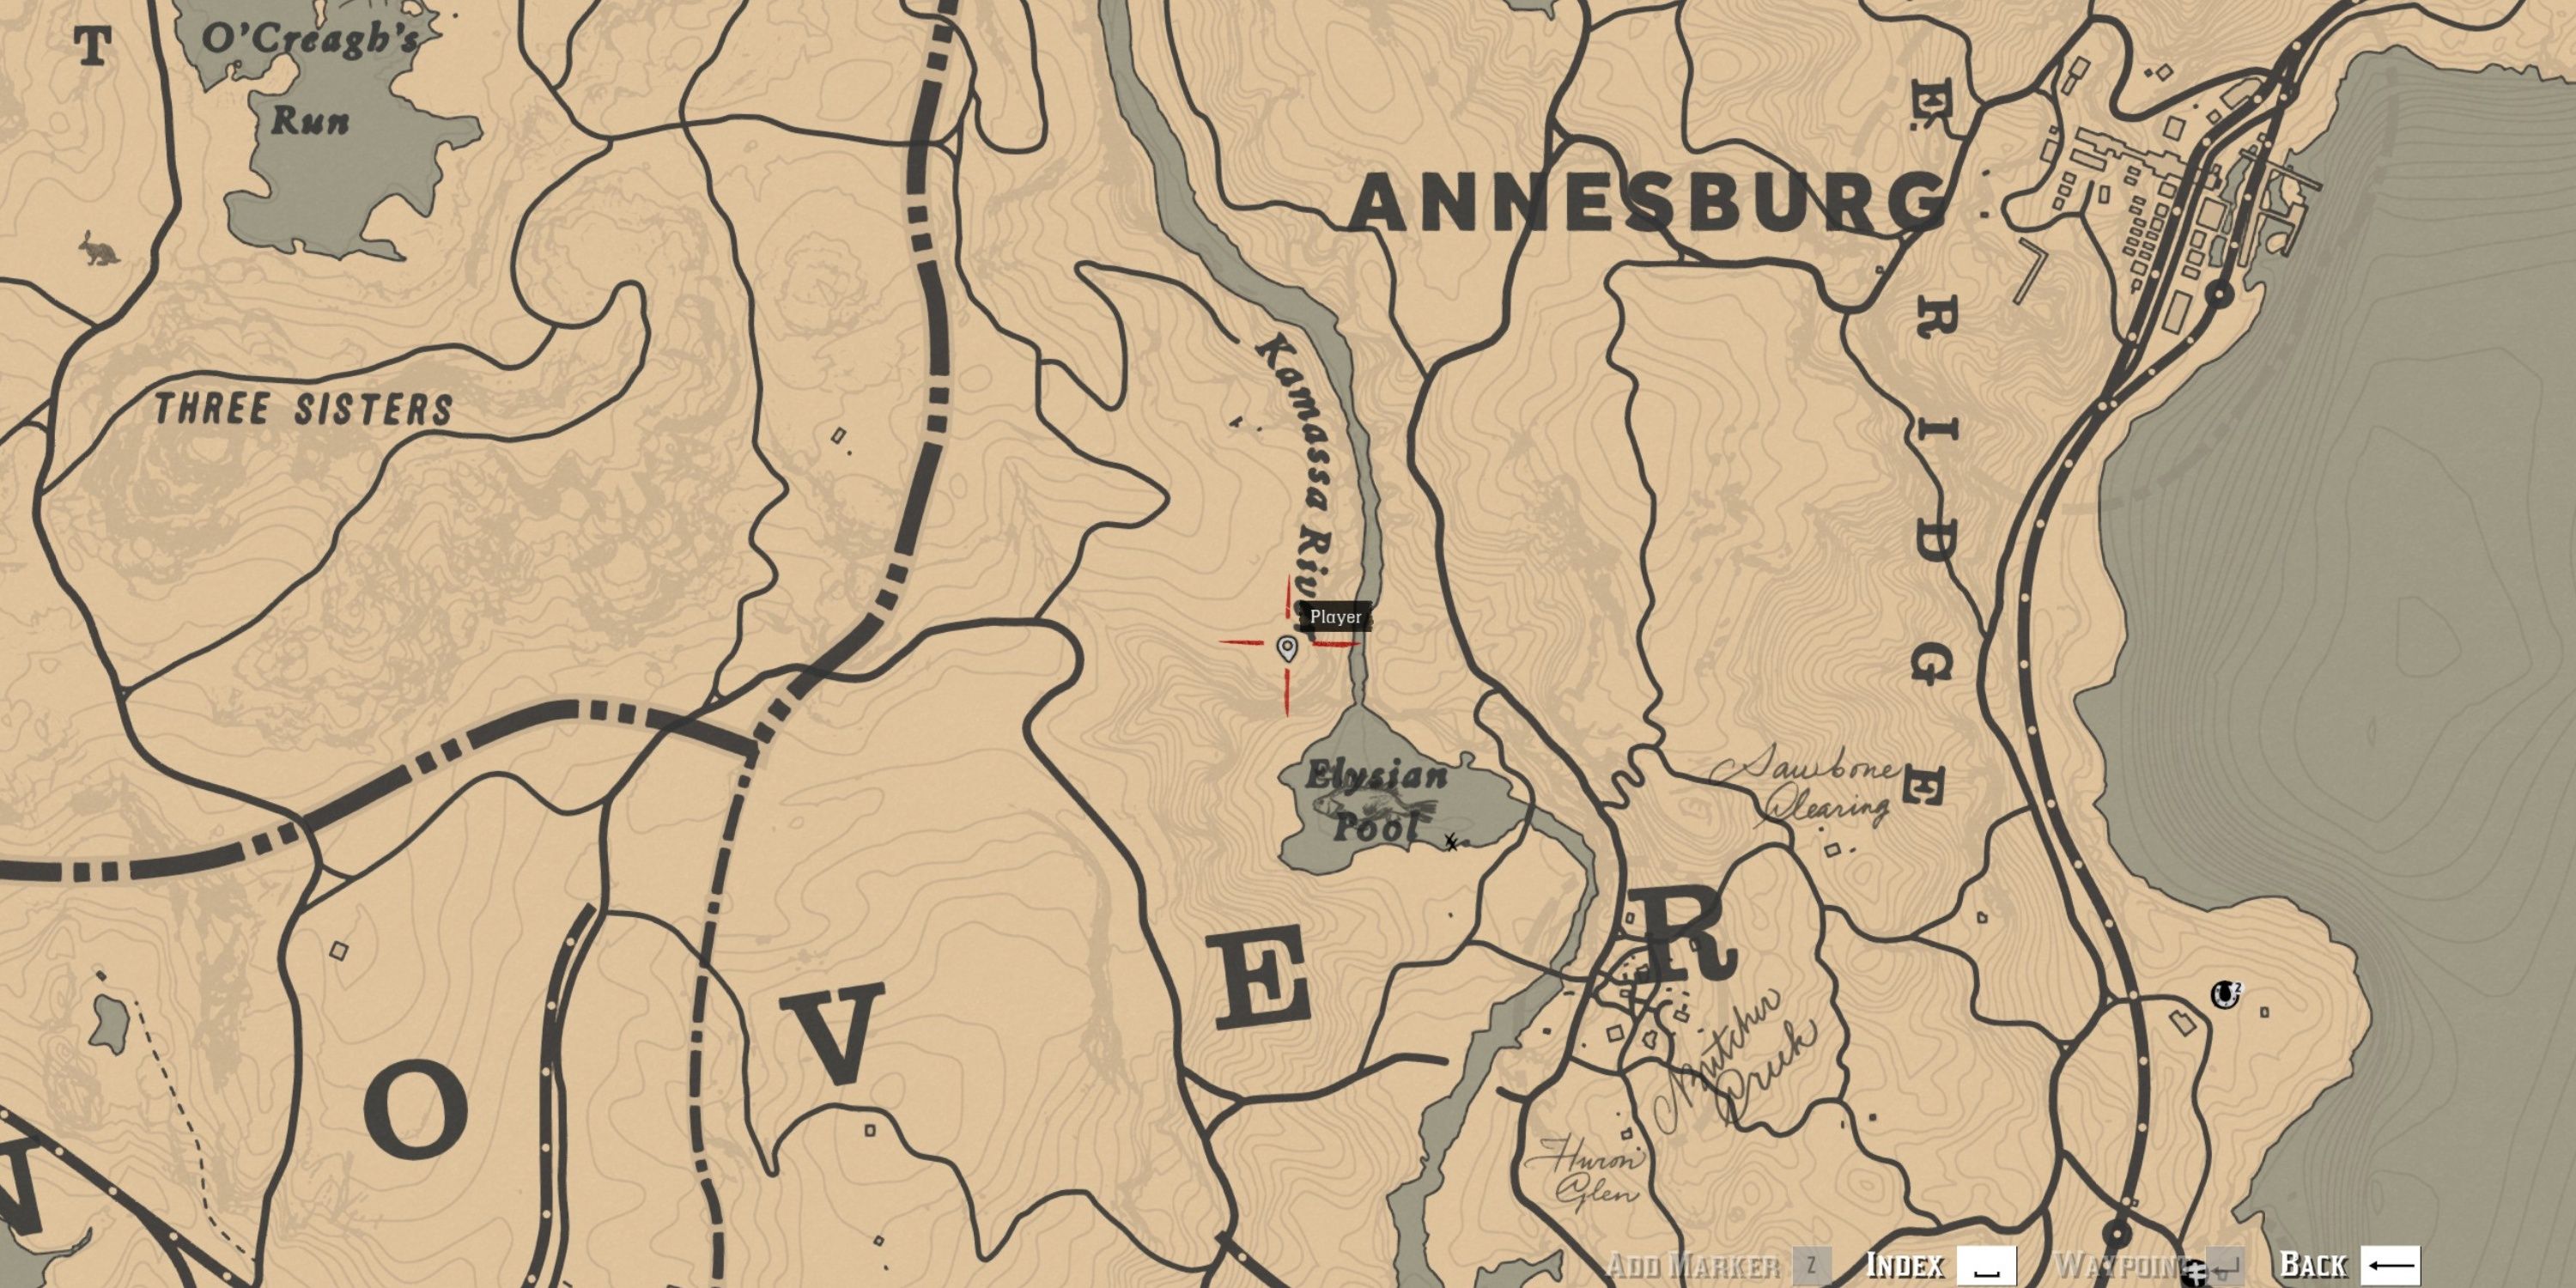

- Loot: Gold Ingot
To locate the Drawn Map, explore the fireplace in Reed Cottage, a humble cabin positioned north of Annesburg. To unravel the mystery of the Drawn Map, venture towards the Kamassa River near Elysian Pool in New Hanover. There, you’ll find the treasure buried beneath a small rock nestled beside a large cliffside rock.
7. Torn Treasure Map 1
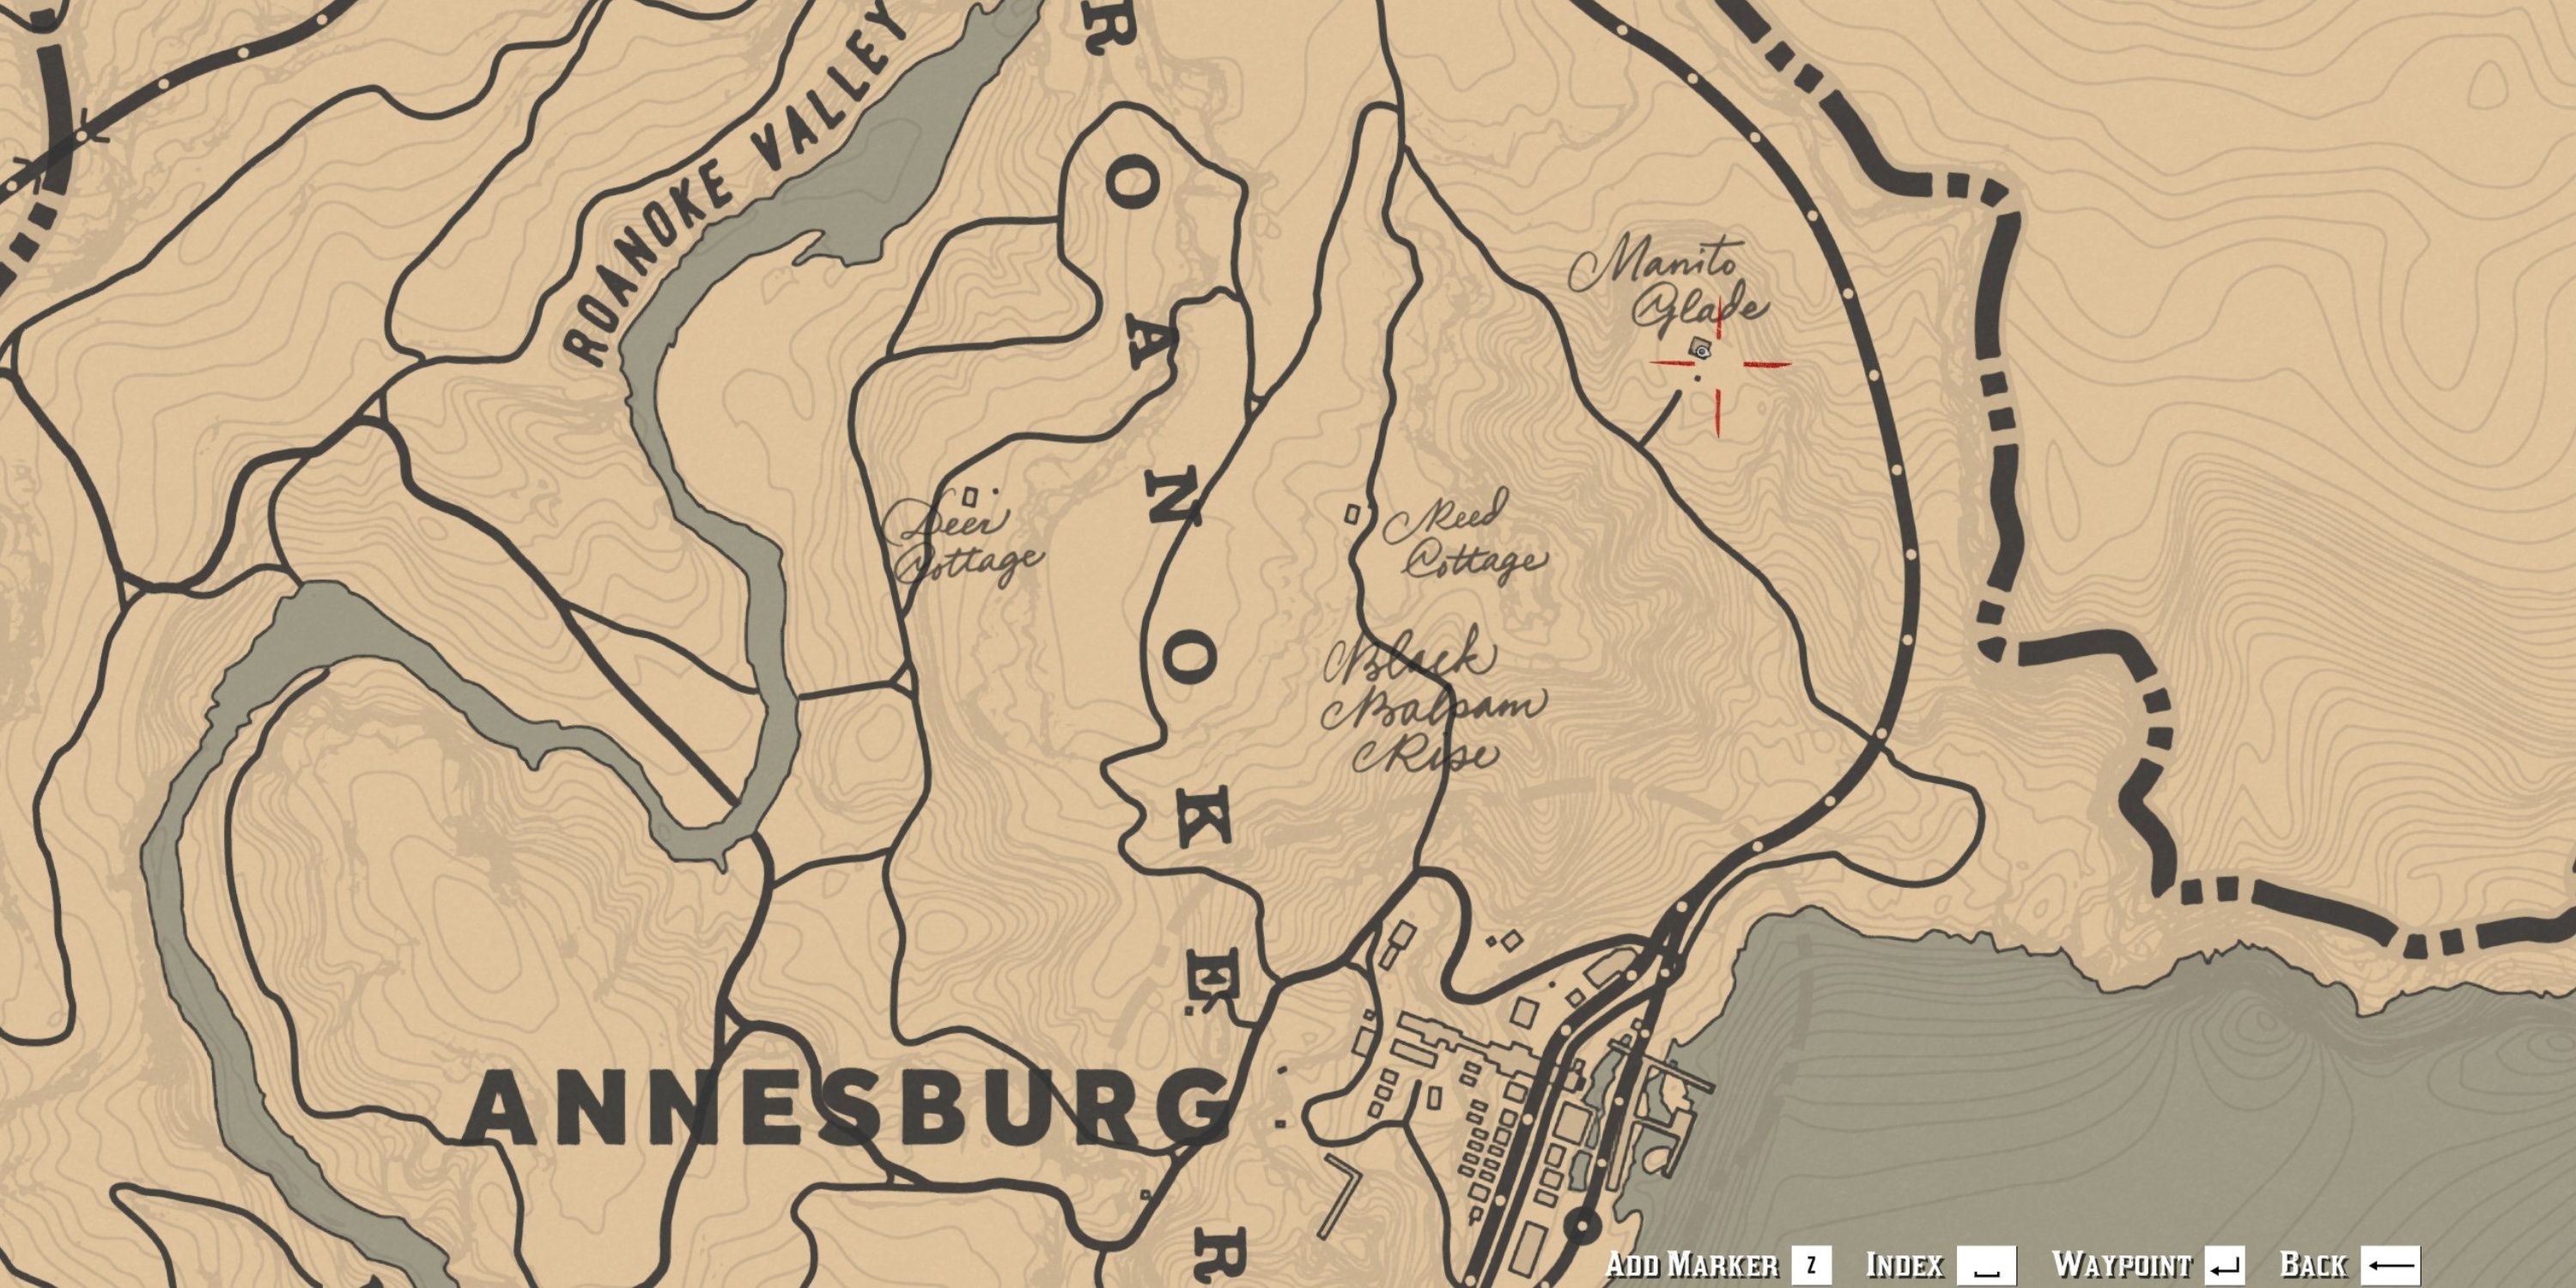
The first torn treasure map can be located by venturing into the Hermit’s hideout, situated within Manito Glade, north of Annesburg. After either subduing or eliminating the Hermit, search his cabin for the torn treasure map 1, which is tucked away in a drawer near the armchair. However, to solve this puzzle, players will require torn treasure map 2 as well.
6. Torn Treasure Map 2
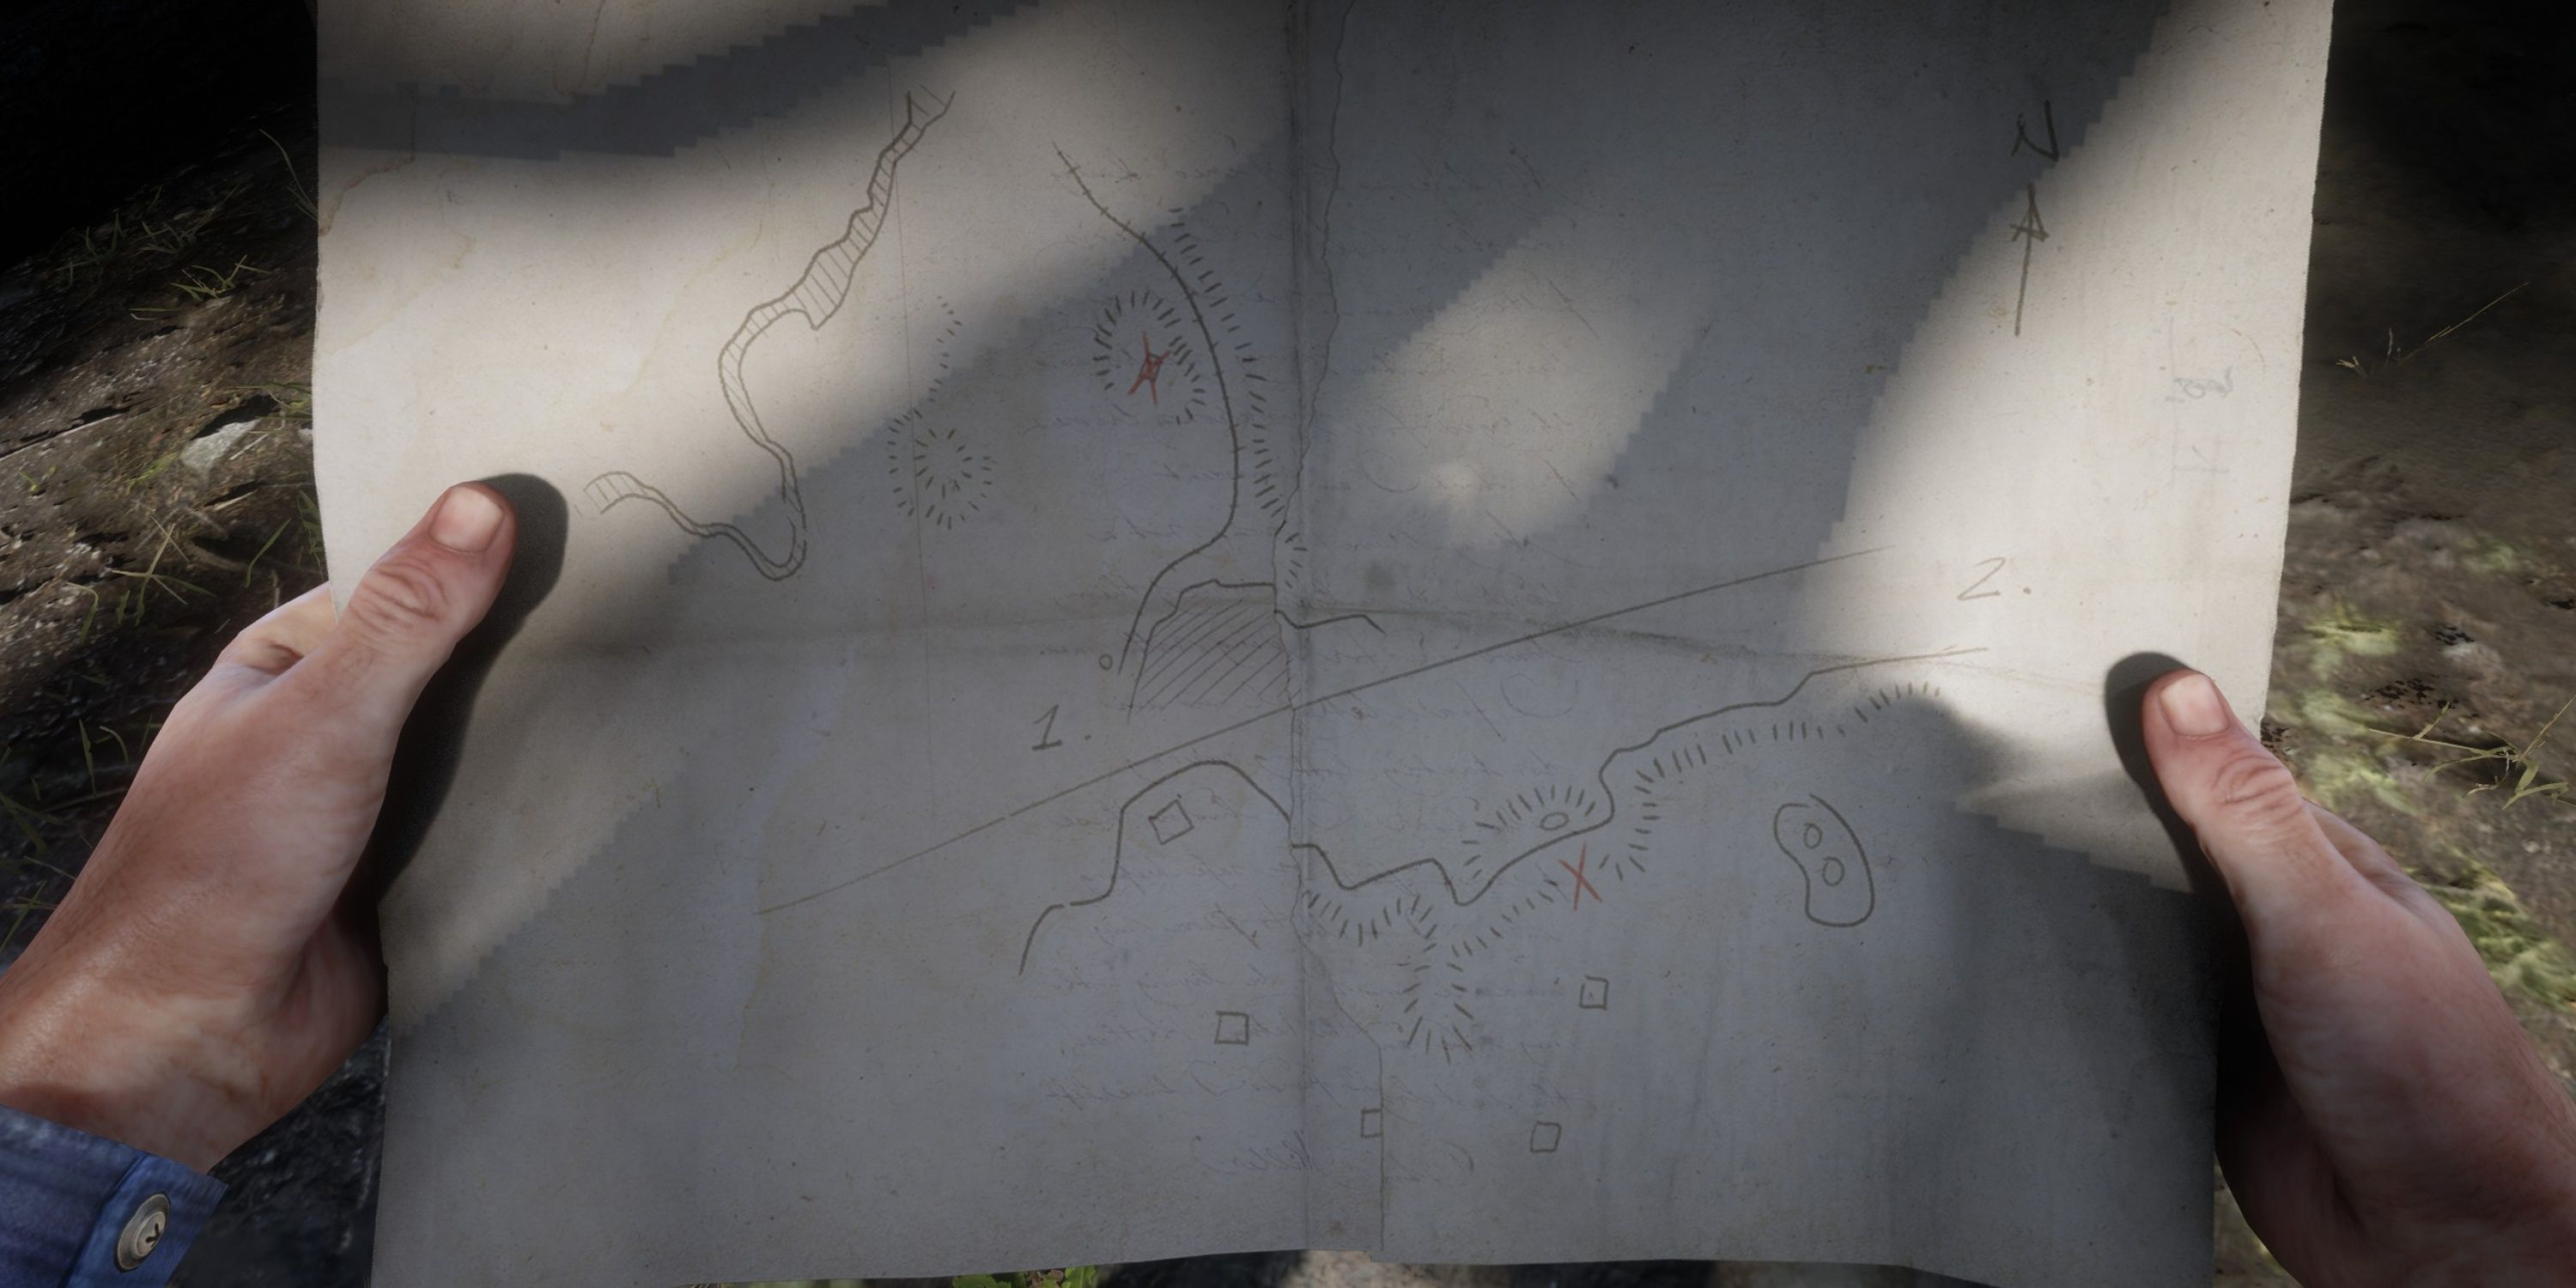
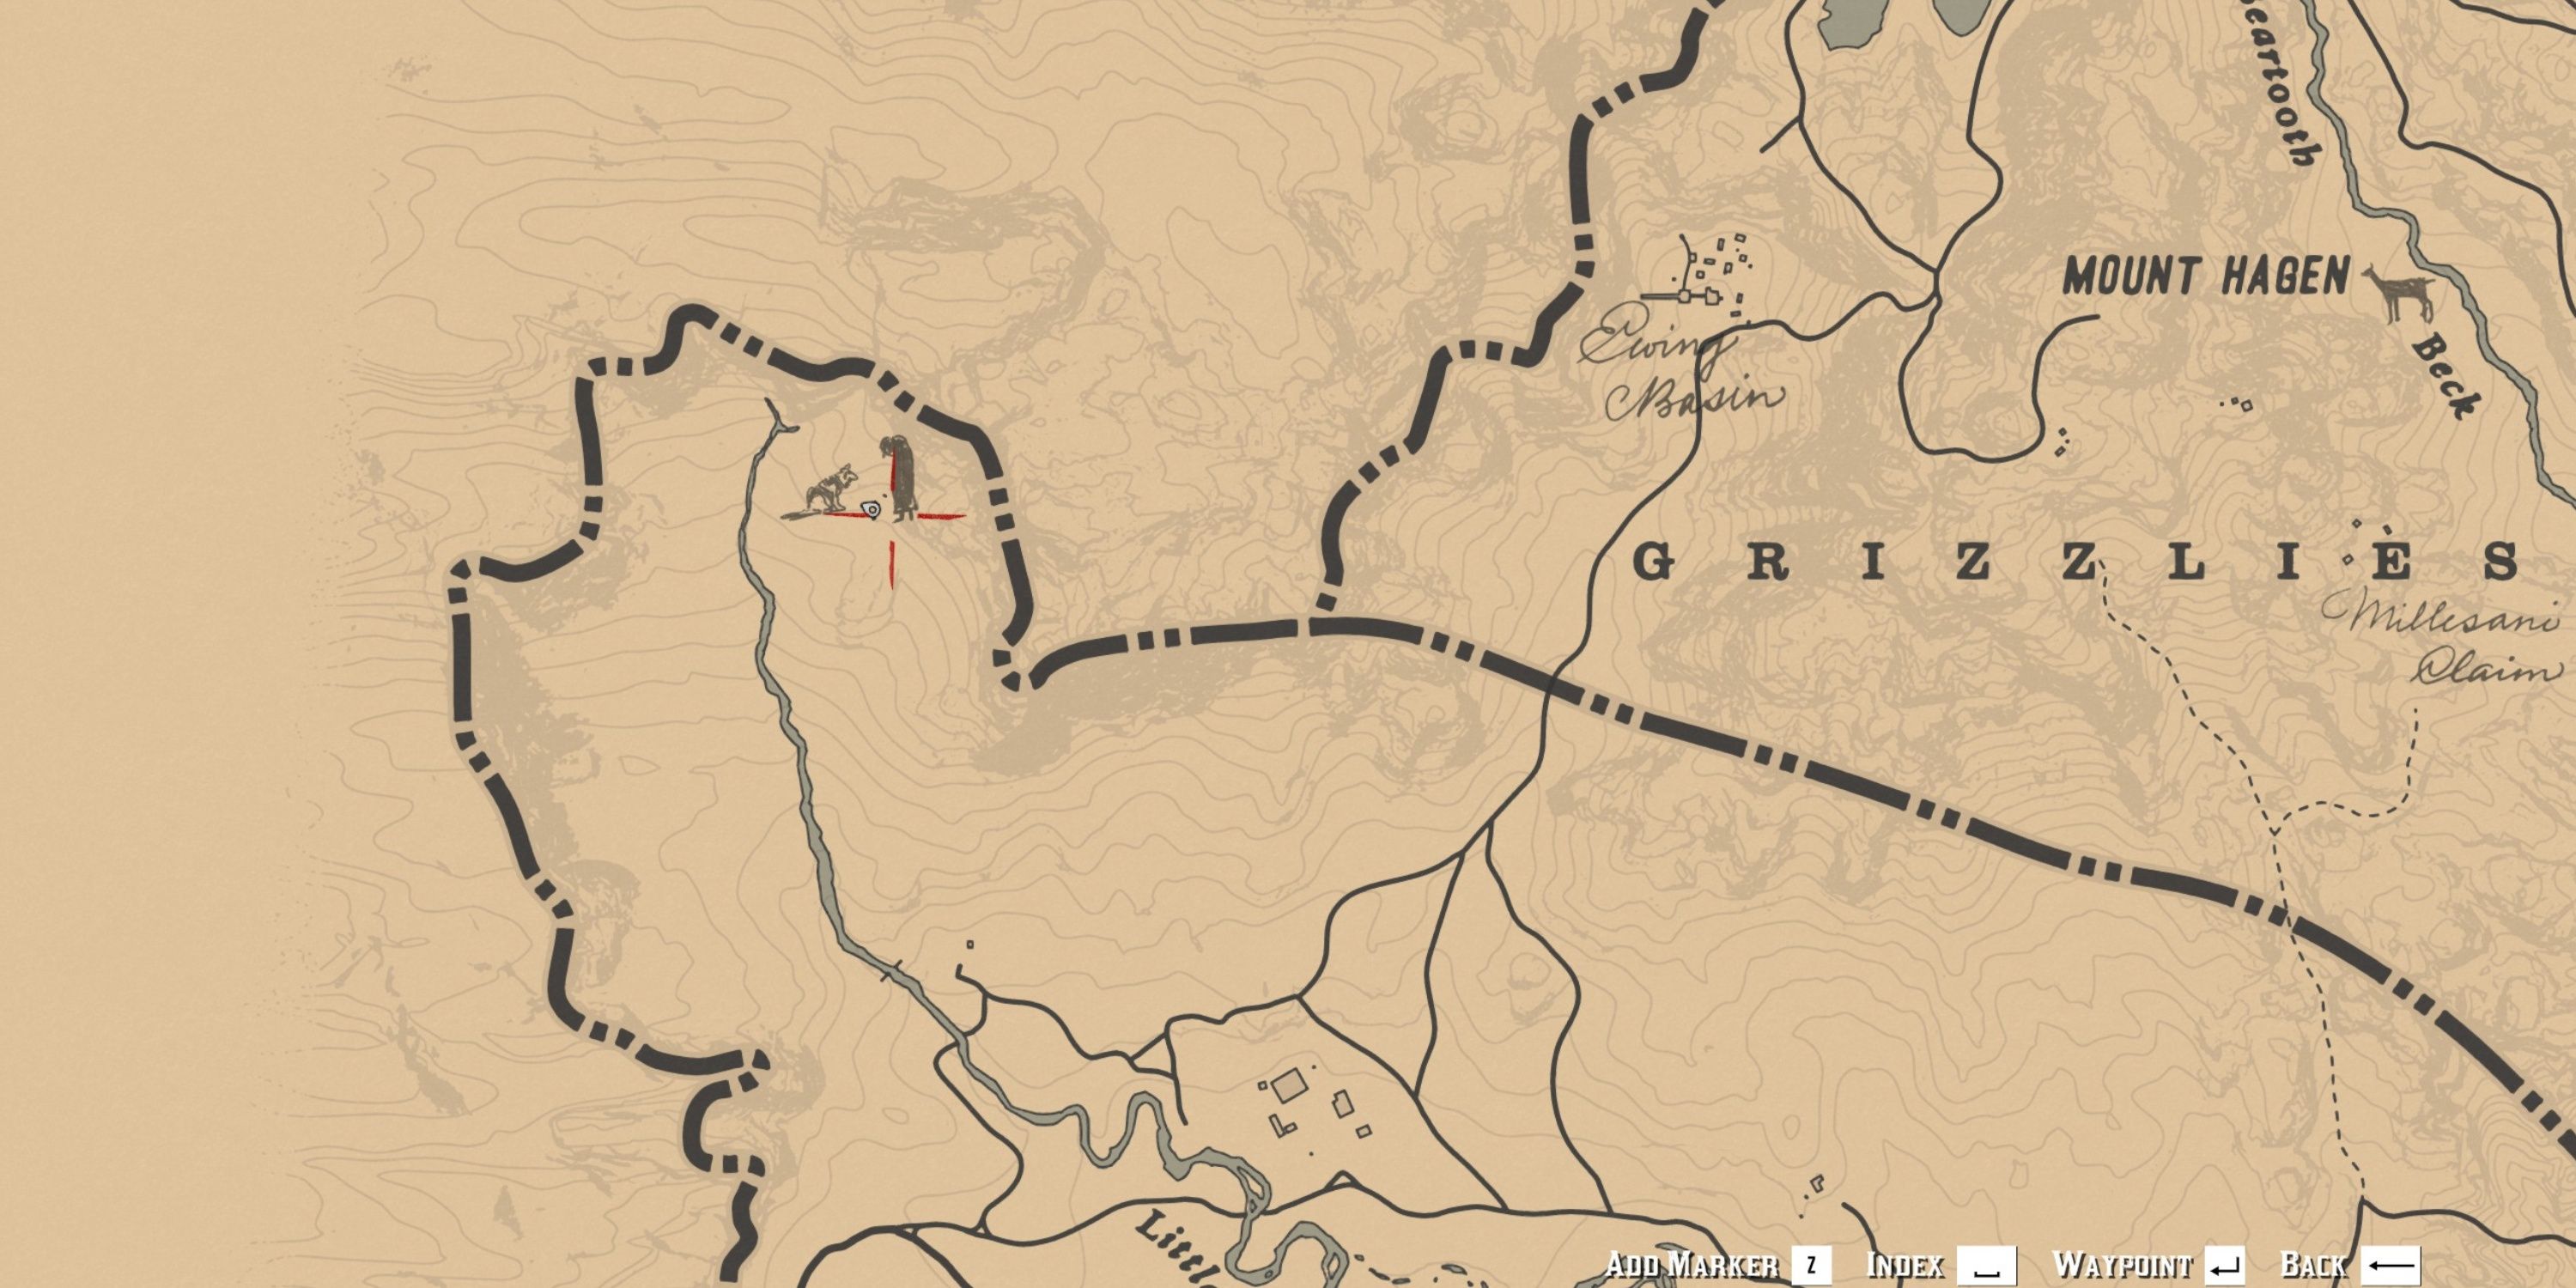
In the secluded cabin of the Recluse Lady, nestled in the far north-western corner of West Elizabeth, along the course of Little Creek River, you’ll discover Torn Treasure Map 2. This lady and her pack of dogs guard this location fiercely, so be prepared to engage them if you wish to enter the cabin and retrieve the torn map hidden in a drawer near her bed. Once you have both parts, you will assemble the Complete Map.
5. Mended Map
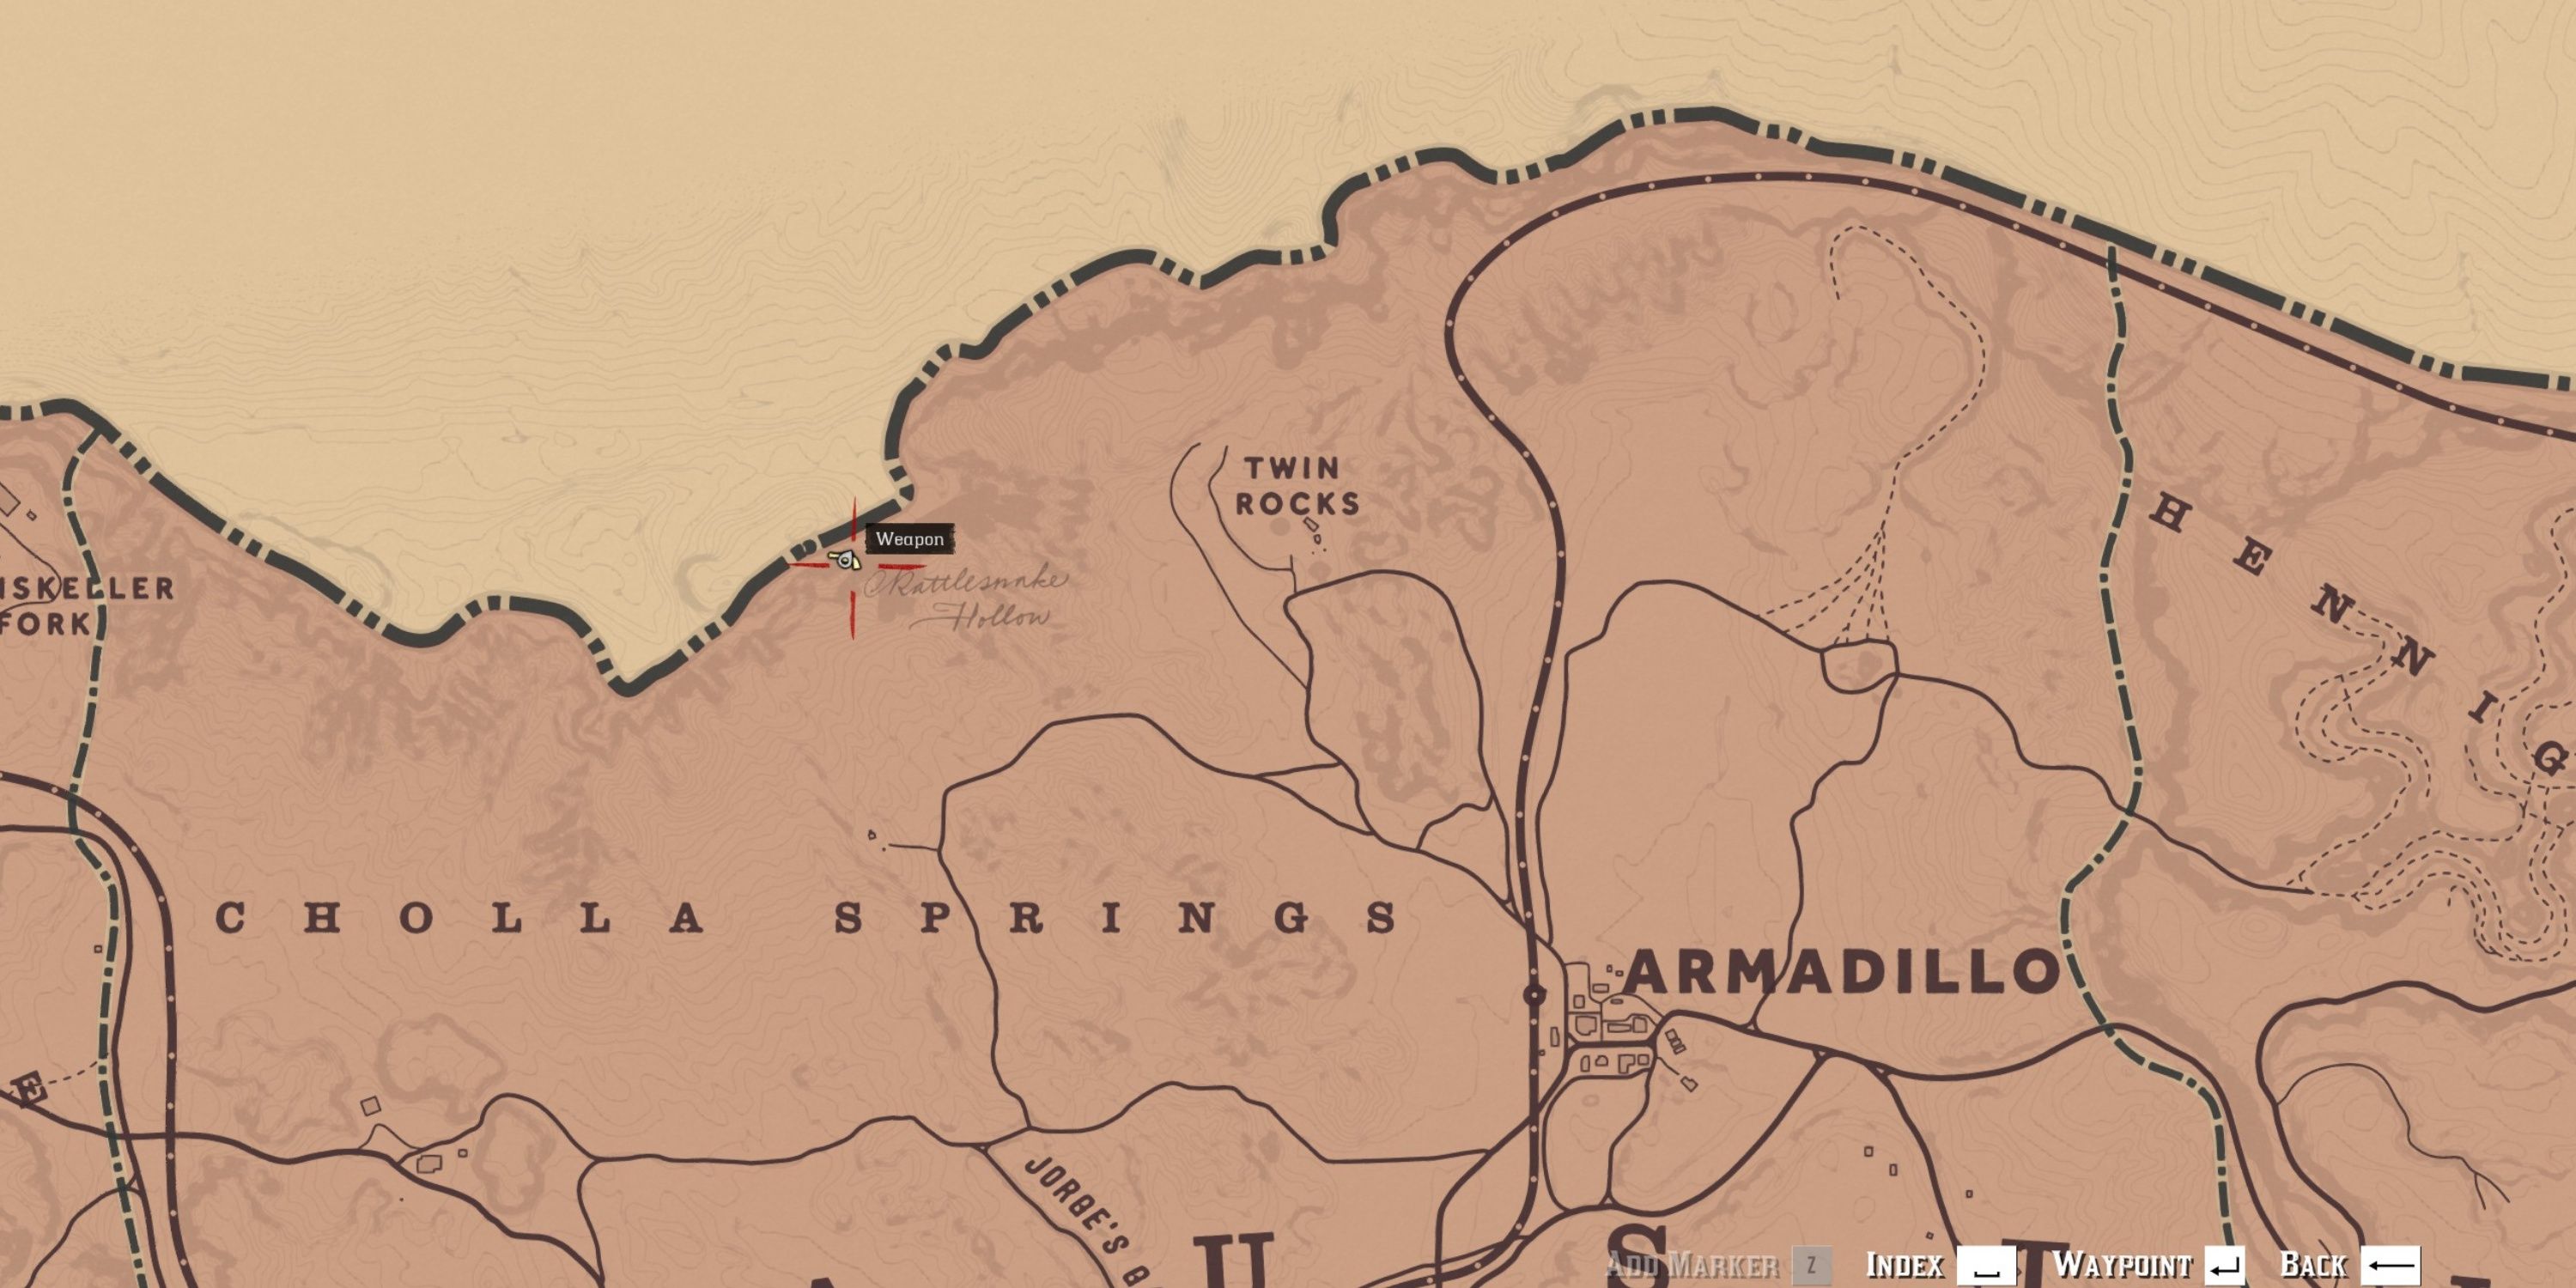
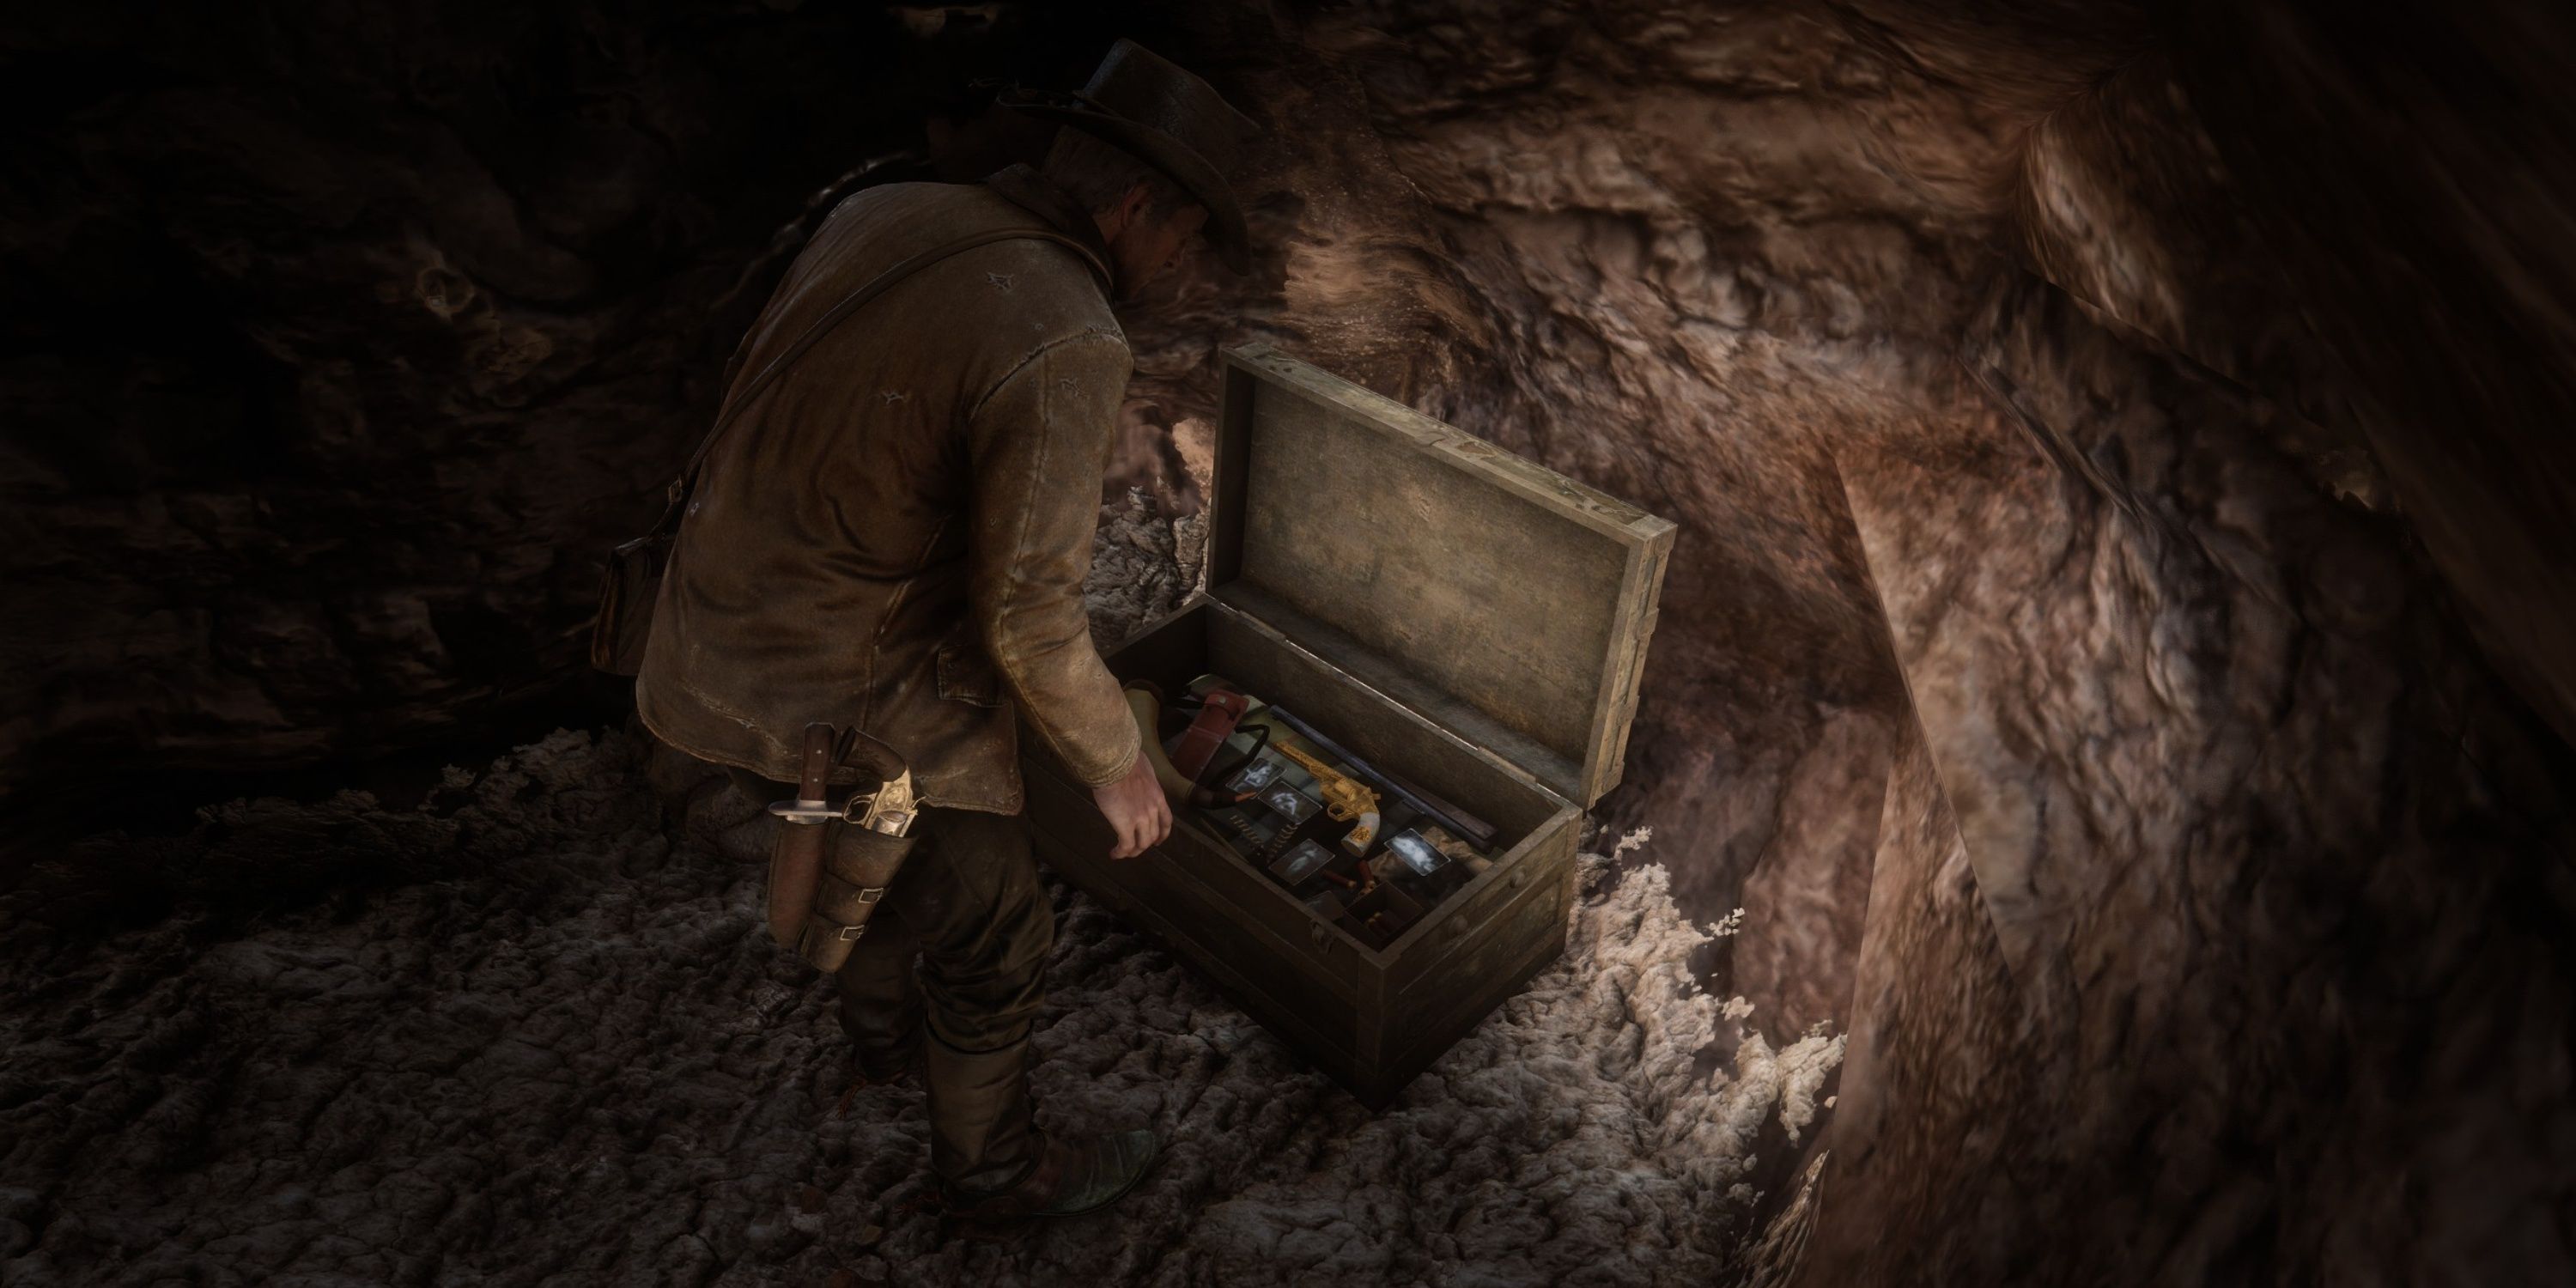
- Loot: x5 Erotic Photograph, Ottis Miller’s Revolver
To reach Rattlesnake Hollow, look for a small cave entrance located westward from Twin Rocks, and it can be found either in New Austin or the northern part of Cholla Springs on your map. Note that players who haven’t reached the Epilogue won’t be able to access this area safely as a hidden sniper will instantly eliminate them if they attempt to go to New Austin.
4. The Elemental Trail Map 1
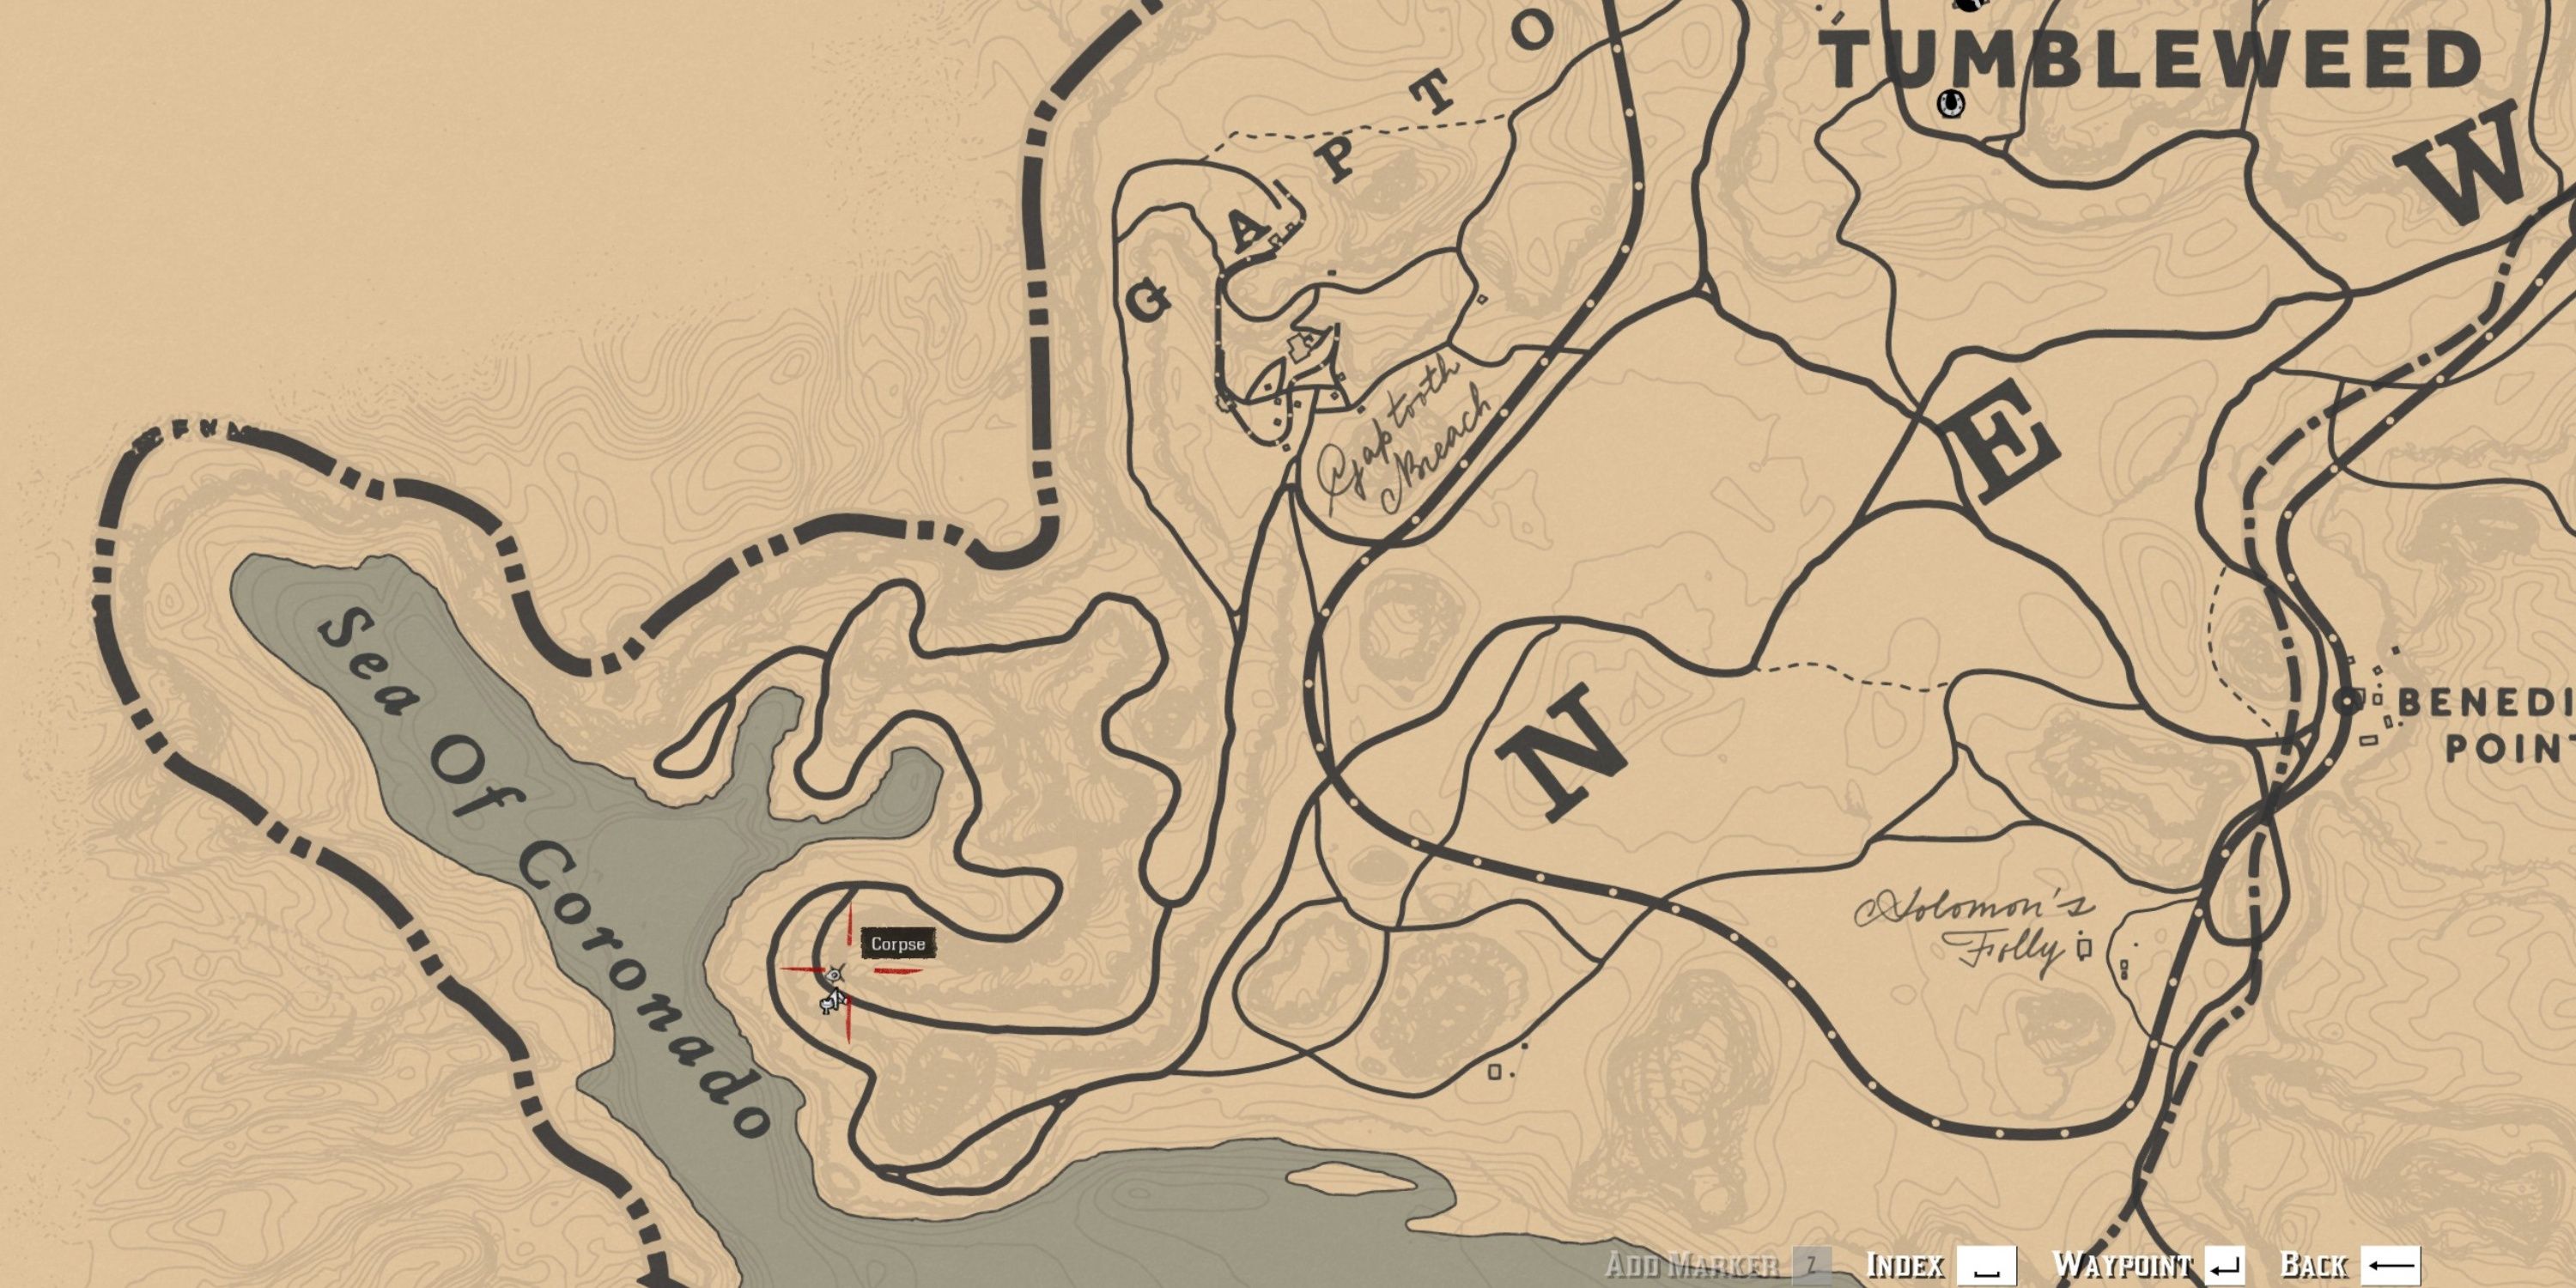
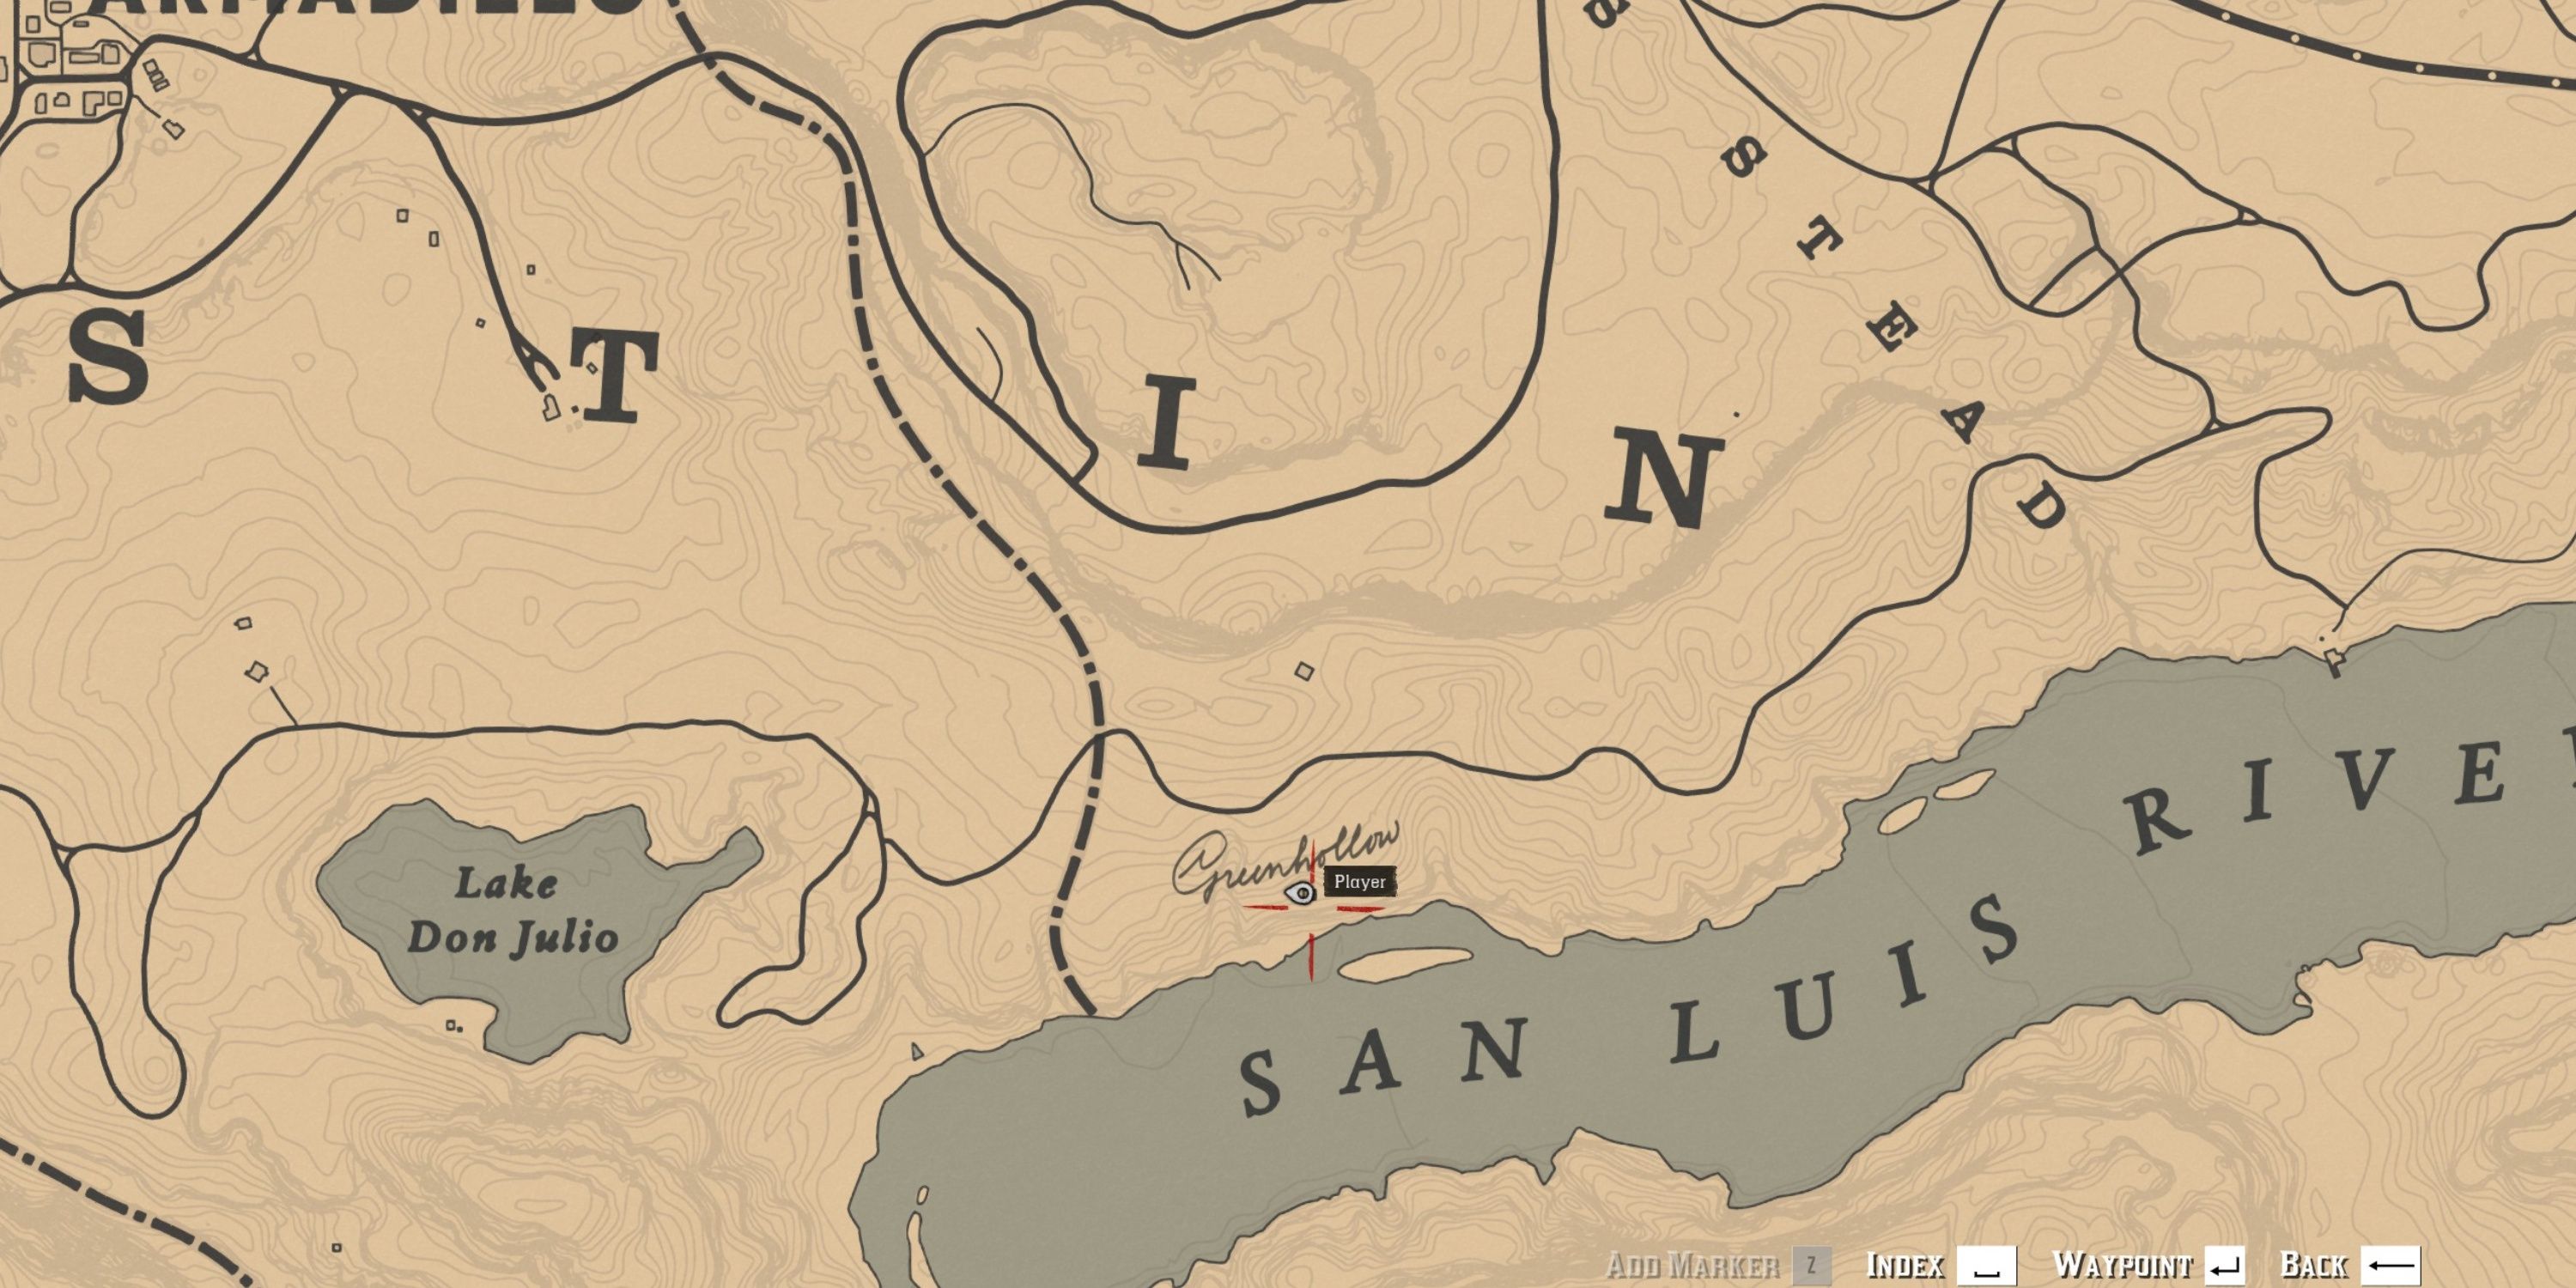

- Loot: Horse Meal, The Elemental Trail Map 2
In the Epilogue, navigate towards the Southwest corner of New Austin, specifically the Sea of Coronado’s southwestern tip, where a man dangling from a cliff by a rope can be found. You can eliminate him to acquire The Elemental Trail Map 1.
To solve this map, search for an abandoned cabin in Greenhollow, located east of Lake Don Julio and nestled beside the San Luis River. The treasure is hidden within the fireplace.
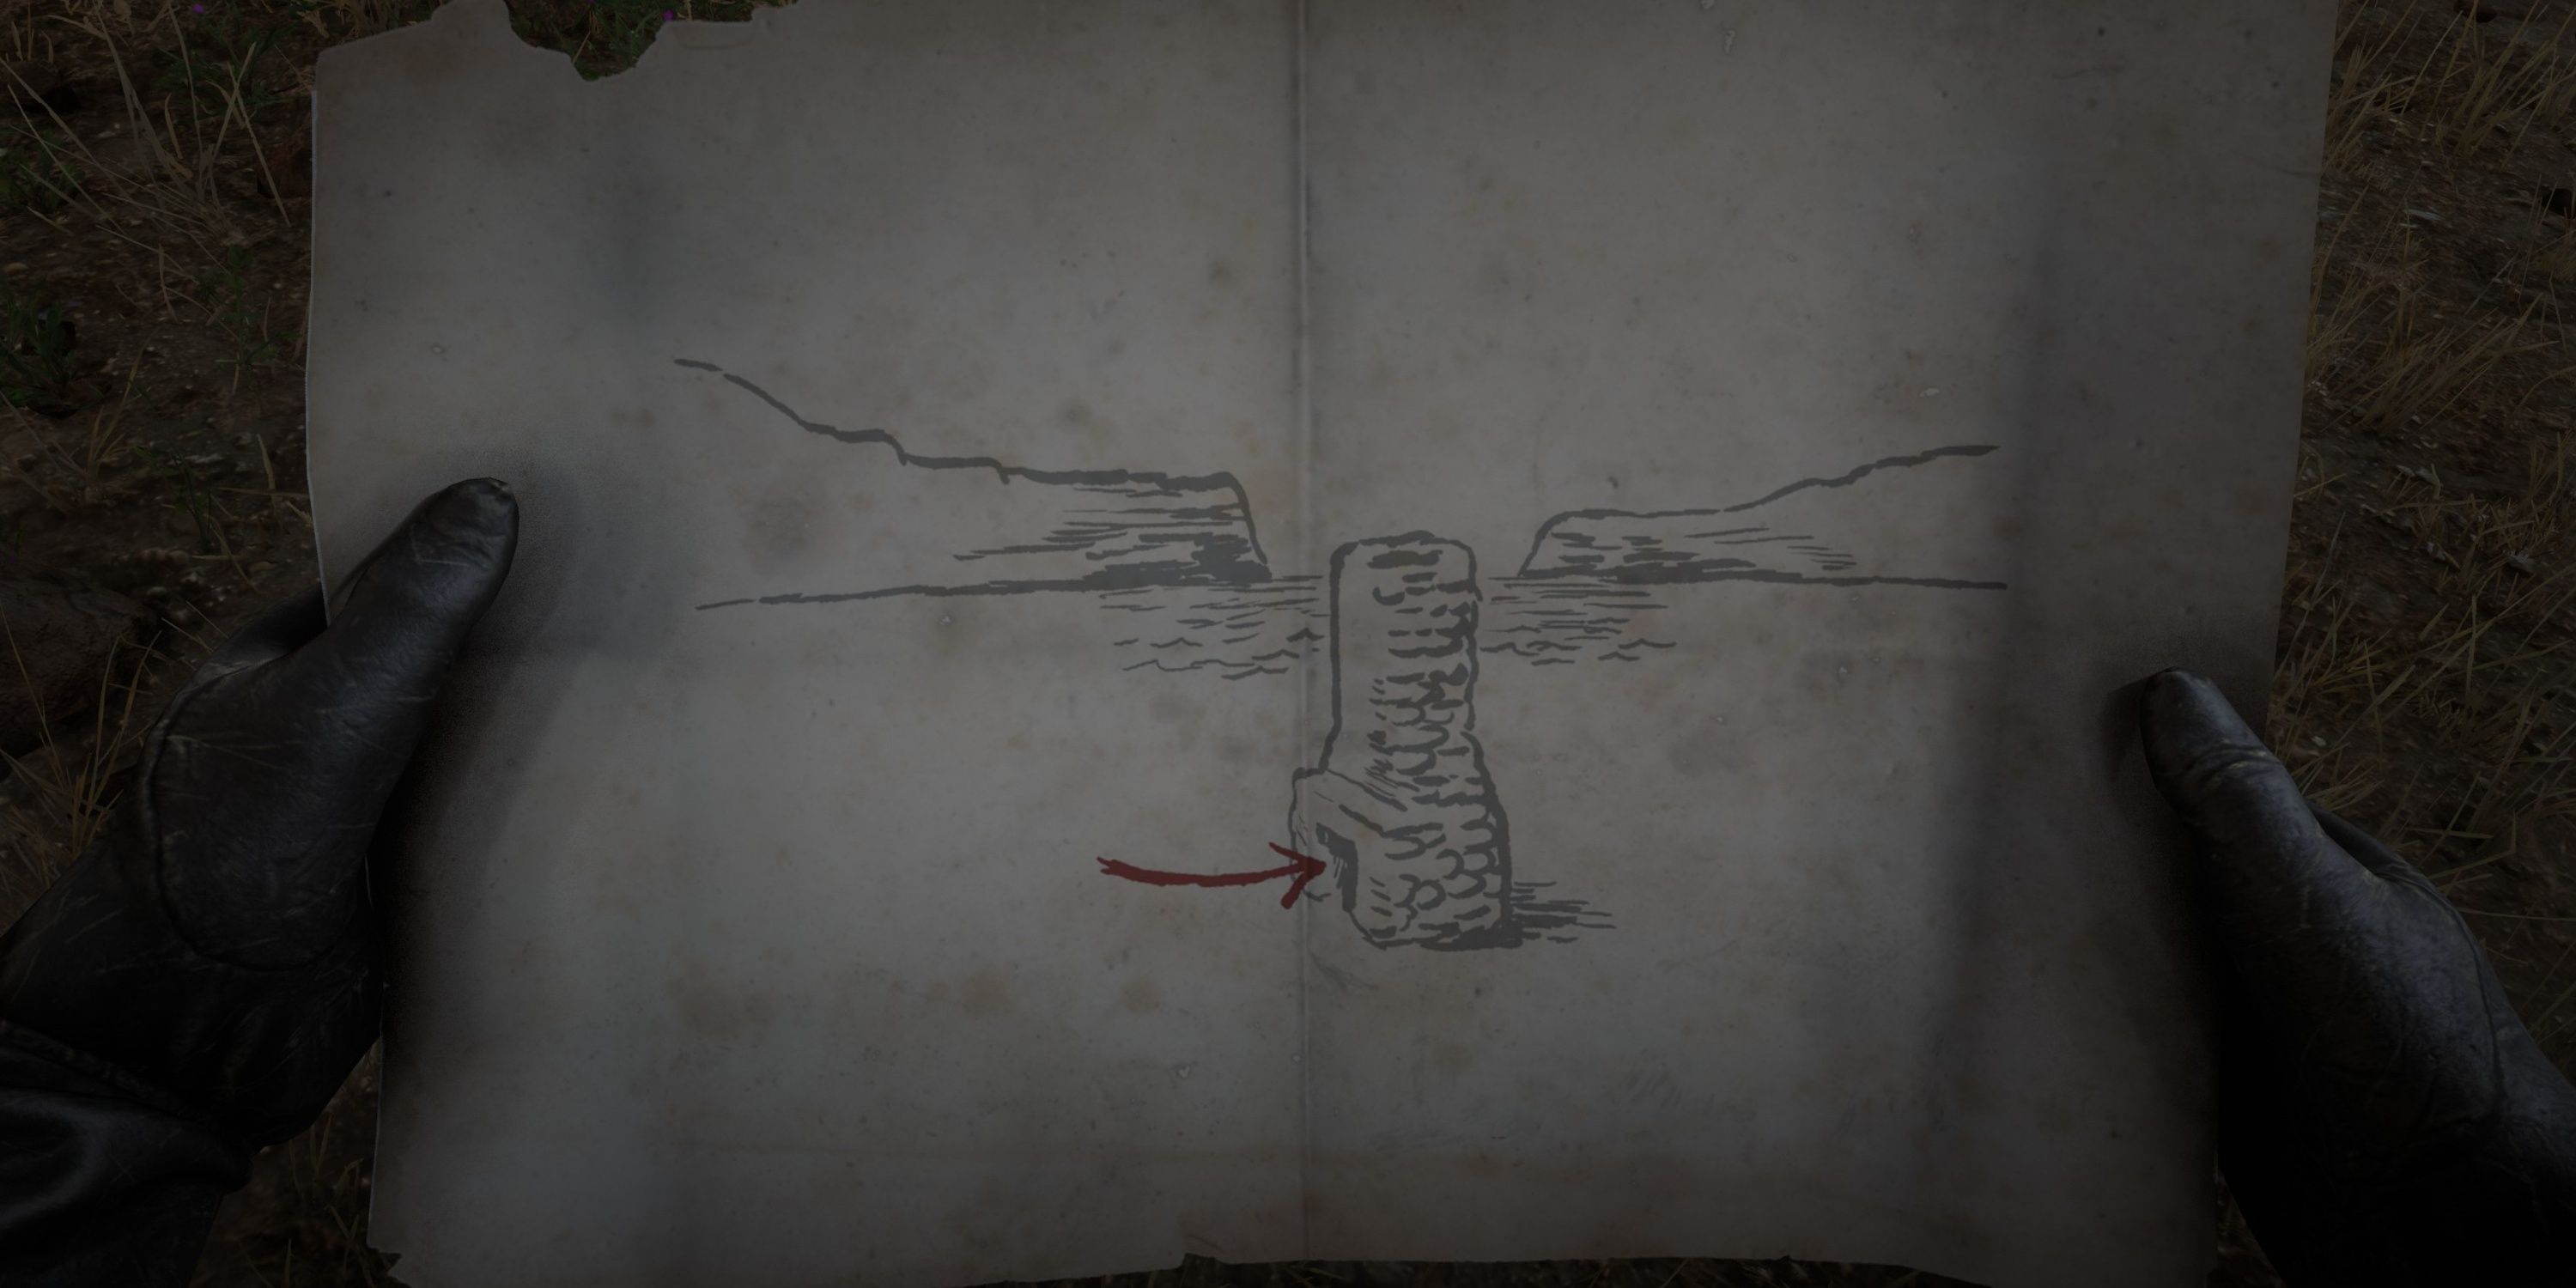
3. The Elemental Trail Map 2
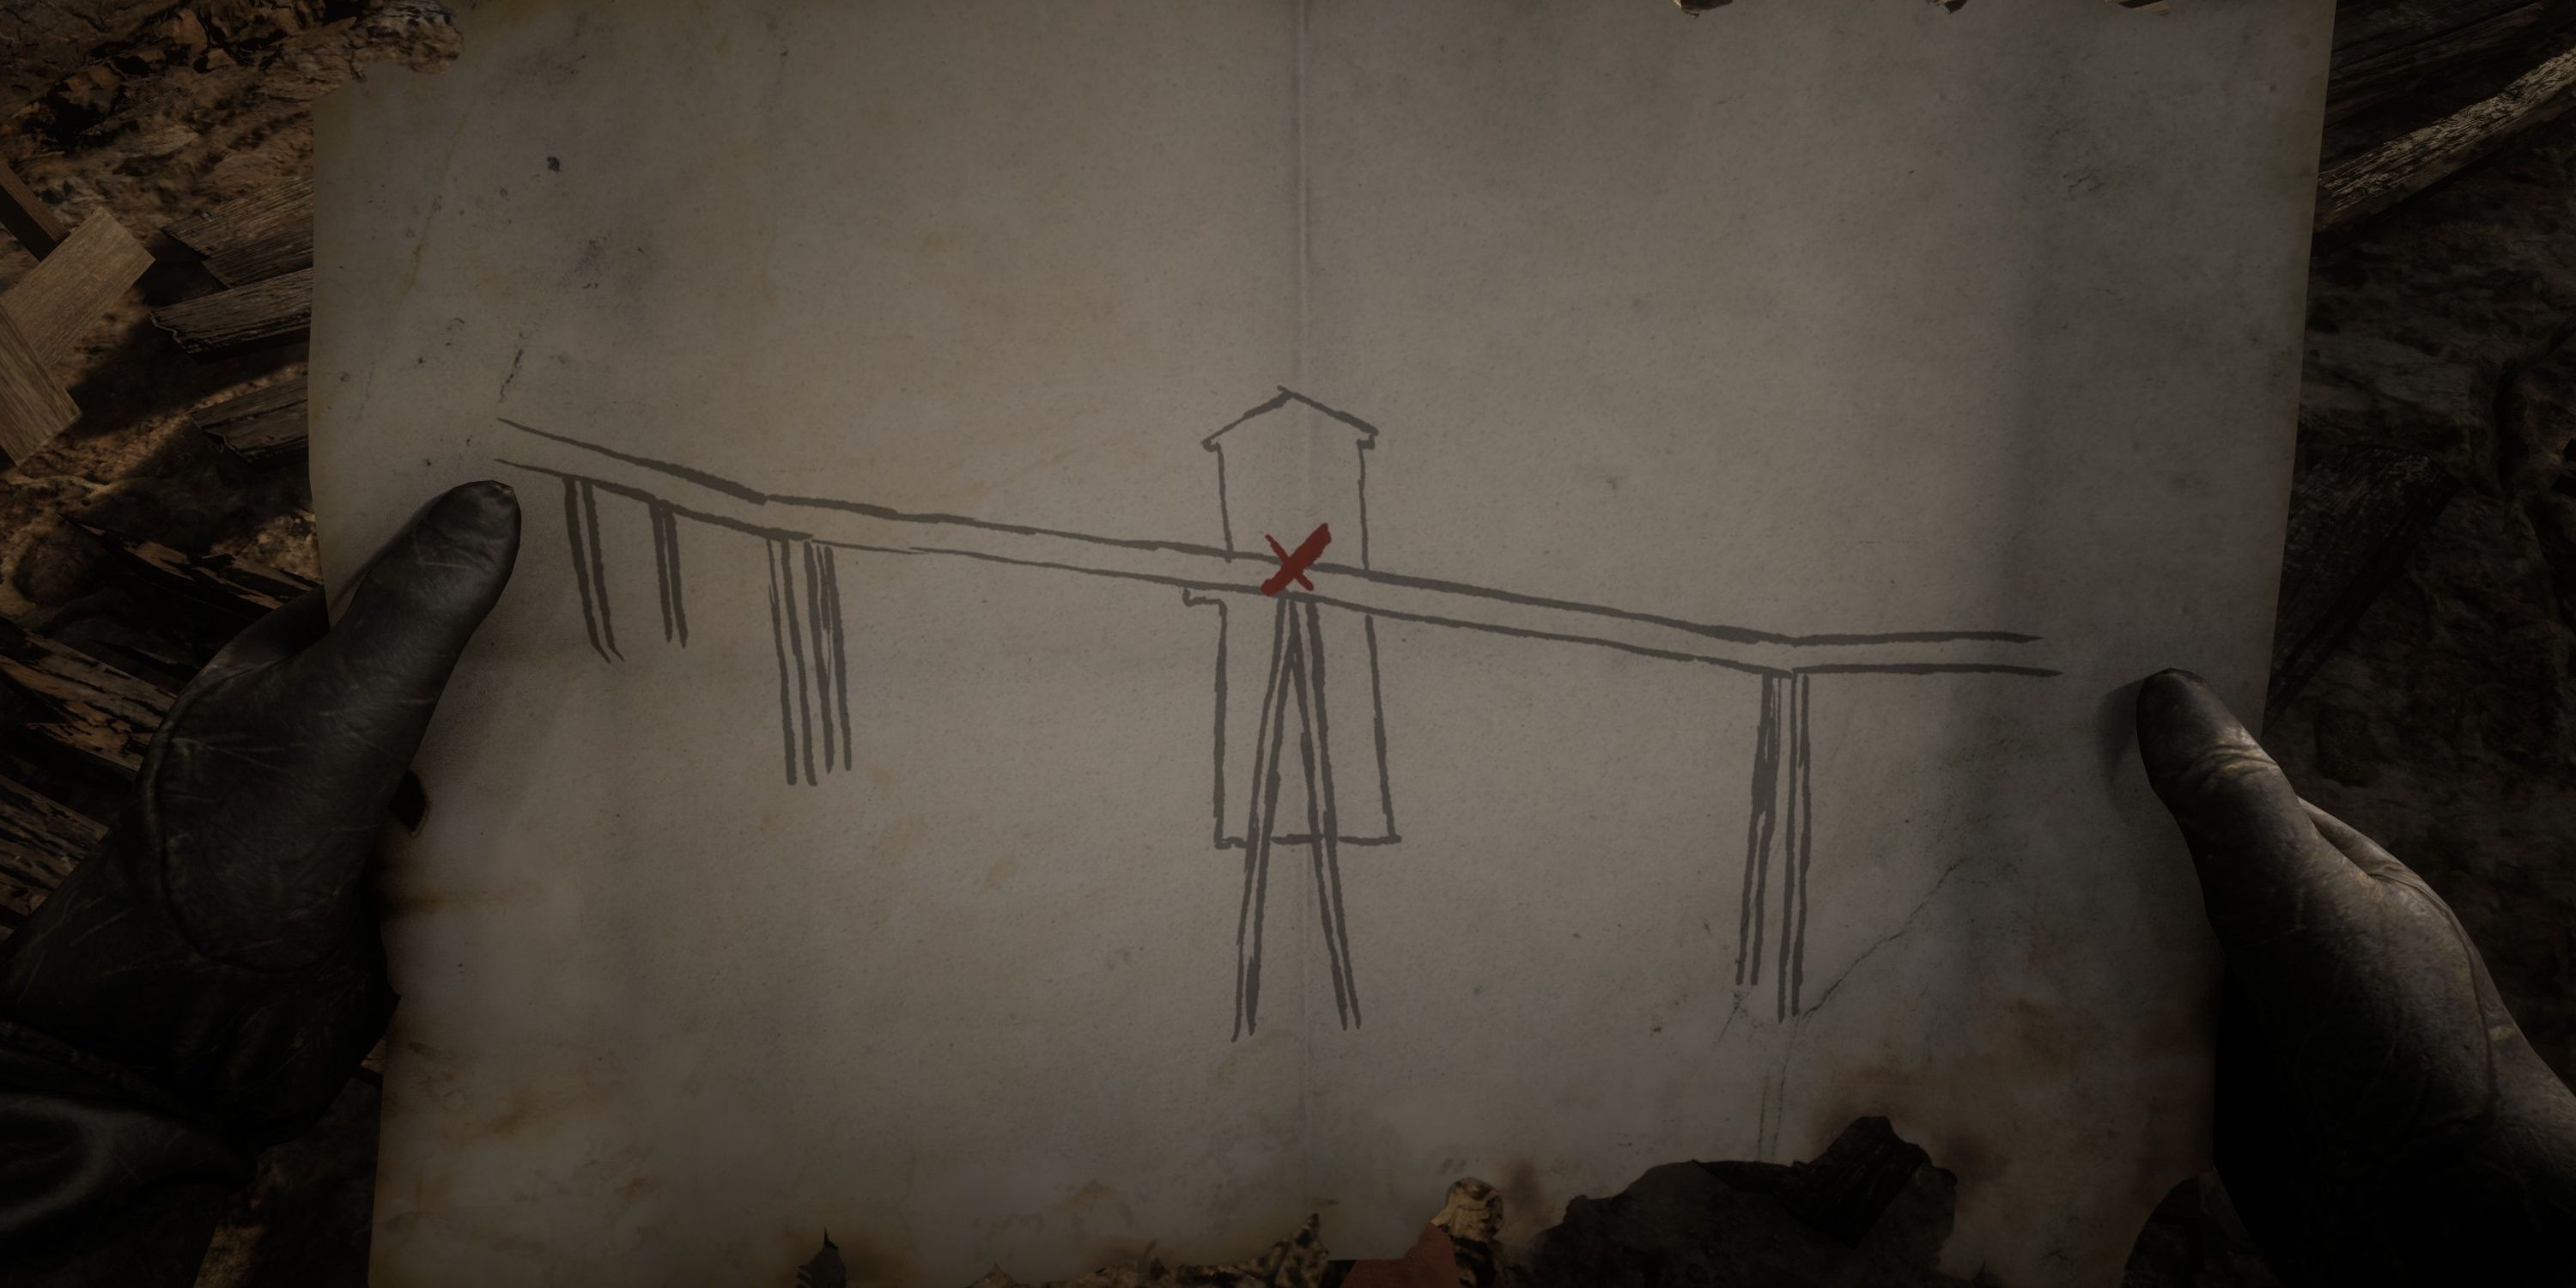
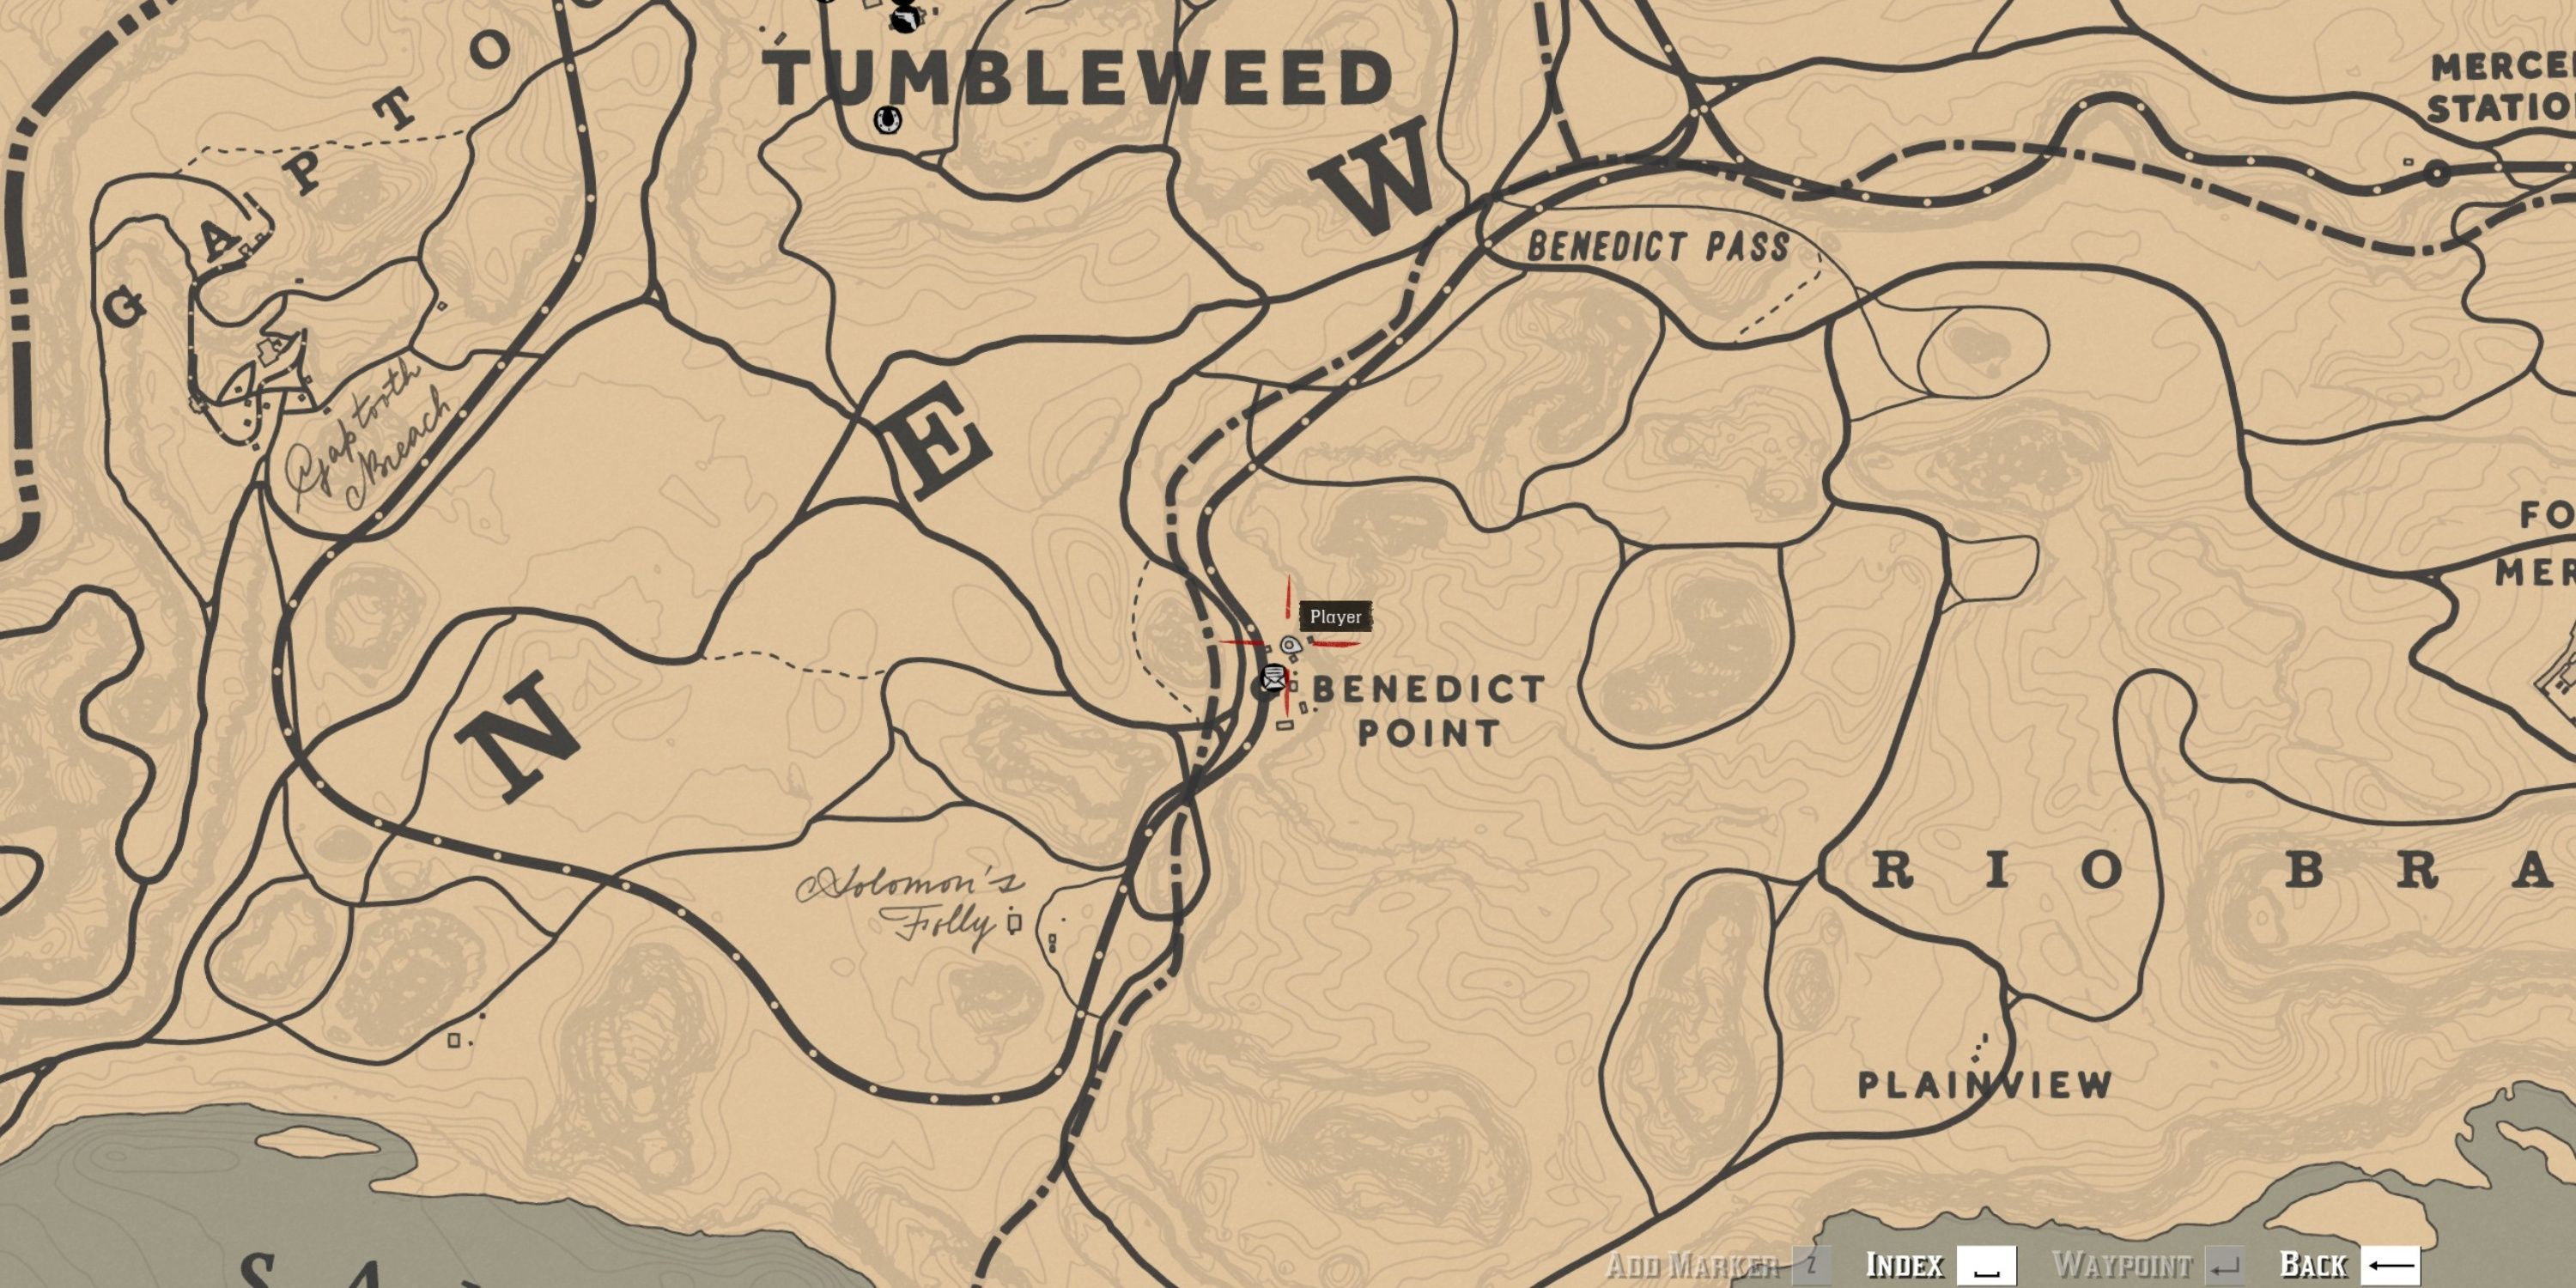
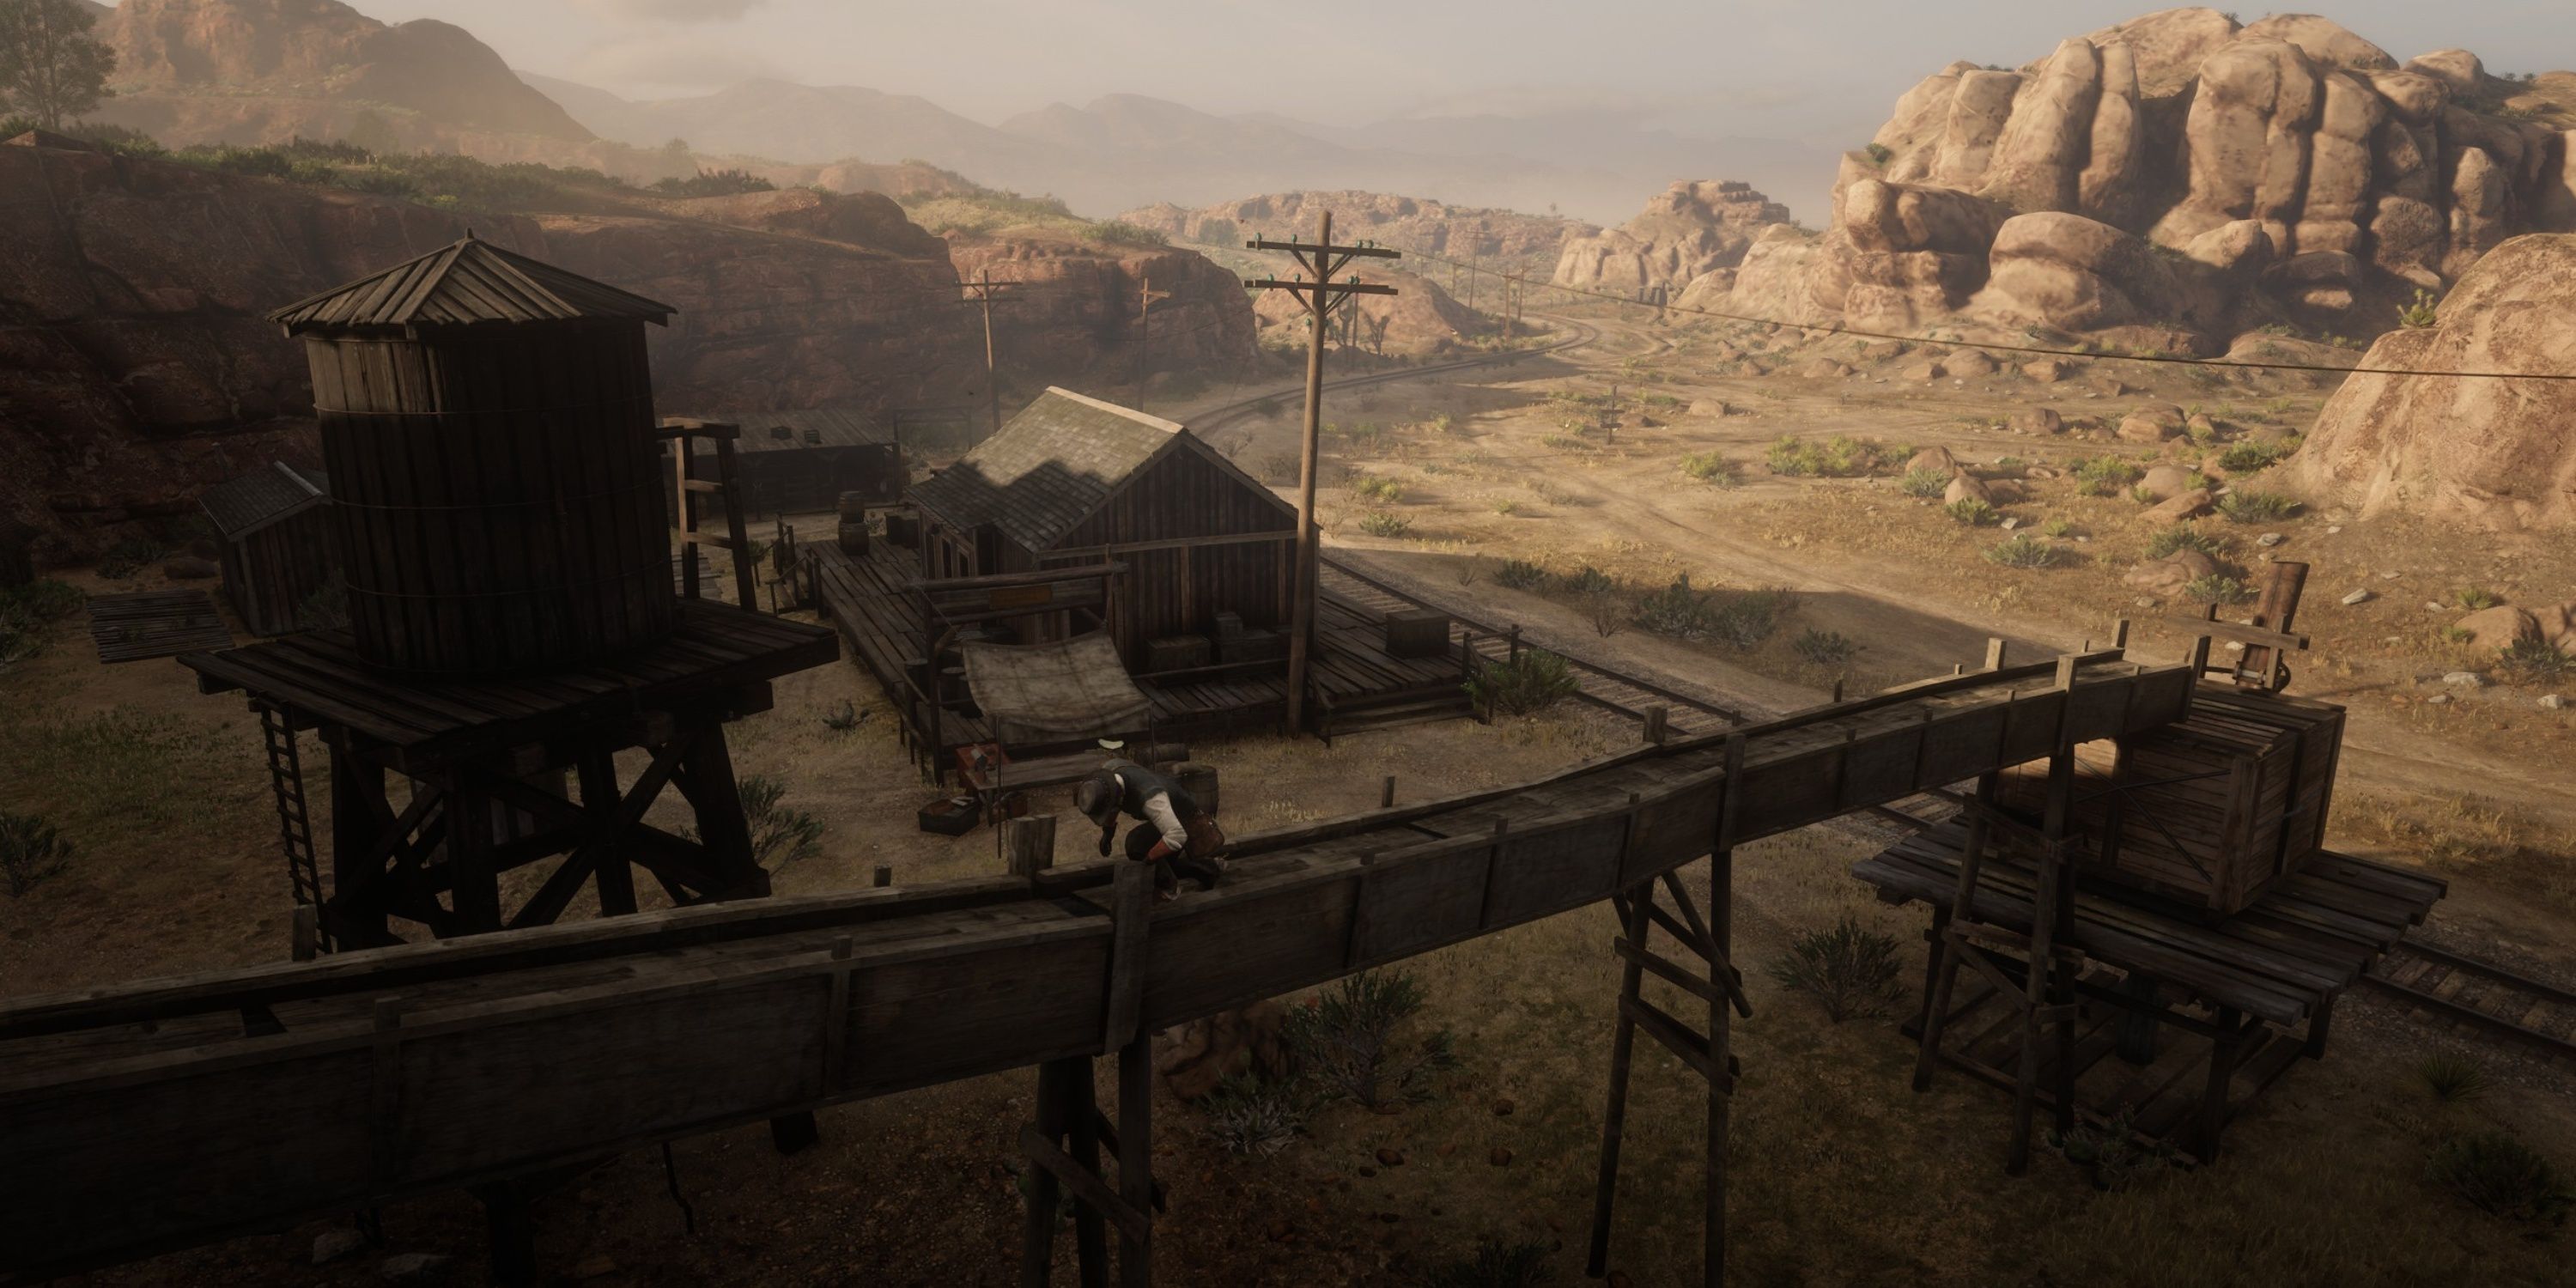
- Loot: Horse Reviver, The Elemental Trail Map 3
To solve The Elemental Trail Map 2, you should journey towards Benedict Point, located south of Tumbleweed in New Austin. Once there, look for a wooden structure next to the train tracks and ascend it using the wooden crates. Walk across the wobbly bridge that follows, and you’ll find the treasure hidden in a space about halfway over the bridge.
2. The Elemental Trail Map 3

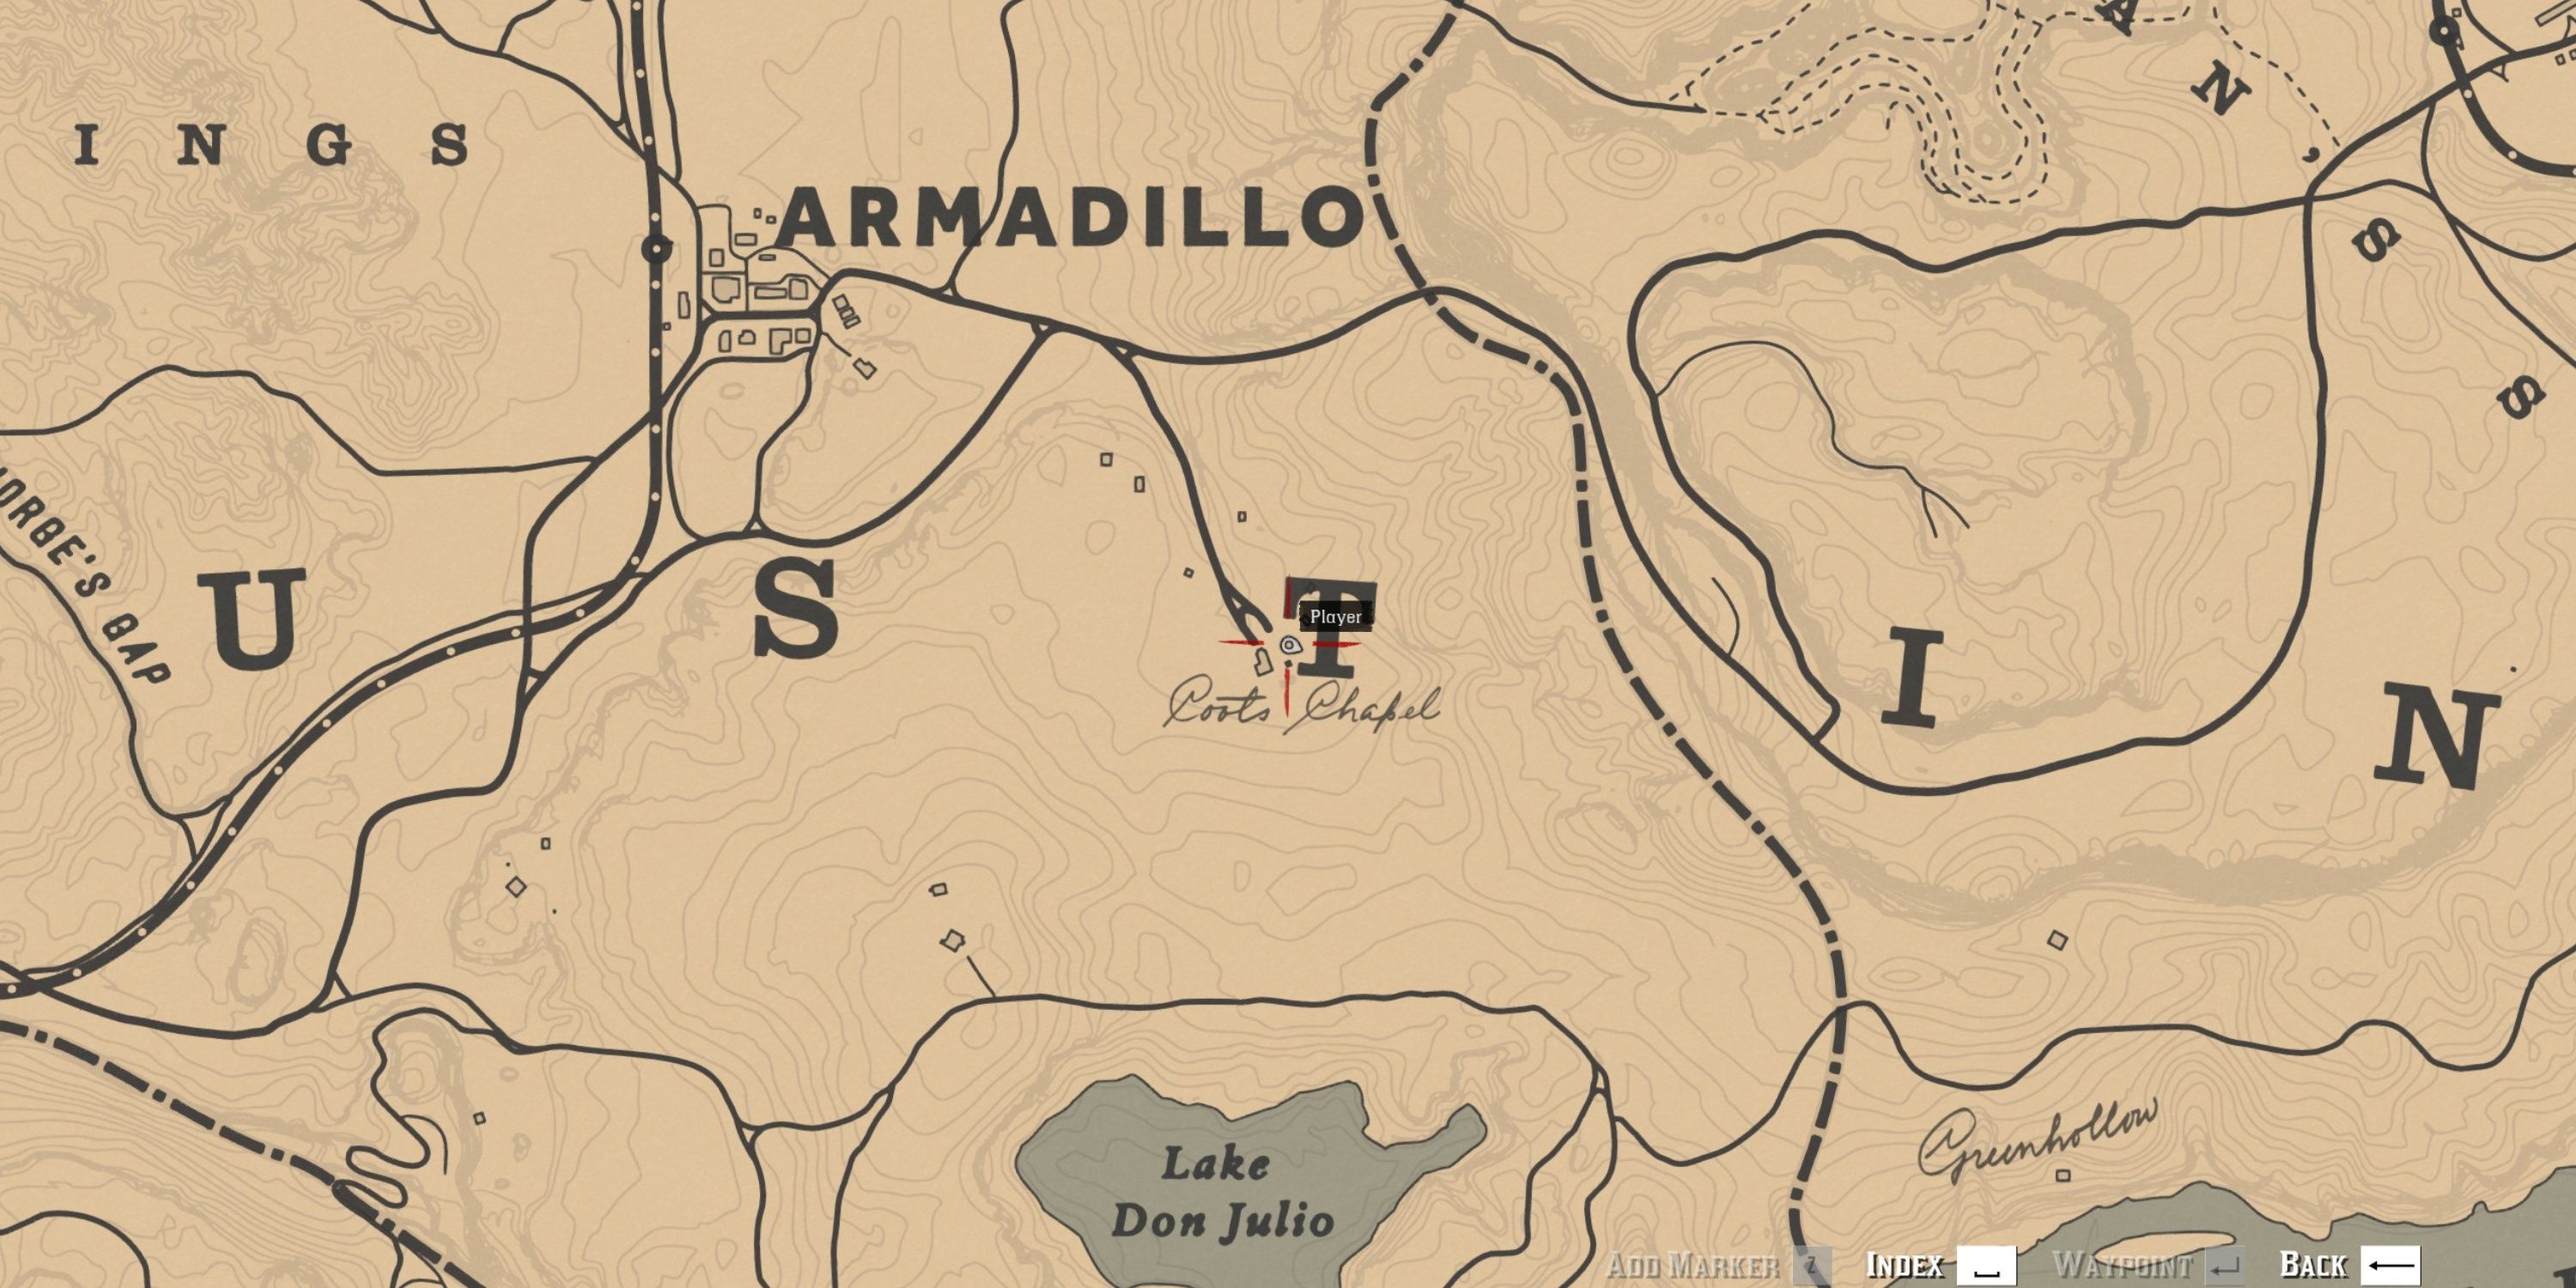
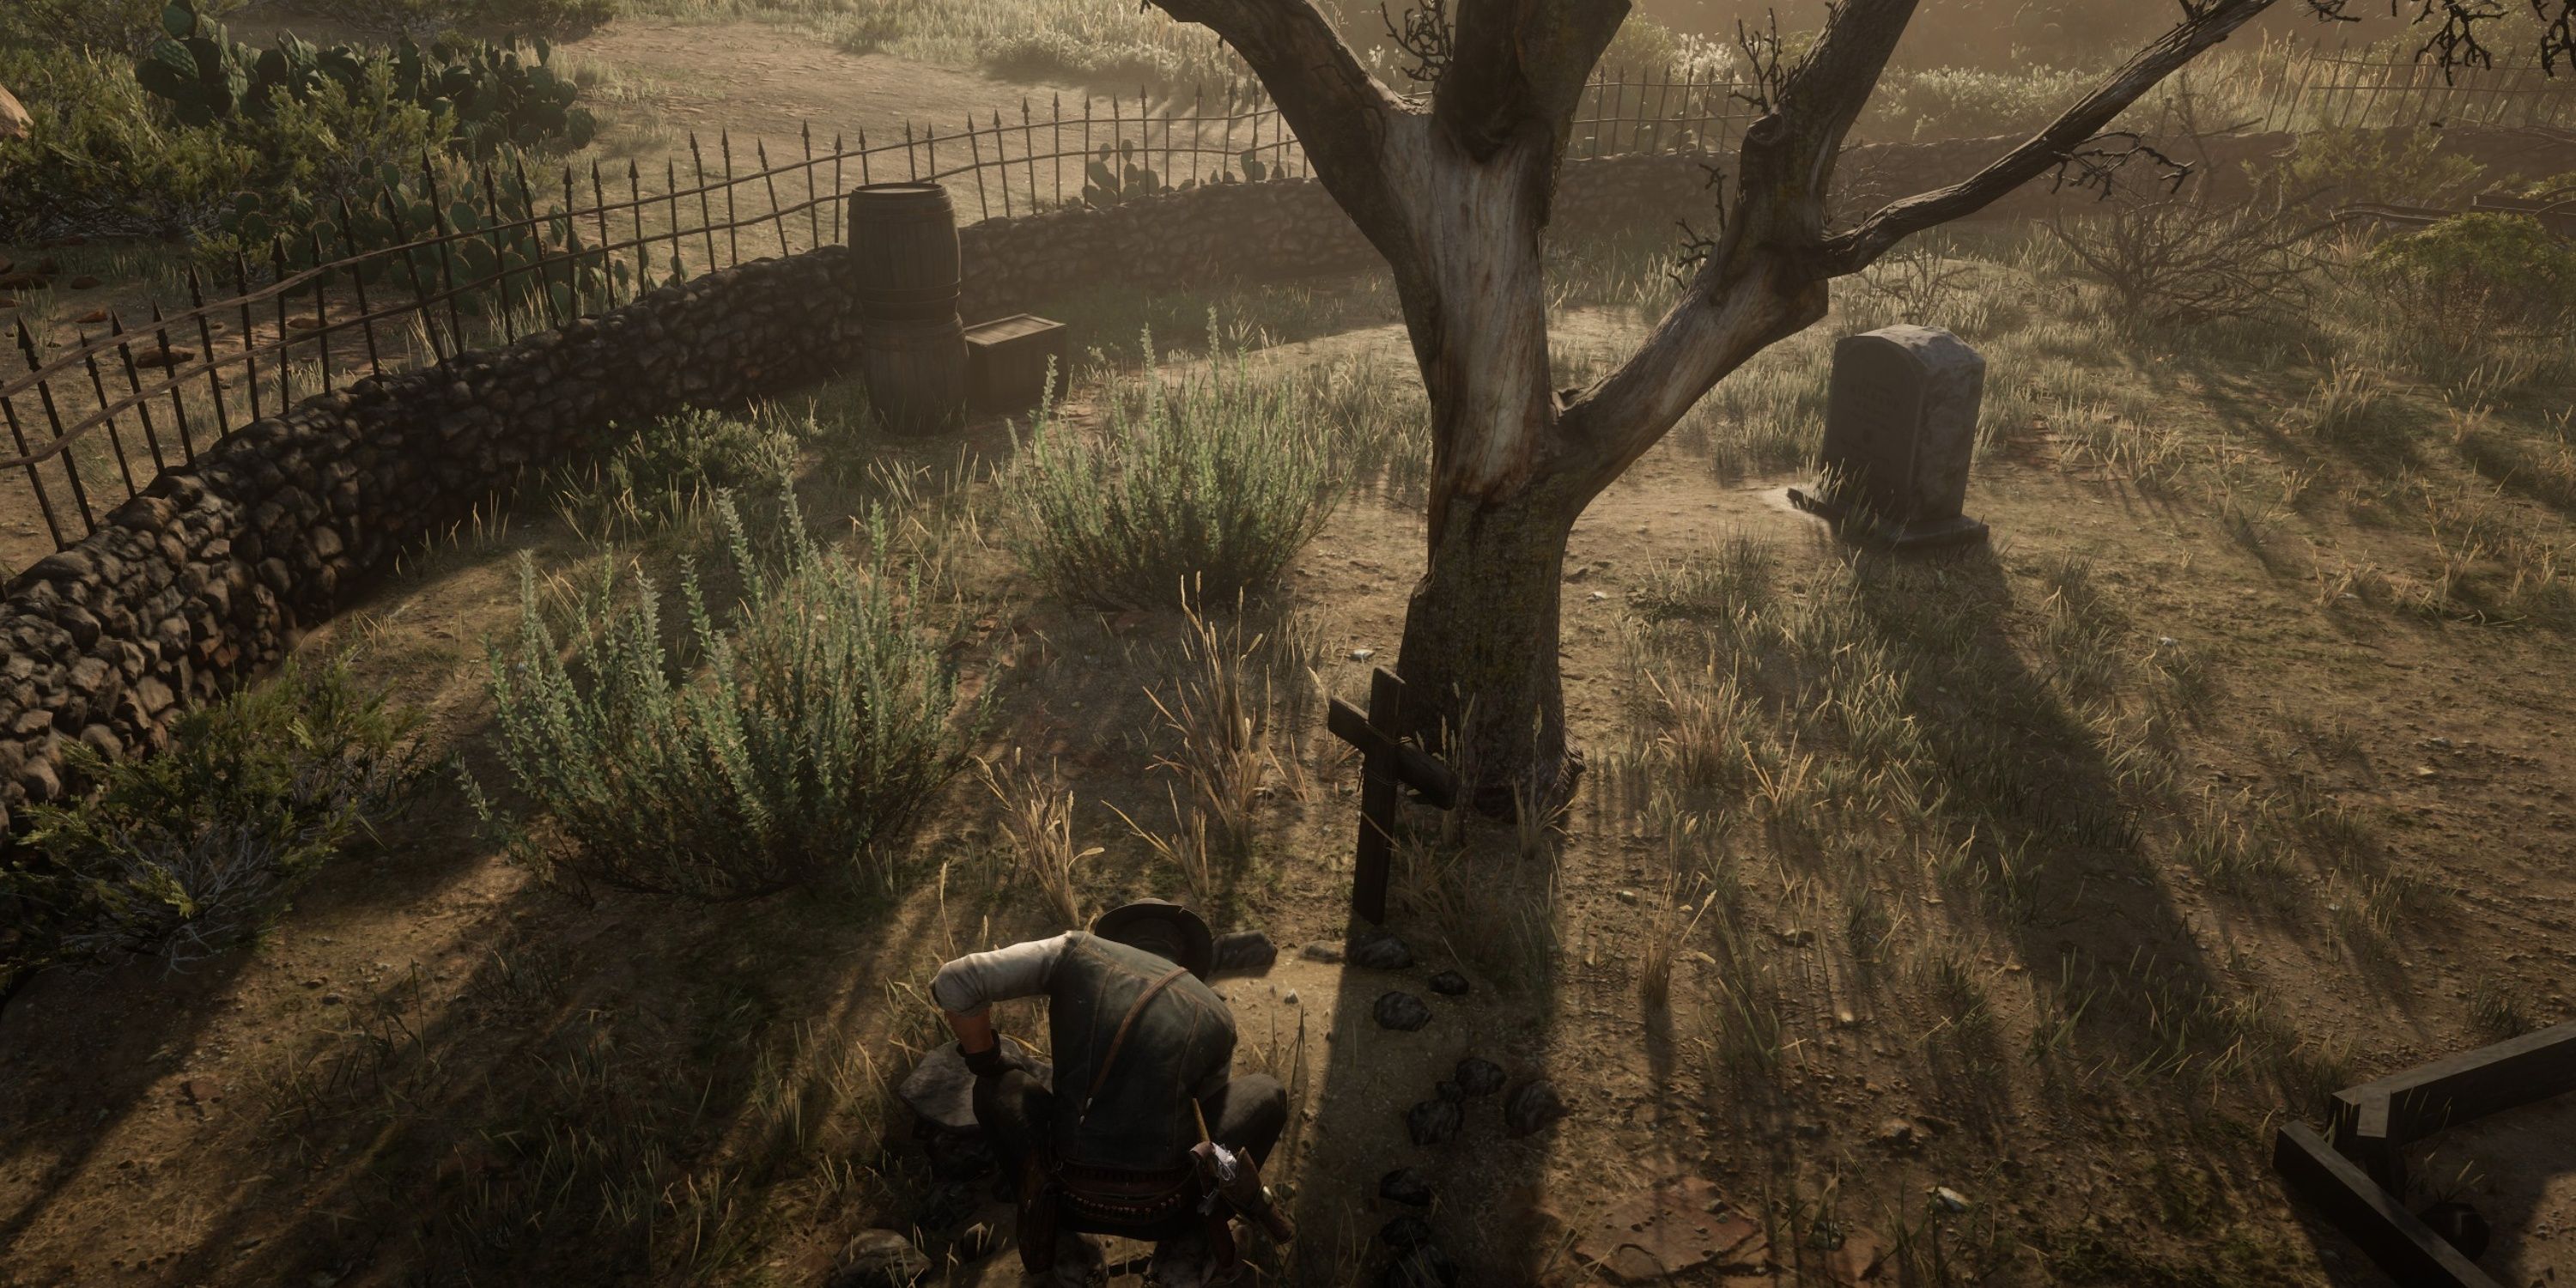
- Loot: Special Horse Stimulant, Special Horse Medicine, Gold Bar, Crow Beak Trinket
The last prize on the Elemental Trail can be found underneath a stone balanced atop a wooden headstone, which is situated under a tree, within Coot’s Chapel – a cemetery positioned south of Armadillo and north of Lake Dun Julio.
Read More
- Nine Sols: 6 Best Jin Farming Methods
- How to Unlock the Mines in Cookie Run: Kingdom
- Top 8 UFC 5 Perks Every Fighter Should Use
- Link Click Season 3 Confirmed for 2026—Meet the Mysterious New Character Jae Lee!
- How to Get 100% Chameleon in Oblivion Remastered
- Top 8 Weapon Enchantments in Oblivion Remastered, Ranked
- USD ILS PREDICTION
- MHA’s Back: Horikoshi Drops New Chapter in ‘Ultra Age’ Fanbook – See What’s Inside!
- Invincible’s Strongest Female Characters
- Gold Rate Forecast
2025-02-25 20:15