19 items known as collectibles can be found in the fifth mission, titled “Devil’s Cauldron,” within the game “Sniper Elite: Resistance.” These collectibles include Classified Documents, Personal Letters, and other items. Many players will likely aim to discover each and every one of them. This guide is specifically designed for those dedicated players, providing detailed instructions on the location of every single collectible within “Sniper Elite: Resistance”‘s Mission 5.
In the game Sniper Elite: Resistance, the layout of levels might be a bit perplexing since north isn’t necessarily at the map’s top. To make things clearer, this guide has chosen to use terms like “top,” “bottom,” “left,” and “right” instead of cardinal directions when explaining locations.
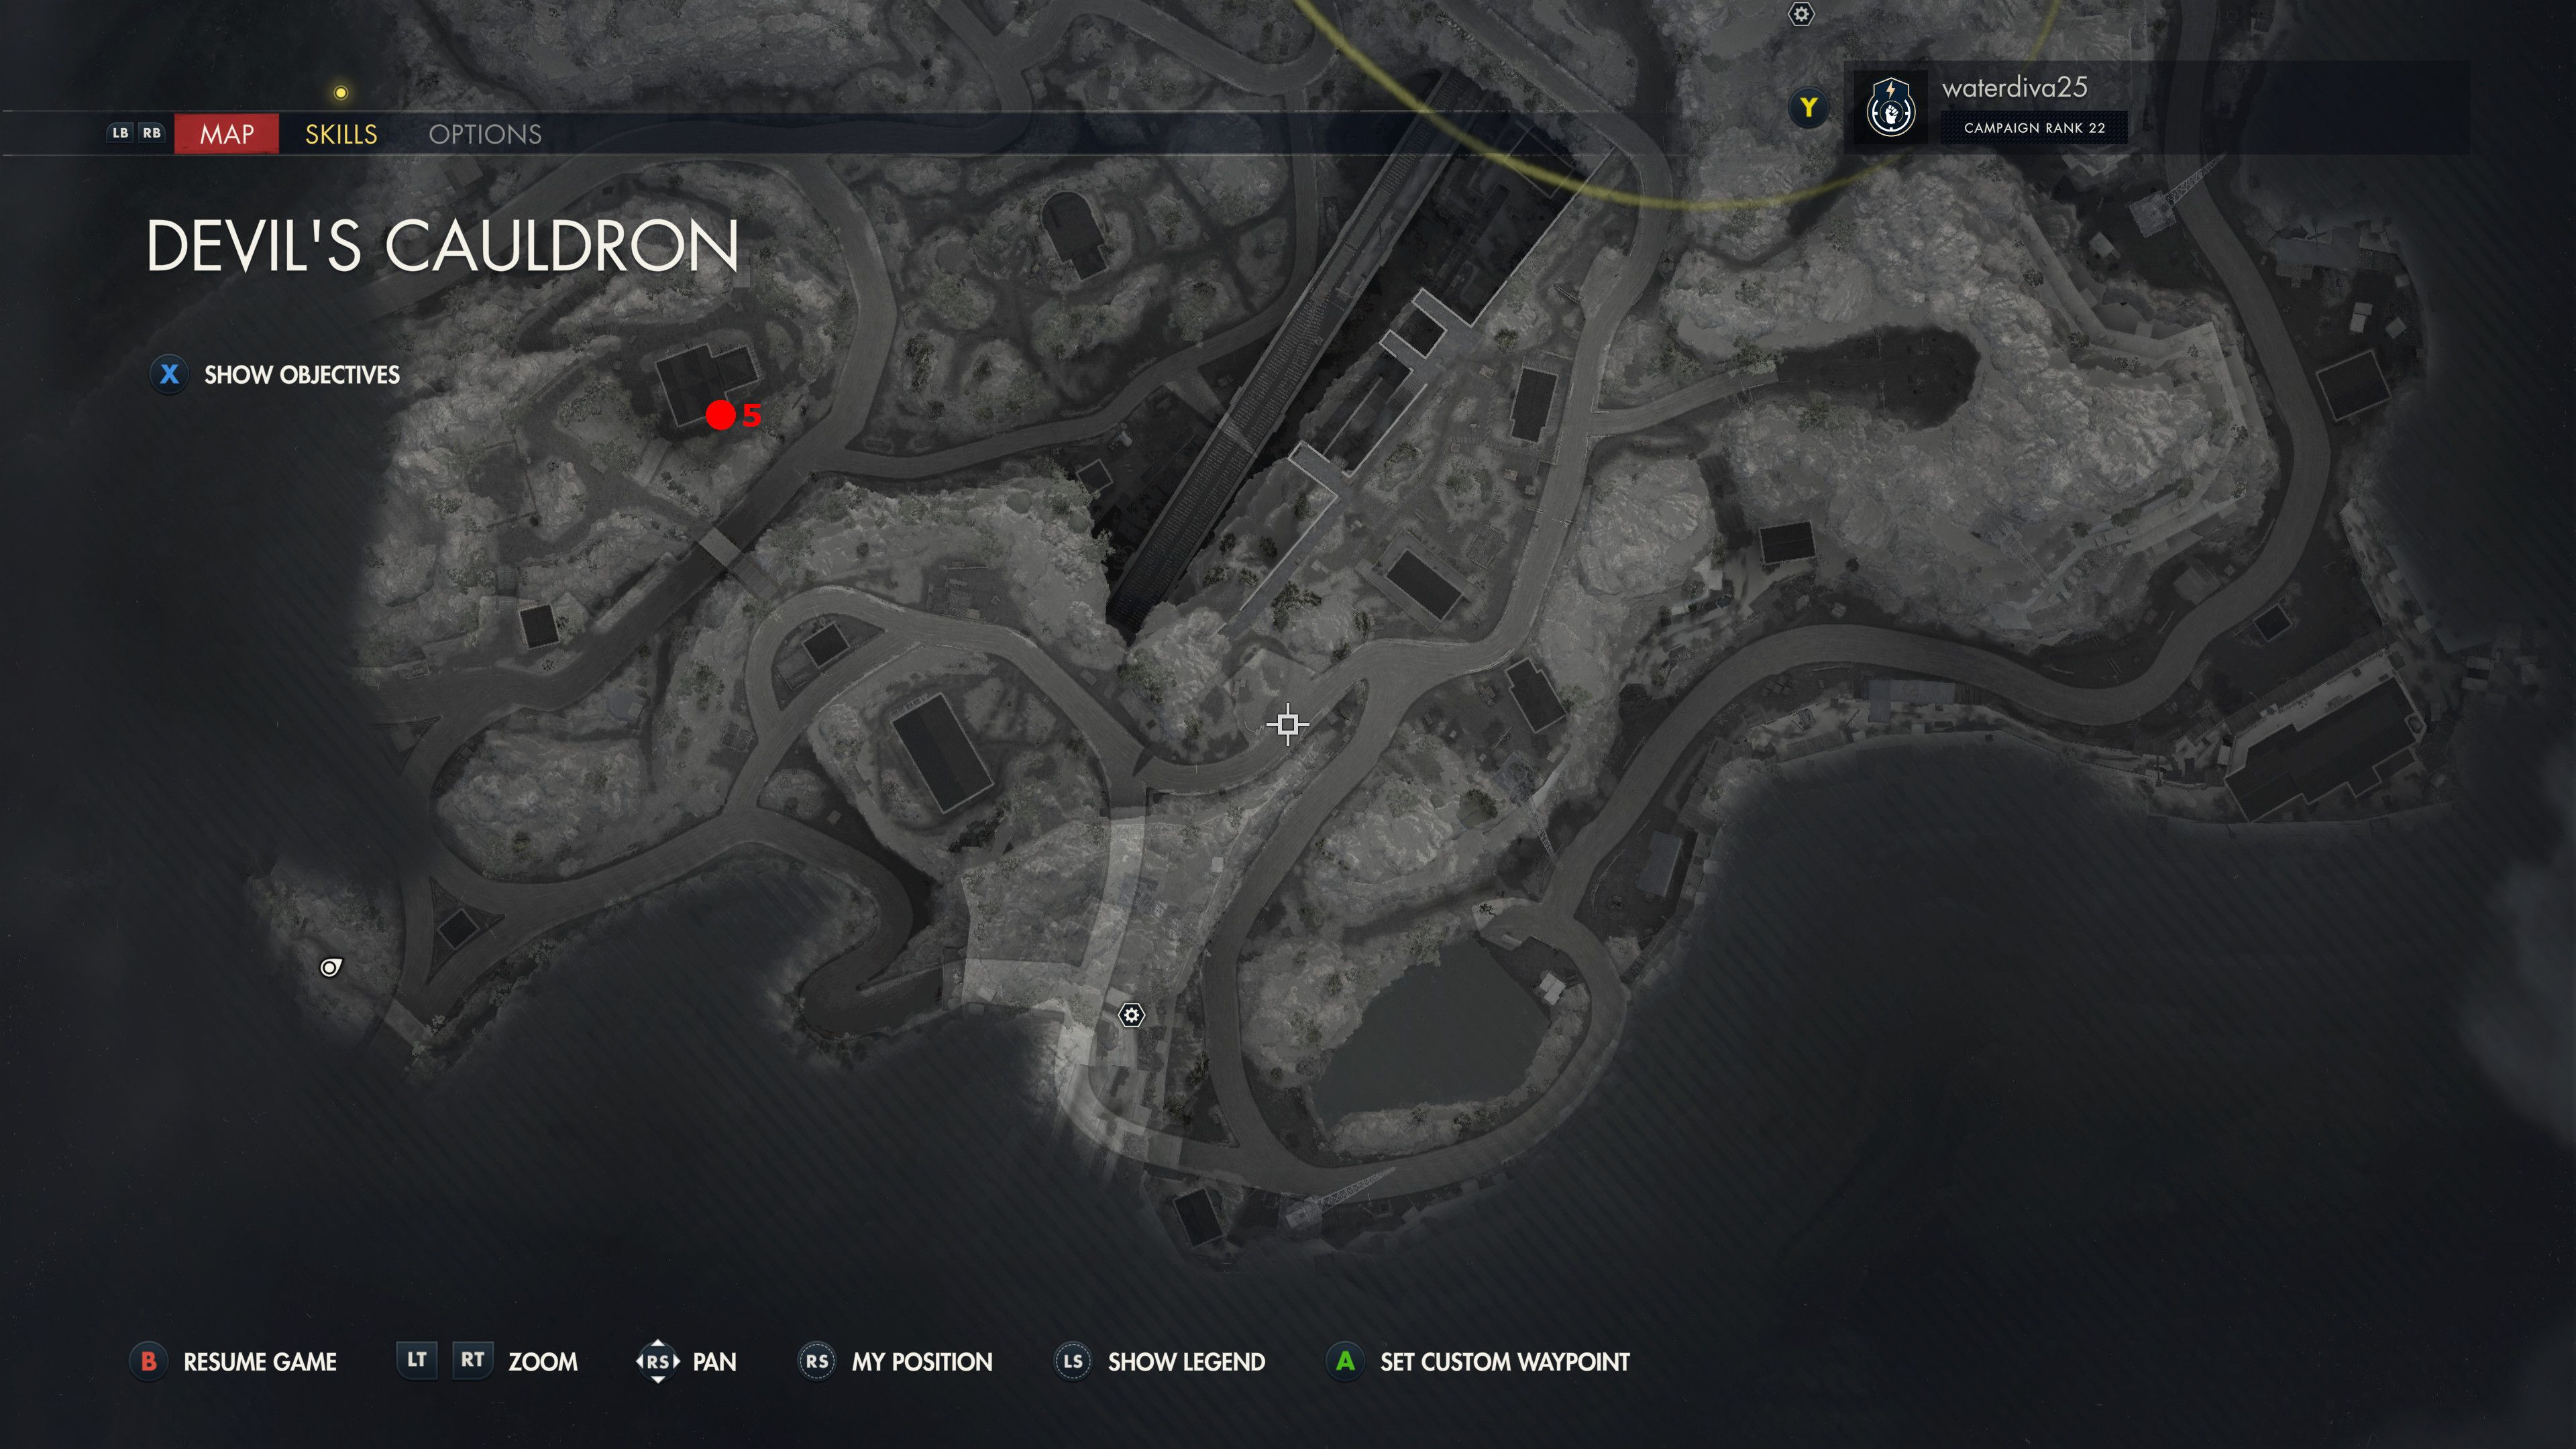
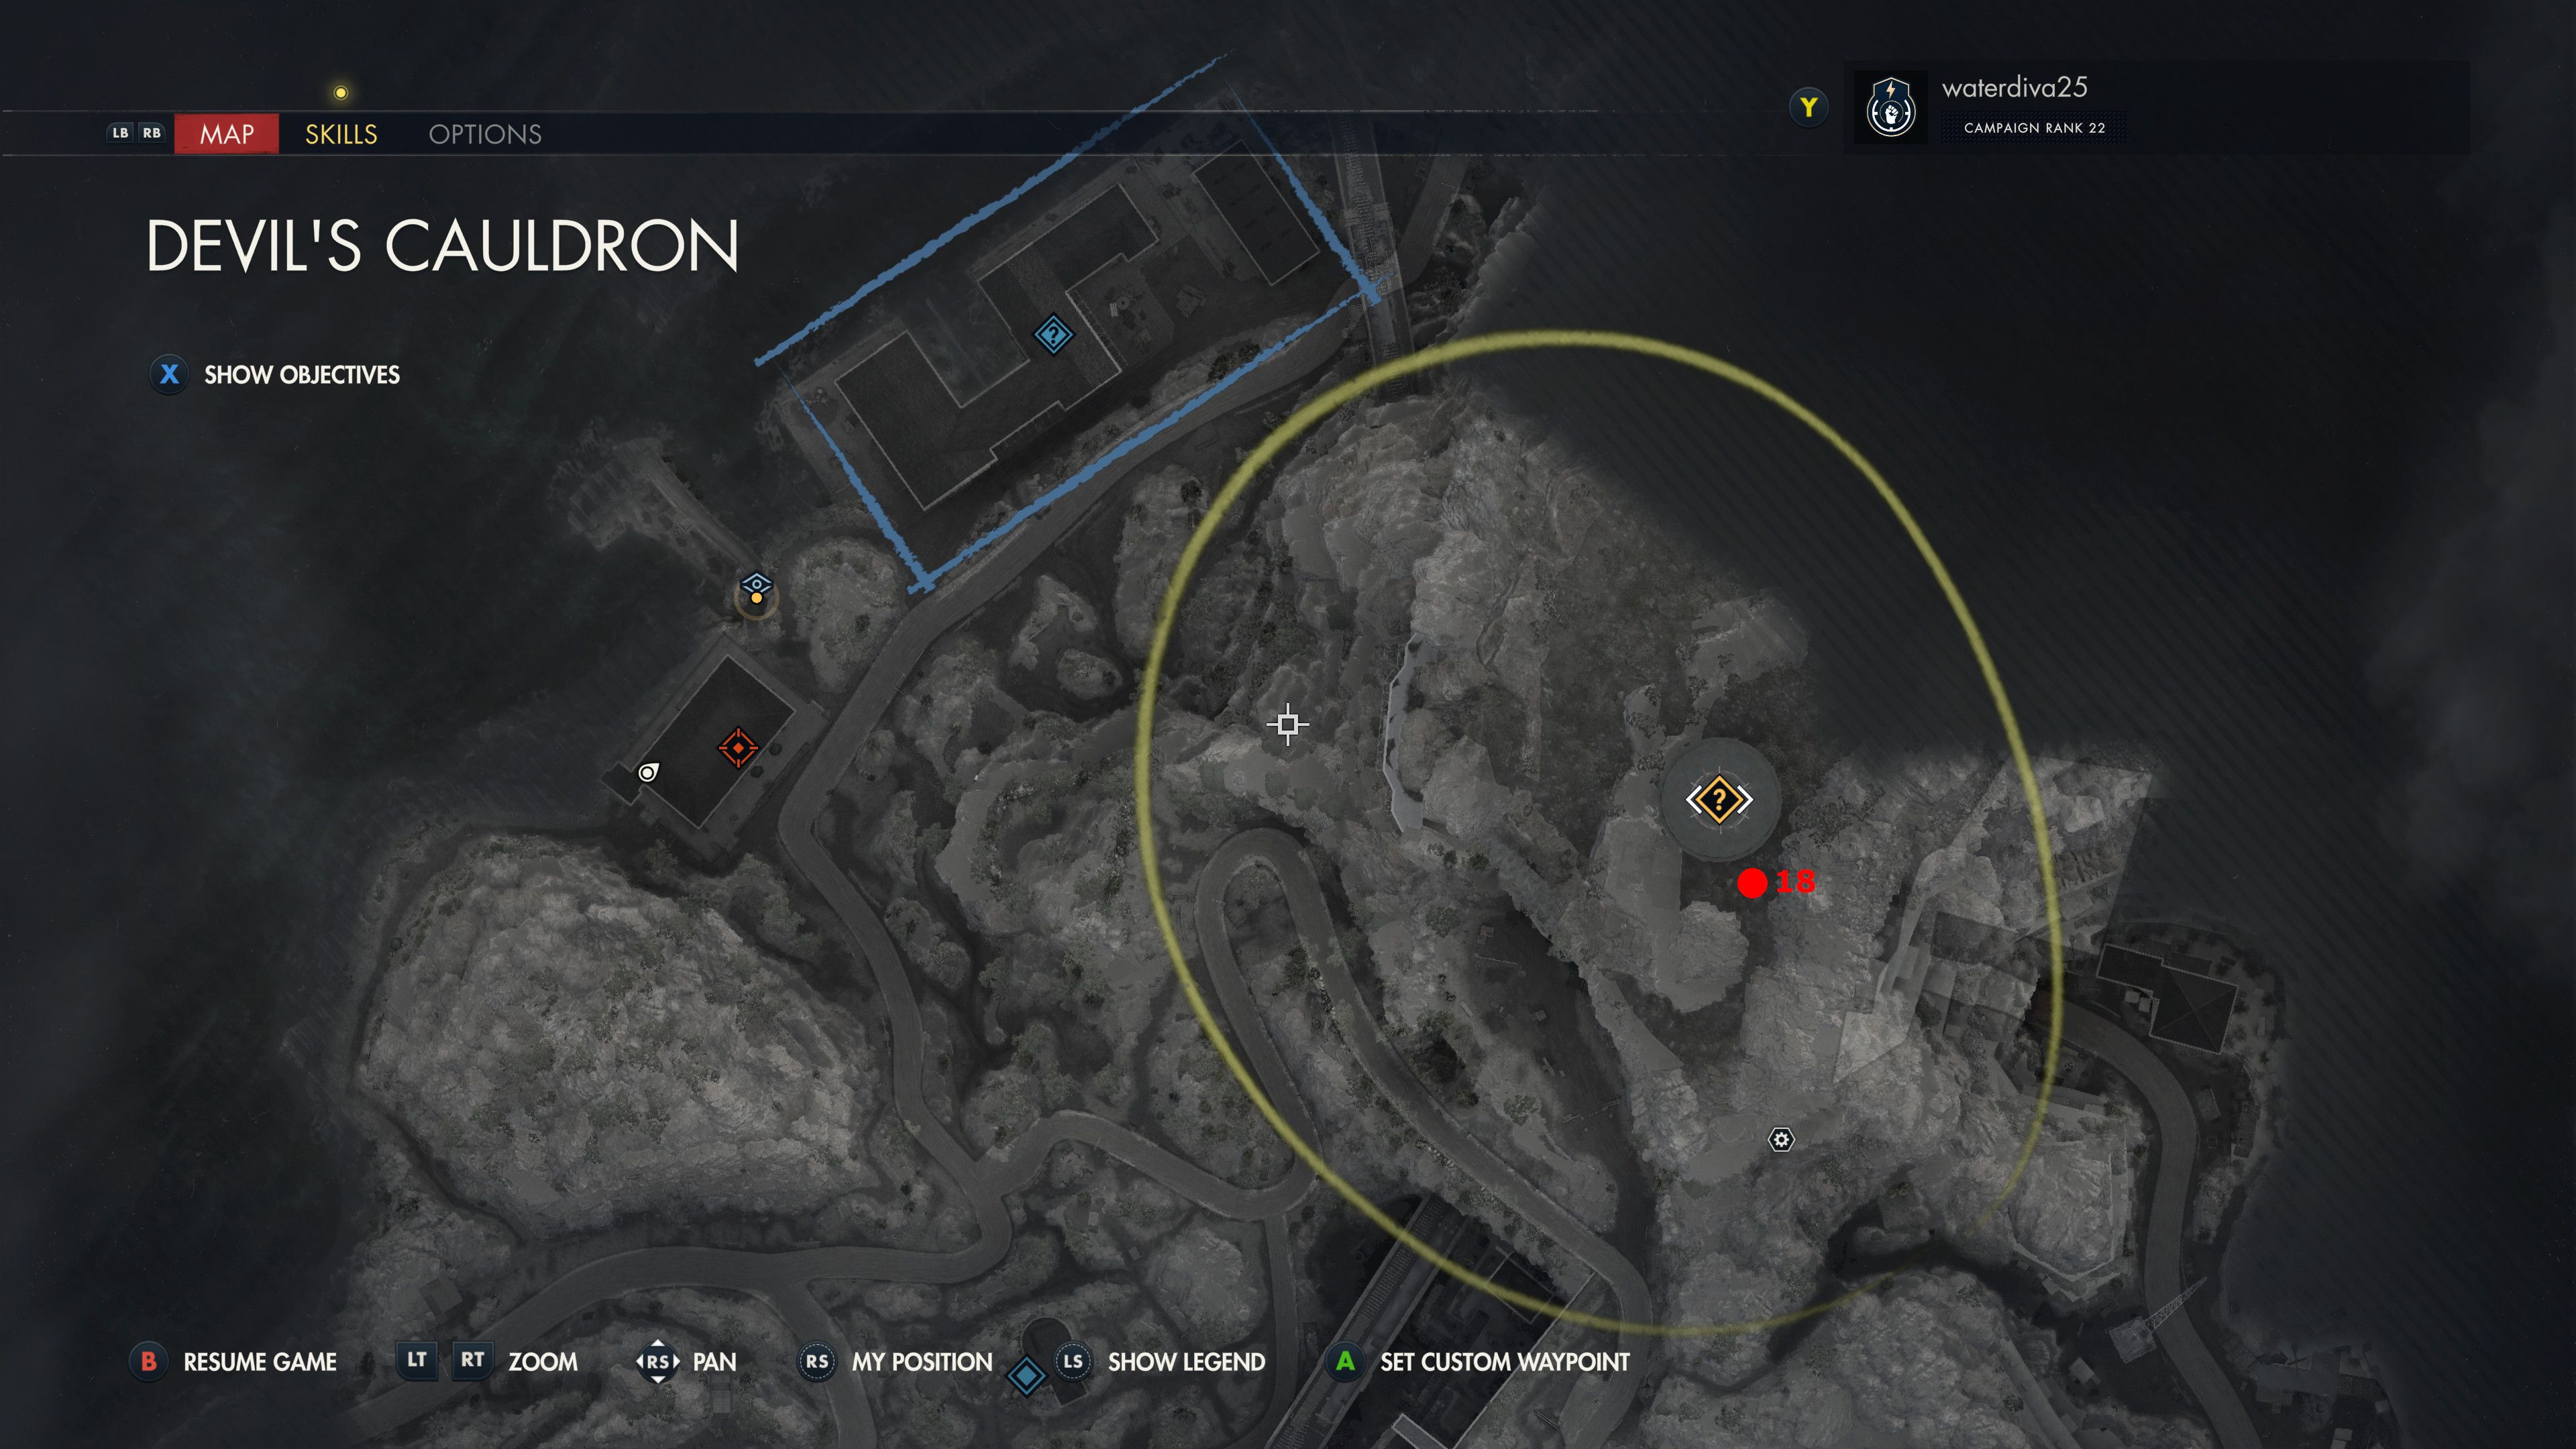
Sniper Elite Resistance: All Devil’s Cauldron Collectible Locations
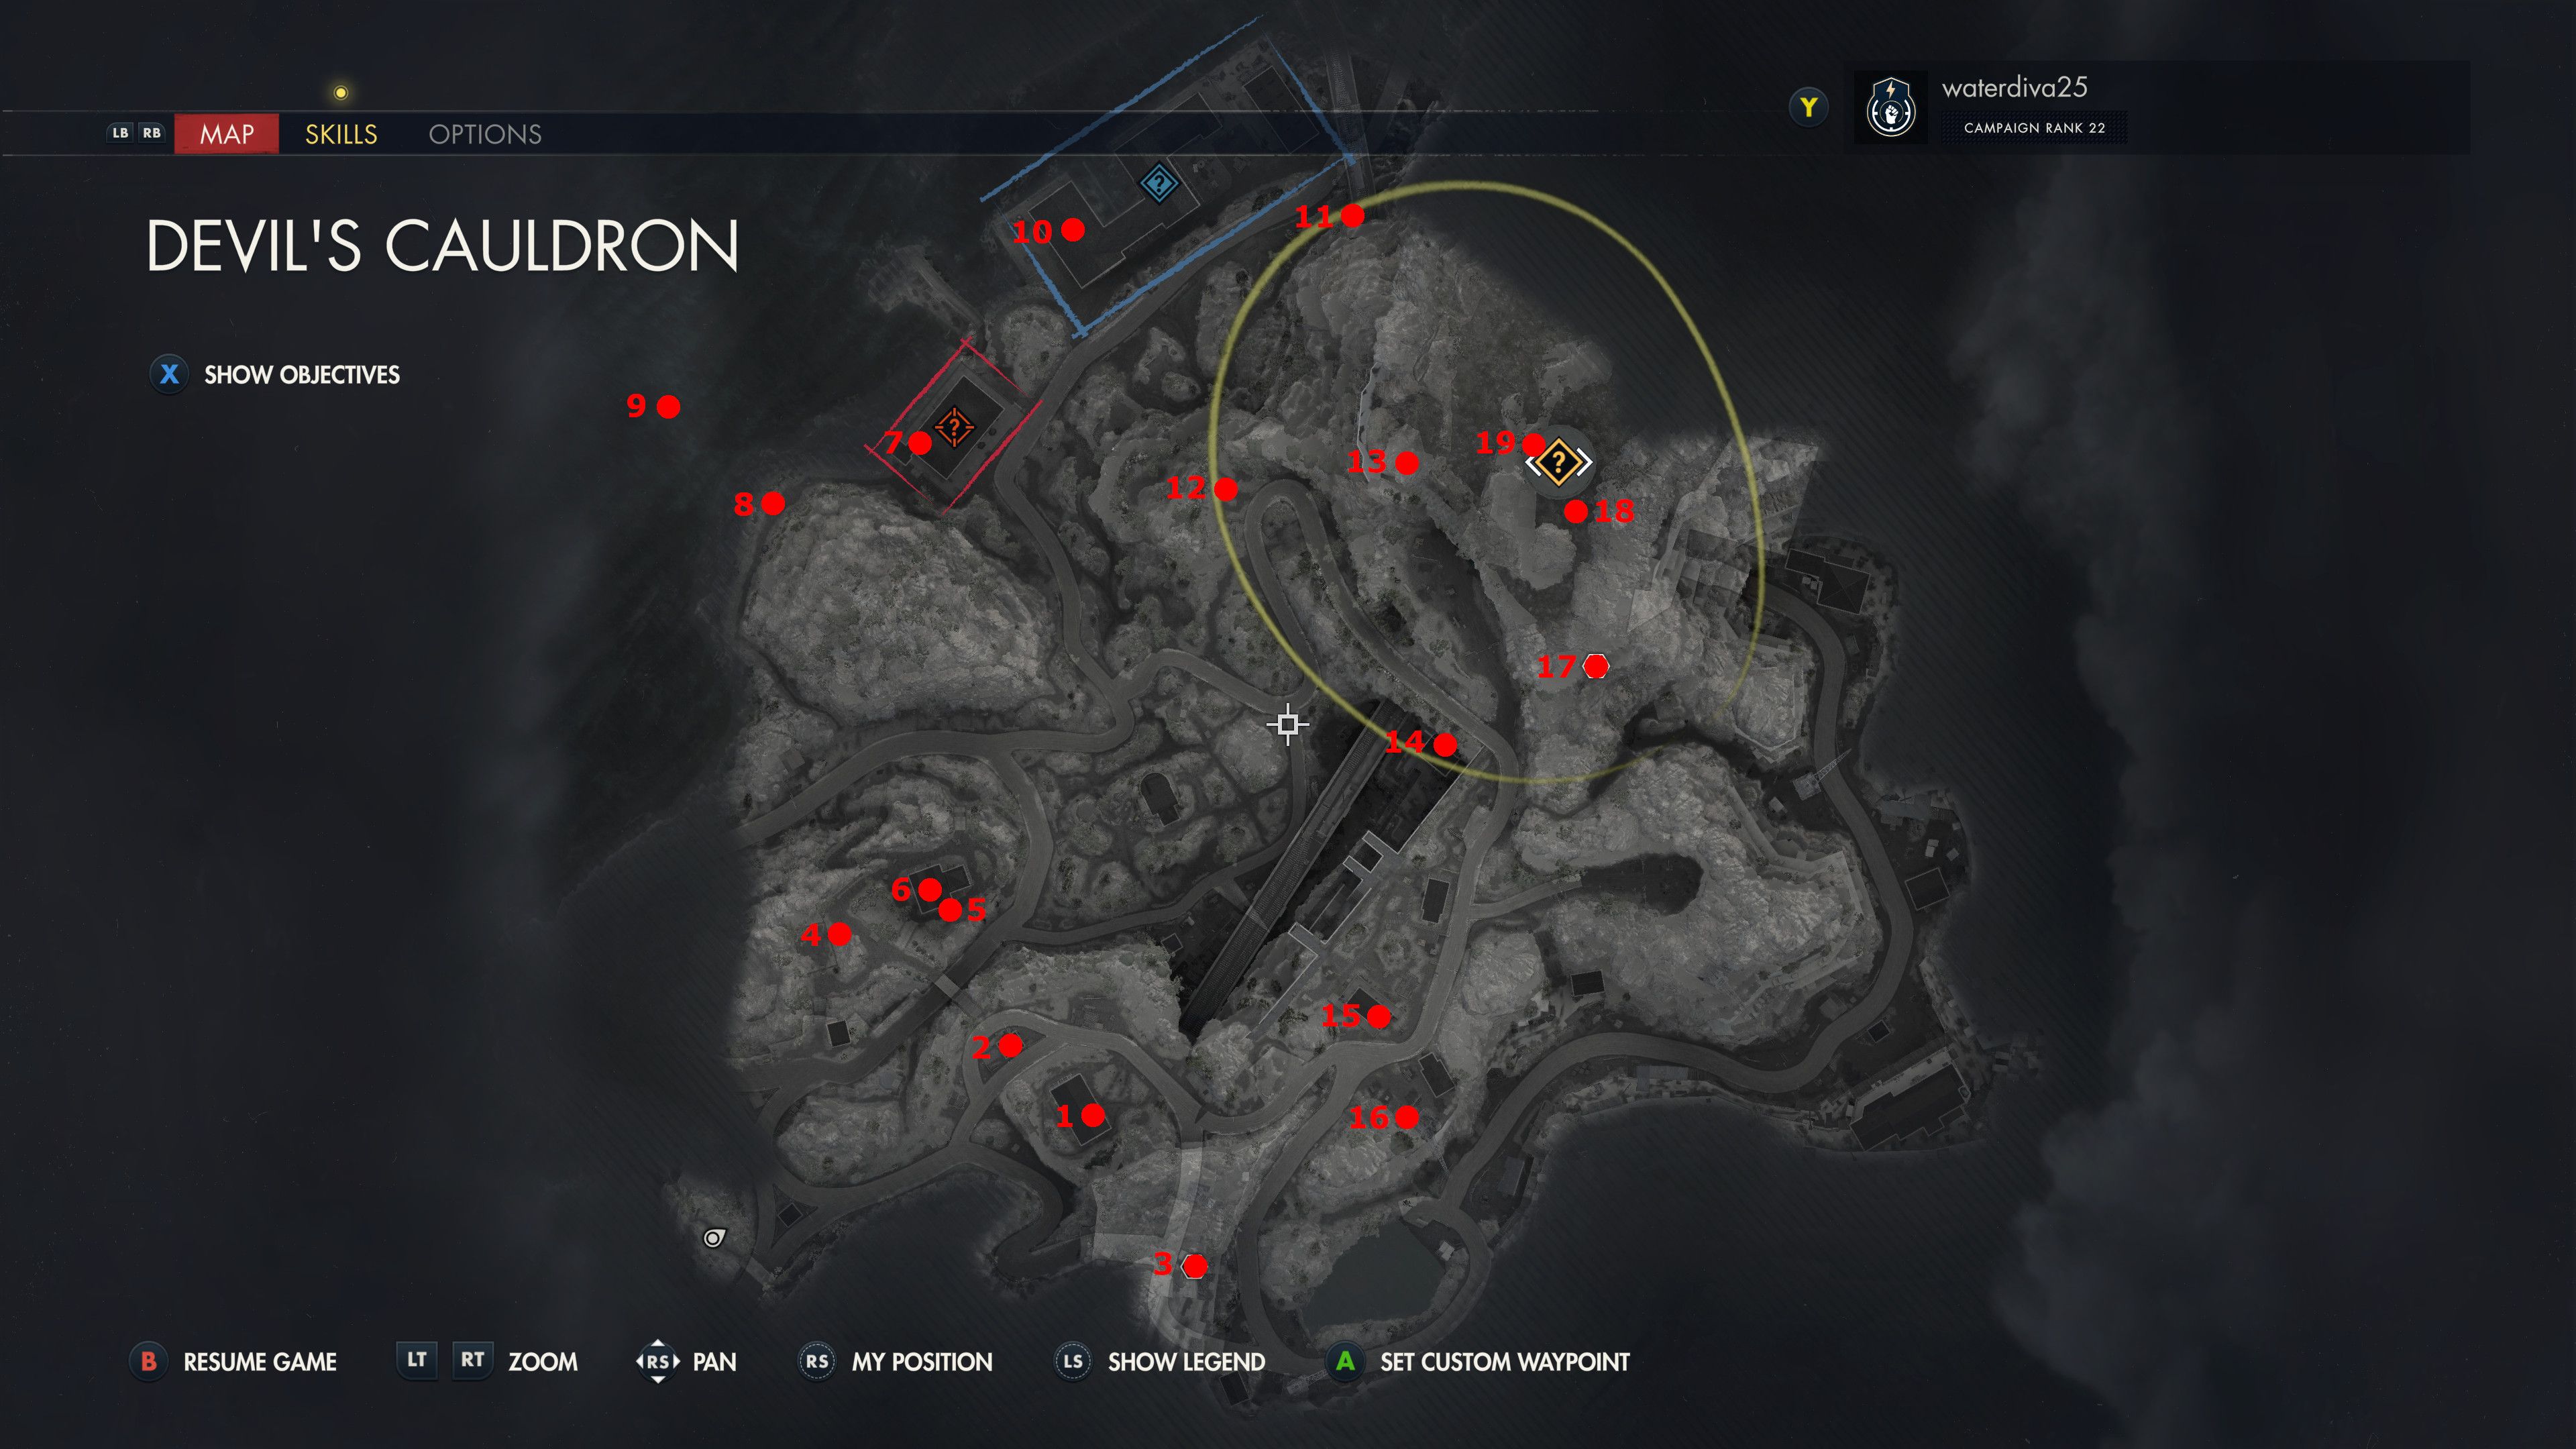
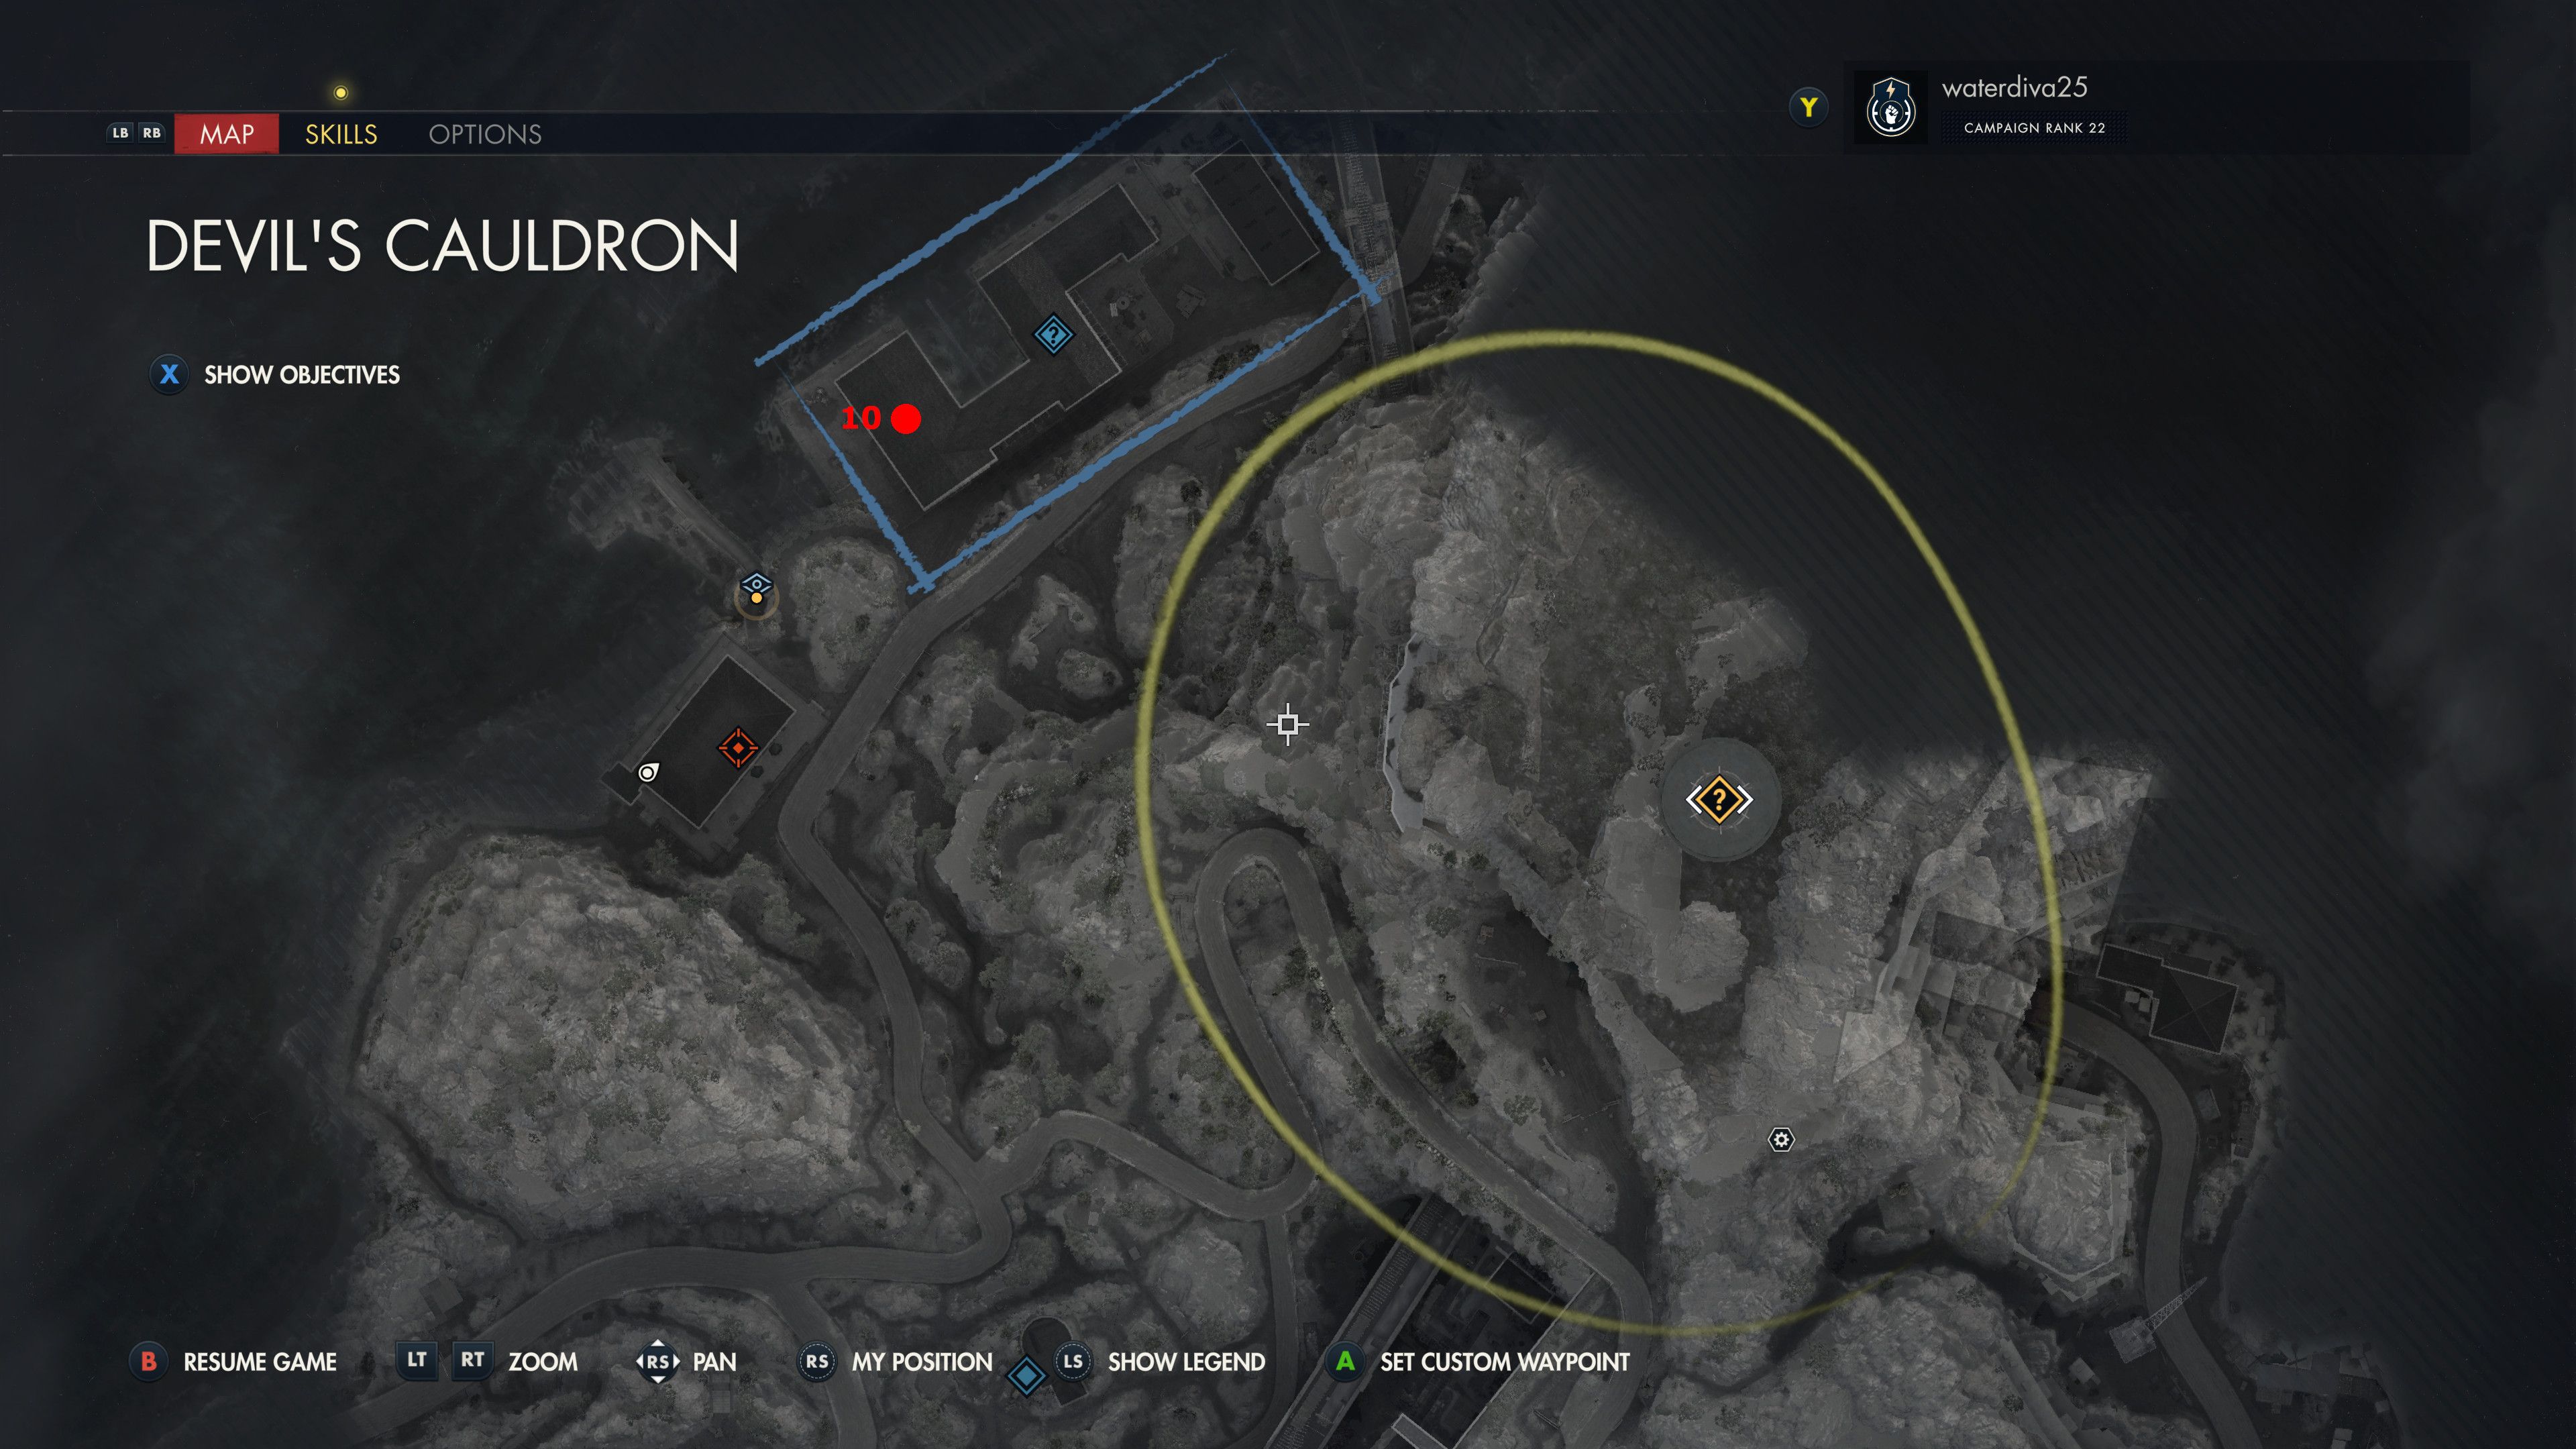
In the fifth mission of Sniper Elite: Resistance, I’ve marked the location of every collectible on this map below. For more details about these locations, check out the sections beneath the map. If you require additional help, don’t hesitate to refer back to those sections.
- Classified Documents (Classified Cargo)
- Personal Letters (A Childish Party!)
- SMG Workbench
- Personal Letters (Location Exposed)
- Hidden Items (Le Maquis Voit Tout Propaganda Poster)
- Rifle Workbench
- Personal Letters (It Is All In Ruins)
- Personal Letters (I Miss You So Much)
- Stone Eagle
- Classified Documents (Wilhelm’s Folly)
- Stone Eagle
- Hidden Items (Playing Cards)
- Hidden Items (Laboratory ID)
- Classified Documents (Intruder Spotted)
- Personal Letters (Be a Man, Not a Boy)
- Stone Eagle
- Pistol Workbench
- Classified Documents (Scuttle Instructions)
- Classified Documents (Scuttle Orders)
1. Classified Documents (Classified Cargo)

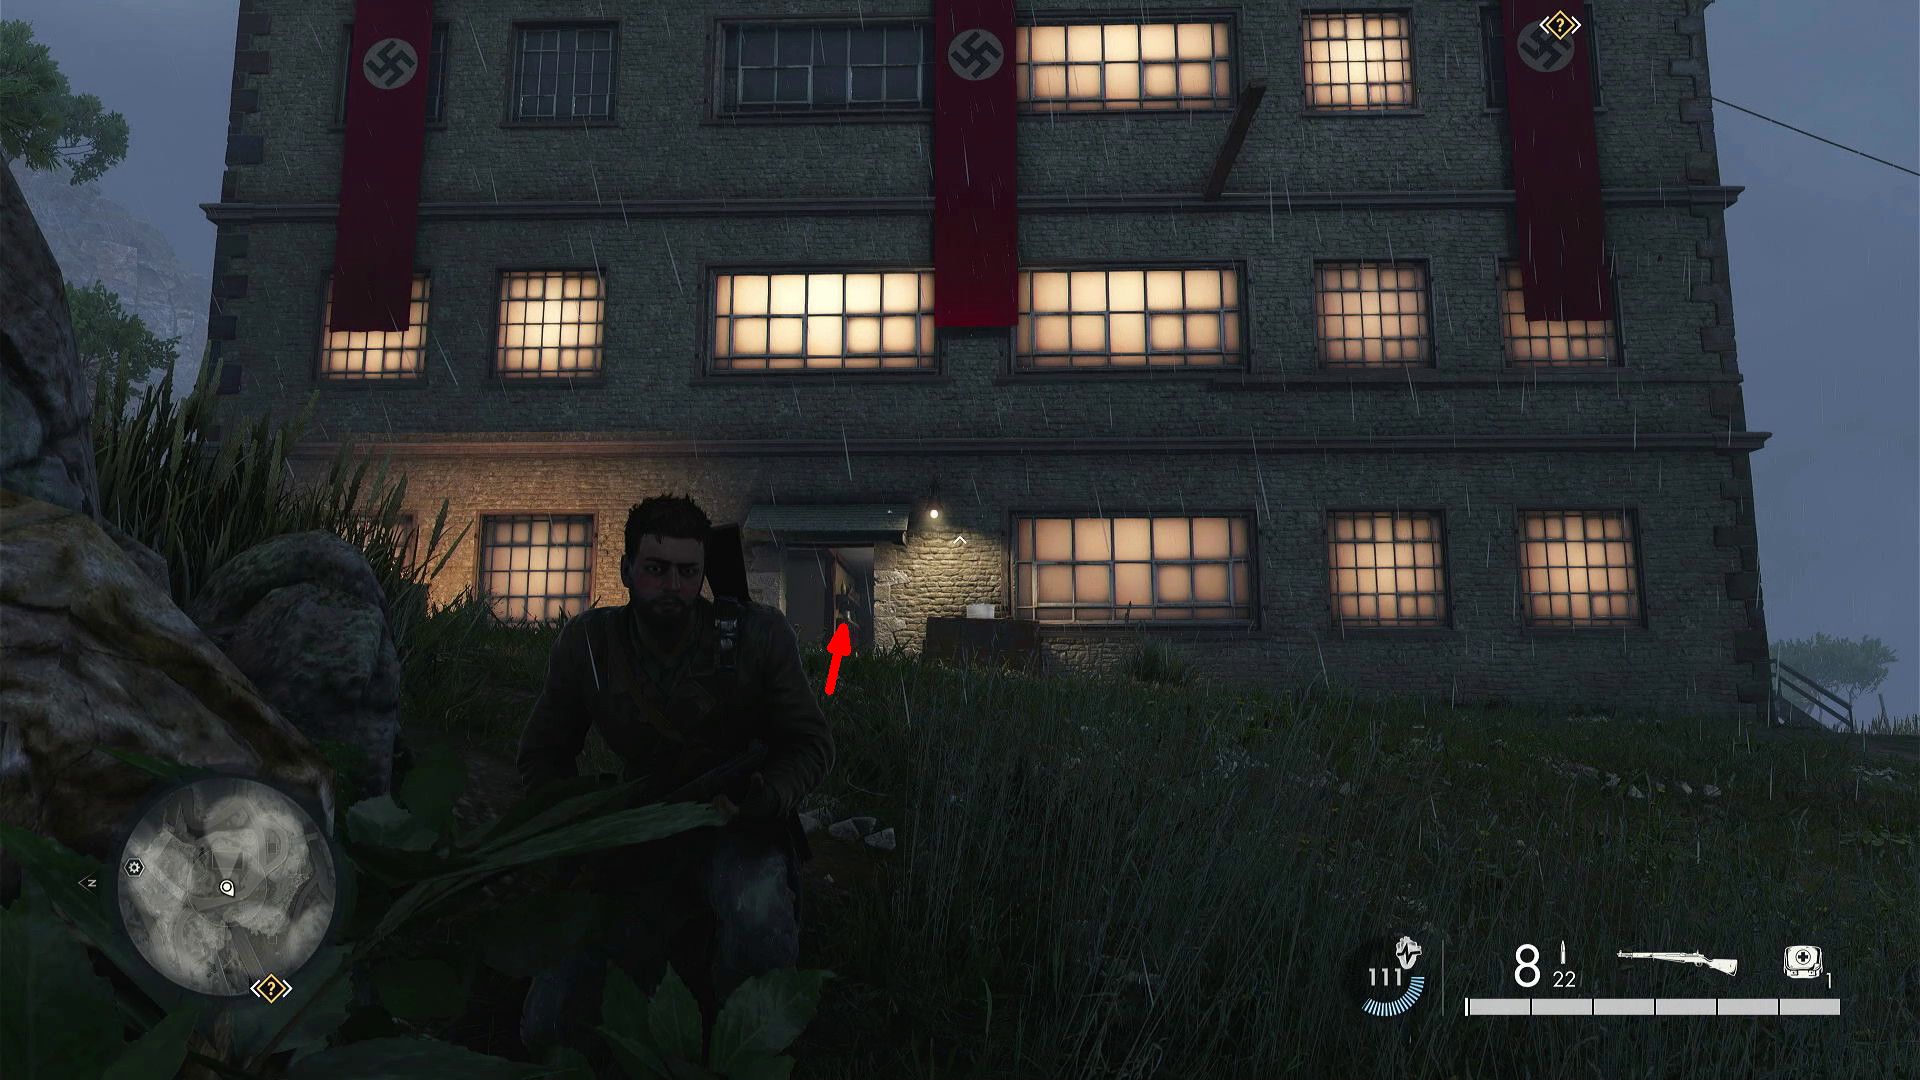
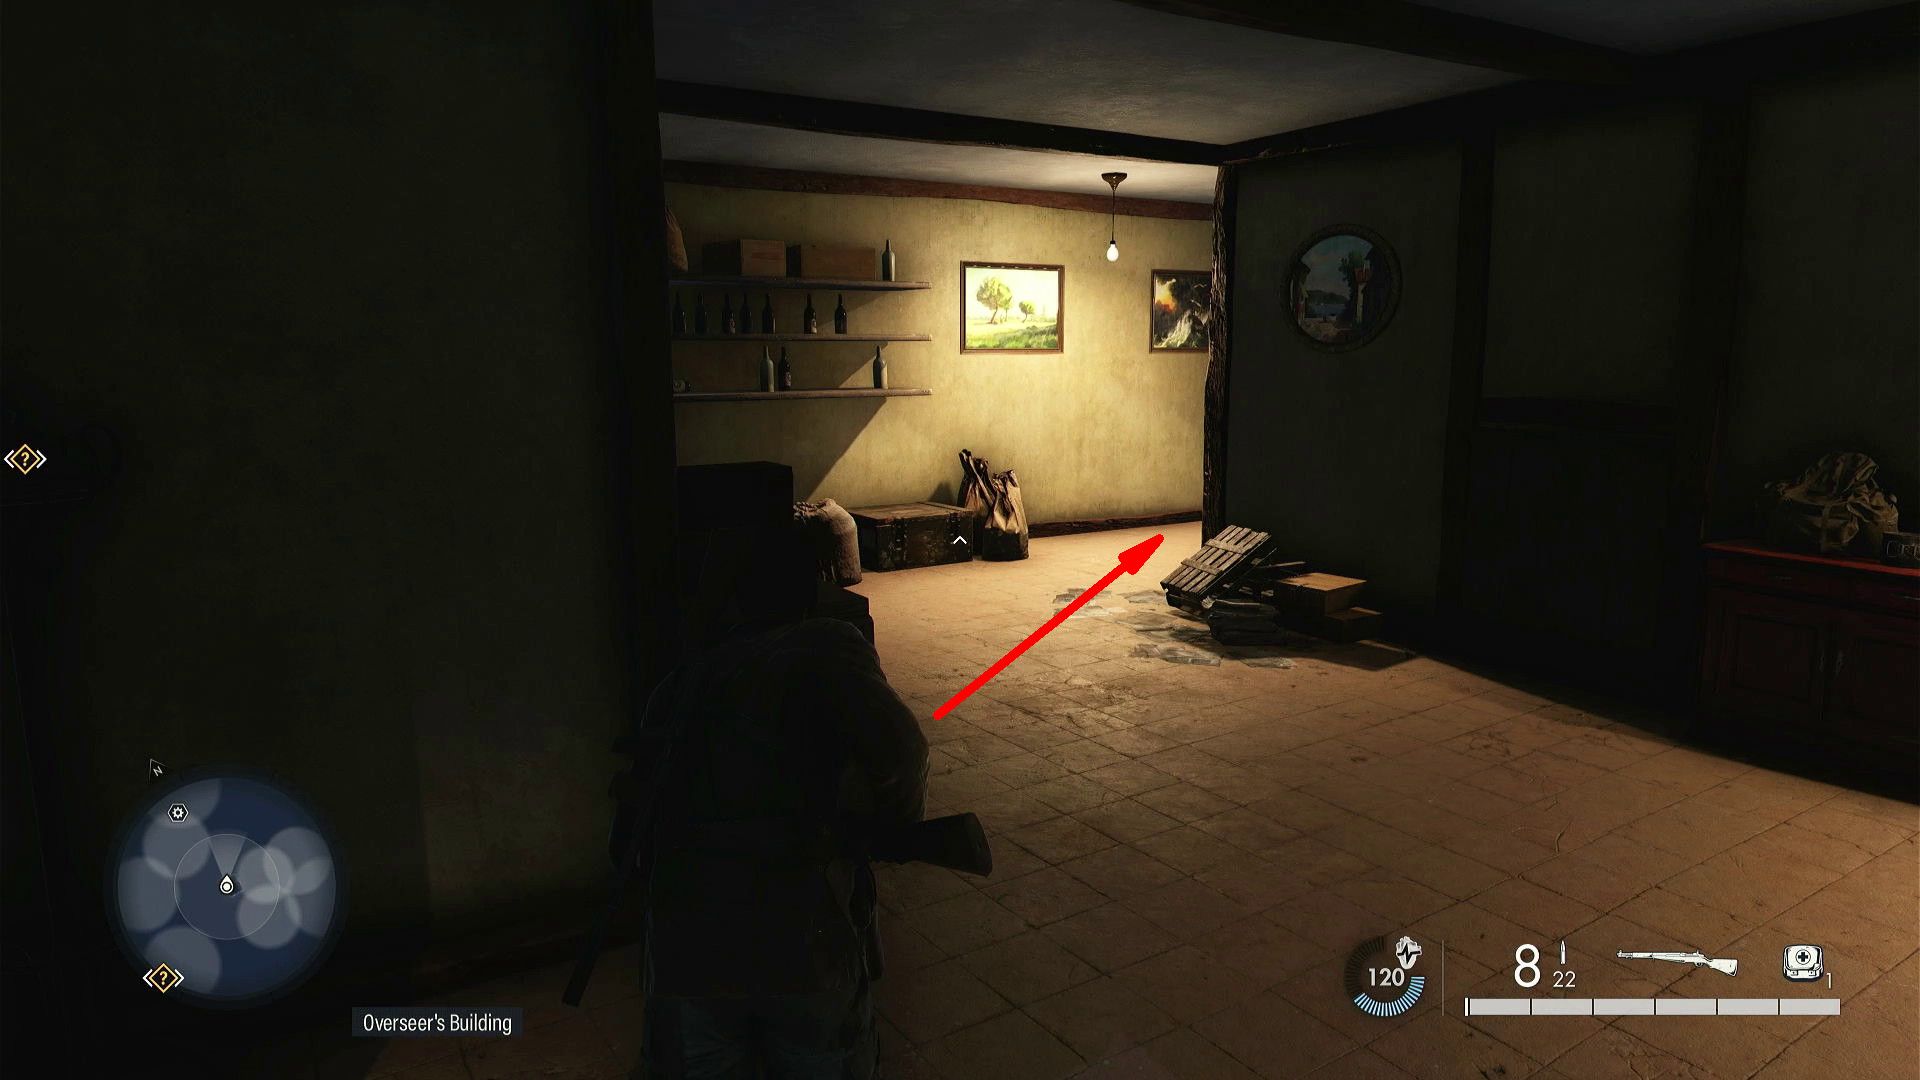
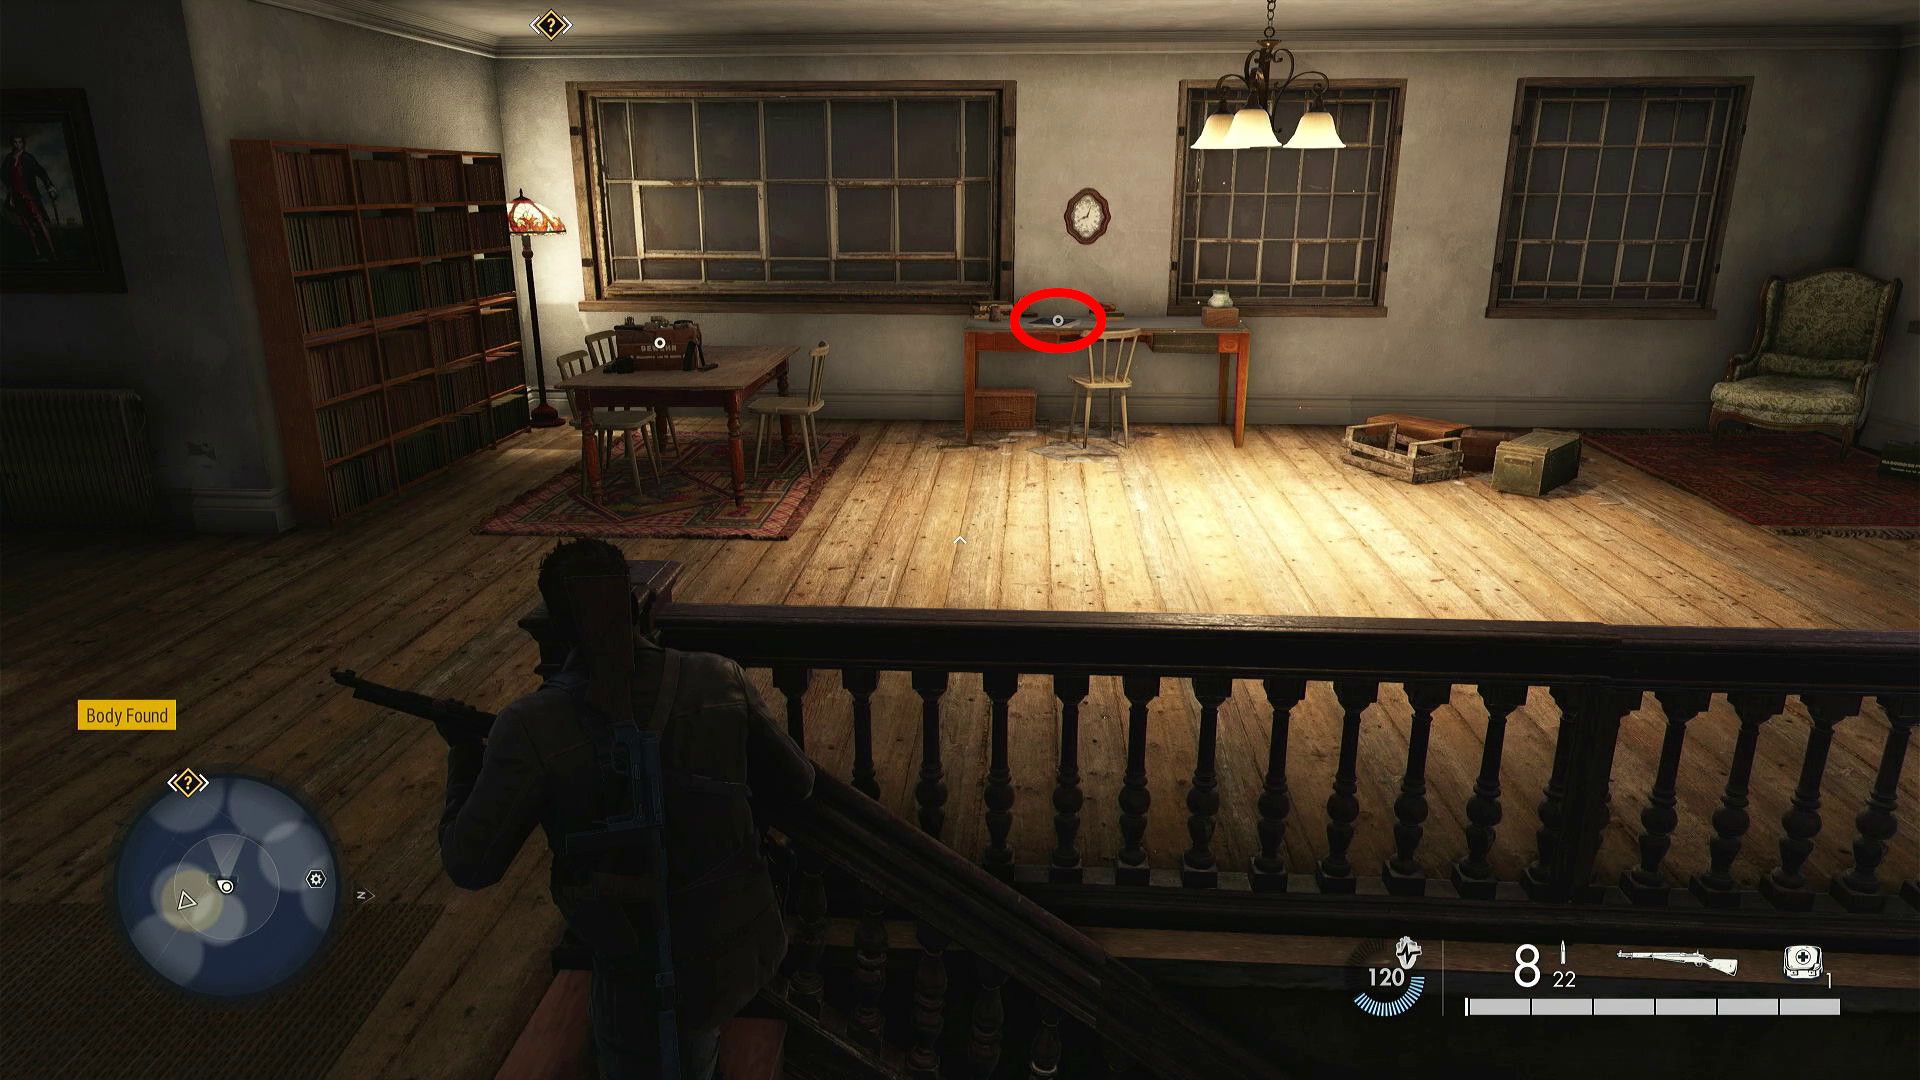
The Classified Document can be found on a desk in the Oversee’s Building, a notable landmark that players won’t miss for long, situated just beyond the East Checkpoint starting point. This large building is hard to overlook.
2. Personal Letters (A Childish Party!)
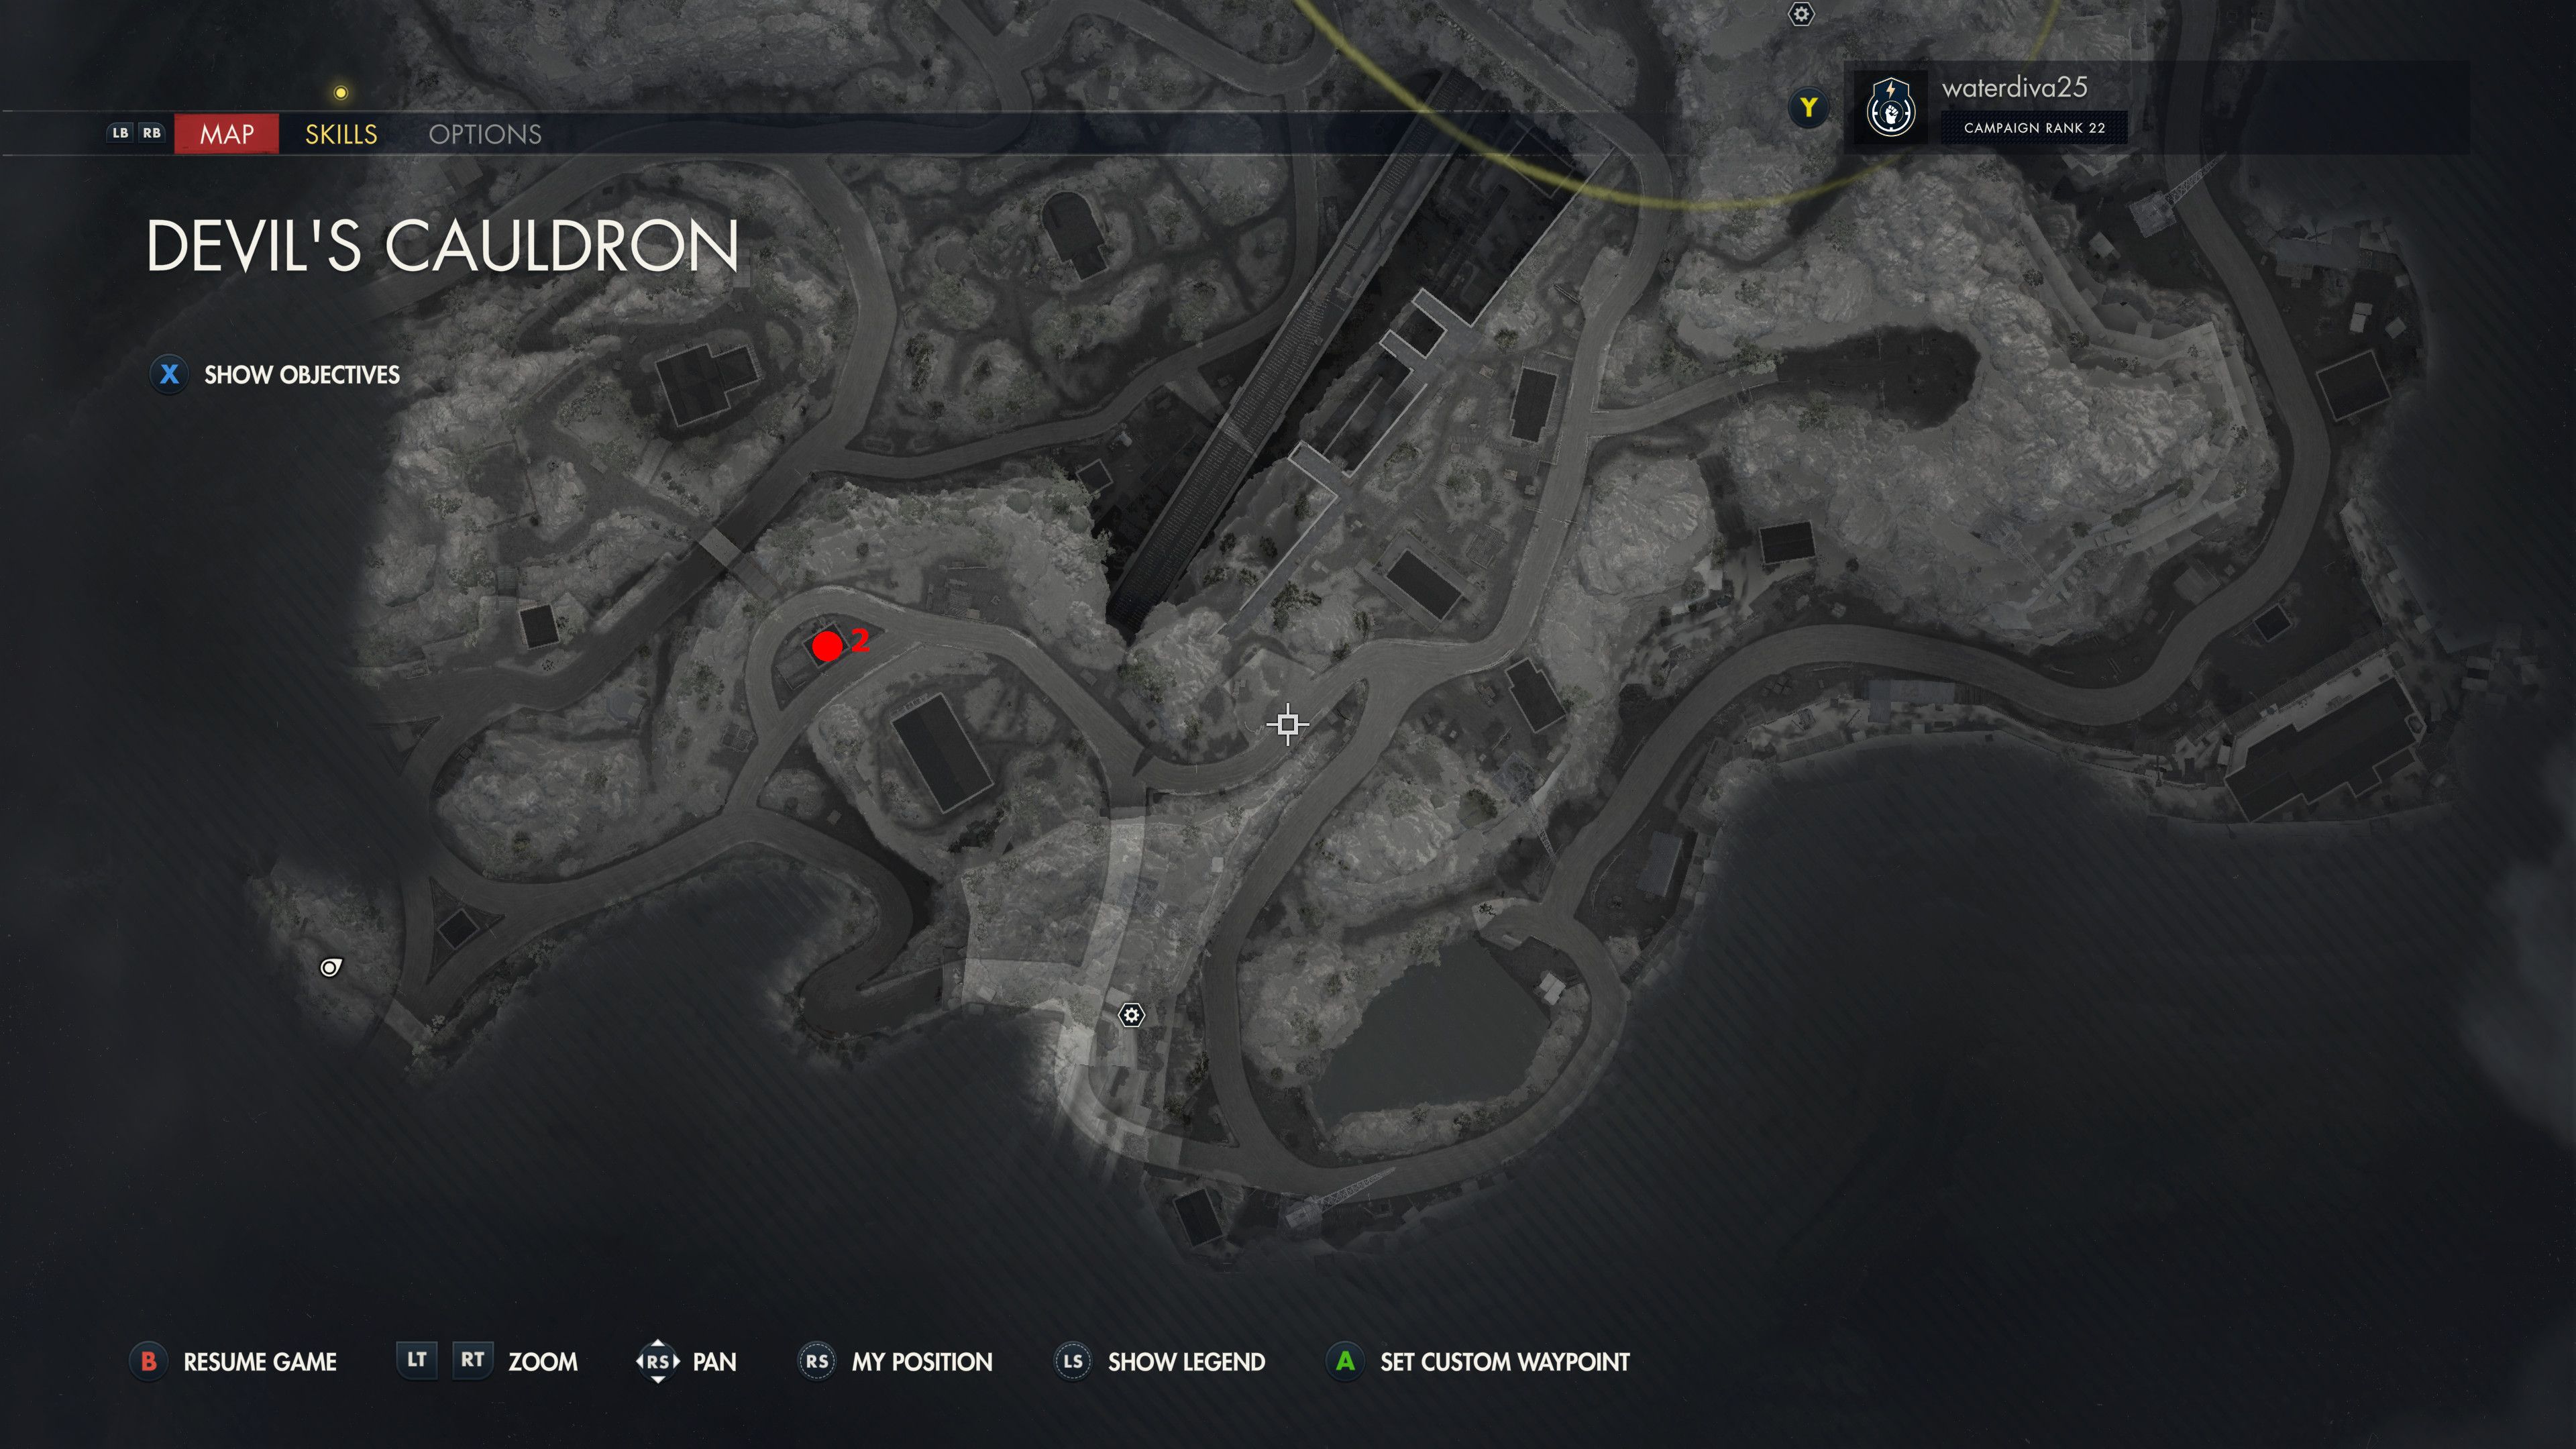

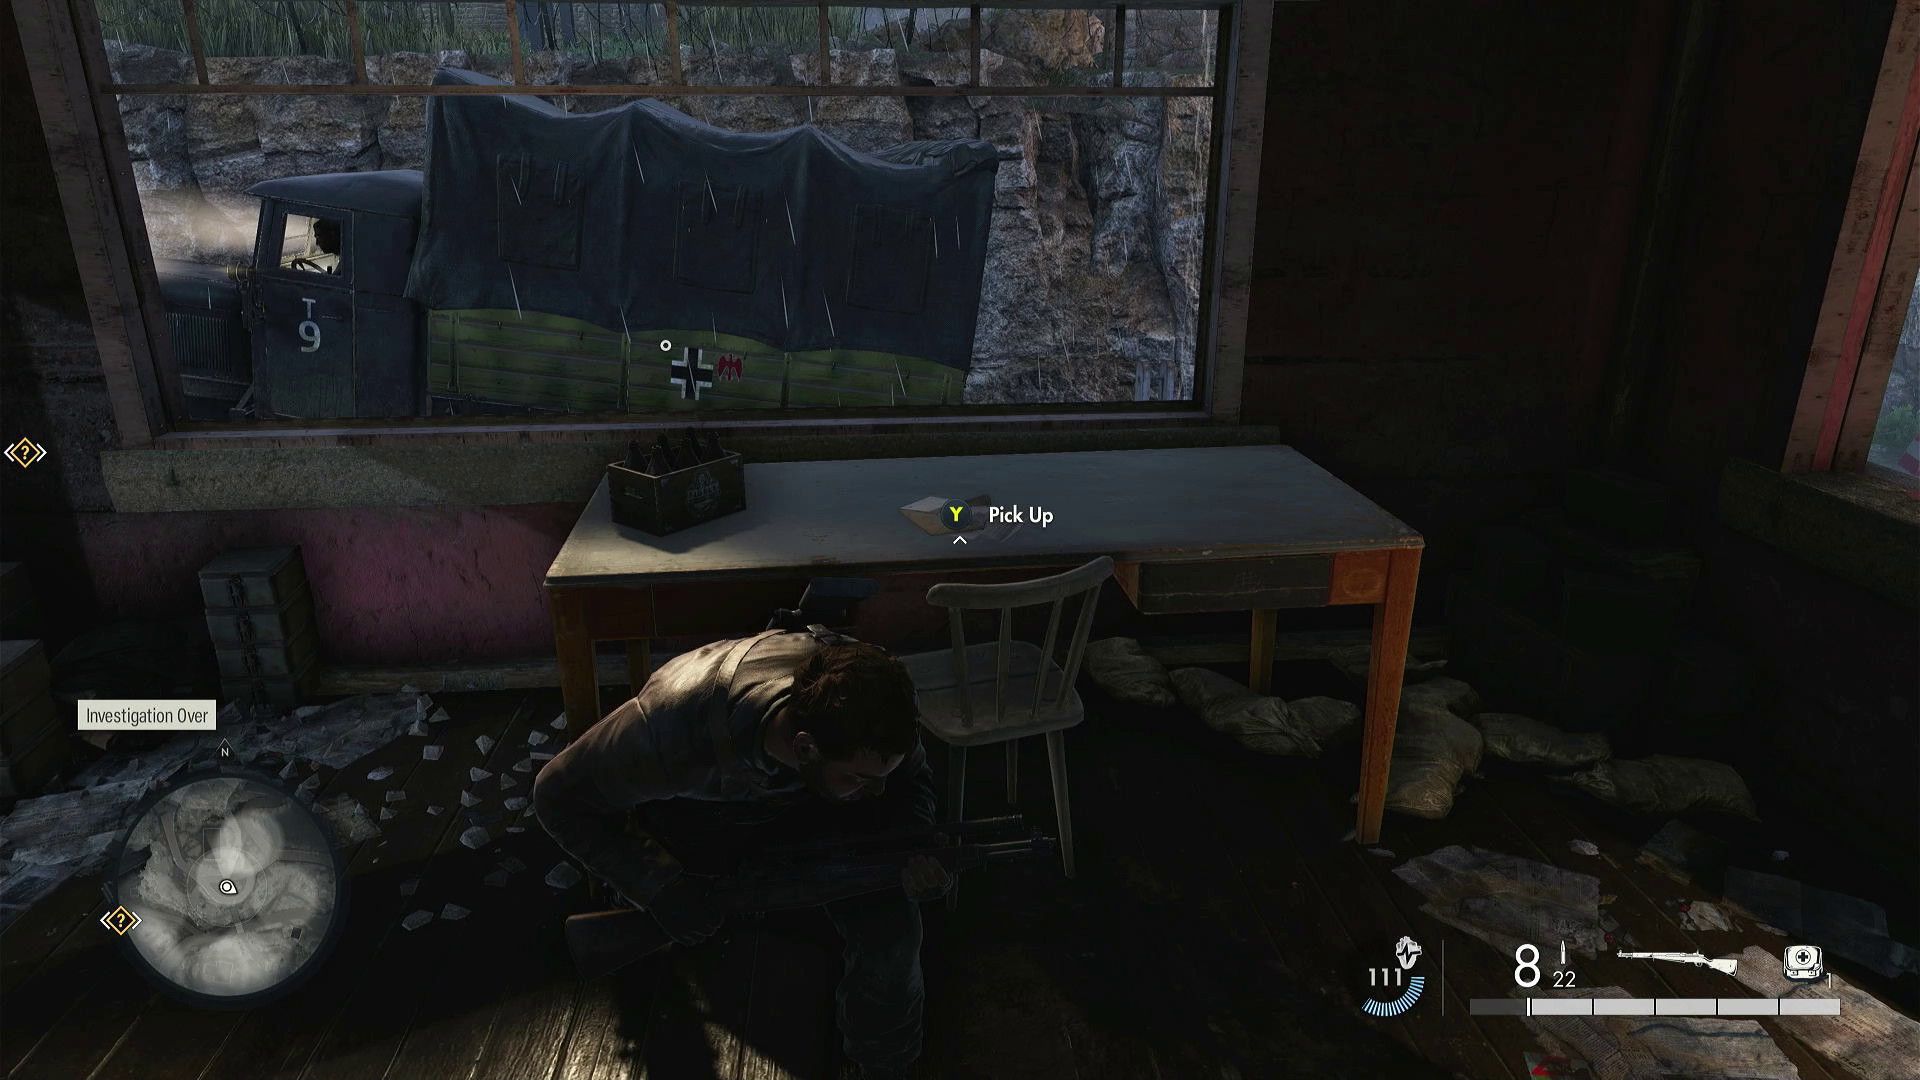
Players can discover the Personal Letter inside the tiny building located near the checkpoint, which is situated above the Overseer’s Building.
3. SMG Workbench
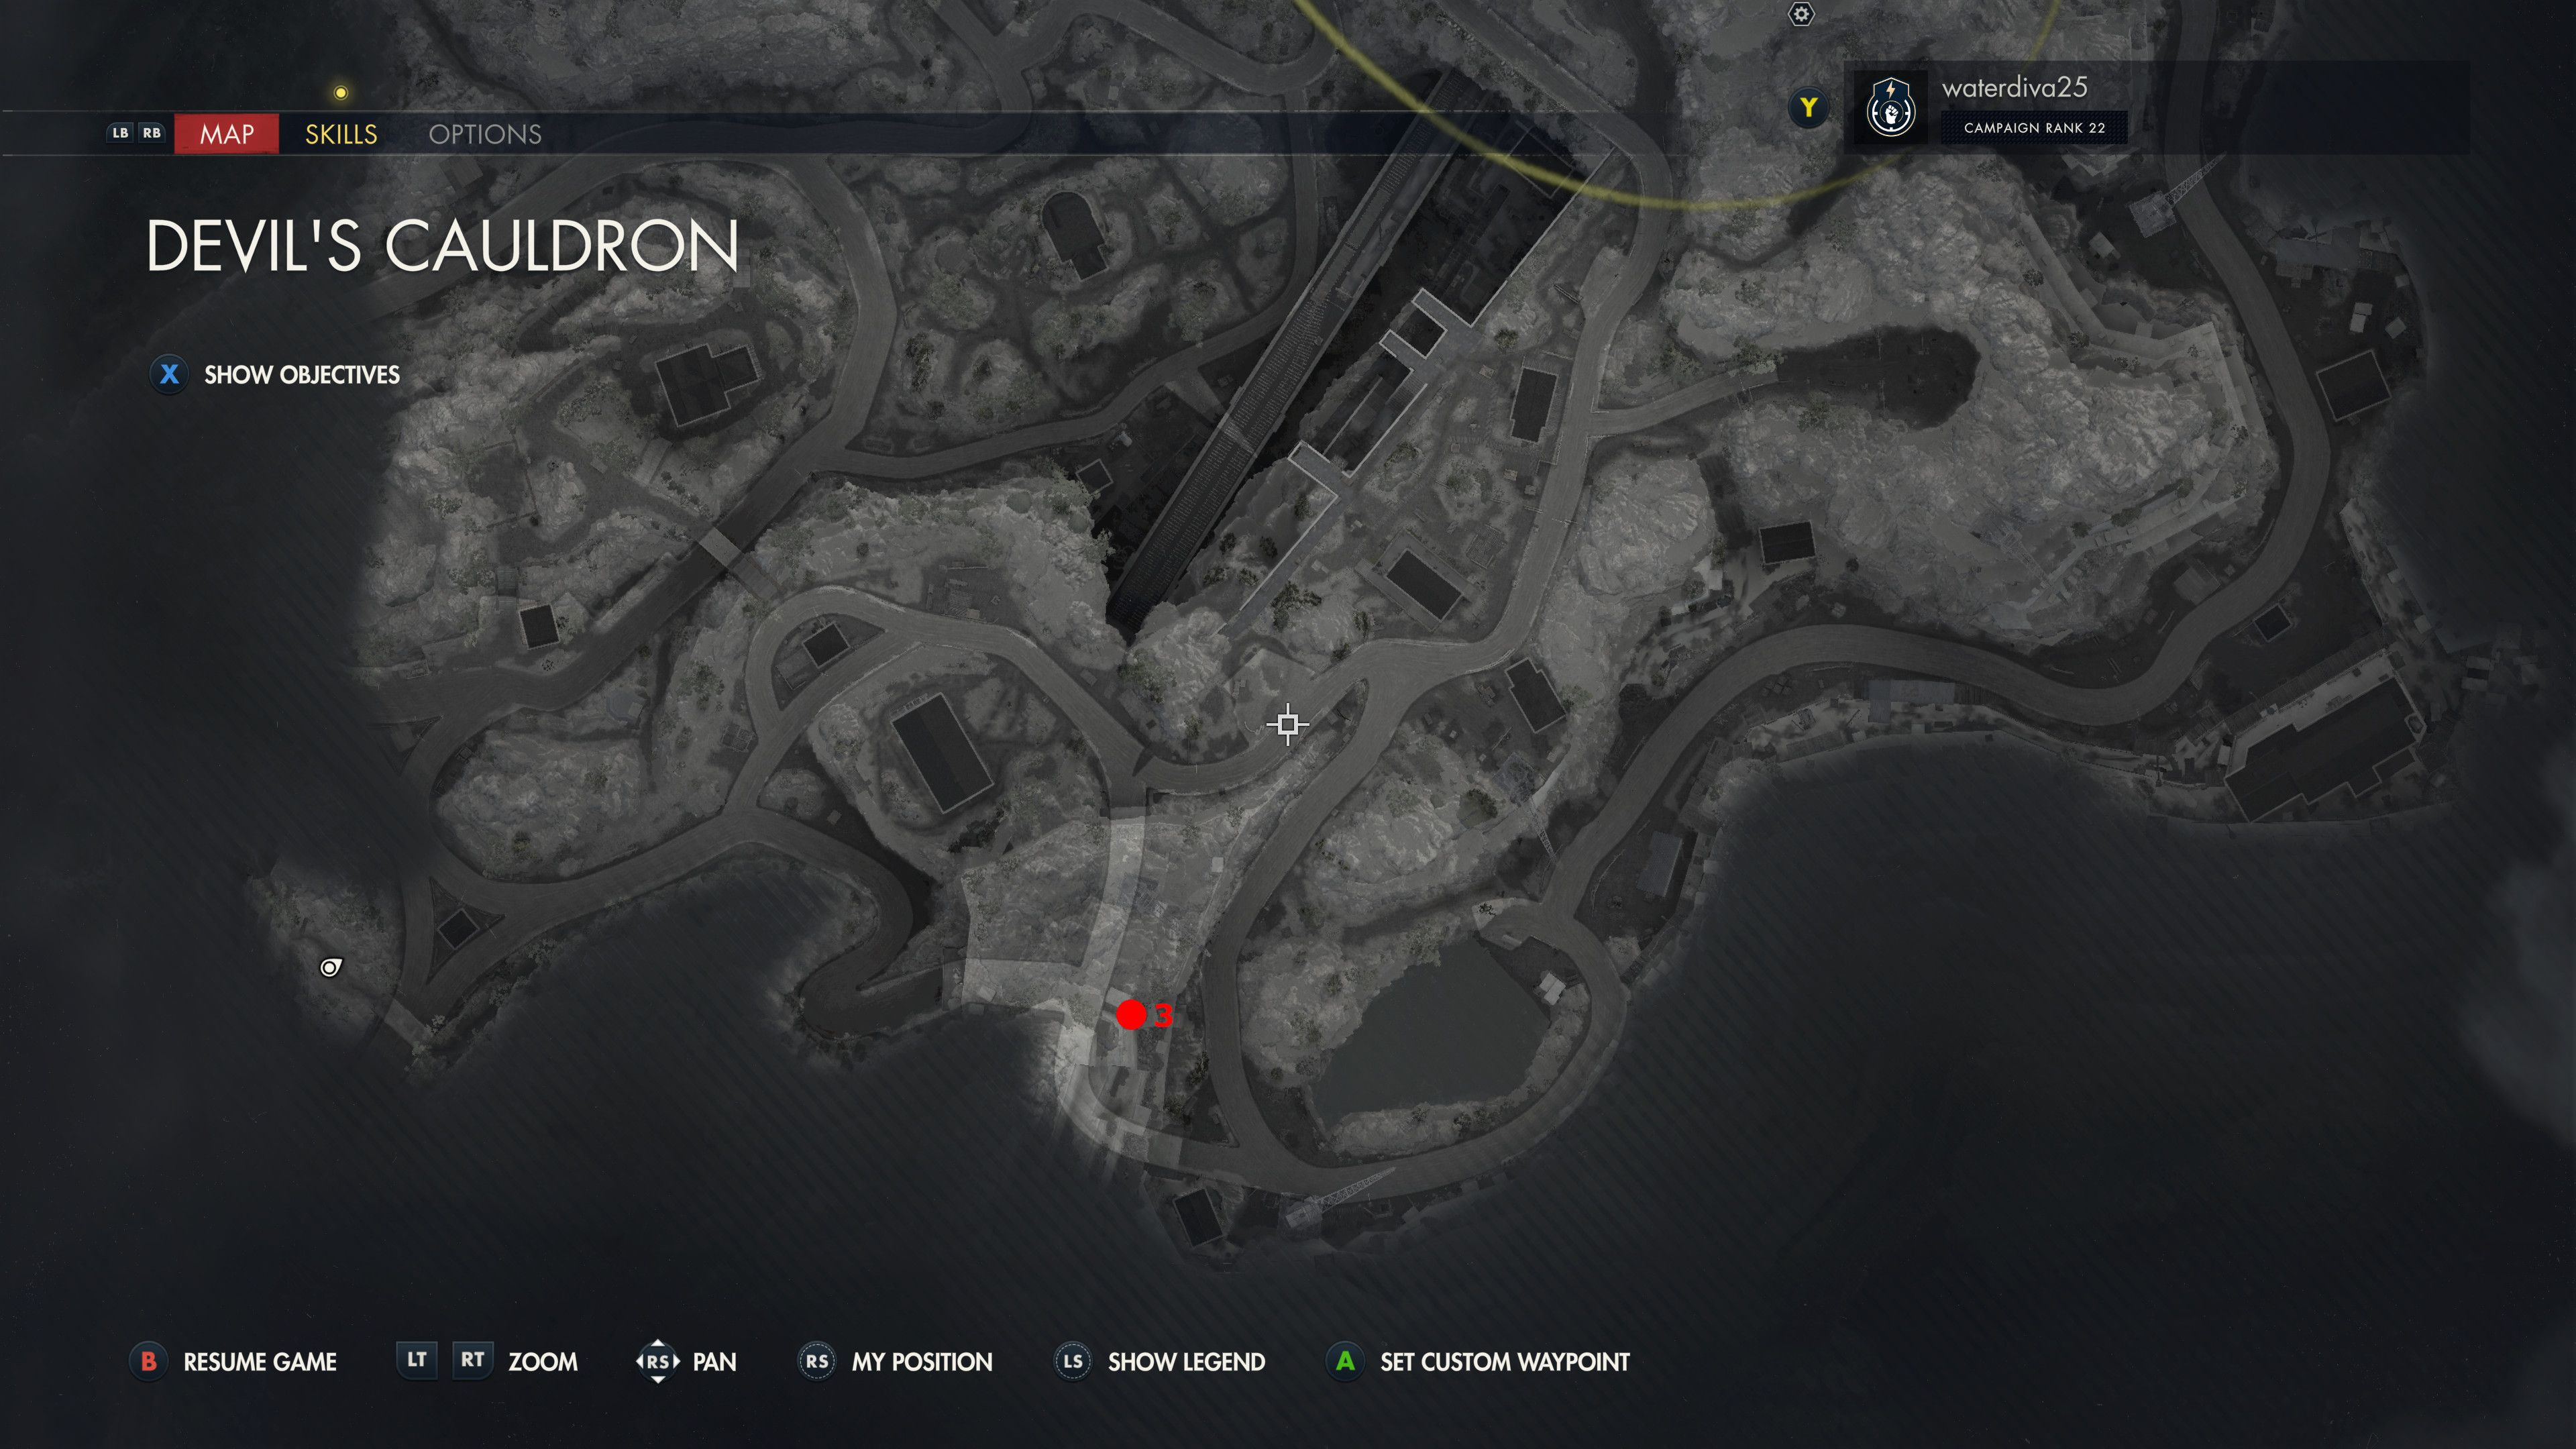
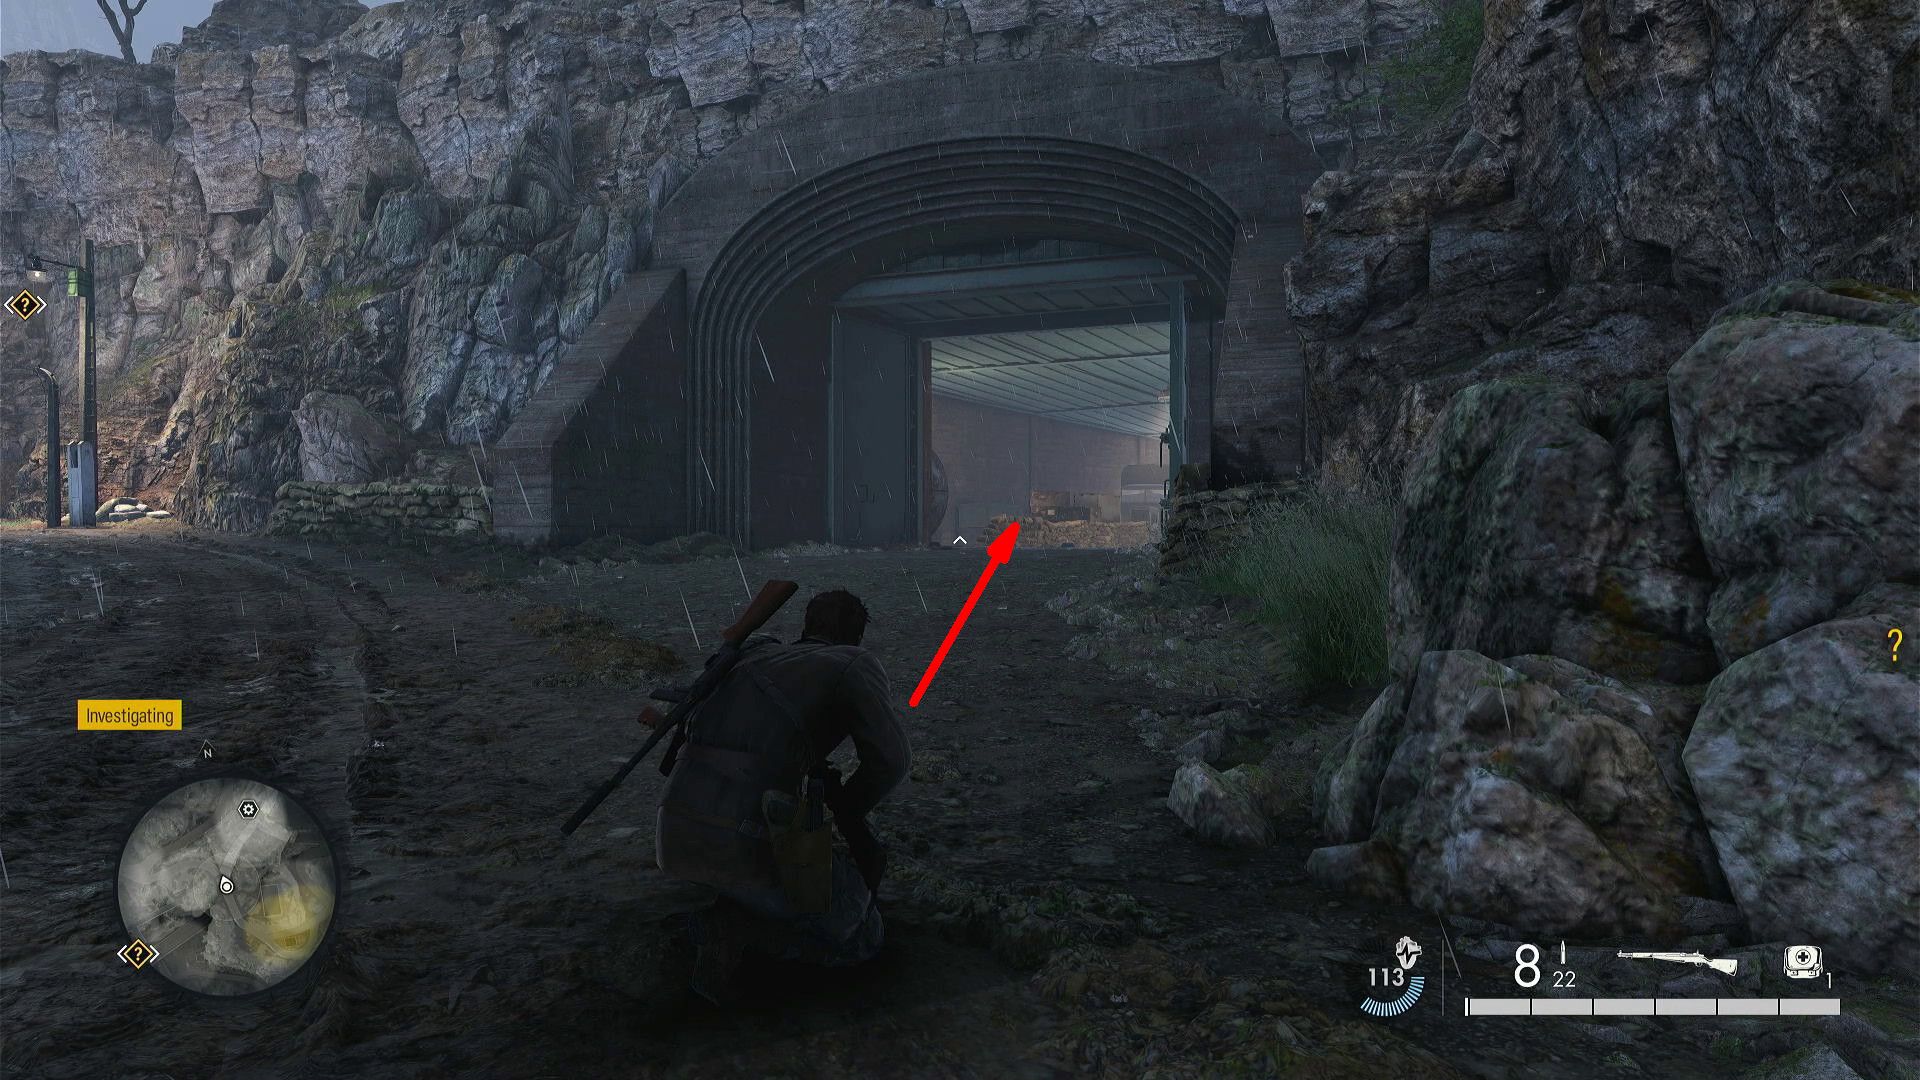

As a film enthusiast and collector, you should kickstart your hunt by venturing into the tunnel located to the right of the Overseer’s Building. Sticking to the left side of this tunnel will lead you to a cozy little room where you’ll find the SMG Workbench hidden away in Sniper Elite: Resistance.
4. Personal Letters (Location Exposed)

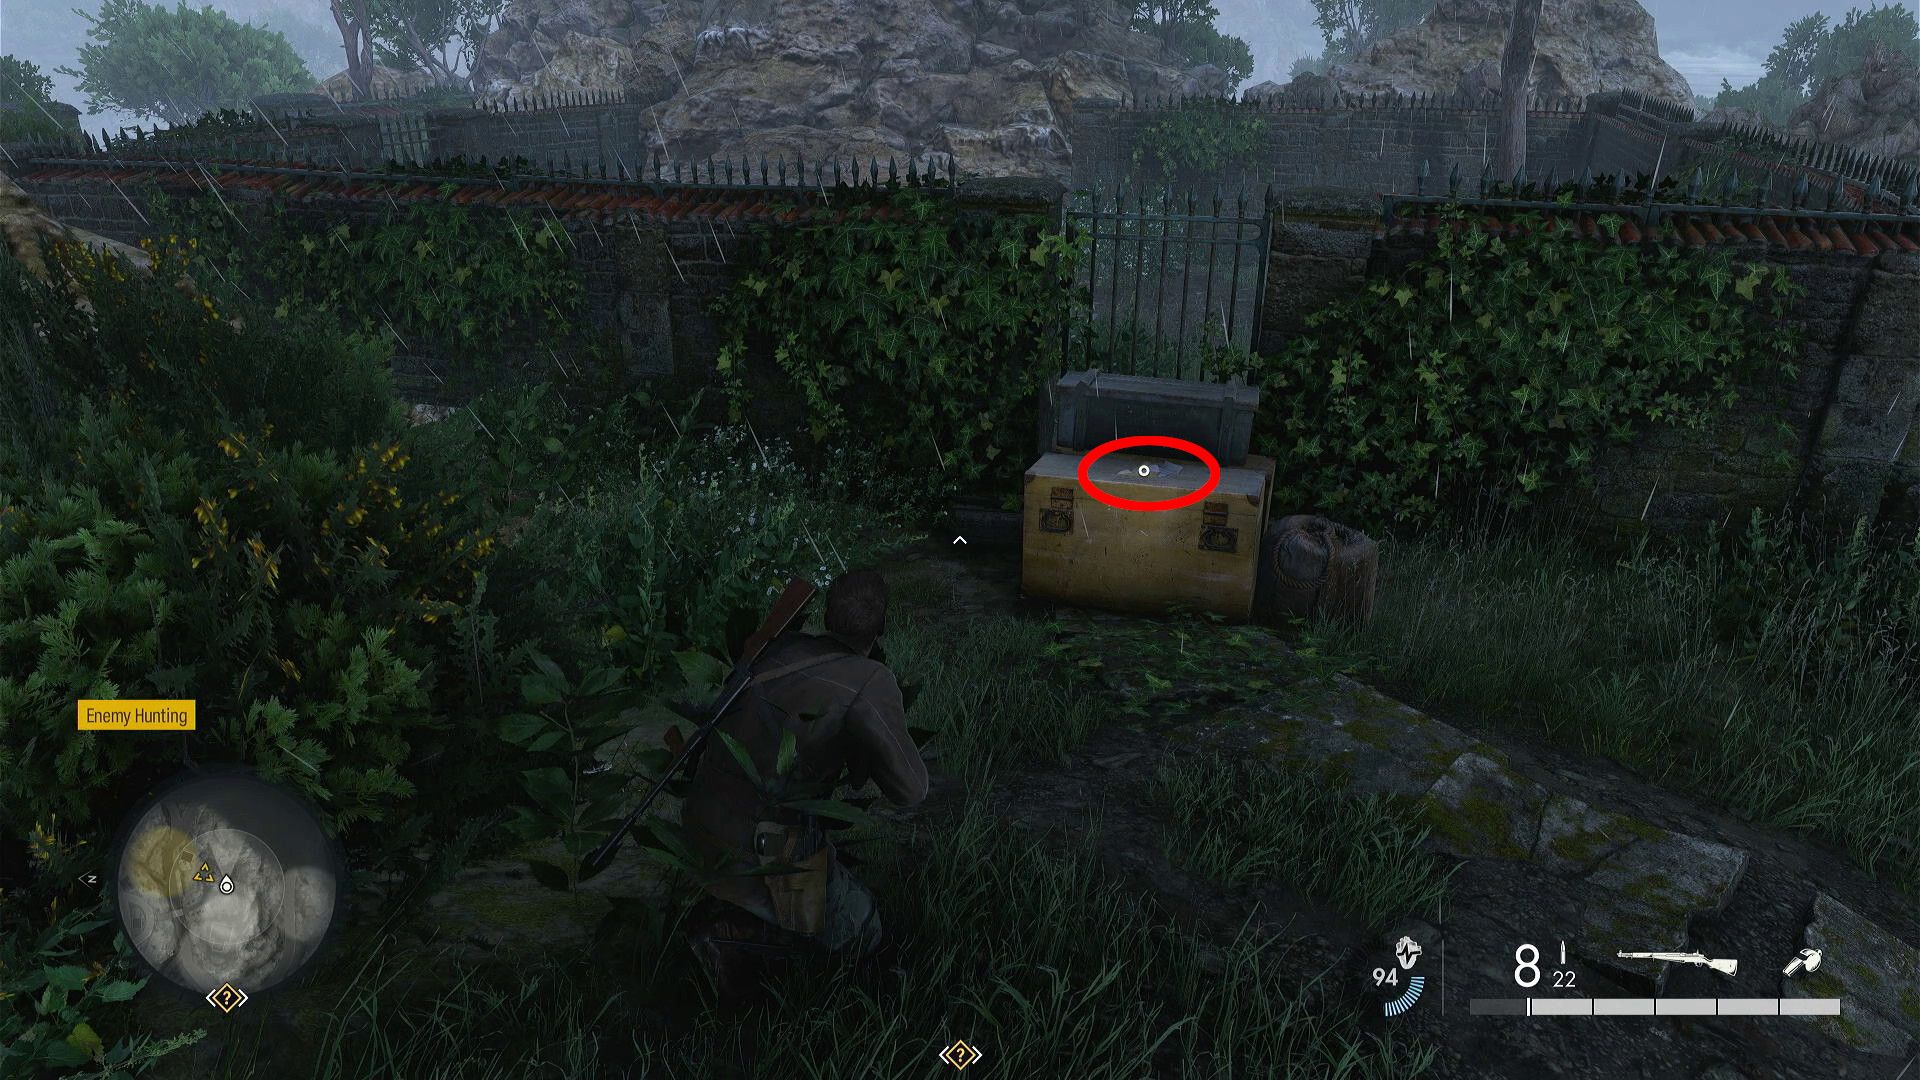
This Personal Letter is sitting atop a crate that is pushed against a stone wall.
5. Hidden Items (Le Maquis Voit Tout Propaganda Poster)
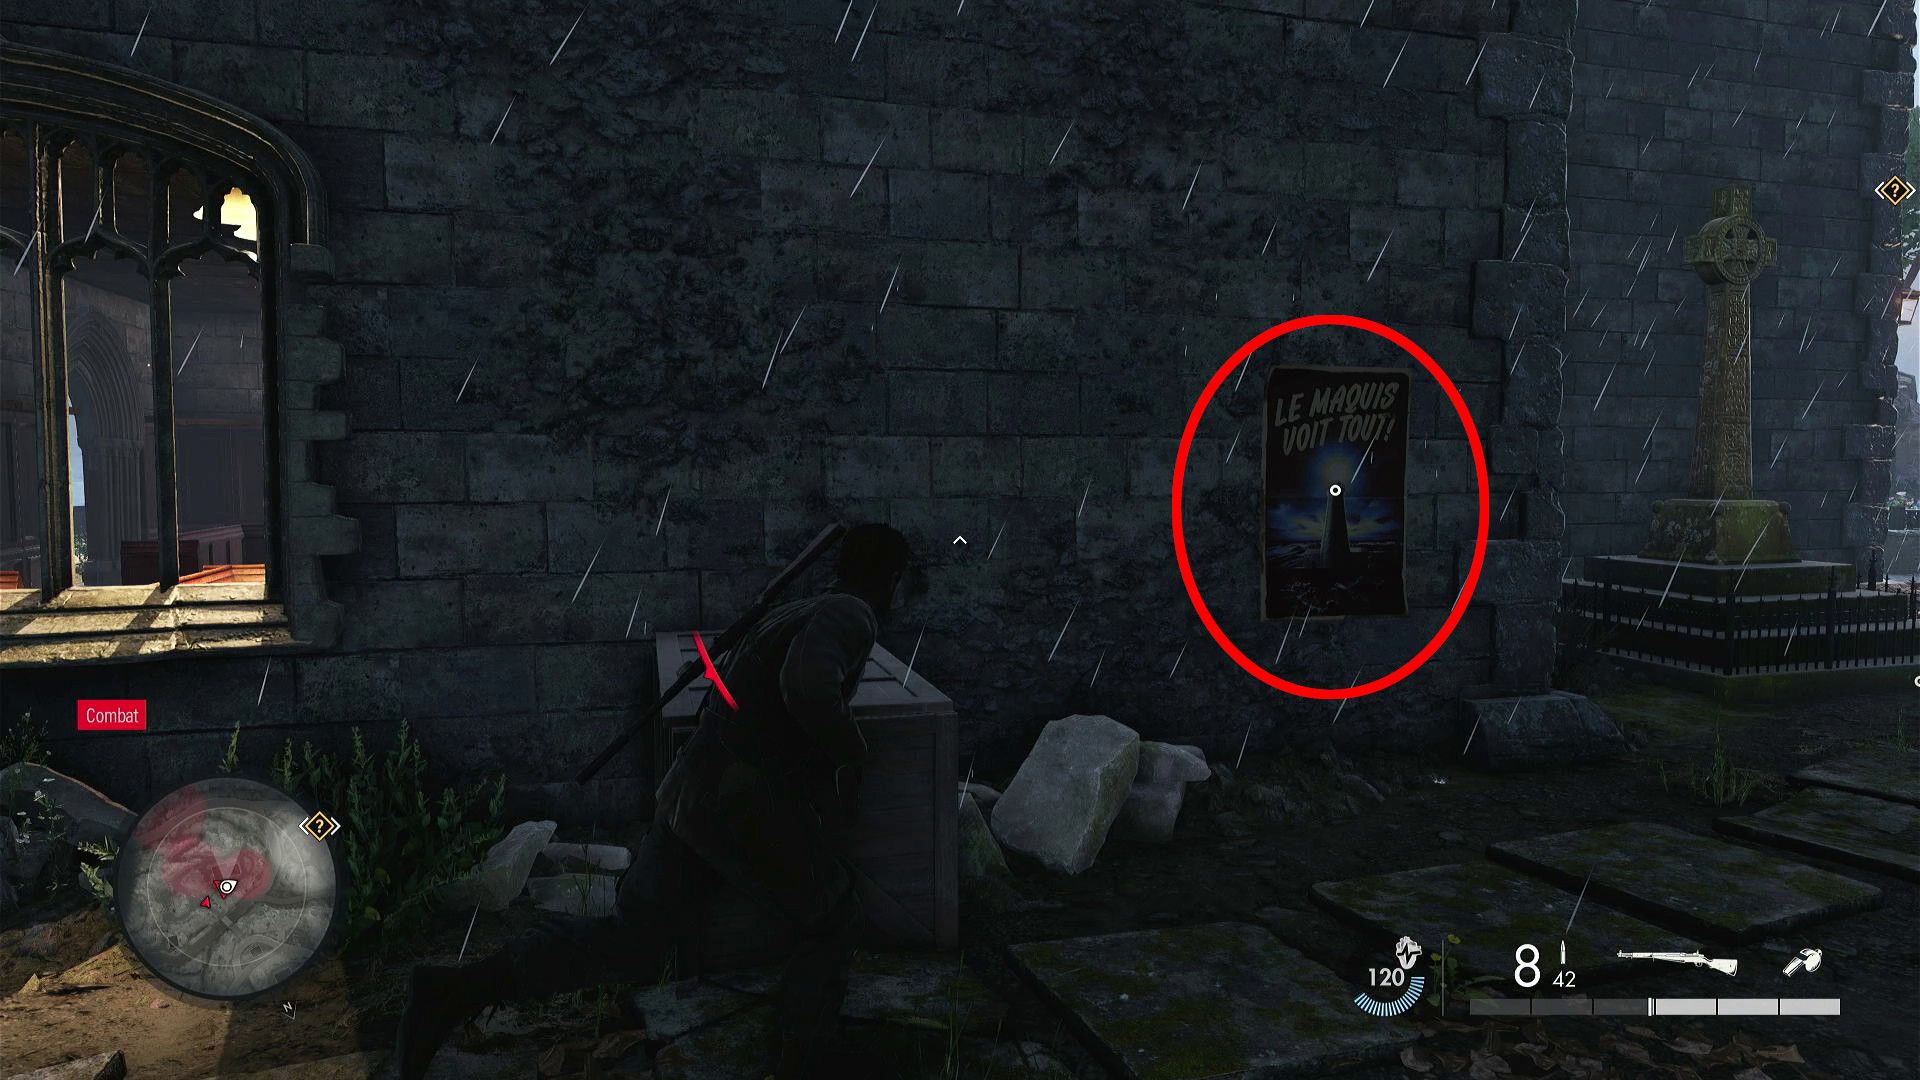
As players explore the church located at the lower left corner of the map in Sniper Elite: Resistance, they should search for a propaganda poster attached to the building’s outside wall.
6. Rifle Workbench

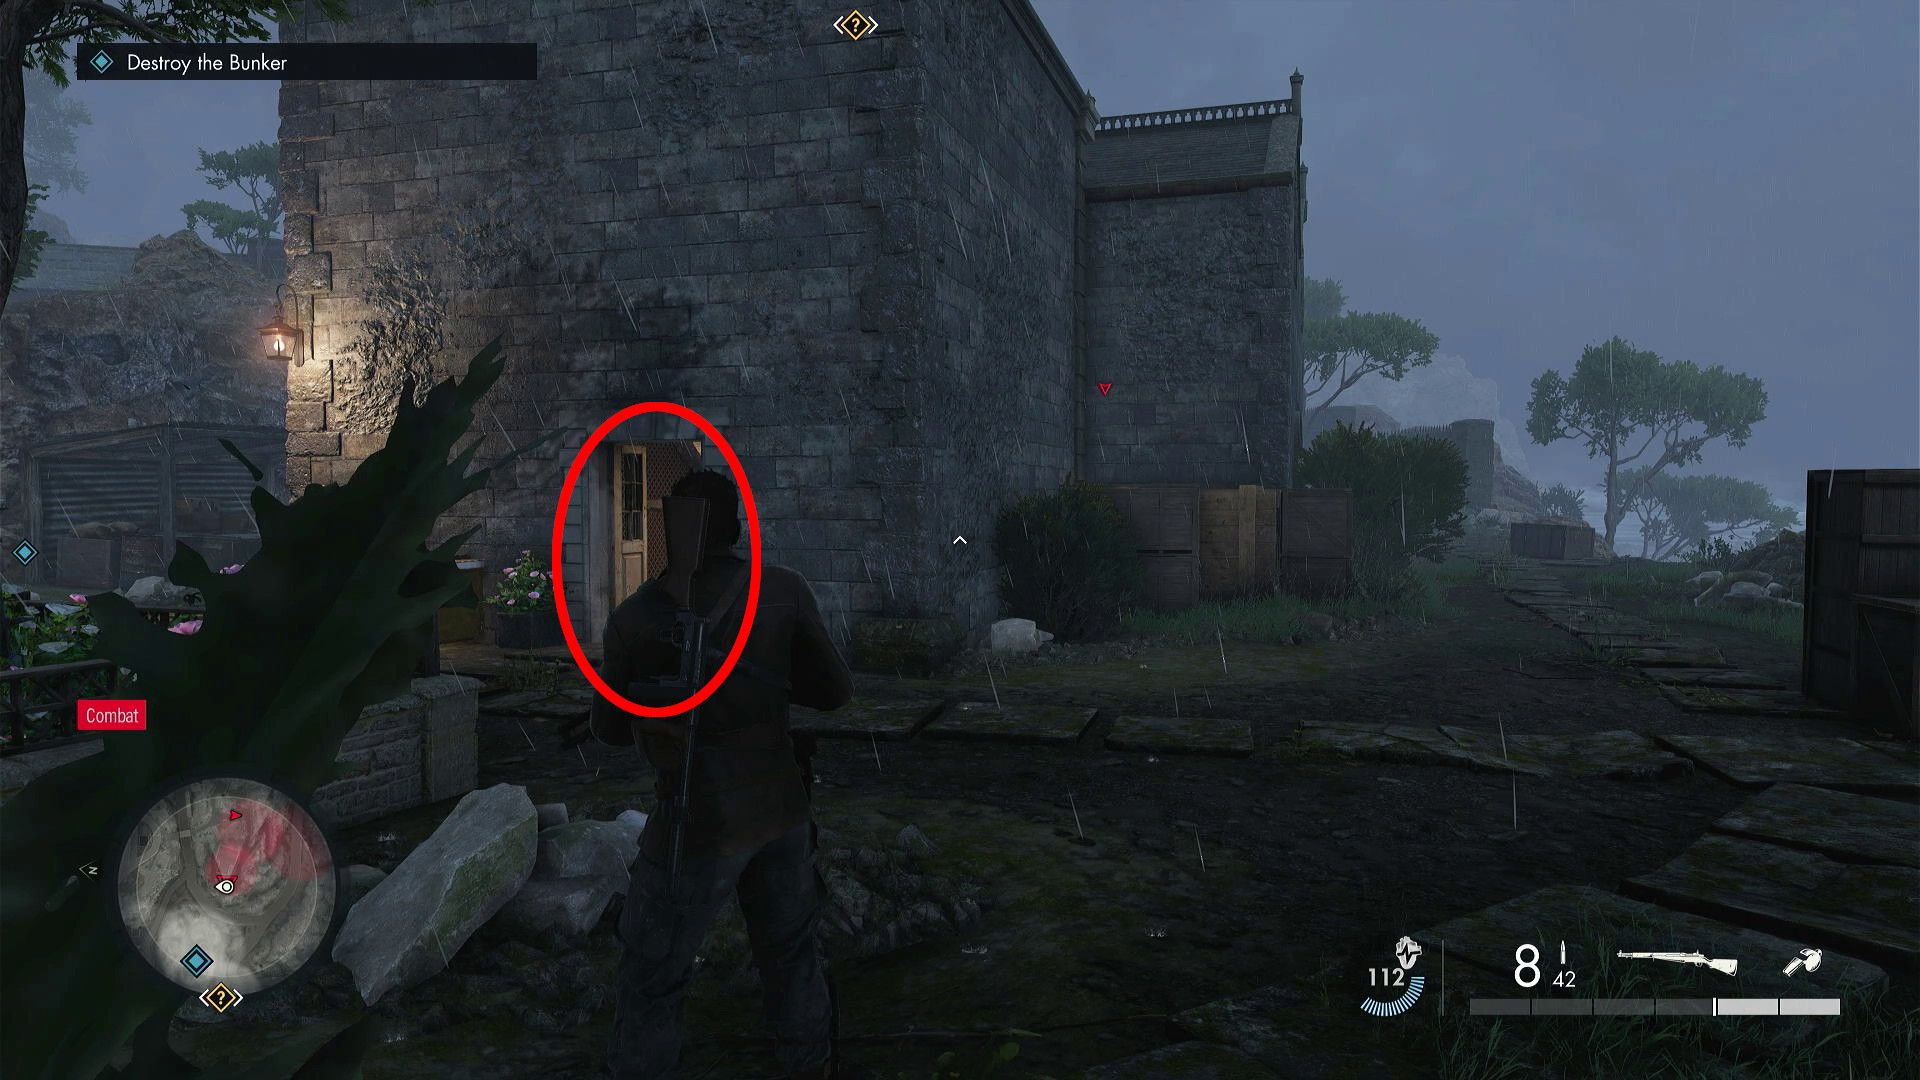
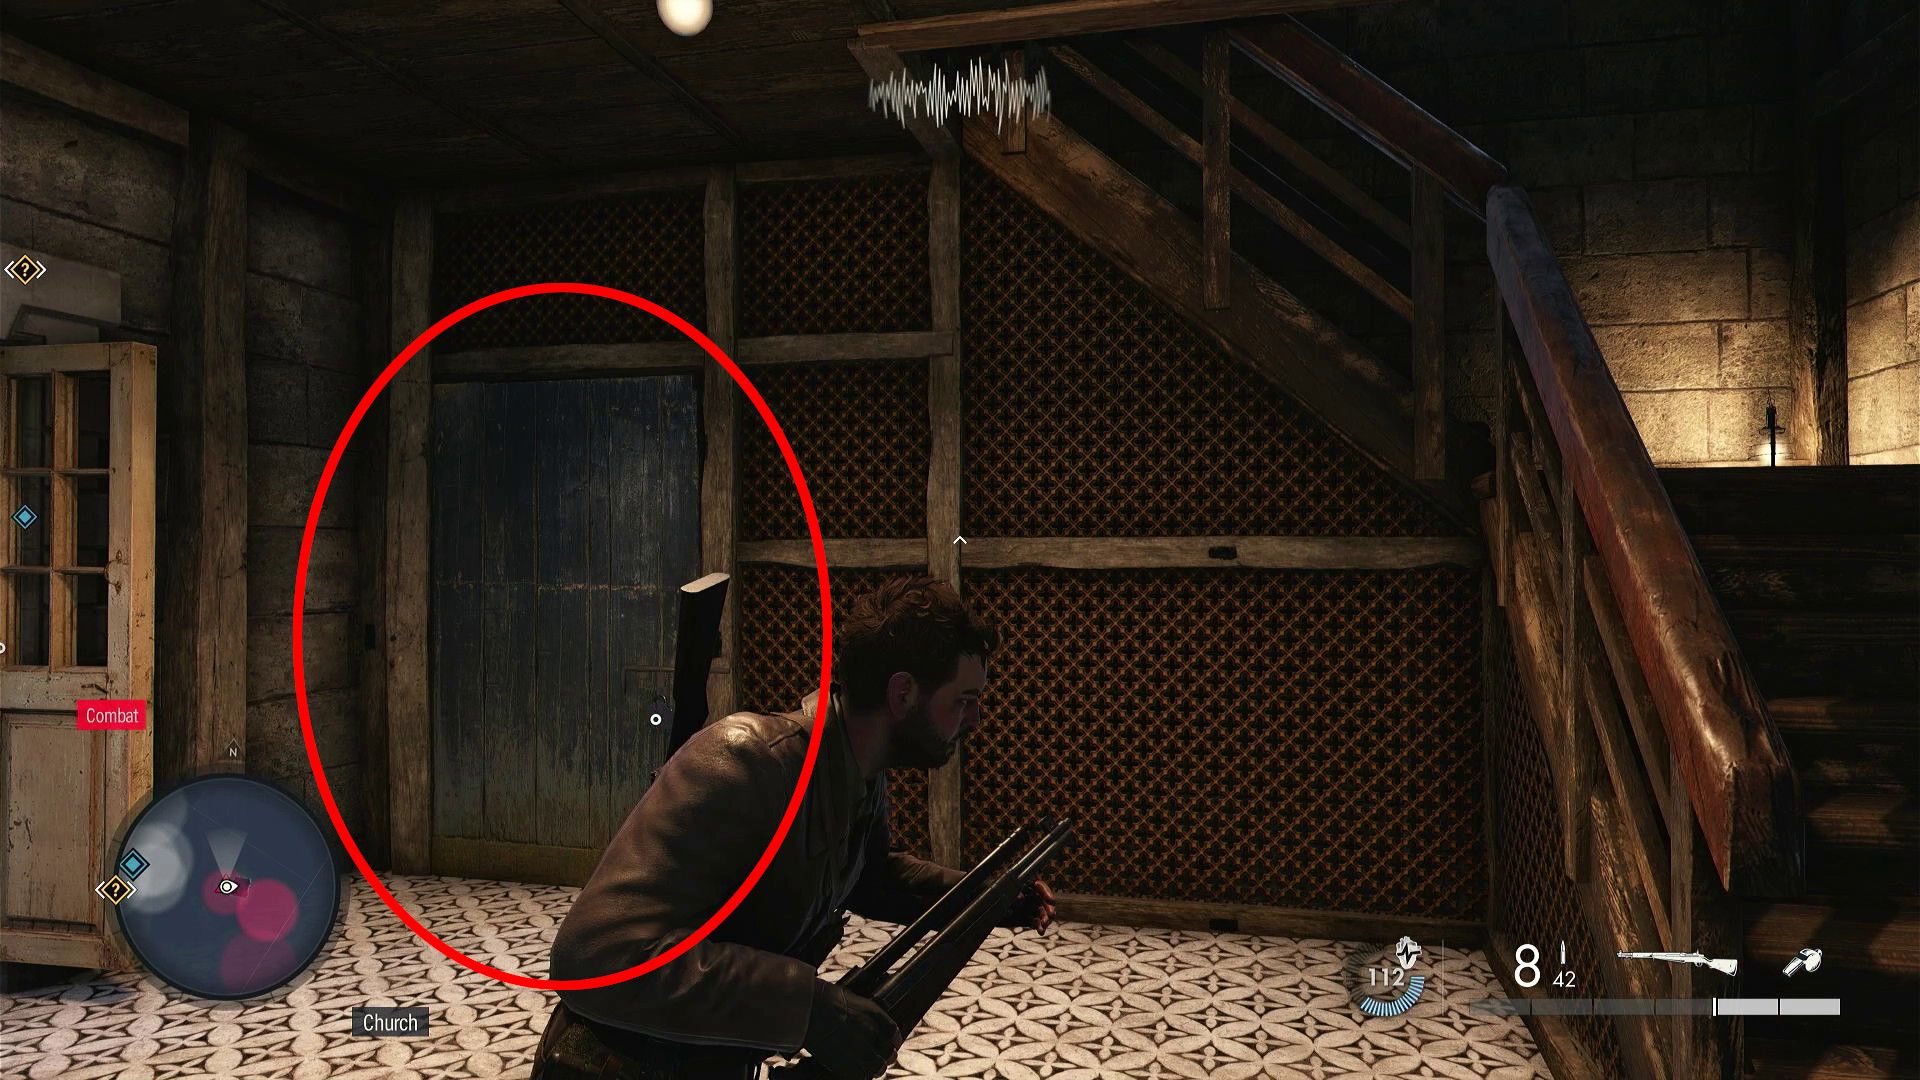
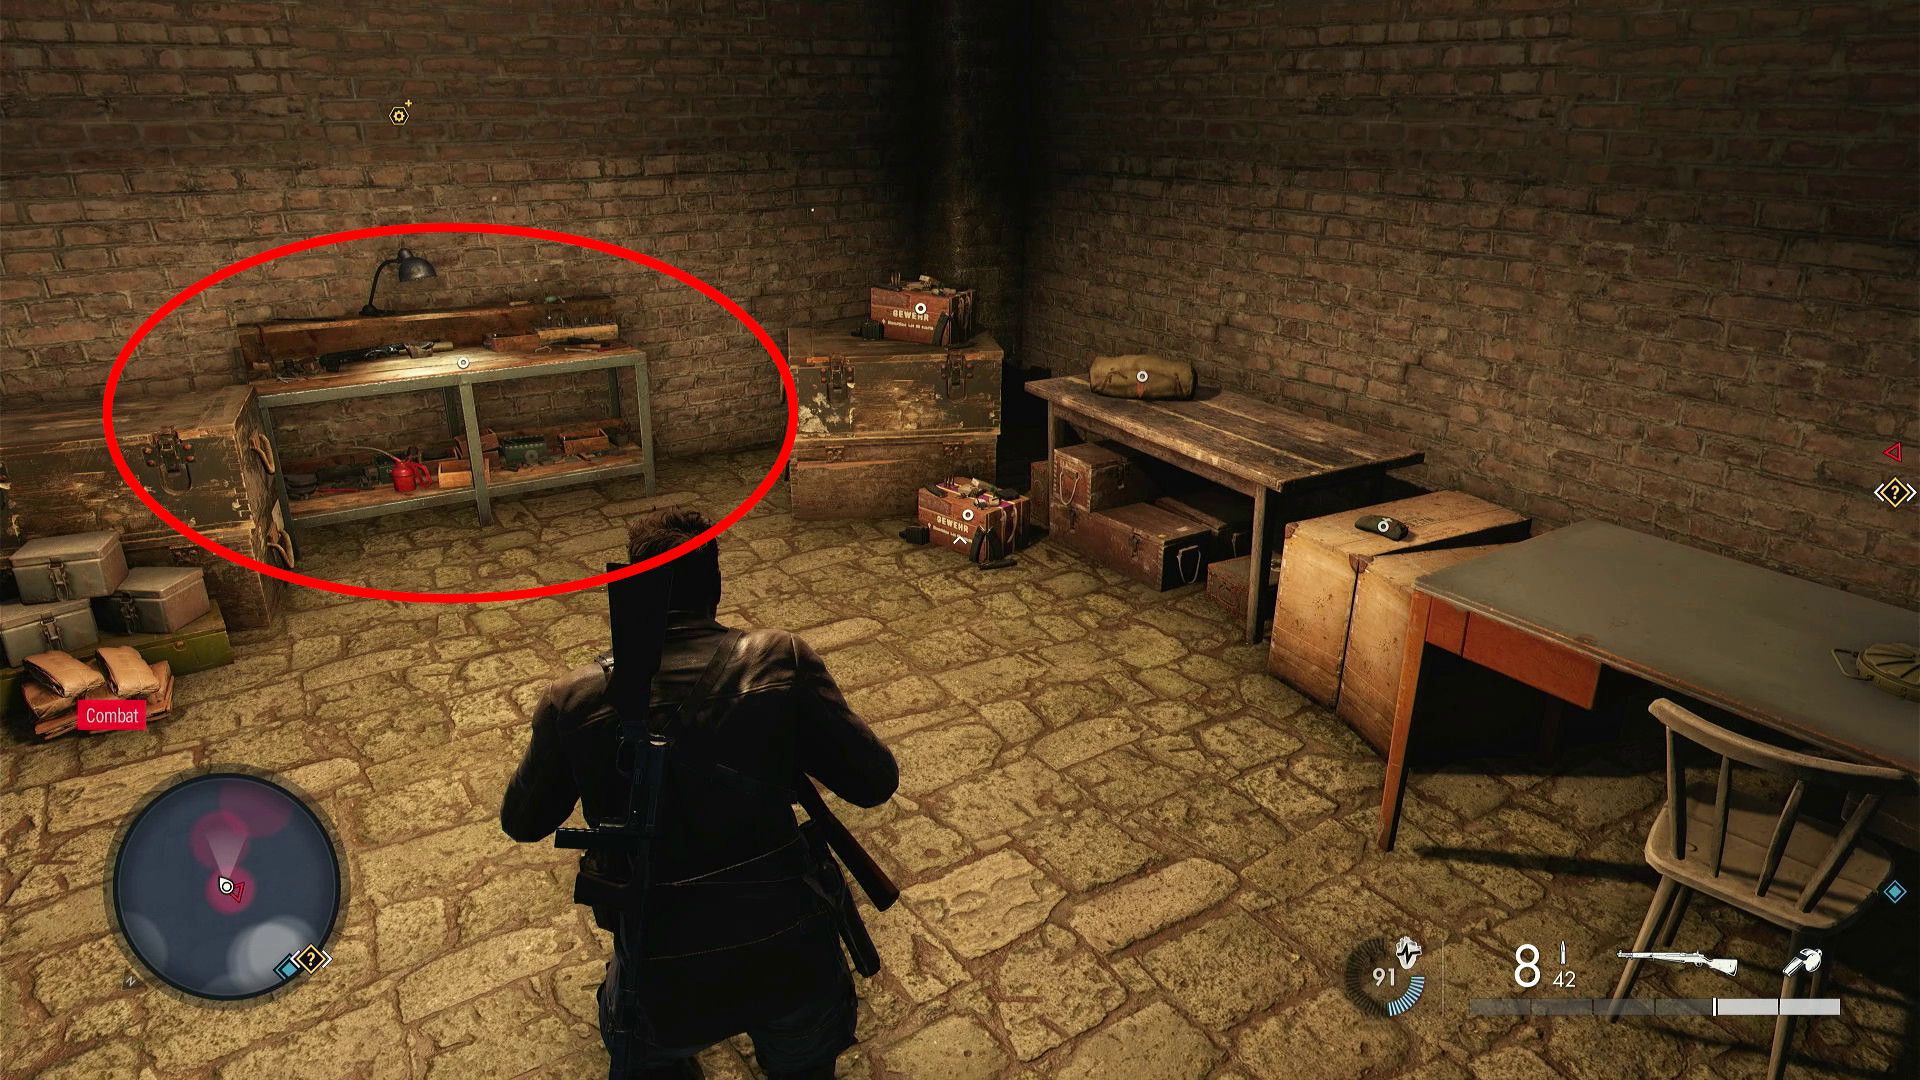
On the initial level of the Church, you’ll find a secure, blue-colored door. Behind this locked door, you’ll discover a workspace dedicated to rifles situated within the cellar.
7. Personal Letters (It Is All In Ruins)

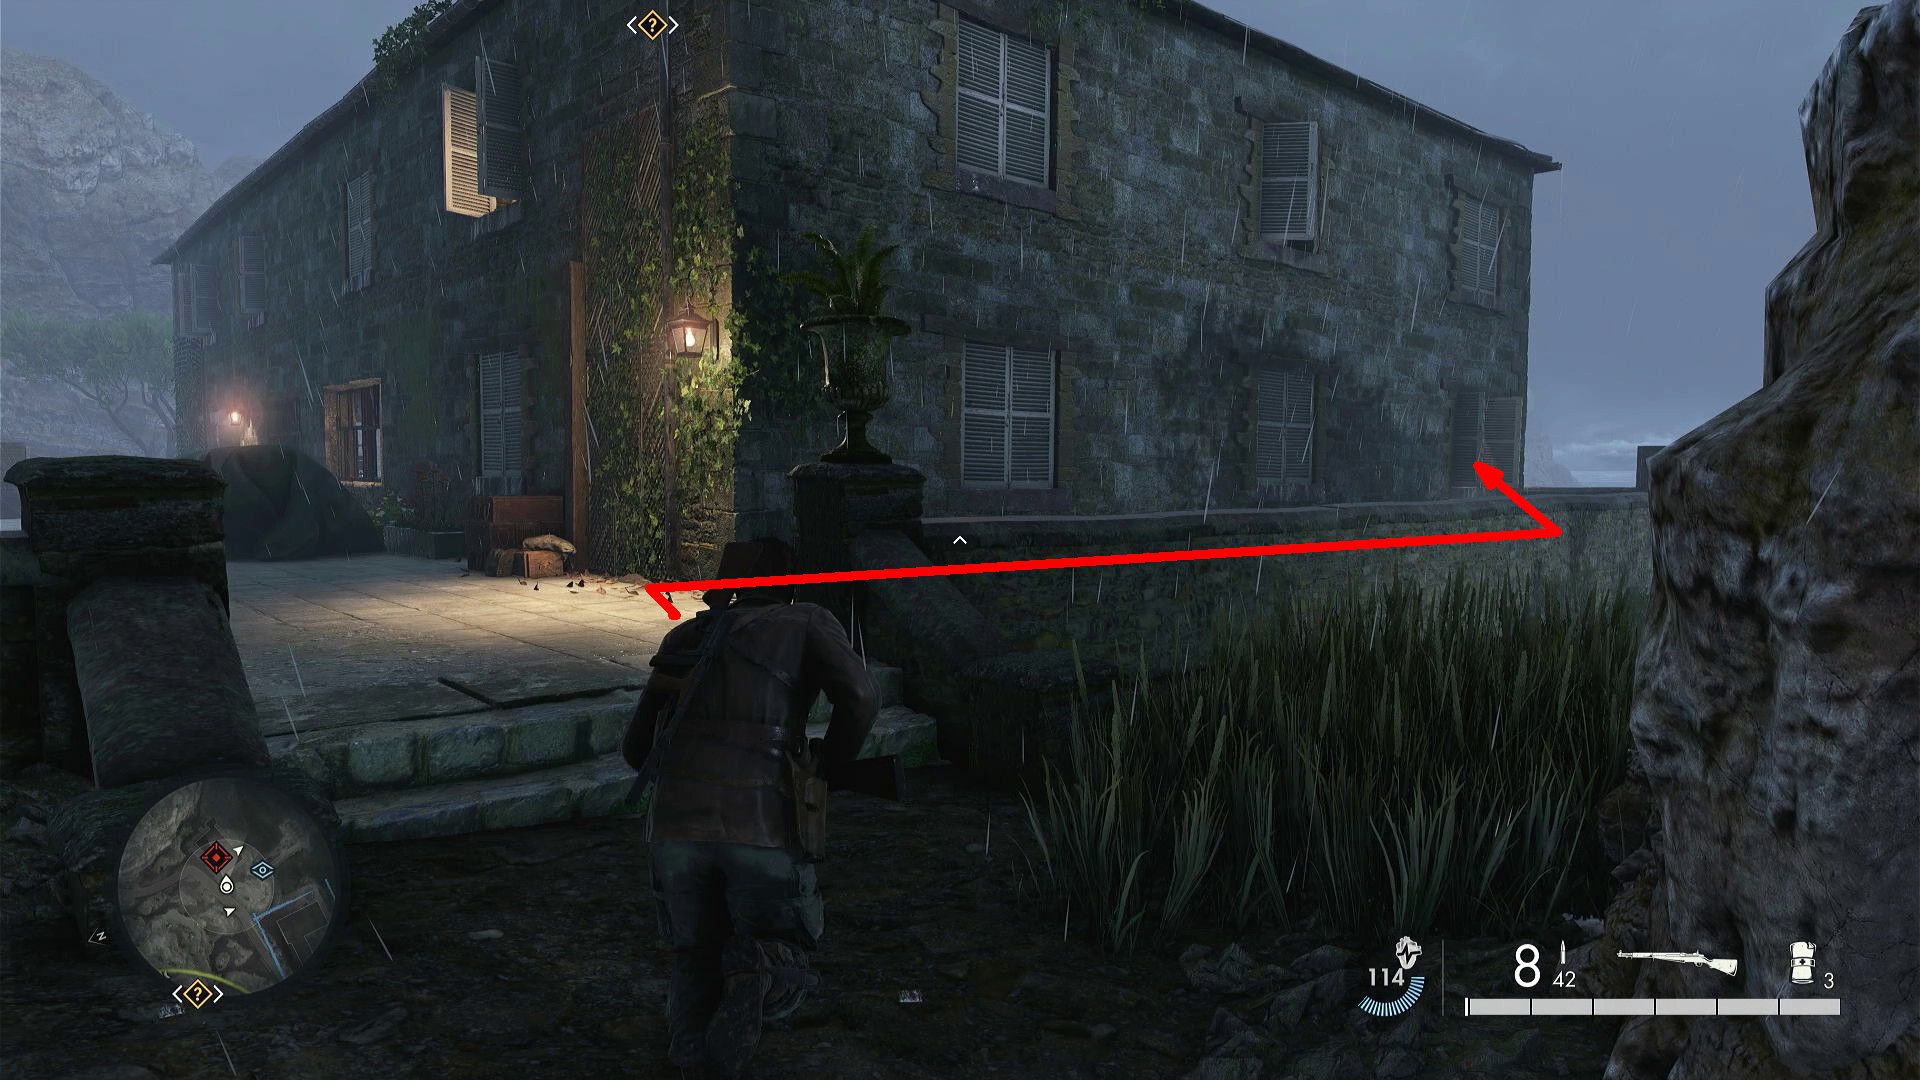
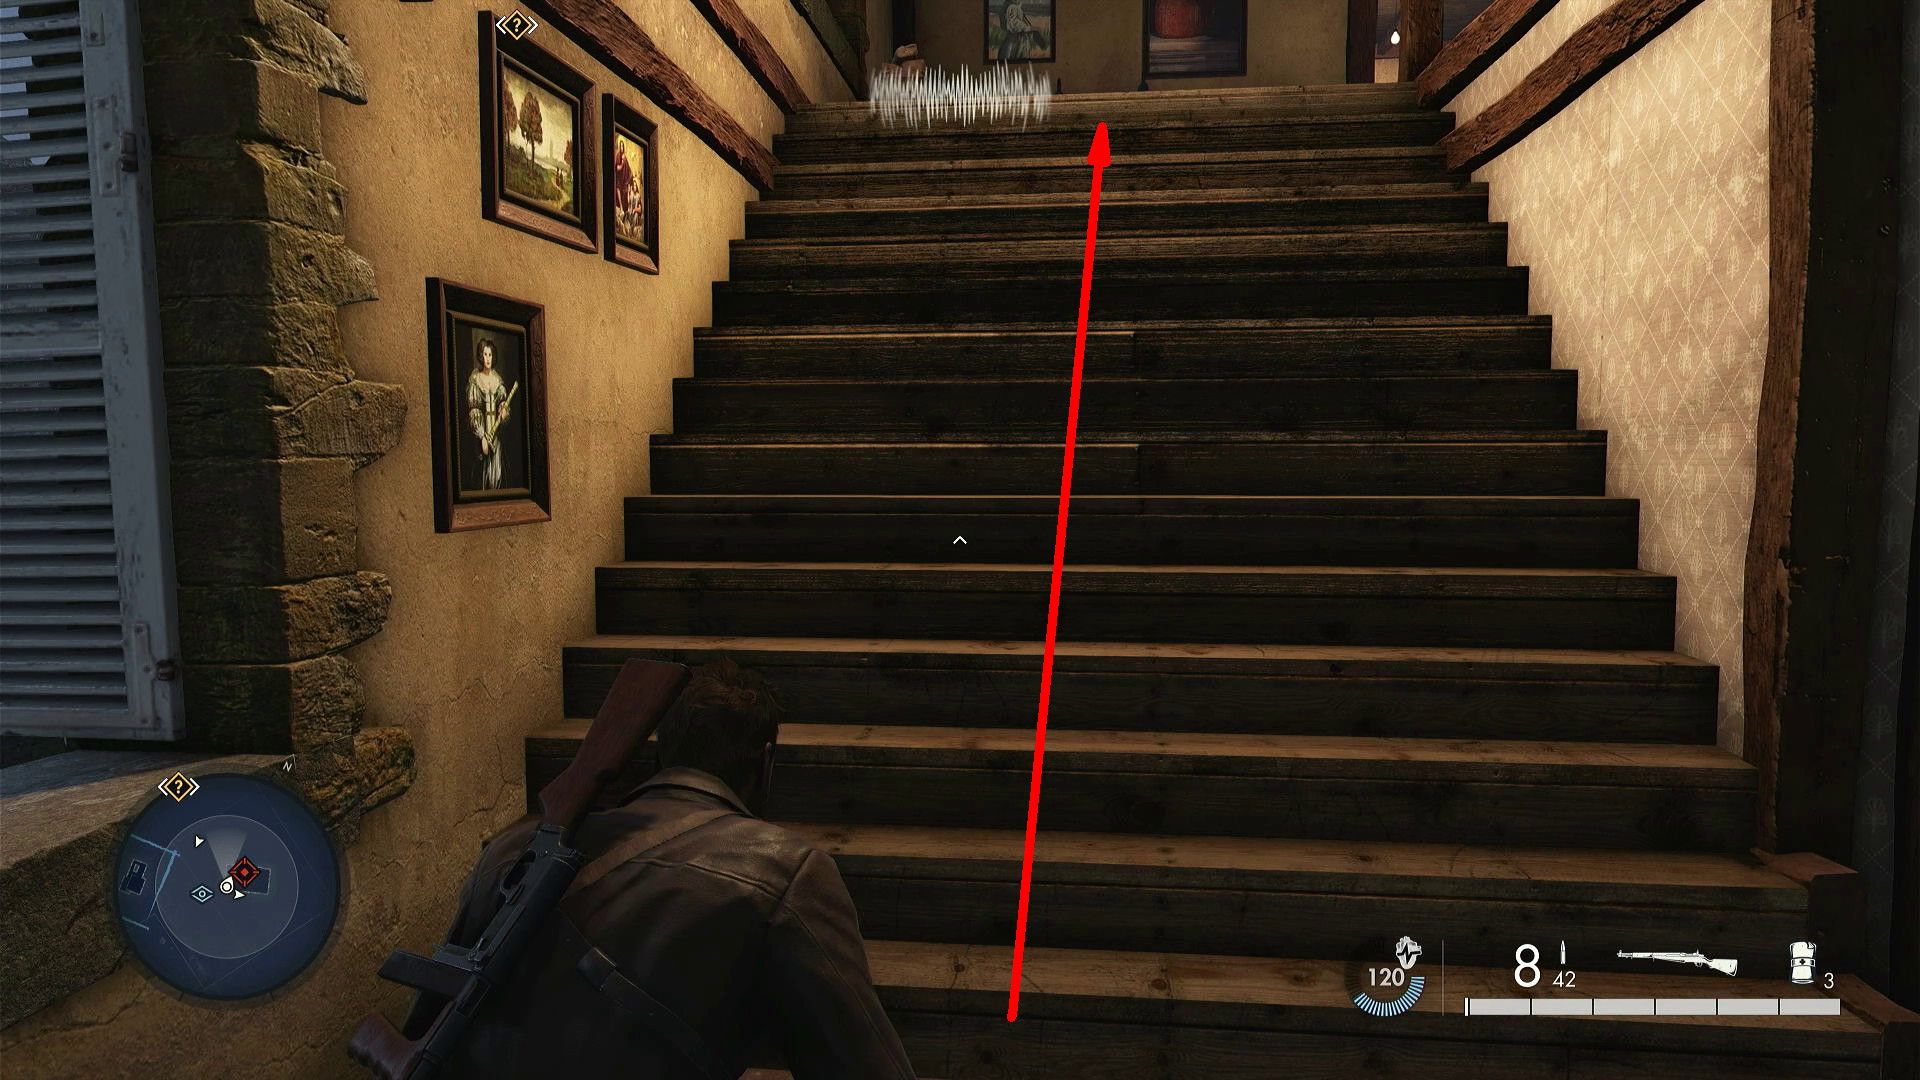
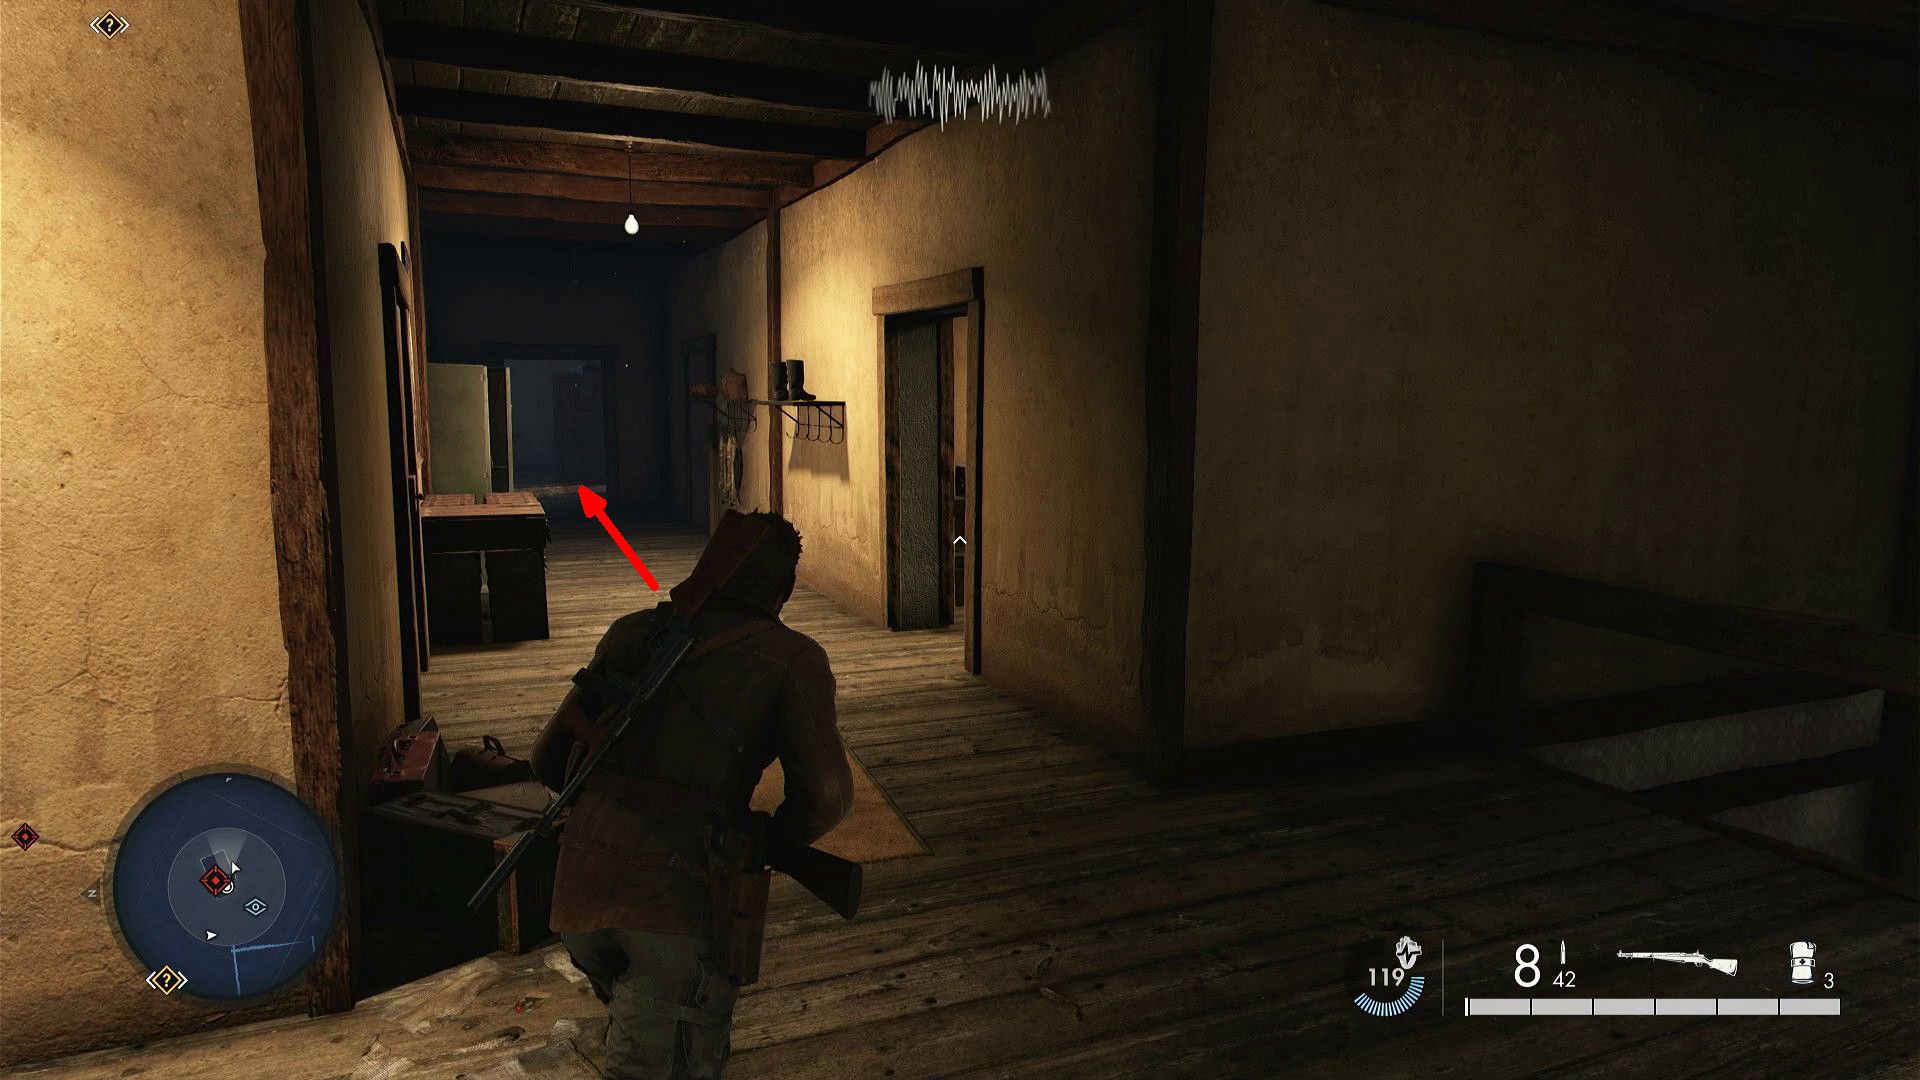
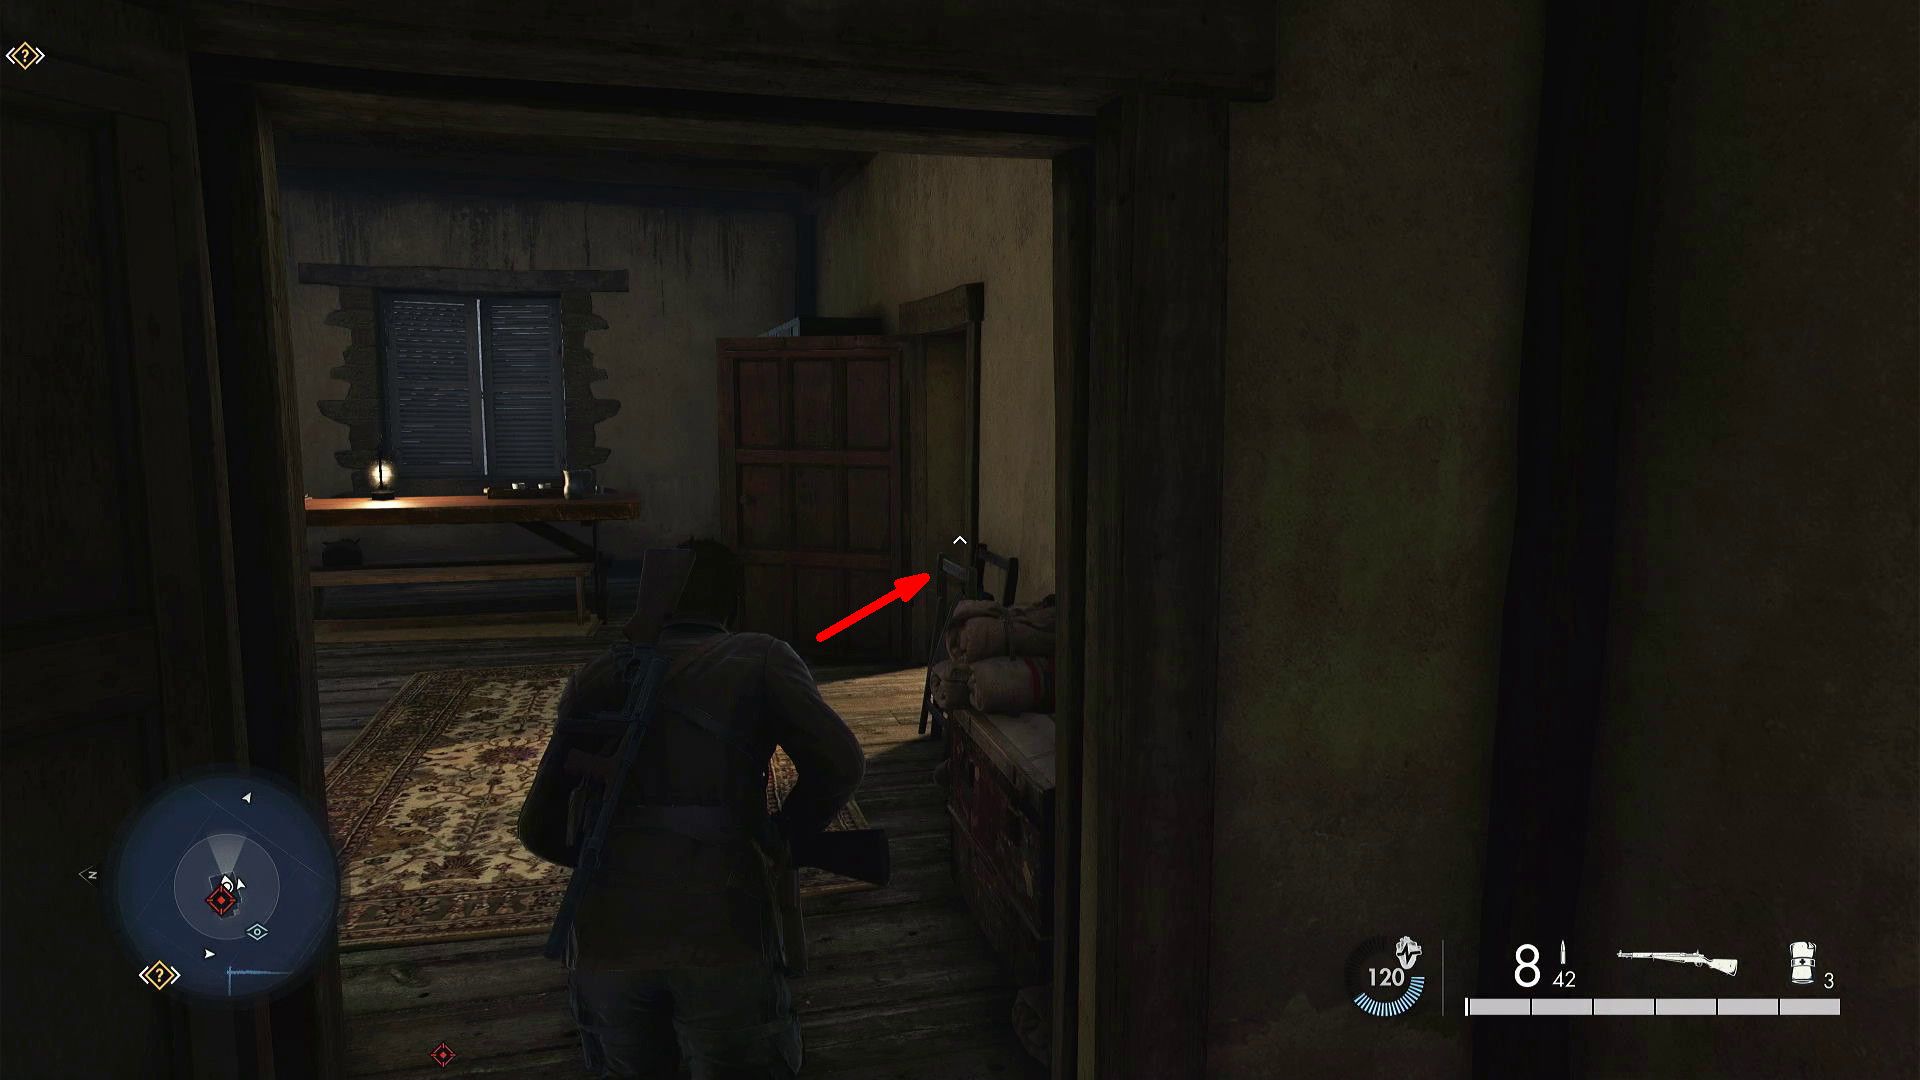
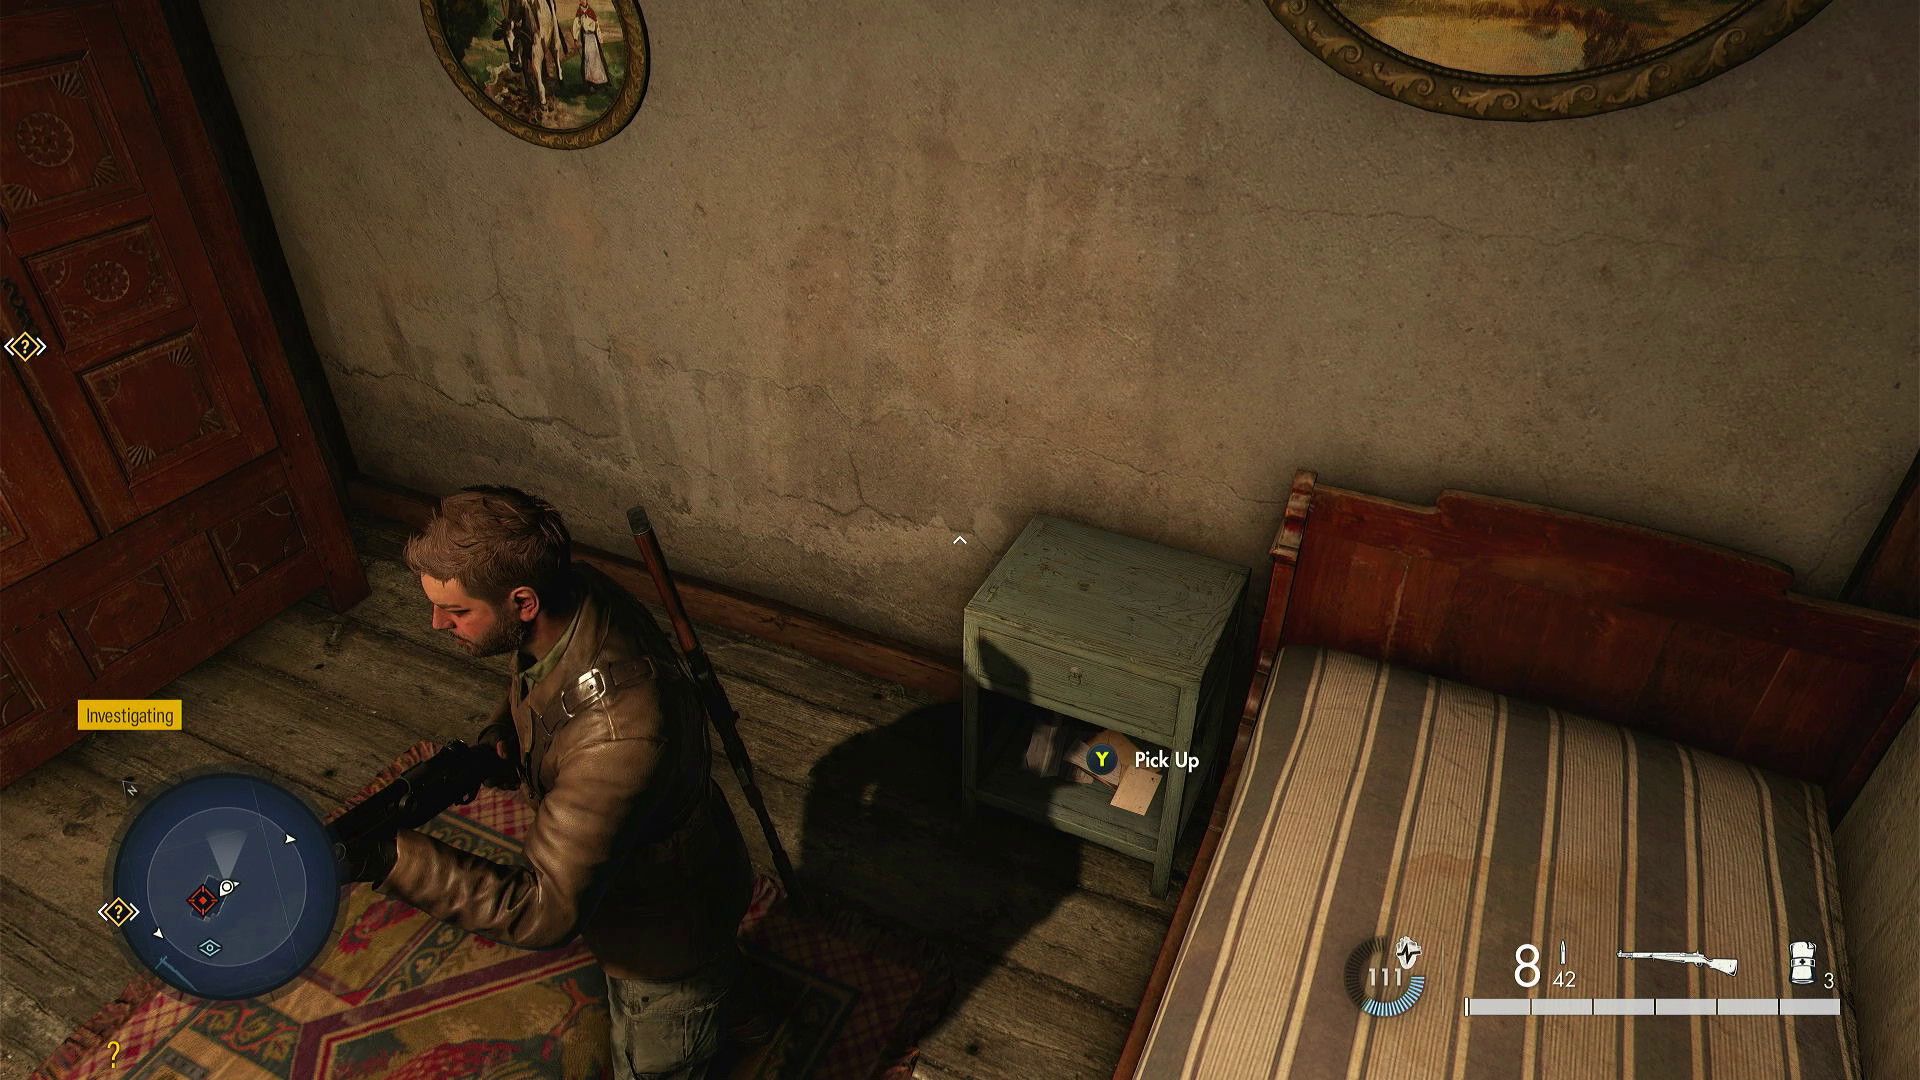
As a discerning movie-goer, I find myself leading my audience to a significant location – a towering structure where our protagonist, Eloi Coste, meets his end. Ascend the staircase, or perhaps take the elevator if time is of the essence, for the key to unraveling this narrative lies on the upper floor. Specifically, venture to the cozy quarters nestled on the second story; herein, you’ll find a table next to a bed, upon which rests a poignant Personal Letter that promises to shed light on the enigmatic Coste.
8. Personal Letters (I Miss You So Much)
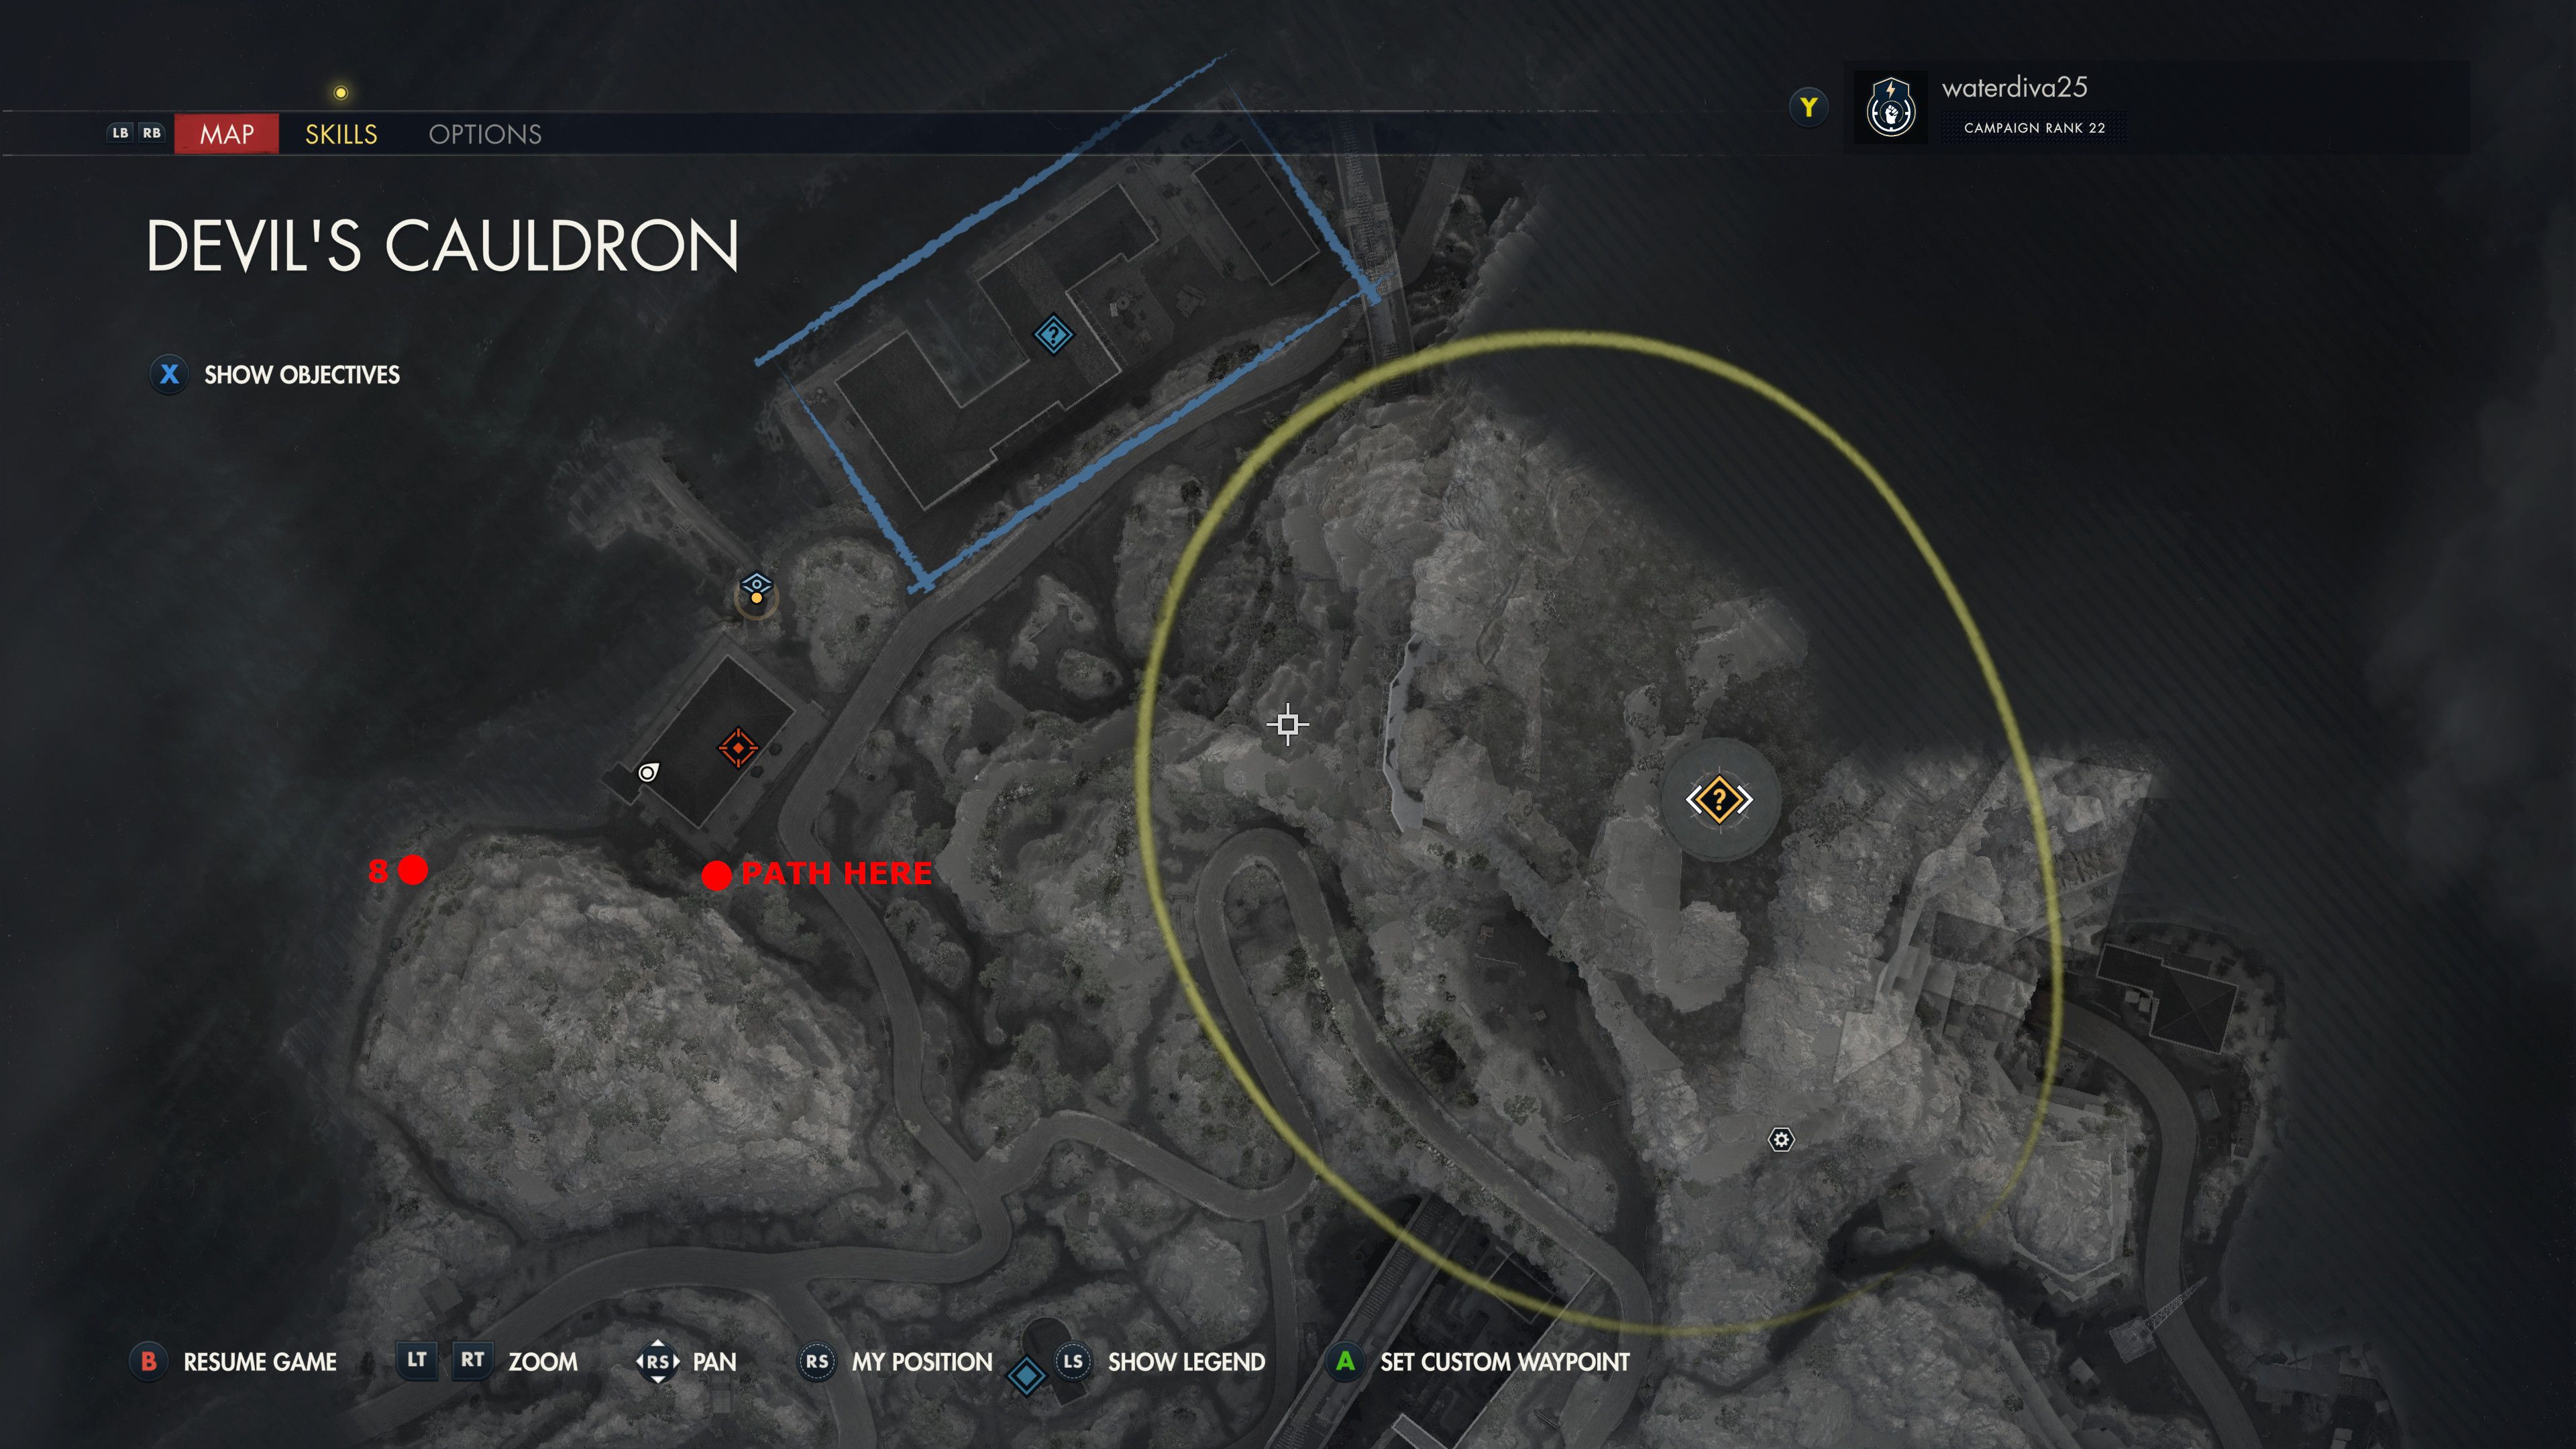
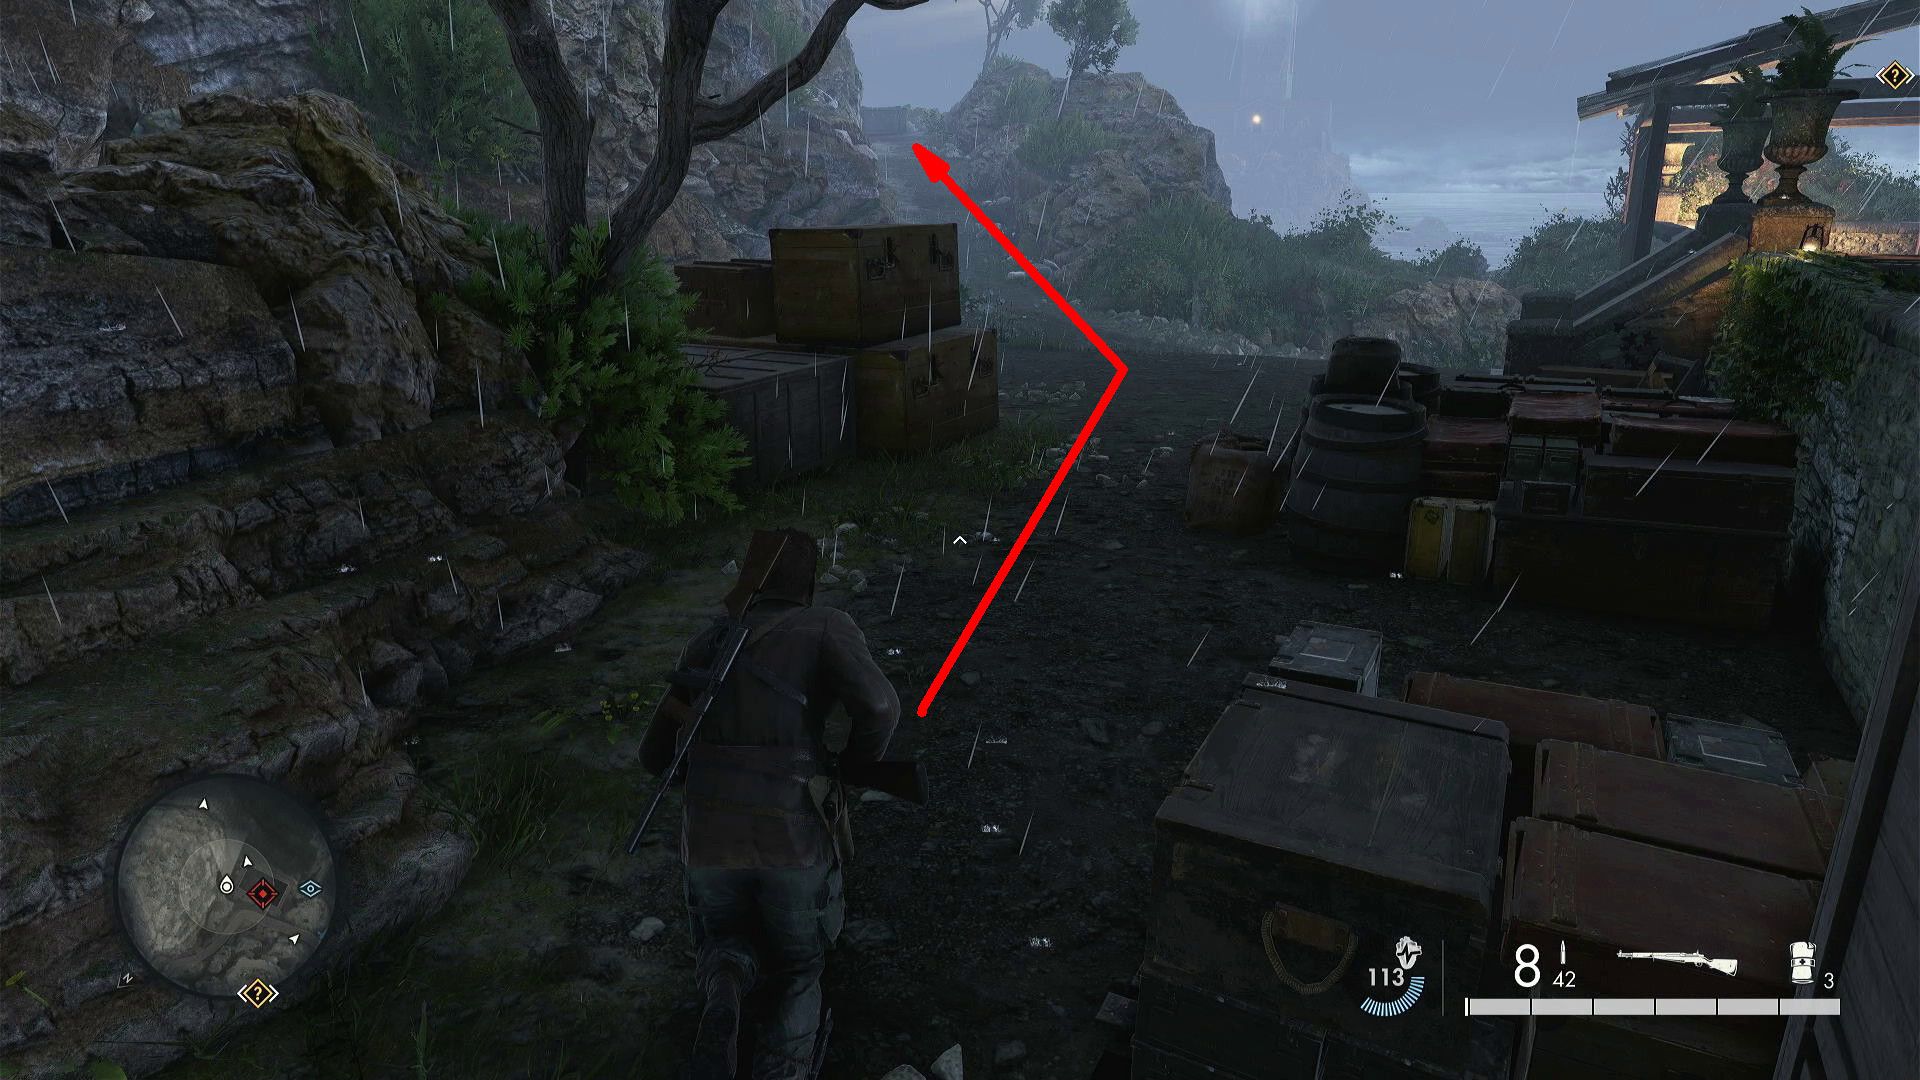
In the area beneath the building, there’s a route where players must eliminate Eloi Coste using an LMG. This path takes you straight to a covering above, and right under this shelter, you’ll find a Personal Letter on a seating spot.
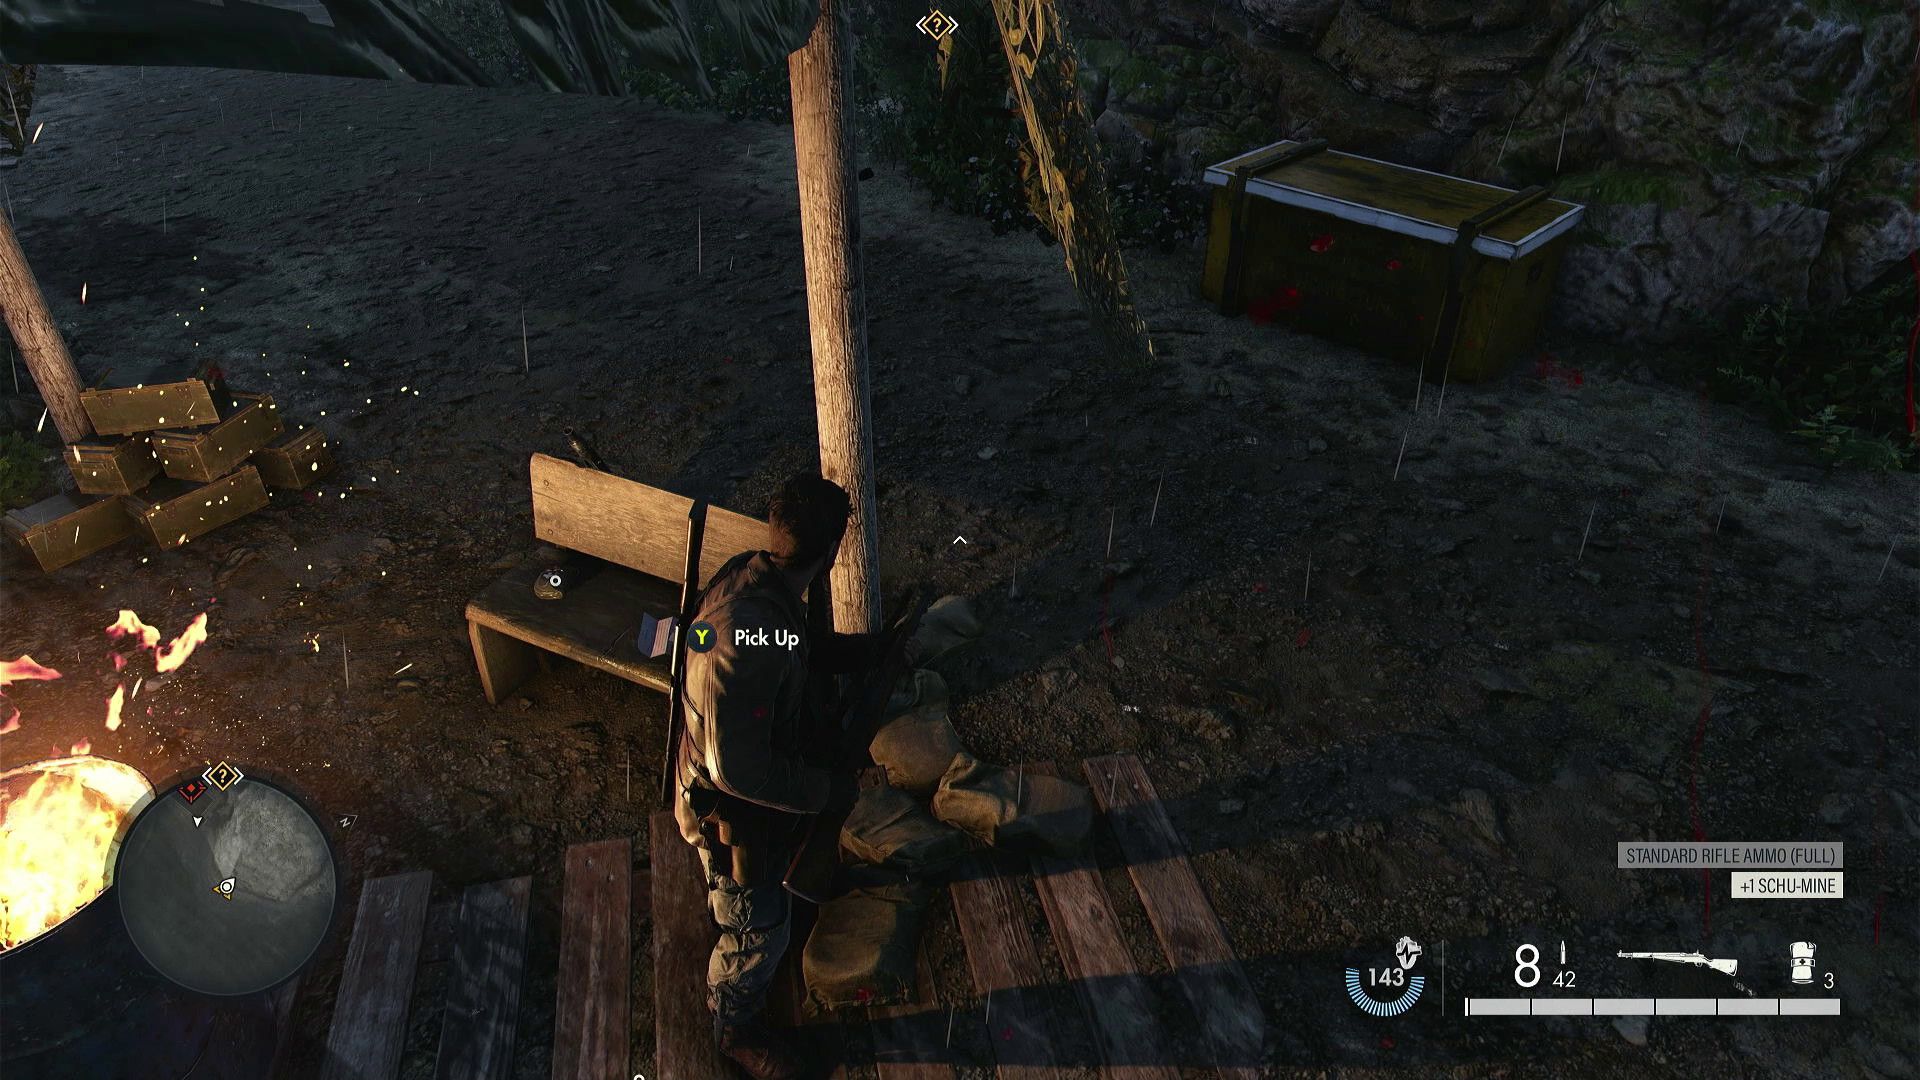
9. Stone Eagle
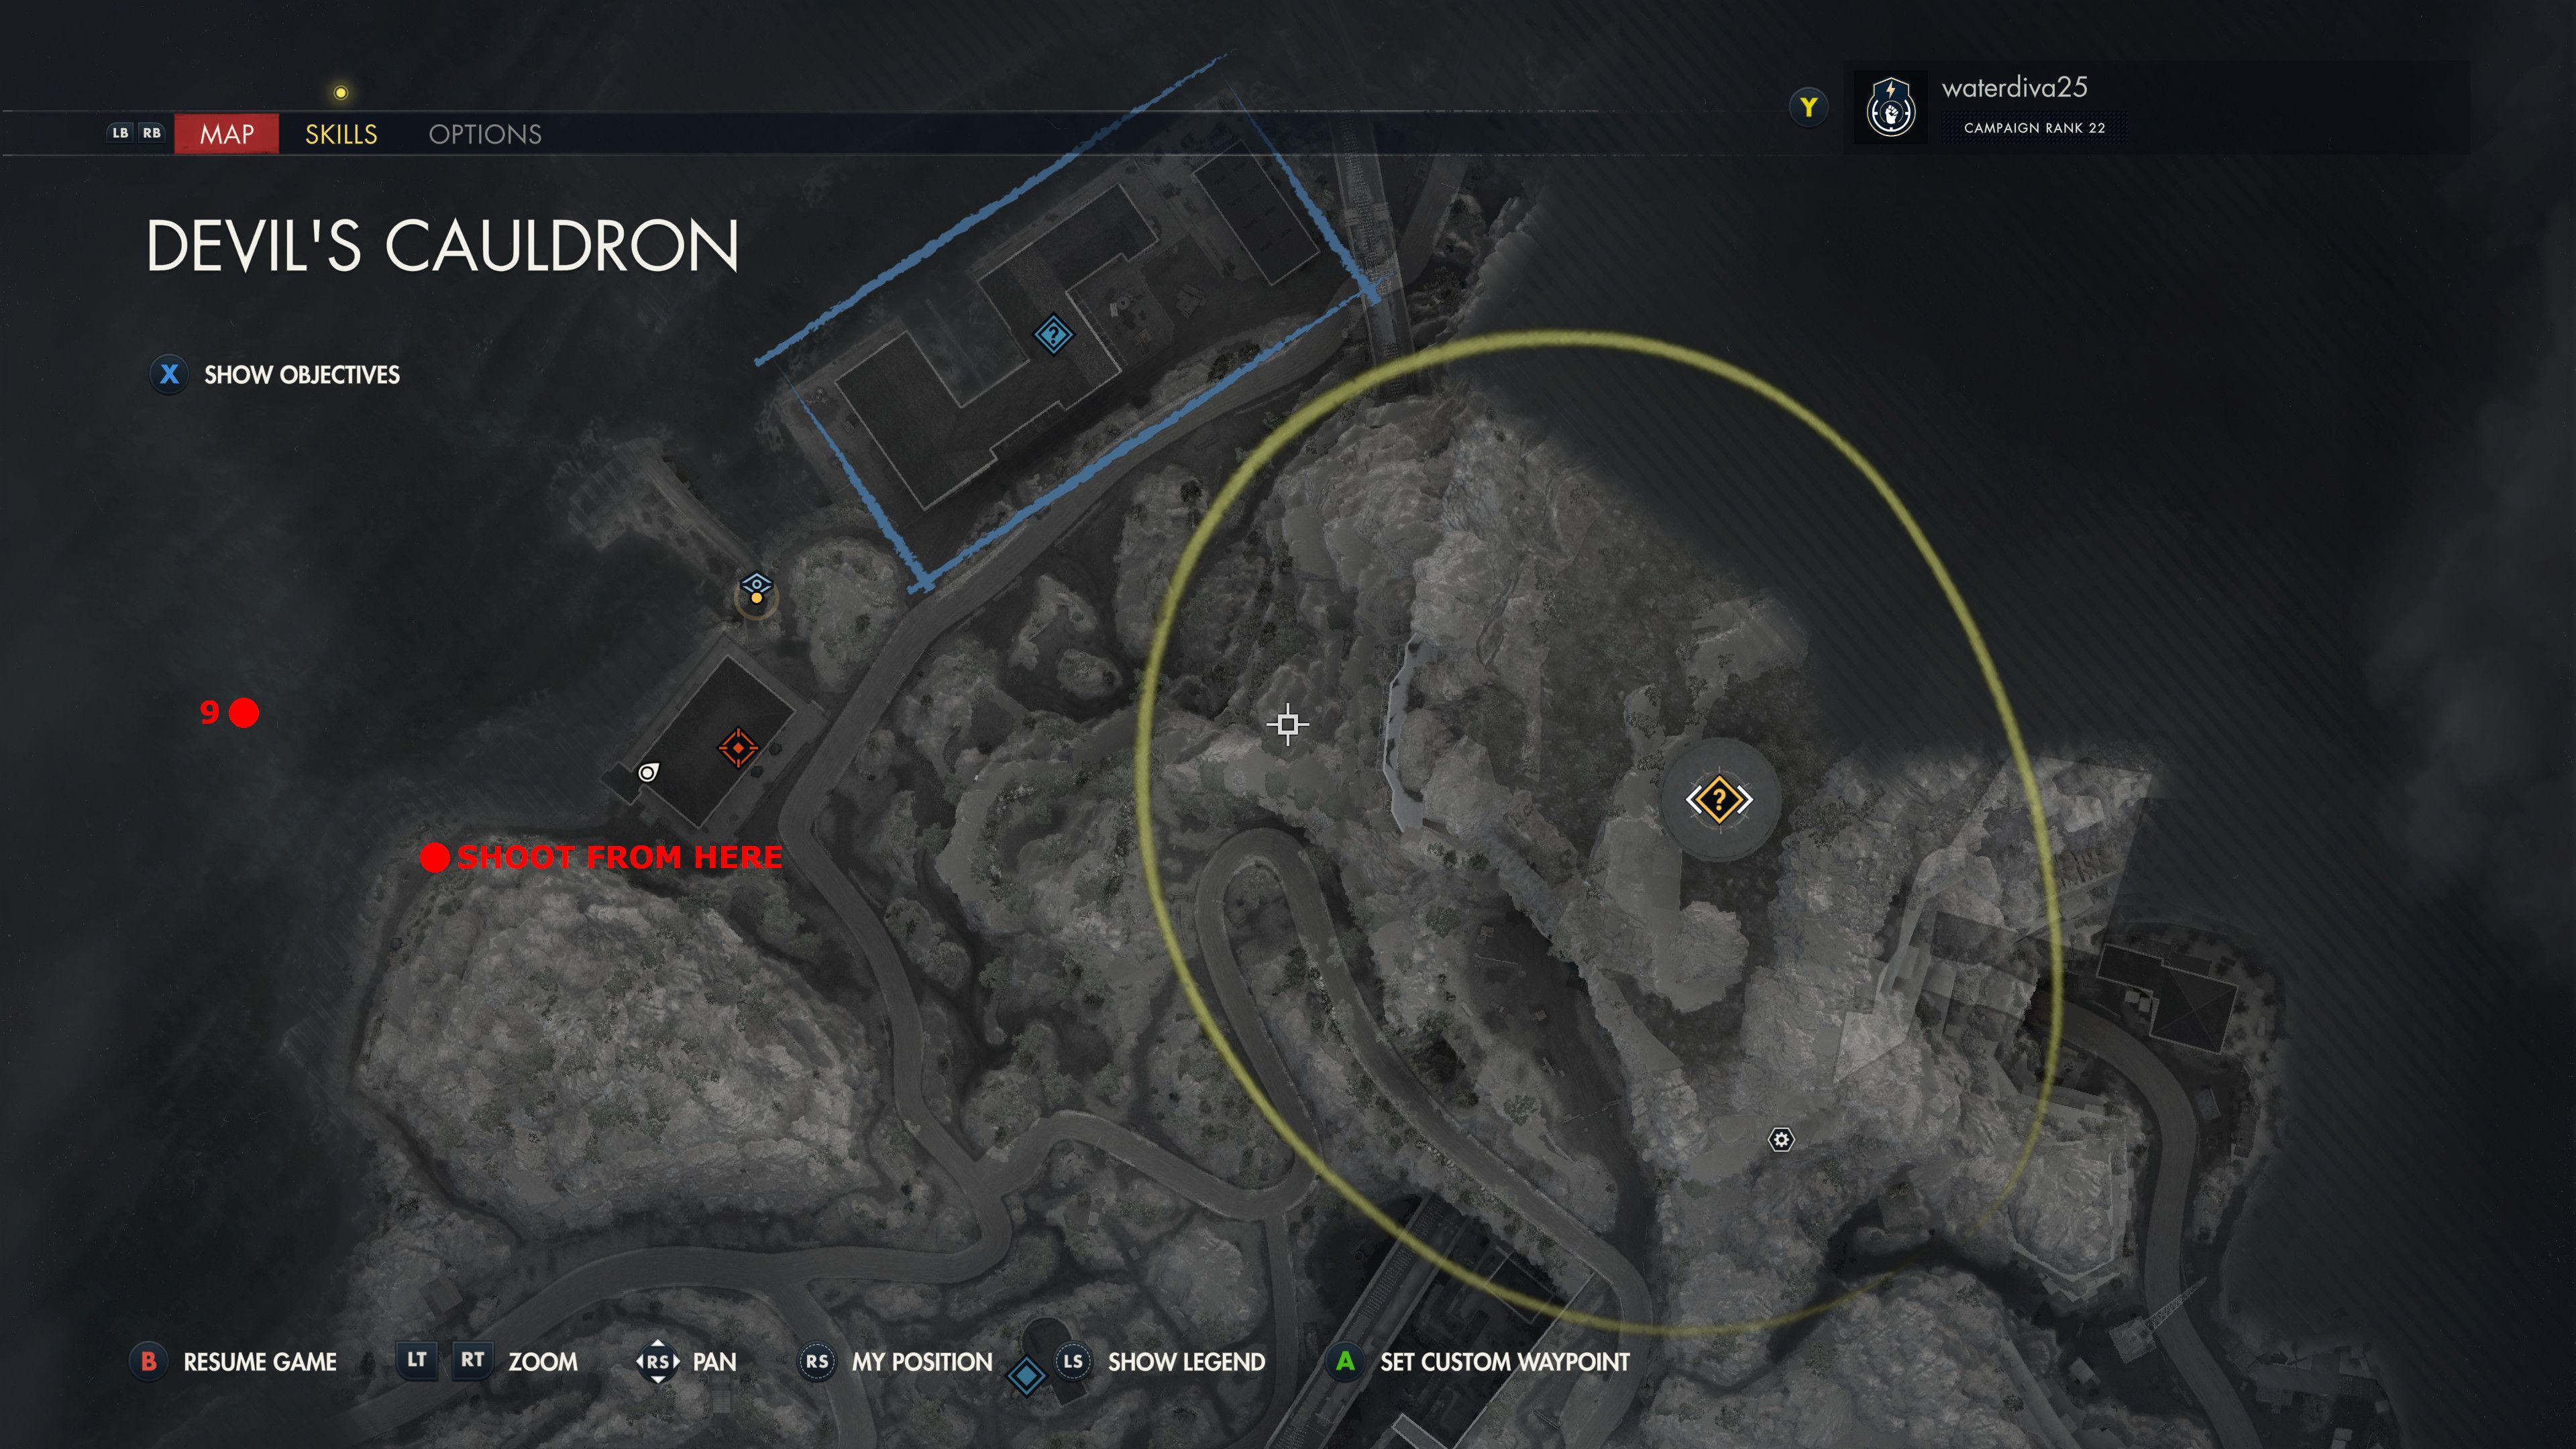
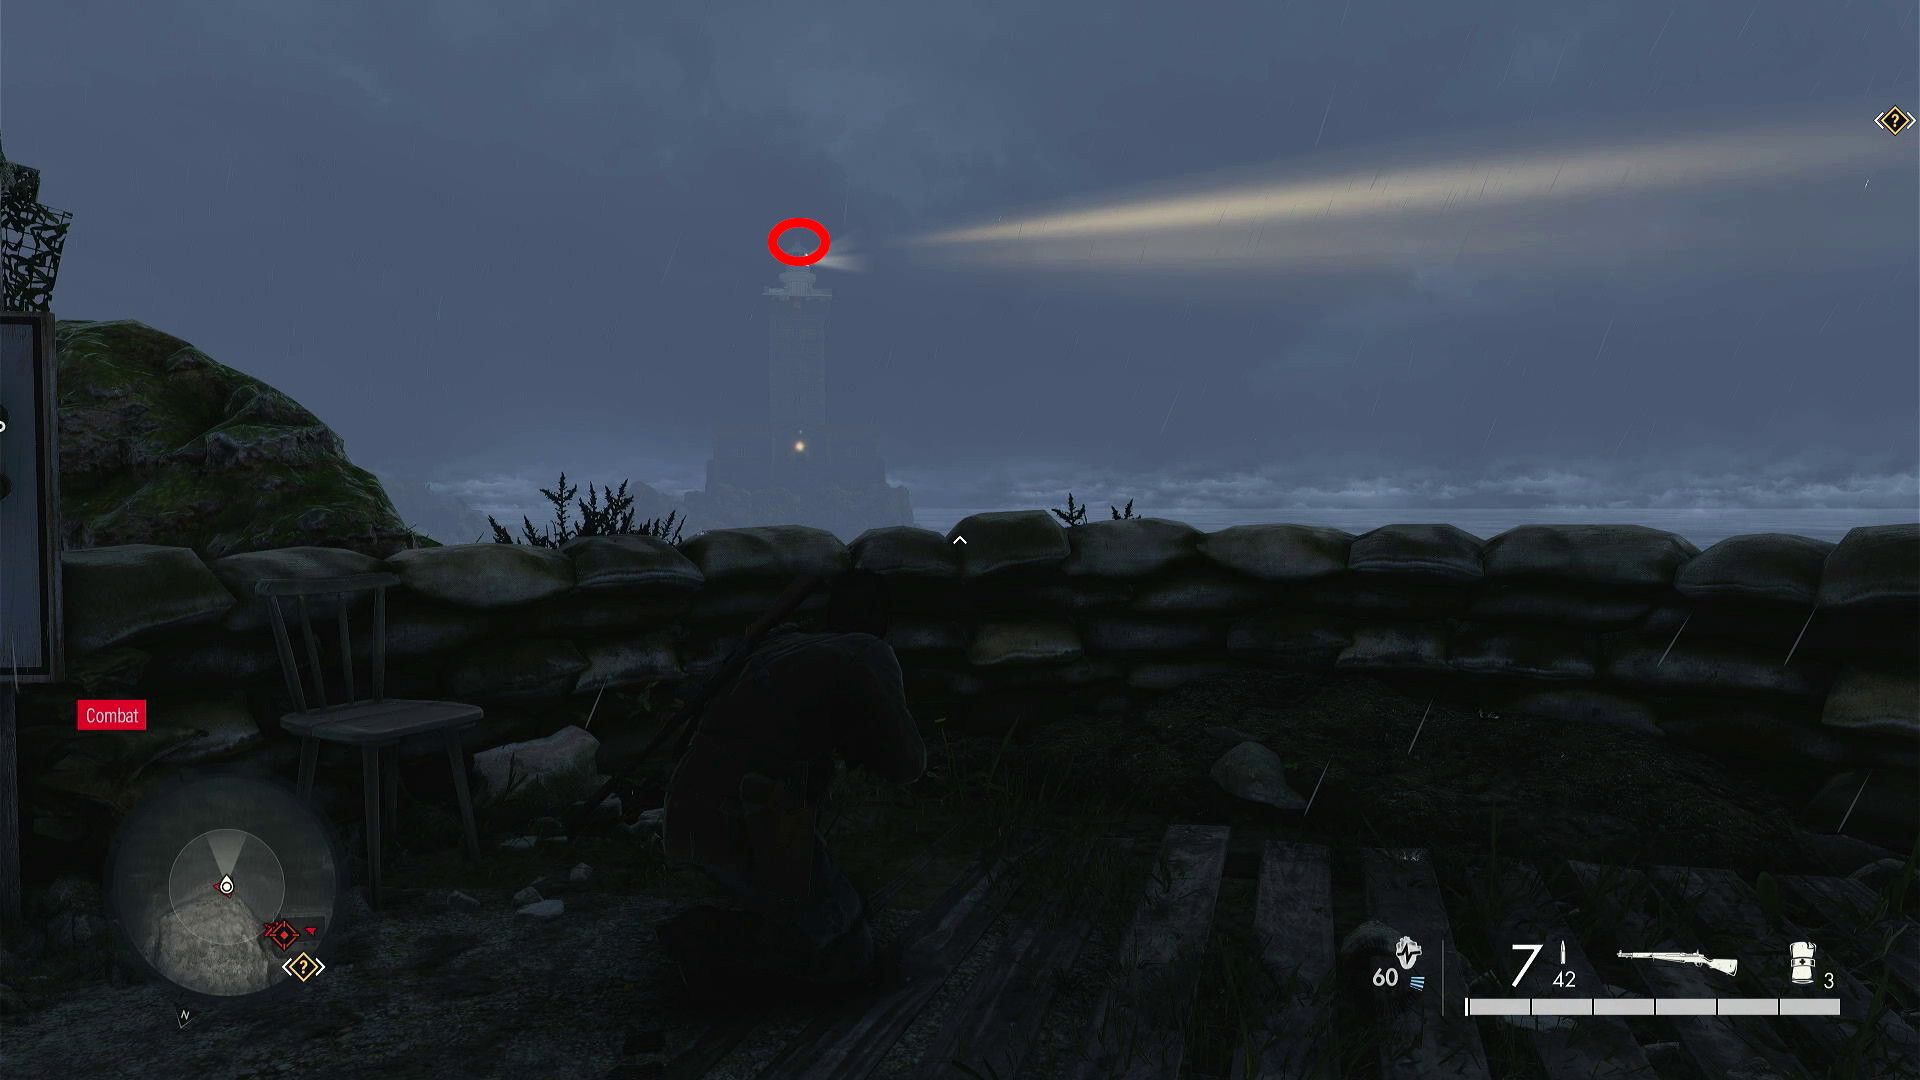
Once players have obtained I Miss You So Much, they should shift their focus towards the structure standing in the water – a lighthouse. Atop this lighthouse, there’s a Stone Eagle that can be brought down using one of the sniper rifles from the game Sniper Elite: Resistance.
10. Classified Documents (Wilhelm’s Folly)
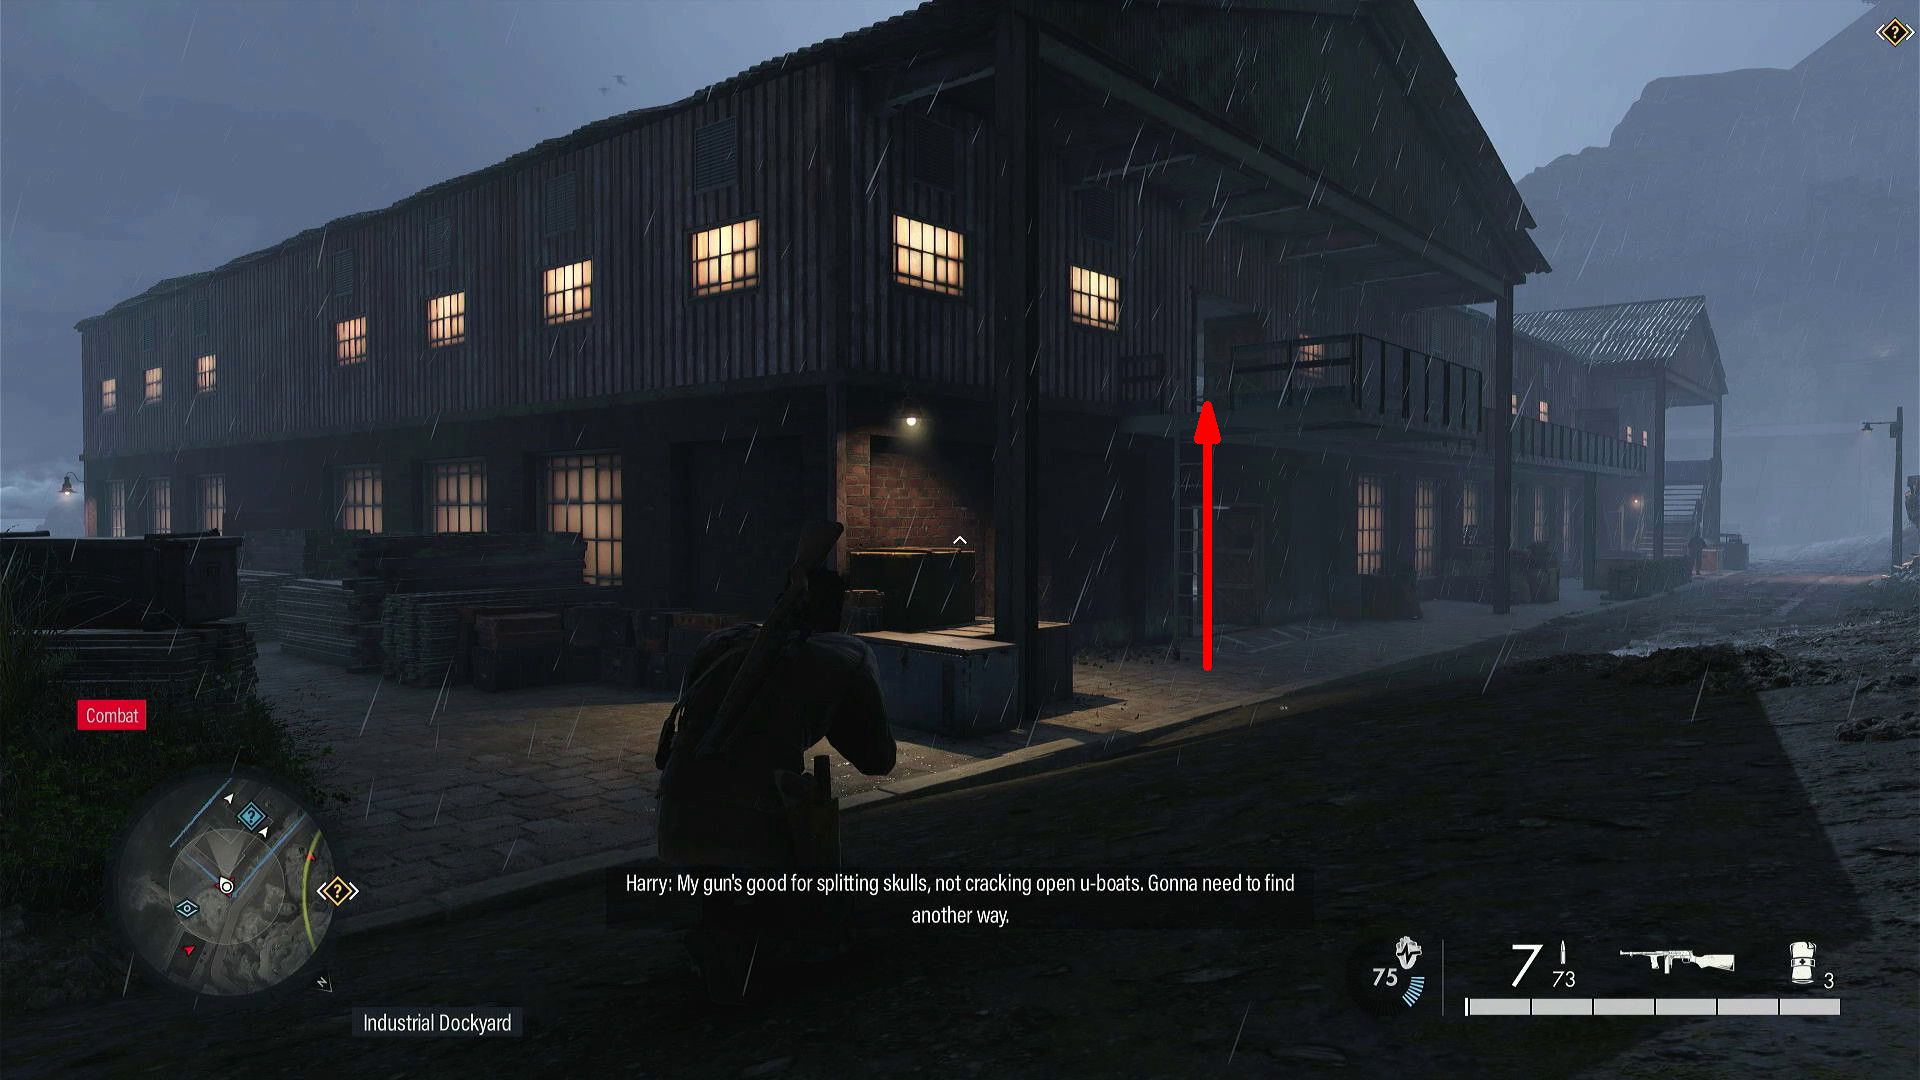
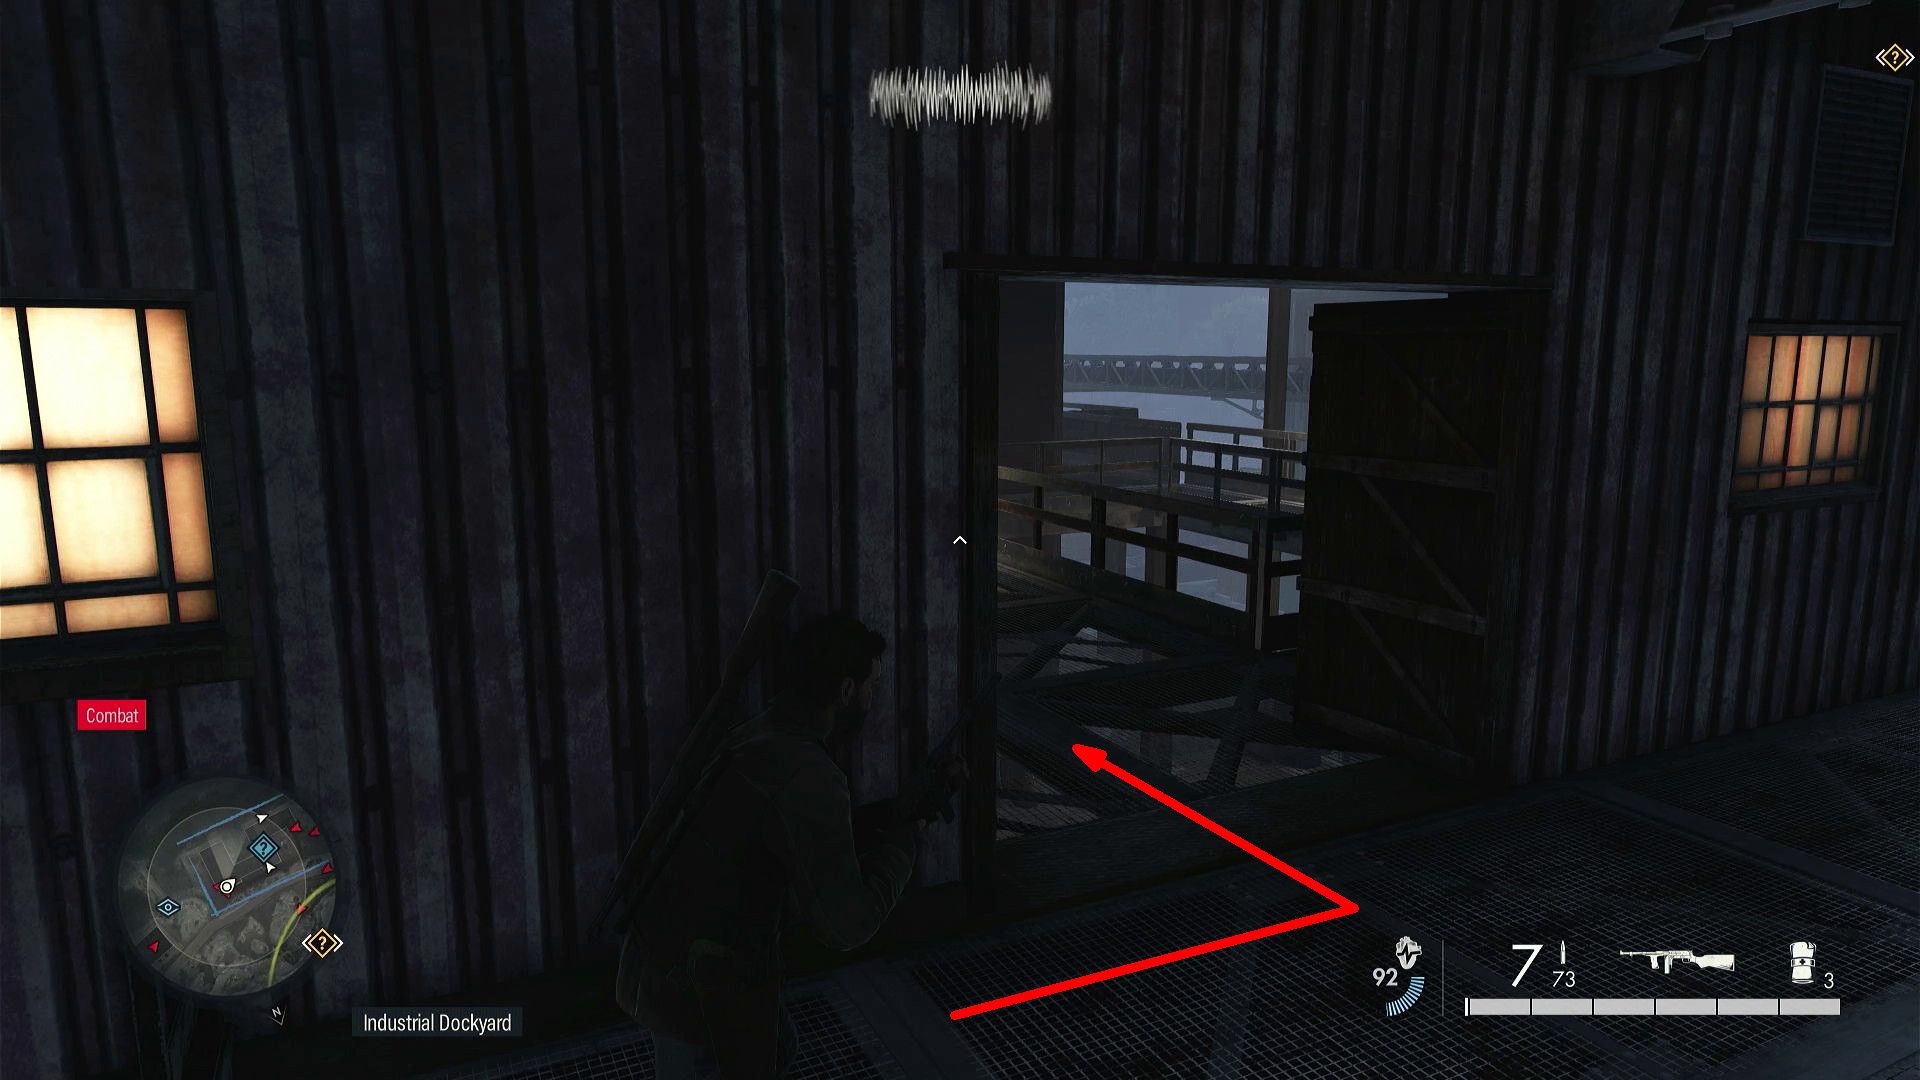
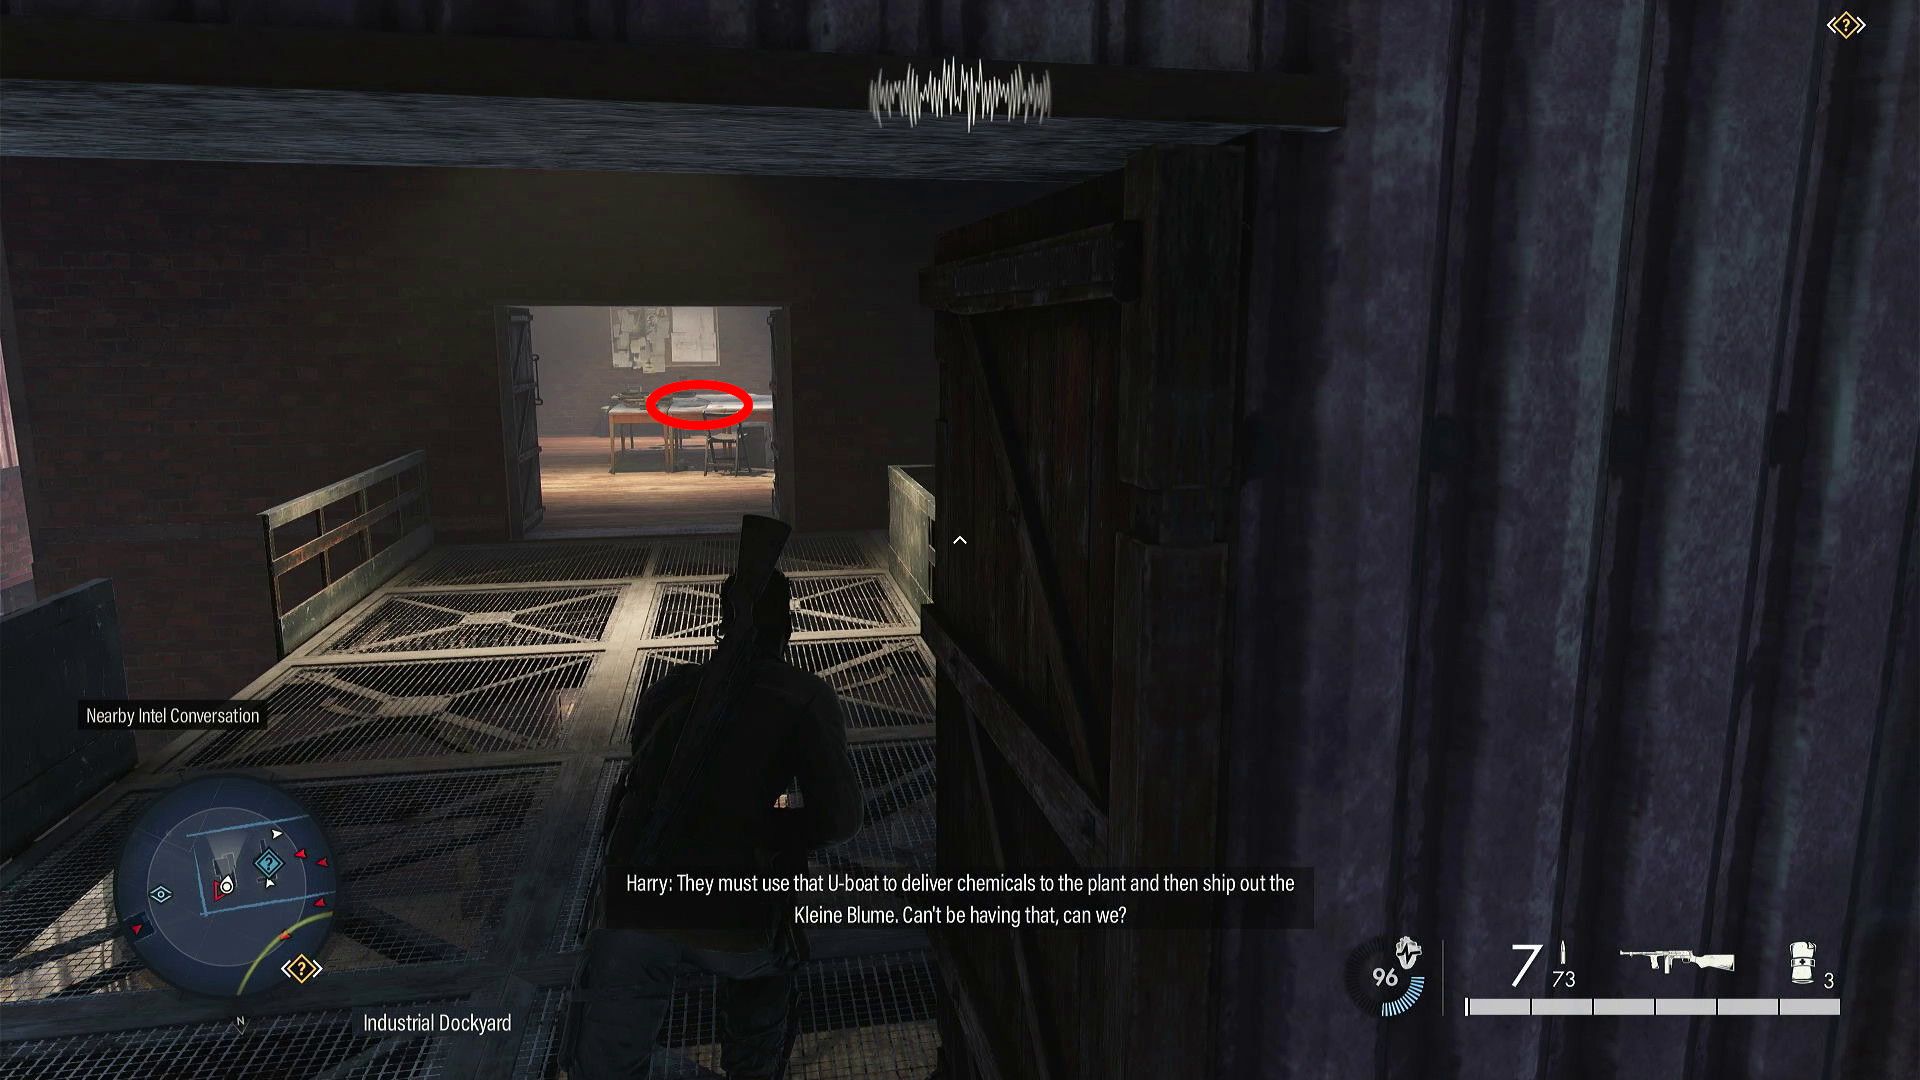
Players need to navigate towards the lower-right side of the structure now, where they will discover a means to annihilate the U-Boat. Fans should employ the nearby ladder to ascend to the second level, proceed through the door on the left, and carry on moving forward to enter an office. The Classified Document is situated right in the center of that room on a table.
11. Stone Eagle
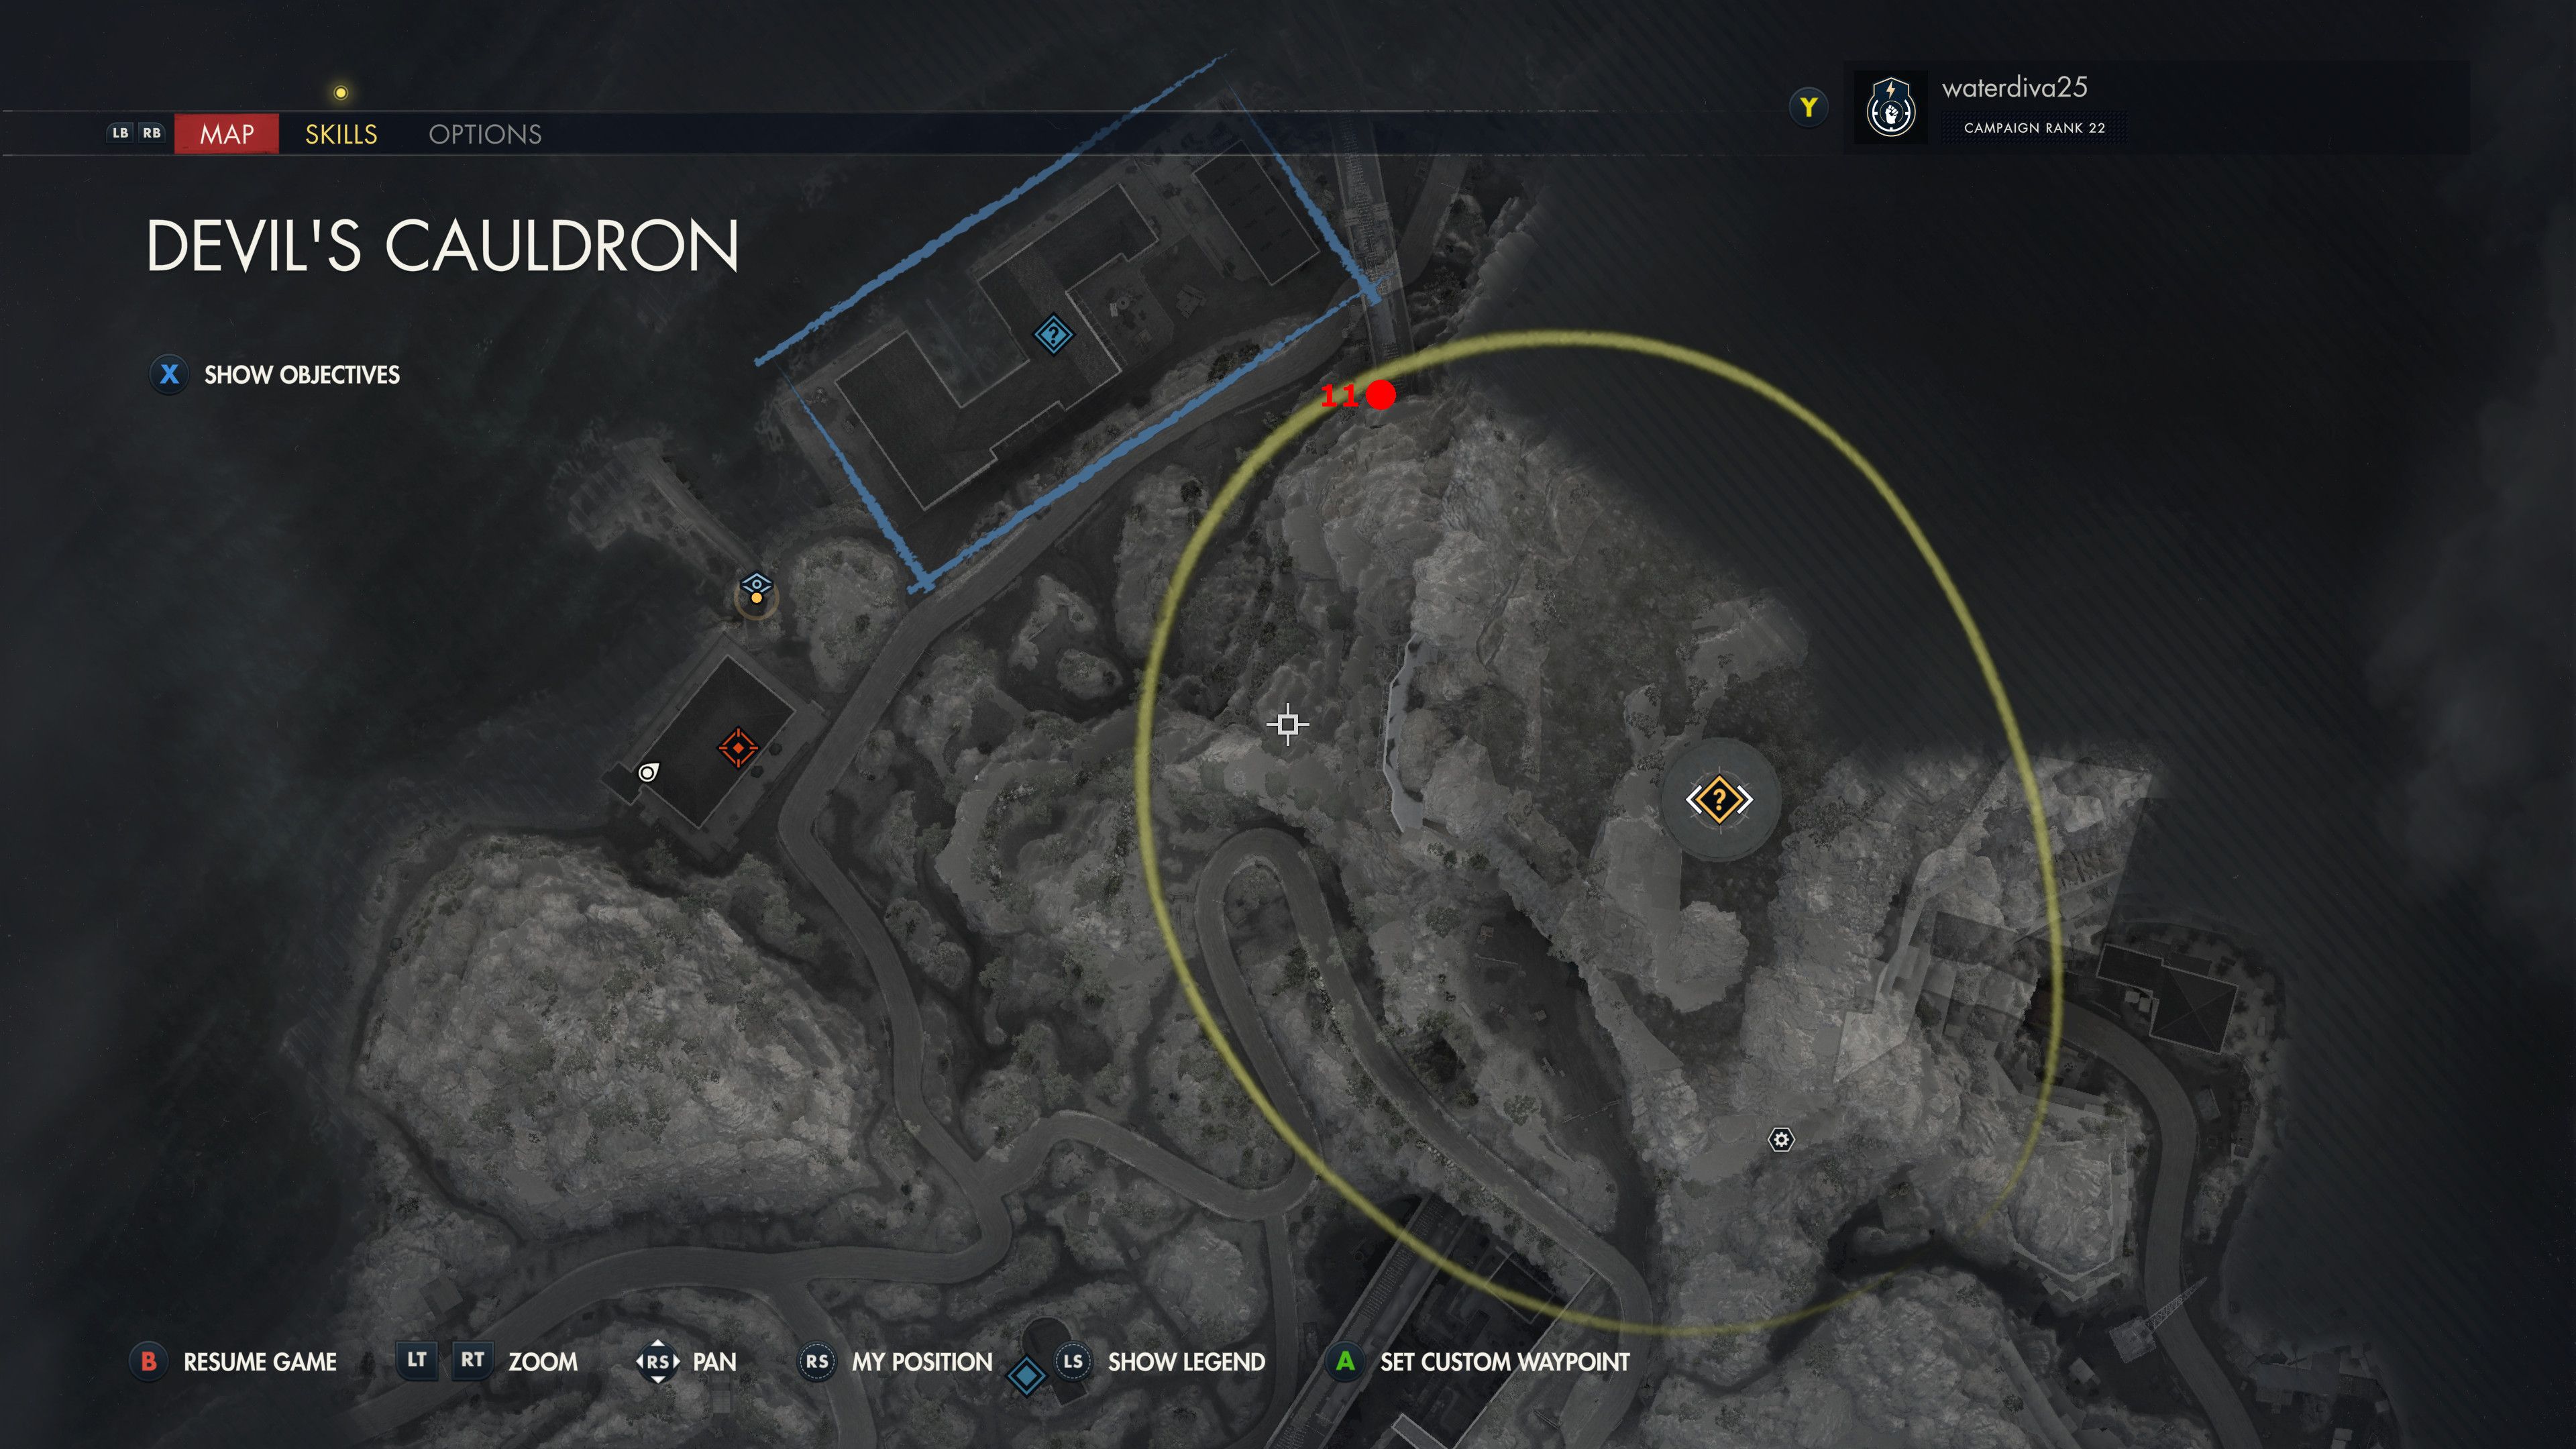

To the right of the building, there’s a tunnel where players must figure out how to demolish a U-Boat. On the right side of this tunnel’s entrance, you’ll spot a Stone Eagle. Spectators can climb up towards the eagle or shoot the statue from any vantage point that offers a view of the tunnel.
12. Hidden Items (Playing Cards)
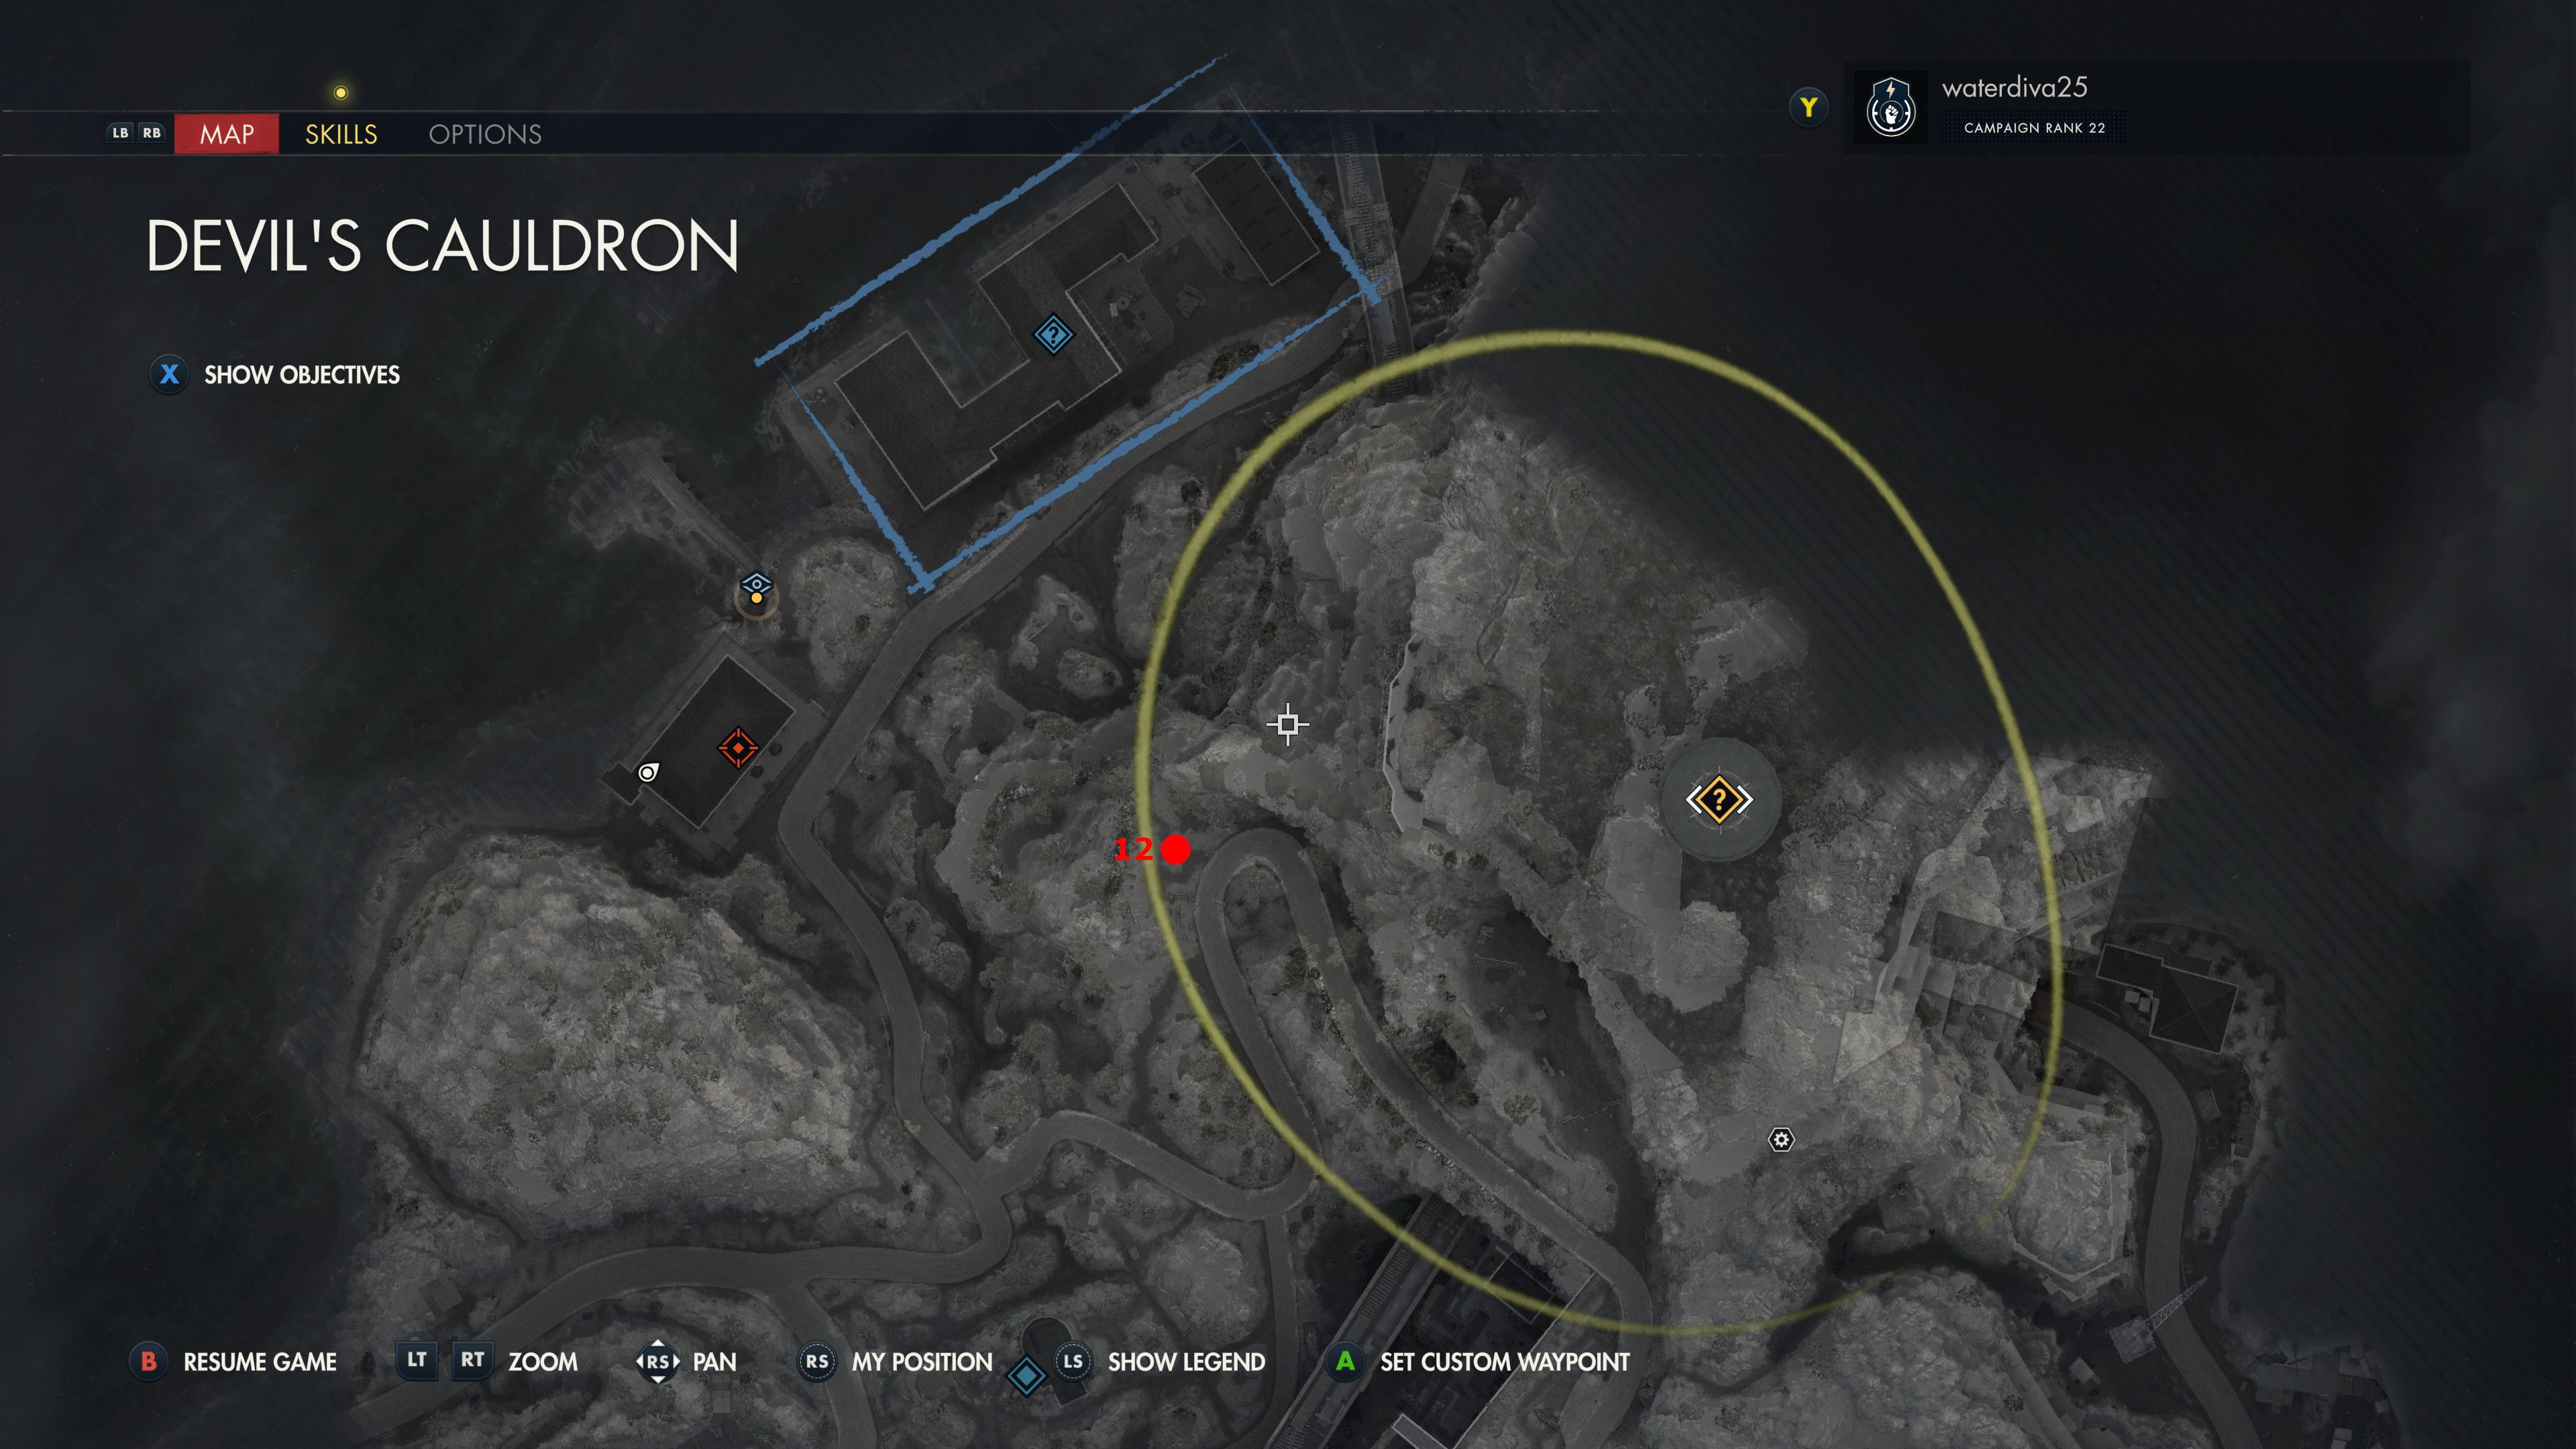

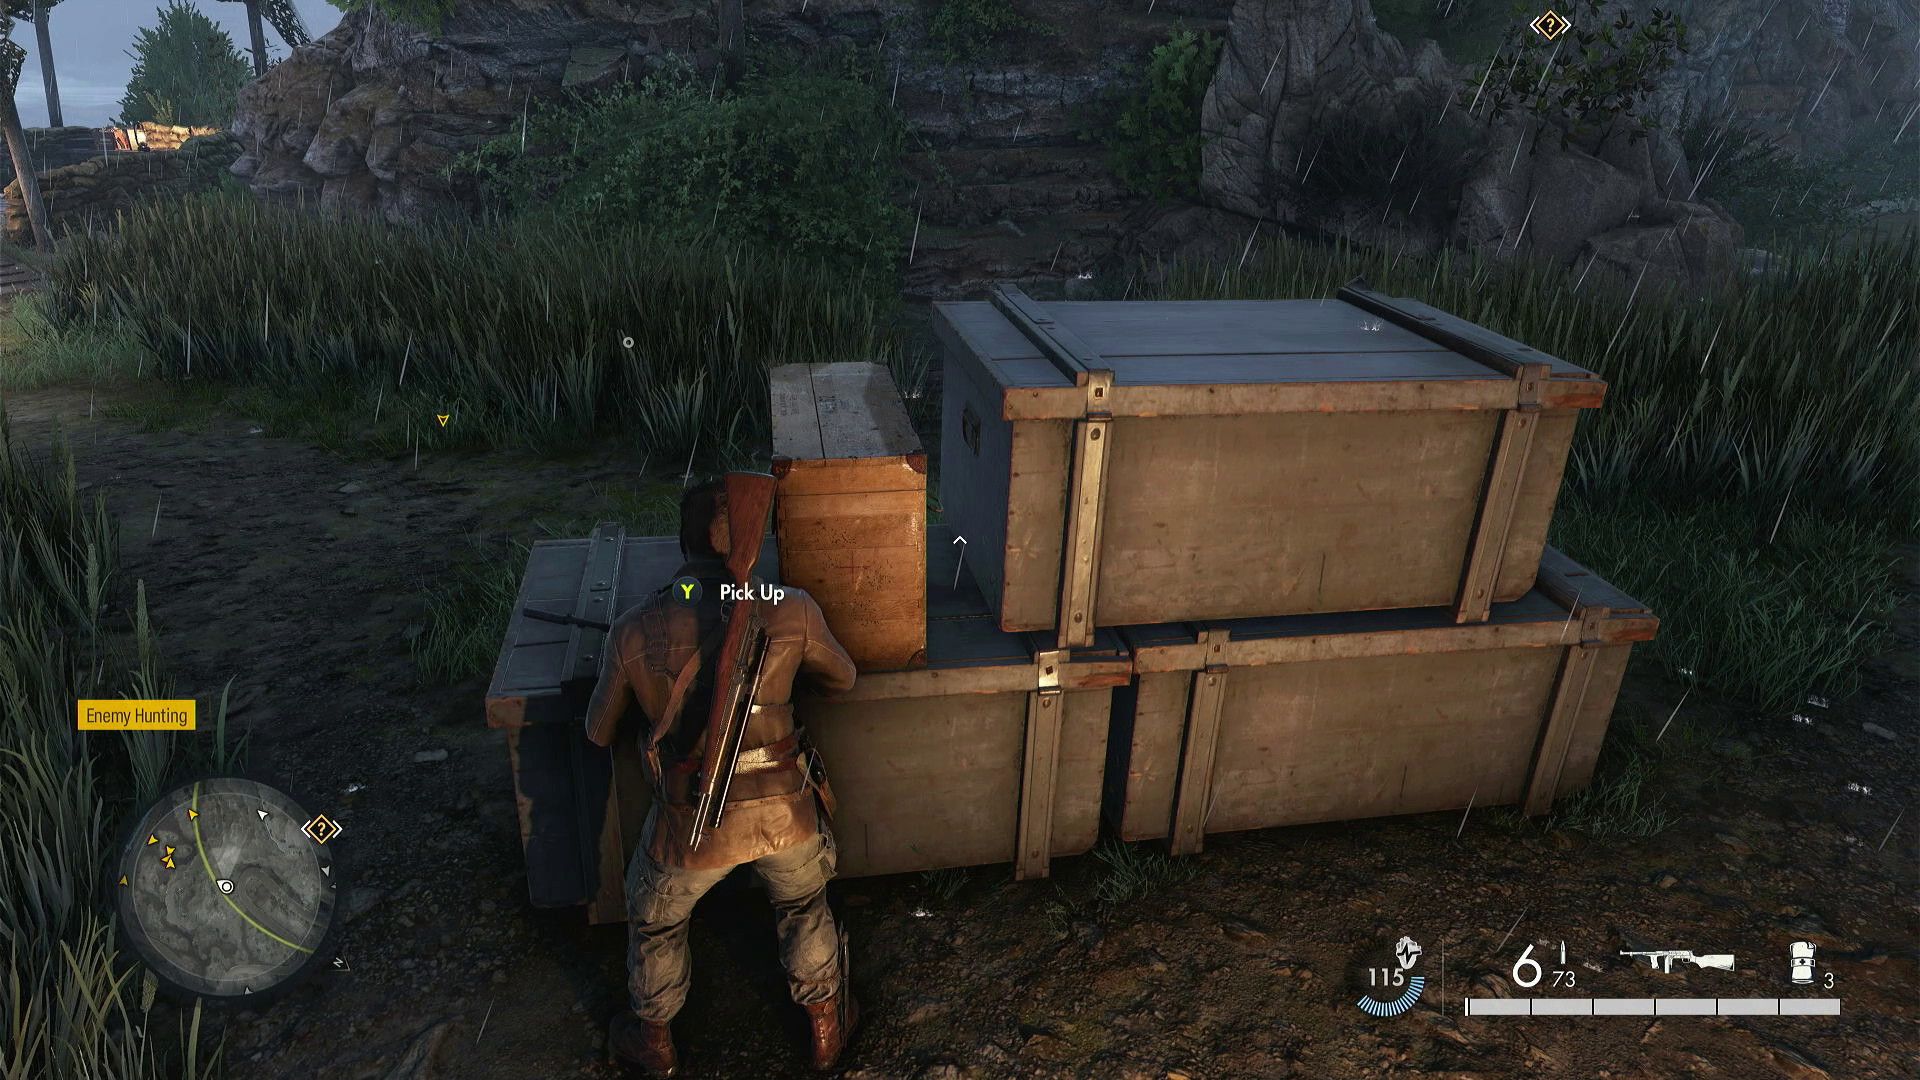
As I traverse the twisting trail towards the heart of the map, I’ll stumble upon a strategic point, a checkpoint. Just off to its side, you’ll find a pile of crates blocking the road. And here’s an intriguing secret, a concealed item, casually perched atop that very stack.
13. Hidden Items (Laboratory ID)
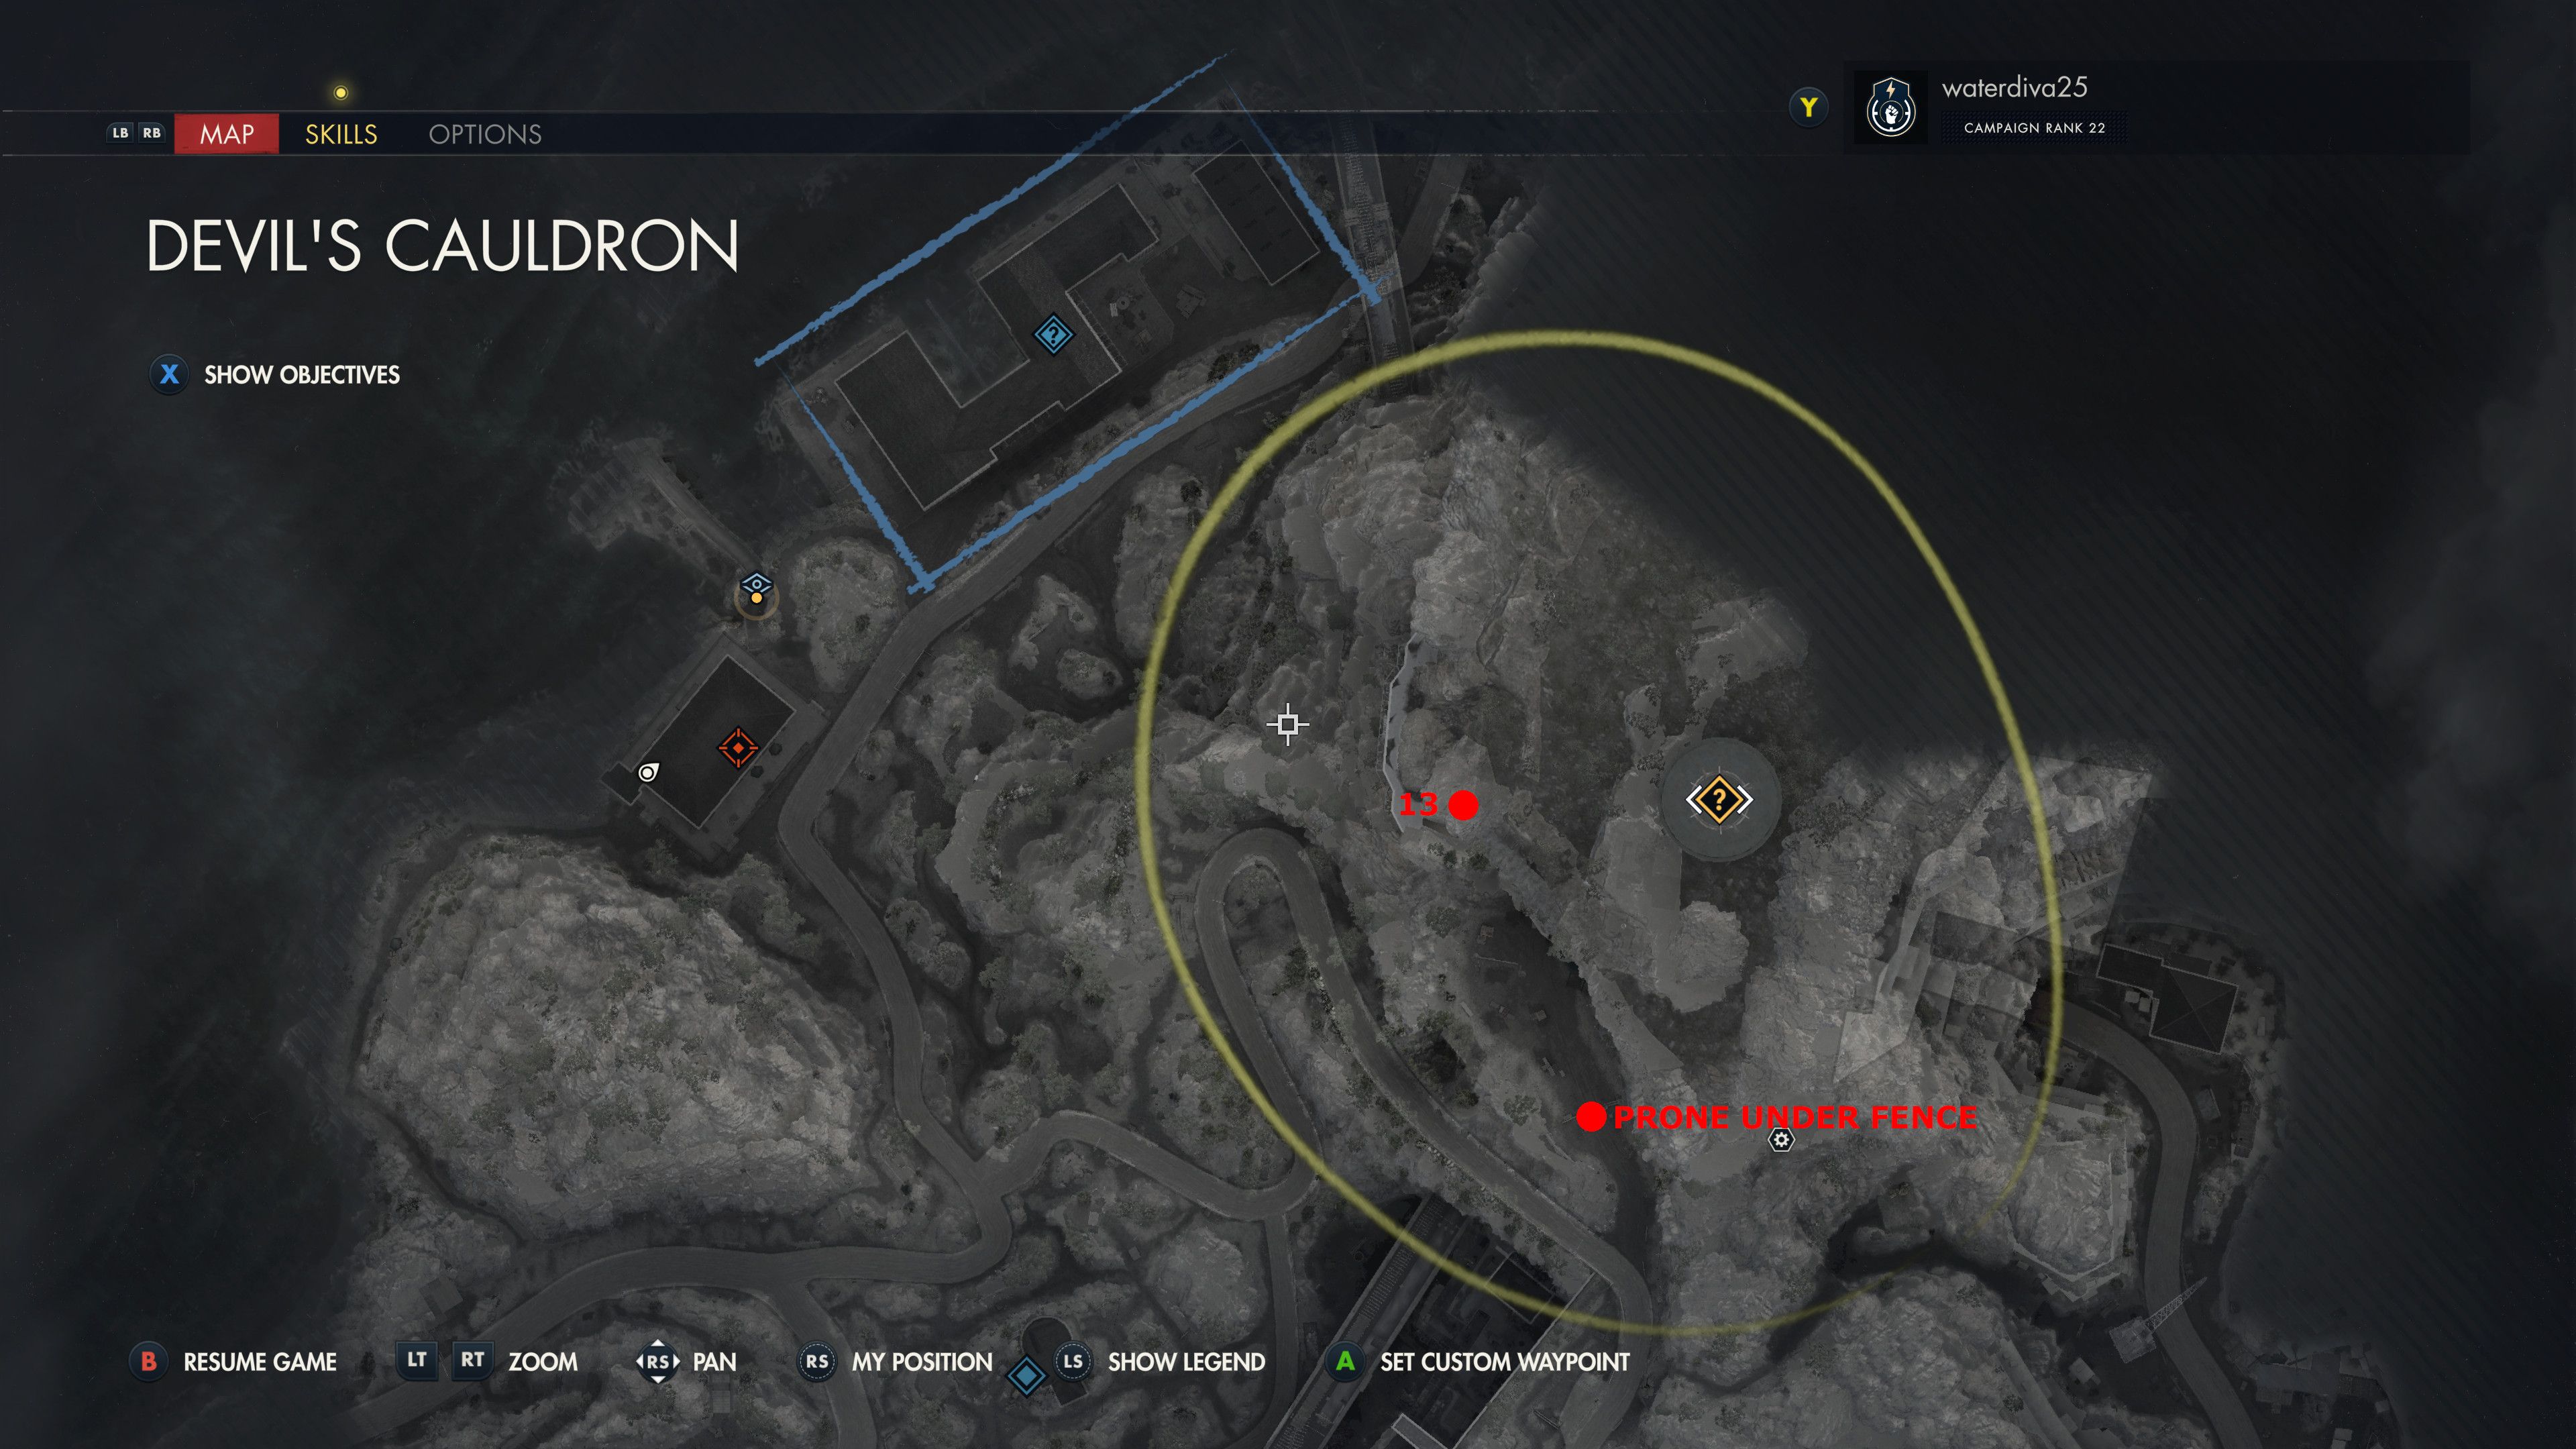
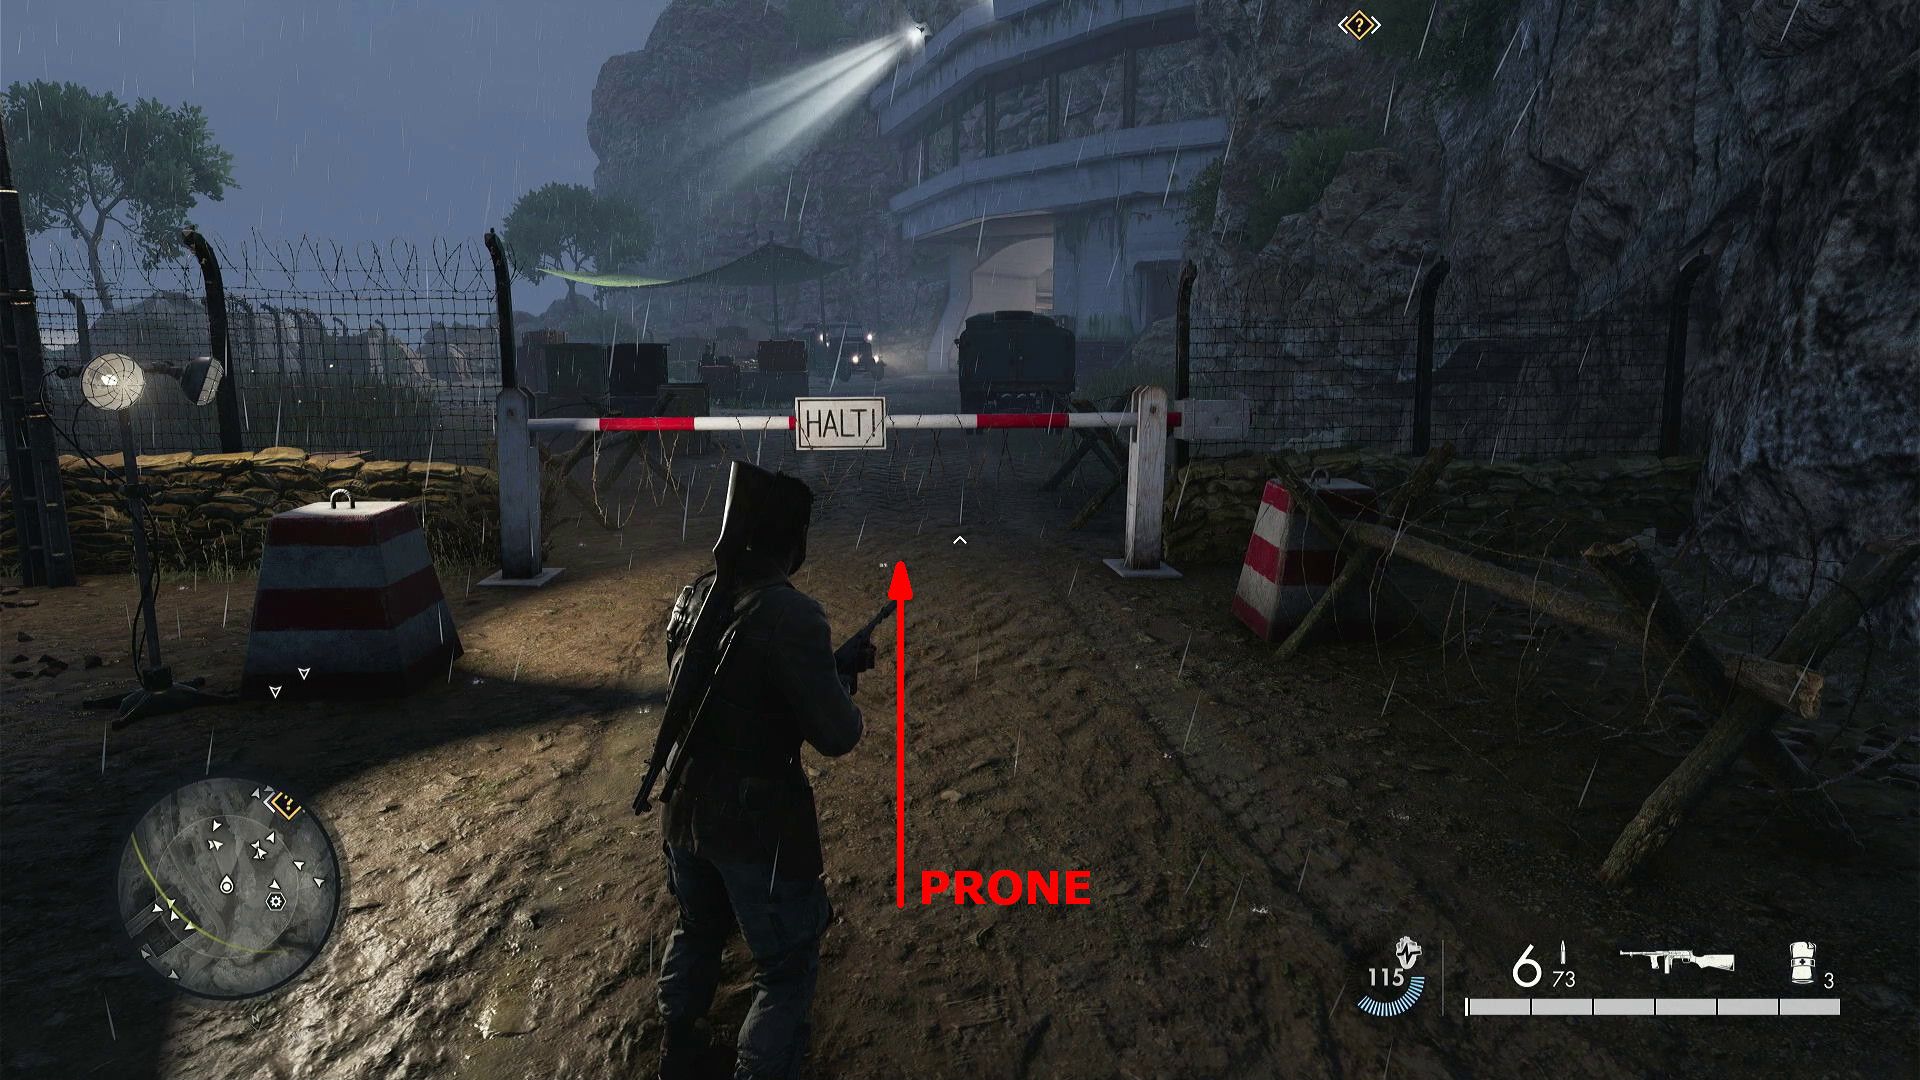
As players traverse the previously mentioned winding path, they will encounter a checkpoint barricade lying flat. Sniper Elite enthusiasts might want to lie down and slither under that obstacle, after which they should perform the following steps to uncover the Concealed Object:
- Enter the tunnel that is ahead.
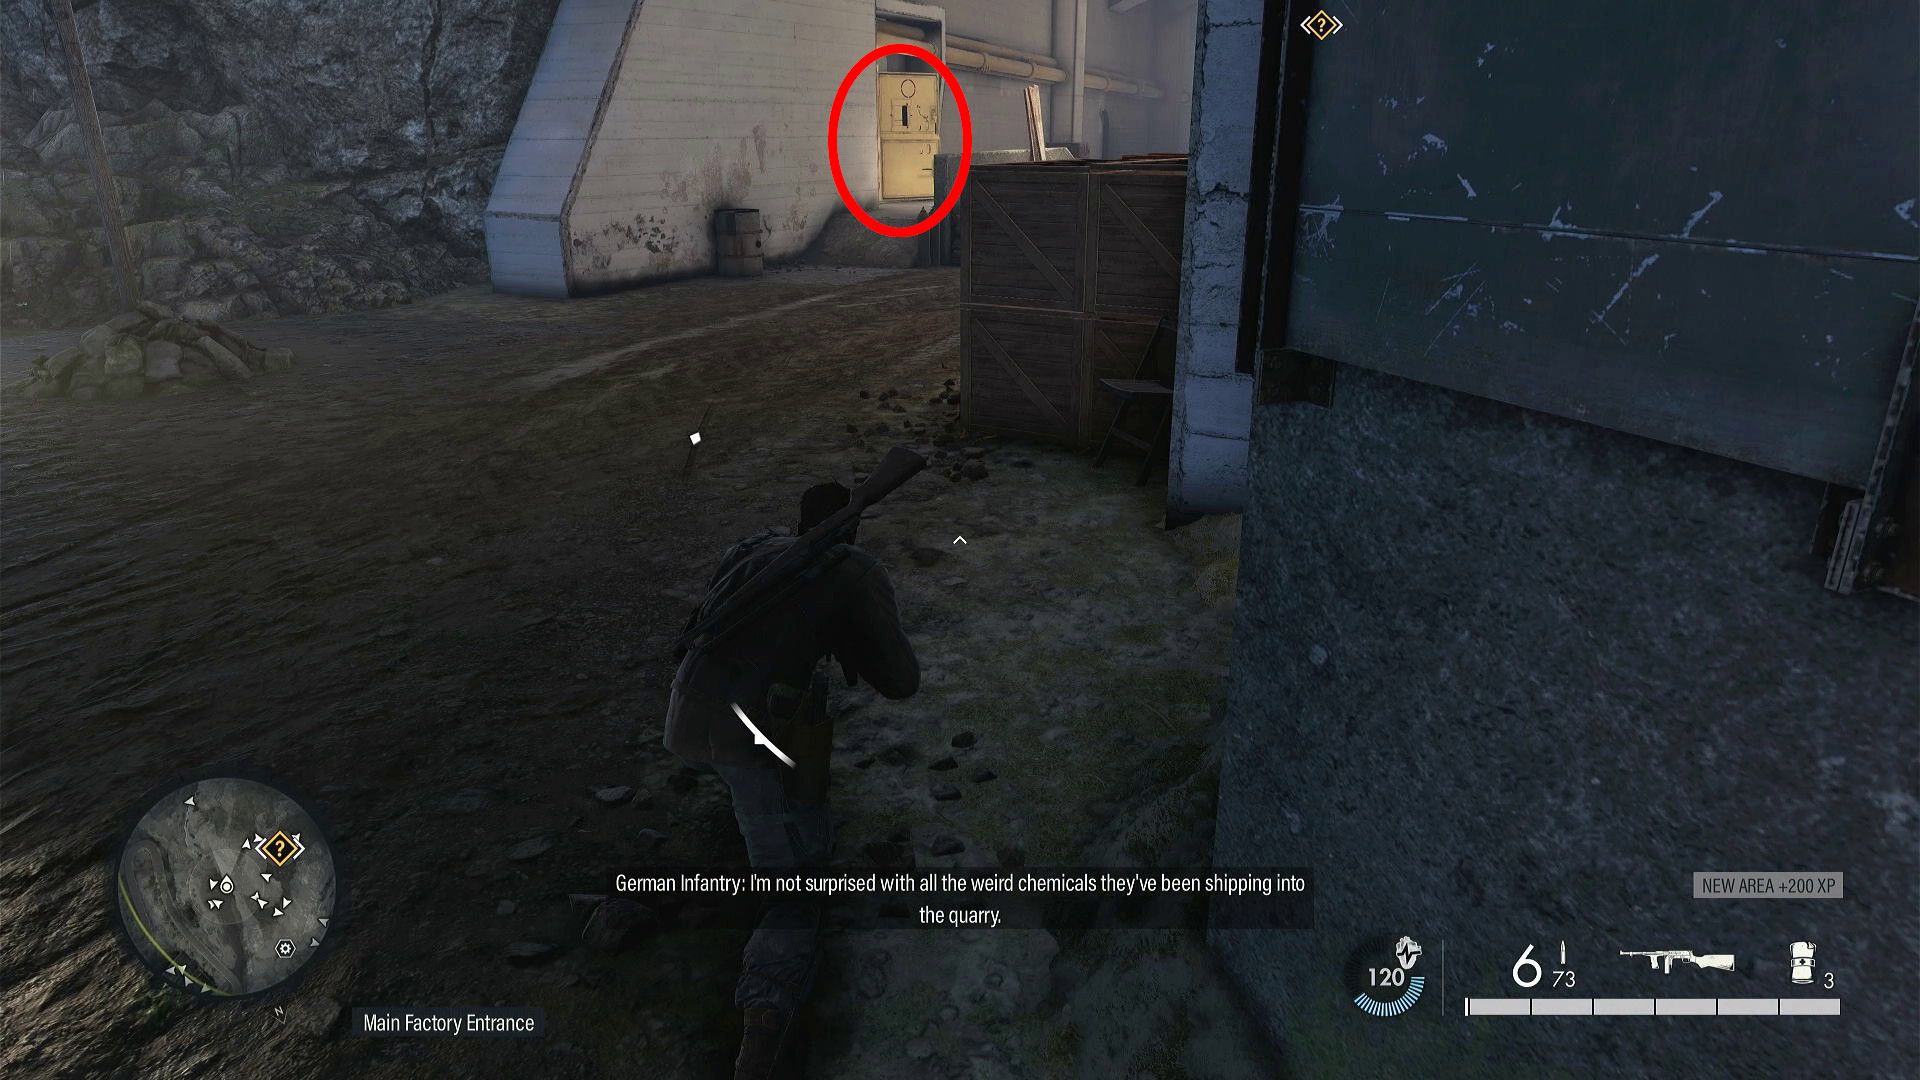
- Pass through the yellow door on the left.
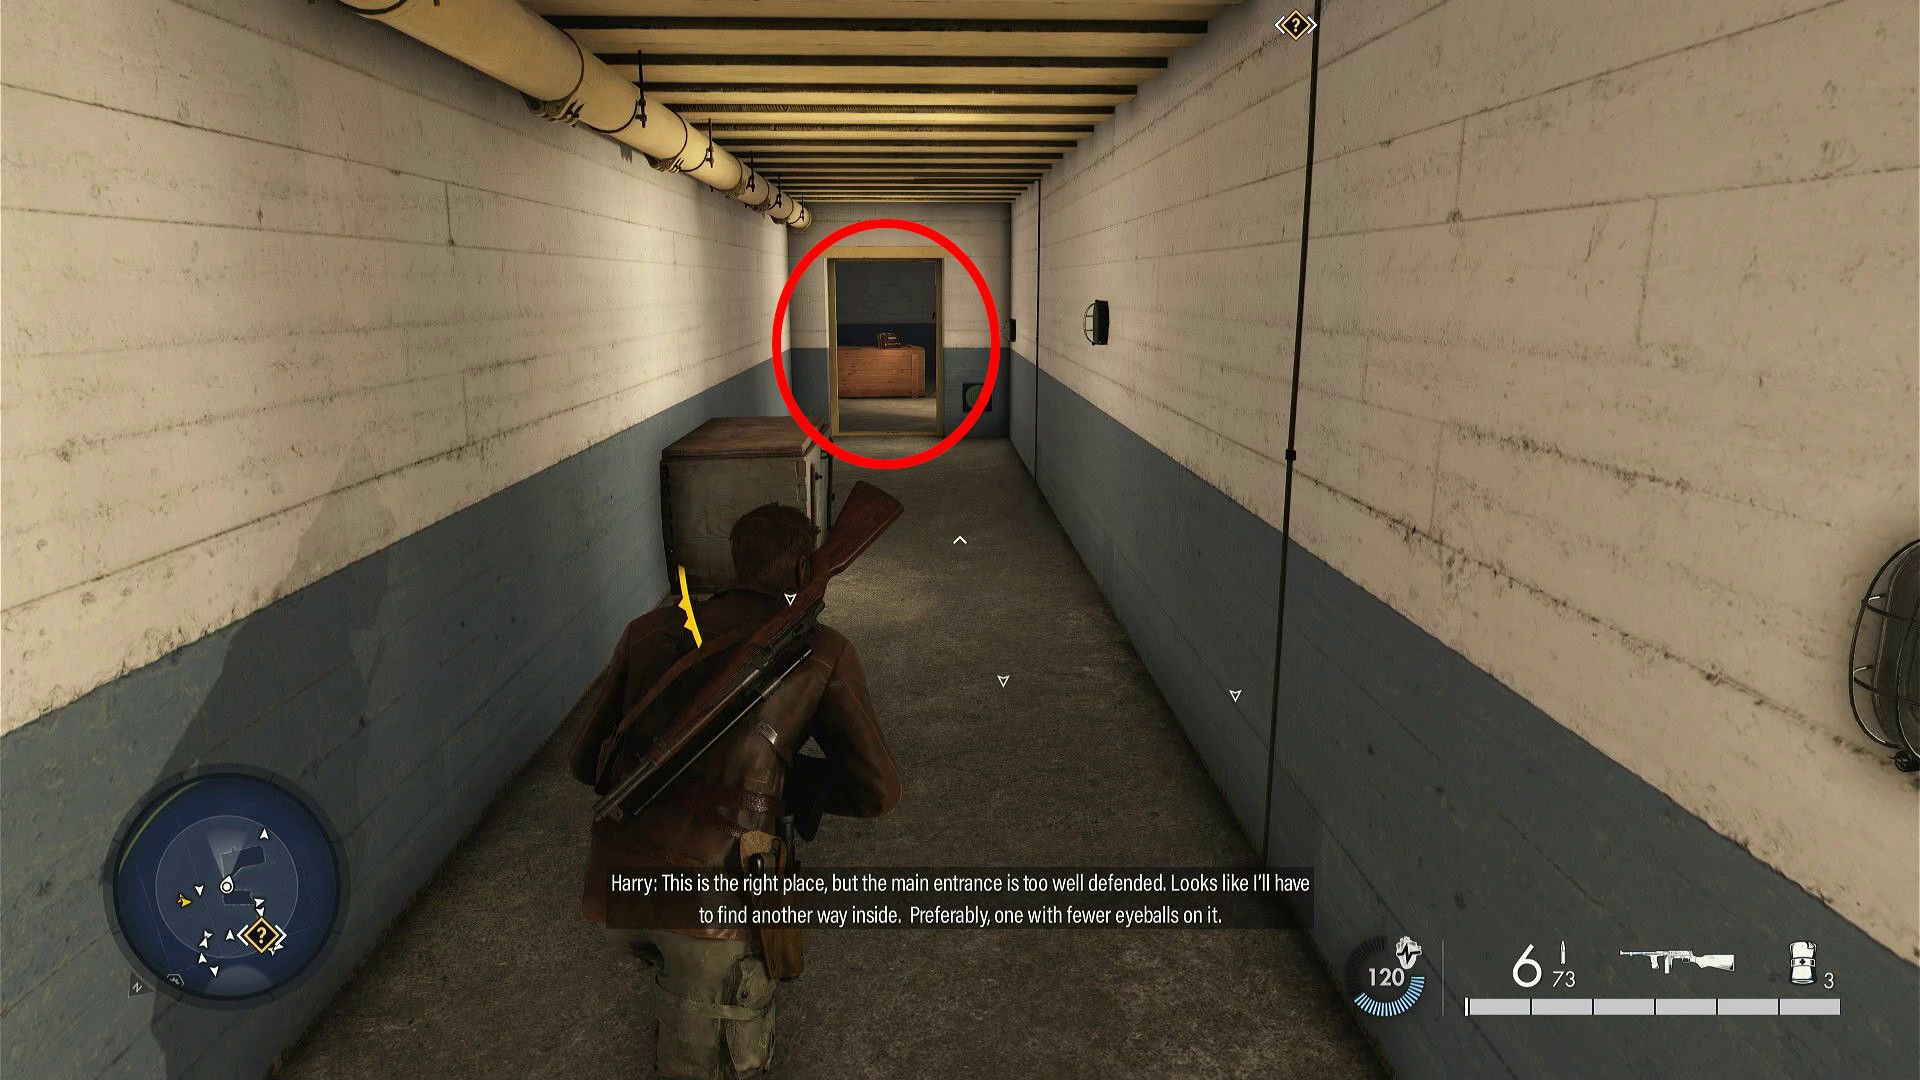
- Follow the hallway until it makes a 90 degree turn.
- At the turn, look right and enter a small room.
- Check the table.
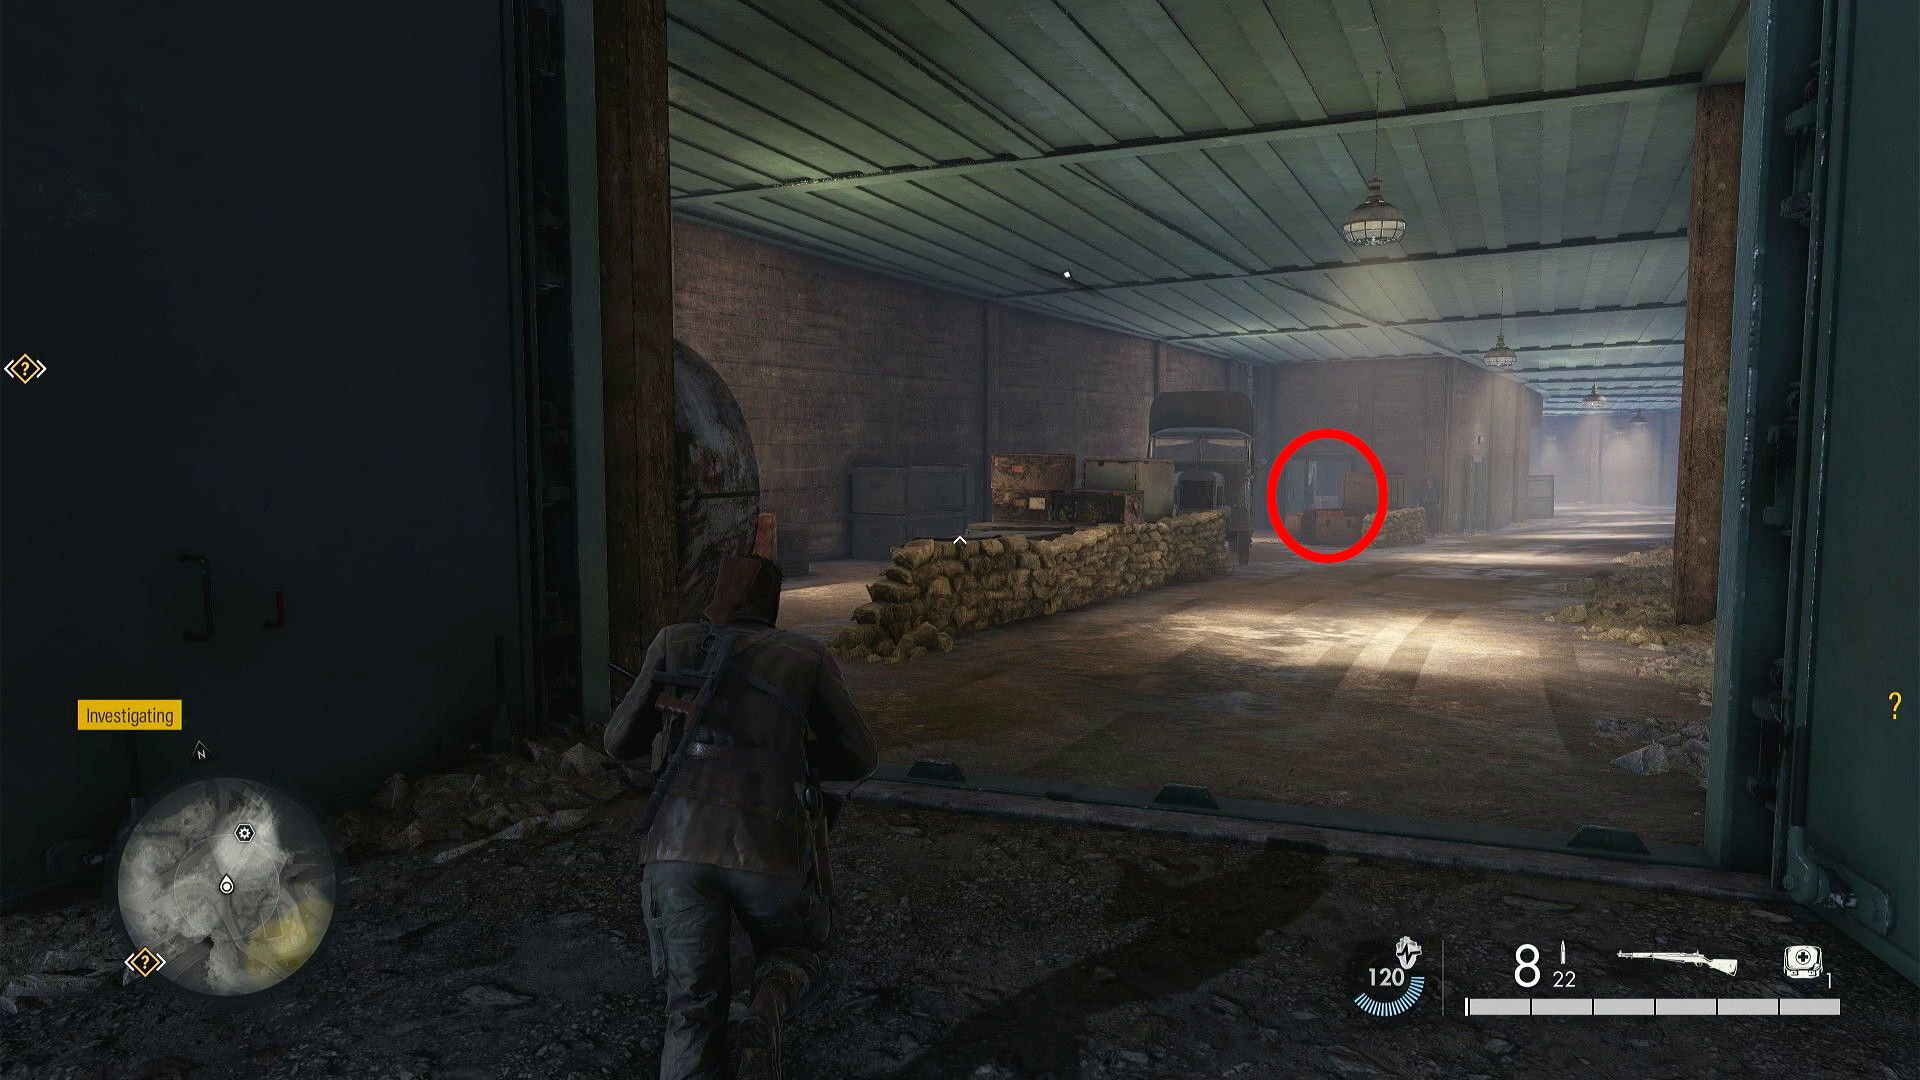
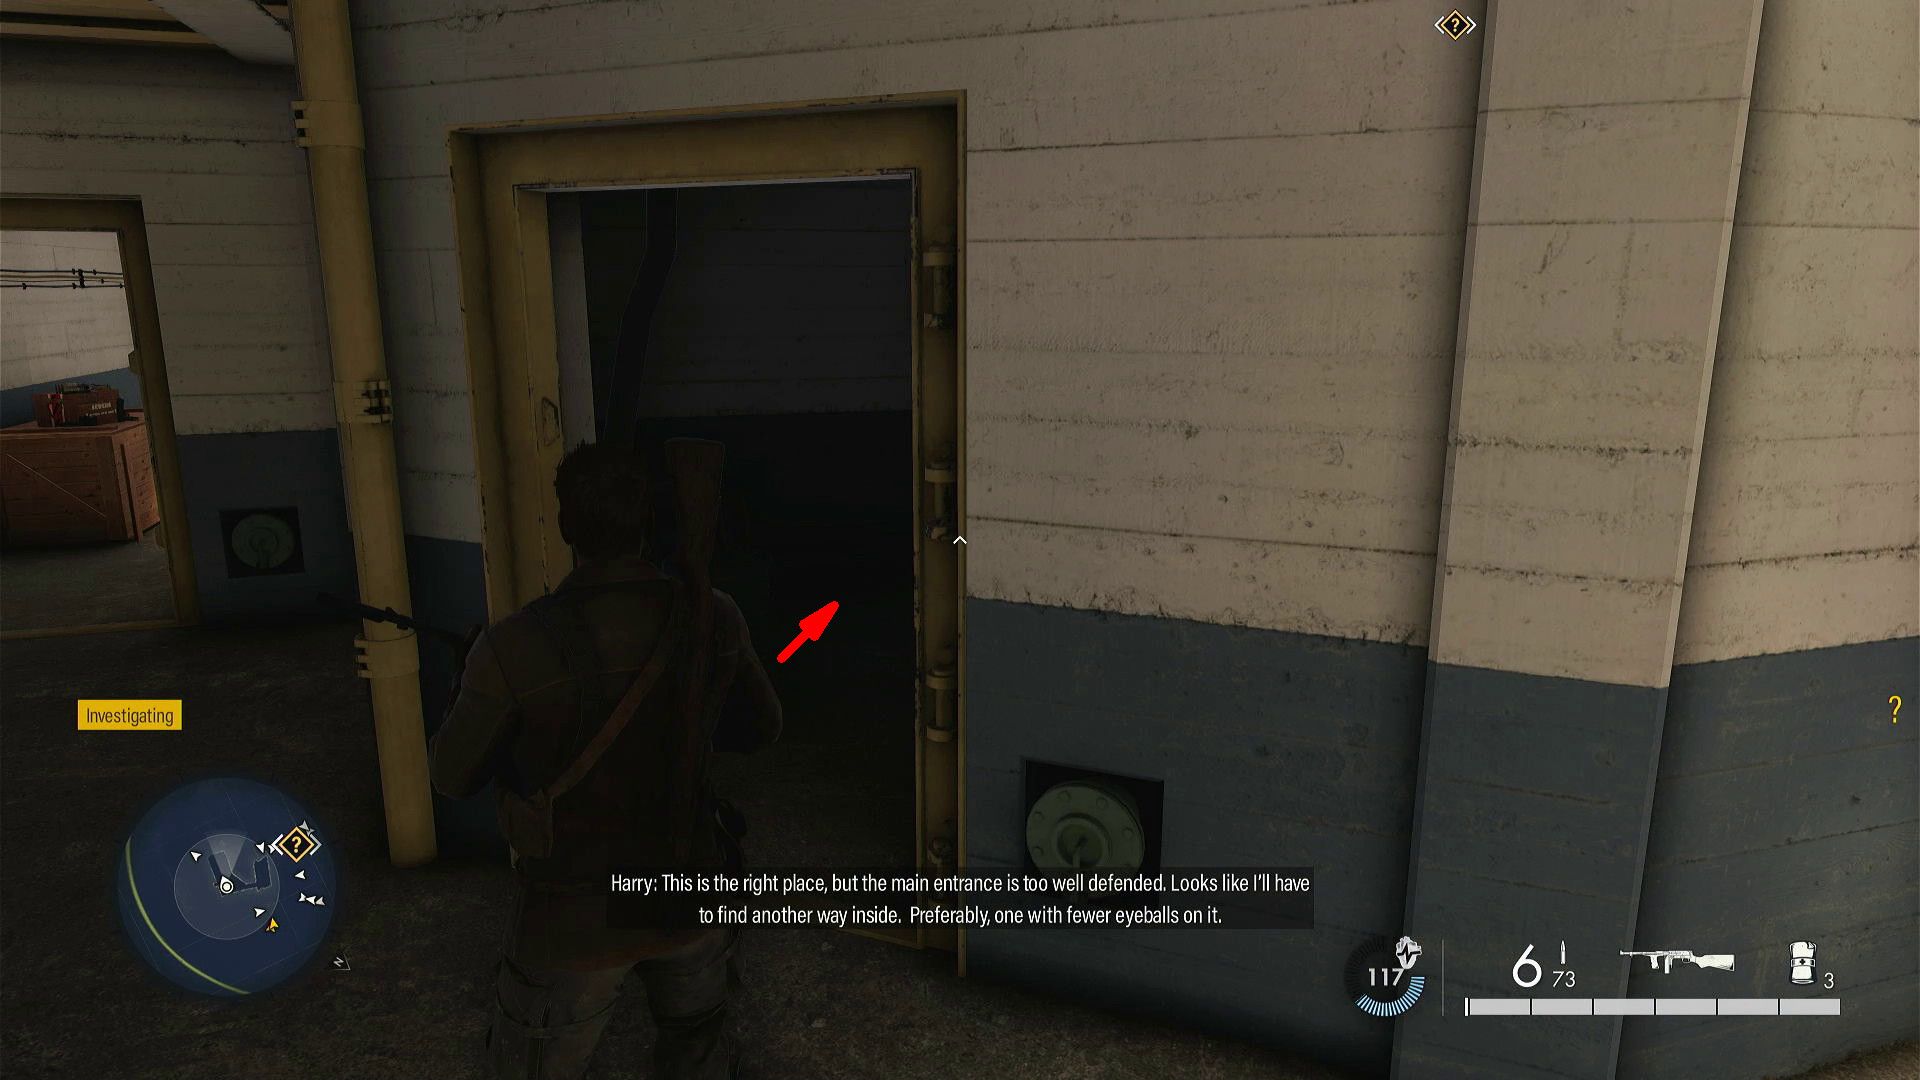
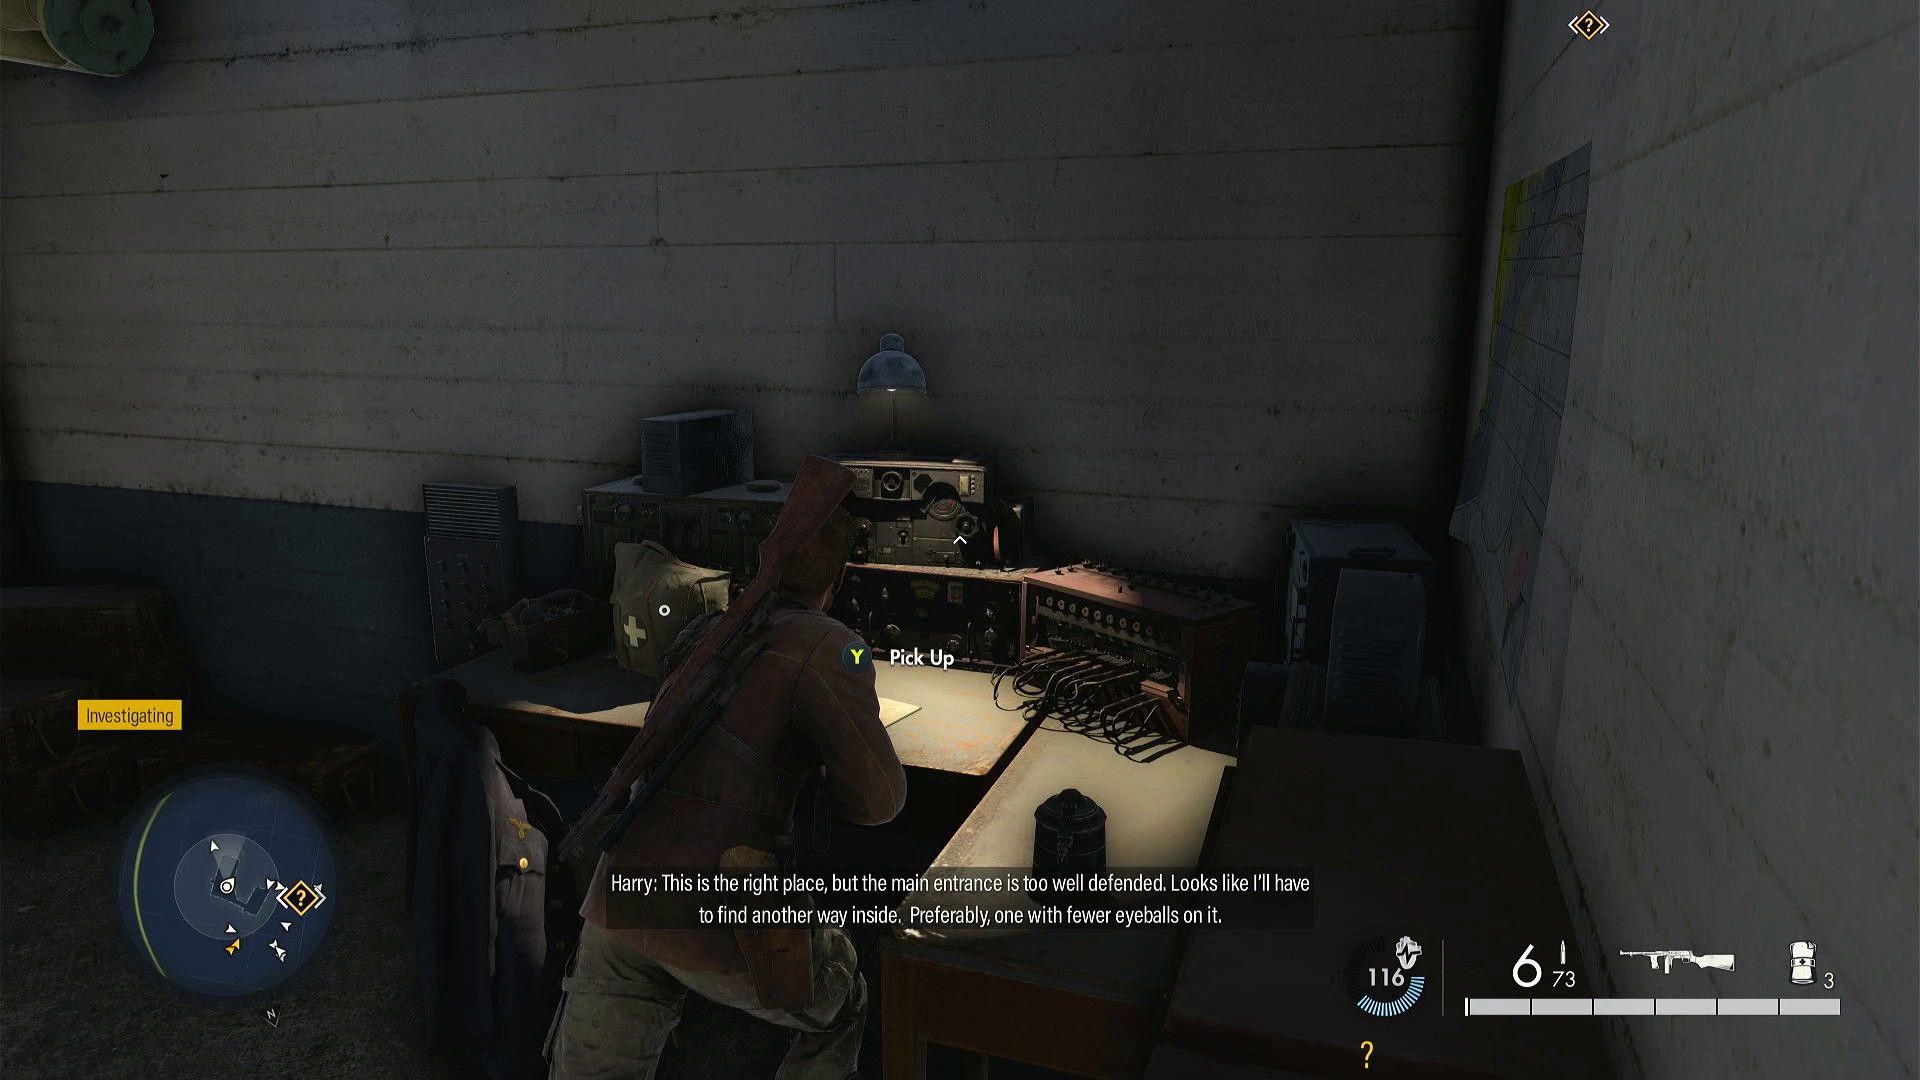
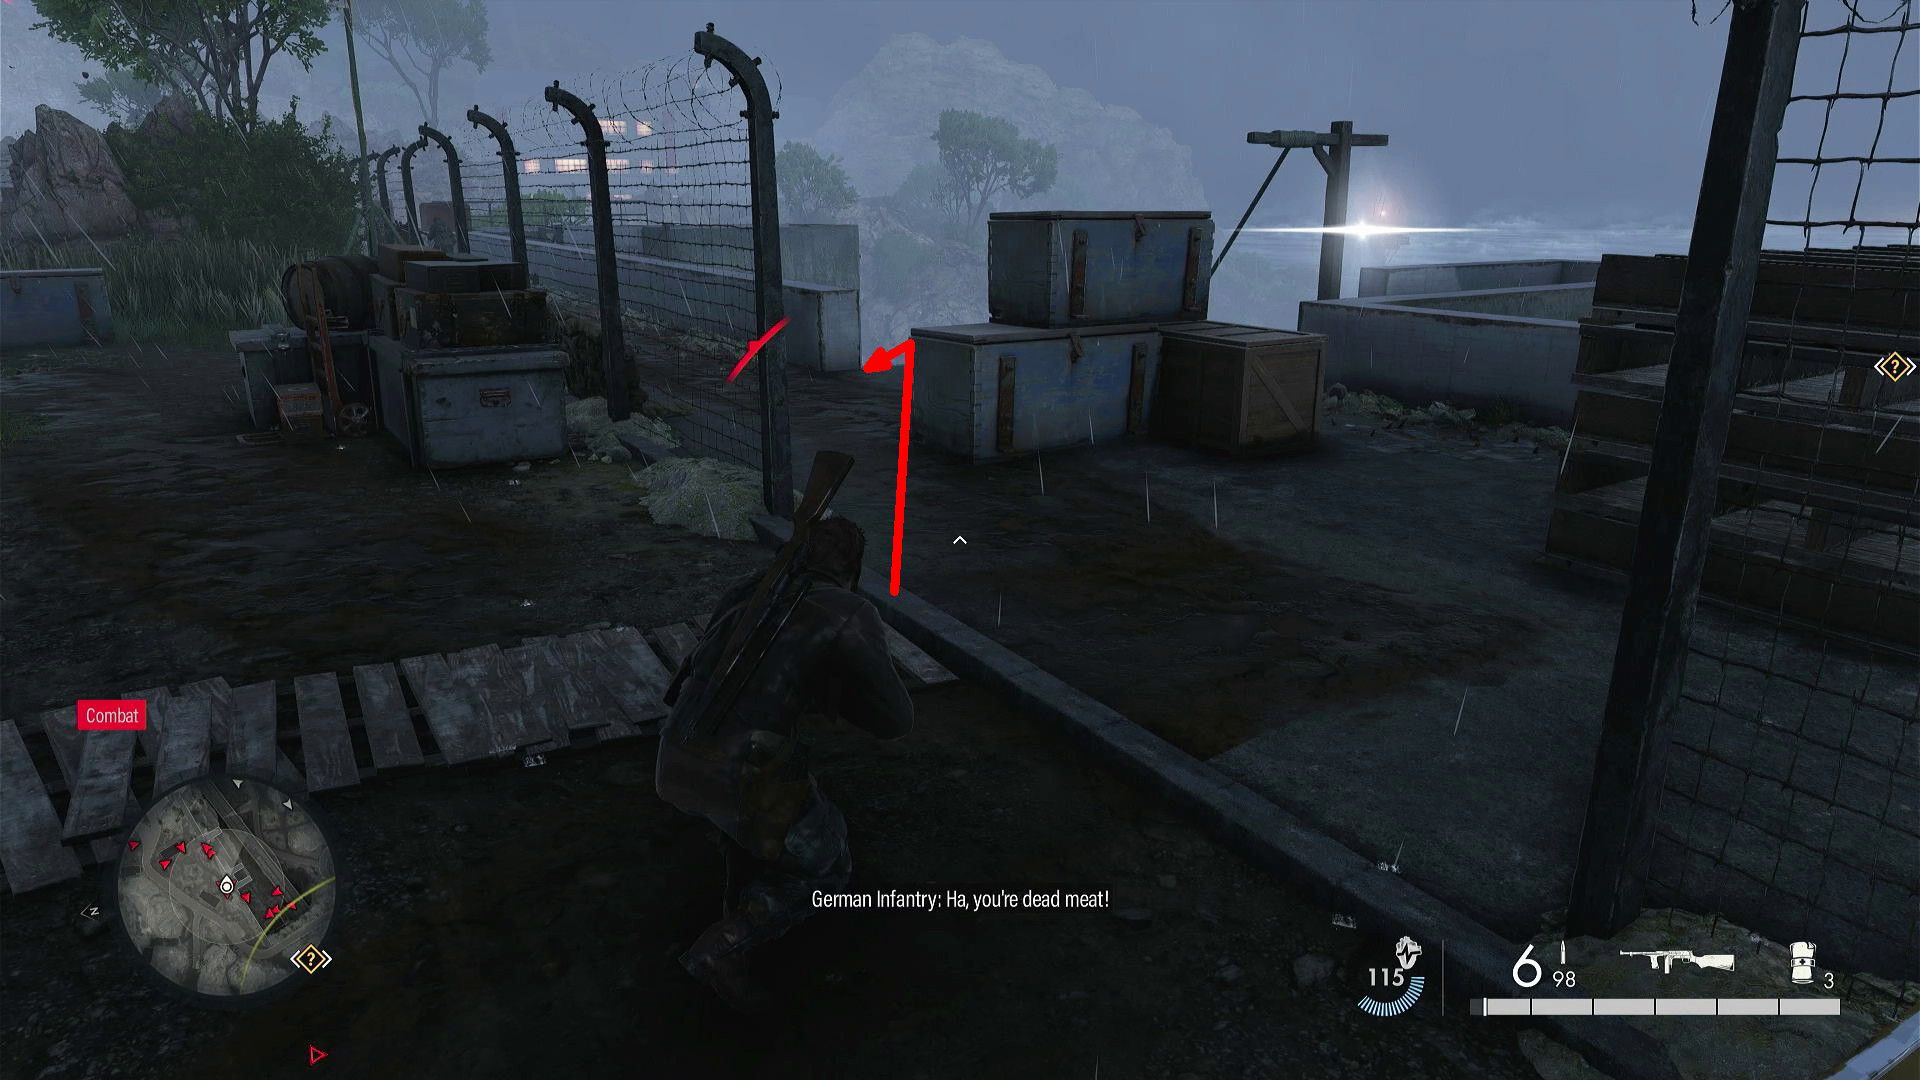
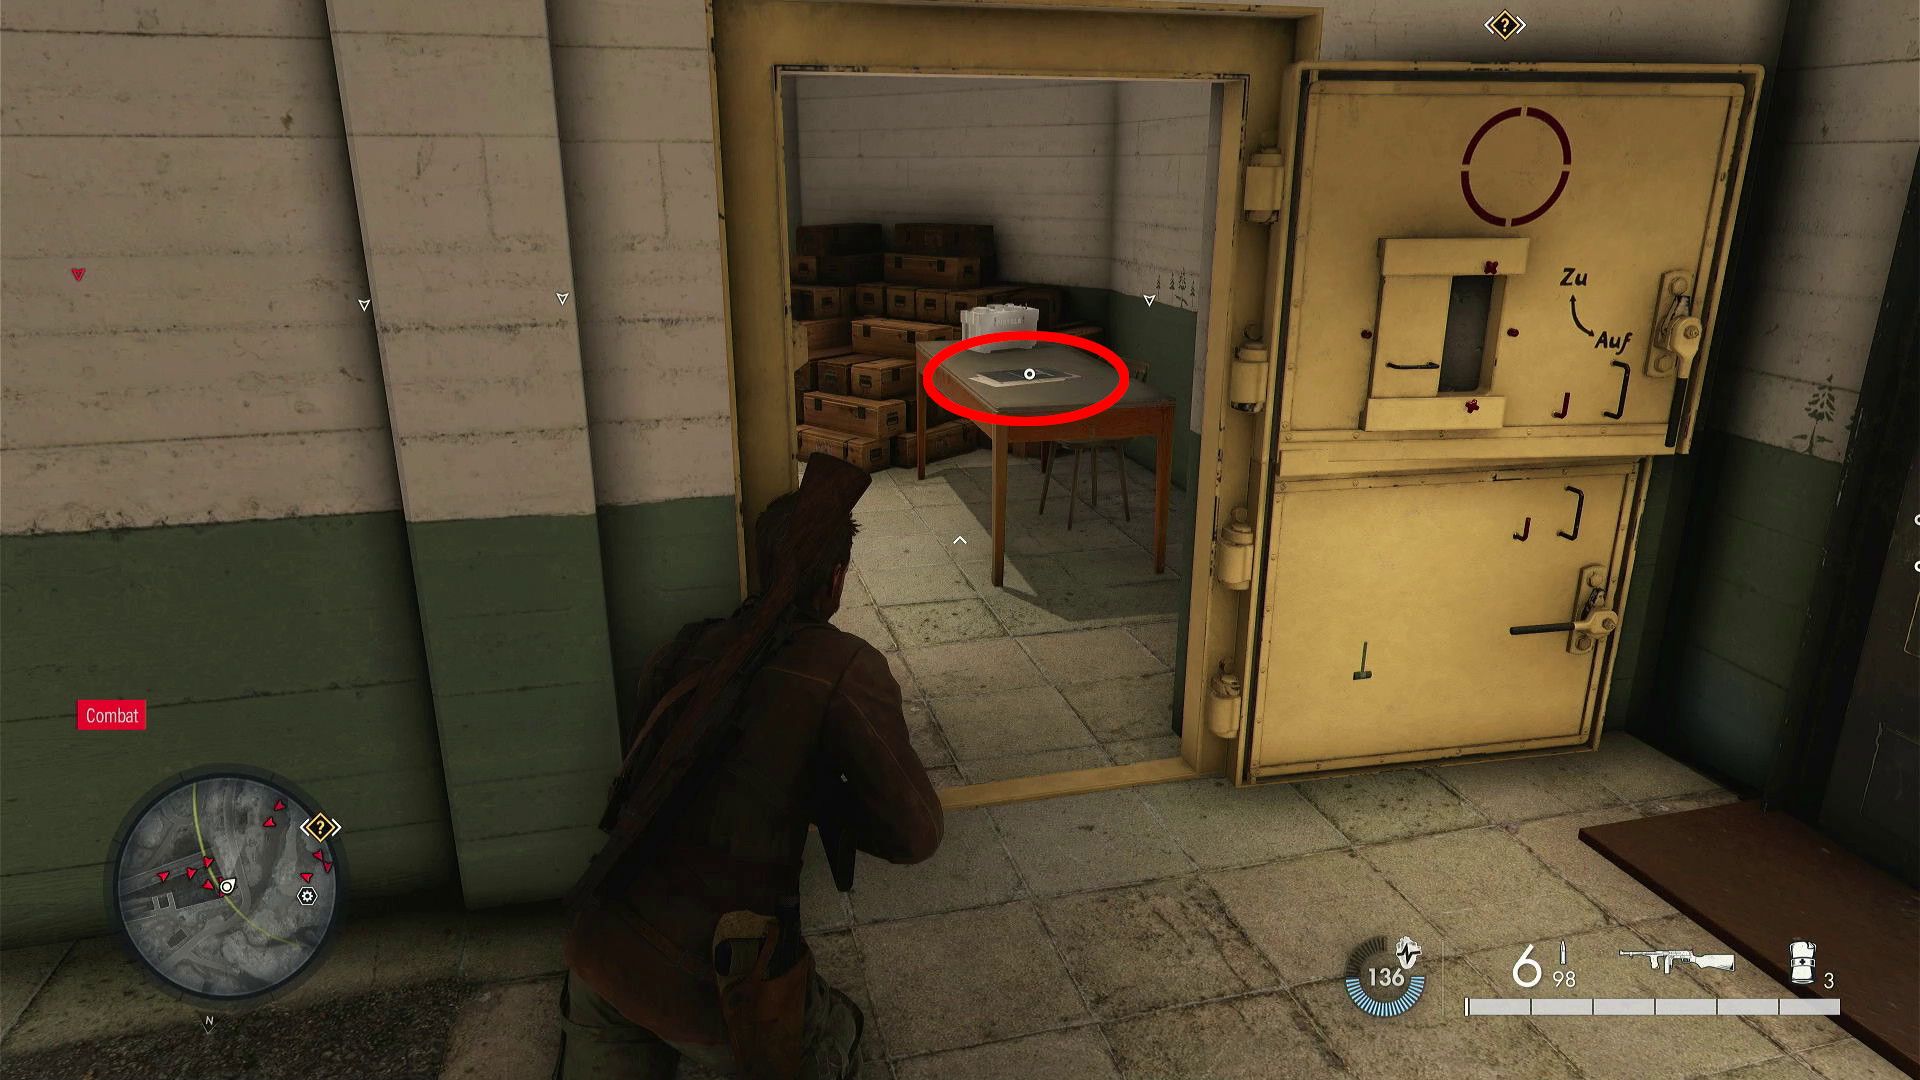
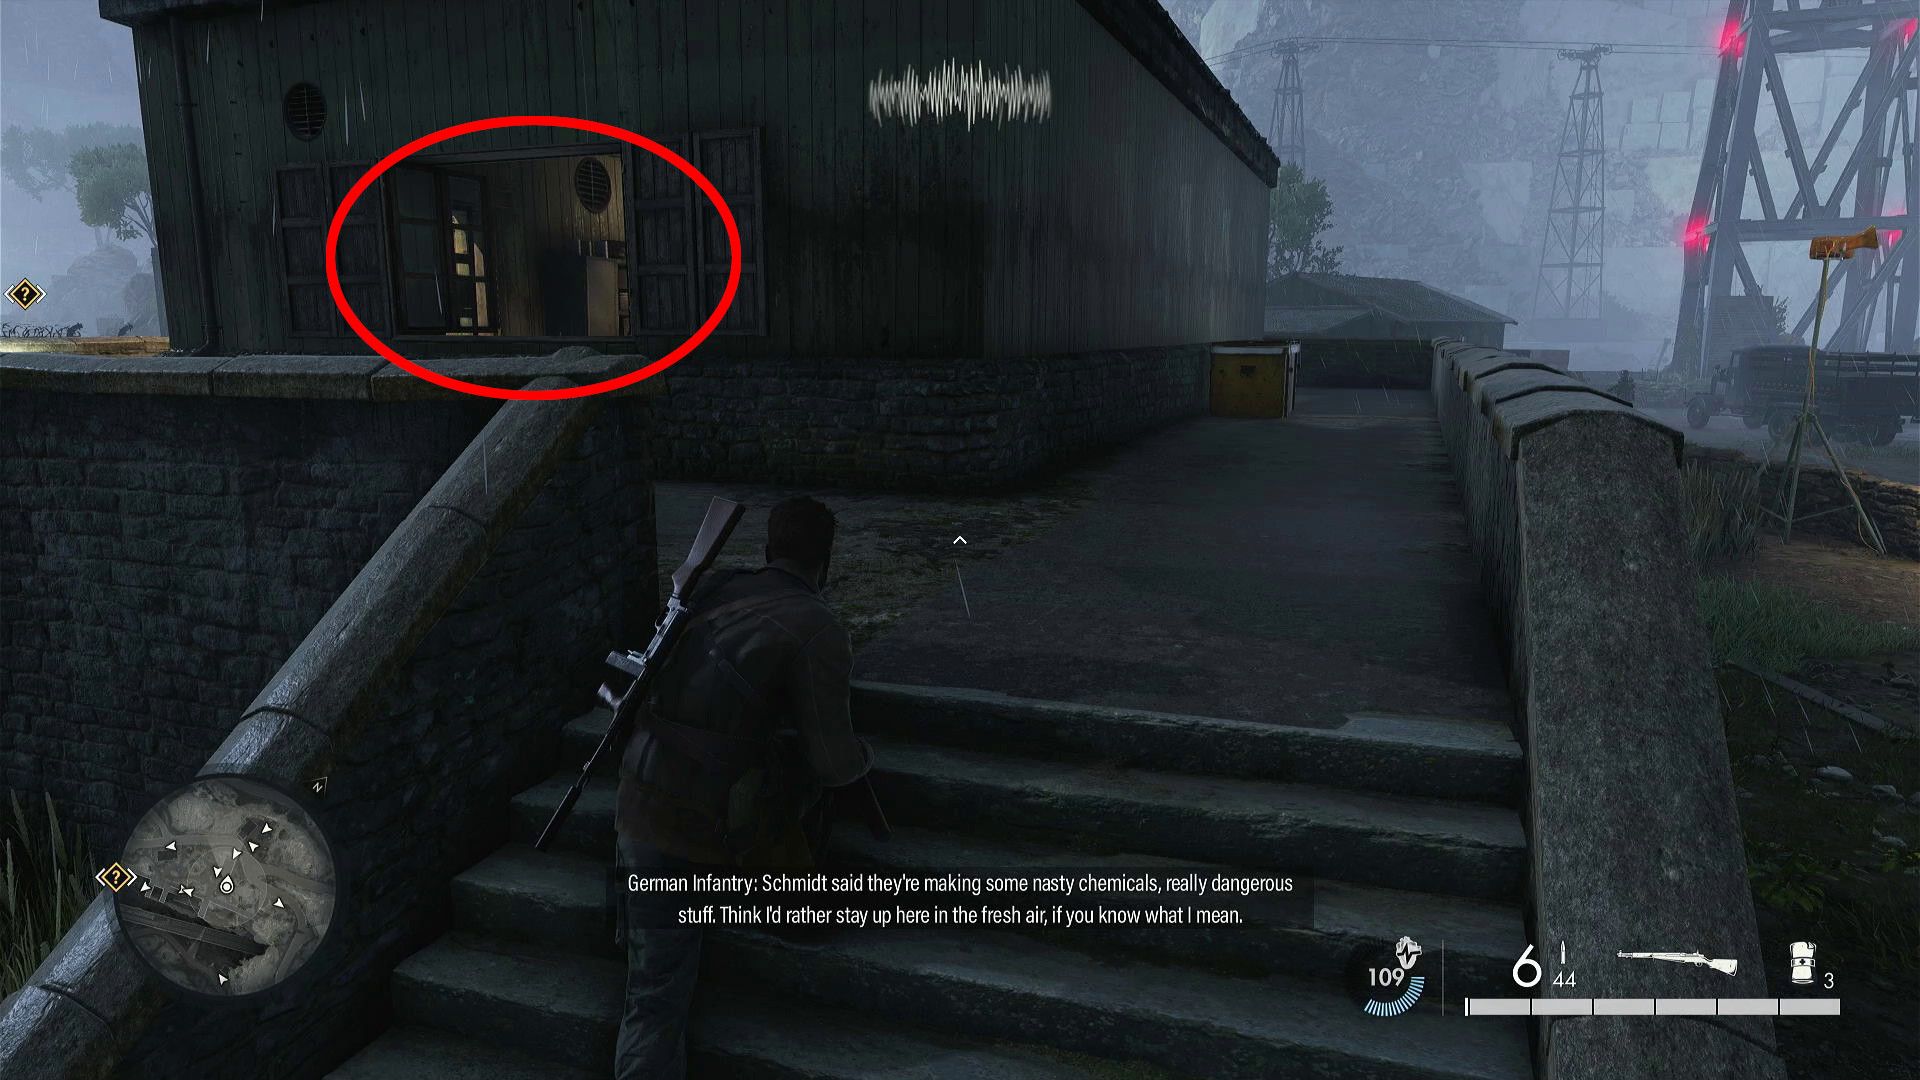
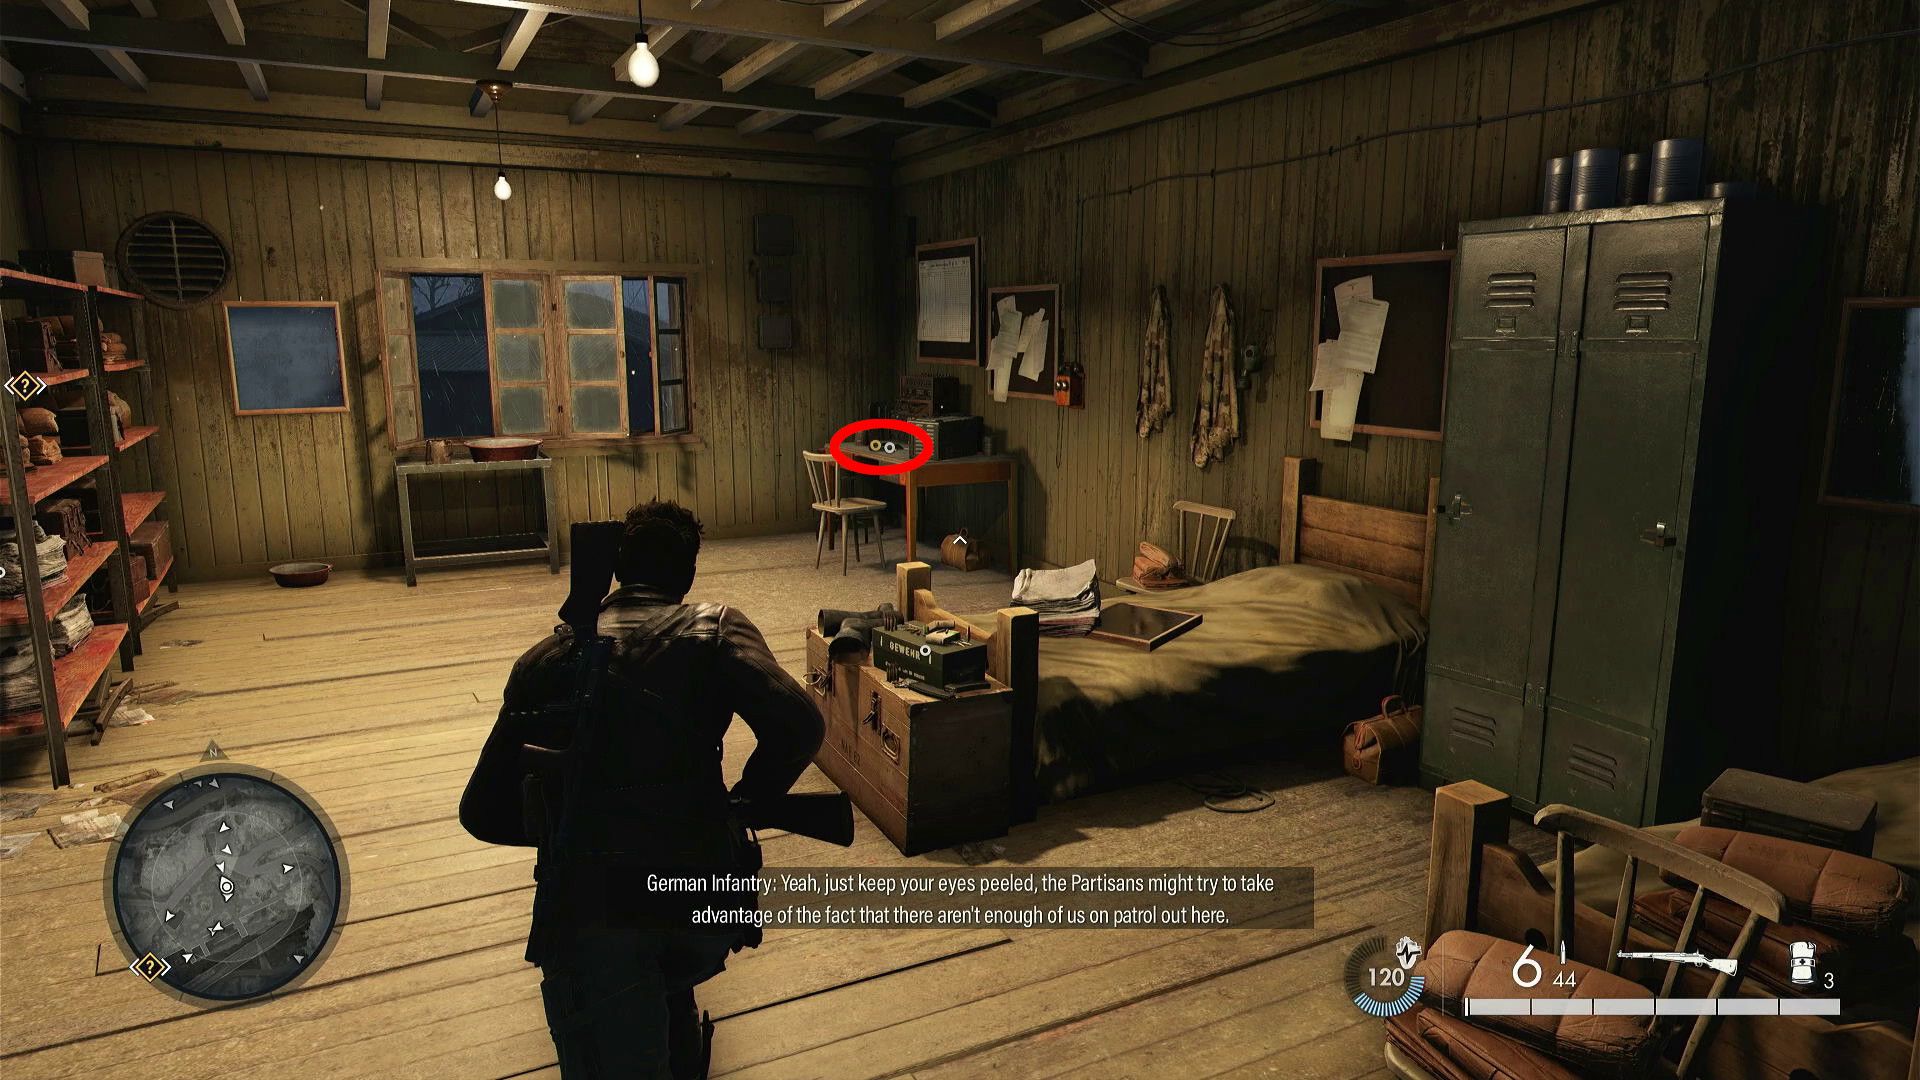
14. Classified Documents (Intruder Spotted)
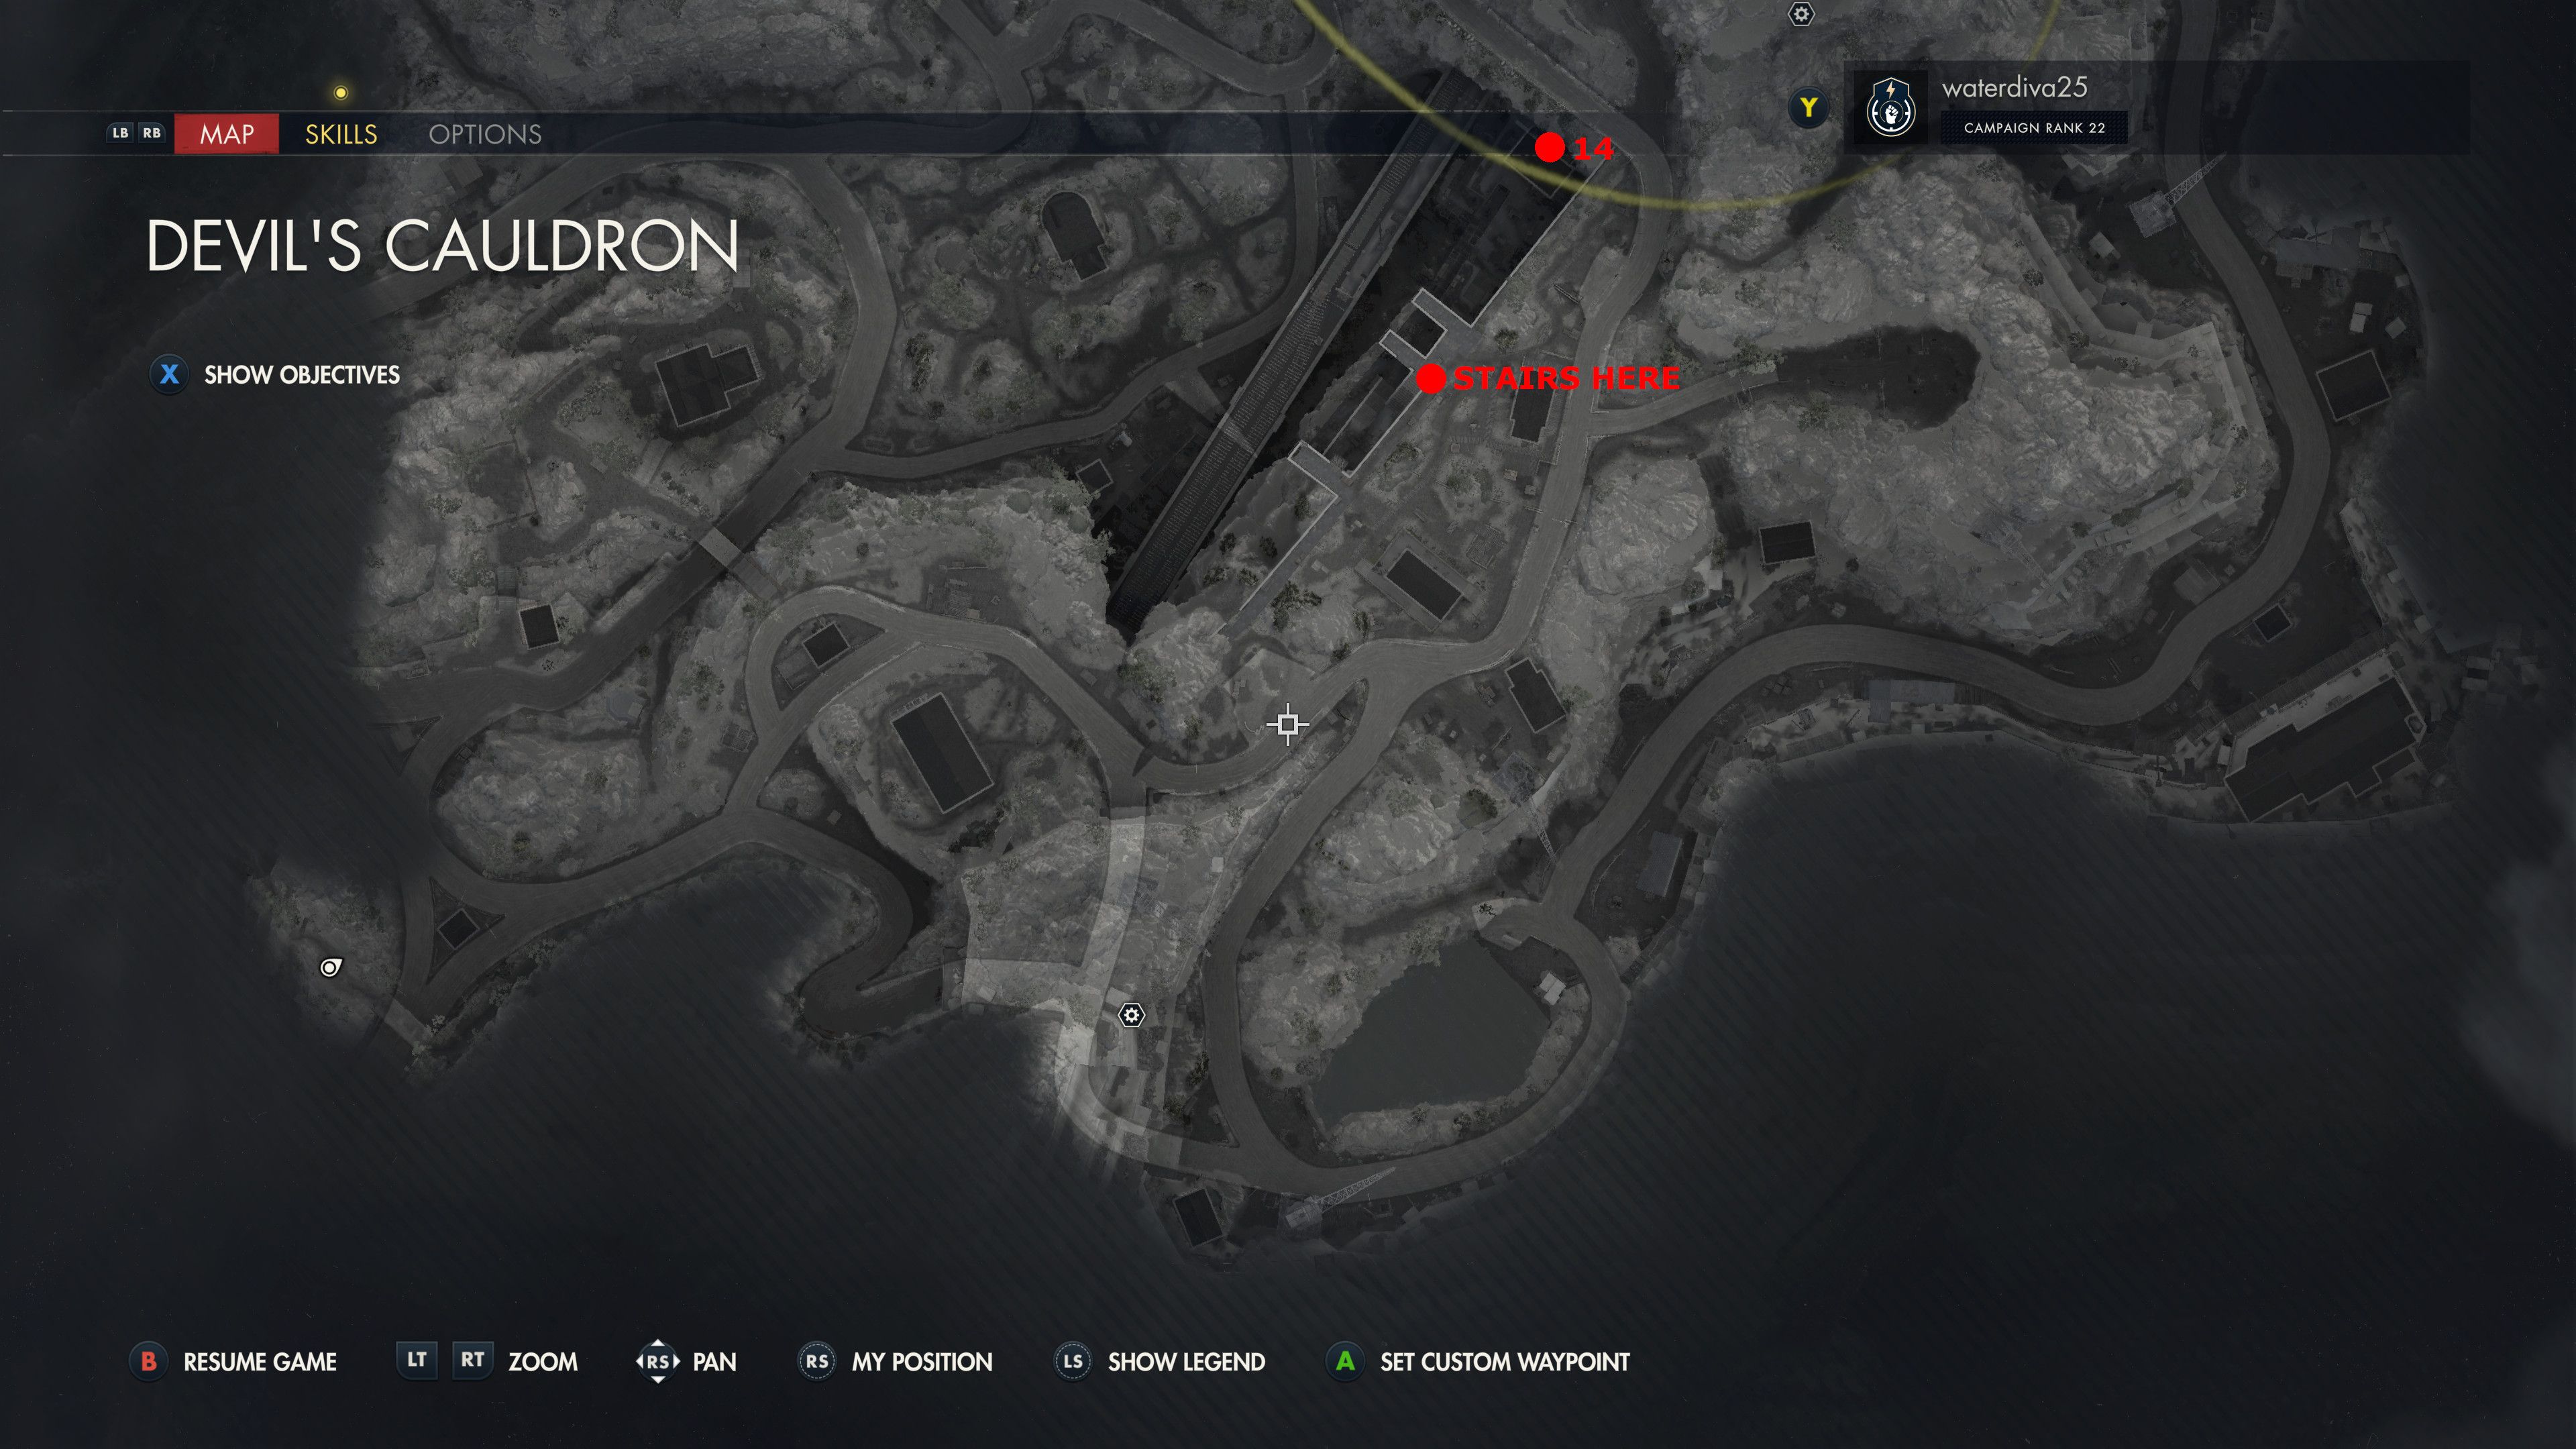
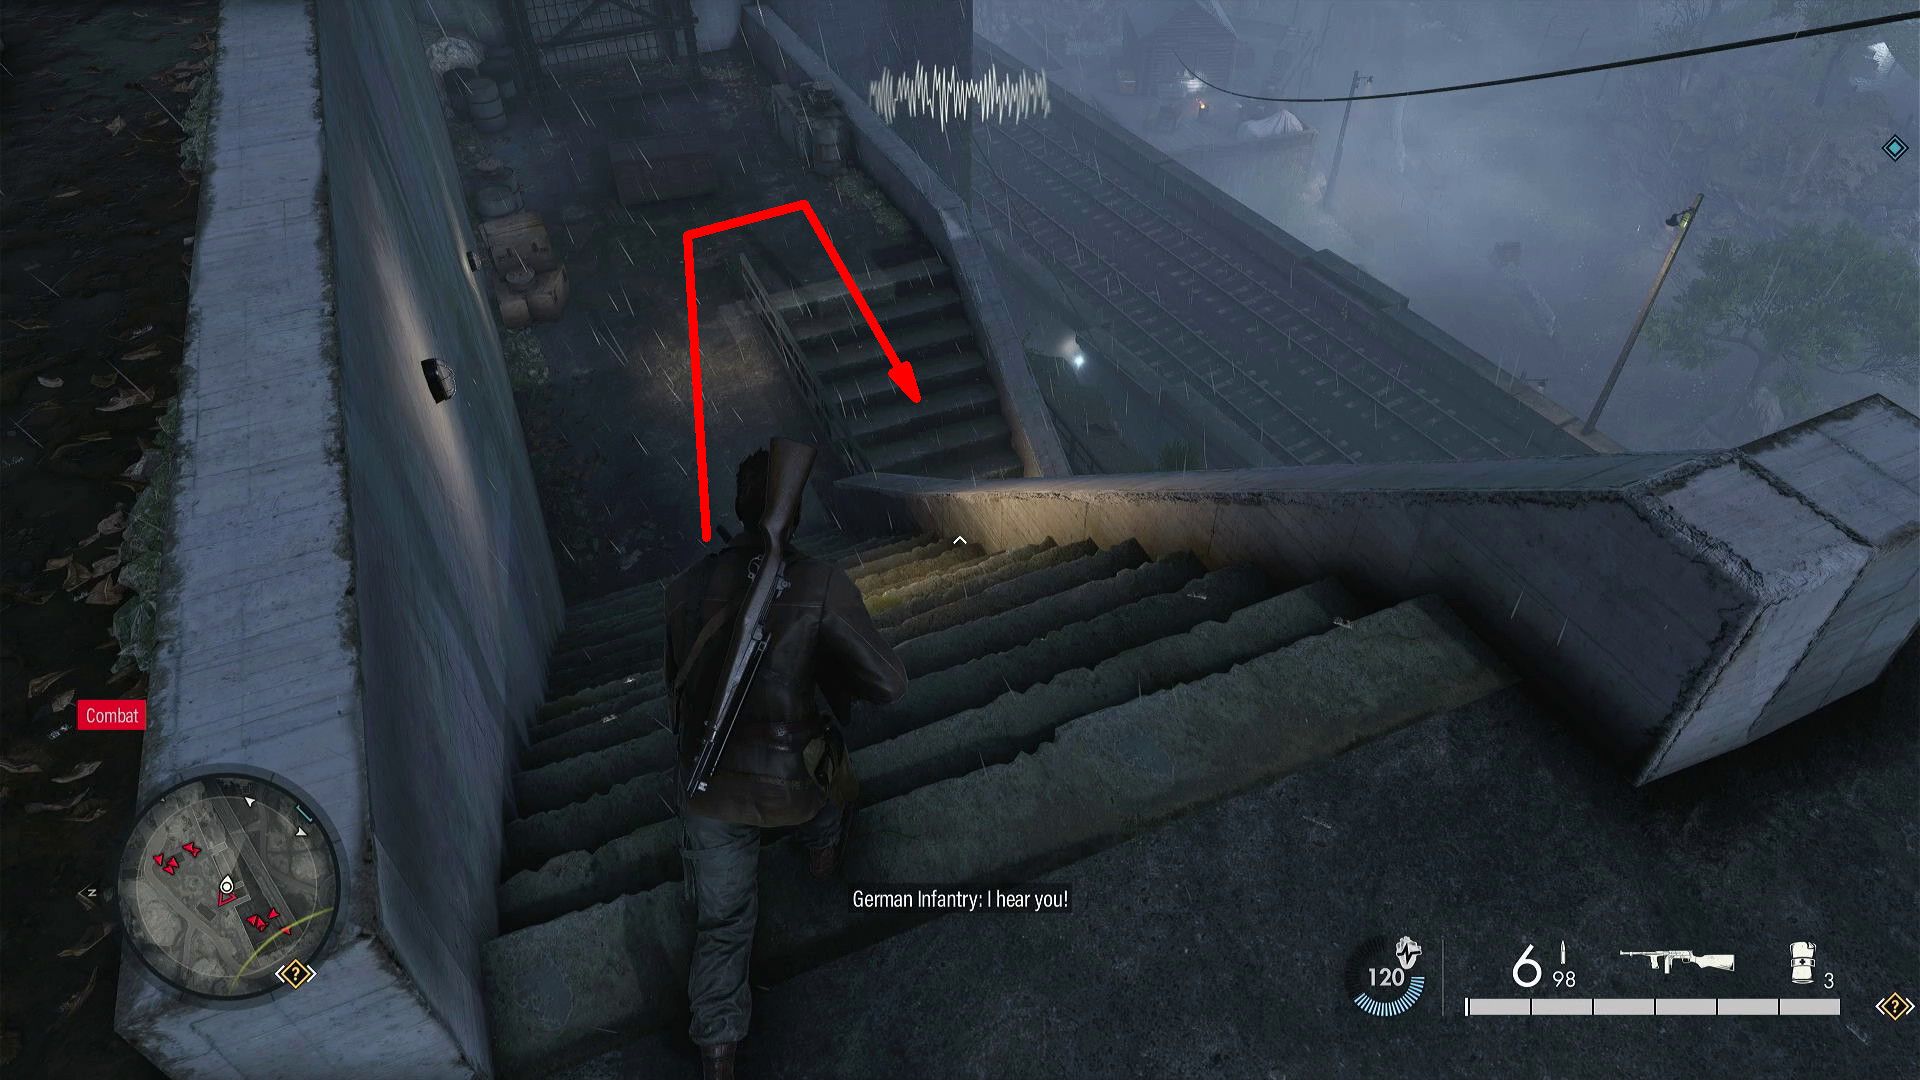
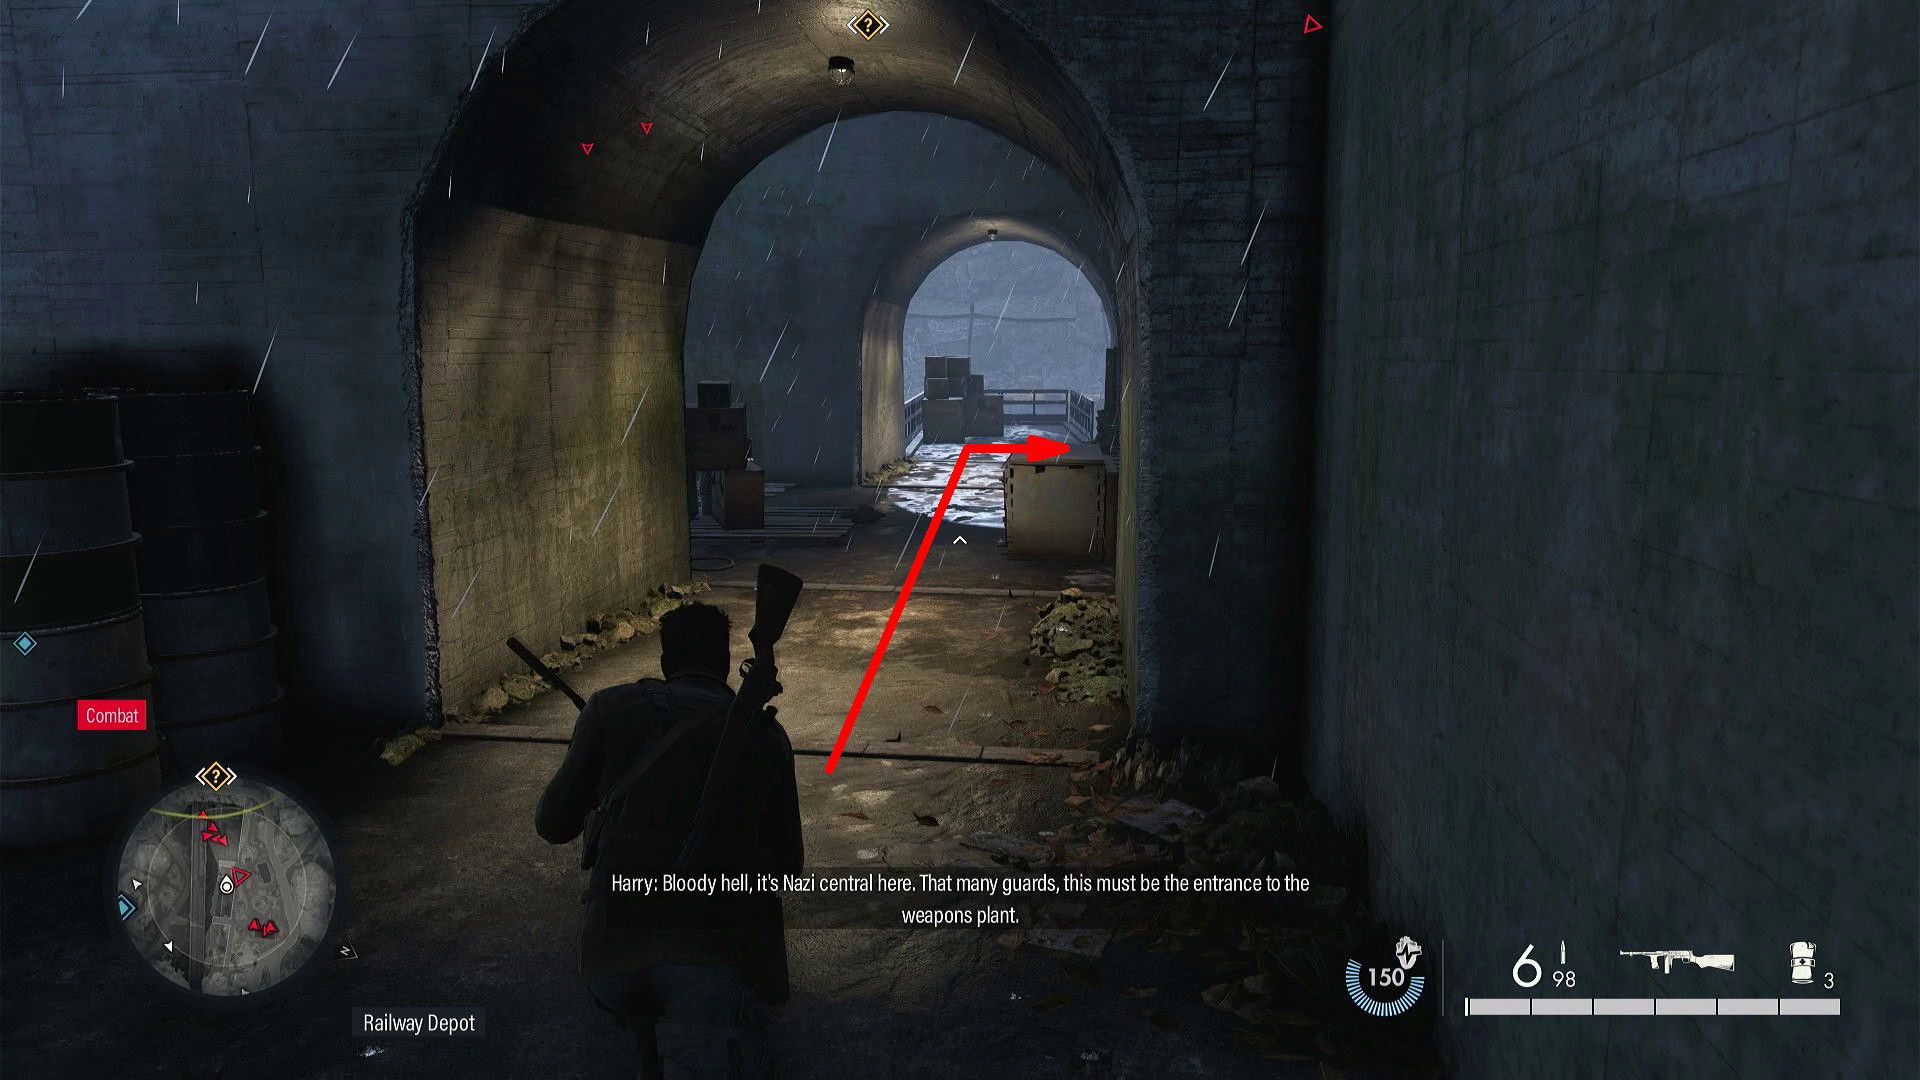
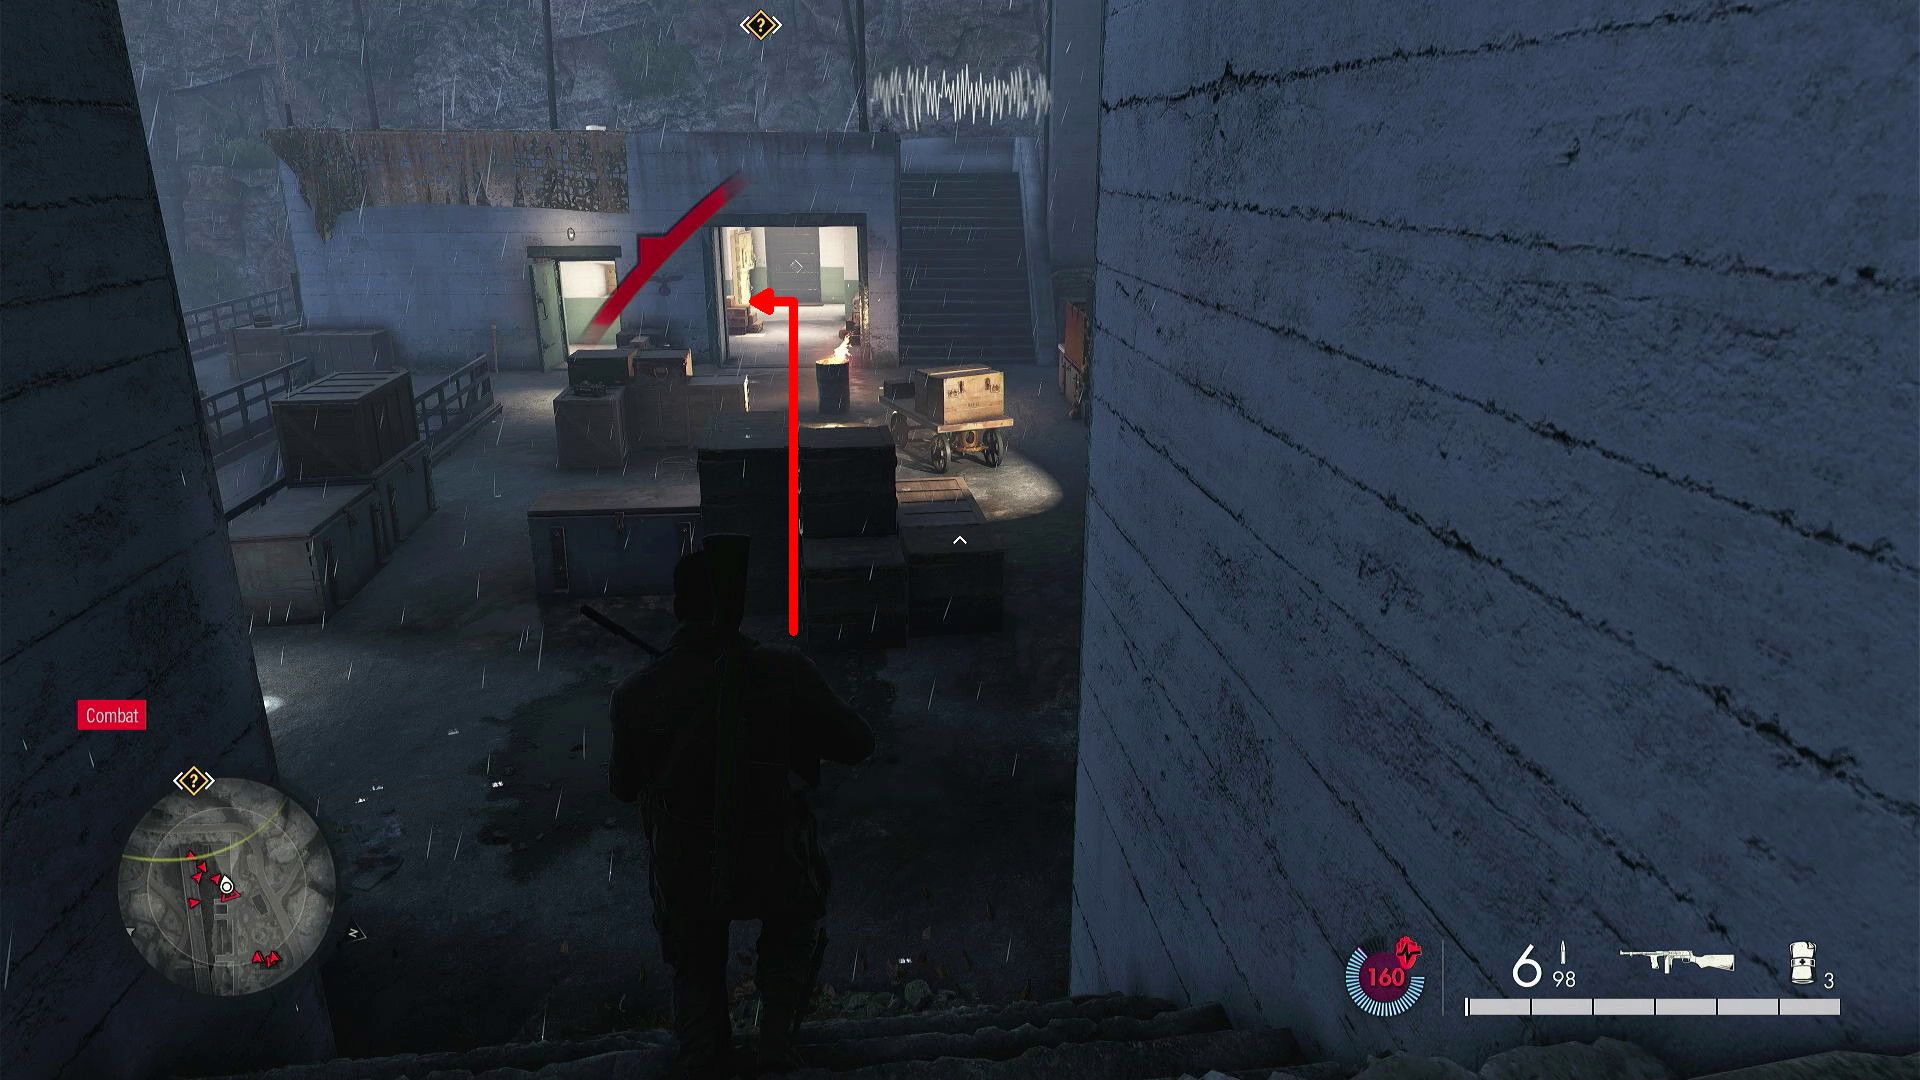
For those seeking the collectible, head towards the stairs as indicated on your previous map. Here’s what you need to do next:
1. Follow the path to the marked stairs.
2. Proceed from there.
- Descend the stairs.
- Descend the stairs at the bottom of the first flight.
- Walk forward and descend the stairs on the right.
- Walk forward to approach a door that can be destroyed with a Satchel Charge.
- Enter the room to the left, and check the table.
15. Personal Letters (Be a Man, Not a Boy)

The given letter can be found sitting on a table within the structure. Interestingly, the Factory Maintenance Key is also resting there.
16. Stone Eagle
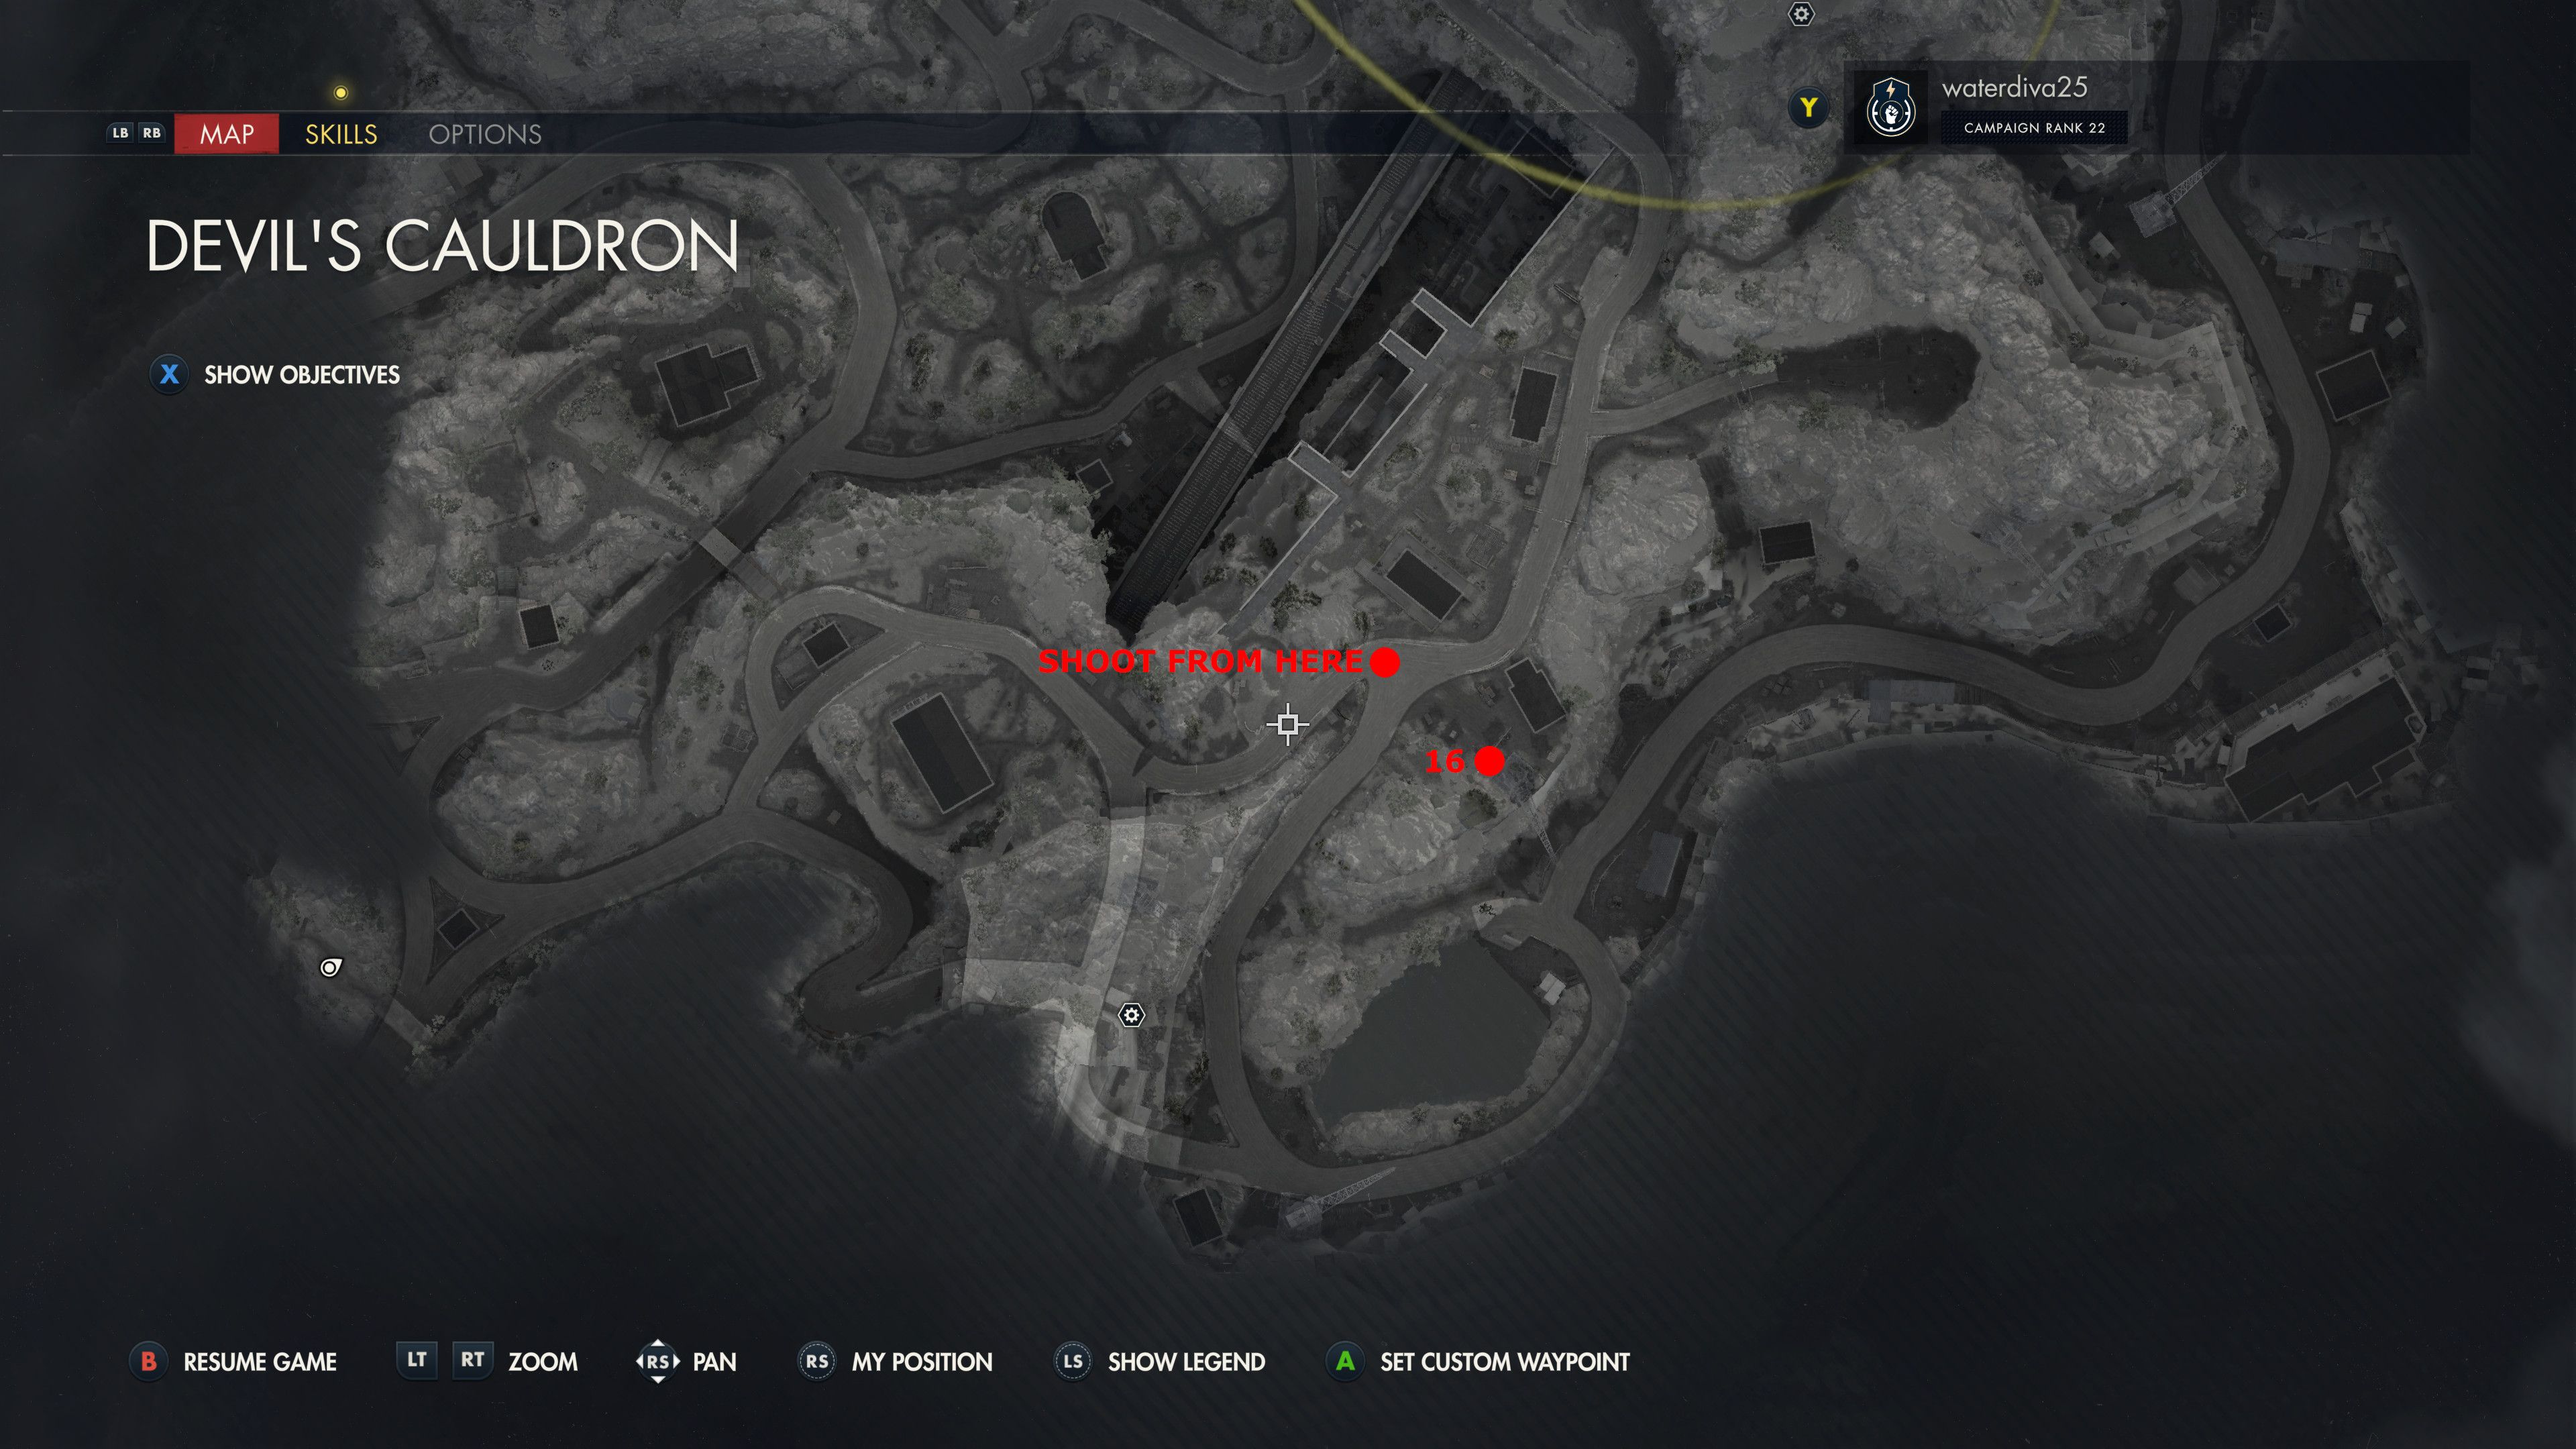
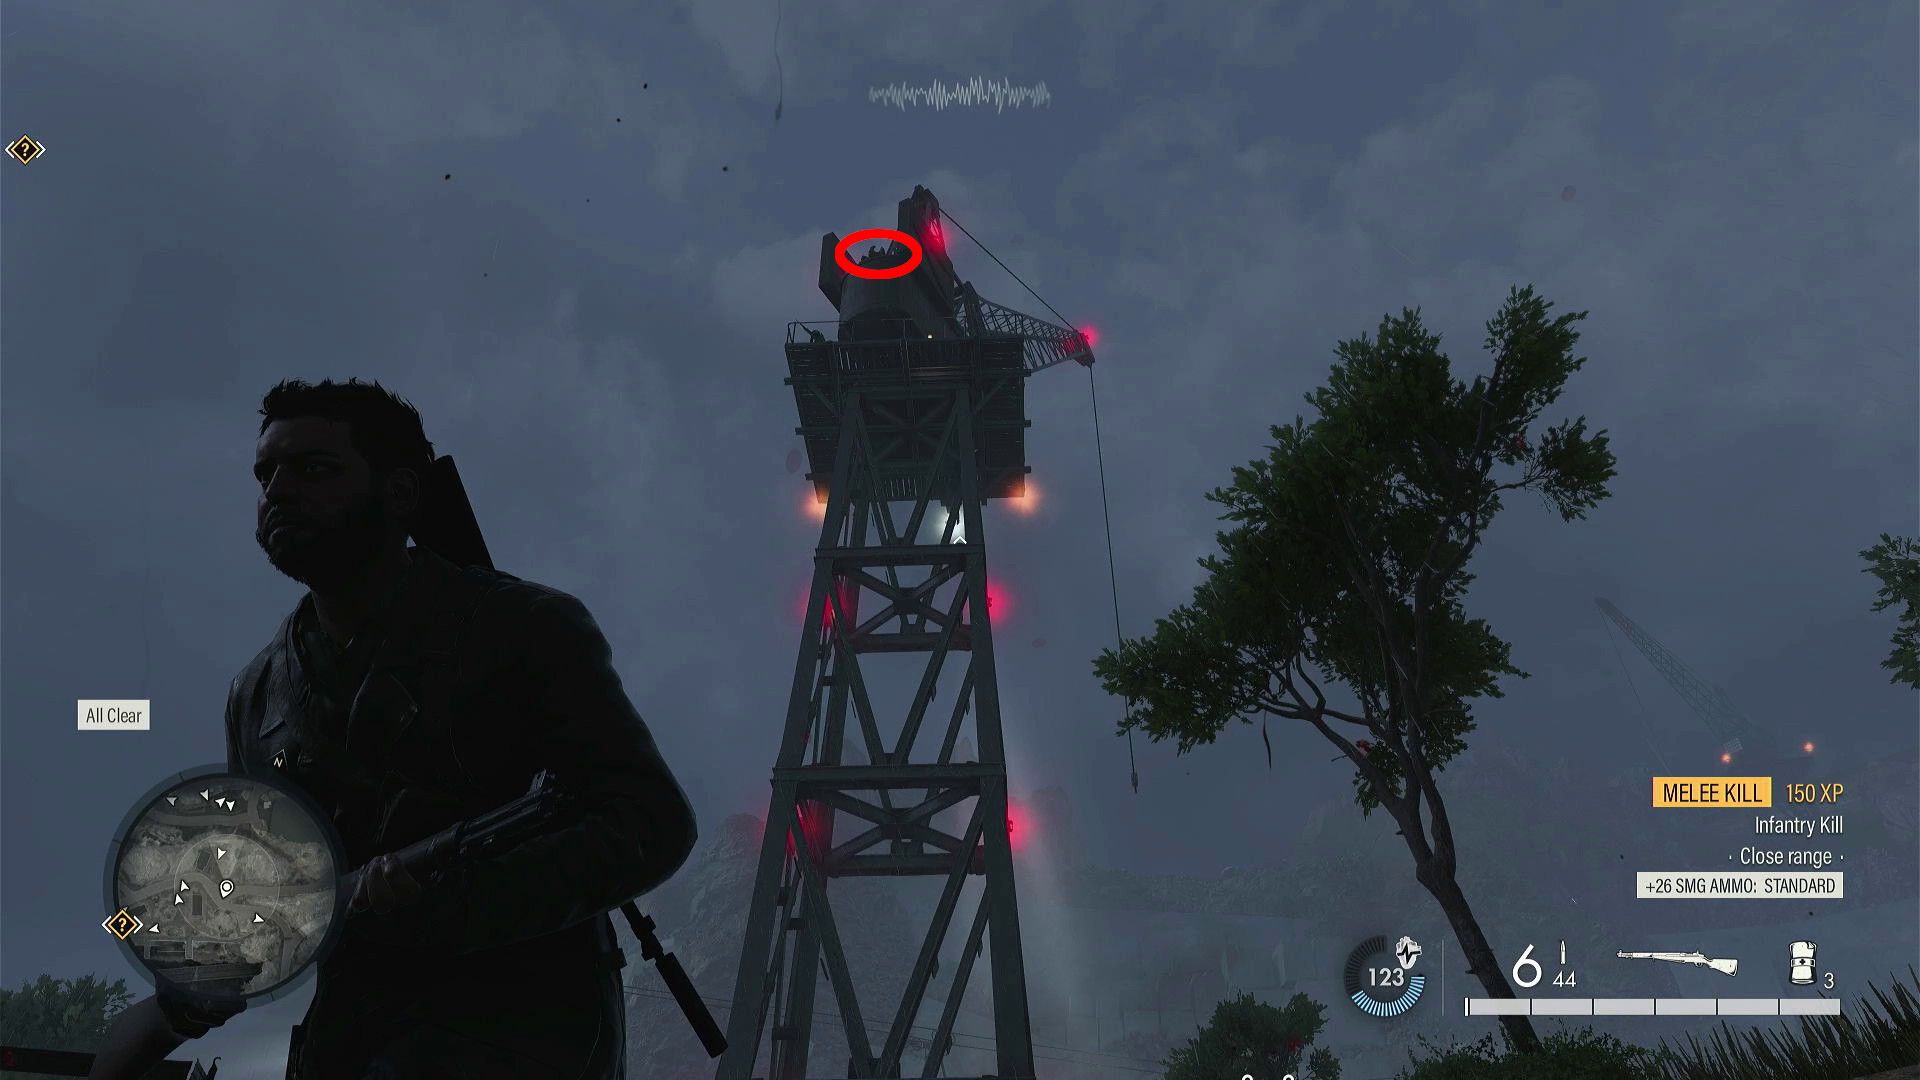
The Stone Eagle can be found sitting majestically on the tall crane close to the structure where individuals gathered to acquire ‘Be a Man, Not a Boy’.
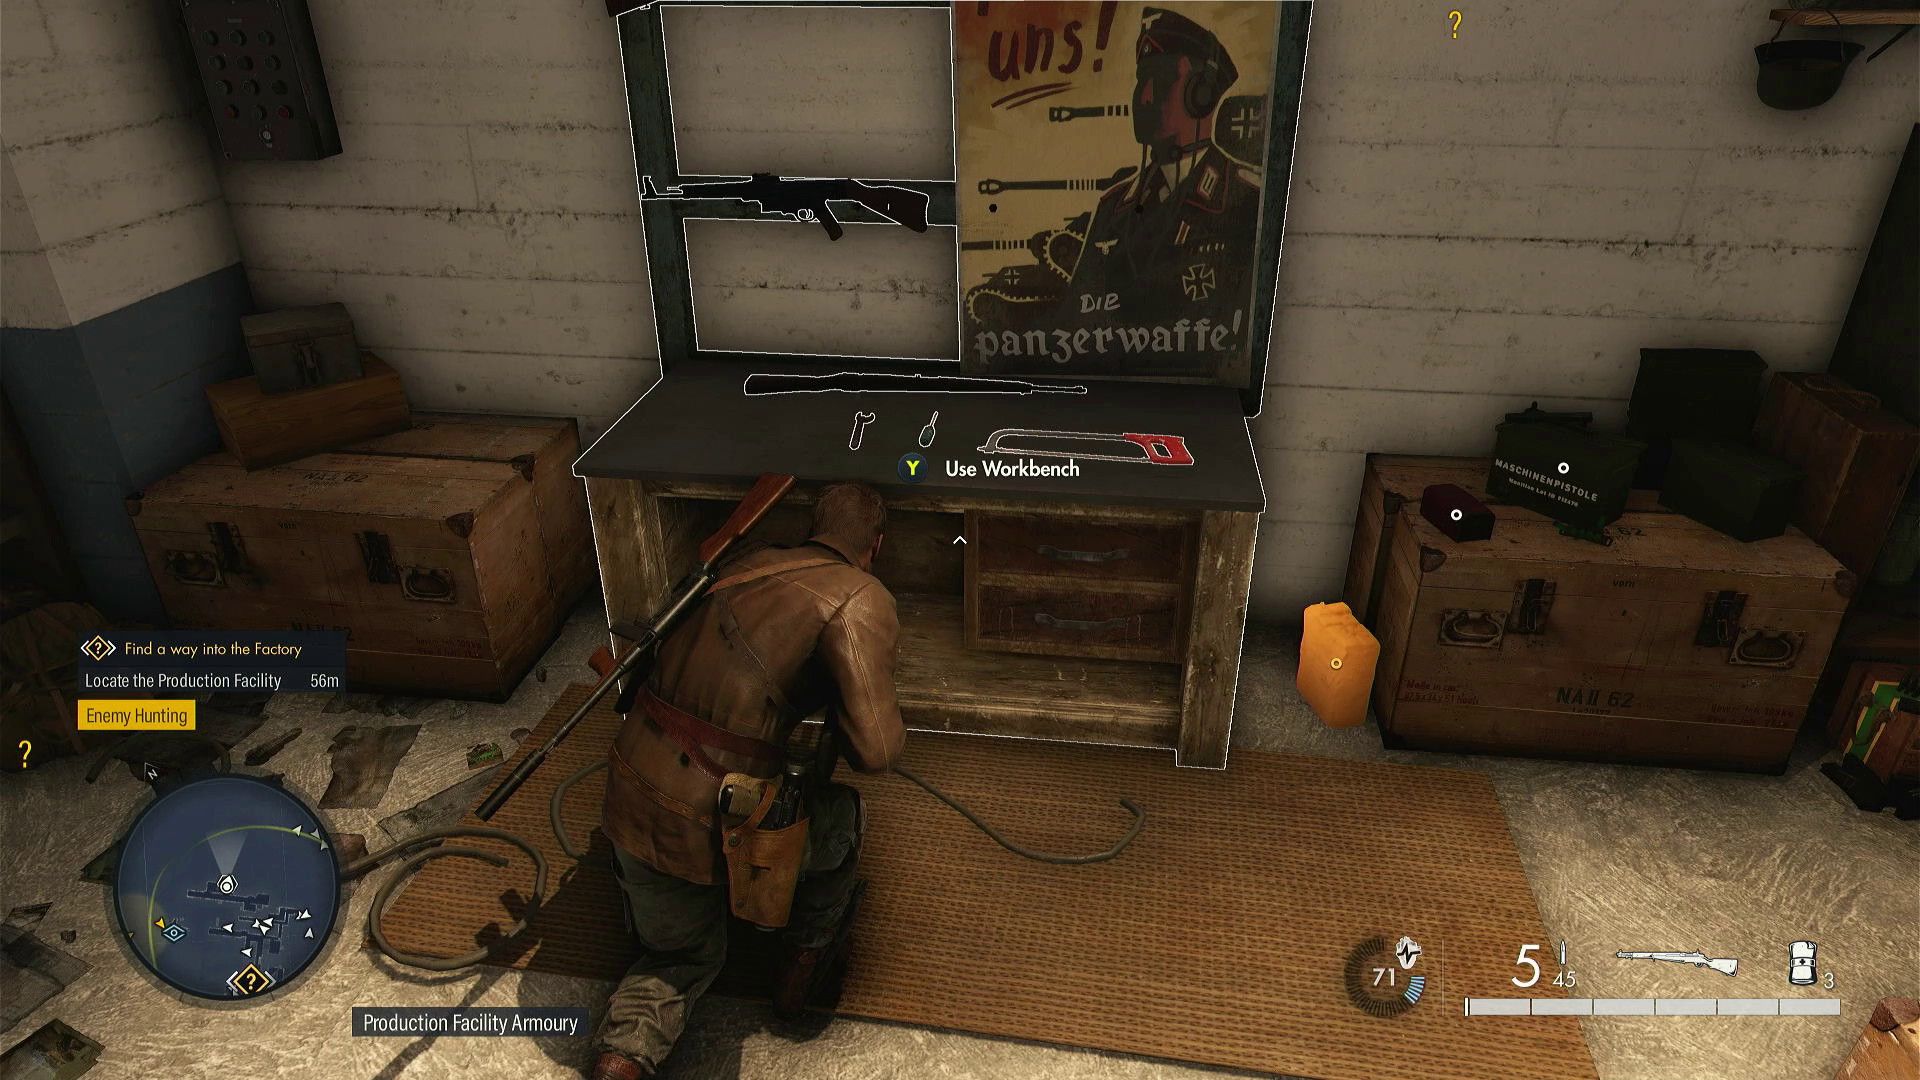
17. Pistol Workbench

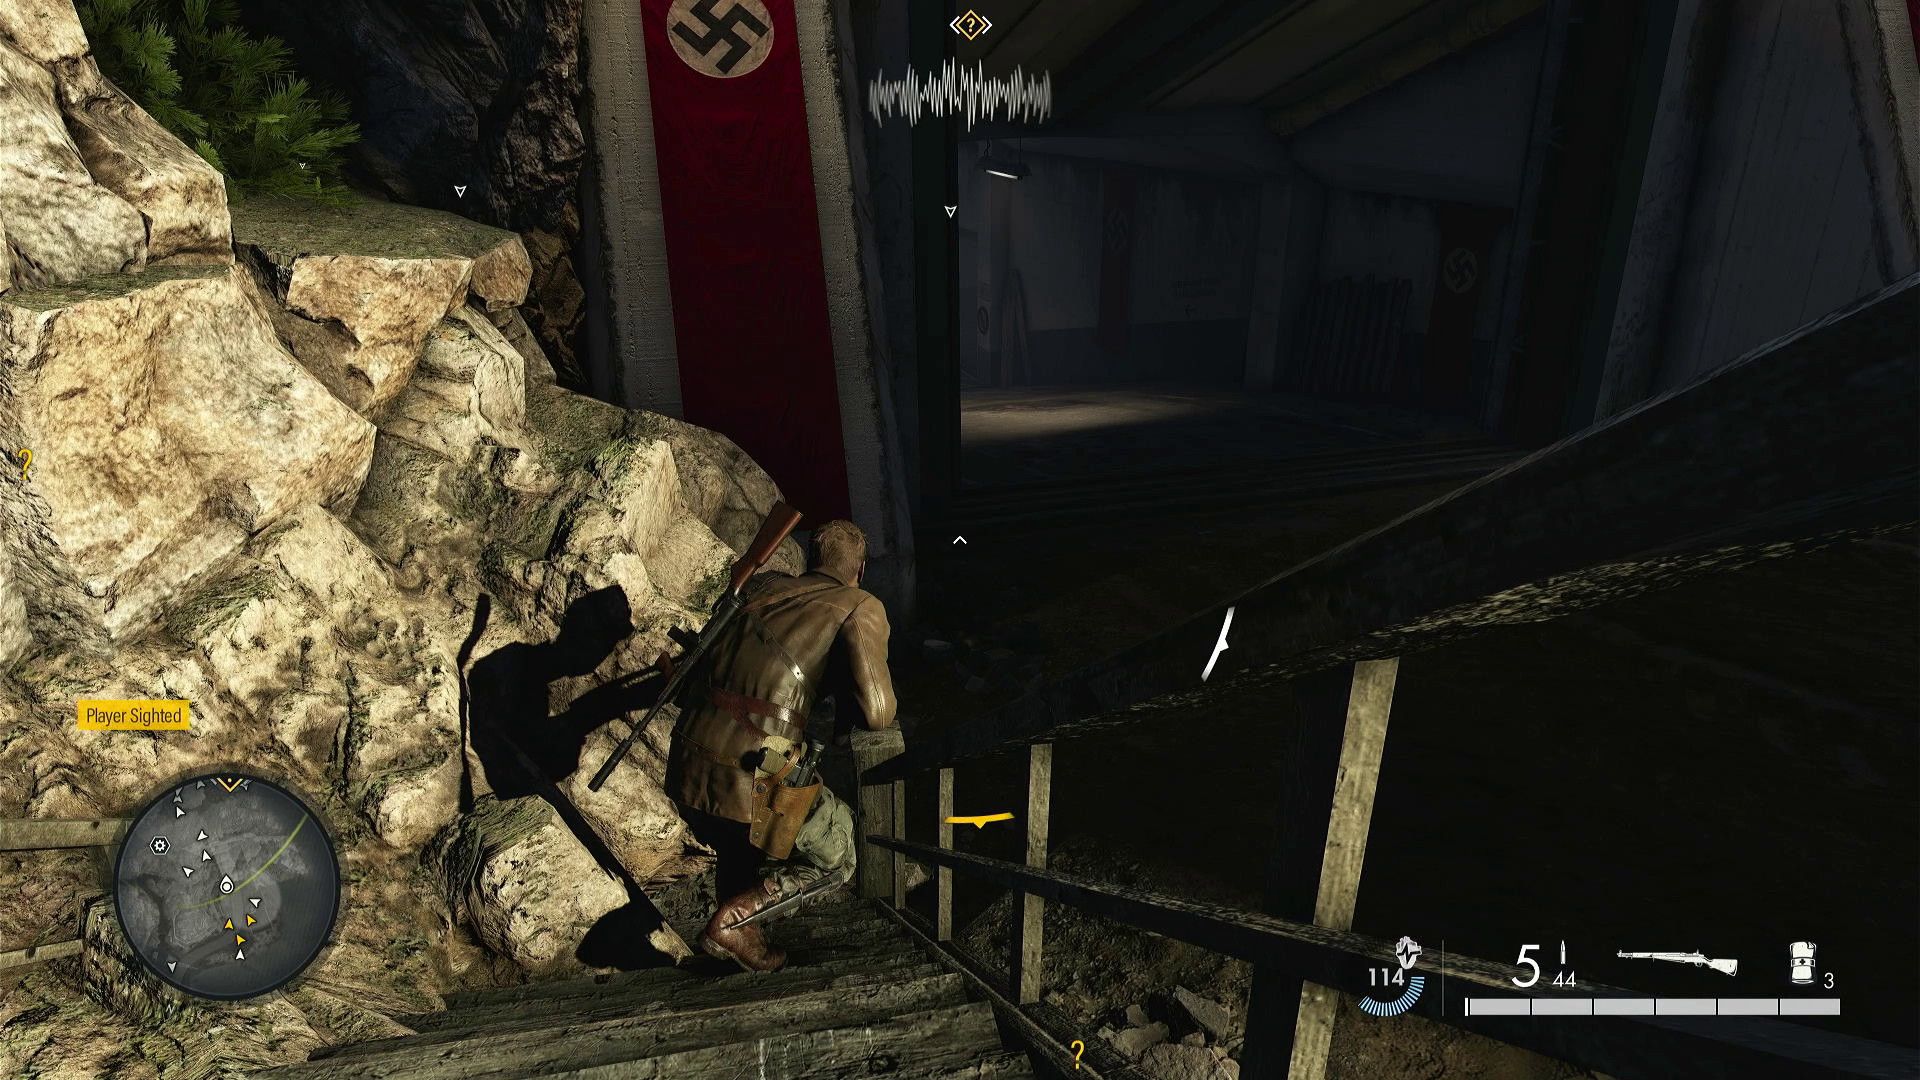
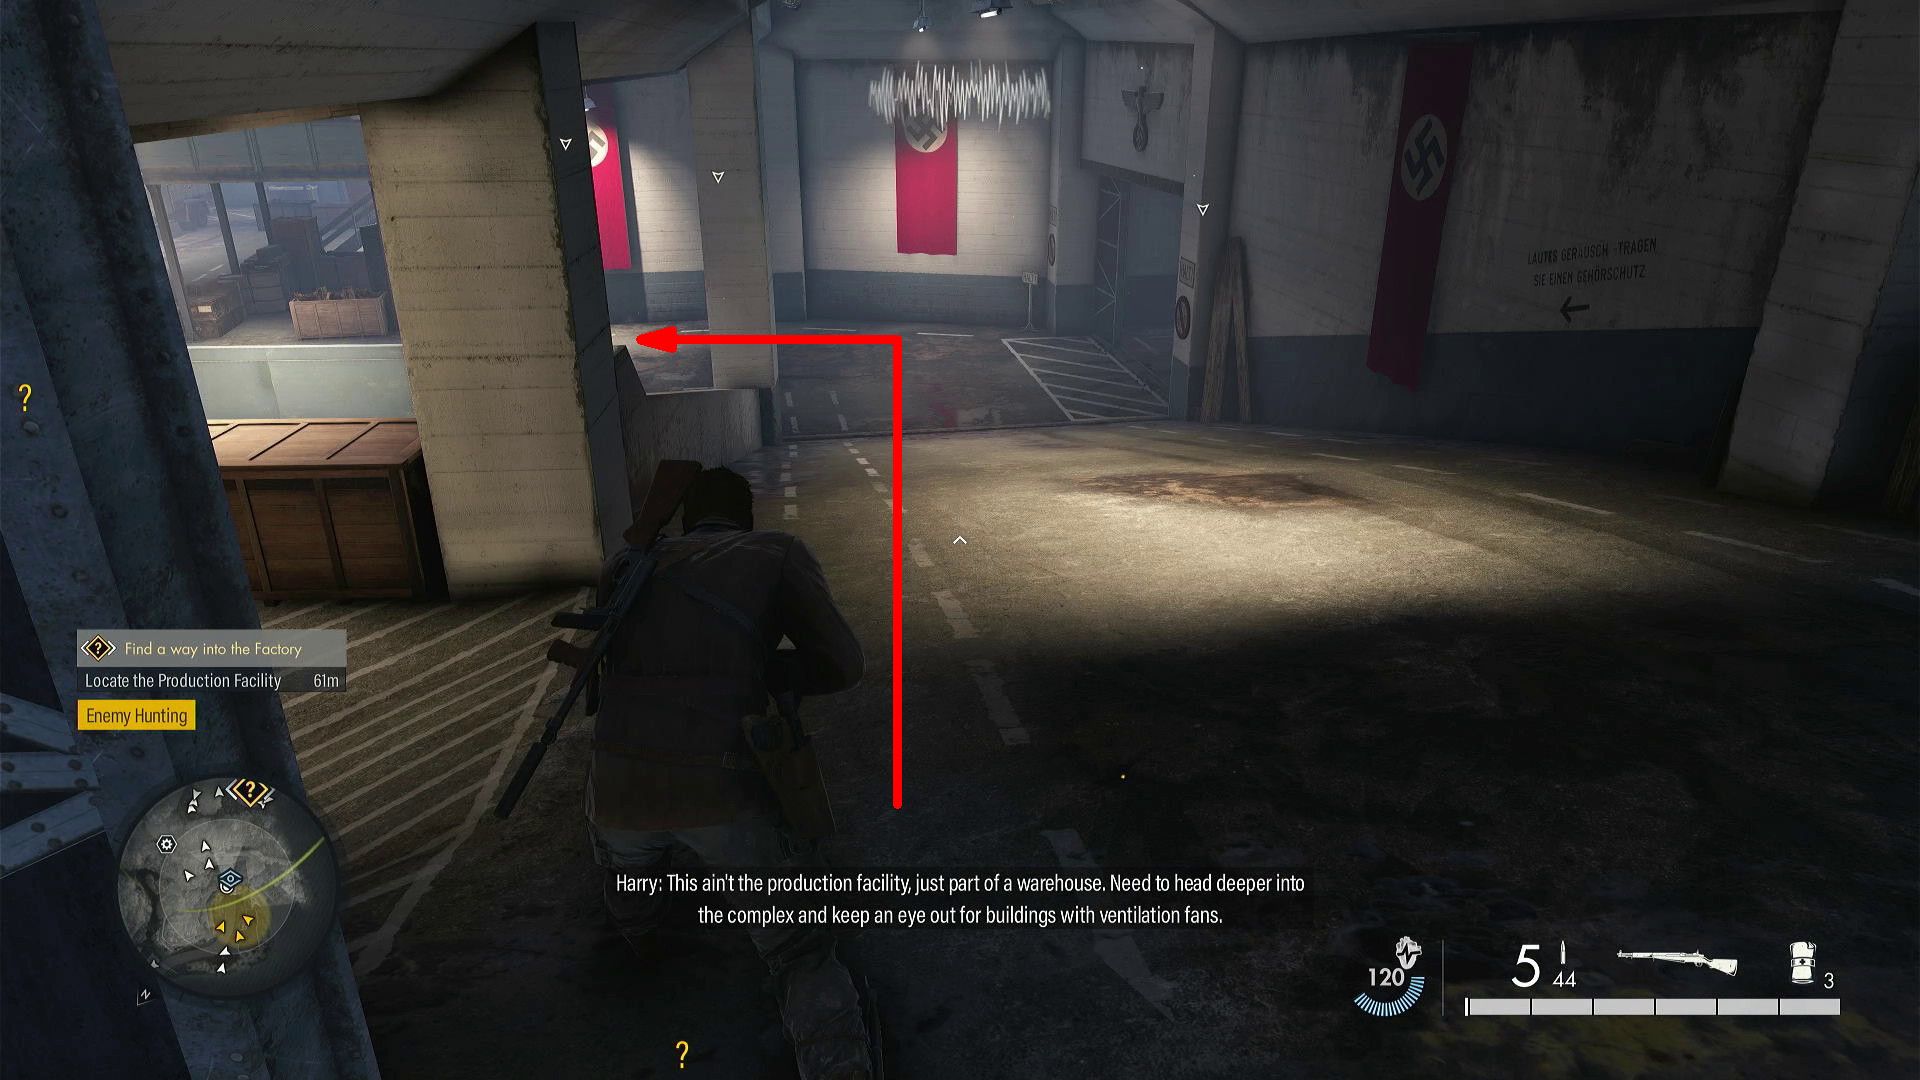

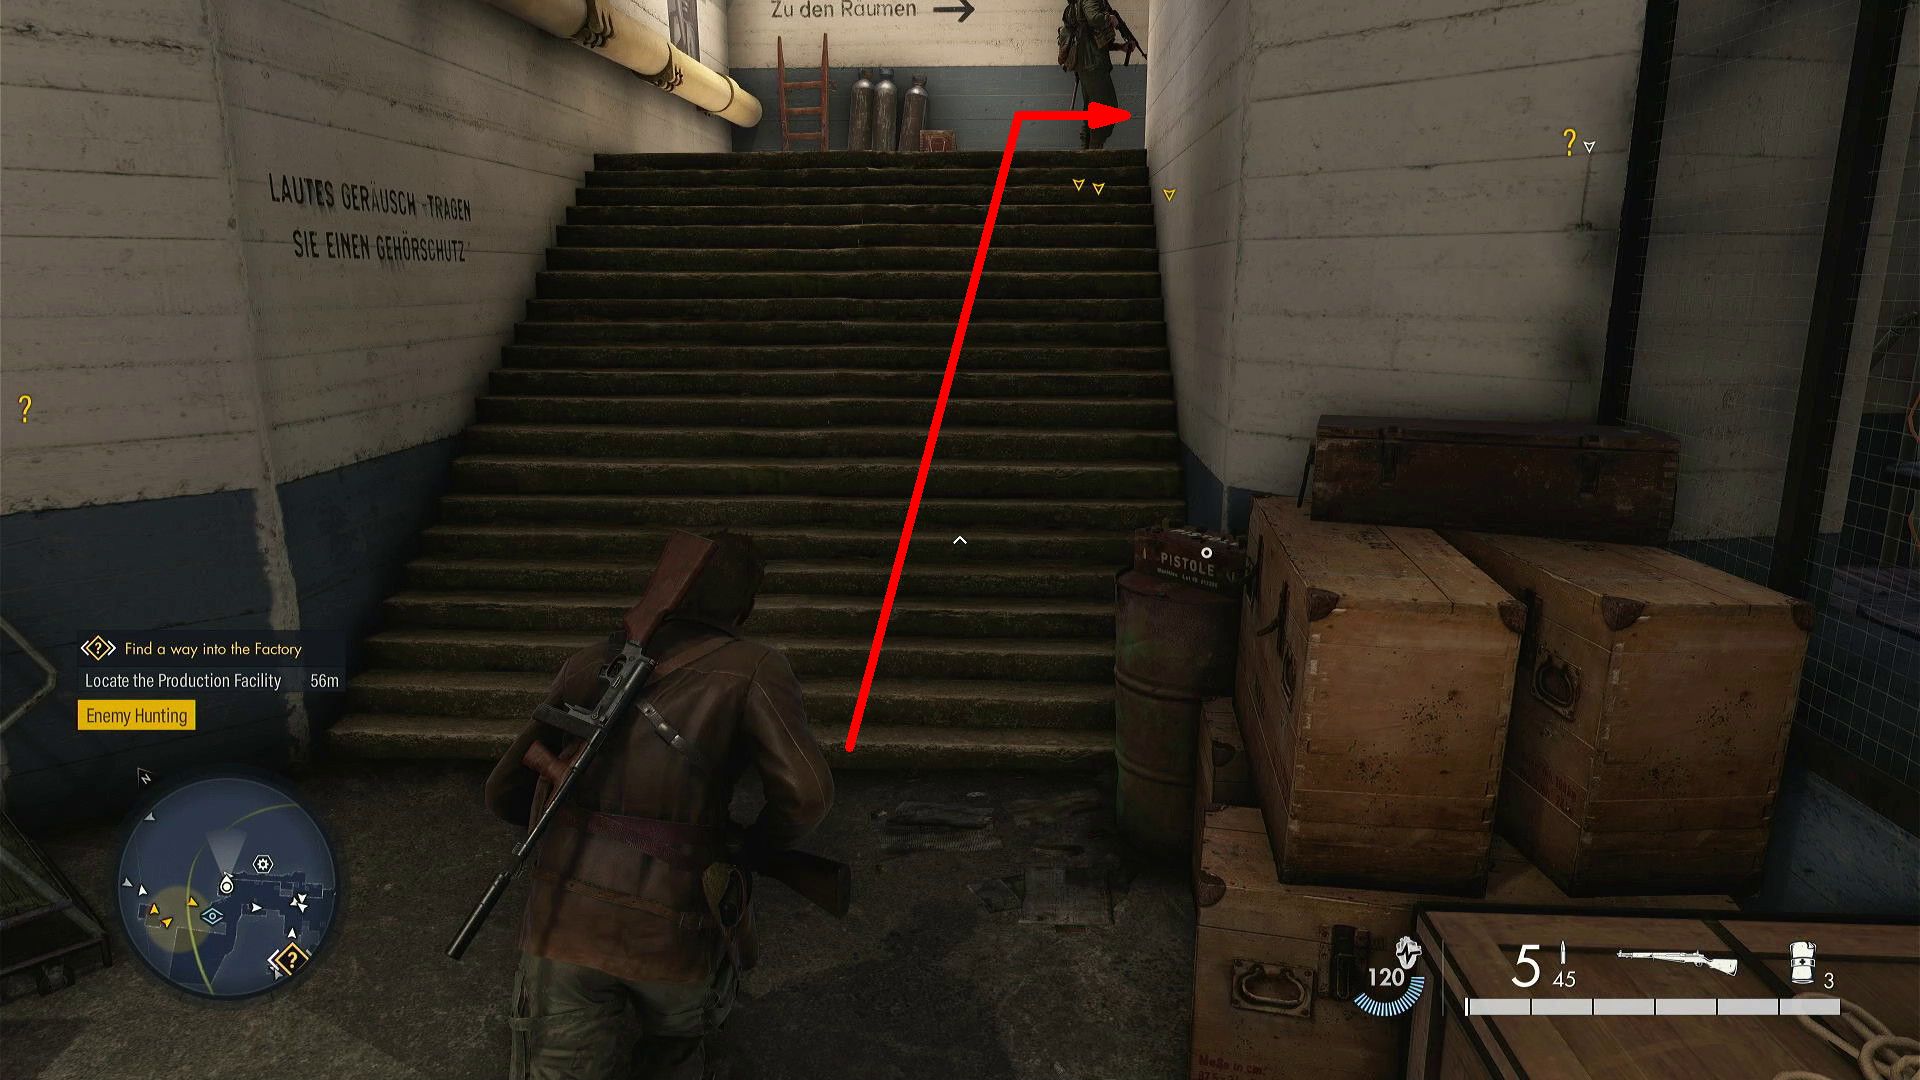

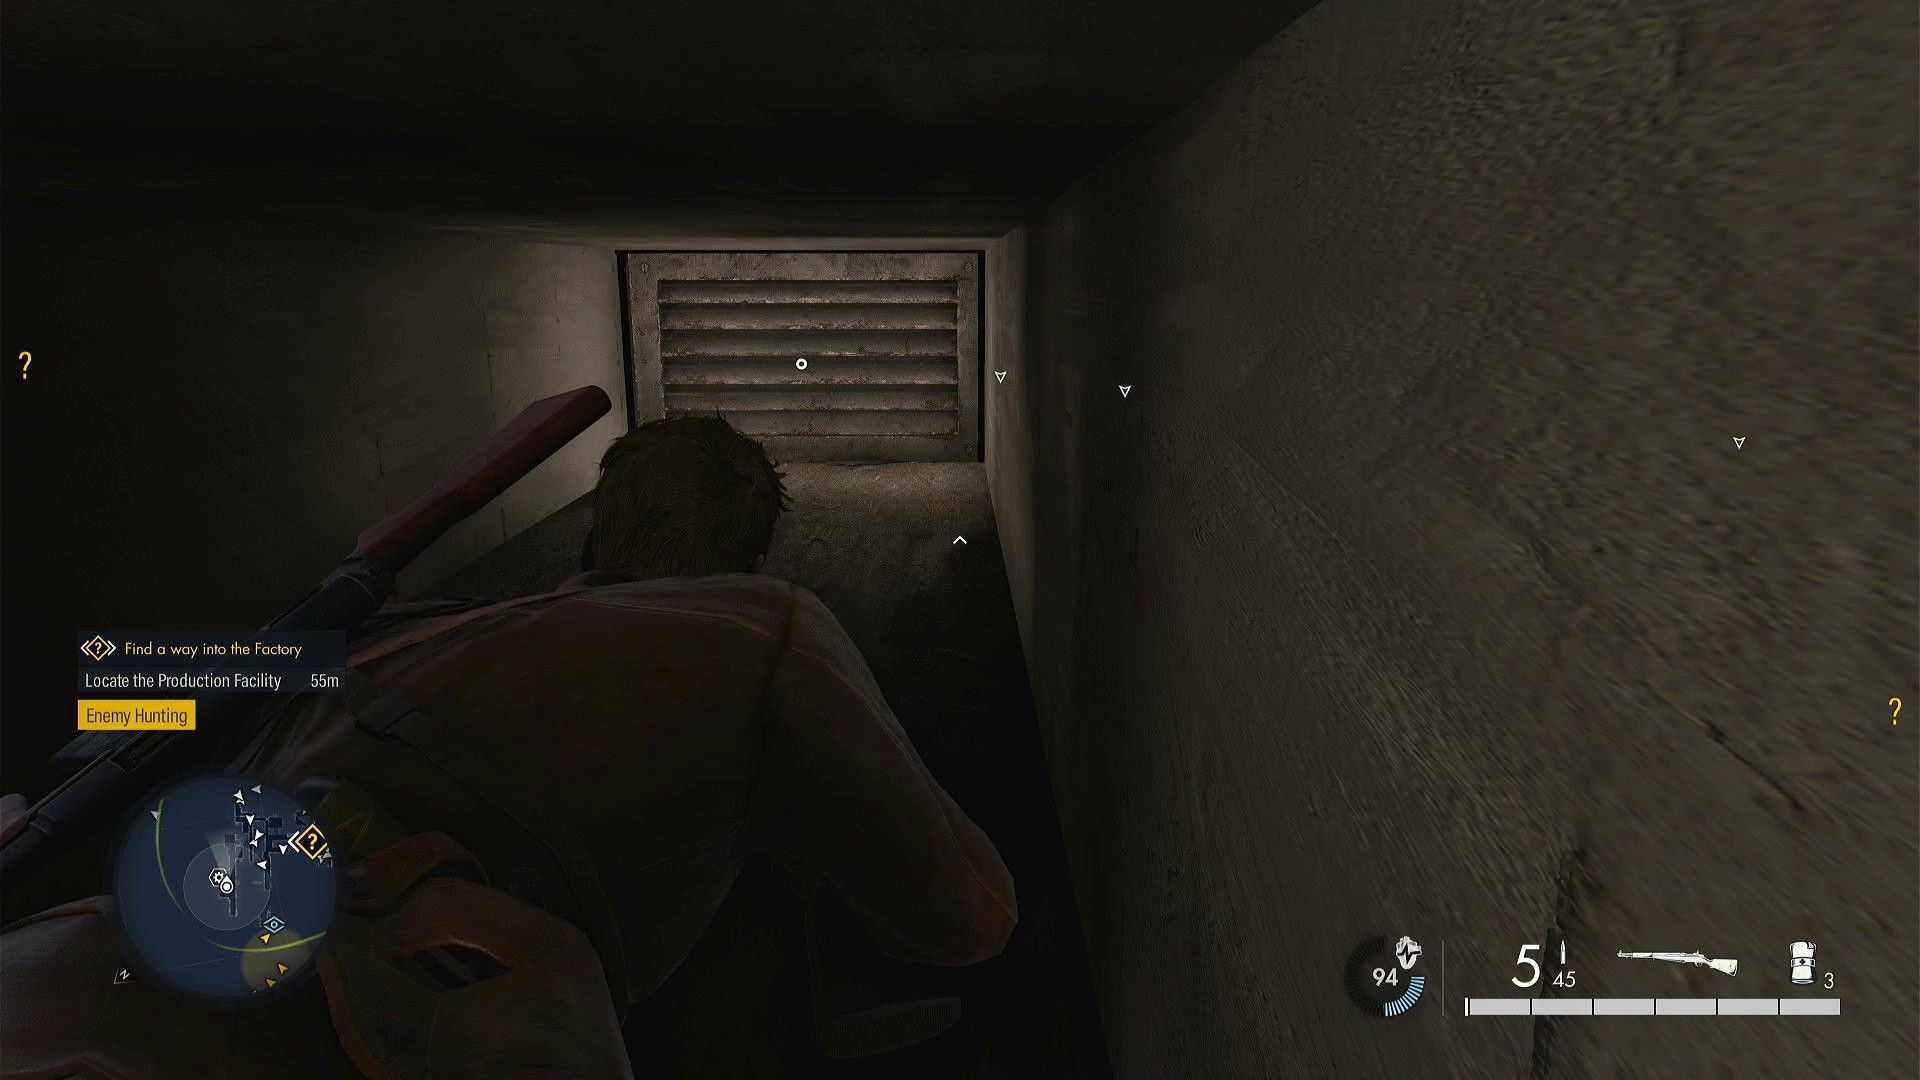
Players are now instructed to navigate towards the tunnel serving as an entrance to the location where they need to discover the Manufacturing Facility. Once inside the tunnel, players should follow these steps:
- Follow the ramp down, and go left at the bottom.
- Enter the green doors on the left, climb the stairs, and enter the yellow door on the left.
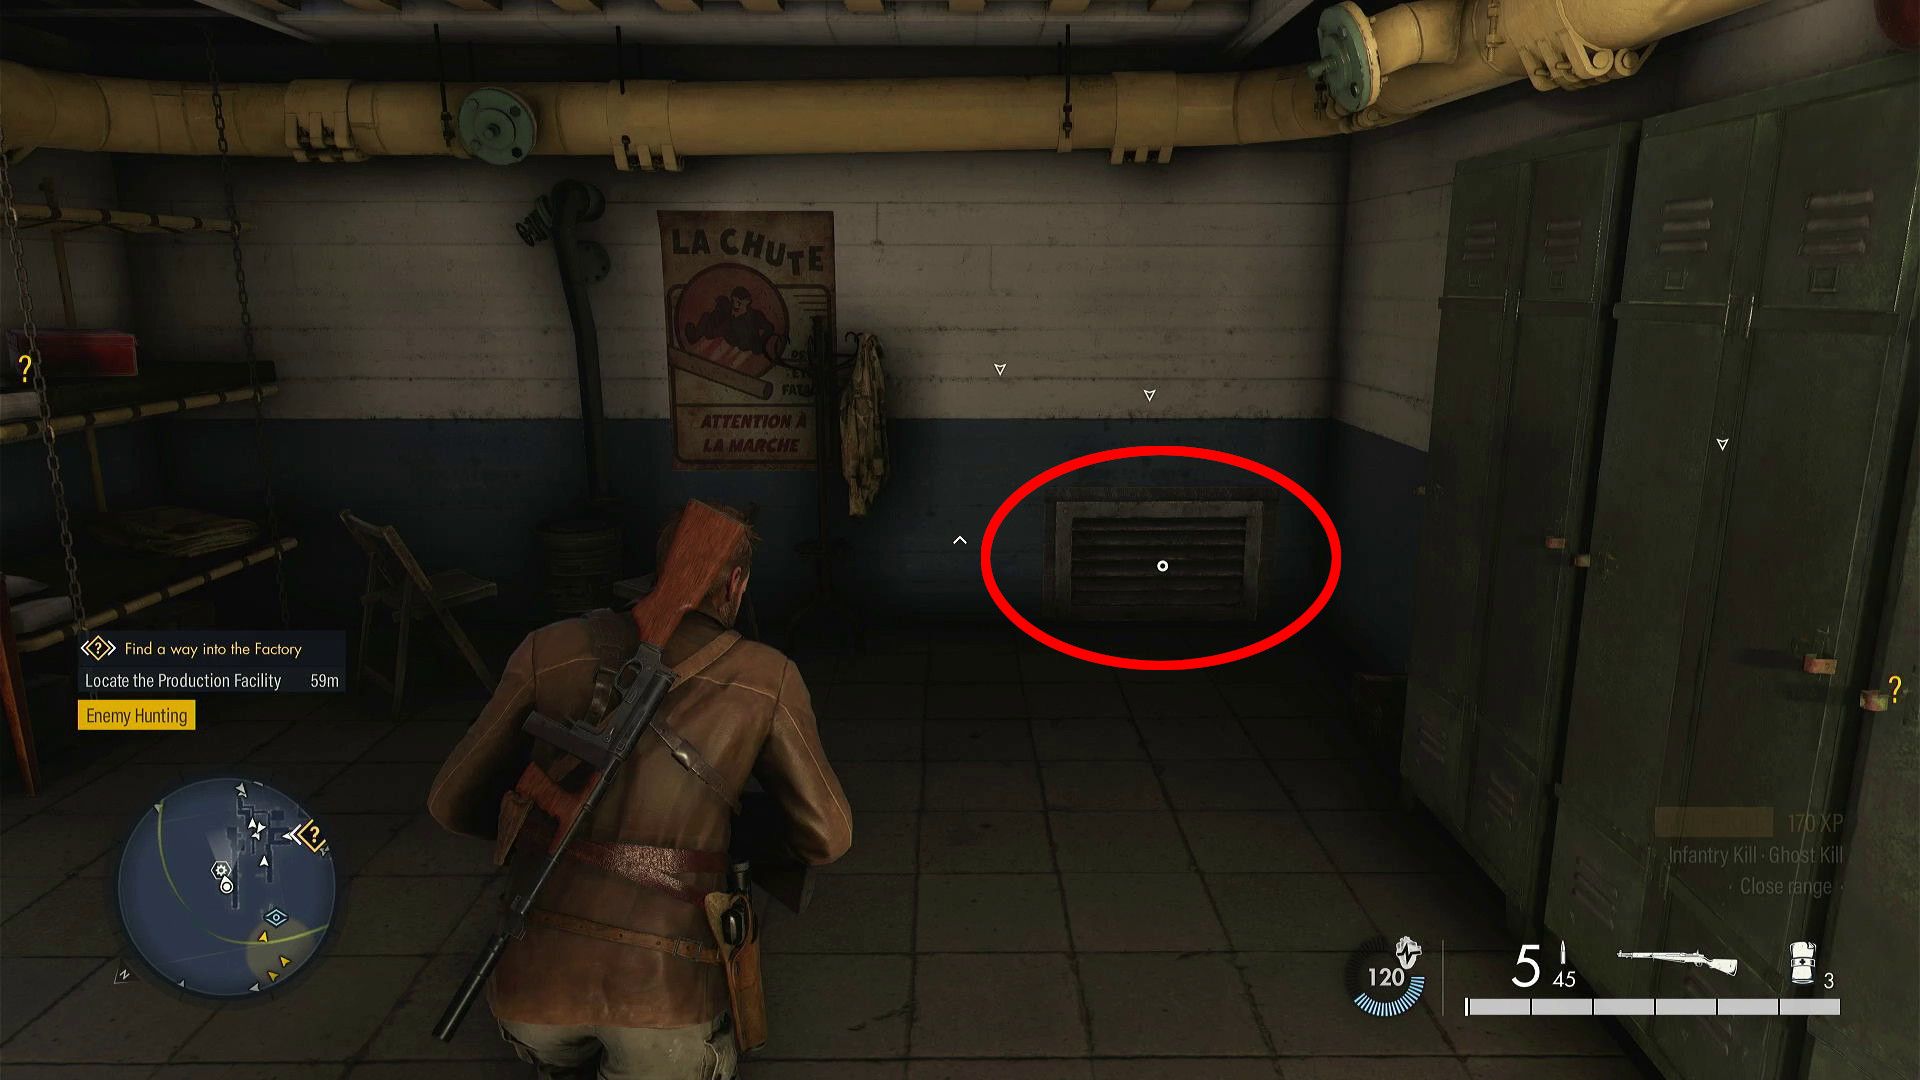
- Open the vent in the room, go prone, and crawl through to reach the room where the Pistol Workbench is housed.
18. Classified Documents (Scuttle Instructions)
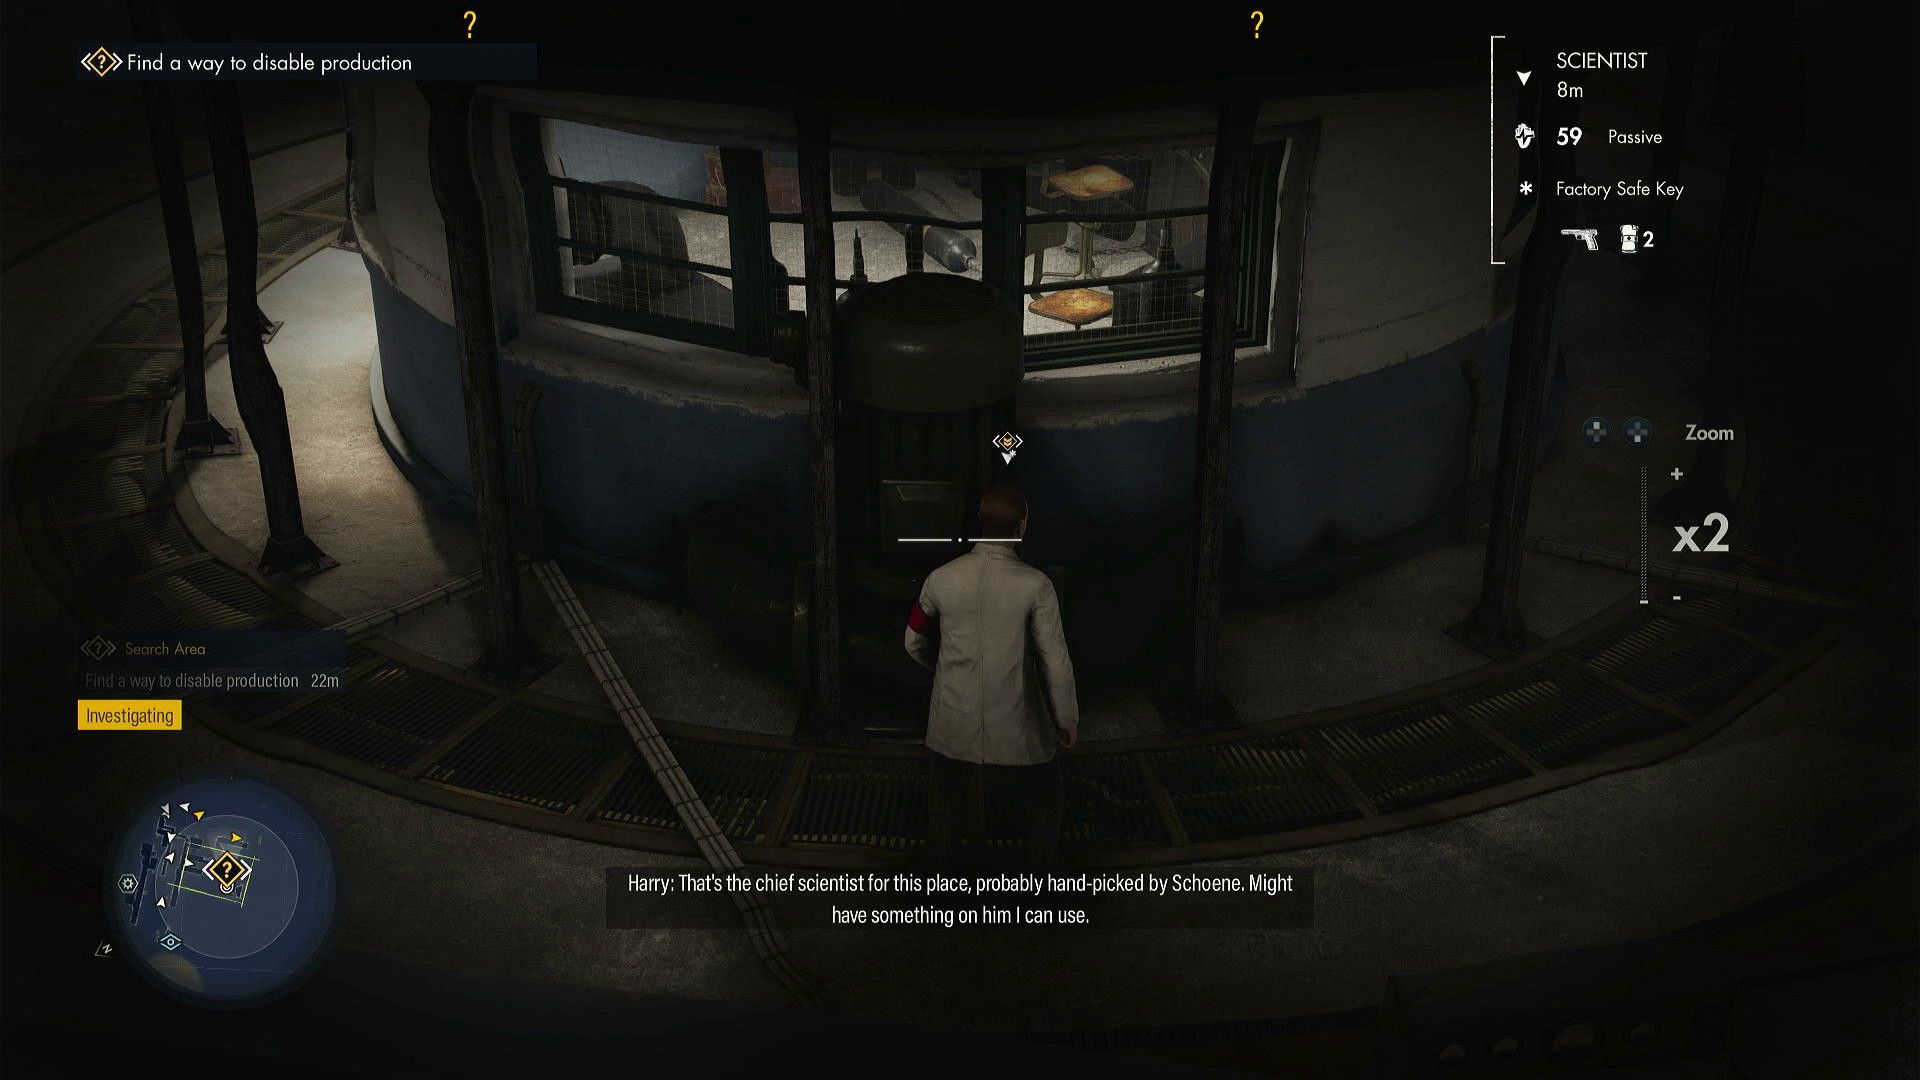

As a movie enthusiast on an exciting quest, I’ll guide you through this: After uncovering the Production Facility, you’ll be tasked to devise a plan to halt production. To accomplish this, you need to access the Factory Vault, which is tucked away next to some wooden storage racks on the initial level of the area. This vault can be opened using either a Satchel Charge or the Factory Safe Key, a valuable loot dropped by an enemy from Sniper Elite: Resistance, easily recognizable by his white lab coat. This elusive character wanders around the factory. The classified document is hidden inside once you’ve managed to secure the key.
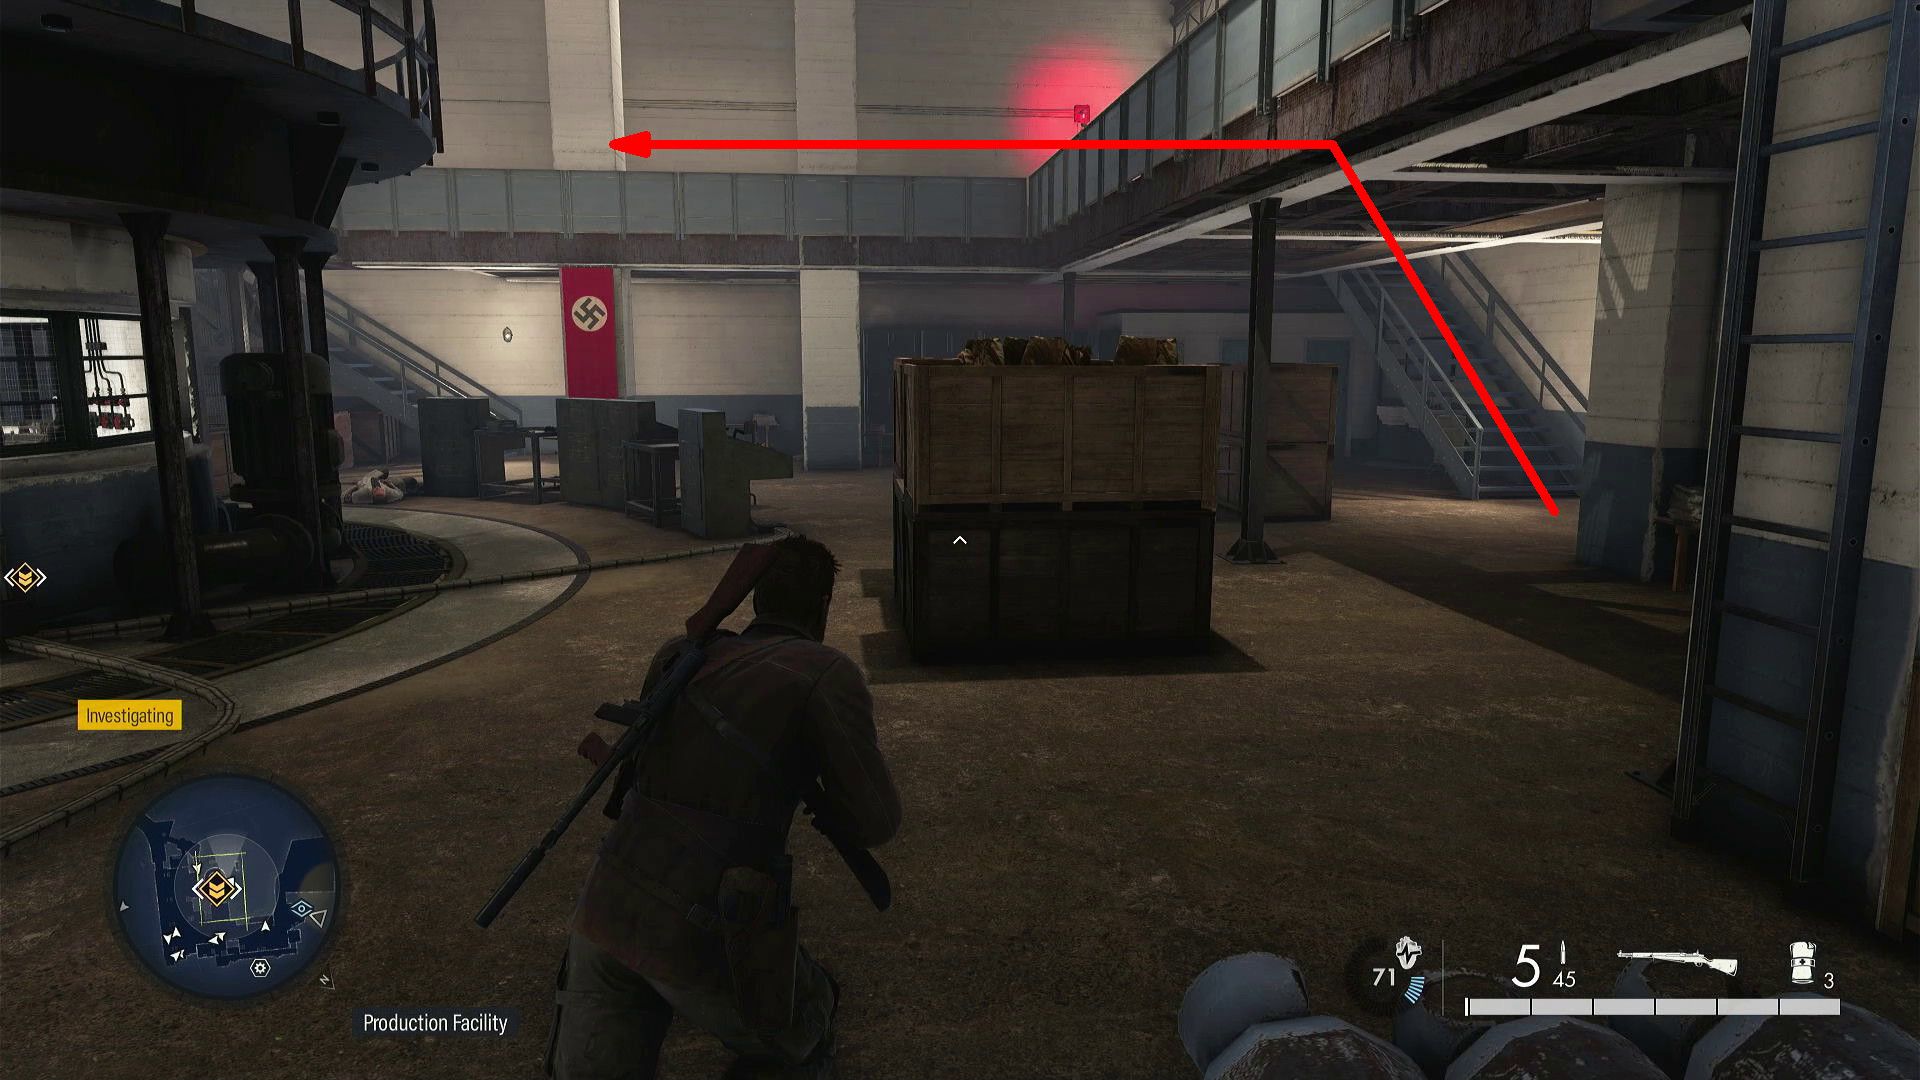
19. Classified Documents (Scuttle Orders)
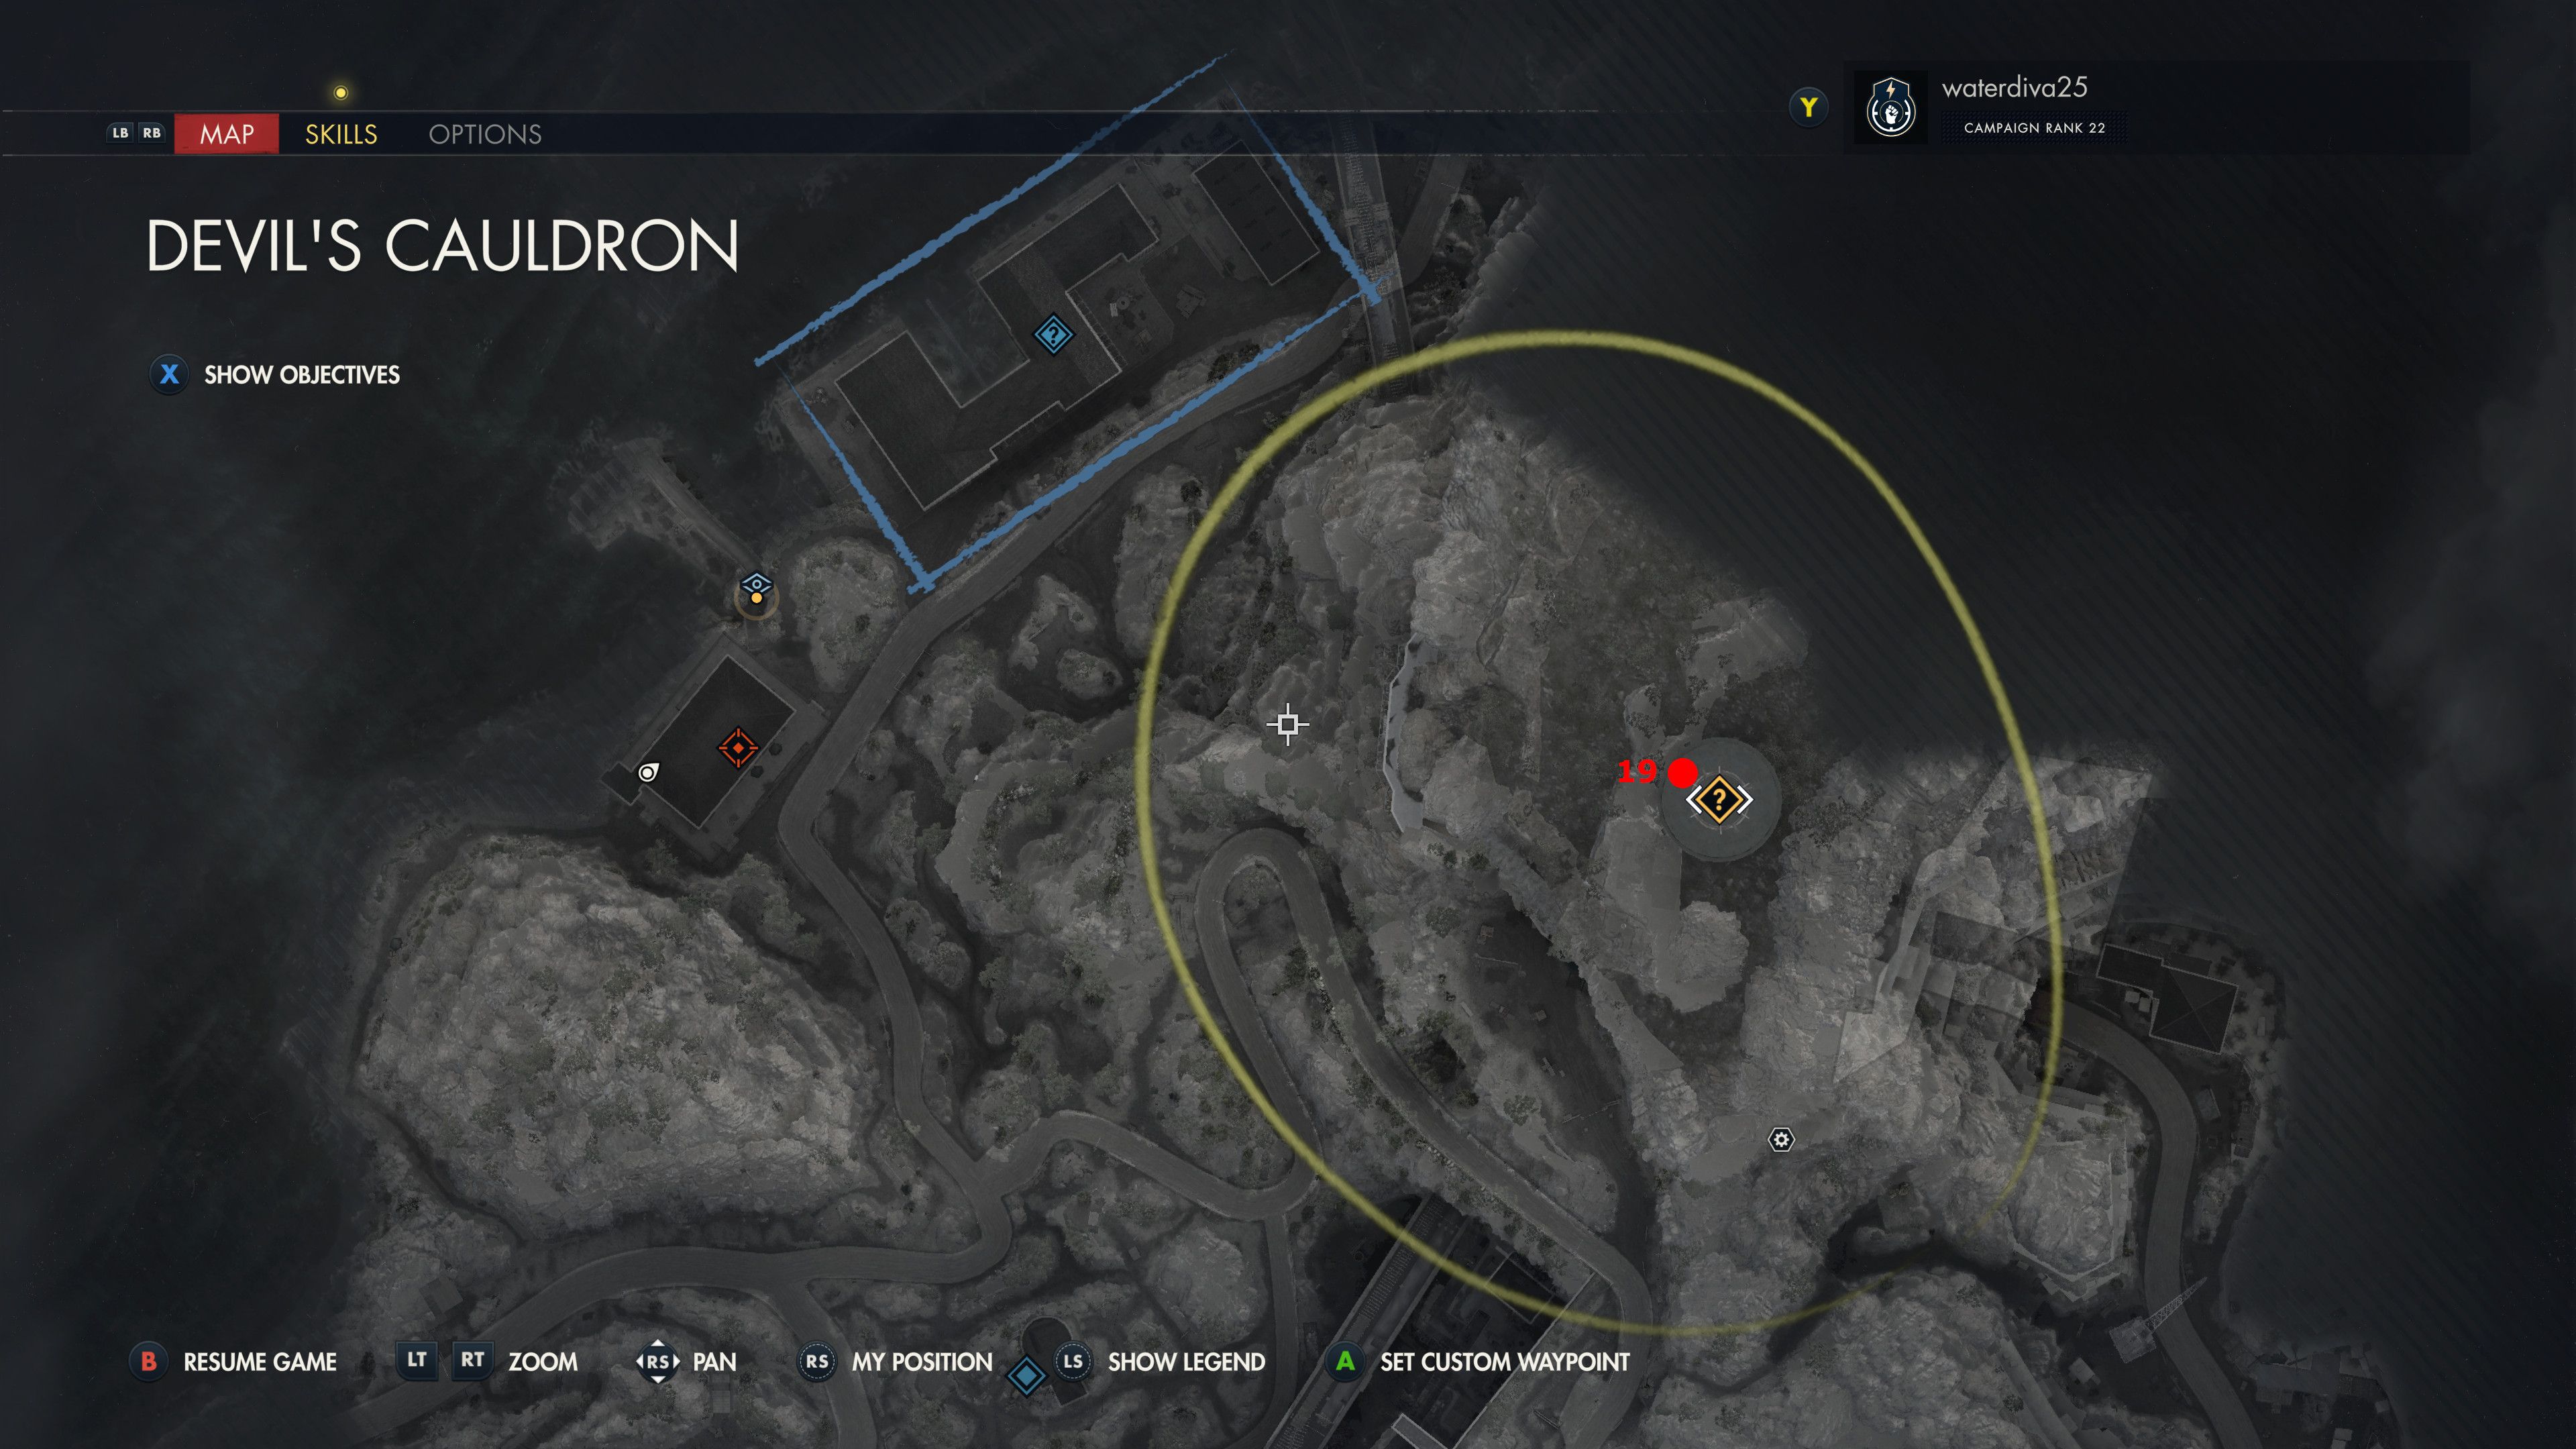

Using the guidelines from Scuttle, players need to perform these steps to discover the last item hidden within this level:
Following the directions provided by Scuttle, here’s what players must do to uncover the secret collectible in this stage:
Or:
By keeping Scuttle’s instructions close at hand, players should follow these steps to locate the level’s hidden treasure:
Each version conveys the same meaning but is presented differently for variety.
- Climb the metal stairs that are across from the Factory Safe.
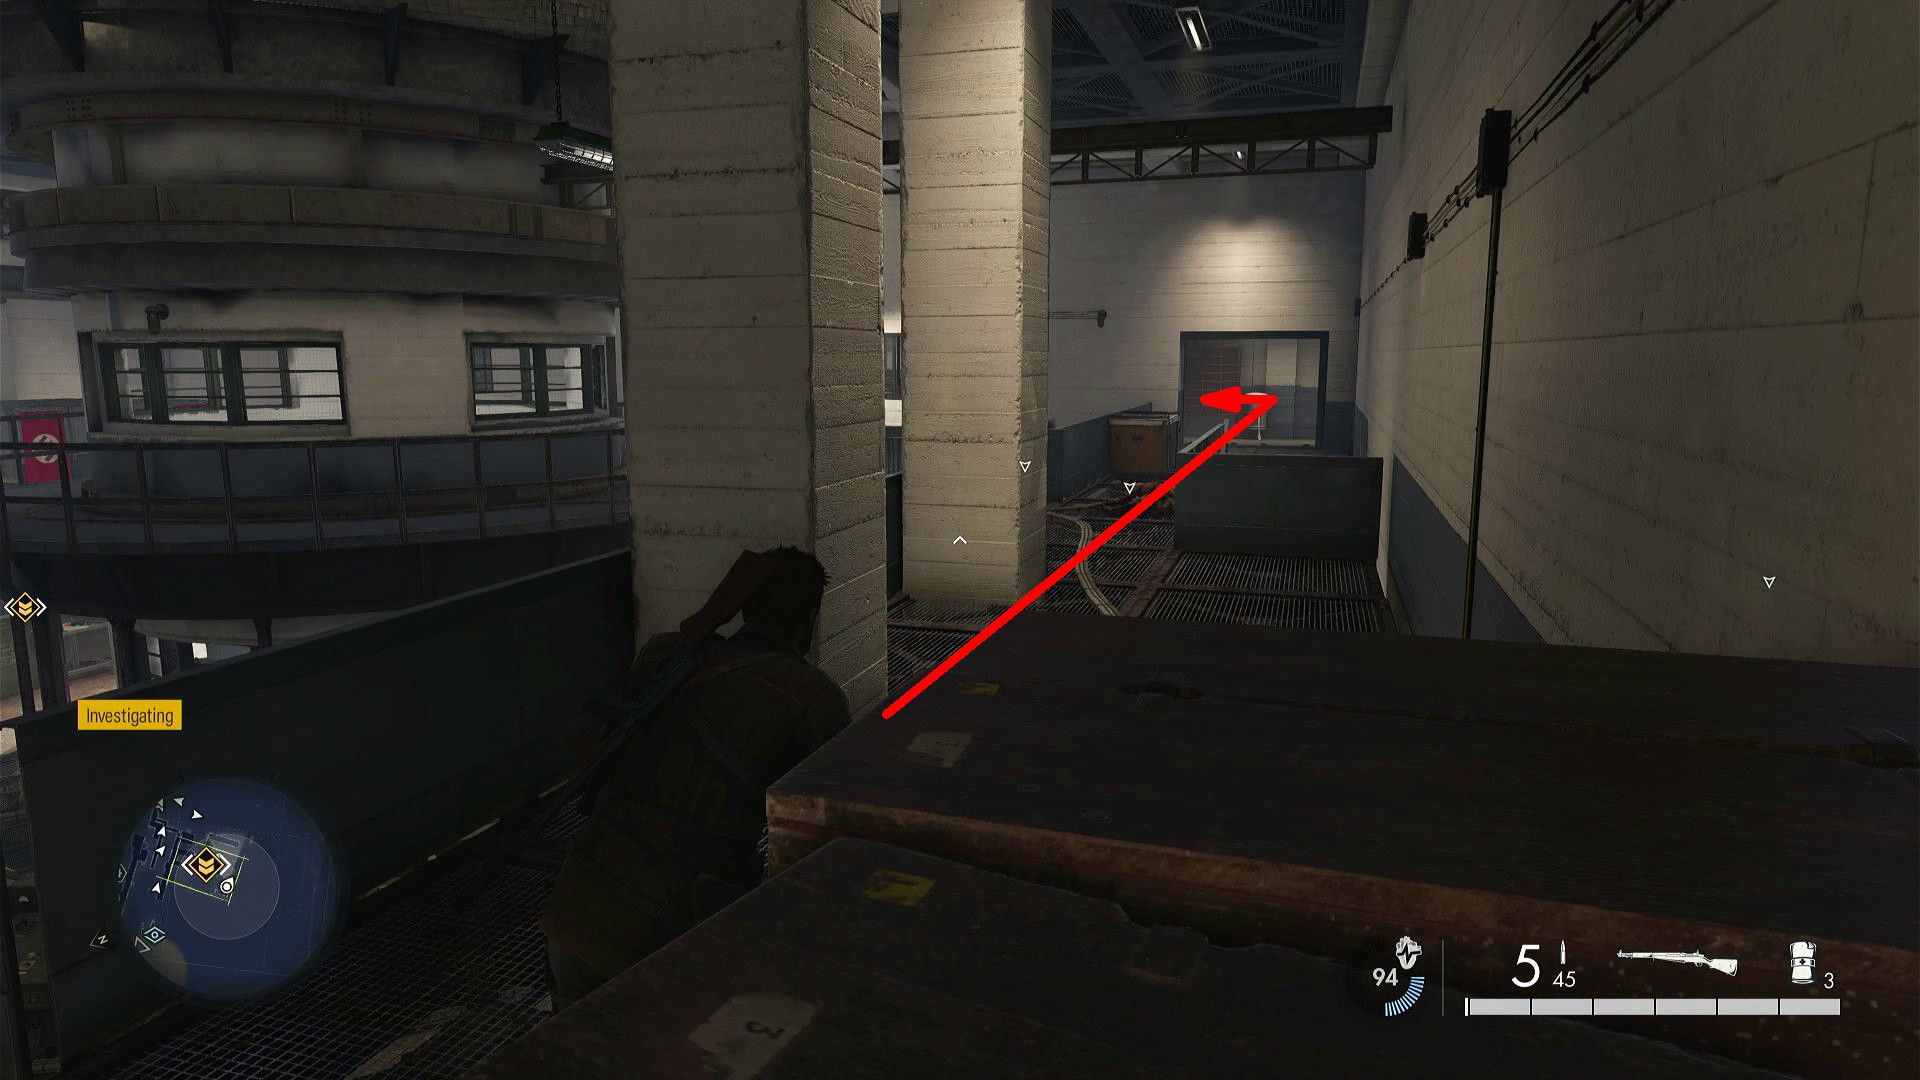
- Follow the walkway at the top, and turn left at the dead end to enter an office.
- Look at the table on the left side of the office.
Read More
- Top 8 UFC 5 Perks Every Fighter Should Use
- Unlock the Magic: New Arcane Blind Box Collection from POP MART and Riot Games!
- Unlock the Best Ending in Lost Records: Bloom & Rage by Calming Autumn’s Breakdown!
- Unaware Atelier Master: New Trailer Reveals April 2025 Fantasy Adventure!
- Unlock Roslit Bay’s Bestiary: Fisch Fishing Guide
- How to Reach 80,000M in Dead Rails
- Unleash Hell: Top10 Most Demanding Bosses in The First Berserker: Khazan
- REPO: How To Fix Client Timeout
- Reverse: 1999 – Don’t Miss These Rare Character Banners and Future Upcoming Updates!
- How to Unlock the Mines in Cookie Run: Kingdom
2025-02-03 20:45