Almost everyone in Atomfall seems to be connected to the enigmatic Oberon in some secretive way, and Joyce Tanner is no exception. She explains that she needs to activate the radio towers within the quarantine zone to broadcast a message. If you aid her, she promises to lend a hand in helping you depart from this grim location.
It’s quite challenging to determine Joyce’s trustworthiness. She seems secretive about the entity she works for and her objectives. Thus, it’s important to verify her honesty and check if she can guide us towards a solution.
Where To Find Joyce Tanner In Atomfall
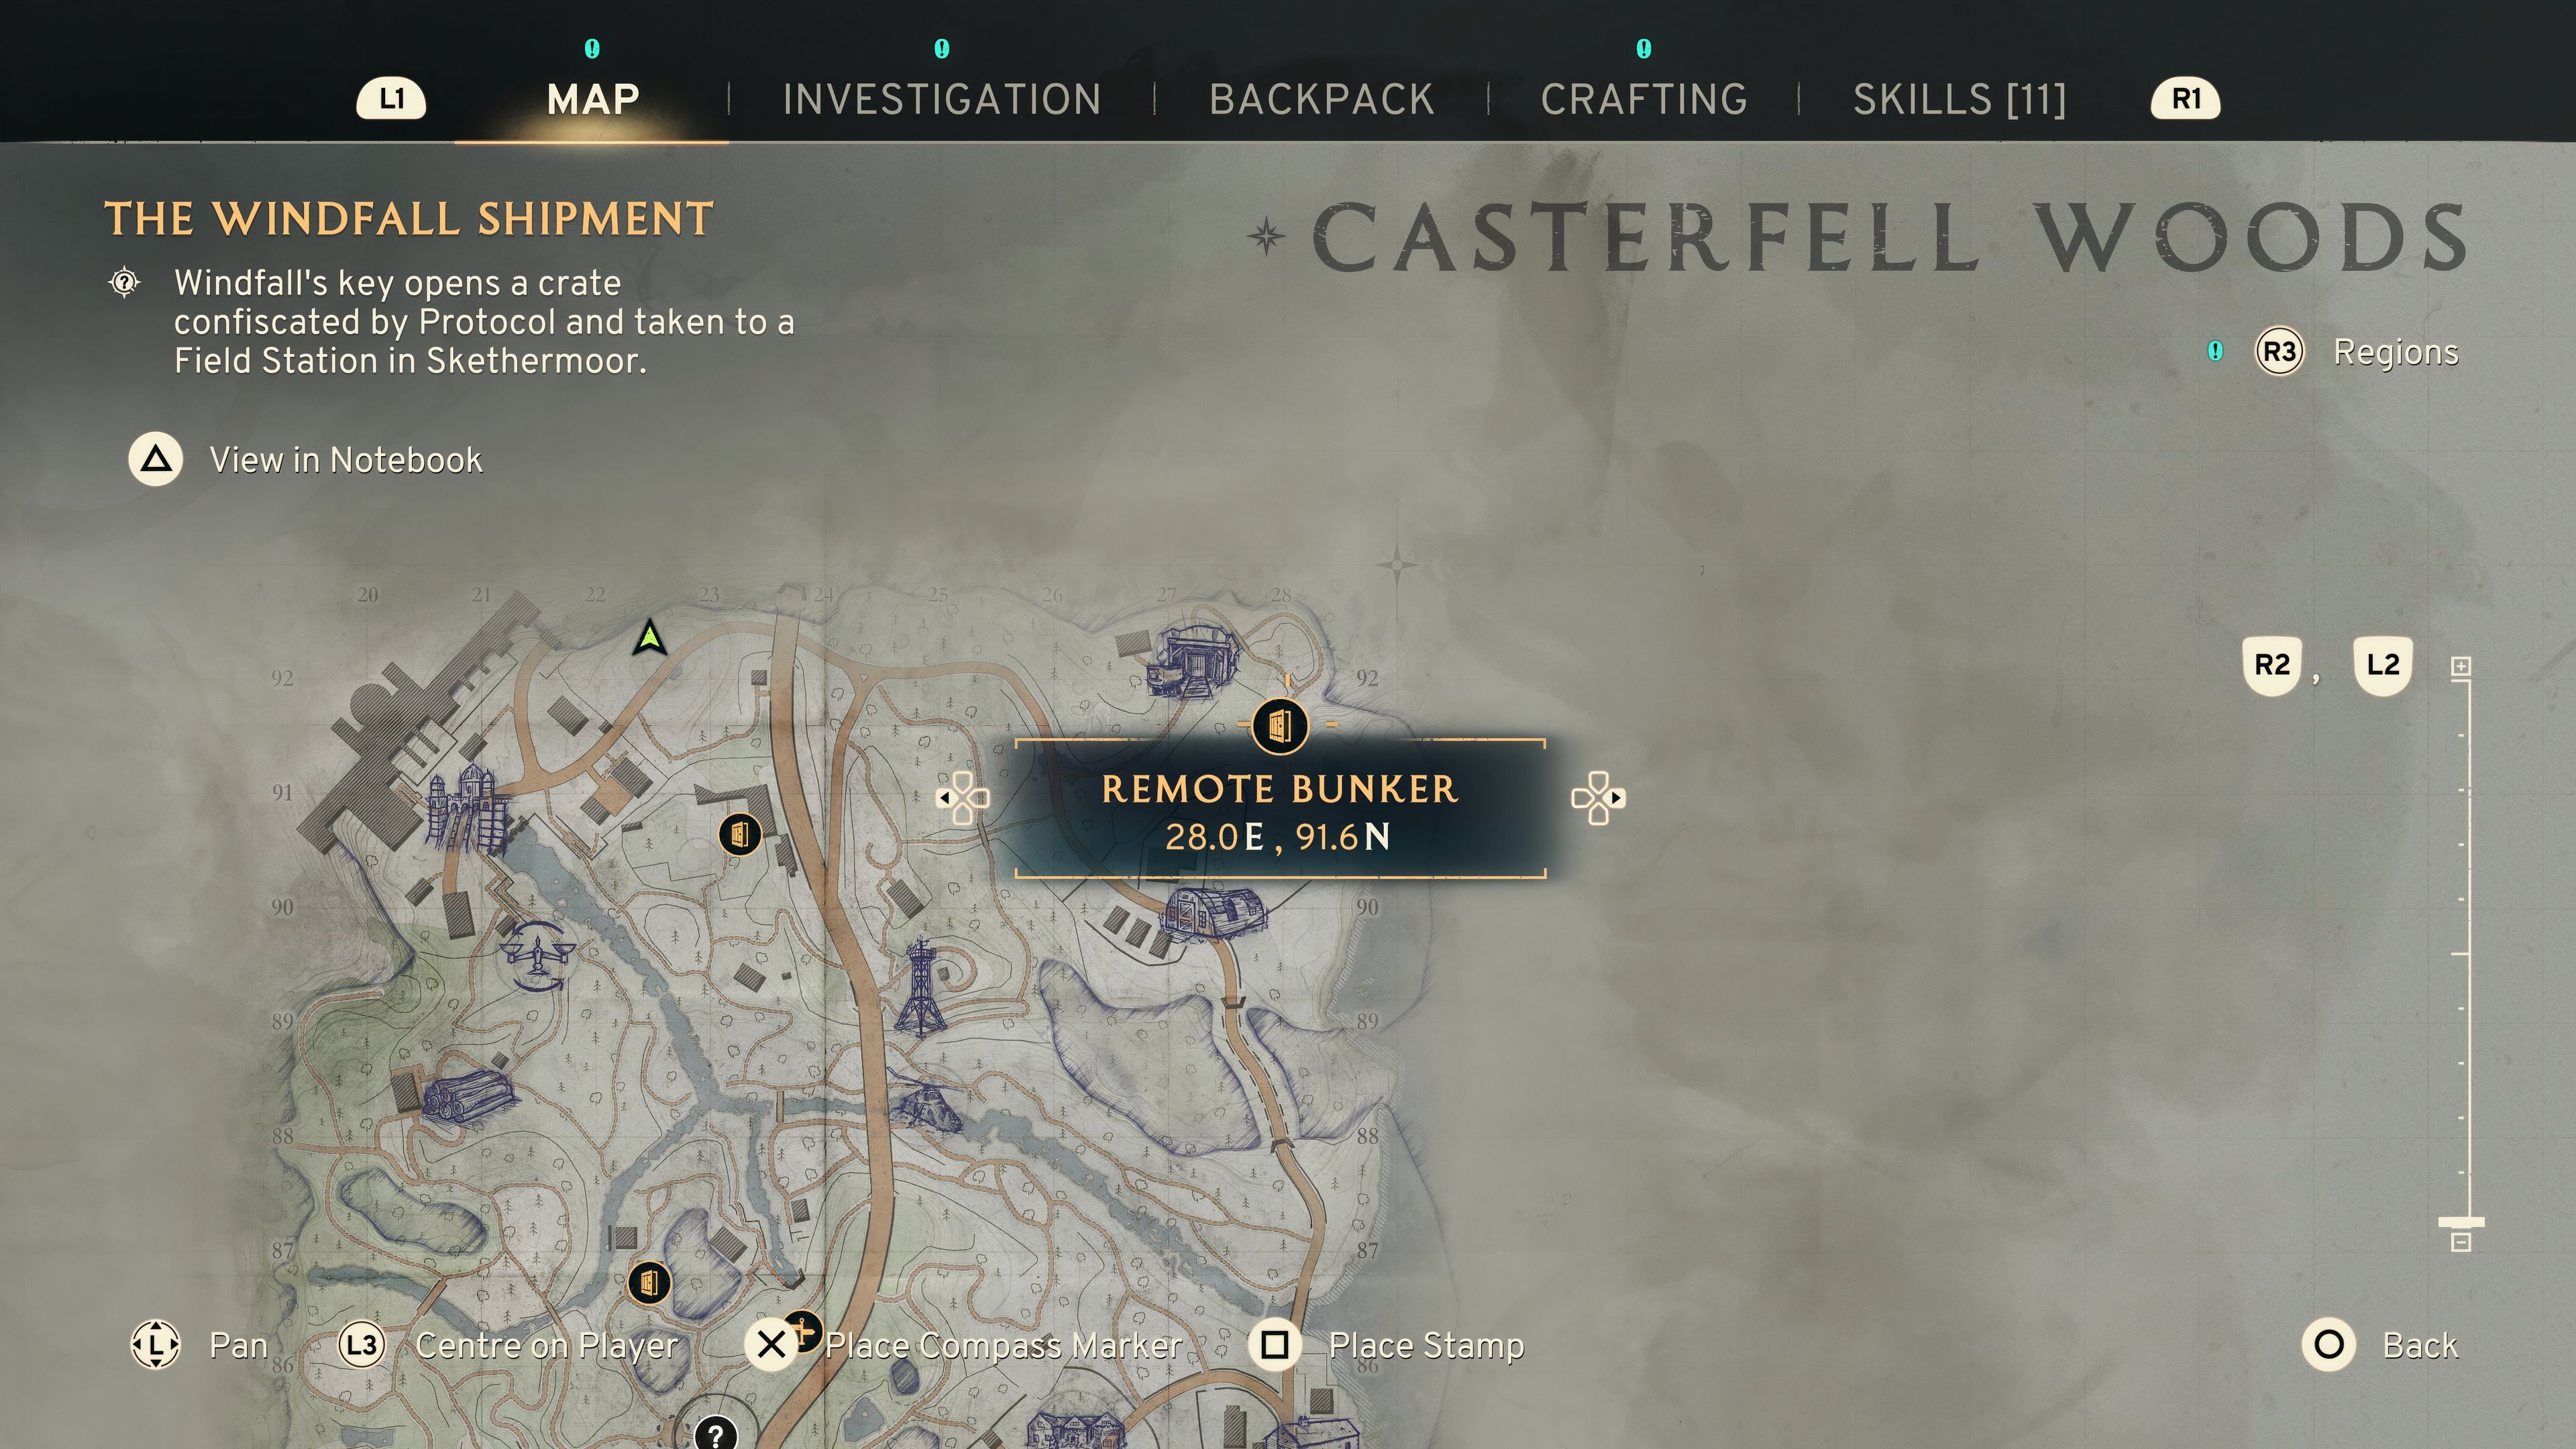
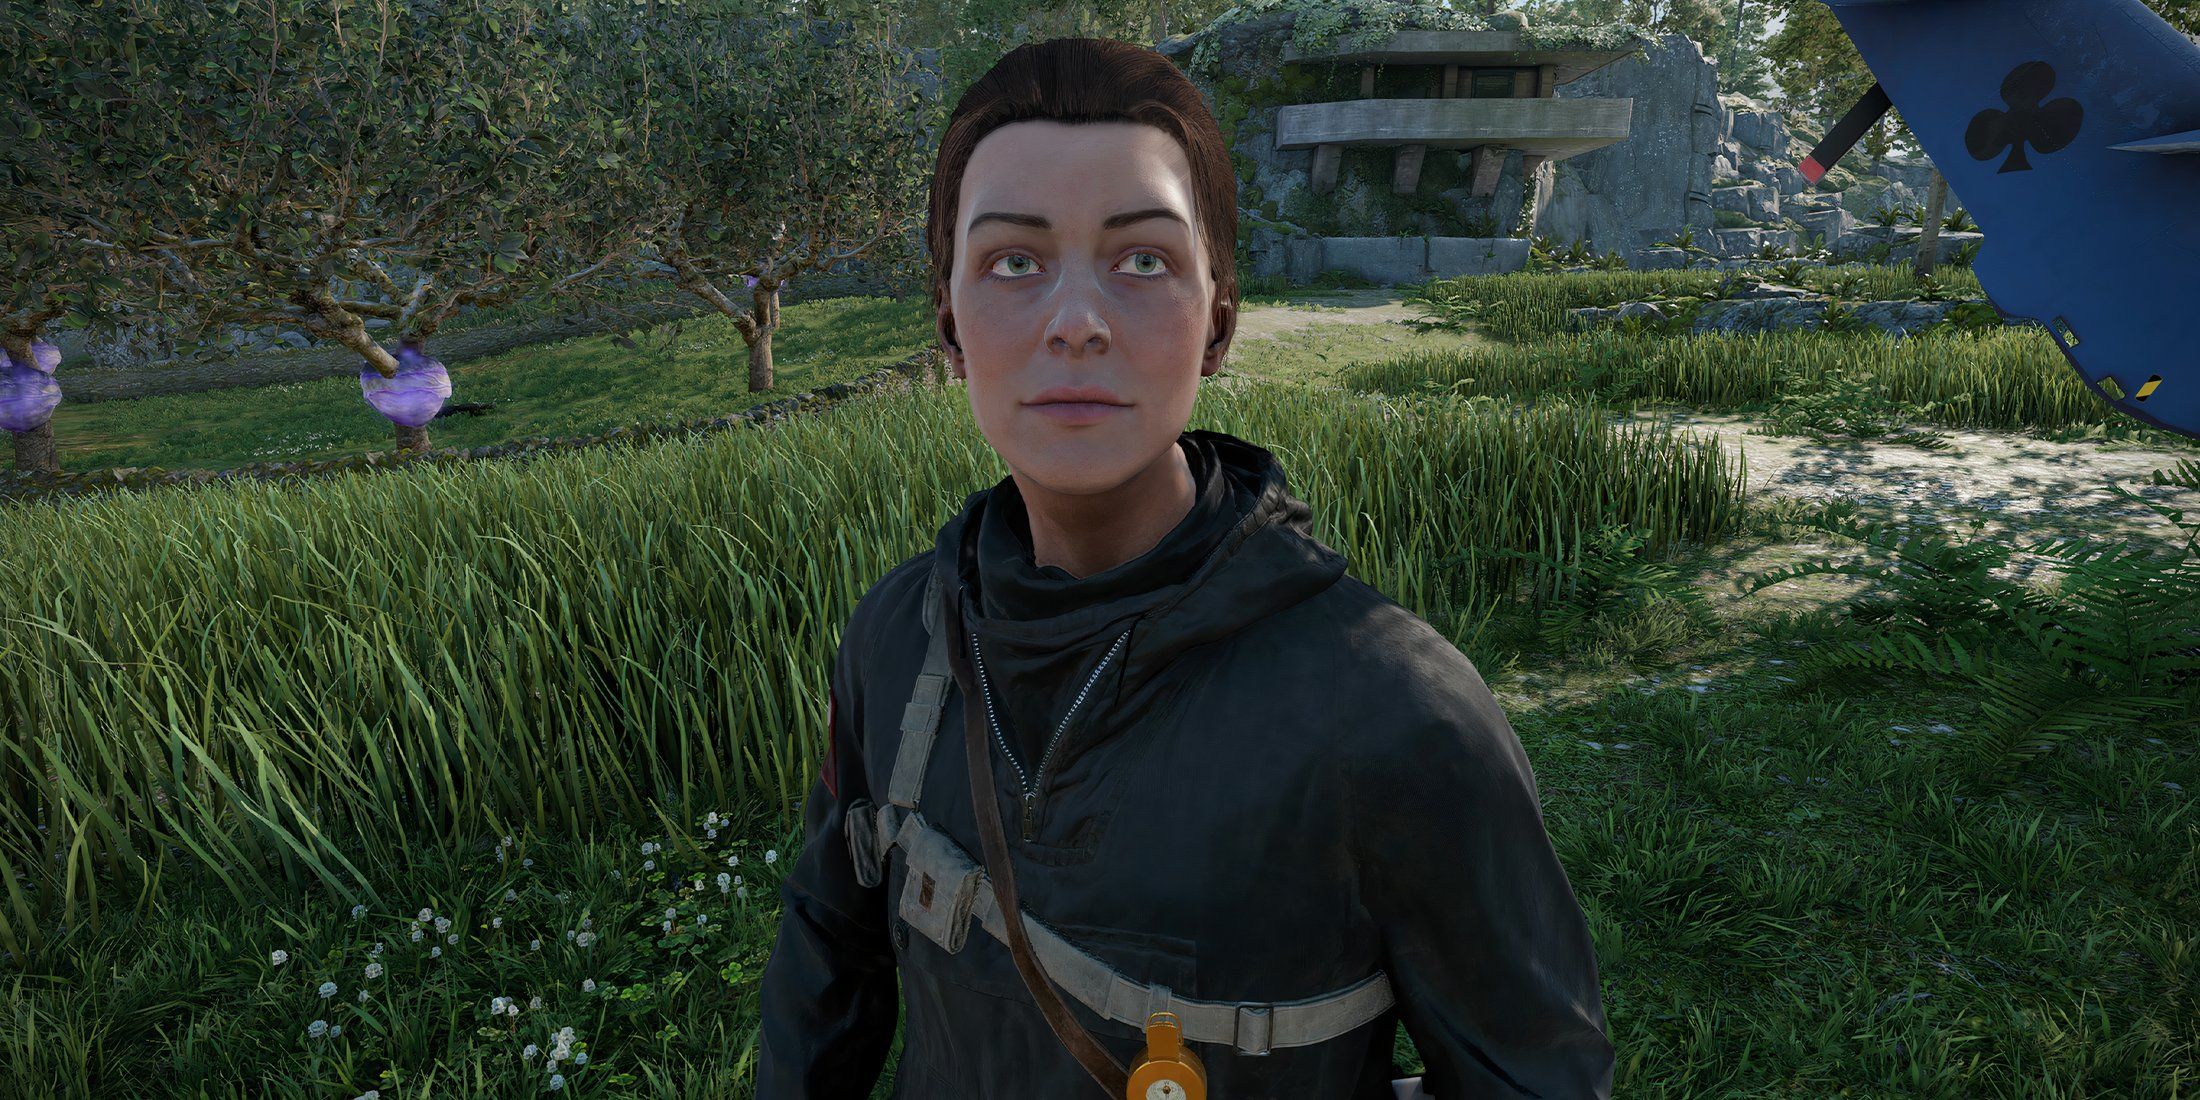
In my gaming adventures, I first encountered Joyce Tanner within the confines of the secluded fortress known as the “Remote Bunker.” Nestled in Casterfell Woods, this hidden sanctuary can be precisely located at coordinates 28.0 E, 91.6 N on your map.
Joyce shares her harrowing tale of having arrived here with a convoy, intending to explore the quarantine zone. However, their journey took an unexpected turn as they were besieged by druids. Miraculously surviving this ordeal, she’s now determined to establish contact with her superiors in order to devise a means of escape.
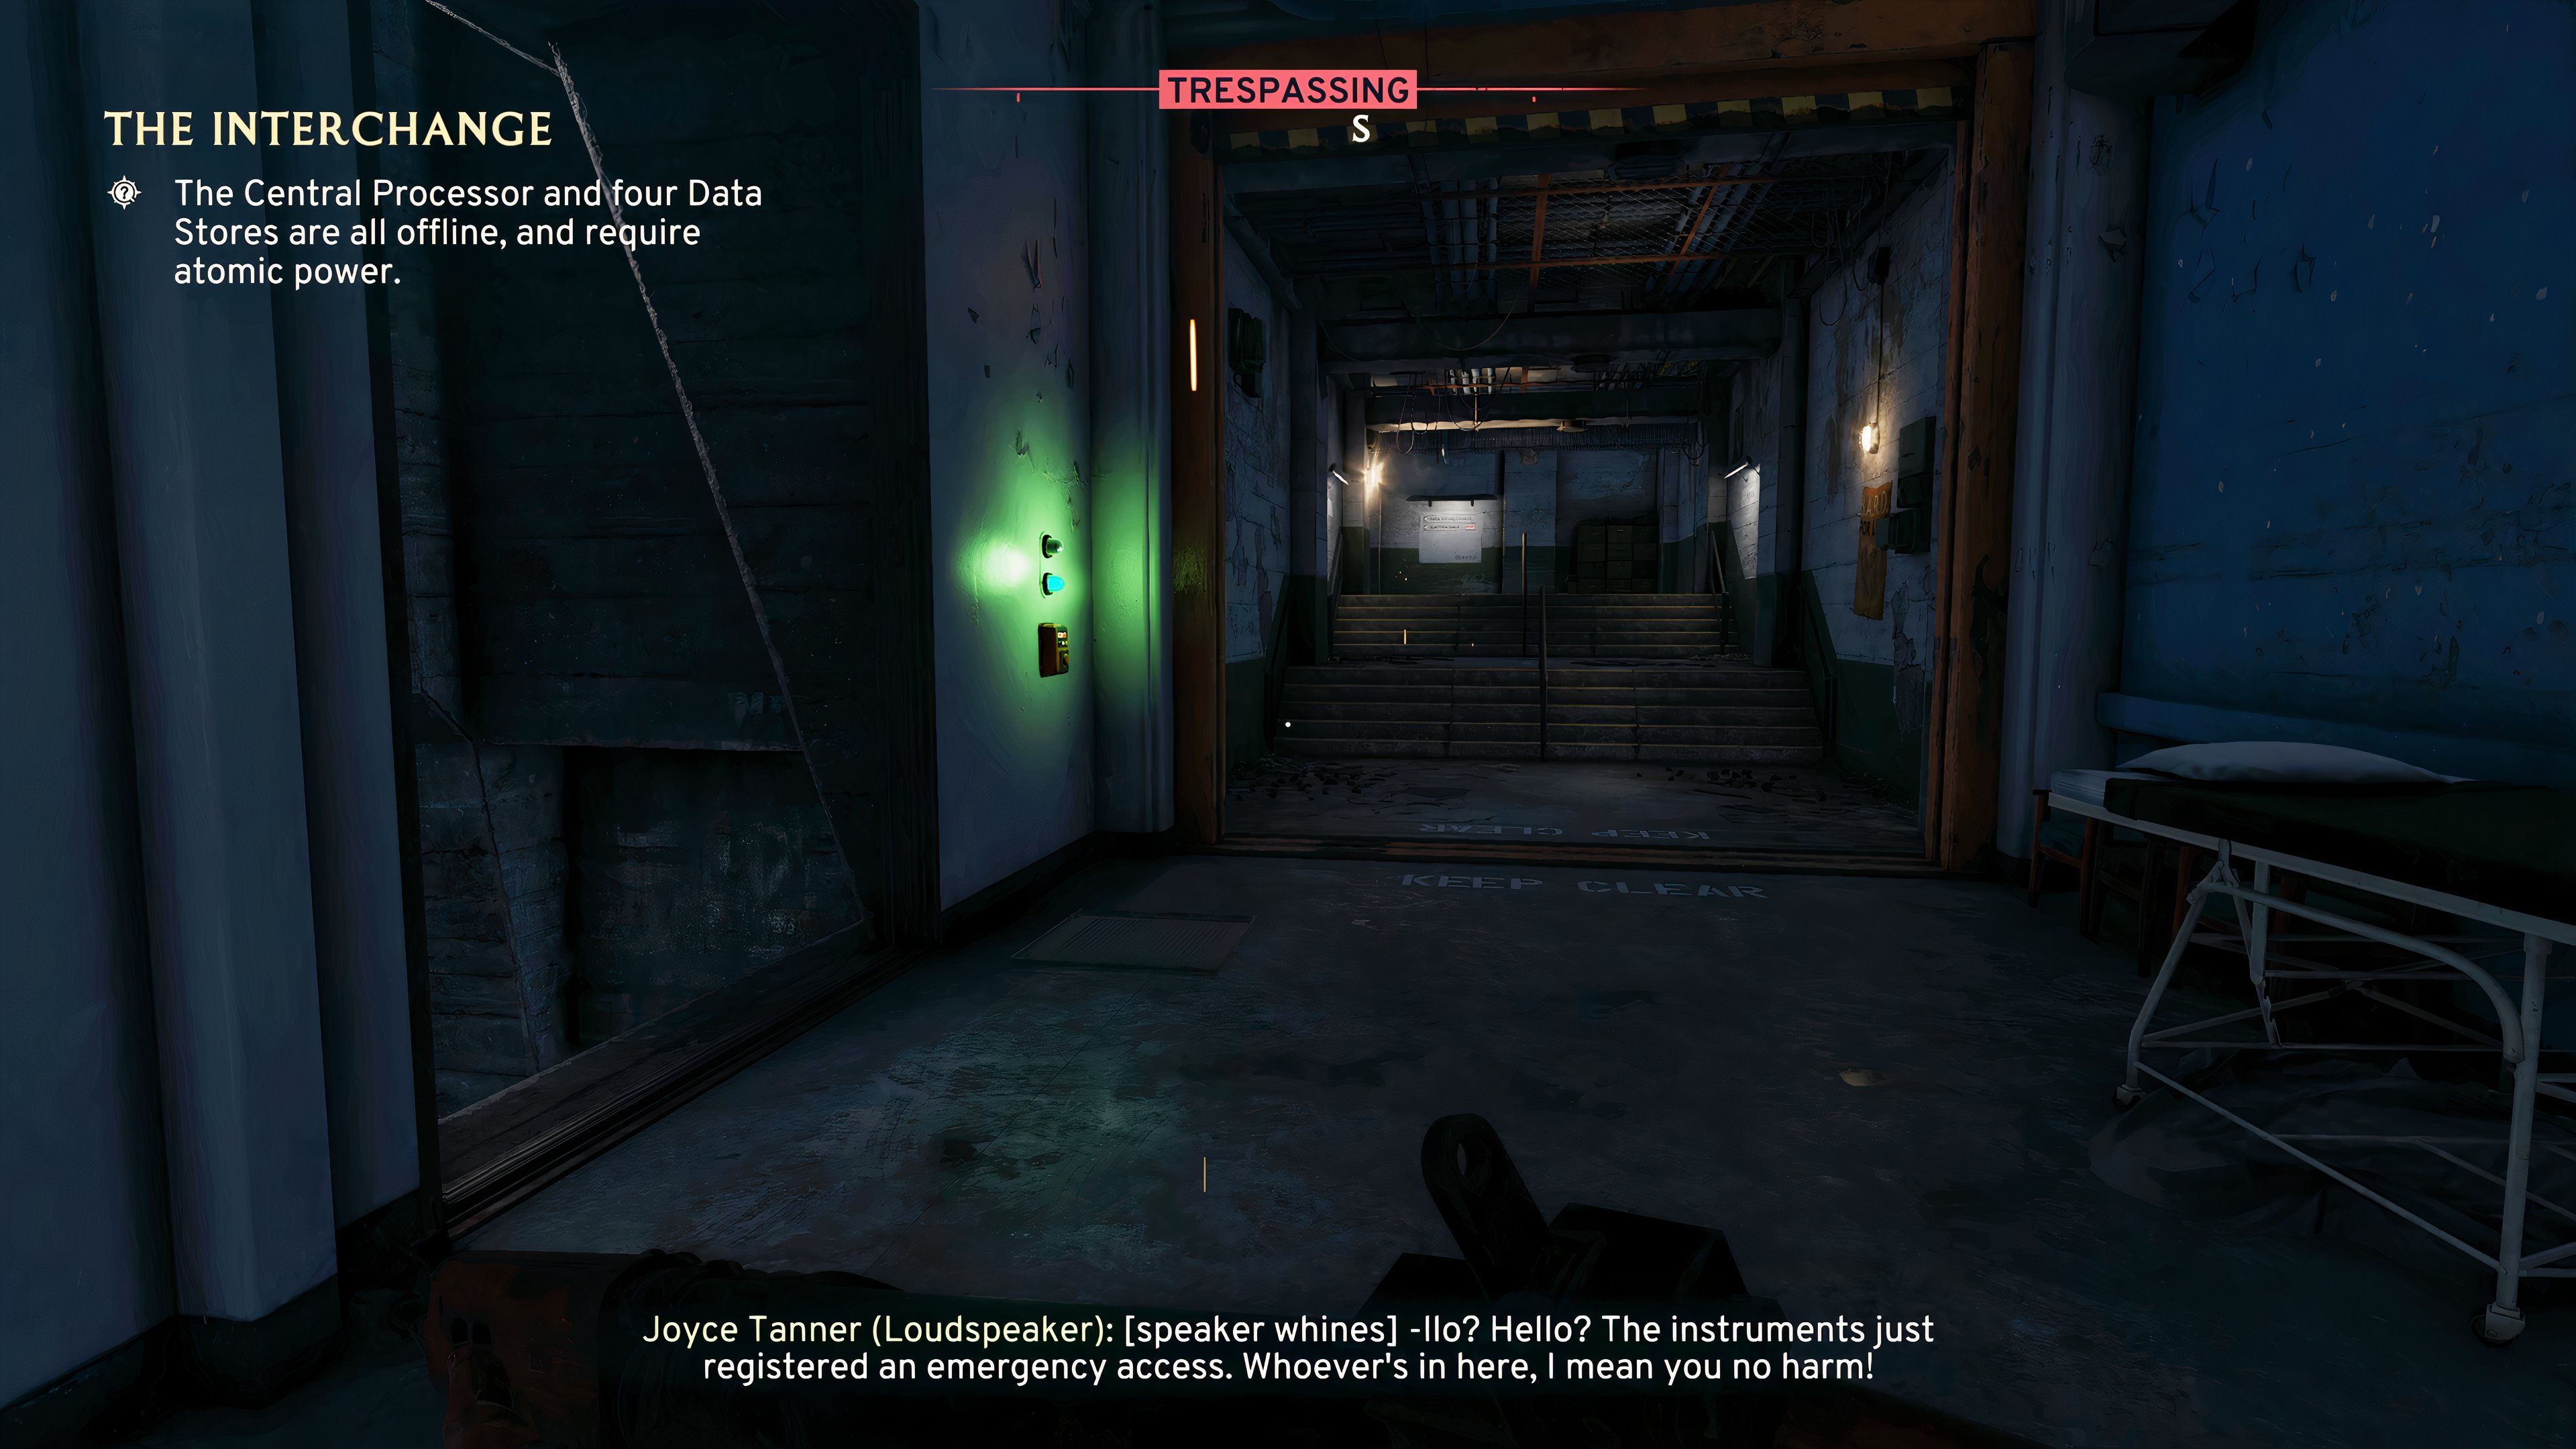
However, for her message to reach beyond the boundaries of the quarantine zone, The Interchange needs to be reactivated first.
When you encounter Joyce in Casterfell Woods, the quickest access point to The Interchange in this area is at coordinates 27.6 E, 83.6 N. Once there, your objective is to find the Central Processor Room, located centrally within the facility. Inside this room, you’ll discover a deactivated console known as the Bootstrap System Terminal. To activate it, you’ll require an essential item called an Atomic Battery. Insert the battery into the terminal’s socket to bring it back online.
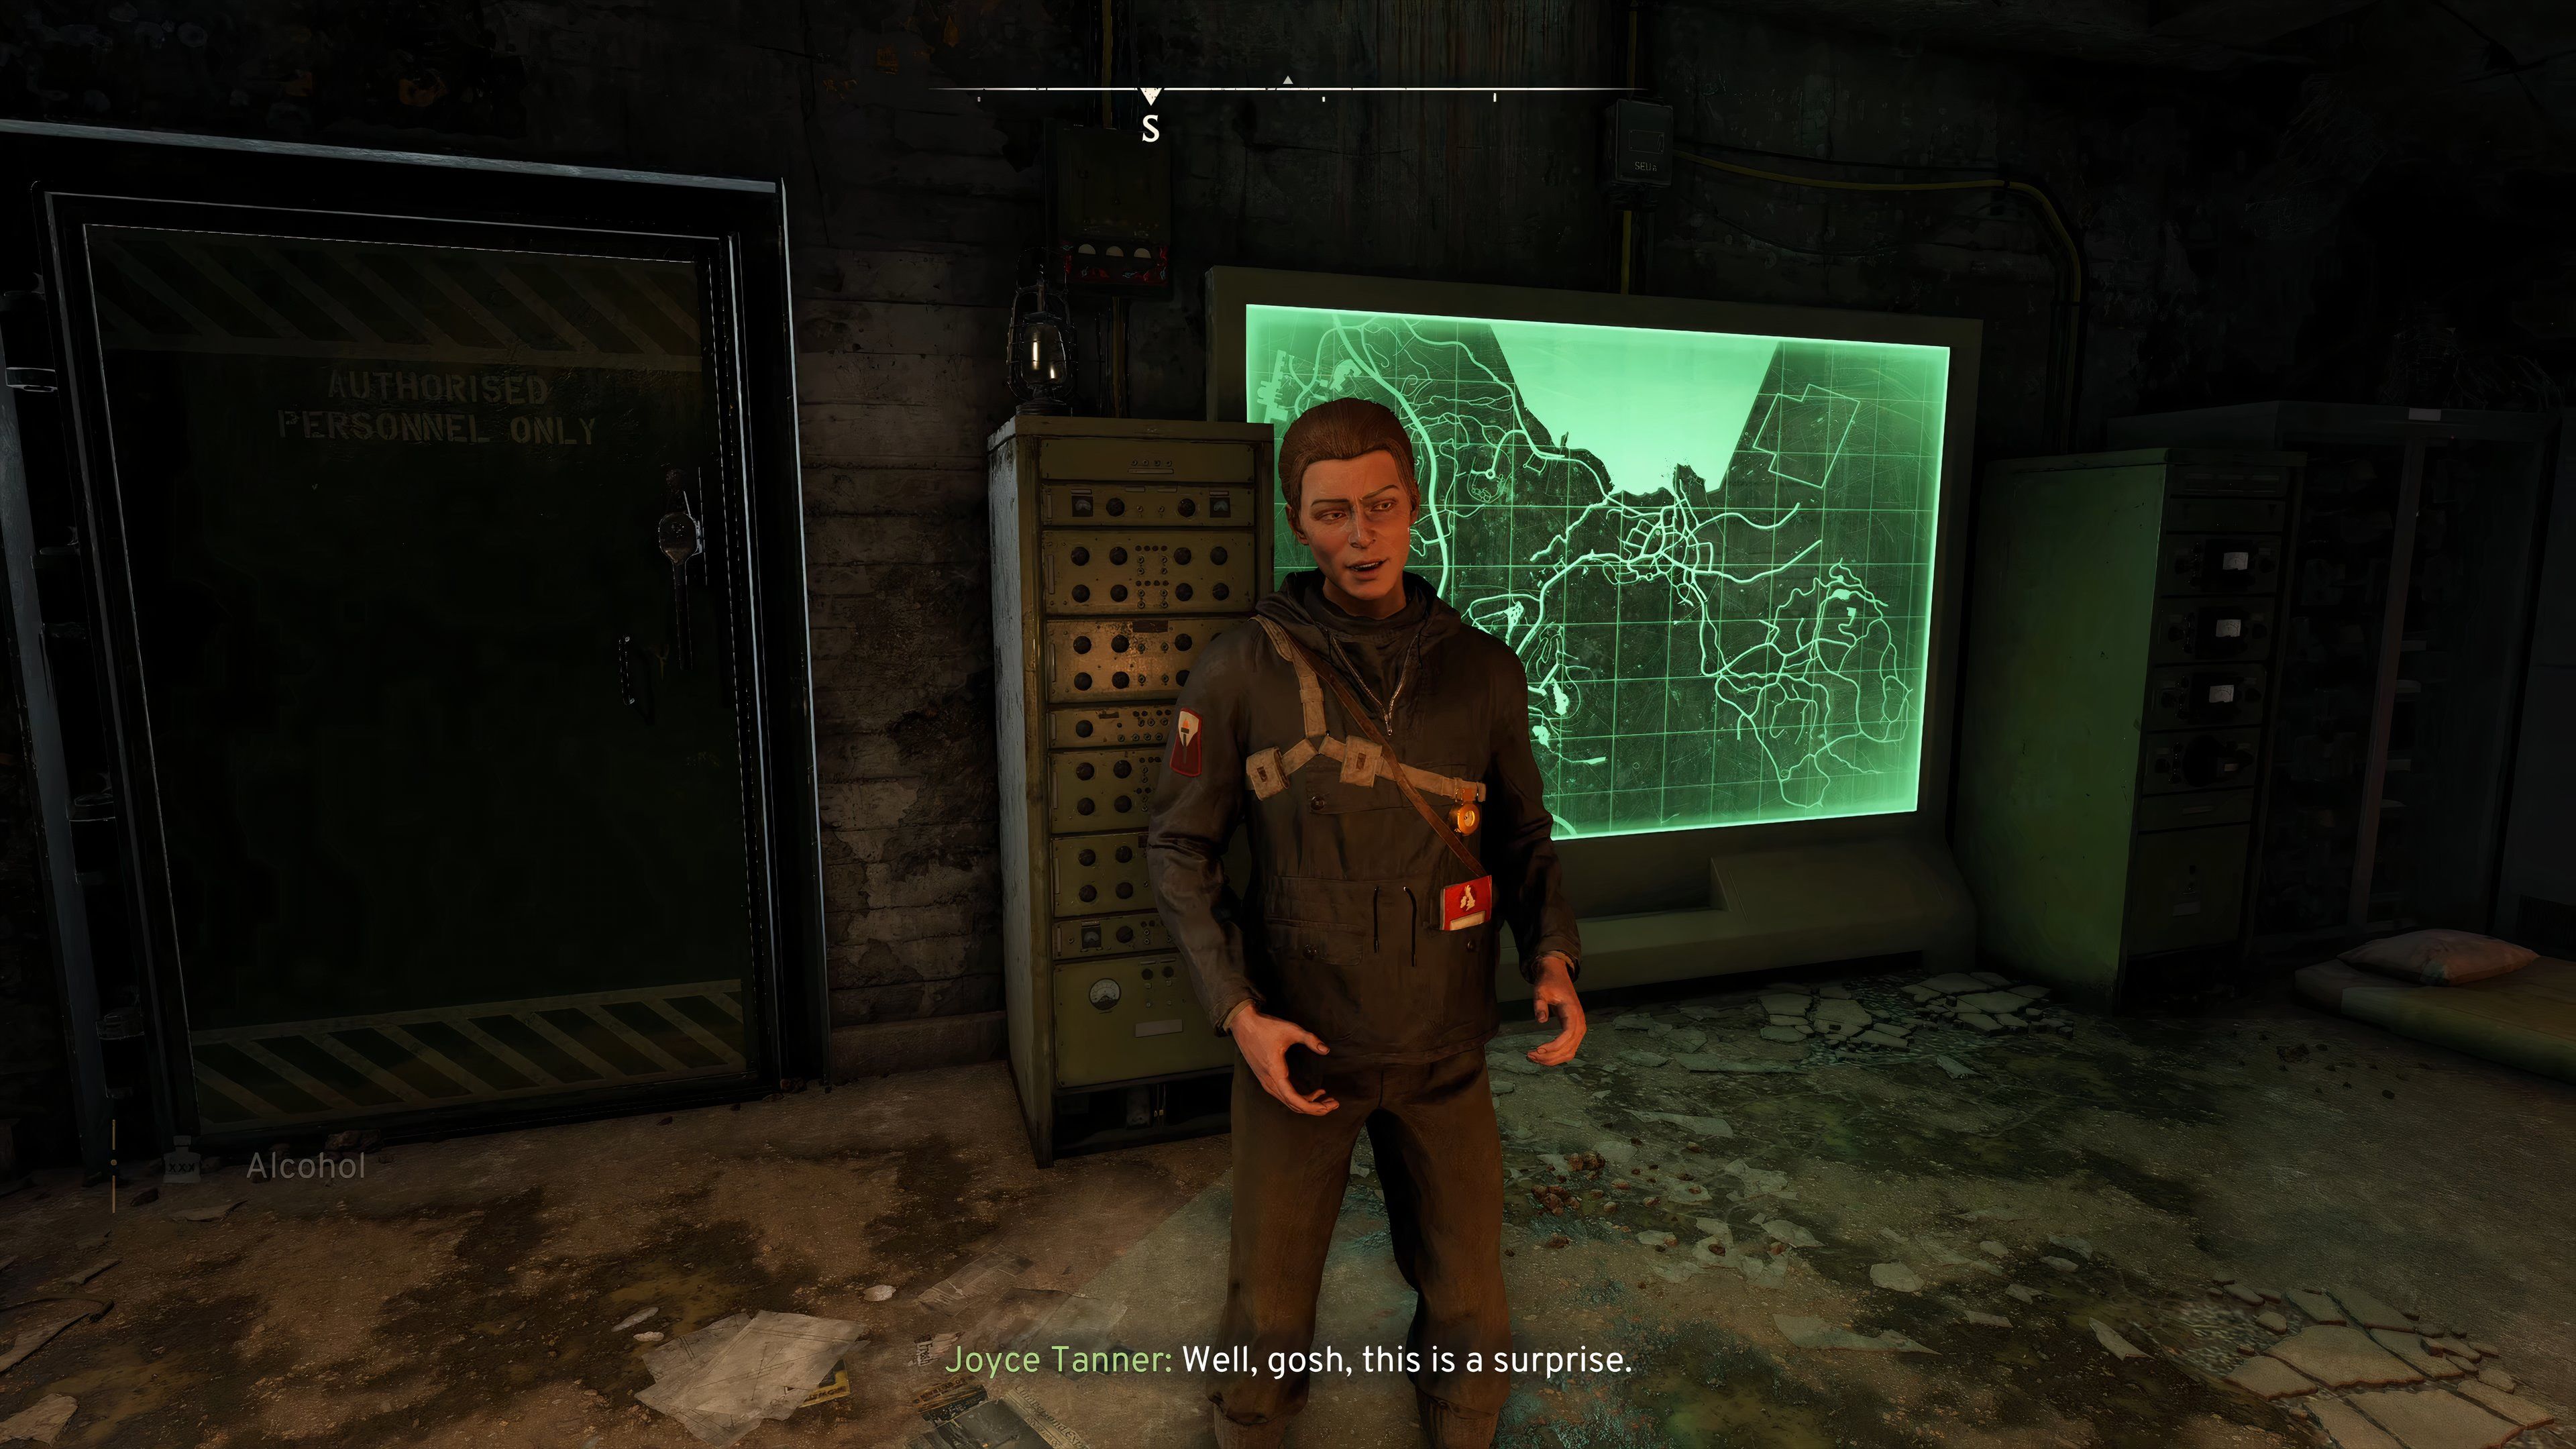
Now, only part of The Interchange is being energized. However, there are extra Data Storage units that will require Atomic Batteries to activate as well. Once you switch on Data Store Charlie, Joyce Tanner will show up at The Interchange. You’ll find her in the upper level of Data Store Charlie, and she’s bound to be taken aback when she spots you there.
She will indicate that she has unlocked the entrances to three radio towers situated within the quarantine area. Yet, she is unable to broadcast a message to her group as each tower demands a keycard for operation. Therefore, you’ll have to visit each radio tower, locate their keycards, and activate them.
How To Activate Every Radio Tower In Atomfall

In Slatten Dale, Casterfell Woods, and Skethermoor, you’ll discover a radio tower. Speak with Joyce at The Interchange to have her pinpoint these locations on your map. To acquire the keys for each radio tower, here’s how it goes:
1. For Slatten Dale’s tower, head to the Power Plant and search for the keycard there.
2. In Casterfell Woods, visit the Abandoned Gas Station and find the keycard inside.
3. Lastly, for Skethermoor’s radio tower, go to the Sewer Exit and retrieve the keycard from that location.
- The Slatten Dale Radio Tower Keycard can be found below the radio tower in a flooded quarry. There will be a metal beam that will act as a ramp to a cave. Inside the cave, you can crawl through a hole in the wall to find a corpse with the keycard on it.
- The Casterfell Woods Radio Tower Keycard is inside Bunker L9, which is found at the coordinates 23.3 E, 90.6 N. on the map in Casterfell Woods.
- The Skethermoor Radio Tower Keycard is stashed in the Vehicle Storage Bunker, which is located at 43.4 E, 74.6 N on the map in Skethermoor.
After collecting all keycards, you’ll gain access to the radio towers where you can interact with their consoles. Activating two of these towers will trigger messages from Joyce. Upon powering up the final tower, a cryptic transmission will play. When inquiring about this message, Joyce appears unaware and somewhat secretive regarding whether her signal has reached anyone beyond the quarantine zone.
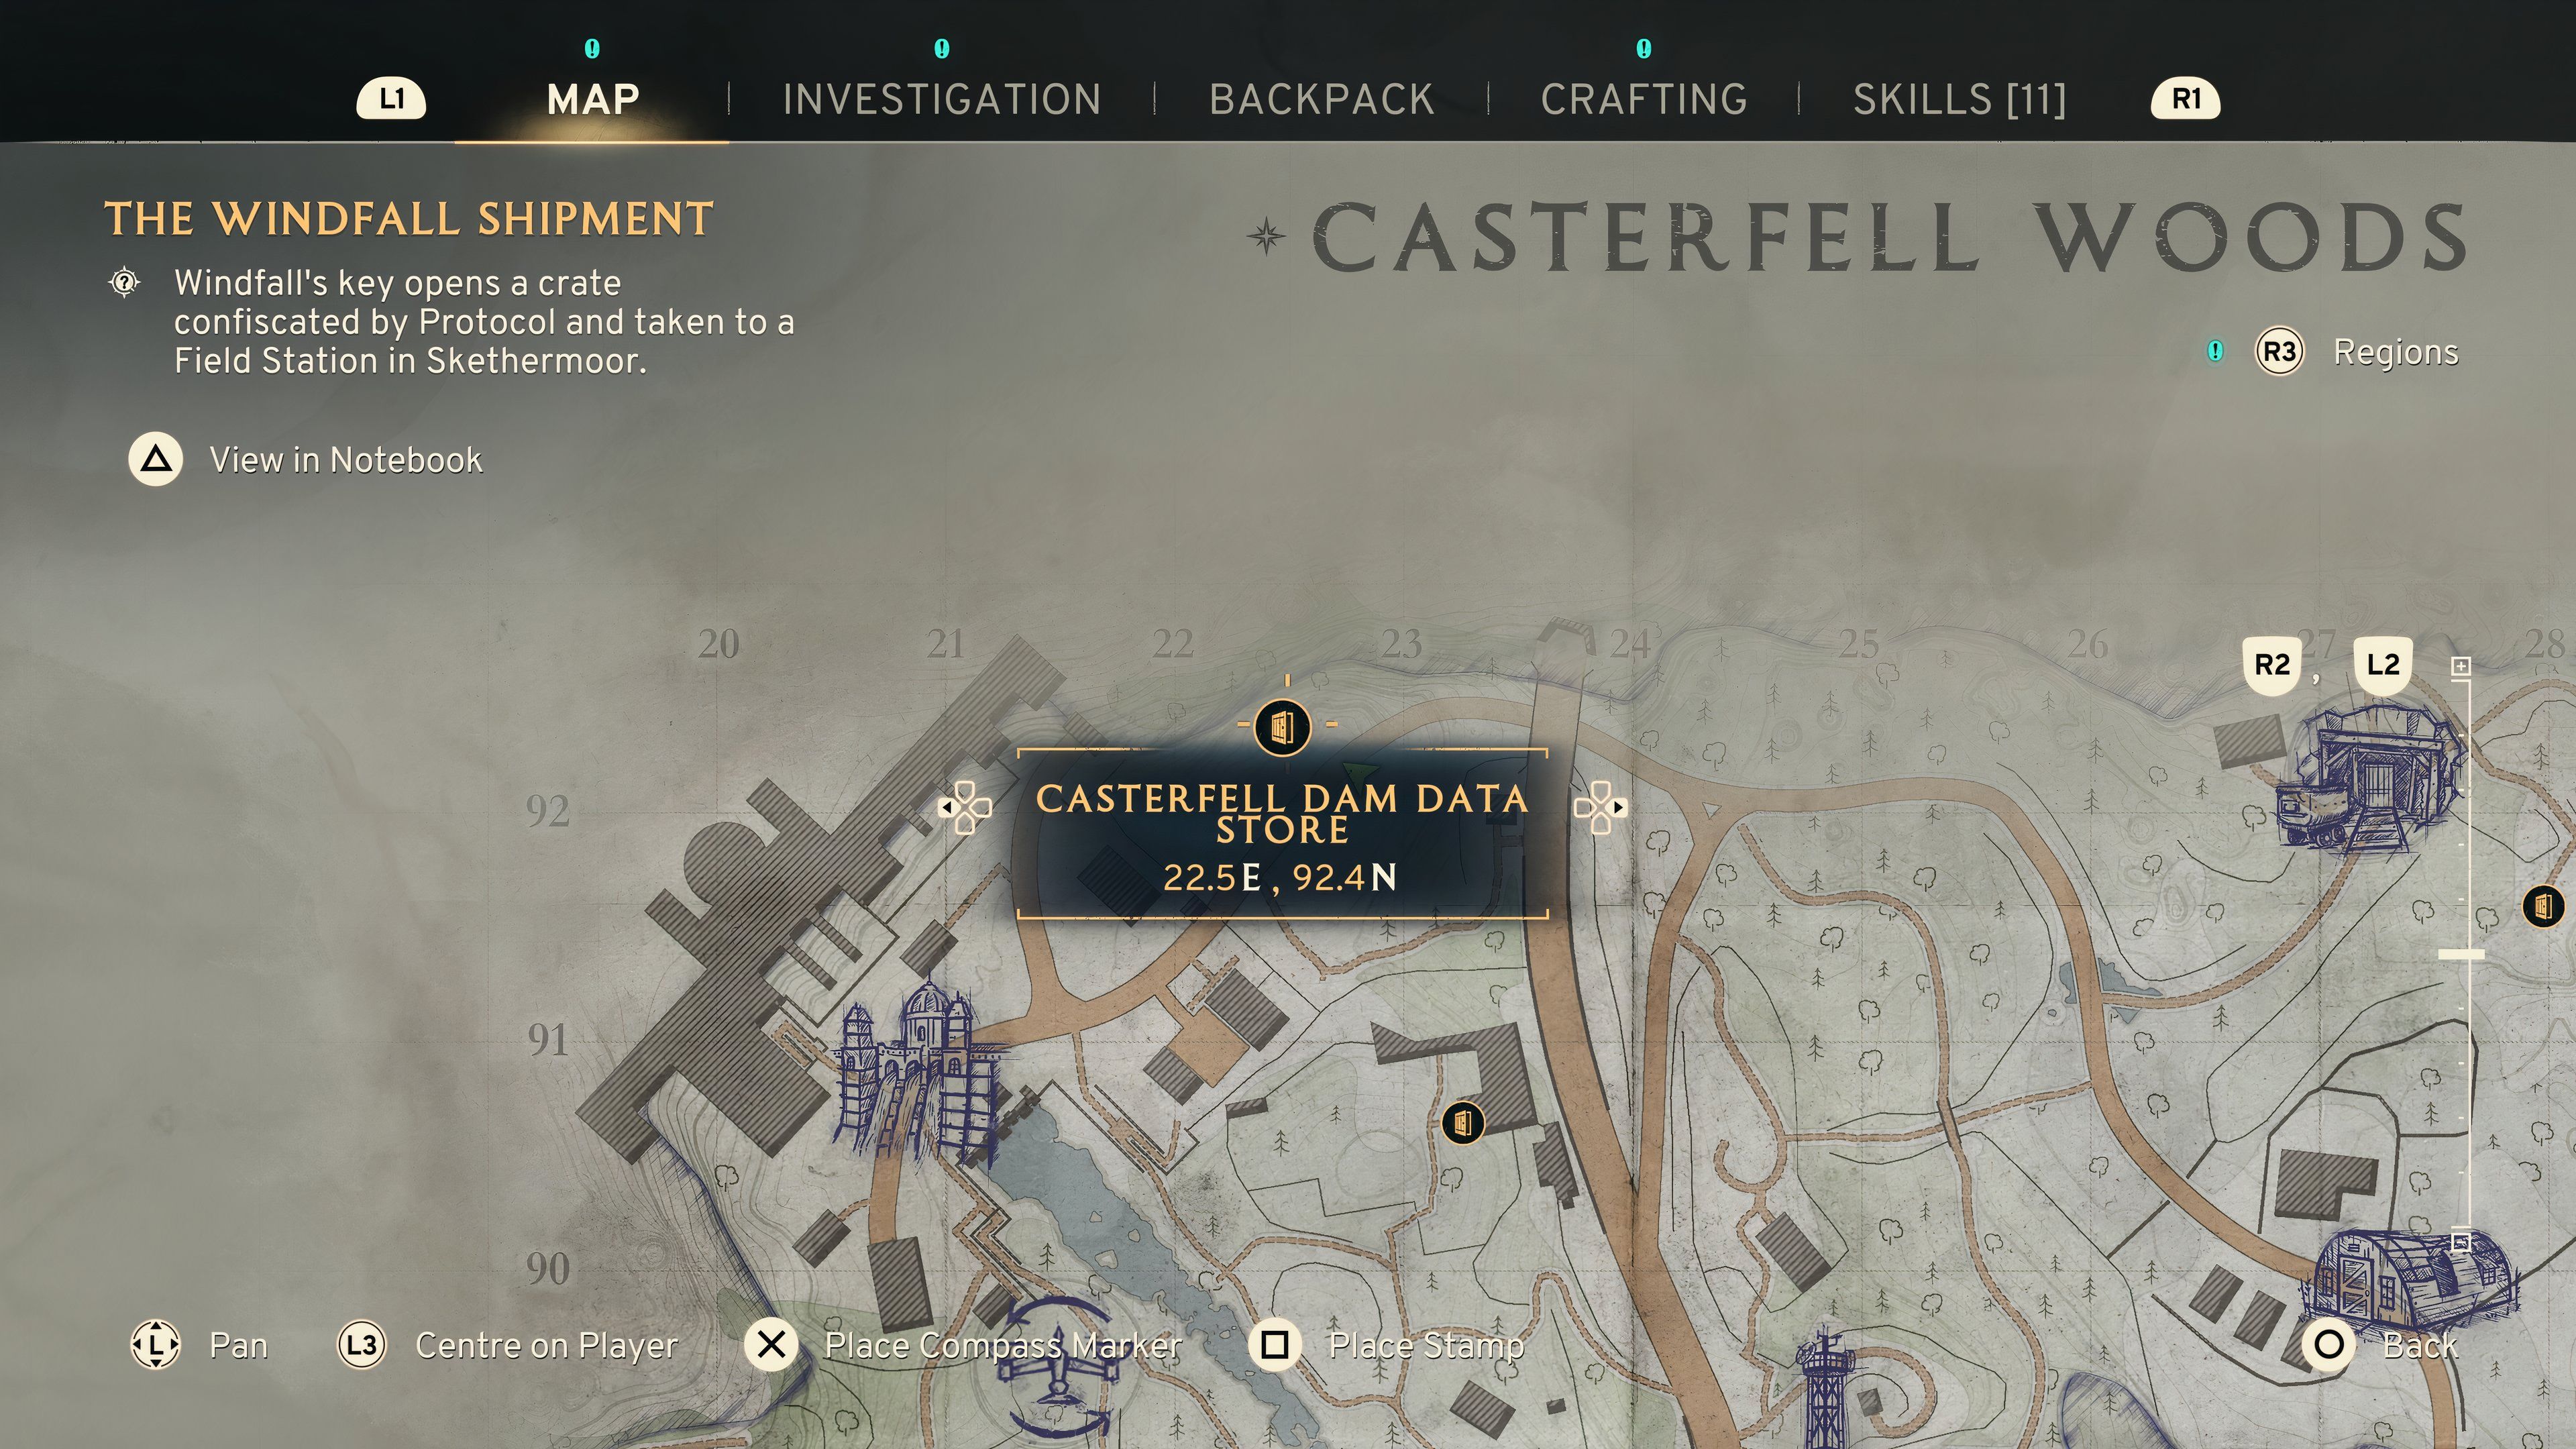
How To Access The Casterfell Dam Data Store

In Joyce’s ongoing journey, you’ll encounter a character named Dr. Garrow next. She’s a scientist who traveled with Joyce in the same convoy and played a role in the sequence of events leading to the quarantine. Currently, she’s imprisoned at Skethermoor Prison, specifically at coordinates 41.1 E, 70.8 N within Skethermoor, for meddling with The Protocol’s defenses. To free her, you’ll need to use a Signal Redirector tool. Unfortunately, after being freed, she’ll escape through an entrance in The Interchange that you can’t reach directly.
Next, you’ll locate Dr. Garrow within The Interchange, specifically in the Central Processor Room. She’ll request your assistance in gathering her research notes from the Robotics department. Once you’ve retrieved these notes, she’ll direct you to the Casterfell Dam Data Store, which is at coordinates 22.5 E, 92.4 N within Casterfell Woods. She’ll provide you with a Dam Data Store Keycard, allowing you to proceed there.
If you’re not concerned with acquiring Dr. Garrow’s research findings, you might choose to eliminate her and retrieve the Dam Data Store Keycard from her person instead.
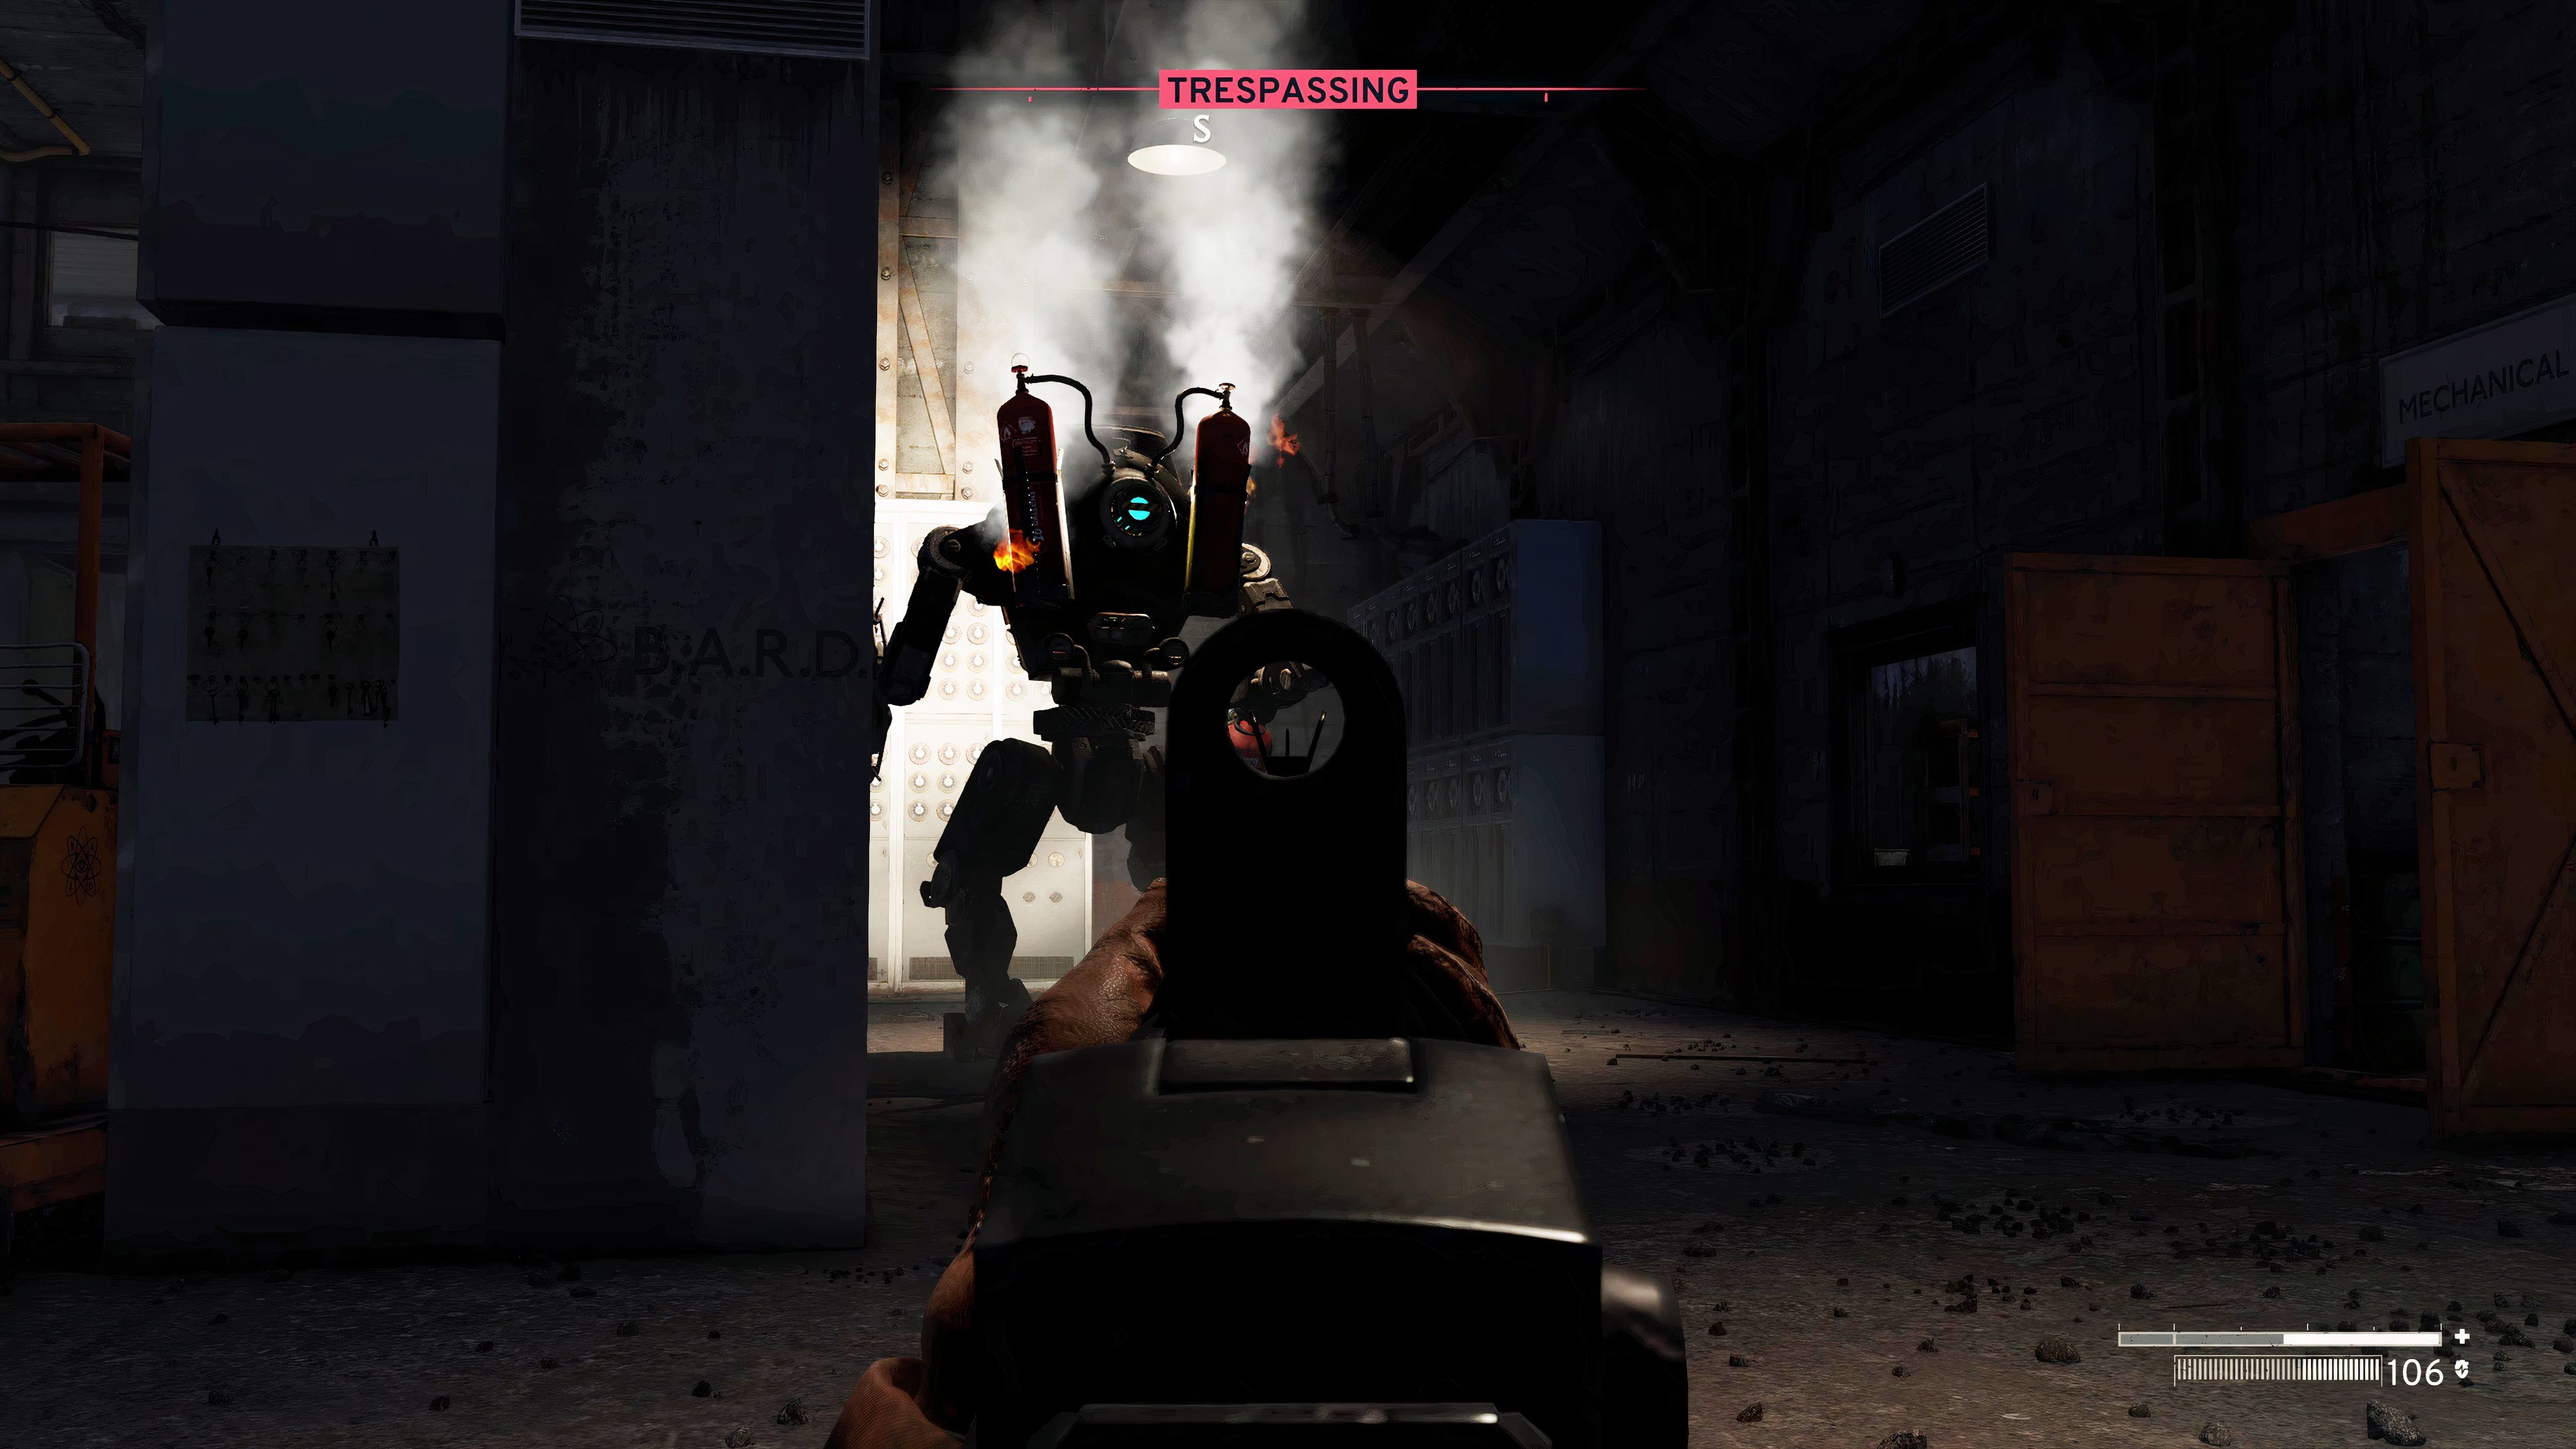
At the Casterfell Dam’s data center, first locate and eliminate a B.A.R.D. Robot using a flamethrower. Next, turn on the entire building until you reach the office where you can use the Dam Data Store Keycard. This action will activate a computer console that Dr. Garrow needs you to execute the command “GEN ERA” on.
Once you restart the system, Joyce will announce over the intercom that she needs the data from the computer. Instead of what you were instructed before, she asks you to input the command “GEN MOVE” which will move all the data from this location onto a tape.
You should execute this command on your computer and then locate the Project Oberon Data Tape, which will be positioned to its left. If you don’t manage to obtain this tape, she won’t assist in helping you escape. So, it is crucial to retrieve the tape to reach a favorable conclusion with her.
Should you opt for executing GEN MOVE and delivering the tape to Joyce, Dr. Garrow may respond aggressively, potentially posing a threat to your life the next occasion you encounter her.
Should You Trust Joyce Tanner To Help You Escape In Atomfall?
Joyce will help you escape in Atomfall, but it leads to an undesirable ending.
Head back to Data Store Charlie in The Interchange and hand Joyce the tape. She might evade your questions about her intentions initially, but eventually, she’ll reveal the steps you need to take to break free from the quarantine zone. Here’s the deal: You need to journey to the Oberon Dig Site, collect a sample from Oberon, and then annihilate Oberon completely.
To access Oberon, first, charge Data Stores A, B, C, and D within The Interchange using Atomic Batteries. Afterward, manipulate the Signal Redirector on the electrical boxes that are embedded in the Central Processor Room’s floor. This action will energize the Bootstrap System Terminal. Once activated, simply pull a lever to initiate the Central Processor, which will ultimately open up the pathway leading to Oberon.
On your journey to Oberon, you may encounter multiple foes and a swirling blue fog that could cause an ‘infected’ condition. If you haven’t mastered the formula for ‘Mysterious Potions’ yet, it would be wise to locate it before setting off for Oberon, as this knowledge will allow you to cure yourself of the infection.
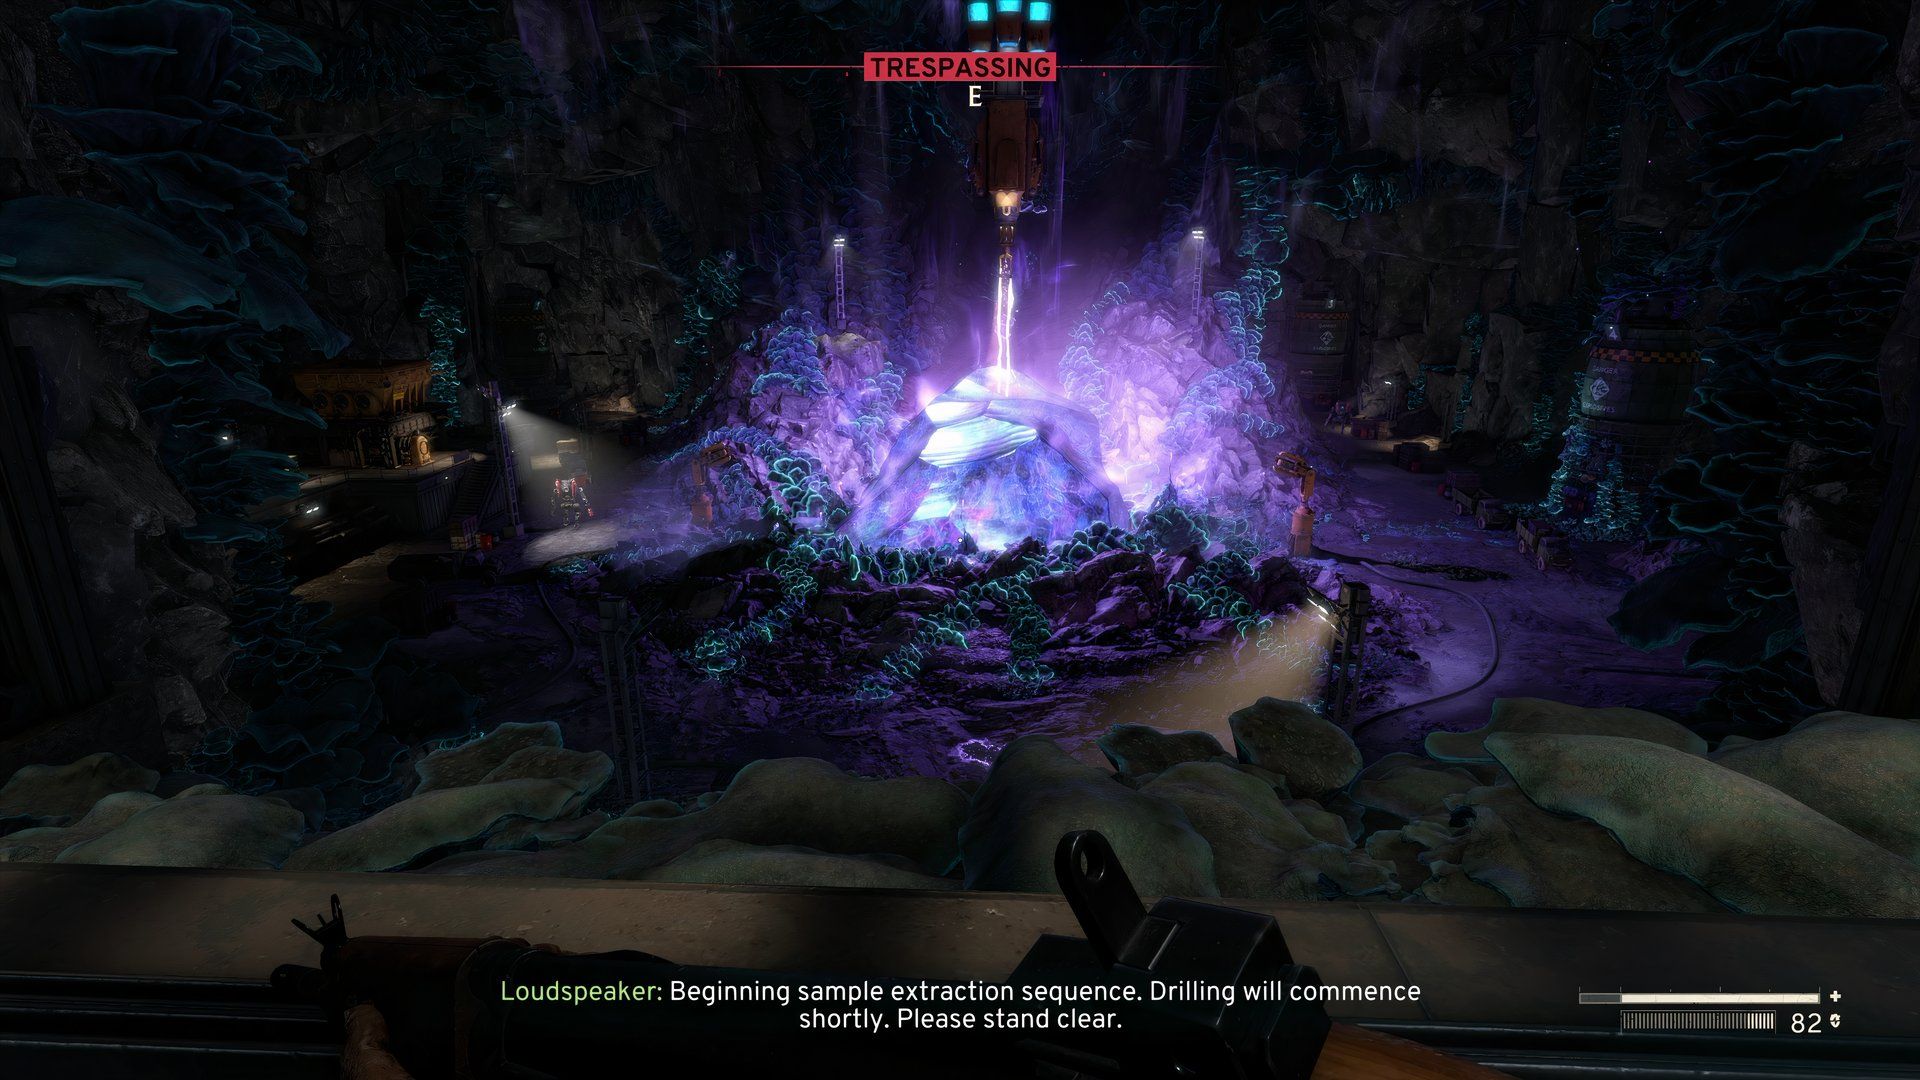
Navigate towards Oberon’s Excavation Site. Locate the massive structure near the meteorite. Be mindful of the wandering Thralls, as they might assault if you create too much ruckus. Your objective is to locate the Generator Room and insert two Atomic Power Cells into the terminal there. Should you require batteries, search for the Dig Site Storage Room Keycard in the Administration Office. The Storage Room will house a battery and a Pneumatic Tube system for retrieving stored items.
After slotting in two batteries, I can make my way to the Control Room. Here, I’ll find numerous levers to play with. One of them is the Sample Extractor Console. Pulling this will set off a drill that bores into the Oberon meteorite, collecting a piece of it. This piece will then be ground down by the nearby Sample Grinder, resulting in a Meteorite Sample Canister. I’ll need to grab this canister as Joyce requires me to bring it back. Be cautious though, there’s a Thrall guarding the grinder and three B.A.R.D. Robots with flamethrowers are patrolling the meteorite area.
1. First off, securing the sample from Joyce is step one. The second task involves neutralizing Oberon, which can be achieved by either igniting it or triggering the explosives on its self-destruct console.
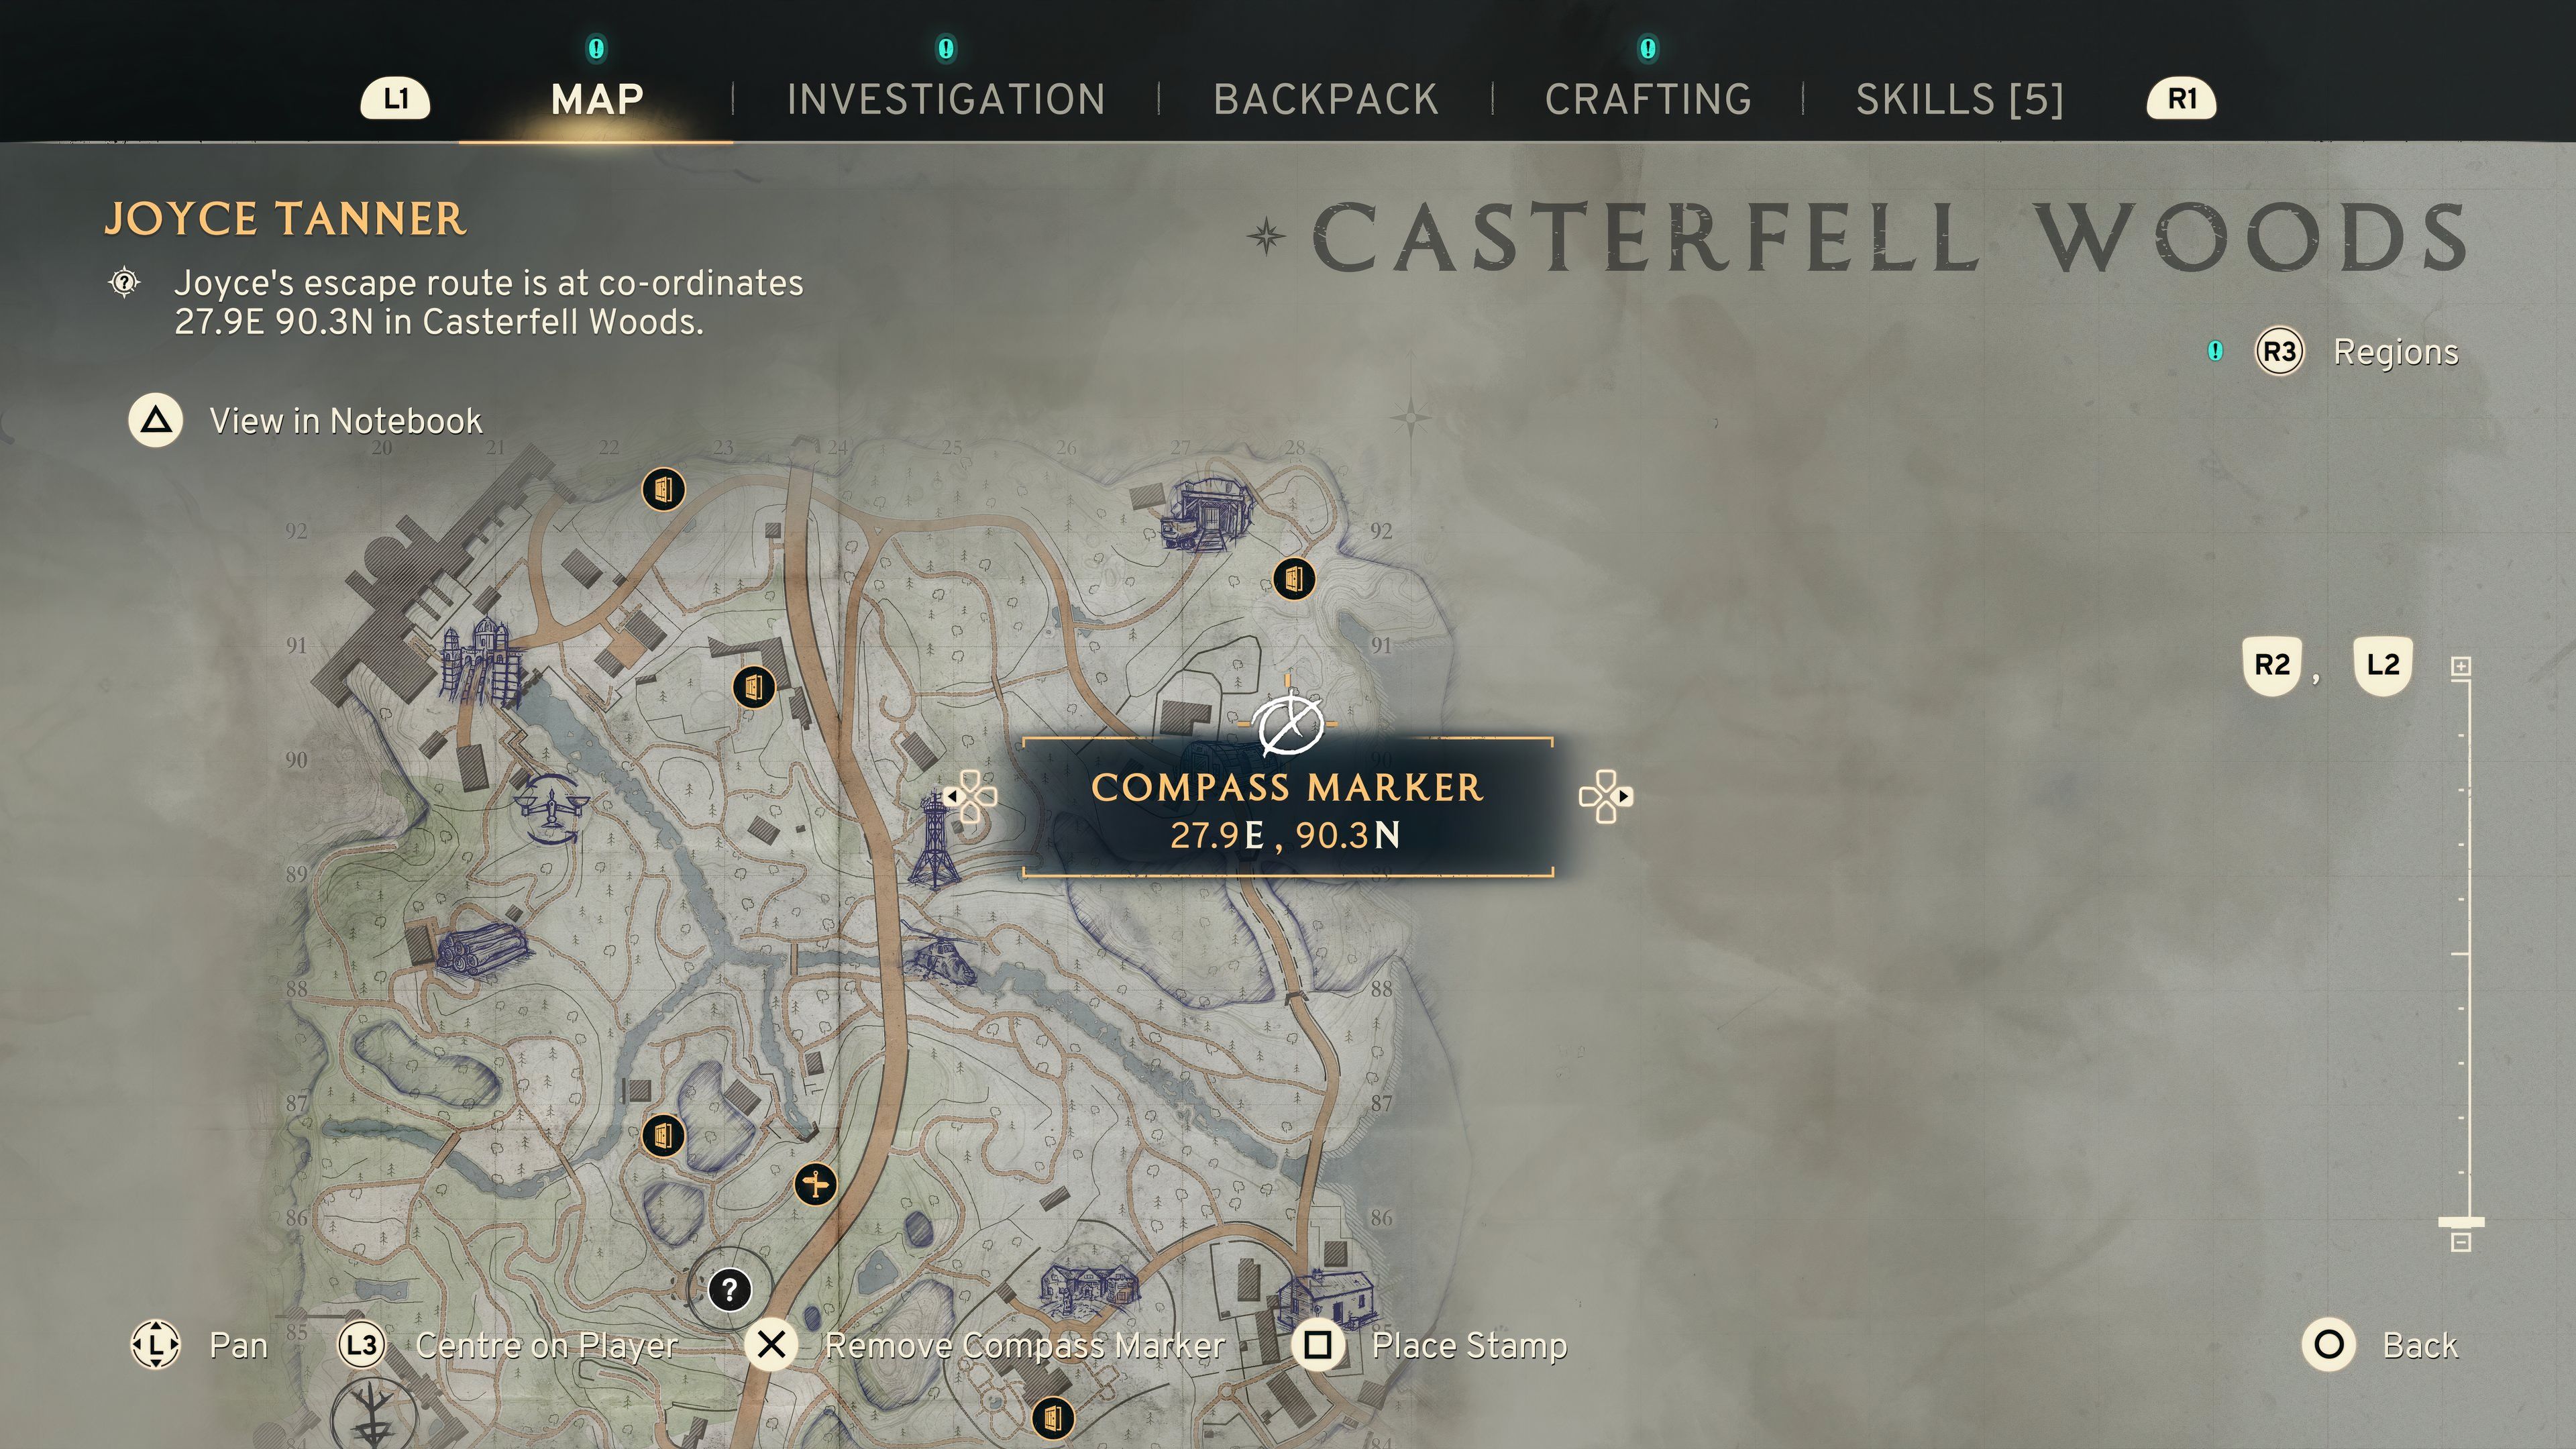
2. Once Oberon is out of the picture, make a beeline for The Interchange because the facility will soon collapse. Upon your return to Data Store Charlie, Joyce won’t be there, but she’ll have left you a message. This message contains the coordinates for her escape from the quarantine zone, found in Casterfell Woods at 27.9 E, 90.3 N – not far from where we initially crossed paths, near the bunker.
Make your way to these given coordinates, and there you will encounter Joyce next to a helicopter. Prior to departing, attempt to extract some details from her. To conclude the game and uncover Joyce’s outcome, present her with the sample.
Regarding whether you can rely on her, Joyce’s conclusion involves her hitting you over the head and rendering you unconscious, allowing you to be transported to her superiors for questioning. This action will help you escape the quarantine zone, but given that it appears you’re on the verge of military detention, this doesn’t seem like a favorable outcome. Thus, among all the peculiar characters in Atomfall, Joyce might be the one you should trust the least.
Read More
- All Shadow Armor Locations in Crimson Desert
- Sega Reveals Official Sonic Timeline: From Prehistoric to Modern Era
- Genshin Impact Dev Teases New Open-World MMO With Realistic Graphics
- Dark Marksman Armor Locations in Crimson Desert
- The Limits of Thought: Can We Compress Reasoning in AI?
- Where to Pack and Sell Trade Goods in Crimson Desert
- How to Beat Antumbra’s Sword (Sanctum of Absolution) in Crimson Desert
- Enshrouded: Giant Critter Scales Location
- Who Can You Romance In GreedFall 2: The Dying World?
- Best Weapons, Armor, and Accessories to Get Early in Crimson Desert
2025-03-26 22:45