In Schedule 1, if you, as a cook, are knowledgeable about cultivating and manufacturing illicit substances, you’re still limited without essentials such as seeds. Fortunately, Hyland Point has numerous suppliers ready to supply all the necessary items for you. However, before your order arrives, you’ll first need to identify its exact location. Here comes the solution: Dead Drops.
Hidden amidst the urban landscape, these inconspicuous spots known as Dead Drops can be crucial for restocking your supplies. To find them all, you’ll need to locate their specific positions within the city. This guide will provide the exact locations of every Dead Drop in Schedule 1.
Schedule 1 Dead Drops & Stashes Explained
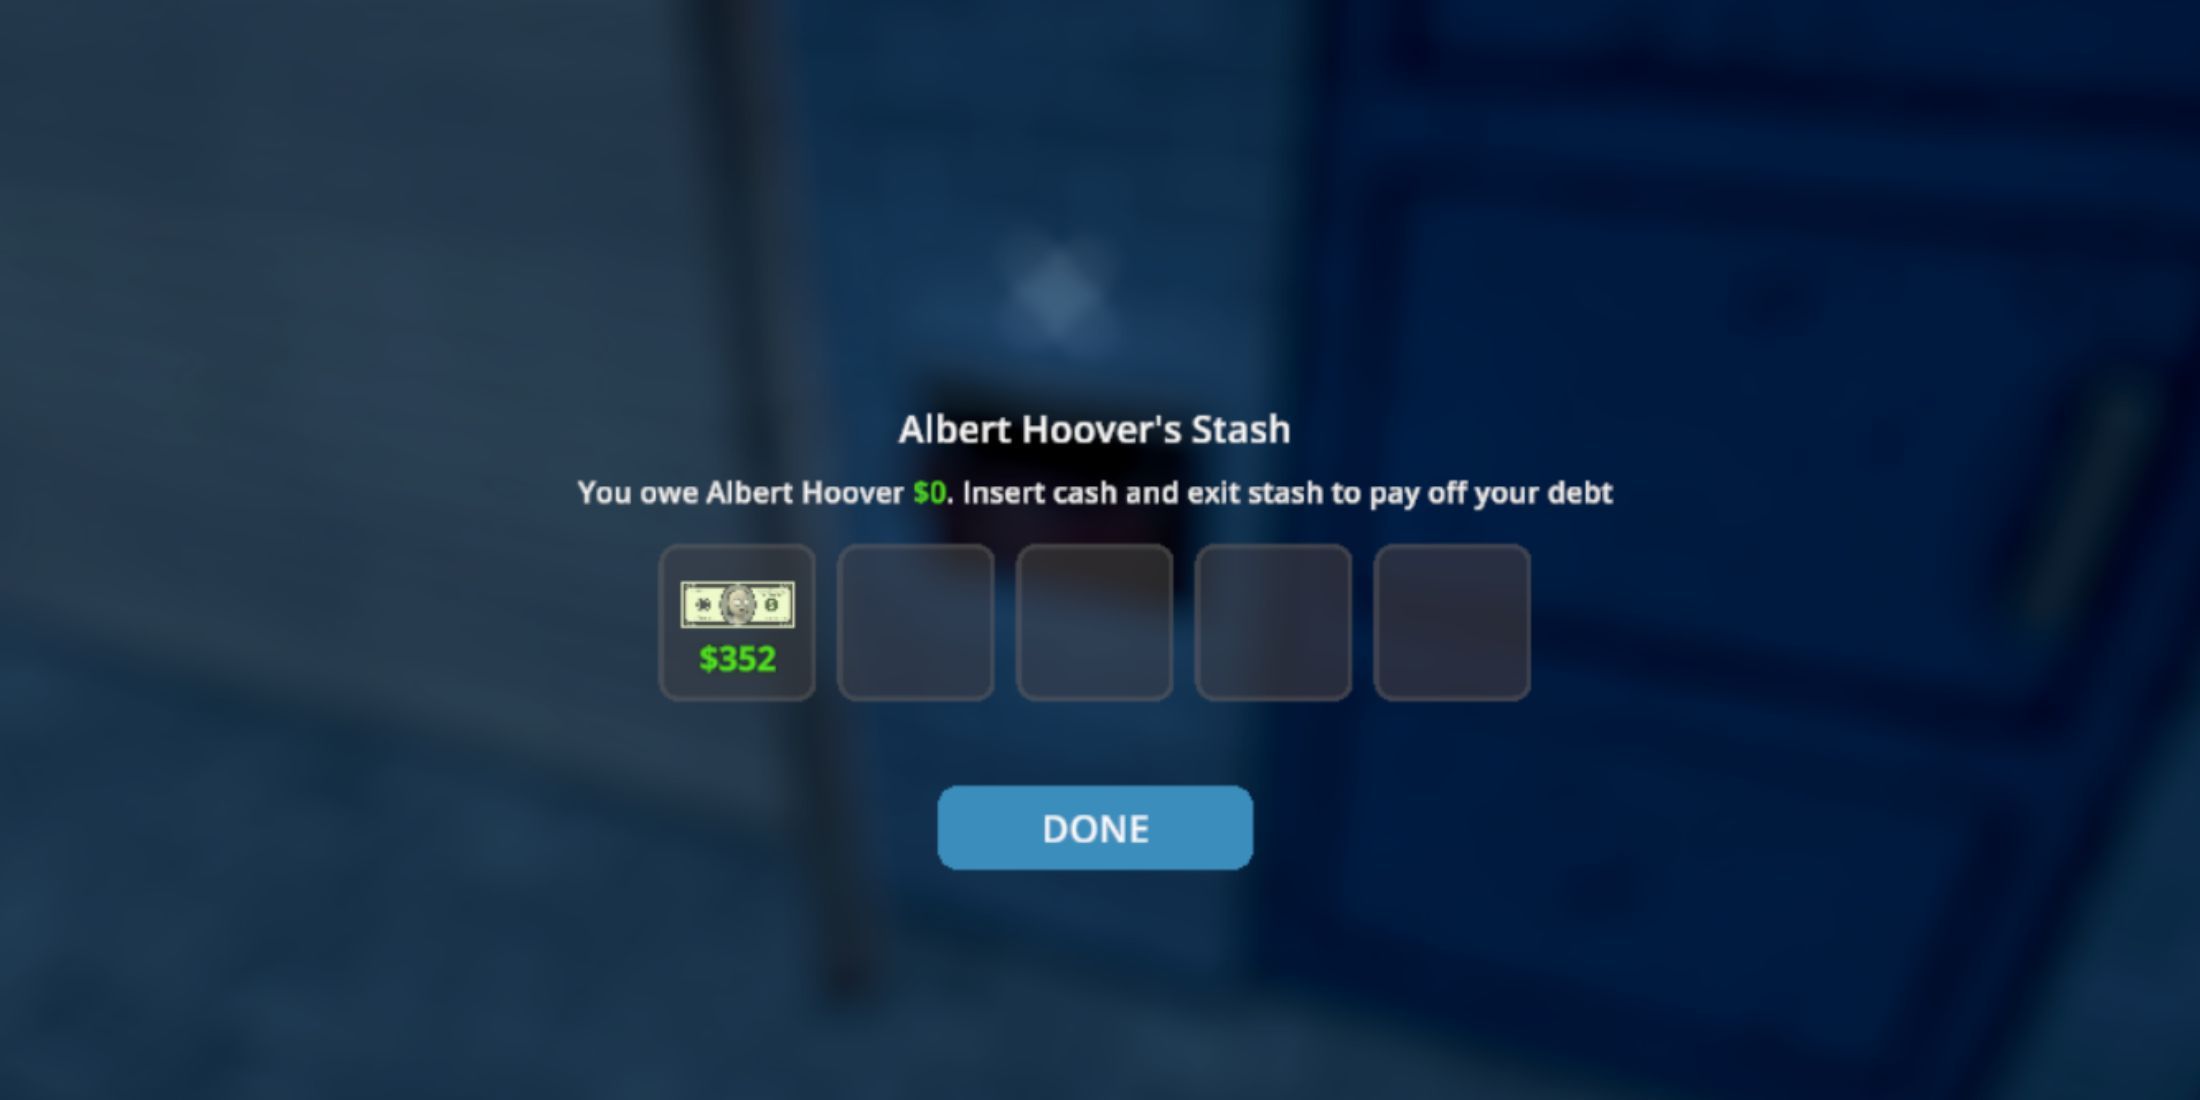
To cultivate your initial crop from Schedule 1, you’ll need seeds. Unfortunately, these can’t be purchased at regular legal outlets. Instead, you’ll have to reach out to Albert Hoover, who can be contacted through the Messages App. Before meeting him in person, though, you must establish a friendly relationship with one of his acquaintances first. Once that’s done, Albert will leave your ordered seeds in one of the Dead Drops located within Schedule 1.
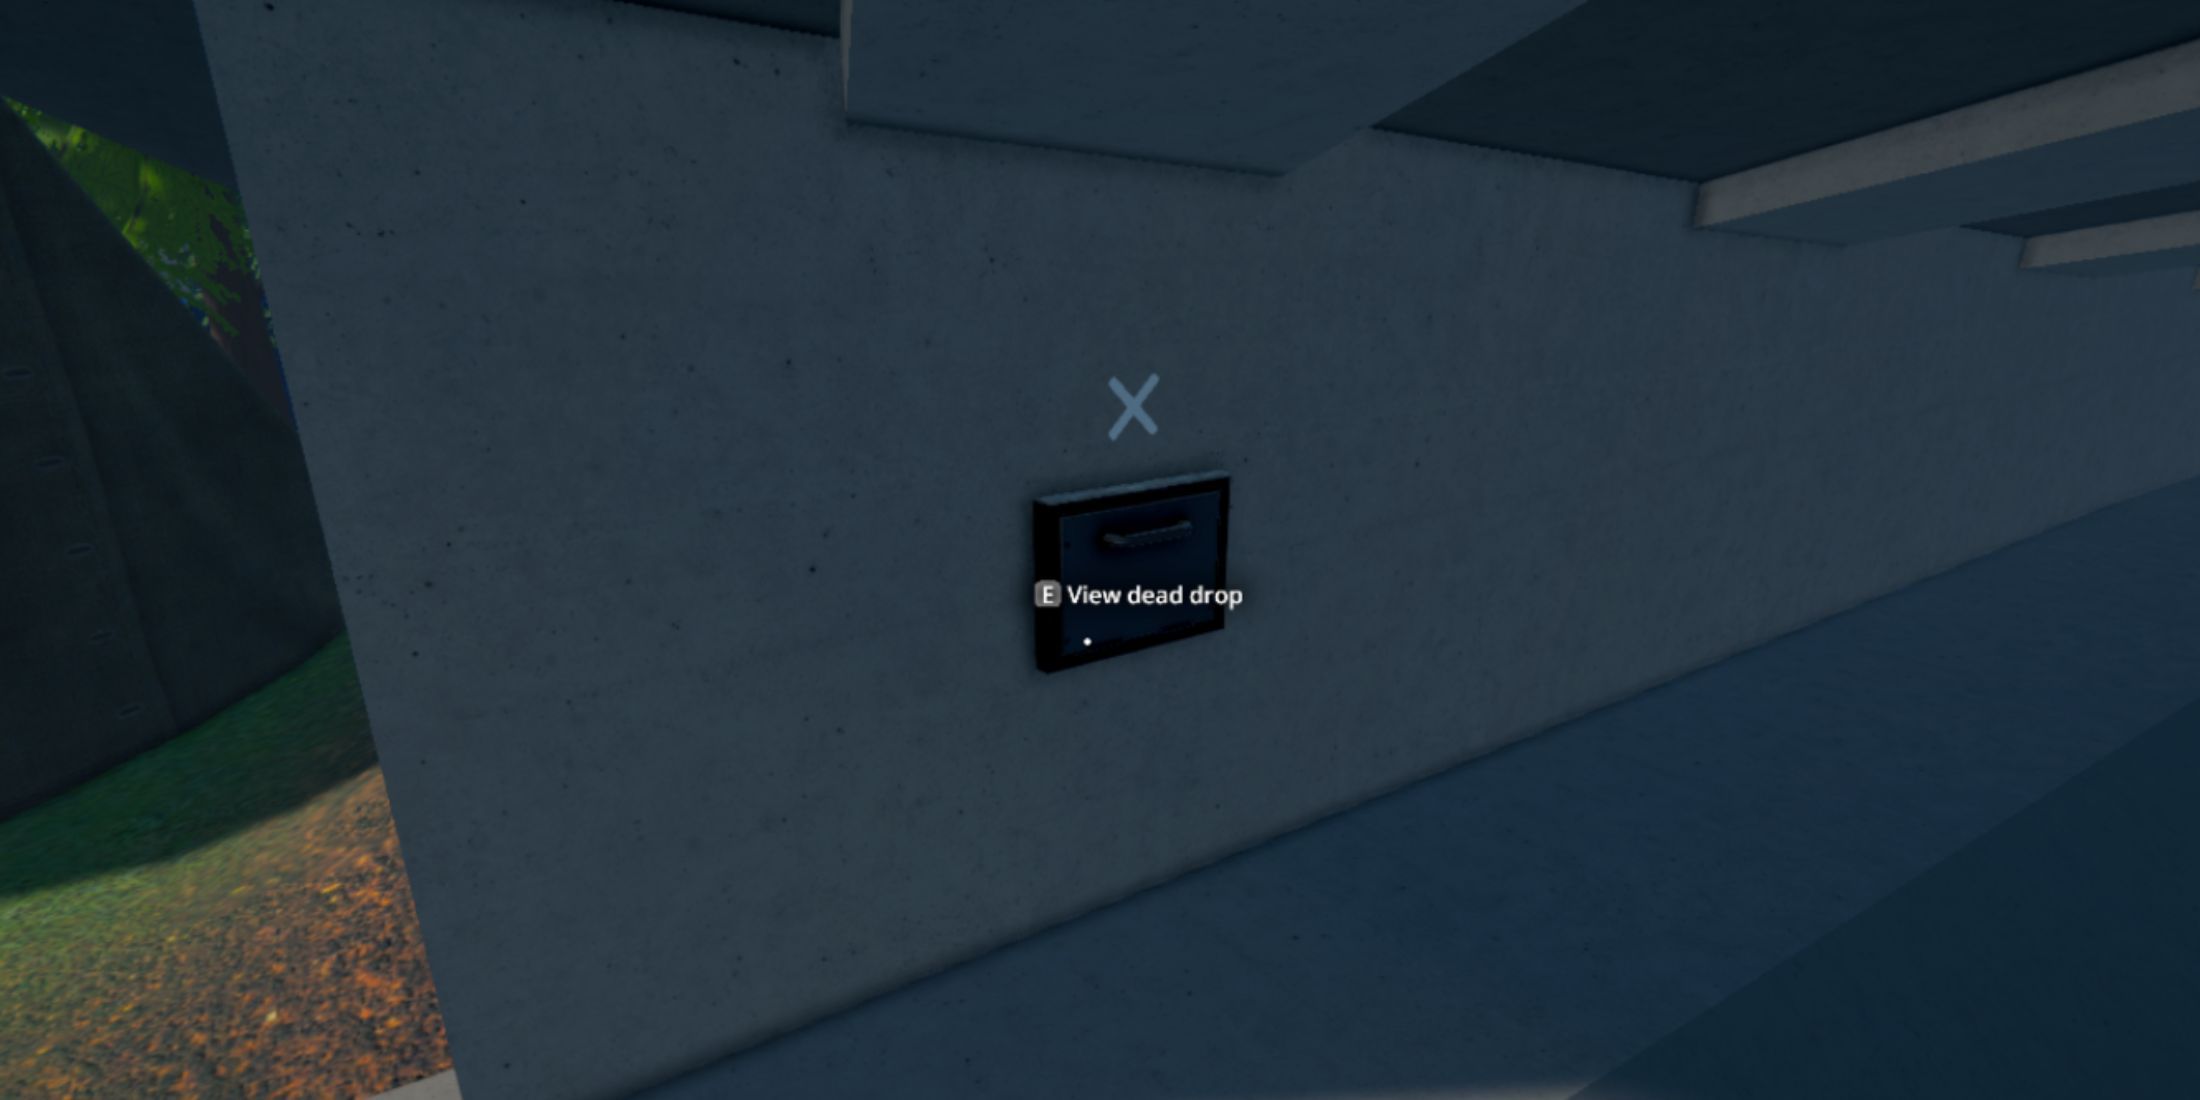
Dead Drops can be thought of as personal drop-off boxes found in Schedule 1. These are usually situated on the walls of various structures, and they are easily identified by an X mark. The advantage here is that users do not have to exchange money right away.
If you hit the limit on your debt, you won’t be permitted to purchase additional items from the supplier. To settle your debt, it’s necessary for you to save money in a designated Fund. These funds, unlike Dead Drops, have their own separate containers for each supplier.
All Dead Drop & Stash Locations In Schedule 1
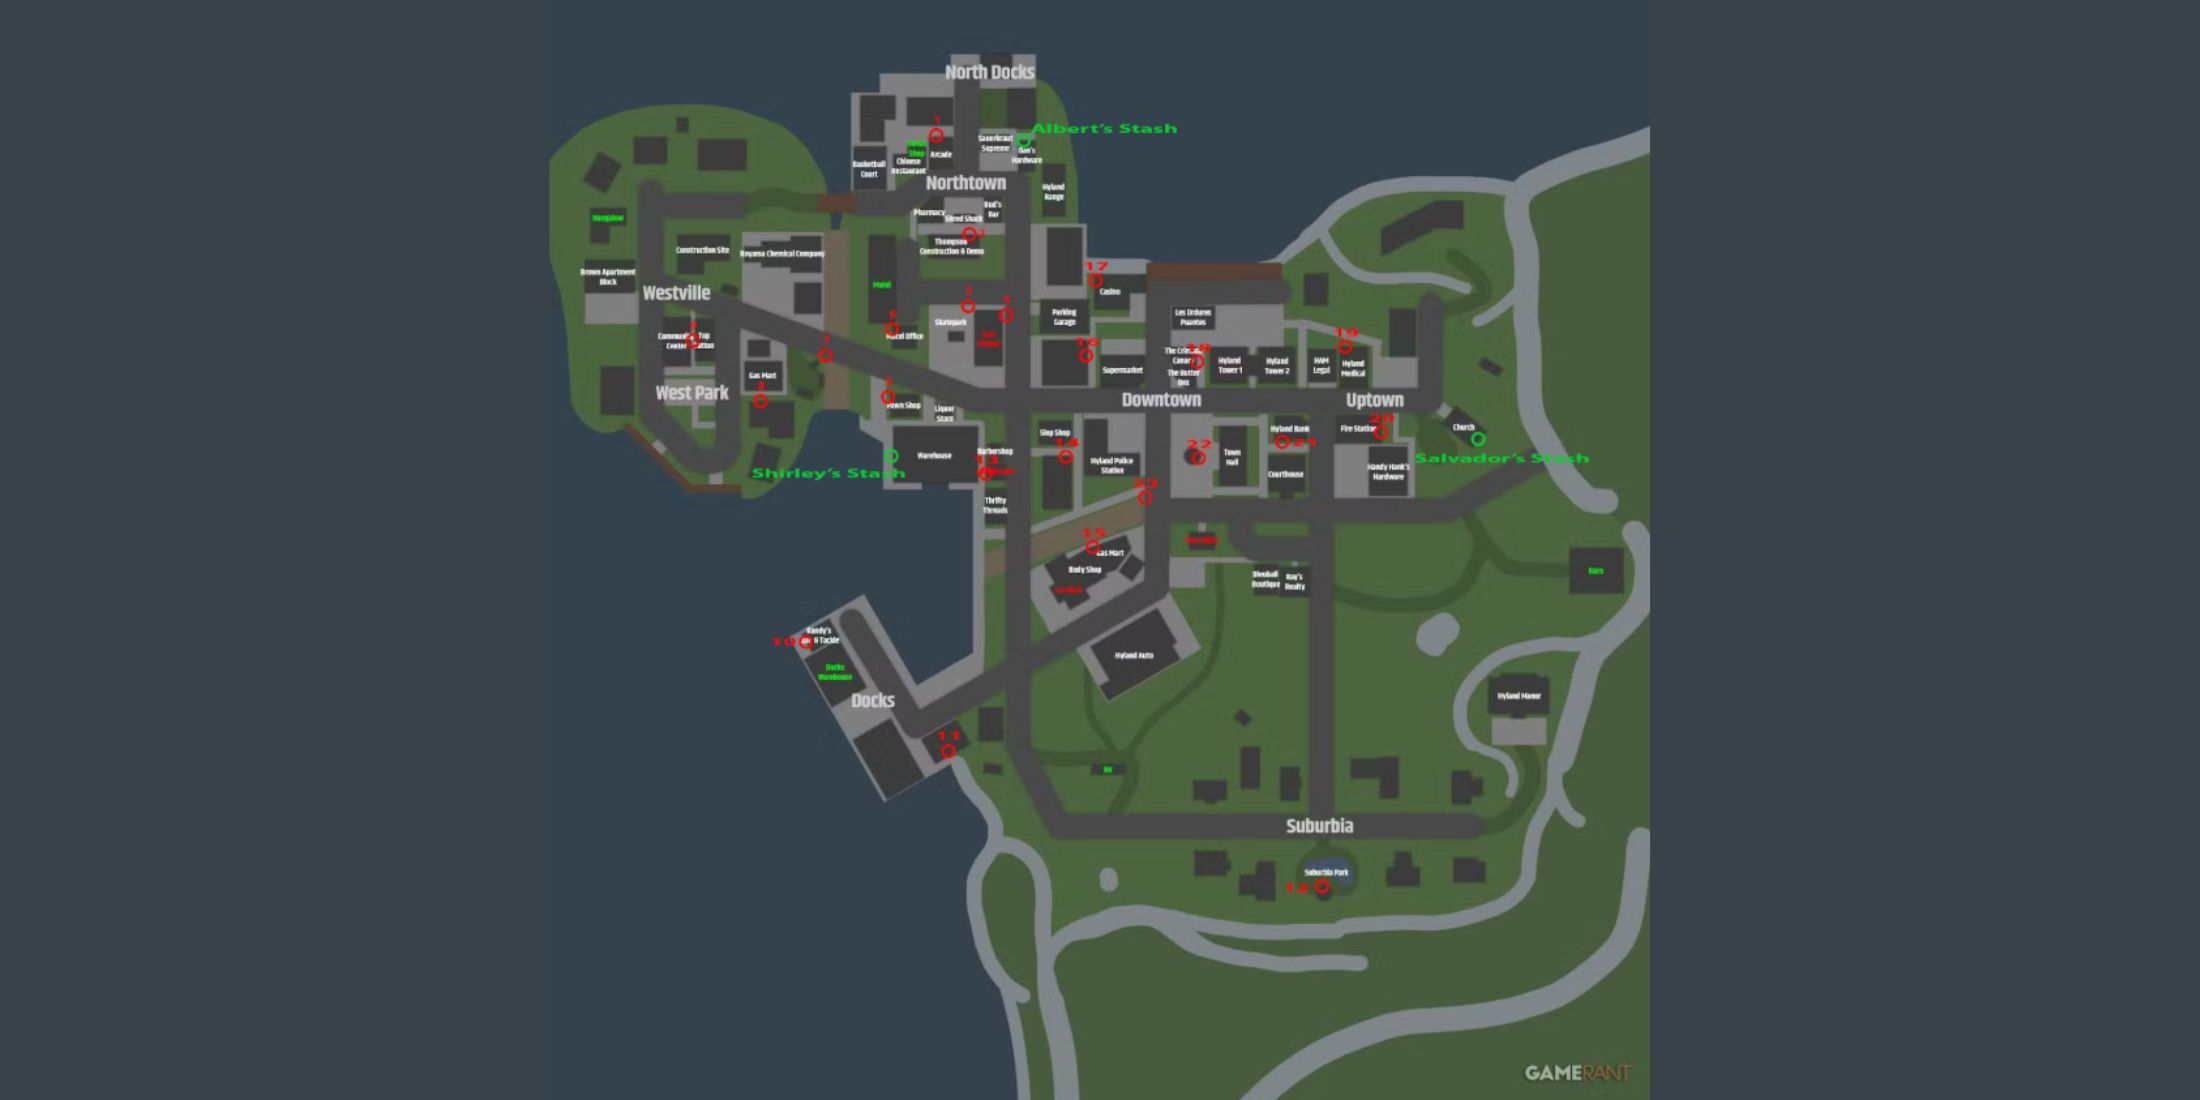
Initially, locating Dead Drops during your journey might prove challenging because they aren’t always indicated on a standard Schedule 1 map. However, this detailed map proves incredibly useful since it clearly marks all the Dead Drops and even the stashes of suppliers, making your search significantly easier.
All Dead Drops In Schedule 1
| Location | Description |
|---|---|
| 1 | On the north wall of the Arcade |
| 2 | Behind Thomson Construction |
| 3 | Skate Park |
| 4 | Taco Ticklers Wall |
| 5 | On the west wall of the Pawn Shop |
| 6 | Behind Motel Office |
| 7 | Under West Bridge |
| 8 | Behind Gas Mart |
| 9 | Behind Top Tattoo |
| 10 | Behind Randy’s Bait and Tackle |
| 11 | Gray Docks Building |
| 12 | Gazebo |
| 13 | Behind the Laundromat |
| 14 | Behind Slop Shop |
| 15 | Behind Auto Shop |
| 16 | Behind the Grocery Store |
| 17 | Behind the Casino |
| 18 | Behind Crimson Canary |
| 19 | Behind Medical Practice |
| 20 | Behind Fire Station |
| 21 | Behind Bank |
| 22 | Behind Fountain |
| 23 | Central Canal |
All Supplier Stash Locations In Schedule 1
| Location | Description |
|---|---|
| Albert’s Stash | Behind Dan’s Hardware Stores |
| Shirley’s Stash | On the west wall of the Warehouse |
| Salvador’s Stash | Behind the Church |
Read More
- All Skyblazer Armor Locations in Crimson Desert
- How to Get the Sunset Reed Armor Set and Hollow Visage Sword in Crimson Desert
- All Shadow Armor Locations in Crimson Desert
- One Piece Chapter 1180 Release Date And Where To Read
- Marni Laser Helm Location & Upgrade in Crimson Desert
- All Helfryn Armor Locations in Crimson Desert
- All Golden Greed Armor Locations in Crimson Desert
- All Icewing Armor Locations in Crimson Desert
- How to Beat Stonewalker Antiquum at the Gate of Truth in Crimson Desert
- Legendary White Lion Necklace Location in Crimson Desert
2025-04-12 18:06