In Super Meat Boy 3D, bandages are collectibles that let you unlock new characters. This guide will show you how to find all 15 bandages in the first world, The Forest. Each level in Super Meat Boy 3D has one bandage, but you need to finish the level after collecting it to actually unlock it. Because the game is challenging, you might need to try each level multiple times.
In Super Meat Boy 3D, bandages aren’t always visible, so keep an eye out for off-screen platforms to jump to. Also, pay attention to any obstacles you see – they might be hiding a bandage or a secret path.
Level 1 – Easy Start Bandage
Okay, so I found the first Bandage pretty easily! Right near the end of the level, instead of going up the blocks on the right, climb the ones on the left. You’ll see the Bandage as soon as you get on the first block of that stack – it’s right at the top!
Level 2 – Sawbot Struggle Bandage

After completing the initial large jump, turn around and jump down to the ledge with the bandage. From there, players can use a series of small jumps to scale the wall.
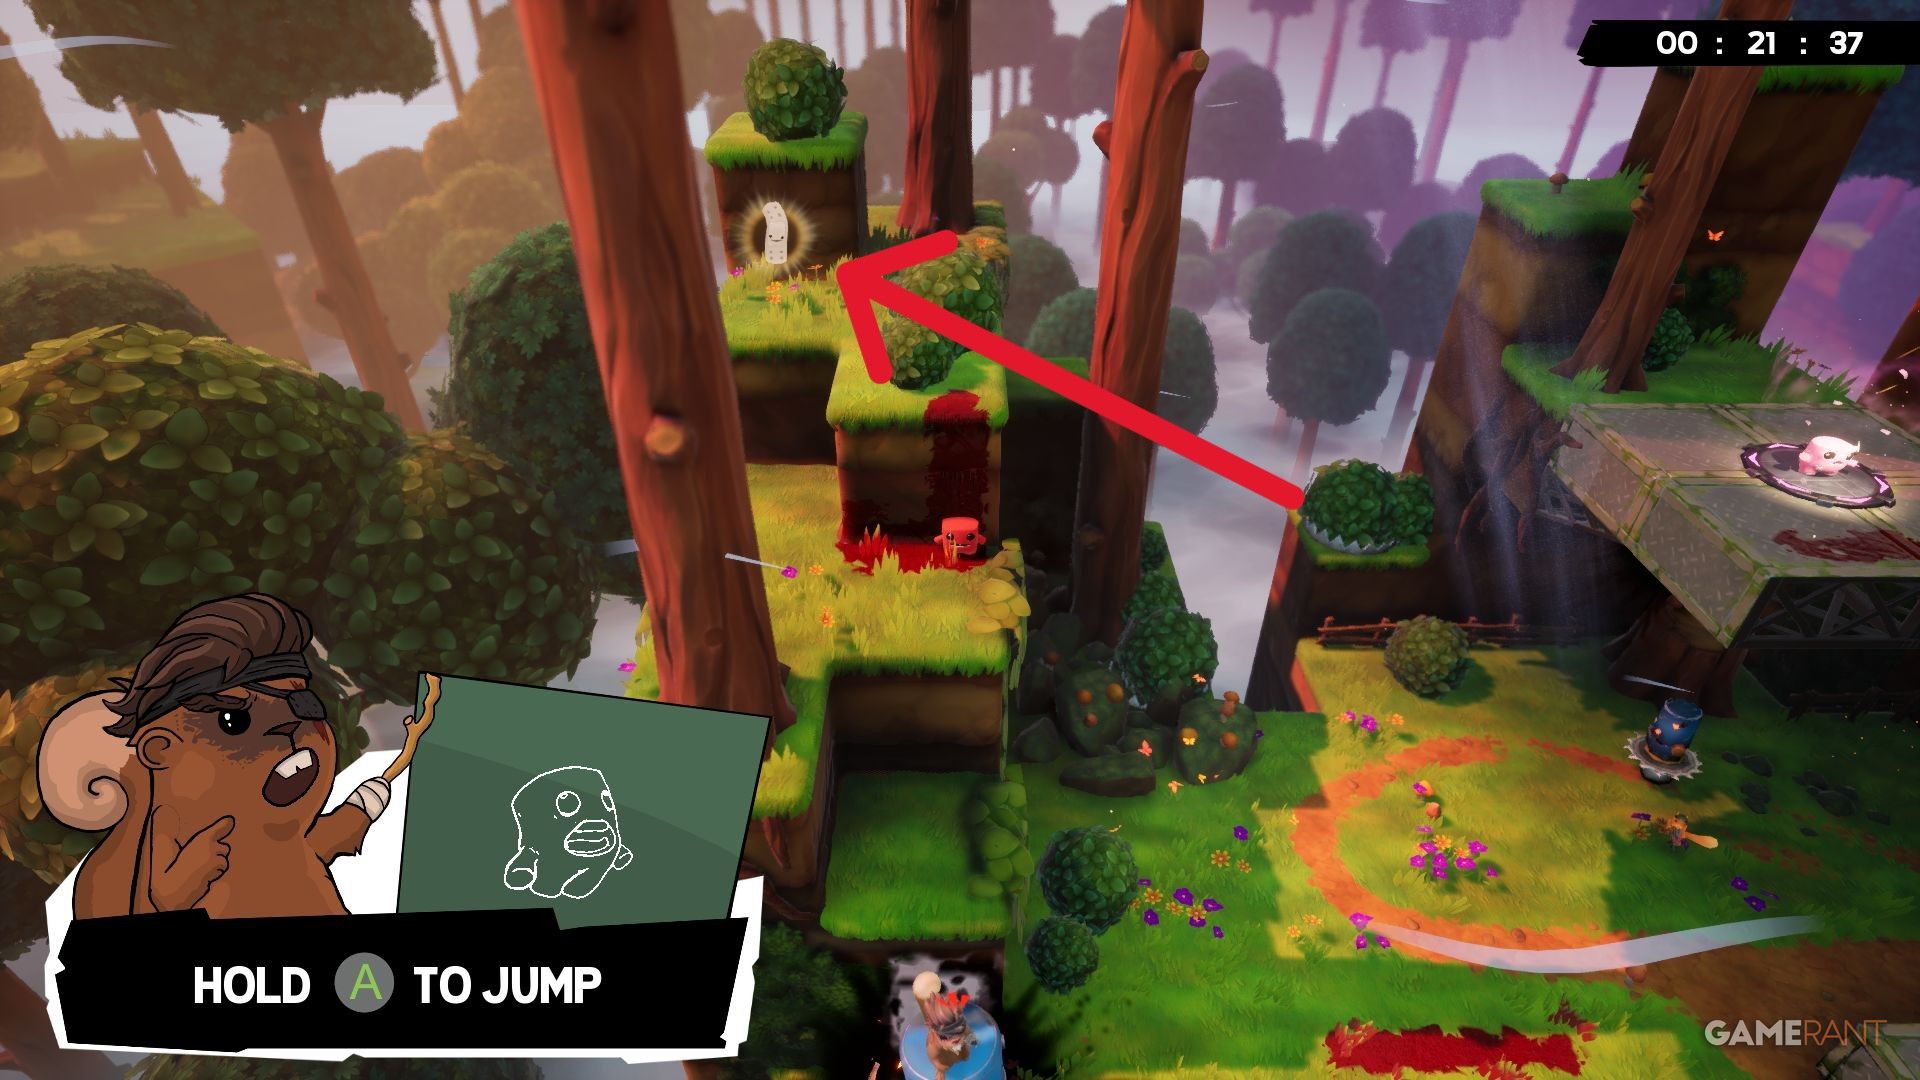
Level 3 – The Great Gap Bandage

Don’t walk across the large log bridge – run and jump to the right instead. You’ll land on a high platform that’s just out of view, where you can find the Bandage. The jump itself isn’t difficult, but returning is trickier because there’s limited space to gain momentum. Use your mid-air dash to help you get back.
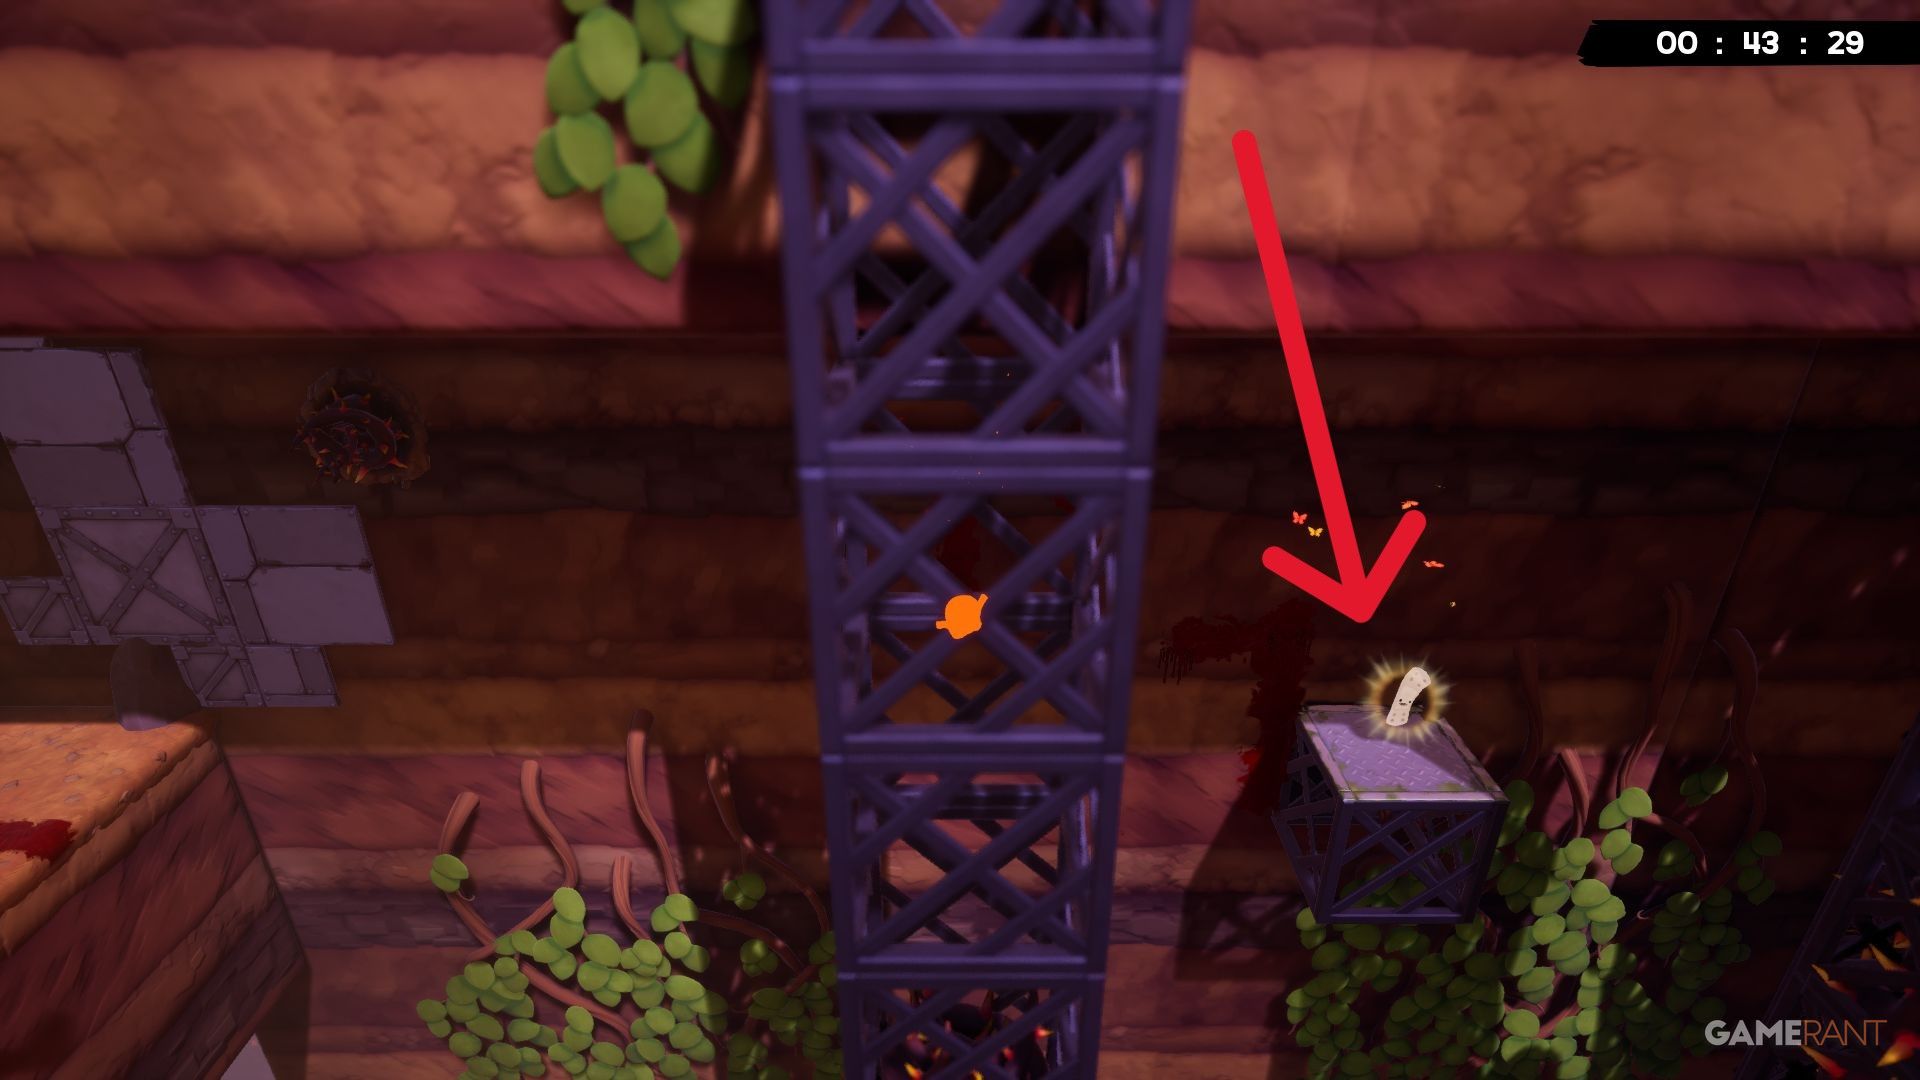
Level 4 – Cave Dash Bandage
This hidden bandage is found by taking an alternate route. After your first jump and climbing the wall, instead of going left to finish the level, jump up and to the right, passing through some green leaves. You’ll then encounter three spinning obstacles to jump over, with the bandage located at the end.
Level 5 – Canyon Crush Bandage

During the Canyon Crush level, on your third jump, try aiming lower to break through the purple barrier instead of jumping to the higher ledge. It’s a fairly simple move, but afterward, grab the Bandage and then jump and dash over to the metal wall before jumping back to your original starting point.
Level 6 – Cliff Climb Bandage
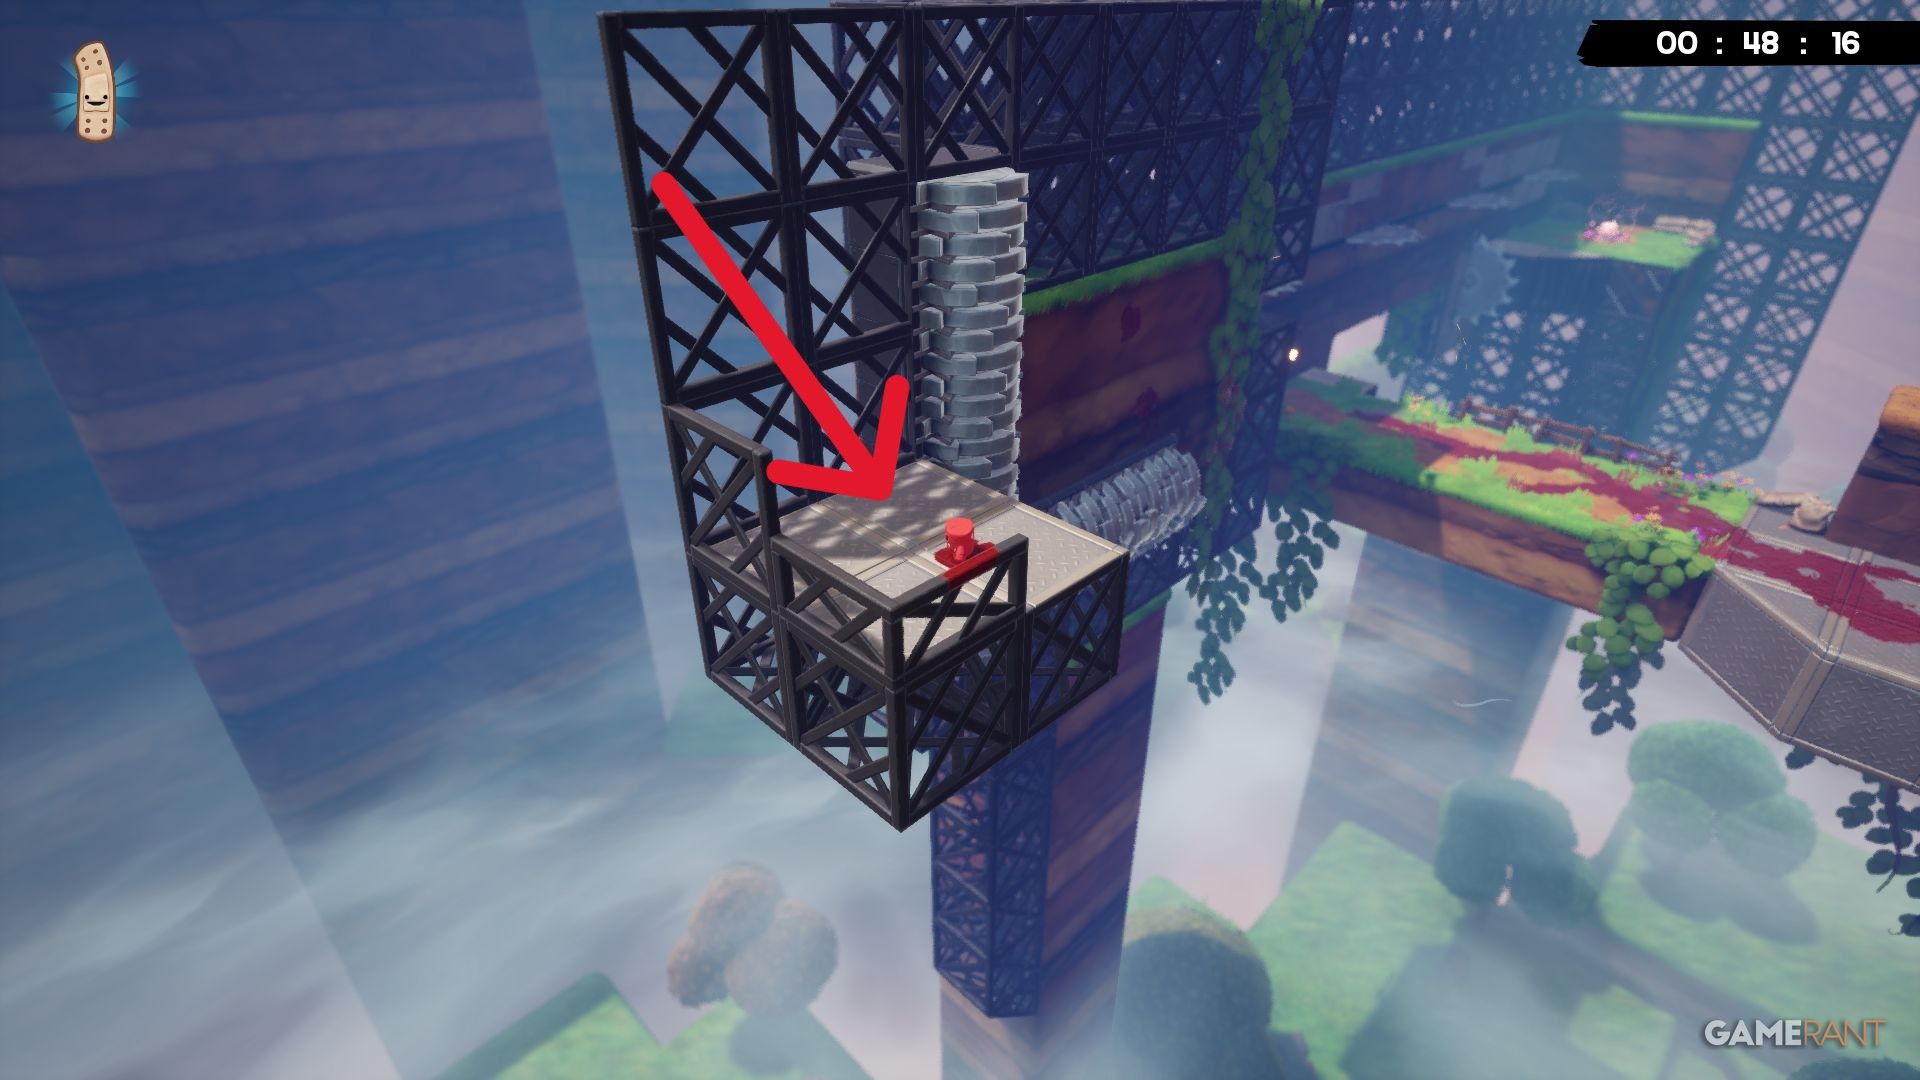
Instead of finishing the Cliff Climb level by going right, turn left first. You’ll find a grinder and a wall you can jump onto. This path takes you to a metal platform where you can find the Bandage.
Level 7 – Squirrel Hole Bandage
Find the shop relatively soon after starting the level. Then, go up to the next level and look to the right for a raised platform with a gap. The Bandage is at the far end of this platform, but watch out for the swinging blade!
Level 8 – Meat Forest Bandage
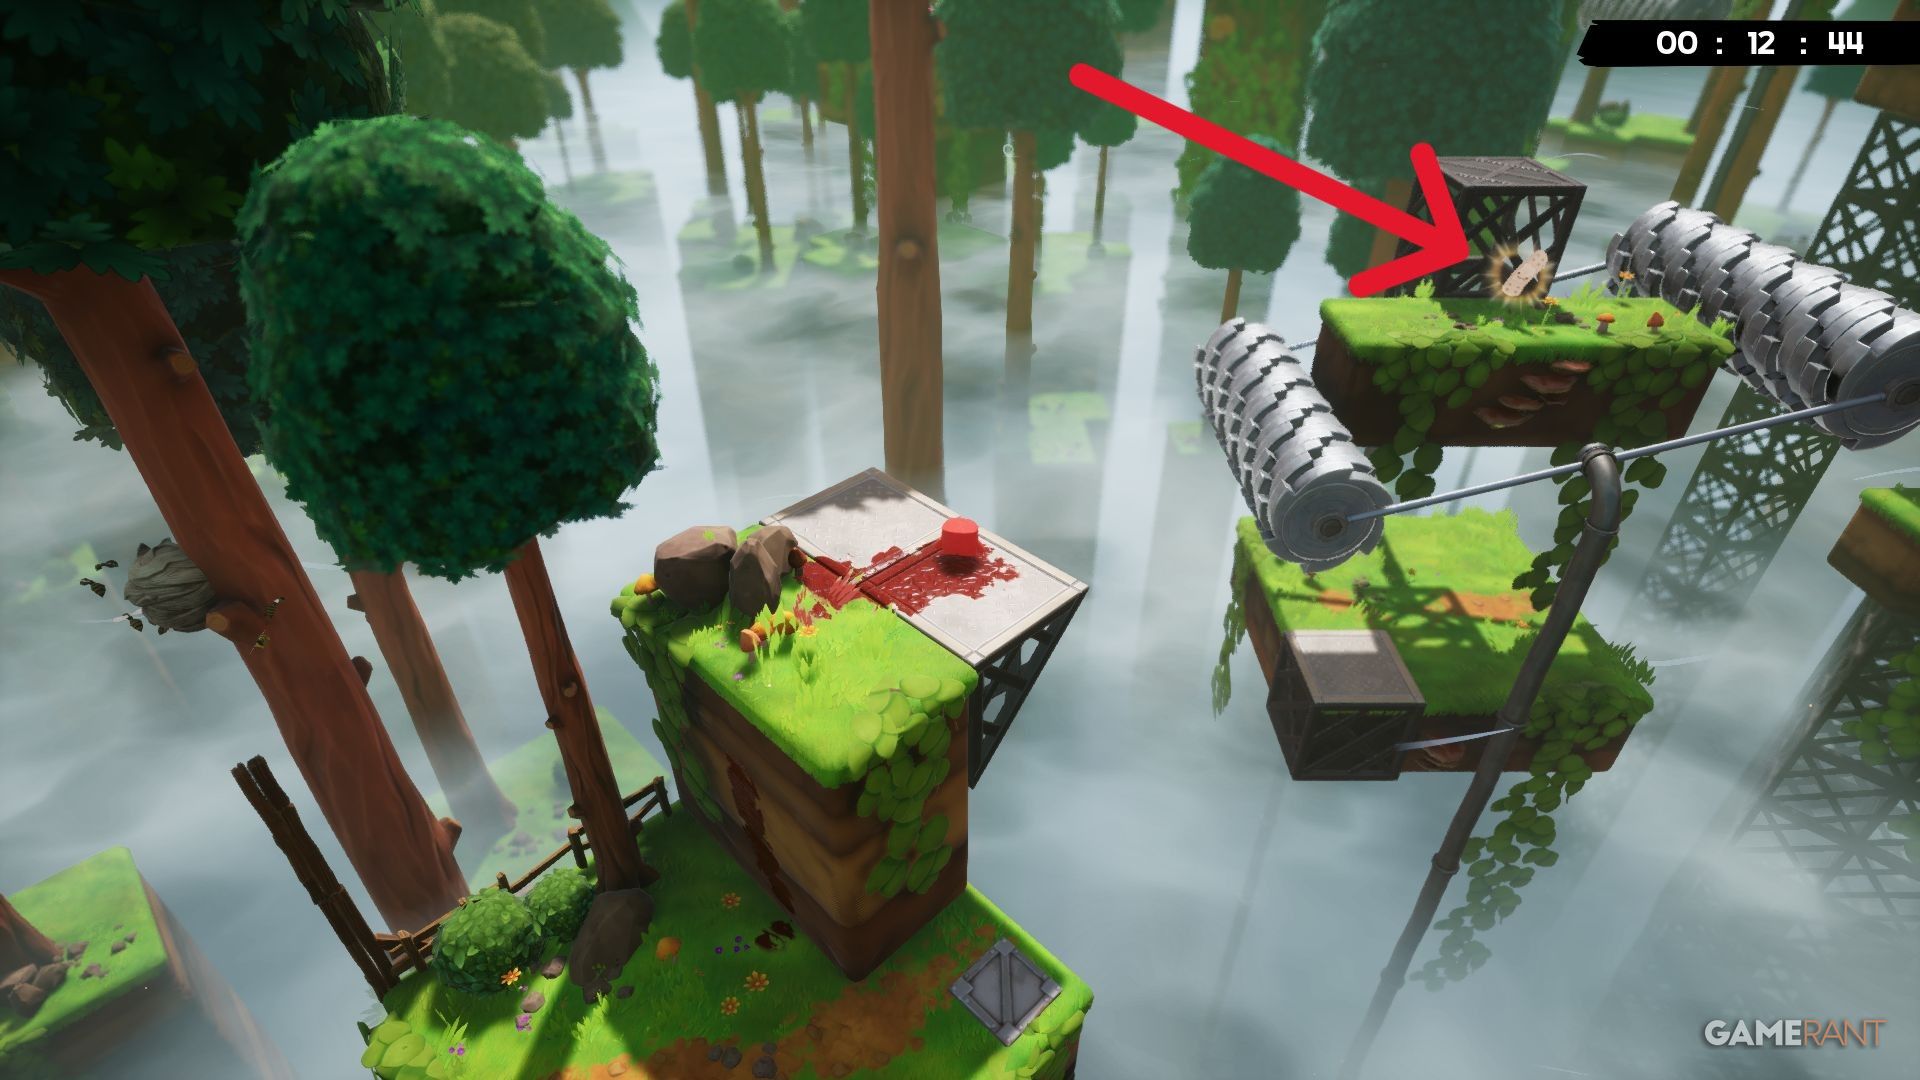
In the Meat Forest level, you can find the Bandage pretty quickly – it’s right after the second obstacle. Getting it takes a little timing because of the spinning, sharp cylinders nearby. Luckily, the platform where the Bandage is located is safe, so you can wait for the right moment and grab it in two steps if needed.
Level 9 – Valley Of The Flying Sawblades Bandage
Once you’ve gotten past the initial climb, you’ll need to jump over spinning sawblades and break through a purple barrier. Instead of climbing the split tree trunk, drop down to grab a Bandage – watch out for some sideways-moving sawblades down there! You can climb back up afterward.
Level 10 – Suicide Siege Bandage
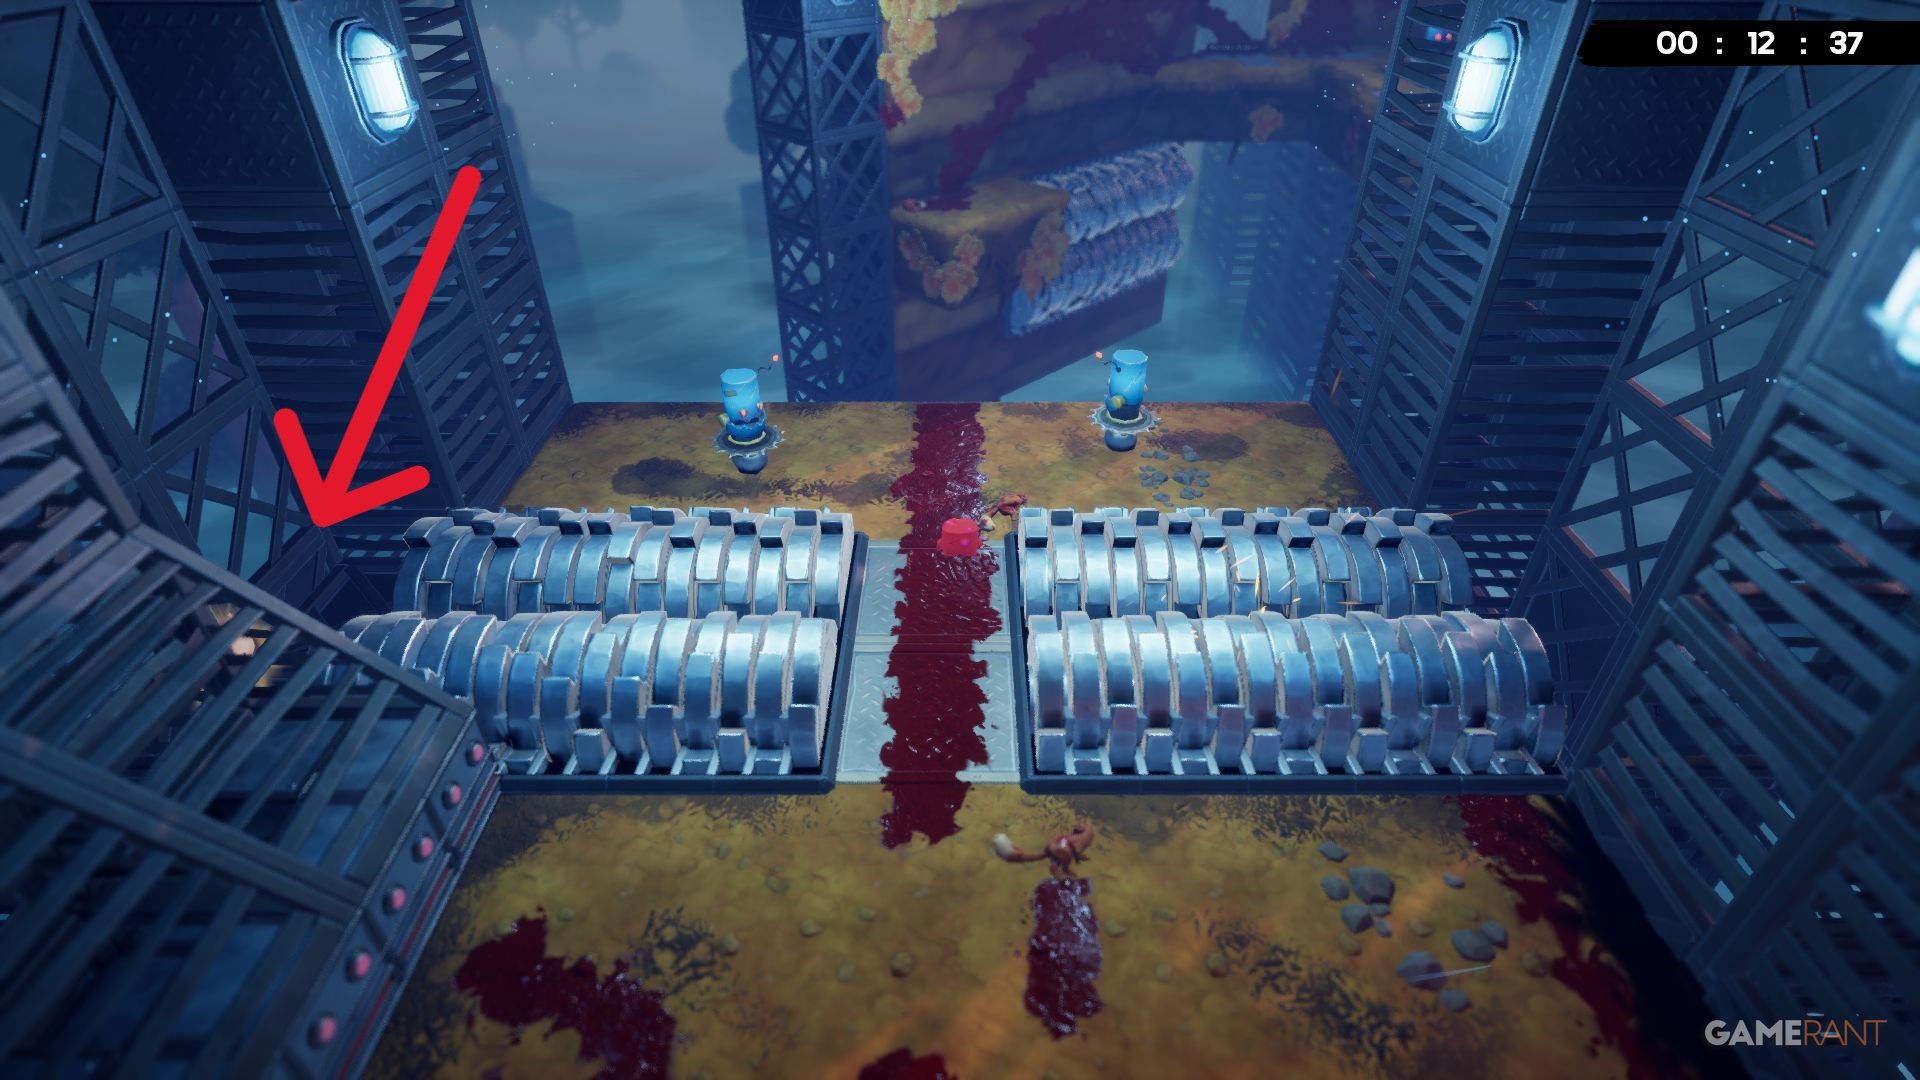
The Suicide Siege Bandage can be hard to spot, but it’s located near the beginning of the area and is fairly easy to reach. After your first jump and avoiding the sawblades, pause between the two sets of grinders. Jump over to the left side into a small alcove, and you’ll find the Bandage there.
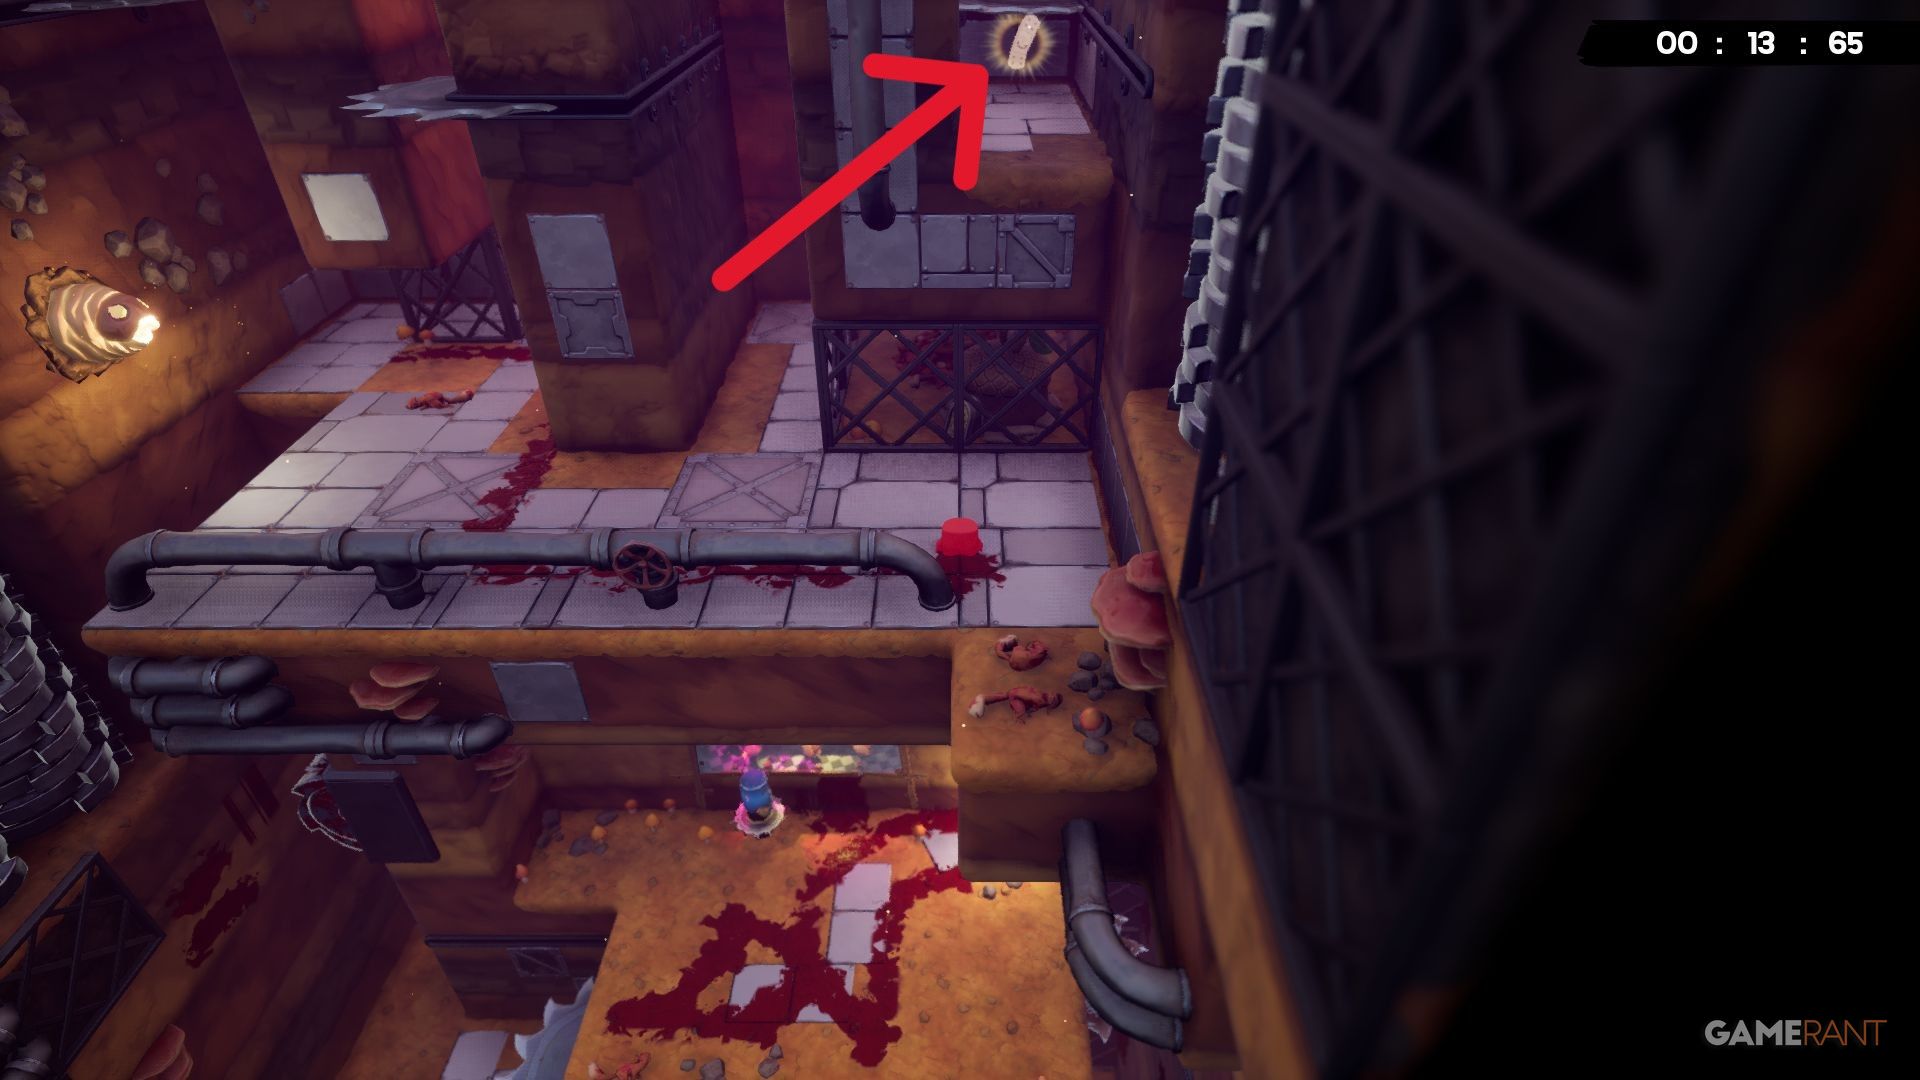
Level 11 – Spelunking Bandage
In the Spelunking level of Super Meat Boy 3D, the Bandage is located at the very end. You’ll be falling towards the right as you finish the level, but the Bandage is actually on the far left, positioned over a dangerous area. You’ll need to make a long jump to reach it. Getting back from the Bandage requires a series of quick, small jumps off the walls.
Level 12 – Thorn Trail Bandage
As you approach the end, don’t aim directly for the finish. Instead, jump far to the right, using the wall for extra distance if necessary. You’ll land on a small platform where you can find a Bandage. From there, simply return along the path to finish the Thorn Trail level.
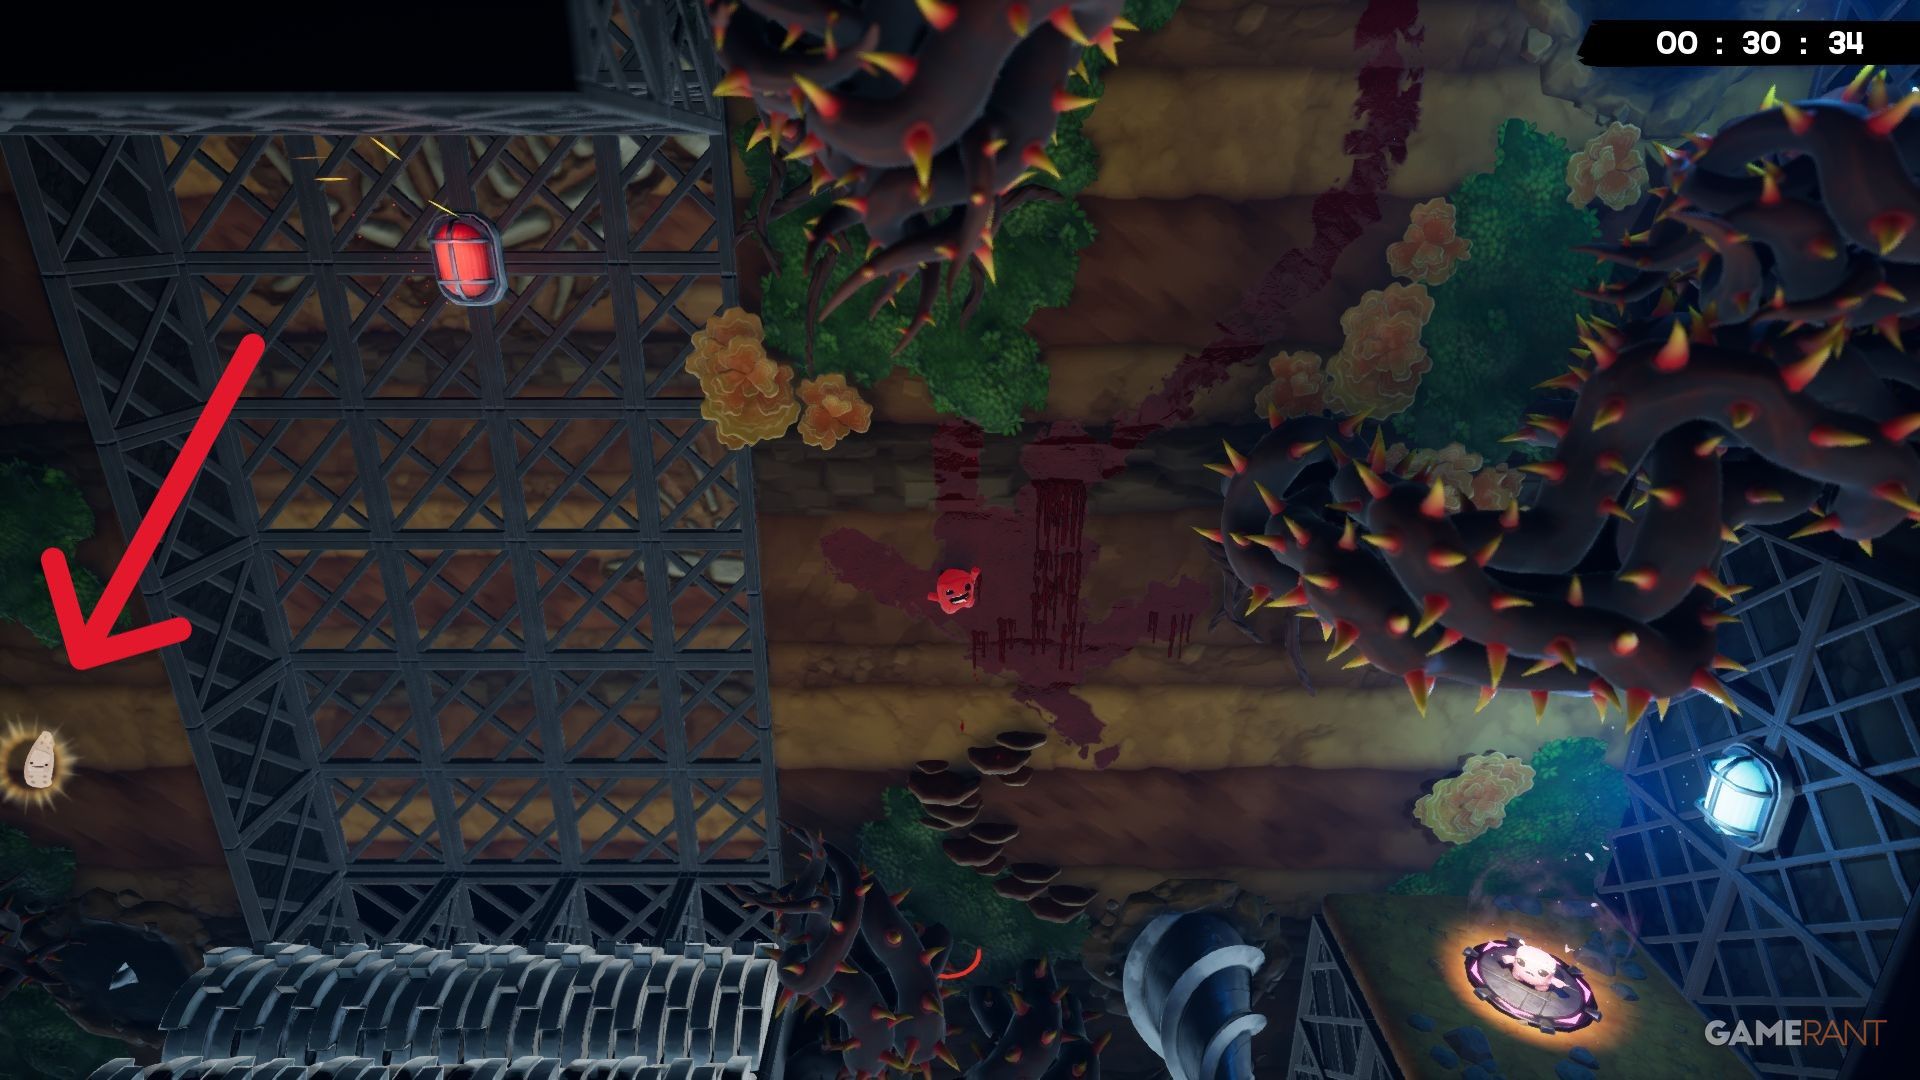
Level 13 – Burning Valley Bandage
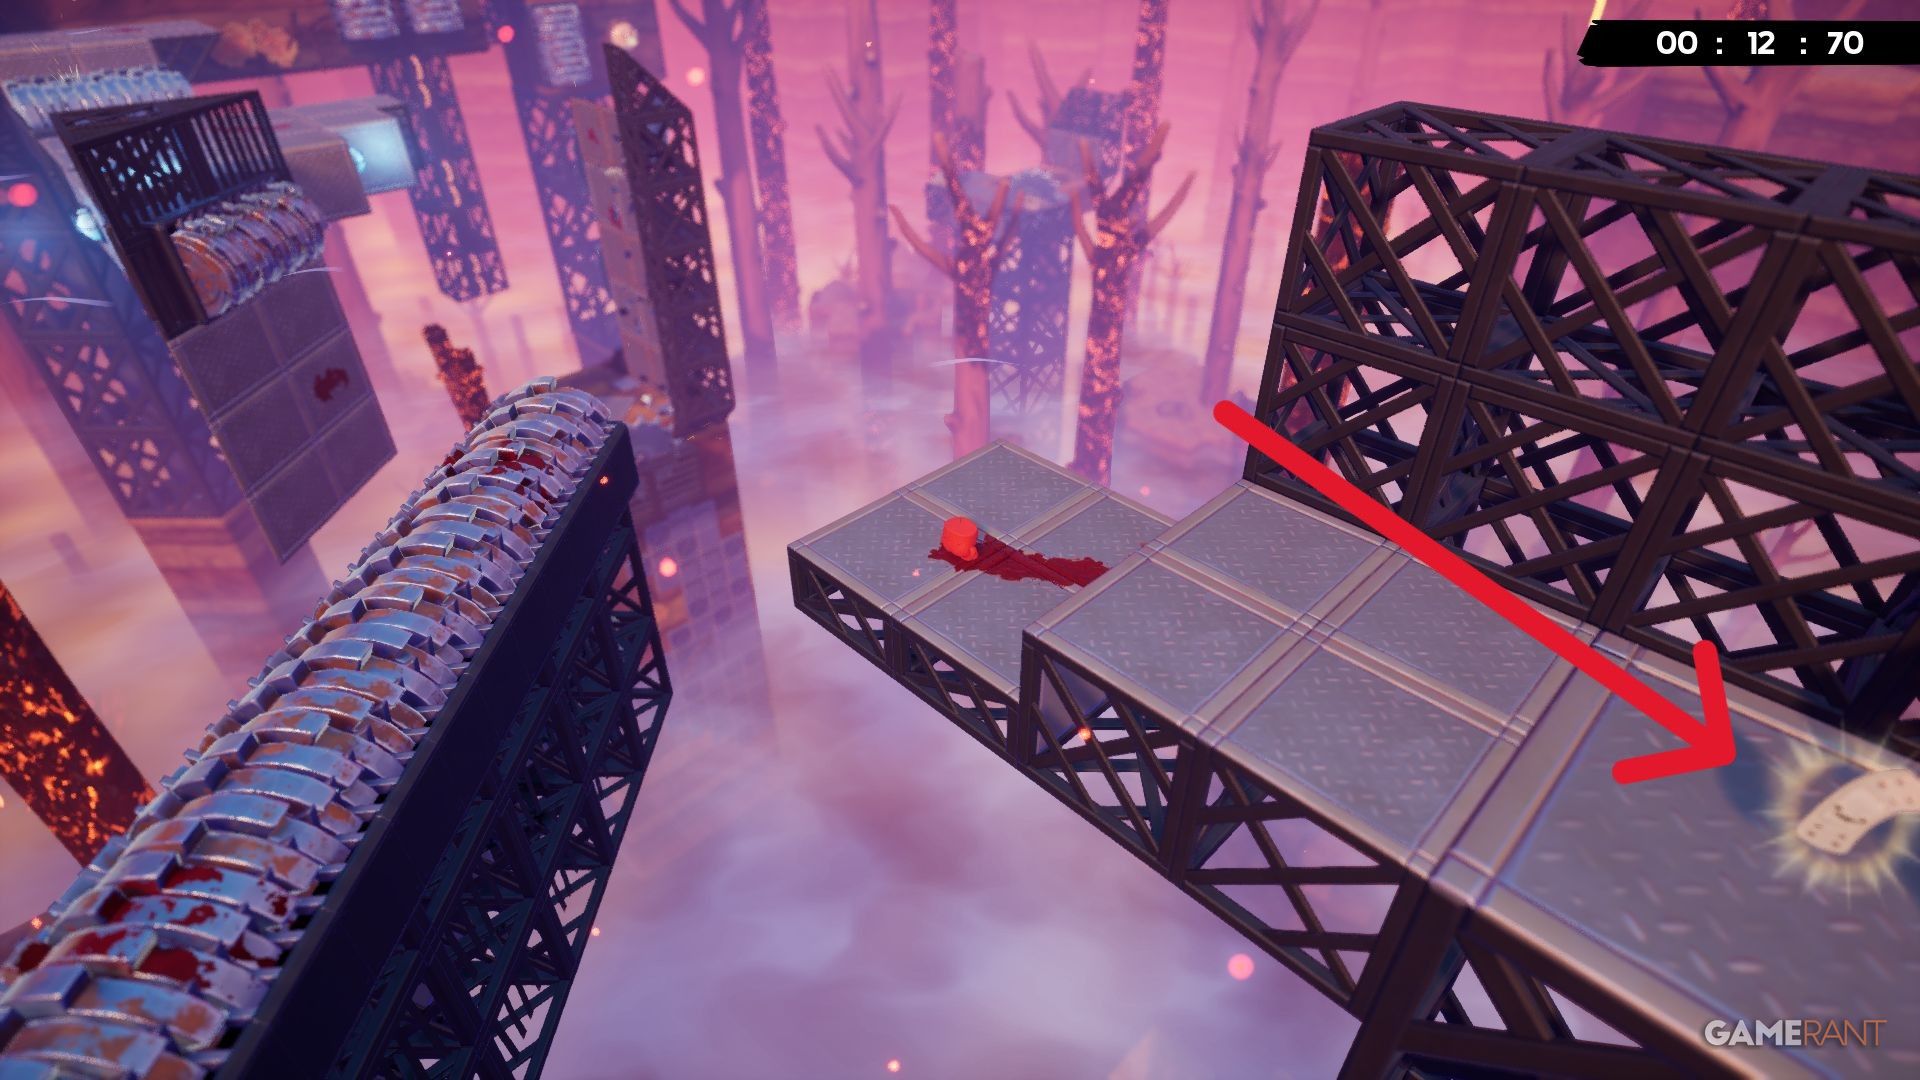
Okay, so the level starts with a climb and some seriously dangerous spinning saws. Once you get past that, you’re speeding along a wall – and this is where things get interesting. The natural path is to keep going forward and dash left, but here’s the tip: if you really want the Bandage, don’t do that! Instead, jump over the wall and head right. Trust me, it’s worth it!
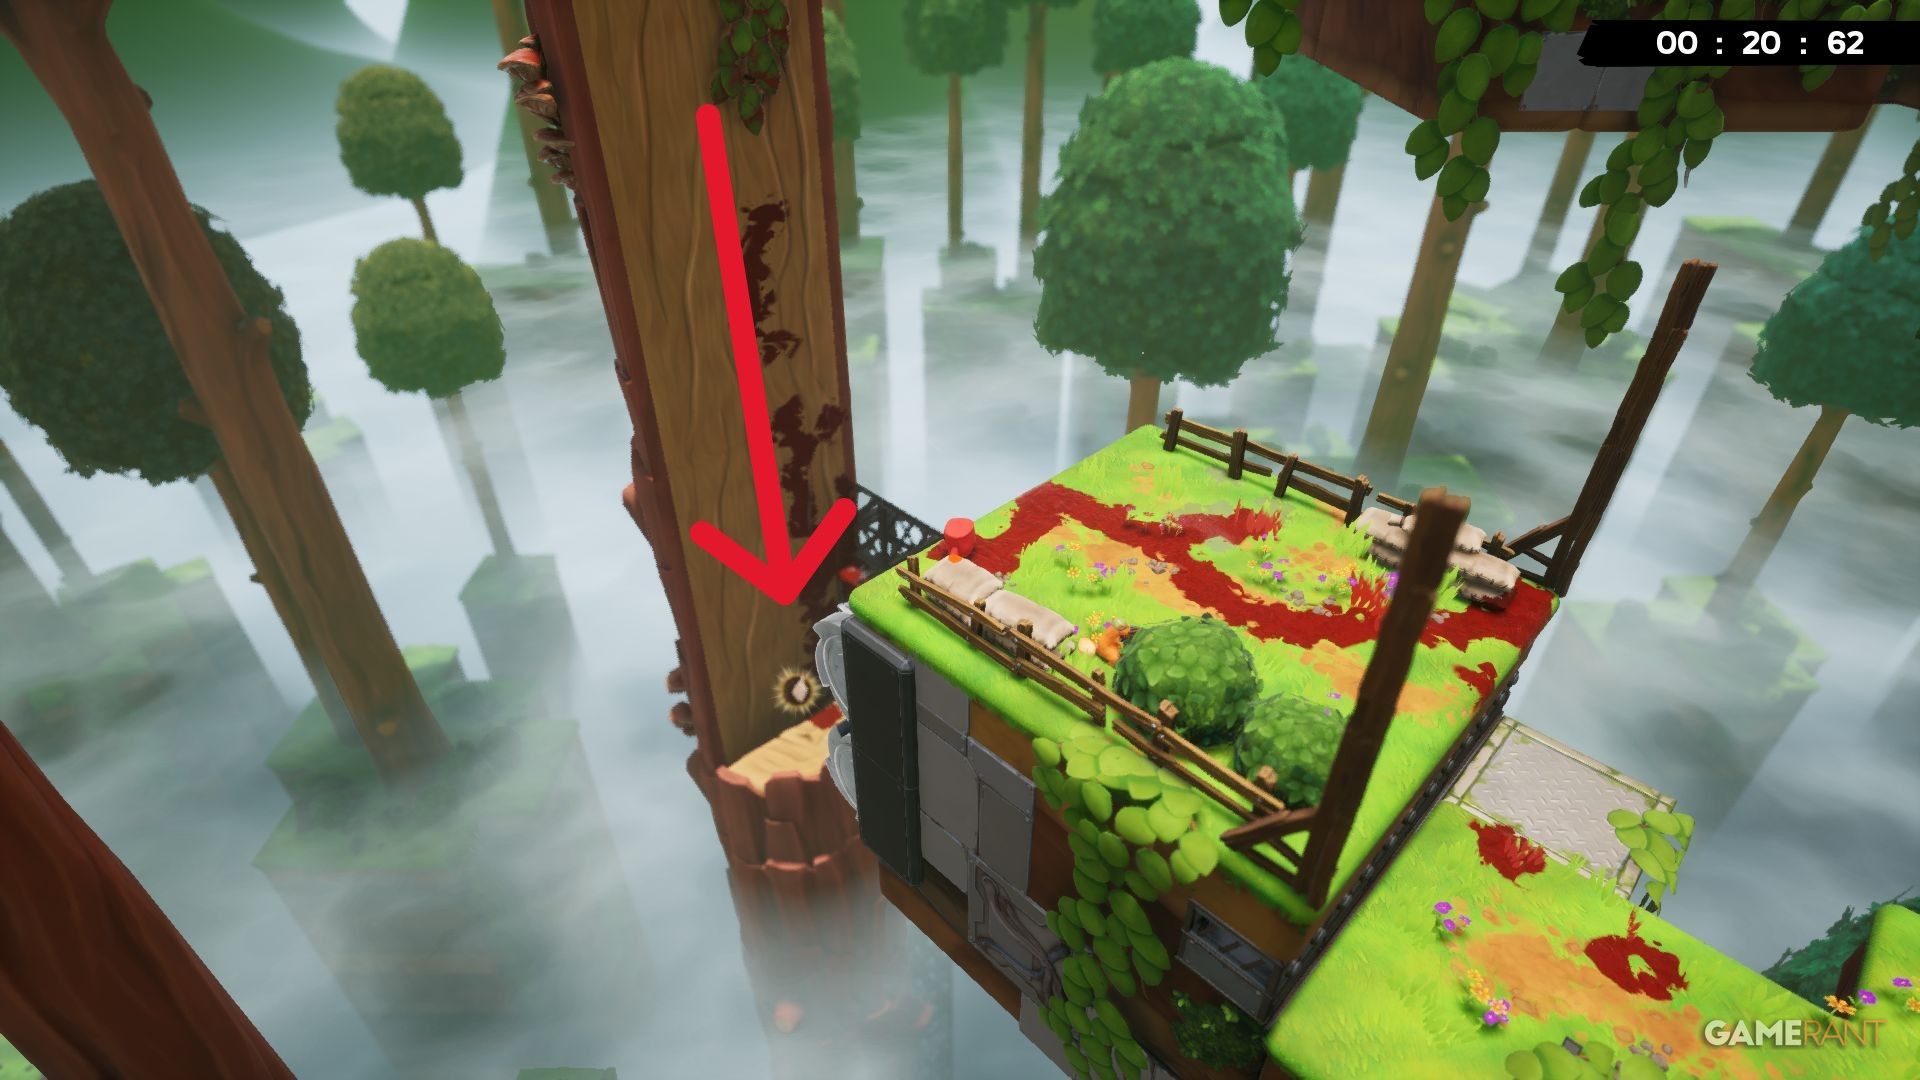
Level 14 – Treetop Trials Bandage
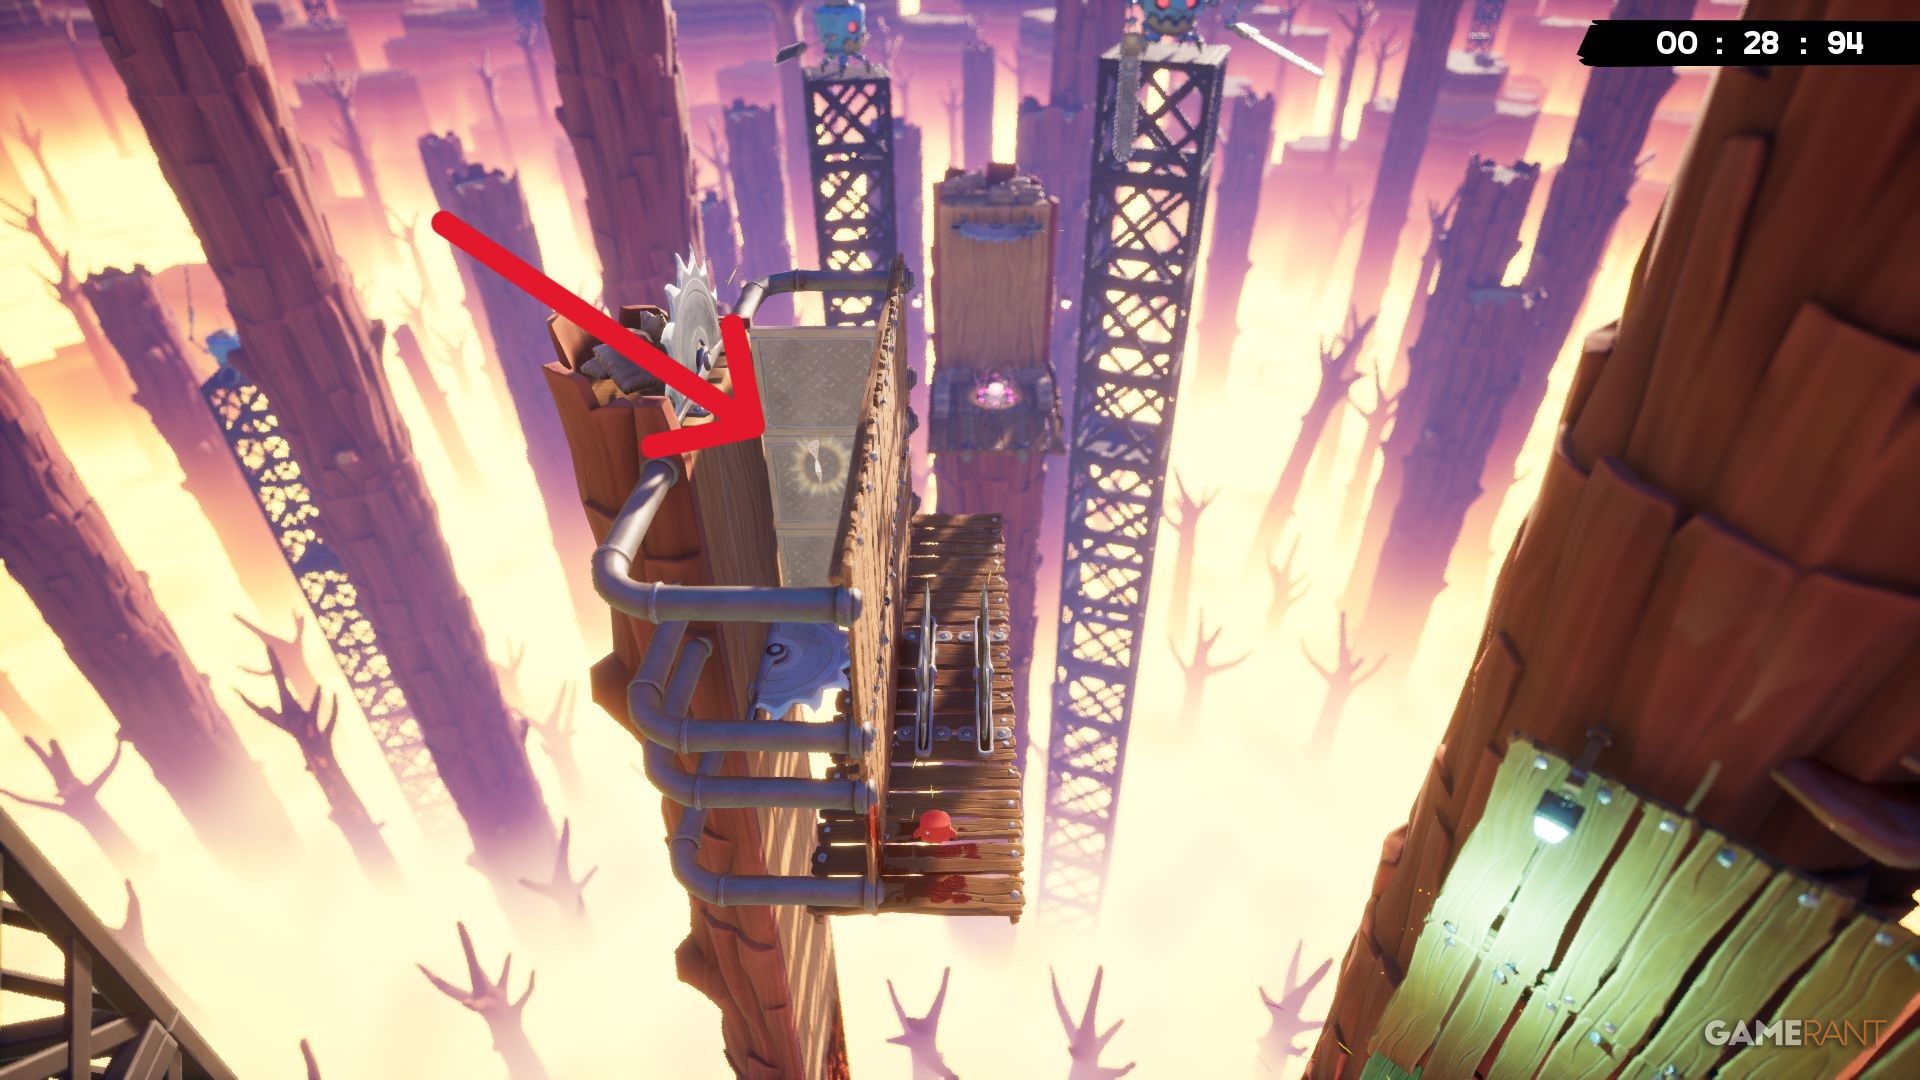
As you near the level’s end, you’ll reach a wooden platform and see two large blue robots with saws in the distance. The Bandage for Treetop Trials is hidden in a small opening on this platform. To get it, jump over the edge of the opening and drop down. Then, use the metal wall at the front of the opening to climb back up.
Level 15 – Rusty Outlook Bandage
Once players navigate a thorny, confined area, they’ll come across large burning logs. The Bandage is located above the logs and can only be reached by performing a series of quick wall jumps. Be careful – there’s danger both behind and above the Bandage, so precise movement is important.
Read More
- All Shadow Armor Locations in Crimson Desert
- How to Get the Sunset Reed Armor Set and Hollow Visage Sword in Crimson Desert
- Jujutsu Kaisen Season 3 Episode 12 Release Date
- Best Bows in Crimson Desert
- Dark Marksman Armor Locations in Crimson Desert
- Wings of Iron Walkthrough in Crimson Desert
- All Golden Greed Armor Locations in Crimson Desert
- How To Beat Ator Archon of Antumbra In Crimson Desert
- Top 5 Militaristic Civs in Civilization 7
- How to Craft the Elegant Carmine Armor in Crimson Desert
2026-03-31 17:05