
It might be shocking to some gamers, but it’s worth mentioning that the Dragon Sword isn’t the sole weapon in Ninja Gaiden 2 Black. Although the Dragon Sword is undeniably awesome, Ryu’s family sword is merely one of eleven weapons hidden within the game. In all seriousness, experimenting with each weapon in Ninja Gaiden 2 Black significantly improves an already fantastic gaming experience. Moreover, with nine melee weapons and two ranged weapons to choose from, it also boosts the game’s replay value. This guide will walk you through where to discover and unlock every single weapon in Ninja Gaiden 2 Black.
How to Get the Lunar Staff in Ninja Gaiden 2 Black Chapter 1
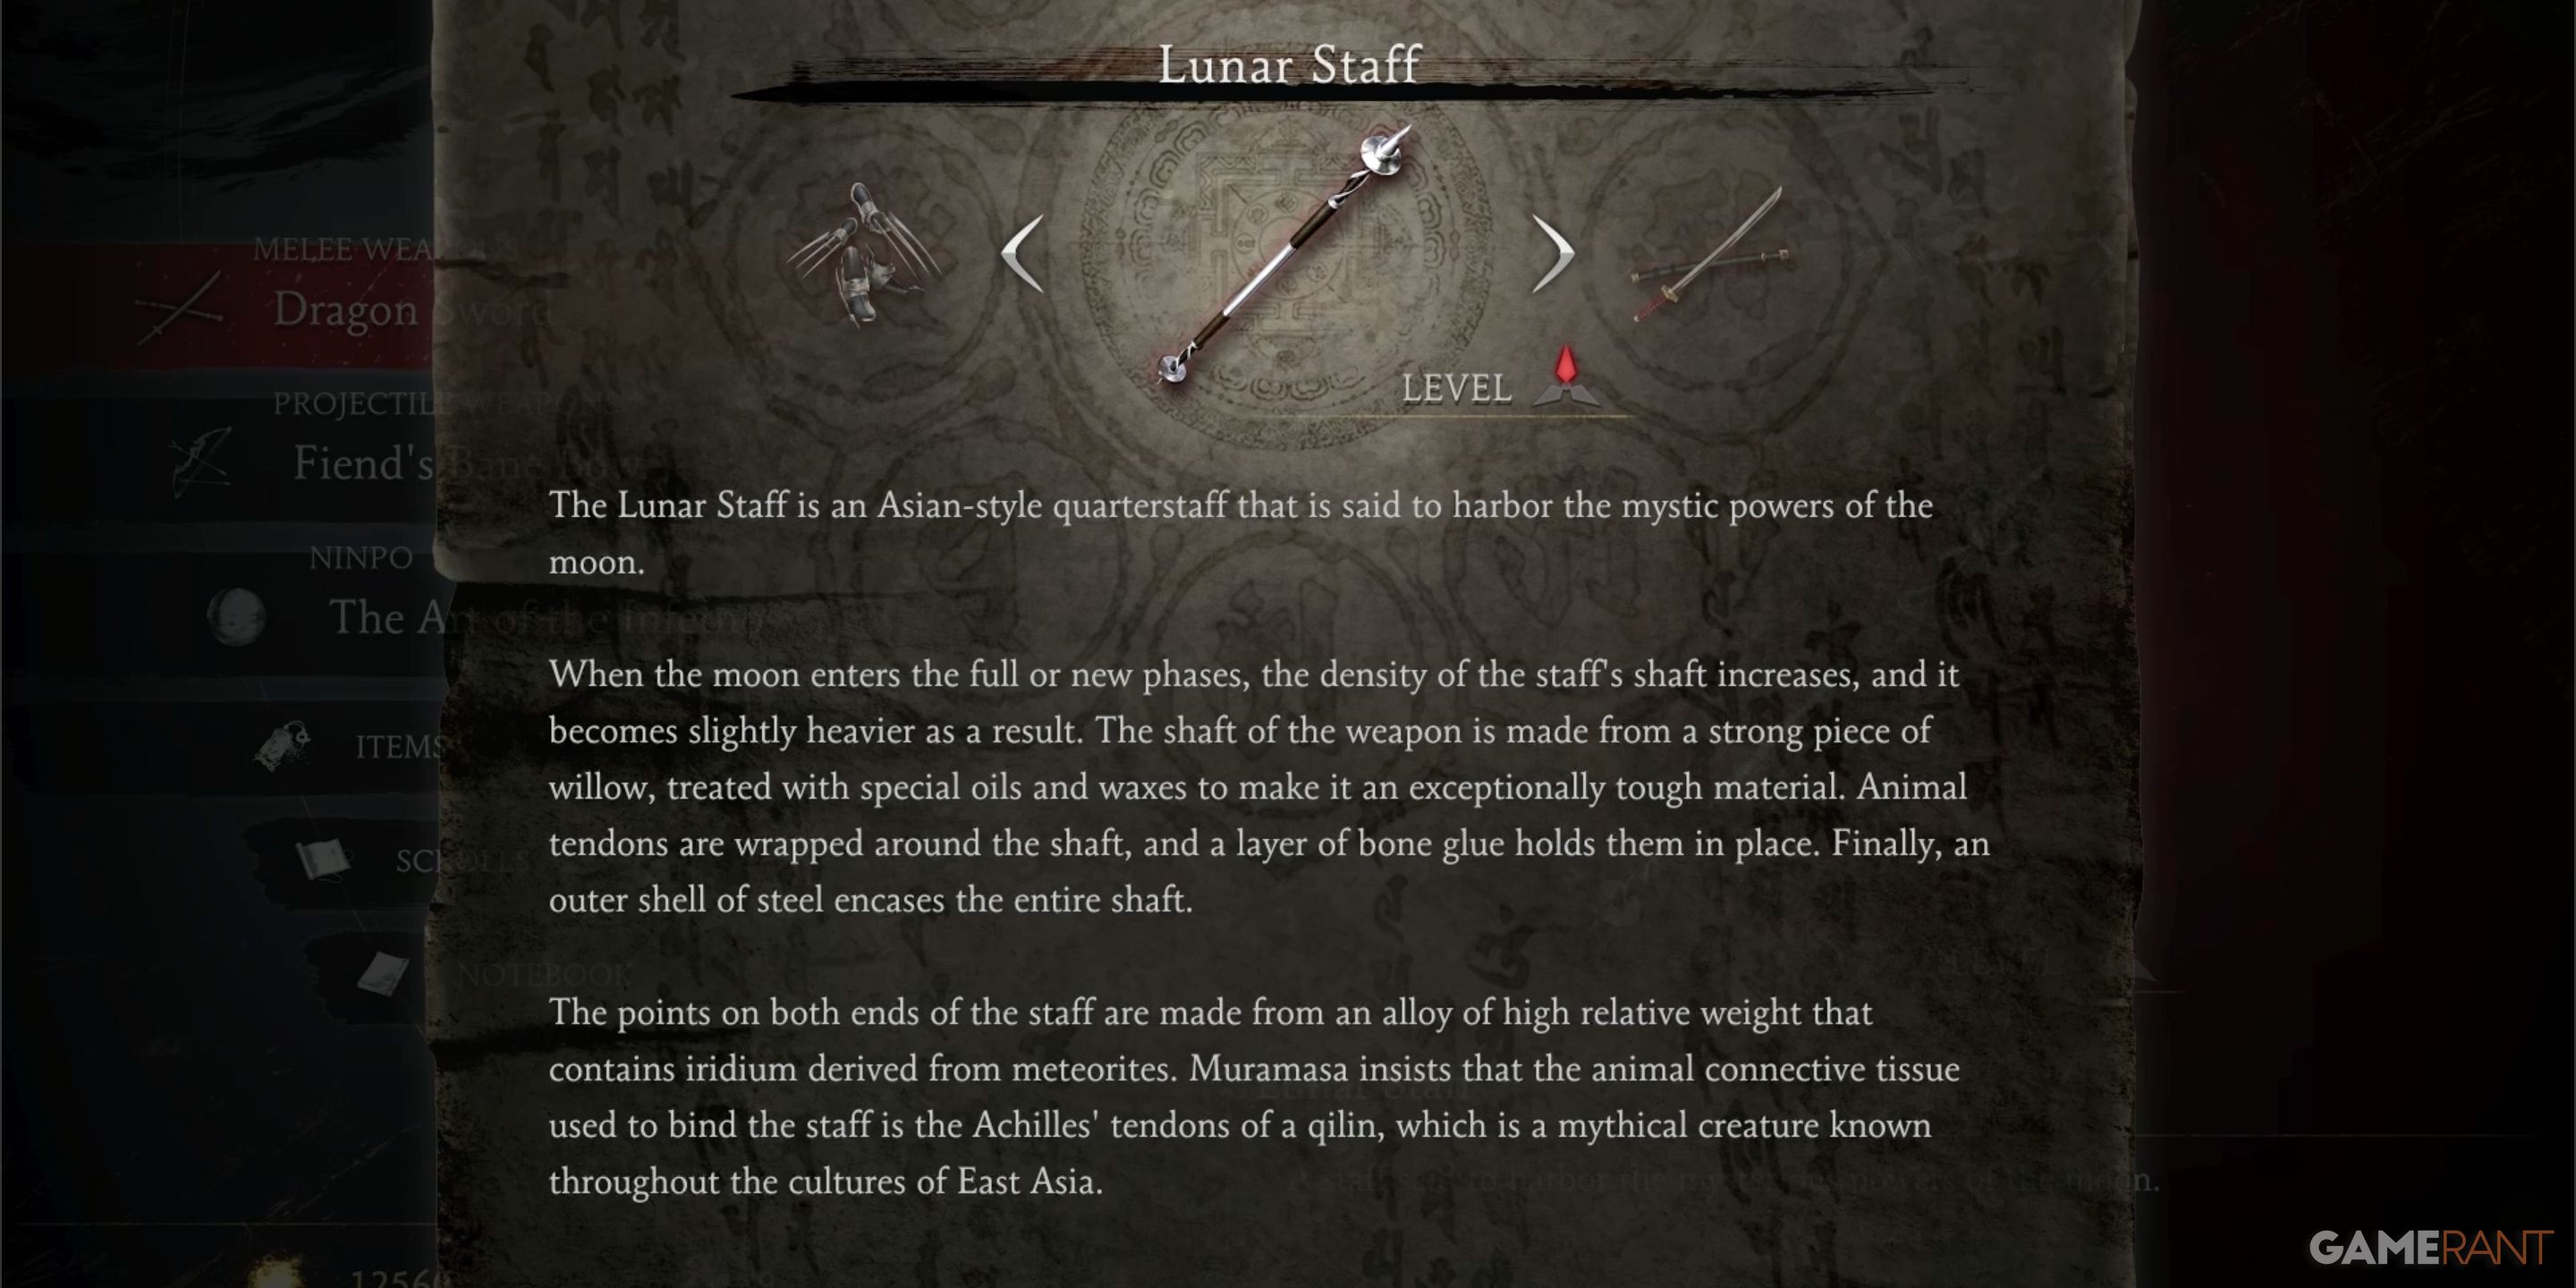
In the first chapter of Ninja Gaiden 2 Black, titled “The Way of the Ninja,” the Lunar Staff is the sole weapon available to you.
Lunar Staff Location:
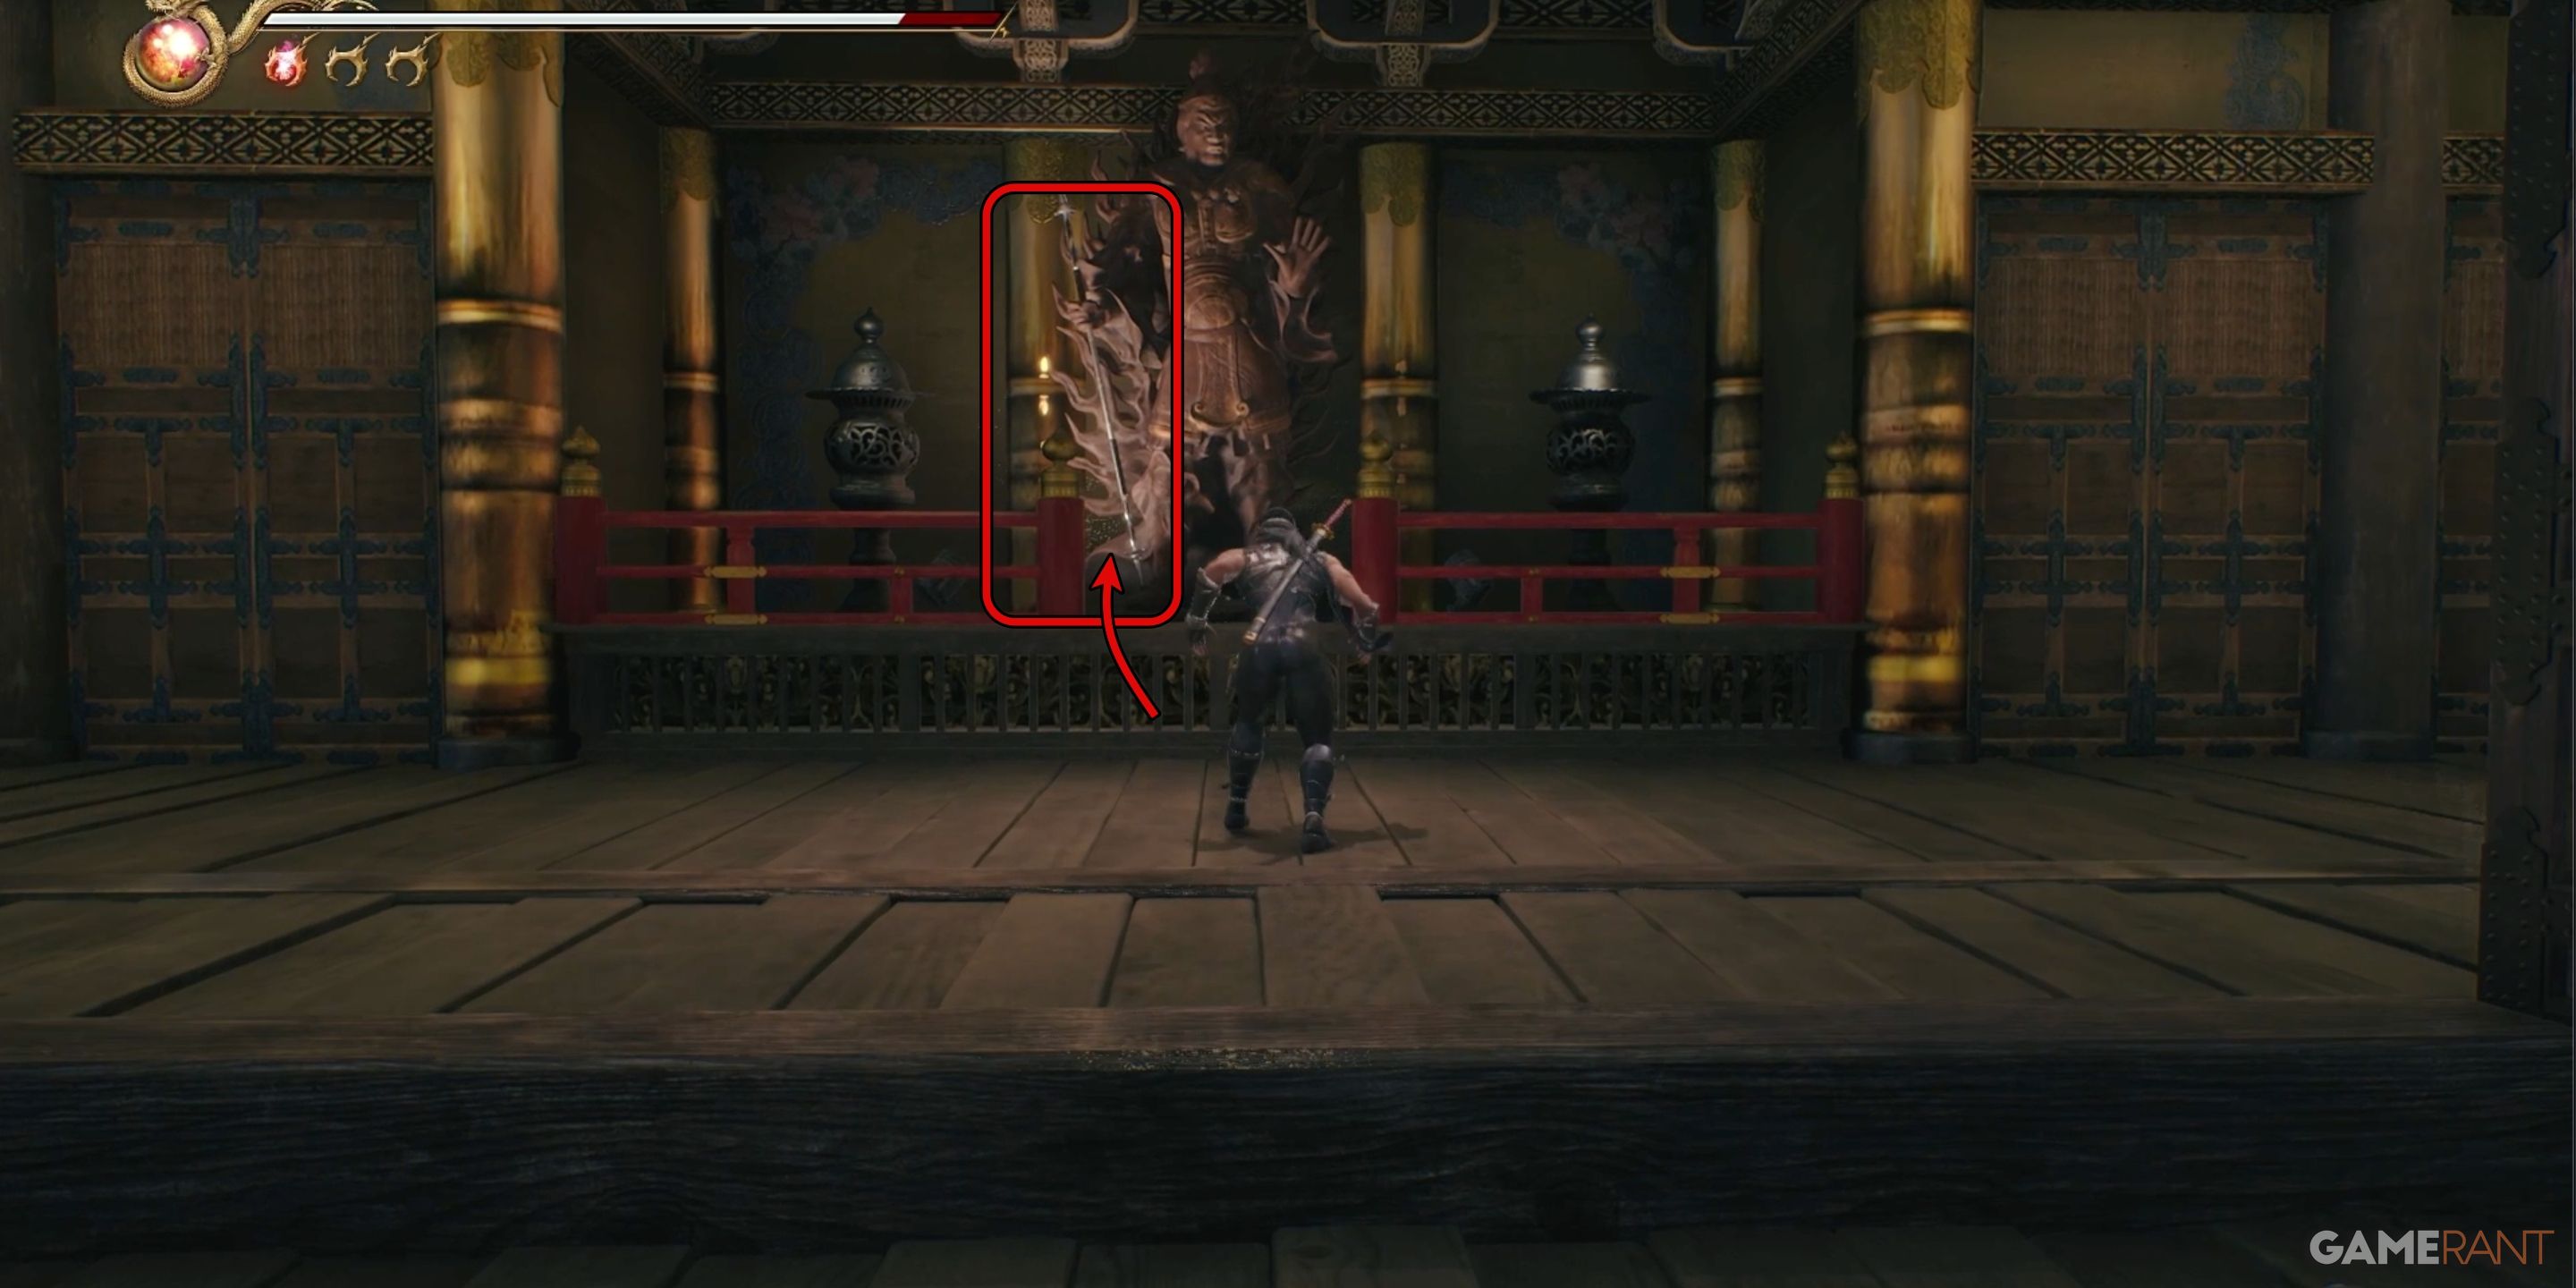
In the first chapter, the Lunar Staff should be approximately at the midpoint. You’ll recognize its proximity as you’ll meet your first fireball-tossing adversaries outside the temple where the staff is hidden. Defeat these enemies, and a scene will unfold demonstrating the staff in the hands of a statue within the temple. To claim the staff, simply approach the statue and grab it.
How to Get the Falcon’s Talons in Ninja Gaiden 2 Black Chapter 2
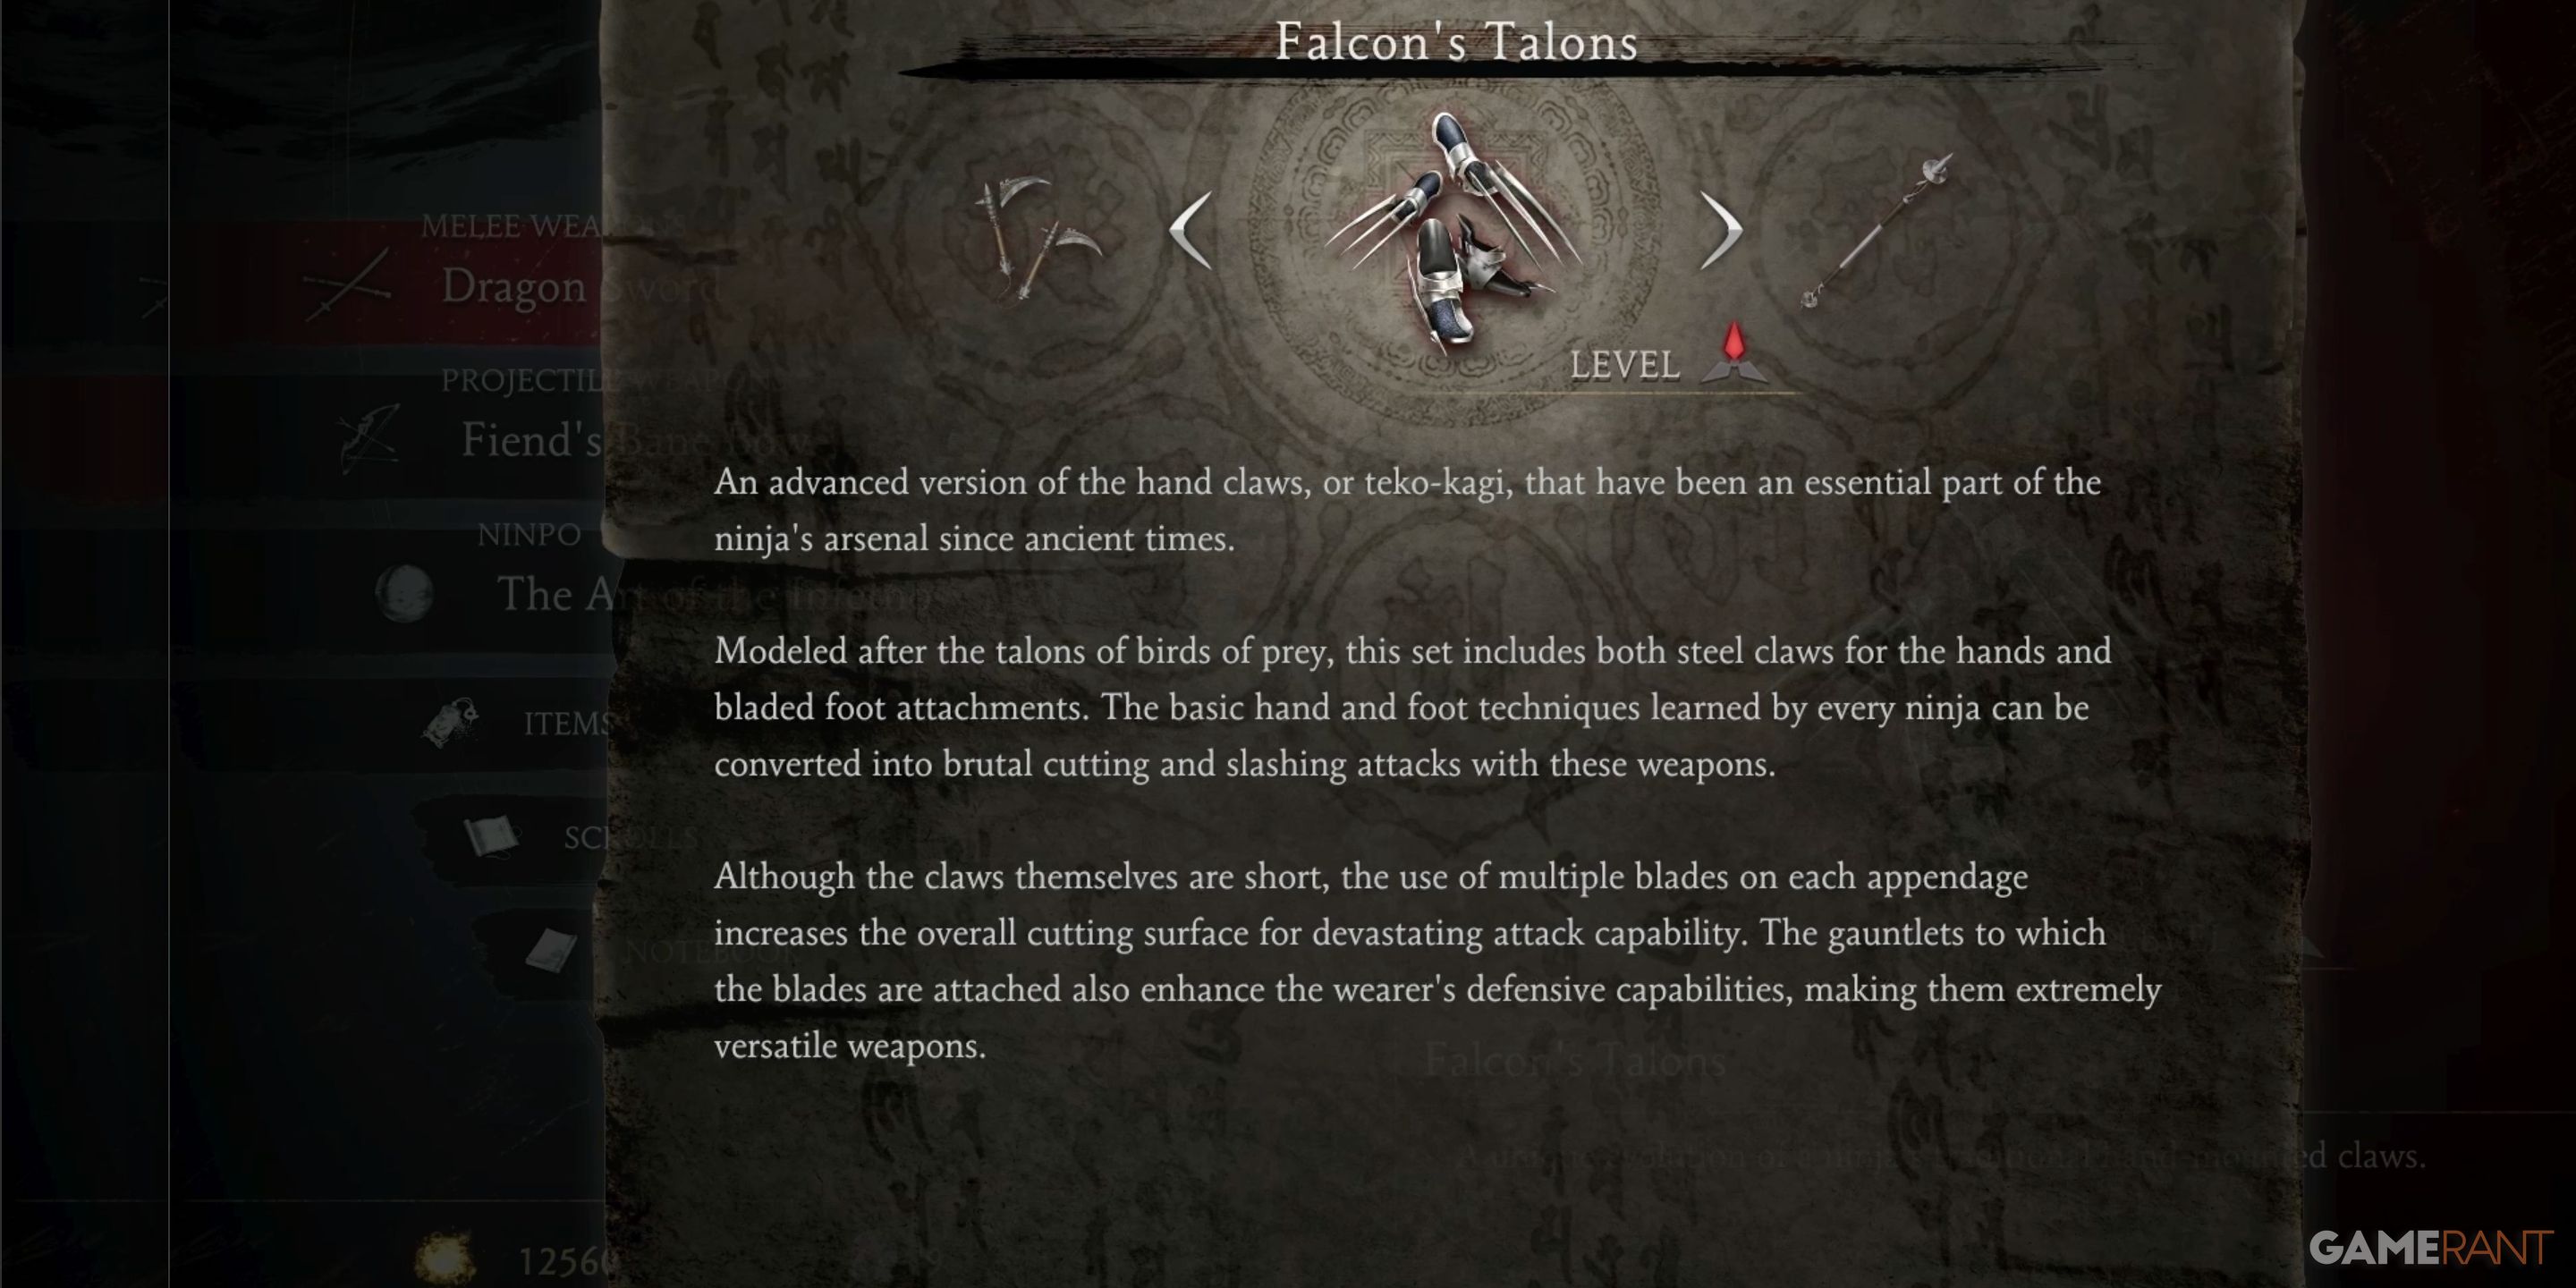
In Chapter 2: Castle of the Dragon within Ninja Gaiden 2 Black, you’ll discover the Falcon’s Talons as one of the two weapons to be found initially.
Falcon’s Talons Location:
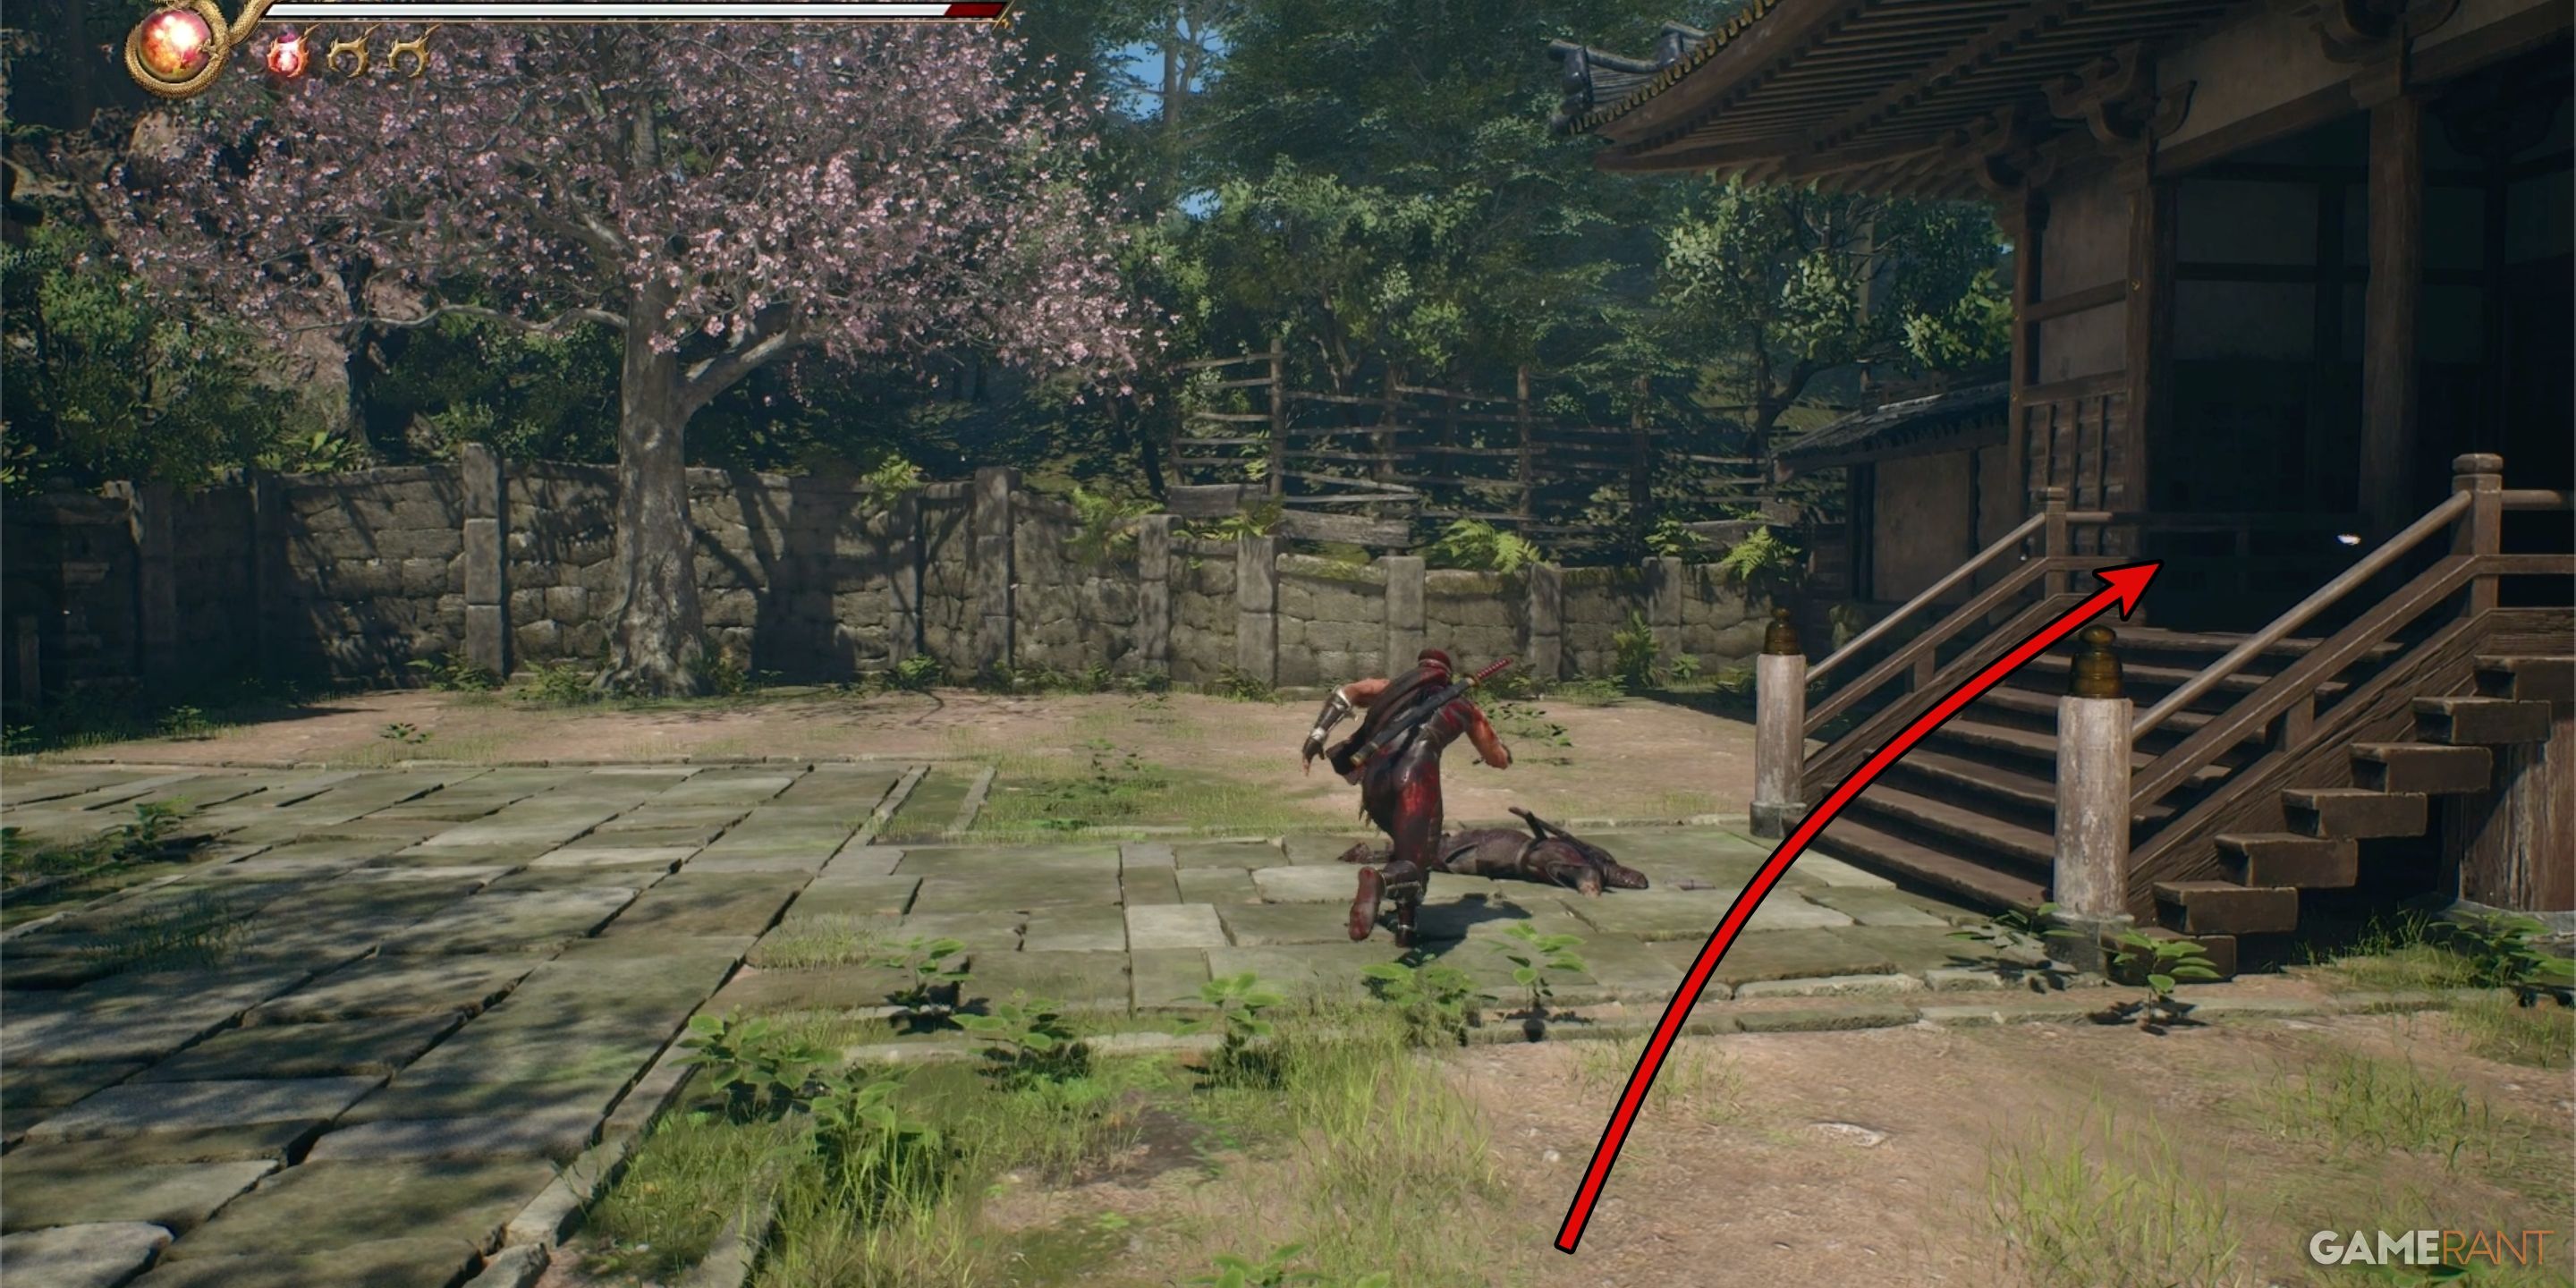

In the early part of Chapter 2, after dashing through the watery expanse, you’ll arrive at the game level’s initial Earth Dragon checkpoint for saving your progress. Following this, you’ll traverse around a building and enter a courtyard flanked by two edifices. One of these structures is sealed off, becoming apparent when you attempt to approach it. Conversely, the other structure – bearing a deceased body and the “Ultimate Guidance” Notebook as loot – remains accessible.
Step inside, navigate towards the back of the room, and there you will encounter the Falcon’s Talons showcased. Remember to prepare yourself for combat before handling the weapon, as confrontation ensues immediately following your grasp.
How to Get the Fiend’s Bane Bow in Ninja Gaiden 2 Black Chapter 2
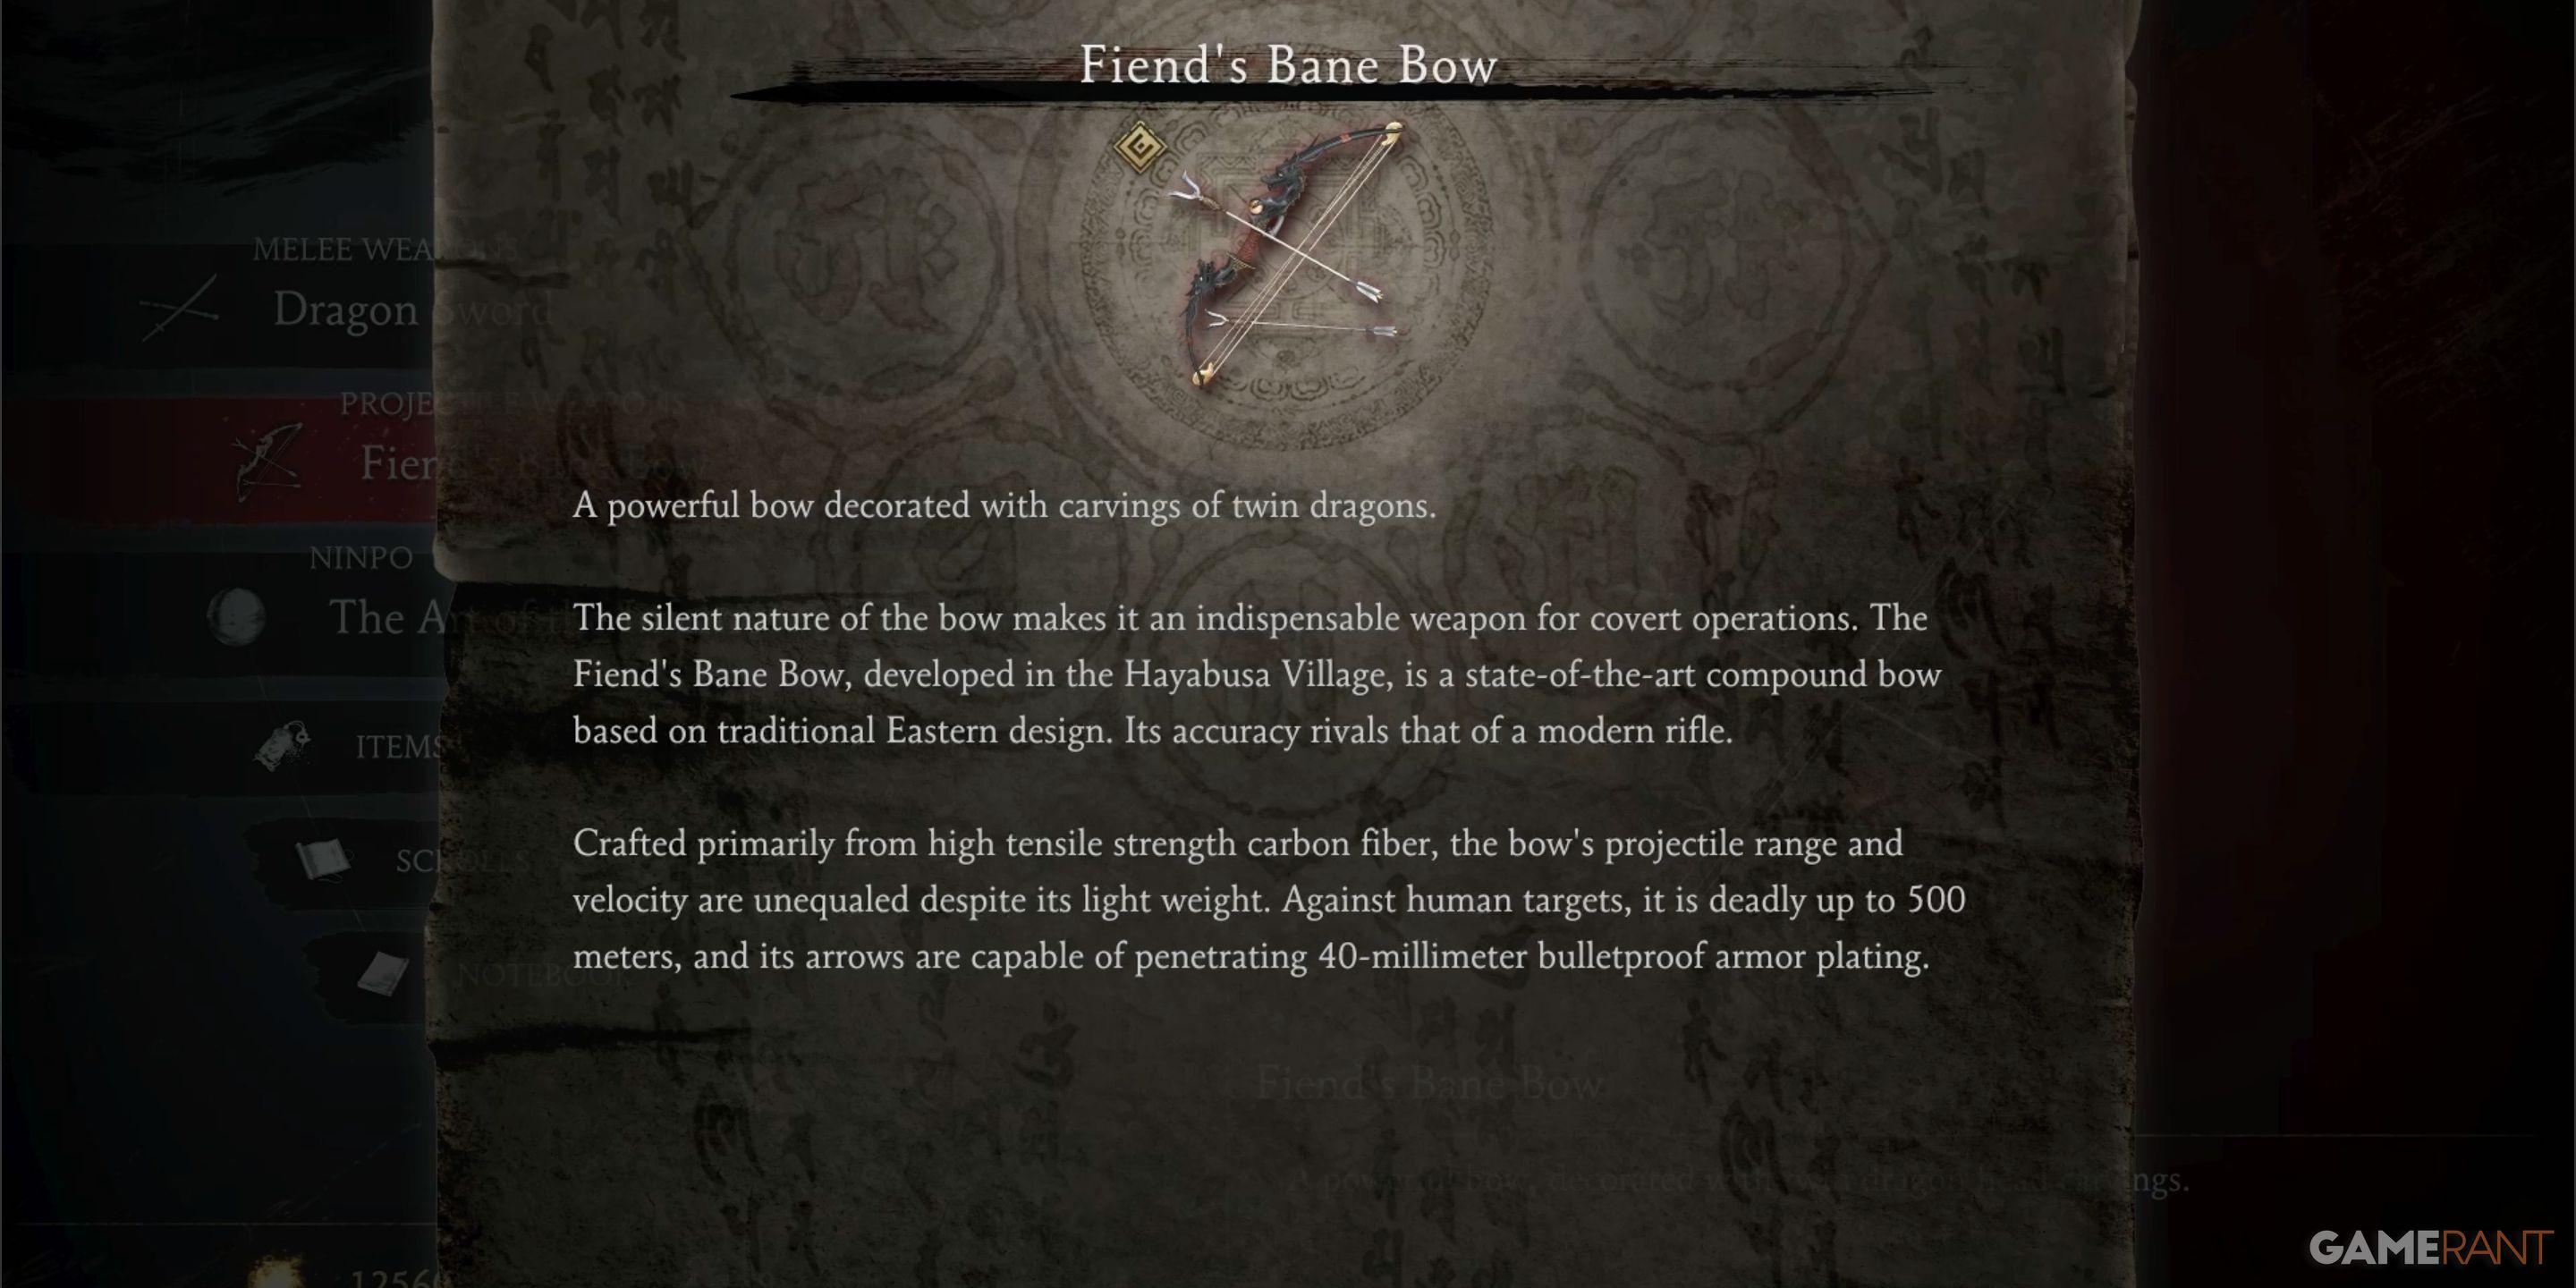
The Fiend’s Bane Bow is the second and final weapon you can find in NG2B Chapter 2.
Fiend’s Bane Bow Location:
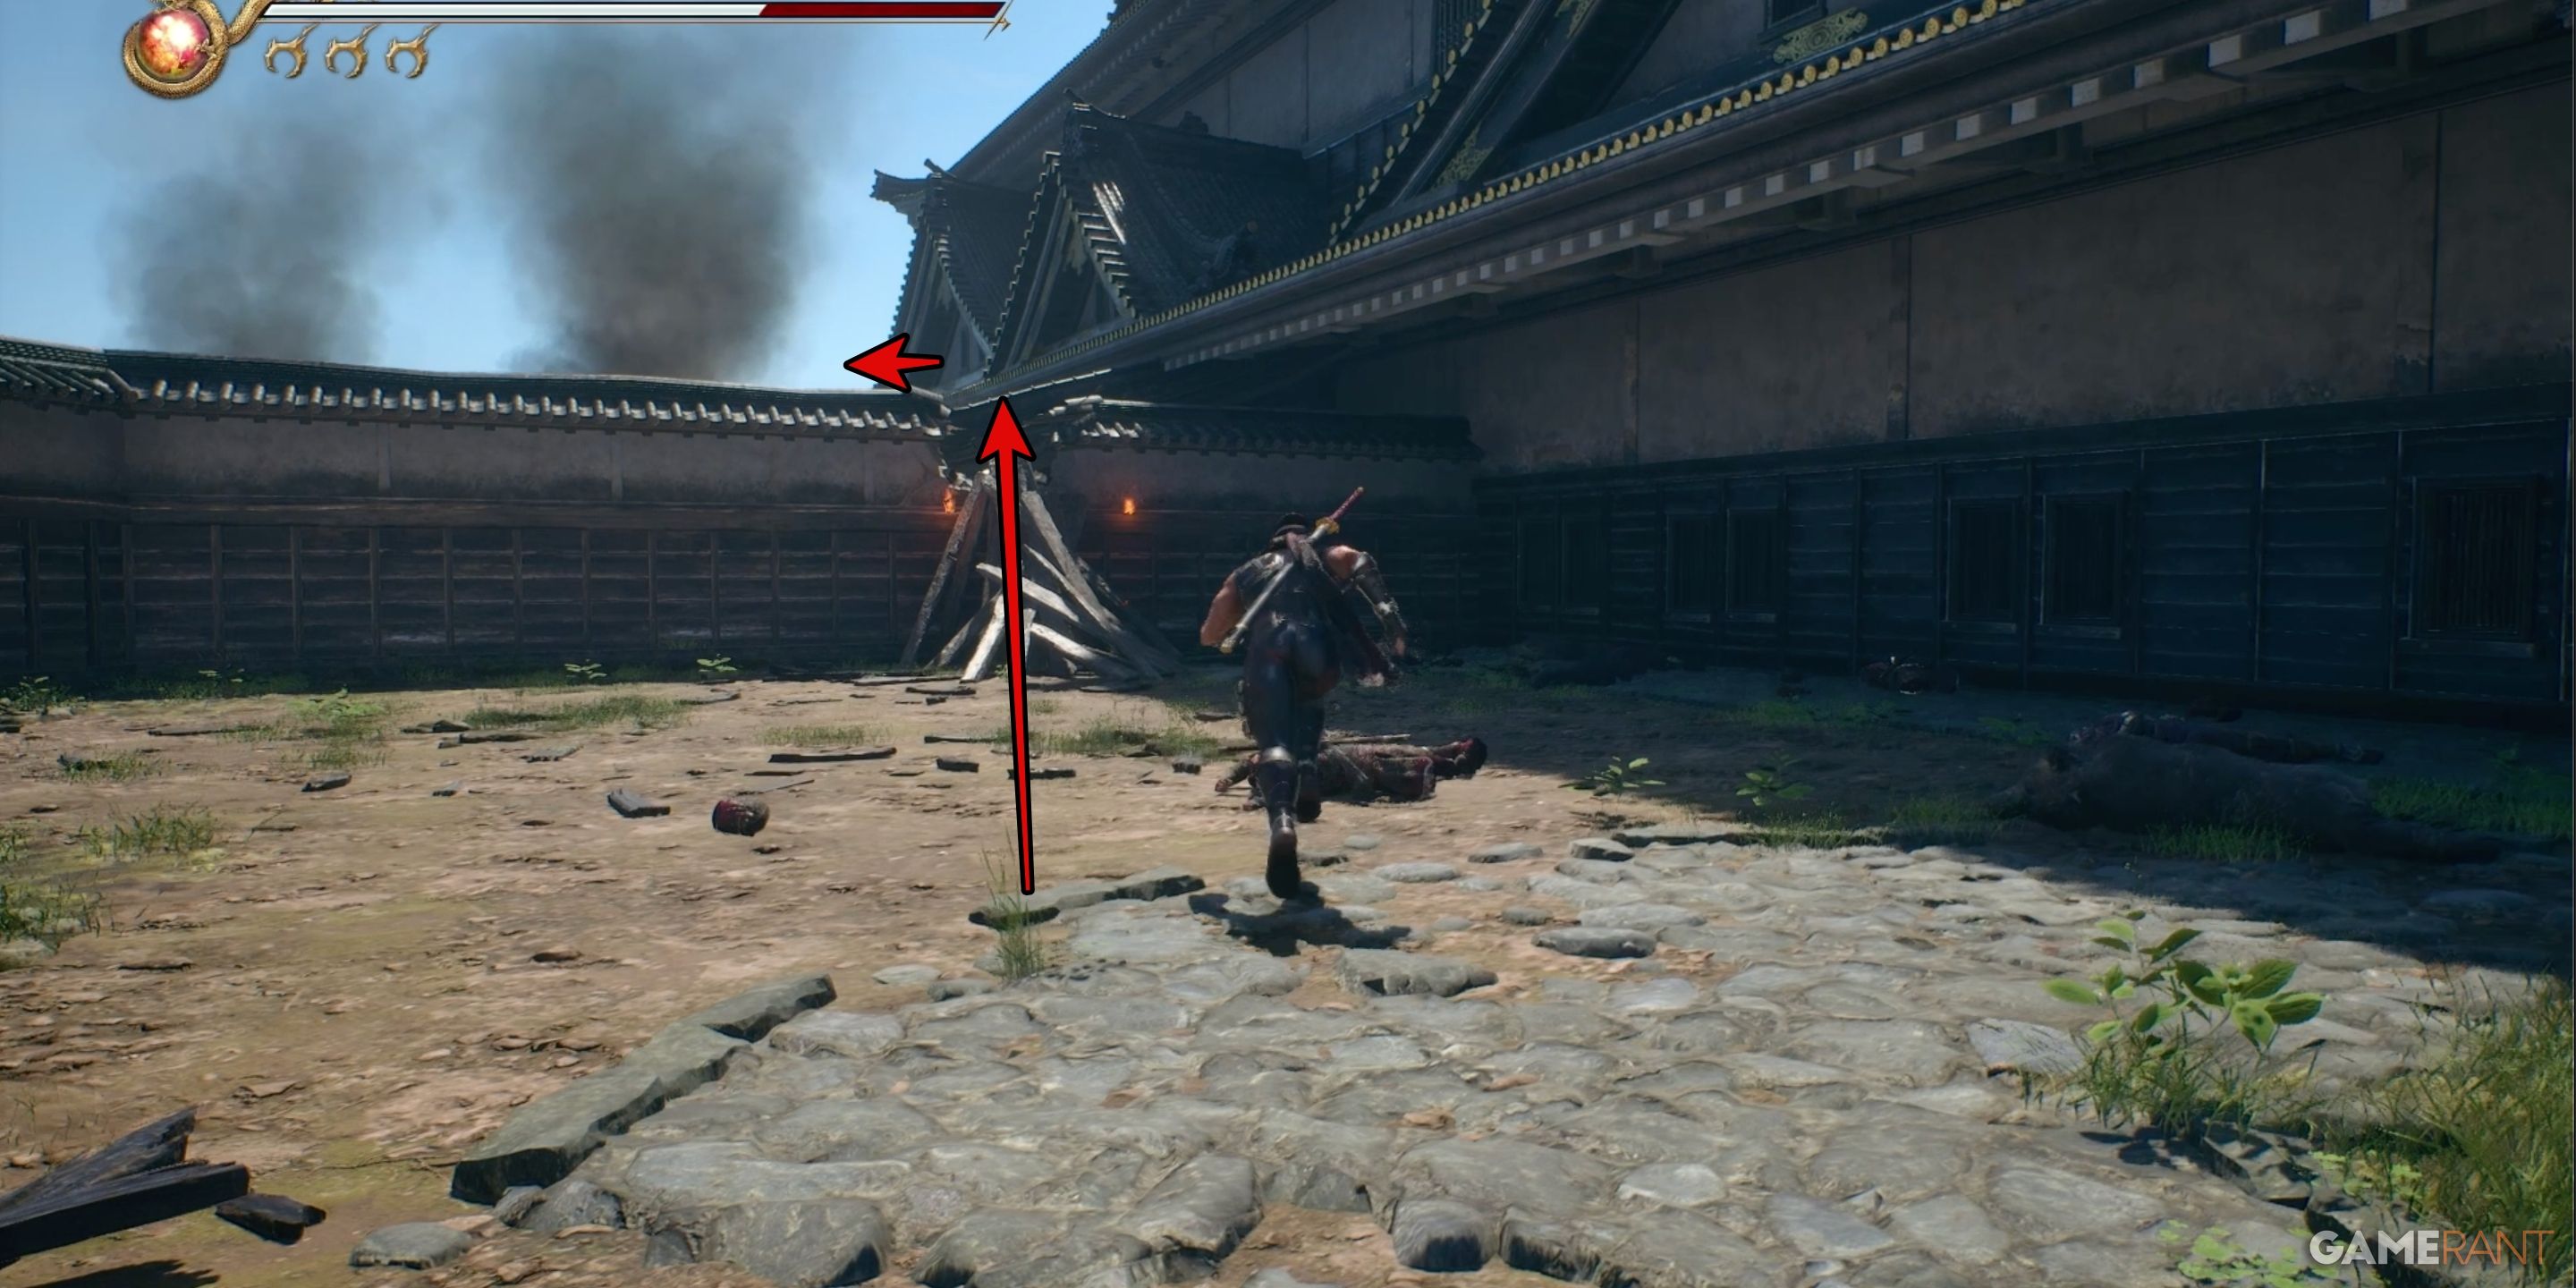
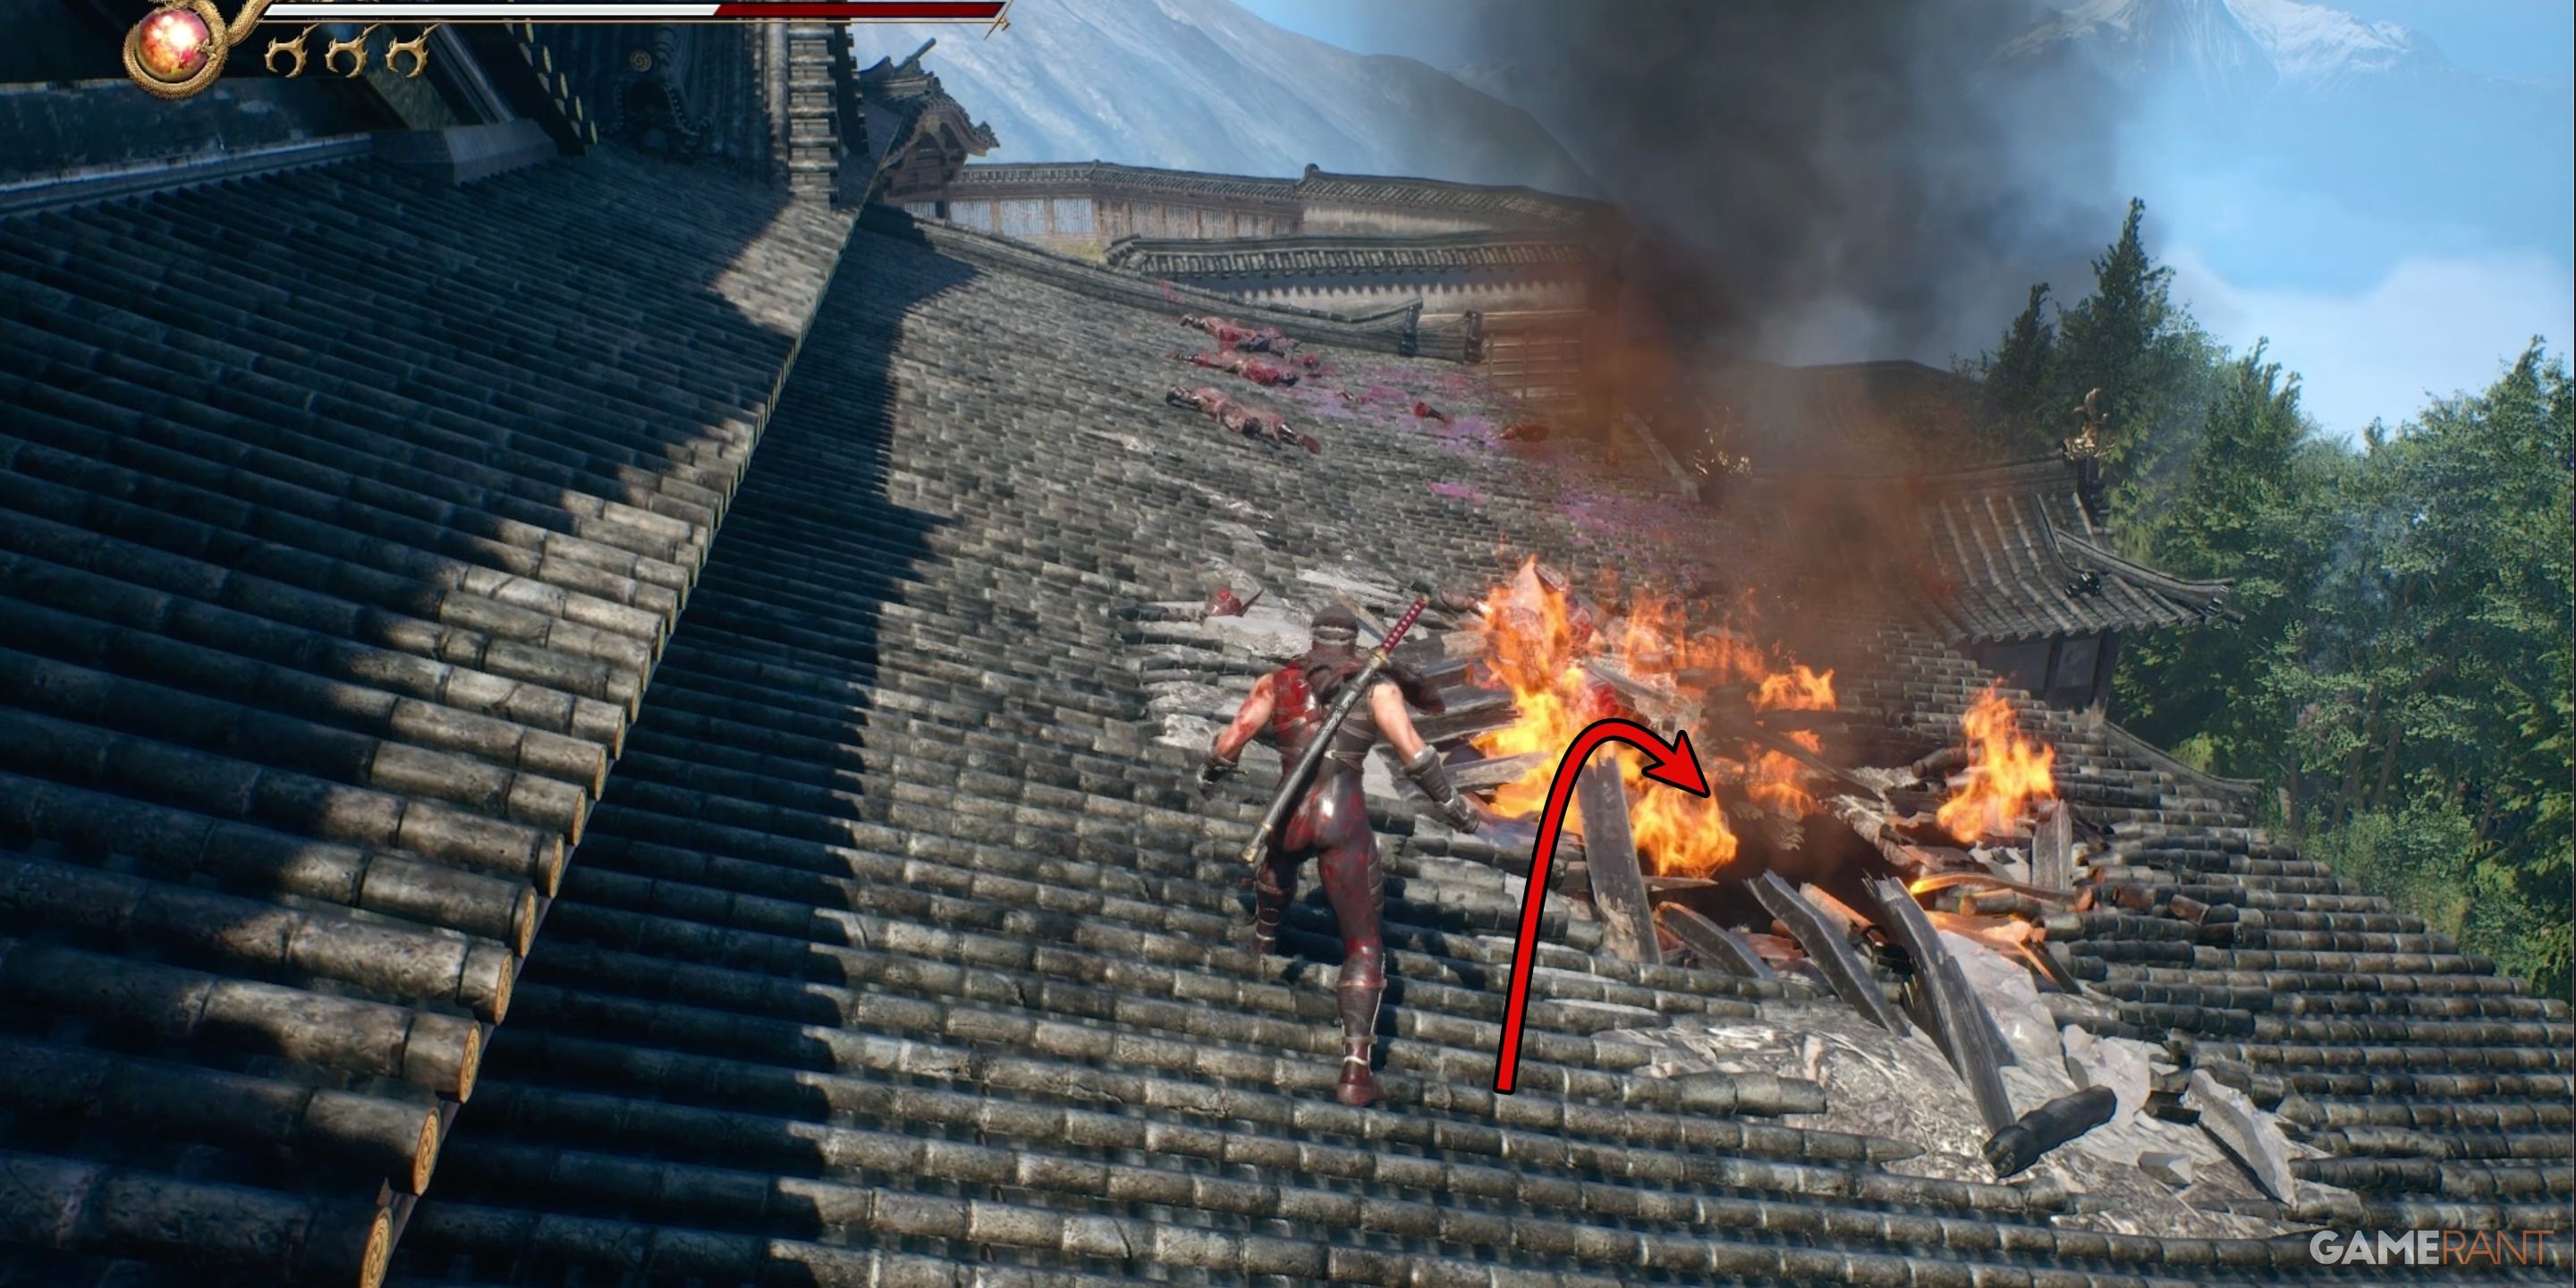
Following your ascent to the top of the hill and reaching the grand temple, you’ll encounter numerous foes scattered across a spacious courtyard outside. Defeat these adversaries, and you’ll scramble up a temporary ramp to the temple rooftop, where additional enemies await. After overcoming this group, you’ll plunge through a fiery hole in the roof, descending into a compact room housing two more adversaries.
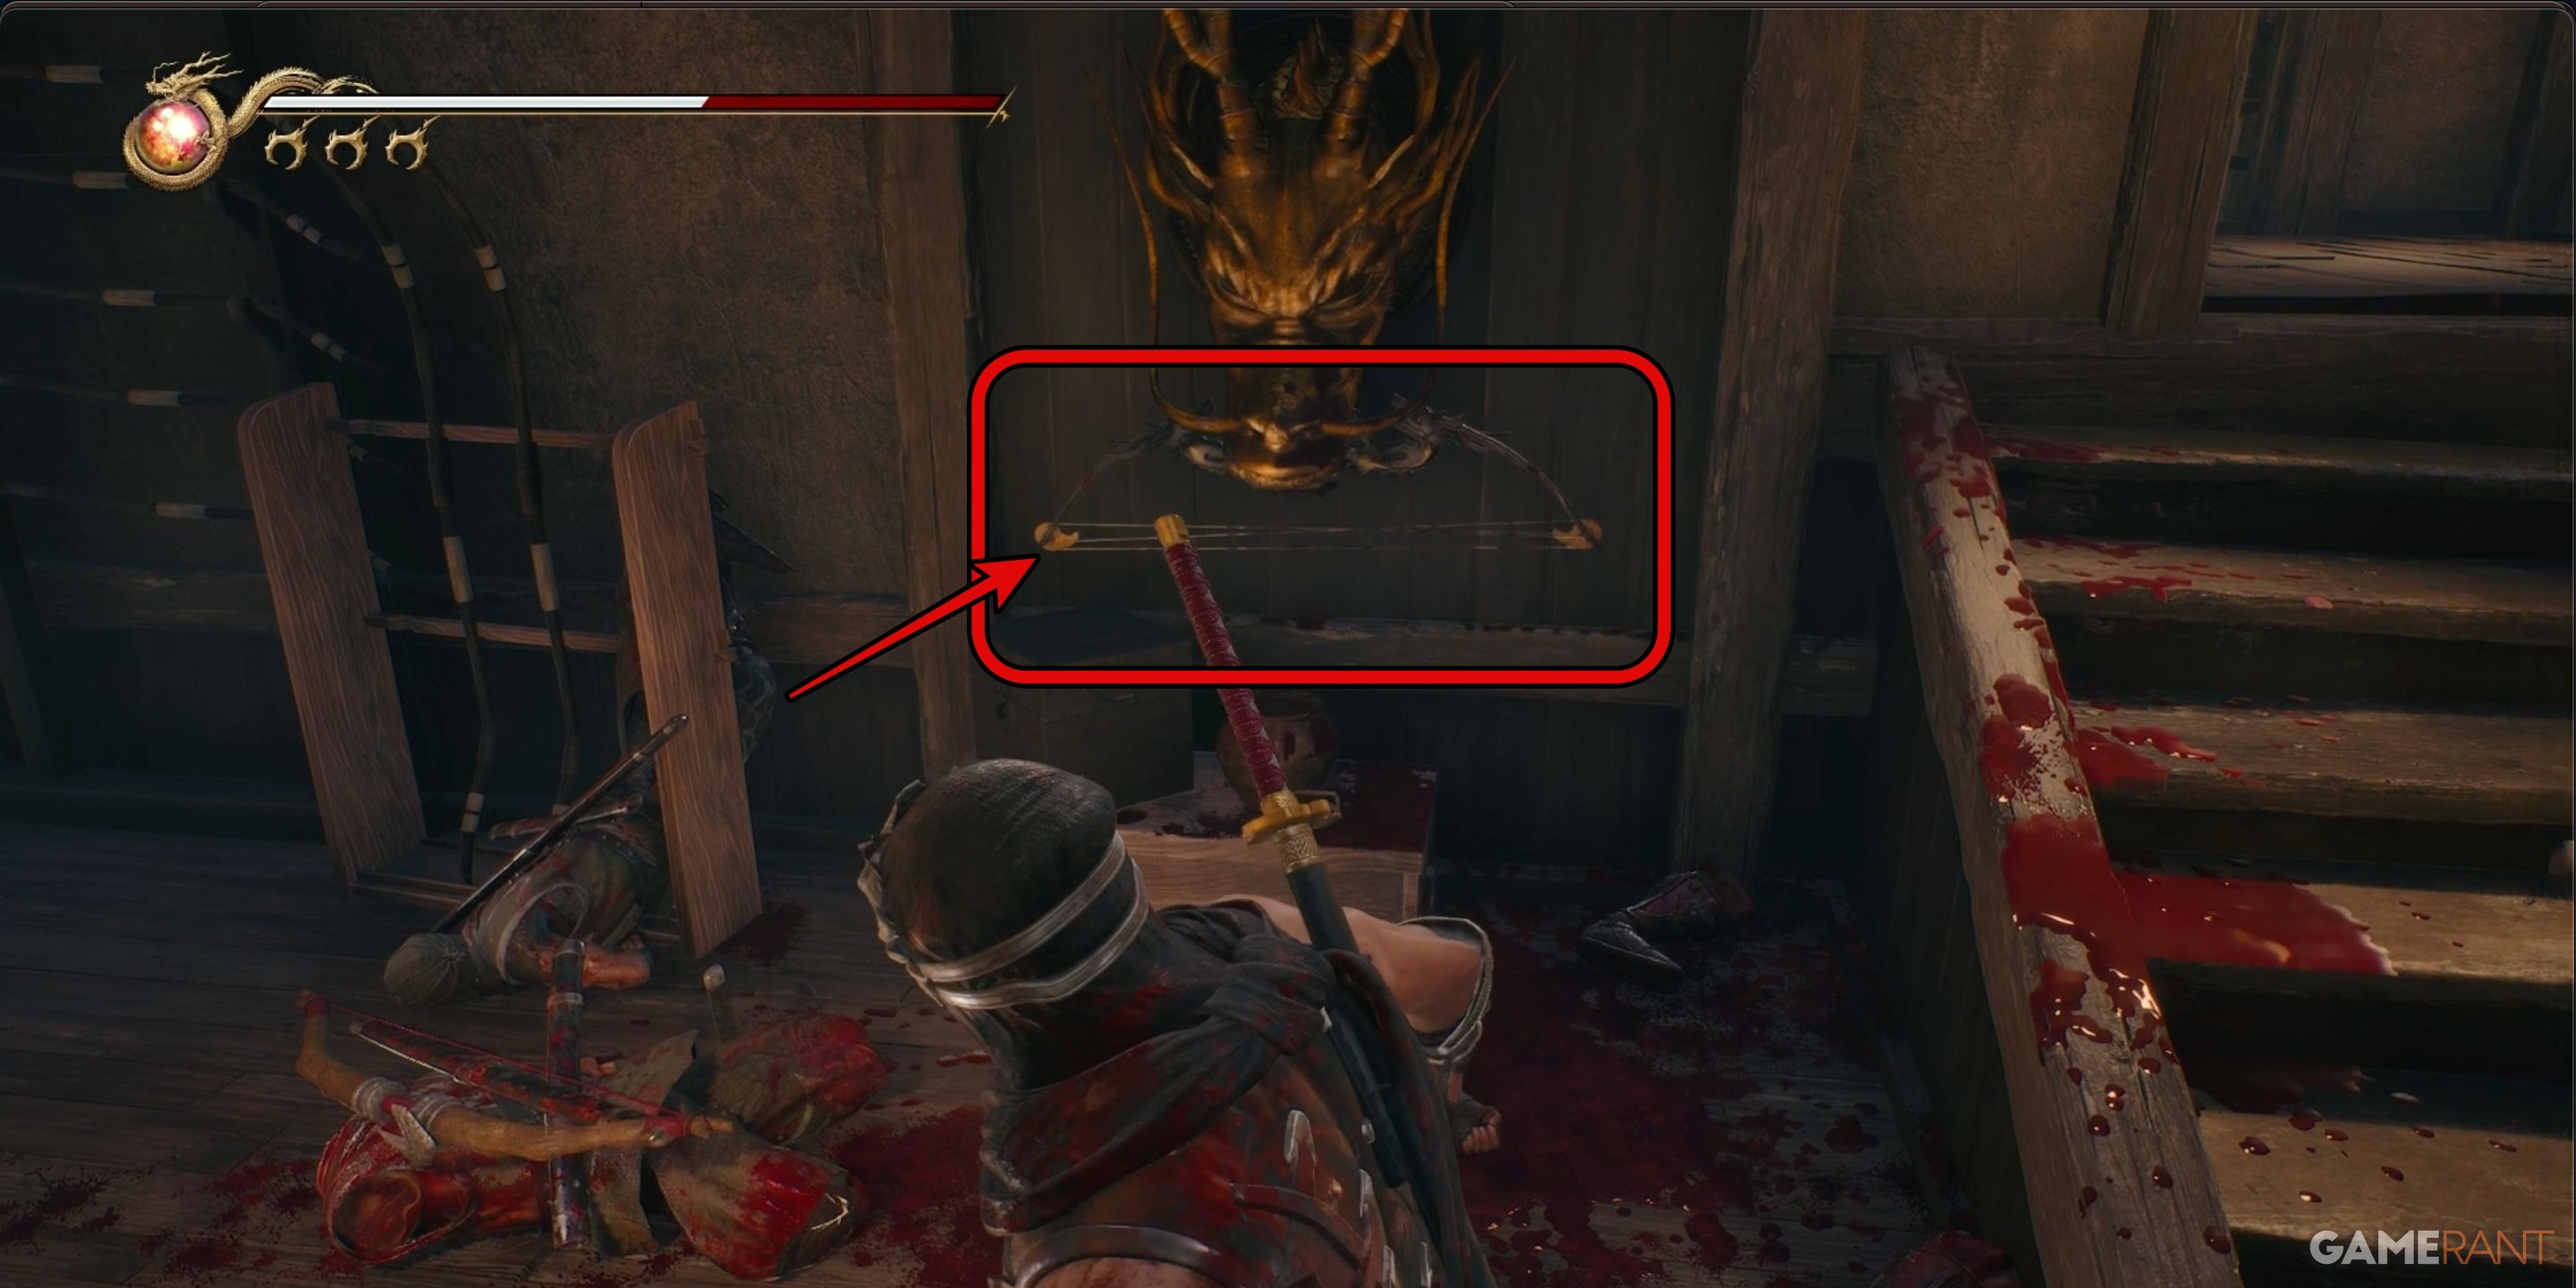
As you prepare to leave this room, don’t forget to glance at the dragon-shaped sculpture situated on the wall to your left just before the exit. You’ll spot the “Fiend’s Bane Bow” nestled within the statue’s jaws. This particular weapon is conspicuous and impossible to overlook, as the door to the next room won’t budge until you secure the bow.
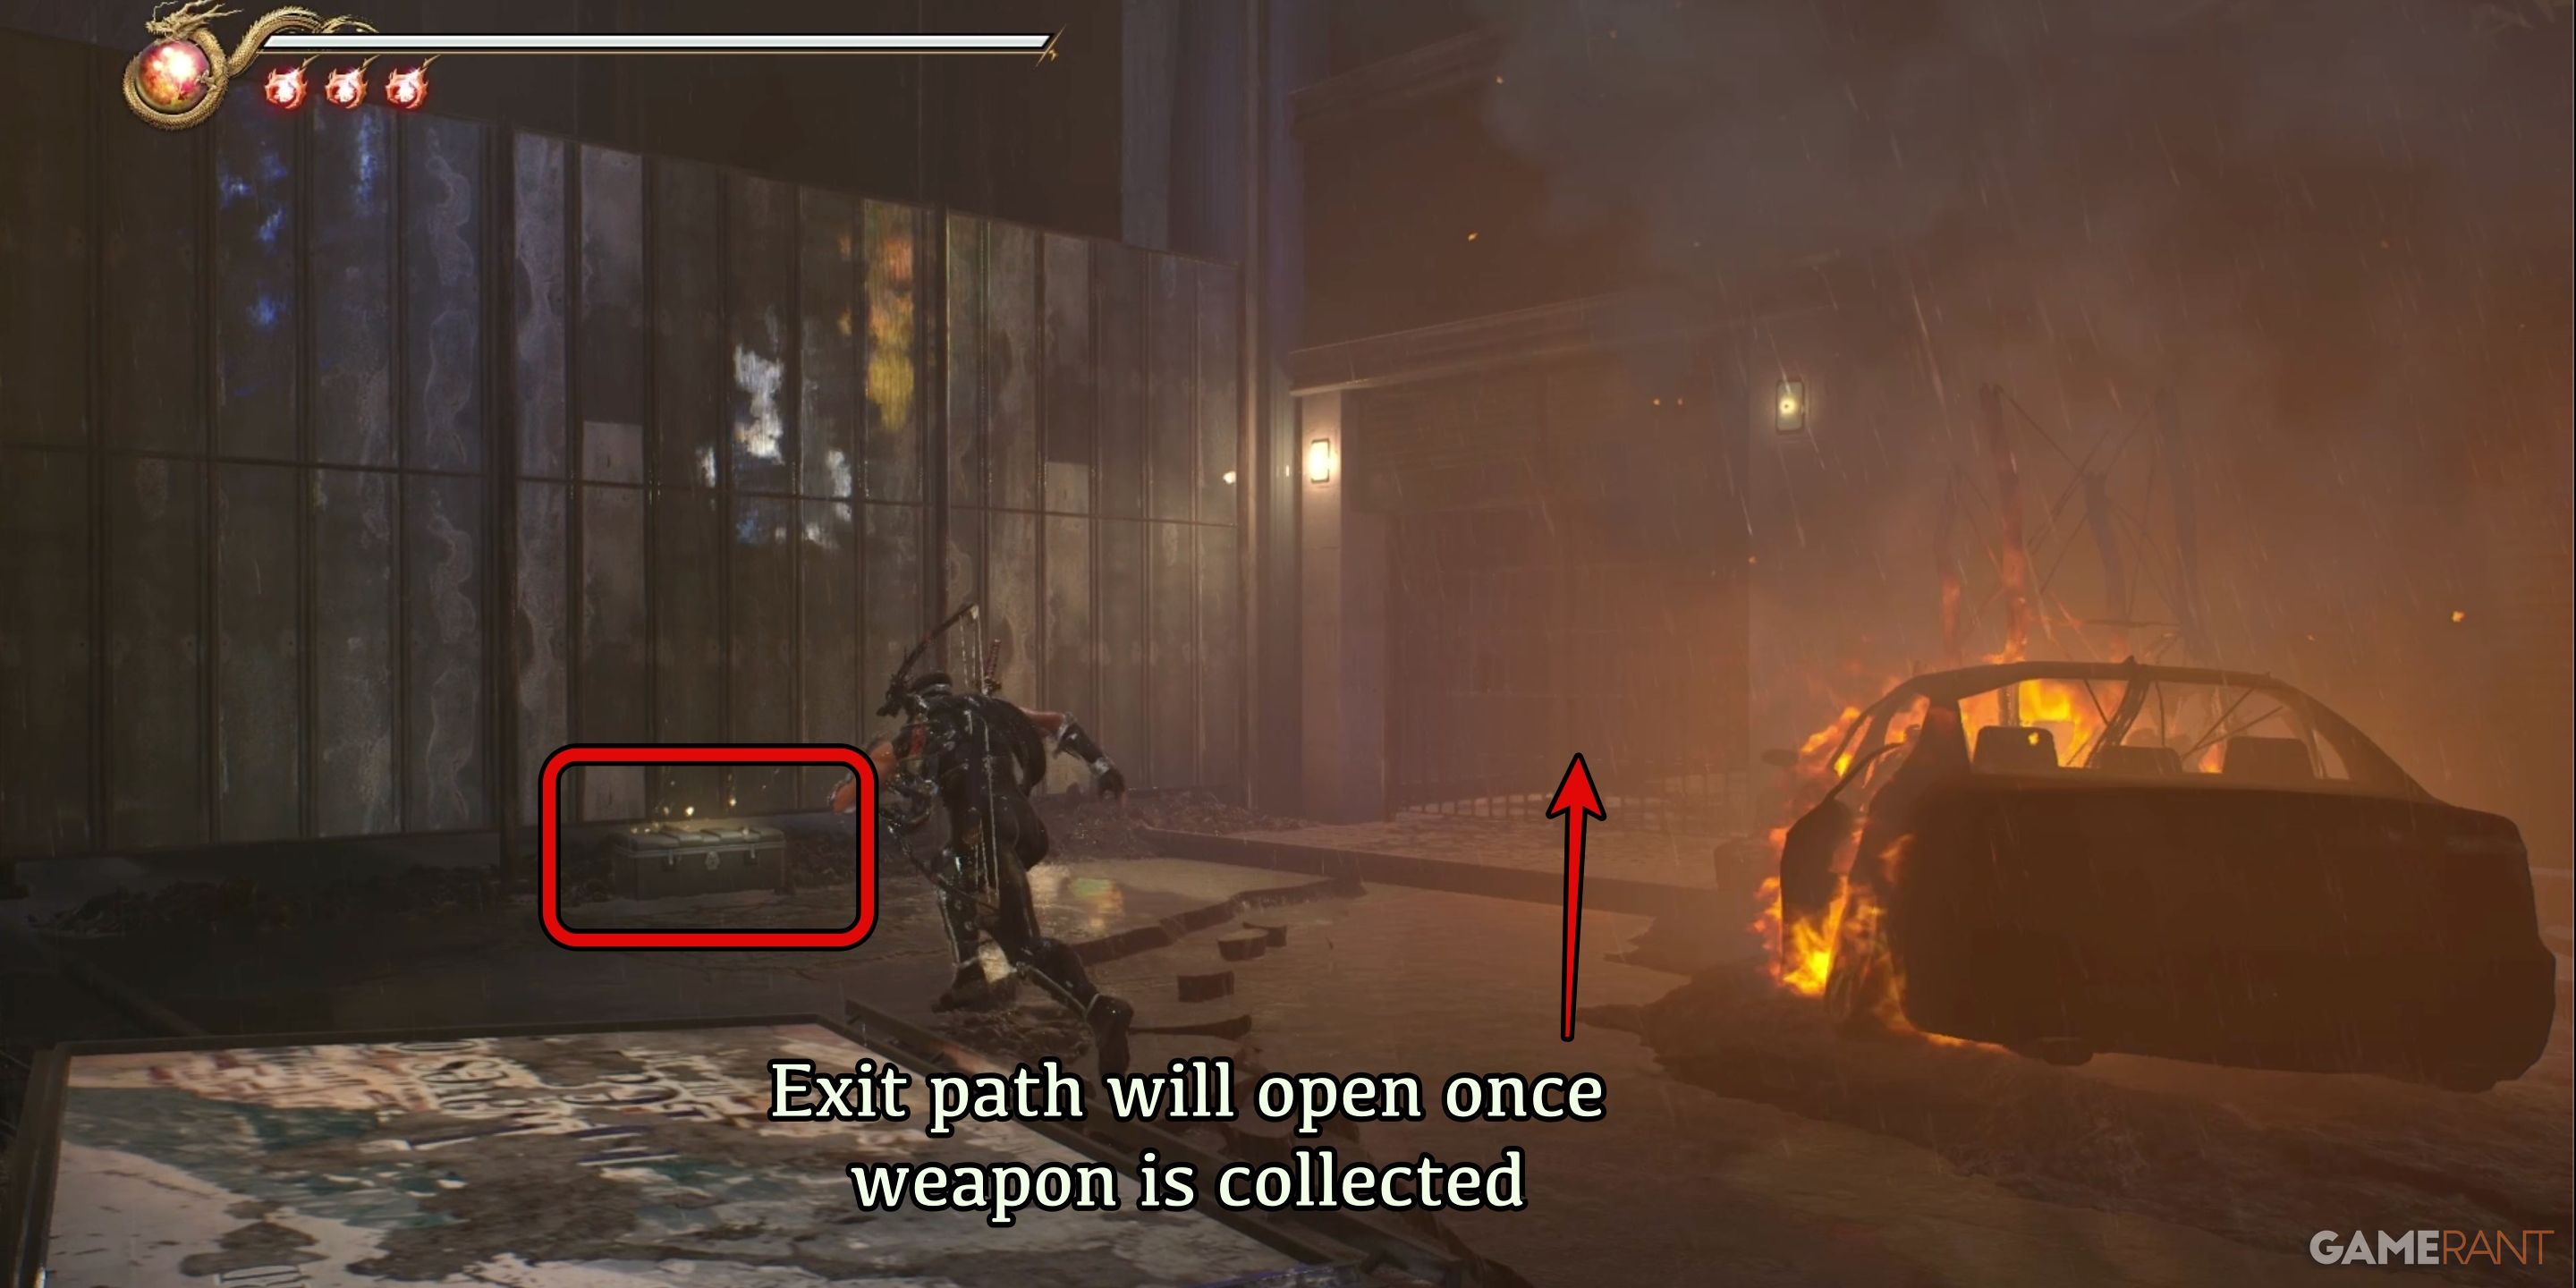
How to Get the Vigoorian Flail in Ninja Gaiden 2 Black Chapter 3
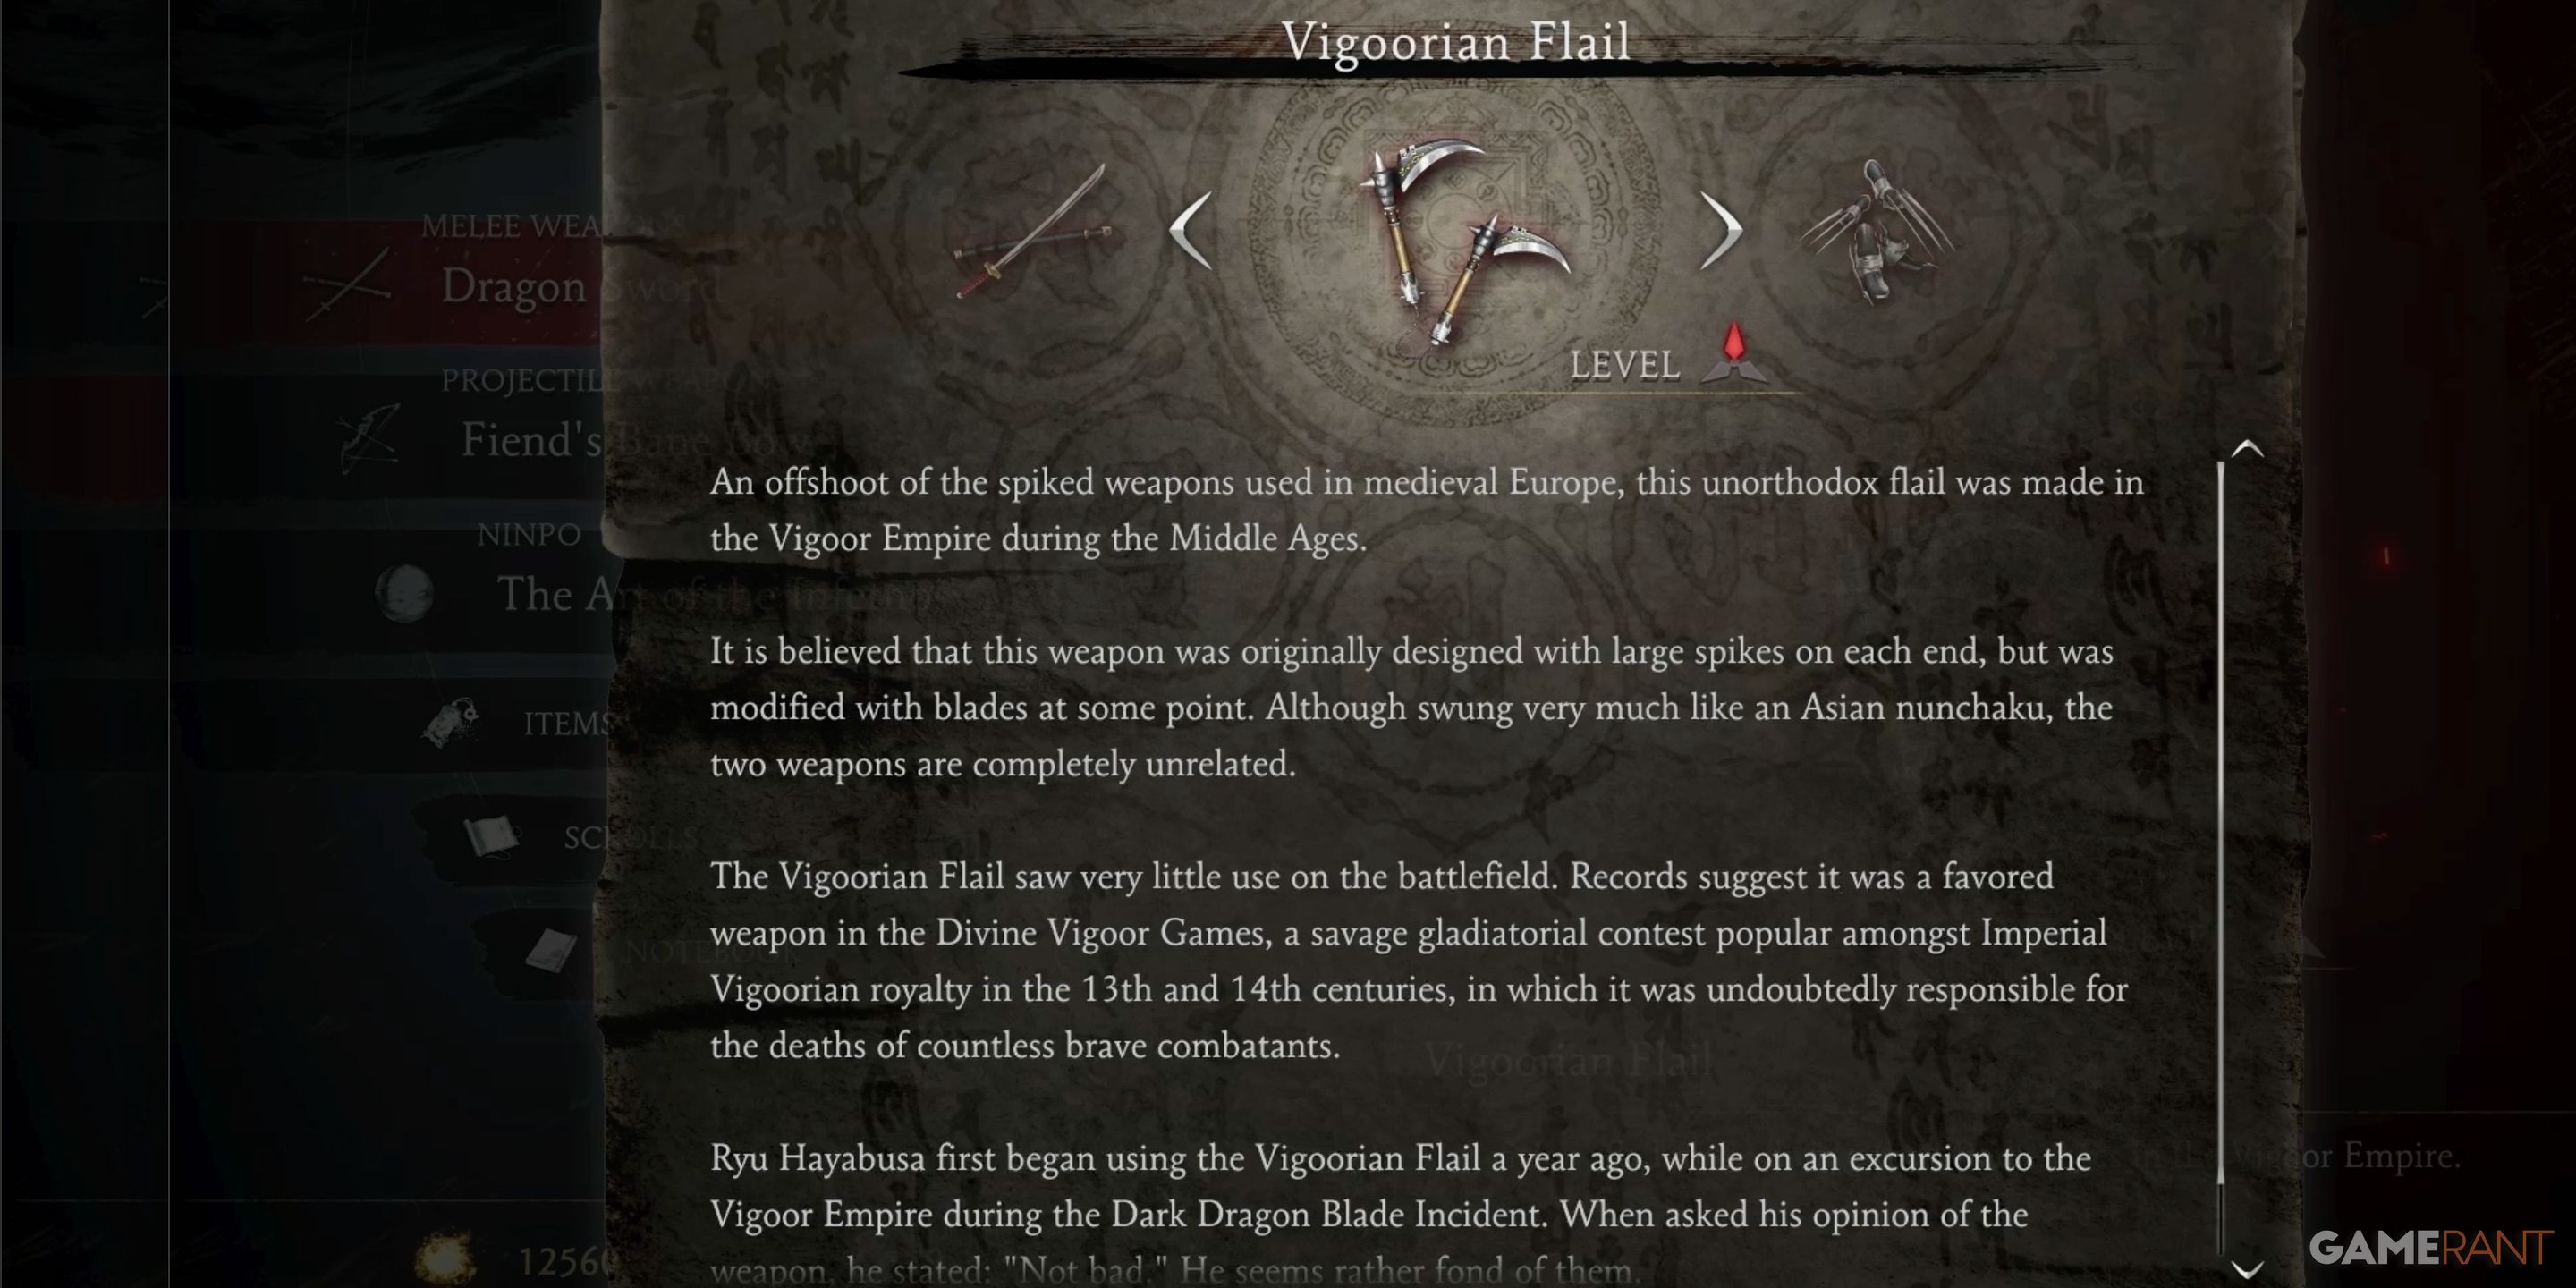
In Chapter 3: Thunderclap of Catastrophe within Ninja Gaiden 2 Black, you’ll discover that the Vigoorian Flail is the sole weapon available.
Vigoorian Flail Location:
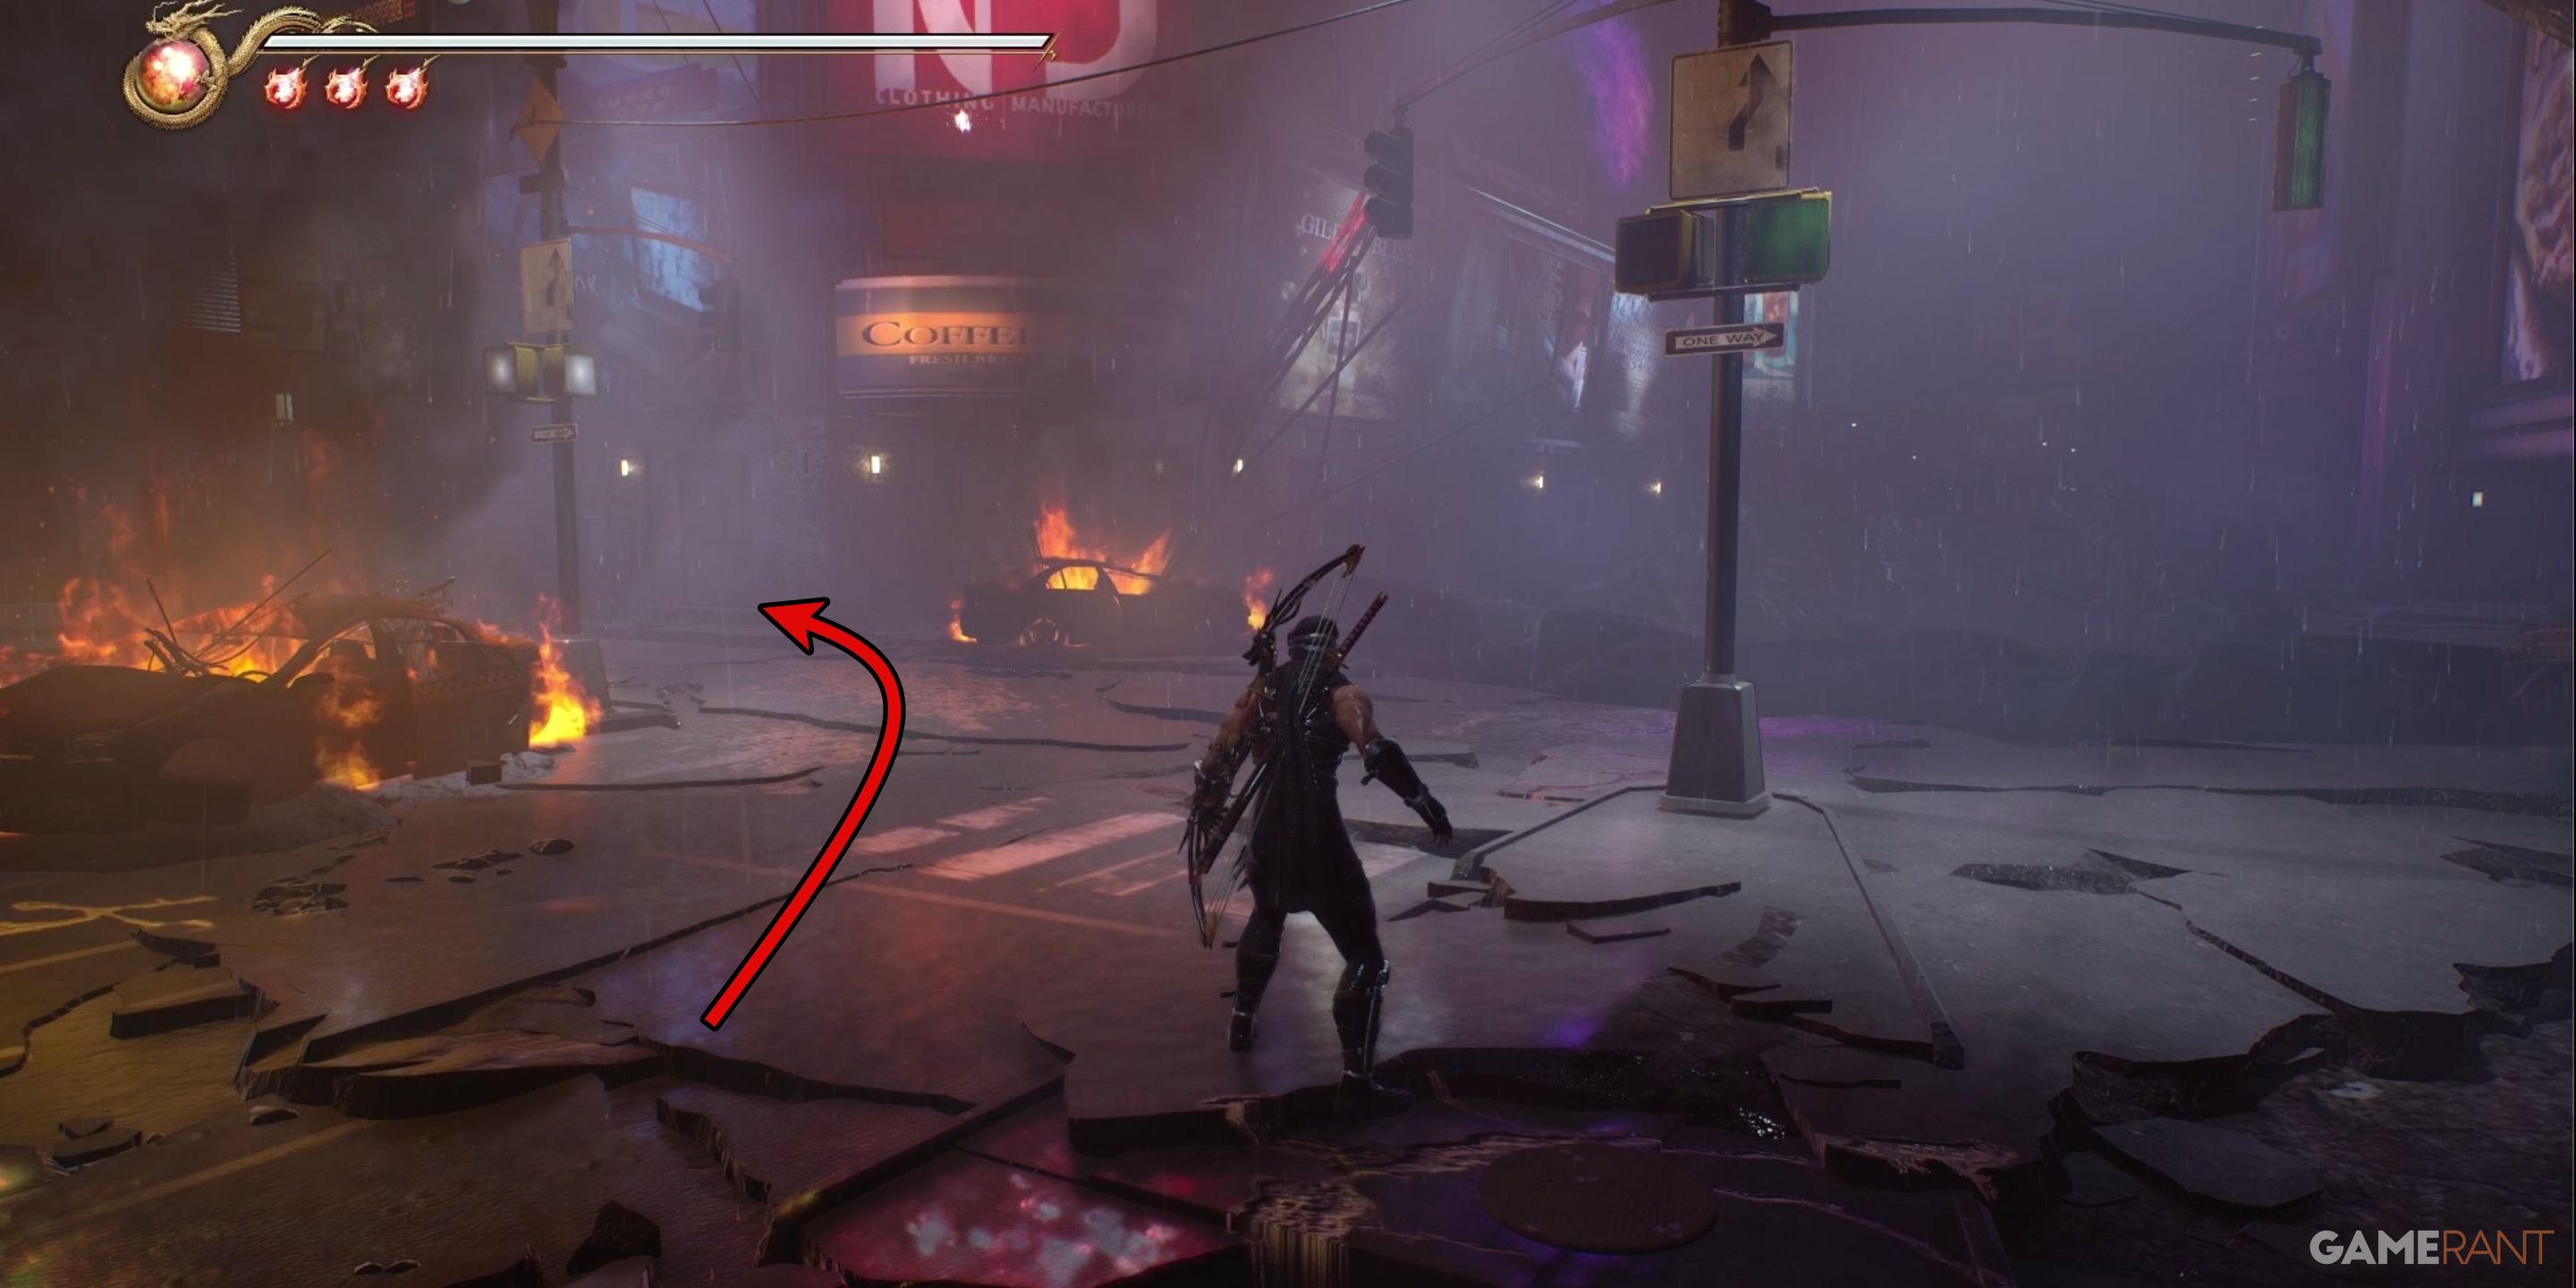
In Chapter 3, Ryu initially encounters an abandoned sector of New York City. Your objective should be to gather all the treasure chests, then proceed towards the colossal dead end where the road has collapsed, leading to a deep trench that stretches far away. Take a left turn at this point and continue along the street until you reach its end. A Coffee Shop sign will be visible at the corner you need to turn – this will confirm you’ve turned in the correct direction.
At the dead-end of the street lies the treasure chest holding the Vigoorian Flail. To your right, you’ll spot the way out, a modest gate that swings open exclusively after you’ve unlocked the chest and retrieved the weapon inside.
How to Get Enma’s Fang in Ninja Gaiden 2 Black Chapter 4
Enma’s Fang Location:
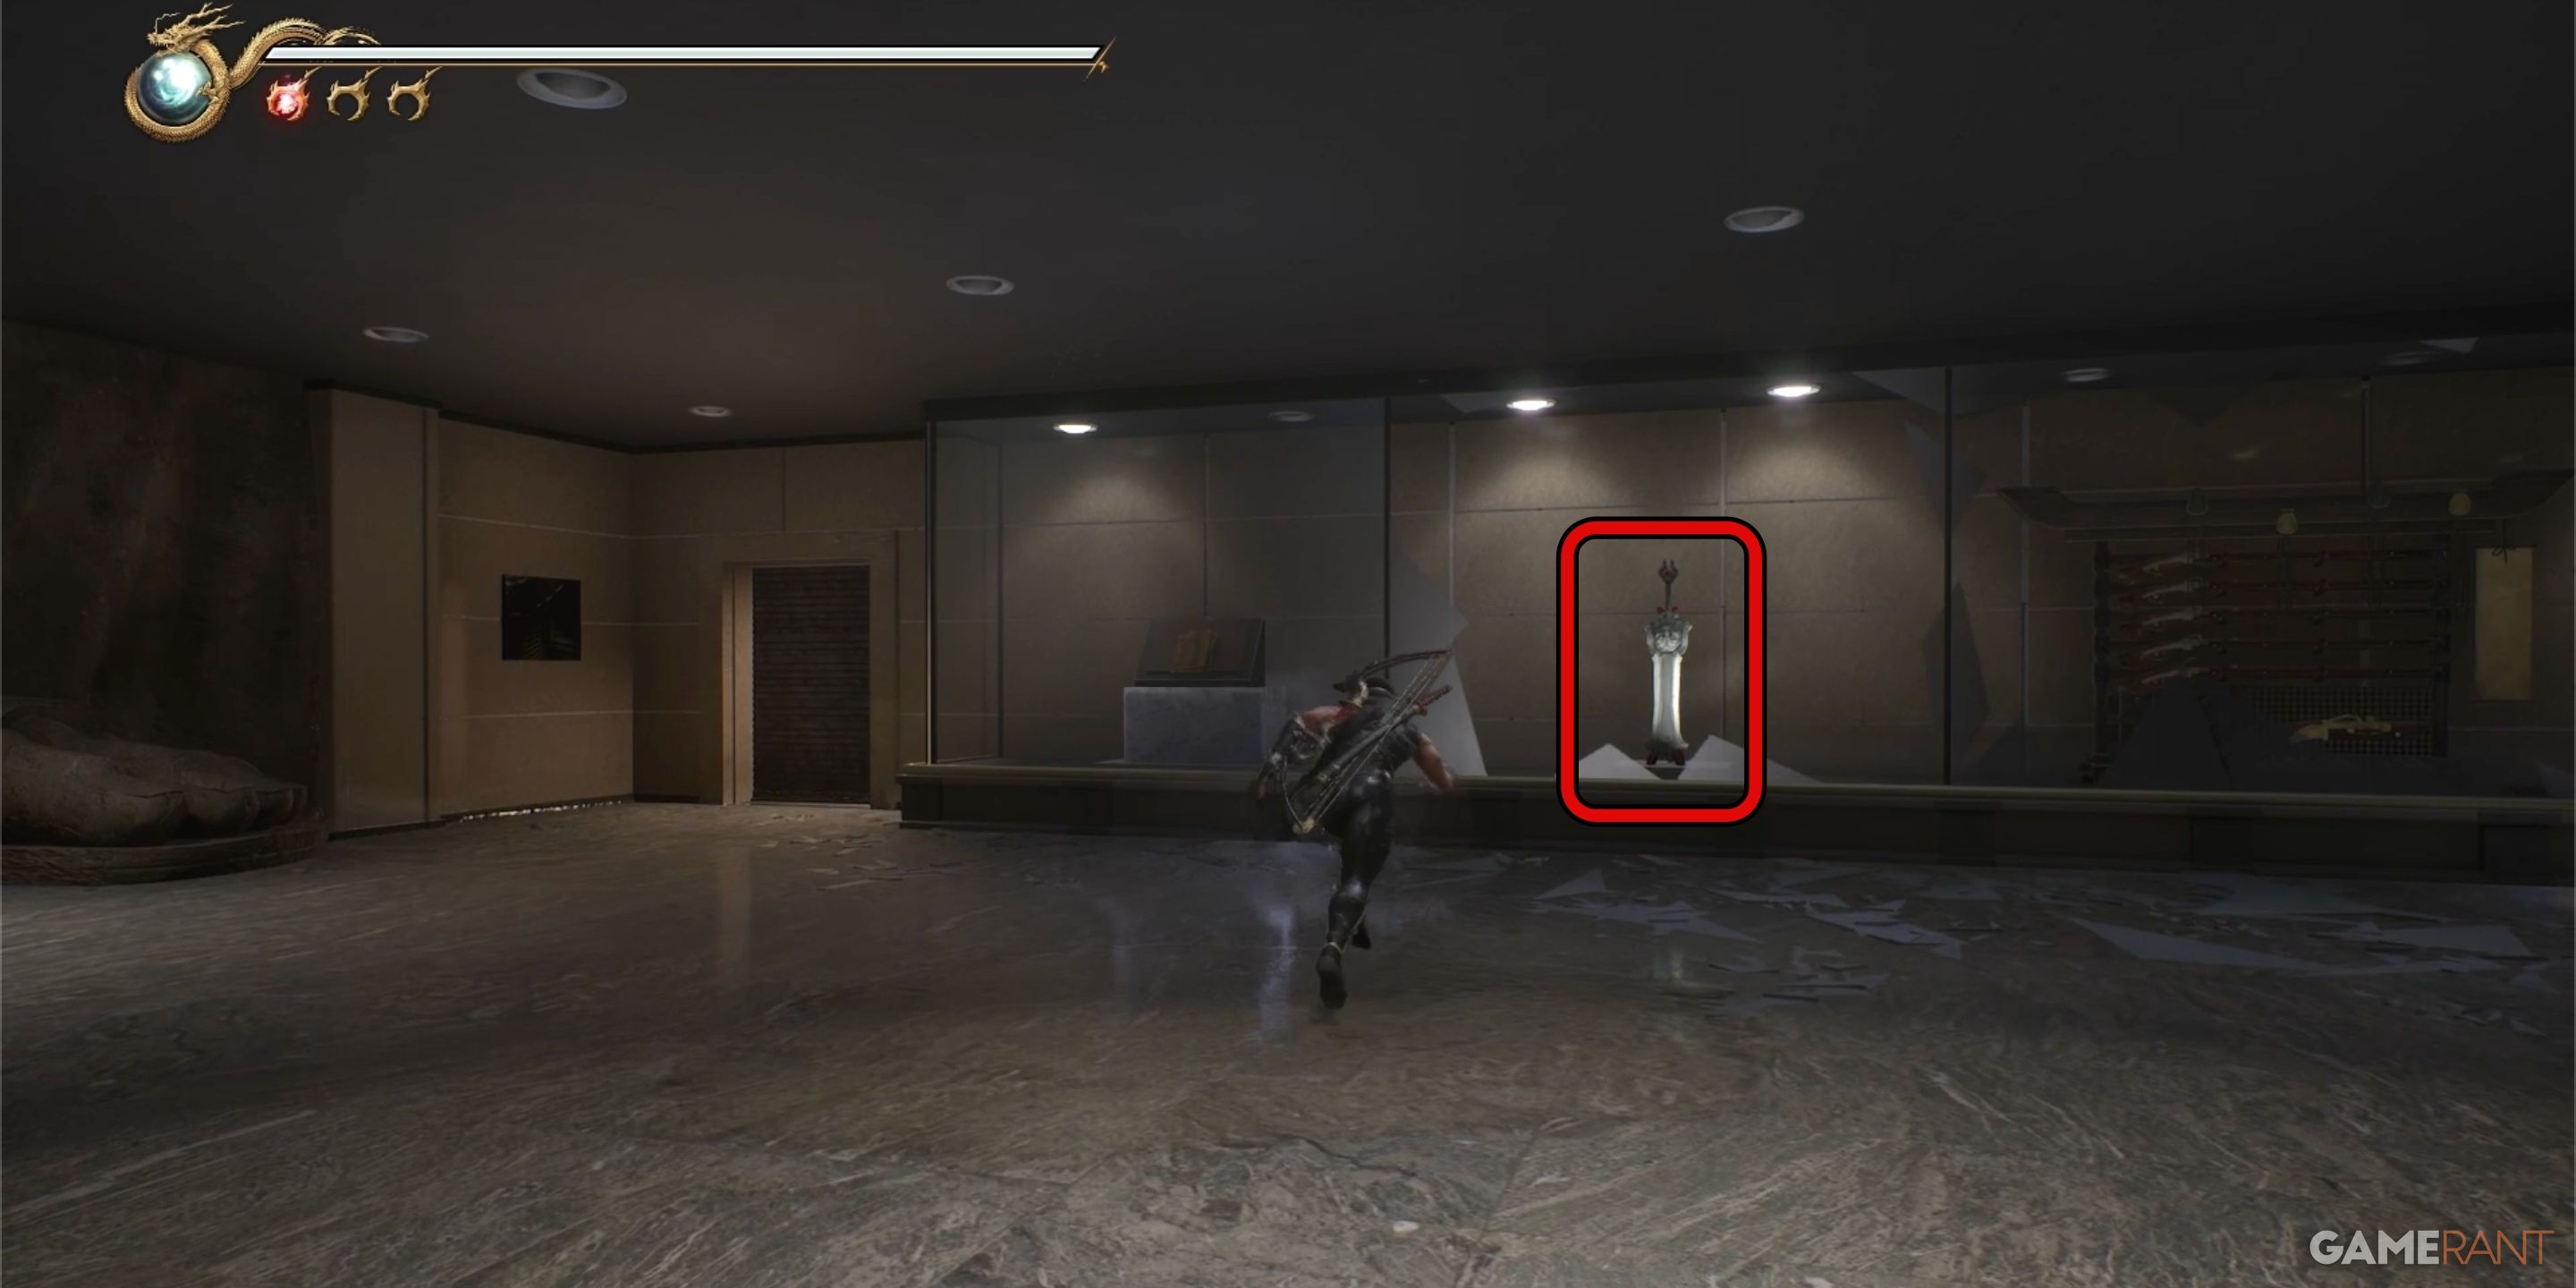
Following your victory over Godomus, venture towards the Statue of Liberty where you will discover Enma’s Fang, an imposing greatsword. After subduing the monstrous creatures in the garden outside that structure, proceed into the first main chamber. Inside, you’ll find various items encased in glass. As you prepare to leave this room, look for a colossal sword standing among the displayed artifacts near the exit. Get close to the sword to claim it as your own.
How to Get Dragon’s Claw and Tiger Fang in Ninja Gaiden 2 Black Chapter 6
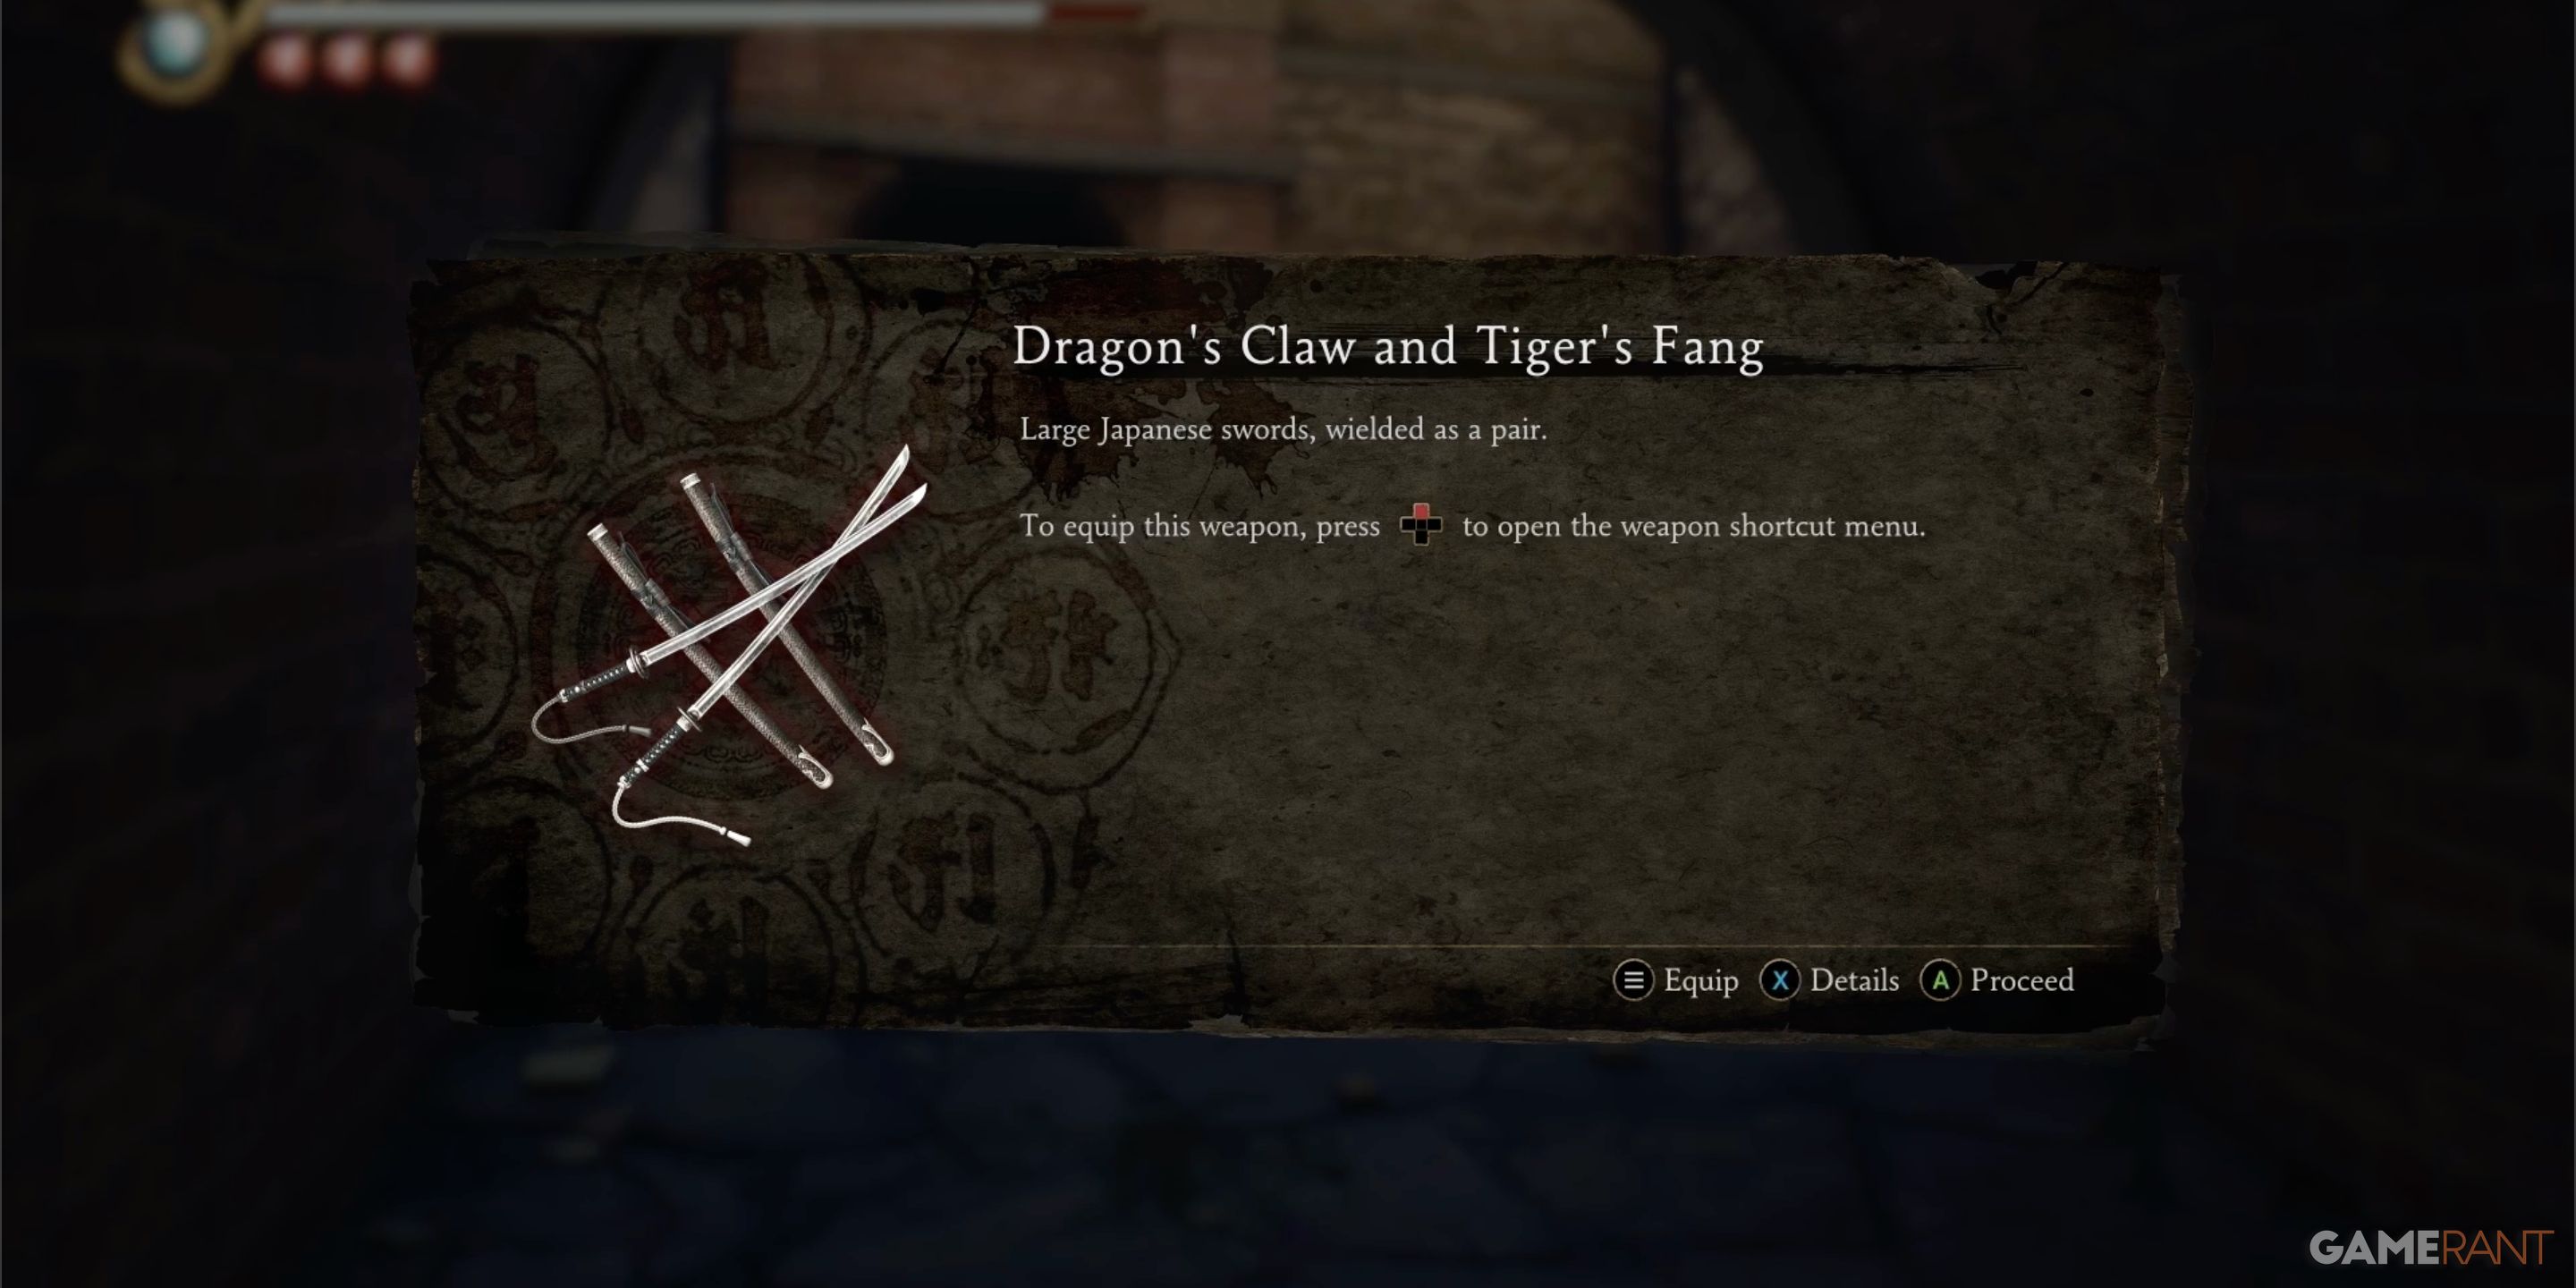
Dragon’s Claw and Tiger’s Fang Location:
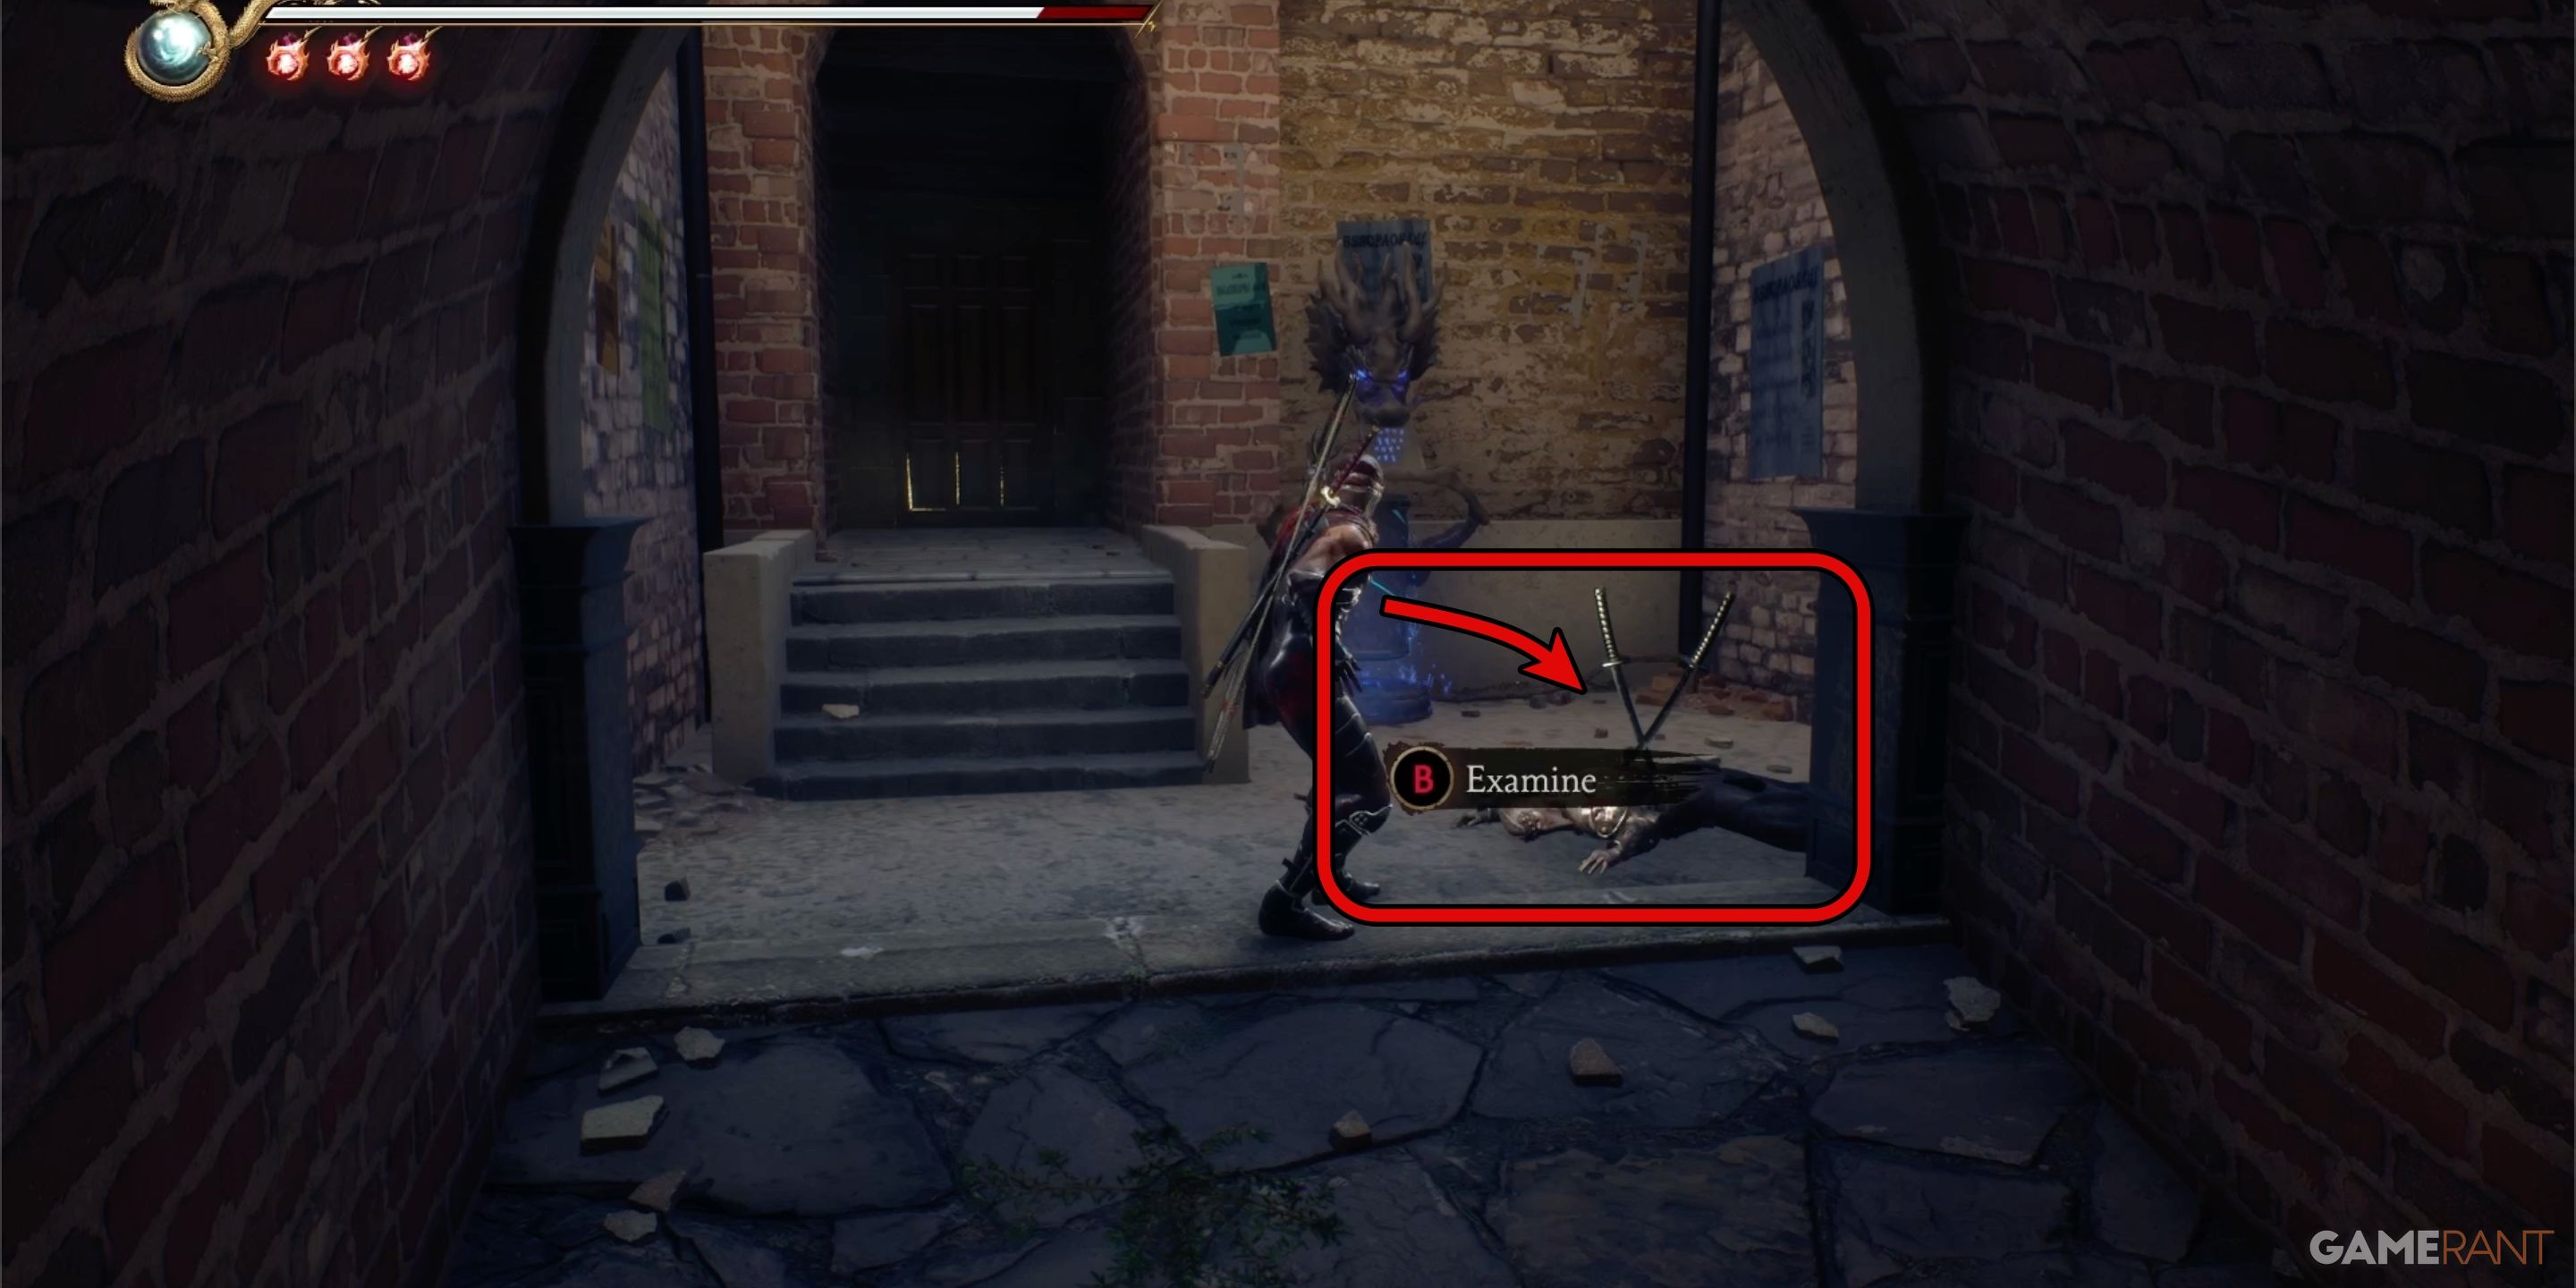
In Chapter 6: The Aqua Capital, you’ll encounter a pair of katanas quite early. Stick to the main route until you hit the first Earth Dragon checkpoint. Although these swords can be considered optional, they are nestled in a deceased body right before the checkpoint. This means you won’t need to venture off-course to get them. Be sure to snatch them when you near the checkpoint, then carry on with your quest.
How to Get the Howling Cannon in Ninja Gaiden 2 Black Chapter 6
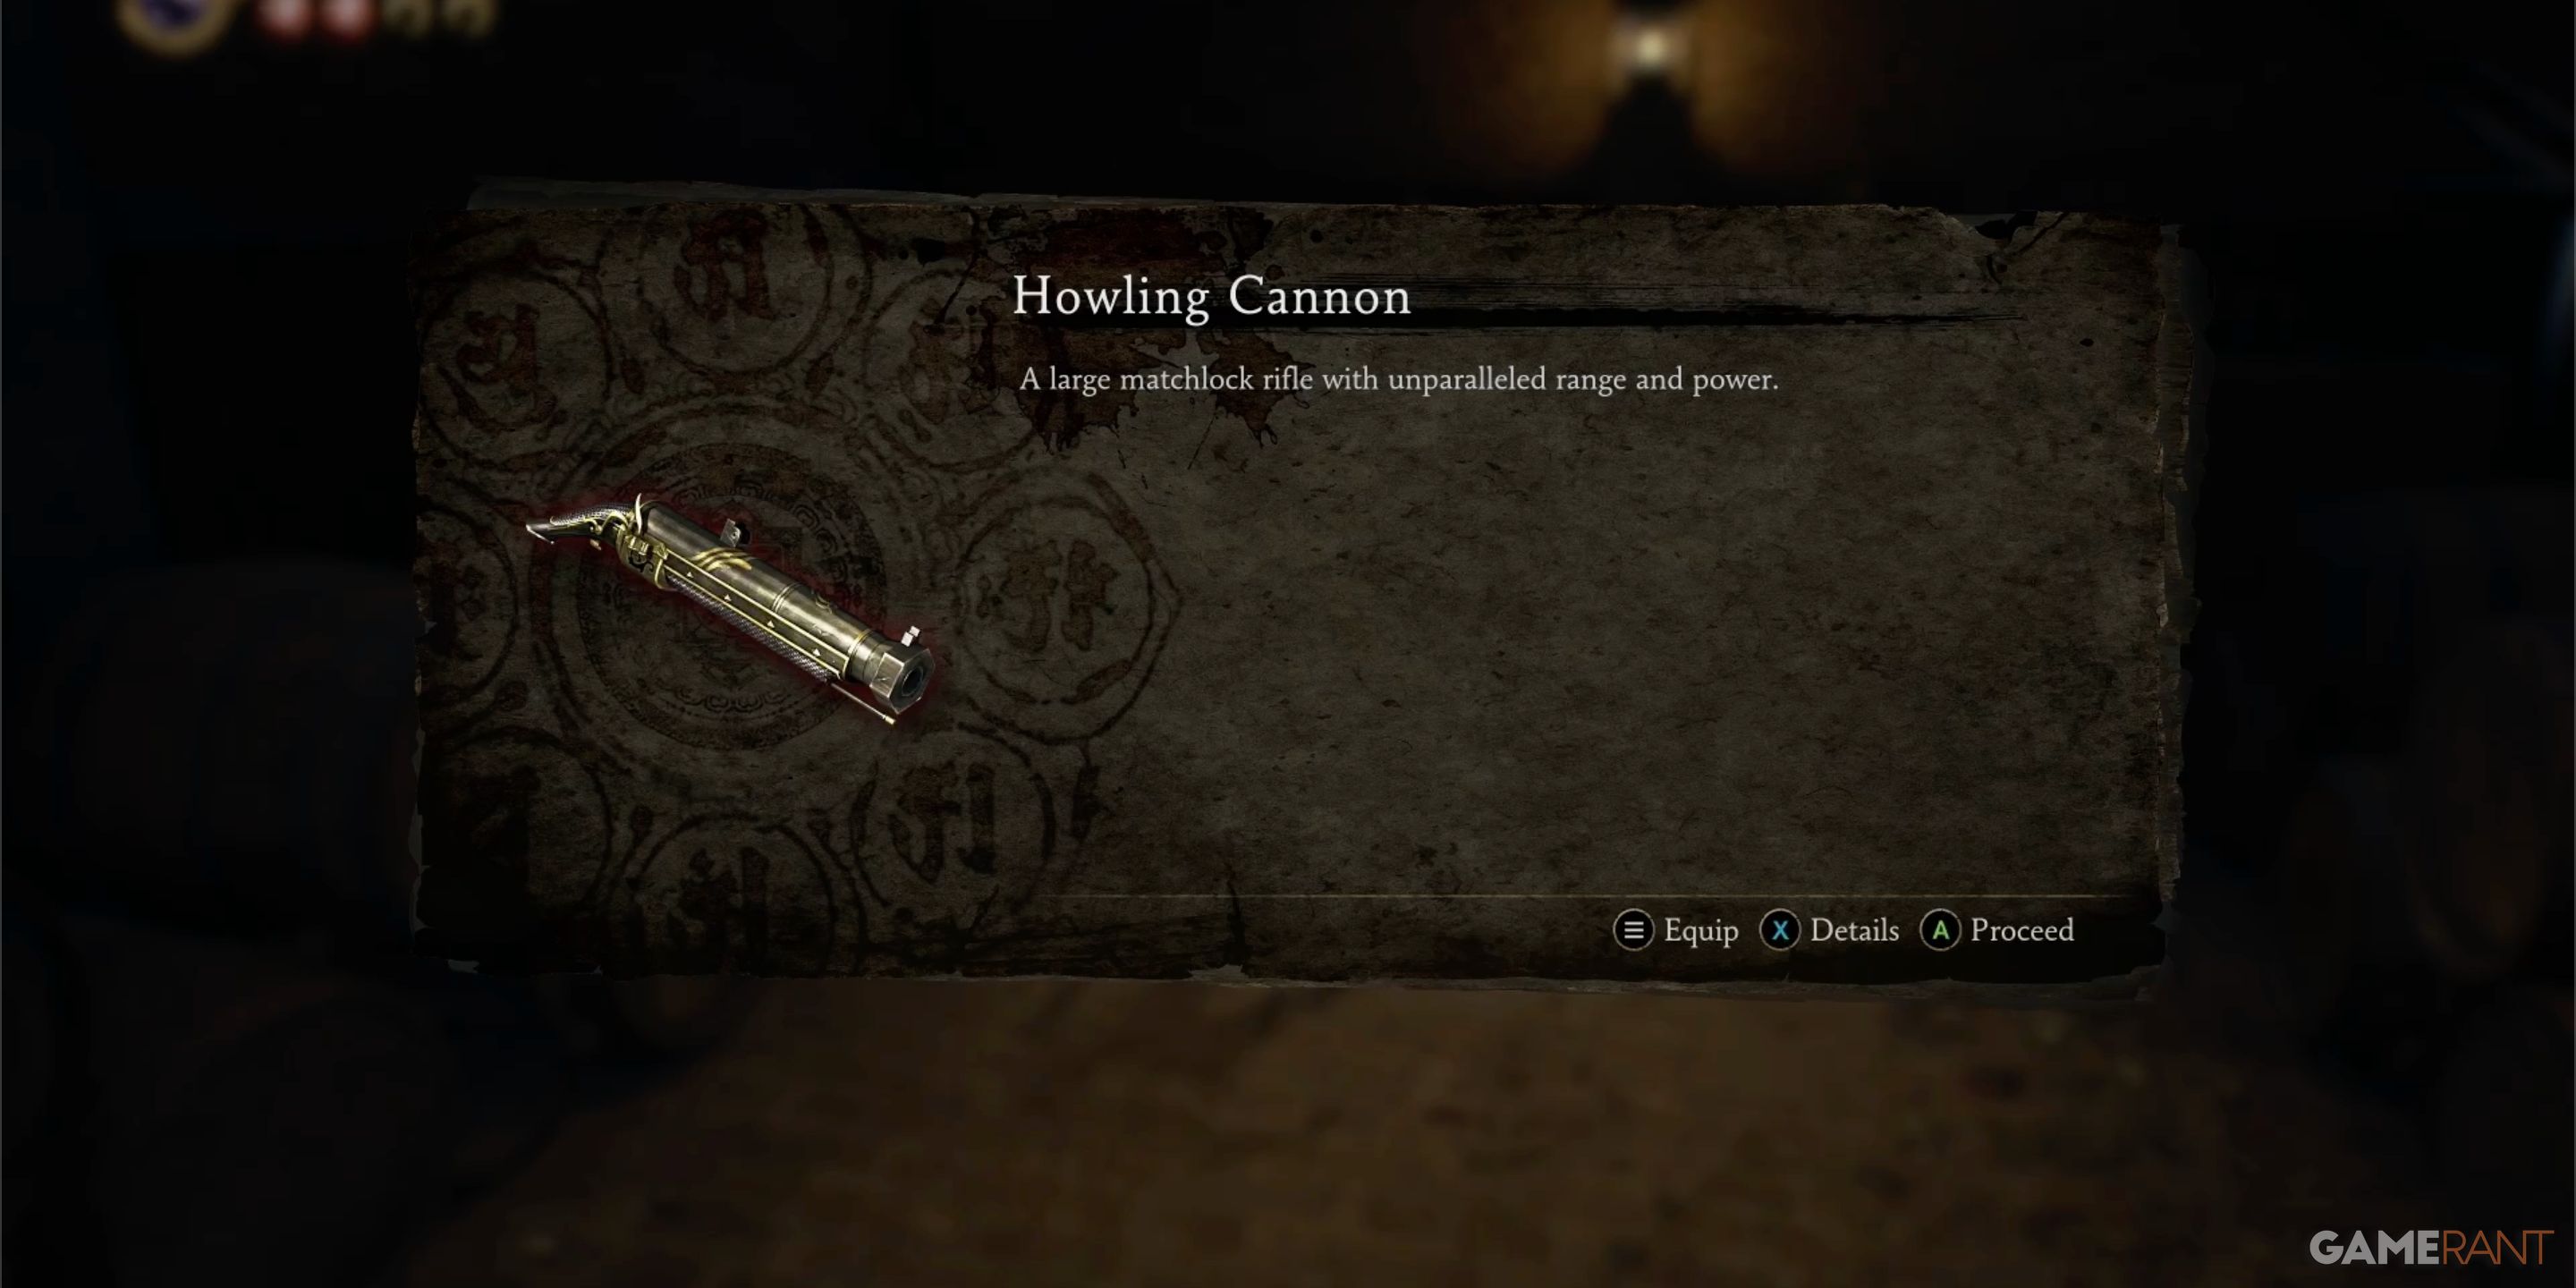
Howling Cannon Location:
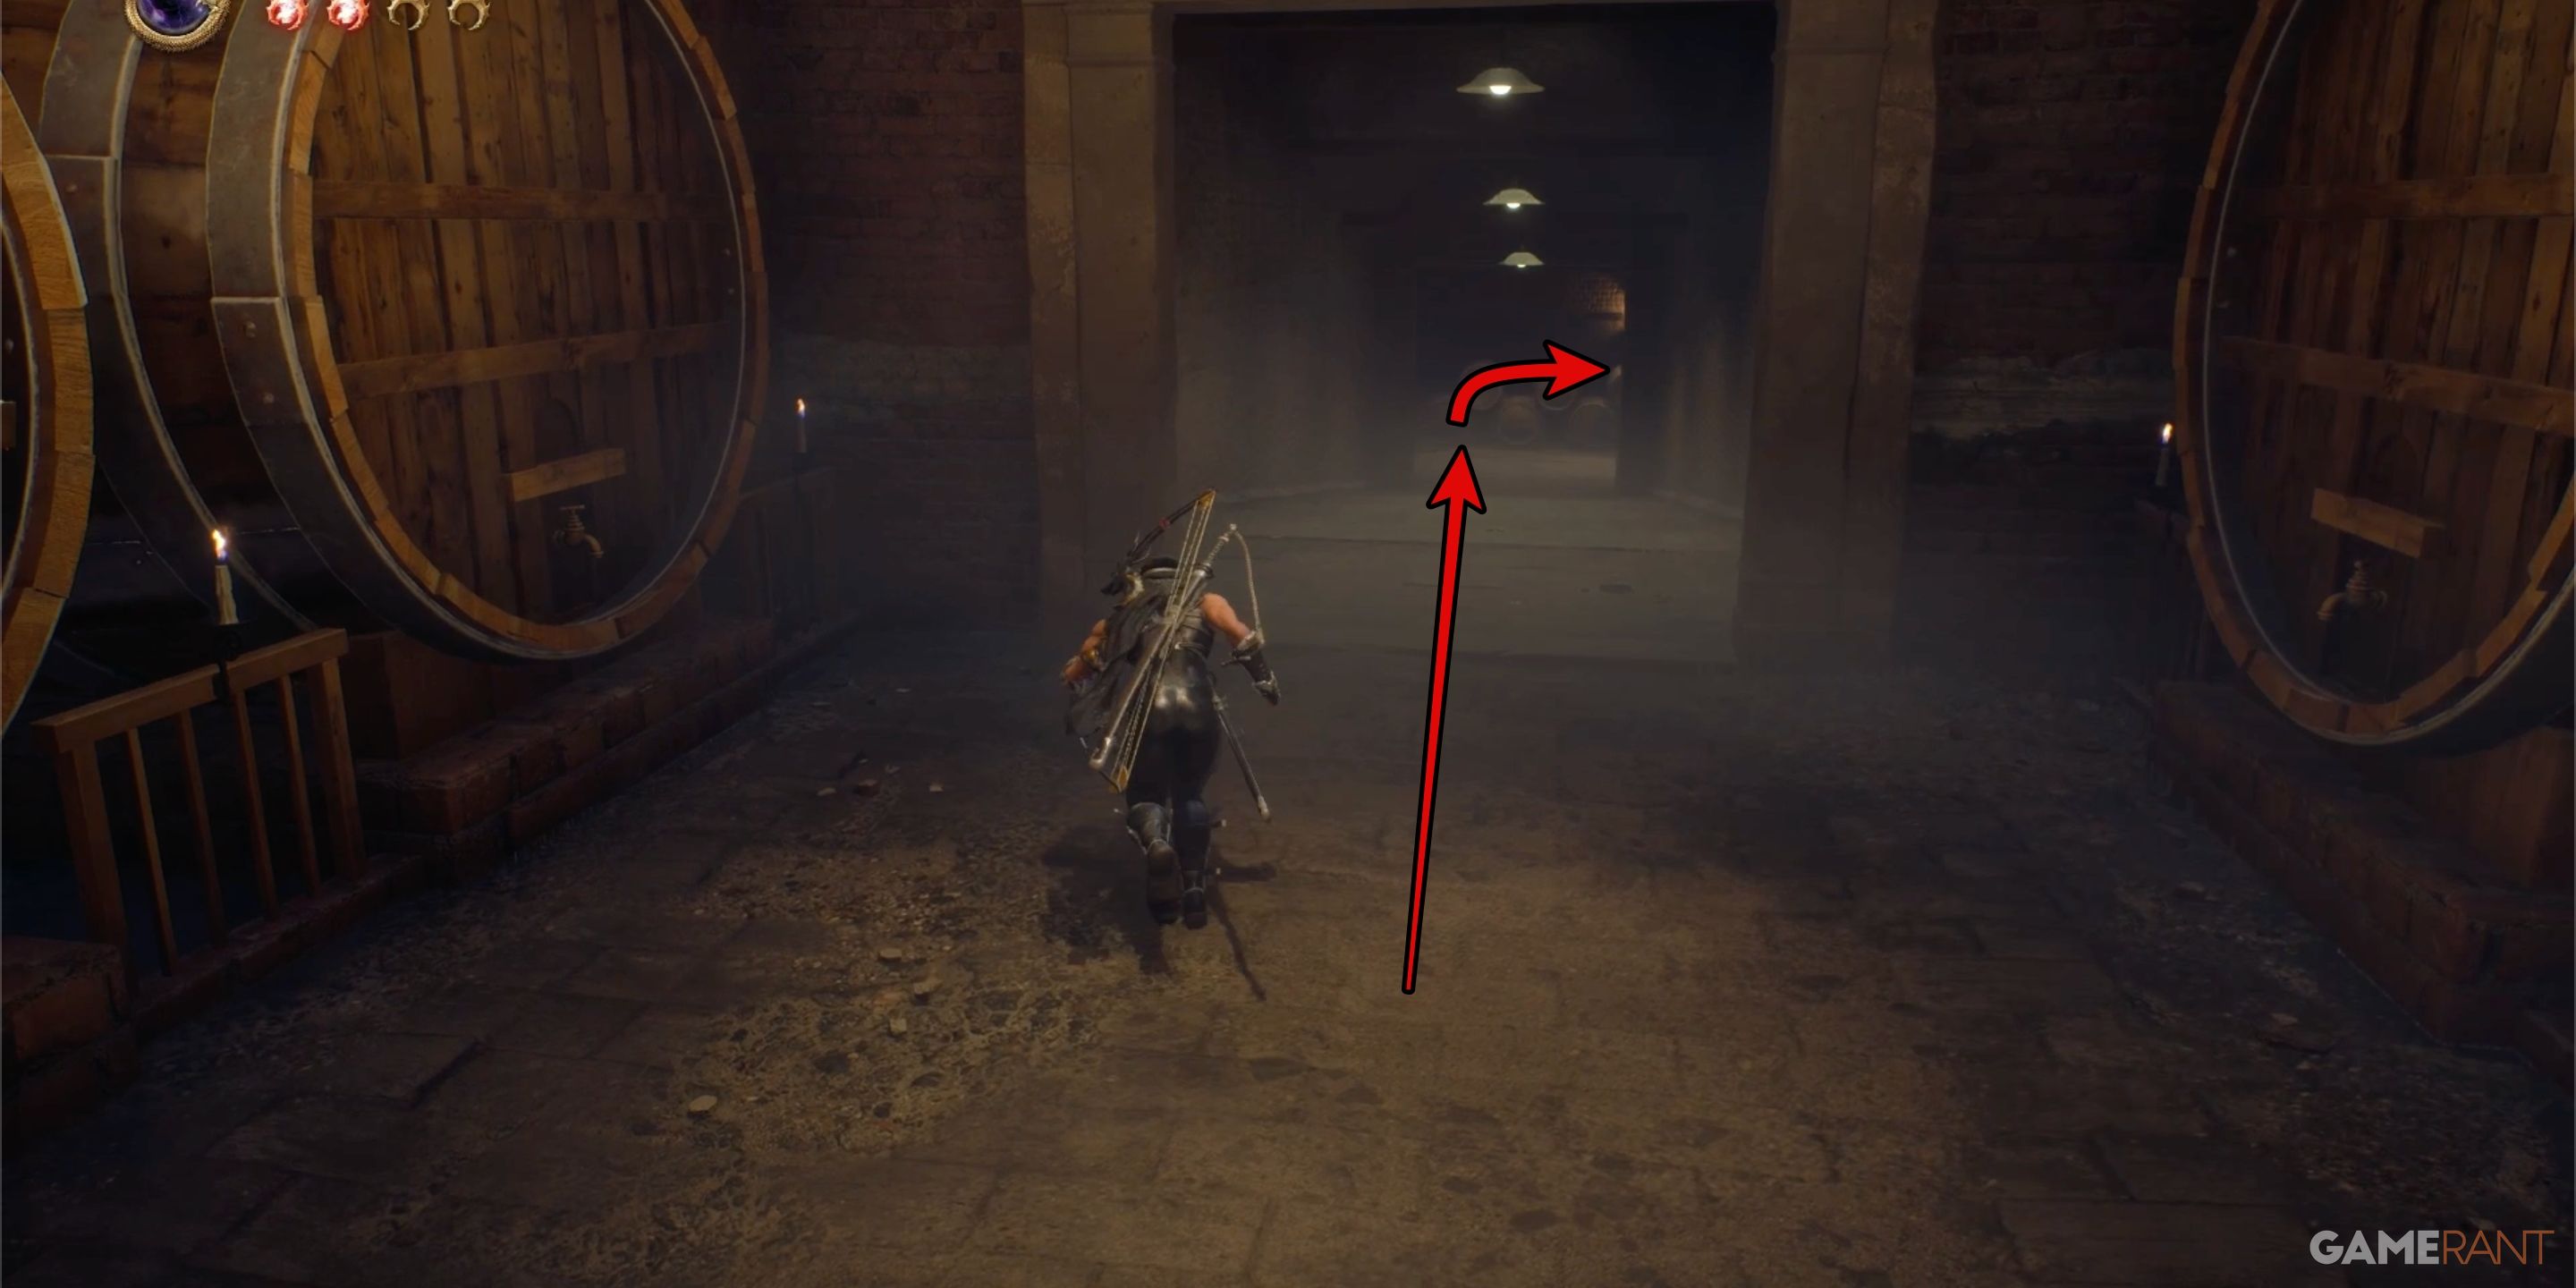
Approximately halfway through Chapter 6, you’ll stumble upon a place referred to as the “Wine Cellar”. You’ll recognize it when you come across a misty courtyard filled with writhing, blade-wielding adversaries. Once these foes are vanquished, leap into the opening situated above the fountain, and you’ll find yourself in a long corridor with chambers on either side. Proceed to the end of this corridor, passing through the chamber containing numerous large barrels along the way.
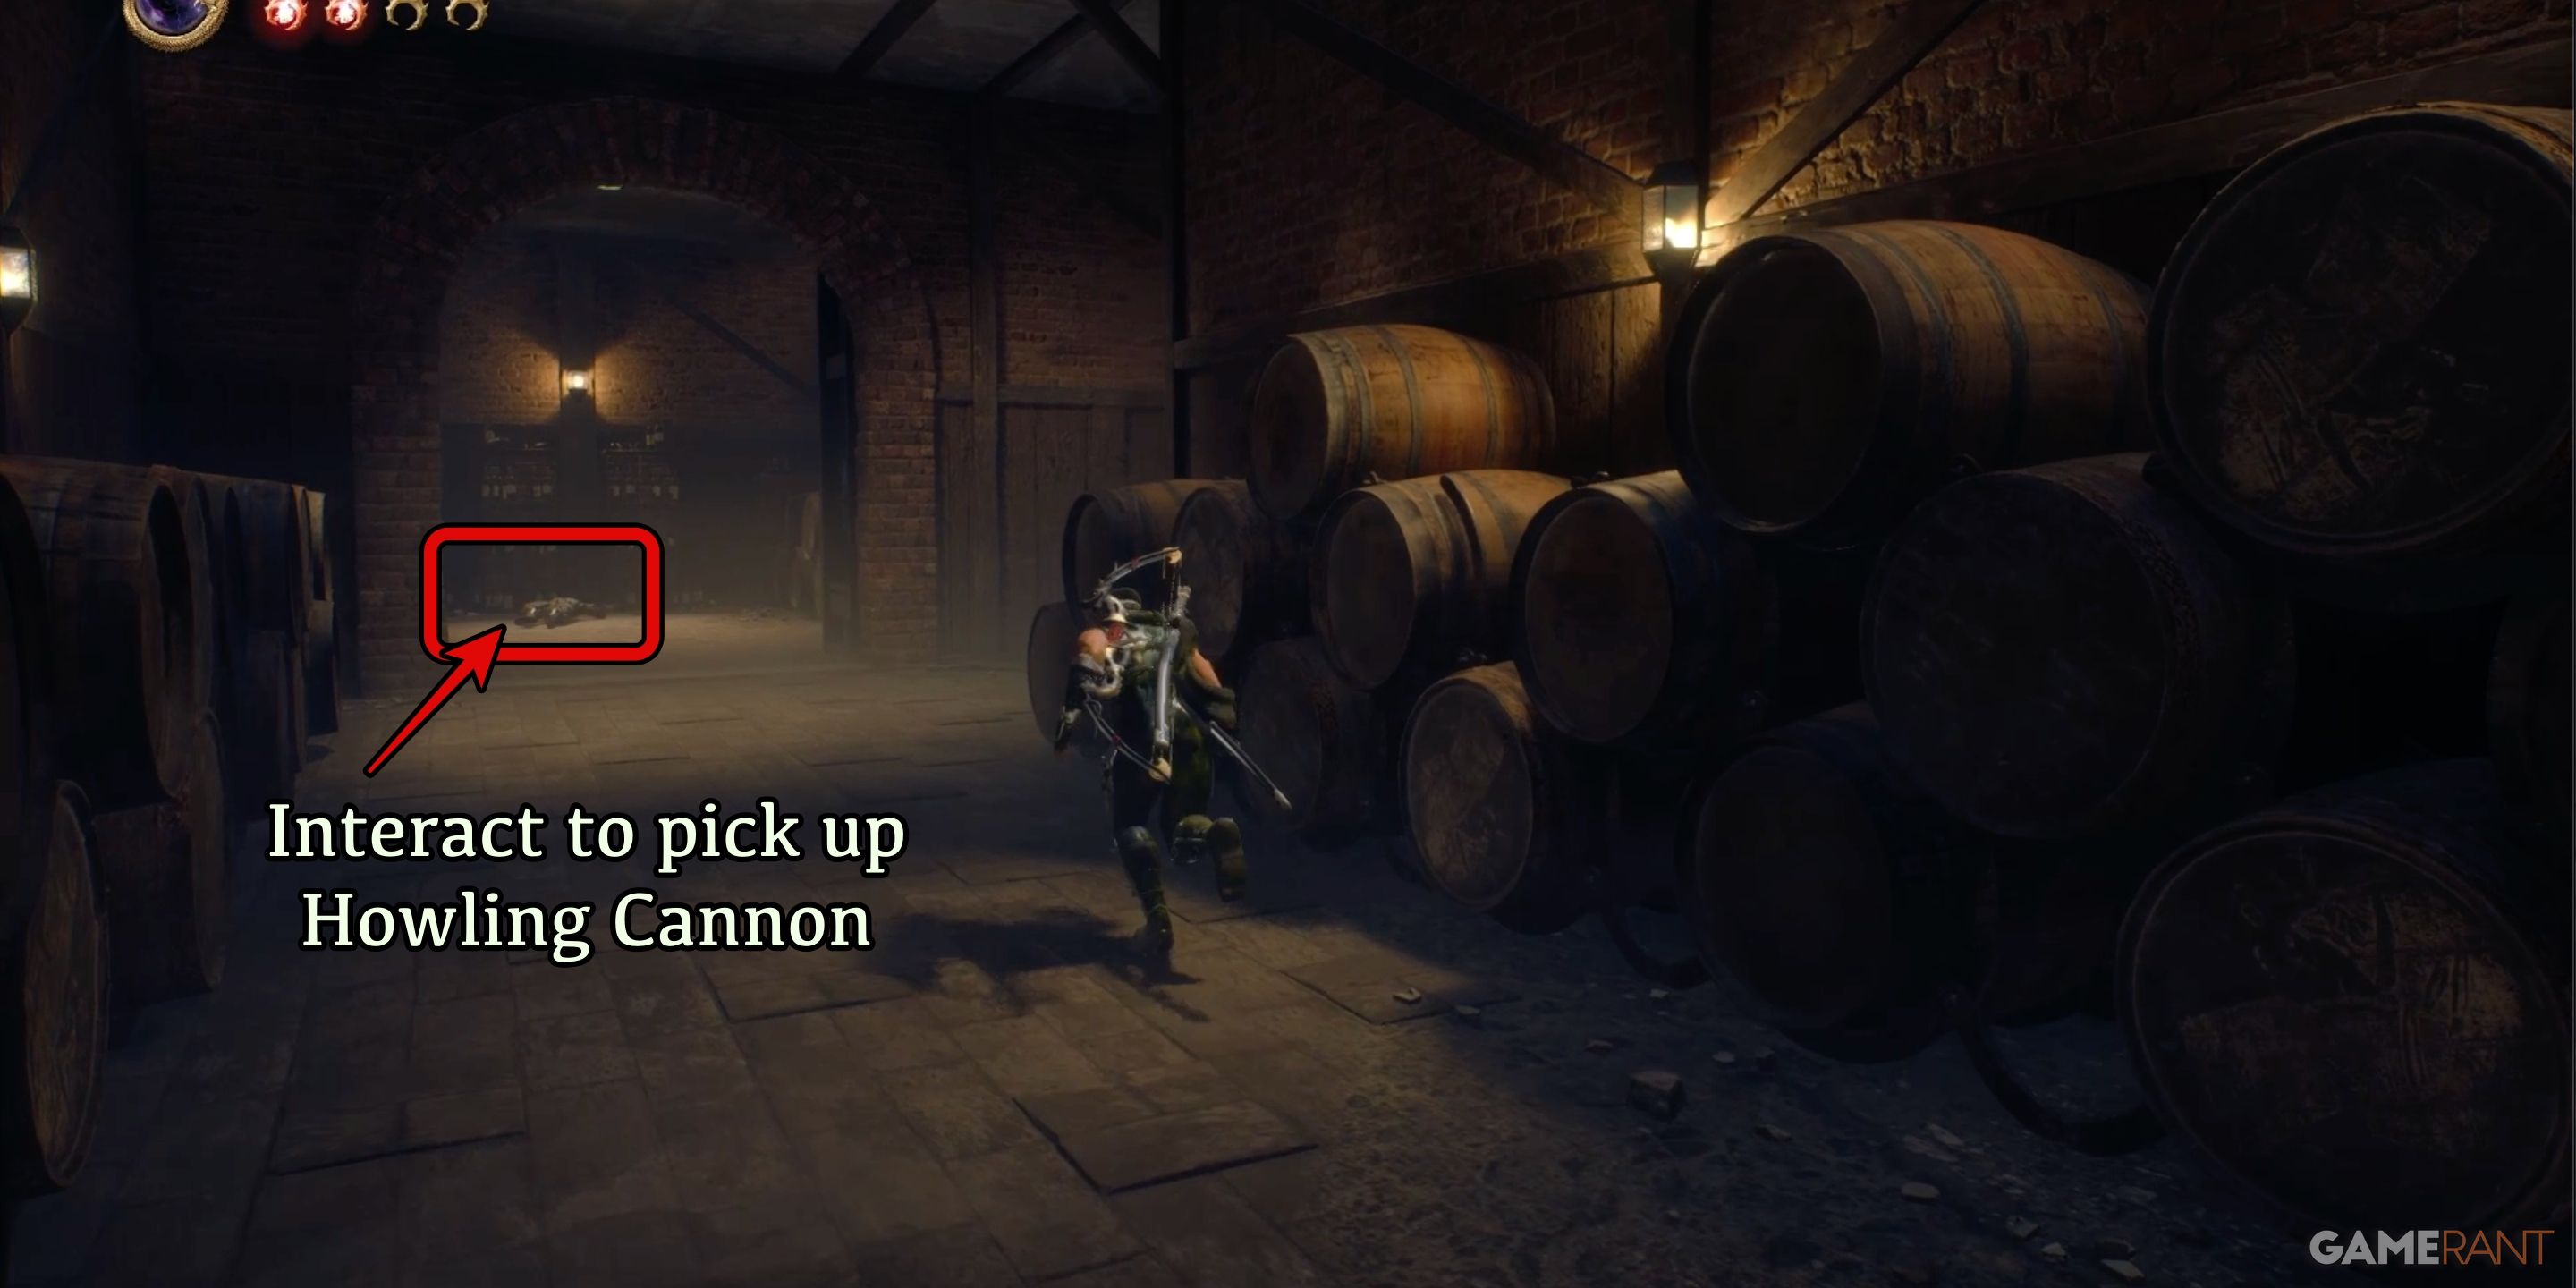
At the terminus of the hallway, you’ll encounter two formidable, winged creatures. After dispatching them by turning right, proceed along that path. You’ll find a deceased individual at the end of the hall. Interact with the body to acquire the Howling Cannon.
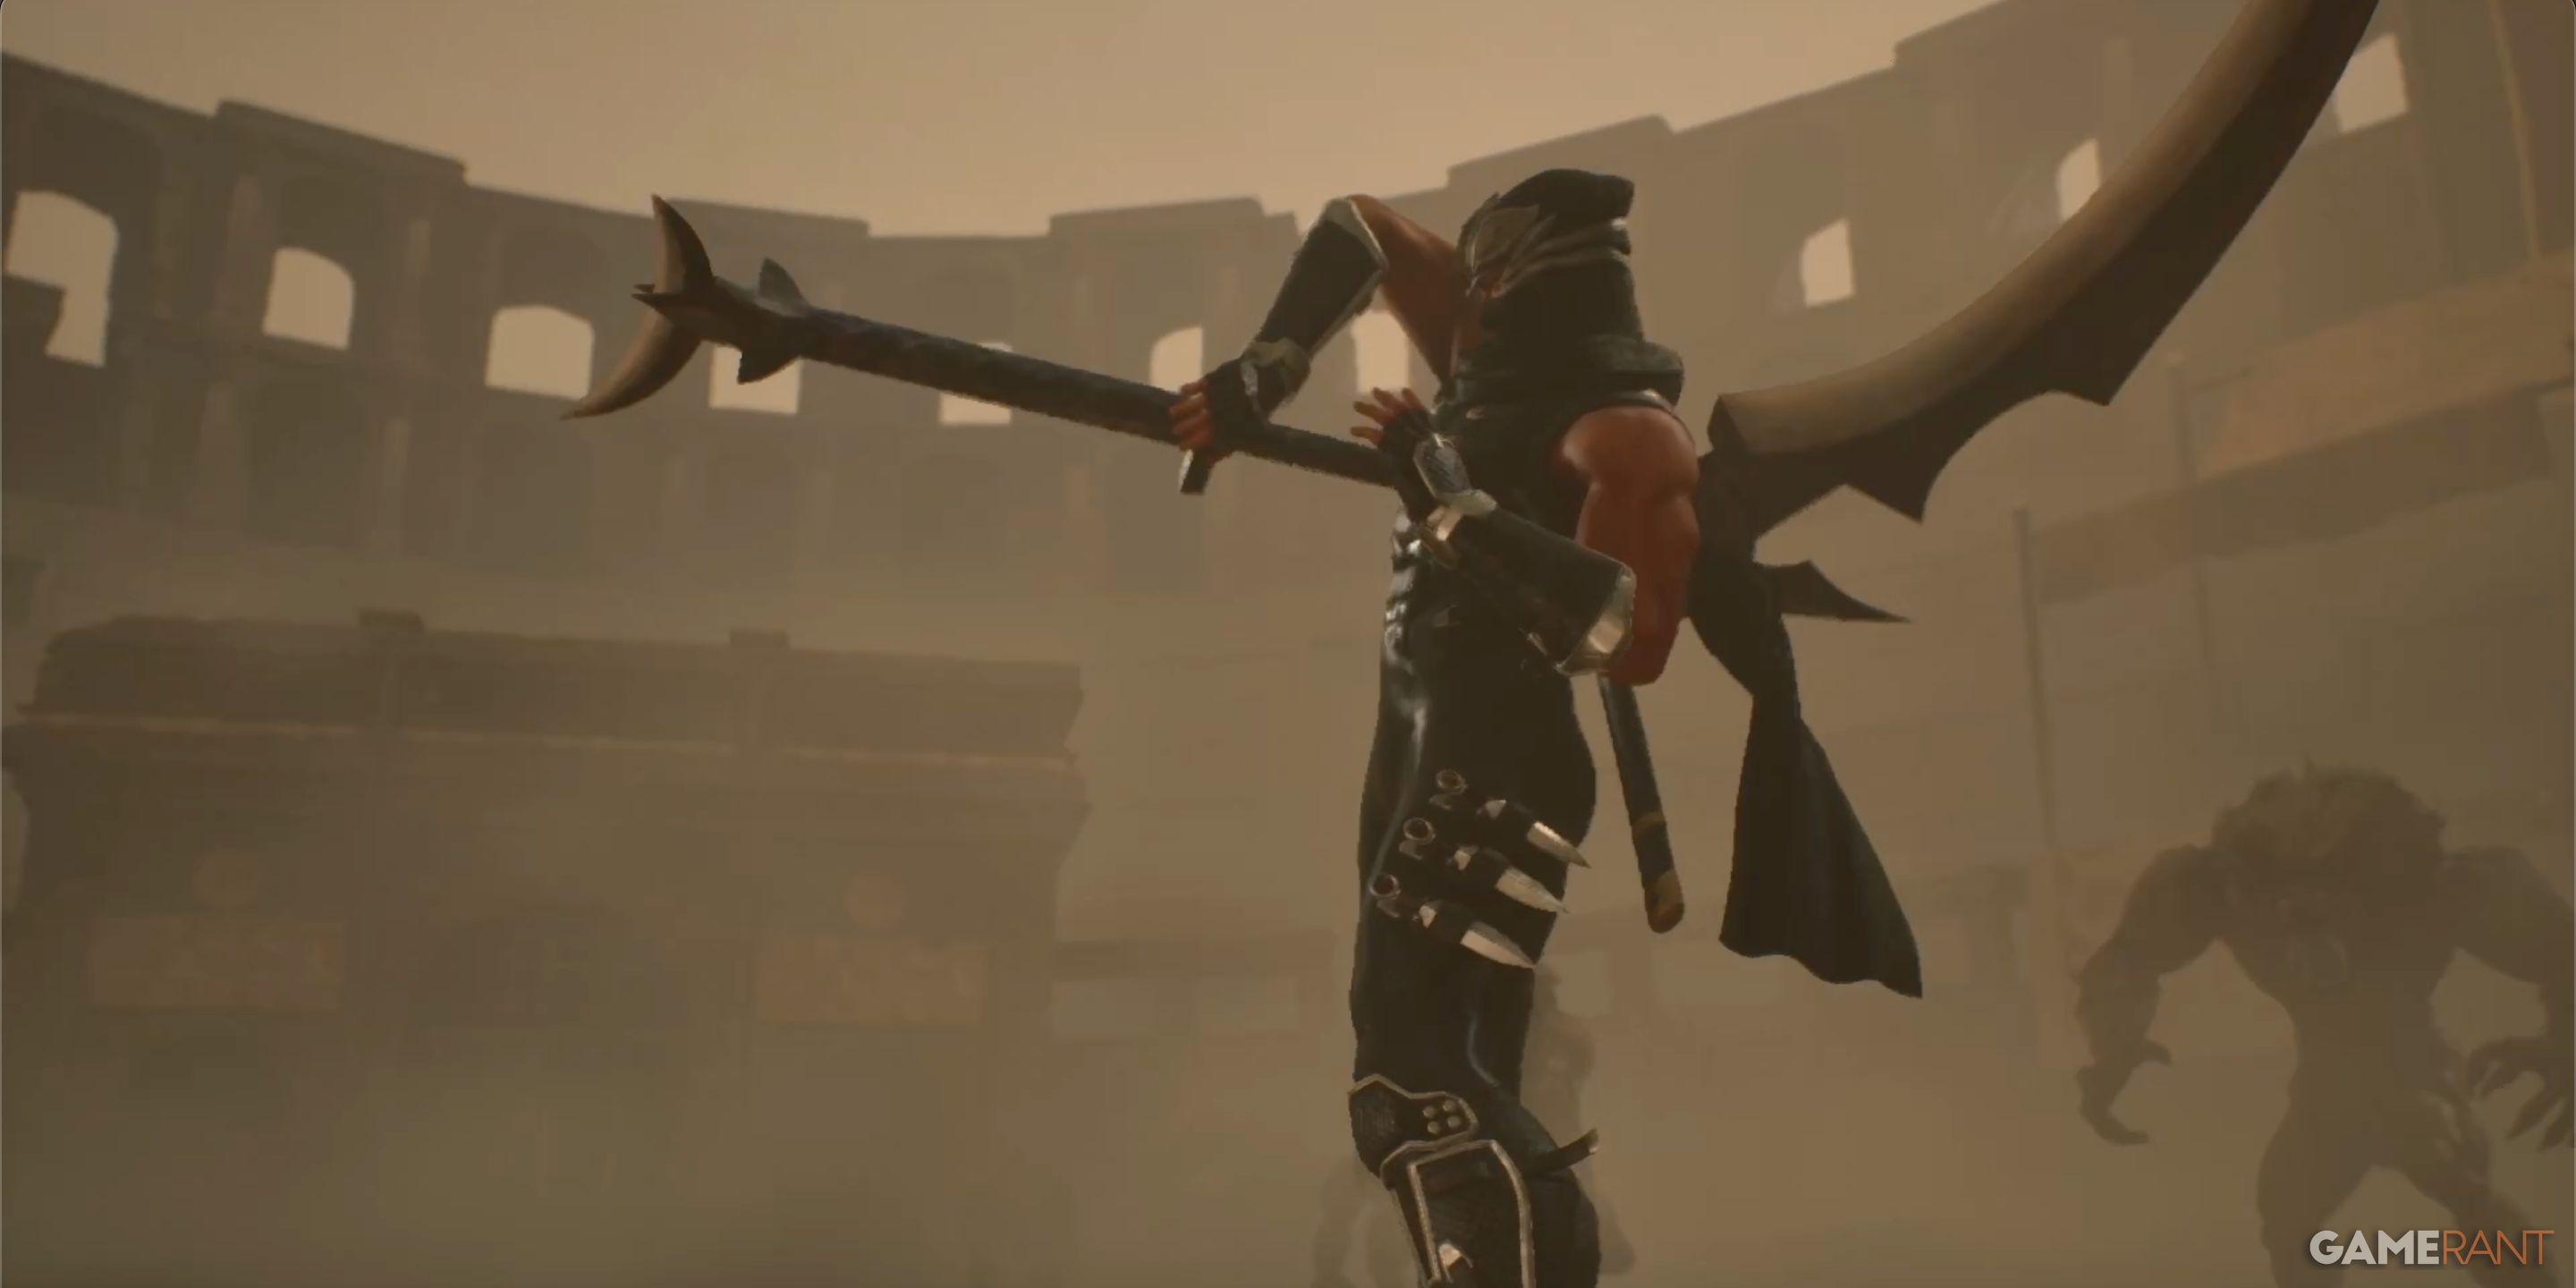
How to Get the Kusari-gama in Chapter 7 – Ninja Gaiden 2 Black
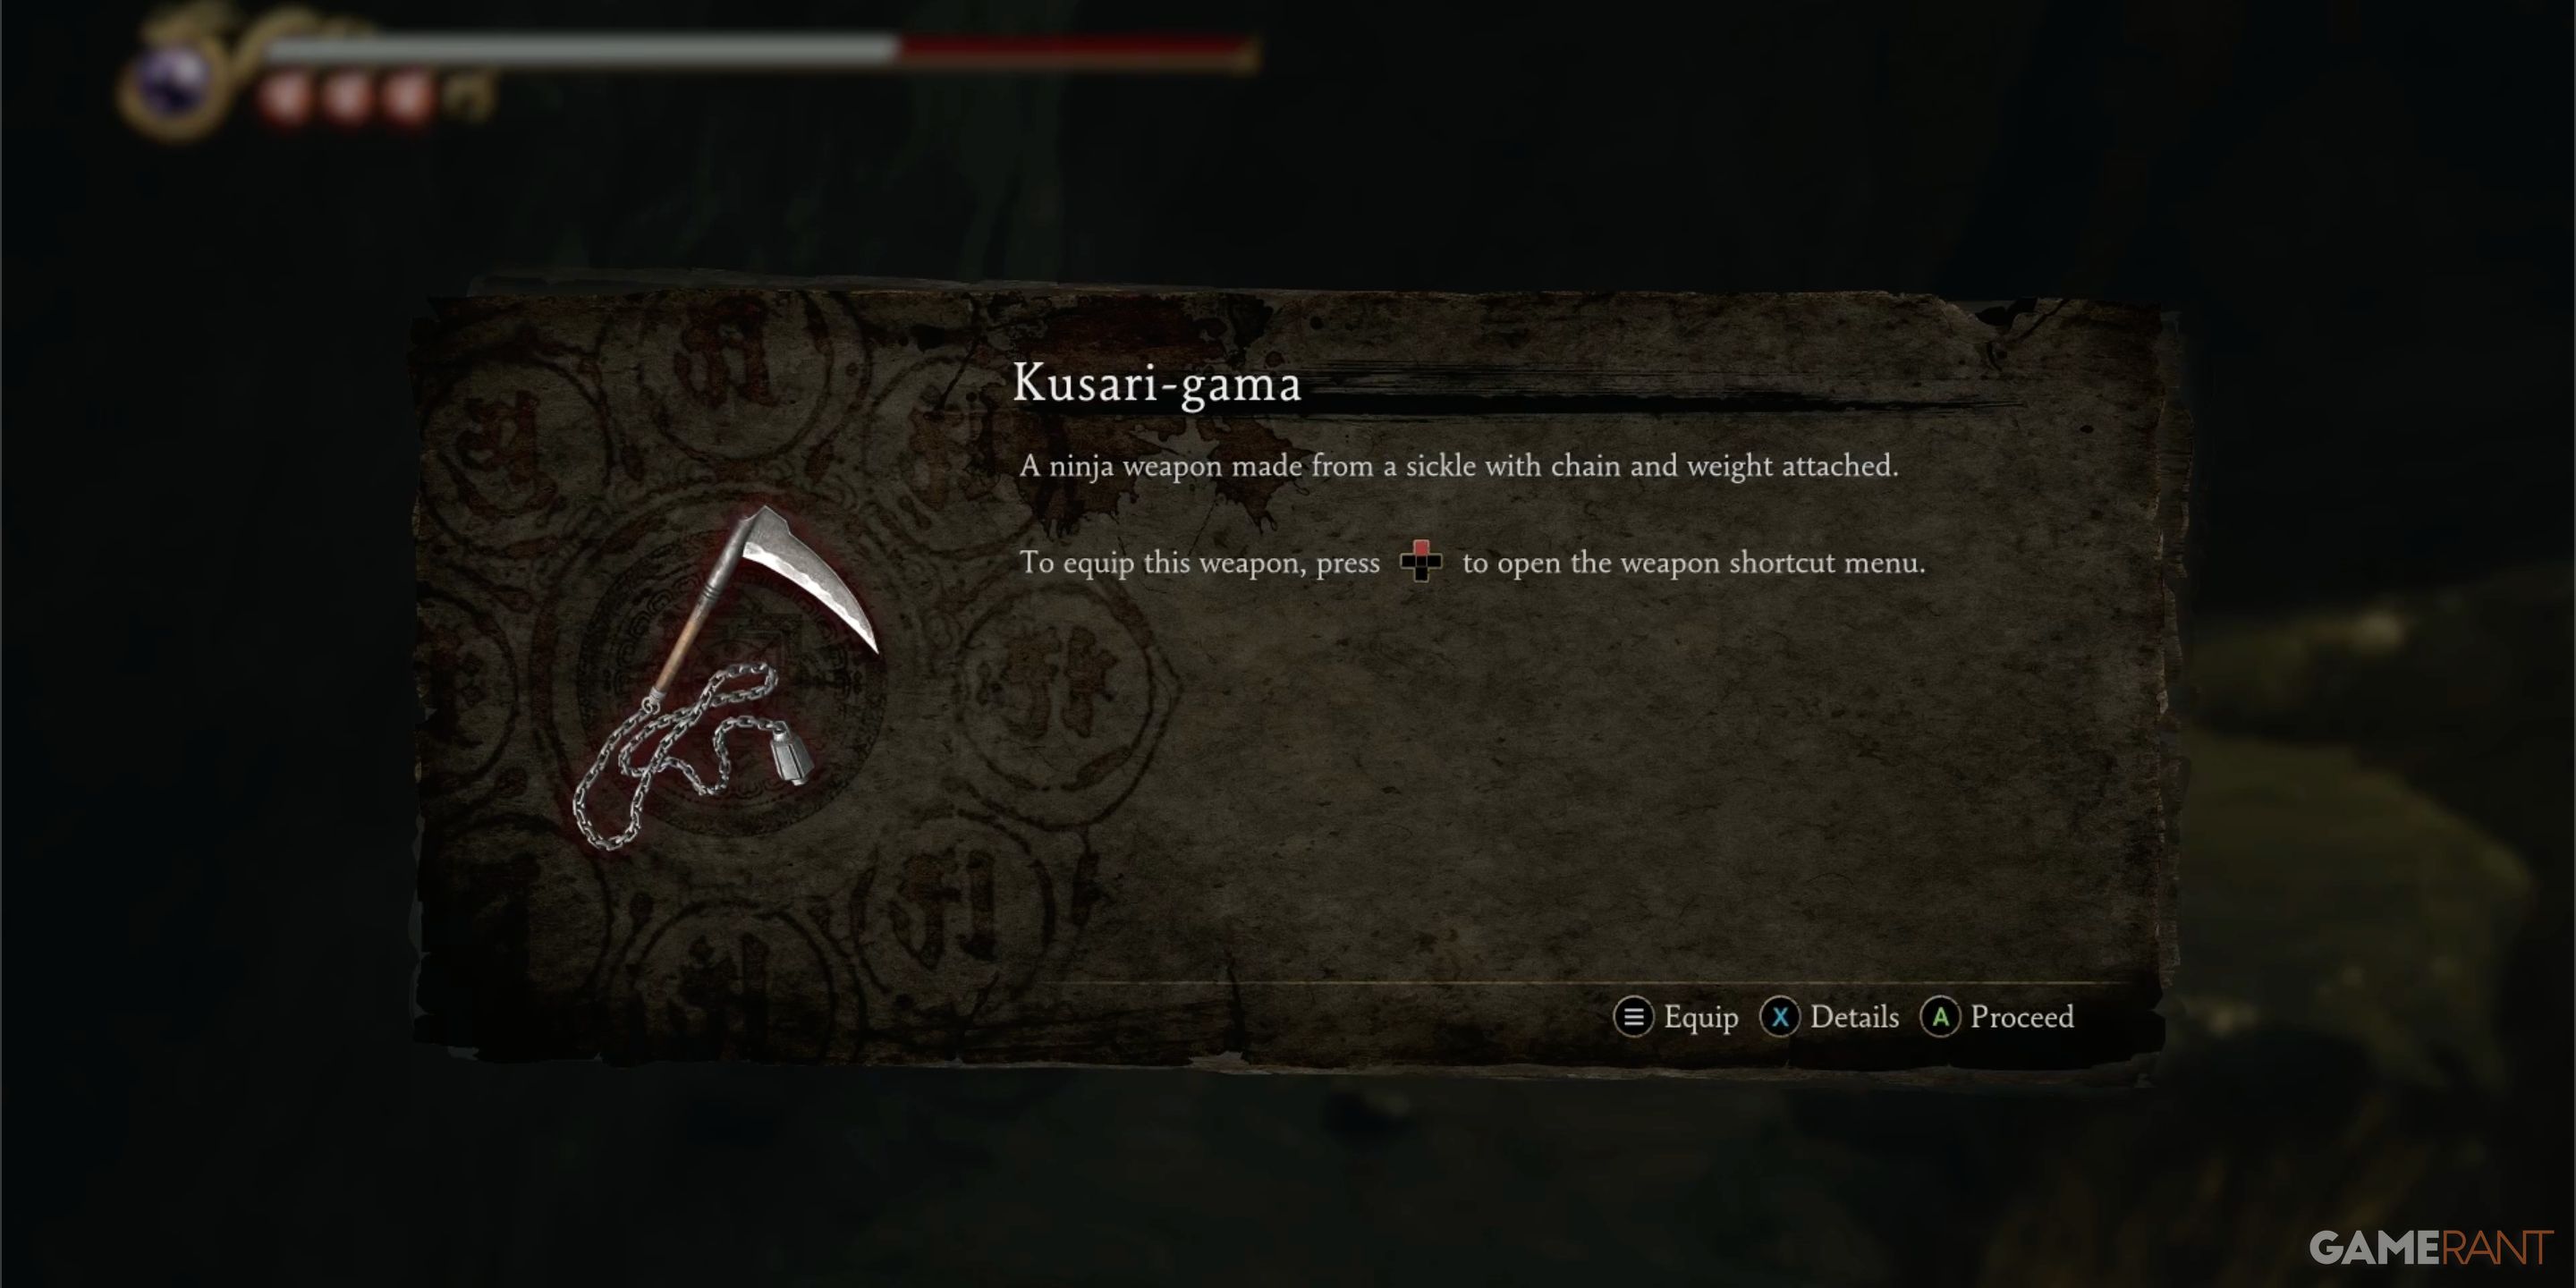
Kusari-gama Location:
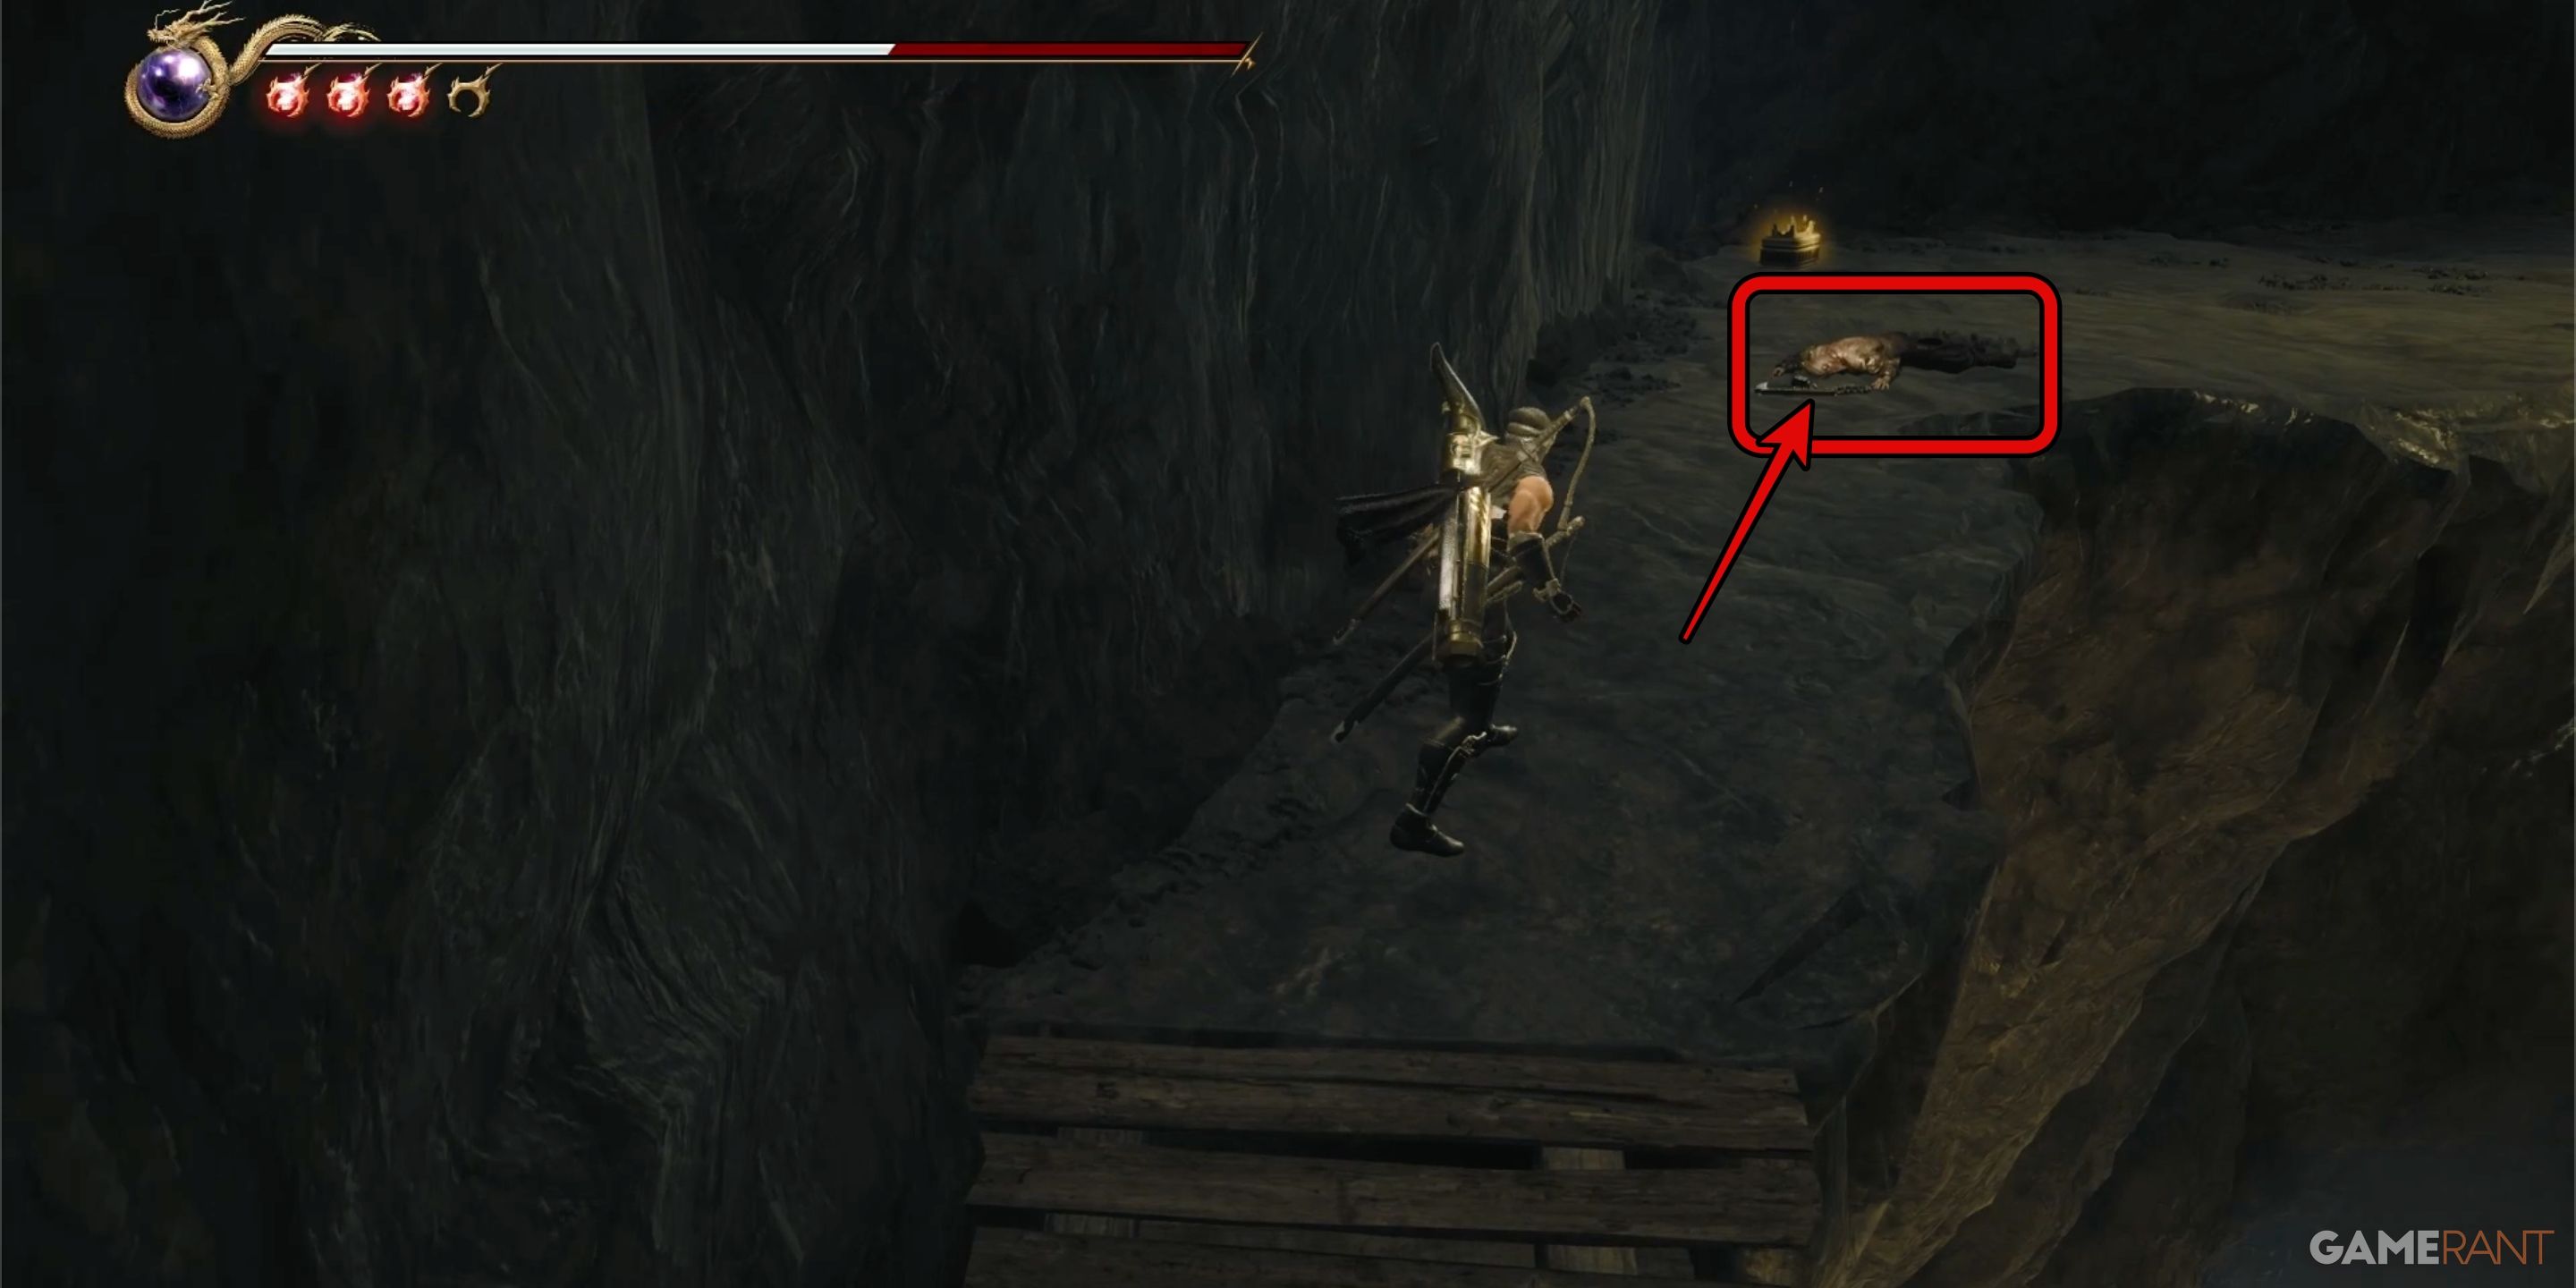
Following your victory against the mid-sized adversary Gogmagog buried in the colossal bone heap, you’ll leap and wall jump up onto the skinny dirt trail hugging the gigantic chasm’s edge. As you progress, the path will transition from dirt to wood. A section of the path will be missing, necessitating a wall-run to pass through it. Immediately after landing on the other side of the void, you’ll come across the Kusari-gama resting on a deceased foe.
How to Get the Tonfa in Chapter 7 – Ninga Gaiden 2 Black
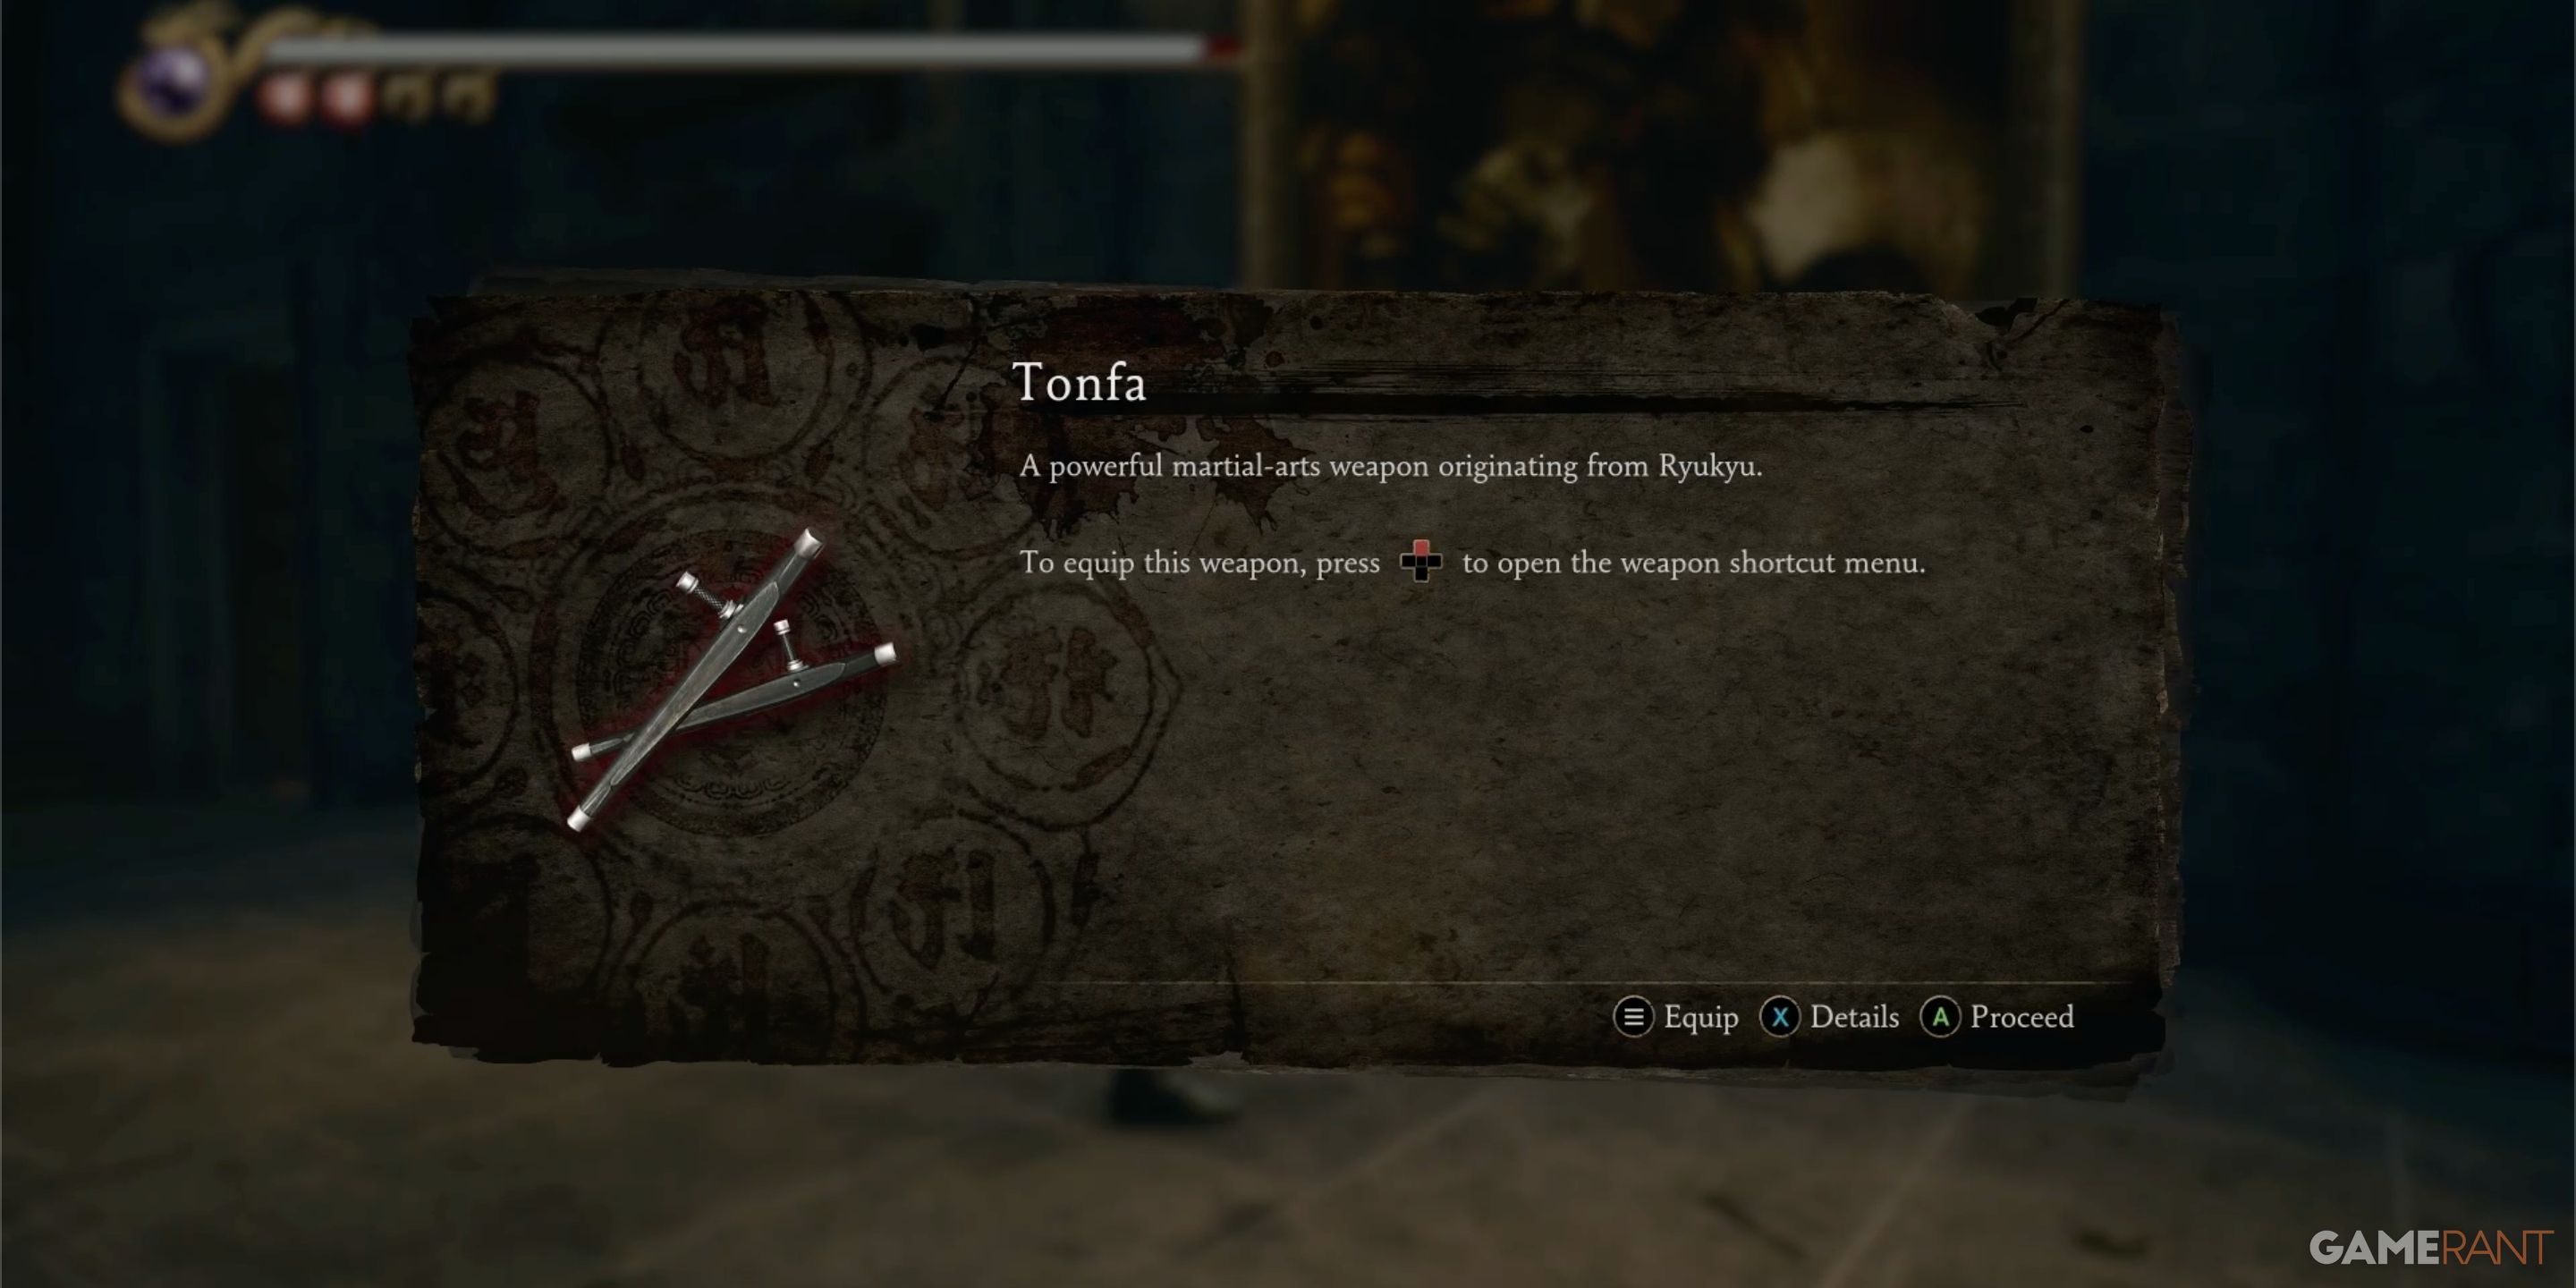
Tonfa Location:
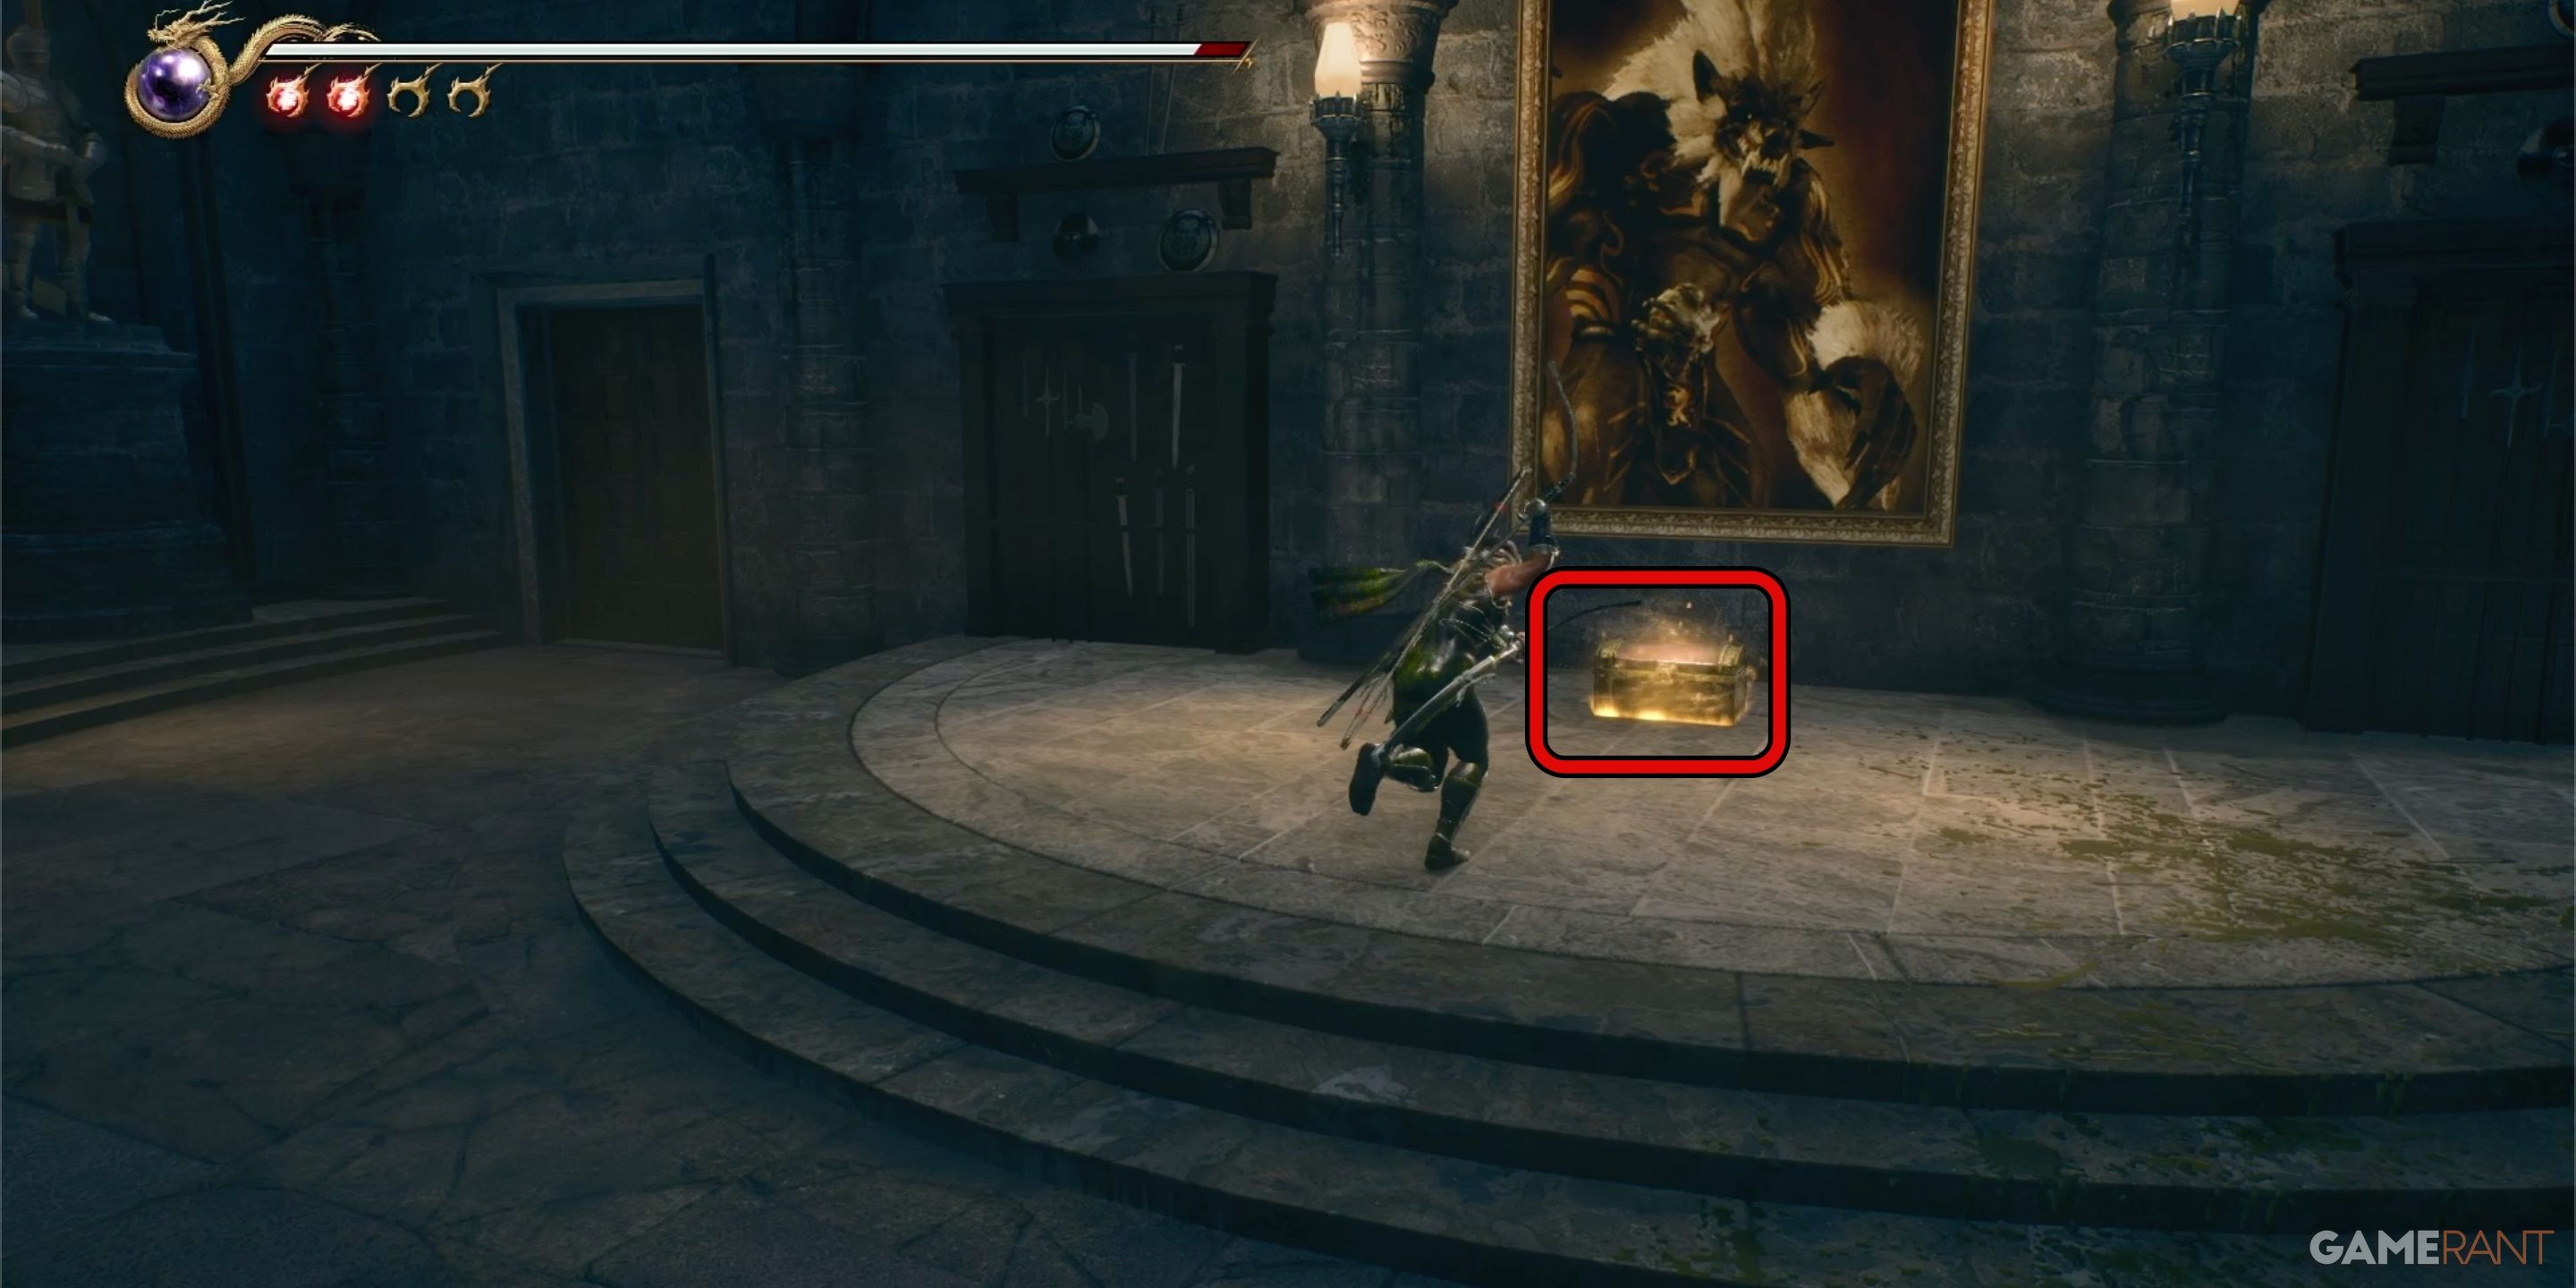
Leaving the chamber via the grand staircase leads you to a spacious room with a big painting of Volf adorning the walls. This room is teeming with various adversaries. Once they’ve all been vanquished, a chest will materialize beneath the portrait, housing the Tonfa.
How to Get the Eclipse Scythe in Chapter 7 – Ninja Gaiden 2 Black
To acquire the Eclipse Scythe, you should defeat Voif, the Master of Storms in the final stage of Chapter 7. After defeating this boss, Ryu will automatically grab the weapon off the ground. Following the acquisition of the weapon, you’ll face a continuous horde of werewolves until a helicopter arrives to rescue you.
How to Get the True Dragon Sword in Chapter 14 – Ninja Gaiden 2 Black
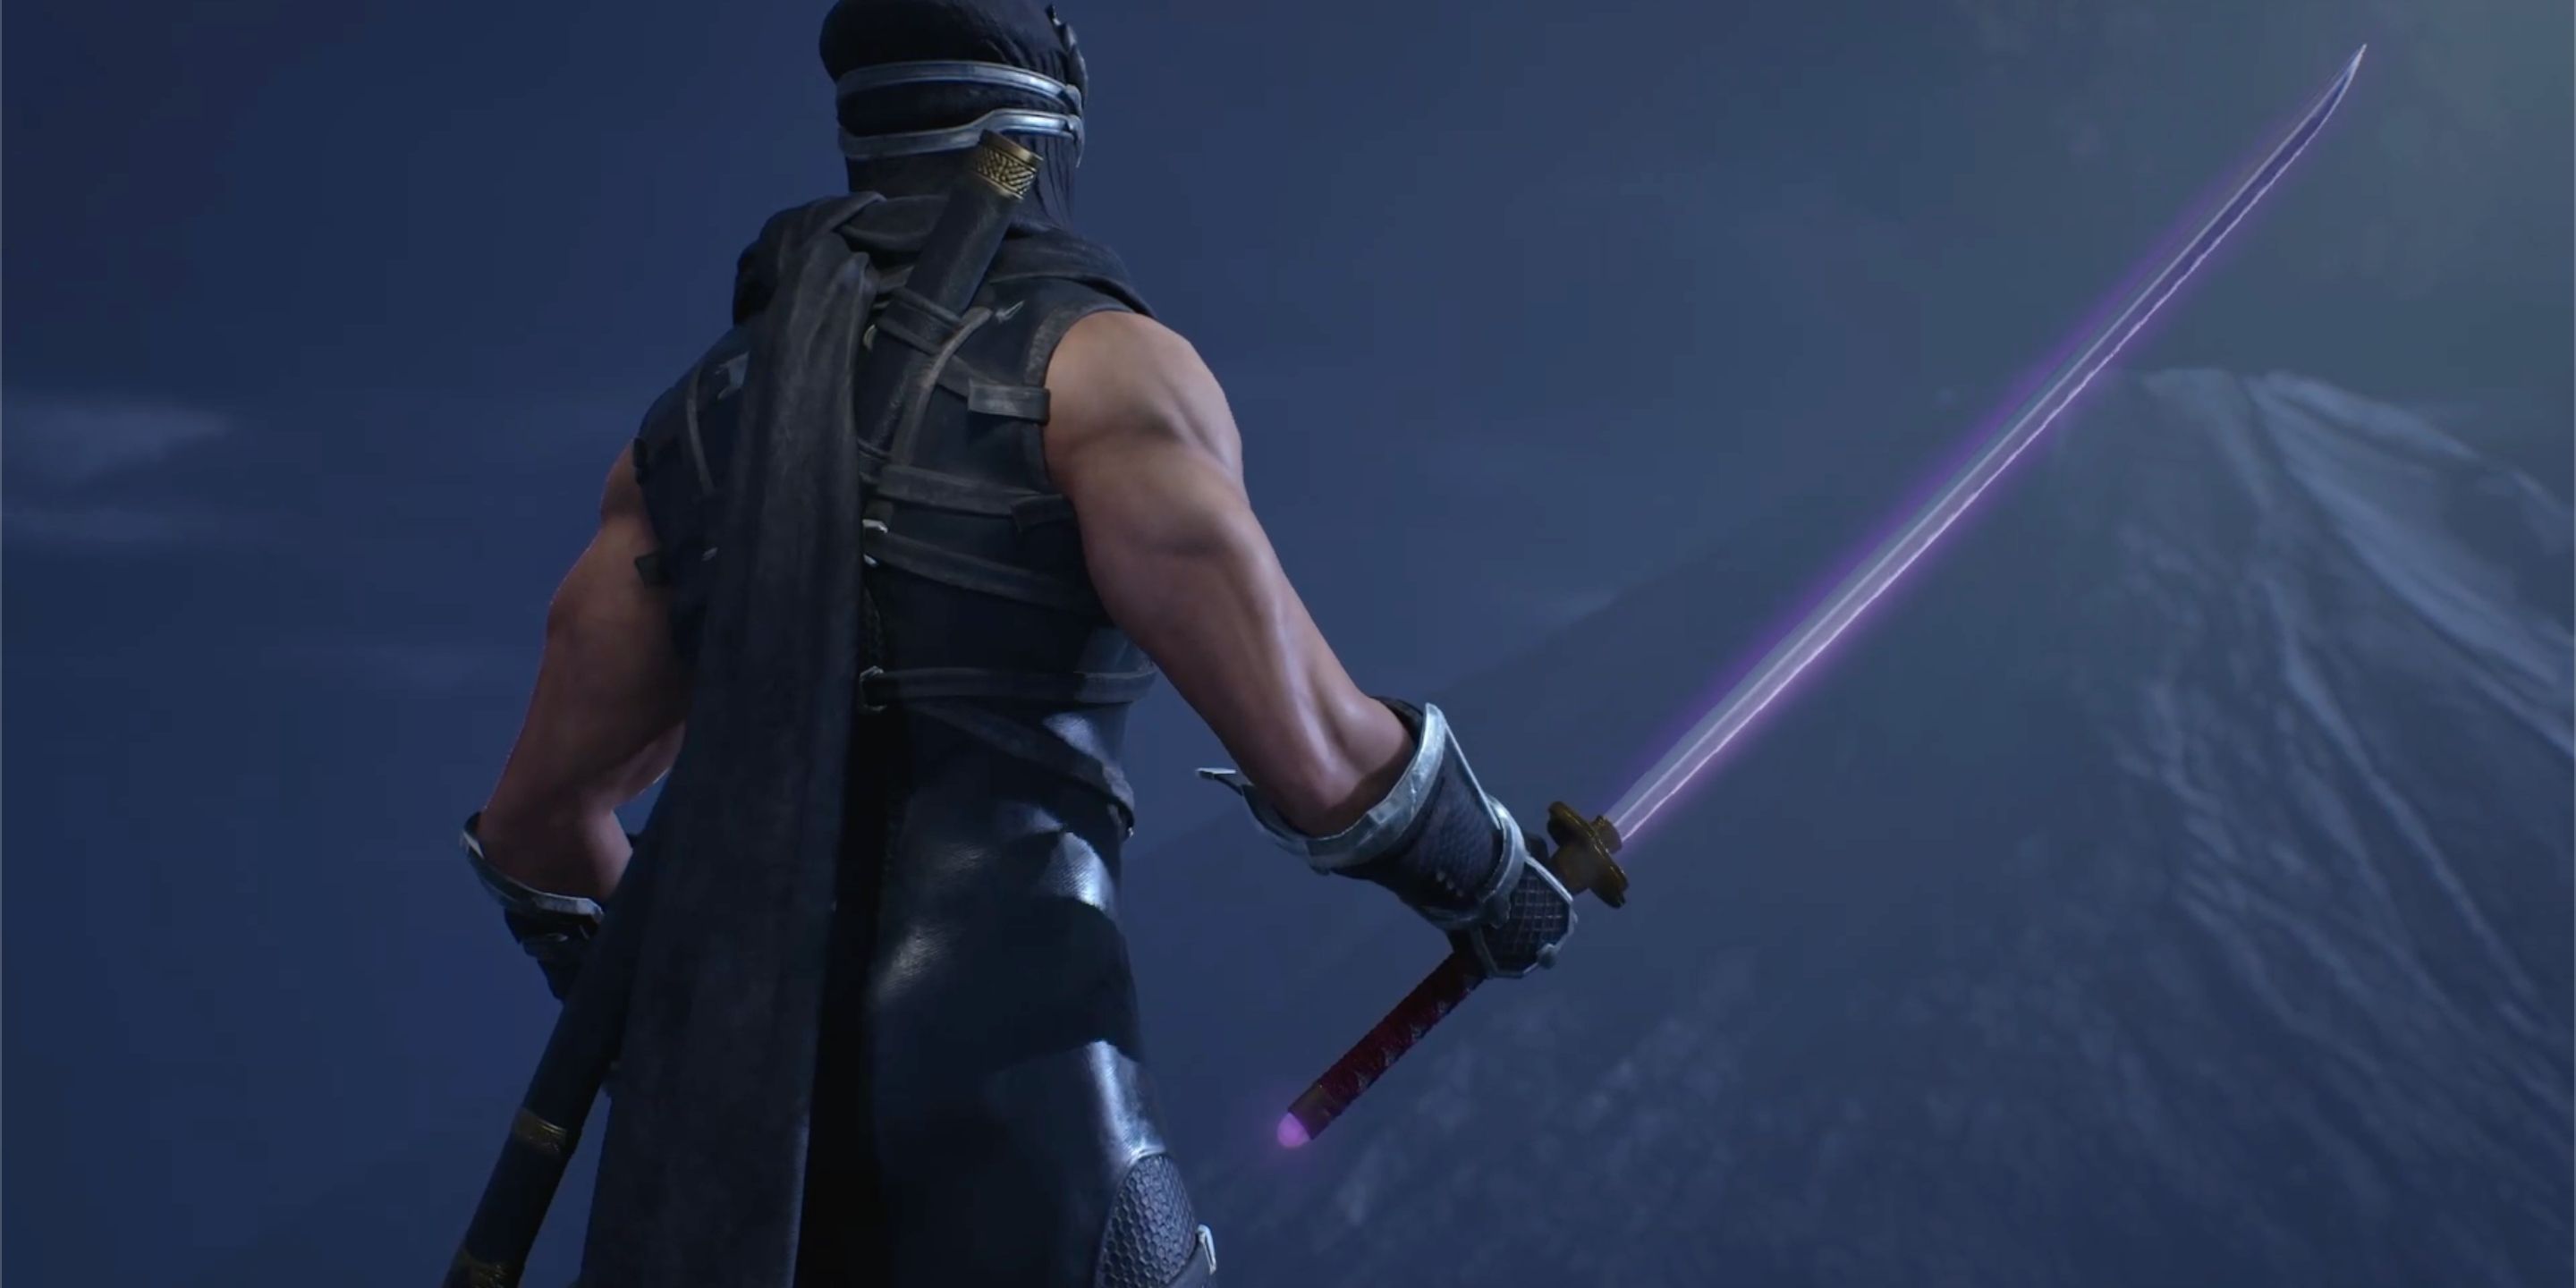
Once you gather the Dragon’s Eye with Ayane in Chapter 11, she will rejoin Ryu at the beginning of this chapter. Without any action required from you, Ryu will instinctively utilize the Eye to transform the Dragon Sword into the True Dragon Sword. This transformation takes place during the chapter’s initial cinematic sequence.
How to Get the Blade of the Archfiend in Chapter 17 – Ninja Gaiden 2 Black
In Ninja Gaiden 2 Black, the ultimate weapon you acquire is known as the Archfiend’s Blade. You gain this weapon automatically upon successfully vanquishing Fiend Genshin in Chapter 17.
Read More
- All Skyblazer Armor Locations in Crimson Desert
- How to Get the Sunset Reed Armor Set and Hollow Visage Sword in Crimson Desert
- All Shadow Armor Locations in Crimson Desert
- Marni Laser Helm Location & Upgrade in Crimson Desert
- All Helfryn Armor Locations in Crimson Desert
- All Golden Greed Armor Locations in Crimson Desert
- Best Bows in Crimson Desert
- All Icewing Armor Locations in Crimson Desert
- How to Beat Stonewalker Antiquum at the Gate of Truth in Crimson Desert
- Legendary White Lion Necklace Location in Crimson Desert
2025-05-20 09:46