As a seasoned adventurer who’s traversed through countless dungeons, I can confidently say that the Gerudo Sanctum’s final boss, the Mogryph, is one of the most intriguing beasts I’ve encountered yet. This Hippogryff-mole hybrid has got me scratching my head and testing my reflexes to the limit.
In the world of The Legend of Zelda: Echoes of Wisdom, I found myself standing at a crossroads, deciding between venturing into Gerudo Desert or Jabu Waters first. Regardless of my choice, Gerudo Sanctum turned out to be quite the challenge, coming either as the second or third significant dungeon in this epic adventure. However, it wasn’t an easy ride – I had to battle through some of the game’s toughest early-game adversaries and track down two crucial items that were hidden deep within its treacherous corridors.
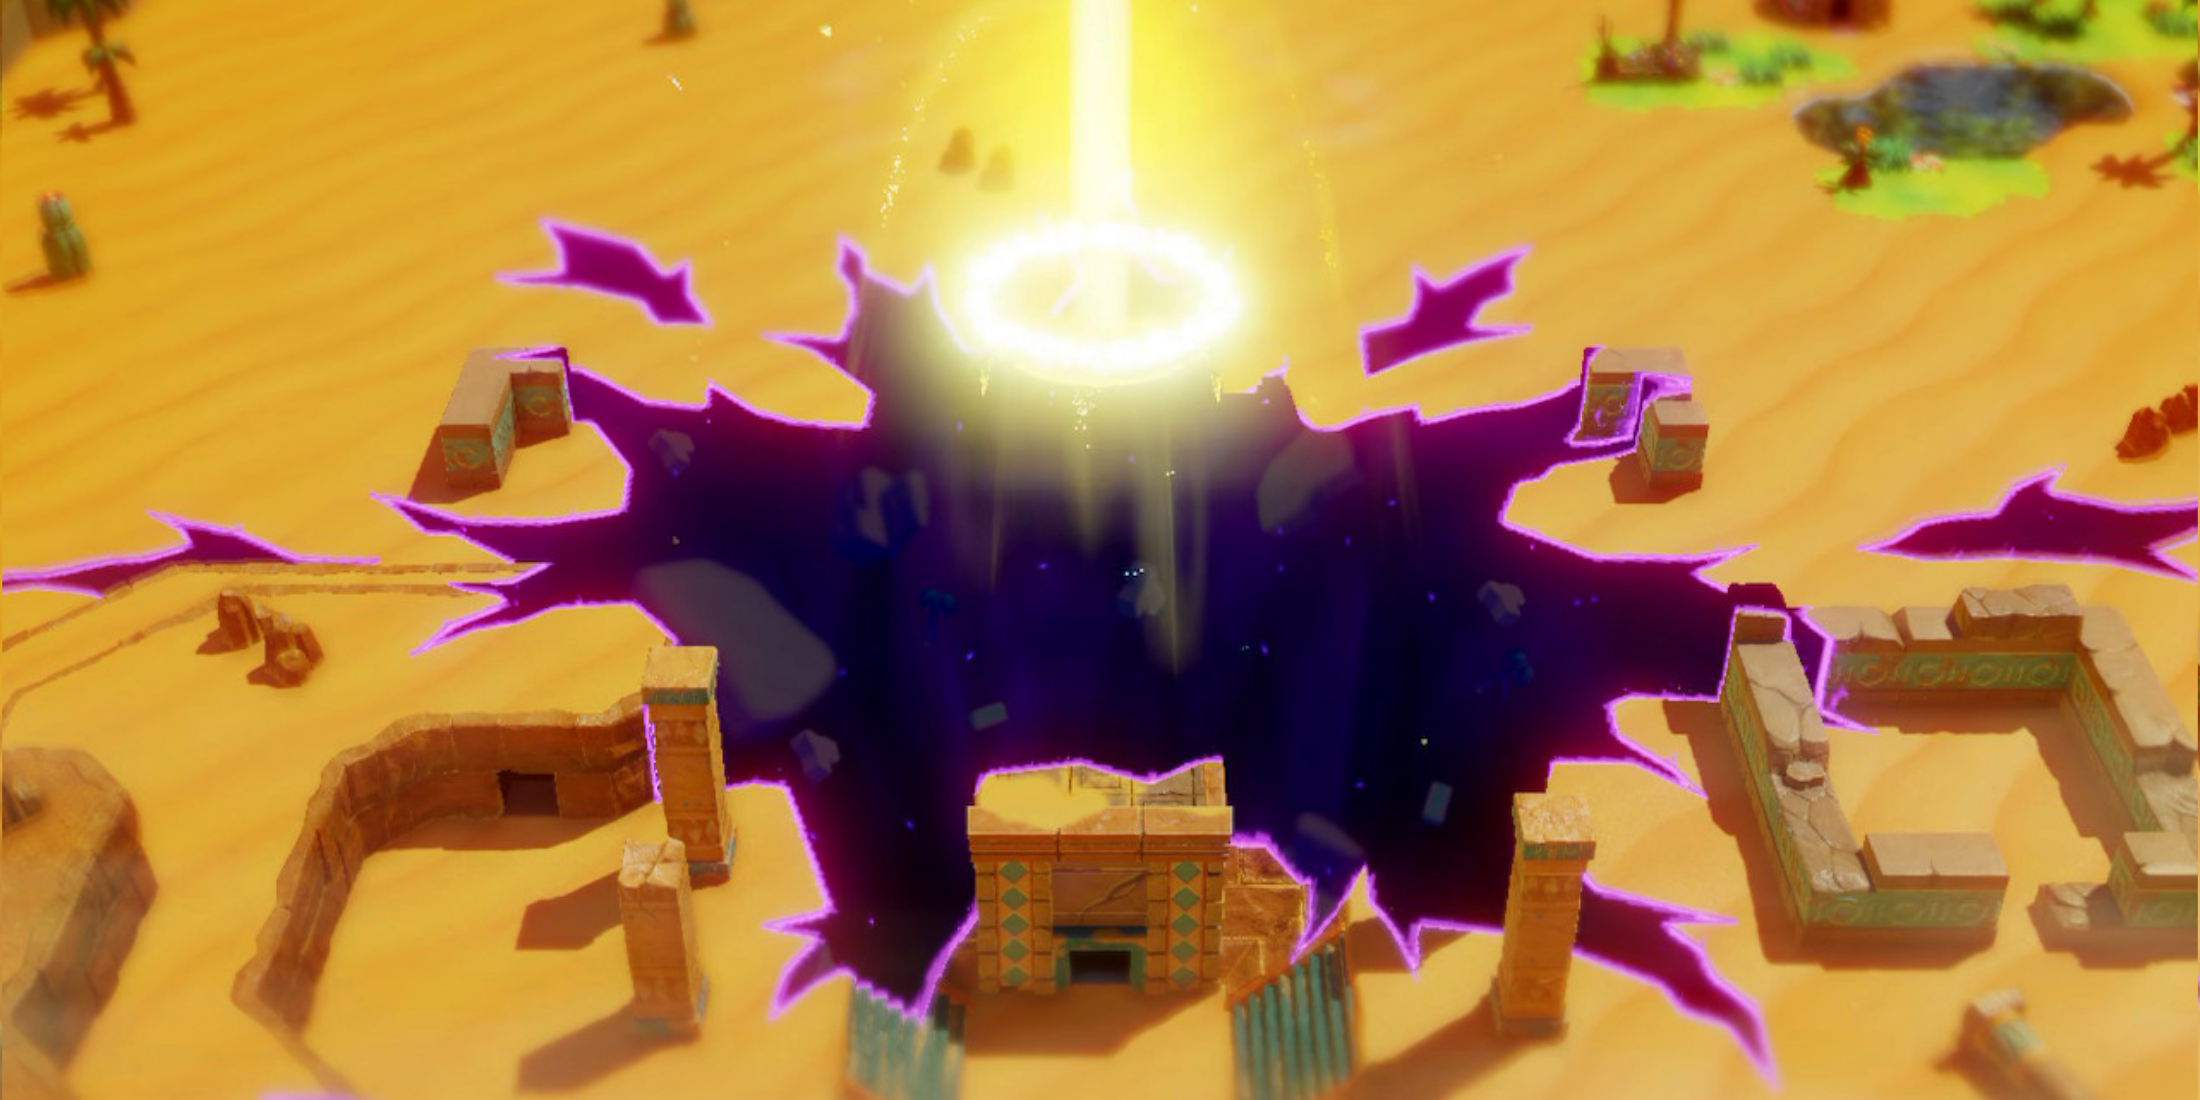
In the game “Echoes of Wisdom,” players must first accomplish the initial main quest set within the Gerudo Desert to reach Gerudo Sanctum. Here, Zelda demonstrates her skill in sealing Rifts, which eventually impresses the Gerudo Chief. Once you’ve removed the sand obstructing the entrance to the sanctum, Zelda can enter and begin working – this guide provides a detailed, step-by-step walkthrough of how to conquer the Gerudo Sanctum dungeon, including strategies for battling its final boss, the Mogryph.
Gerudo Sanctum Echoes of Wisdom Walkthrough
Reaching The Tribute Room
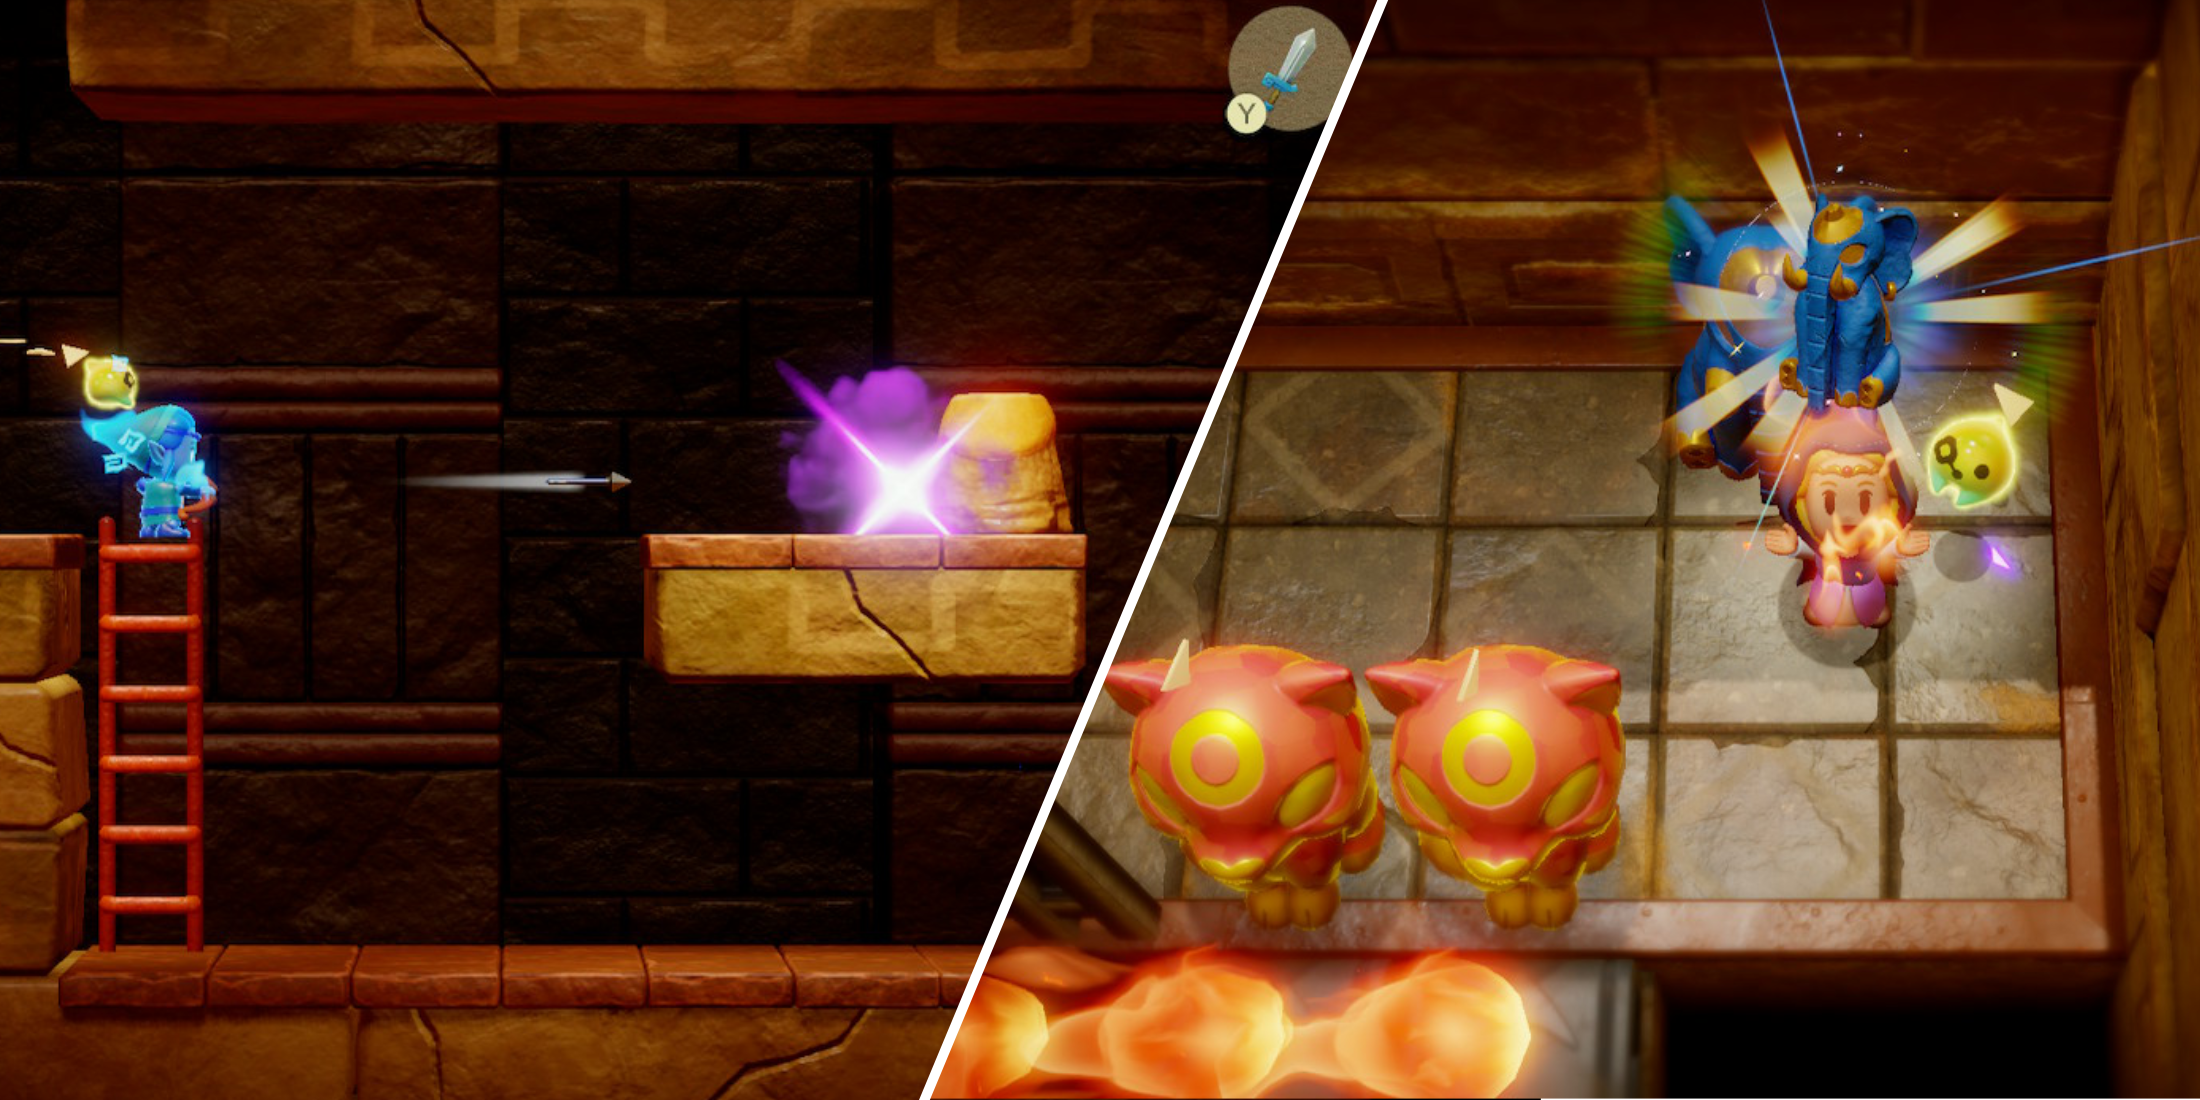
Upon venturing into the Gerudo Sanctum, you’ll come across an area that seems to depict Link up ahead. Scale the ladder to access a 2D side-scrolling platform.
First, place a Heavy Echo (which functions like a Boulder) to block the Wind Cannon on the lower right side. Then, ascend the climbing wall on the right side.
On the second level, you’ll encounter a closed door up ahead and a room off to your left. Take a brief diversion to your left first to grab the “Flying Tile Echo”, an excellent choice for long-range movement in “Echoes of Wisdom”. Once you have it, continue right to re-enter the room with the locked door, then make another right turn.
Pull the cord located on the left side of the room all the way, which will open a group of doors on the right side. After pulling it as far as it can go, move swiftly towards the upper level on the right side, making sure to reach there before the doors shut again.
Heading north, you’ll come across an apparently empty chamber. Use your Bind ability (press X) to latch onto the large stone wall in the center of the room, then pull it backwards to uncover a hidden room. Step inside to discover a chest with a Small Key inside.
To return to the room containing the locked door that goes upstairs, retrace your steps by walking back through two rooms and turning left at the third.
The majority of this room is covered in sand, and a door seems to be partially hidden to the north. For now, focus on handling the Mothula (and mastering the Mothula Echo) before eventually moving to the room on the left once it becomes accessible.
In this particular room, there’s a chest situated behind a central wall that you cannot access at present. You’ll be able to get to it further along in the dungeon. For now, proceed by going south. Access will be possible later through the ceiling using a Holmill summon.
In this particular space, hop onto the moving belts and promptly employ your Bind skill to shift the crates hindering your way across the abyss on the opposite side. It might require a couple of attempts due to the intricate timing, but don’t worry about losing any health points as you won’t fall off.
Move the ladder to another side-scrolling zone.
Leaving this side-scrolling zone will lead you to the Tribute Room. Take a moment to read the inscription on the wall, as it explains that you must collect “Two Unique Tributes” to advance further.
First, Get The Elephant Statue
In the sanctum of Gerudo, the first item you’ll encounter is the majestic Elephant Sculpture. To retrieve this sculpture, you will need to venture back outside and circle around the complex until you discover another entryway that takes you to a different sector within the sanctum.
the Elephant Statue is among the two essential Tributes, though it’s not mandatory for your progression.
To reach a room containing a Poe enemy, proceed from the Memorial Chamber by taking a left turn. These creatures fly backward and leave trails of purple fire behind them at intervals. To neutralize the Poe, consider deploying a Ranged Reinforcement (similar to Spear Moblins or several Crows) for ranged combat, or transform into a Swordfighter to chase it down in close quarters. Alternatively, you can use the Caromadillo or a Pathblade from a distance to eliminate this enemy, as they will swiftly catch up once summoned, provided there are no obstacles blocking their path.
Overcome the Poe Echo after defeating that foe, and subsequently proceed south to re-enter the Still Gerudo Sanctum region from outside.
To make it across Gerudo Sanctum, you’ll need to circle around its entirety. First, go below to locate a bridge, which is situated south of the Sanctum. Battle enemies along the way and then proceed leftward, followed by upward onto another platform. Stay clear of ground-dwelling enemies by creating objects that allow you to ascend to the upper right corner of this island, then move upward again to spot a misaligned tower.
First, activate your Bind power on one of the grips at the tower’s base. Afterward, walk backward to adjust the ladder pointing upwards. Ascend the ladder and move left, following a circular path around the platforms. Be cautious as you encounter Whirlwind enemies who might try to knock you off their course.
As a gamer, I’ve got to make my way across to the other side. Then, I’ll dive down to find a lower platform, followed by a right turn. After that, another descent is necessary to scale the peak of the Sanctum. Oh, and don’t forget to grab the Waypoint before moving on!
If you possess the Holmill echo, you can utilize it on a patch of ground on the left side of this rooftop to uncover the hidden Treasure room, which was earlier inaccessible. After obtaining this Treasure, just teleport back to the peak of the Sanctum using Fast Travel.
As an enthusiast of Echoes of Wisdom, I’d say from the vantage point at Gerudo Sanctum’s peak, one should traverse rightwards and then descend to uncover a concealed entryway to the inner sanctum on the edifice’s right side.
Upon entering, locate the cord on the left and yank it to unveil the doors up right. Hurry across the treacherous quicksand before they shut again. The Gerudo Slippers could be your savior if you’re finding it tough to traverse swiftly enough.
To the right, you’ll find a door secured, yet it holds a crucial clue for identifying the correct statue. There’s no need to linger here as you make your way past obstacles to enter a room teeming with Cat Statues, Re-Dead, and Gibdo adversaries. Overpower these foes to discover the Echoes of Re-Dead, Gibdo, and Cat Statue, expanding your collection (if they’re not already in your possession). Keep in mind that neither the Cat nor Snake Statues can serve as Tributes for the door; only the Elephant and Hawk will do.
After you’ve conquered the adversaries in here, shift the statue of a cat located at the top-left corner aside to uncover a path ahead. Proceed into this room, then head towards your left (gathering Heart Containers and additional items from the Pots as you go) and advance upwards until you encounter the Mini Boss, Dark Link.
Dark Link Mini Boss Guide
In truth, the path Zelda takes into the dungeon isn’t actually Link; it’s a fake! When she steps into this chamber, this phony Link will spin around and shoot arrows at our Zelda. This battle might seem challenging, but don’t be fooled: there are two distinct rounds, one against a single Impostor Link, followed by another where you face three Impostor Links simultaneously.
In the initial battle against the Dark Link boss, call forth a melee combatant near Dark Link (such as Boarblin or a Darknut). This enemy will commence its assault immediately, providing a distraction for Dark Link and allowing you to move in closer for attacks. Additionally, consider activating Swordfighter Mode to facilitate swift movement and accurate strikes against the Impostor. It’s important to land at least two or three hits on the Impostor before it vanishes, with the number of strikes depending on the forcefulness of your attack.
In the second stage, following the defeat of a solitary Dark Link, an additional three Dark Links will emerge, each possessing the same moveset. These enemies are strategically positioned throughout the room and will incessantly fire arrows. To manage this situation more effectively, summon a Darknut (or any other armored Echo creature) and focus on one of them to attract its attention. If you can divert the other two Dark Links using Echoes, it becomes simpler to handle the remaining one.
In this situation, activate your Swordfighter Form and maneuver strategically to dodge oncoming Arrows. Leverage the surroundings to evade getting hit, and either twirl or shield yourself in Swordfighter Form to deflect the arrows. Don’t hesitate to consume a Smoothie if your vitality drops significantly.
Following the victory over the three Impostor Links, a brief cutscene unfolds, resulting in Rift Link disintegrating into particles, and introducing a fresh weapon for your Swordfighter Form: the “Bow of Power”. When wielding Swordfighter Form, you can launch the Bow of Power by pressing the X key. This allows you to aim at enemies that are not directly on your level.
Continuing To The Elephant Statue
Following your victory against the Dark Link mini-boss, make your way northwards until you find a Ladder. Proceed through the dungeon in this side-scrolling environment. In this part, activate Swordfighter Form and shoot arrows at the Beetle Mound to prevent new enemies from appearing. Continue onward, cross the gap by constructing ramps or utilizing Flying Tile Echo.
To get to the upper right corner of the 2nd floor map, you need to ascend the ladder on the opposite side of this scrolling area. Once you’re there, you’ll notice two flamethrowers shooting flames across a conveyor belt, which will take you to the other side of the room – that’s where you’ll find the Elephant Statue’s location.
As a devoted adventurer, I’d call upon a robust, fire-resistant Echo figure (similar to those found within this labyrinth) to shield me from the inferno. Position myself behind it and use its formidable presence to ward off the blazing flames emanating from both flamethrowers, one on either side of the conveyor belt. By doing so, I can navigate safely across to the other side.
First, familiarize yourself with the Elephant Statue’s Echo, and then swiftly teleport back to the peak of the Sanctum in the Tranquil Realm to reach the Hawk Statue’s position promptly.
Hawk Statue Location
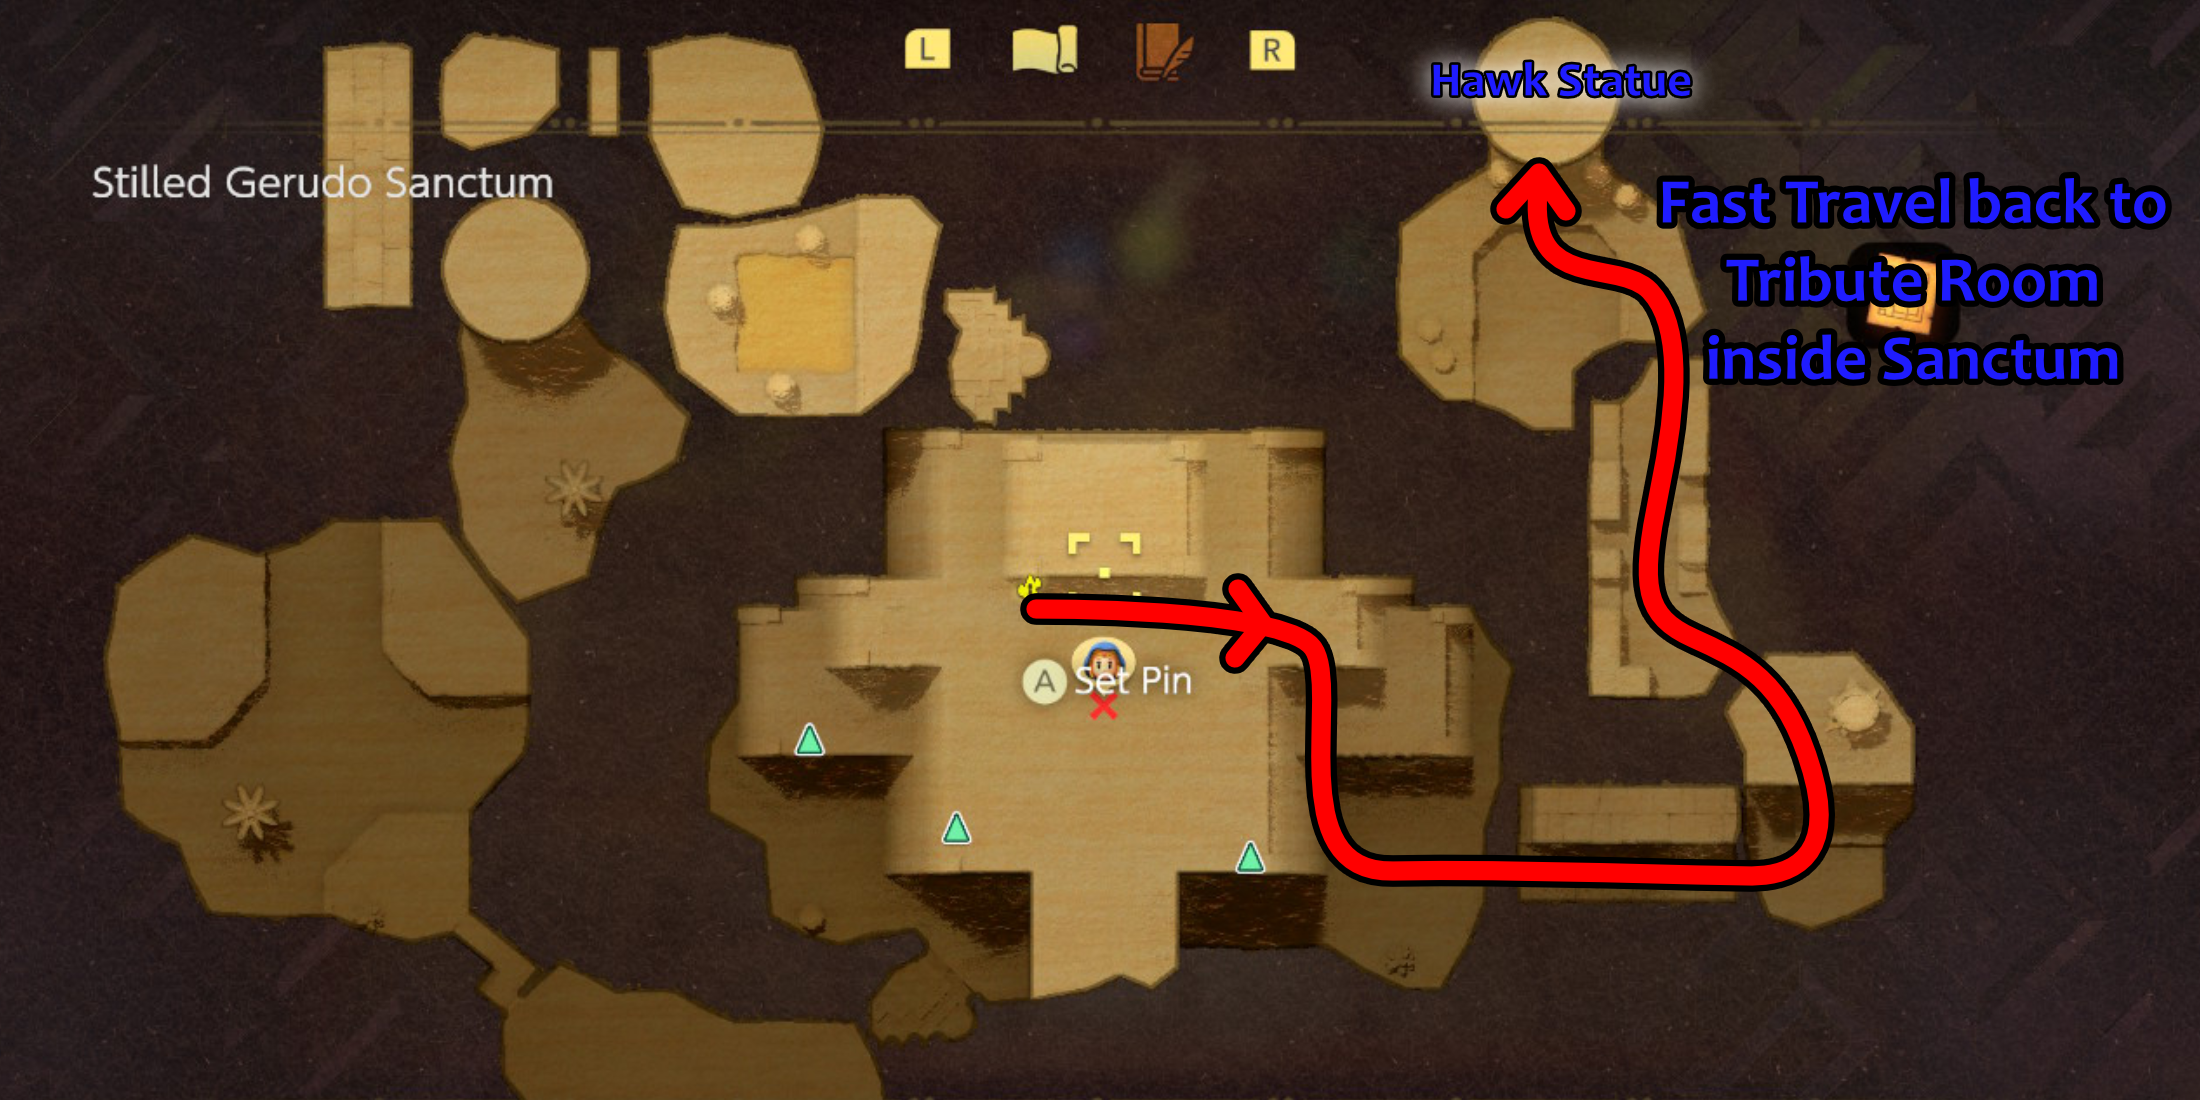
Following a Fast Travel back to the Waypoint on Gerudo Sanctum’s peak, move towards the right edge of the building. Avoid entering the door like the one for the Elephant Statue. Instead, keep moving to the right and traverse multiple floating platforms (watch out for Sandshark enemies). Utilize your Bind skill to pull them from the walls as you ascend, eventually reaching another misaligned Tower.
Again, employ your binding ability to draw this back into position and straighten out the rungs on the ladder that ascend vertically.
The location of the Hawk Statue can be found atop the northeastern-most Tower in the Still World. After acquiring the Elephant Statue, defeating Dark Link, and collecting the Hawk Statue, simply teleport back to the Tribute Room for your final visit.
As a gamer, I’d say: “Bring forth the Elephant and Hawk Statues on the platforms ahead, near the dark stone Tribute door. Their echoes seem to hold the key to opening it. Inside, you’ll discover another enigmatic artifact, reminiscent of the one found in the Cryptic Cavern, which unveiled the location of the Gerudo Sanctum.
To remove the sand from the doorway leading to the Boss Room, please take out this plug. Once the sand has been drained, enter through the now vacant hole to discover a room housing a large chest labeled as the ‘Big Key Chest’. Inside this chest lies the dungeon’s Big Key, which grants entry to the final boss chamber.
Gerudo Sanctum Big Key Puzzle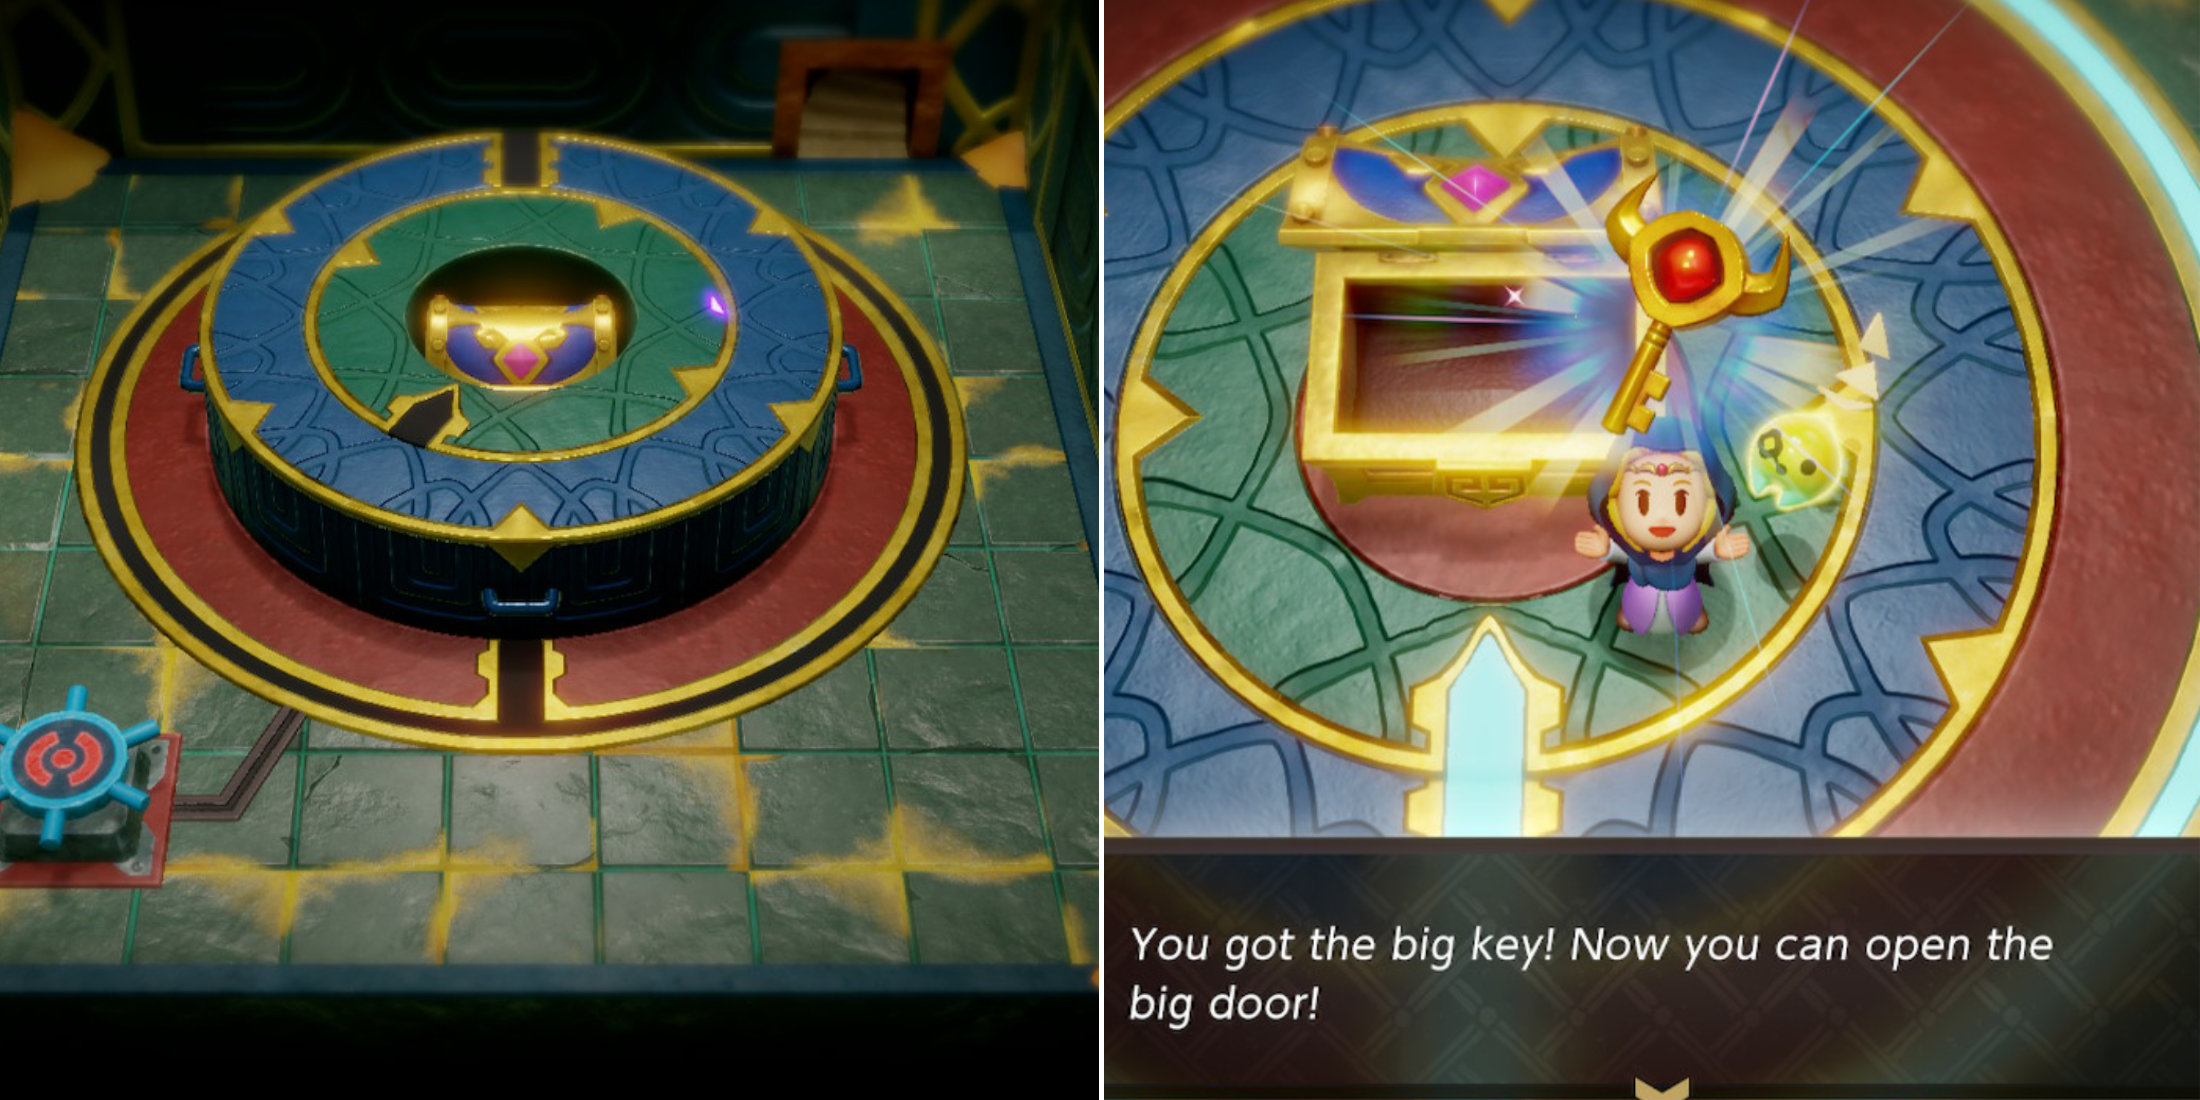
In Gerudo Sanctum, the Big Key puzzle may appear deceptively straightforward. By manipulating the small wheel located at the bottom-left corner of the room, you cause Zelda to rotate the outermost wheel approximately 60 degrees each time it’s turned (equivalent to one sixth of a full rotation). To solve the puzzle, turn this wheel three times so that the line on the blue wall aligns with the line on the red floor, pointing downwards.
The blue wall will then sink into the ground.
To adjust the green barrier, use your Bind ability to tug it into a more convenient position for realignment. Remember that each pull only moves the wheel 1/6 of its full rotation, and it doesn’t make smaller adjustments. Once you’ve repositioned the green barrier with your Bind skill, try using the Wheel again to check if it will spin correctly in the new alignment.
If you arrange your Bind skill properly, it will rotate into position and uncover the chest holding the Grand Key. To acquire the key, simply open the chest. Then, proceed up the stairs located at the upper right corner of the room to eventually find yourself at the entrance of the Boss’s Door.
In the usual course of things, make sure not to overlook grabbing the Waypoint positioned nearby, and secure your “Echoes of Wisdom” file for safekeeping. Remember, the final boss’s door cannot be accessed without the Big Key. However, if you wish to prepare more beforehand, you can activate this Waypoint early.
Mogryph Boss Fight Guide
In the Gerudo Sanctum dungeon, the ultimate adversary is none other than the Mogryph – think of it as a Hippogryff’s counterpart with a Mole-like physique. The encounter has two distinct stages, yet you can conquer them both by employing essentially the same winning strategy.
During stage one, the Mogryph boss possesses two main assaults: it can either unleash a gust of sand towards you, or dig beneath the ground before abruptly emerging and rushing towards your current position.
As a fan, I’d suggest two strategies to respond to these moves:
During battles with the Mogryph boss, it will occasionally emit a loud roar and generate additional heaps of sand frequently. Should these sand piles become troublesome, utilize the Wind Blaster Echo ability to clear them away.
If you position yourself behind a Statue as the boss rushes toward you, it will likely collide with the Statue, causing it to stagger for several moments. Then, activate your Swordfighter Form and attack its vulnerable midsection. Depending on your current Swordfighter Form proficiency, it might require two or even three attempts to bring it down.
Once sufficient harm has been inflicted, it will advance to Phase 2 and scatter quicksand across the battlefield. Make sure you’ve equipped the Gerudo Sandals accessory to handle the quicksand, and always watch the skies.
In the second stage, the Mogryph acquires two significant abilities: it now creates whirlwinds that send Zelda soaring through the air, and it can also perform a dive-bomb attack on her current position. After diving, it will continue to swipe and charge towards Zelda, but you can seize it in either state of attack or charge.
As a fan, I’d like to share a tactic I’ve found useful against Mogryphs: If you manage to position an obstacle, such as a Statue or a formidable Echo like a Boulder or Wind Cannon, beneath it just before it lands, the Mogryph will momentarily stun itself and be vulnerable to attacks. Timing can be tricky, but keep your eyes peeled when it starts rising higher in the sky. Look for its shadow on the ground as it descends; if timed correctly, you can bypass the second part of its moveset entirely!
Should the Mogryph touch down and engage both its attacks, including the Charge maneuver, position a statue strategically between you and it during this scenario. This action will stun the creature much as it was done in Phase 1.
Keep doing it several times to overcome the Mogryph, gather a Heart Piece, and permanently rid the Gerudo Sanctum of its Rift contamination.
Read More
- LUNC PREDICTION. LUNC cryptocurrency
- BTC PREDICTION. BTC cryptocurrency
- USD PHP PREDICTION
- BICO PREDICTION. BICO cryptocurrency
- USD ZAR PREDICTION
- USD COP PREDICTION
- USD CLP PREDICTION
- SOL PREDICTION. SOL cryptocurrency
- CKB PREDICTION. CKB cryptocurrency
- MOVR PREDICTION. MOVR cryptocurrency
2024-09-29 02:26