Alright, brave adventurer, let me walk you through this thrilling dance with the enigmatic Null Phase 3. With my years of gaming under the belt, I can confidently say that this battle is a true testament to the adrenaline-pumping action that games like Echoes of Wisdom deliver.
As a devoted fan, I’ve journeyed through “Zelda: Echoes of Wisdom,” and let me tell you, Null’s Body stands as the ultimate stronghold – the final dungeon housing the game’s climactic battle. What’s intriguing is that it’s not the most challenging dungeon in the game, but the final boss here presents a substantial leap in difficulty compared to the rest of the bosses encountered within “Echoes of Wisdom.
In the heart of this labyrinth, Zelda’s Swordfighter Form is unavailable, making it essential for you to utilize Link’s Echoes to navigate the Null’s Body Puzzles and vanquish adversaries as you progress. Additionally, remember that there are no save points within this dungeon, so stock up on potent Smoothies, expand your Heart Containers, and gather some robust Echoes before embarking on this climactic trial in the game Echoes of Wisdom.
Null’s Body Echoes of Wisdom Dungeon Walkthrough
Entrance & First Combat
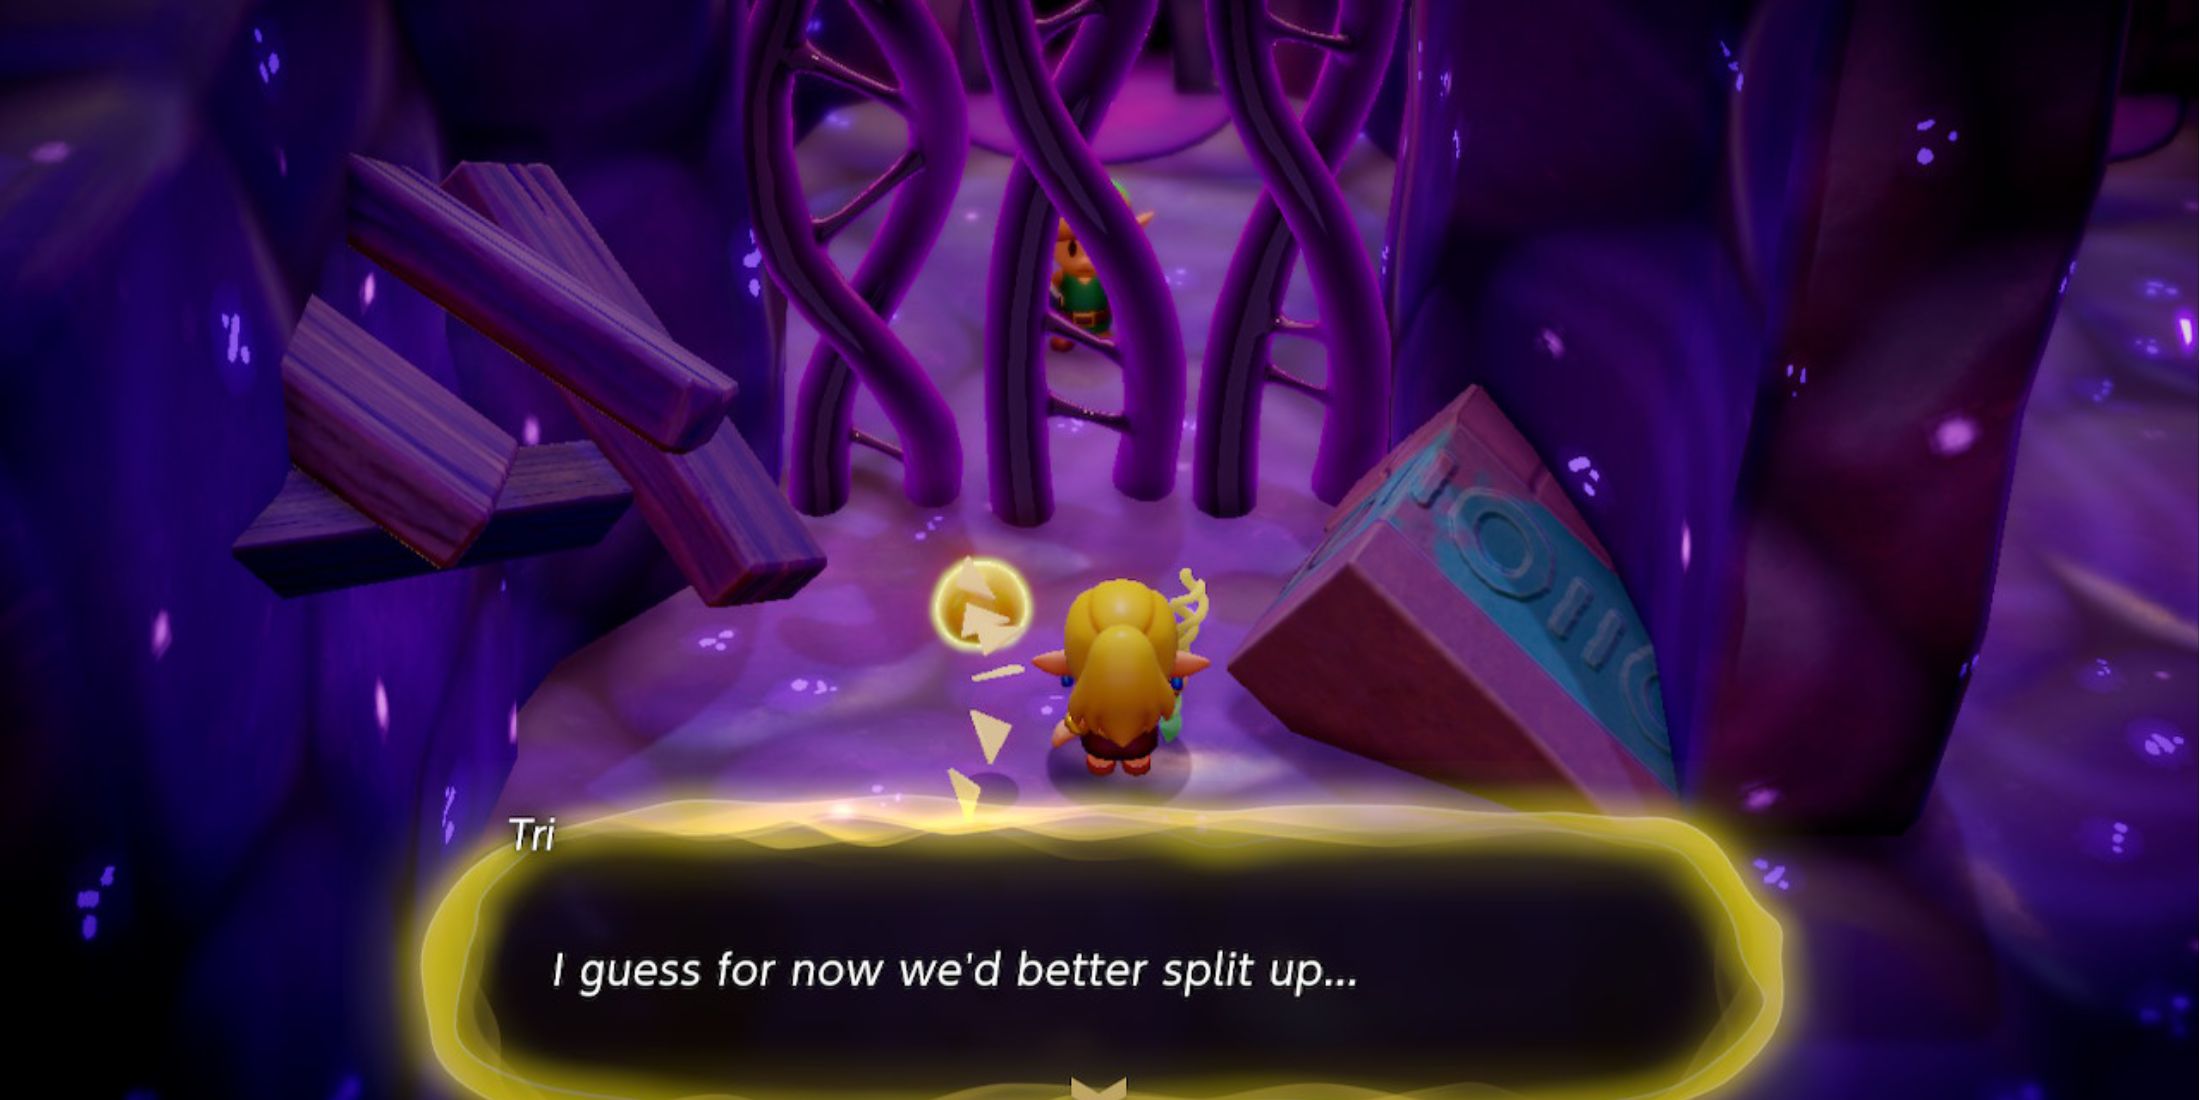
Once you’ve stepped into Null’s Body lair, proceed through the room ascending to reconnect with Link. Continue along the path that veers right followed by an upward trajectory to penetrate the initial battle chamber of Null’s Body within Echoes of Wisdom.
Since Zelda temporarily loses her Swordfighter Form abilities for this dungeon, call upon your most potent duplicates (such as the level 3 Darknut duplicate), and have them handle the tough tasks. After a succession of enemies emerge from blobs tracking Zelda’s position, advance into the chamber moving upwards and Link will unexpectedly be isolated behind some purple vines.
For the remainder of the dungeon, Zelda needs to work out puzzles to advance from one room to another by employing the echoes she has obtained. Following their separation, proceed towards the right and subsequently upward to gain entry into the initial puzzle located within Null’s Body.
First Separated Zelda & Link Puzzle
In this room, over by Zelda’s corner, you’ll spot a hidden switch tucked behind some violet grilles to your right. Aligning myself parallel with the solitary platform concealed behind those grilles, I can leverage my Long Distance Summon skill to generate a ranged damaging echo on that platform.
After calling out to your Echo, aim it towards the switch located at the upper right corner of the room. The Echo will autonomously assault it using a ranged attack, thereby activating it and unlocking the doors to the following room.
Additionally, you have the option to conjure an Echo that promptly inflicts harm on whatever it comes into contact with, similar to the Sea Urchin, right onto the target or focus point.
Ascend further to step into another battle arena, where Link and Zelda remain divided across the space. Again, unleash your most potent Summons against the adversaries on my side of the room. Once they’re subdued, utilize your Long Distance Summon skill to aid Link in dispatching his foes.
Climb upwards once more, you’ll discover a descending ladder that takes you into an underground side-scrolling part of this dungeon.
Null’s Body Sidescrolling Section
In this side-scrolling part of the game, you’ll encounter various platforms that are moving about the room. To progress, move to the left by using Echoes (avoid the Flying Tile Echo as it might shatter in this tight space), and when you reach the tunnel, utilize Water Blocks for ascending.
As an enthusiast, I’d like to share another strategy: You can harness the power of Bind and Follow the moving platform heading towards the top-right corner in this location. This allows Zelda to be pulled up through the tunnel effortlessly.
Moving forward, you’ll encounter a room brimming with Gustmasters. You have two options to handle them: either create a pathway above them (or utilize Flying Tiles), or try to harness their gusts to carry Zelda to the next platform. It’s more straightforward to bypass these Gustmasters and navigate normally, so keep going to your left until you reach an area with vents.
To reach the isolated block suspended in this region, you can utilize the magical abilities of Flying Tiles and Strandtula Echoes. Once there, switch to Water Blocks for an effortless journey to the upper left corner. Ascend further until you spot a ladder, which will guide you back to the dungeon.
Second Null’s Body Puzzle Room
Leaving the ladder behind, make your way right to locate the second “Null’s Body” puzzle chamber. Inside this room, you need to direct Link towards a pressure plate positioned in the center-top of the room. The most convenient approach to get Link up there is by employing the Platboom Echo.
Activate the “Long Distance Summon” spell to produce a Platboom directly below the overhanging ledge at a distance. Wait for Link to leap onto it. As the Platboom ascends, he’ll jump off and slice through the hanging vines with his sword. Finally, upon landing, he’ll press the pressure plate, thereby unlocking the pathway into the adjoining chamber.
As a gamer, here’s what I discovered: Instead of relying solely on Platboom Echo for height gain, you can also establish a direct bind with Link and strategically navigate the terrain. There’s a small block located at the top-left corner in Link’s area, which when utilized correctly, can elevate him sufficiently to reach the high ledge on the far right of his room.
If you don’t possess a Platboom, Zelda has the ability to construct a staircase reaching three blocks in height. First, summon a boulder and a tree on top, followed by just a tree, then a box, a trampoline atop the box, and another trampoline beneath it. Be sure to release the Summon button early to adjust the distance where your Echoes materialize.
Reunite With Link To Face Null
Move into the next chamber where you’ll meet up with Link, as together, the Hero and Princess Zelda make their way towards the concluding part of the Echoes of Wisdom dungeon that is the Null’s Body. In this final leg of the journey, simply trail behind Link as he guides you through the remaining chambers within the Null’s Body dungeon, ultimately leading to the entrance of the boss room.
When you’re ready to beat Echoes of Wisdom, jump into the hole to face Null alongside Link.
Echoes of Wisdom Null Boss Guide
The Final Boss Of The DLC – With No Swordfighter Form
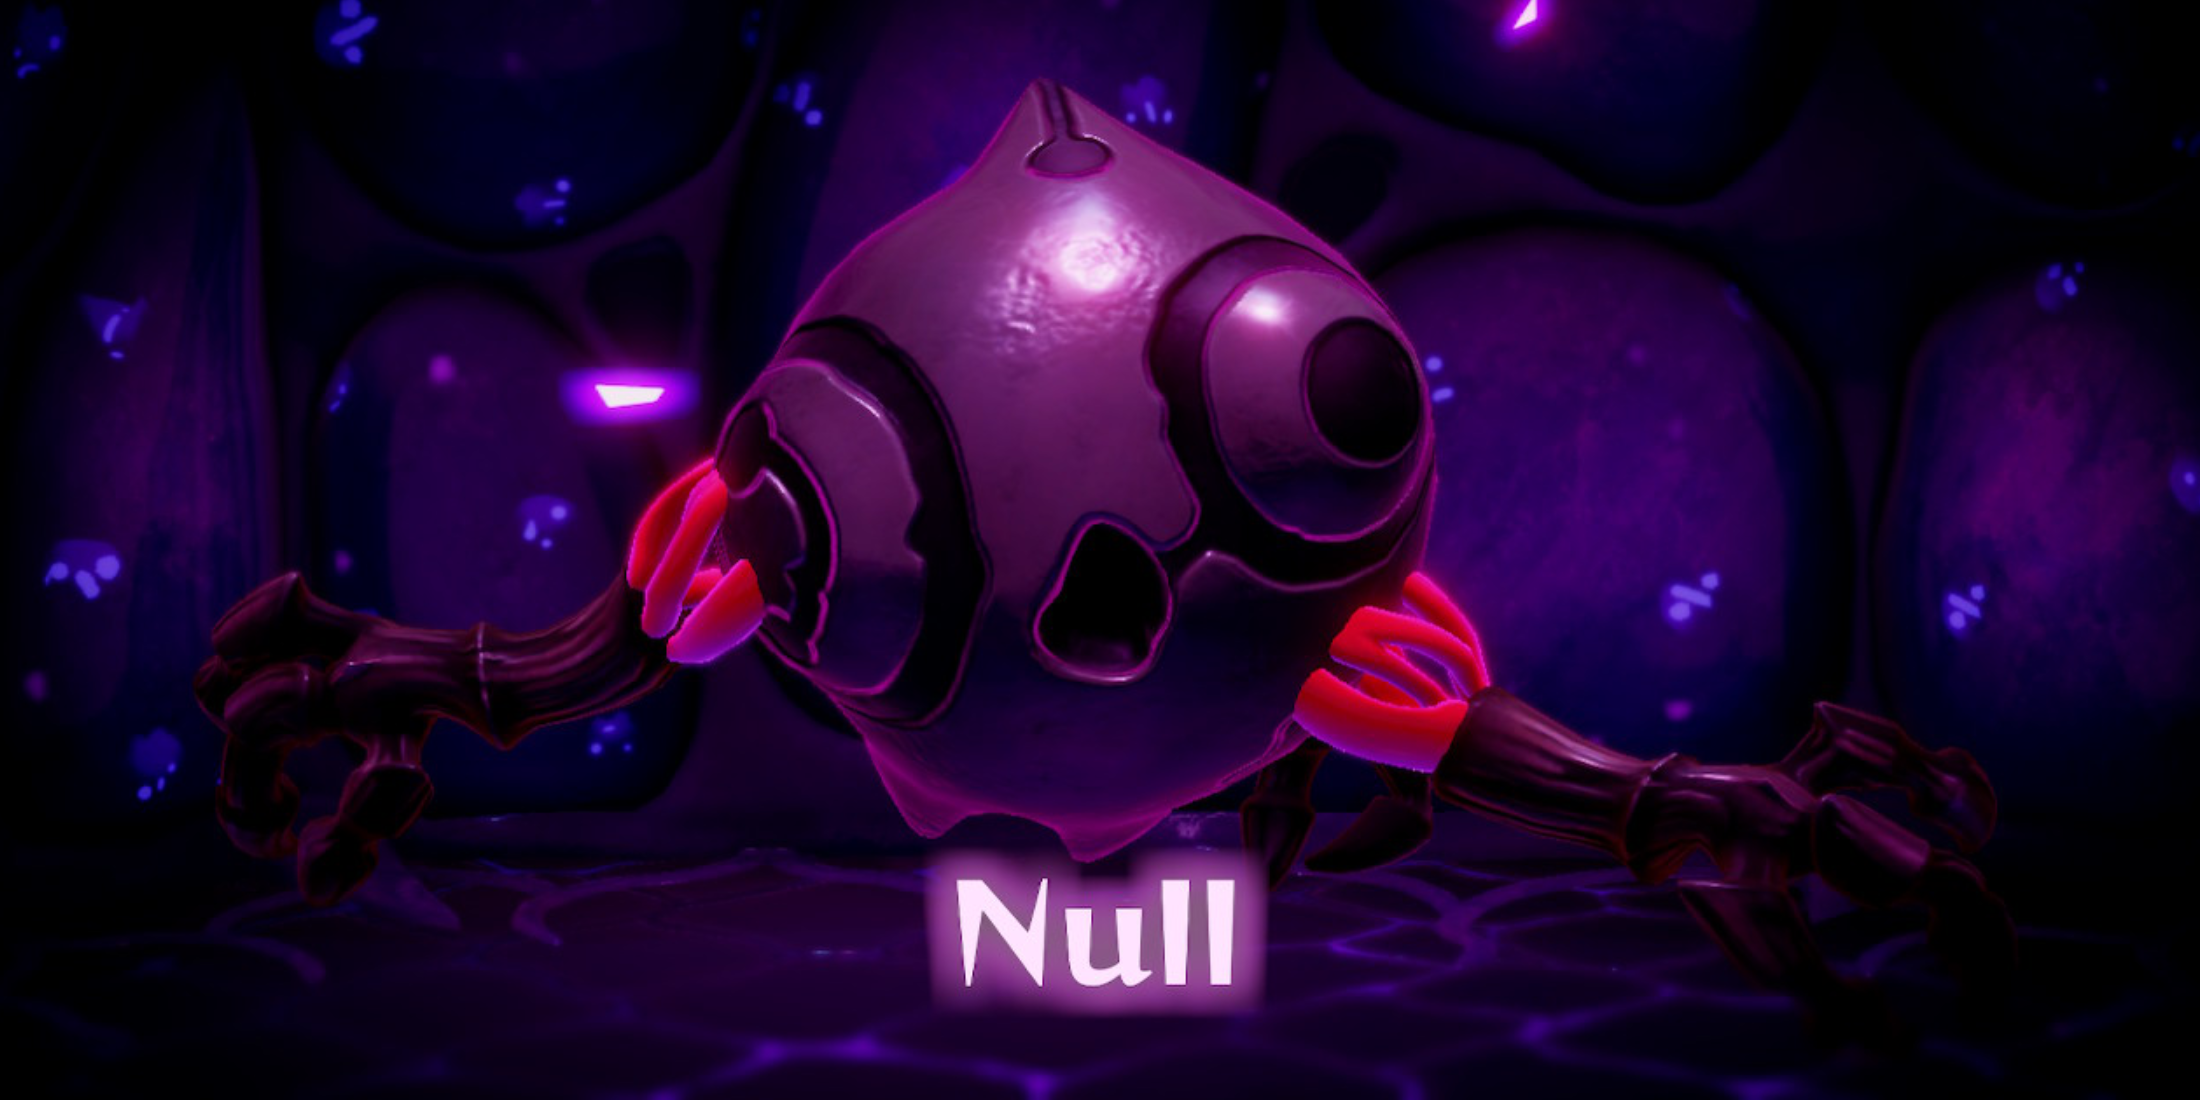
Essentially, Null consists of three distinct stages. The initial and final stages present a top-down perspective, whereas the second phase unfolds in a side-scrolling underwater environment. During each stage, Null learns new abilities and necessitates fresh strategies for defeating it.
In this battle, the challenge level increases significantly compared to the rest of the game unless you’re well-prepared, so remember to whip up some Smoothies and Potions and fill your Fairy Bottles before venturing into the dungeon.
You cannot save inside Null’s Body, so if you need to make some Smoothies for buffs, you will need to repeat the previous rooms. Thankfully the rest of the dungeon isn’t too difficult, and to beat Null you will definitely want plenty of healing.
Phase One Null Boss Strategy
In the initial stage, the battle unfolds within a confined, sparsely spacious area. Here, your primary objective is to inflict sufficient damage on all of Null’s Arms, aiming to annihilate them.
In a different phrasing, let me say: The null entity will appear with three arms and then forcefully strike the ground, sending projectiles originating from the ground straight towards Zelda’s position.
If dodging isn’t an option for you, call forth a 1-Tri Power Echo shield to ward off this attack instead. However, due to its slow movement, it would be wiser to simply dodge if possible.
During this phase, the boss will forcefully strike the ground with its spherical form, inflicting significant damage in a surrounding area. While it’s an attack to be aware of, you can generally avoid it with ease. However, if it poses a problem for you, keep an eye on the boss as it tends to leap into the air. Typically, after jumping, it will come crashing down, providing you with a moment to move away safely.
When fixated on one of its appendages, deploy Long Distance Summon to generate an impactful Echo close to each tentacle. Placing the Echo near where the boss requires striking ensures optimal effectiveness, and simultaneously protects Zelda from Slam harm.
When you damage an arm, Null will go into a wild state and leap onto the walls. From multiple locations around the top of the boss’s arena, it will slam with its arms. Focus on eliminating each arm individually to calm Null down again.
Upon returning,Null will start causing destruction as it slams with its arms, leaving behind trails of damage. Be mindful of your positioning and steer clear from these affected areas when attempting to target one of the boss’ arms.
If you take down another limb, it’ll hide within its fortifications again. To defeat the boss for good during this interlude, use a mix of damaging attacks and powerful slams. Once you’ve finished this stage, the boss will withdraw and move on to Phase 2.
Phase Two Null Boss Strategy
During the second stage, Zelda will dive underwater to engage Null in a side-scrolling underwater battle. As the fight progresses, Null may also summon bosses, beginning with Vocavor from the Jabul Ruins. Be careful to dodge the large whirlpools that Vocavor produces, as multiple whirlpools can cause difficulties if they appear simultaneously on screen.
In this underwater part, keep an eye out for whirlpools and adversaries, but prioritize locking onto the boss and calling upon Chompfins to assault it. The phase tends to pass swiftly with the assistance of Chompfin, and if your Tri Level is high enough, you can even summon two simultaneously.
Once sufficient harm has been inflicted, both the boss and Link will be pulled into the arena for the subsequent boss fight, where they’ll encounter an enhanced version of the initial phase known as Null Phase 3.
Phase Three Null Boss Strategy
In Phase 3, Null will appear with five arms and call upon Echoes from the diverse roster of game bosses to assist it. This battle could stretch for quite a while, but if you adhere to the mechanics and avoid rushing headlong, you should ultimately emerge victorious.
Each of these Echoes is a copy of one of the bosses of the seven dungeons leading up to Null’s Body, each of which will use one of its iconic moves from their boss fights. After performing its move, each Echo will disappear.
- When Null summons the Mogryph boss, it will launch Tornados at Zelda
- When Null summons the Seismic Talus boss, it will spin in place, dealing damage in a close AoE
- When Null summons the Ganon boss, it will perform its lunging stab attack
- When Null summons the Skorchill boss, it will spin while moving around the room in a smaller area than the Talus boss Echo
- When Null summons the Gohma boss, it will create Spider Webs over the arena, which must be Burned to move
As you move into Phase 3, concentrate on eliminating the two front arms located near the boss’s eye socket initially. By doing so, the boss will find it harder to attack Zelda, making it more vulnerable to further attacks. Regardless of your approach, ensure that you tackle one arm at a time to advance through this phase successfully.
Initially, only the Seismic Talus and Mogryph boss will be called by the boss. Once you’ve inflicted sufficient damage on Null and pushed it into the walls for a break, it will start summoning Darknut enemies. Also, the Arms hidden in the walls may attempt to seize Zelda from below at random moments. To reinstate Null, concentrate on defeating the Wall Arms one by one.
In the subsequent segment of the third stage, Null is also expected to bring forth Ganon and Skorchill as formidable foes. Upon summoning Ganon, three replicas will appear in the combat zone, charging towards Zelda’s position. When Skorchill is called forth, it will produce two duplicates that ricochet off each other, covering a significant portion of the battlefield for the boss encounter.
Keep concentrating on attacking Null’s uncovered arms with your most powerful Echoes, using Long Distance Summon to minimize damage taken. Attack each Arm individually as they persistently attempt to seize Zelda and summon more formidable enemy Echoes. Once Null goes into another intermission and retreats back into the walls, you can take a moment’s rest.
In due course, you’ll advance into the climactic phase of the Null boss battle, as it goes into a wild frenzy. After this brief intermission at the second wall, all its moves will become stronger. It will also start summoning the Gohma boss, so be prepared to use an Ignizol to burn through any webs it creates or you’ll find yourself moving slowly and taking heavy damage. Also, note that the boss now summons more Ganon and Skorchill bosses as it spins back towards these areas.
To fortify your health, consume smoothies regularly. Be cautious of engaging summoned bosses and dodging Null’s assaults. Instantly recall your powerful echoes when they perish, persistently resummoning them until you successfully conquer Null.
Once you’ve defeated the boss, take a moment to unwind. Let the final moments of “Echoes of Wisdom” unfold before your eyes – congratulations!
Read More
- ENA PREDICTION. ENA cryptocurrency
- USD PHP PREDICTION
- SOL PREDICTION. SOL cryptocurrency
- BTC PREDICTION. BTC cryptocurrency
- SHIB PREDICTION. SHIB cryptocurrency
- Red Dead Redemption: Undead Nightmare – Where To Find Sasquatch
- LUNC PREDICTION. LUNC cryptocurrency
- USD ZAR PREDICTION
- USD COP PREDICTION
- HEC/USD
2024-10-10 01:44