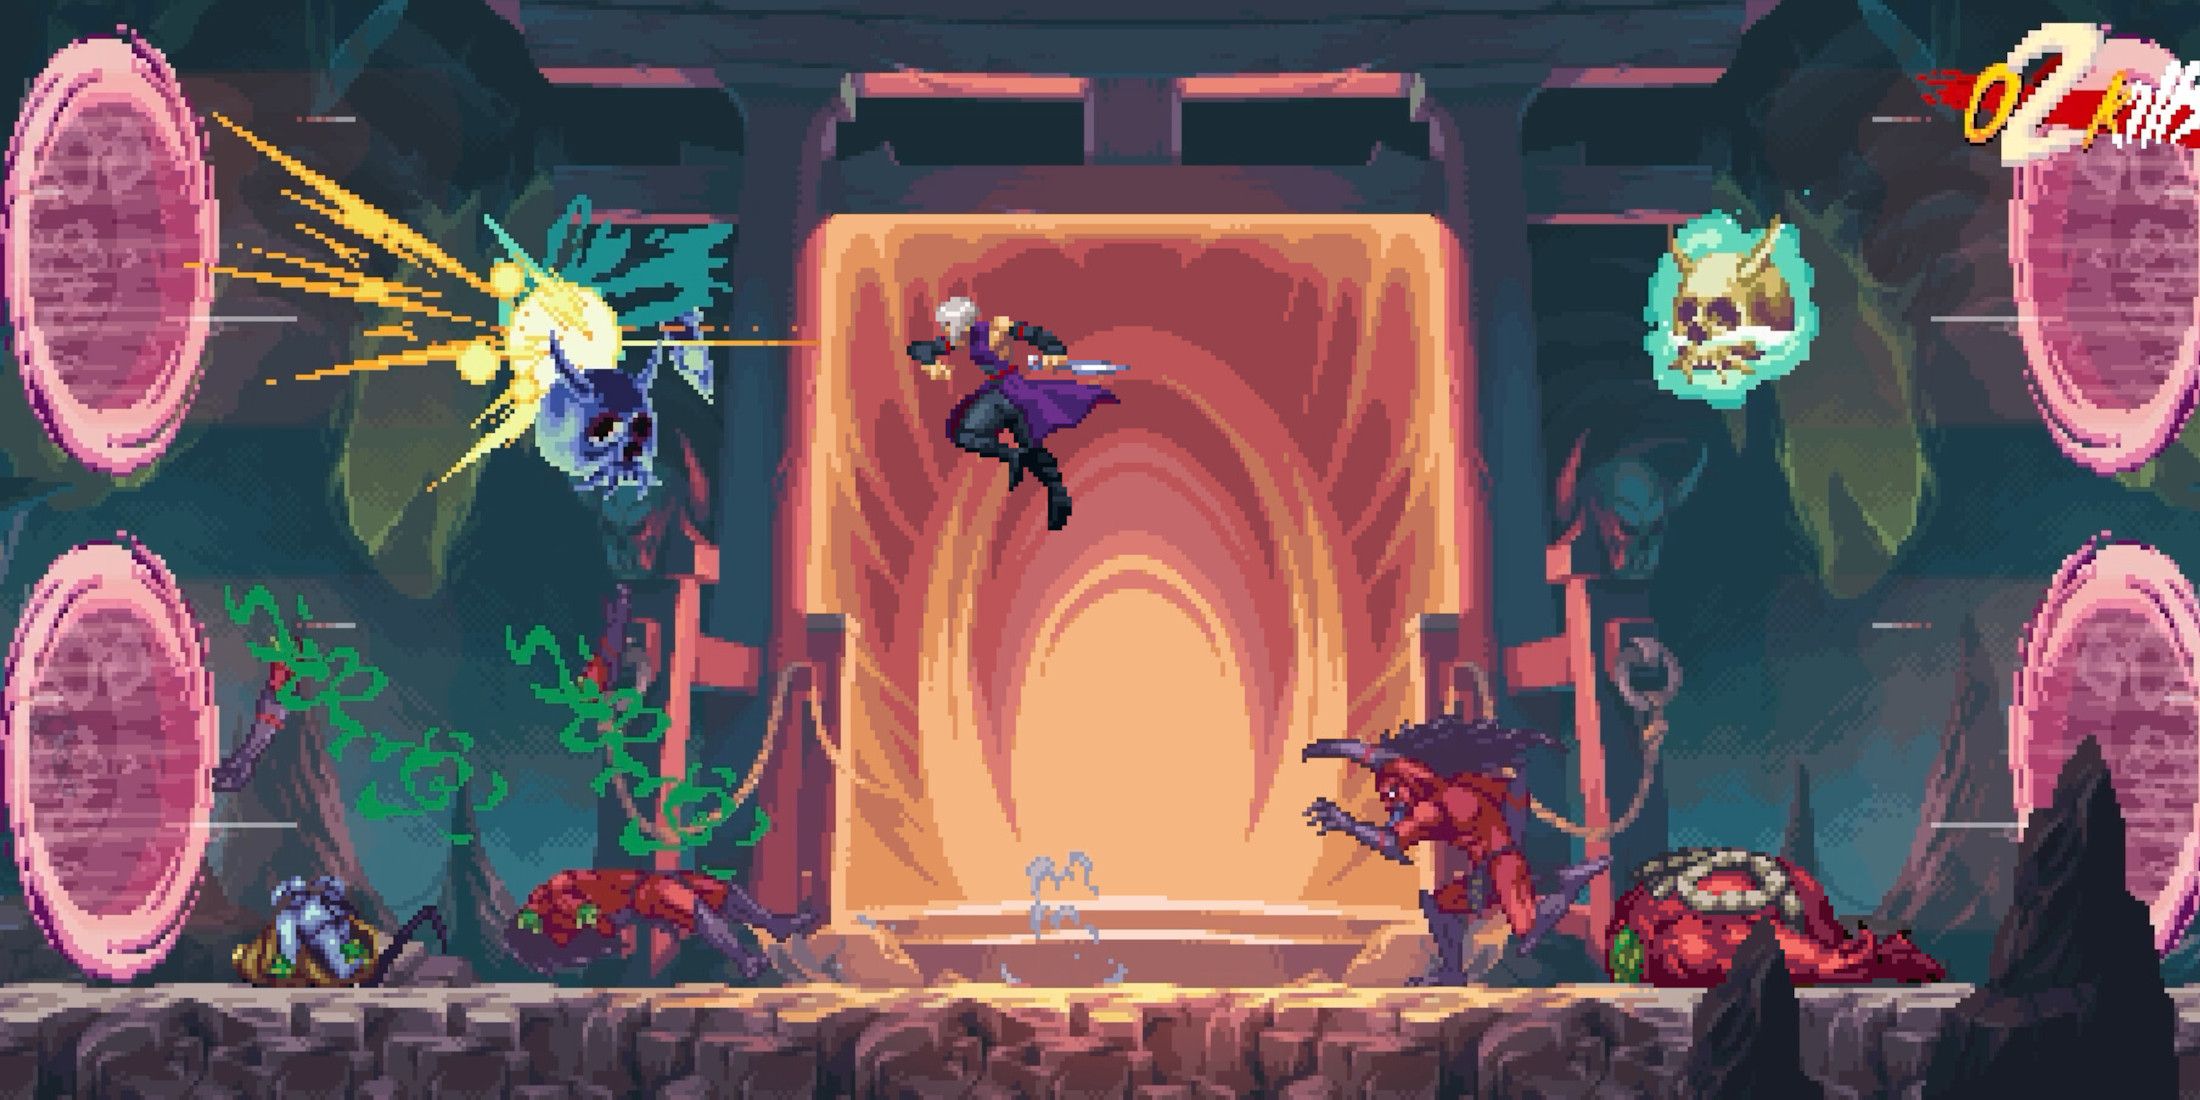
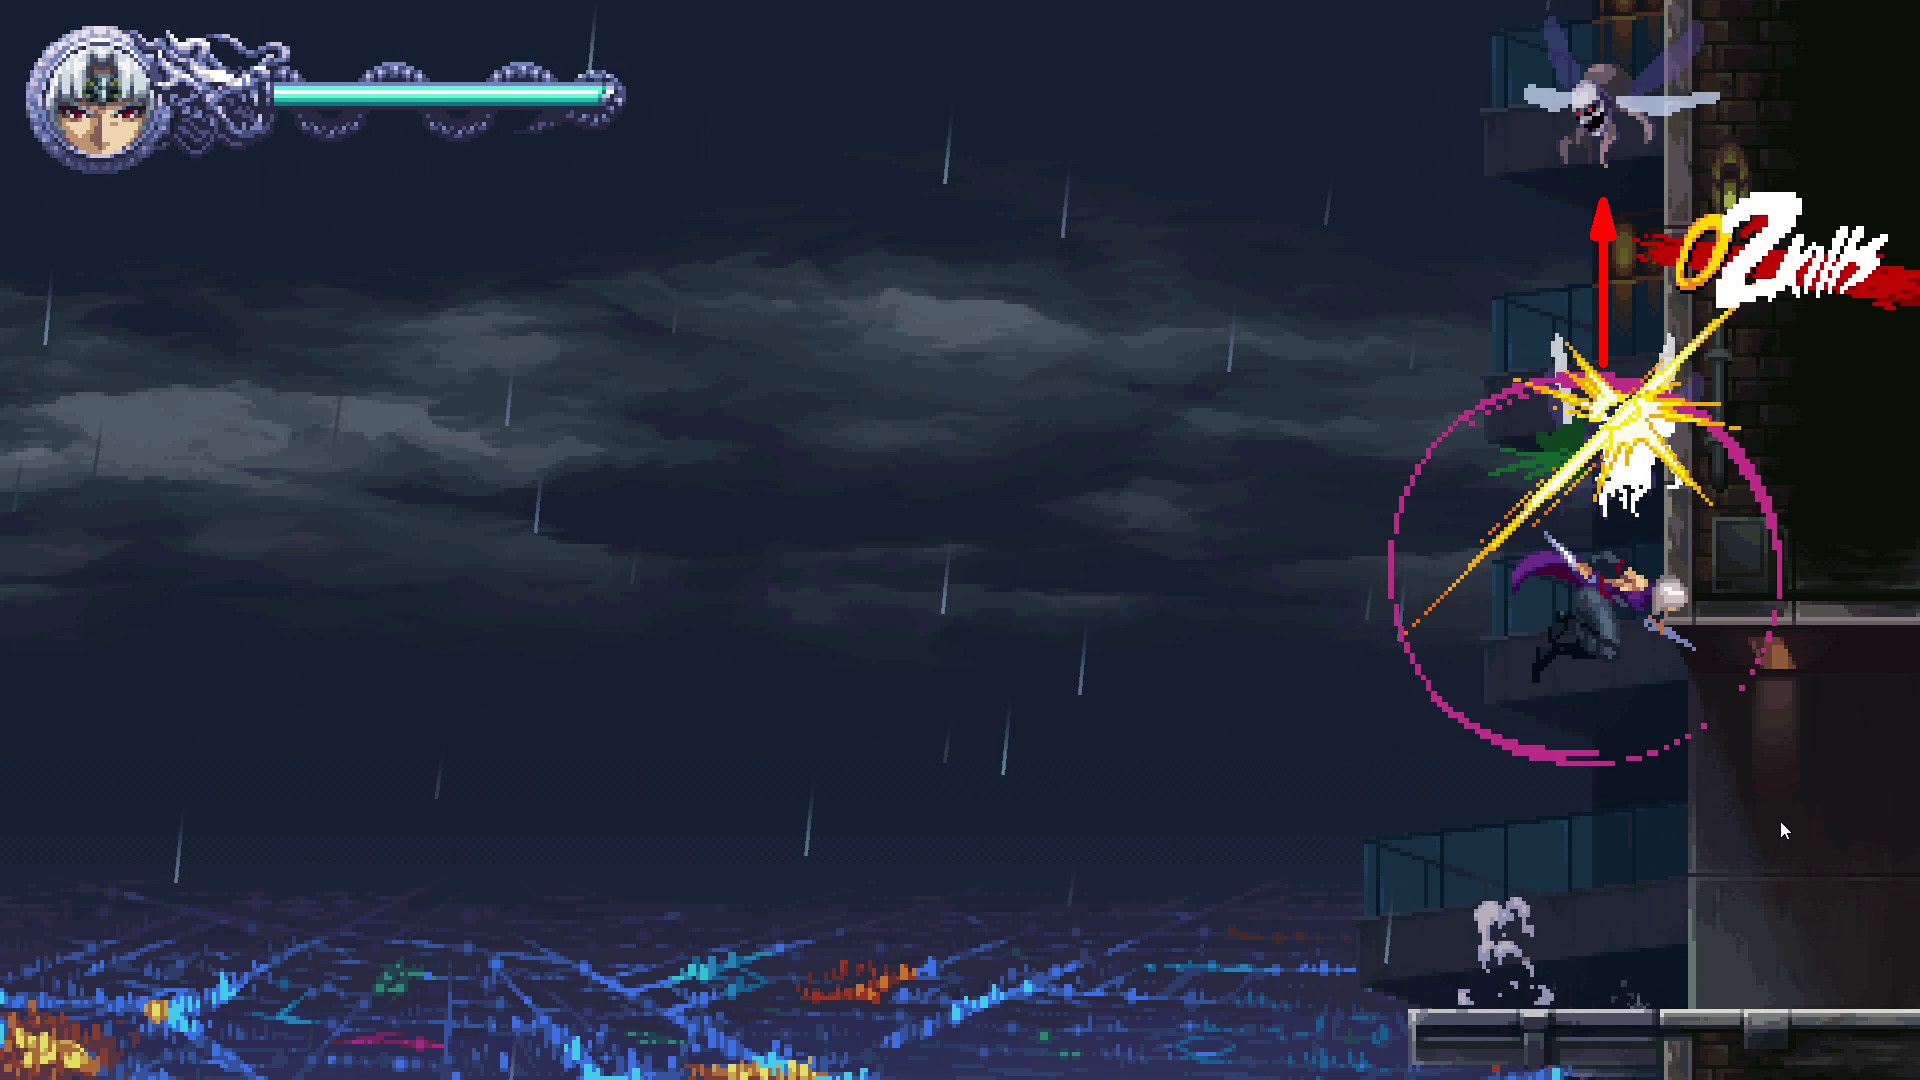
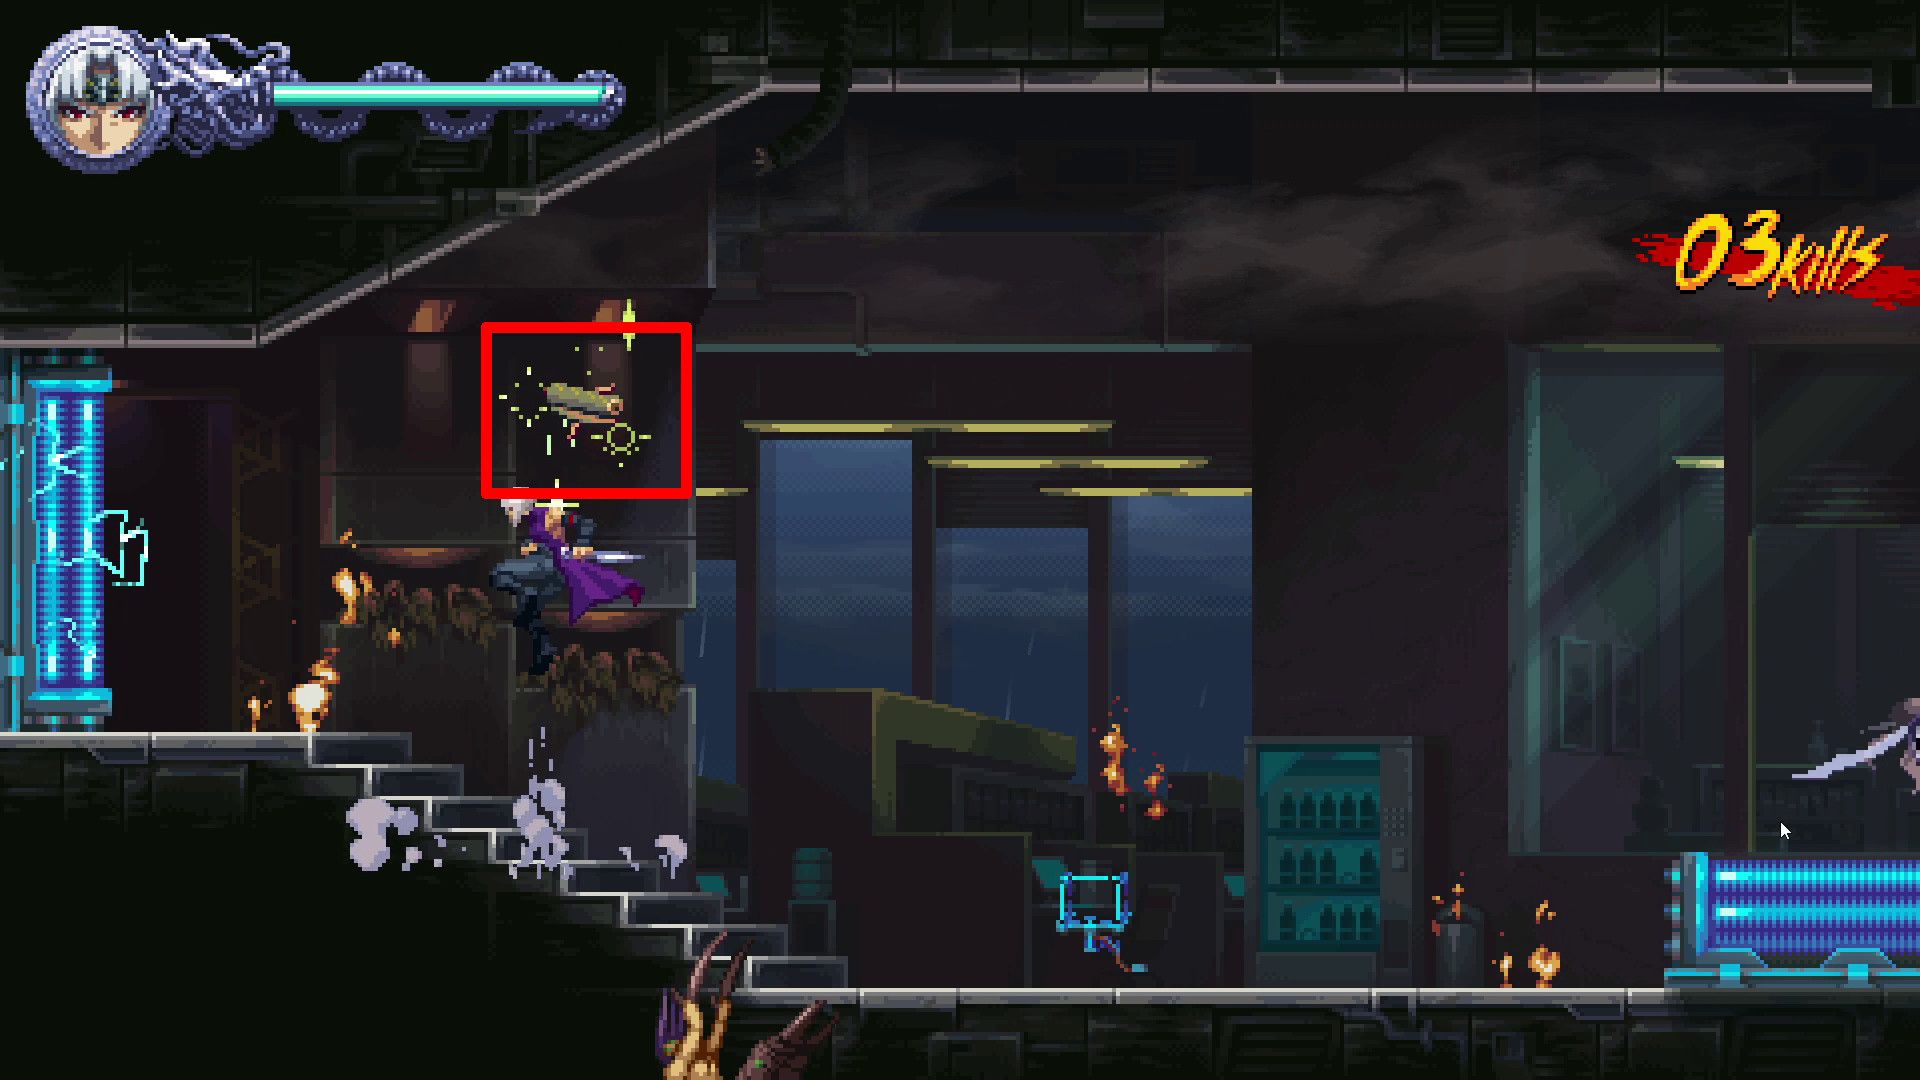
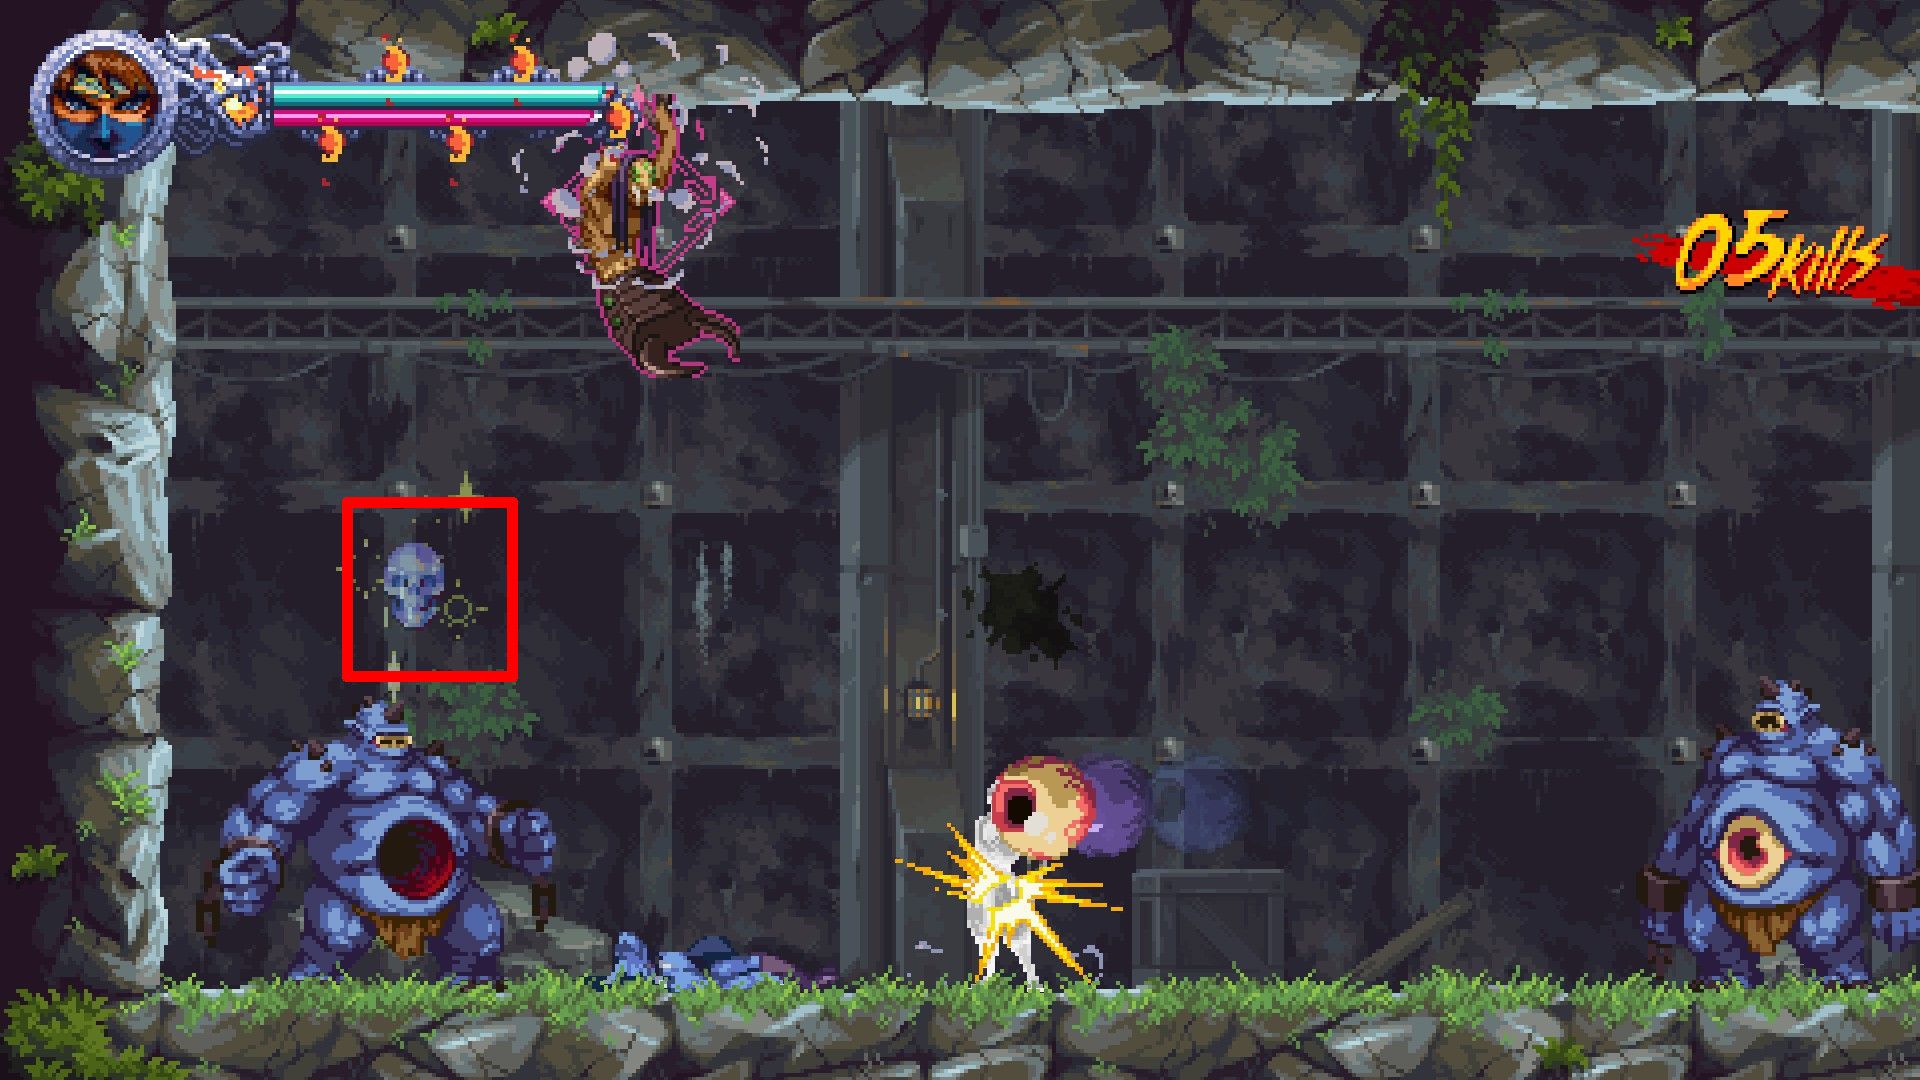
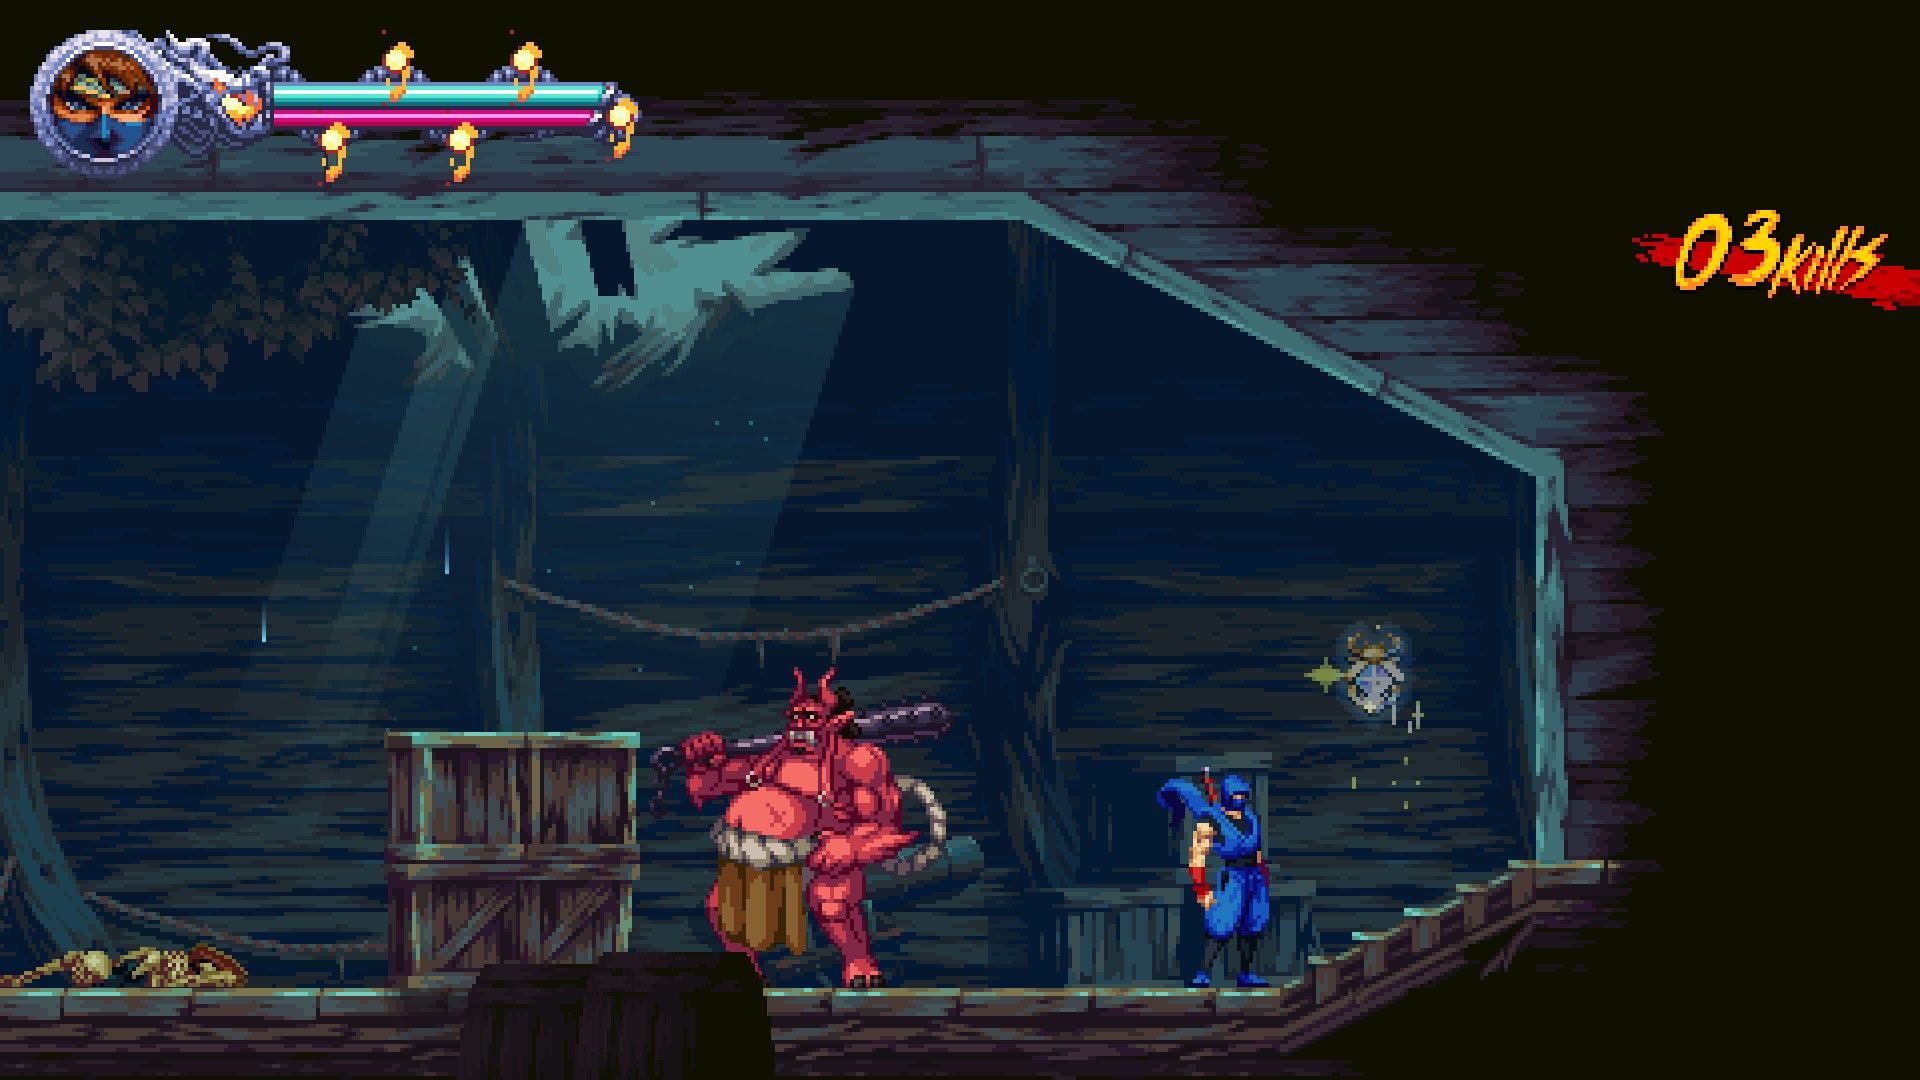
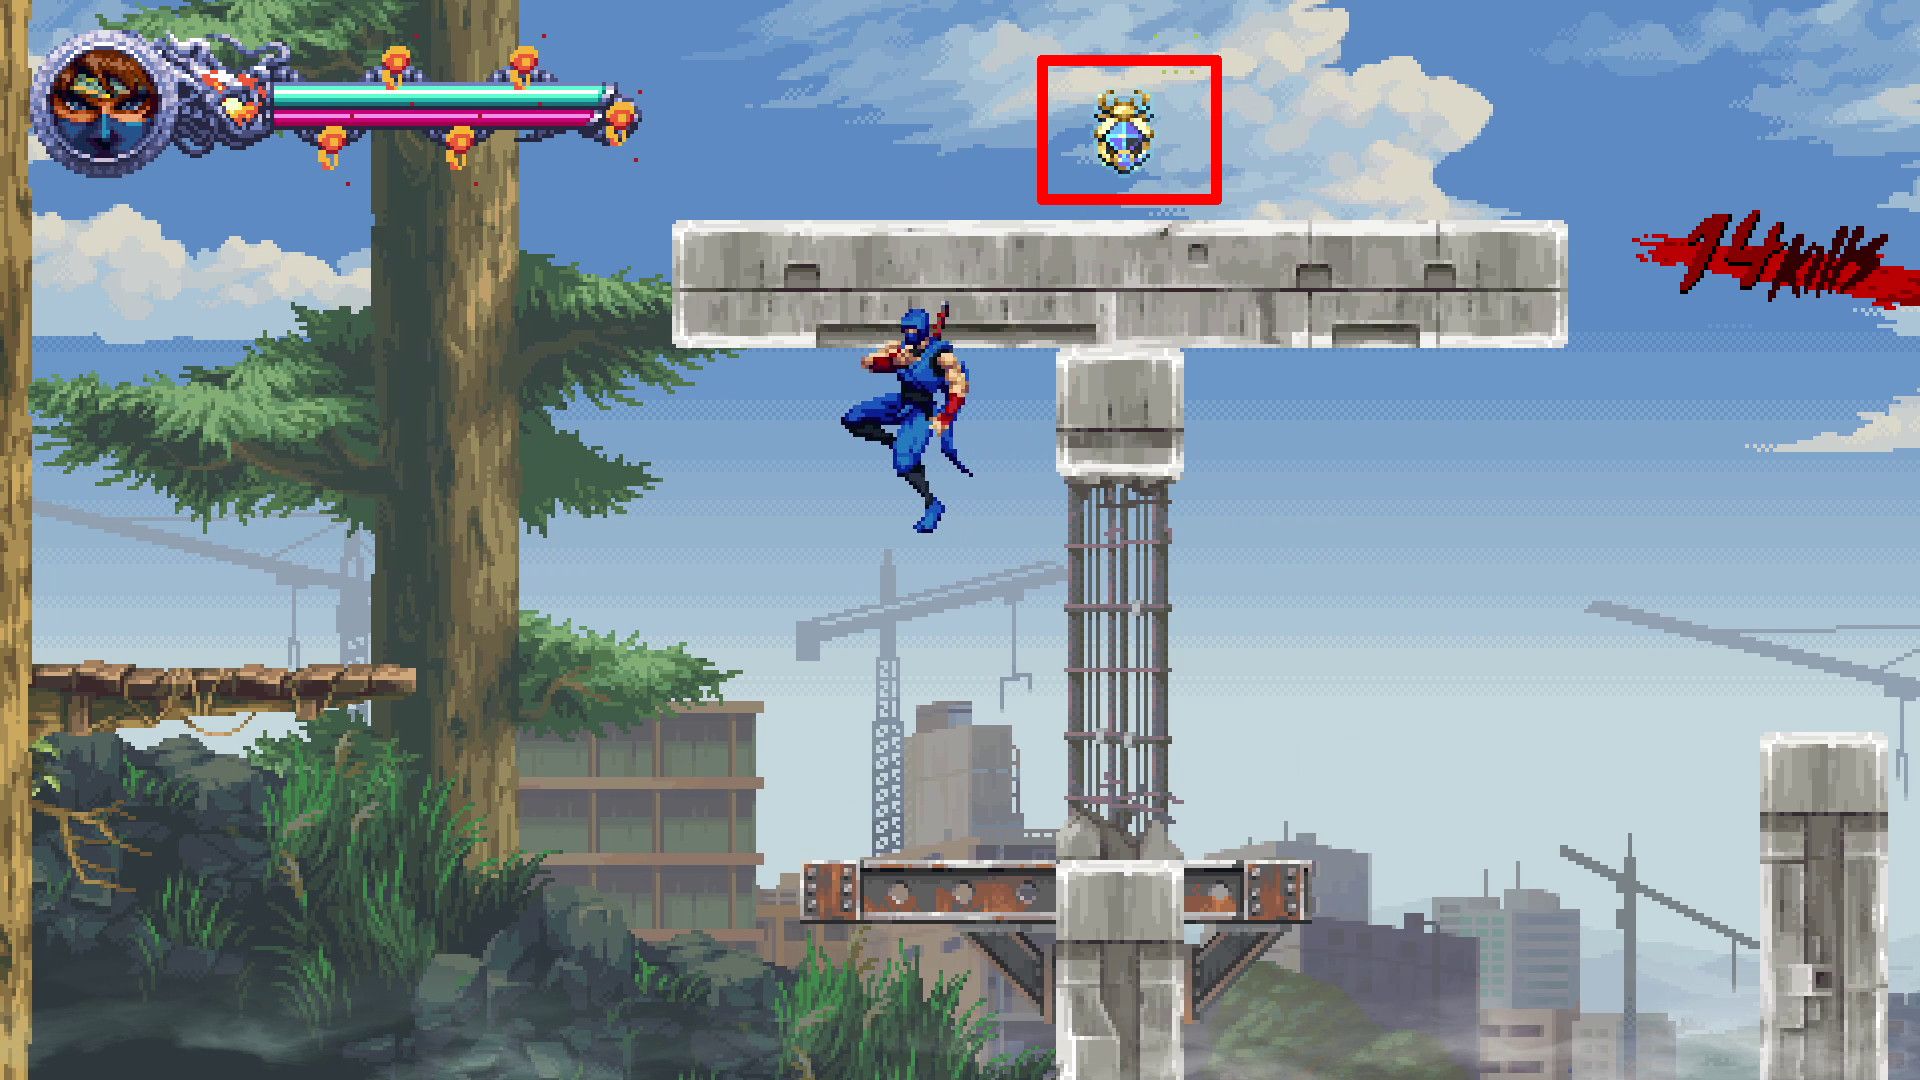
In the game Ninja Gaiden: Ragebound, you’ll discover three distinct types of items to gather: Crystal Skulls, Golden Scarabs, and Scrolls. Although players aren’t required to find every item in the game, there are numerous benefits to doing so. For instance, Golden Scarabs can be utilized to unlock new gear, and Scrolls grant access to hidden stages. This guide is designed for gamers who aim to locate all collectibles within Ninja Gaiden: Ragebound, and it’s structured by Act.
A collectible can only be considered truly obtained when the accompanying task or objective is successfully finished following its acquisition. Consequently, if a player decides to revisit a level to snag a collectible they overlooked earlier, they need to be ready to go through that stage from start to finish once more.
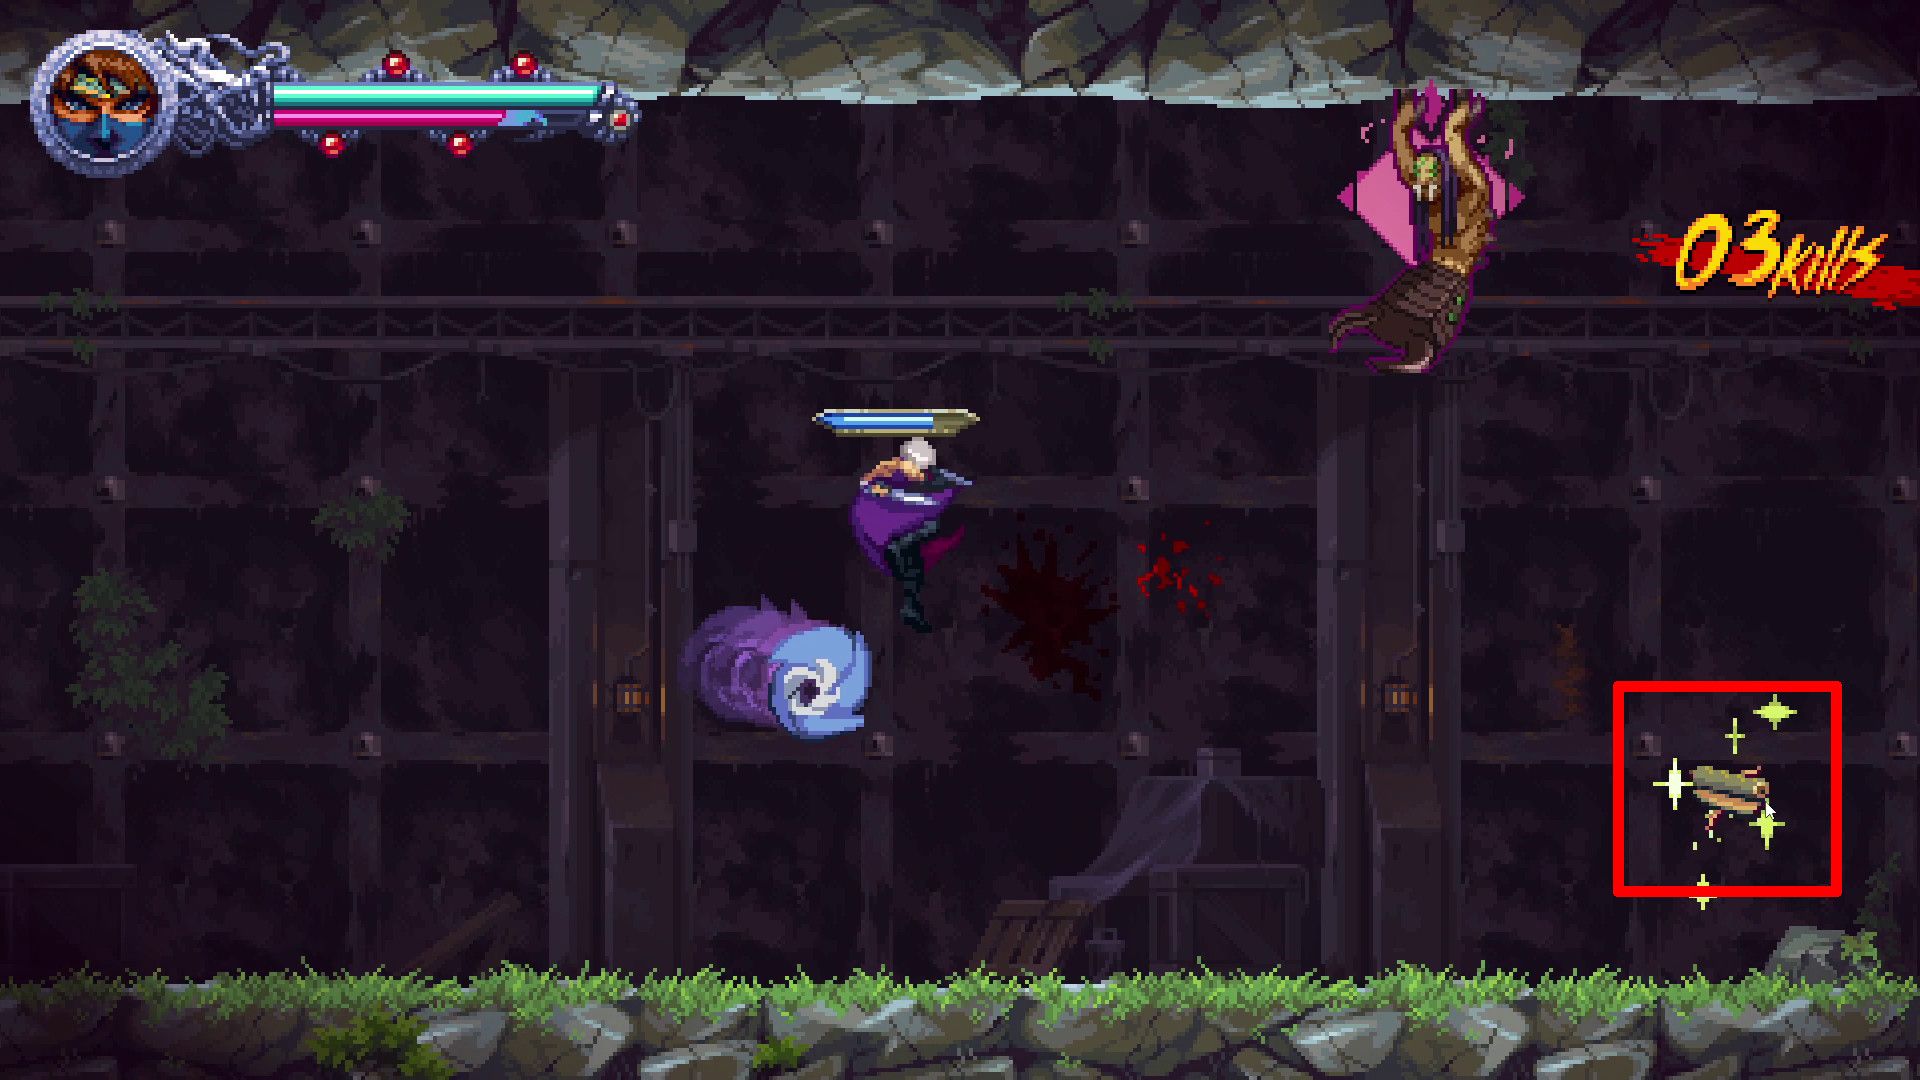
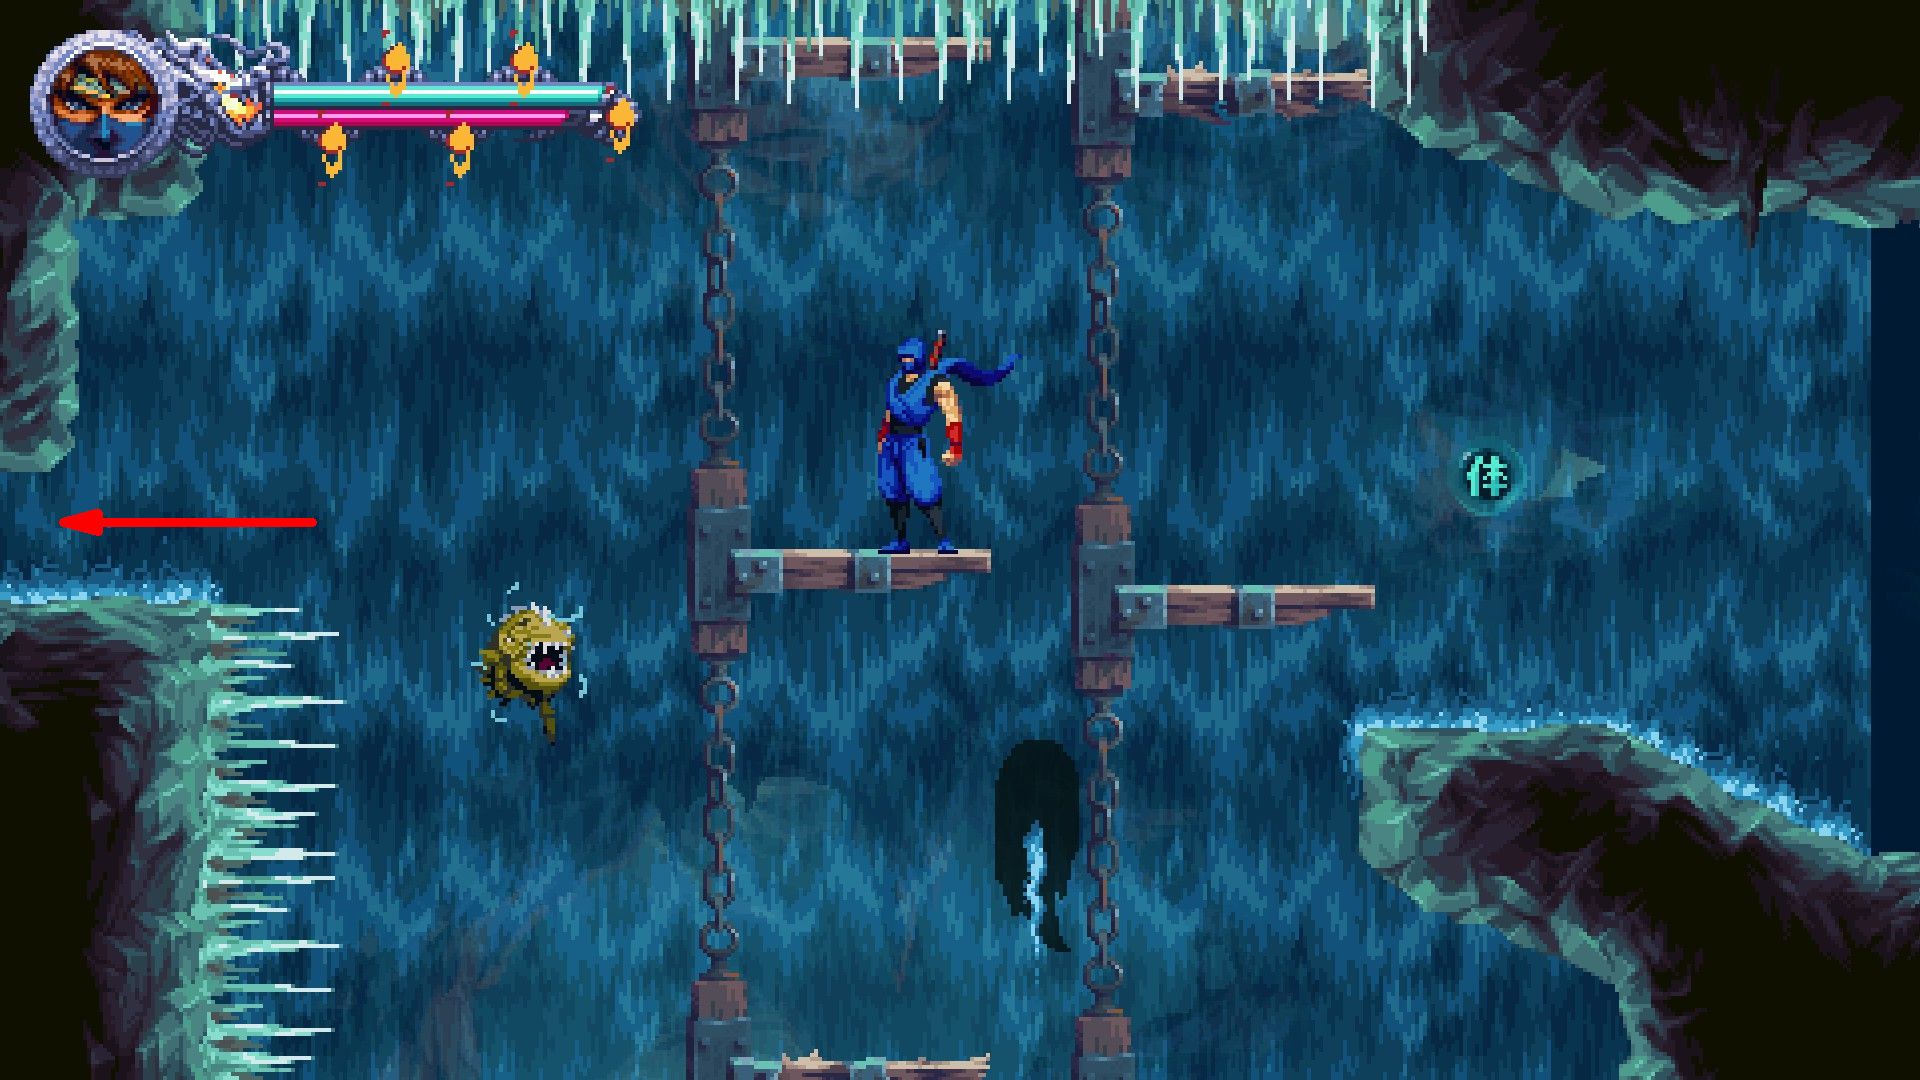
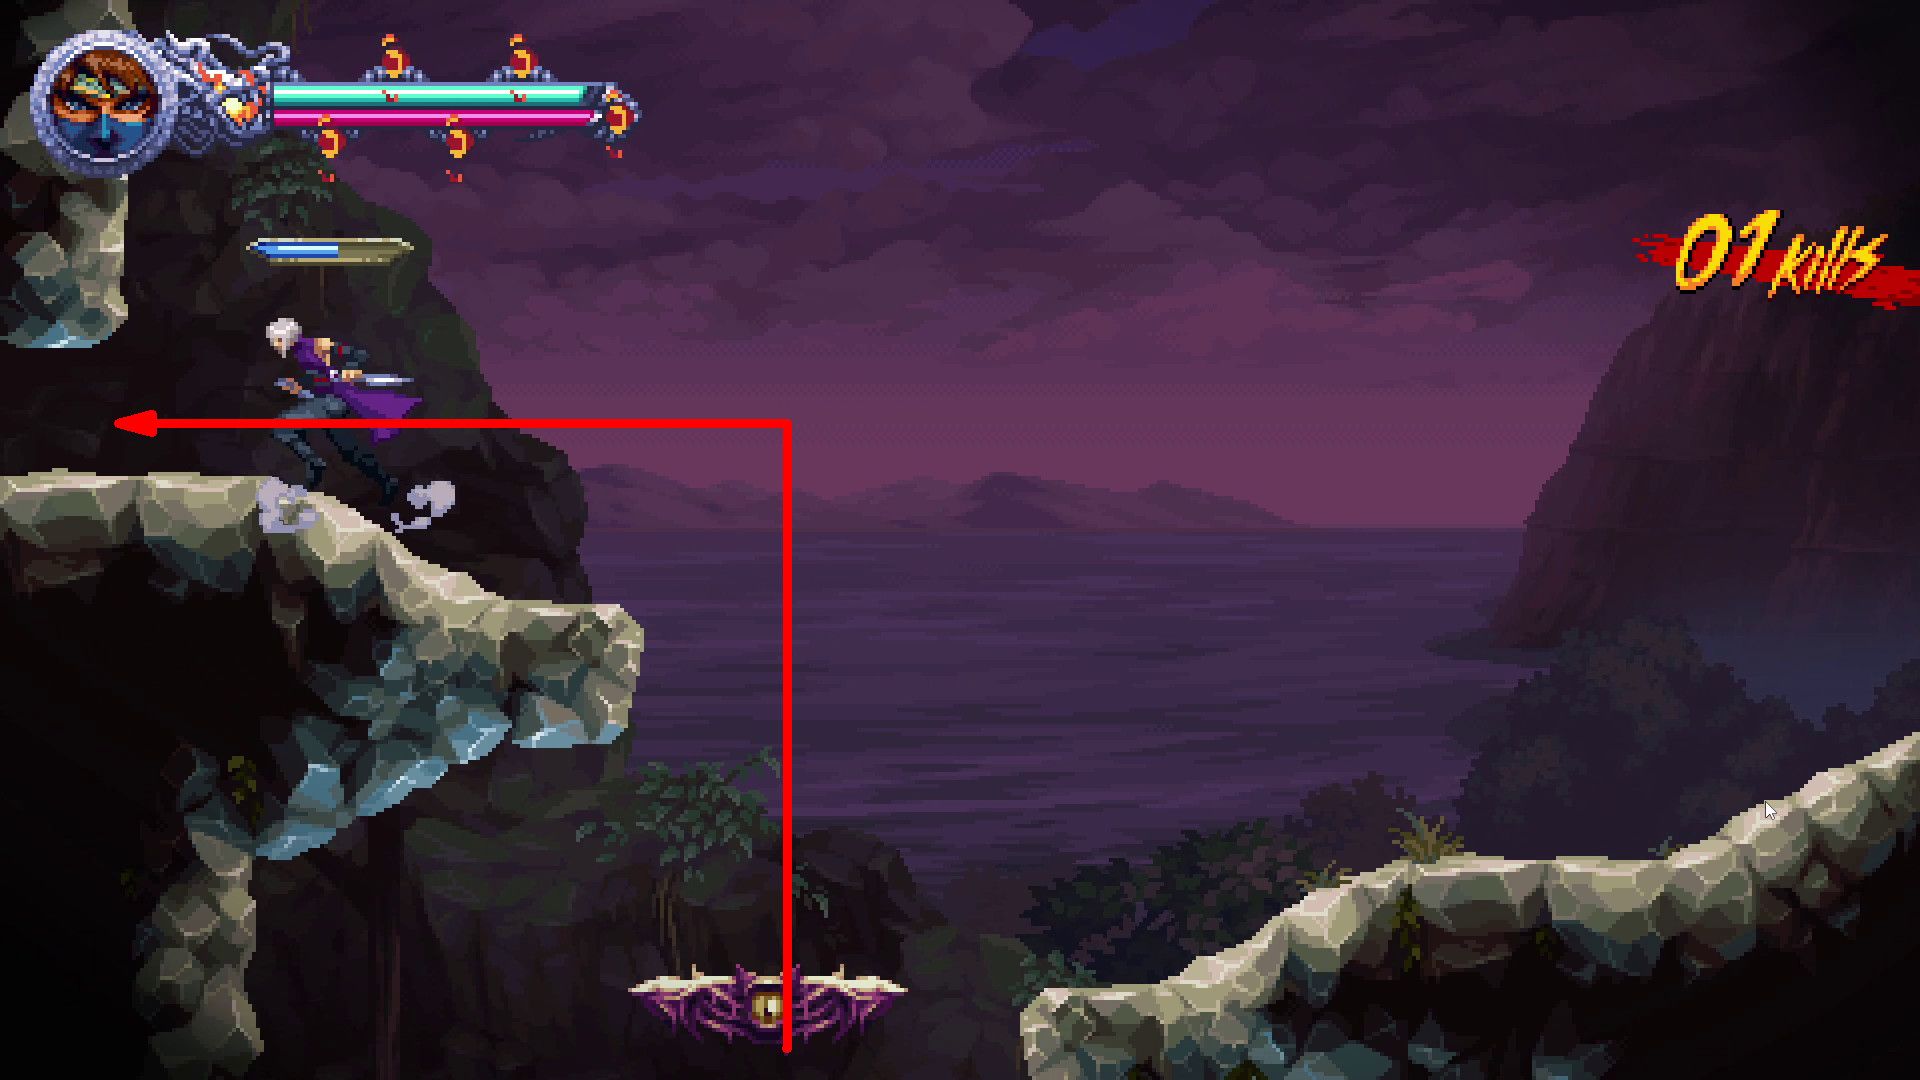
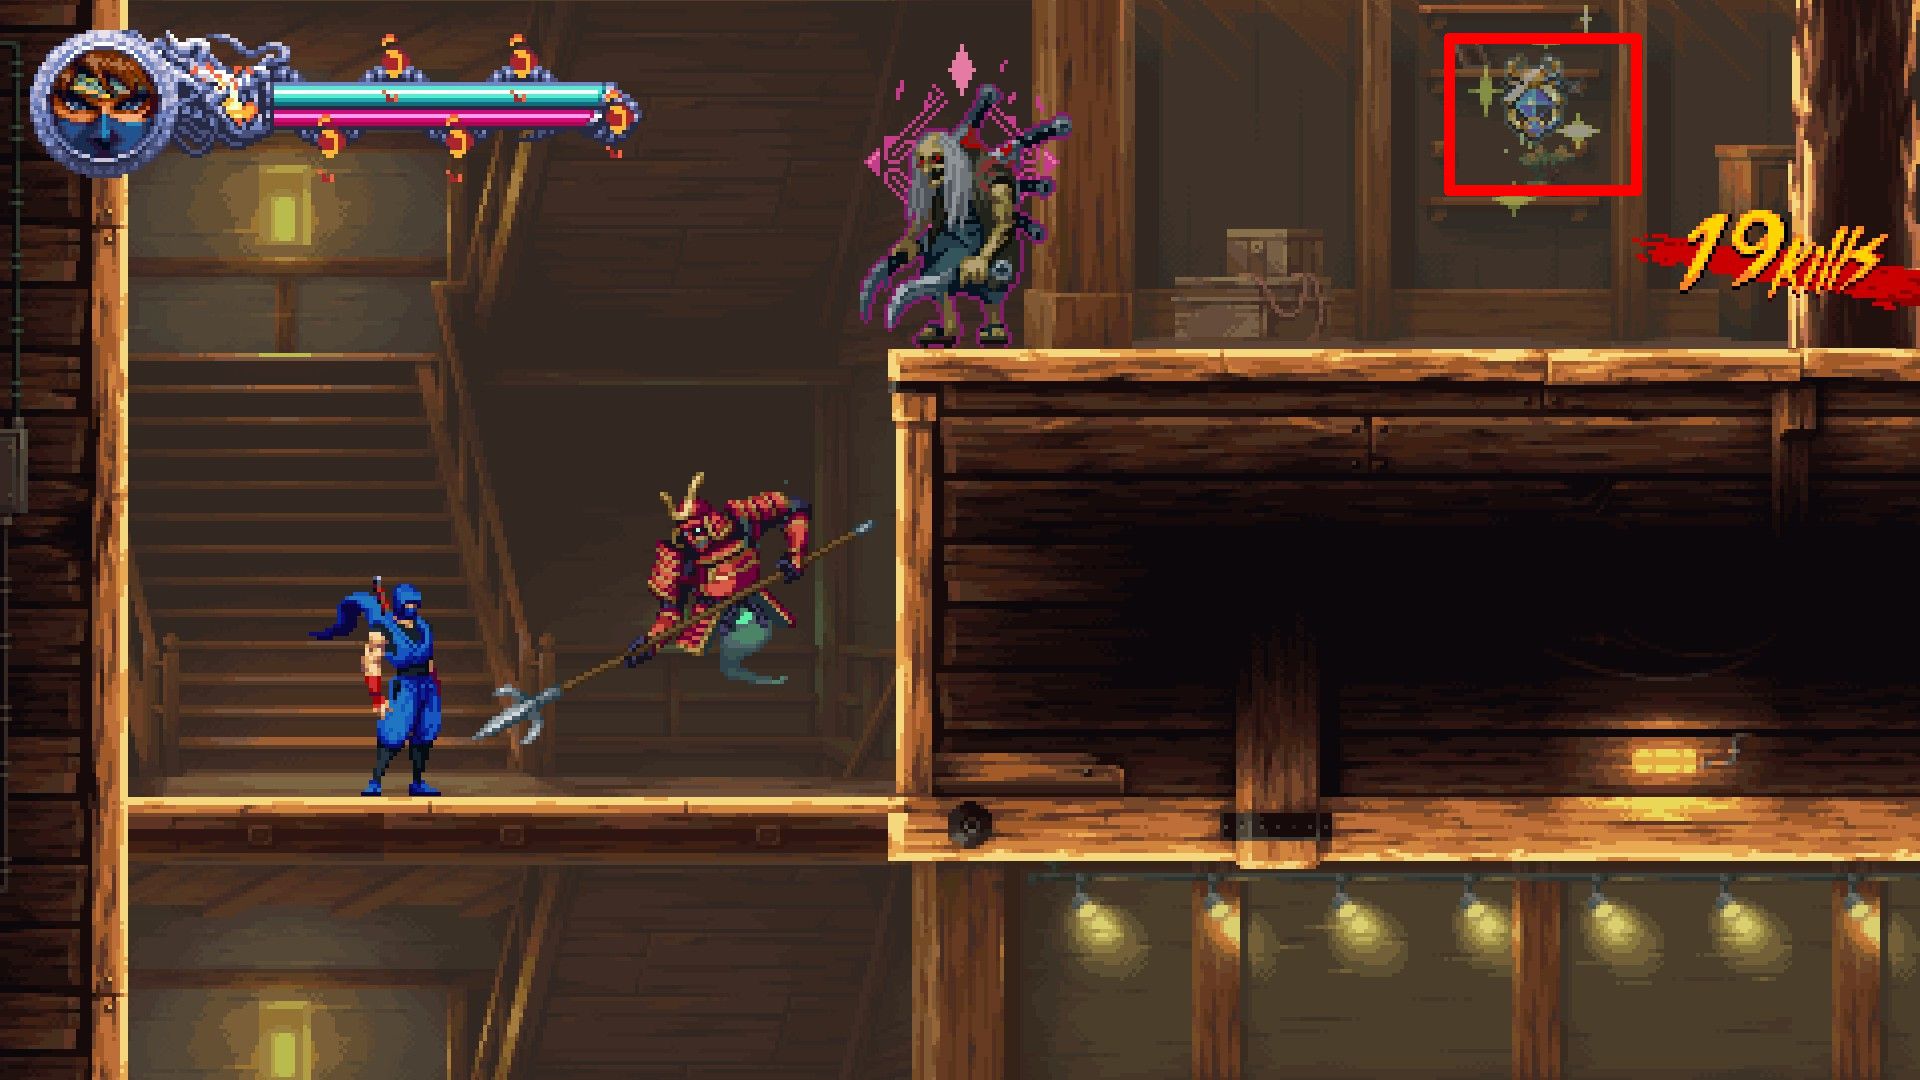
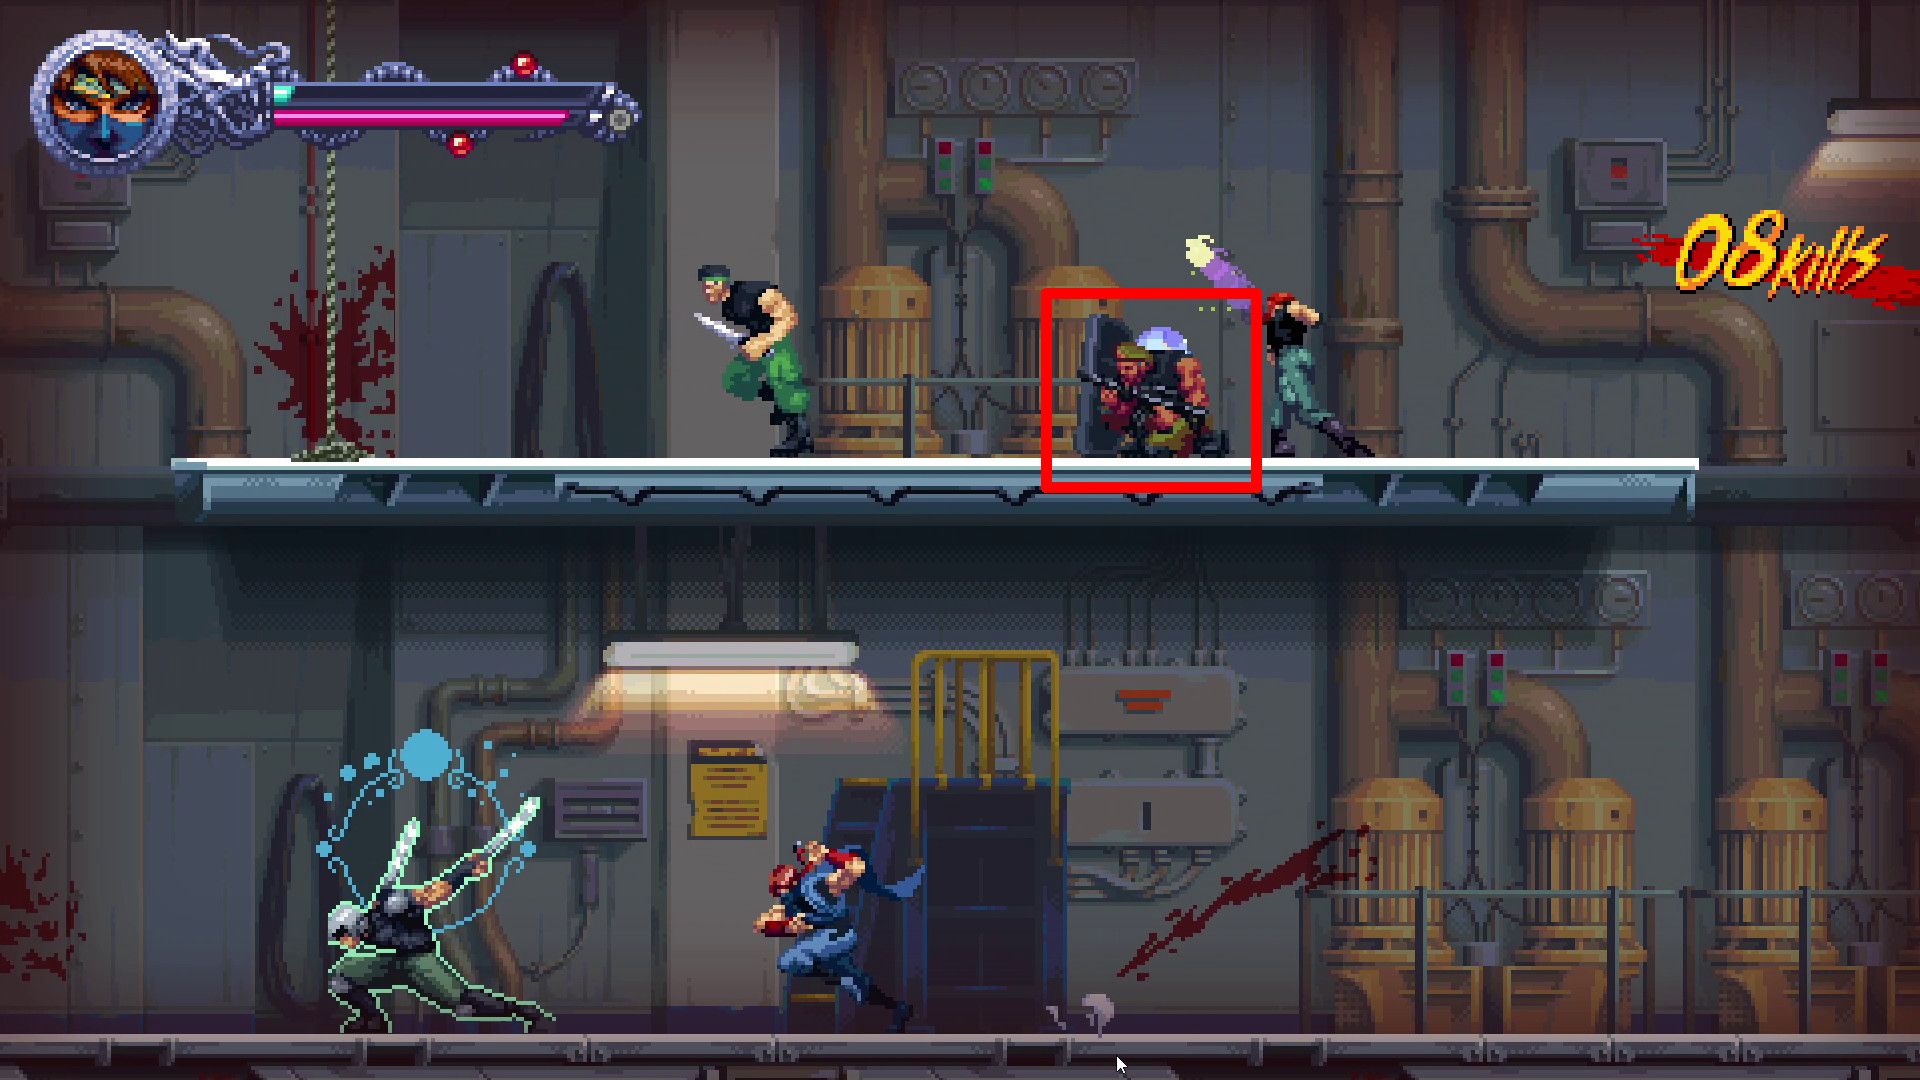
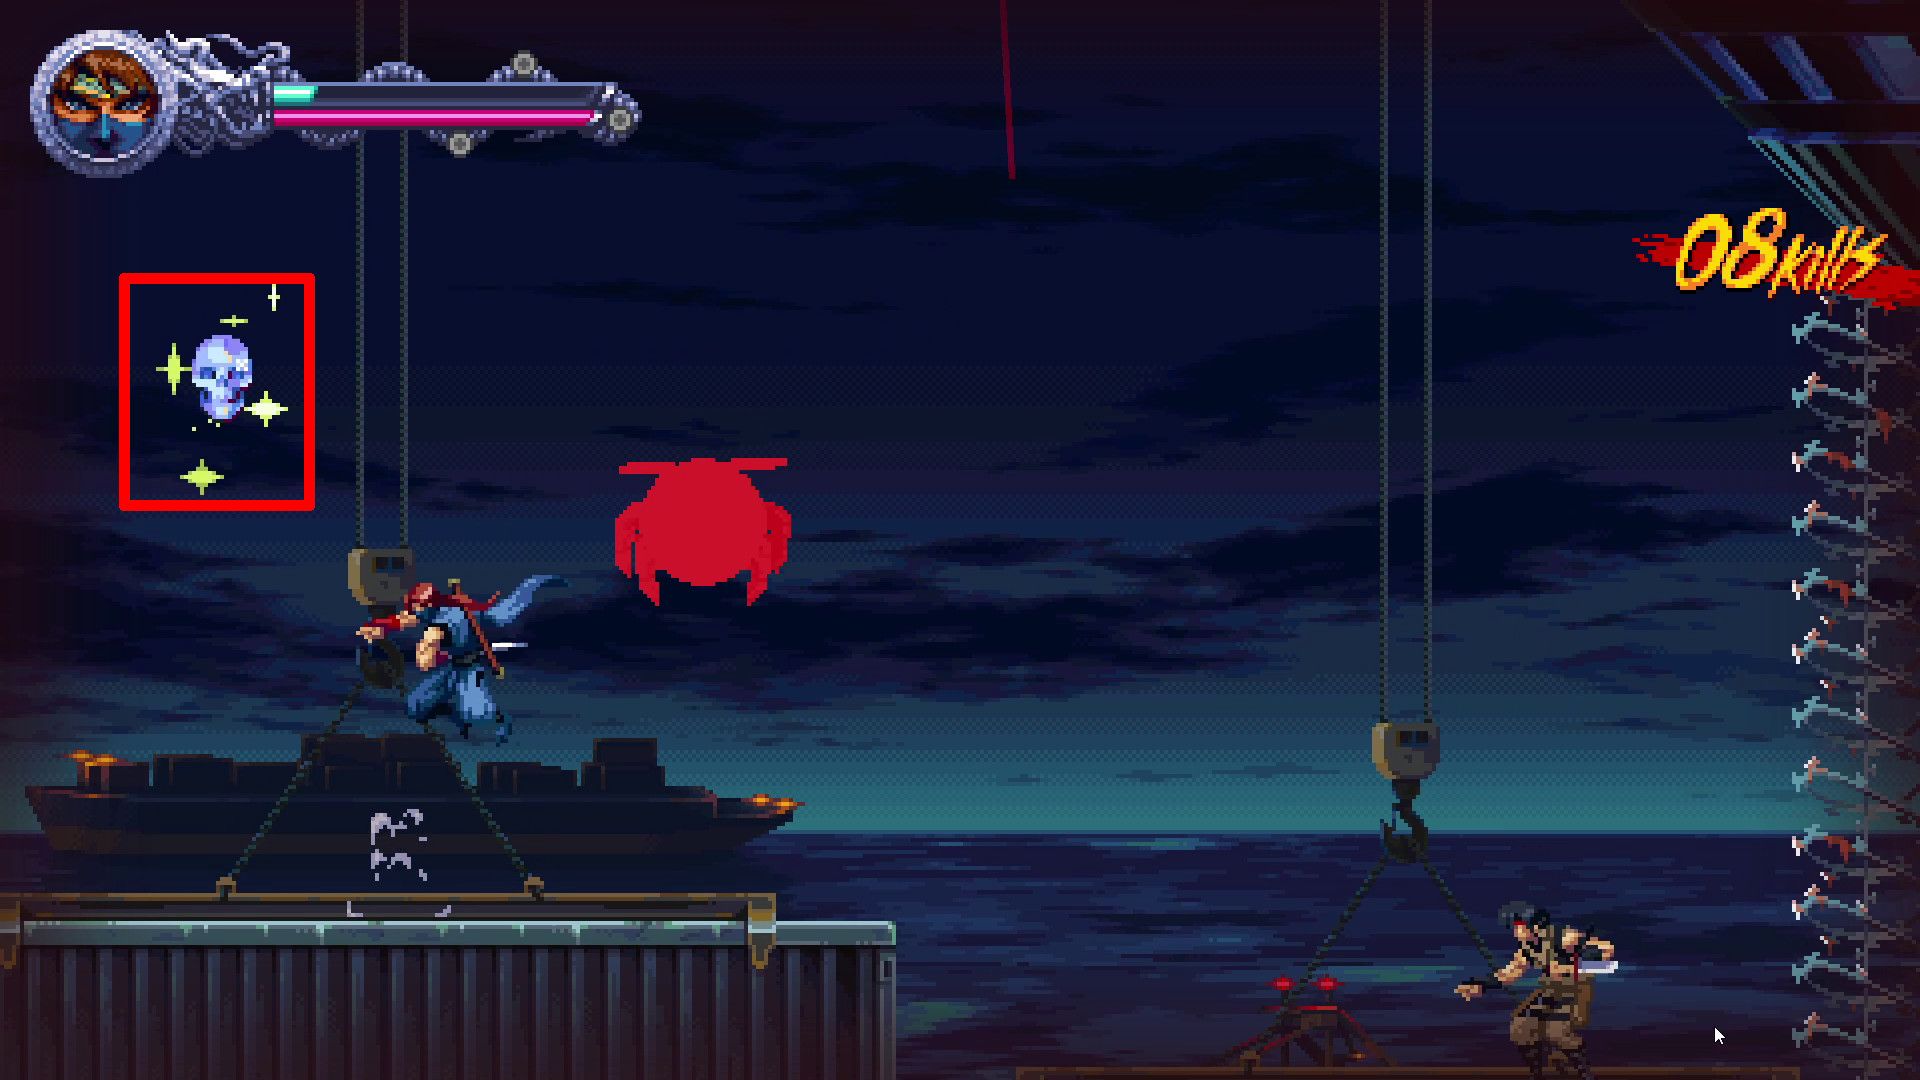
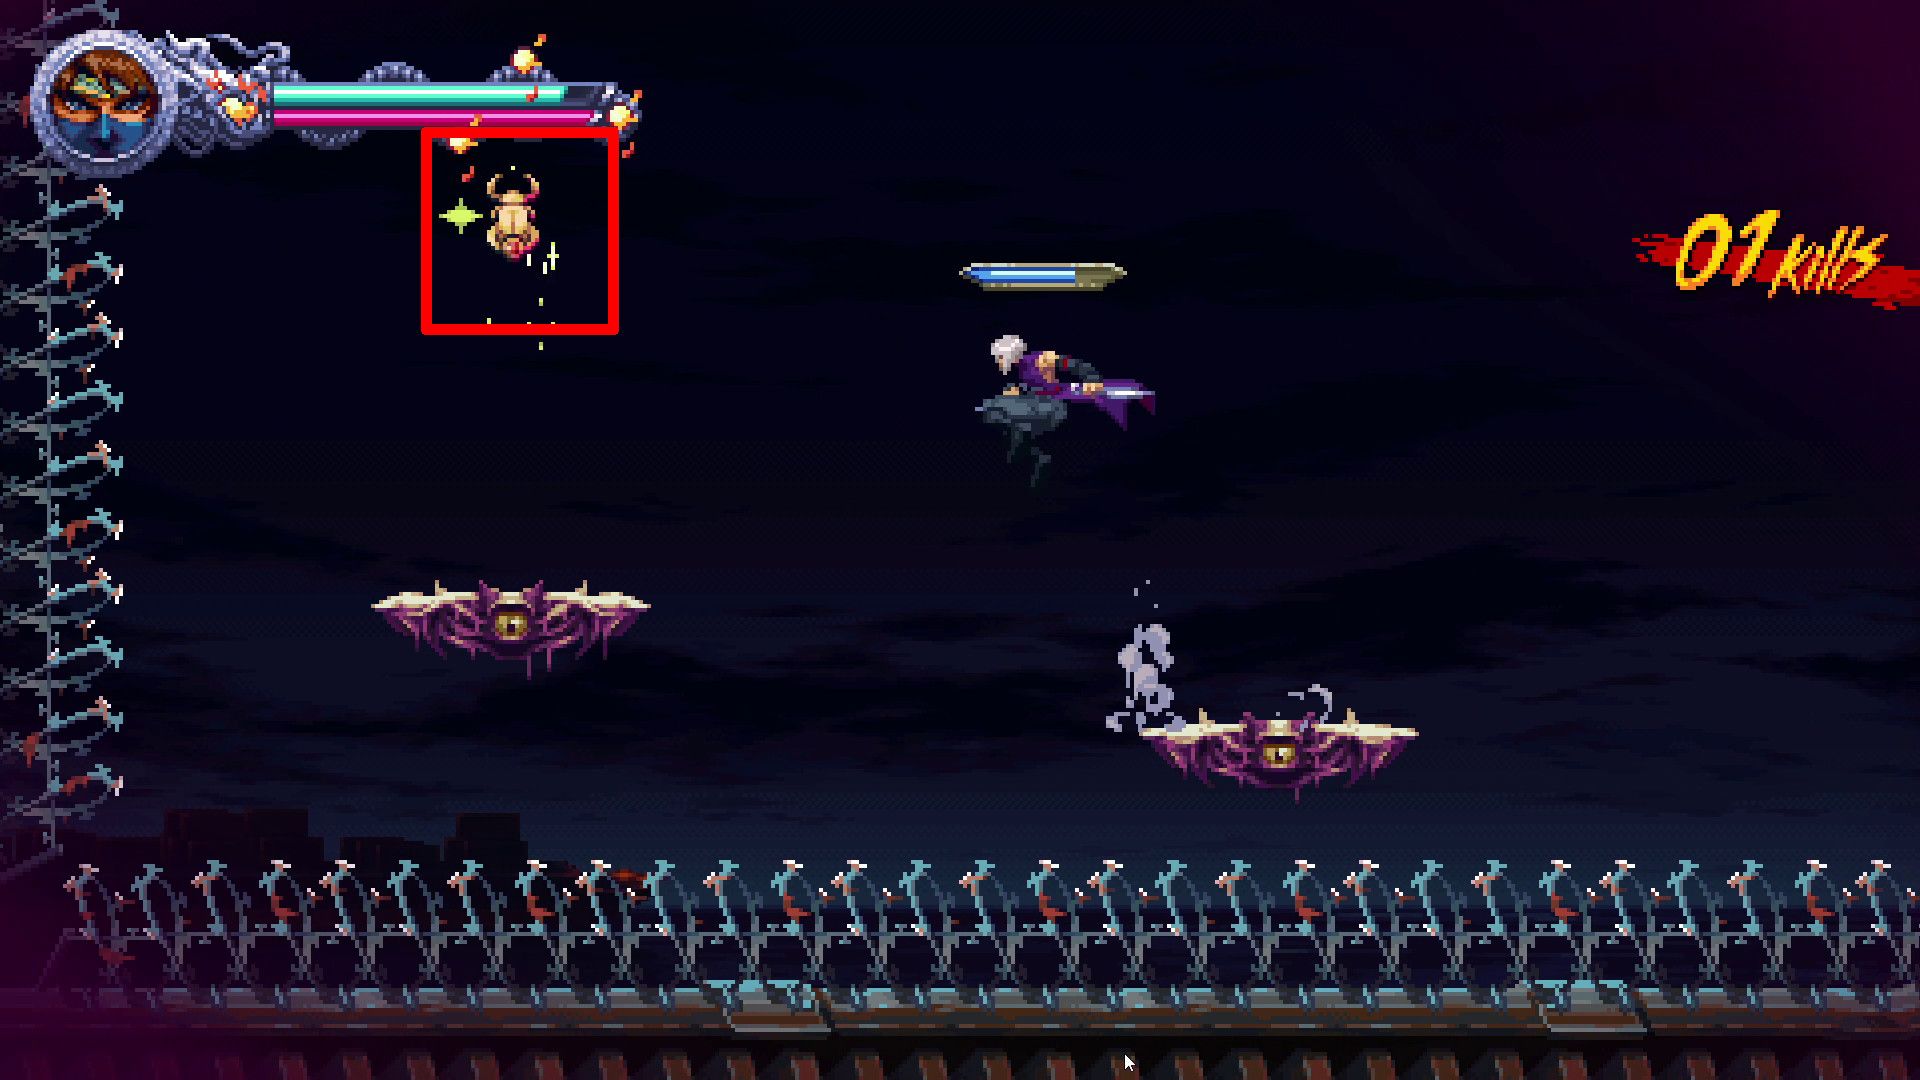
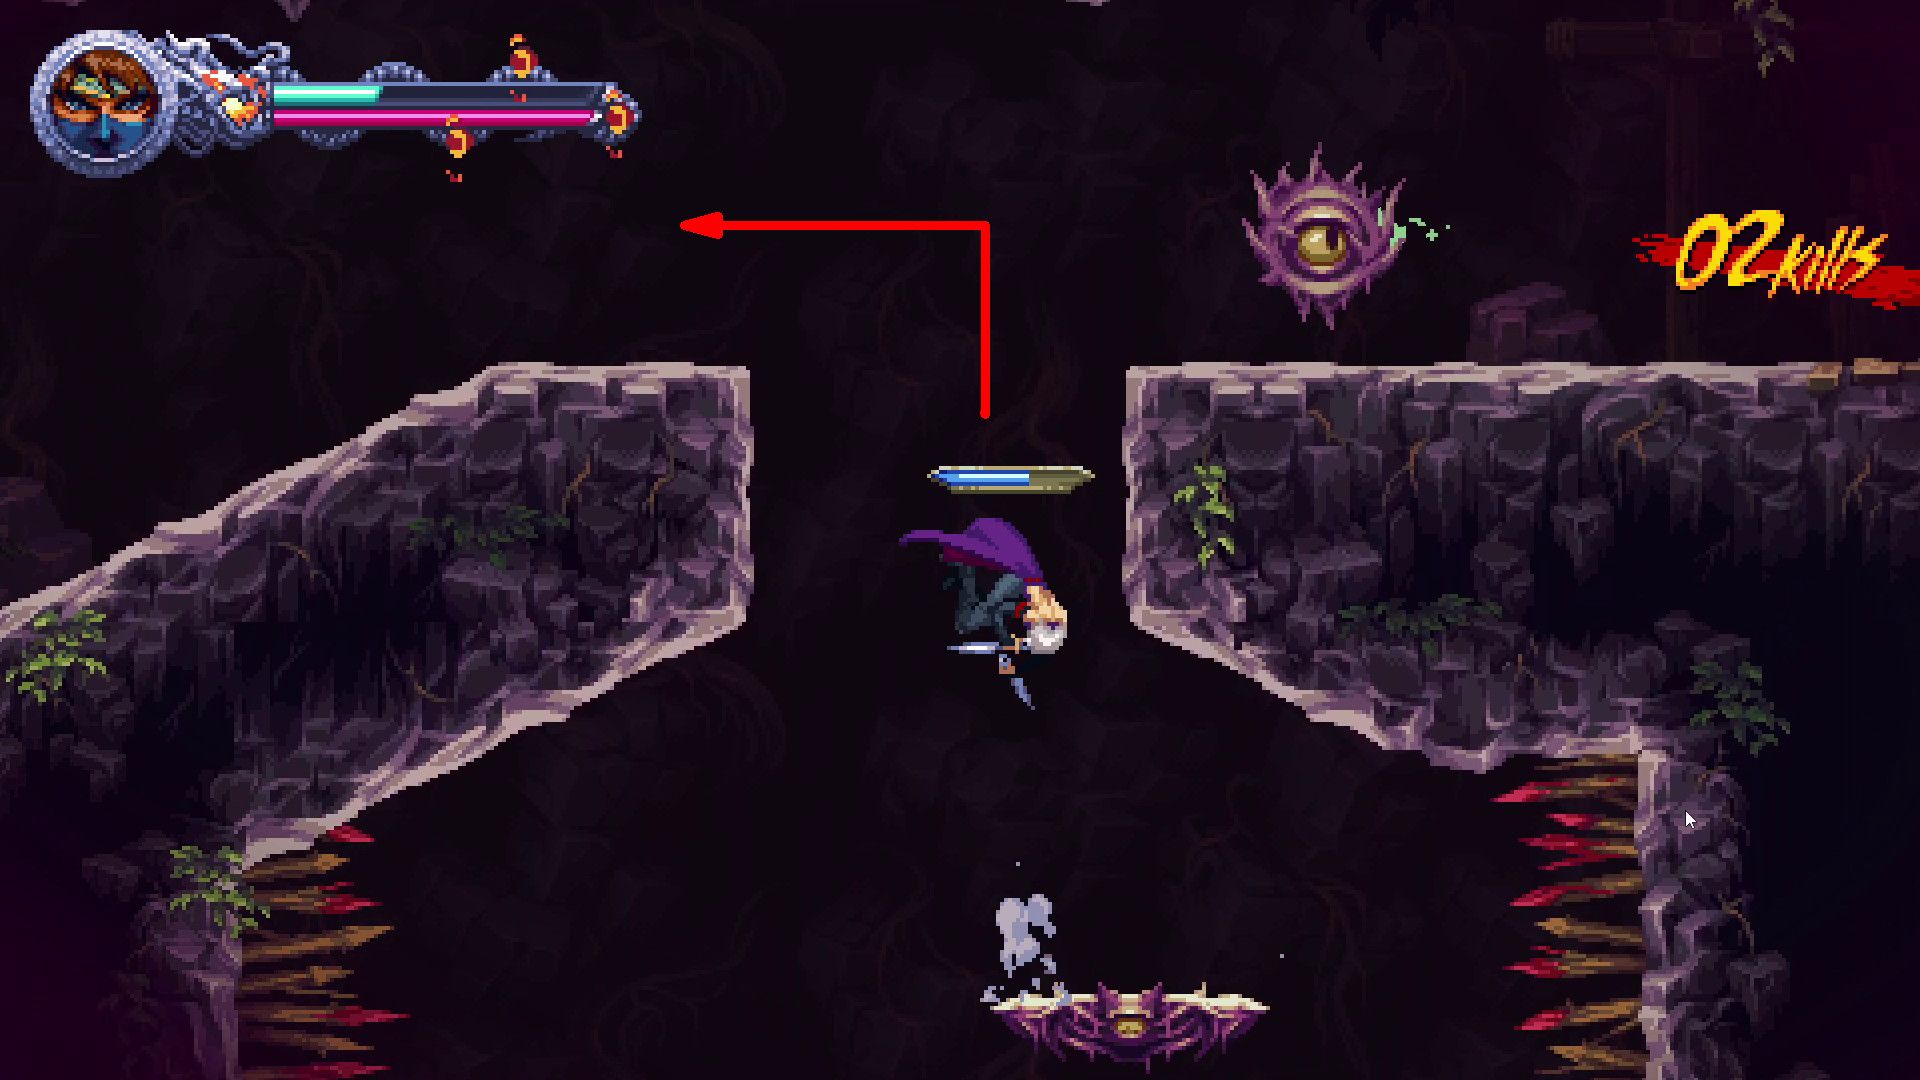
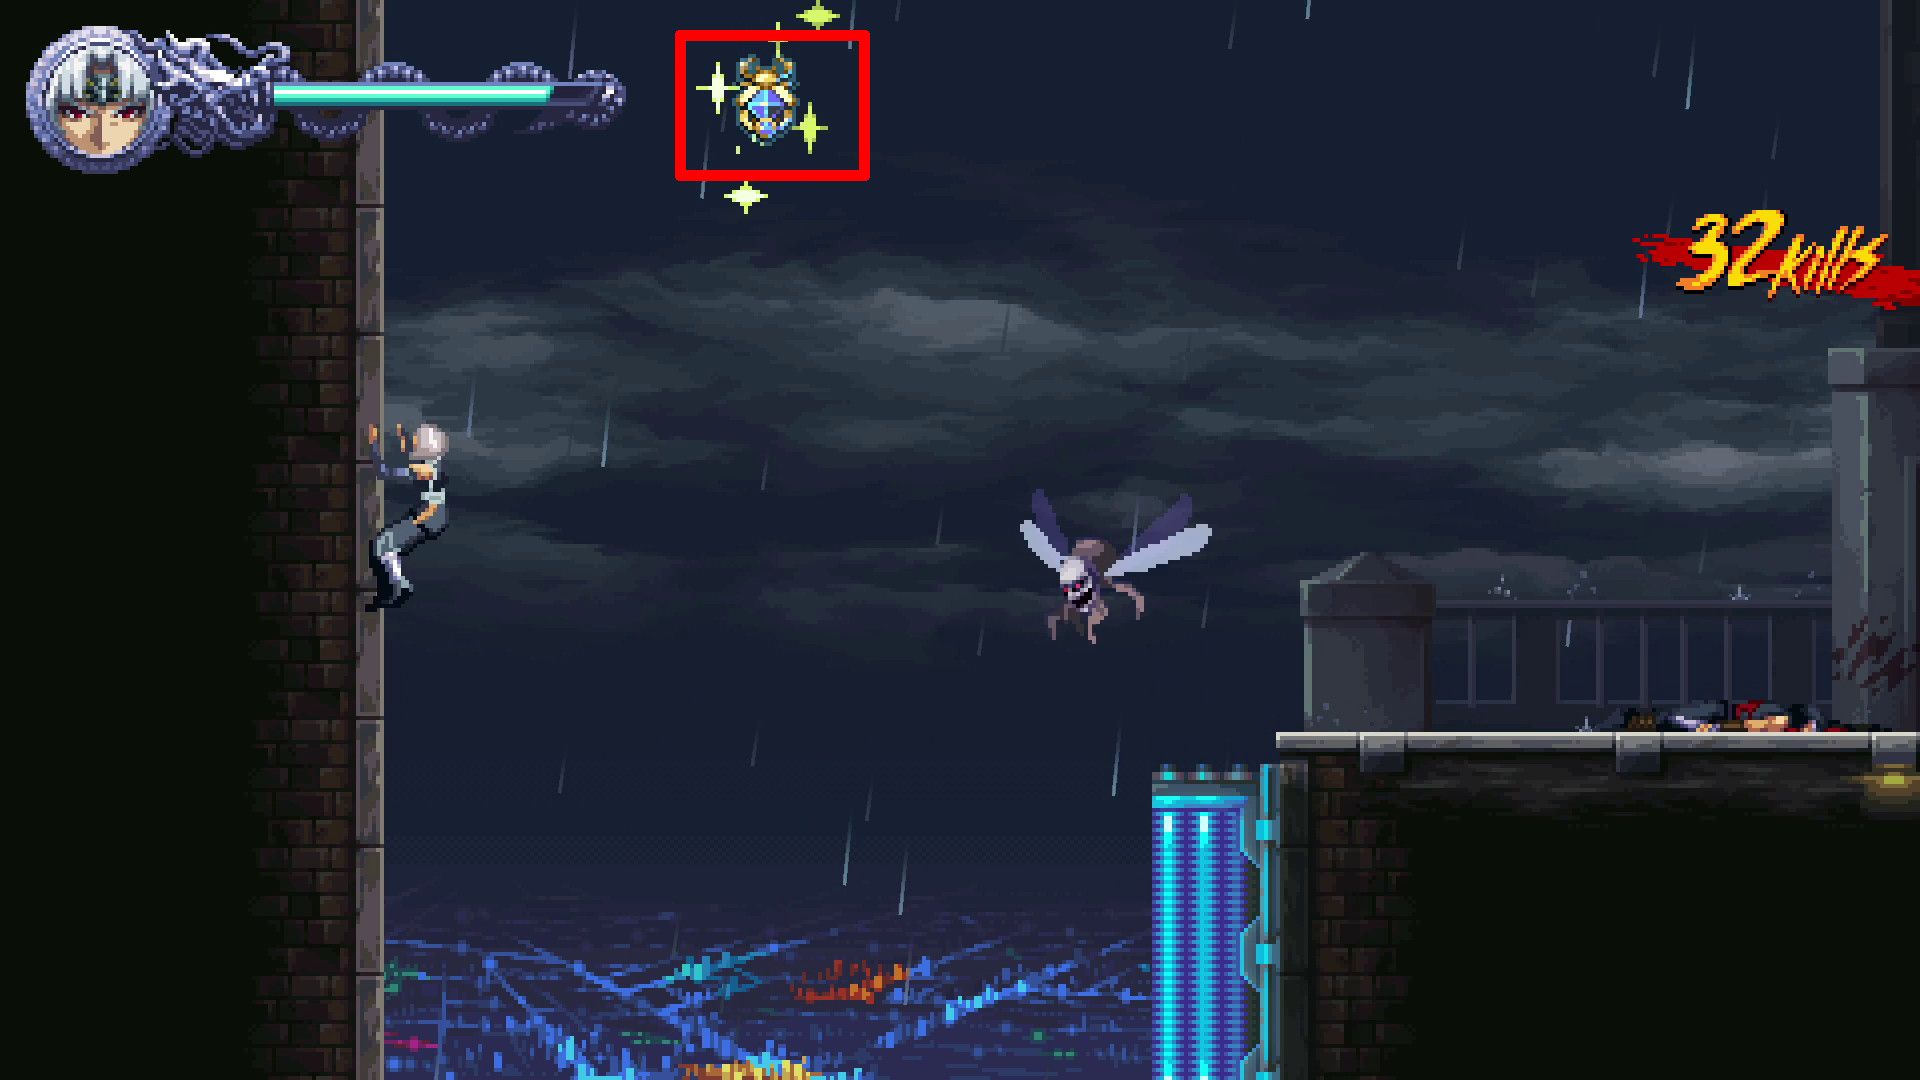
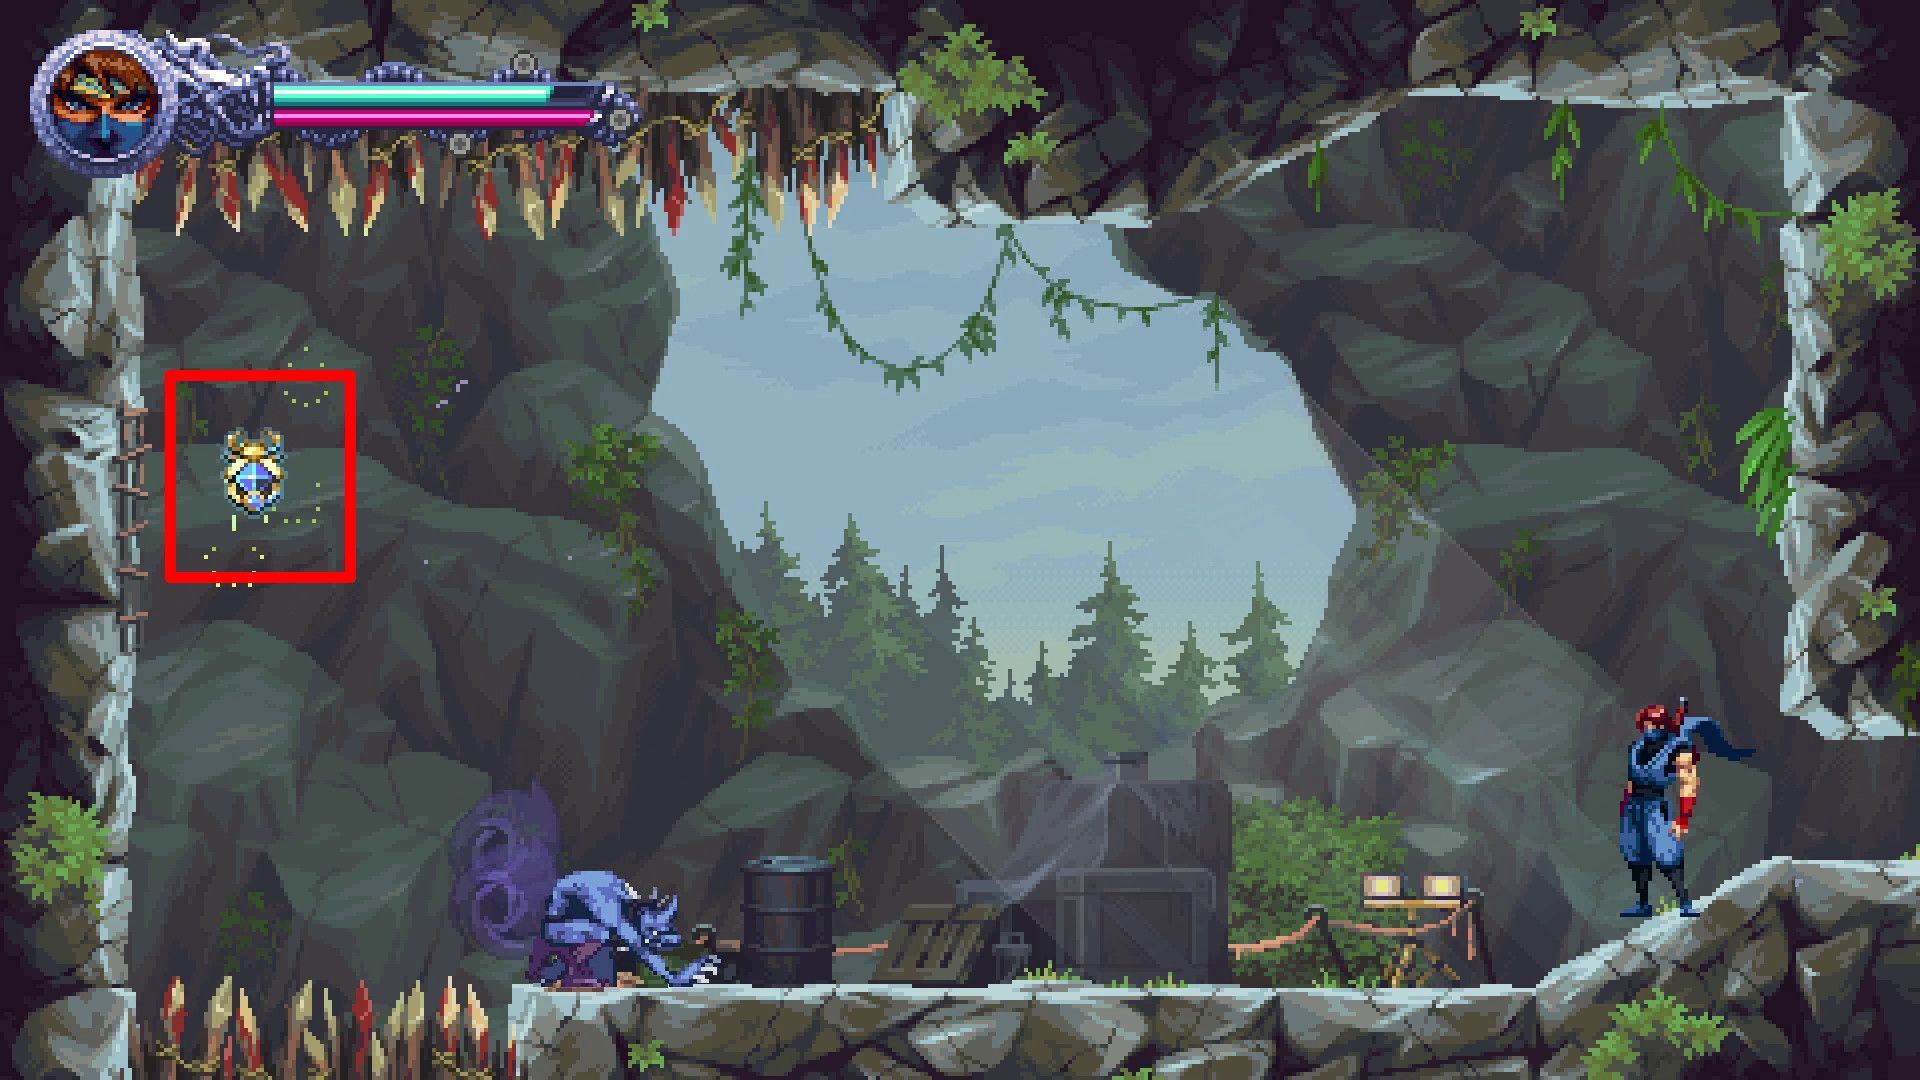
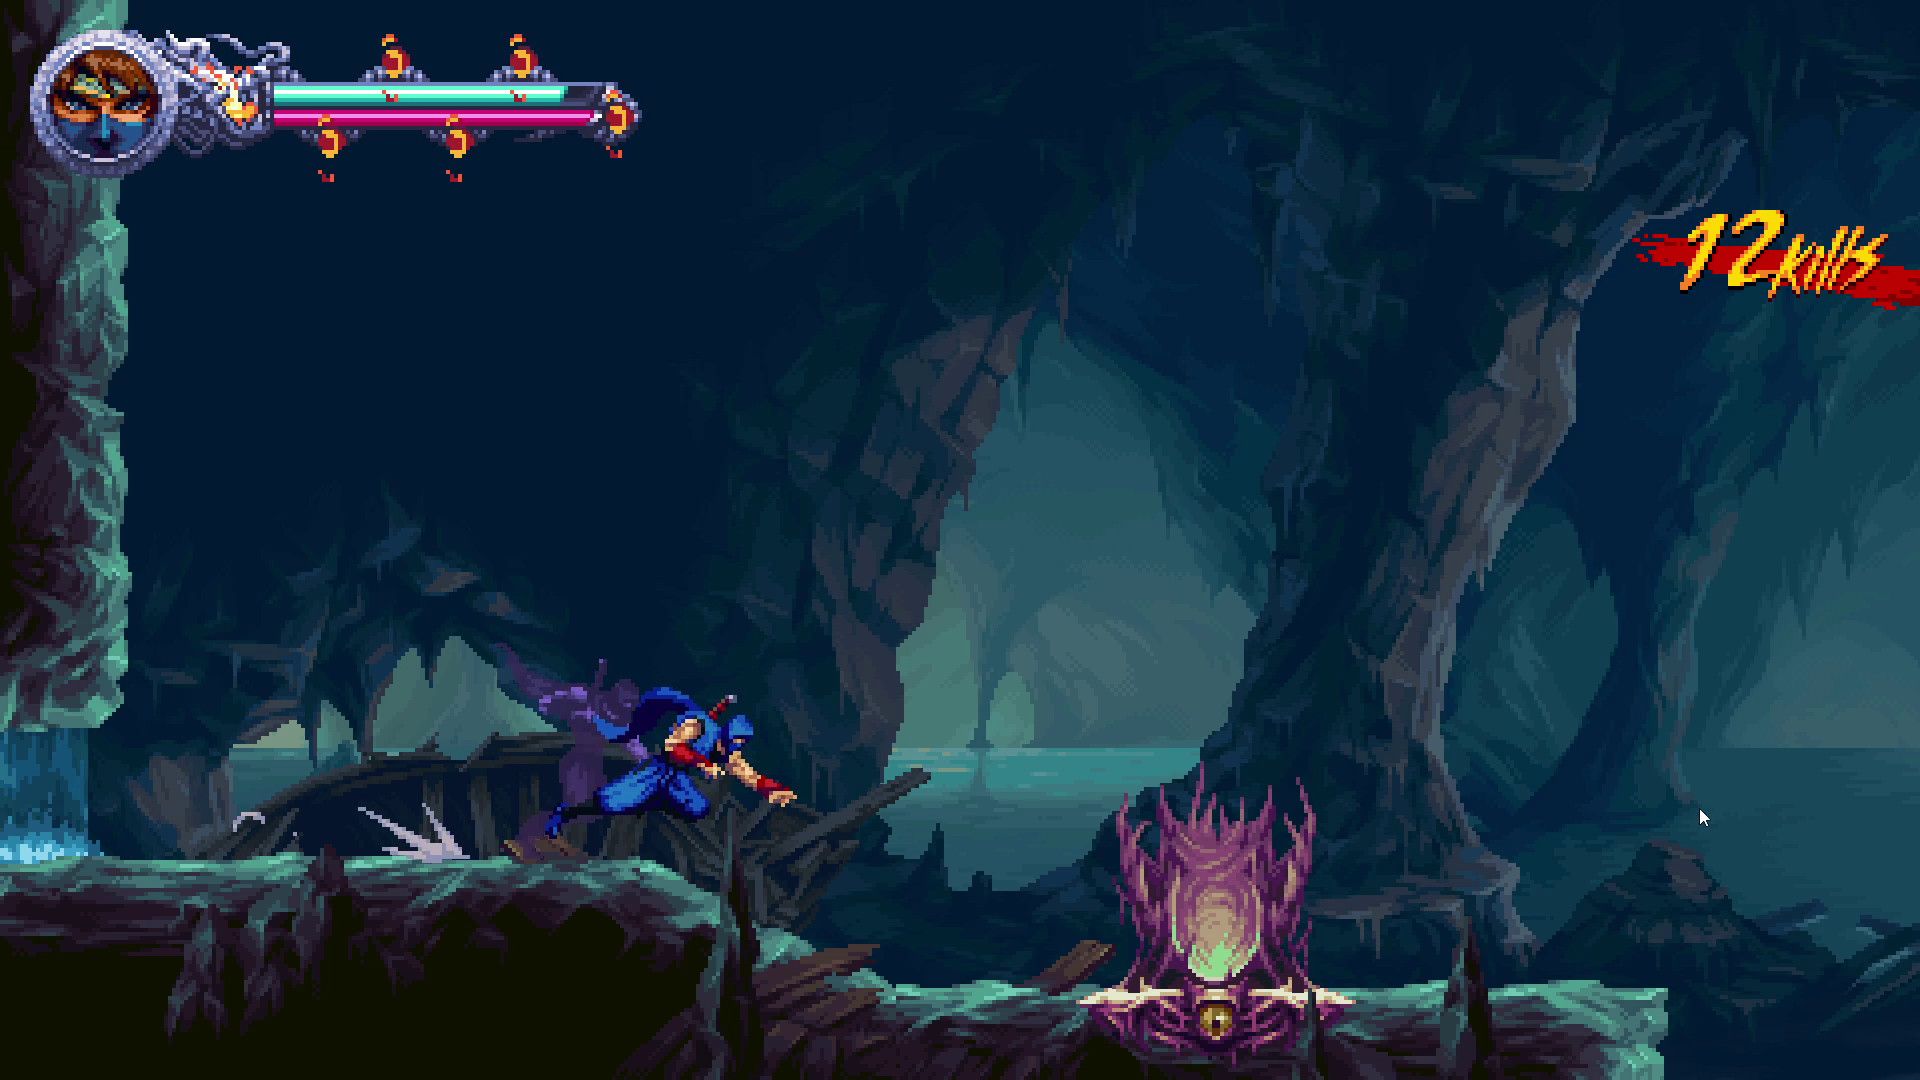
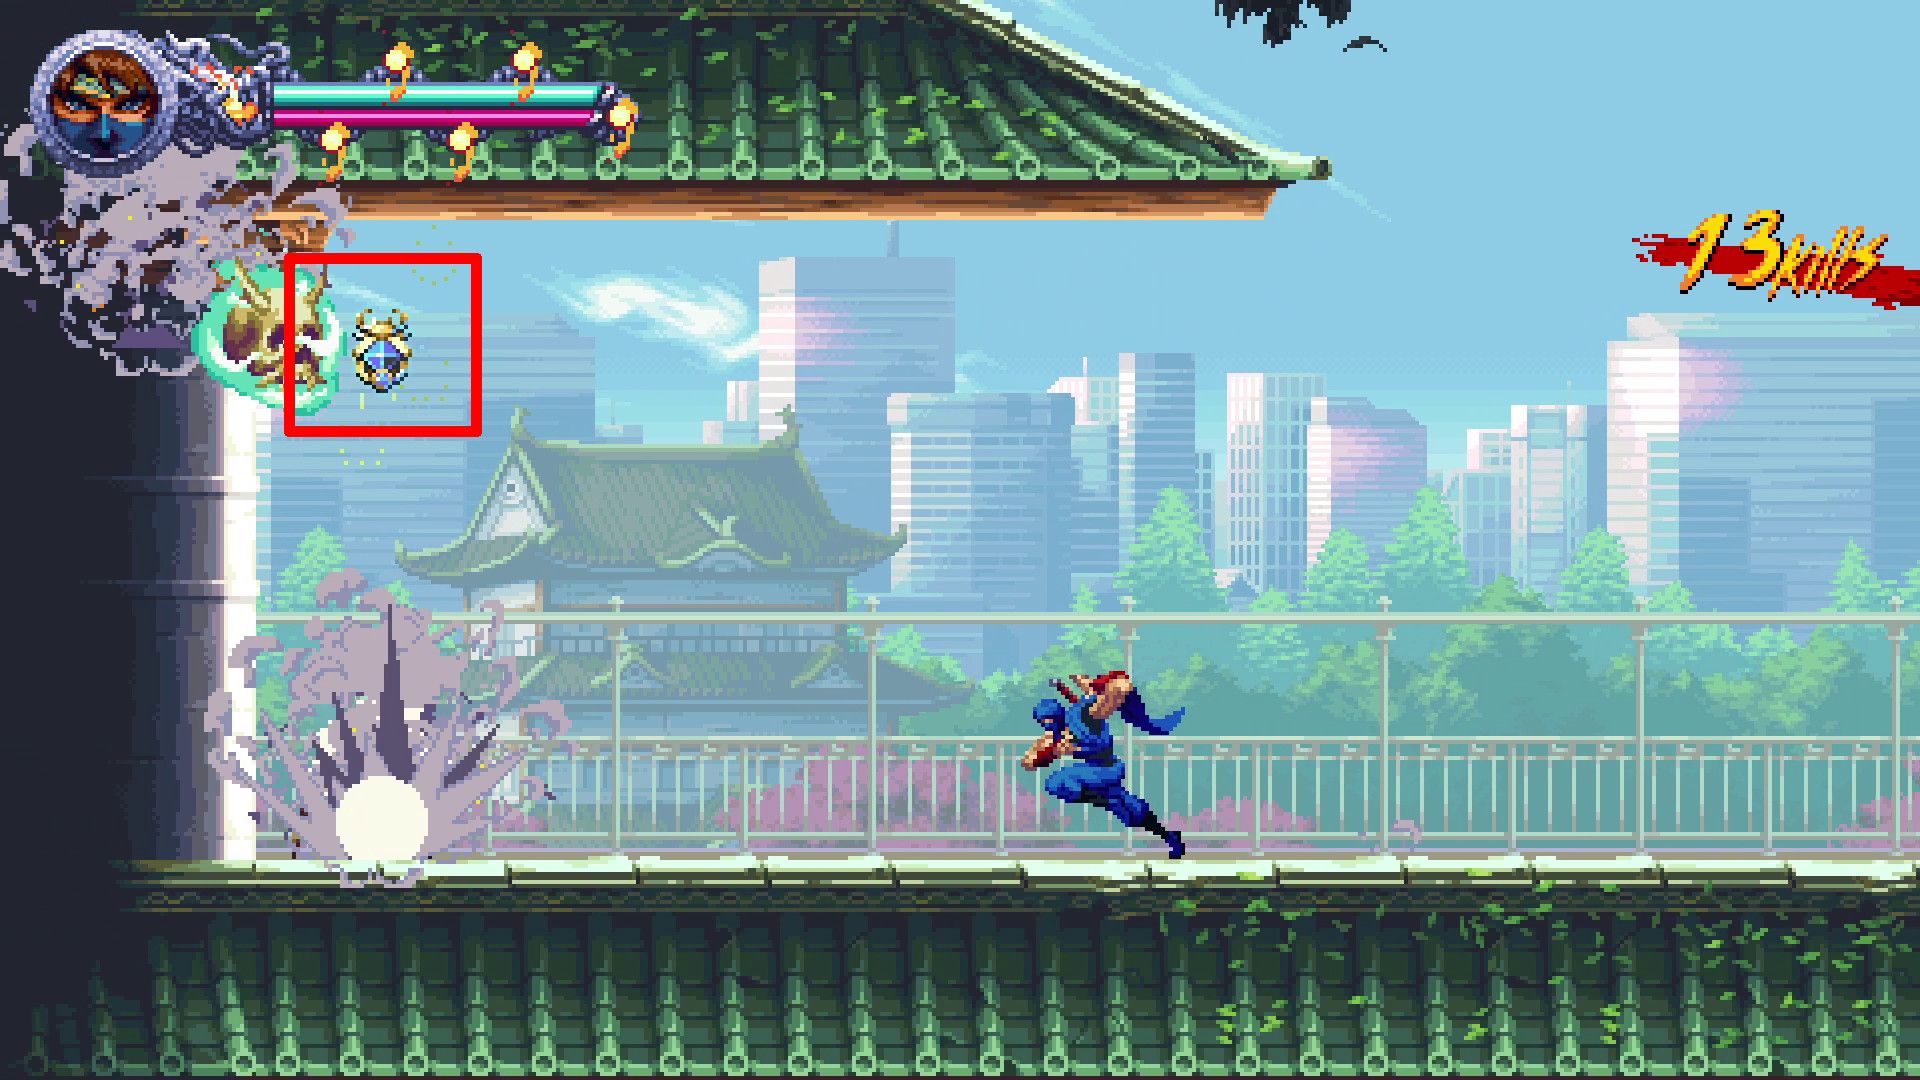
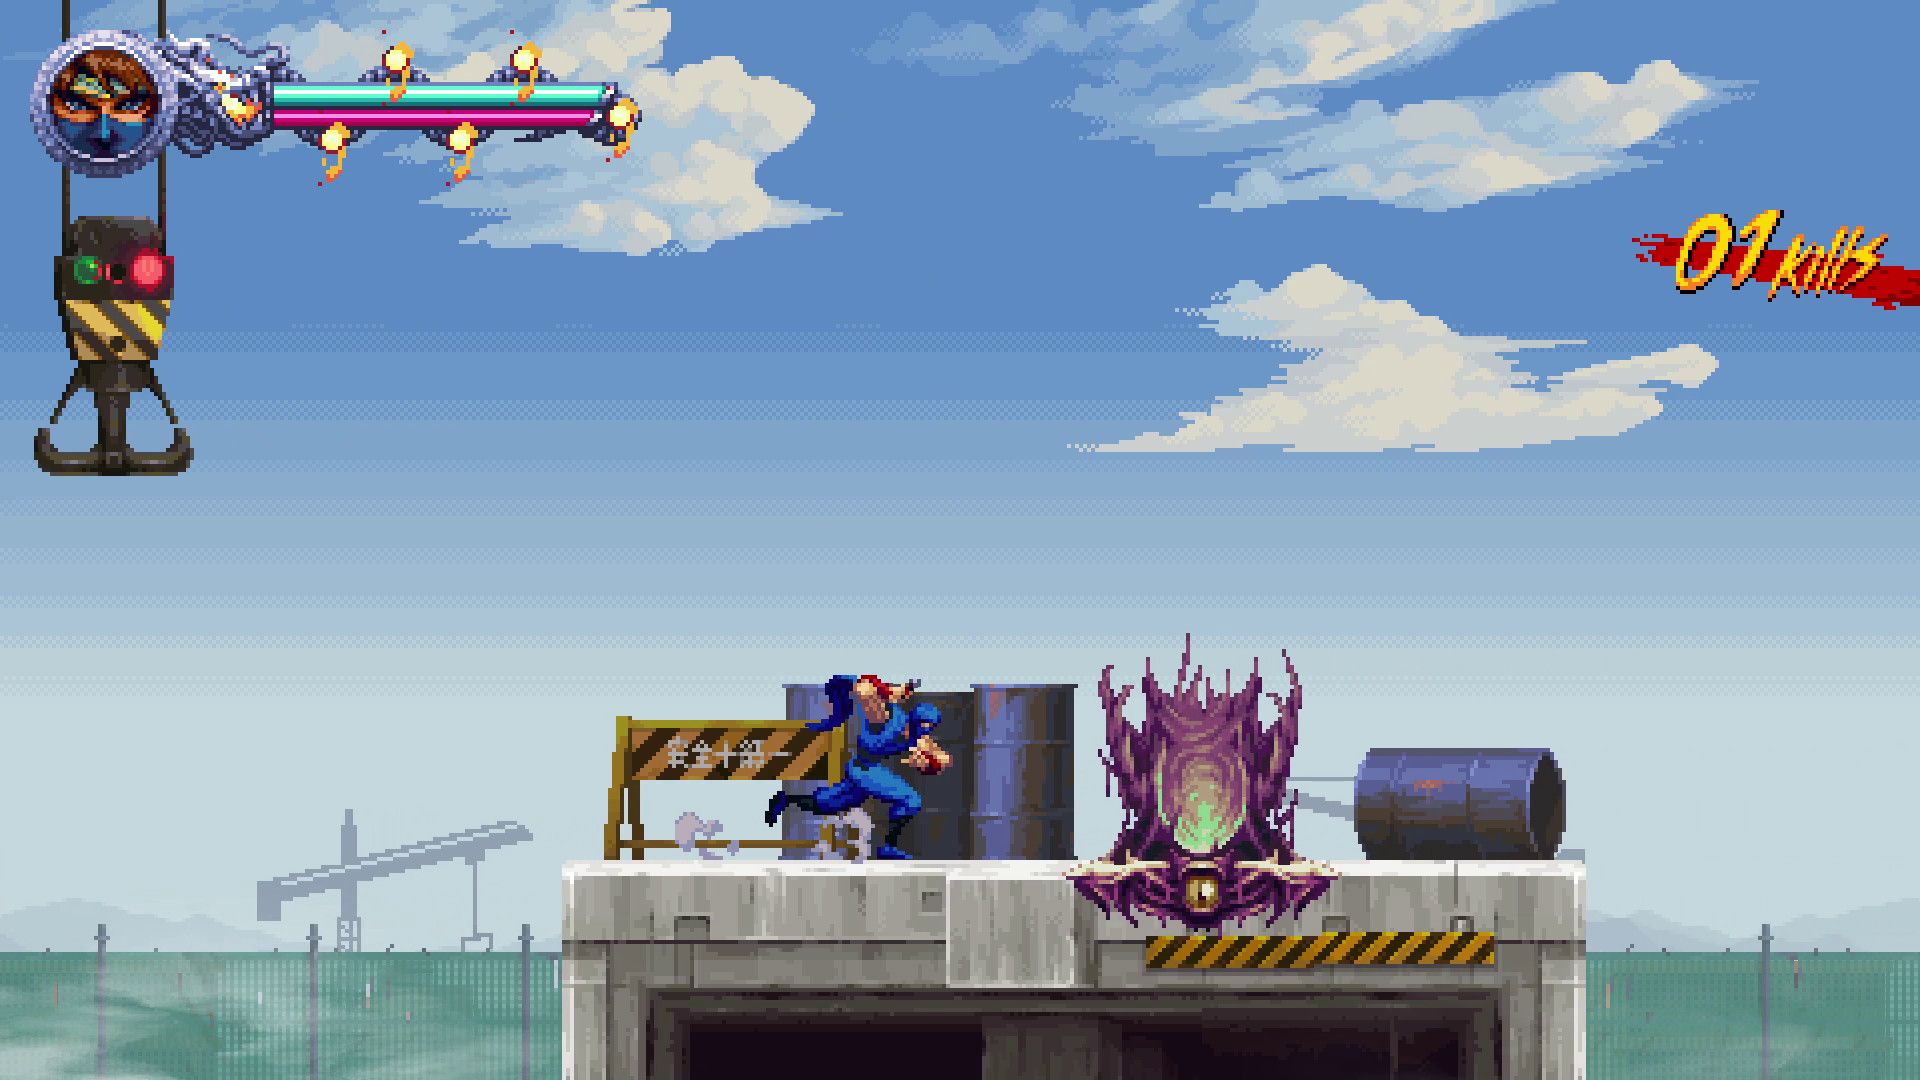
Prologue Collectibles in Ninja Gaiden Ragebound
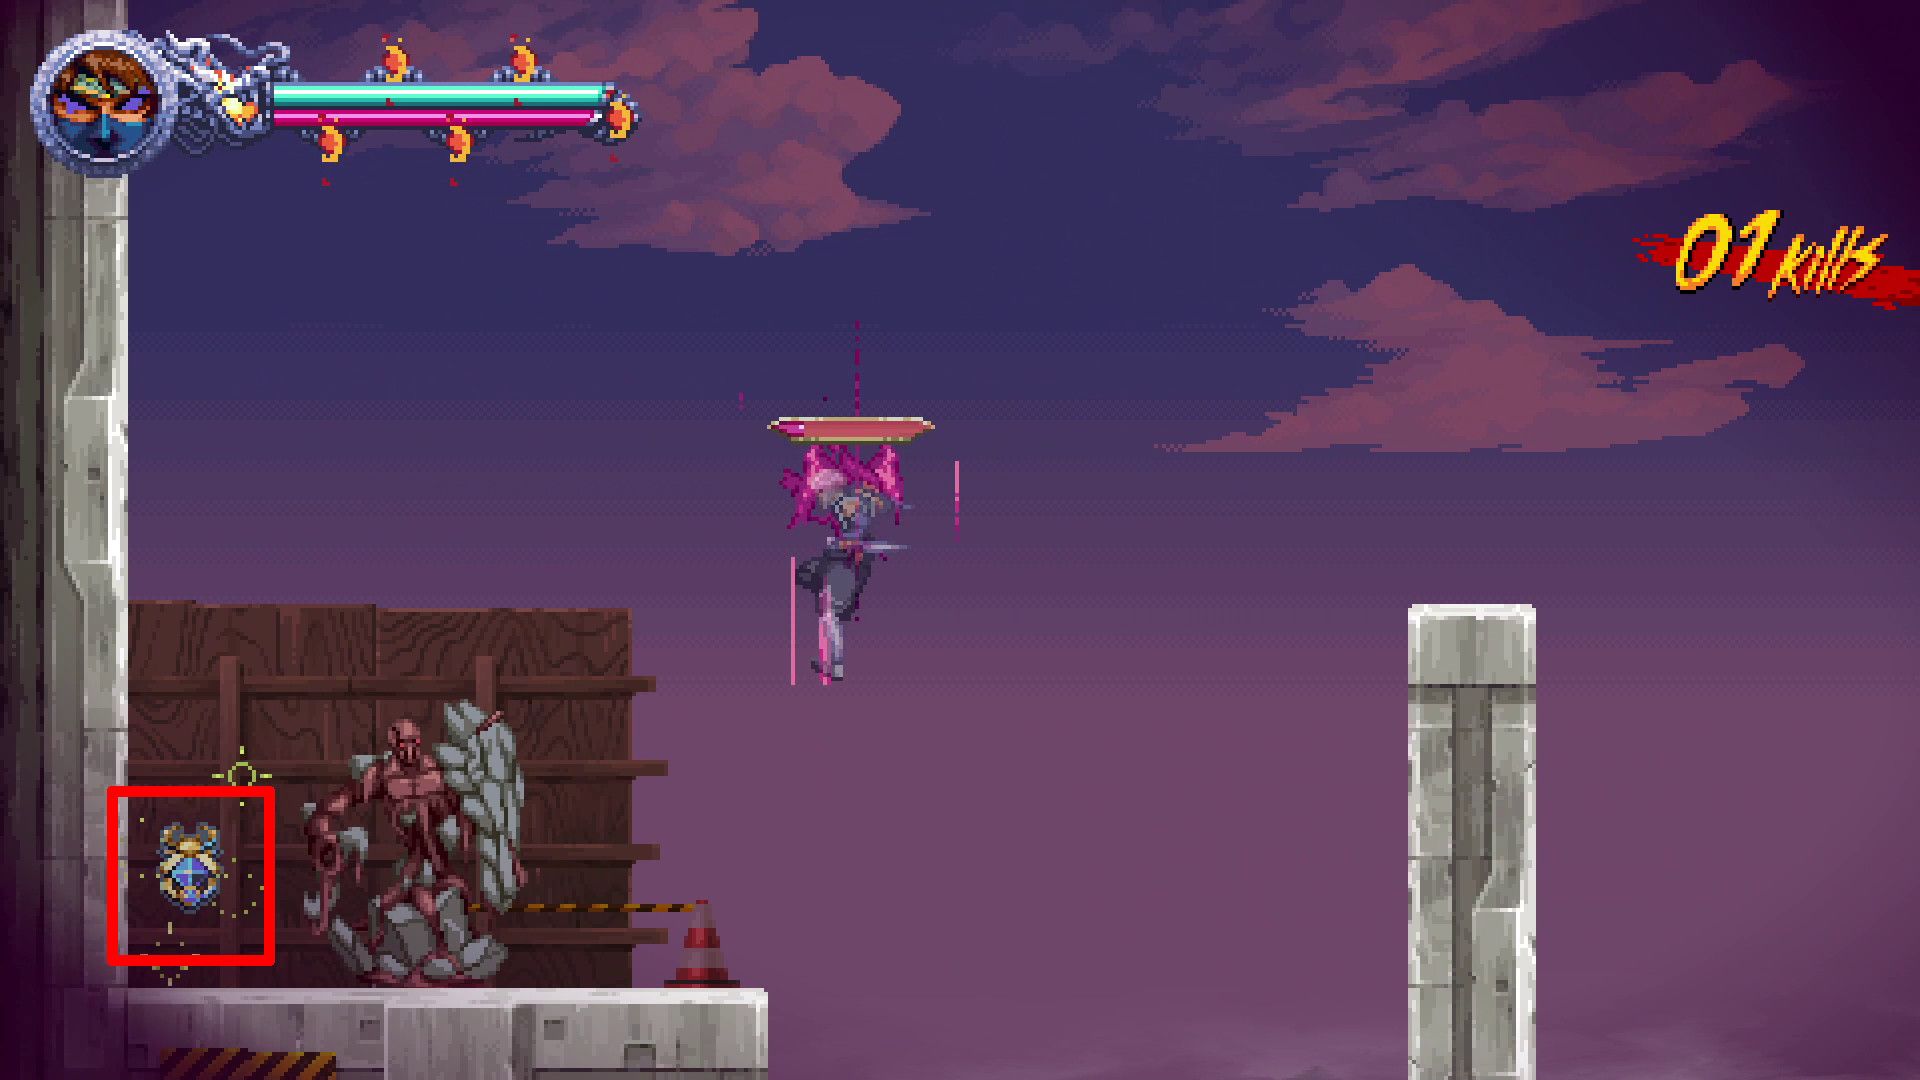
Crystal Skulls
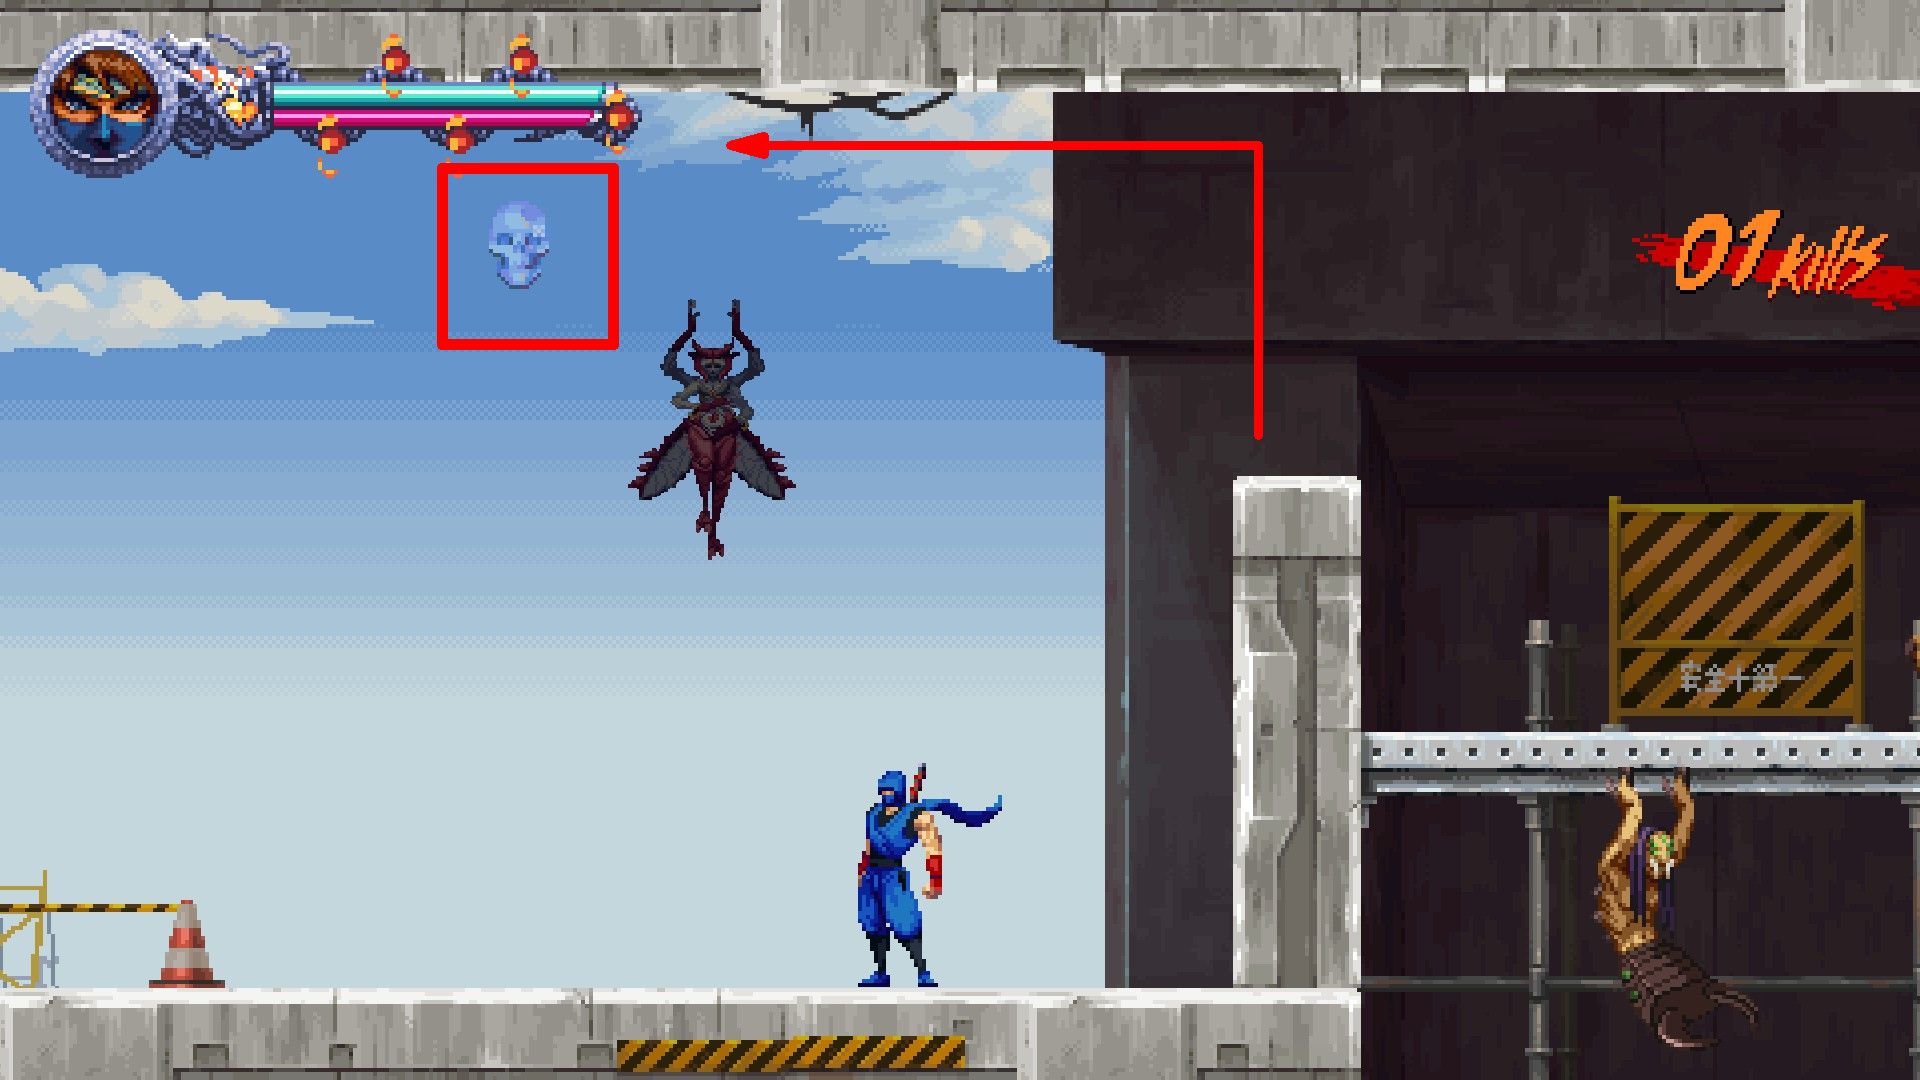
If you’re on the hunt for the elusive Crystal Skulls in the beginning of the game, here’s a helpful guide for you:
For those searching for the three Crystal Skulls right from the start, check out this handy guide:
Or, more casually:
If you’re trying to find all three Crystal Skulls at the beginning of the game, give this guide a read!
- Ninja Gaiden Ragebound Prologue Crystal Skull Locations
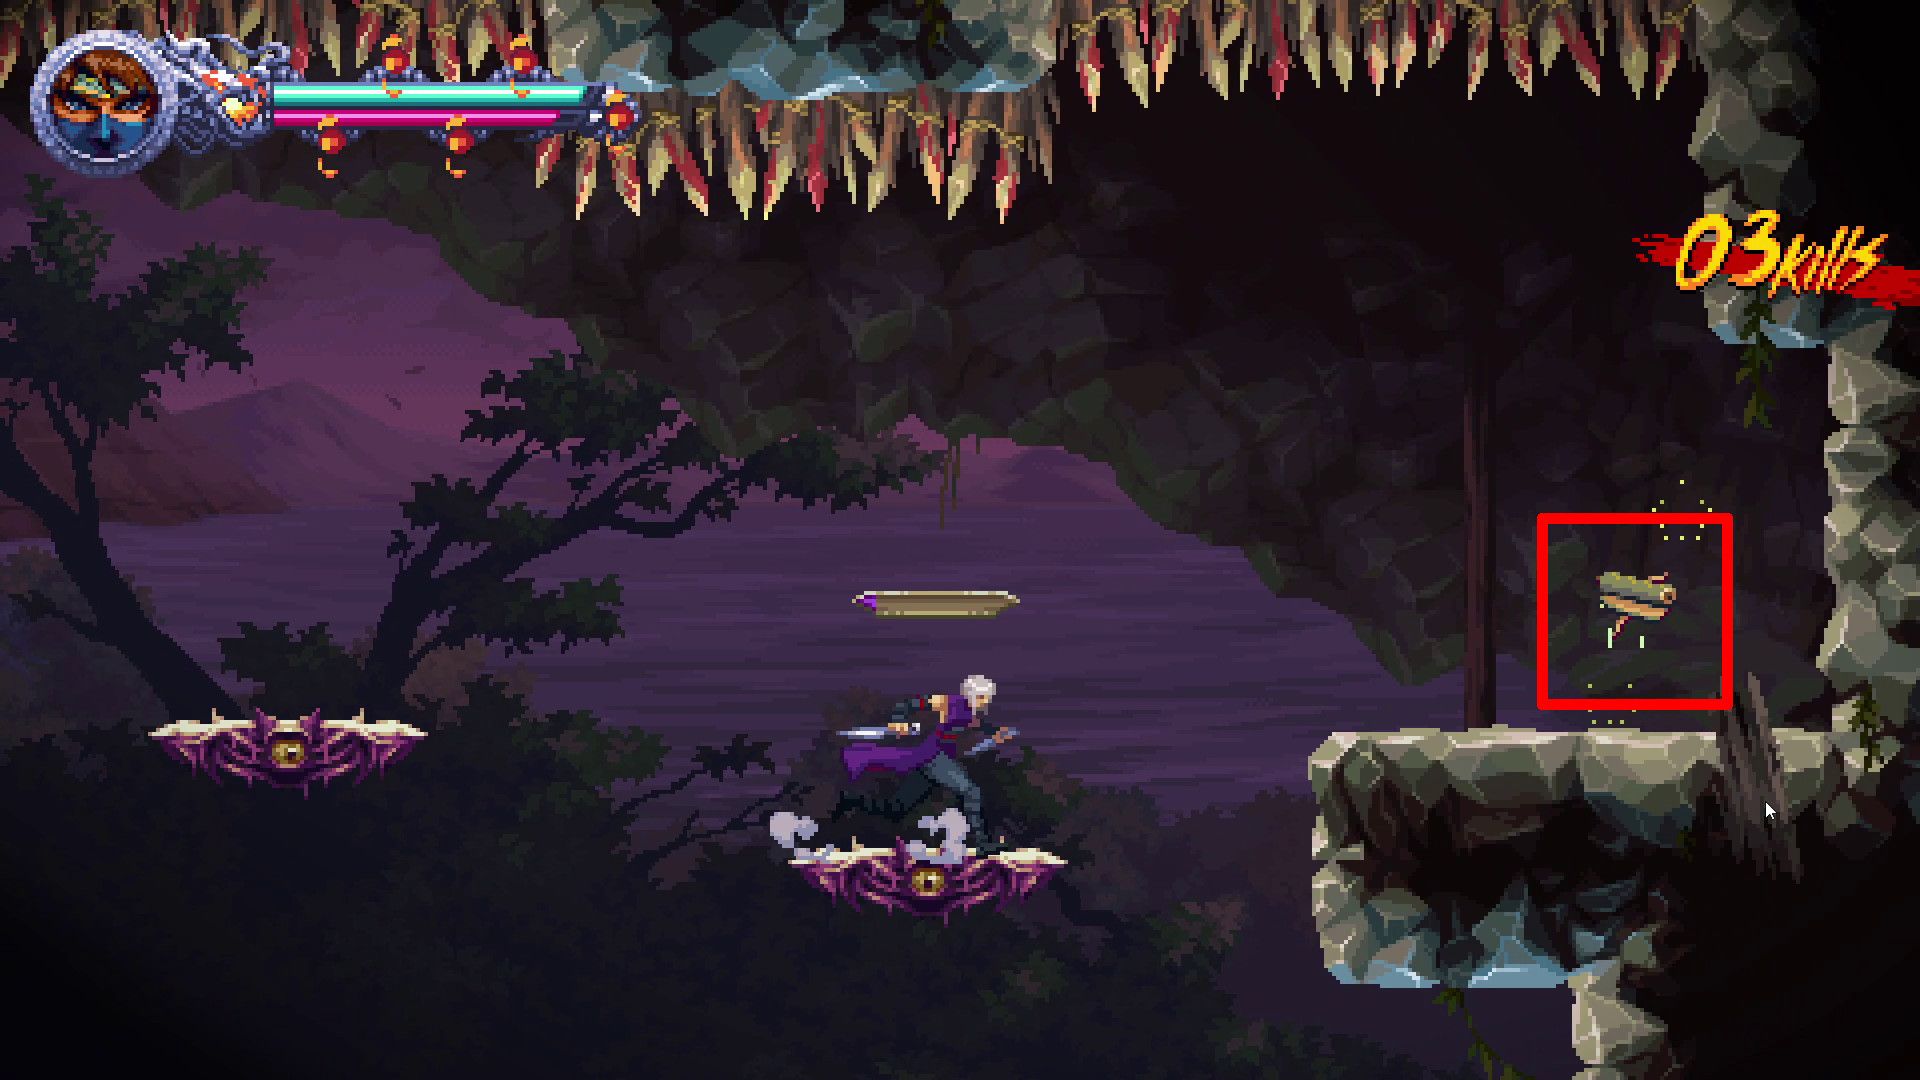
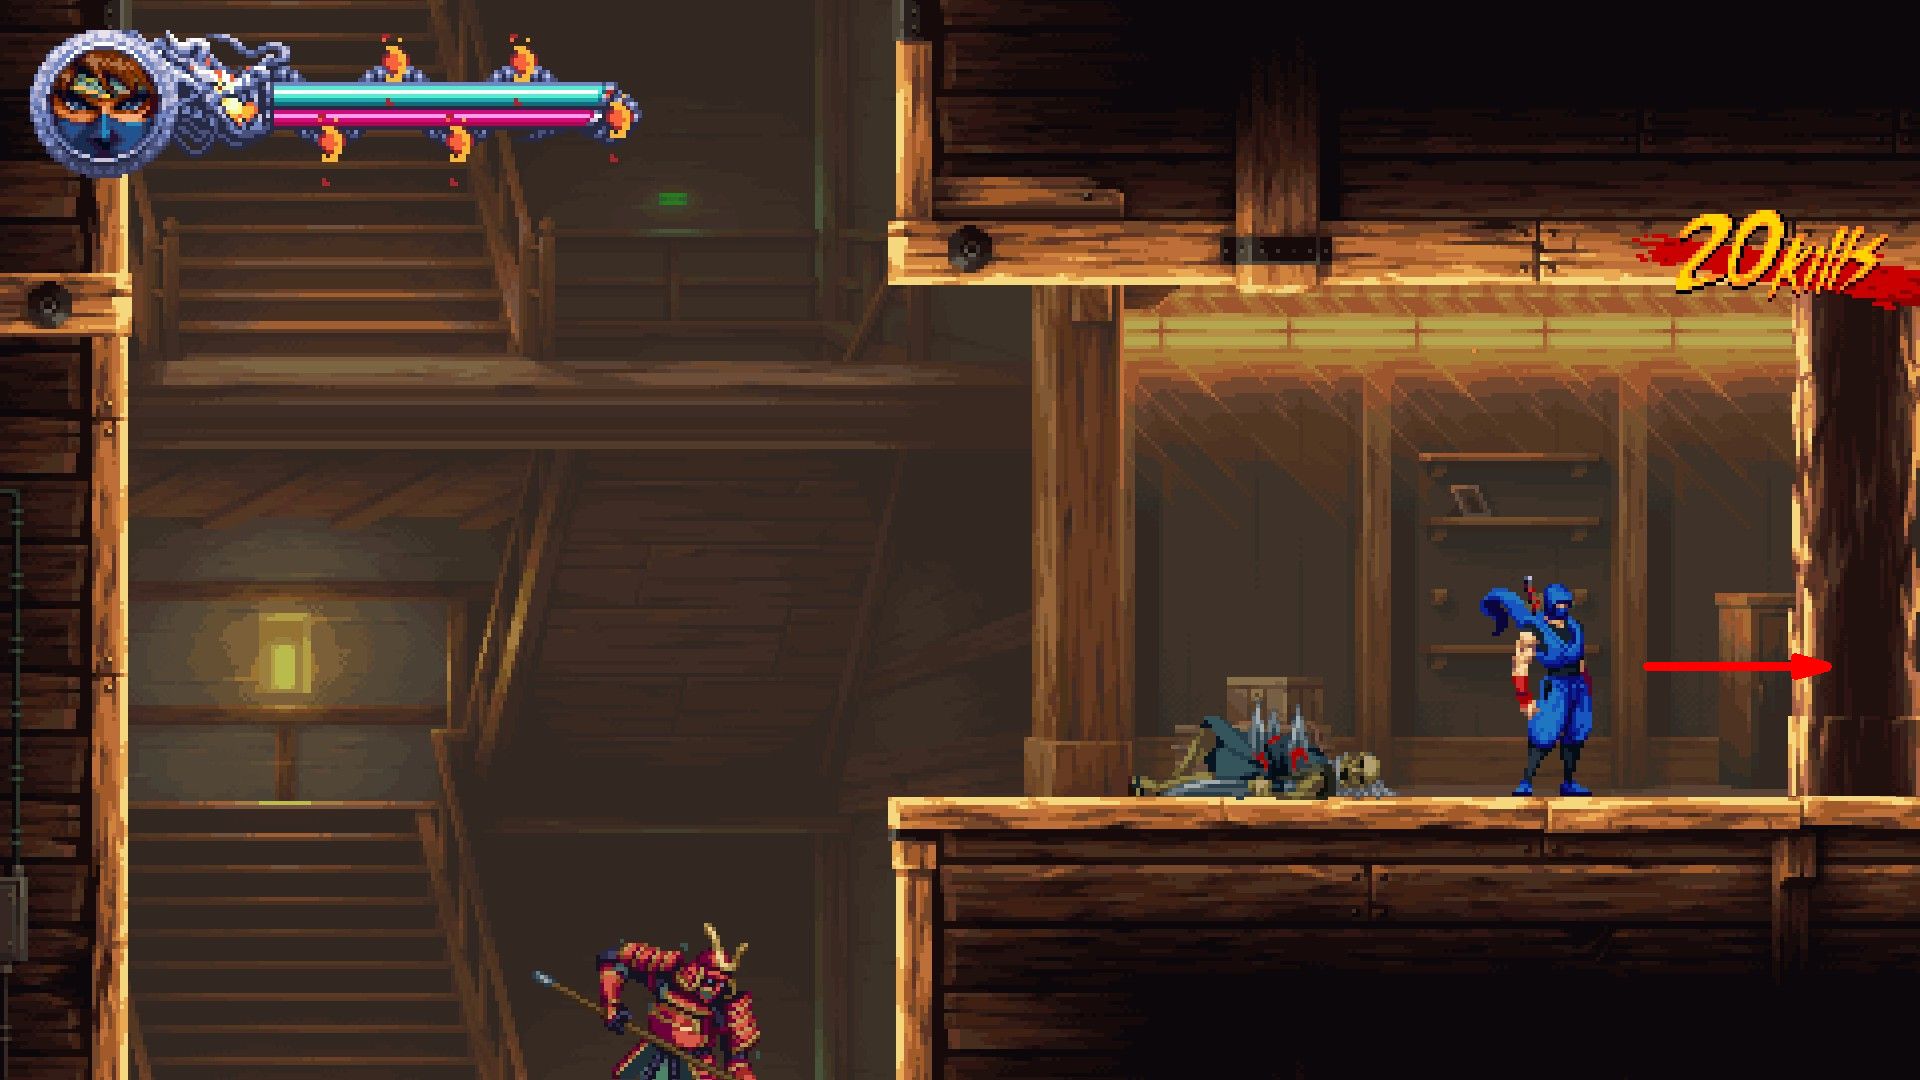
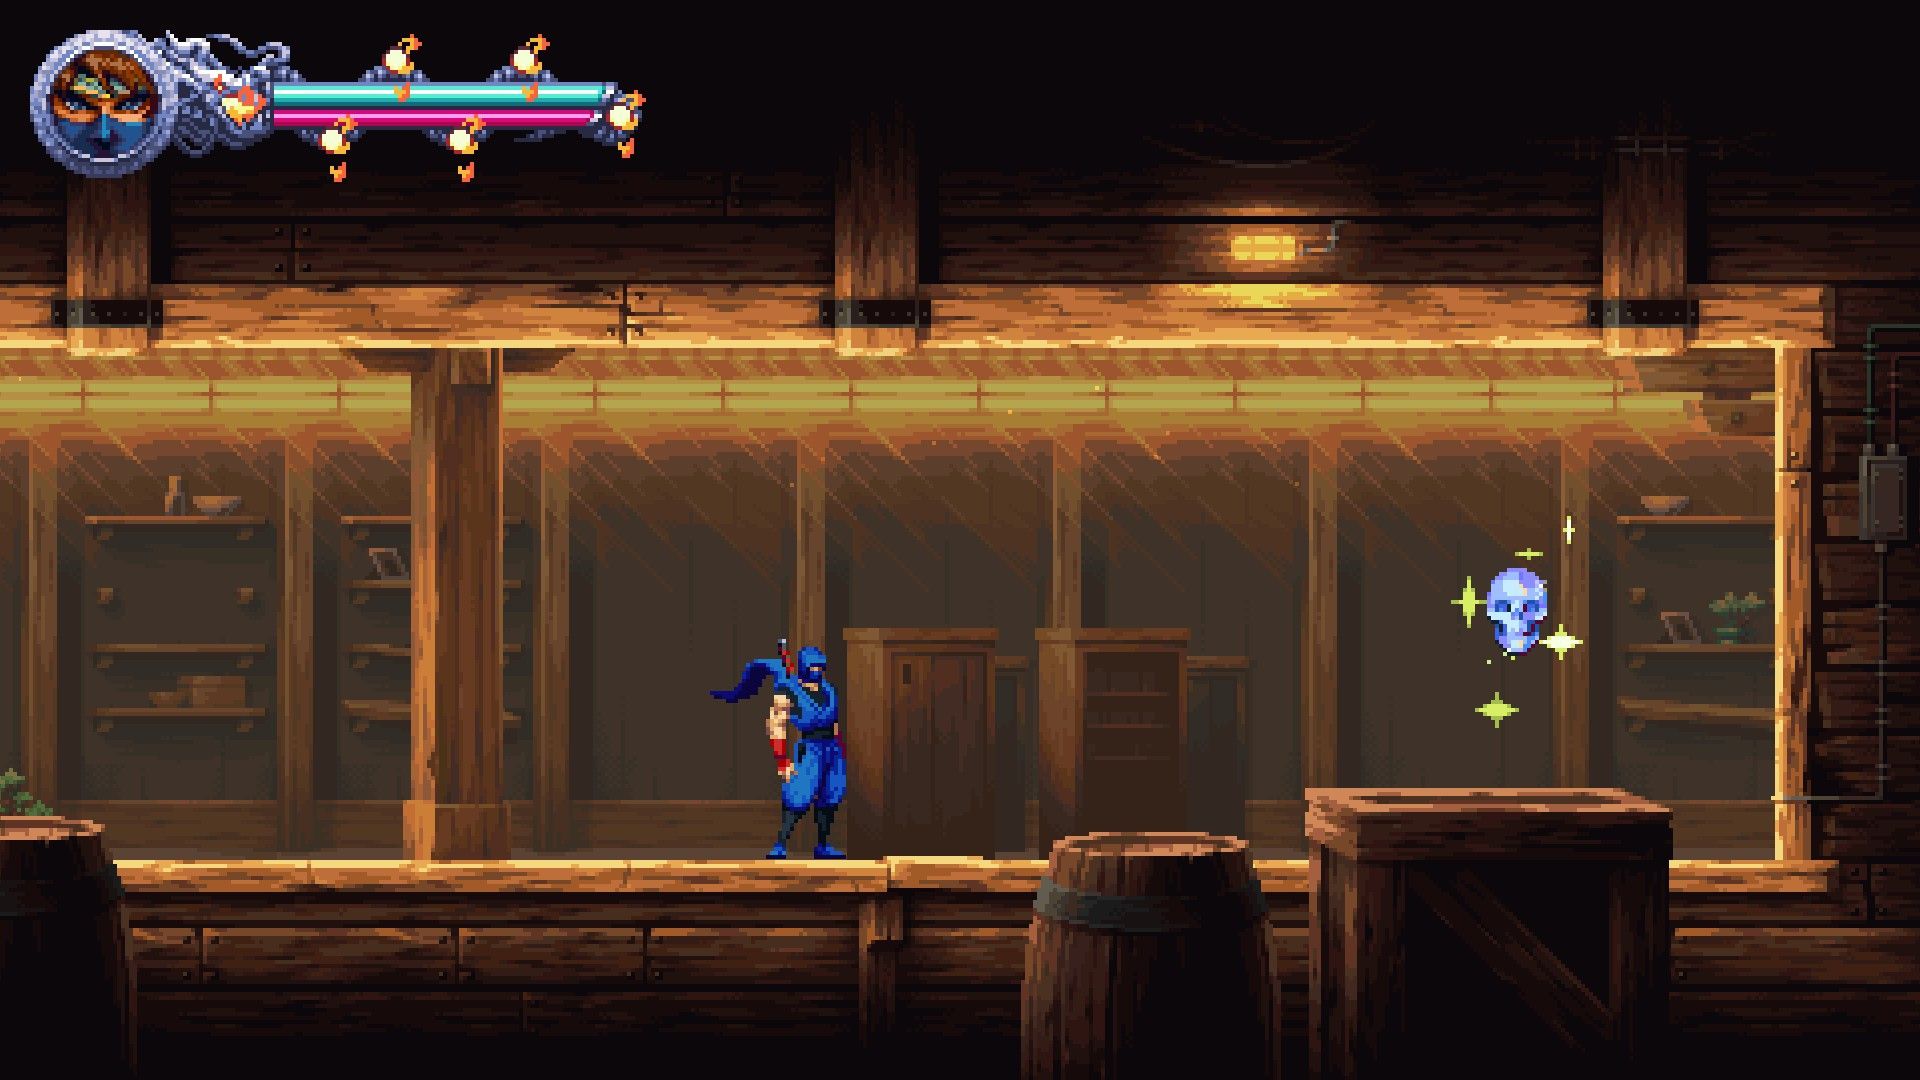
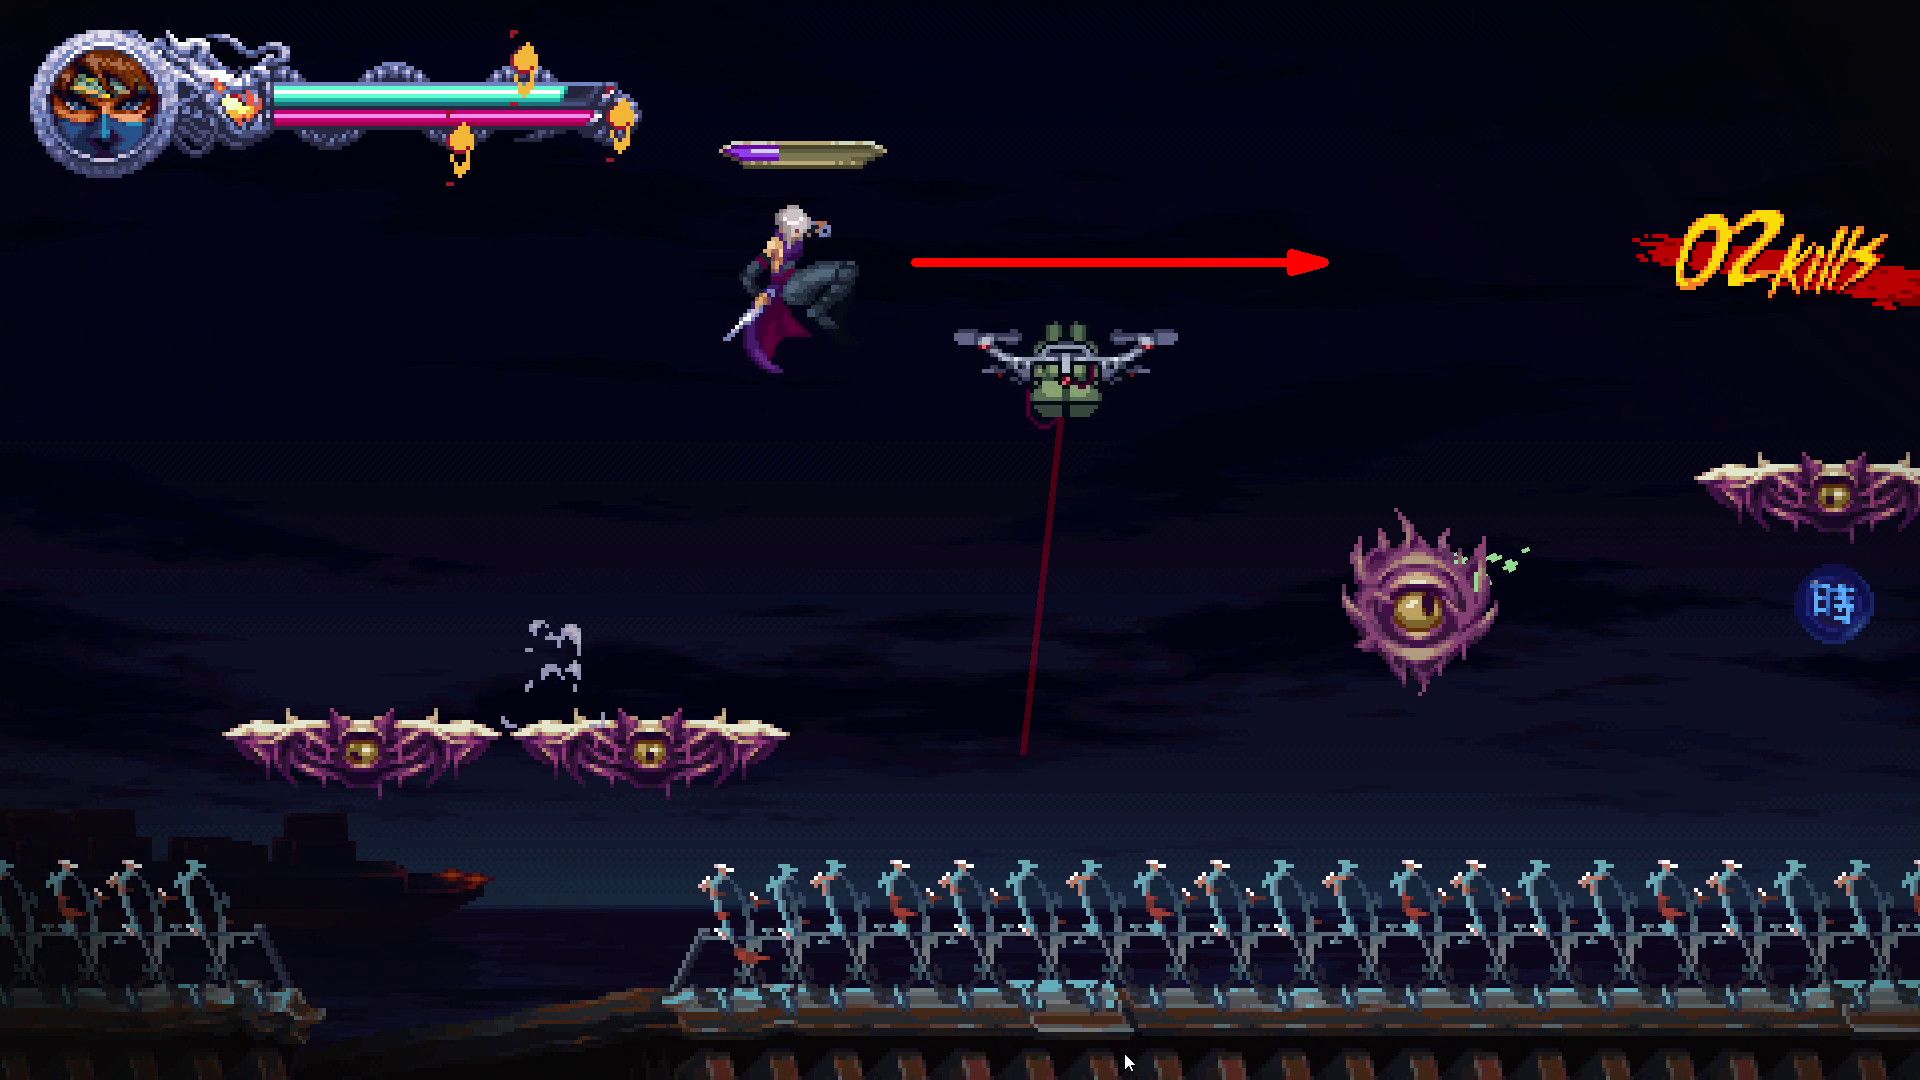
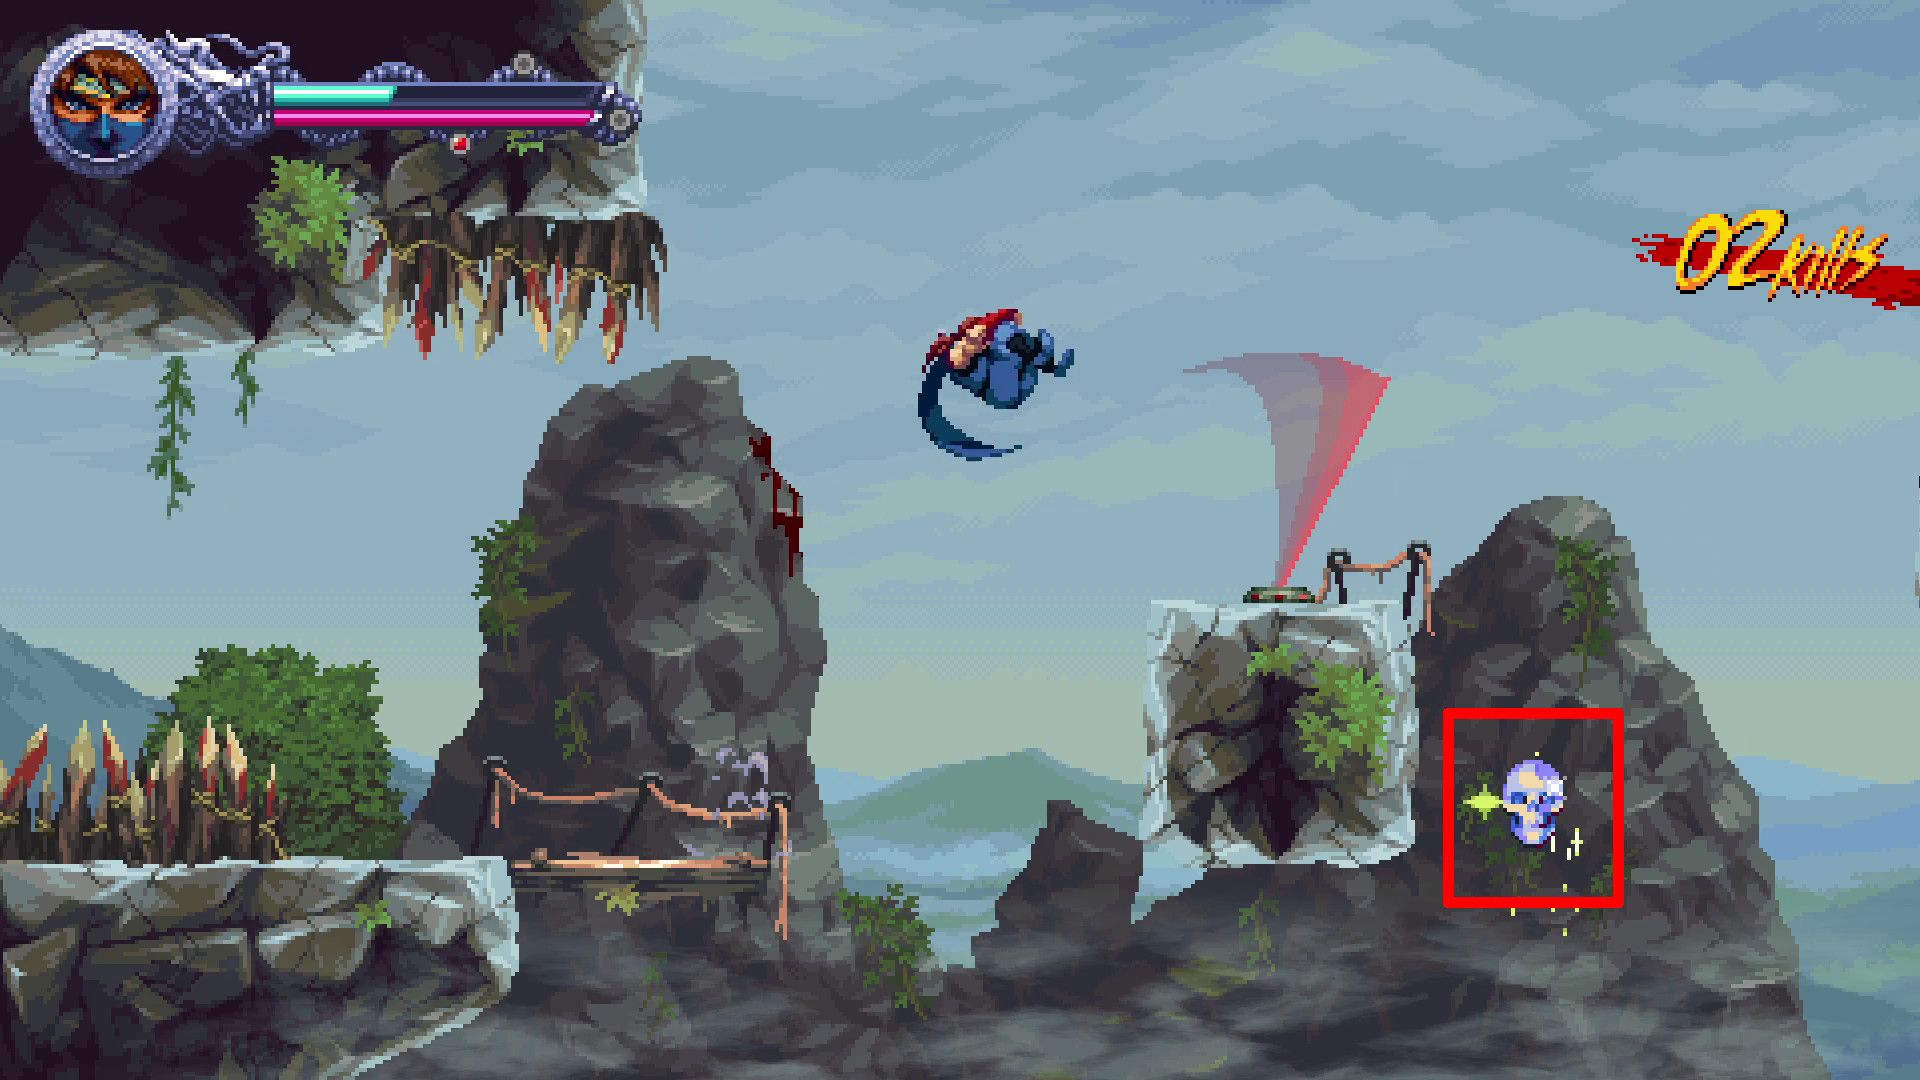
Act 1 Collectibles in Ninja Gaiden Ragebound
Crystal Skulls
This guide will help players find every Skull in Act 1:
- Ninja Gaiden Ragebound Act 1 Crystal Skull Locations
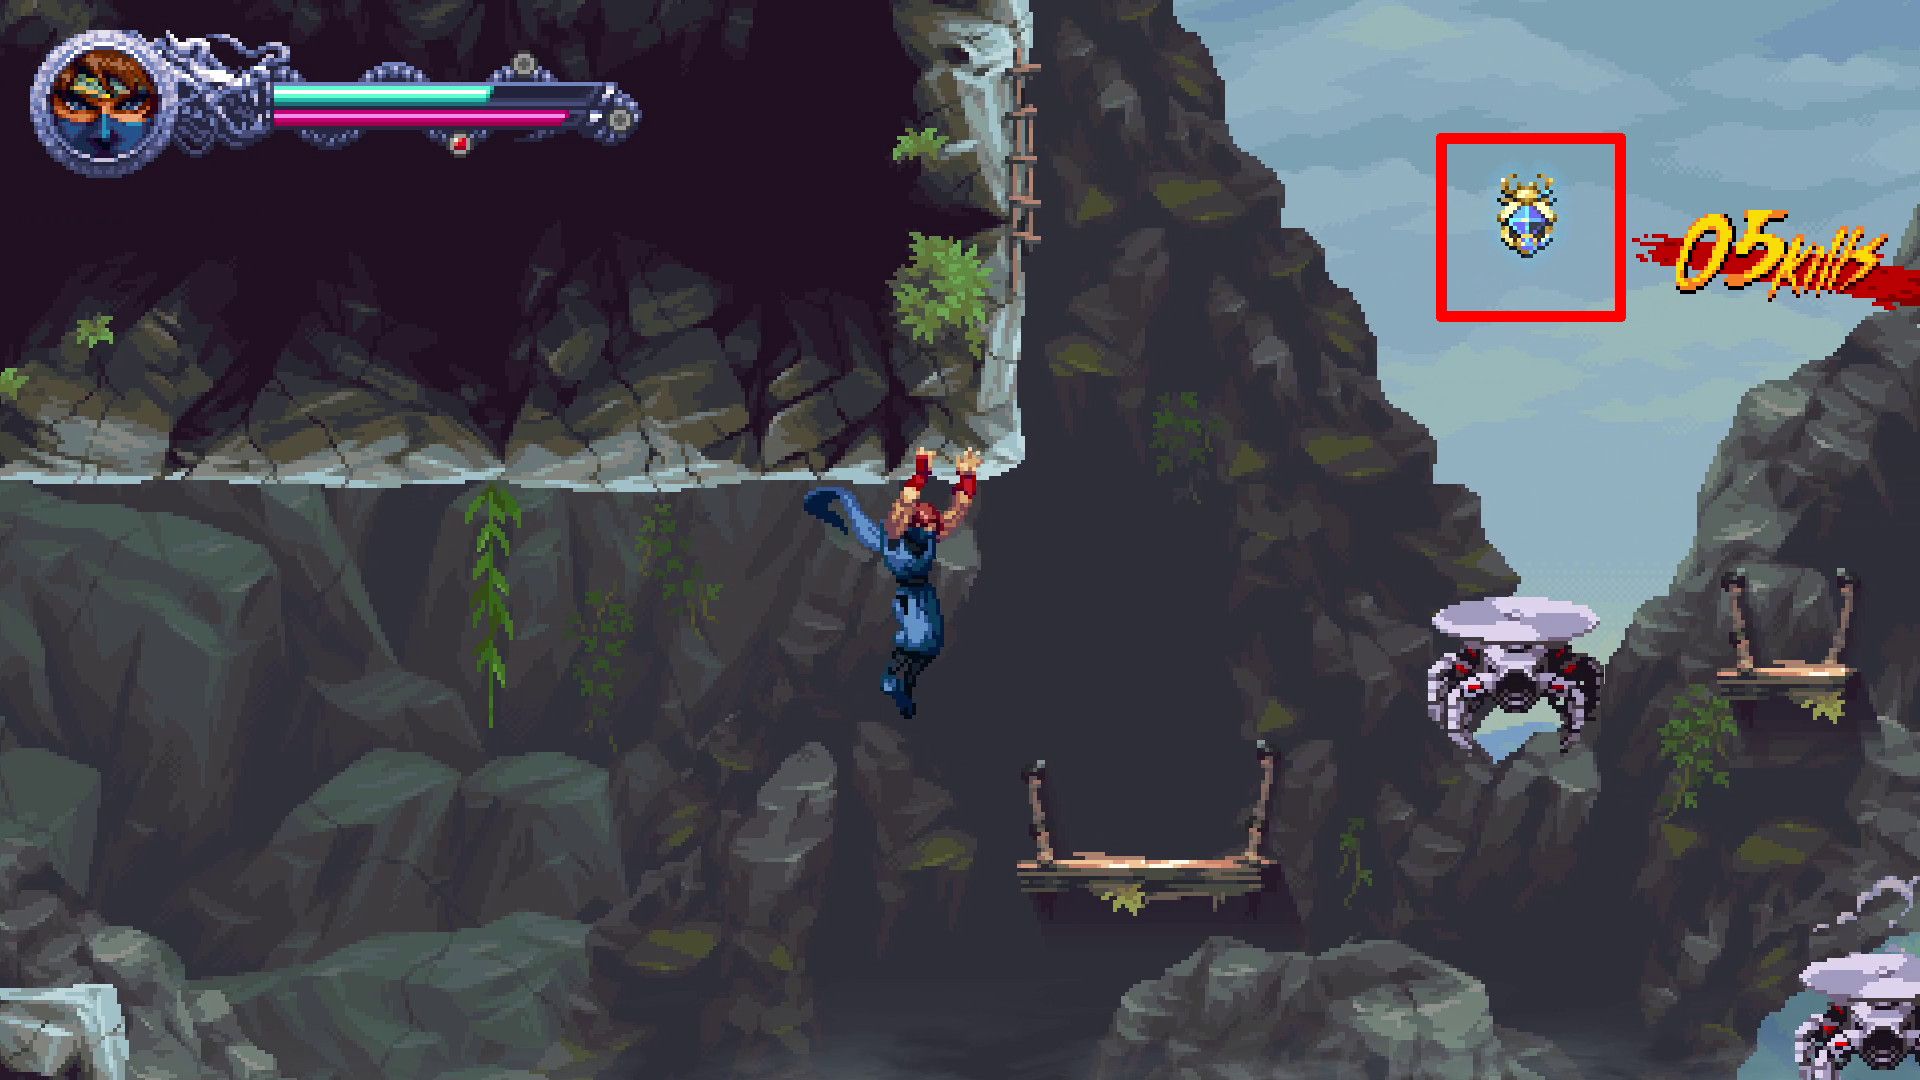
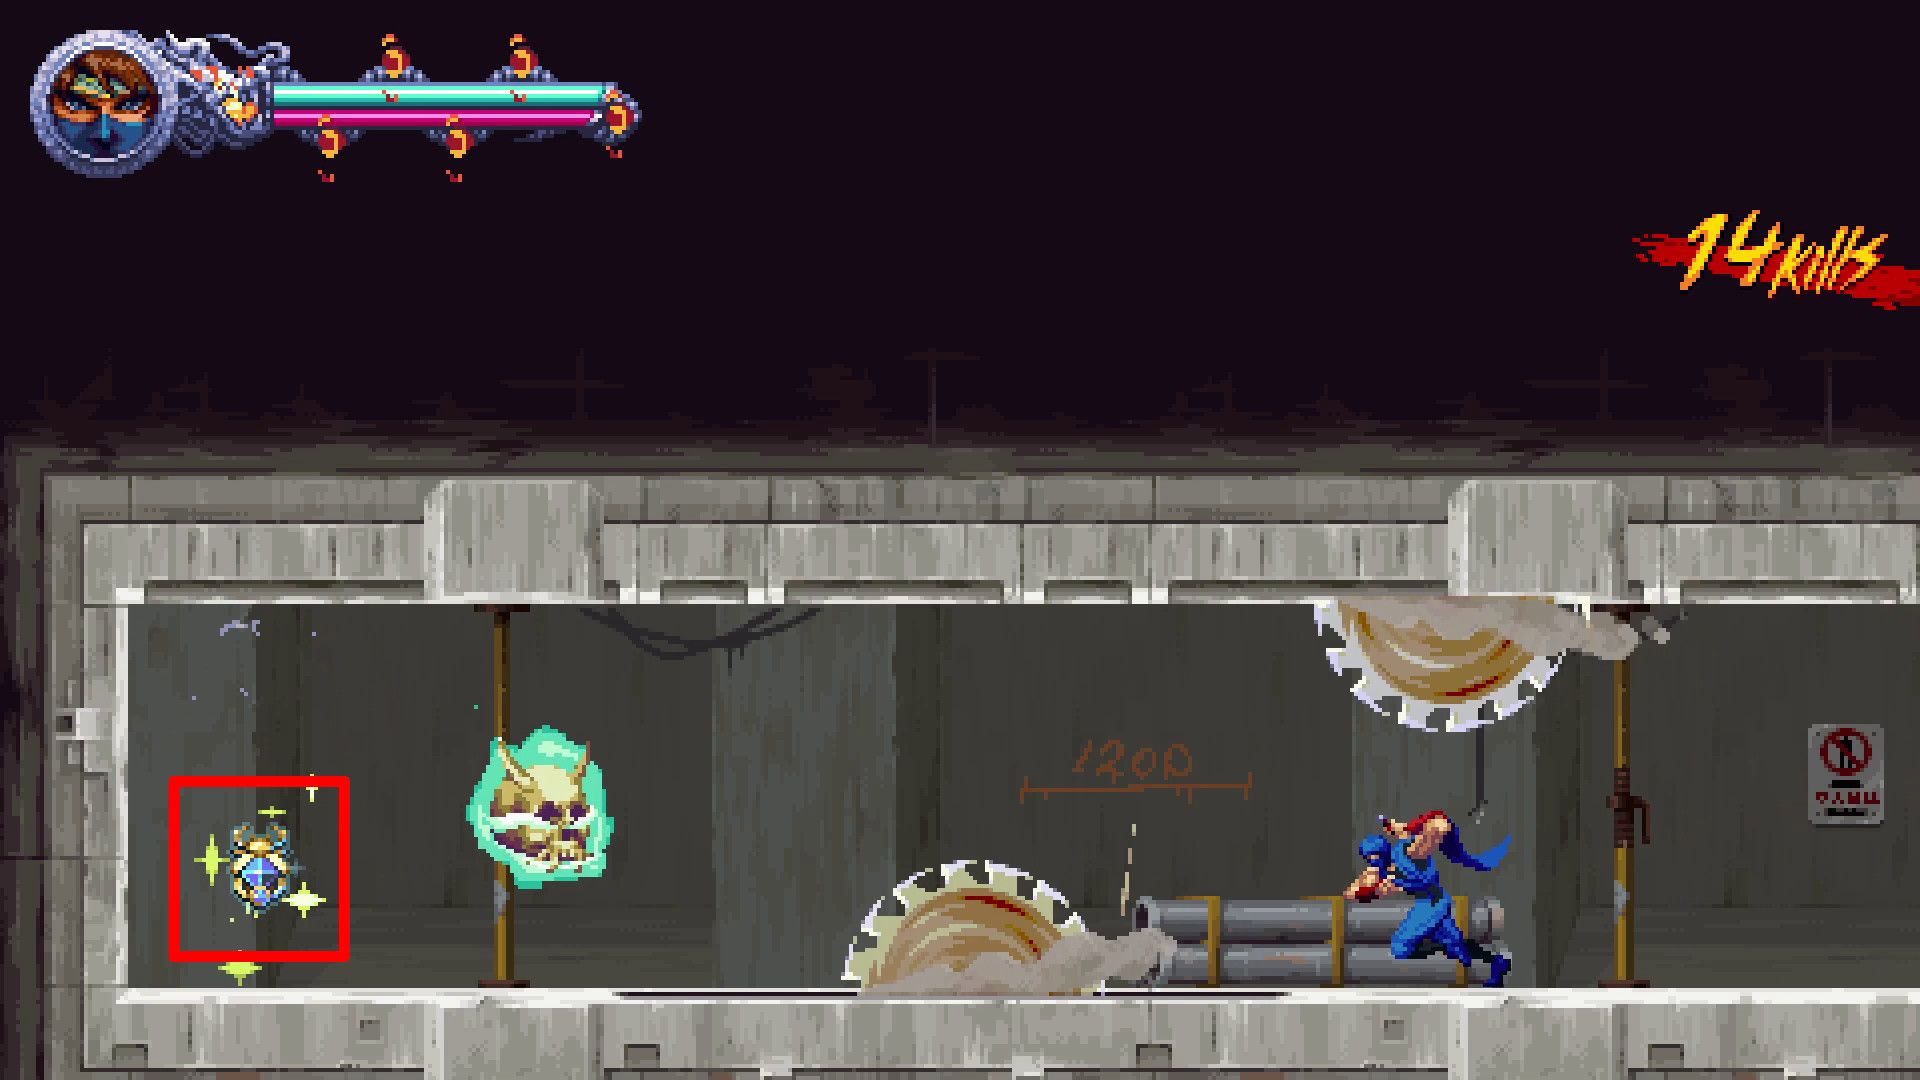
Golden Scarabs
Players can find the location of every Scarab in Act 1 detailed in this guide:
- Ninja Gaiden Ragebound Act 1 Golden Scarab Locations
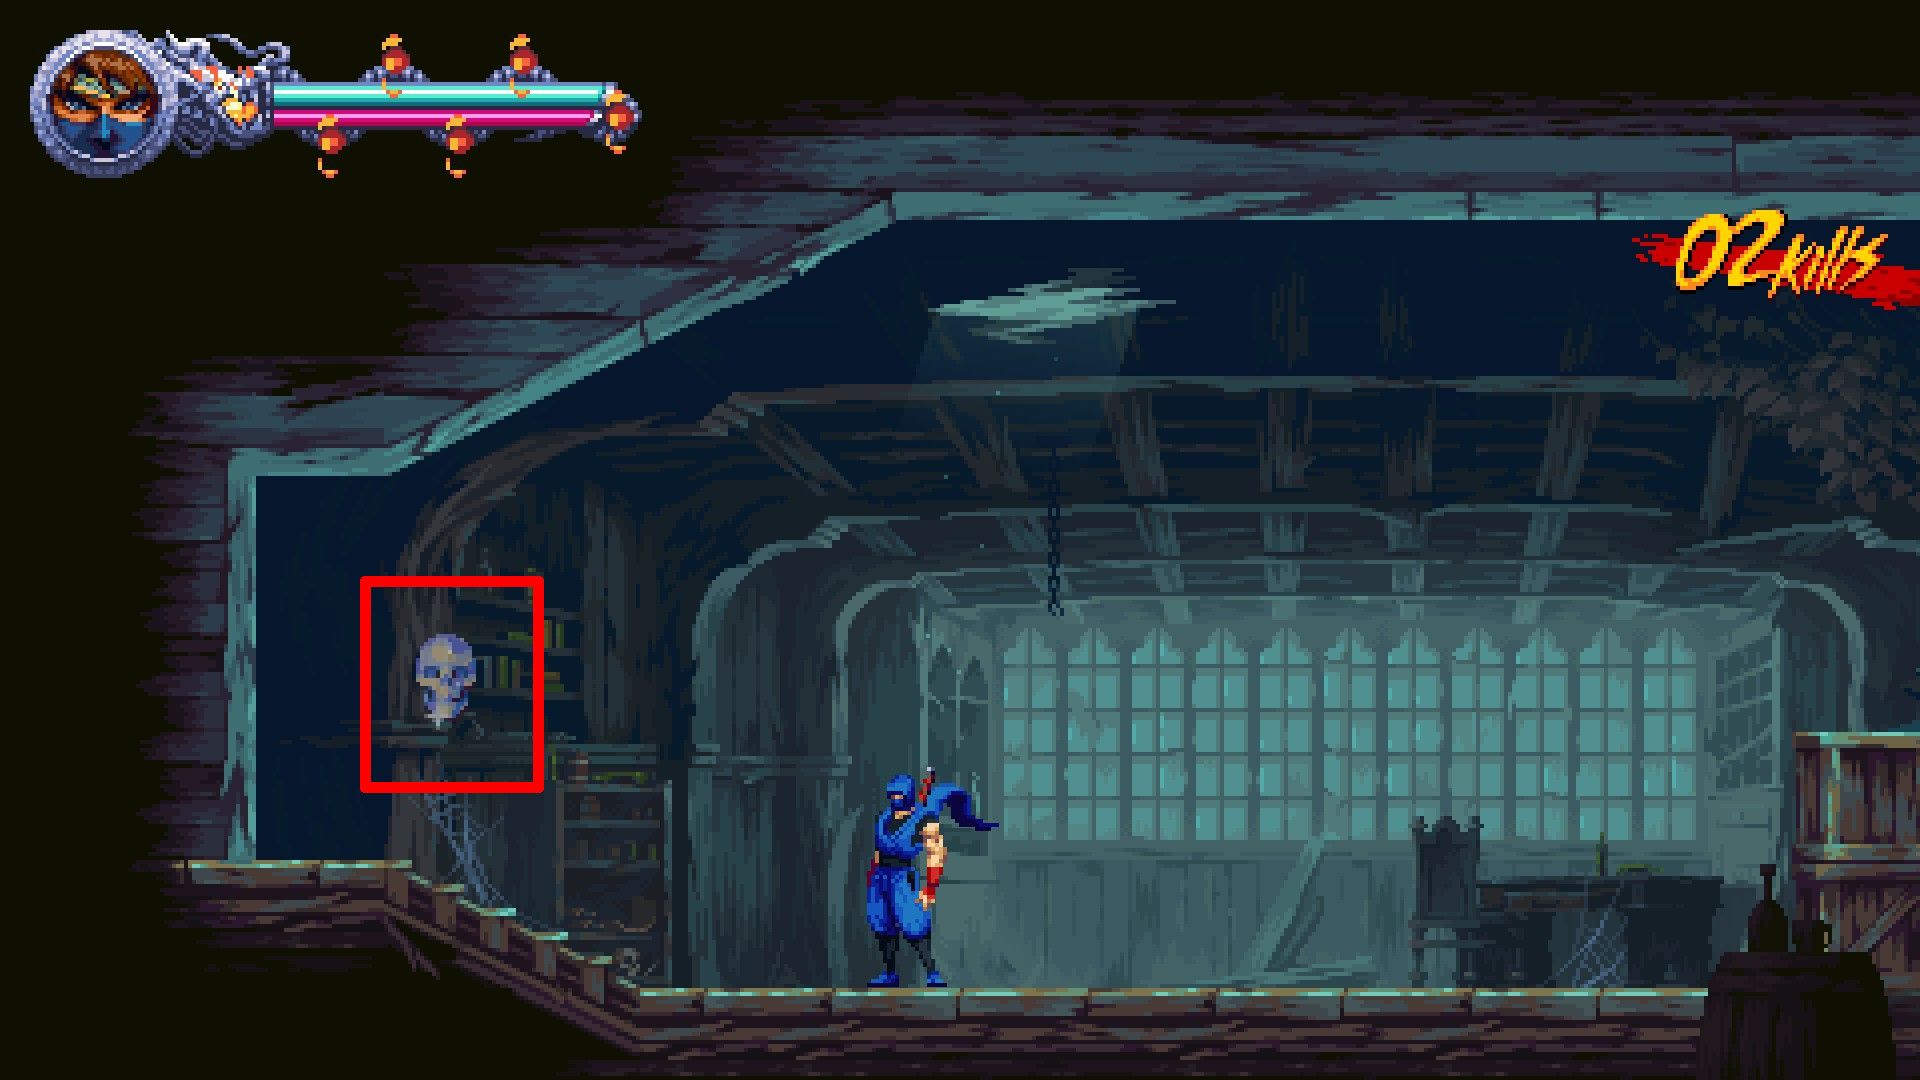
Scrolls
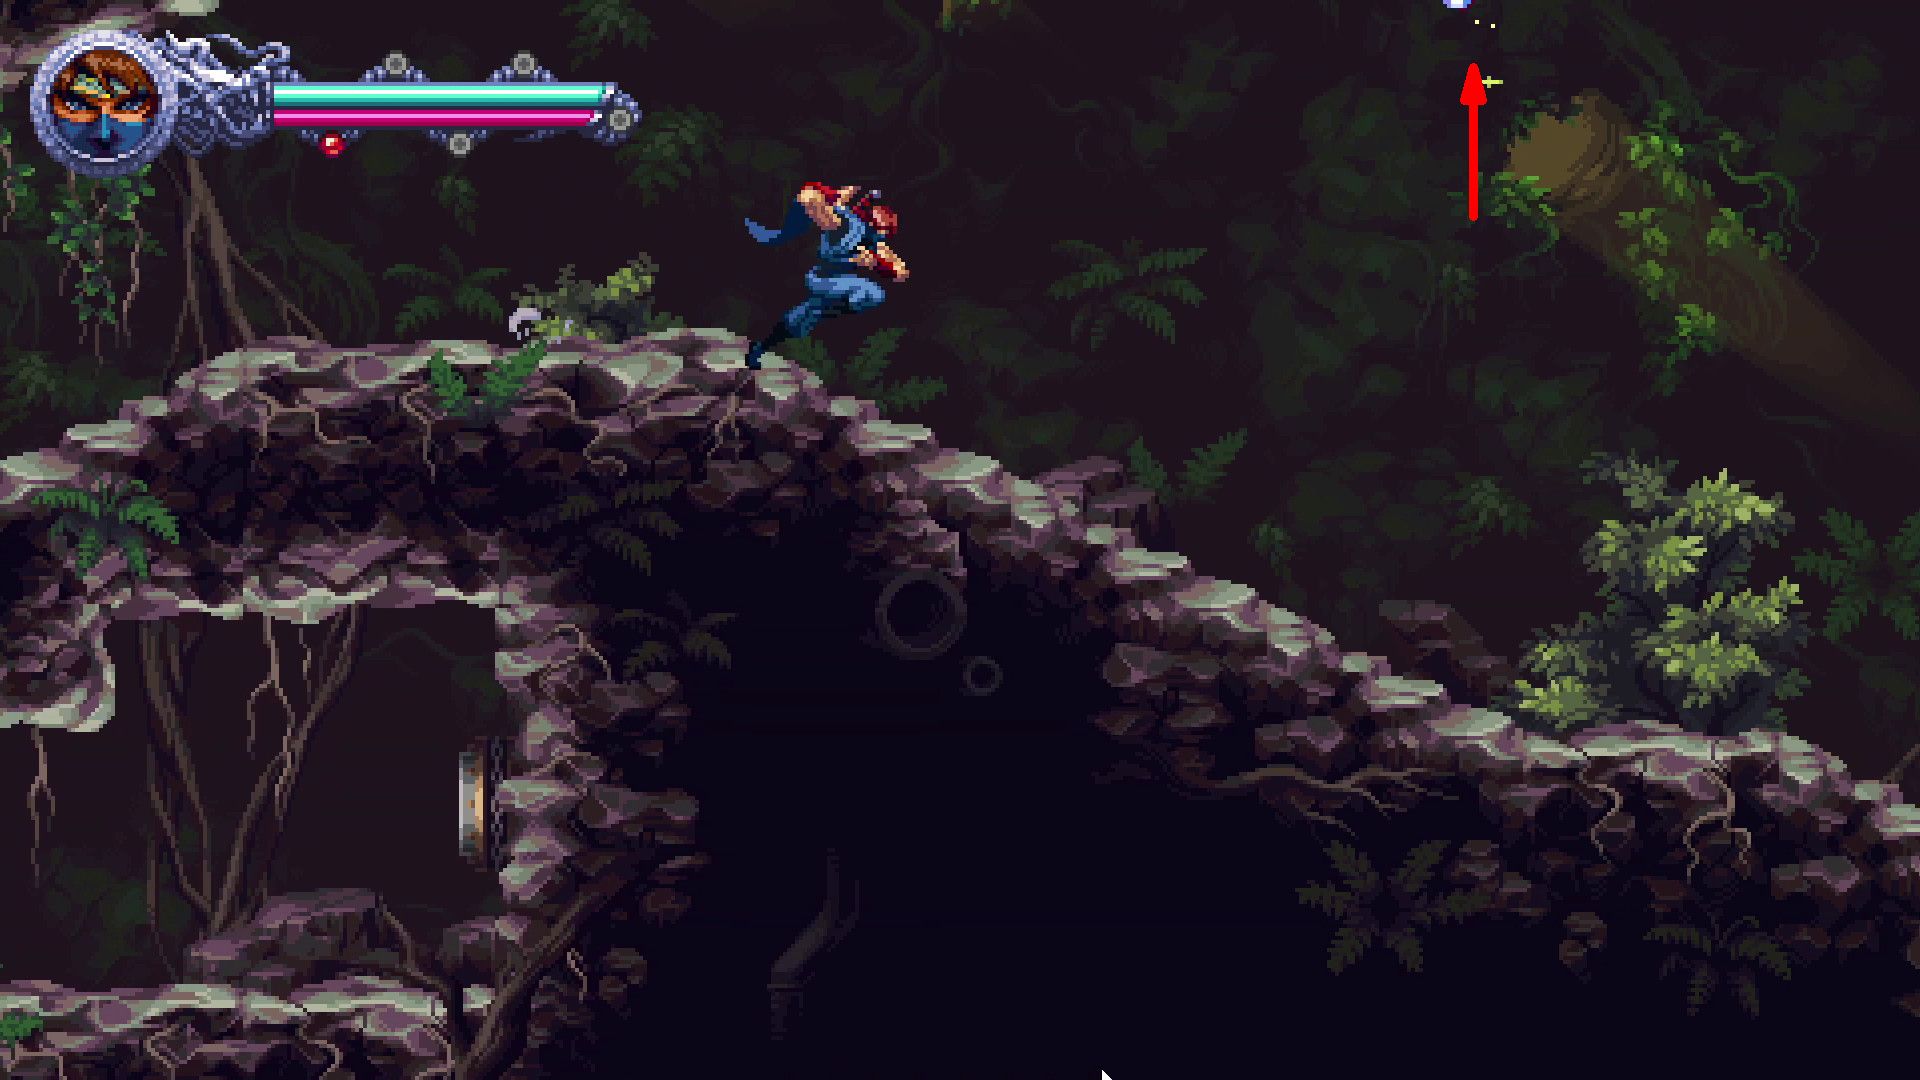
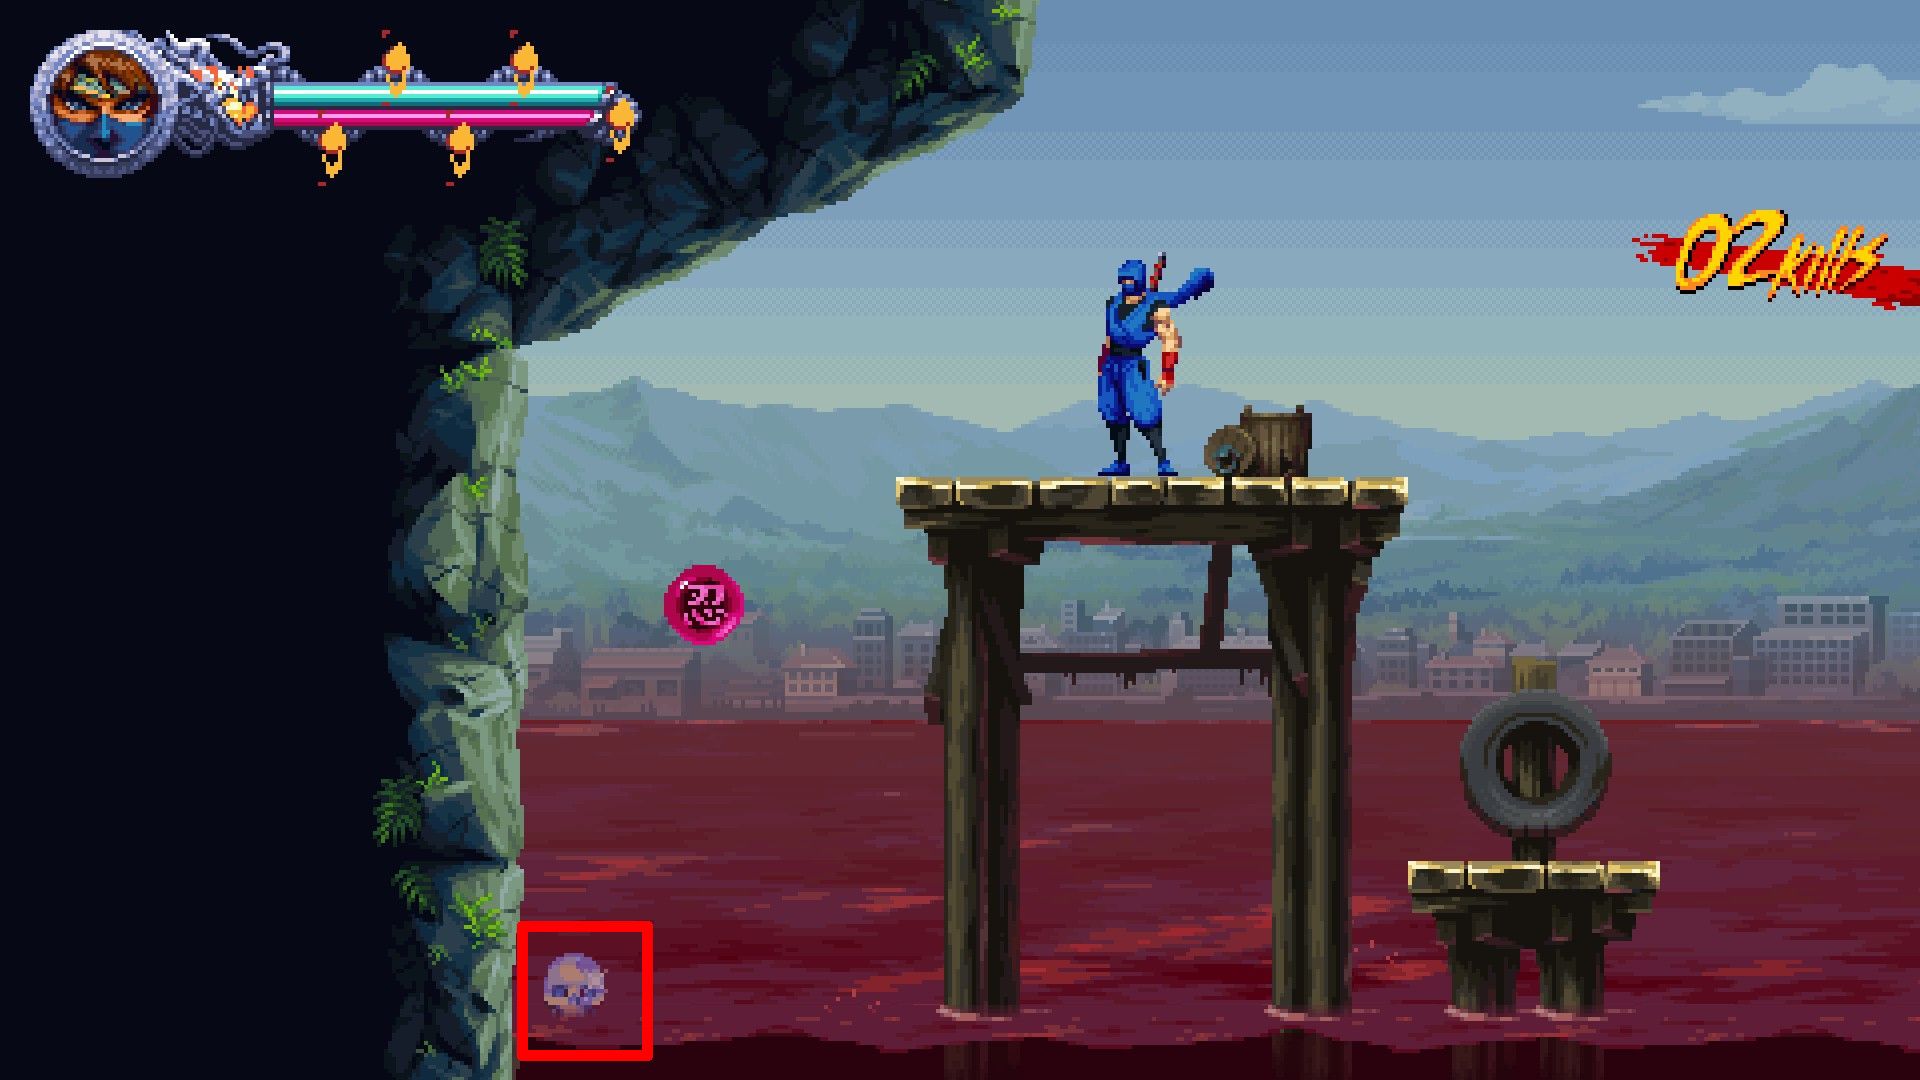
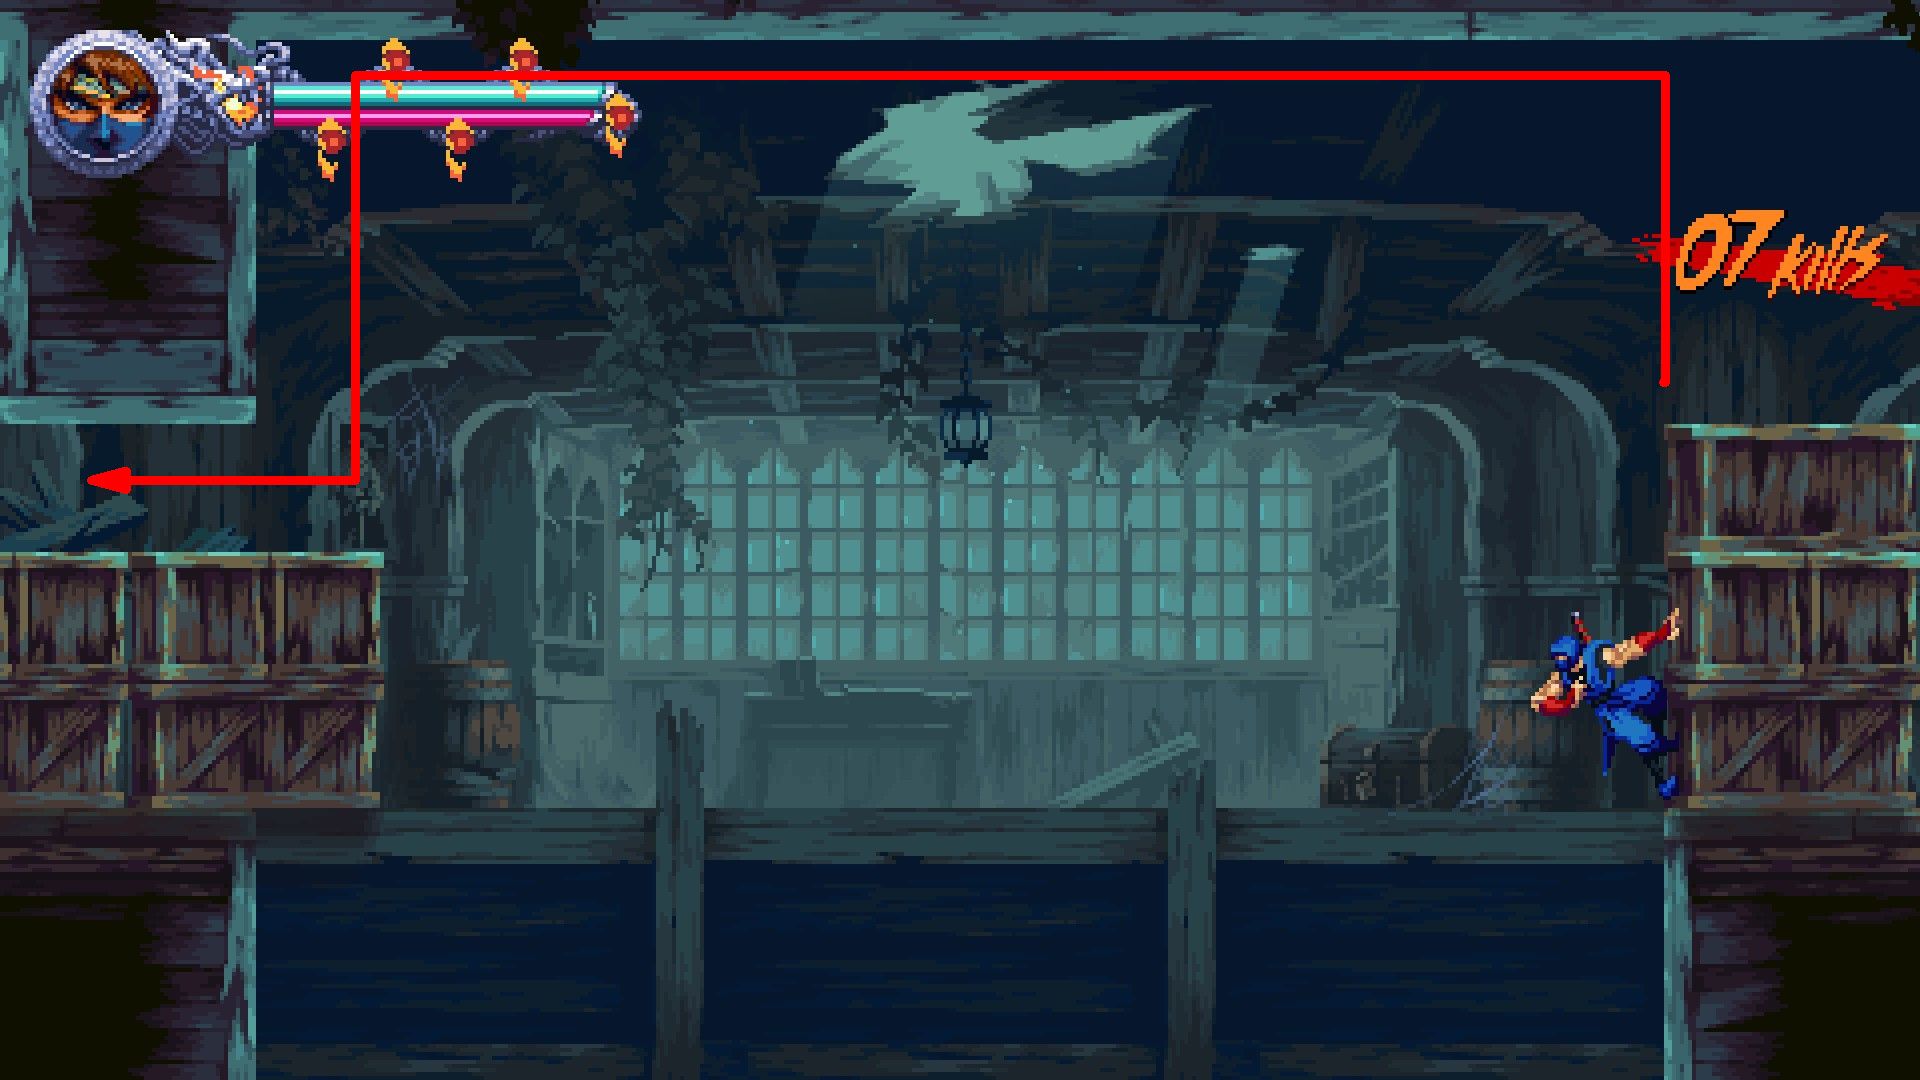
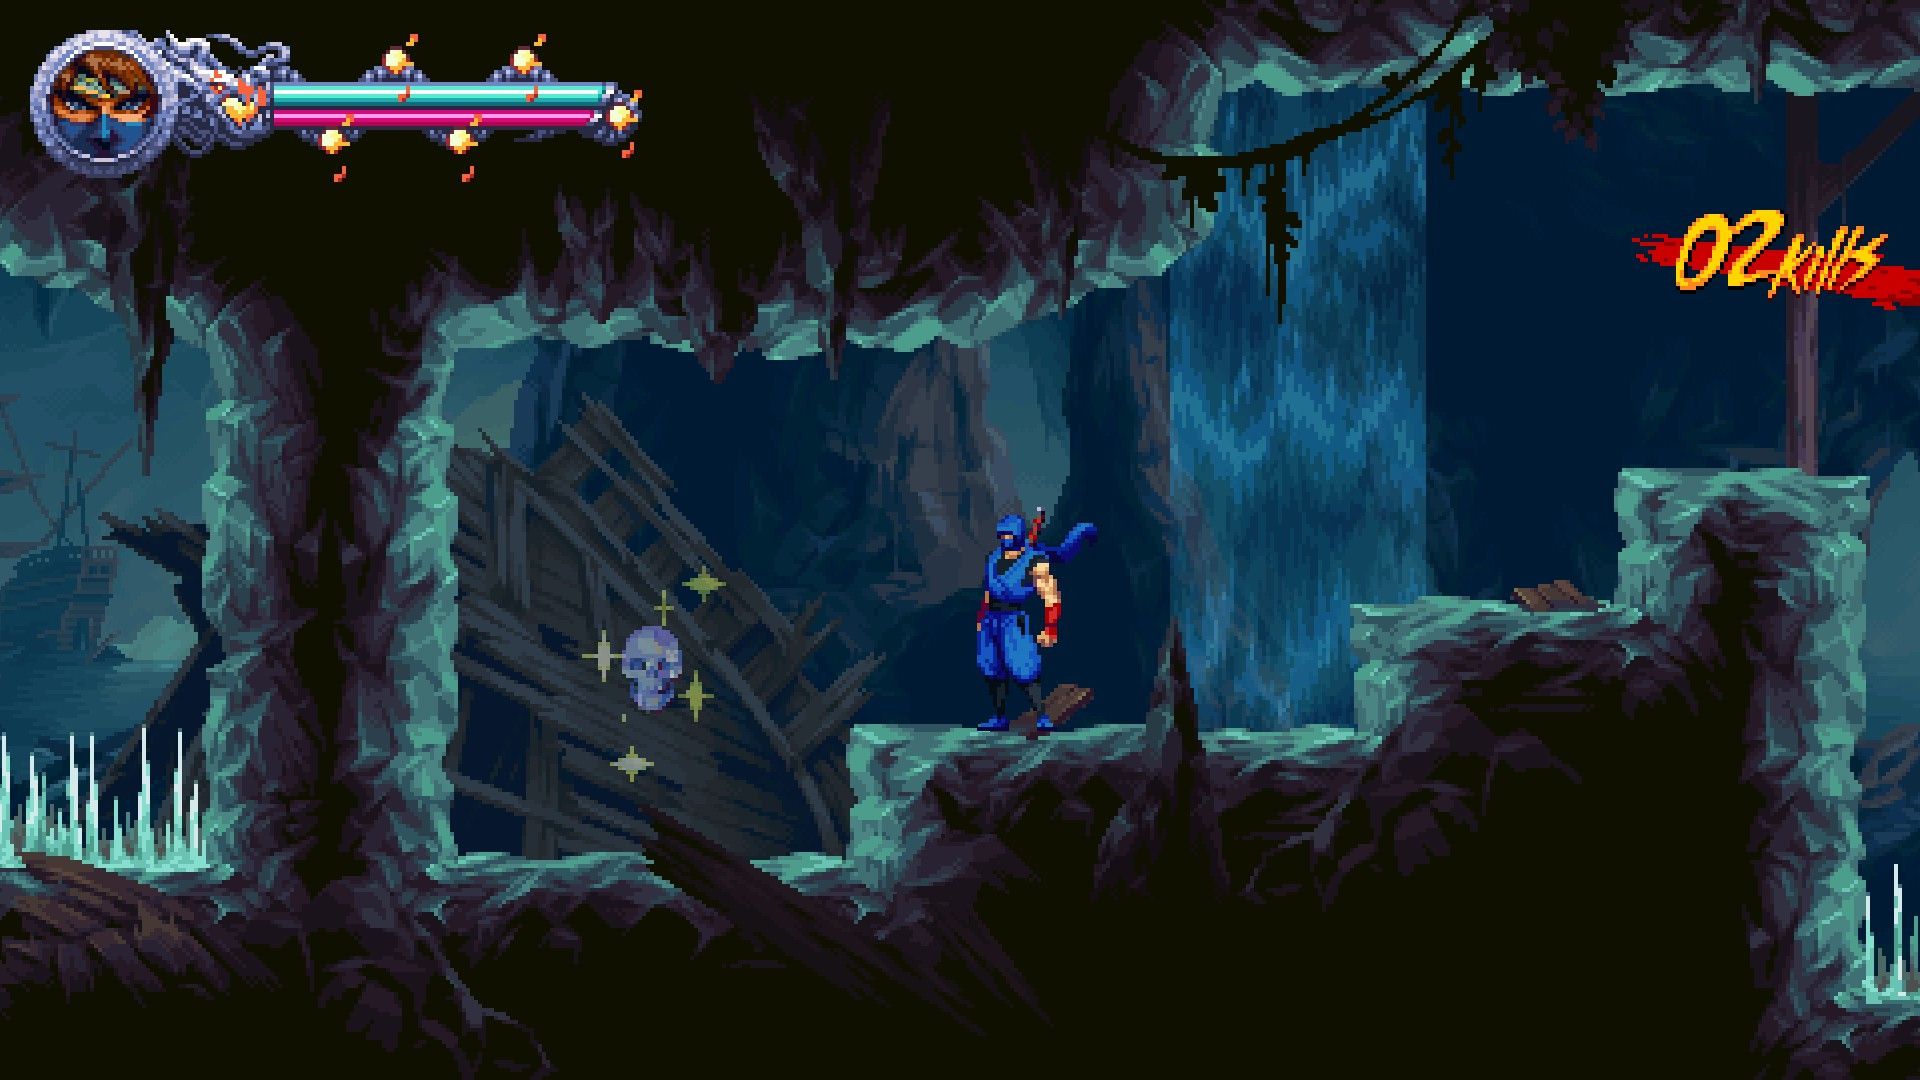
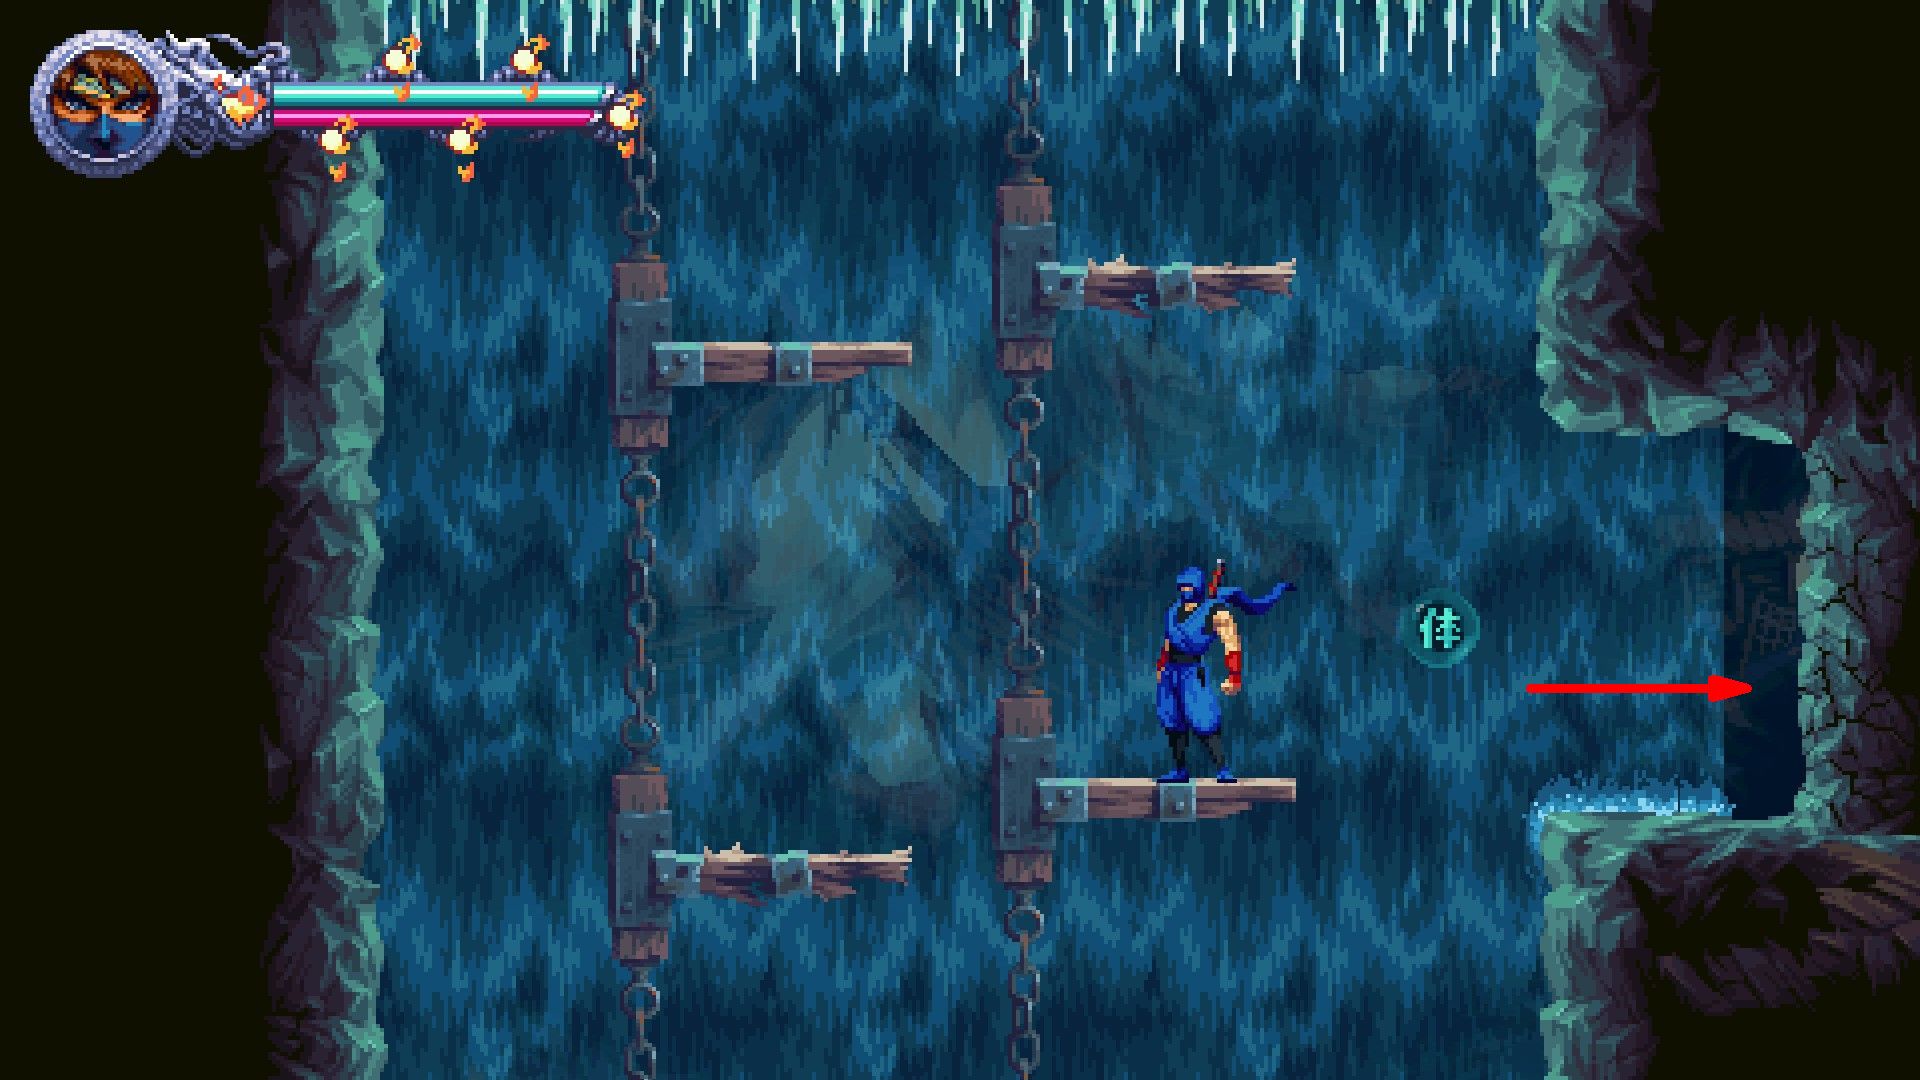
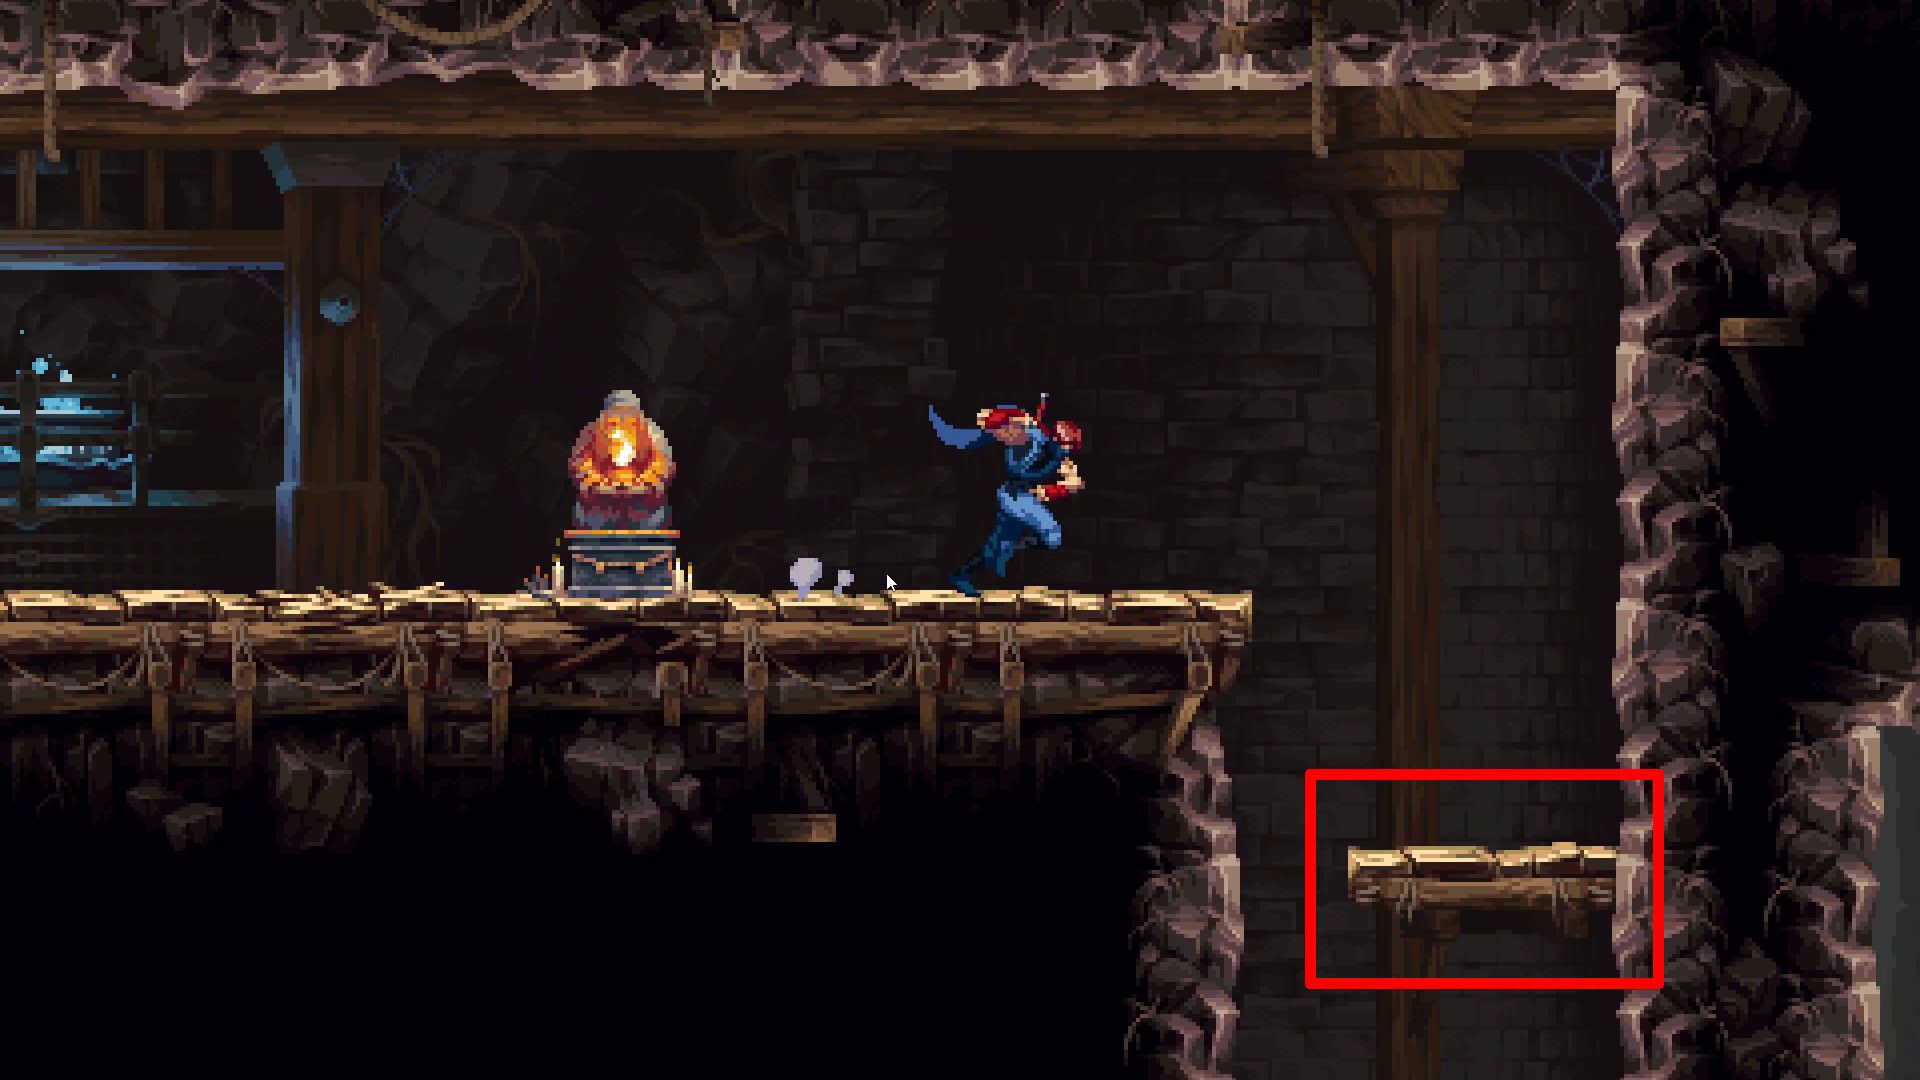
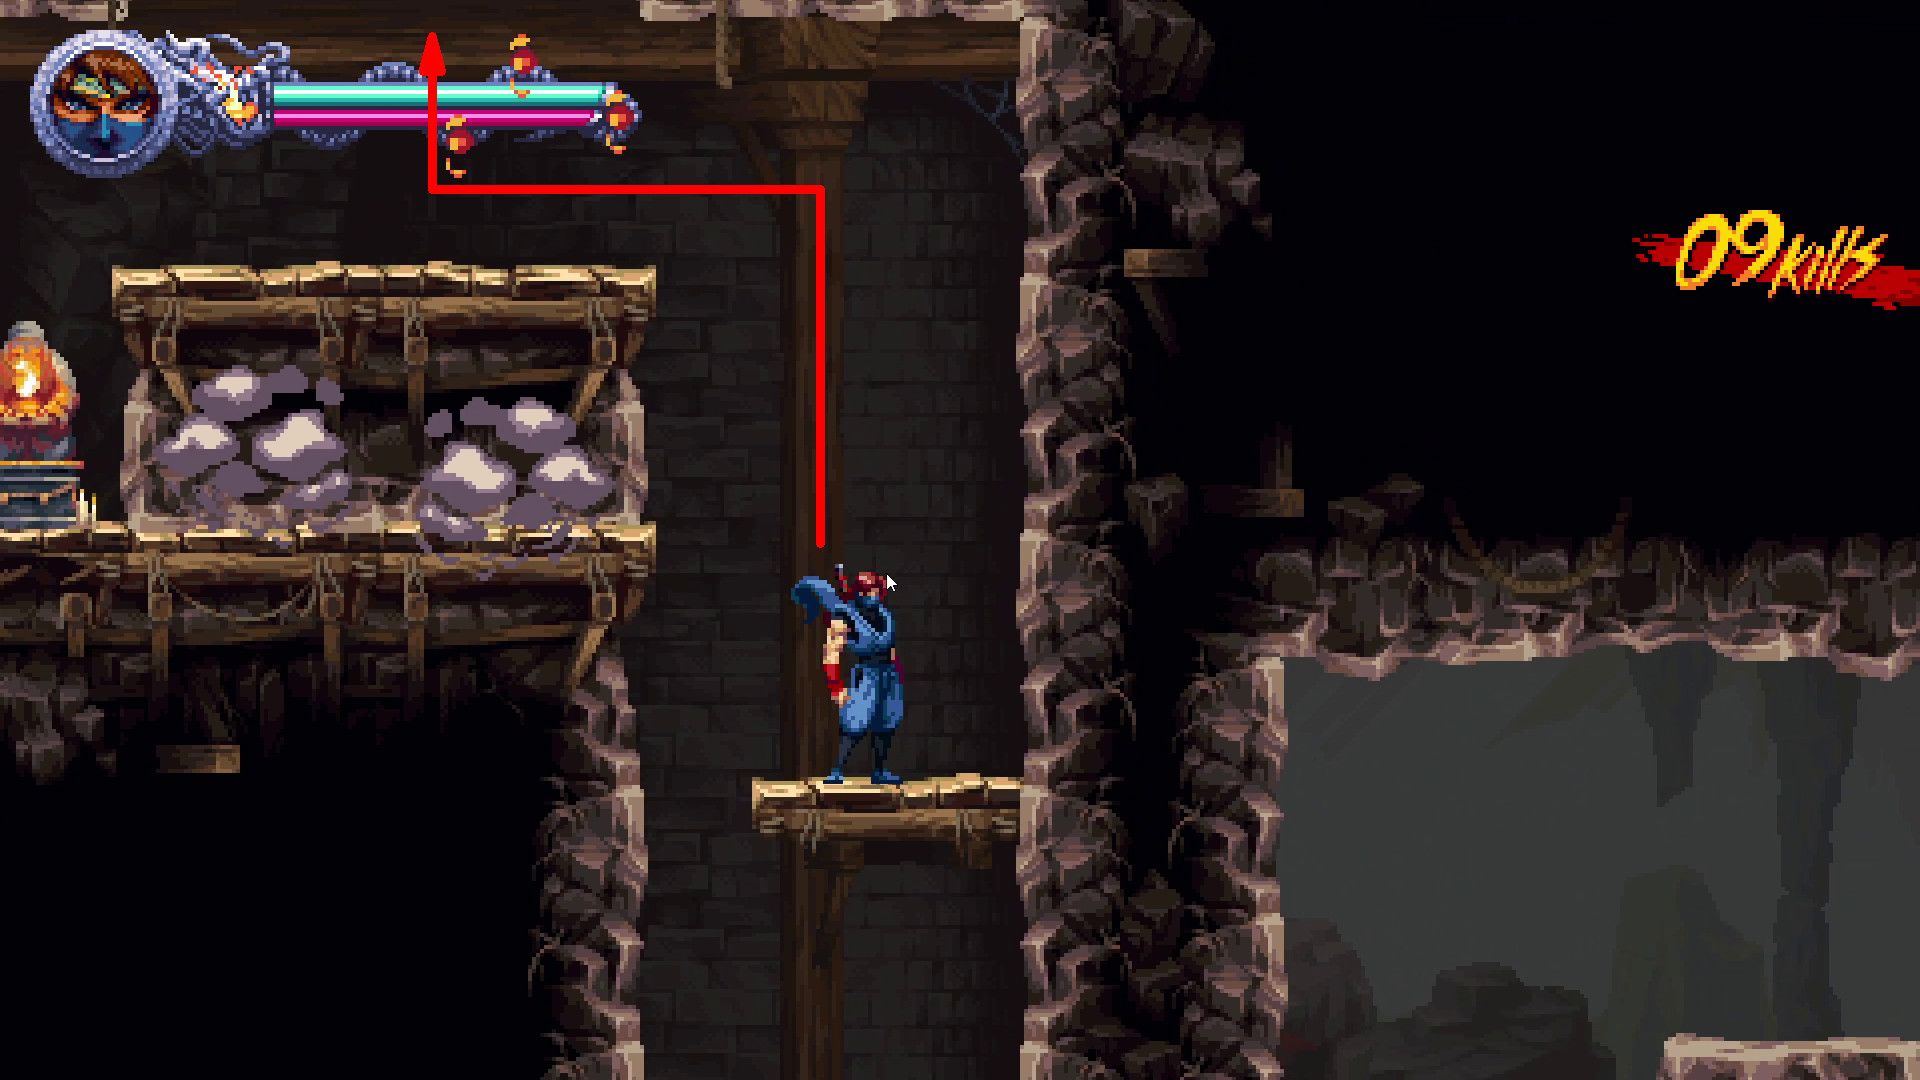
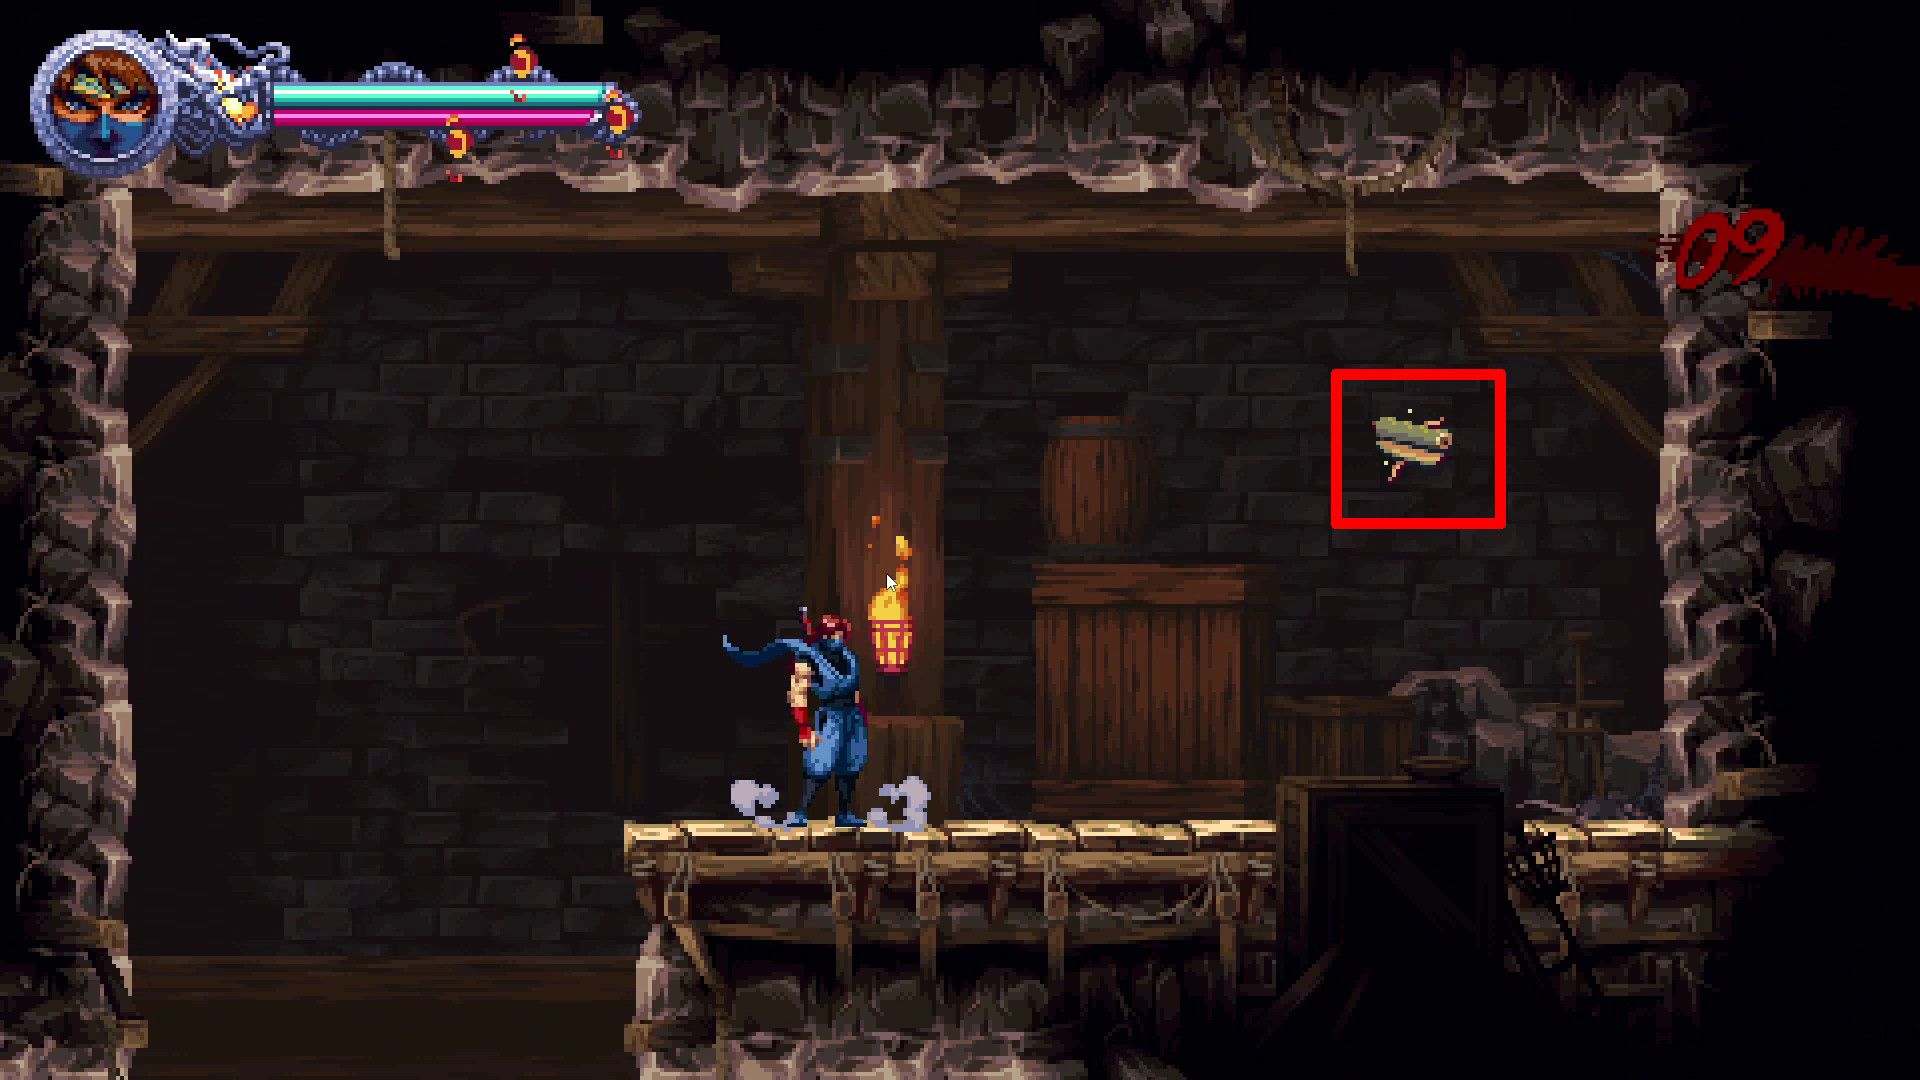
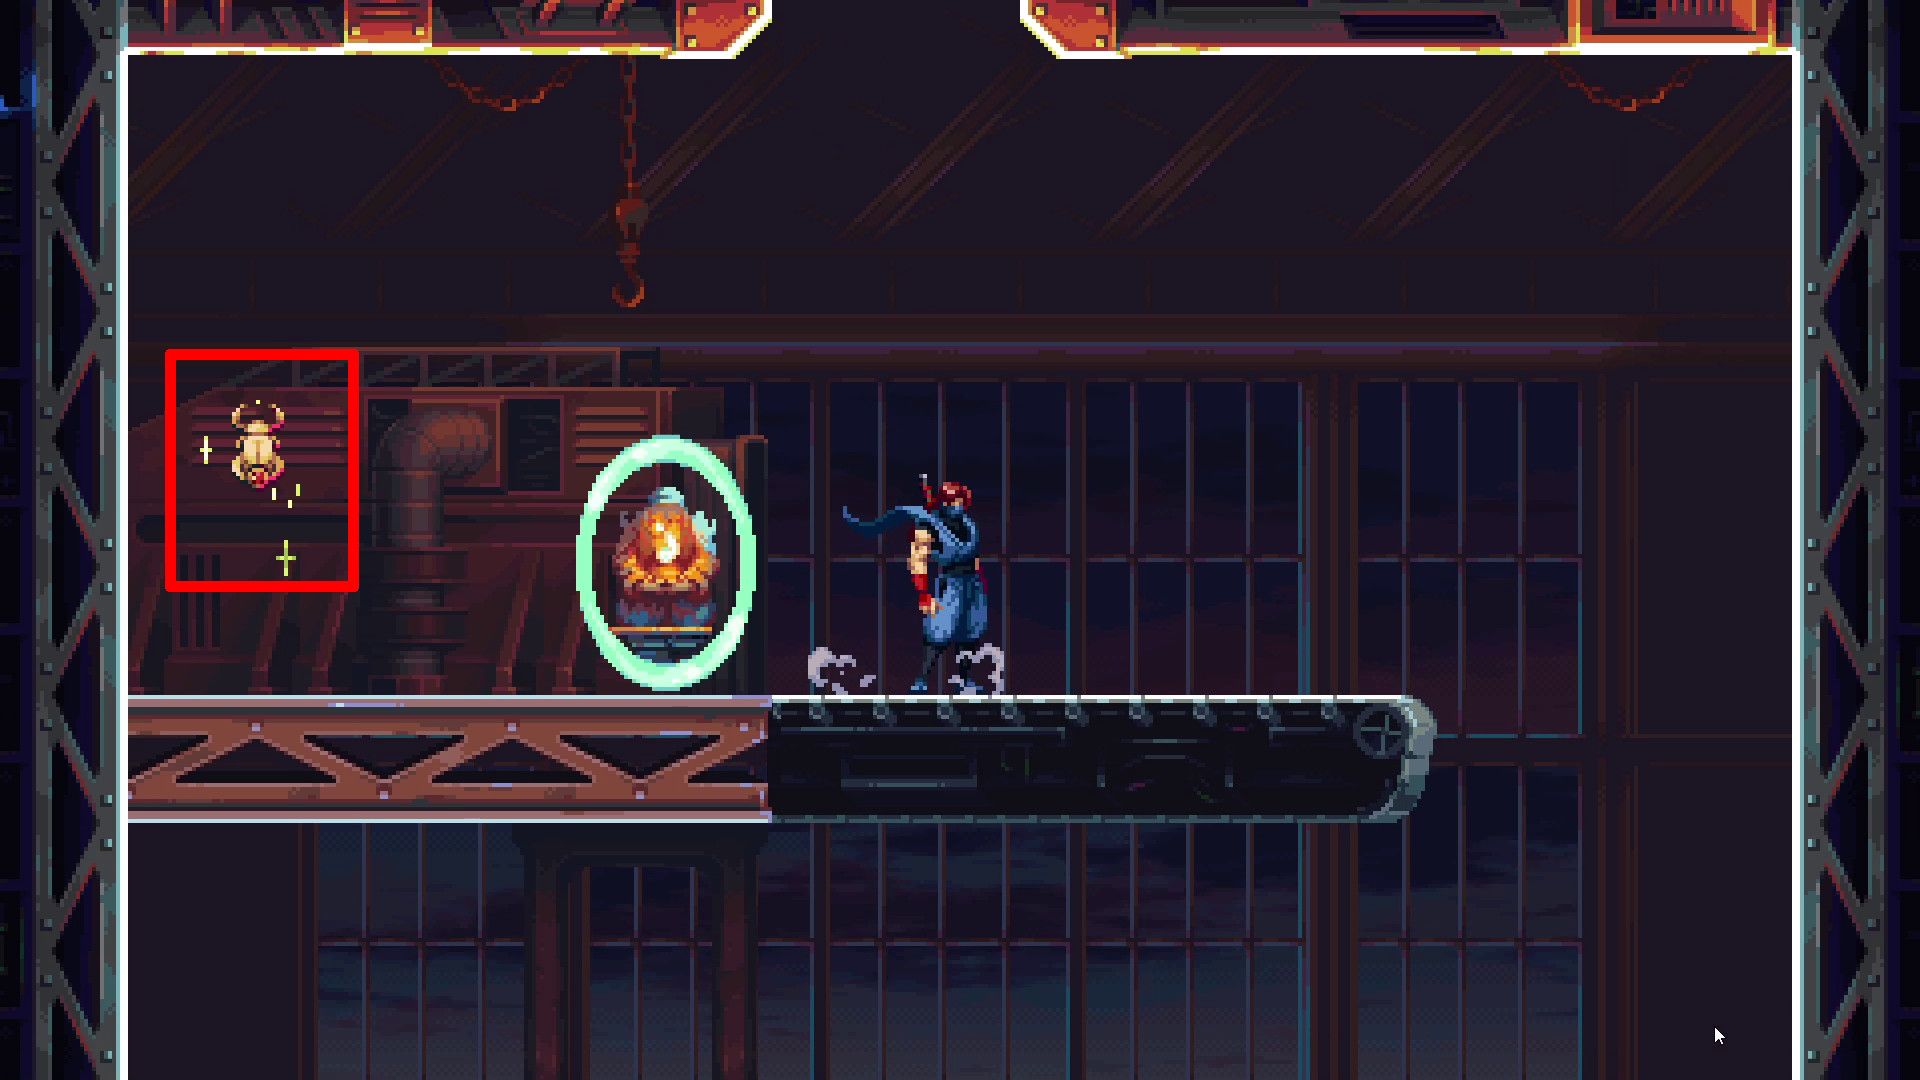
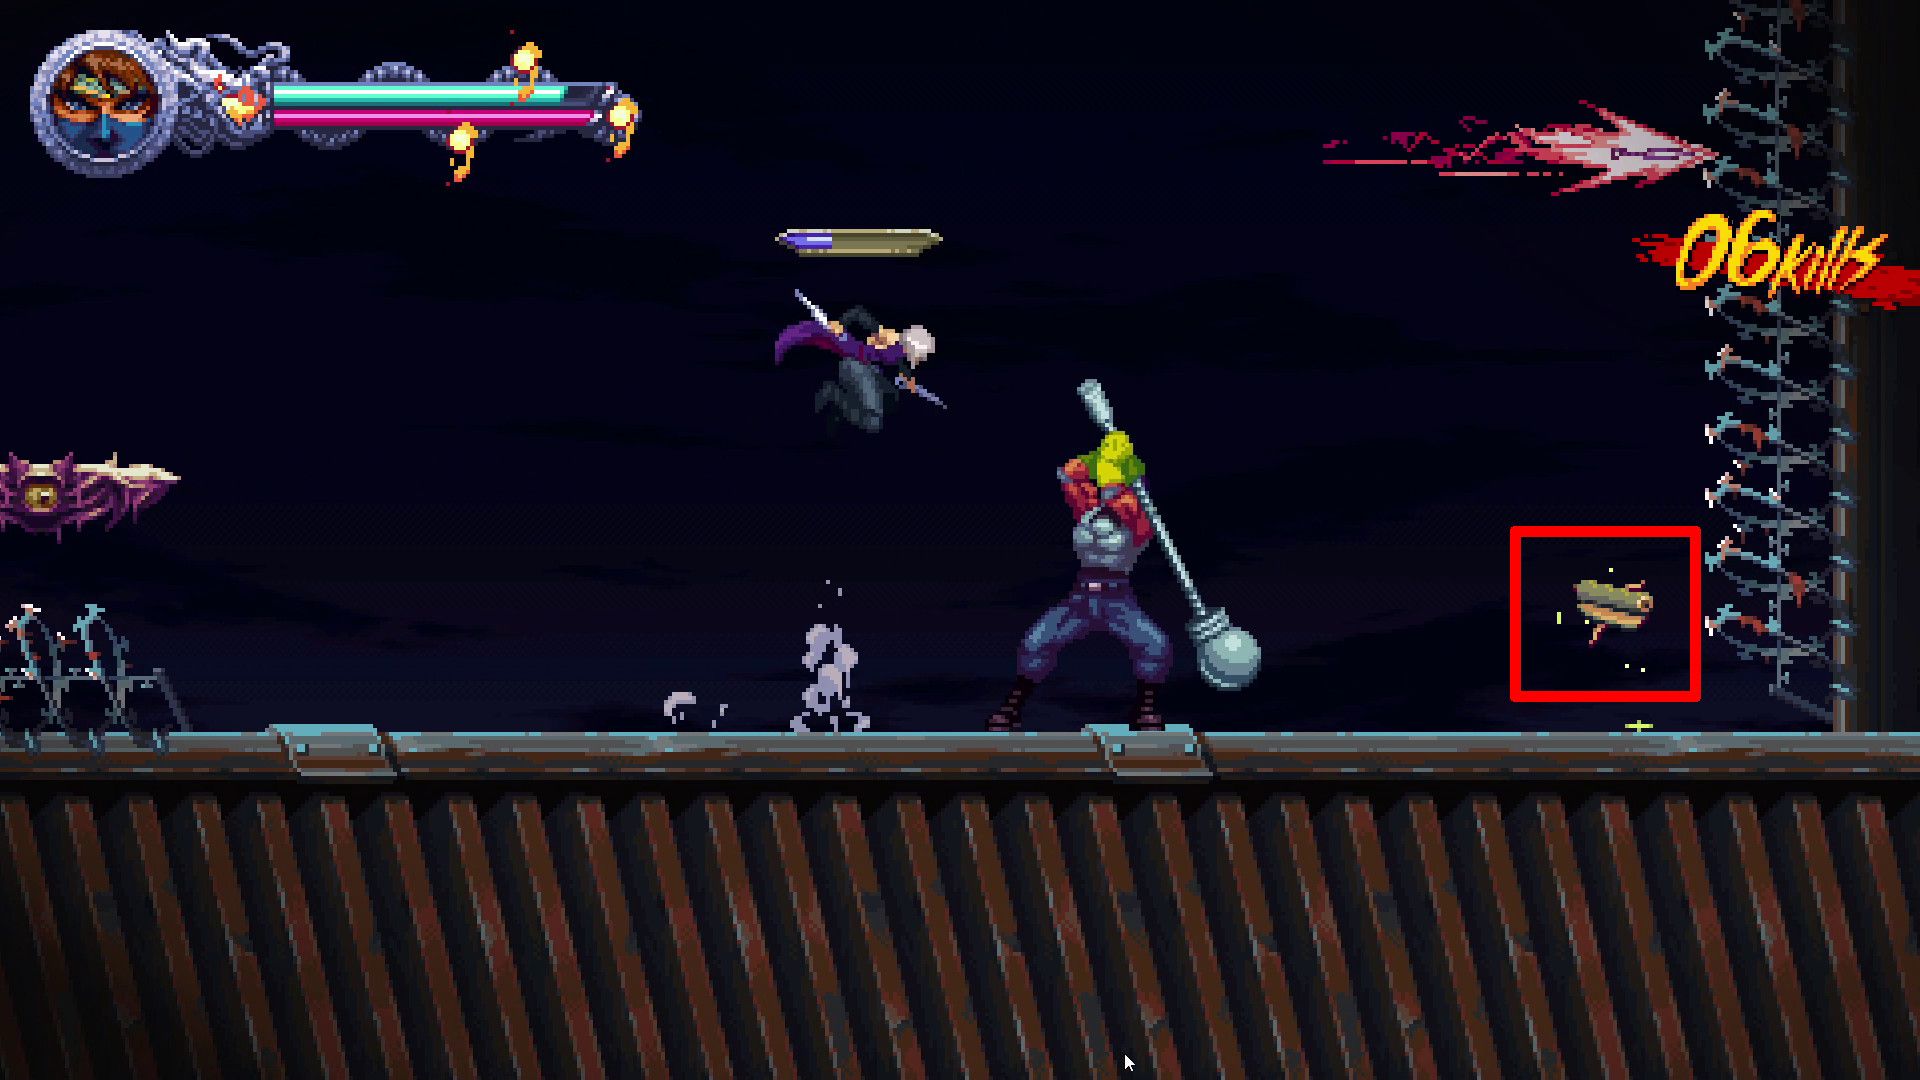
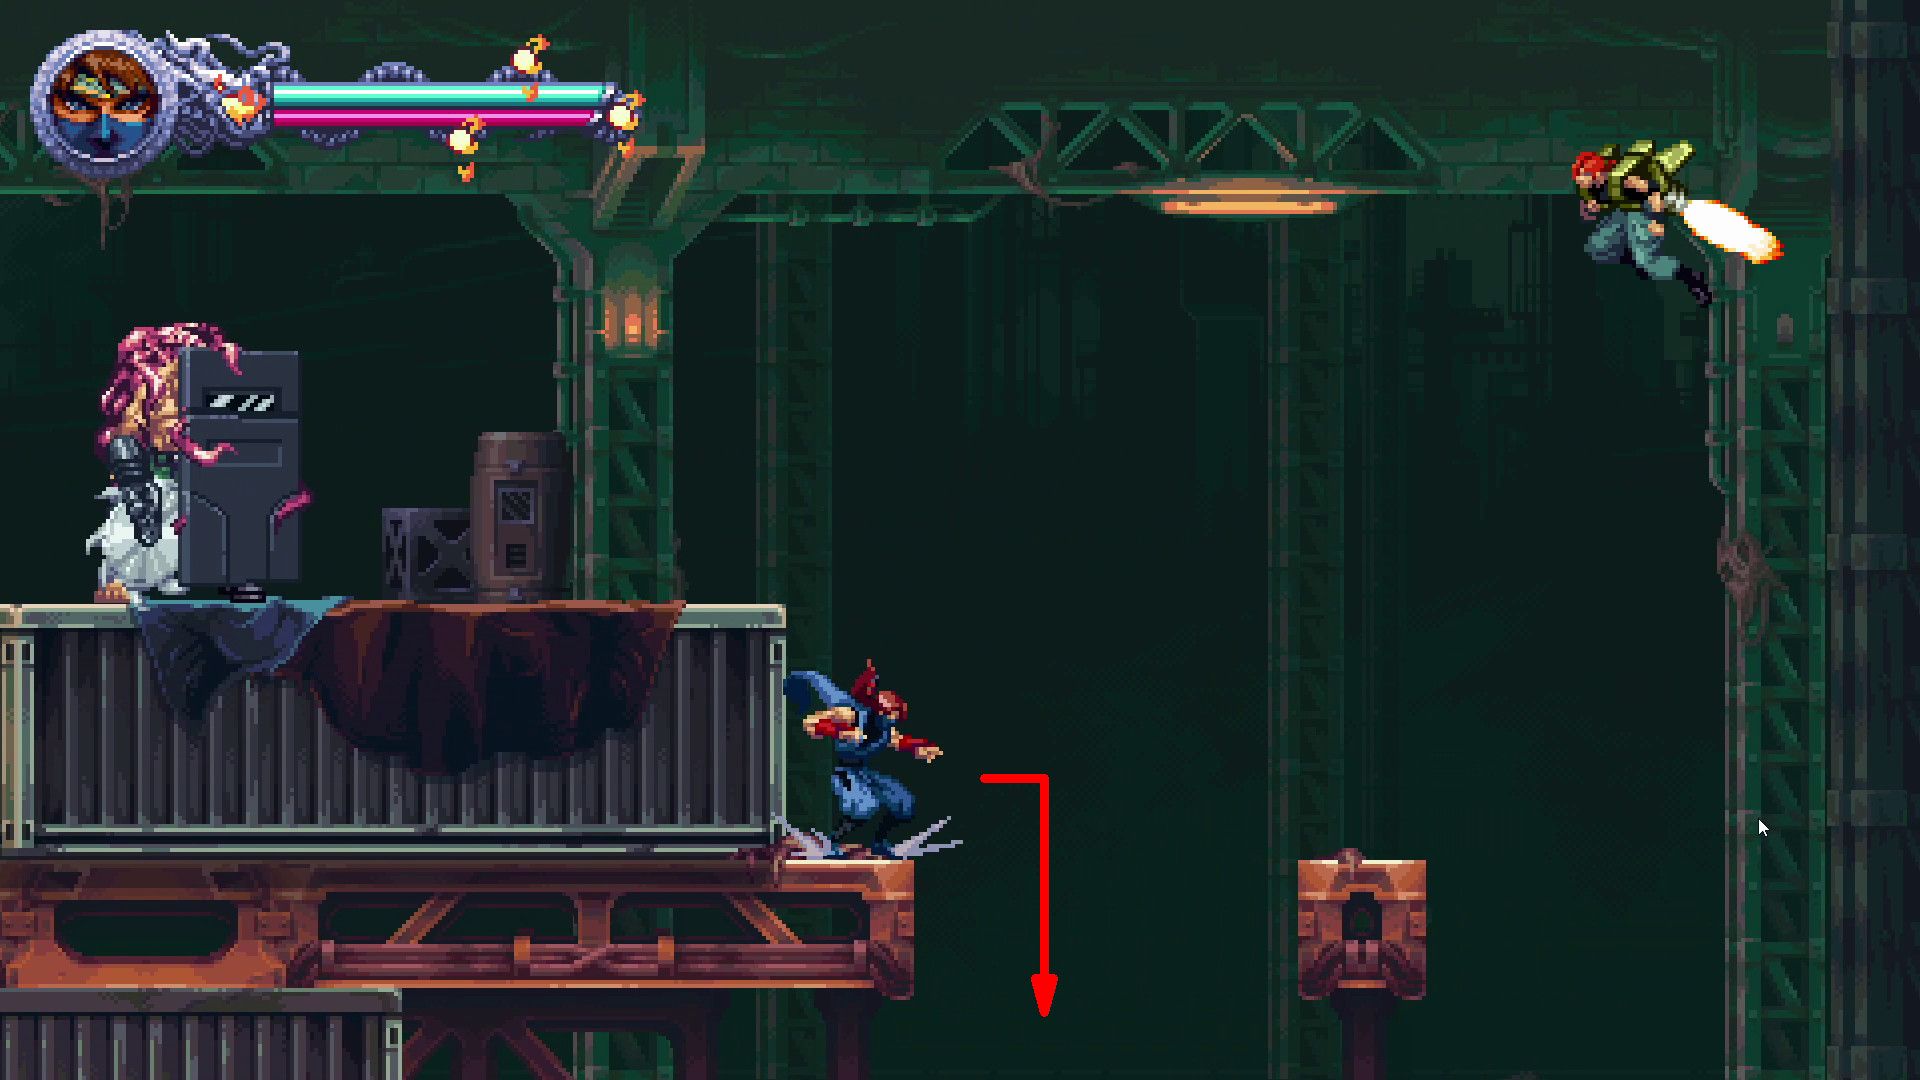
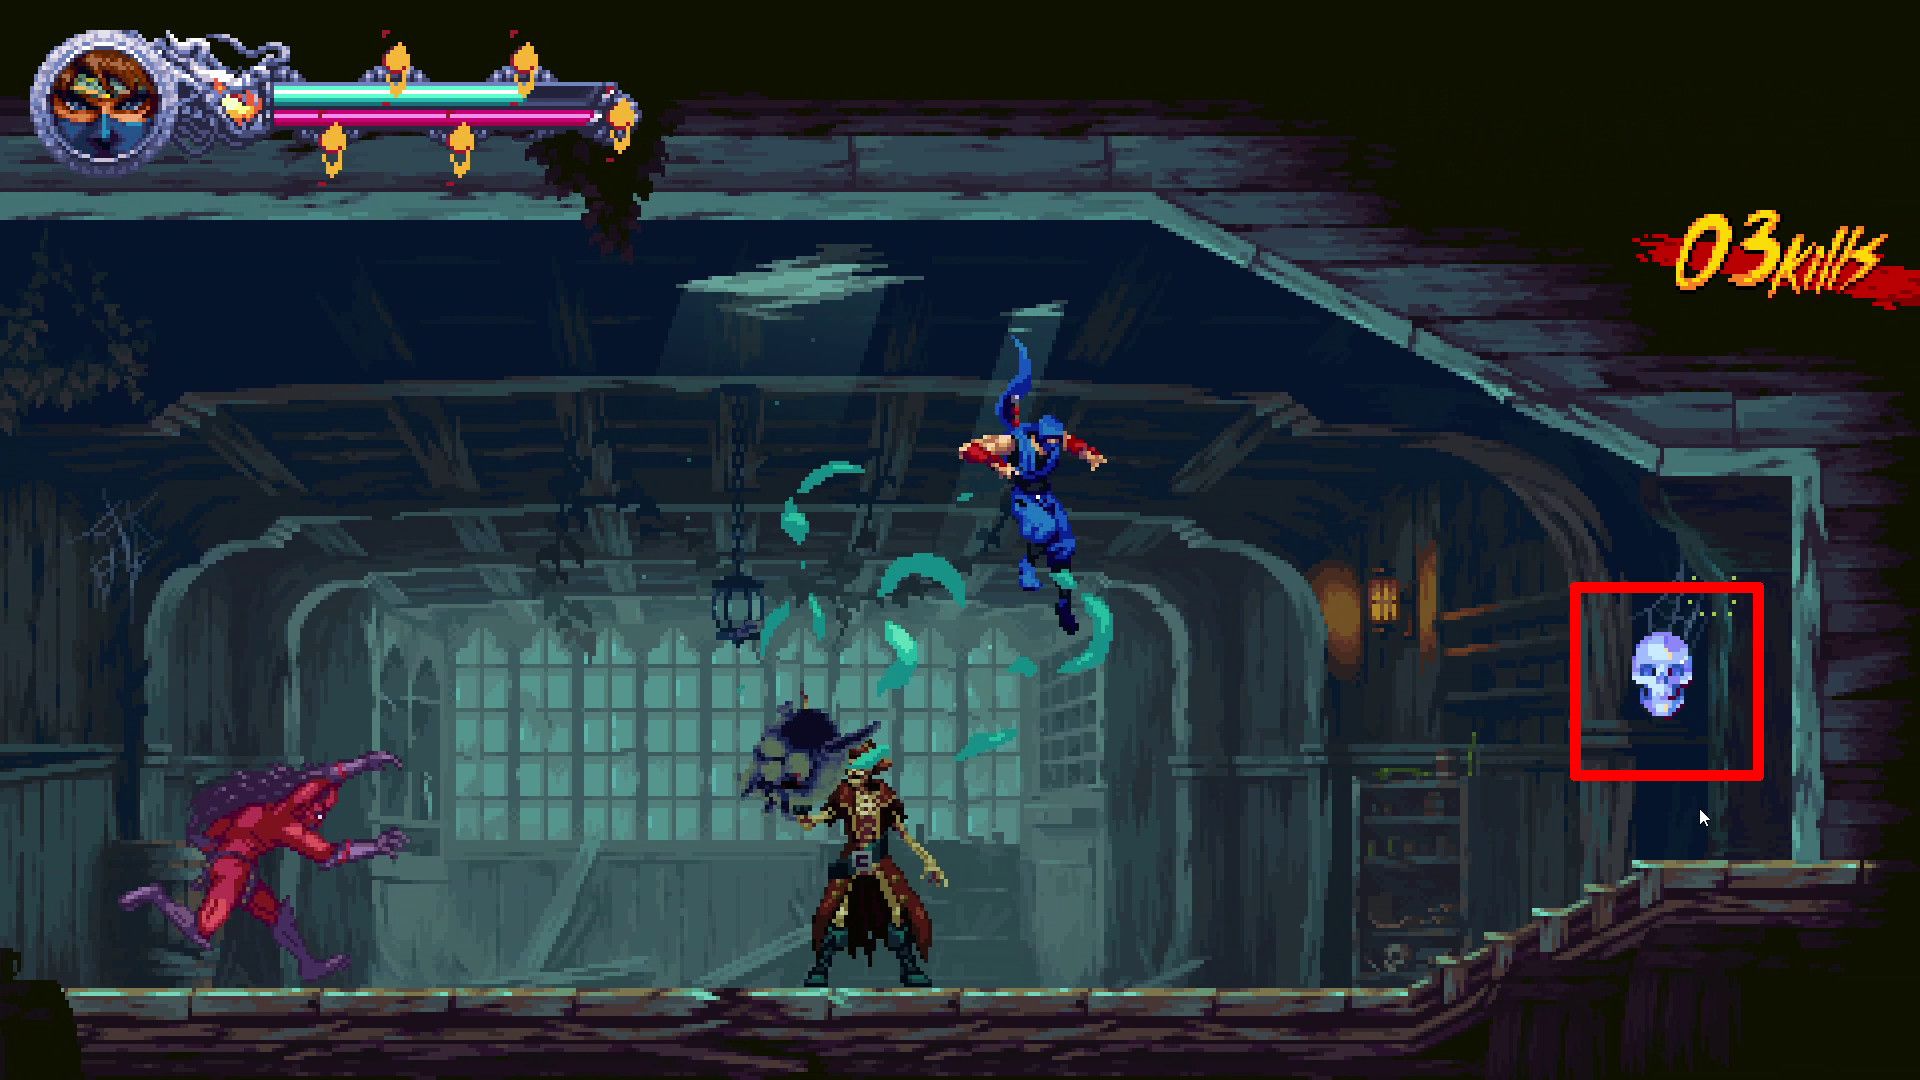
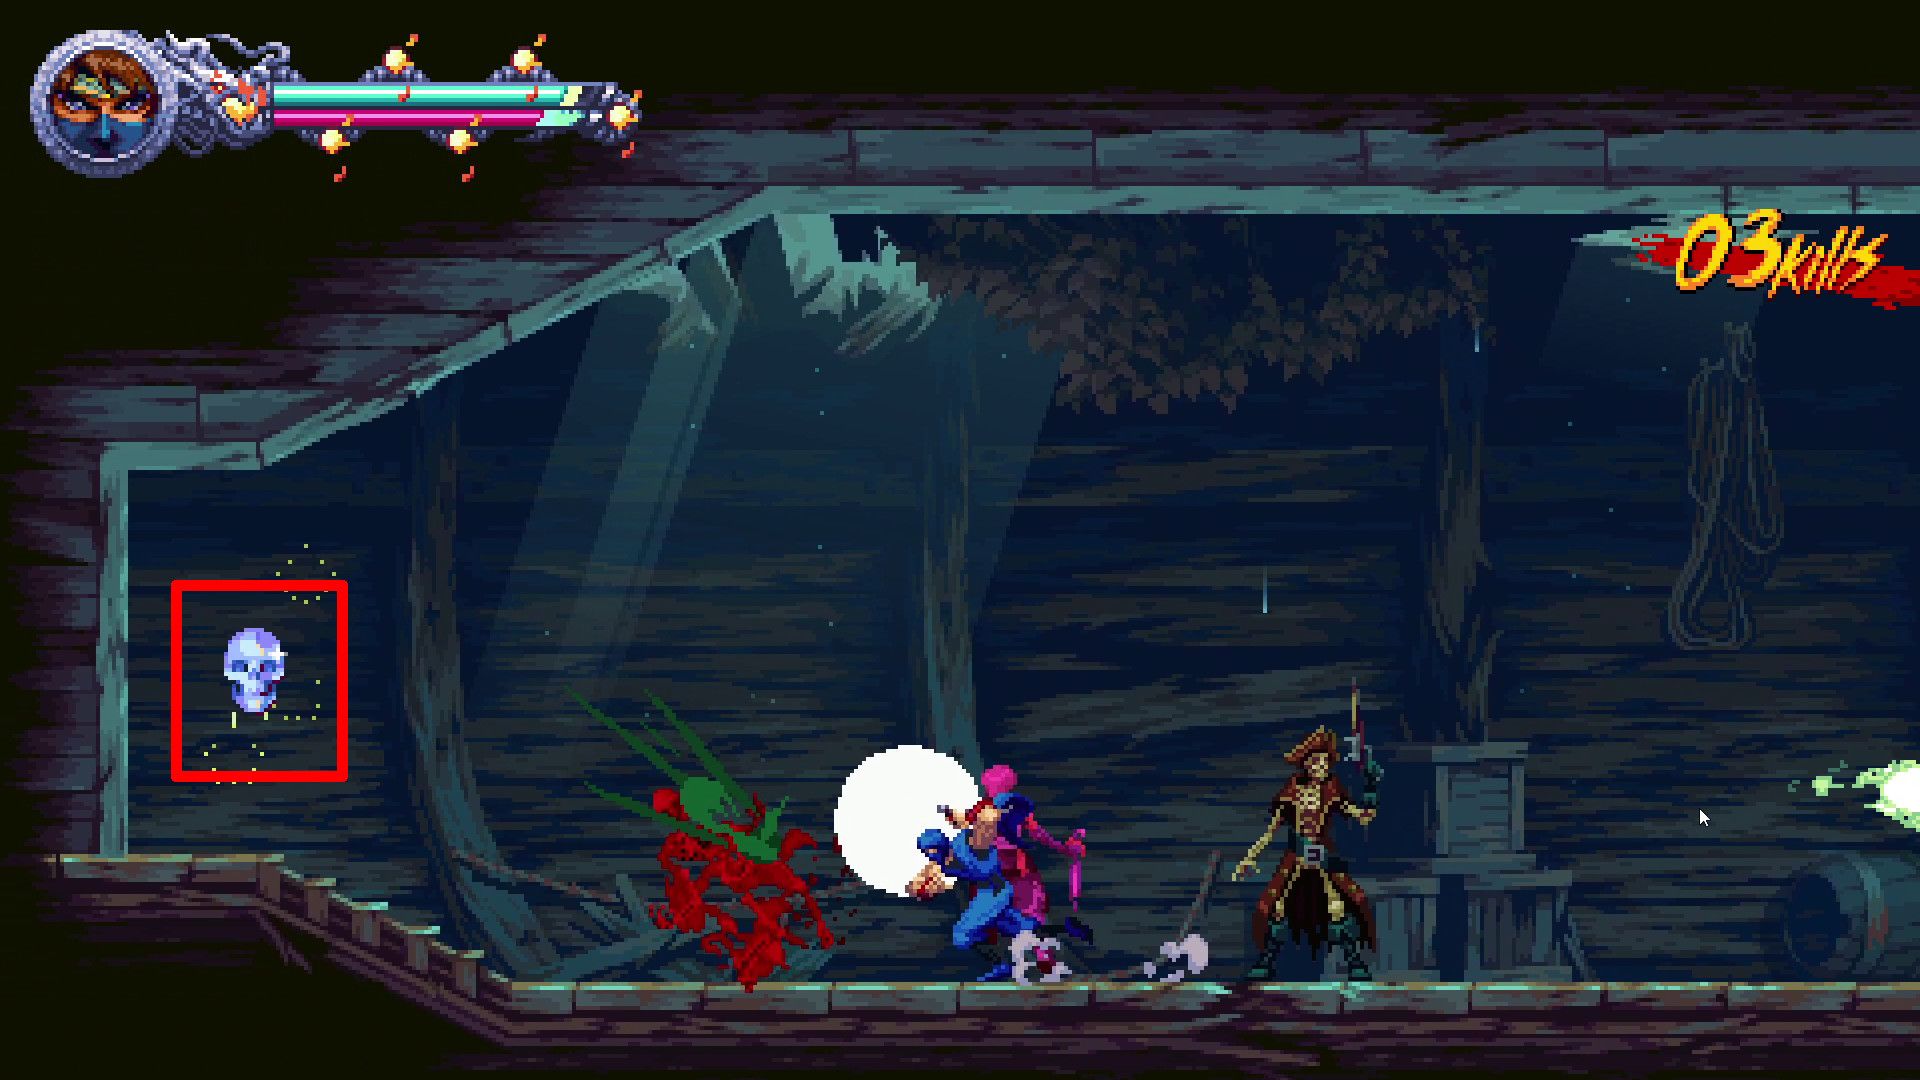
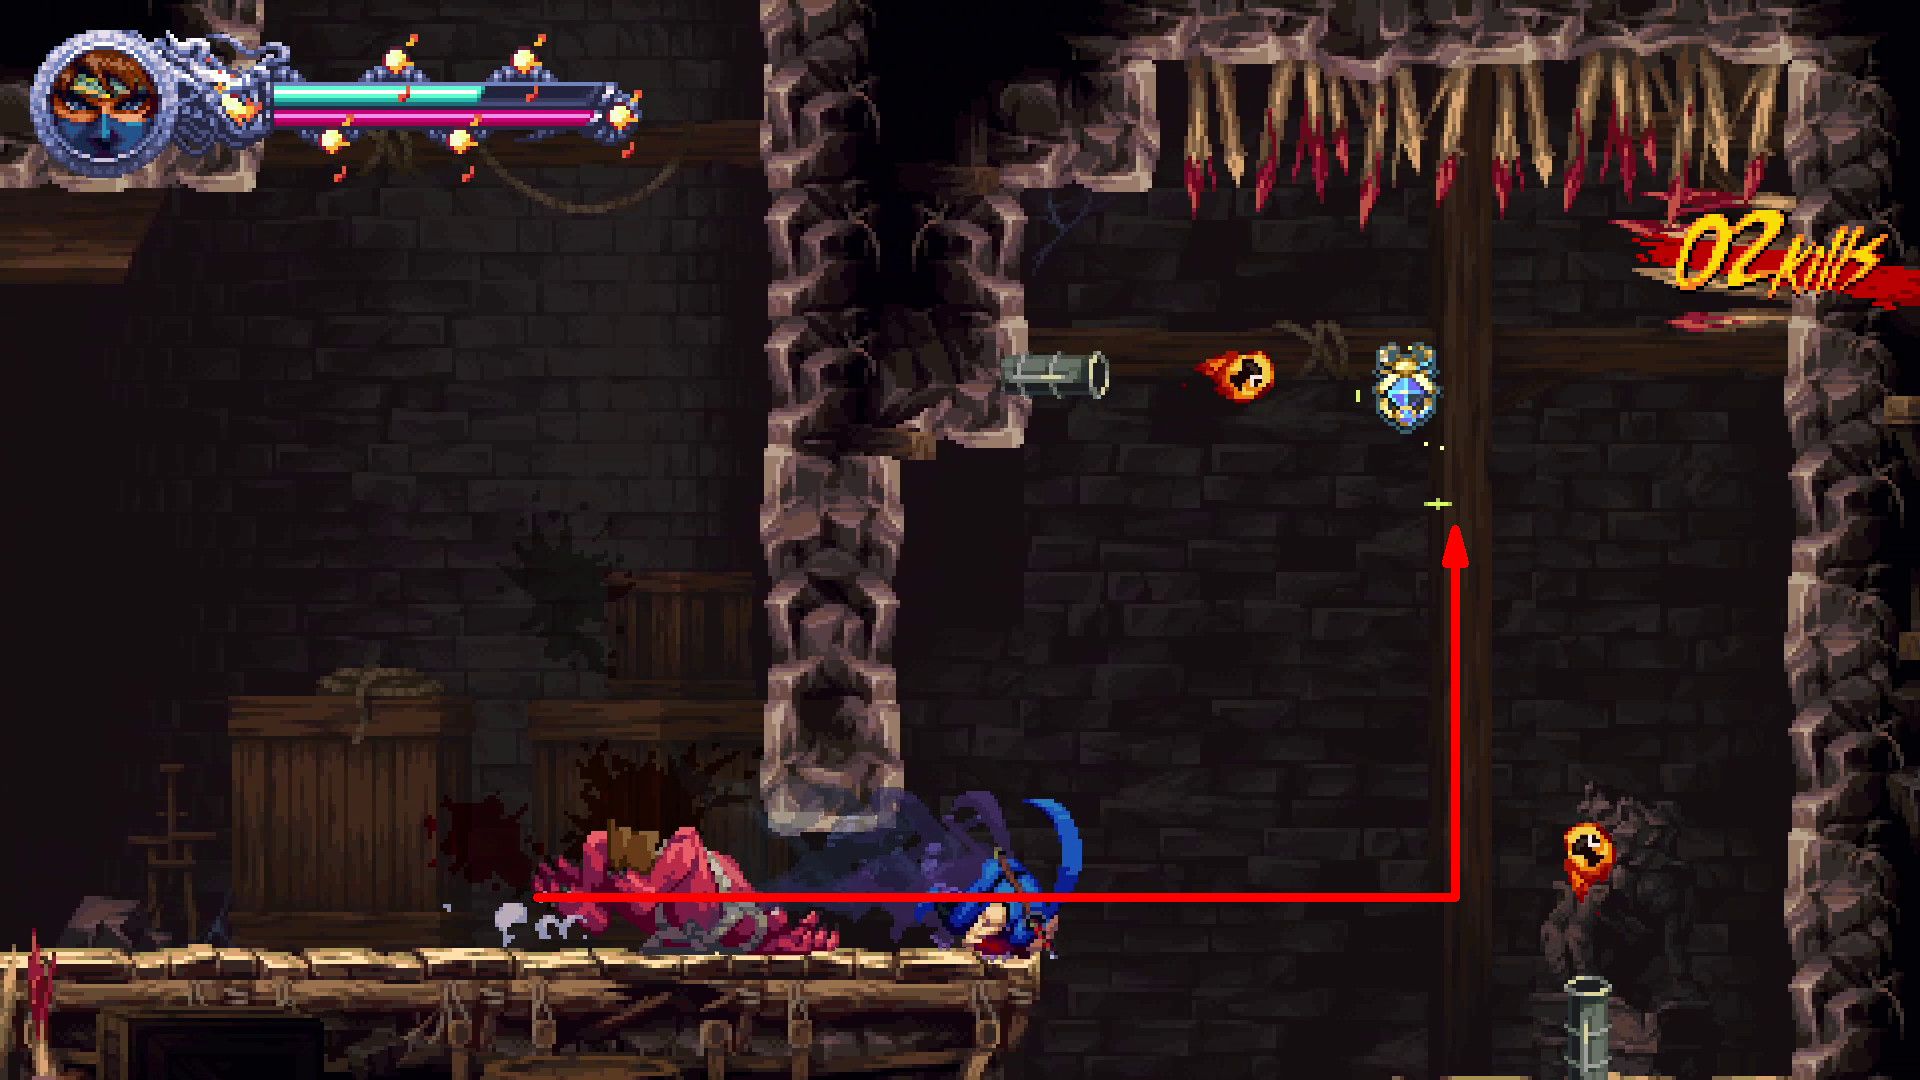
- After the Demons! (1-3)
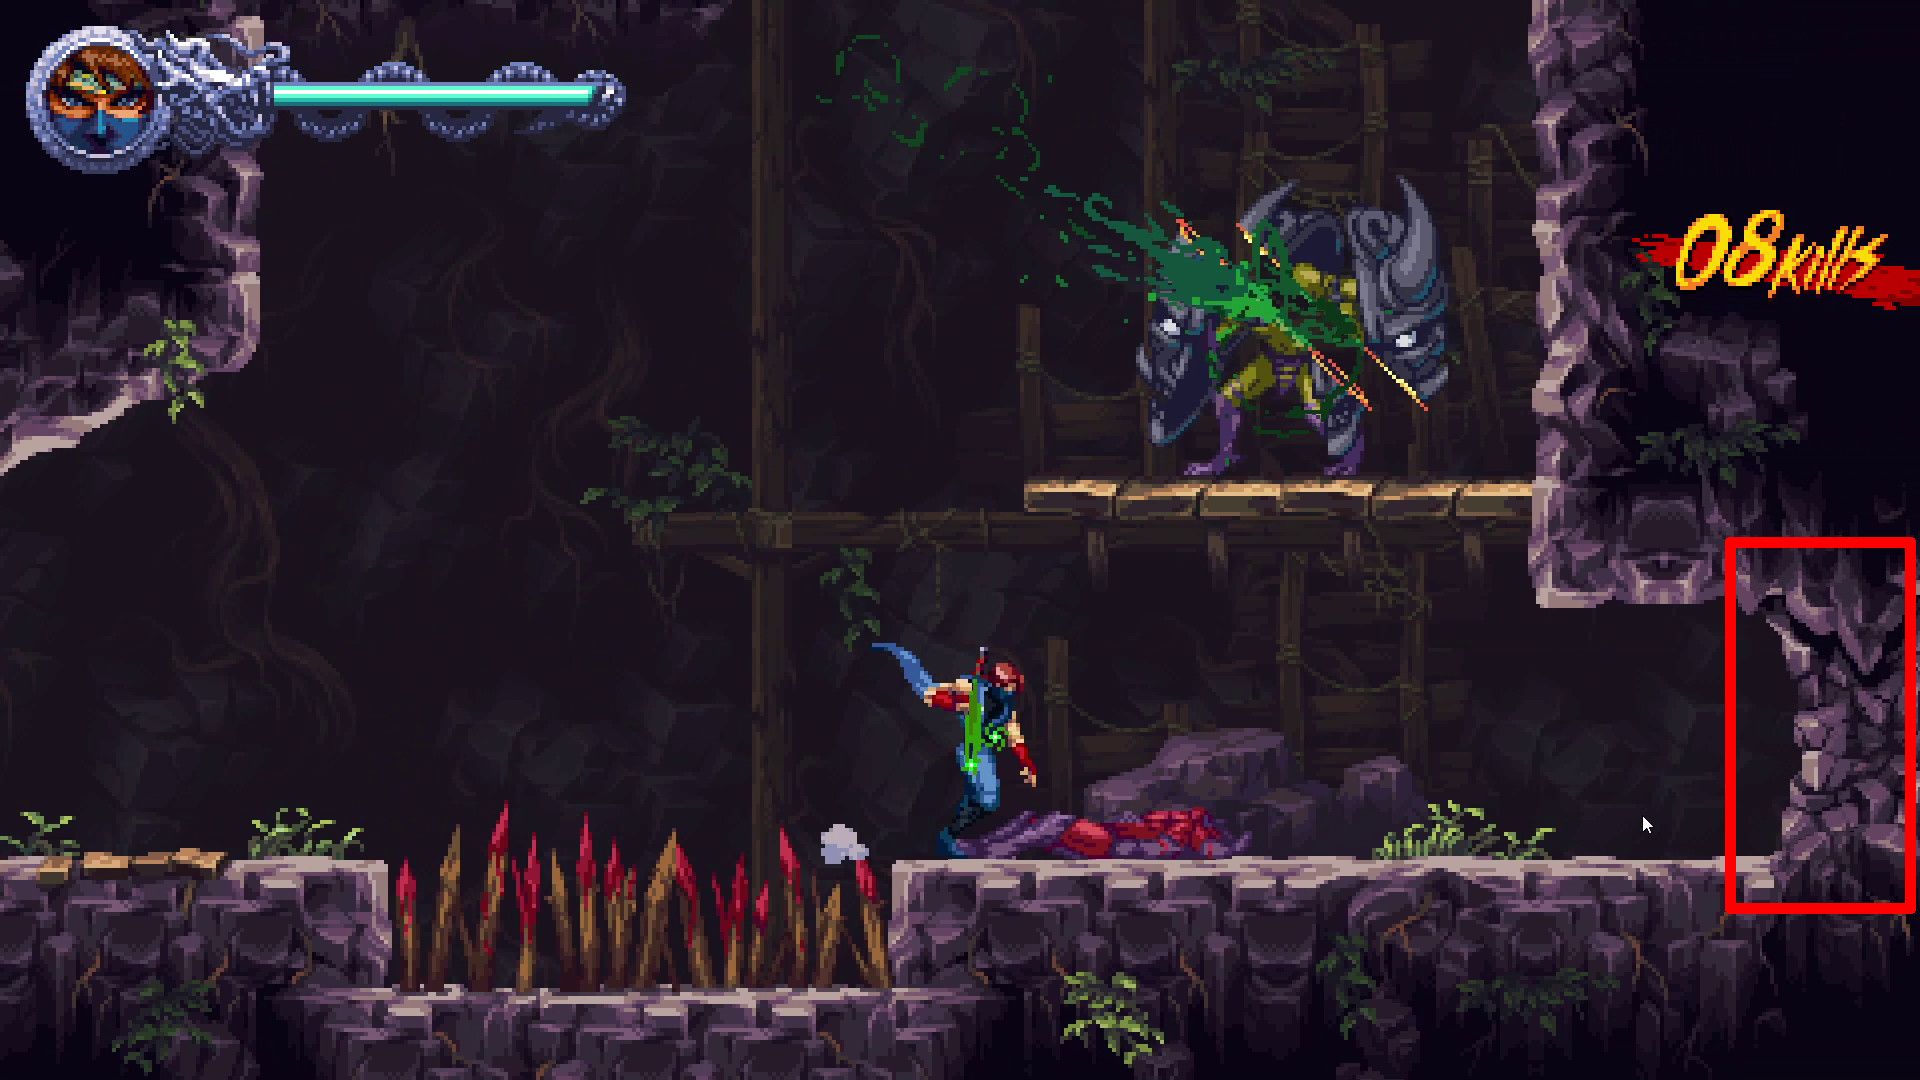
In the early stages of mission 1-3, as you progress through the main part, you’ll come across a cave where you encounter Muramasa. After conversing with this character, continue moving right until you reach a point where you must ascend. Look for a damaged wall in the lower-right corner of the screen; by repeatedly attacking it, you can break it down. Proceed to the hidden room on the right side, and utilize Guillotine boosts to overcome the spikes. The Scroll will be found within this secret area.
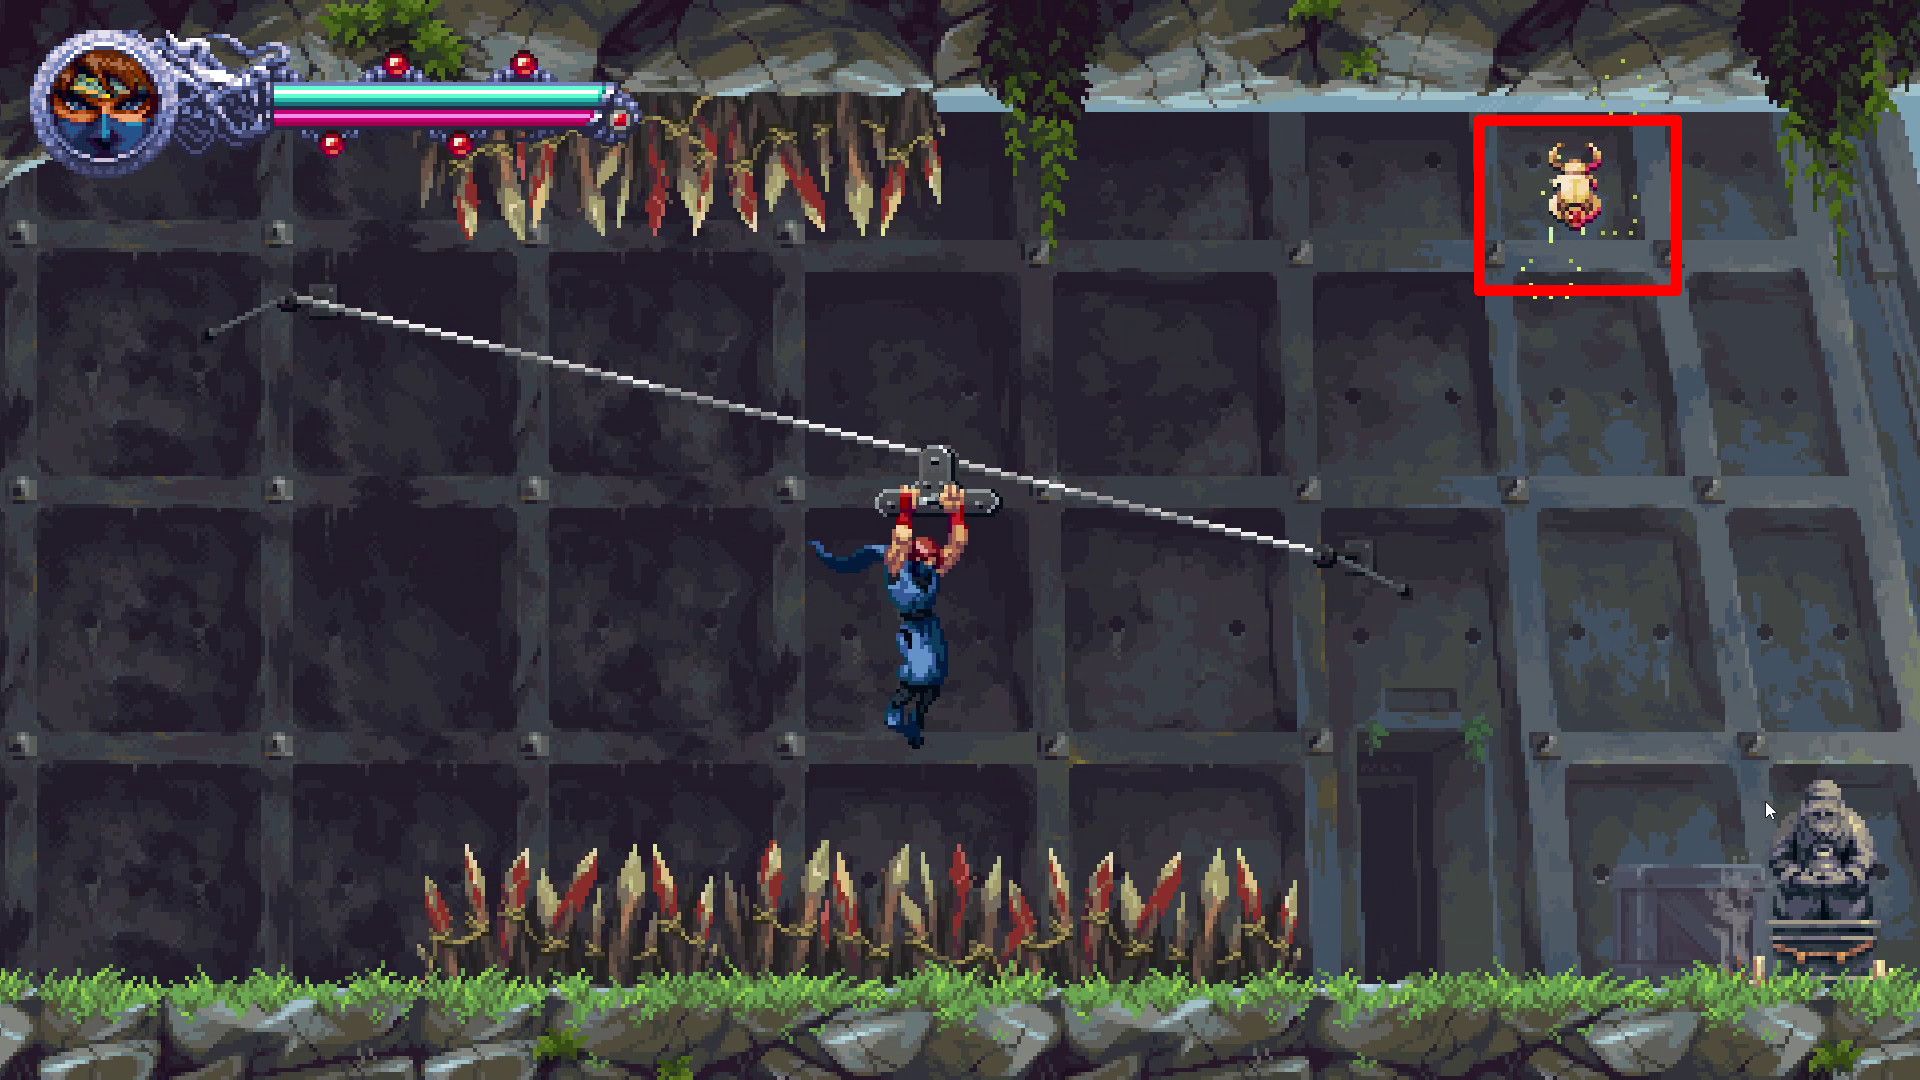
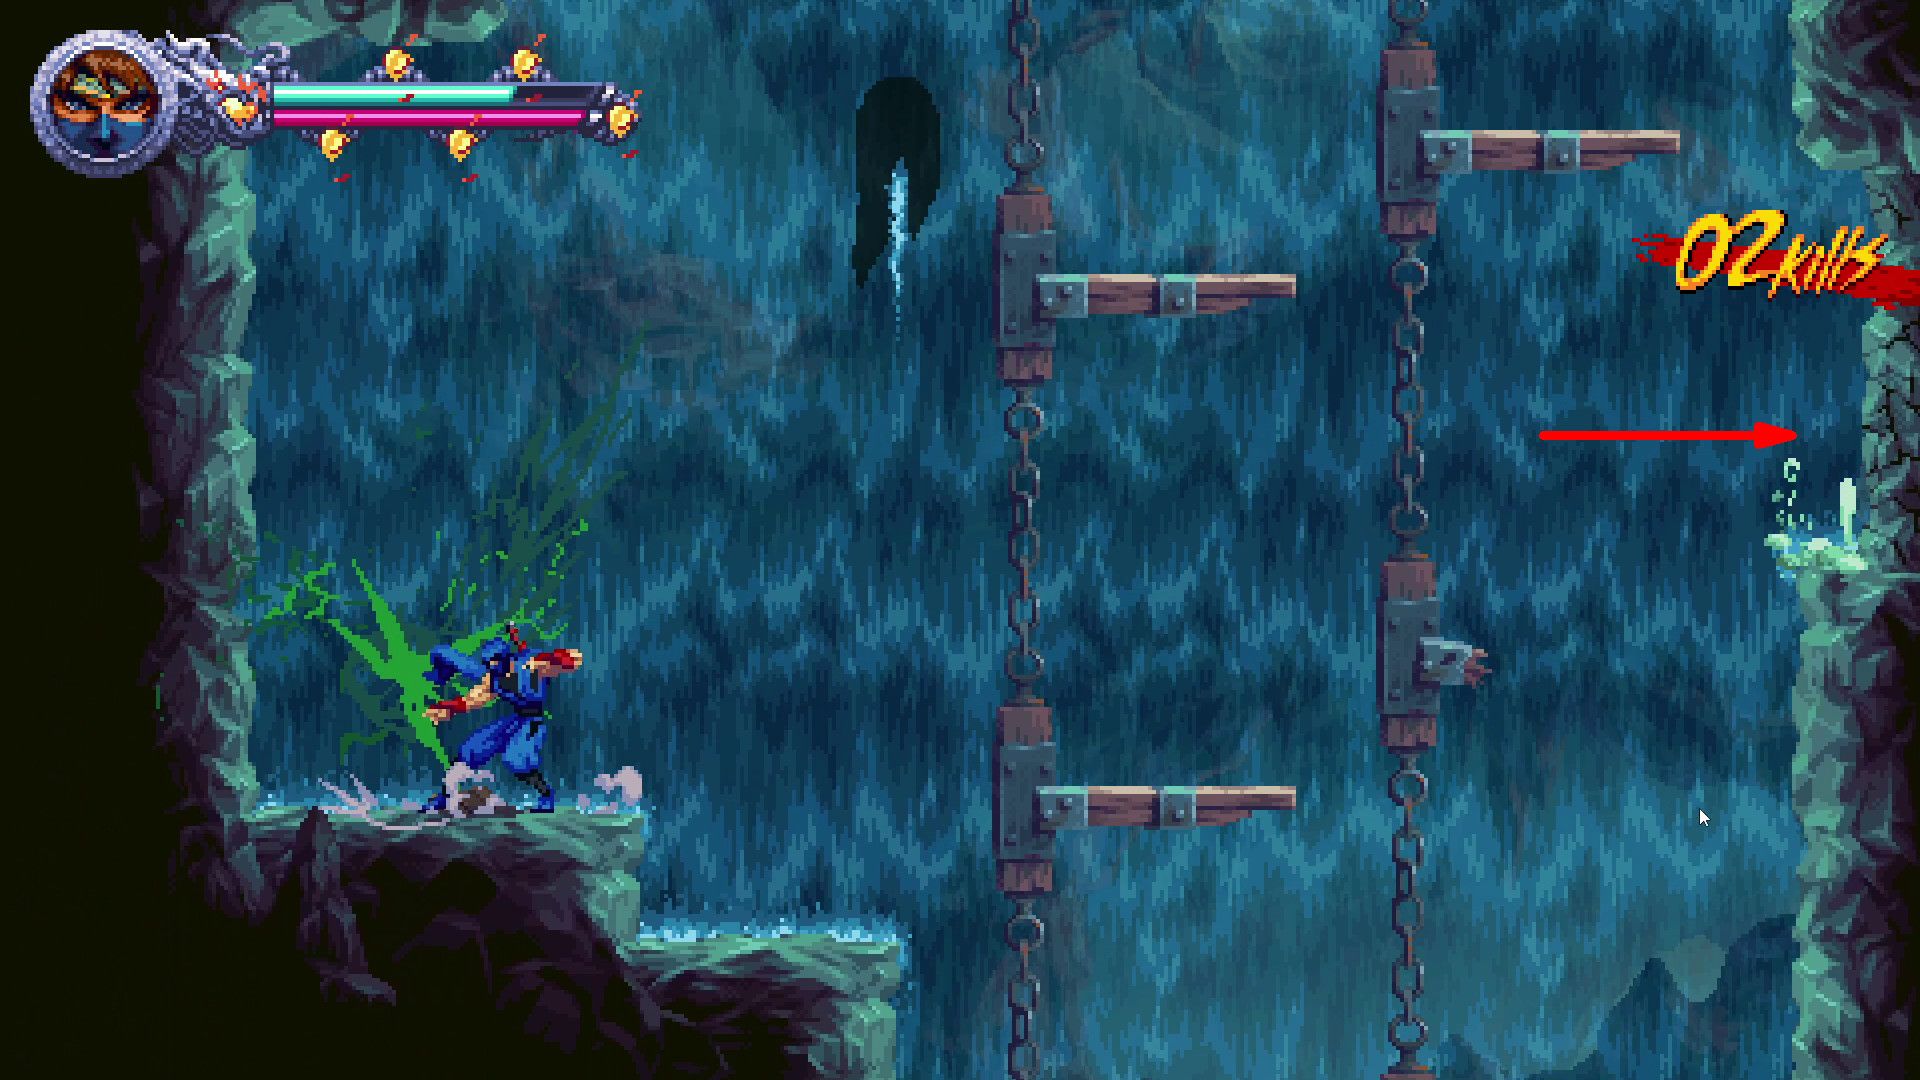
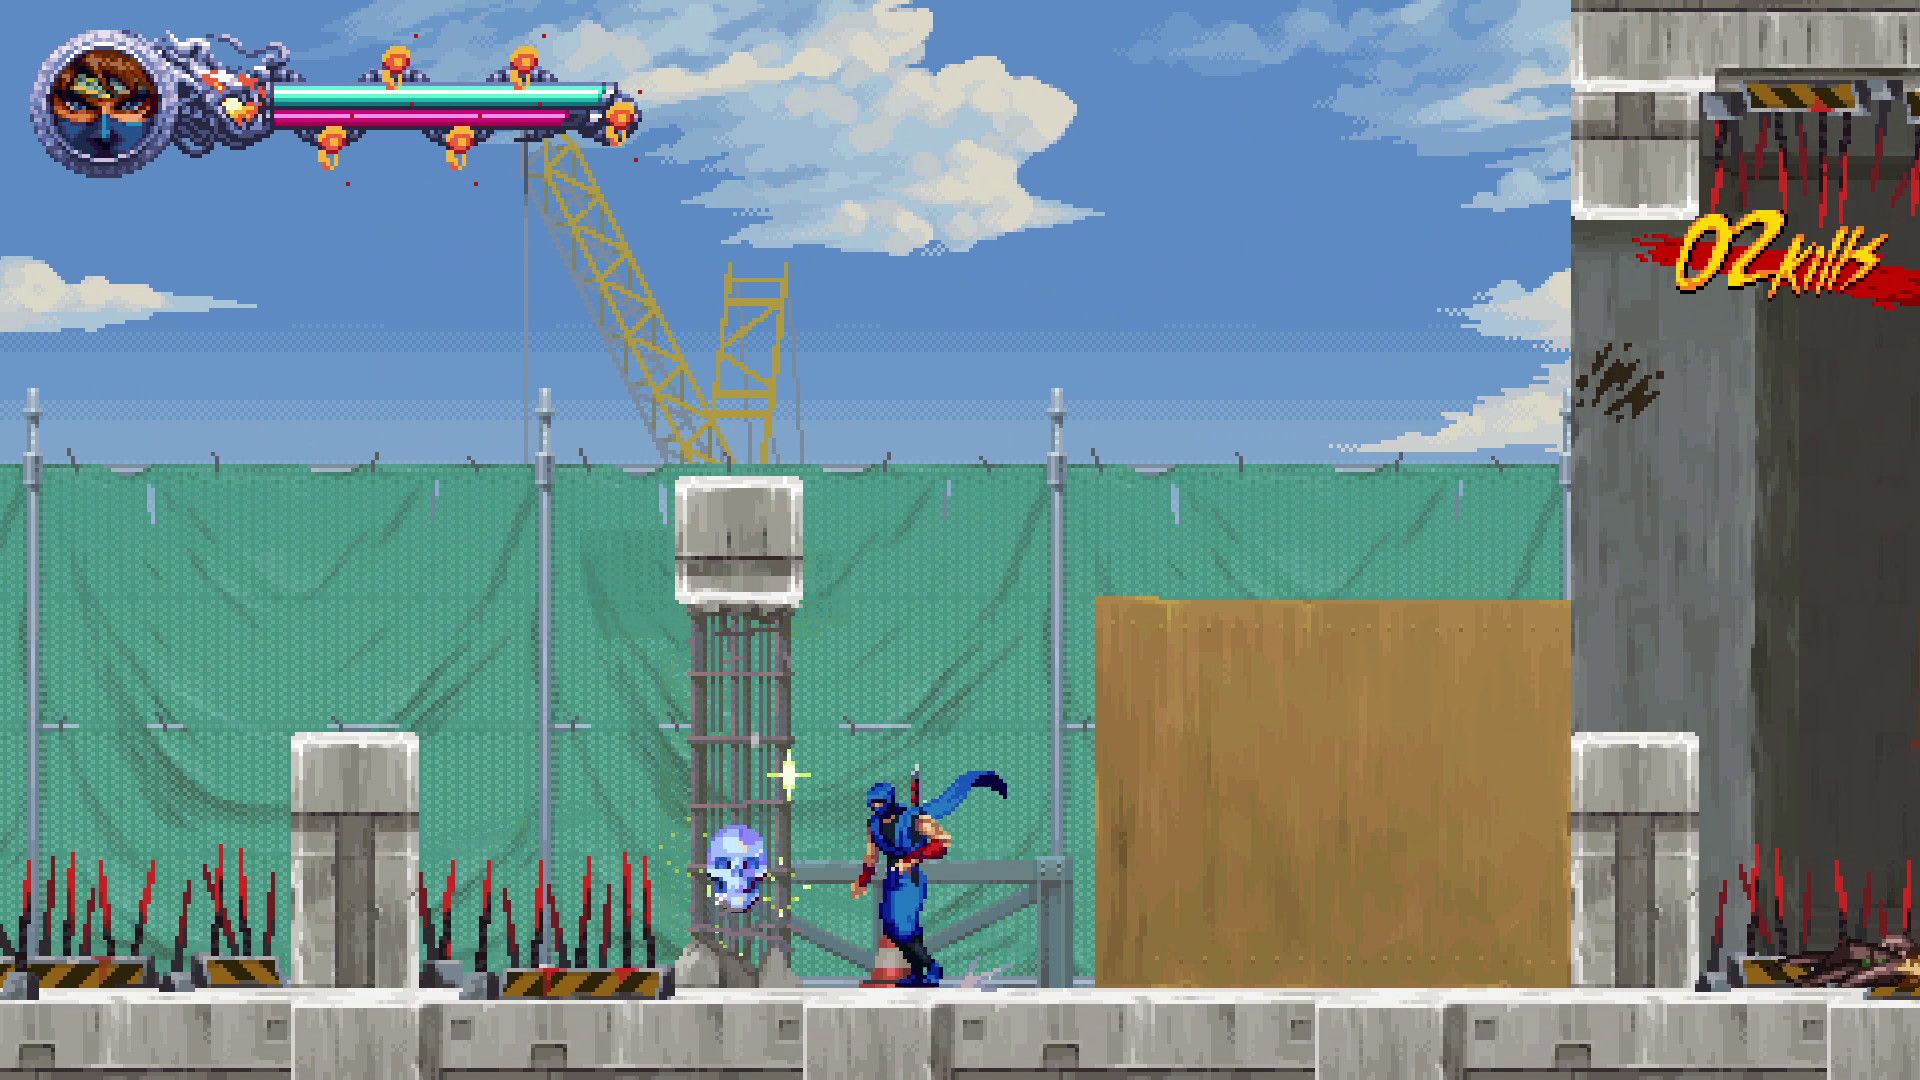
Act 2 Collectibles in Ninja Gaiden Ragebound
Crystal Skulls
Players who are looking for Skulls in Act 2 should reference this guide:
- Ninja Gaiden Ragebound Act 2 Crystal Skull Locations
Golden Scarabs
This guide covers the location of every Scarab in Act 2:
- Ninja Gaiden Ragebound Act 2 Golden Scarab Locations
Scrolls
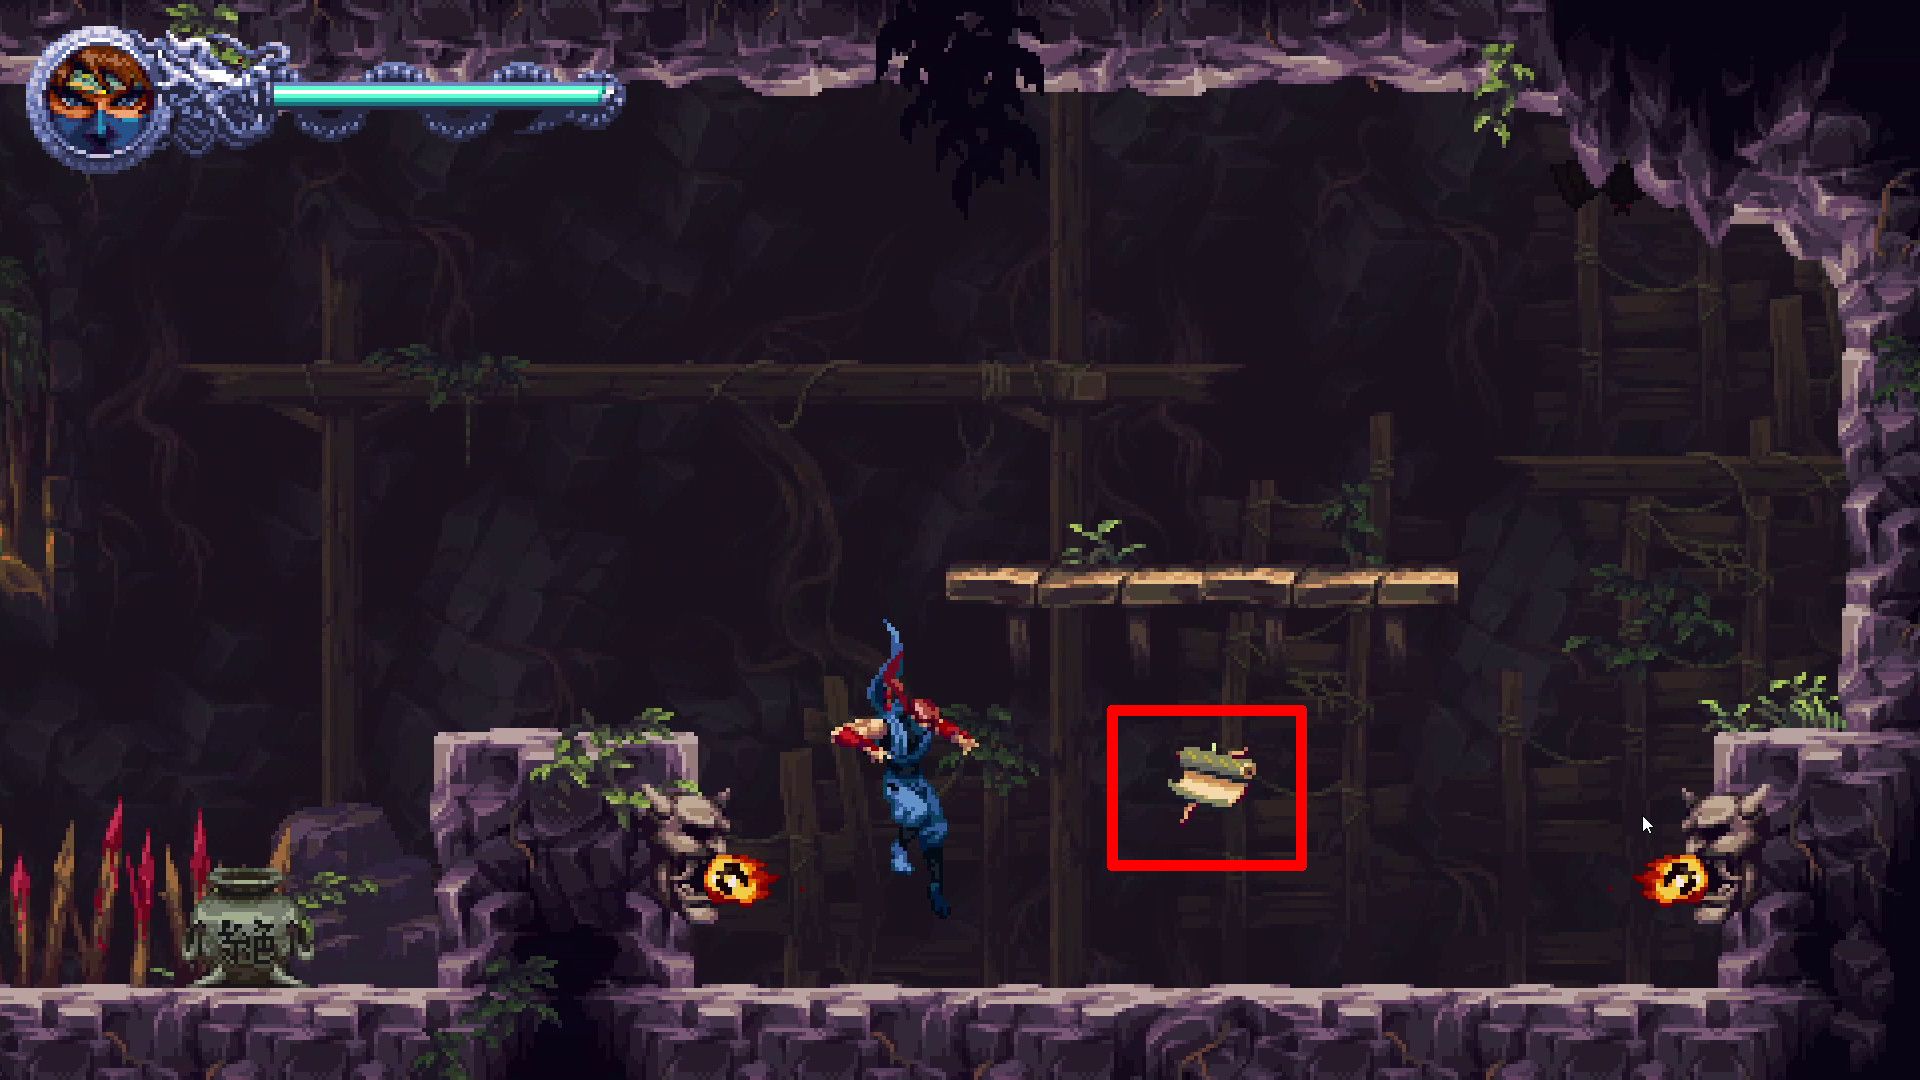
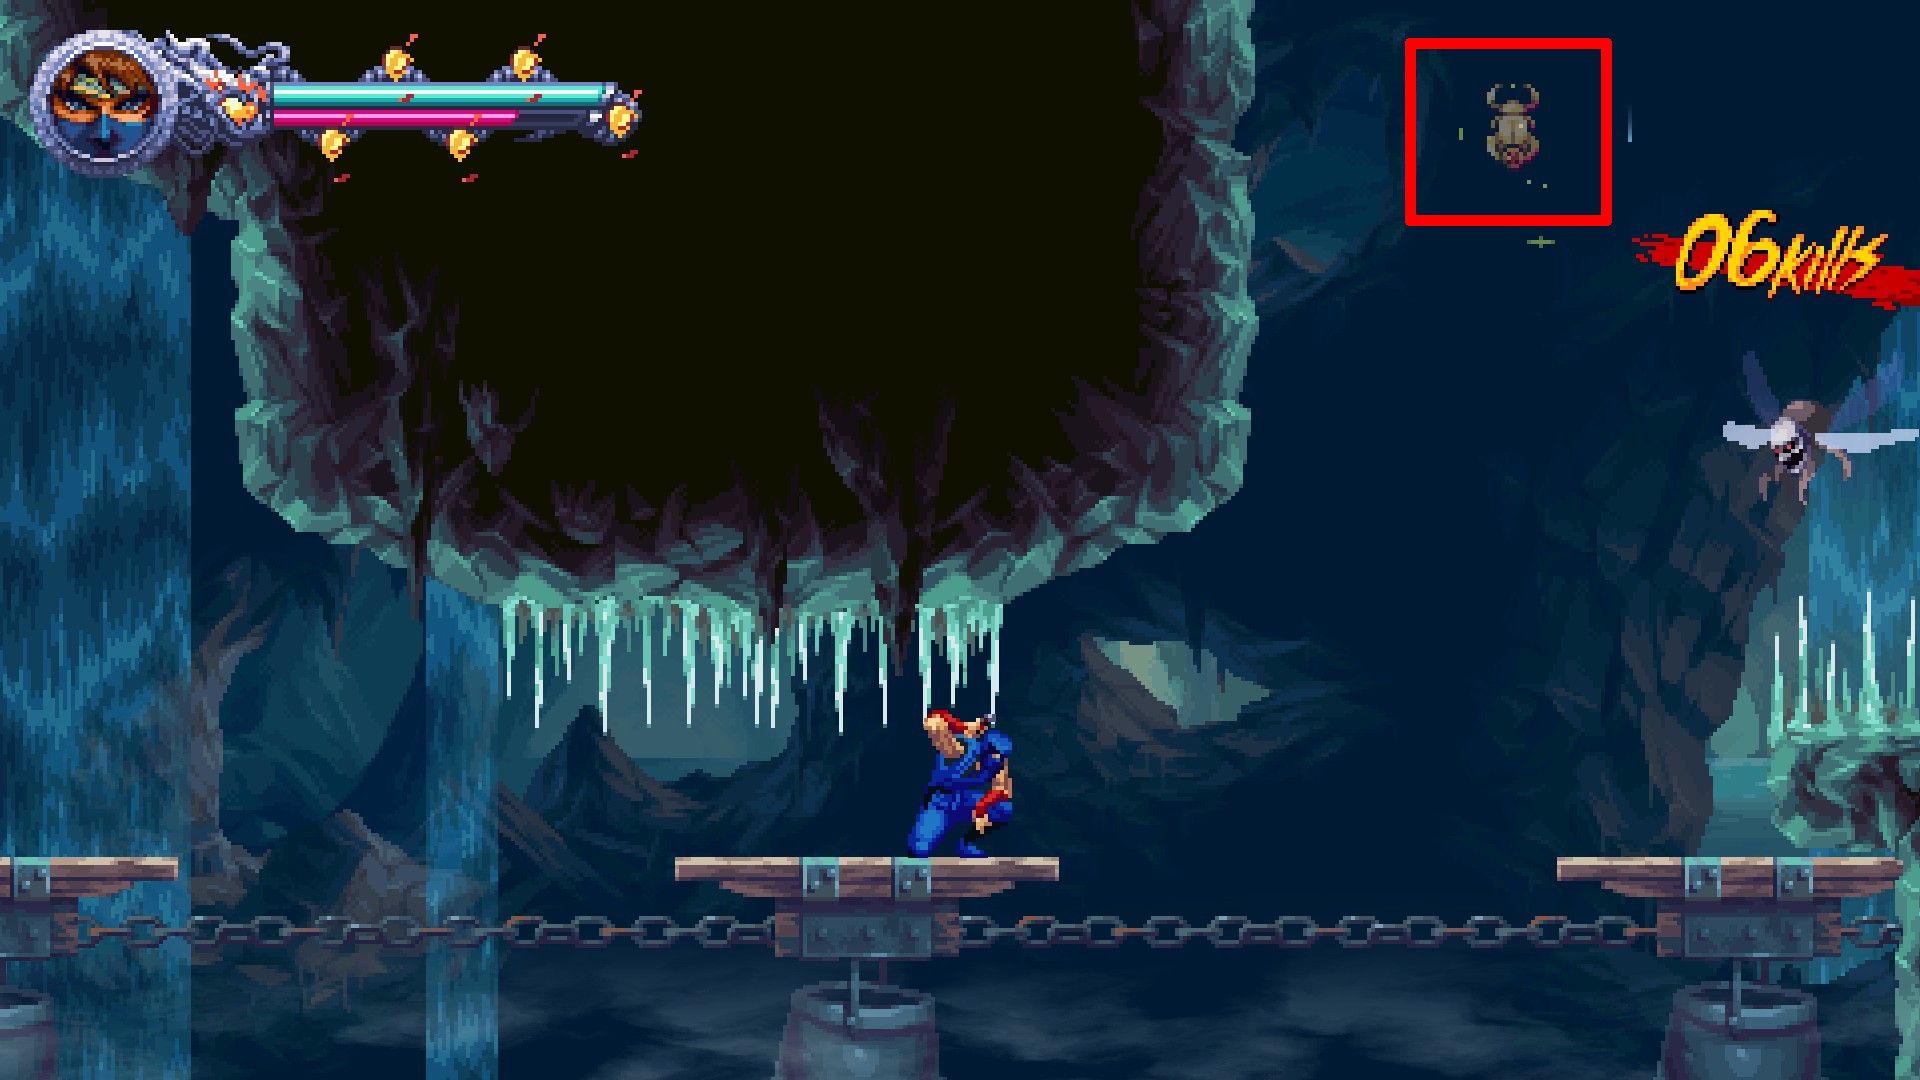
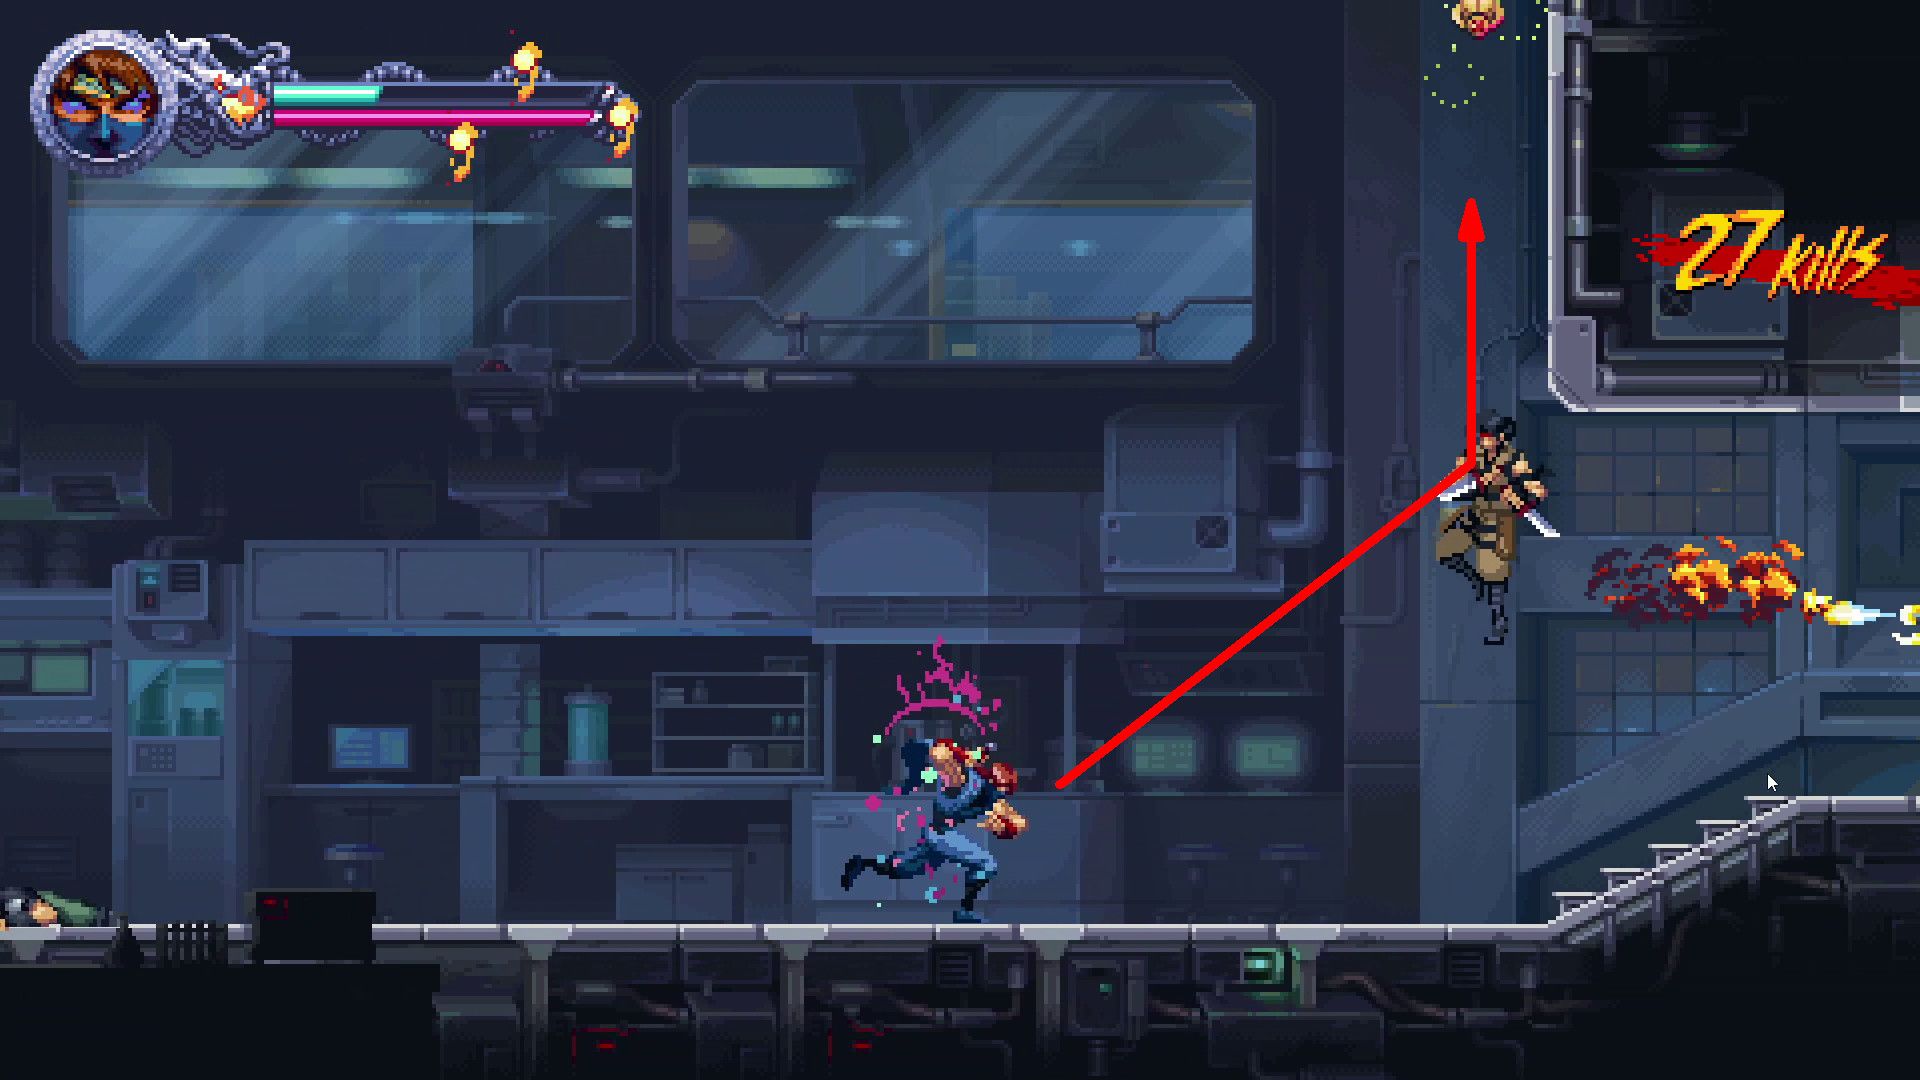
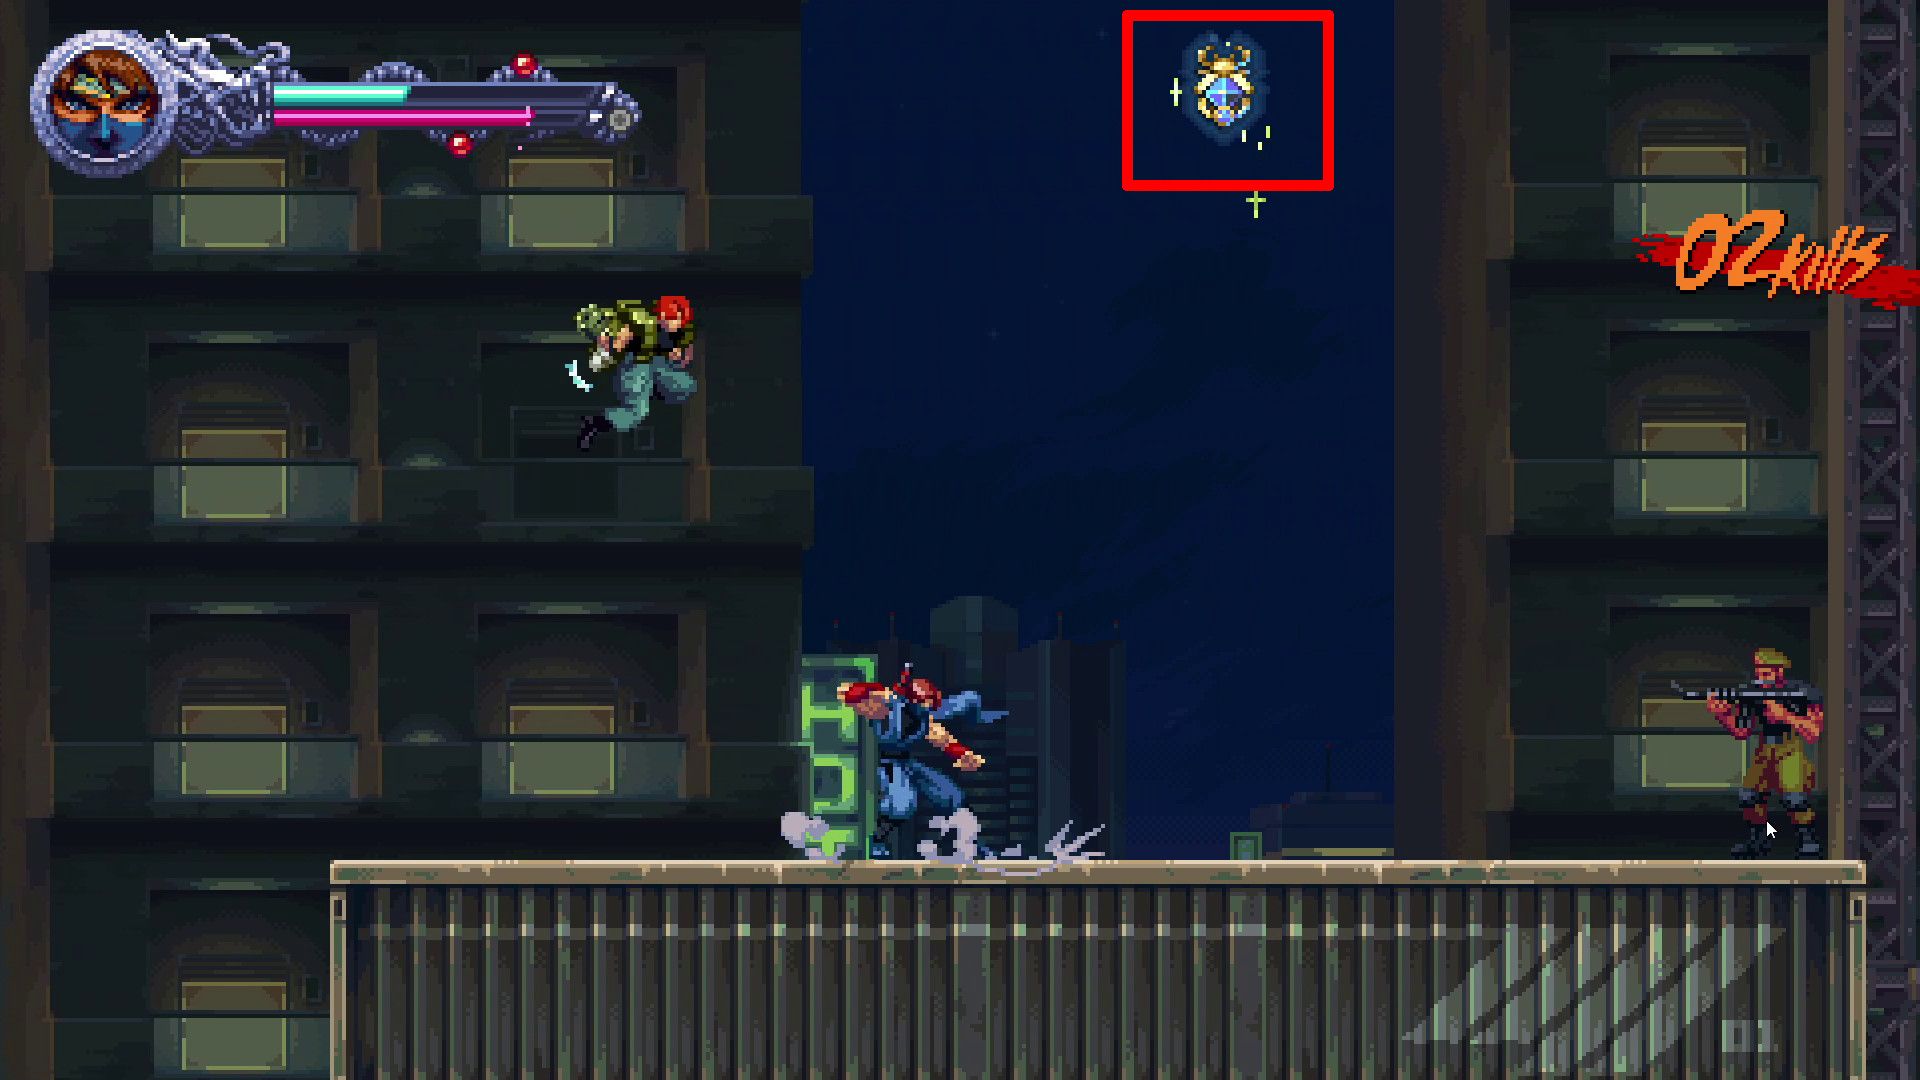
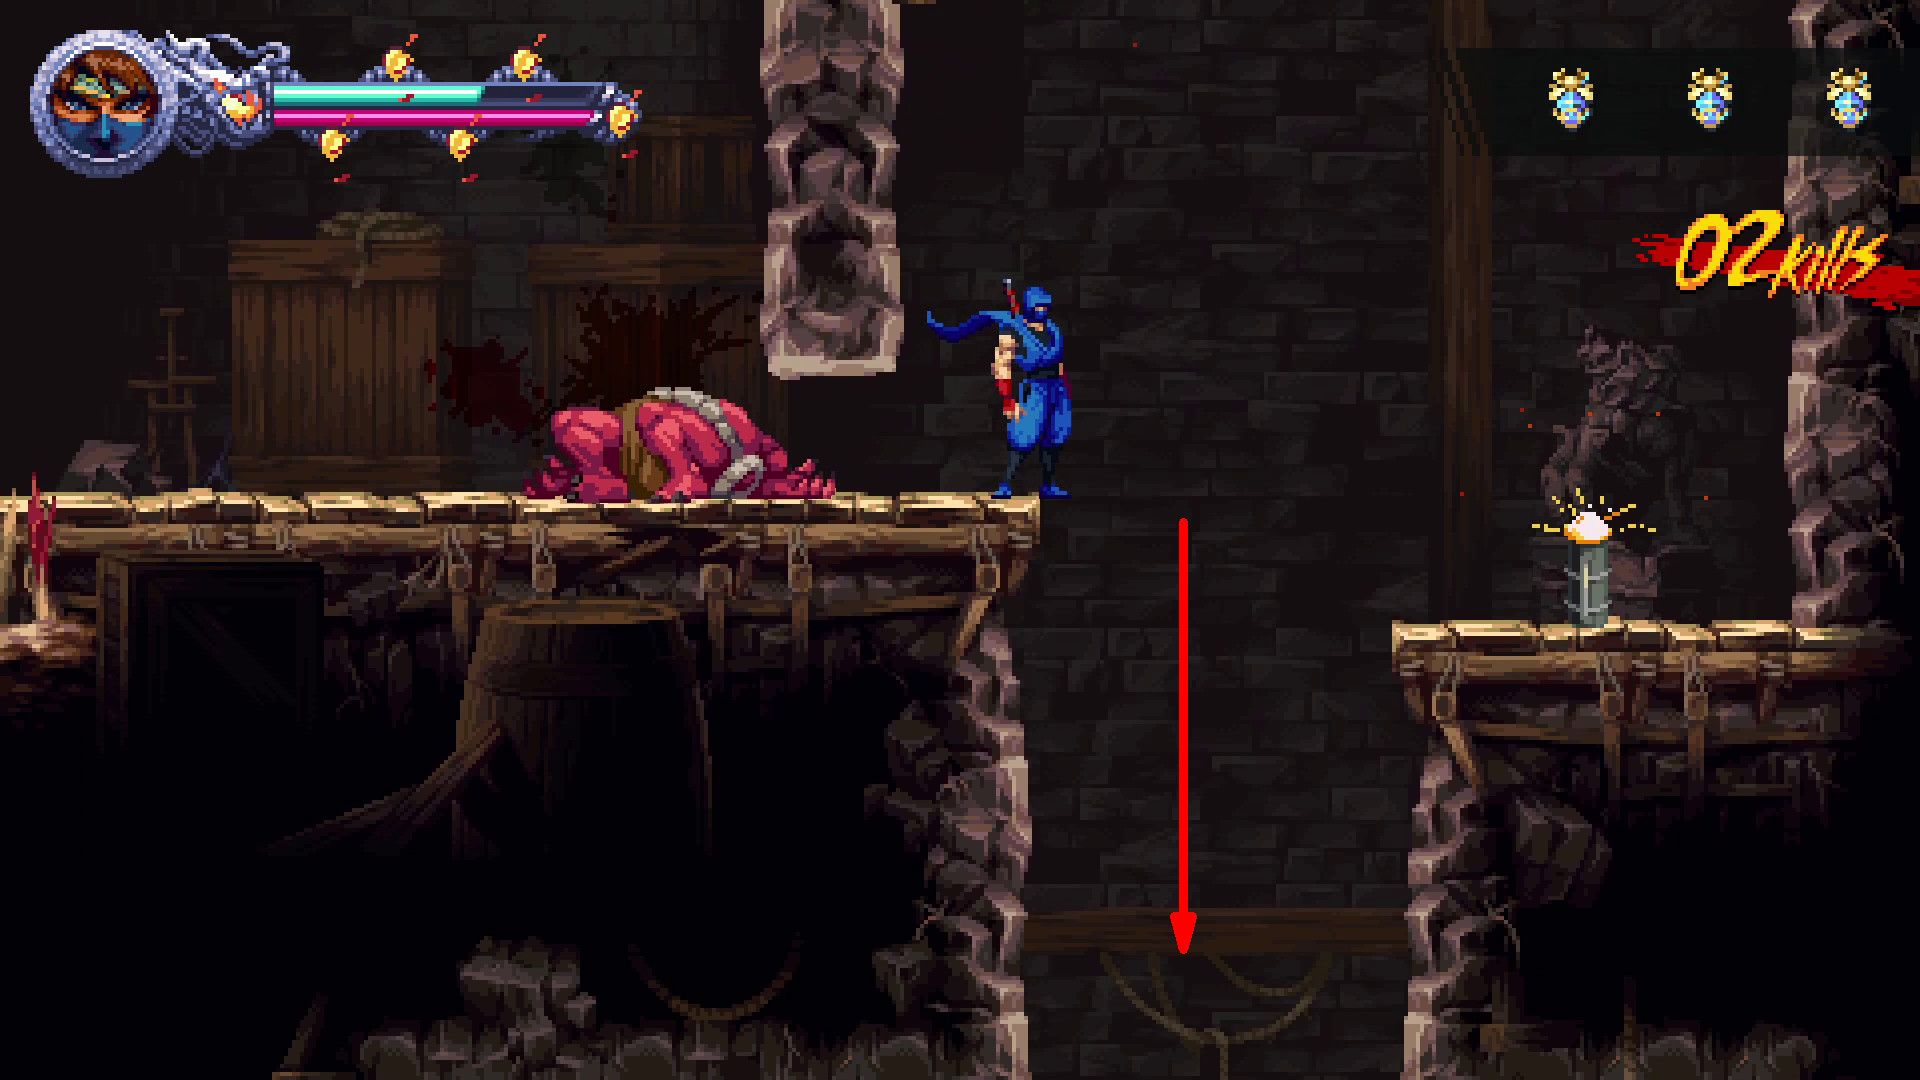
- Midnight Assault (2-1)
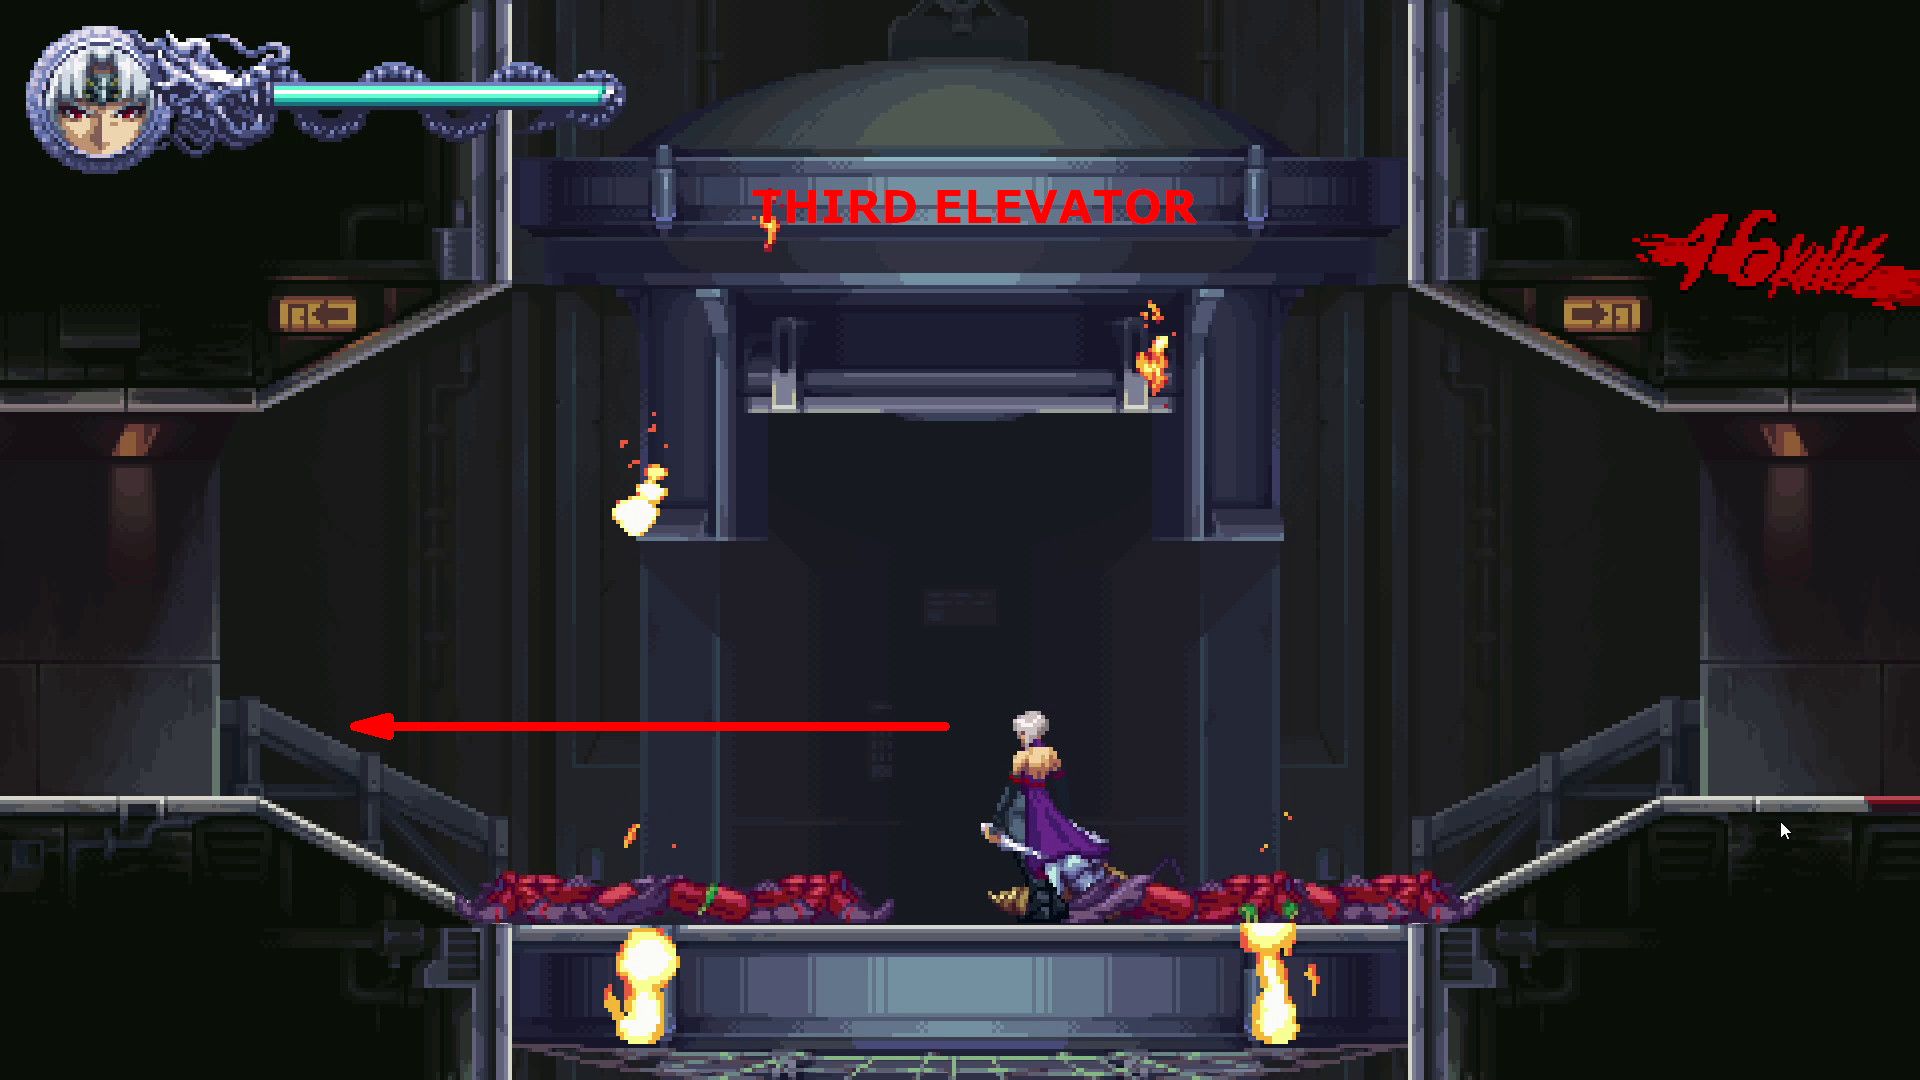
Move forward in the main mission, reaching mission 2-1’s third elevator. This elevator descends when Kumori steps inside it. Afterward, take a left at the bottom and continue along the path you took to get to the third elevator. Jump onto the elevator from above, then enter the room located upper left of that elevator. The Scroll is situated on the left side of this room.
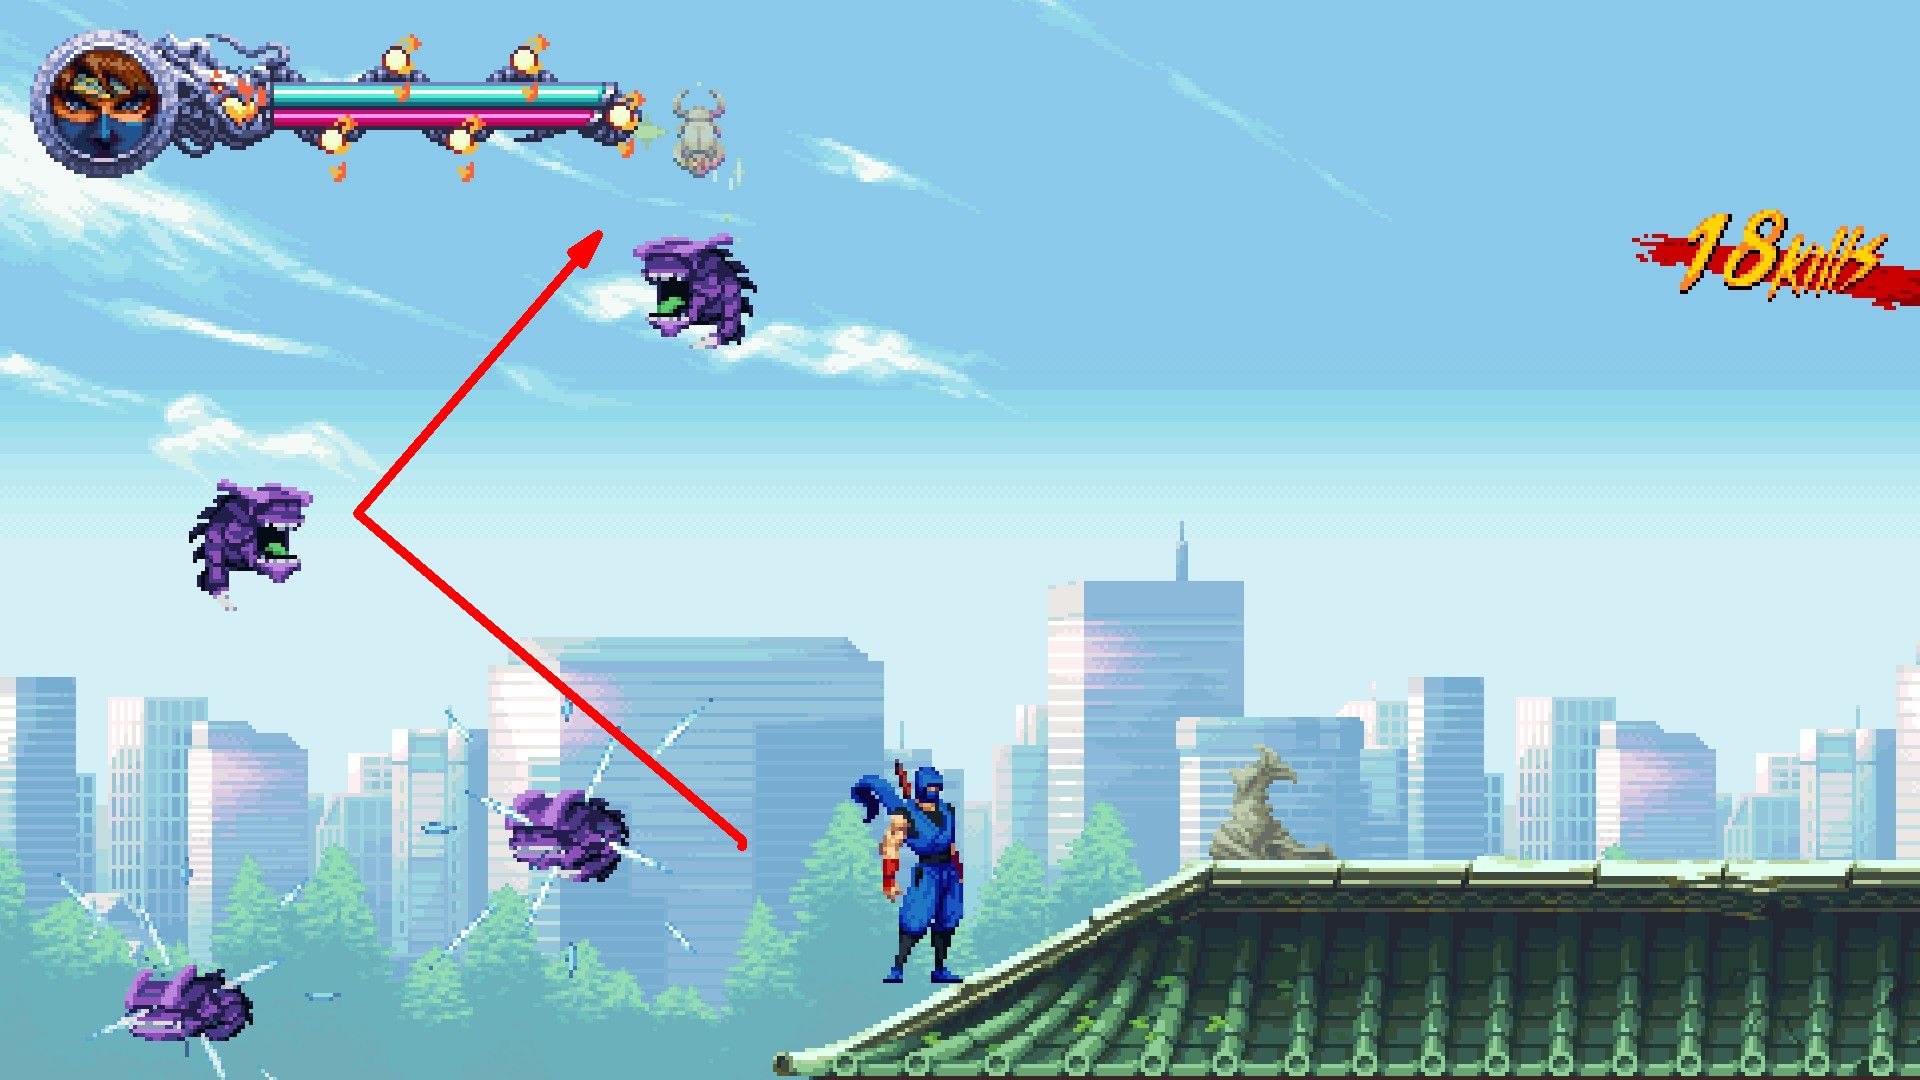
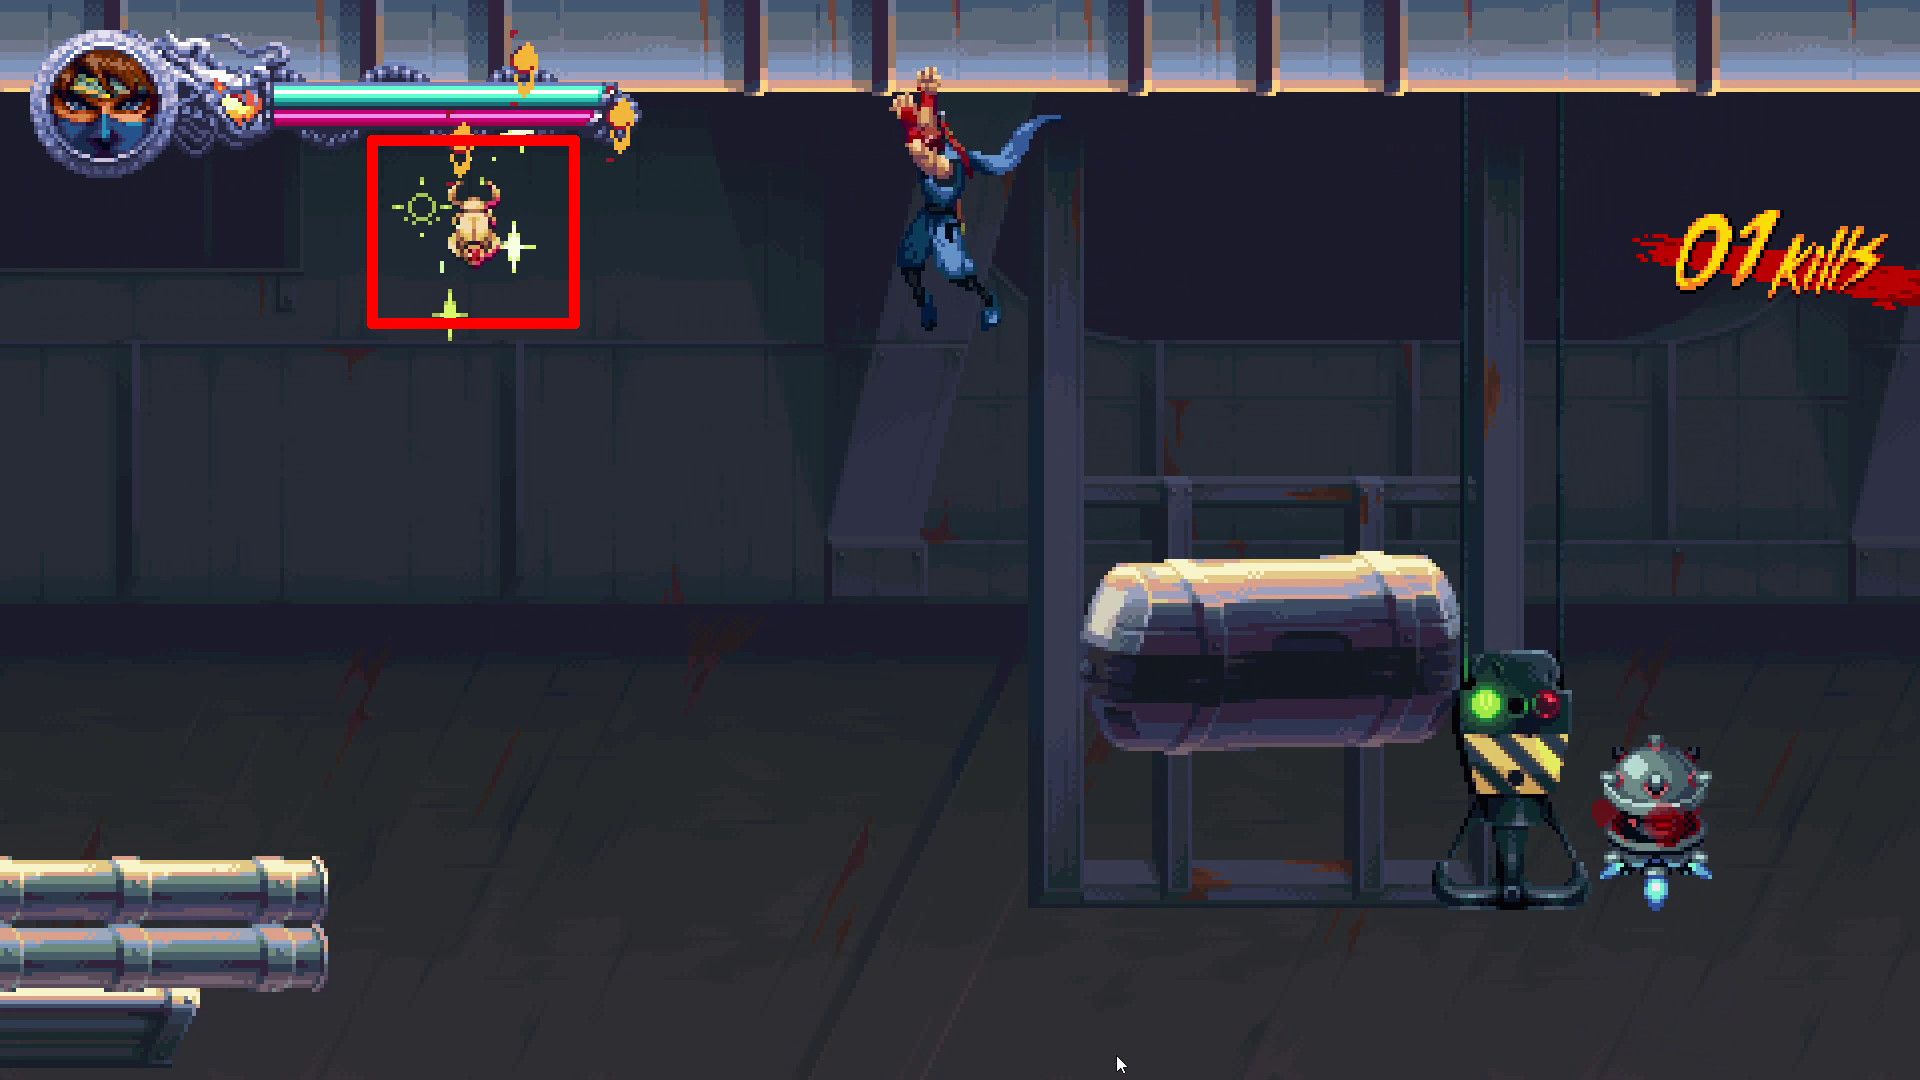
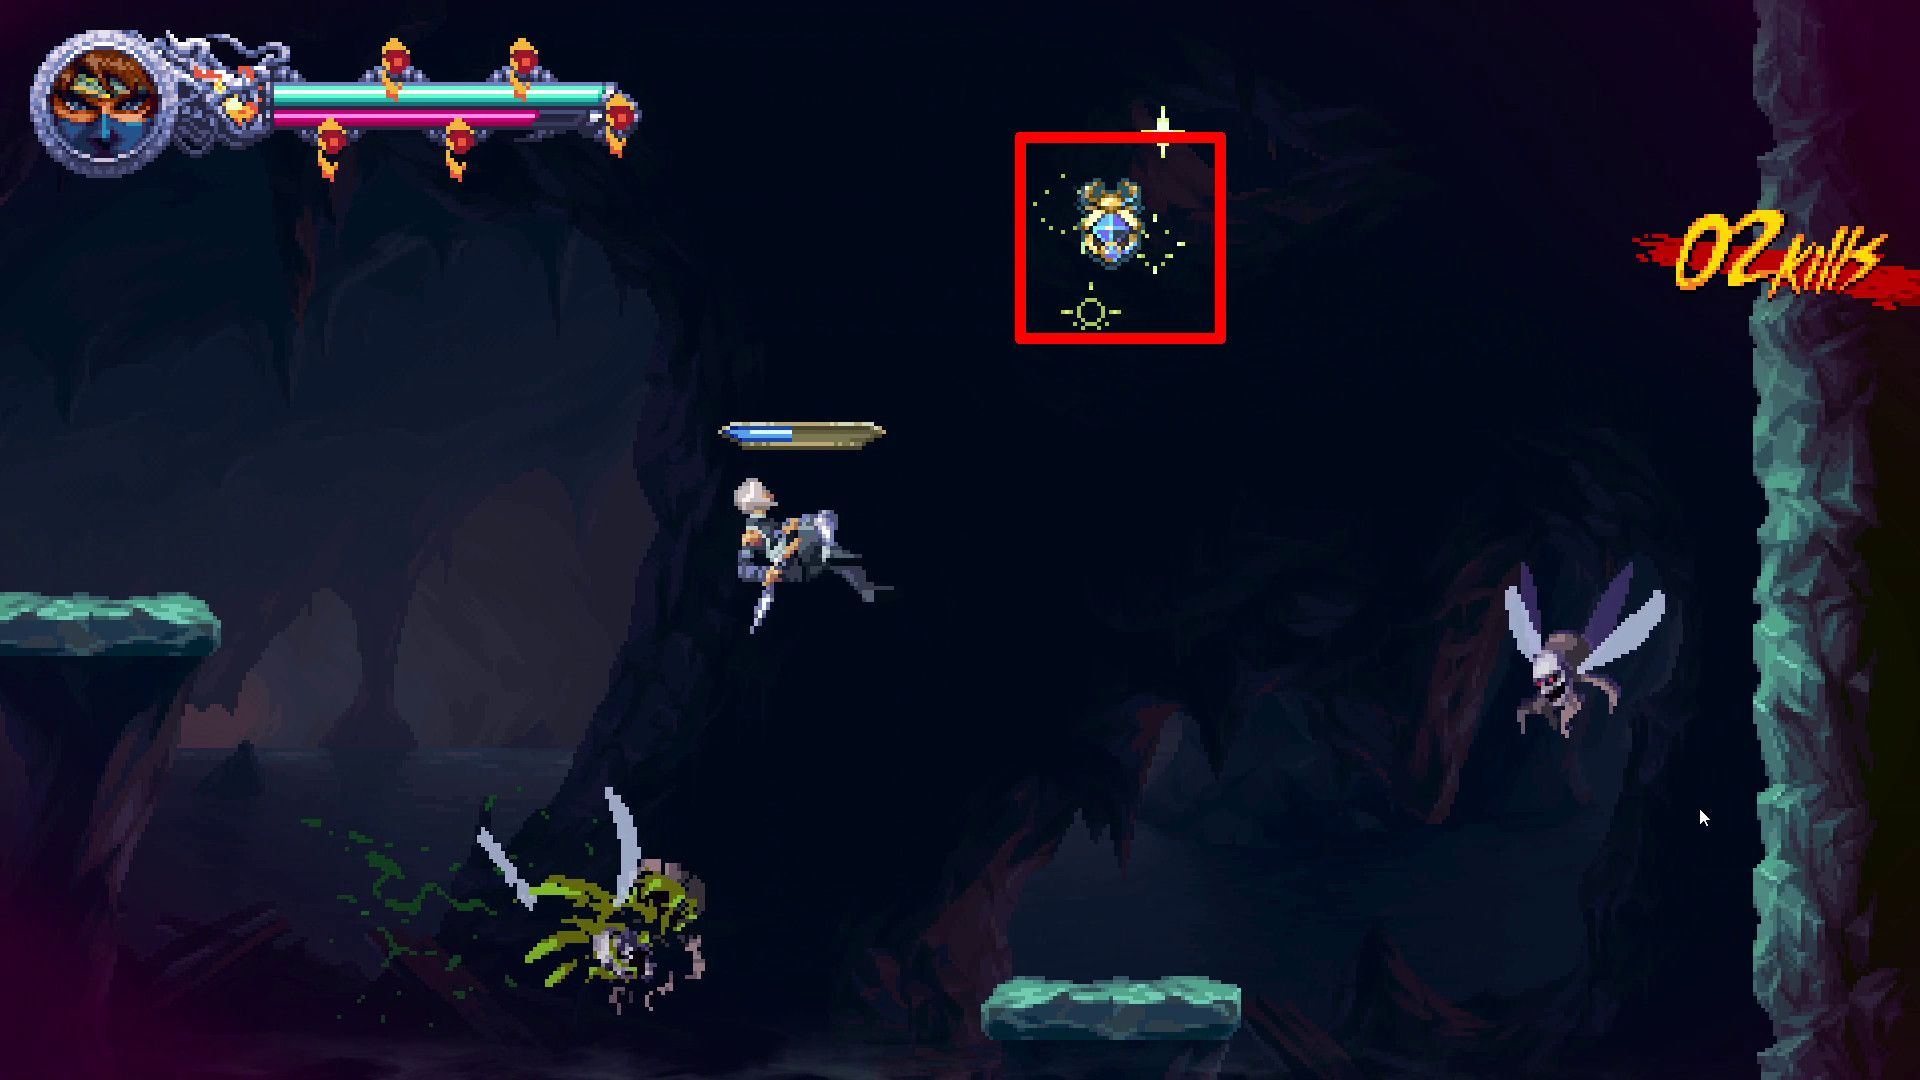
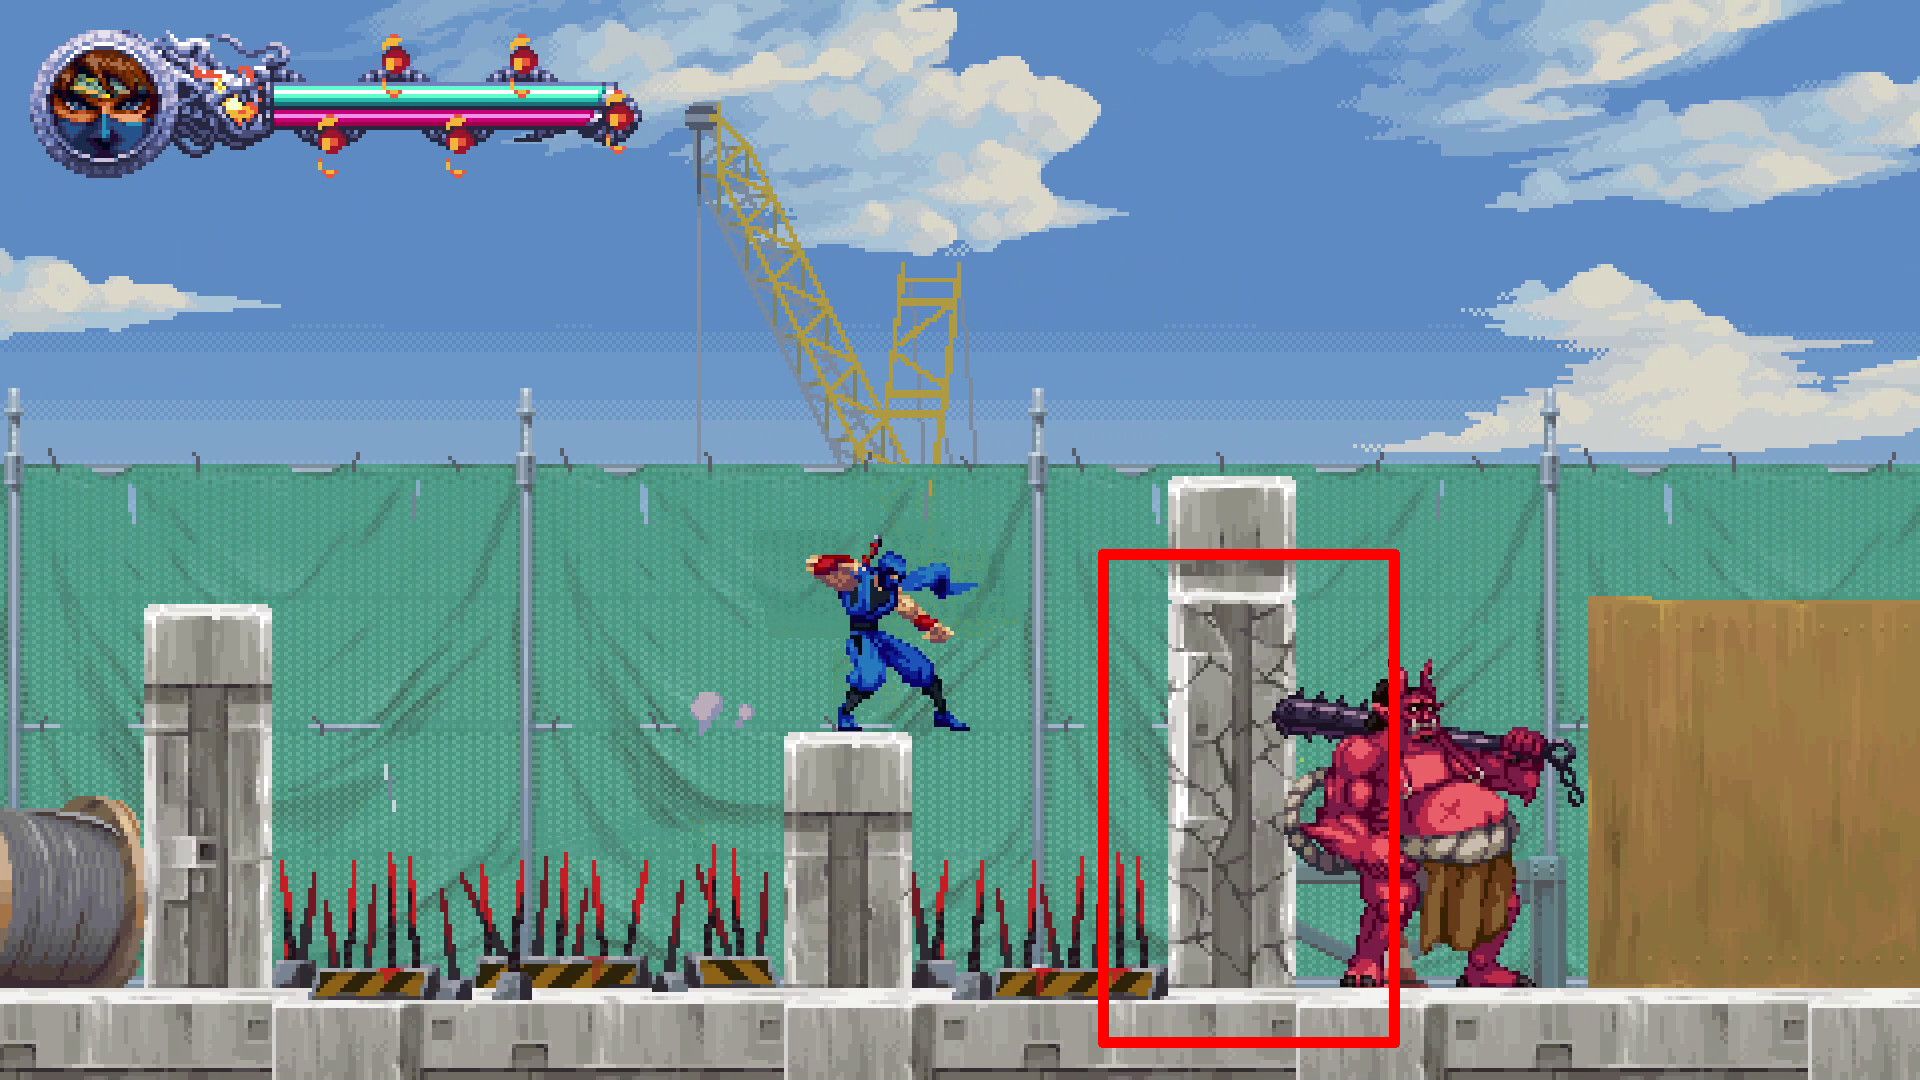
Act 3 Collectibles in Ninja Gaiden Ragebound
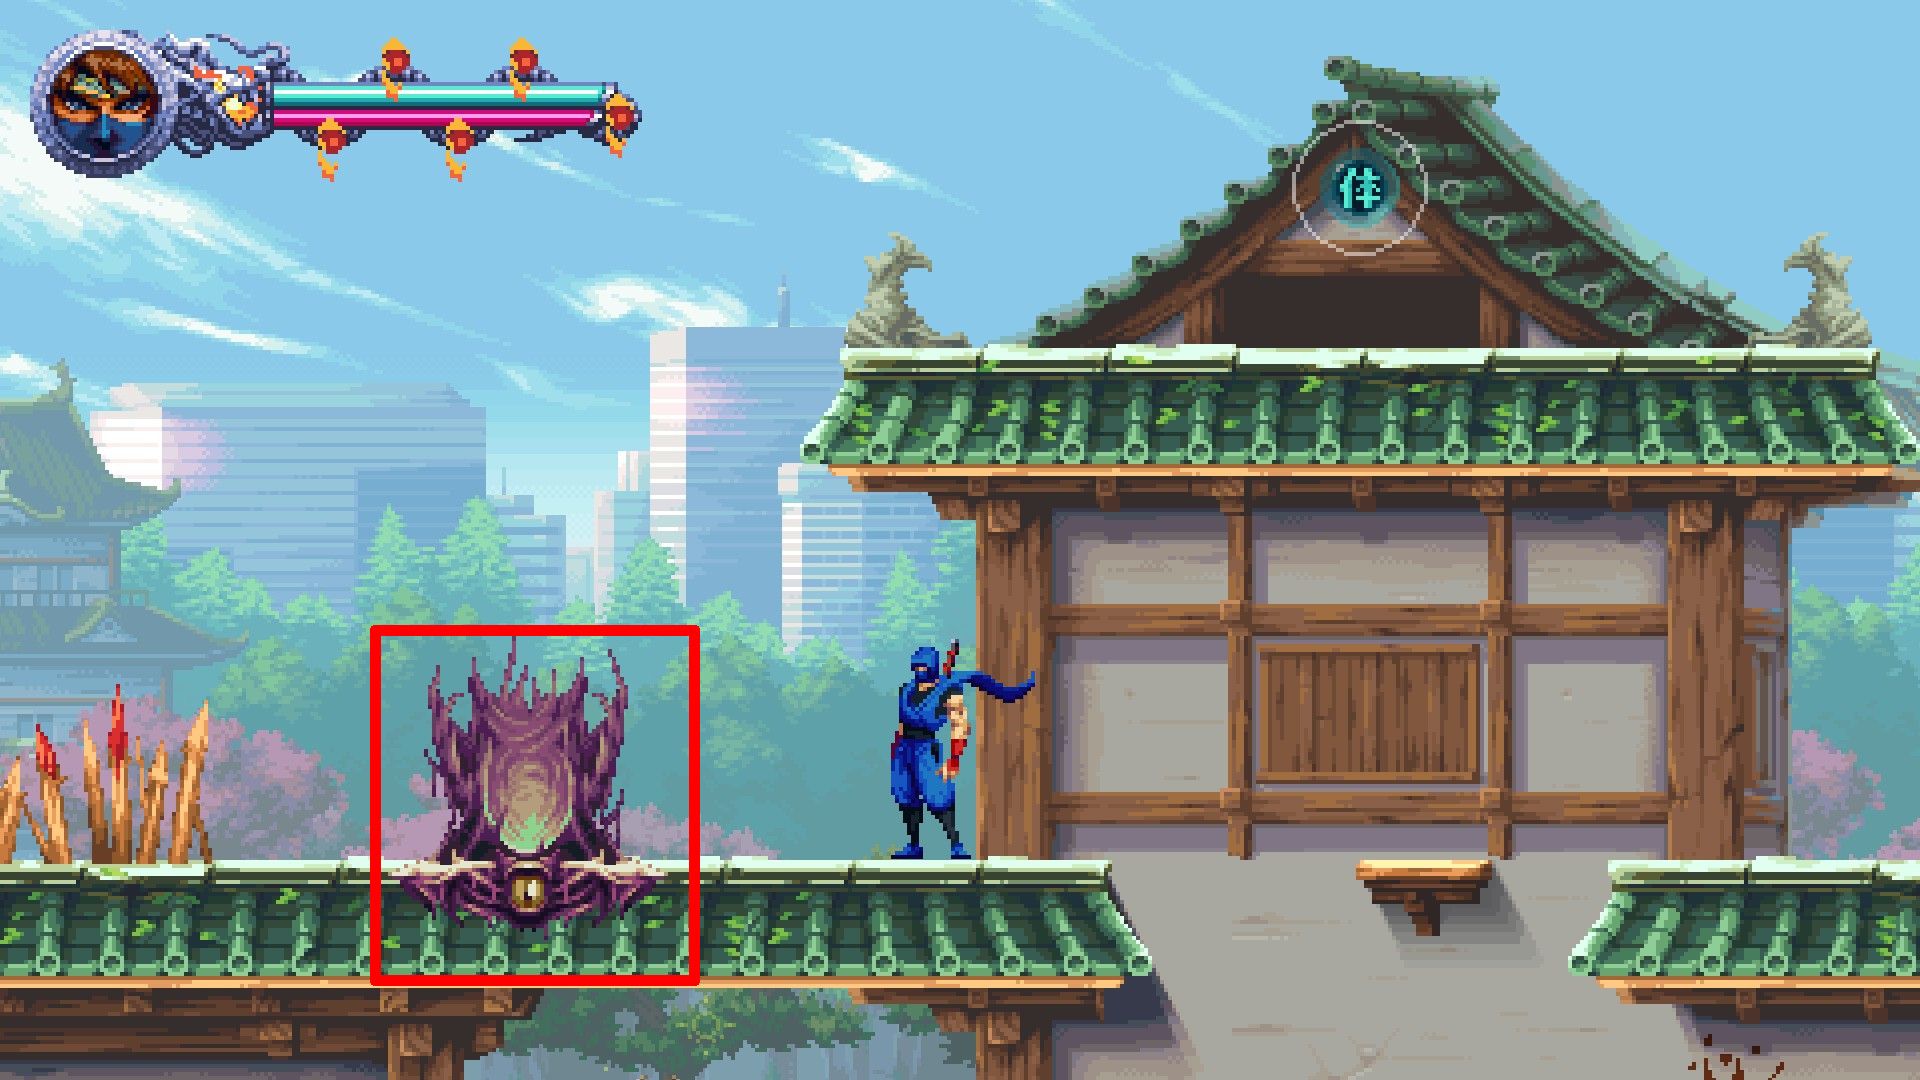
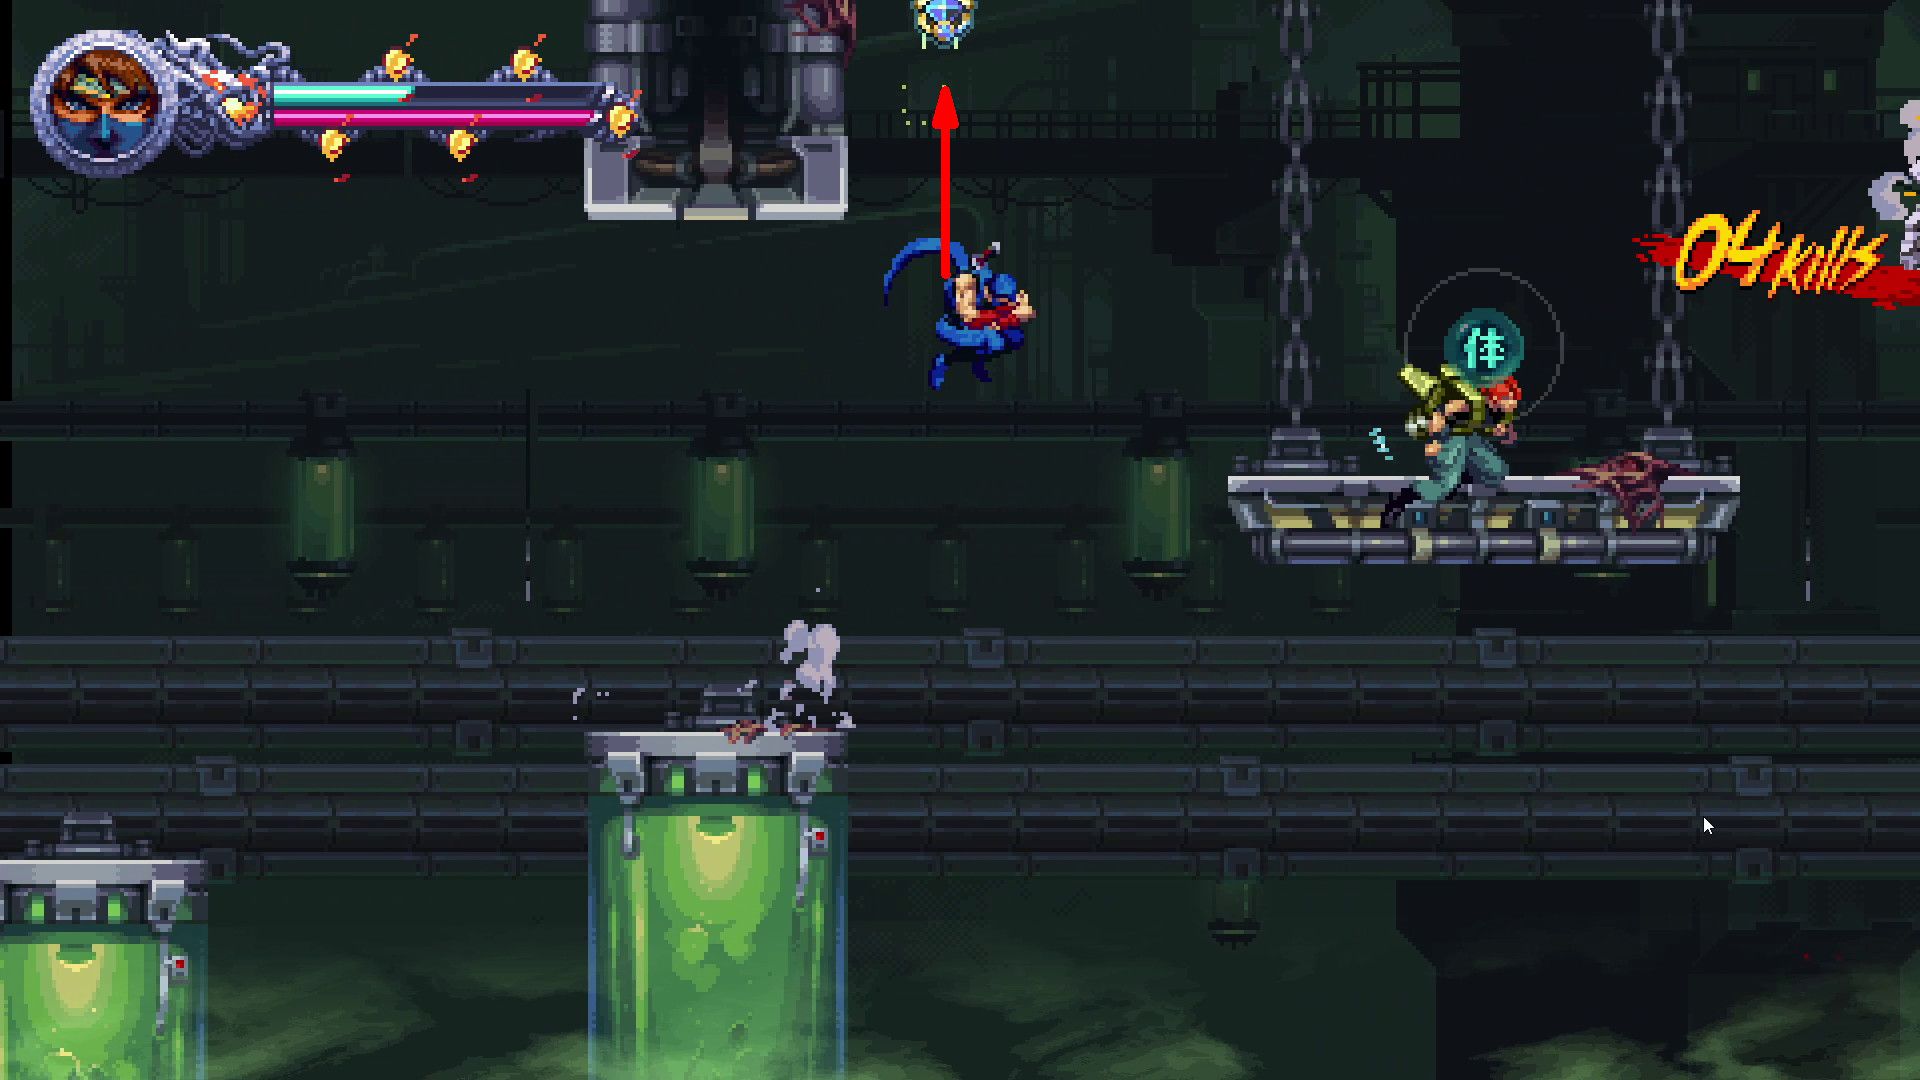
Entwined Fates (3-1)
- Crystal Skull #1
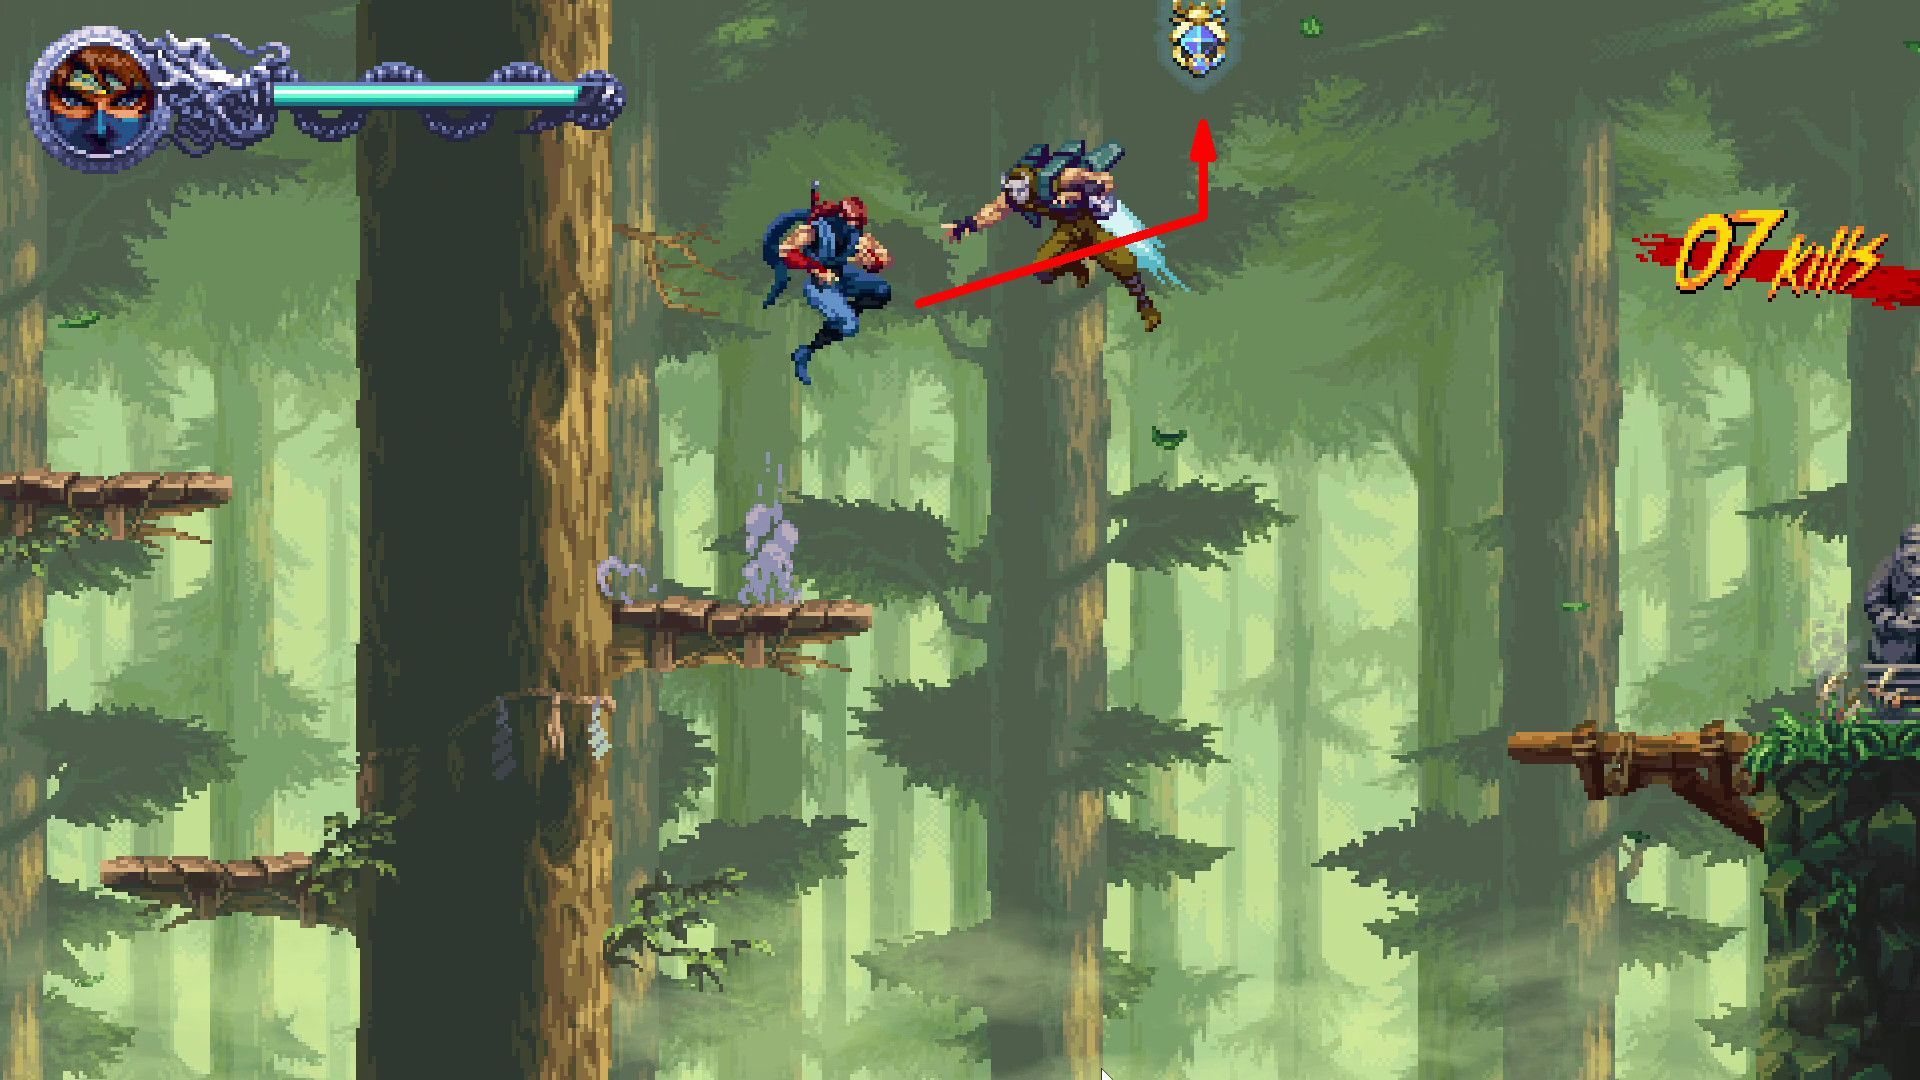
Shortly following the level’s milestone, players will find themselves sliding down a steep, rocky incline, and a glimmer at the horizon catches their eye, emanating from a Crystal Skull. It is worth mentioning that this slope materializes right before the tutorial on blue and red auras.
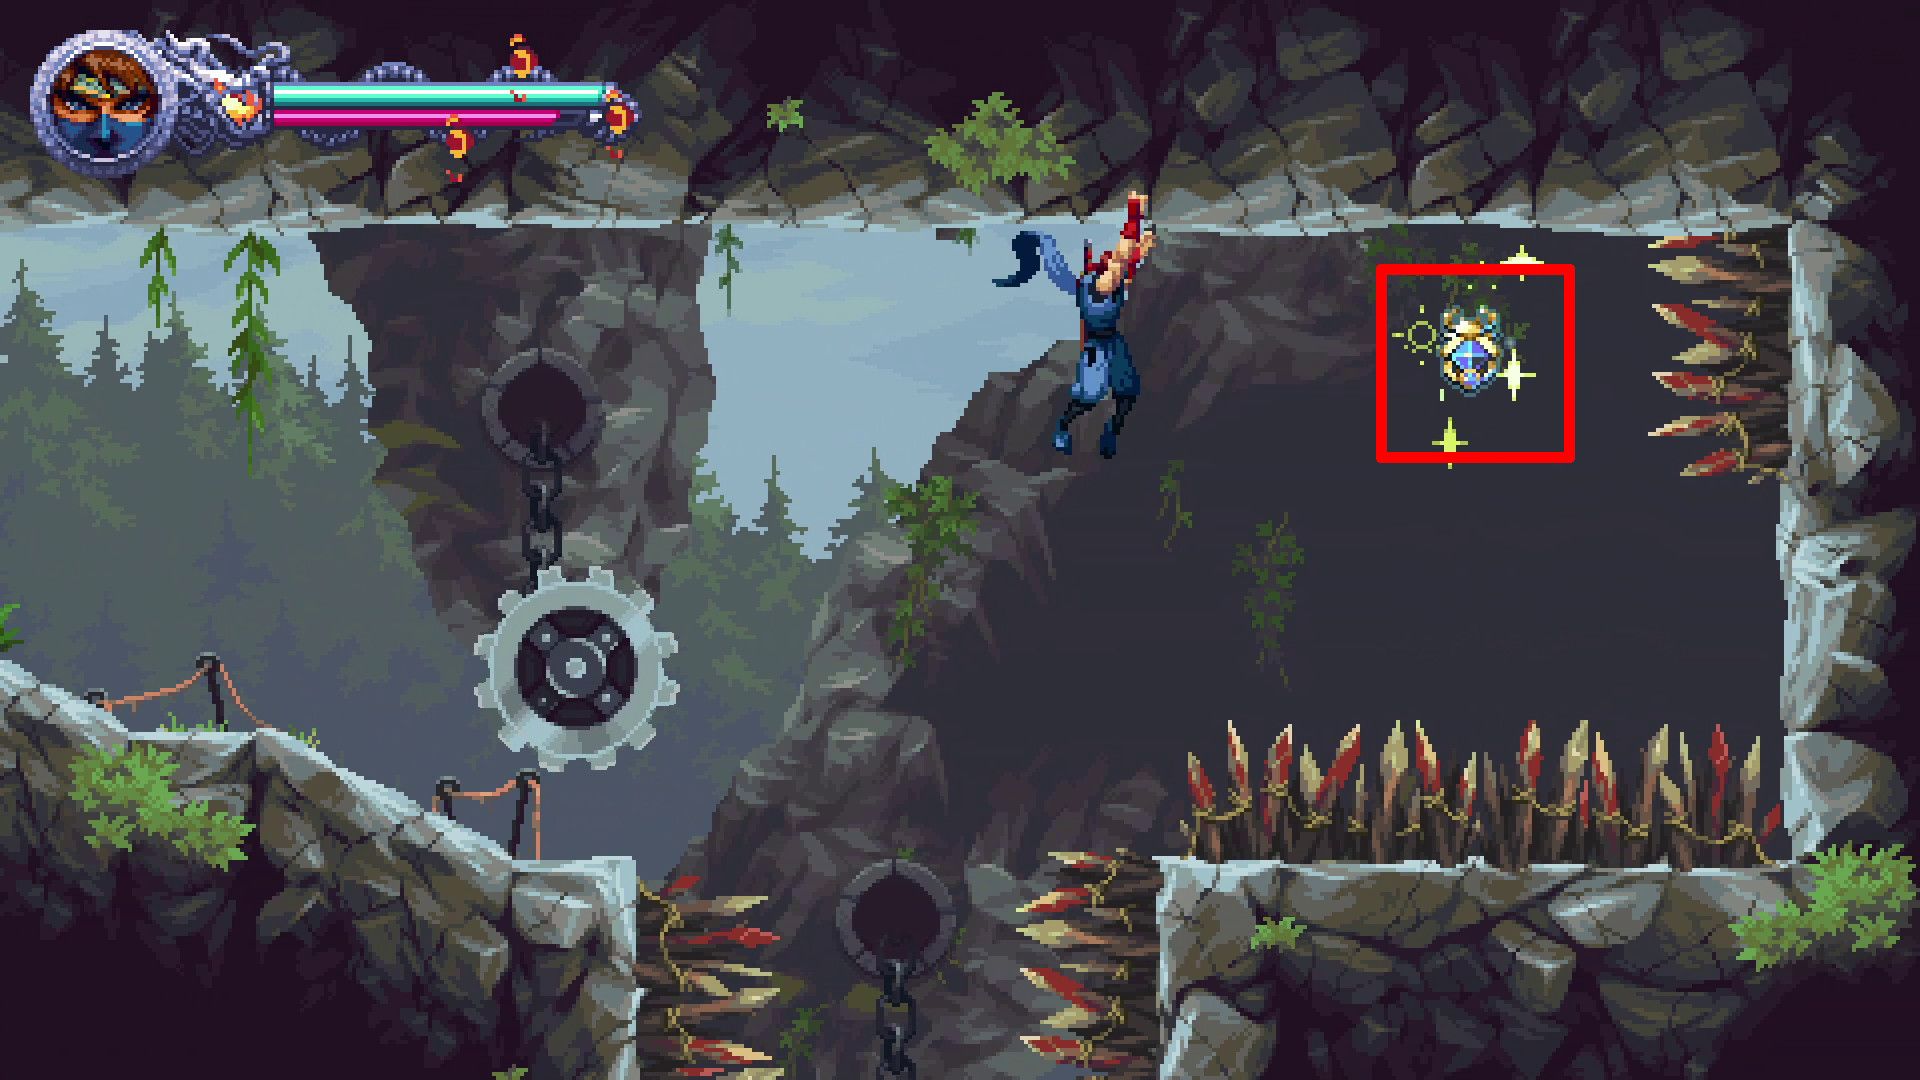
A Perilous Desert (3-2)
- Golden Scarab #1
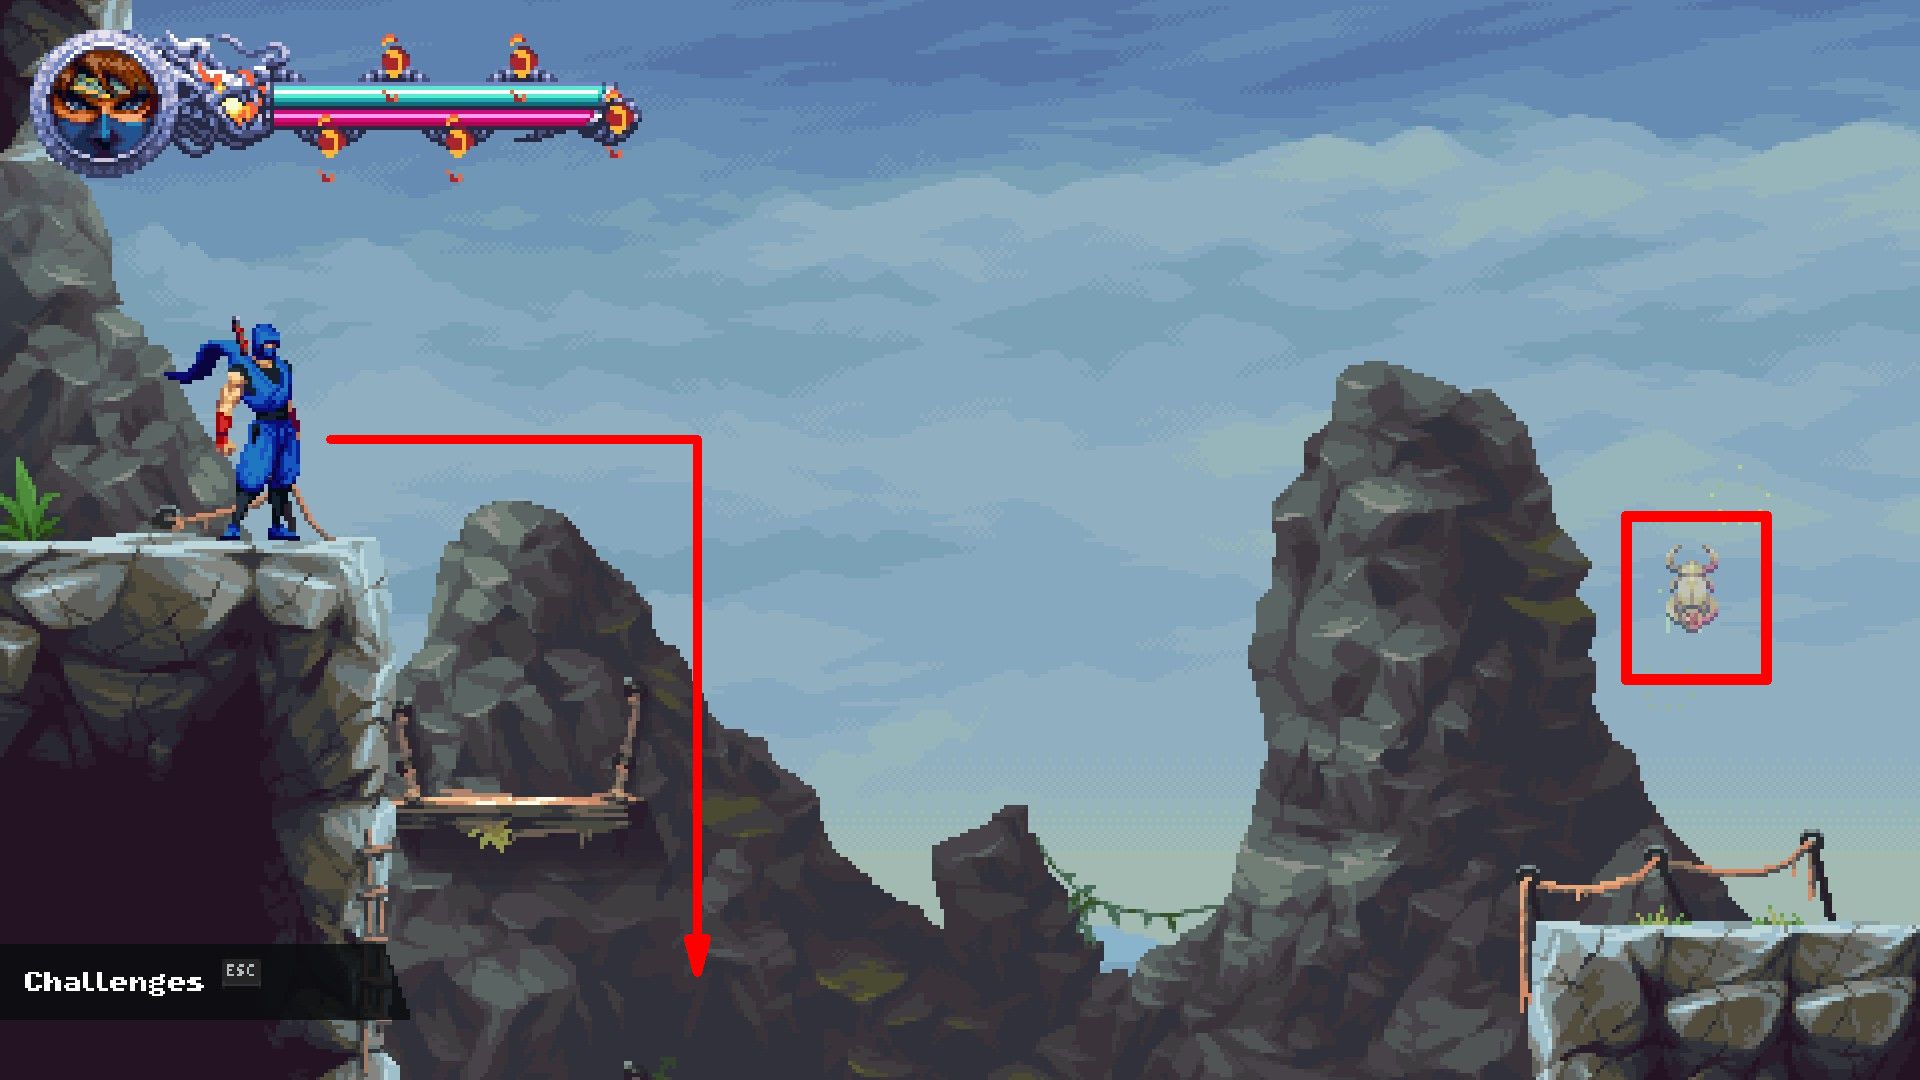
To start off at the level, descend onto the floating rectangular stone block. Being on this stone triggers a rising square stone. With this raised stone, players can climb up to retrieve the Golden Scarab.
- Golden Scarbs #2, 3 & 4
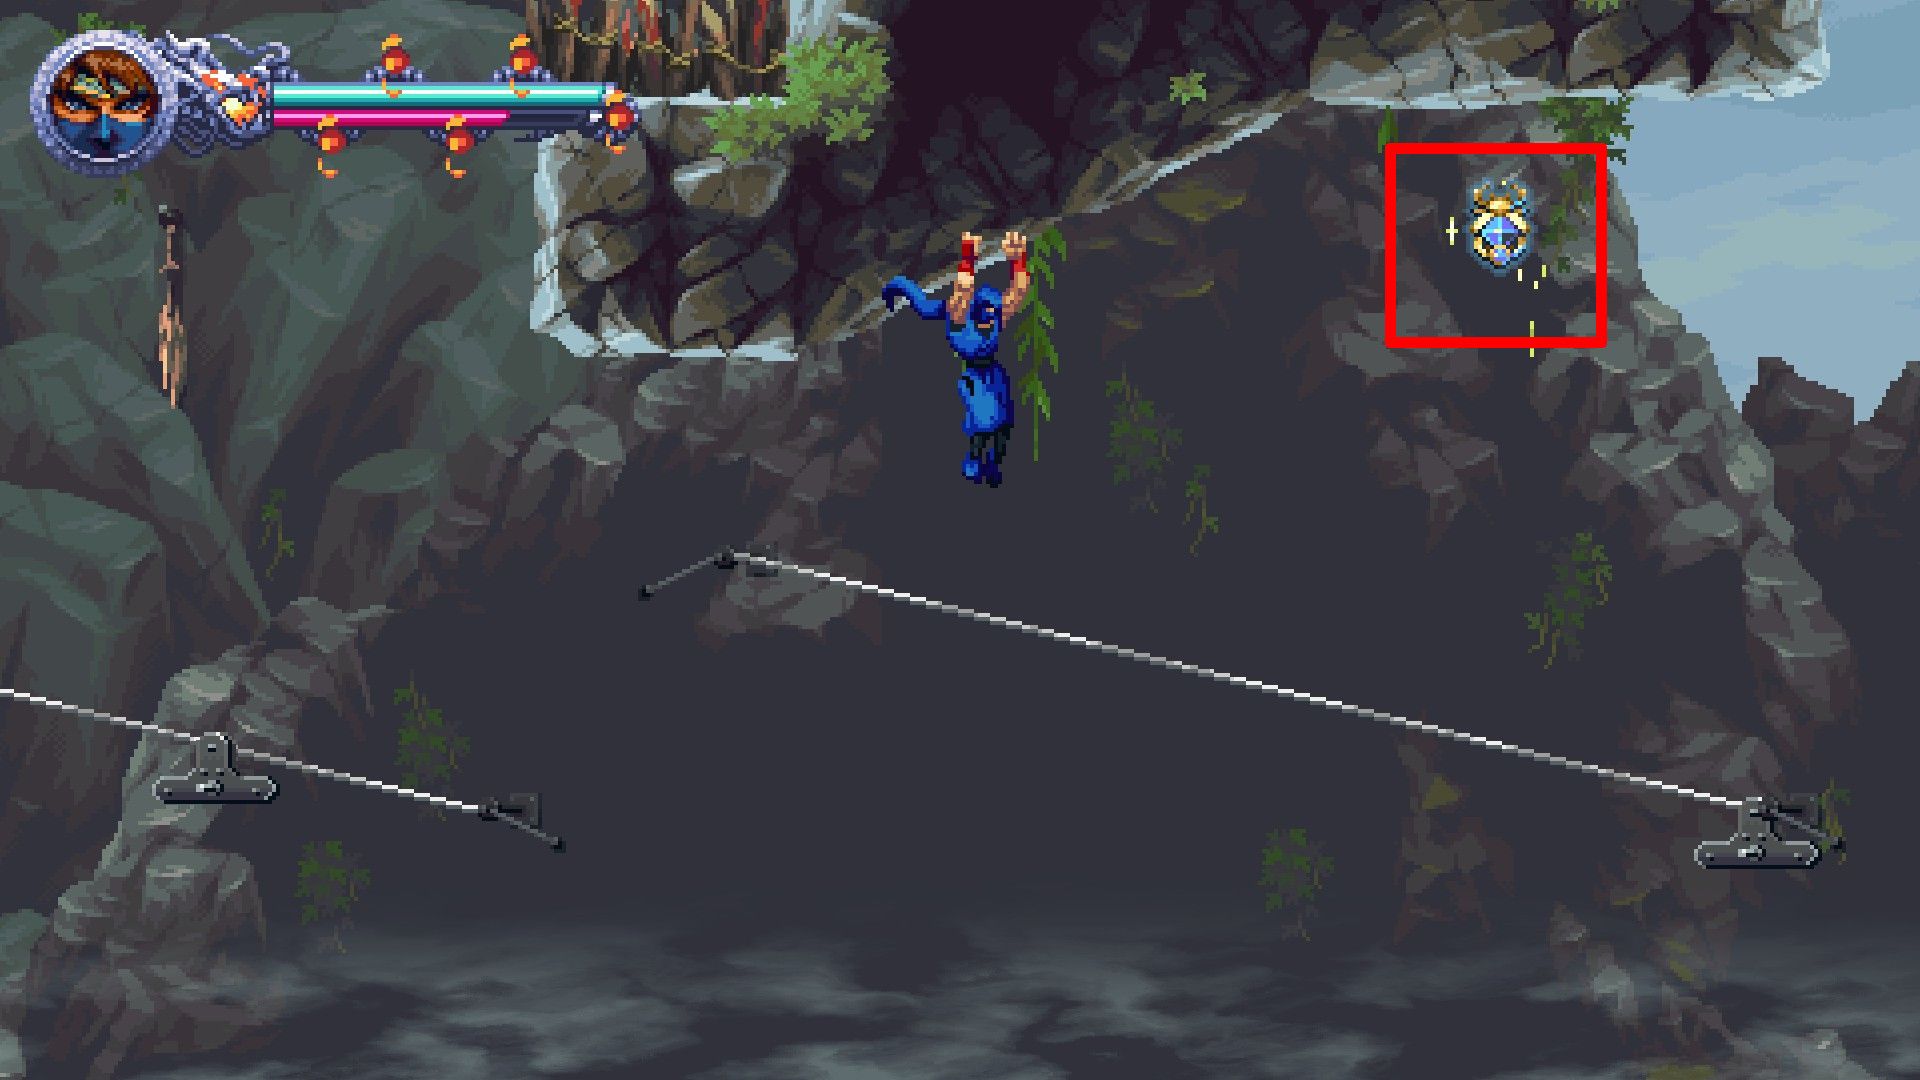
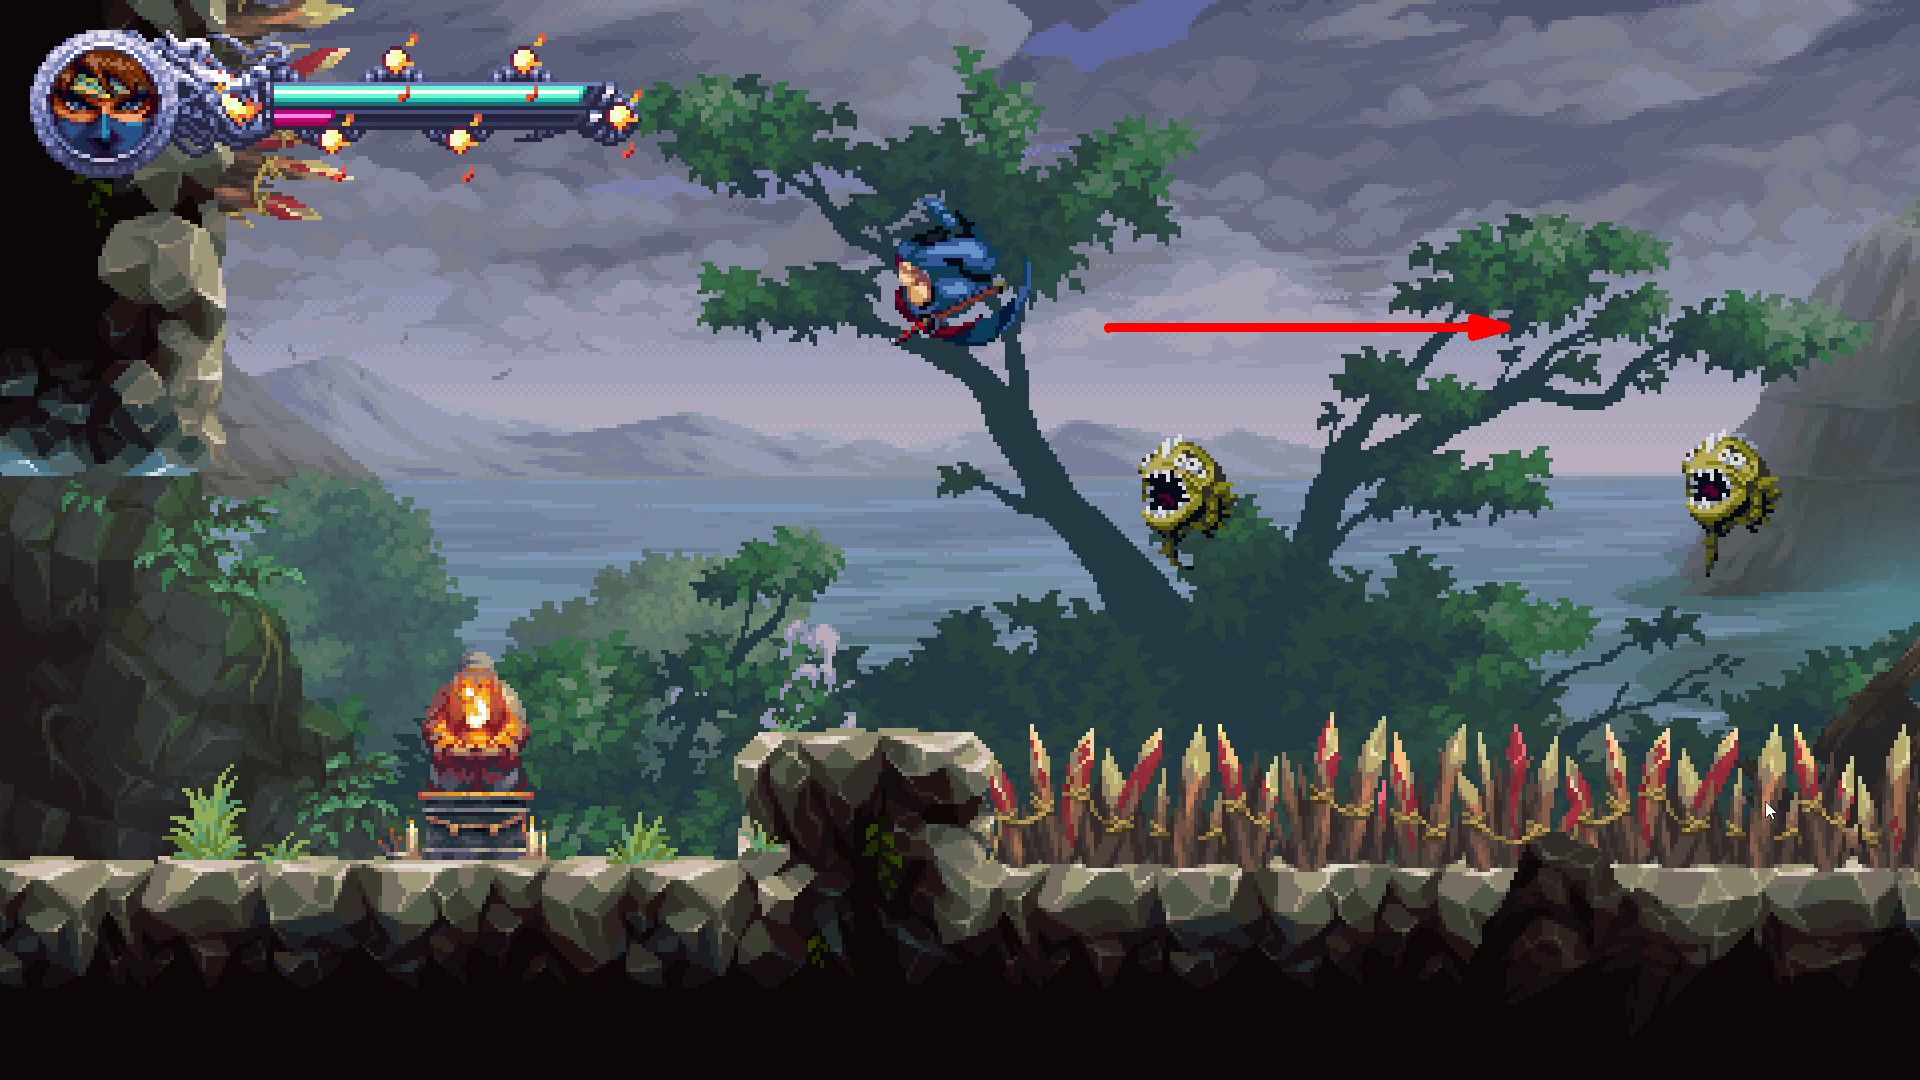
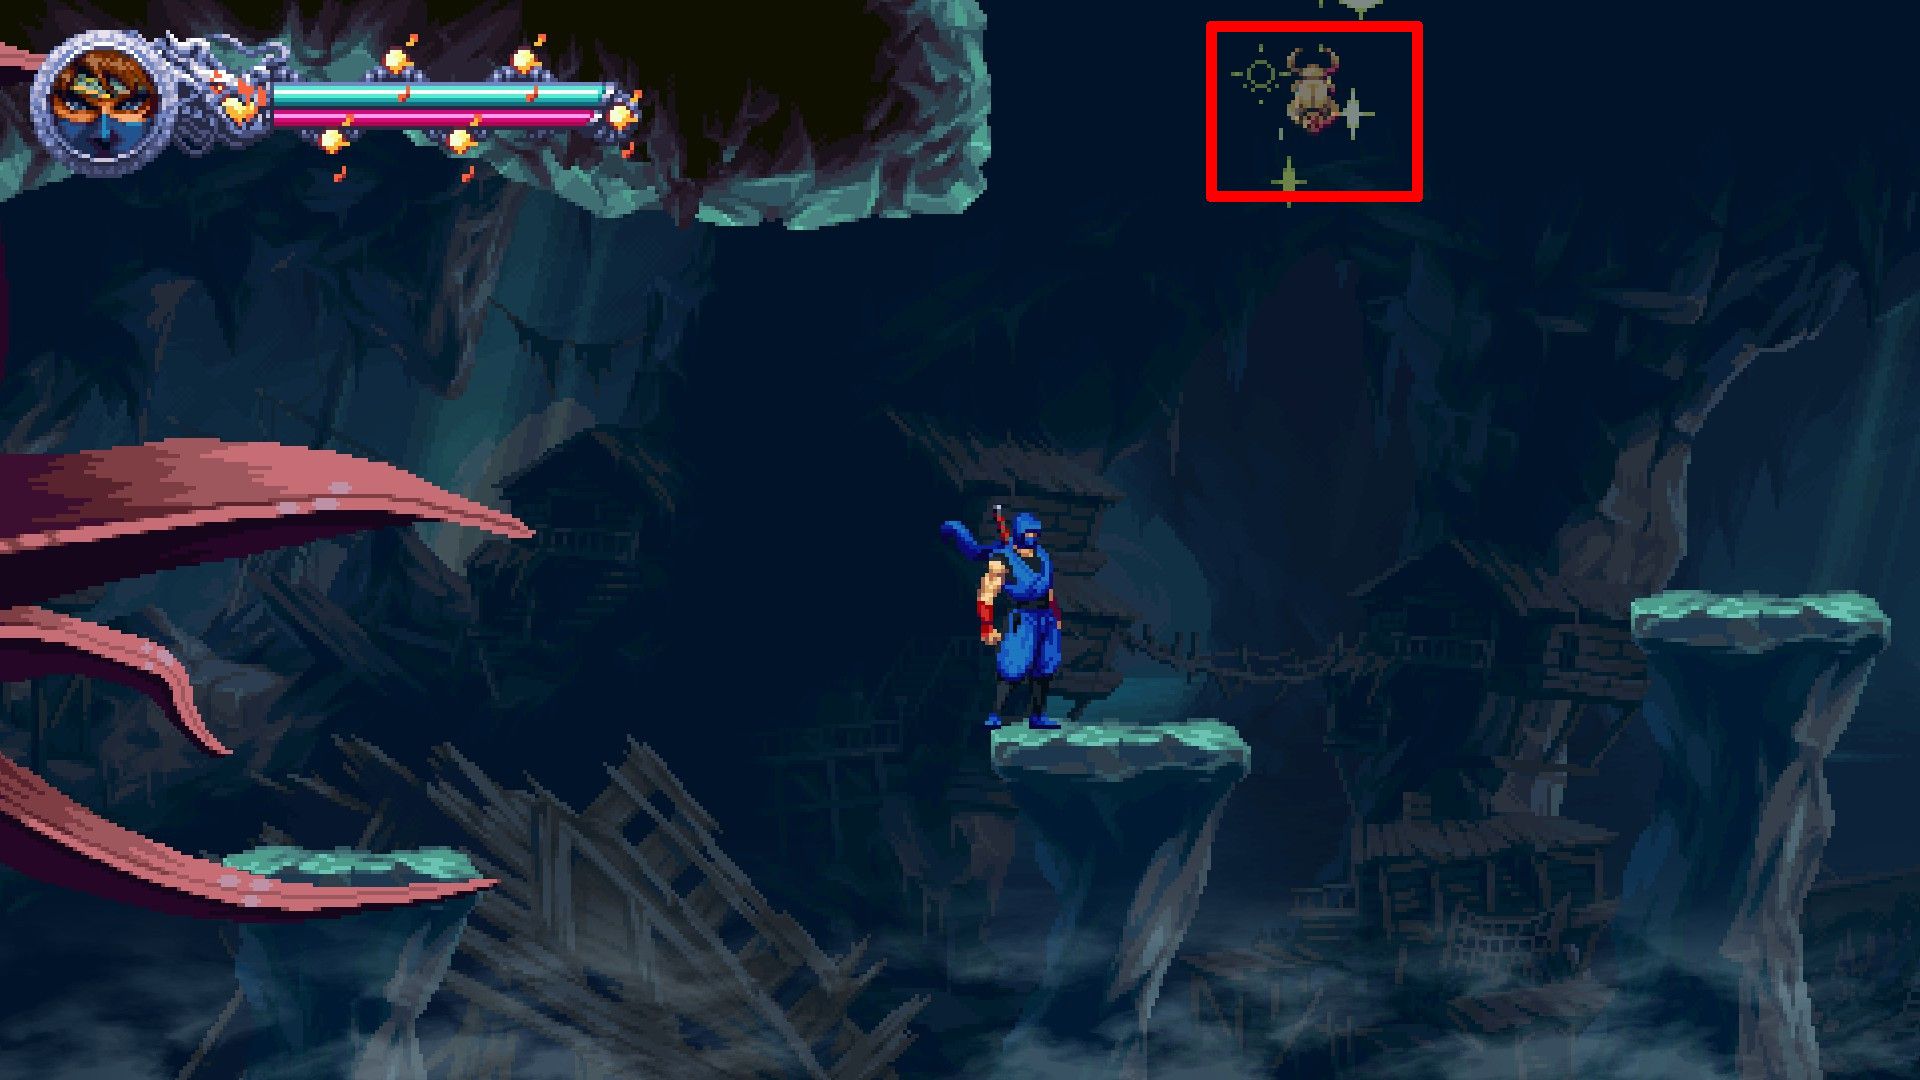
Move forward to the next part where you’ll find a row of ziplines. Keep an eye out for a Golden Scarab hovering above one of these ziplines; when you spot it, swiftly latch on to the ceiling to get there.
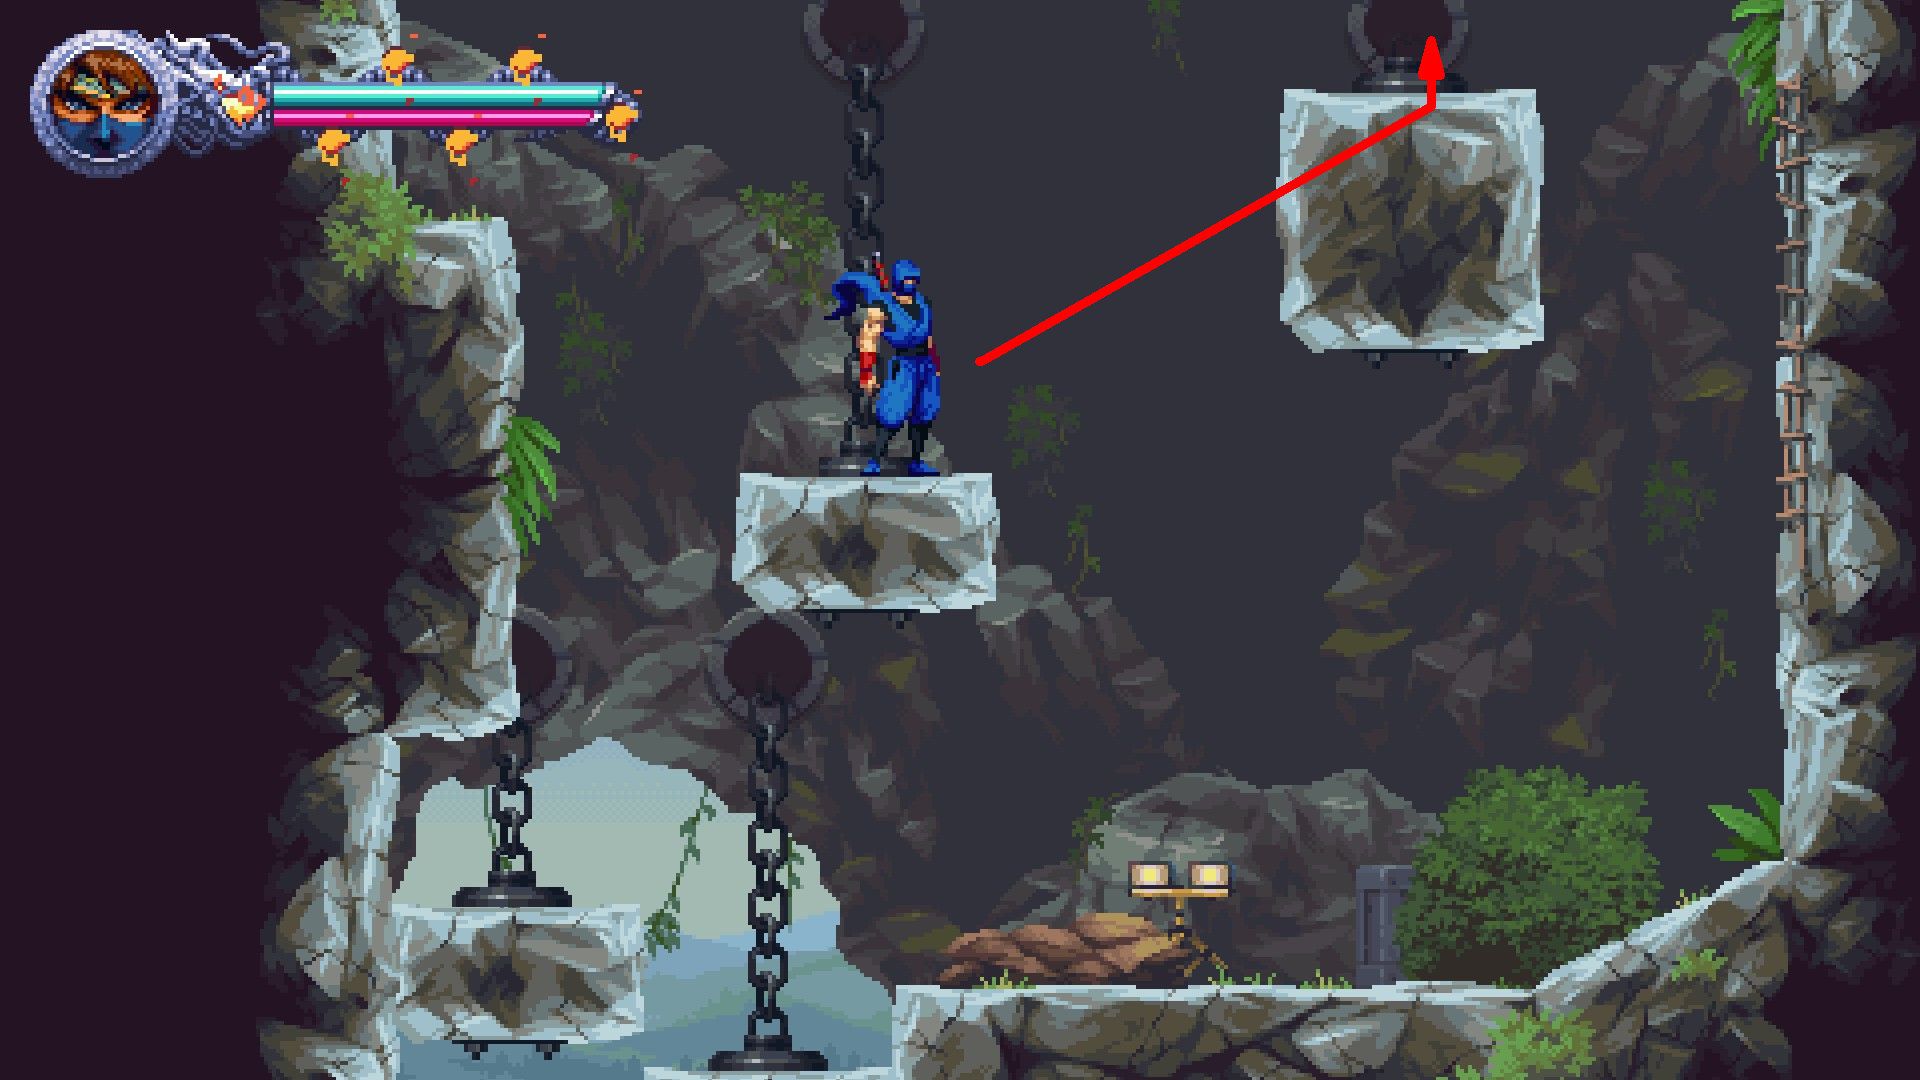
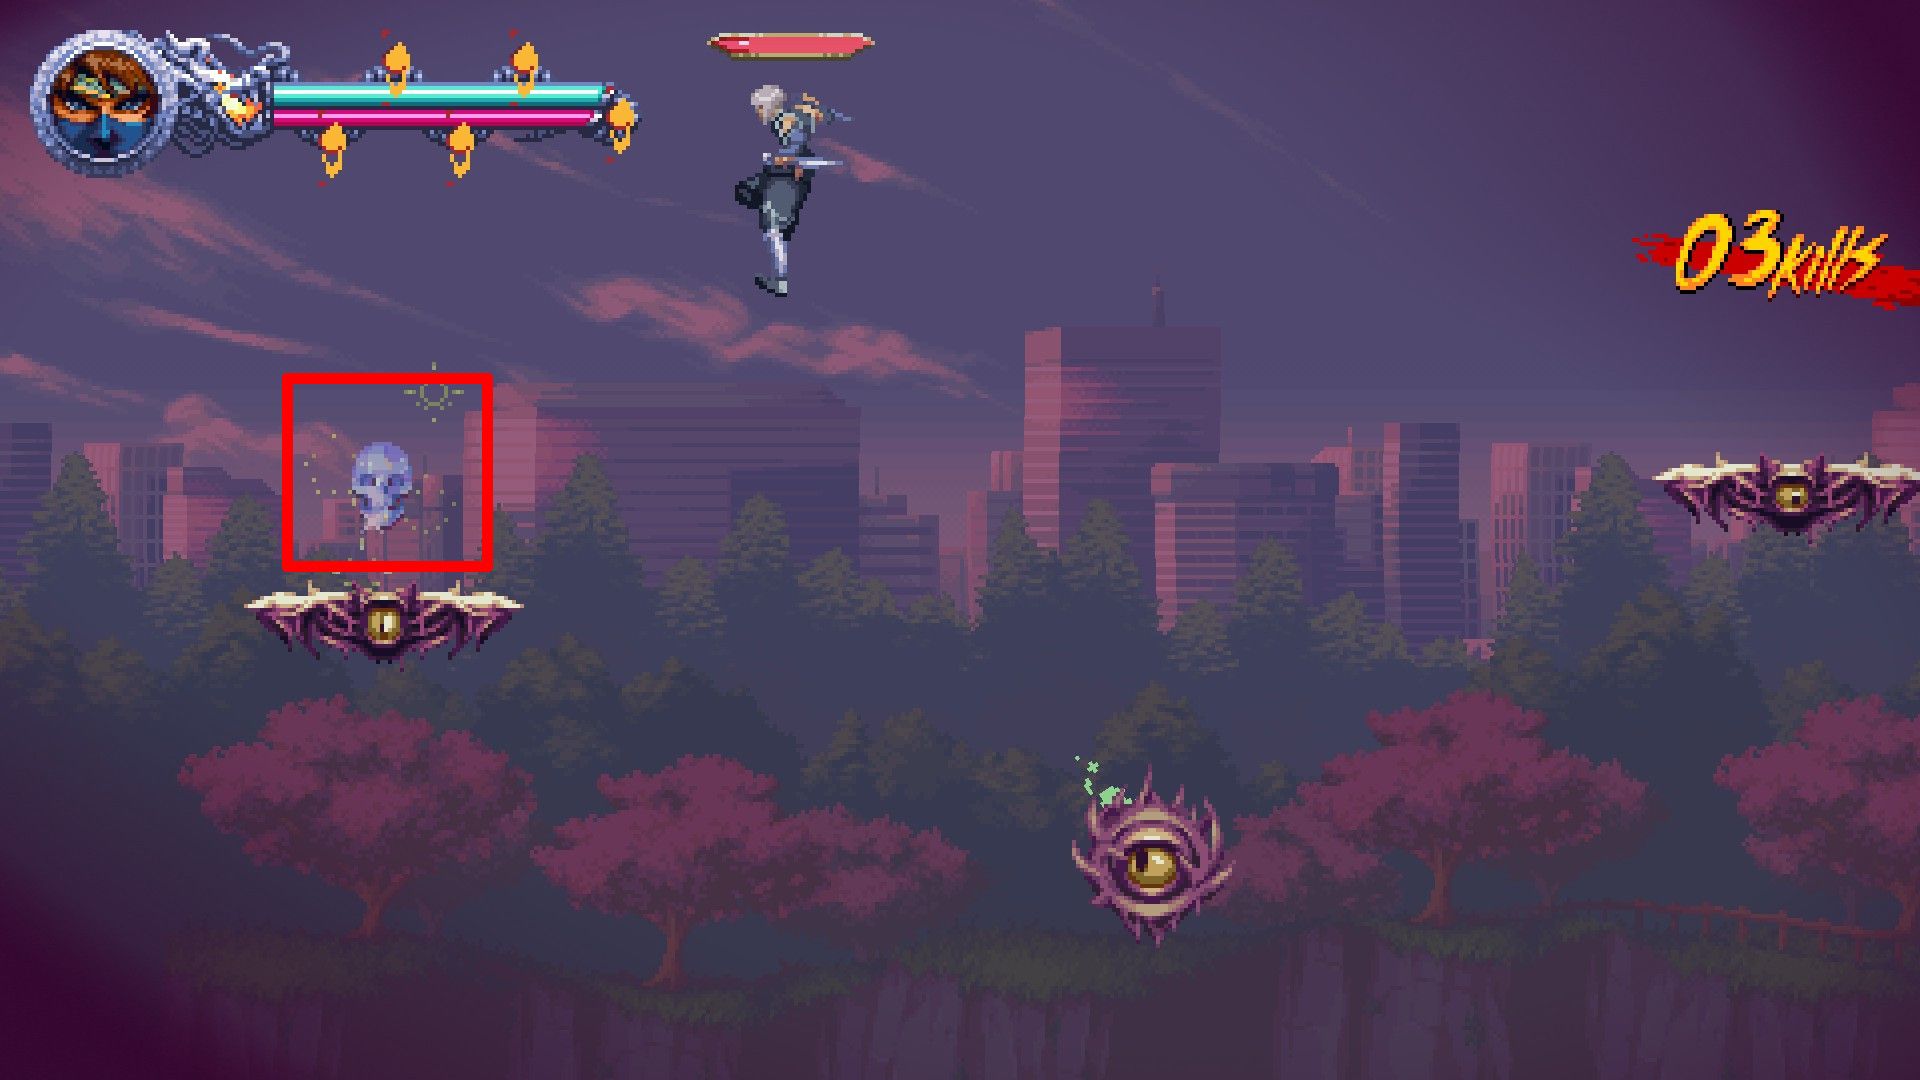
- Crystal Skul #1

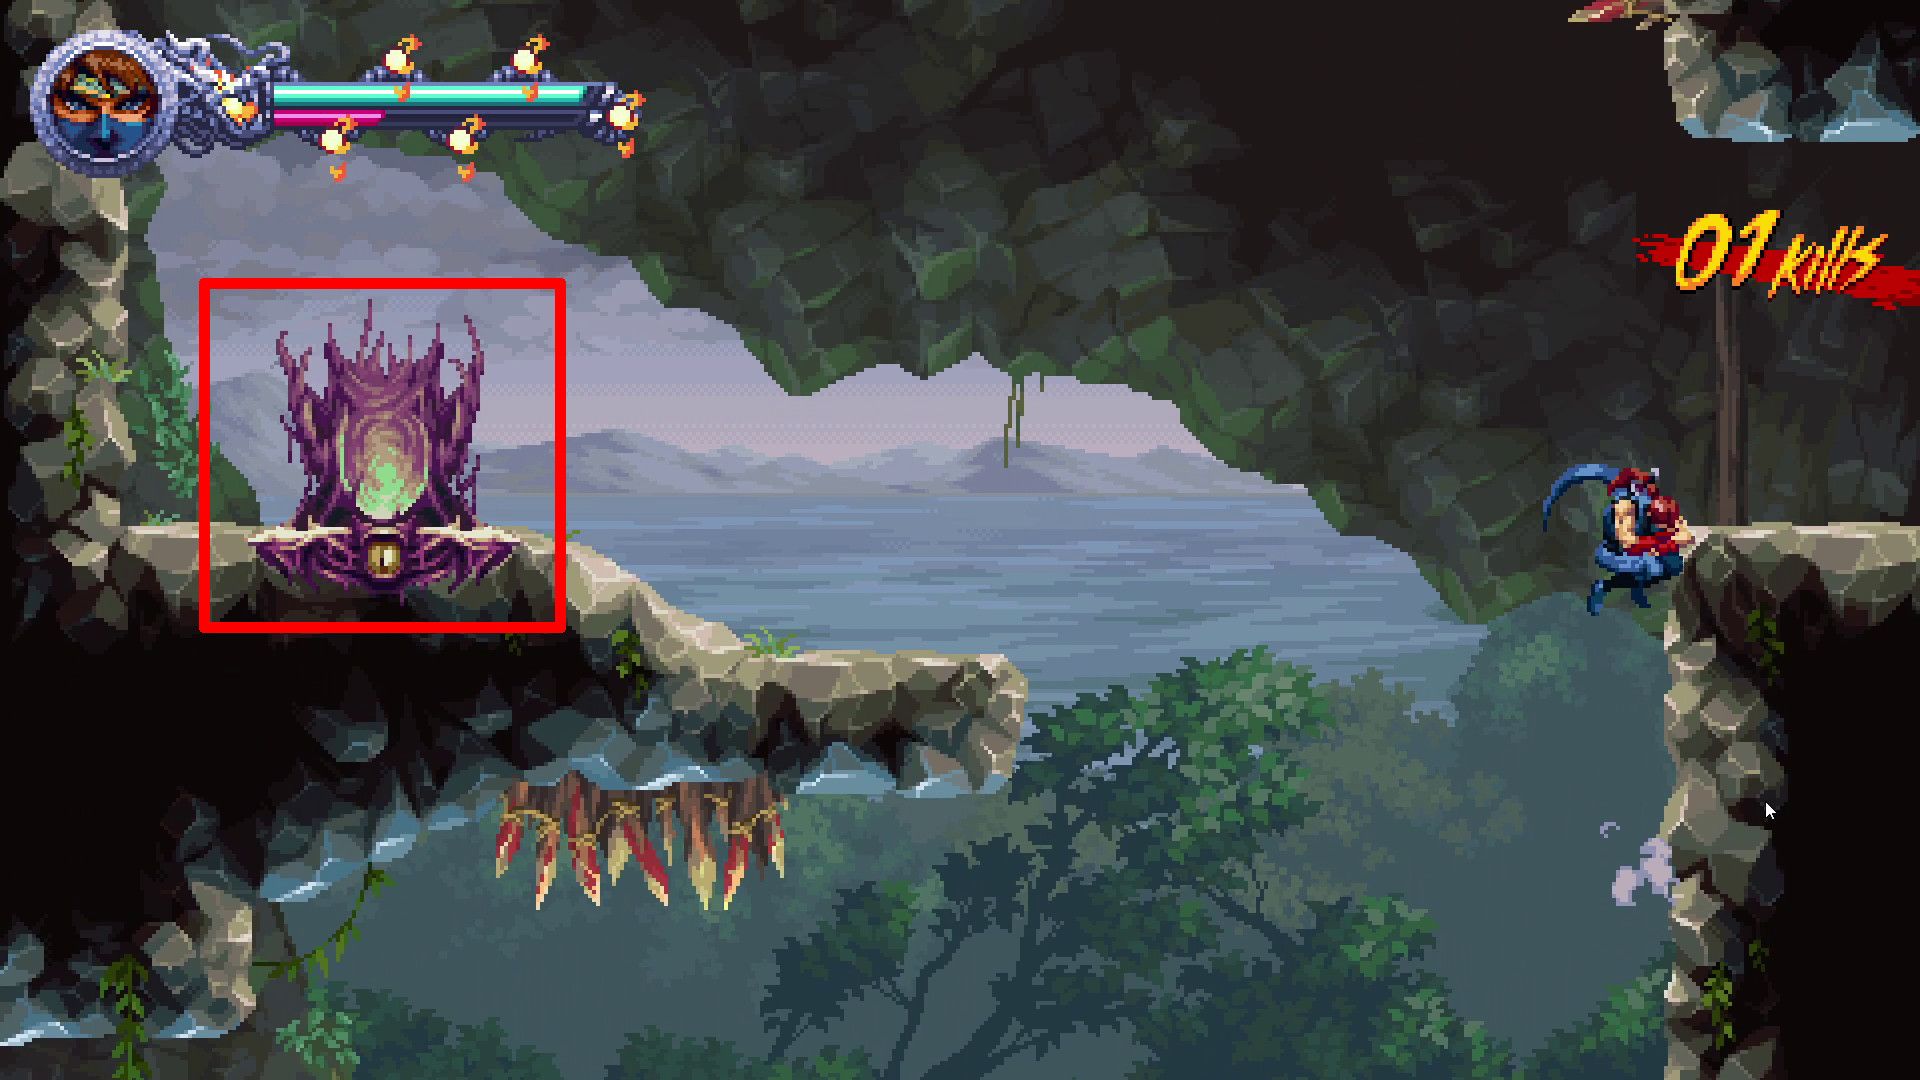
Beyond the zipline area, you’ll find a checkpoint and an ominous-looking altar, often referred to as the Demon Altar. Approach the altar, navigate the course it presents, and repeatedly hit the cog at its end to lift a hanging rock. Once lifted, swiftly ascend the shaft the rock was raised from to obtain a Crystal Skull, as Kenji.
After crossing the zipline, you’ll see a checkpoint and a spooky altar. Go near it, follow the path it provides, and hit the lever at the end repeatedly to lift a rock. Once lifted, climb up the hole where the rock was lifted from to get a Crystal Skull, as Kenji does.
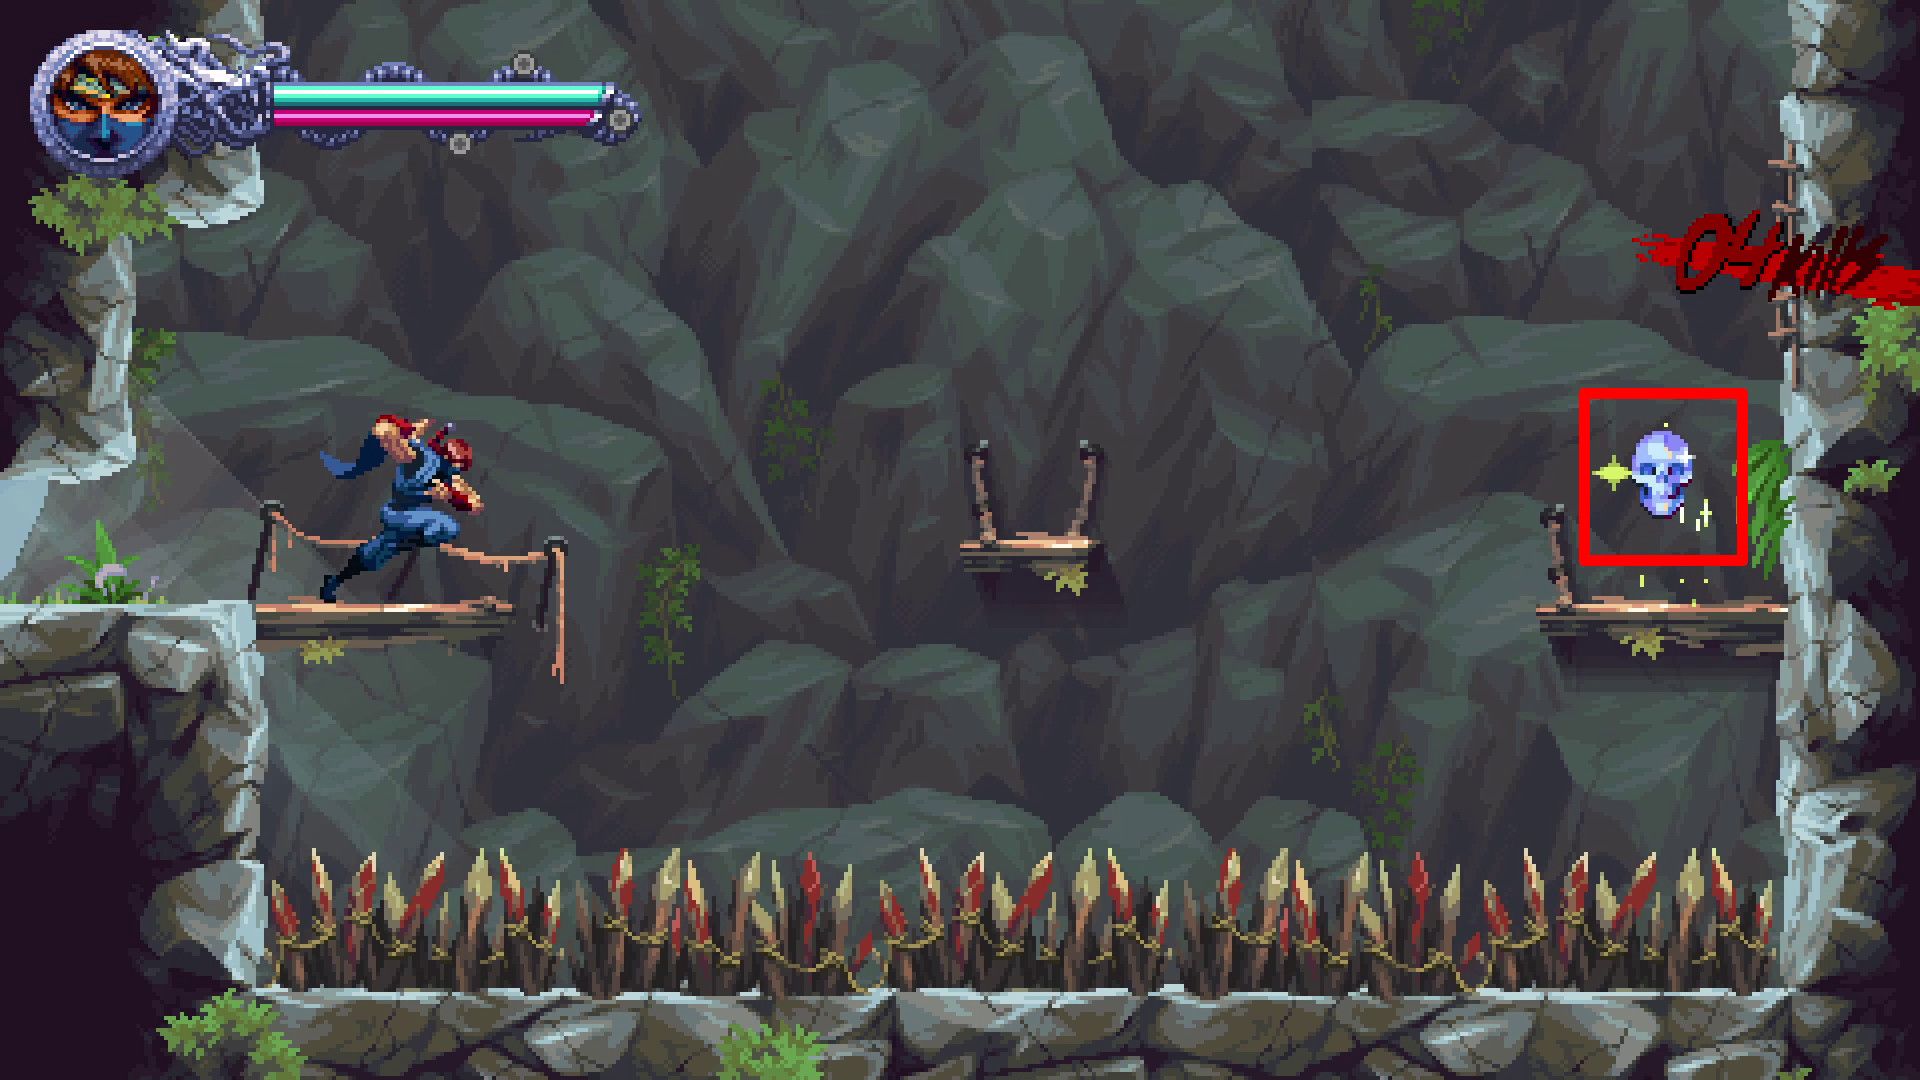
- Crystal Skull #2
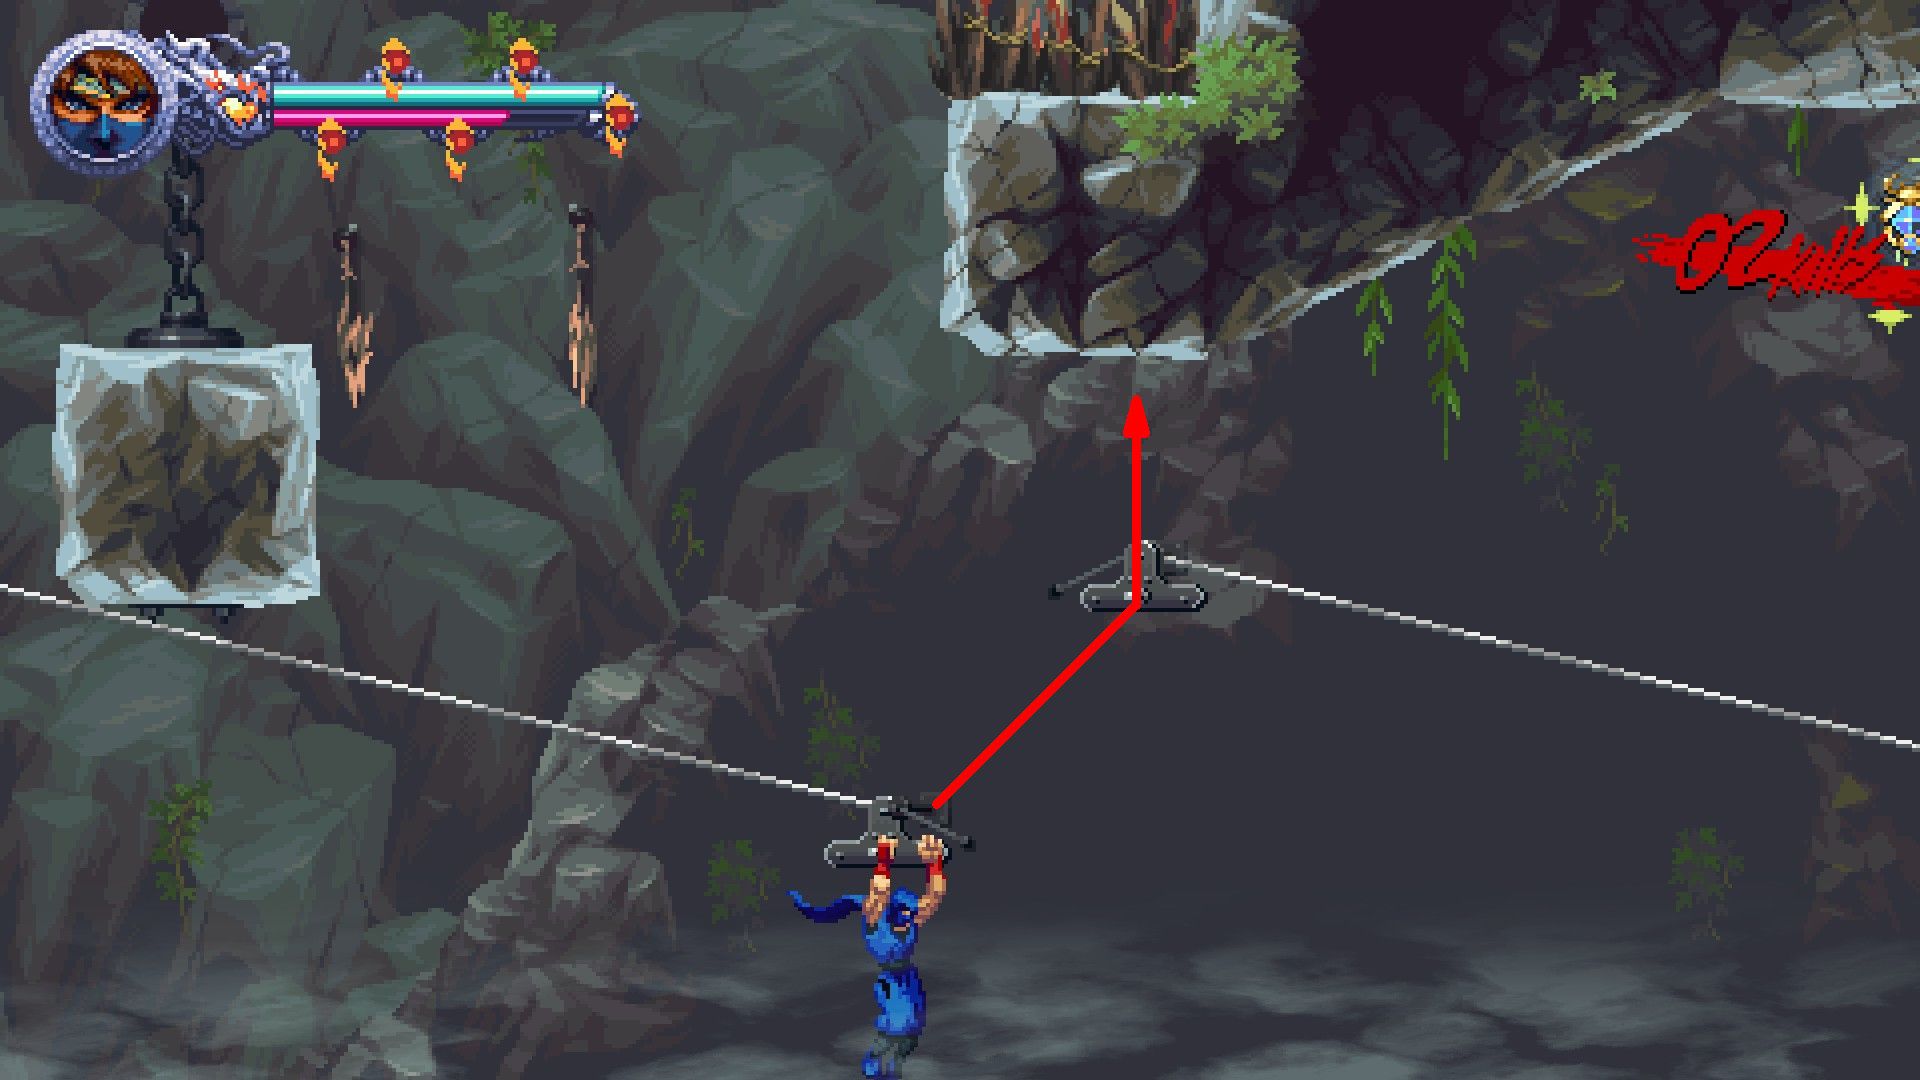
Following the thrilling zip line ride alongside the monstrous eel-like creatures, players should adhere to the path and make their way through a narrow passageway when necessary. At the end of this forced journey, locate the broken wall on your left side to unlock entry into an area featuring a Crystal Skull.
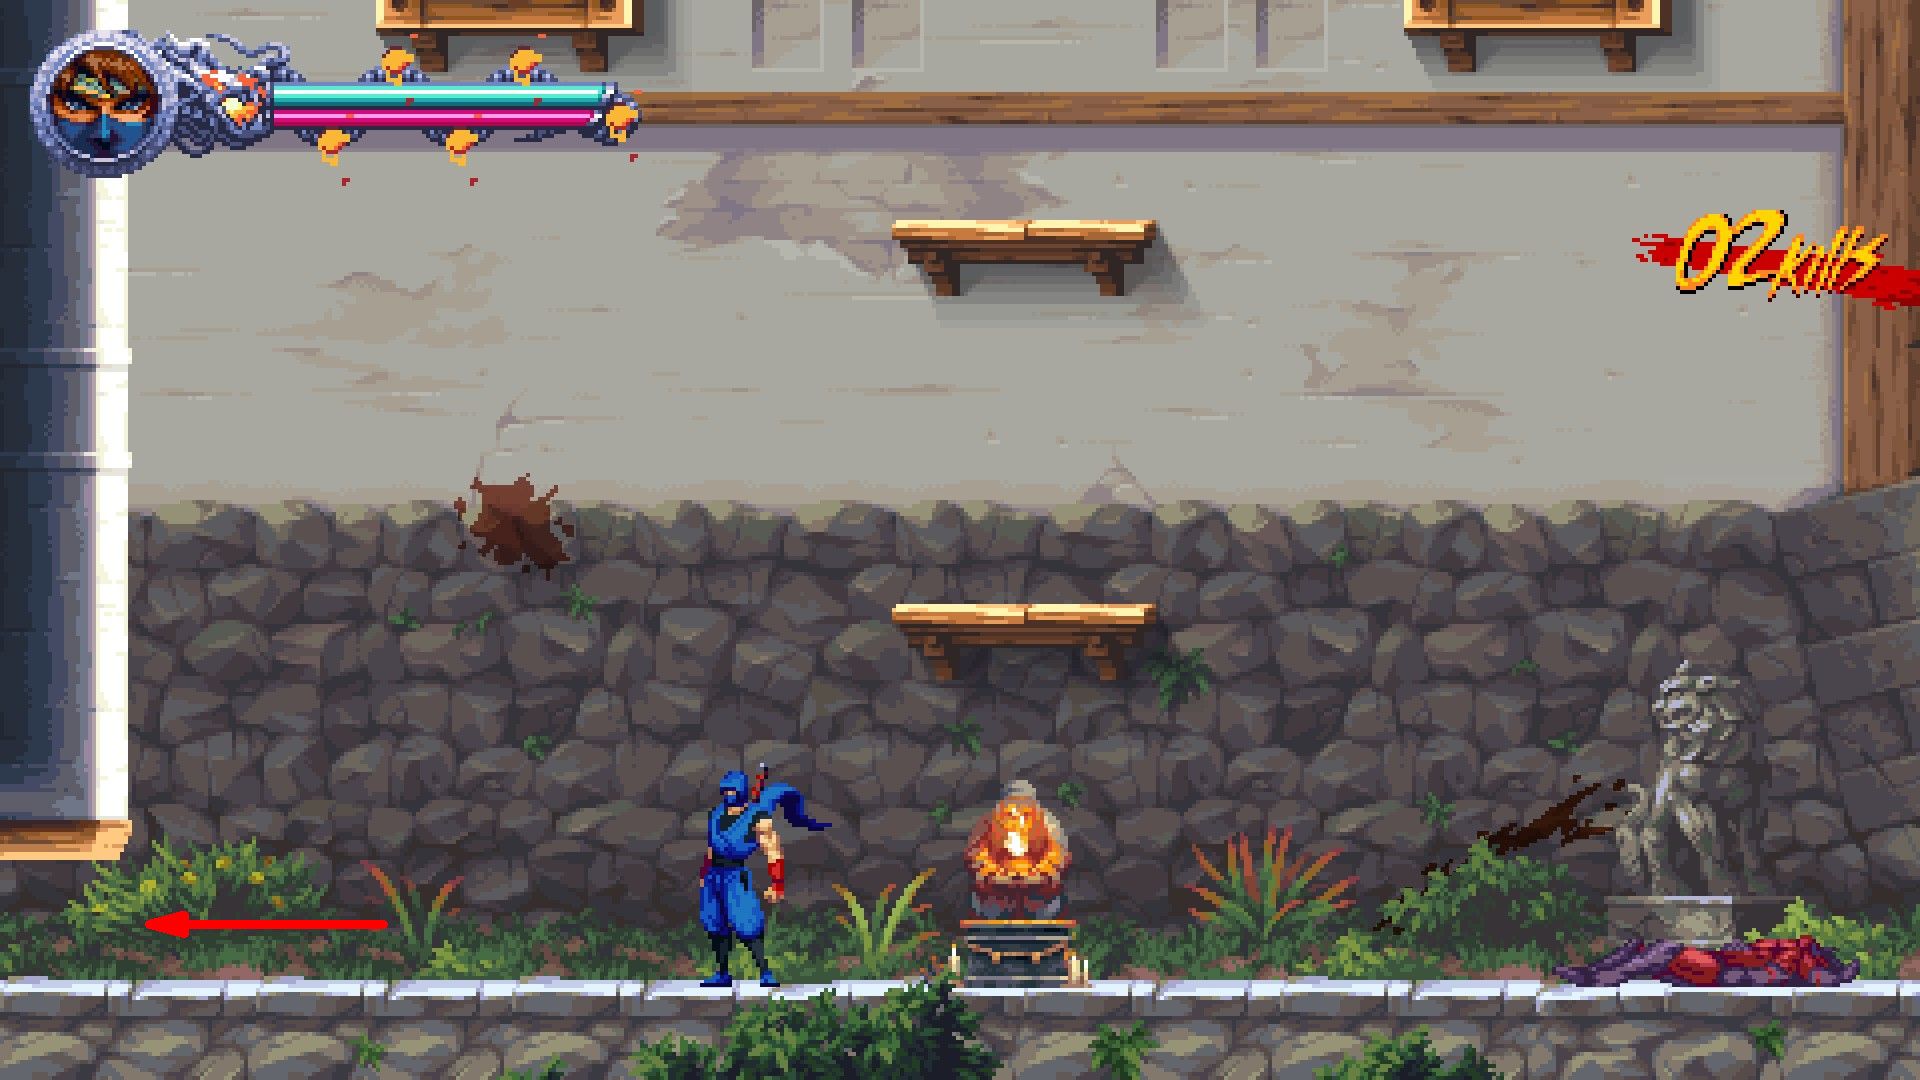
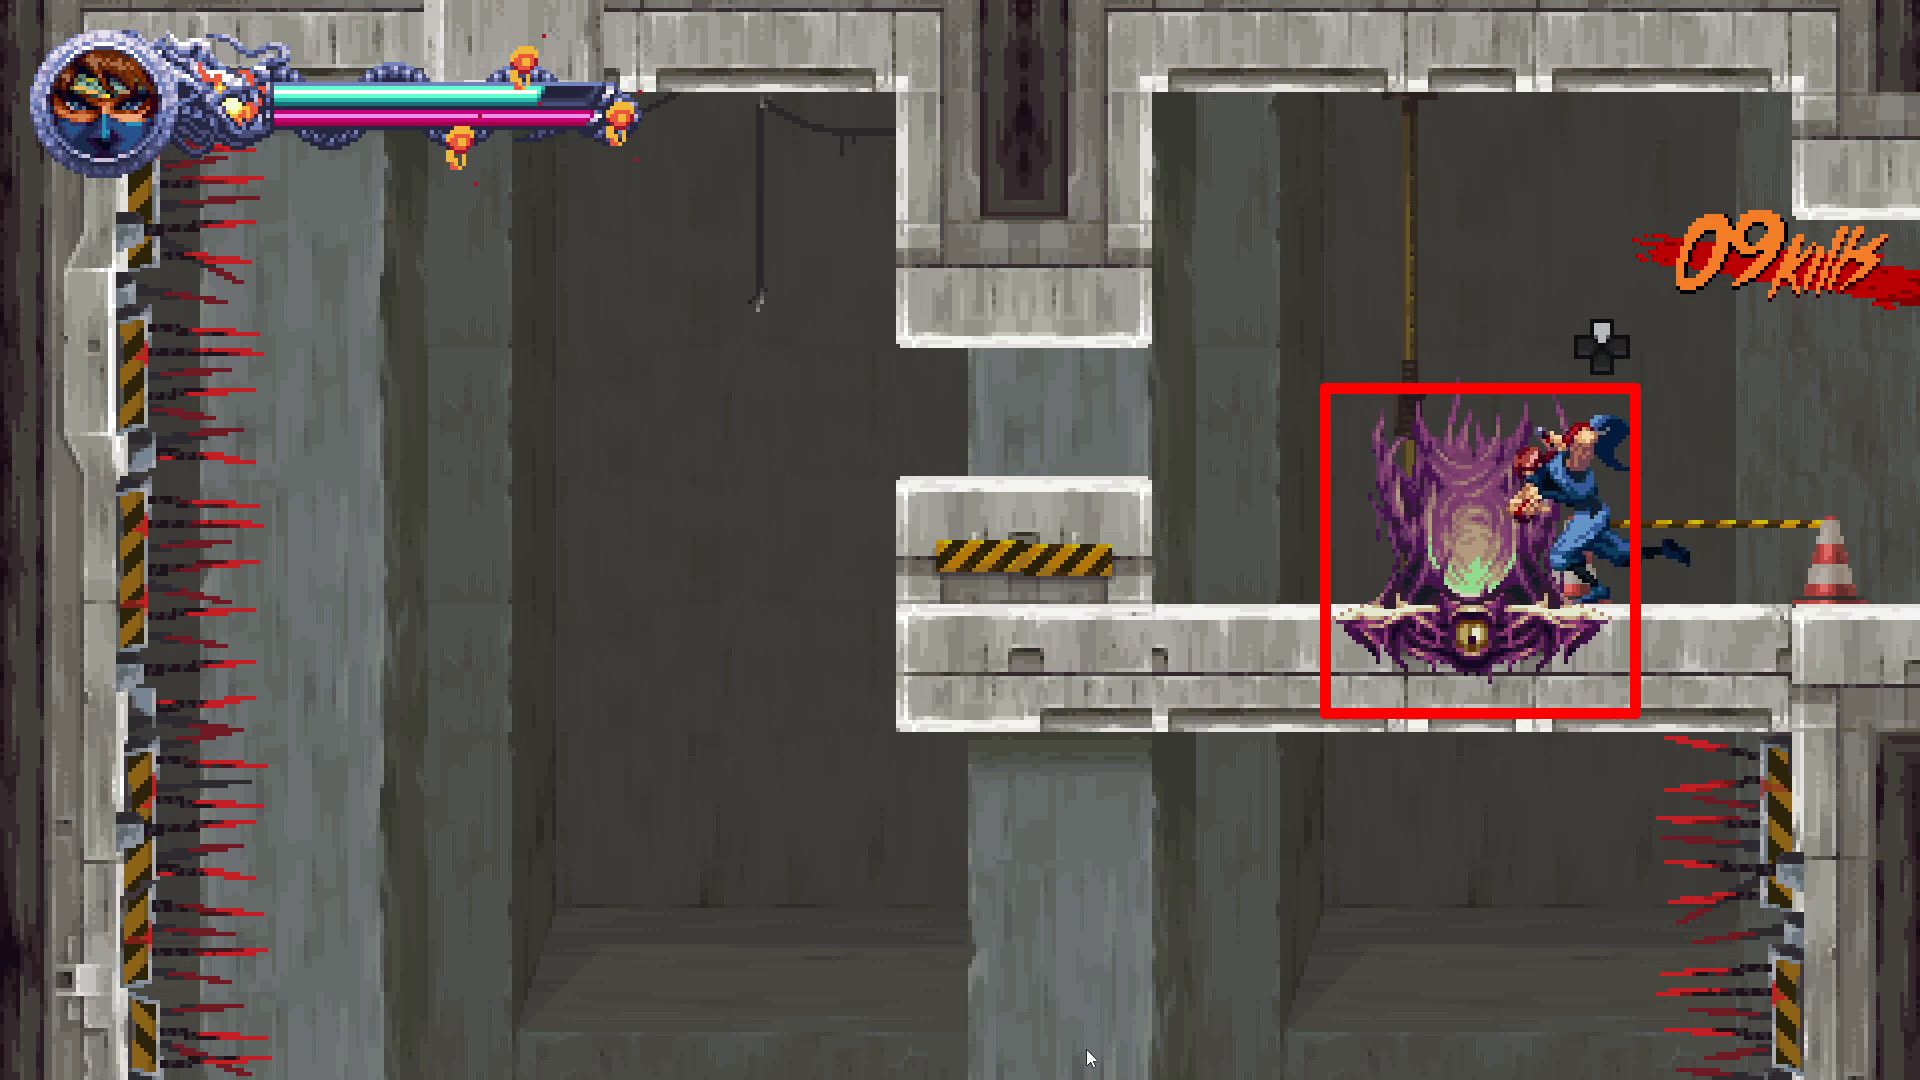
- Scroll
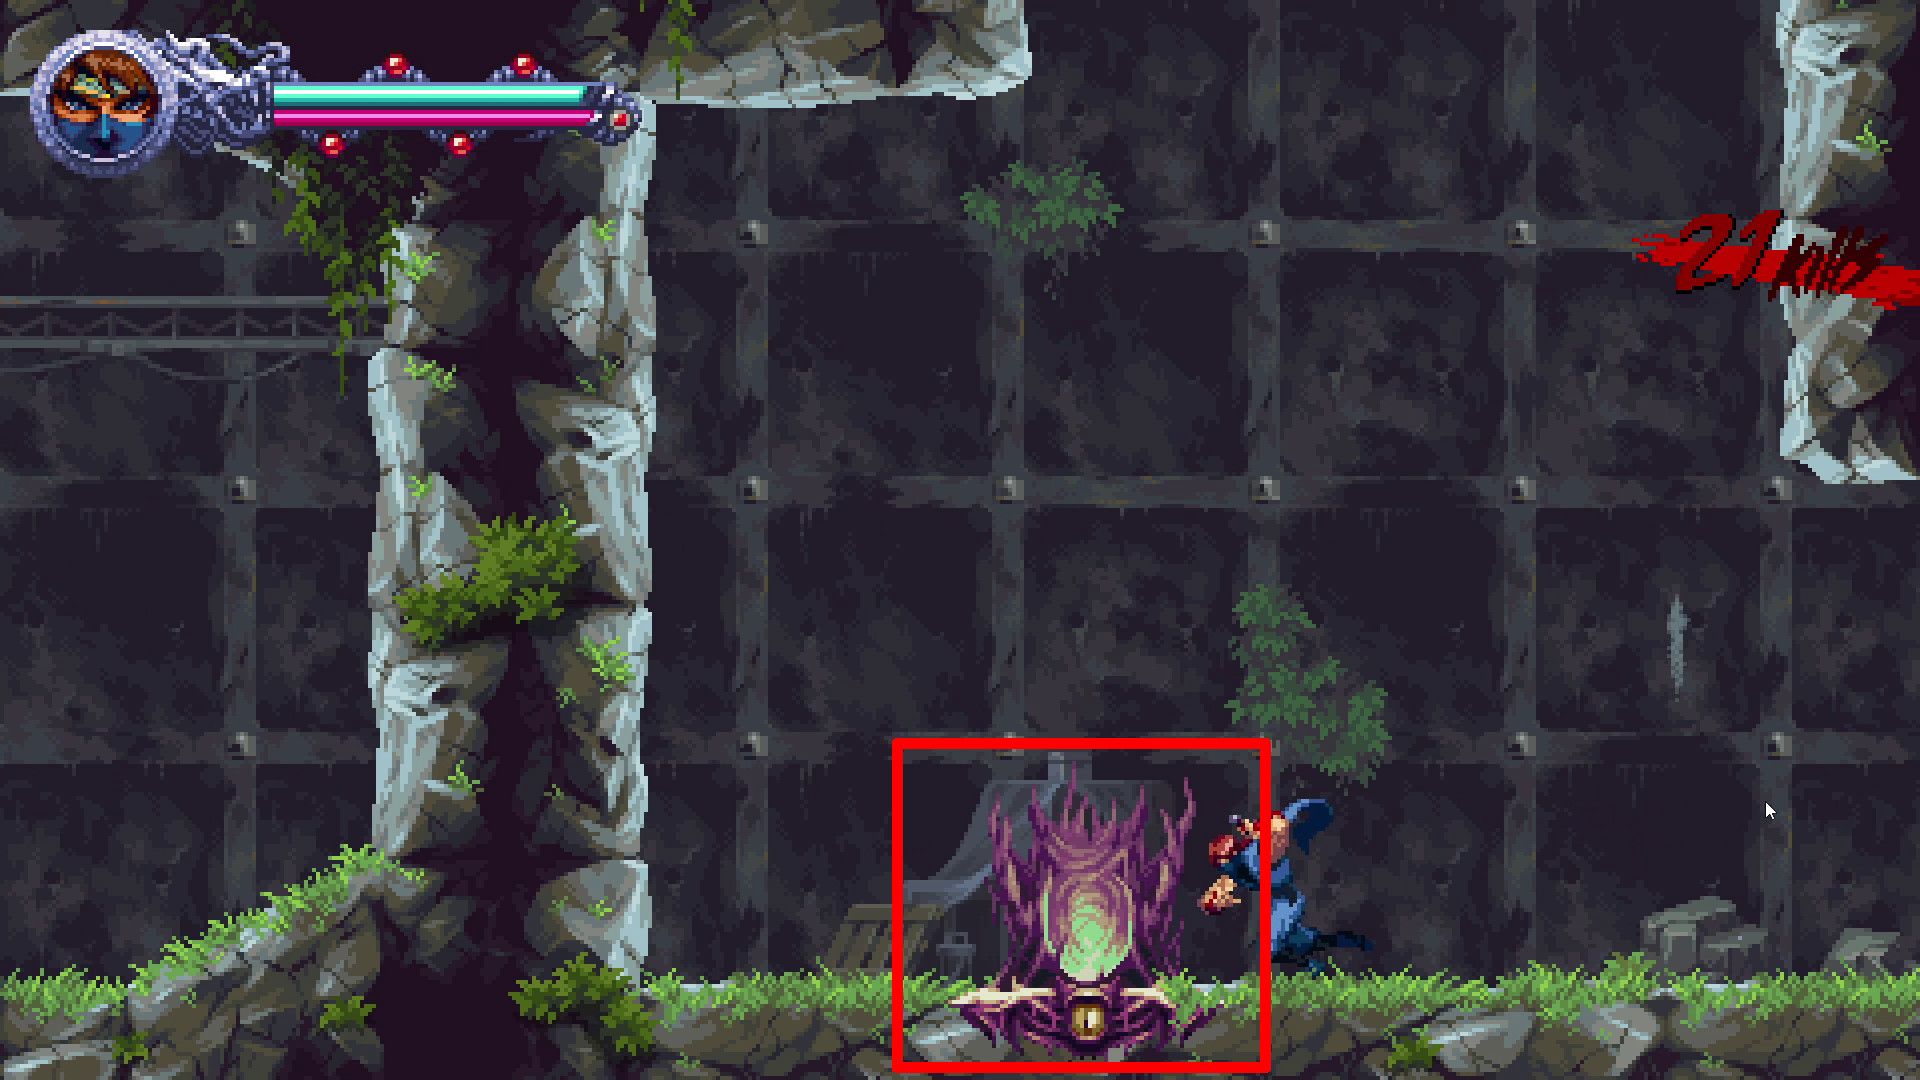
Proceed along the essential route to trigger another checkpoint before reaching an underground locale. At the base of this subterranean zone, gamers will come across a damaged wall on their left; they need to hit it multiple times to shatter through. Upon entering the Demon Altar, utilize Kumori to navigate the sequence that follows. The Scroll is situated at the termination of that sequence.
- Golden Scarab #5
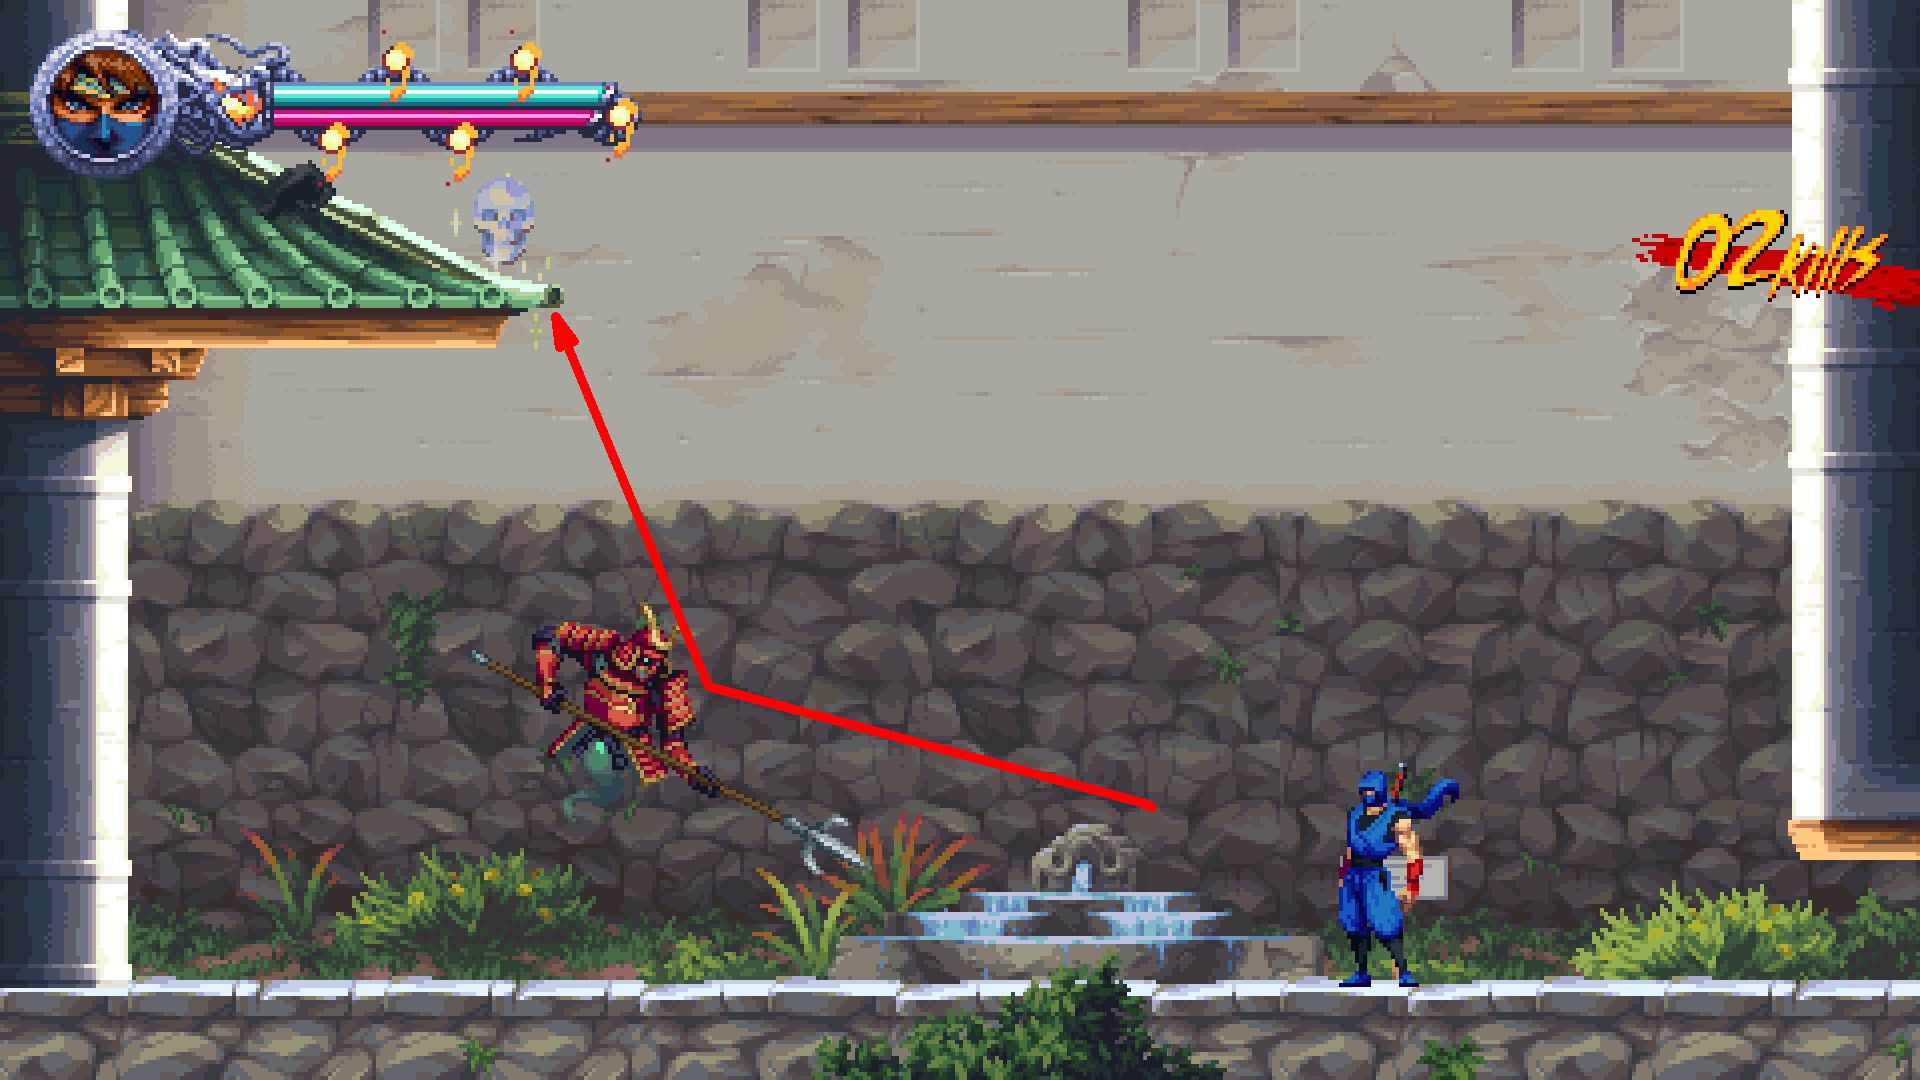
To your right, you’ll find a zip line beside the previously mentioned cracked wall, with a Golden Scarab floating above it. Move rightwards near the Scarab to provoke certain opponents, then use a Guillotine boost off these enemies to obtain the collectible.
- Crystal Skull #3
Progress across the region where there’s red-stained water, pausing once you reach a timber platform at its summit. The last Crystal Skull is perched on the water’s surface in the lower-left part of the display screen.
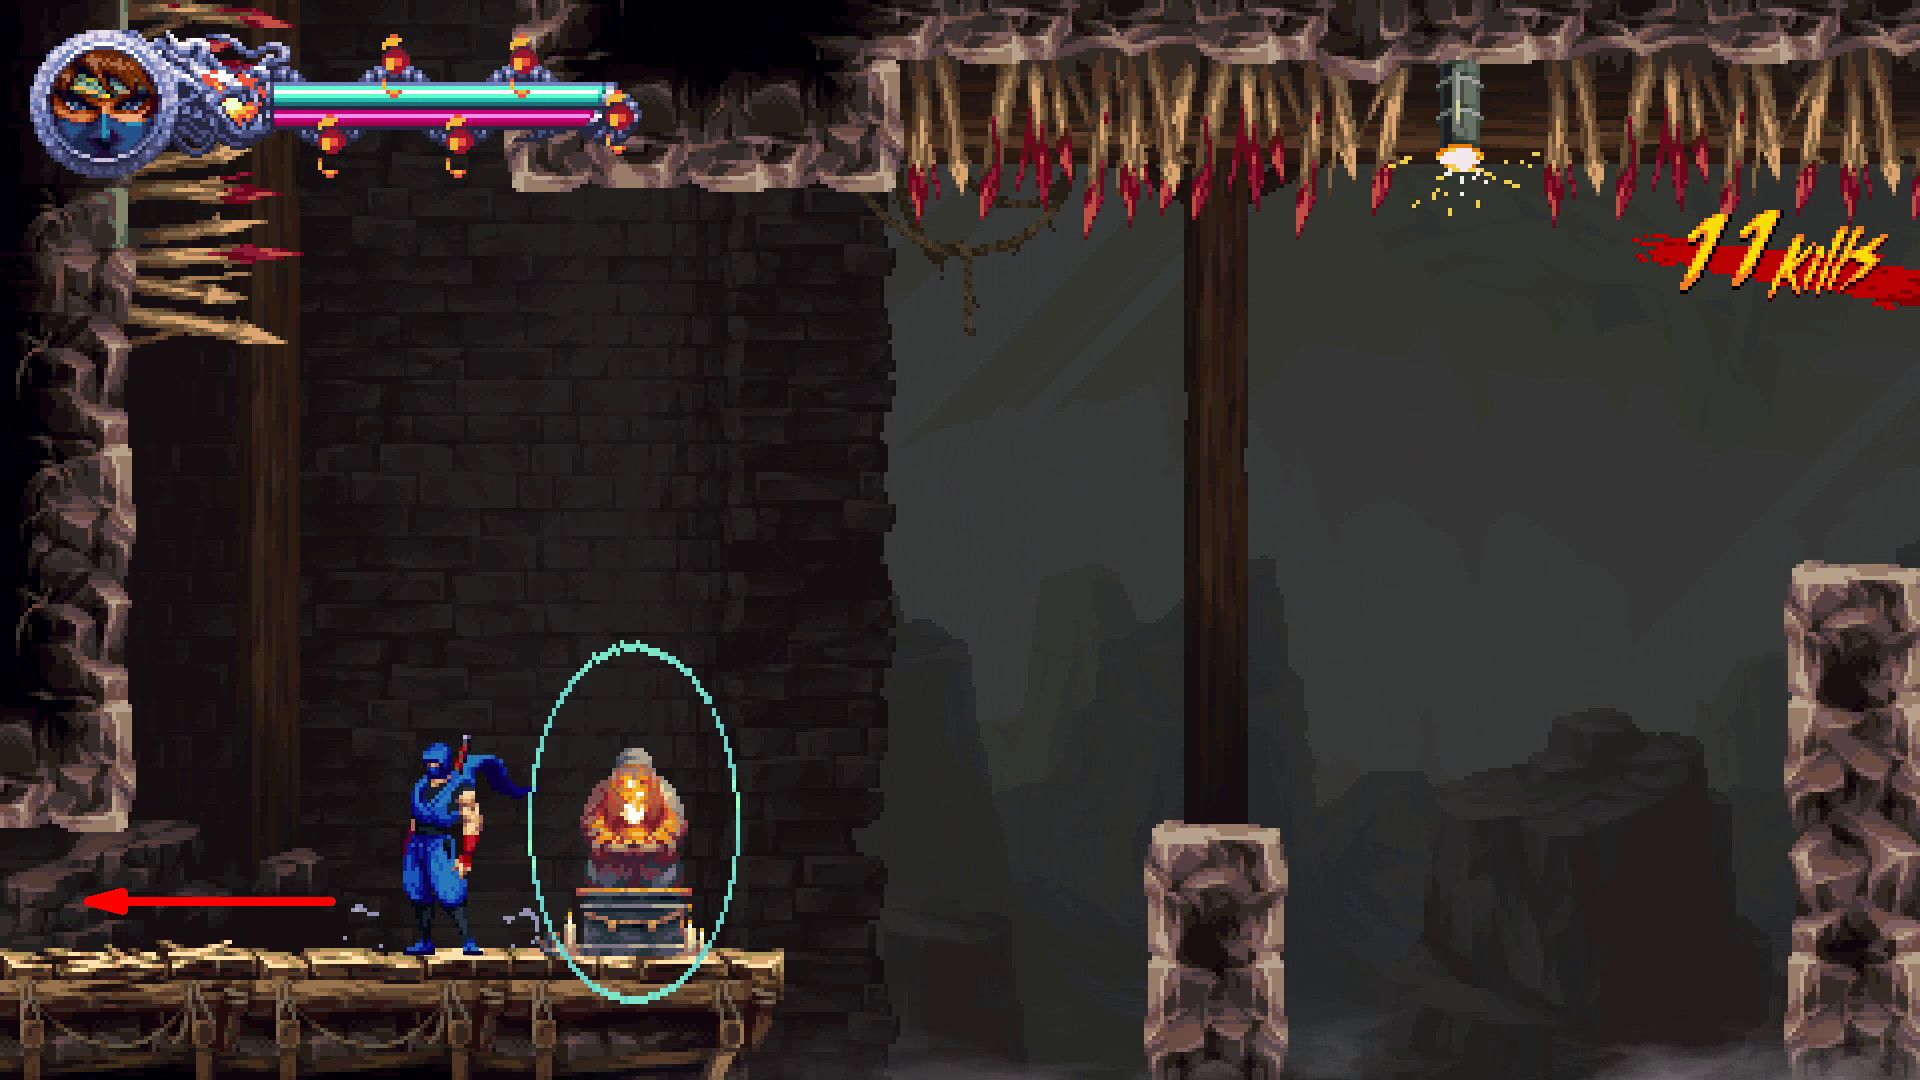
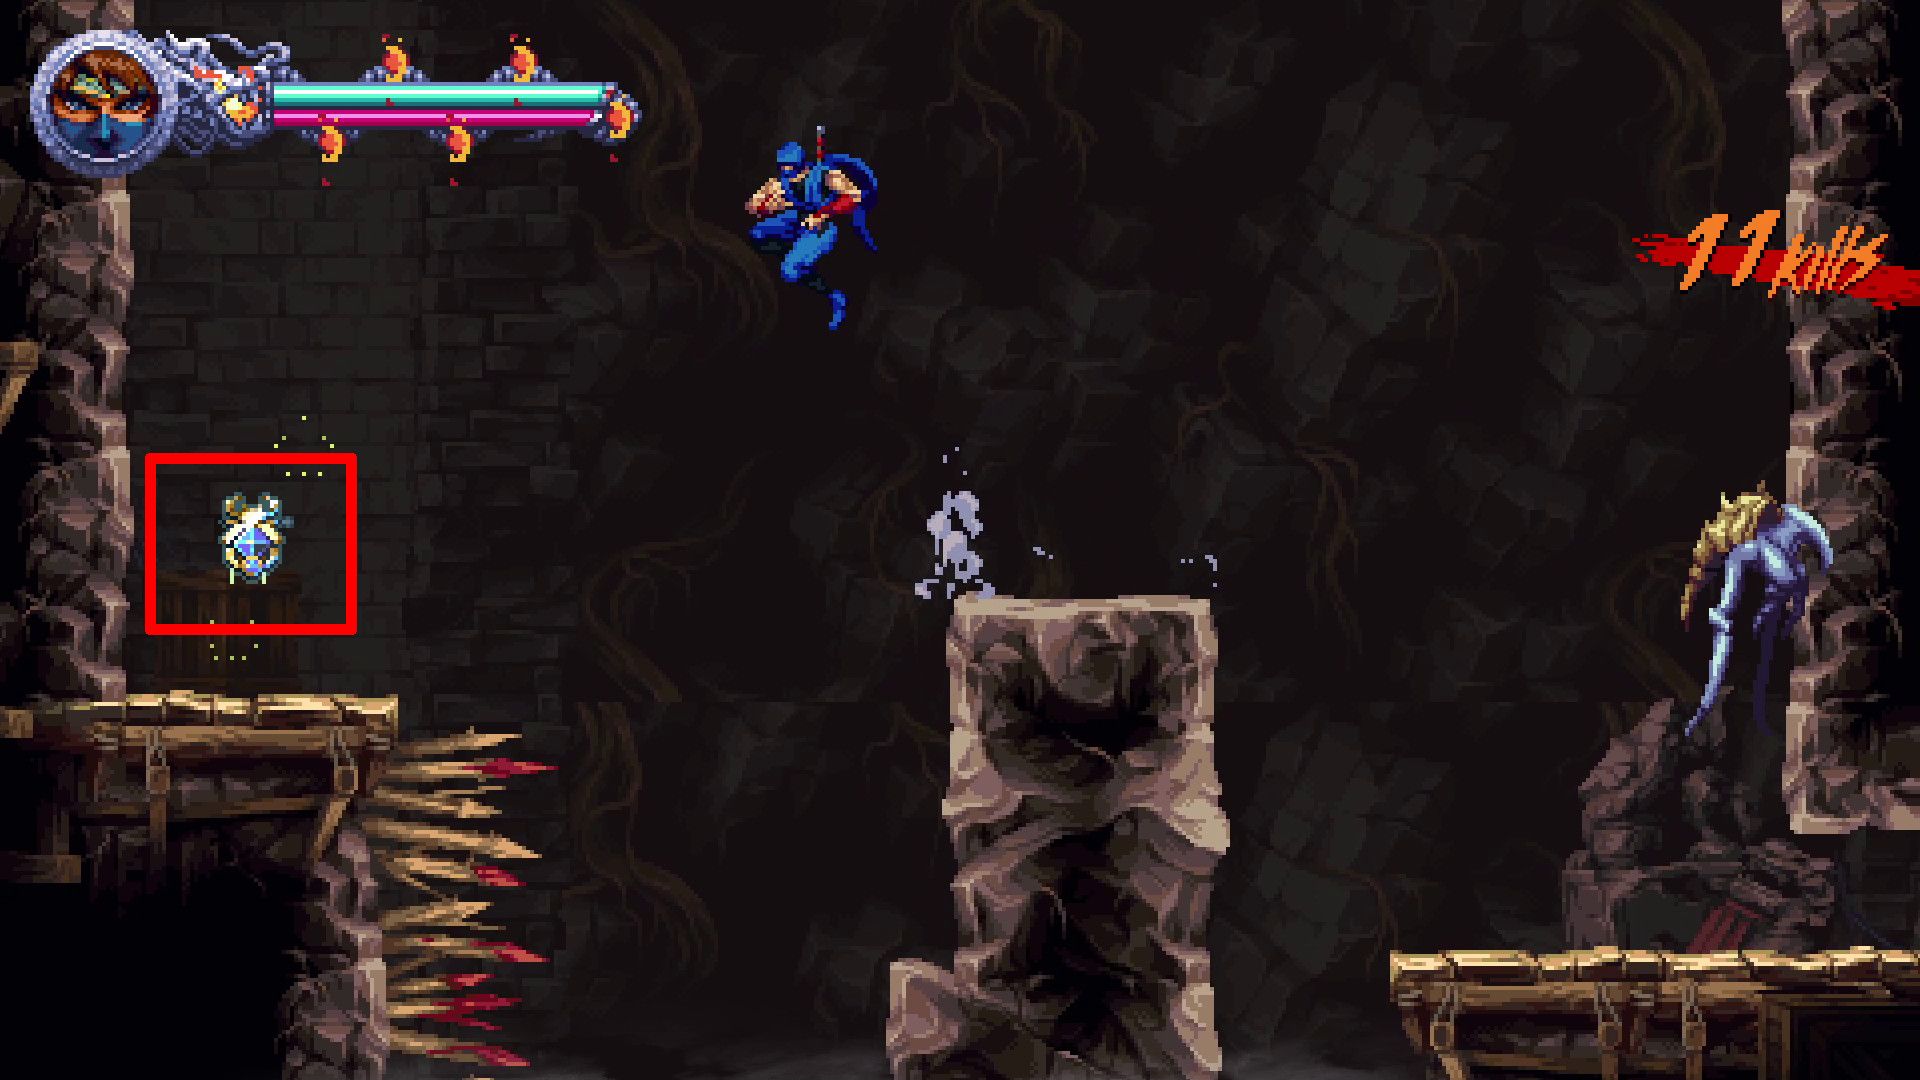
Ancient Pirate Cave (3-3)
- Golden Scarabs #1, 2 & 3
Go into the cave, then trigger the initial checkpoint. To proceed further, shatter the broken wall on your right side, leading you to a space containing the Golden Scarab.
This version maintains the original meaning but uses more descriptive language and simpler sentence structure, making it easier for readers to understand.
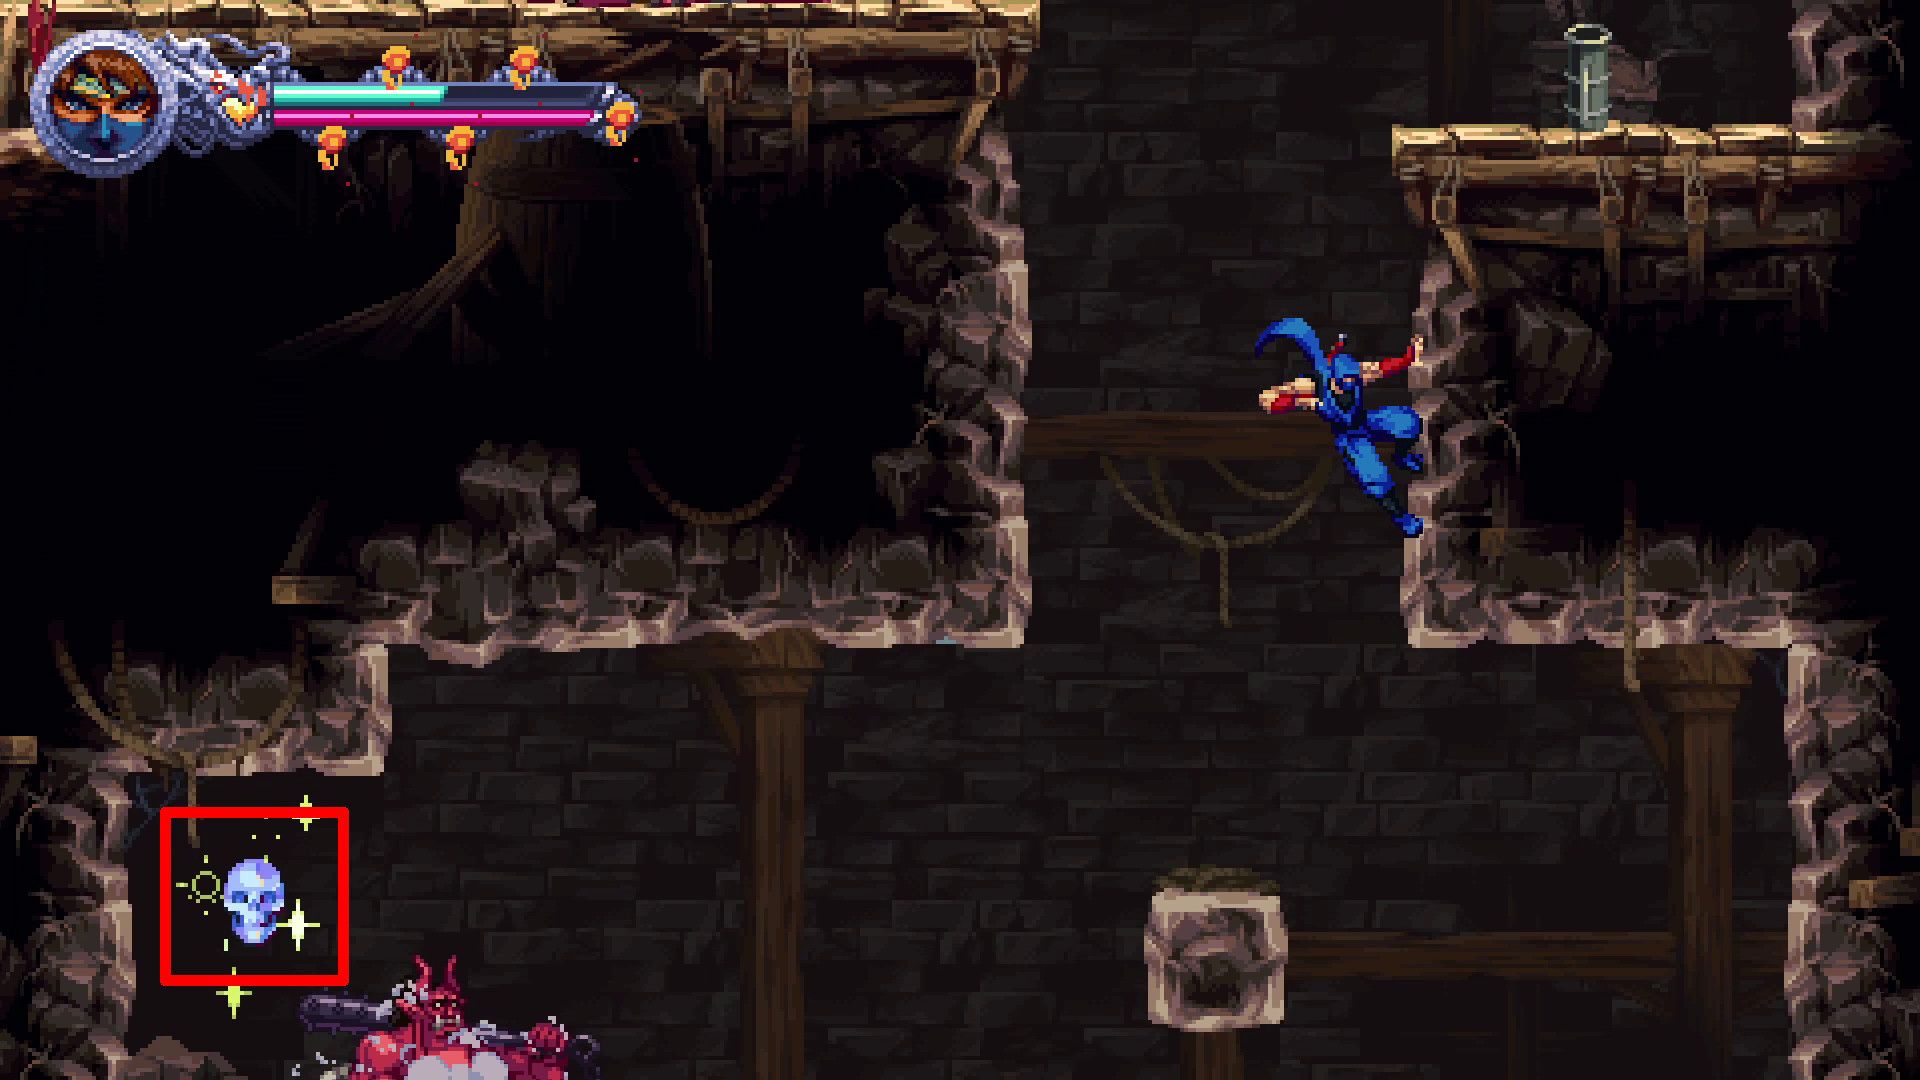
- Crystal Skull #1
Following their journey through the cave featuring a massive waterfall, players will ascend up the right edge of a sizable chasm flanked by towering stacks of crates on either side. To grab the crates on the left, they should traverse along the ceiling and then dart through the gap to access a room containing a Crystal Skull.
- Golden Scarab #4
Proceed on the main route to get to an area featuring moving wooden platforms that shift to the right. Up above, you’ll find a Golden Scarab, which players can grab by using the nearby wall for support.
- Golden Scarab #5


In the upcoming part, participants will glide along ascending wooden planks. On the right-hand side of this area, there’s a fractured wall, and a Golden Scarab lies behind it.
- Crystal Skull #2
At the highest point of the segment featuring moving wooden platforms, navigate through a hole in the left wall to gain access to a spot where a Crystal Skull is found.
- Scroll
Follow the crucial path ahead to get to an open, elevated location. Now, go right until you’re compelled to climb, and you’ll notice a Demon Altar on your left at the peak of your ascent. Once you enter this altar, ascend the initial platform set and navigate through the opening in the upper-left corner of the wall. The platforming section beyond that gap will take you straight to the Scroll.
- Golden Scarab #6

Continue moving forward until you reach a cavern featuring a massive waterfall and sharp protrusions in the upper right region. Jump off a foe using the guillotine boost to latch onto the opposite wall next to the spikes, then ascend to find the Golden Scarab.
- Crystal Skull #3
Following your acquisition of the last Golden Scarab, descend to encounter a red demon equipped with a cannon. Beyond this demon lies a crack in the wall, and beyond that crack, you’ll find a Crystal Skull.
- Golden Scarabs #7, 8 & 9
As an enthusiast, I’m venturing along the crucial route, aiming to uncover another segment adorned with movable wooden platforms that ascend. There’s a fissured wall in the upper-right corner of this area, hinting at a hidden chamber containing a treasured Golden Scarab behind it.
- Golden Scarab #10
The last Golden Scarab has been found in the area featuring a tentacle pursuit. Players can grab this item by using a Guillotine jump from the tentacles to reach it.
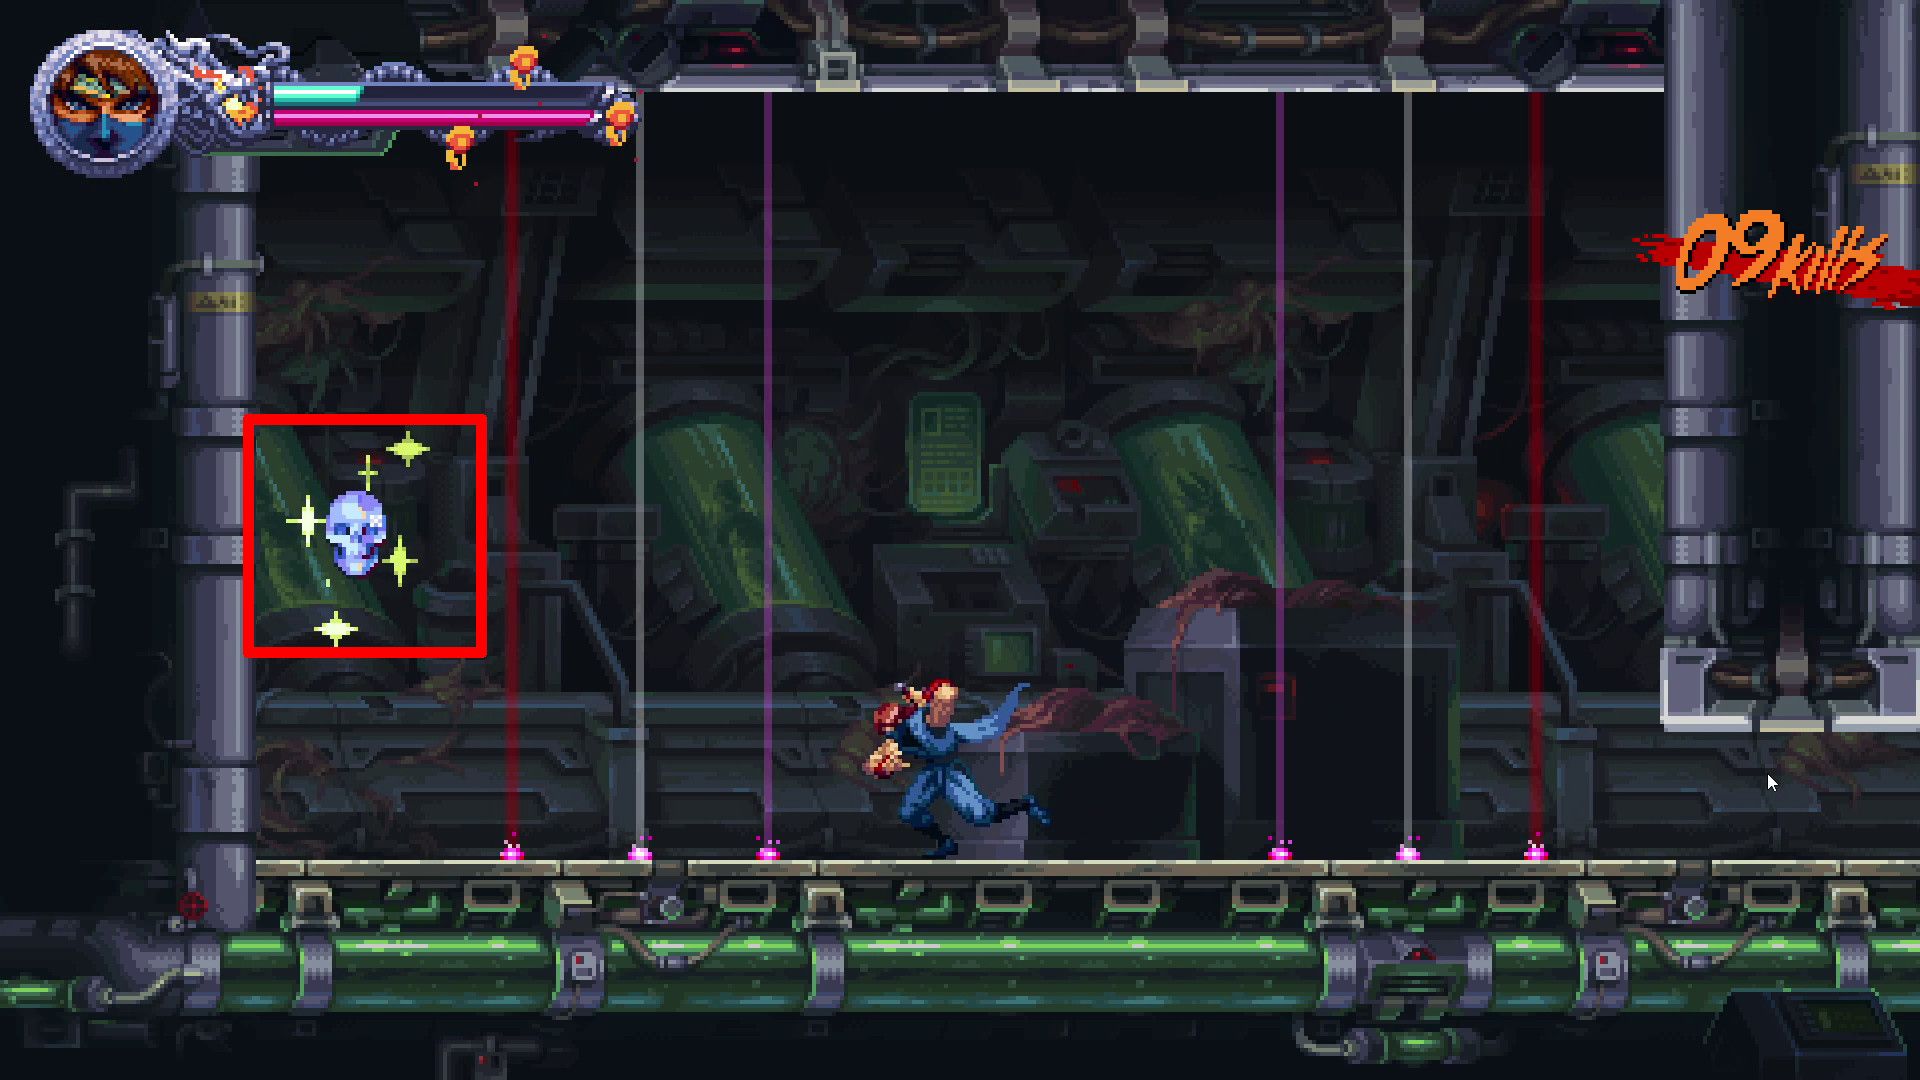
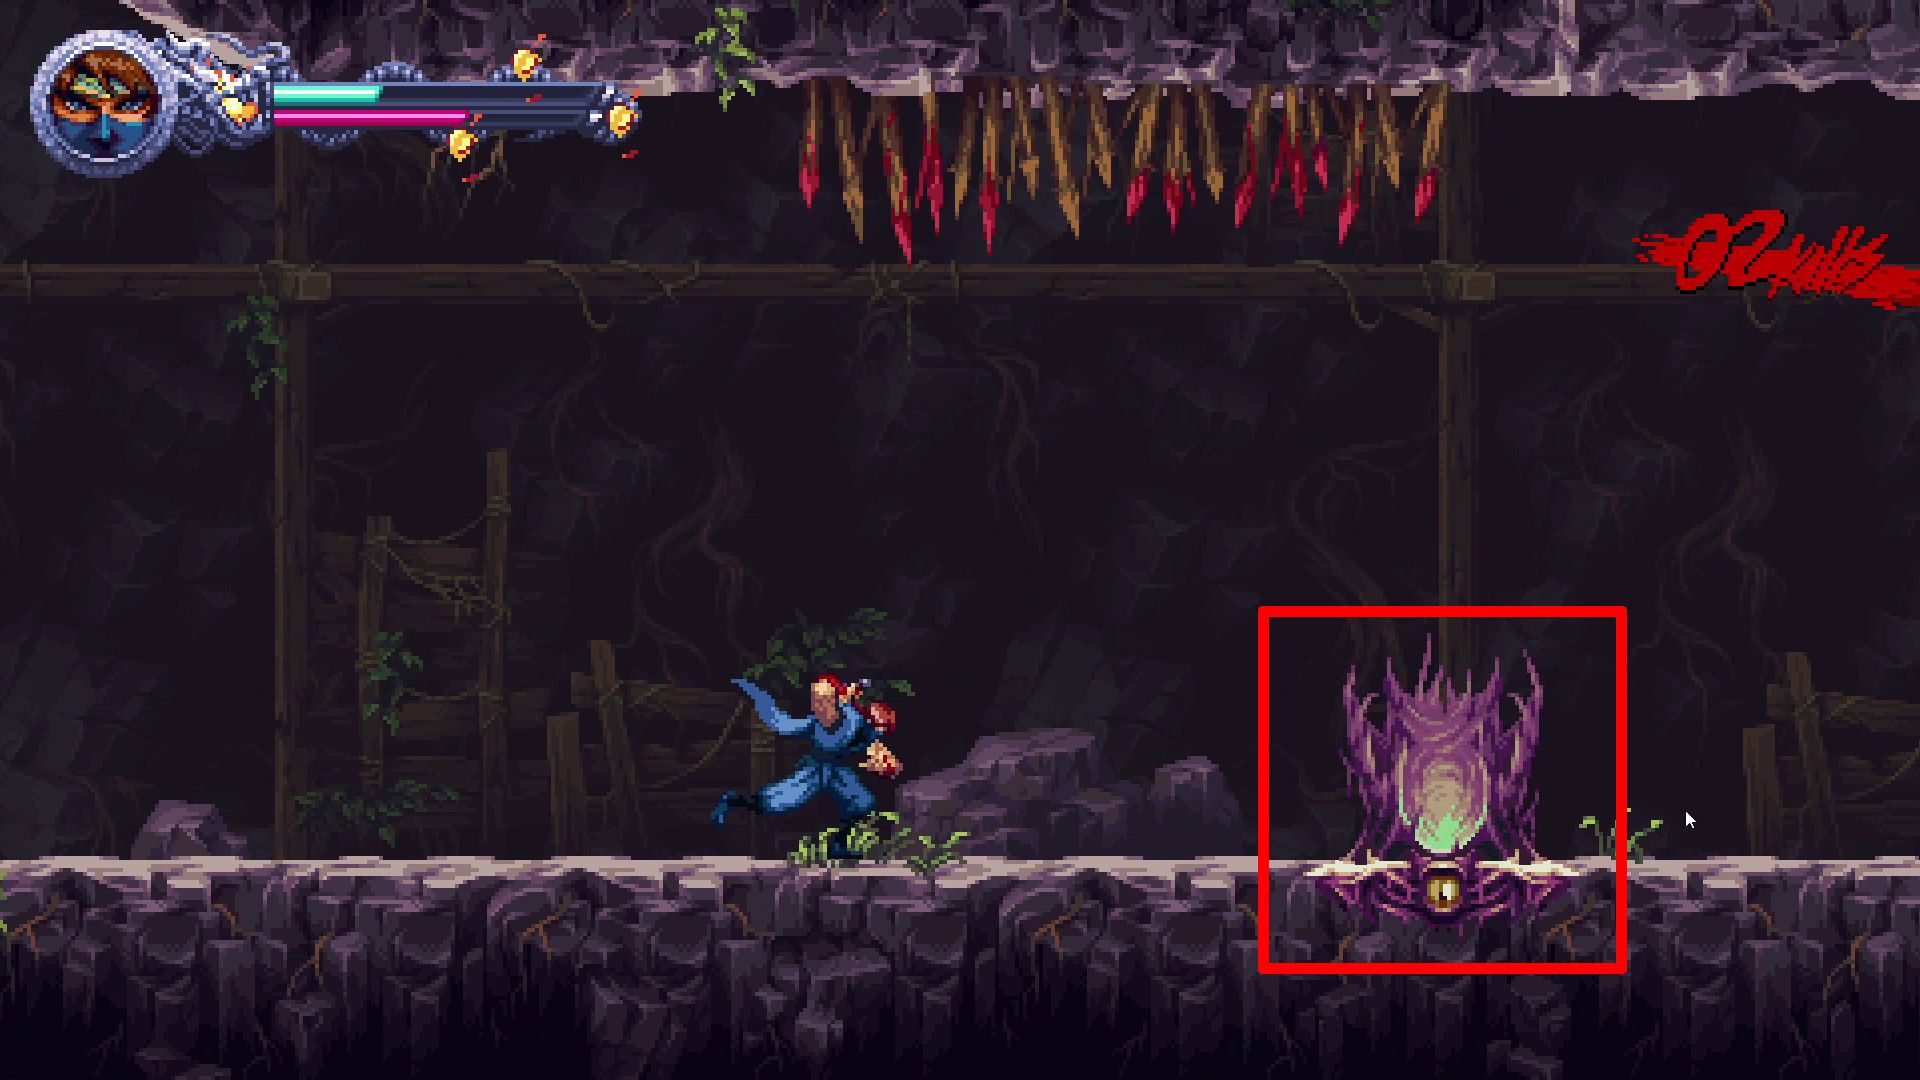
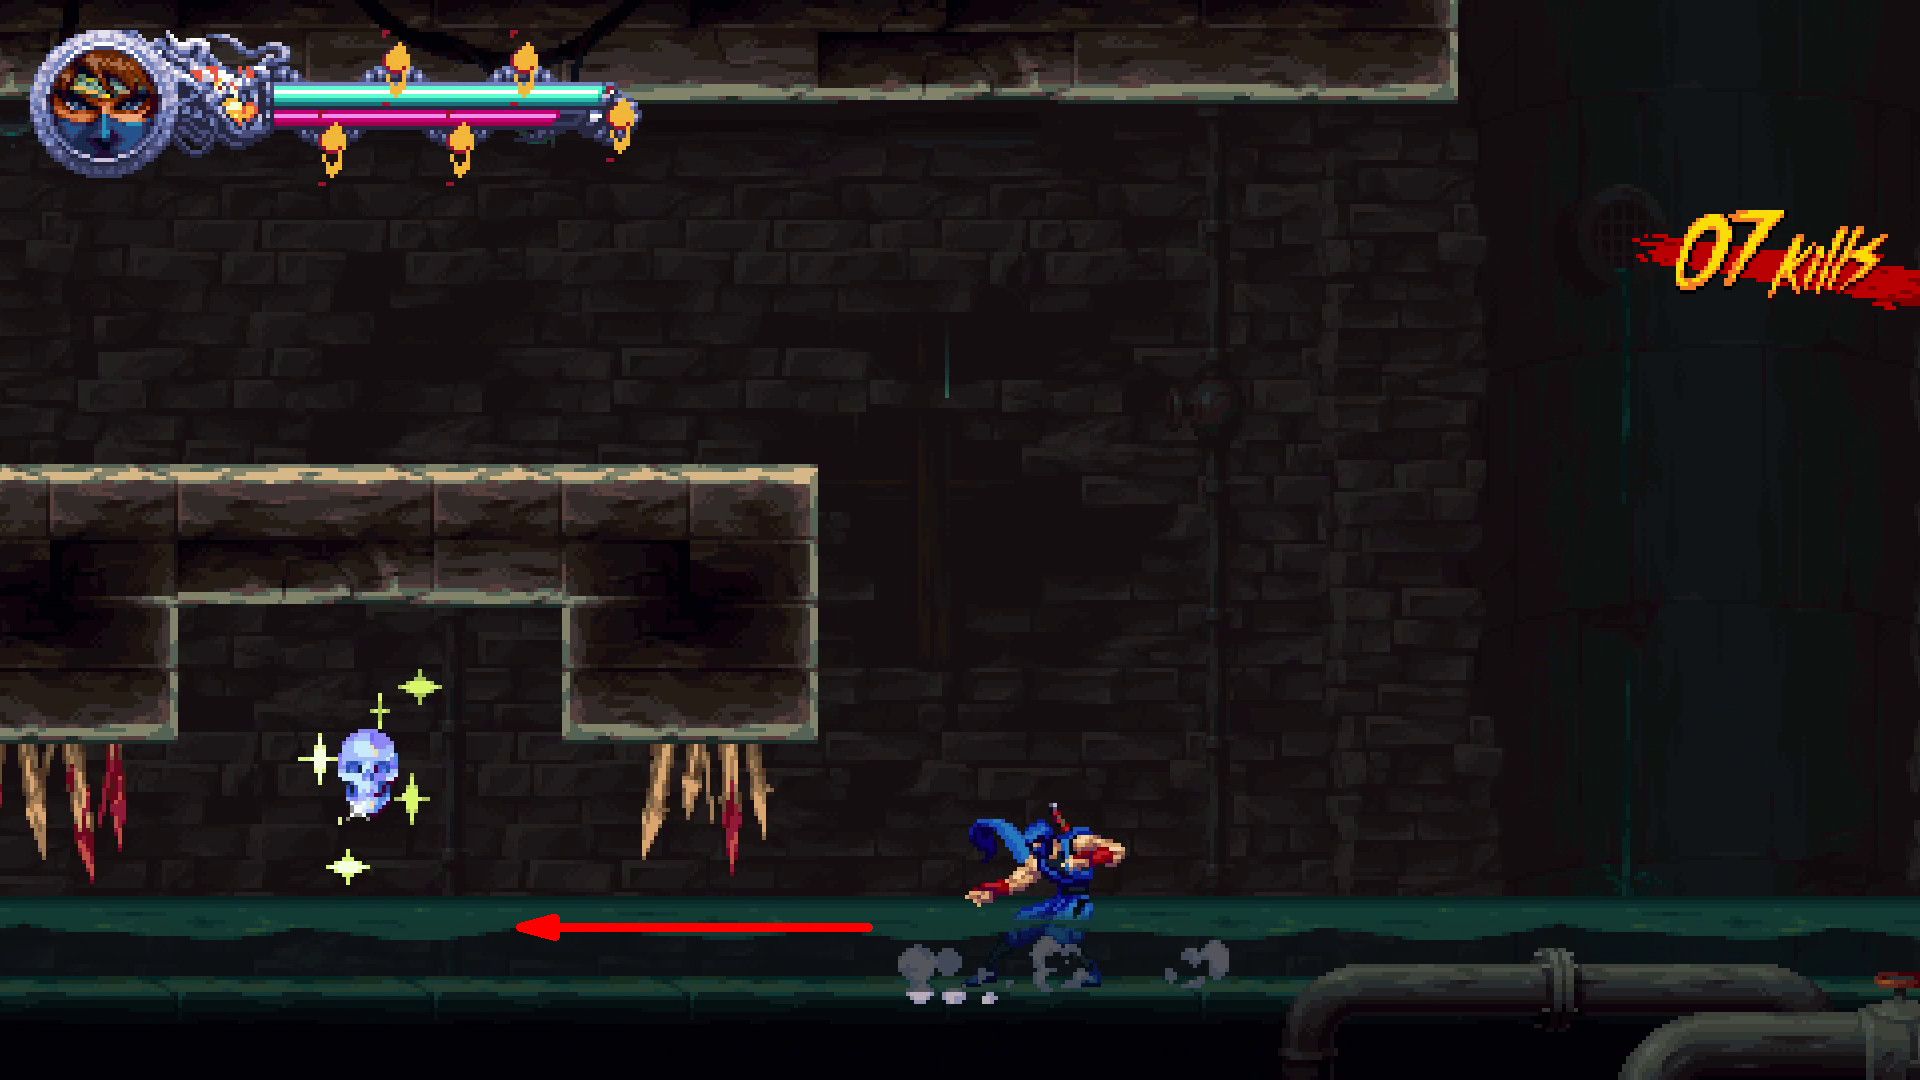
Into the Catacombs (3-4)
- Golden Scarab #1
Once you’ve scaled the initial barrier within this level, seek out a Golden Scarab hidden beneath a green canopy on the screen’s left-hand side.
- Crystal Skull #1
Step into the Demon Altar located over the initial Golden Scarab, and finish the journey to secure a Crystal Skull as your reward.
- Crystal Skull #2
Traverse along the green rooftop section until you arrive at a checkpoint. Squeeze through an opening in the left wall, then use a Guillotine jump to propel from the demon and grab a Crystal Skull.
- Golden Scarabs #2, 3 & 4
As you move forward, stick to the main route, which is crucial. Keep your eyes open for a cozy nook on your right side while advancing through this part of the location, because it contains a Golden Scarab hidden inside it.
- Crystal Skull #3
To your right, you’ll find a sturdy wall that can be shattered with persistent blows. Hidden behind it lies an intriguing Crystal Skull.
- Golden Scarab #5
Beyond the inner part lies another sector adorned with lush, green rooftops. Atop this sector sits a Golden Scarab, accessible to players through a maneuver called Guillotine boosting on the tiny, violet imps.
- Scroll
Keep moving towards an underground region inhabited by slimy foes with spikes. Proceed to the second marker within this zone, then jump onto the platform on your right which will trigger a section of the ceiling to collapse. Navigate through the newly created hole in the roof to discover the Scroll.
- Golden Scarabs #6, 7 & 8

Progress through the underground region until you encounter a spot where water flows from both your left and right sides. Descend into the intersection where these waters meet to uncover the last Golden Scarab.
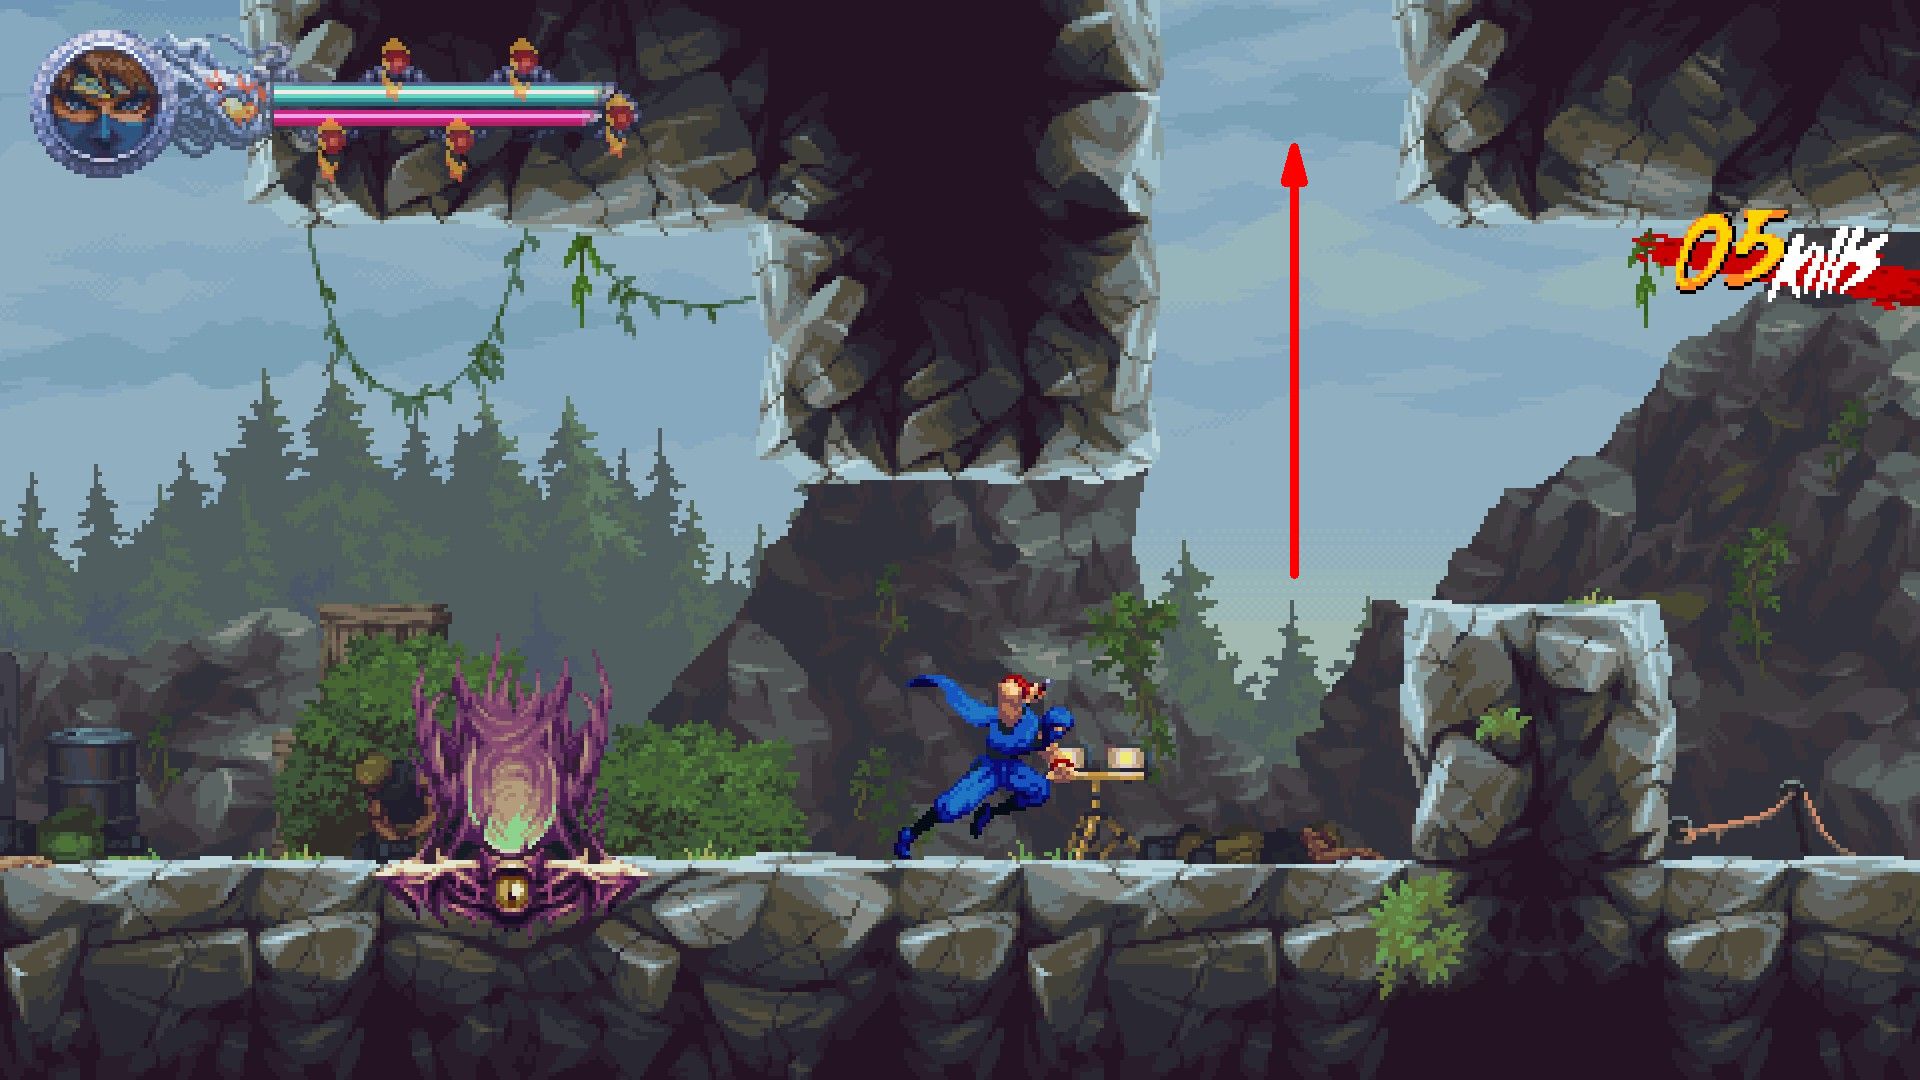
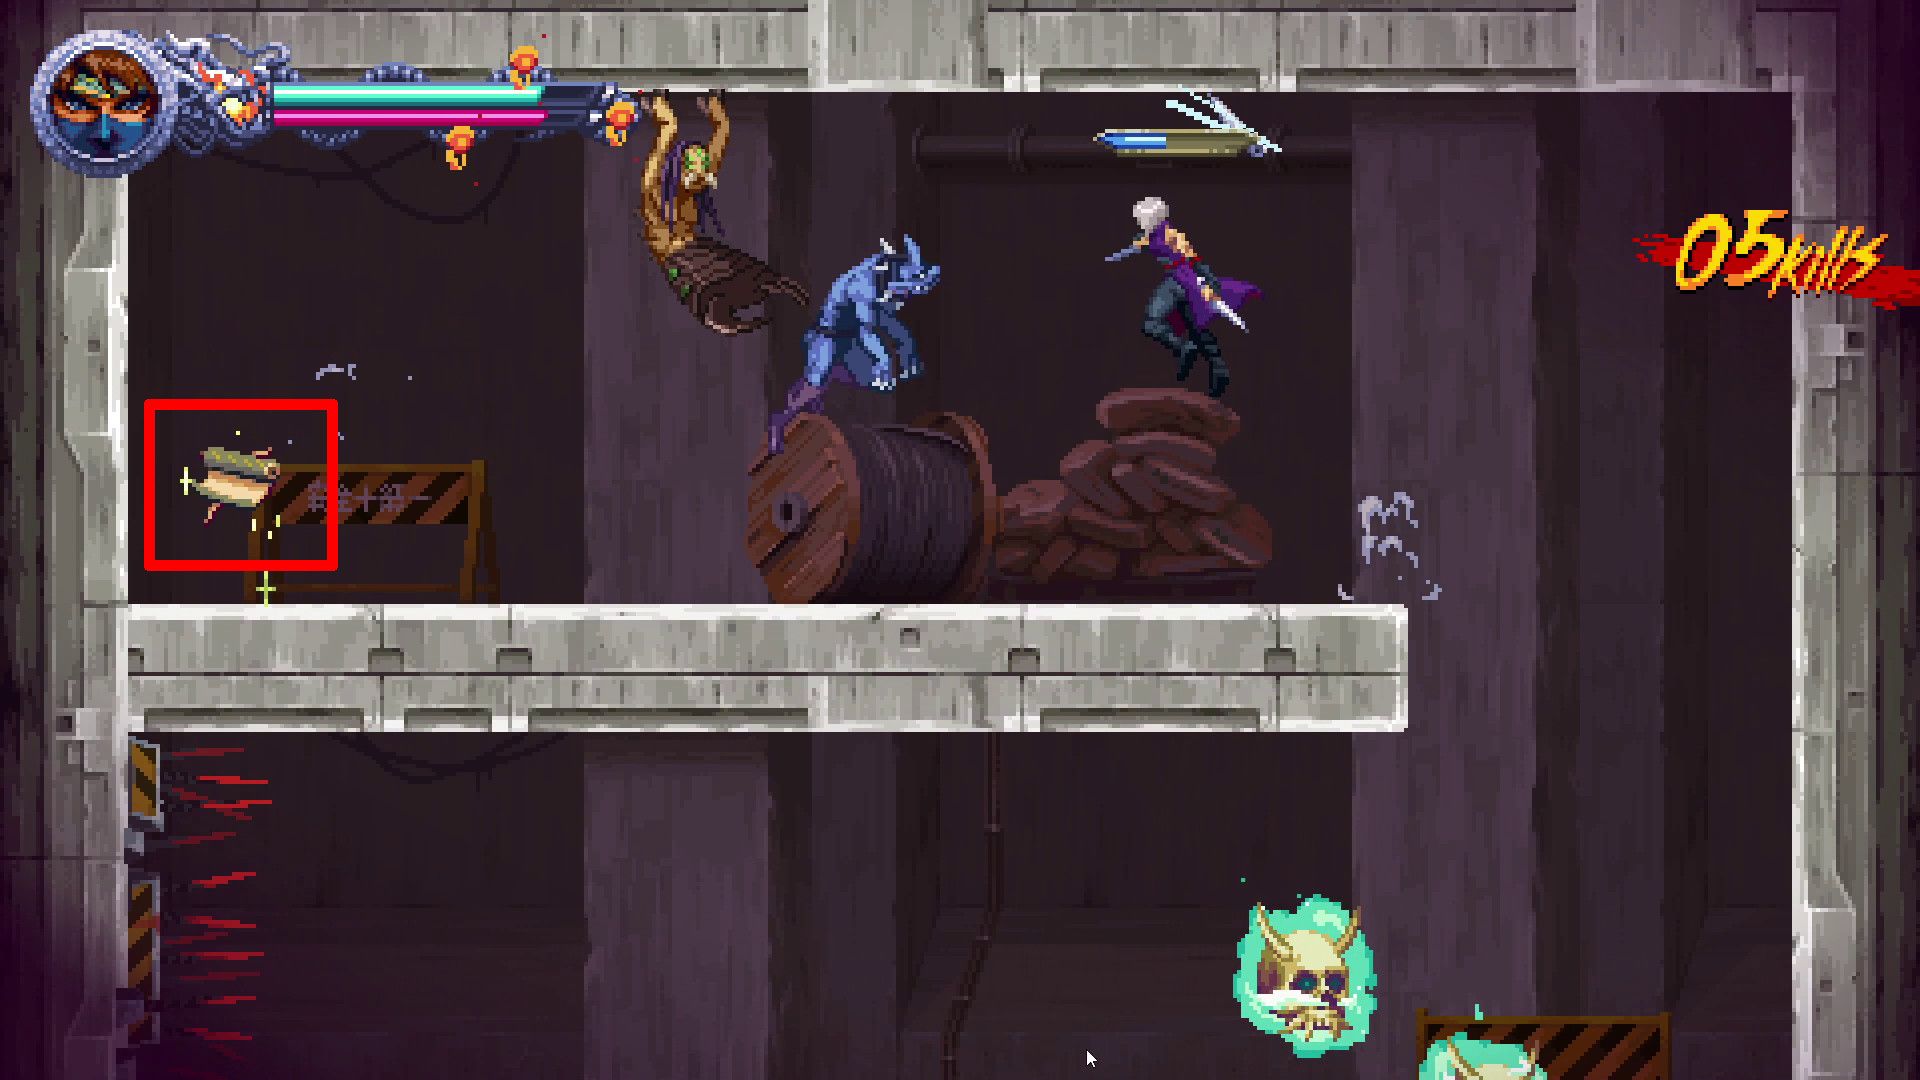
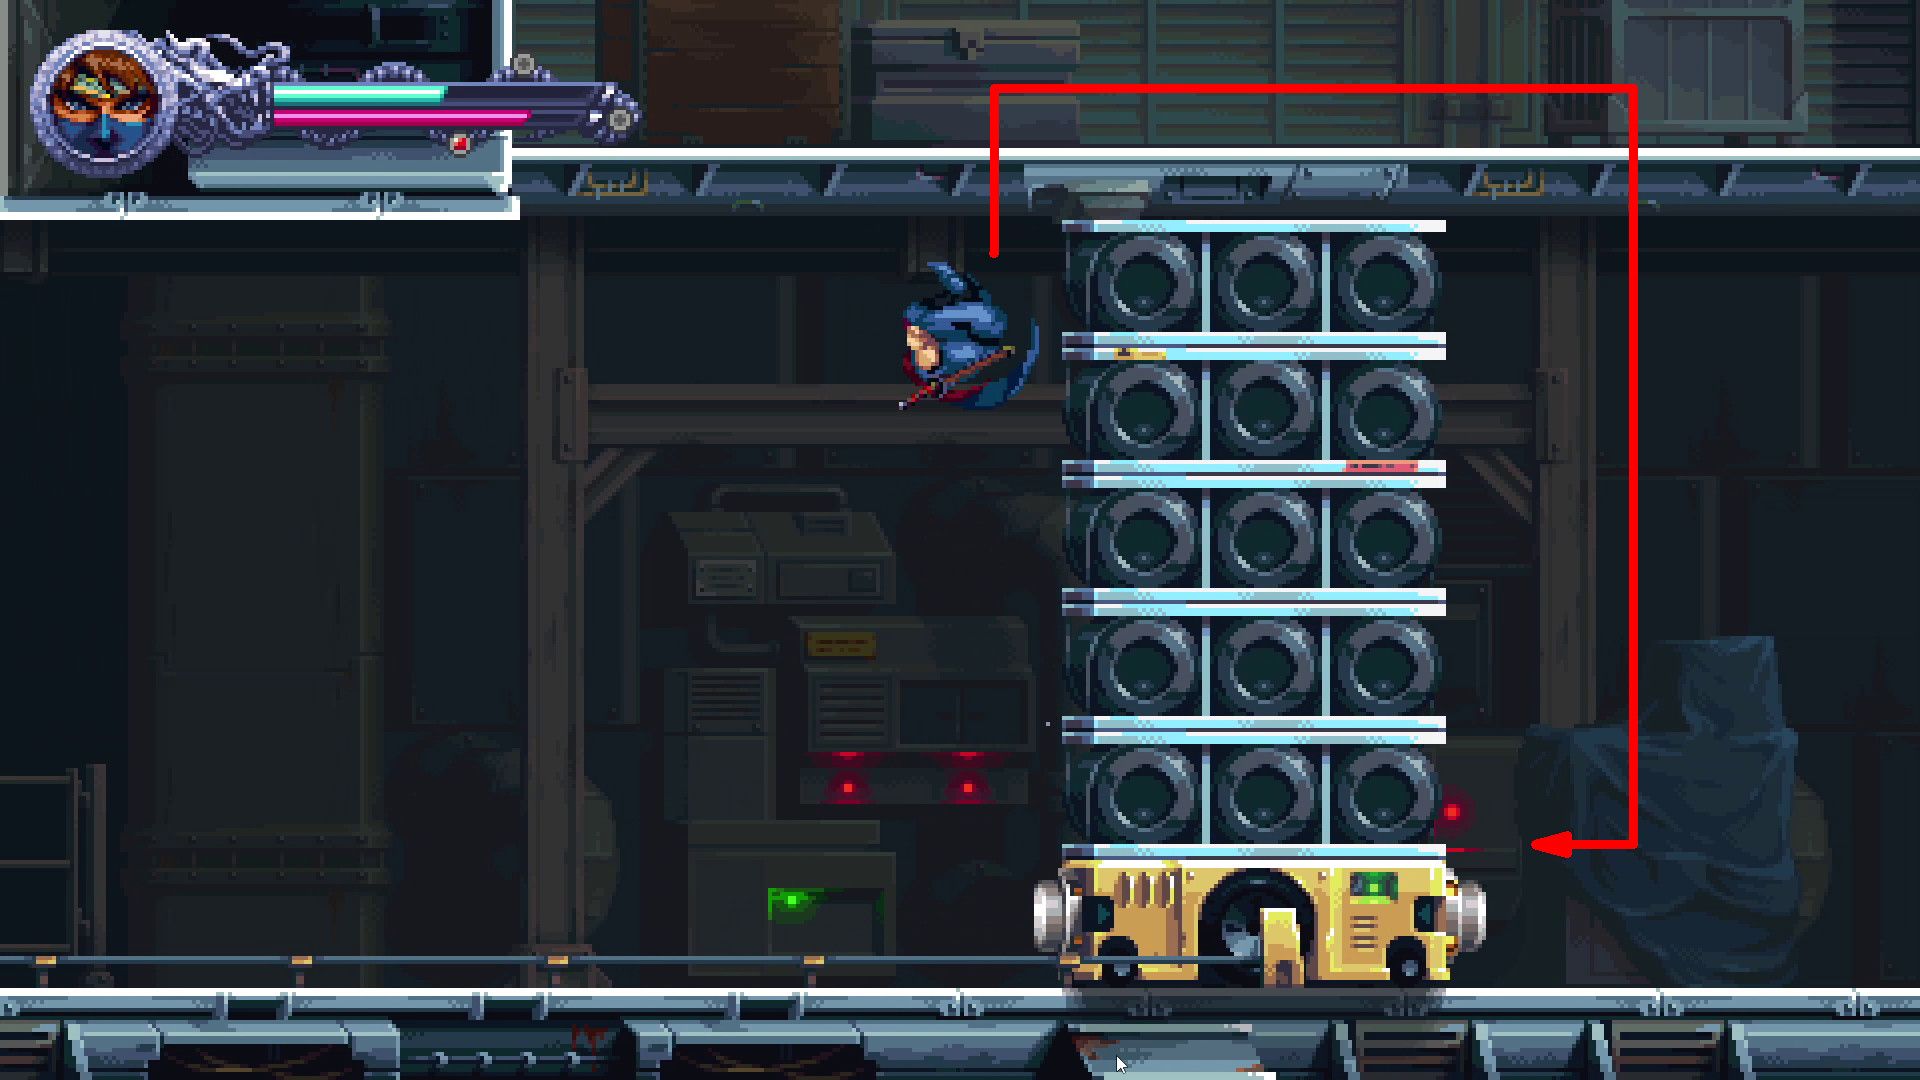
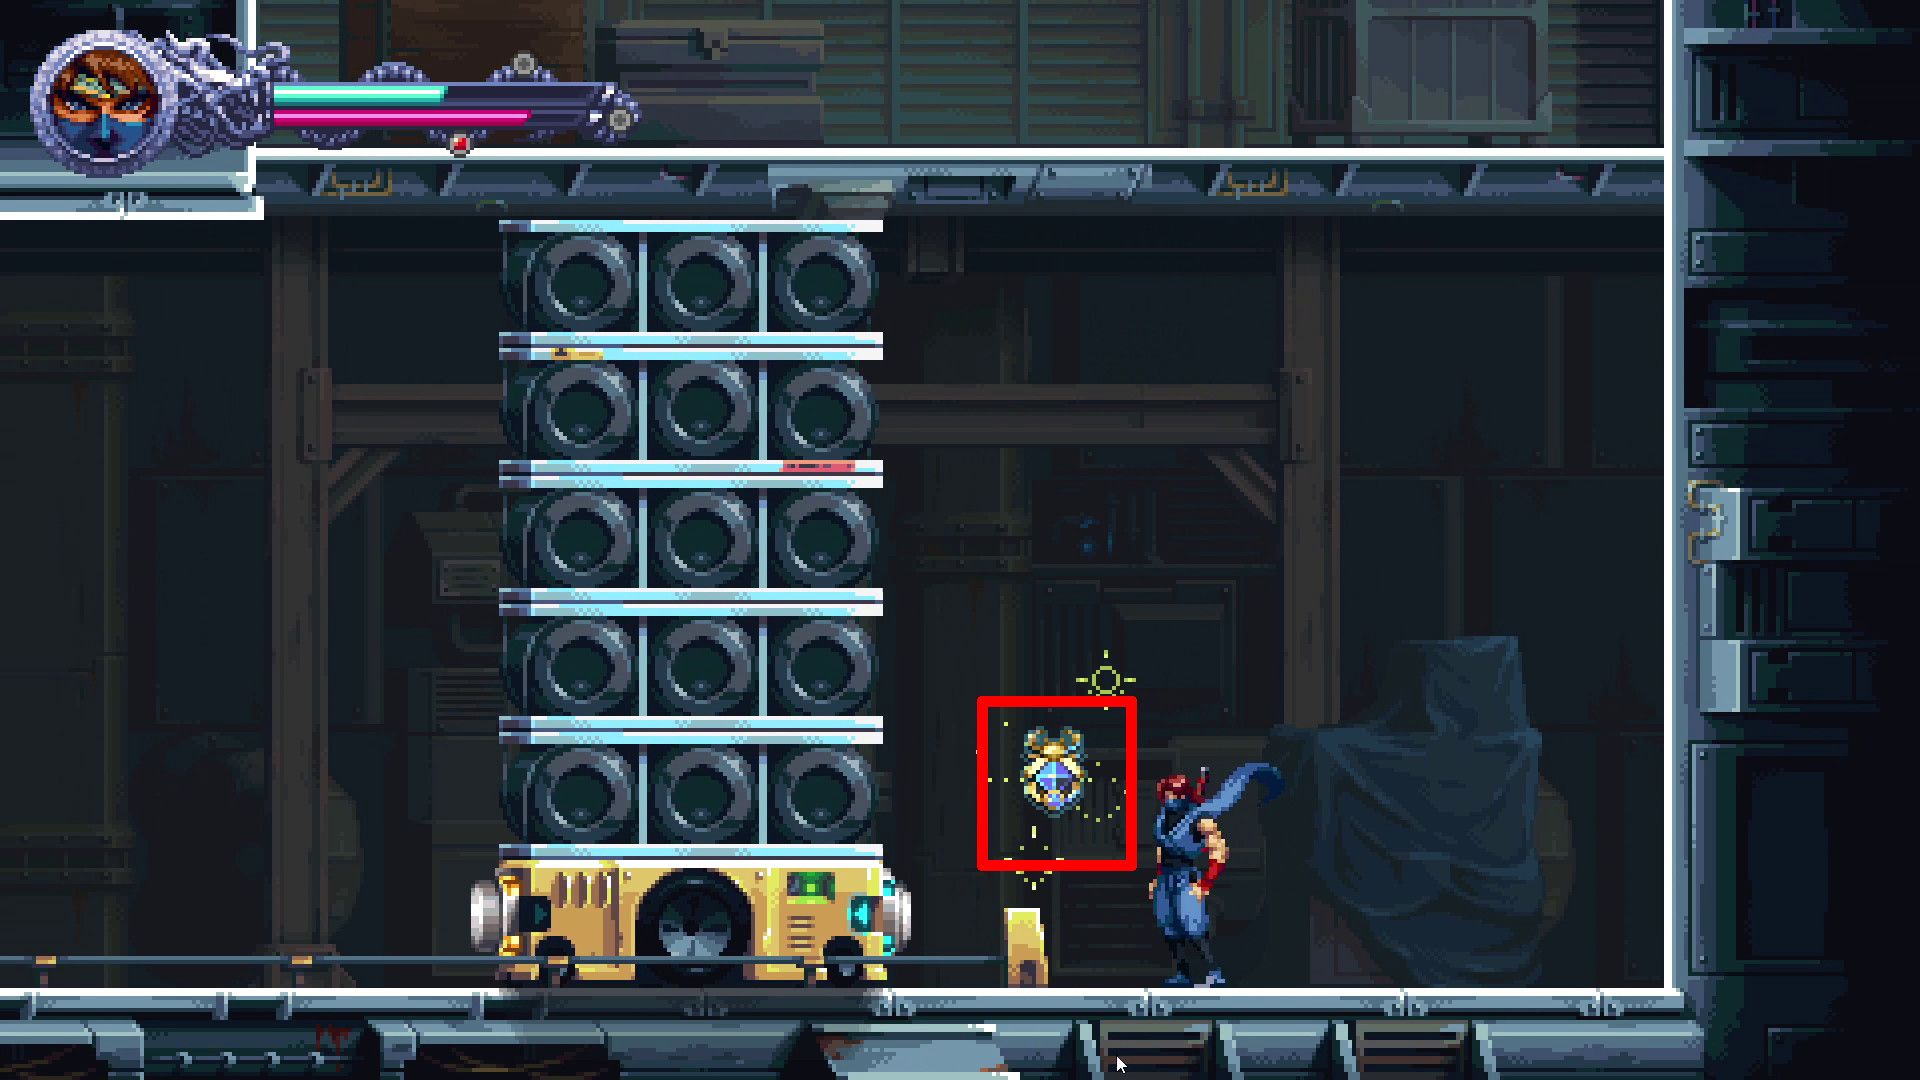
Construction Site (3-5)
- Golden Scarab #1

Make your way up to the specified level, then encounter the Demon Altar. To obtain a Golden Scarab, break the cracked wall on its right side.
- Crystal Skull #1
As you proceed following the crucial route, you’ll eventually come across an area where a lush green barrier encloses the scenery in the backdrop. Keep your eyes peeled for a damaged wall while traversing this section, as it conceals a mysterious Crystal Skull hidden beyond it.
- Crystal Skull #2
While engaged in the Rhyvashi pursuit, search for a Crystal Skull positioned high up on your screen. Traverse the ceiling to grab this collectible.
- Scroll
Following Rhyvashi’s pursuit, gamers will stumble upon an old, industrial structure. As they venture within this building, players are advised to seek a damaged wall on their left side. Persistently assaulting this weakened wall will eventually cause it to crumble, providing access to a Demon Altar. This altar can be entered, paving the way for a straight route to the Scroll.
- Golden Scarabs #2, 3 & 4
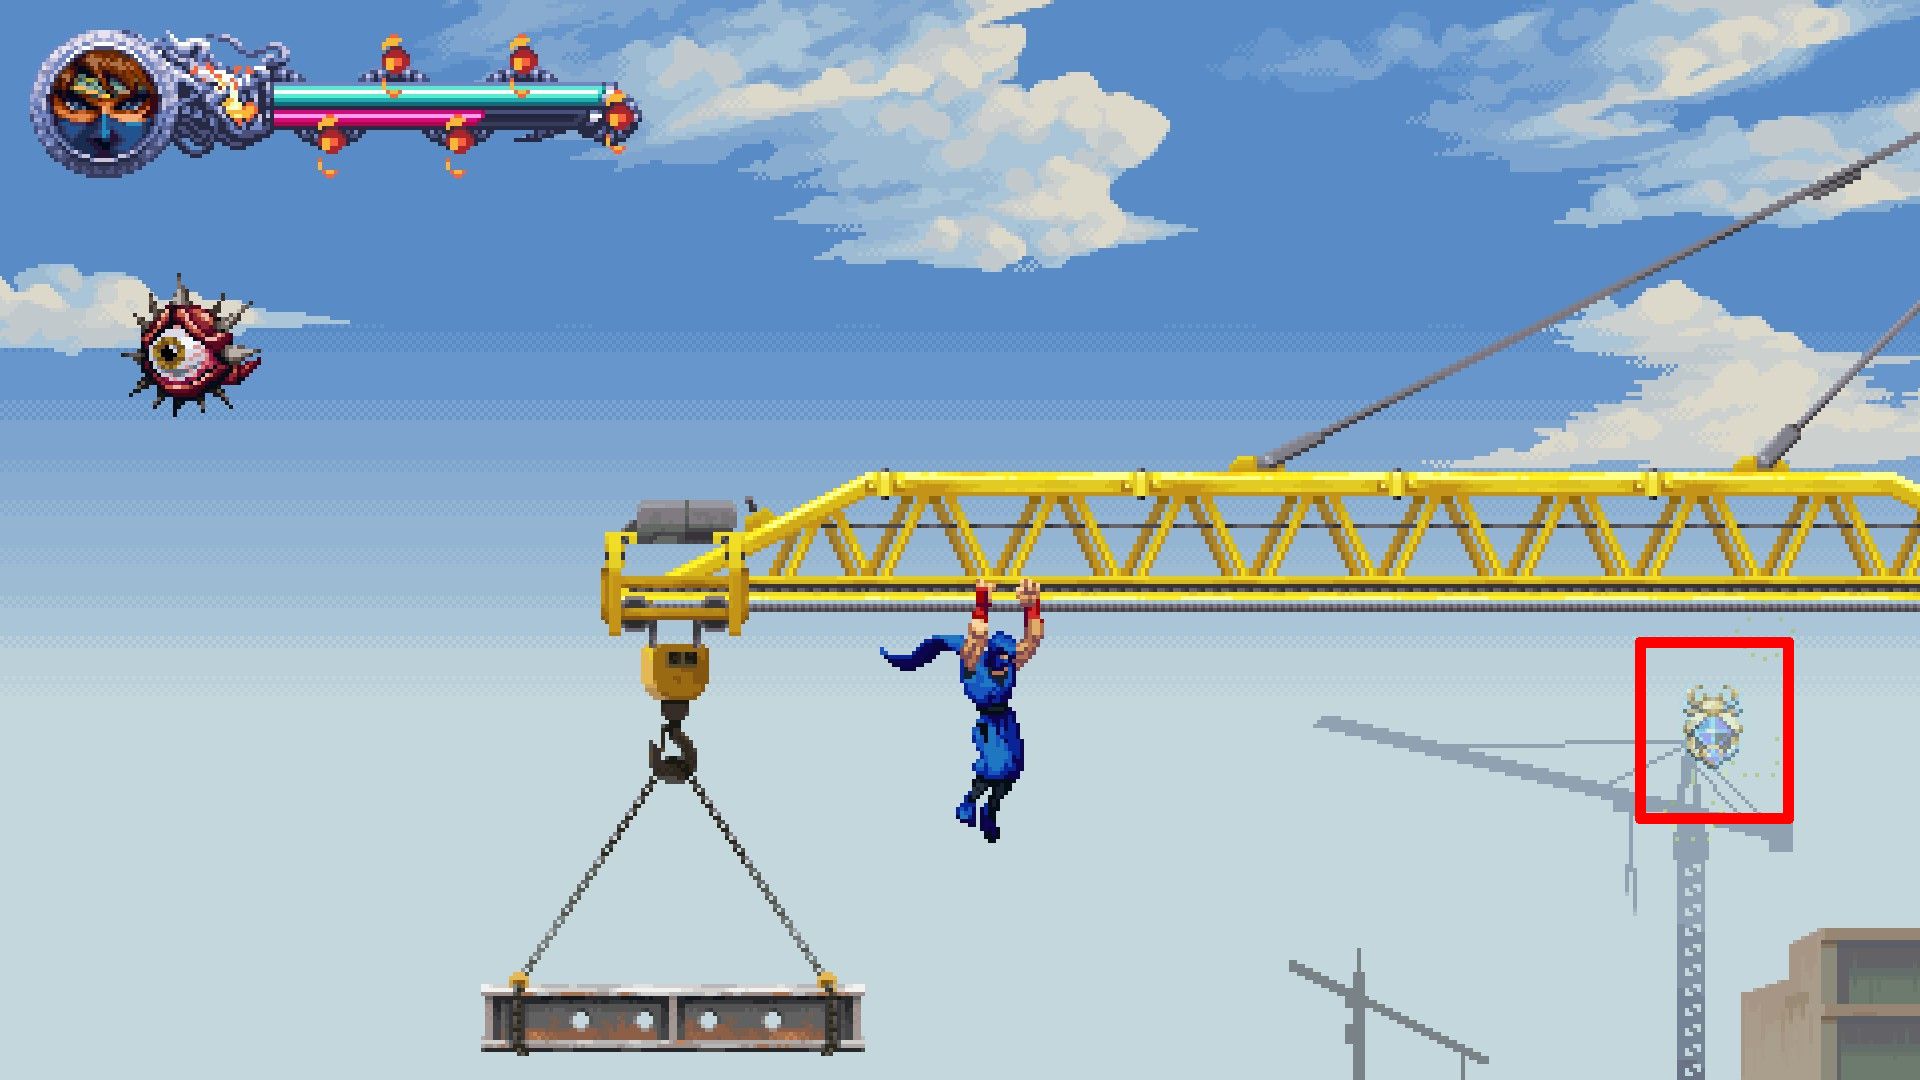
After gathering the Scroll, players need to navigate towards an area featuring giant, yellow cranes. Nestled among them, you’ll find a Golden Scarab tucked beneath the wing of one of these cranes, which you can then scale to reach.
- Crystal Skull #3
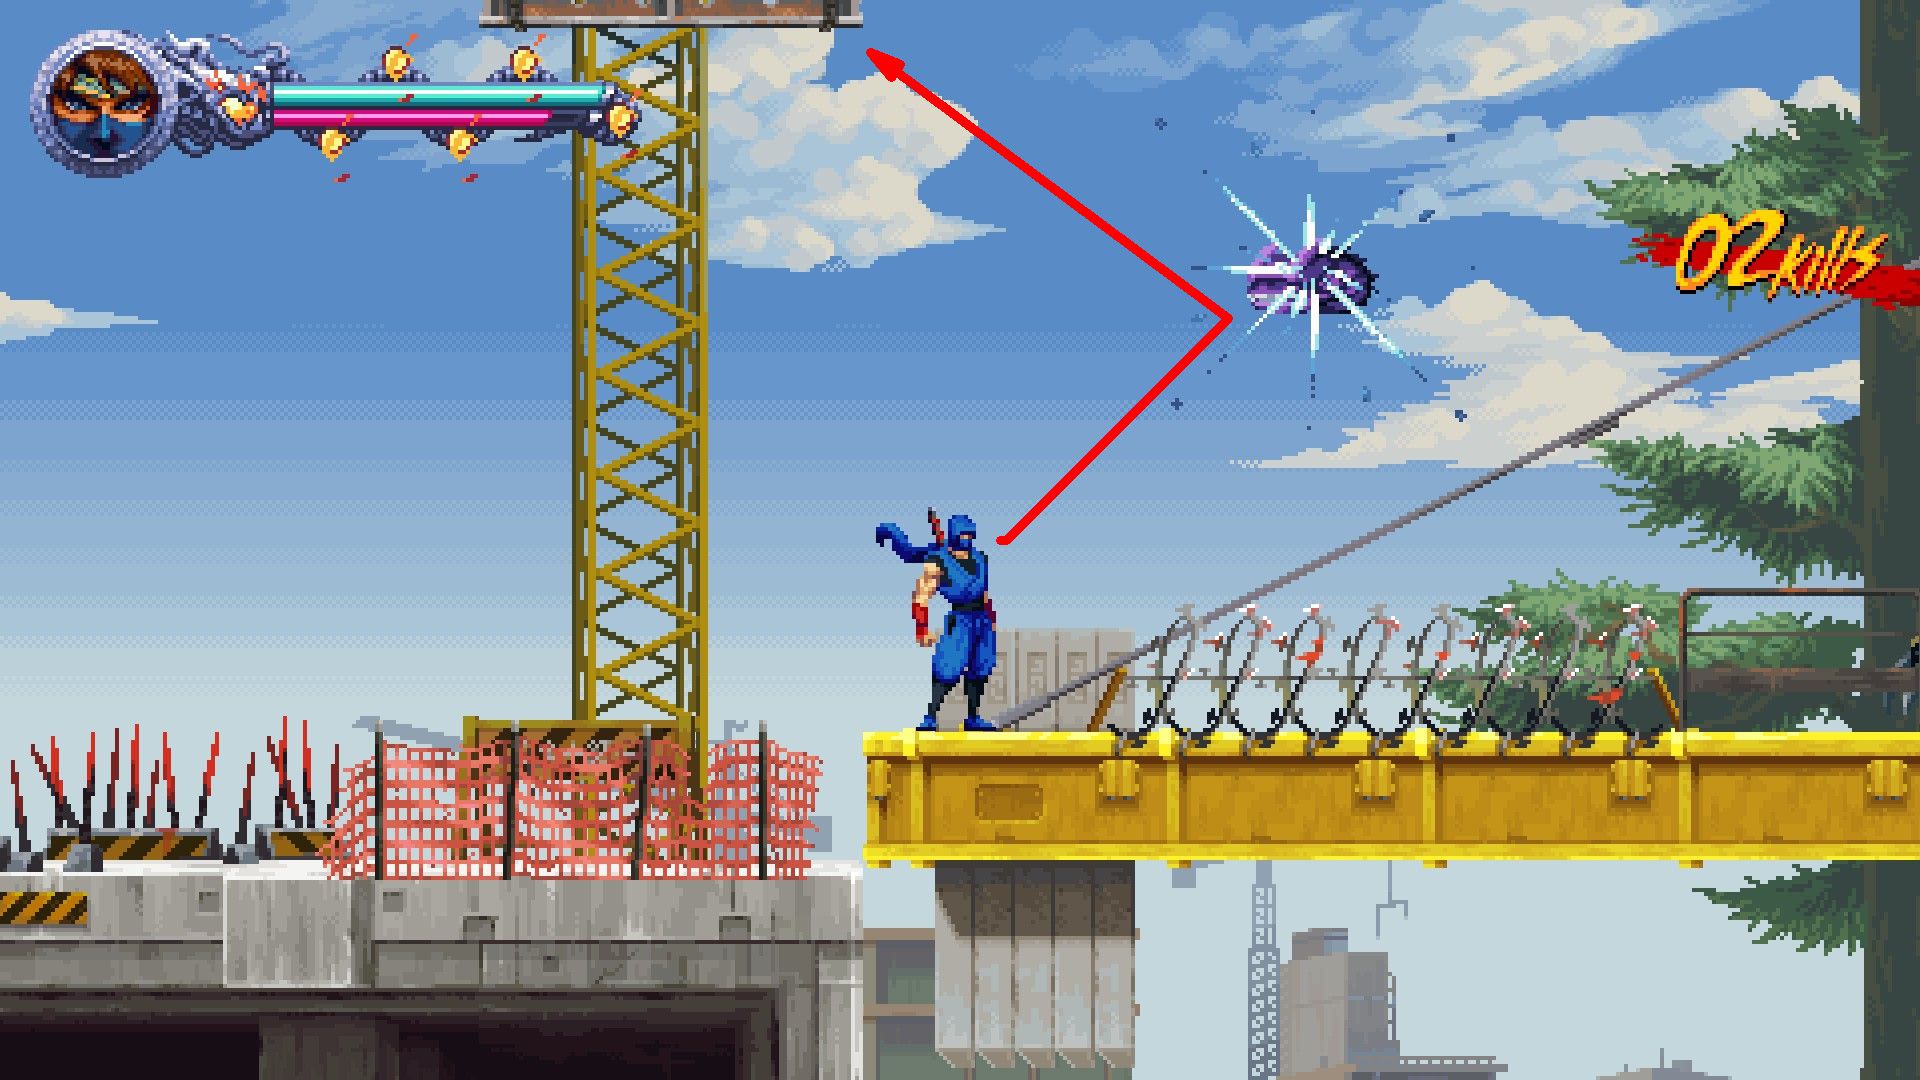
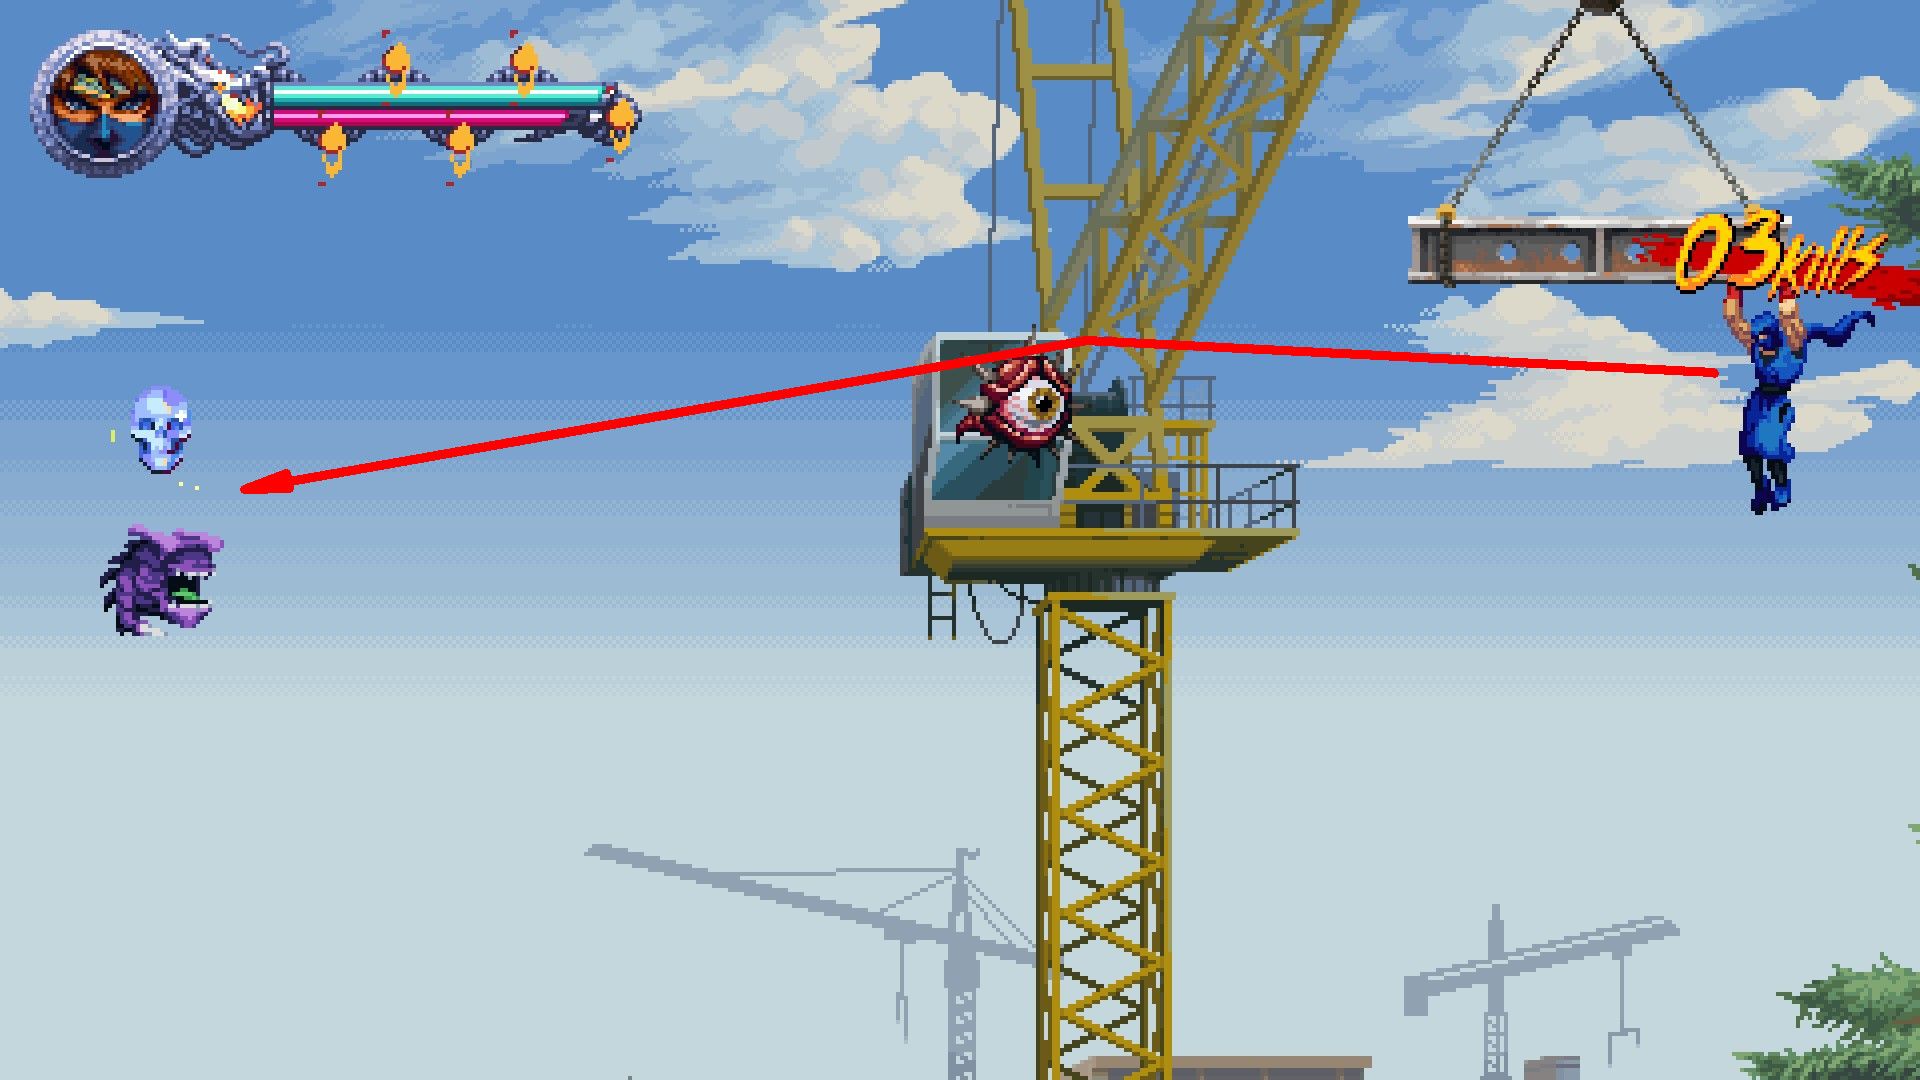
Beyond the radiant Golden Scarab, you’ll find a yellow crane adorned with sharp wire. Suspended above it hovers a menacing purple figure. Give Guillotine an extra push to neutralize that foe and latch onto the overhead beam. Then, using Guillotine’s power boost, navigate across obstacles to secure a Crystal Skull.
- Golden Scarab #5
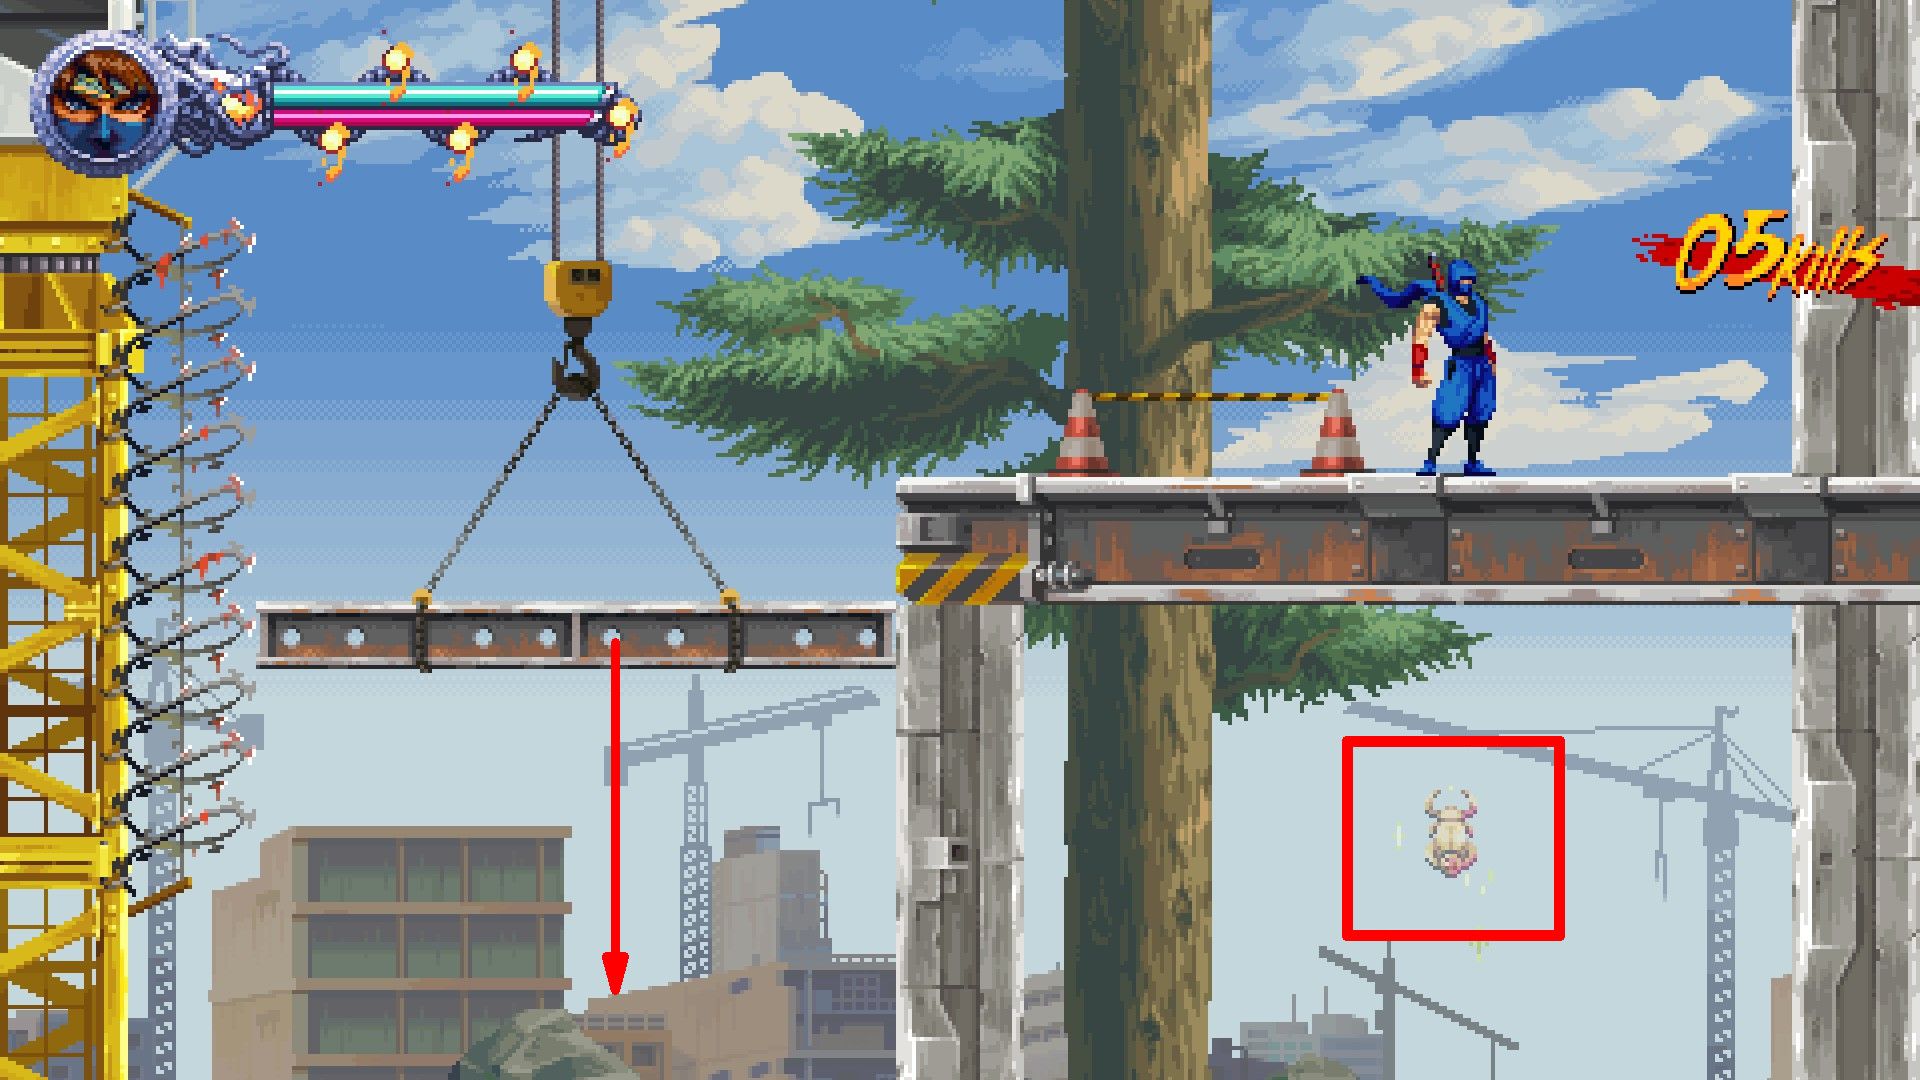
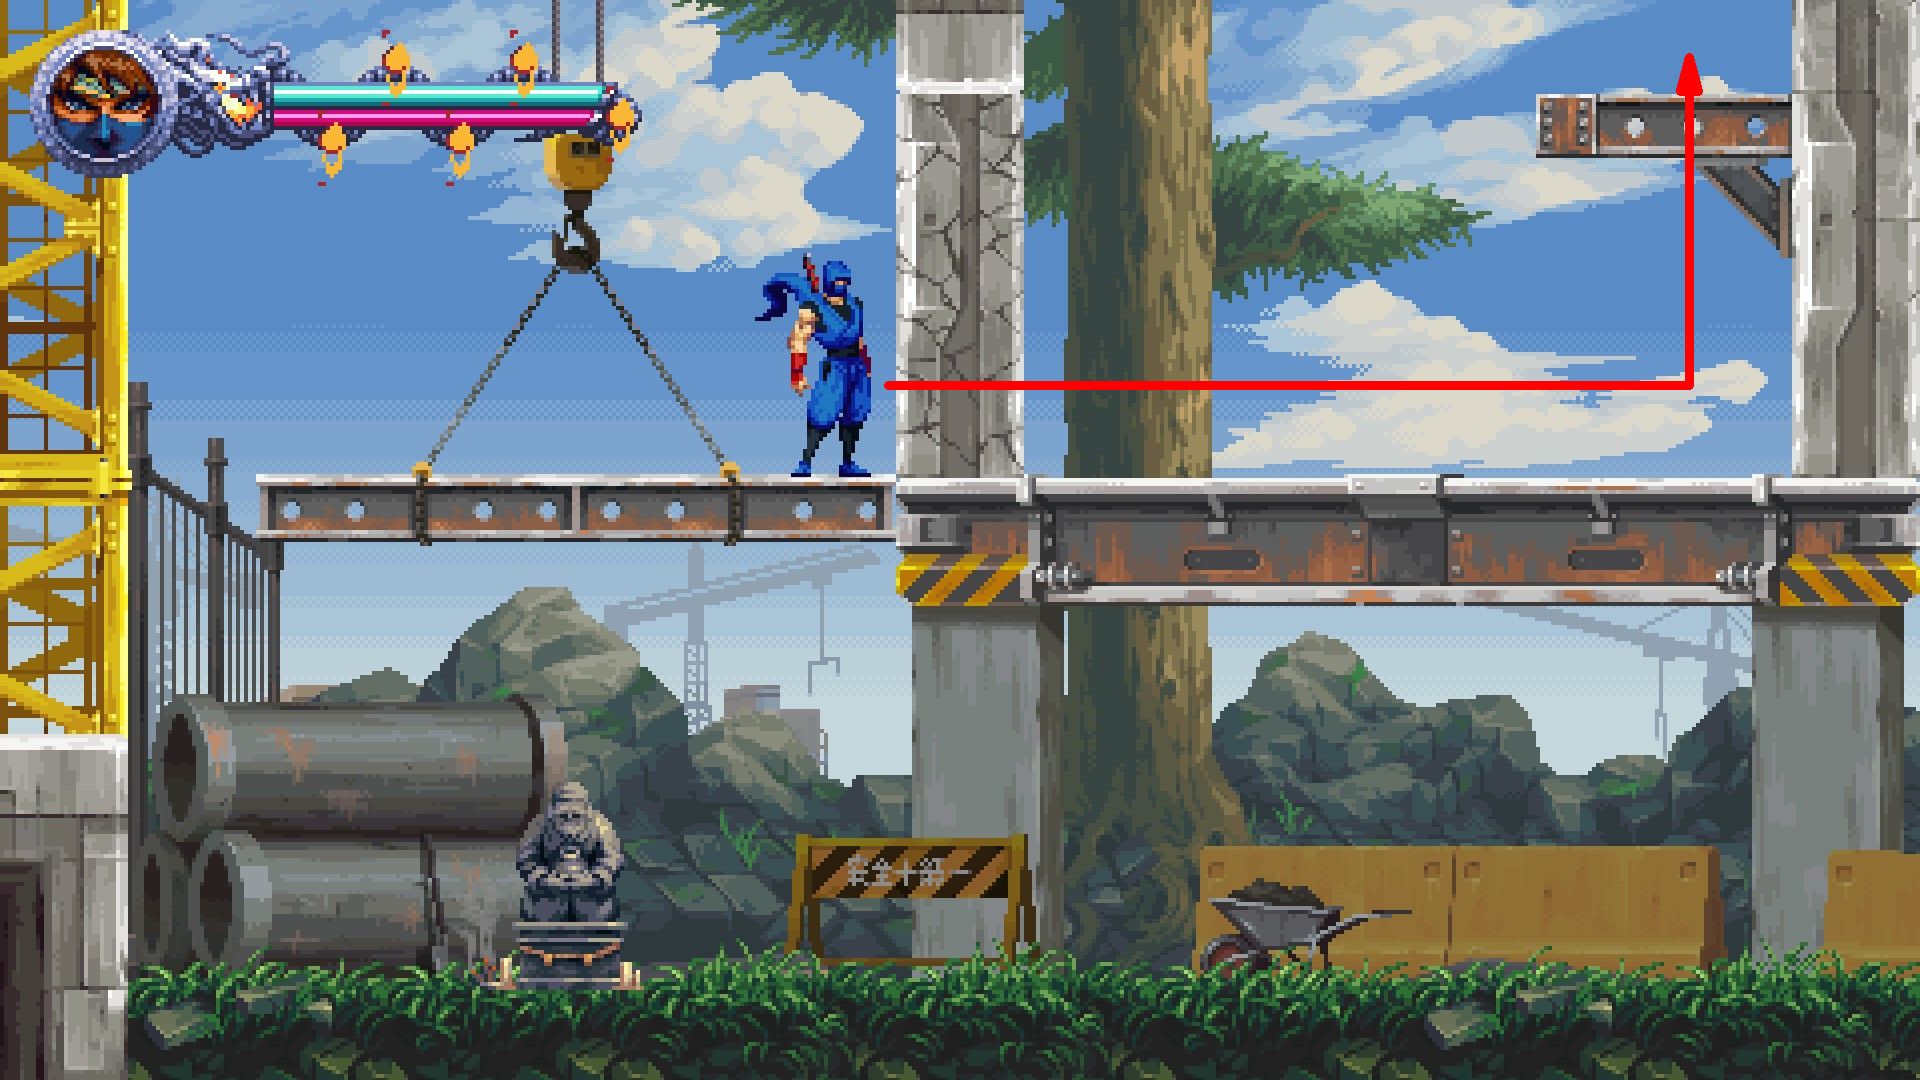
Following your acquisition of the Golden Scarab, move in the direction to your right, descend using a ledge or surface there, and then position yourself on a horizontal support or bar to cause it to lower. Once this bar has come to a stop, smash through the fissured wall to your right, which will grant you access to an area containing the last Golden Scarab.
Act 4 Collectibles in Ninja Gaiden Ragebound
Steel Prison (4-1)
- Crystal Skull #1
Right at the onset of the stage, knock over the crate positioned furthest to the left to uncover the initial Crystal Skull.
- Golden Scarabs #1, 2 & 3
Move forward until you find yourself sandwiched between two carts that you can move. Push the cart on your right in the direction of the right, then maneuver yourself over it so you’re positioned on its right side. After that, give the left cart a push to uncover the Golden Scarab.
- Golden Scarab #4
Proceed on the main course, following the crucial route, until you get to the upcoming milestone. Break open the crate that’s under the milestone to uncover a Golden Scarab.
- Crystal Skull #2
This Crystal Skull is on a metal platform just past the aforementioned checkpoint.
- Crystal Skull #3
As you move forward in this extended room, make sure to pass by the second cart to stay safe from the electrified ground. After doing so, take a glance at the raised metallic stage up ahead. There, you’ll find the Crystal Skull hidden behind an adversary wielding a shield.
- Golden Scarab #5
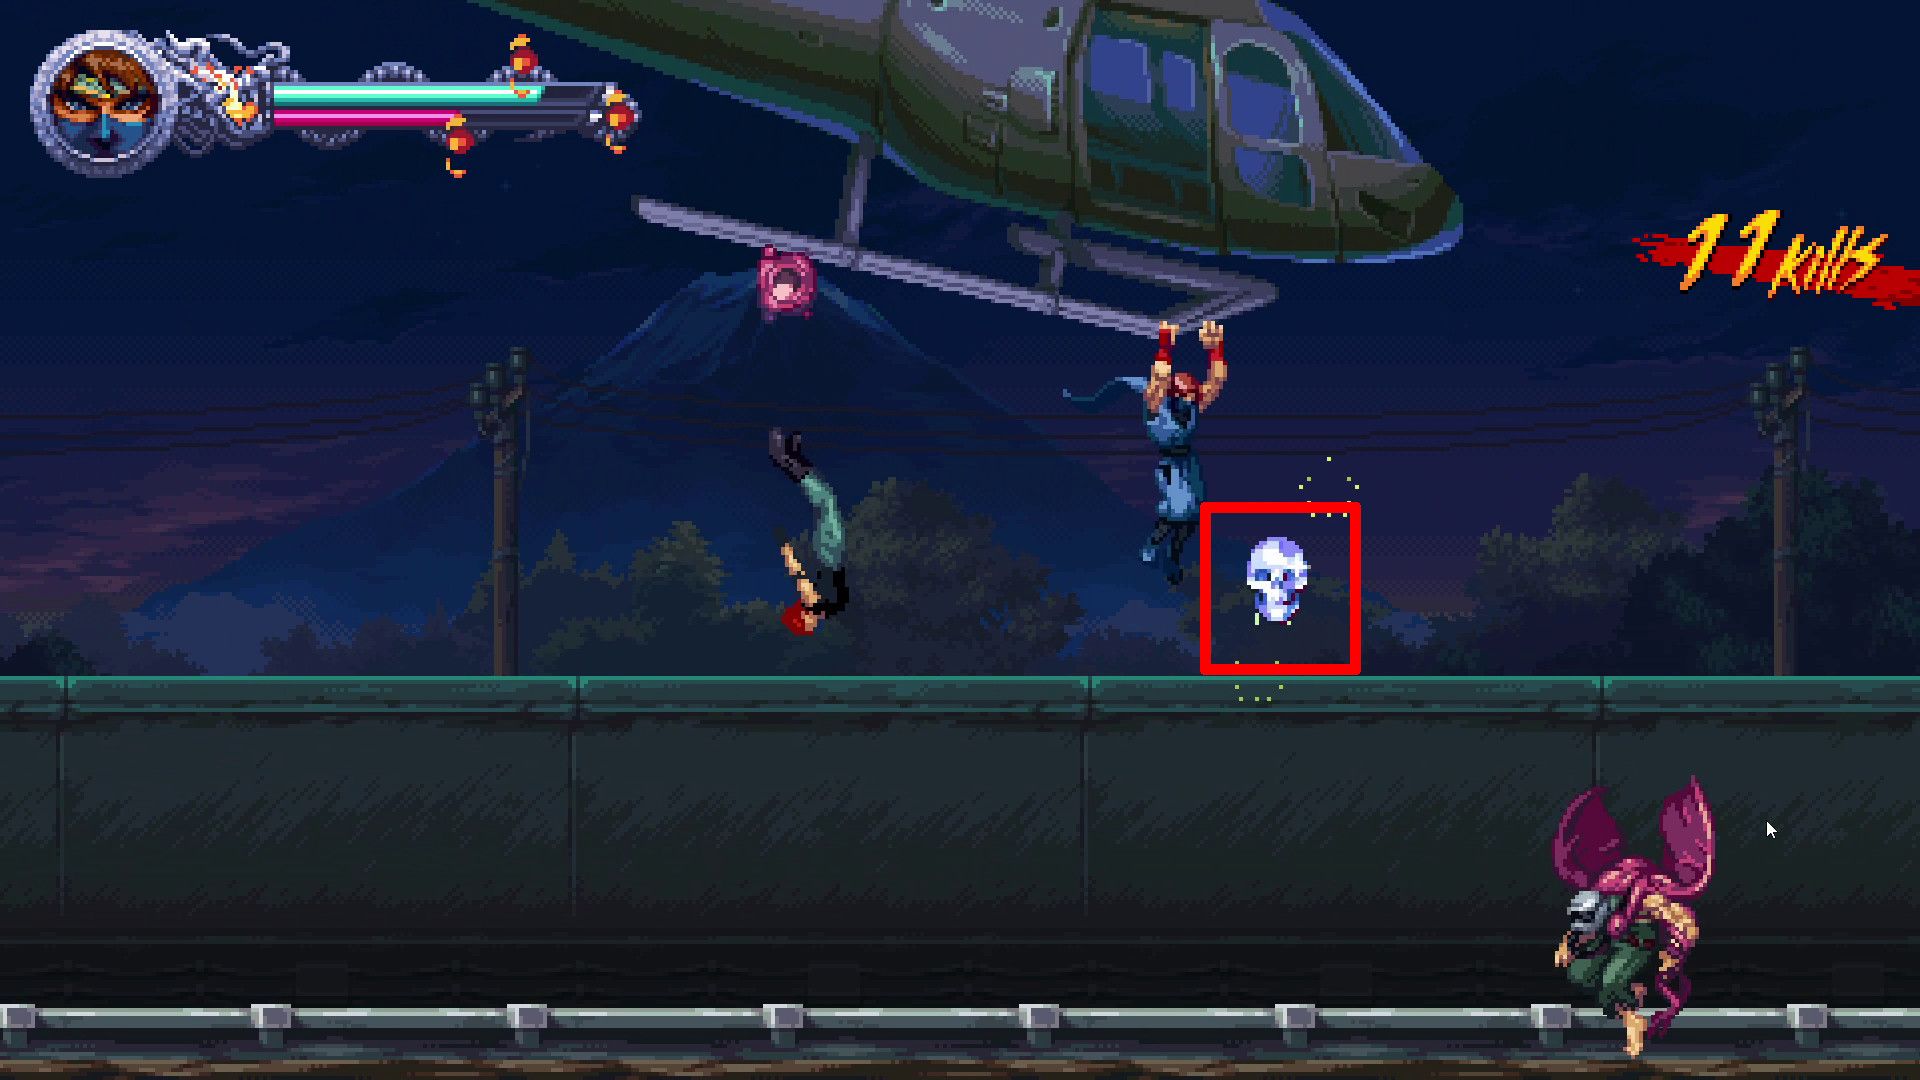
Directly following the skirmish near the helicopter, search for the last Golden Scarab. After traversing the pulley adorned with both green and red lights, players will find this collectible. They can obtain it by moving along the ceiling.
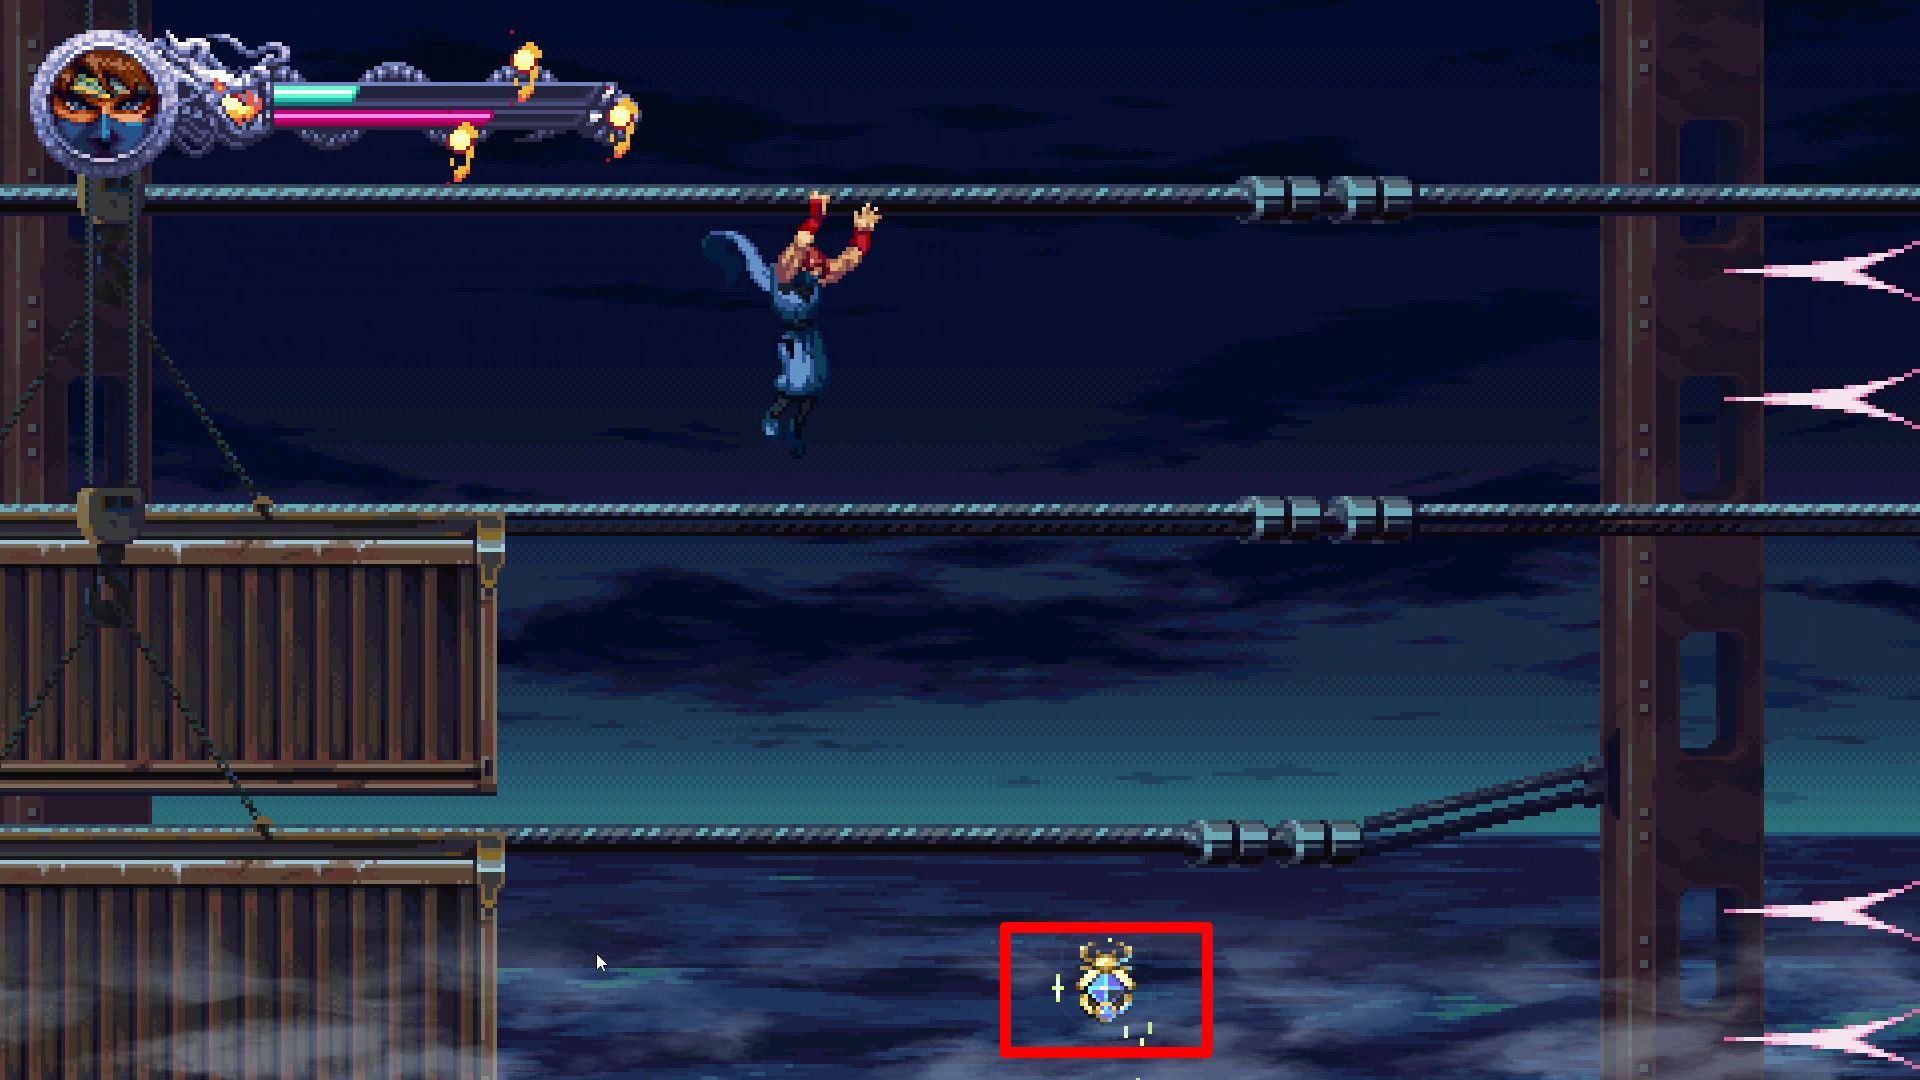
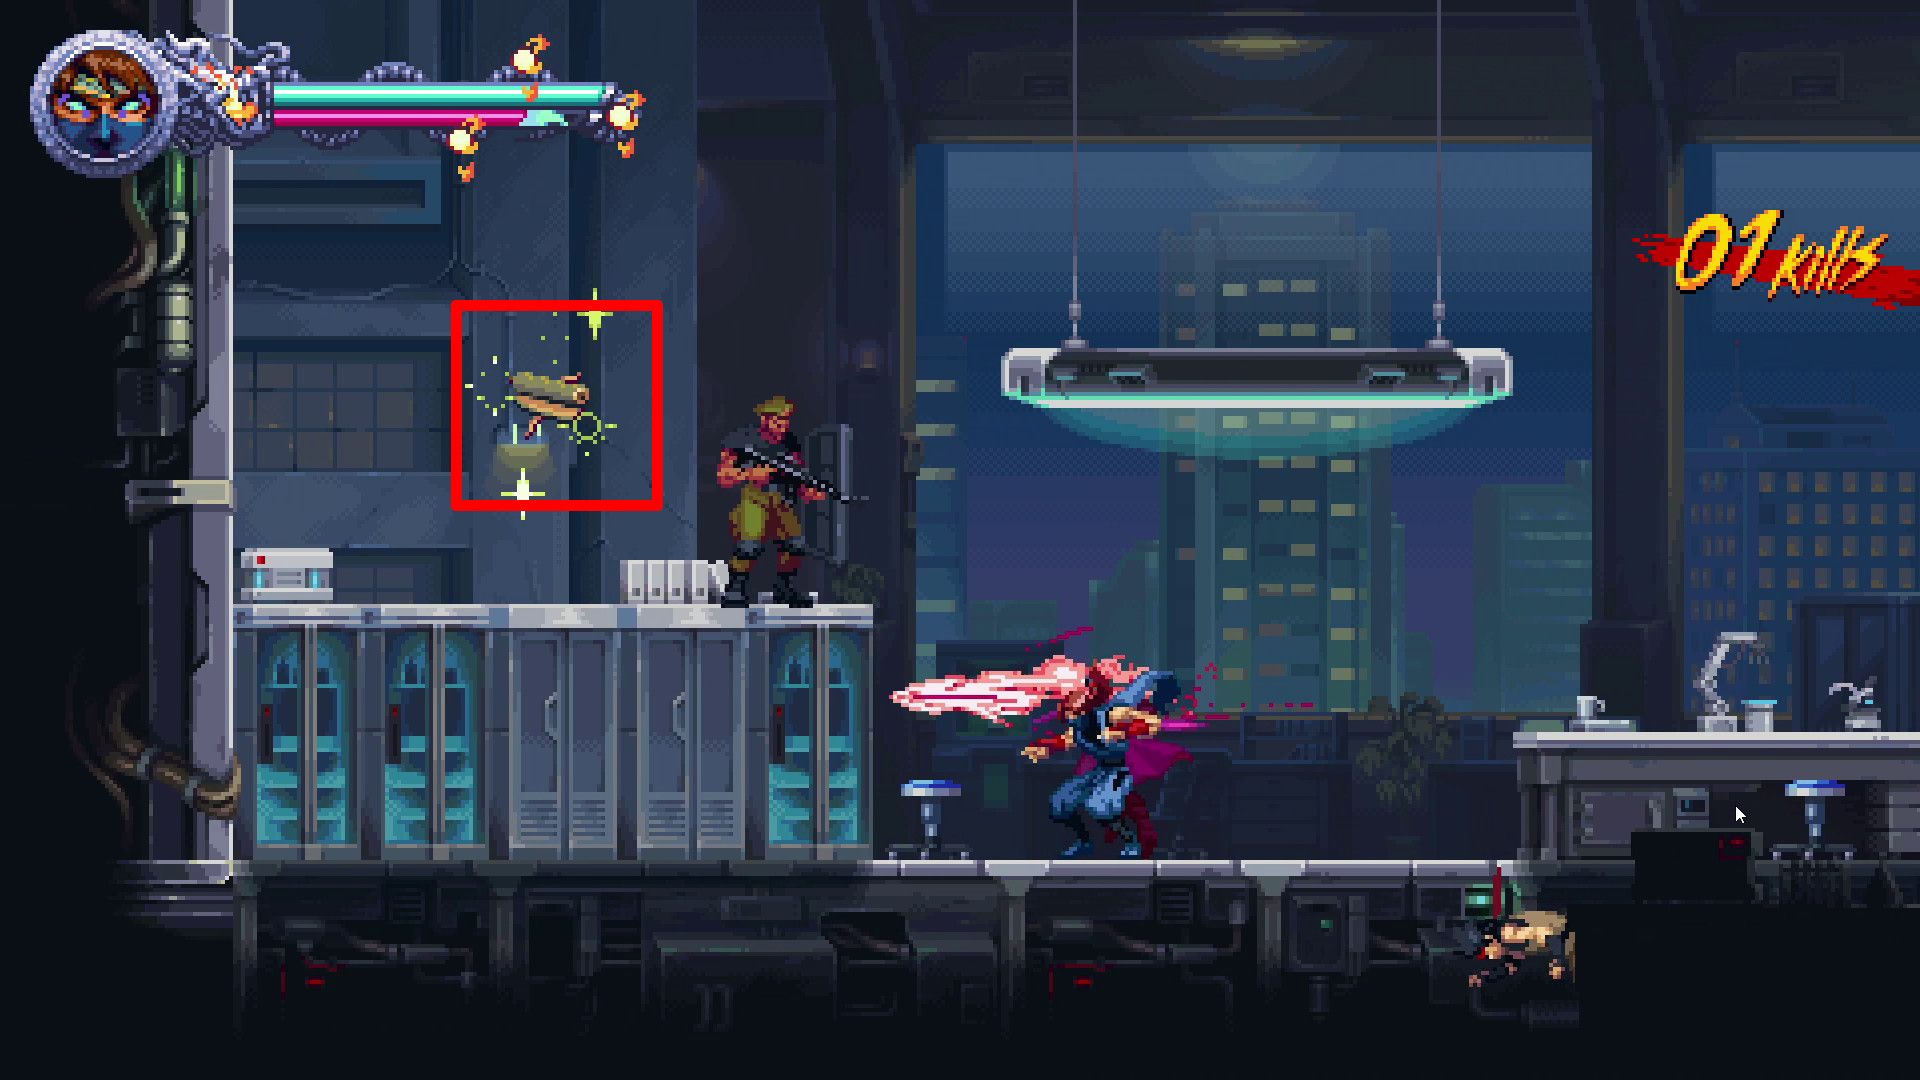
Open Sea Chase (4-2)
- Crystal Skull #1
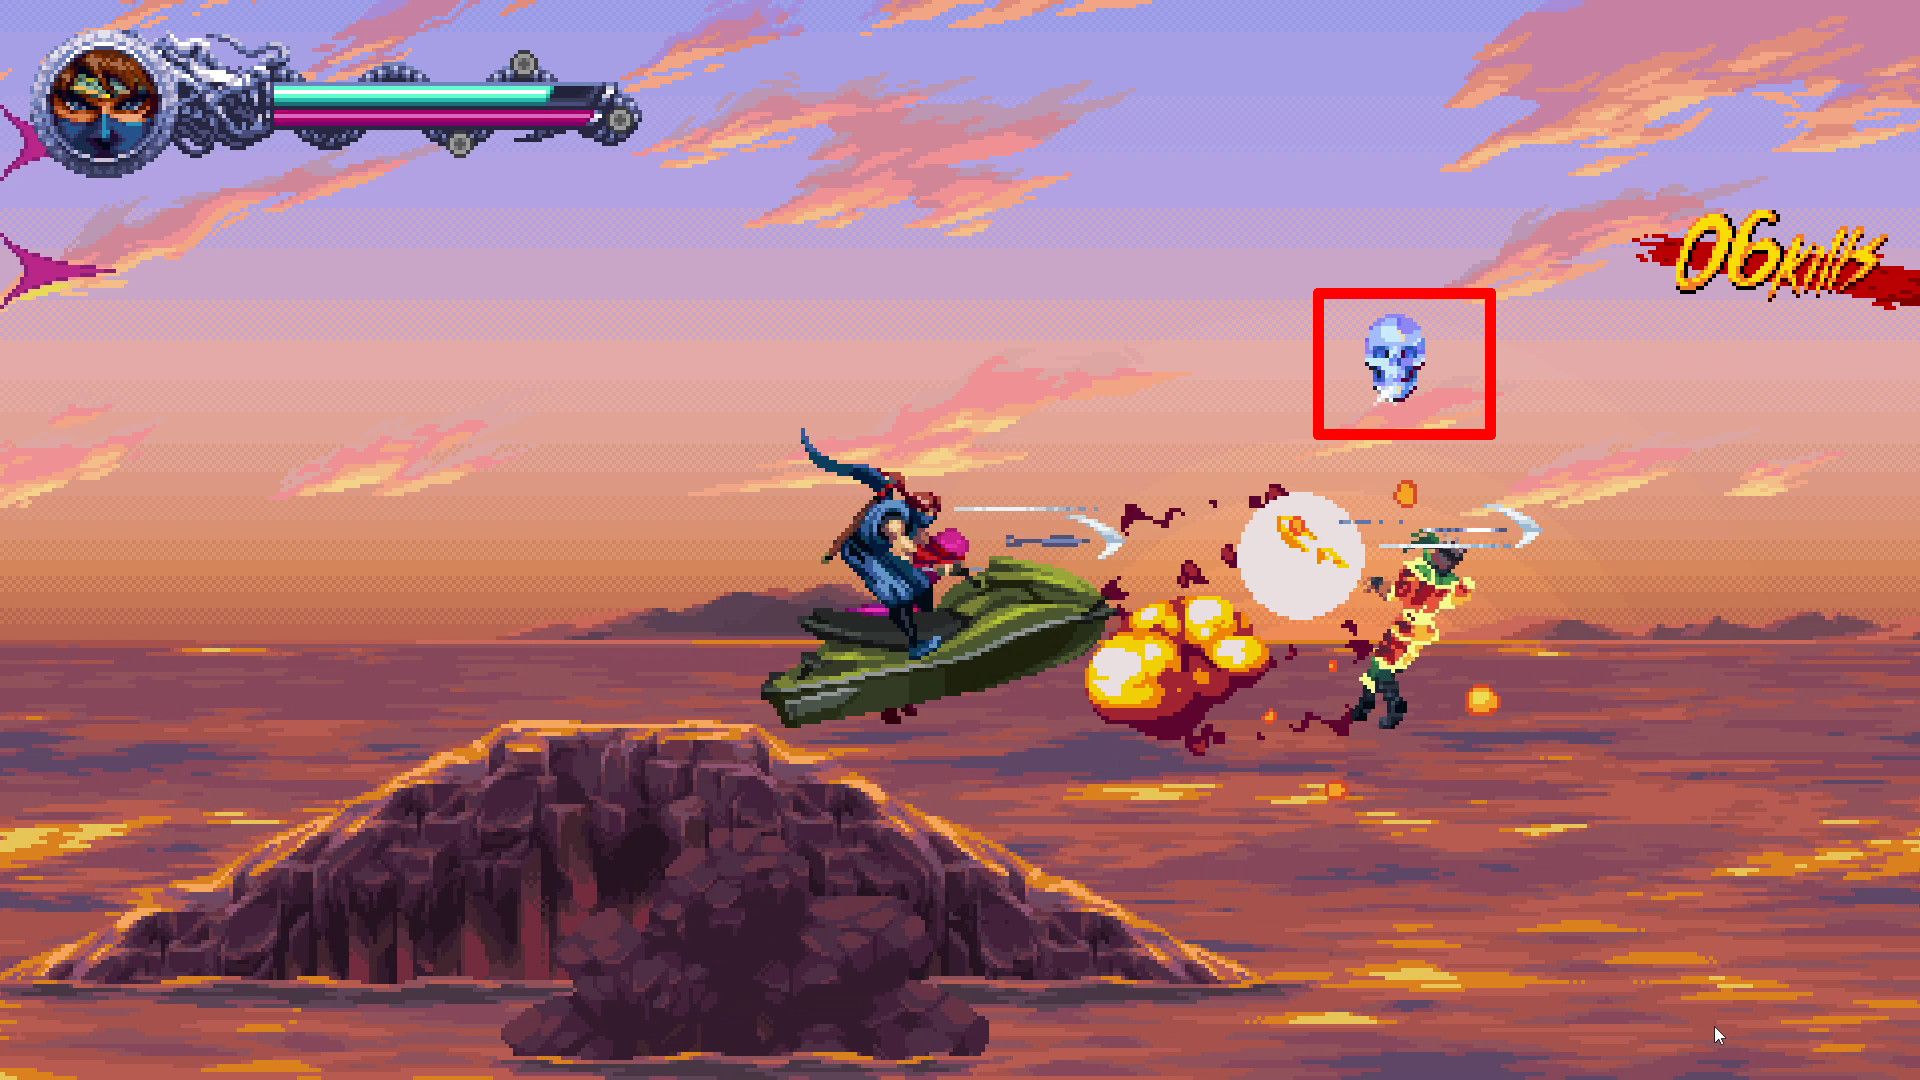
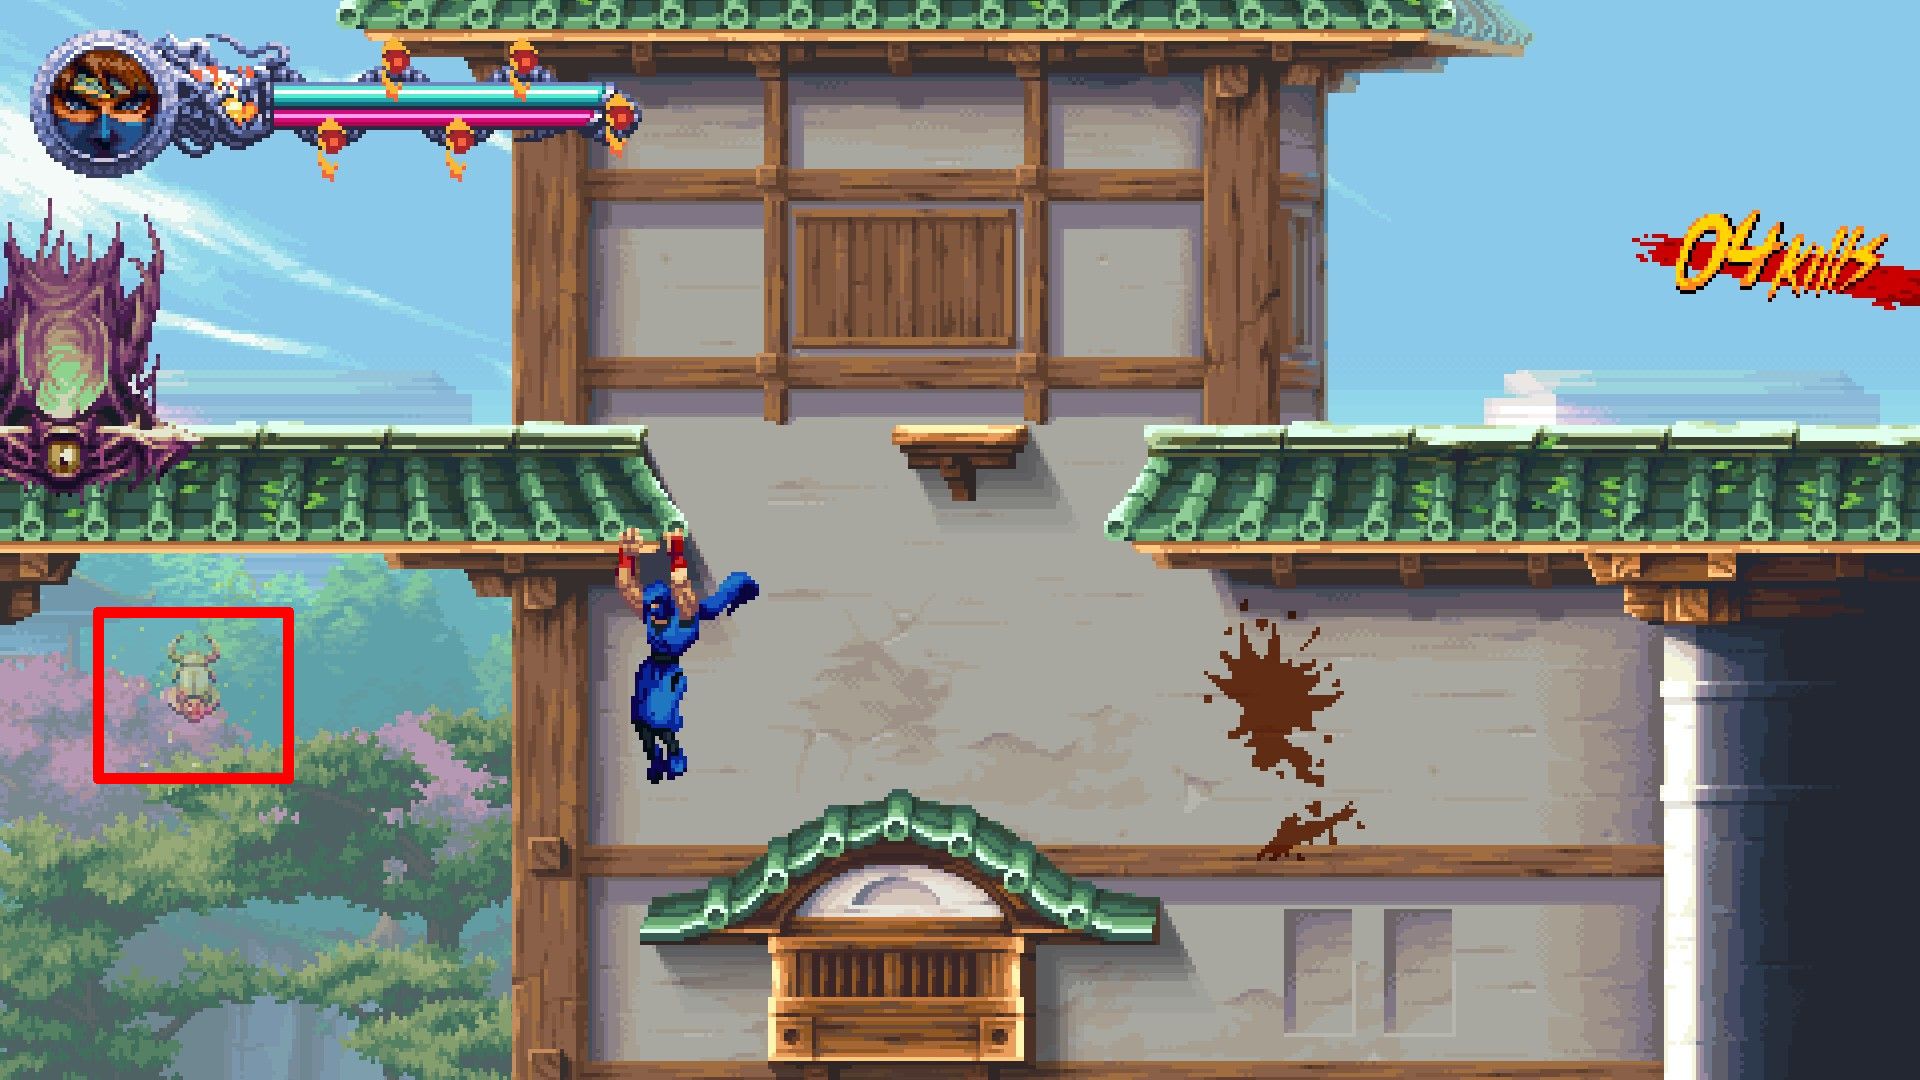
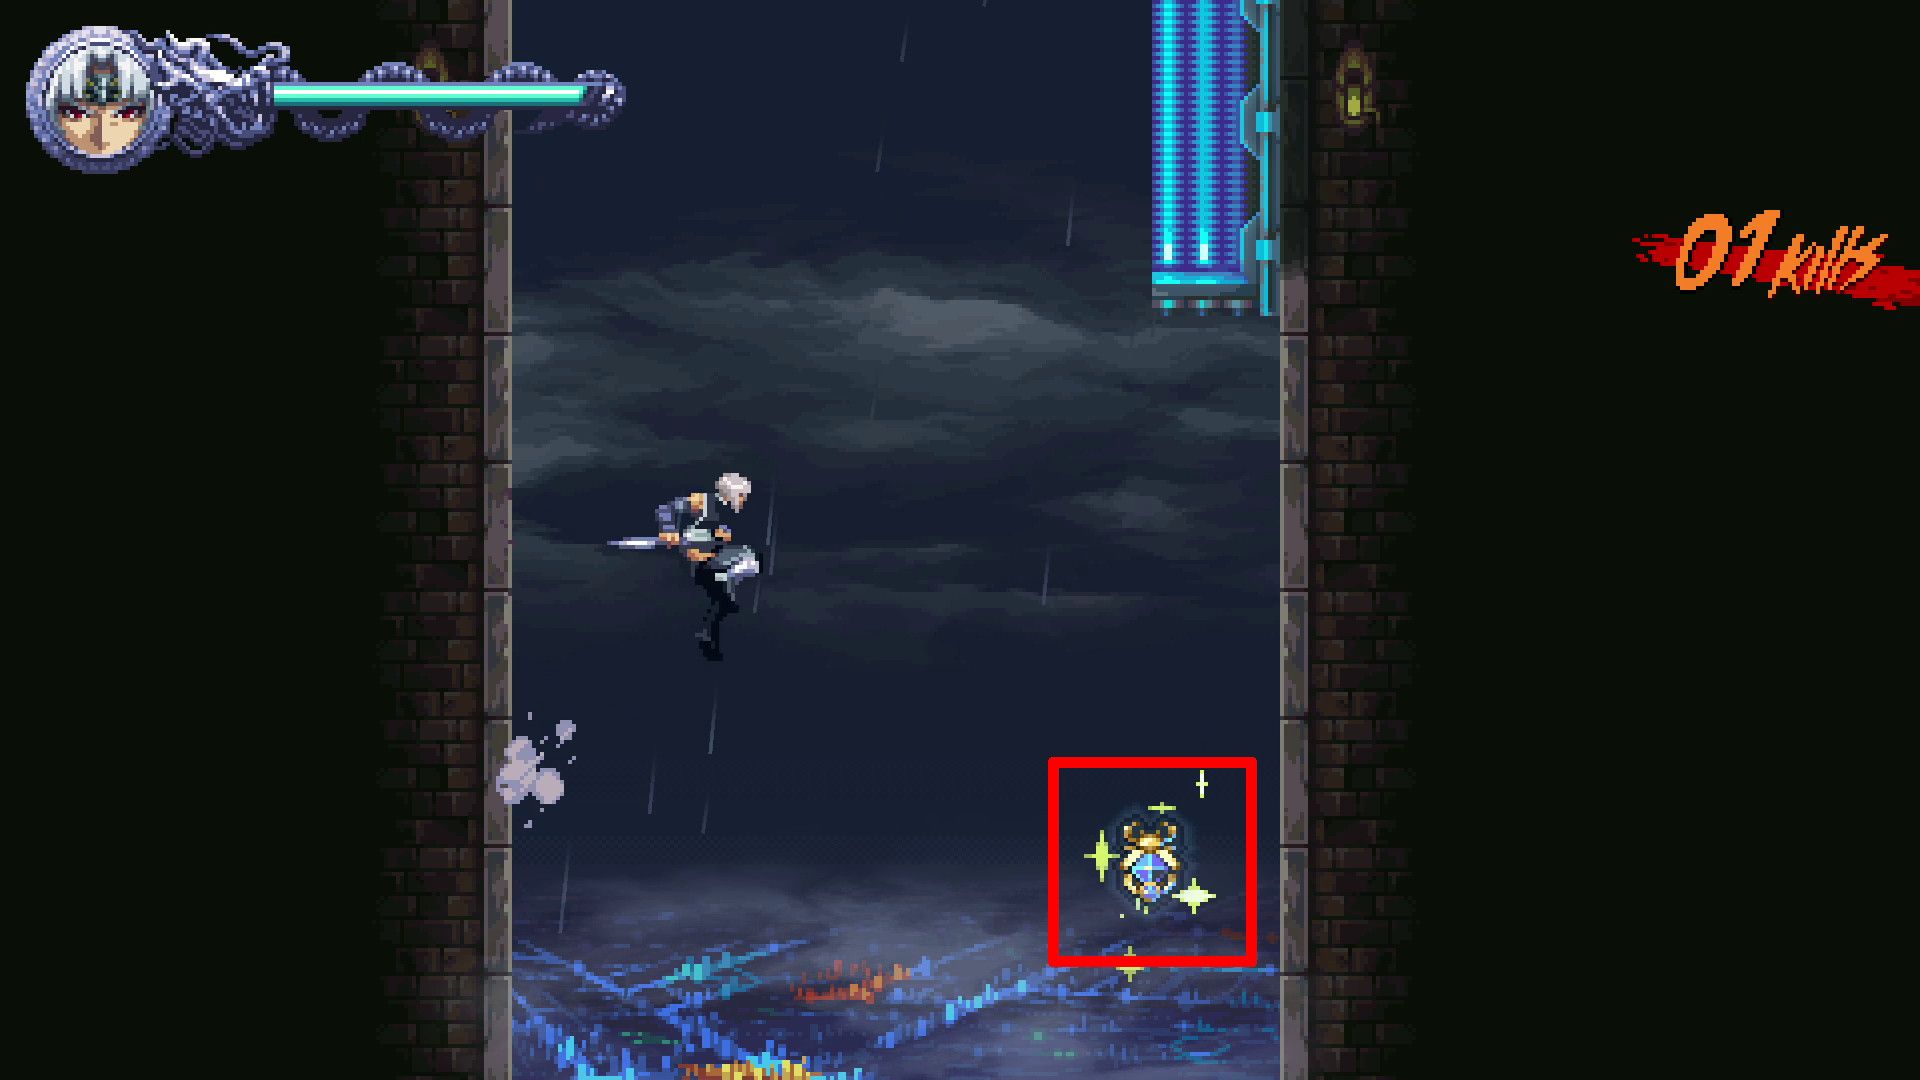
At the start of the level, you’ll find the initial Crystal Skull hovering overhead, shortly preceding the arrival of a chopper that drops bombs from its left side.
- Golden Scarab #1

Once you’ve triggered the initial safety point, leap over the raised stages to get to that Golden Scarab.
- Crystal Skull #2
After grabbing the Golden Scarab, make your way up to the raised areas, for you’ll find a floating Crystal Skull hovering above.
- Golden Scarab #2
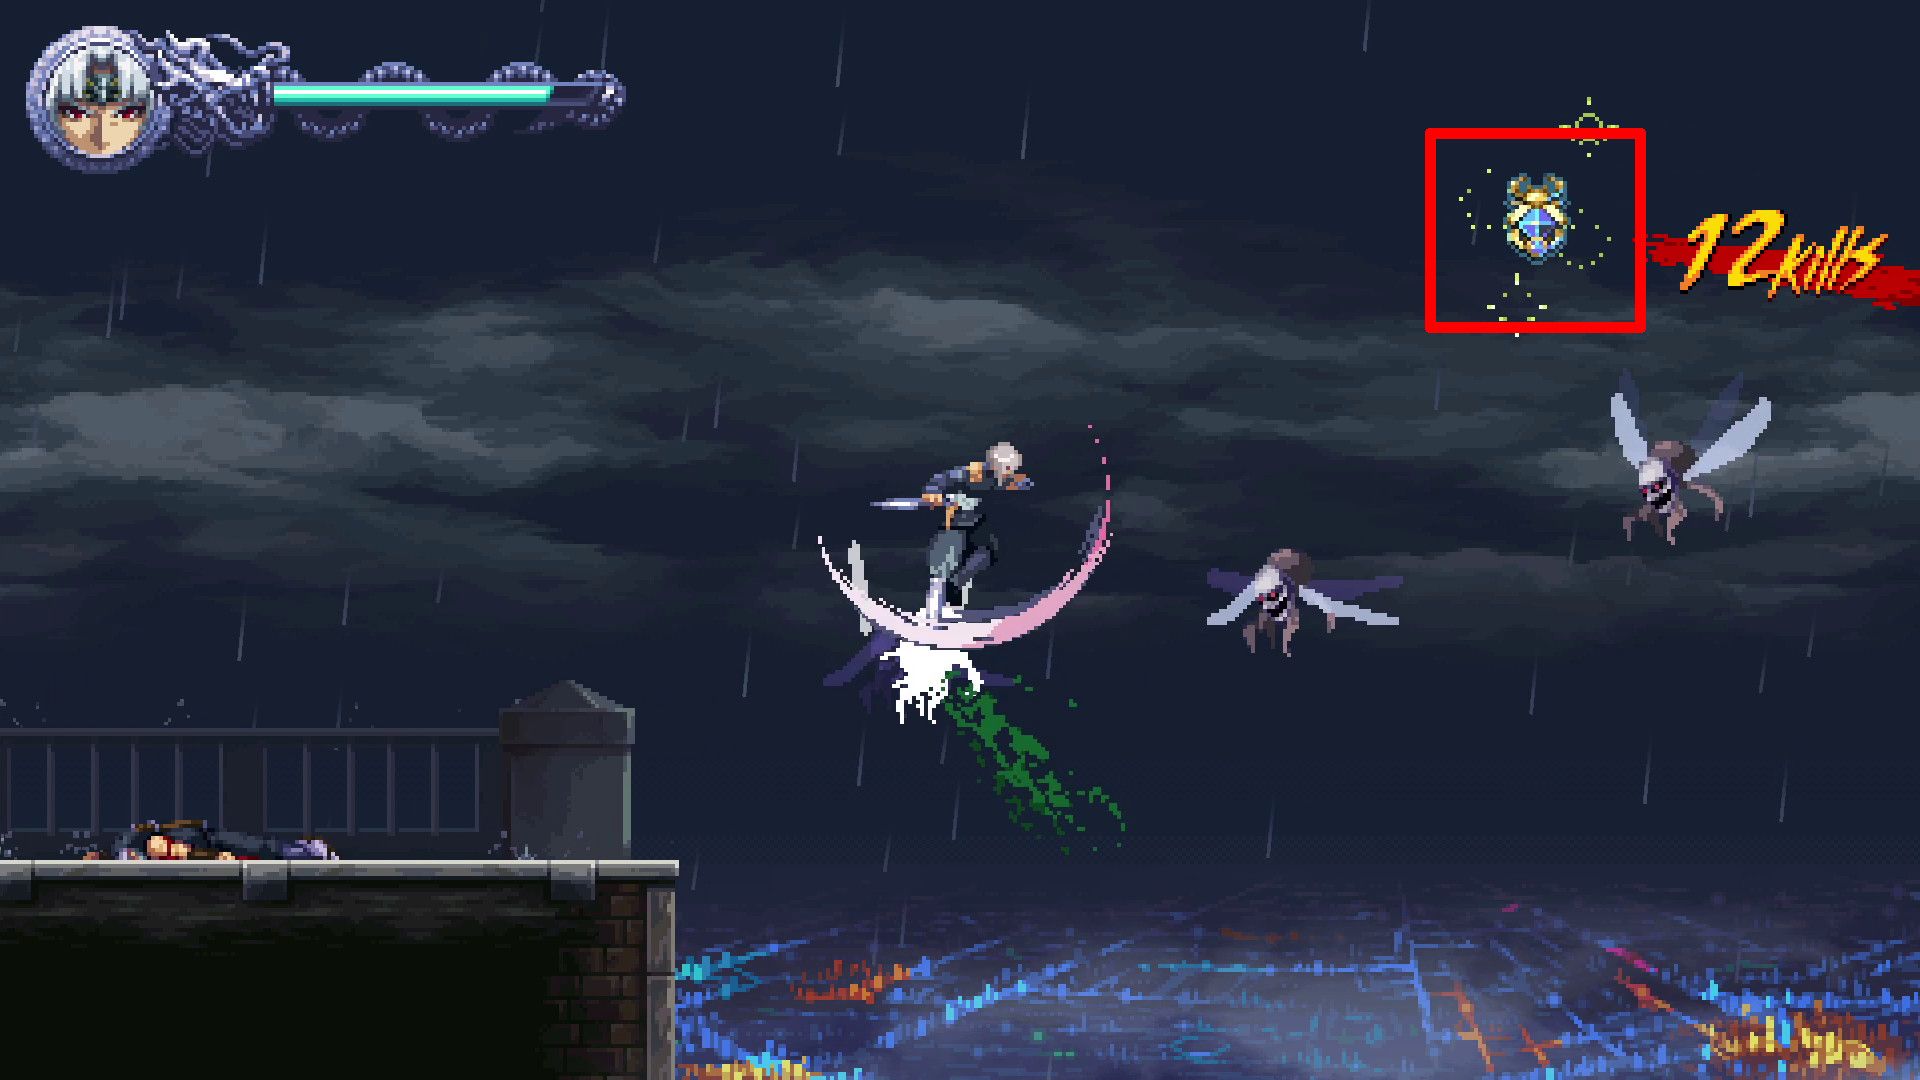
The final Golden Scarab is hovering above the water not long after the preceding Crystal Skull.
- Crystal Skull #3
Players will find the final Crystal Skull just above the water near the end of the level.
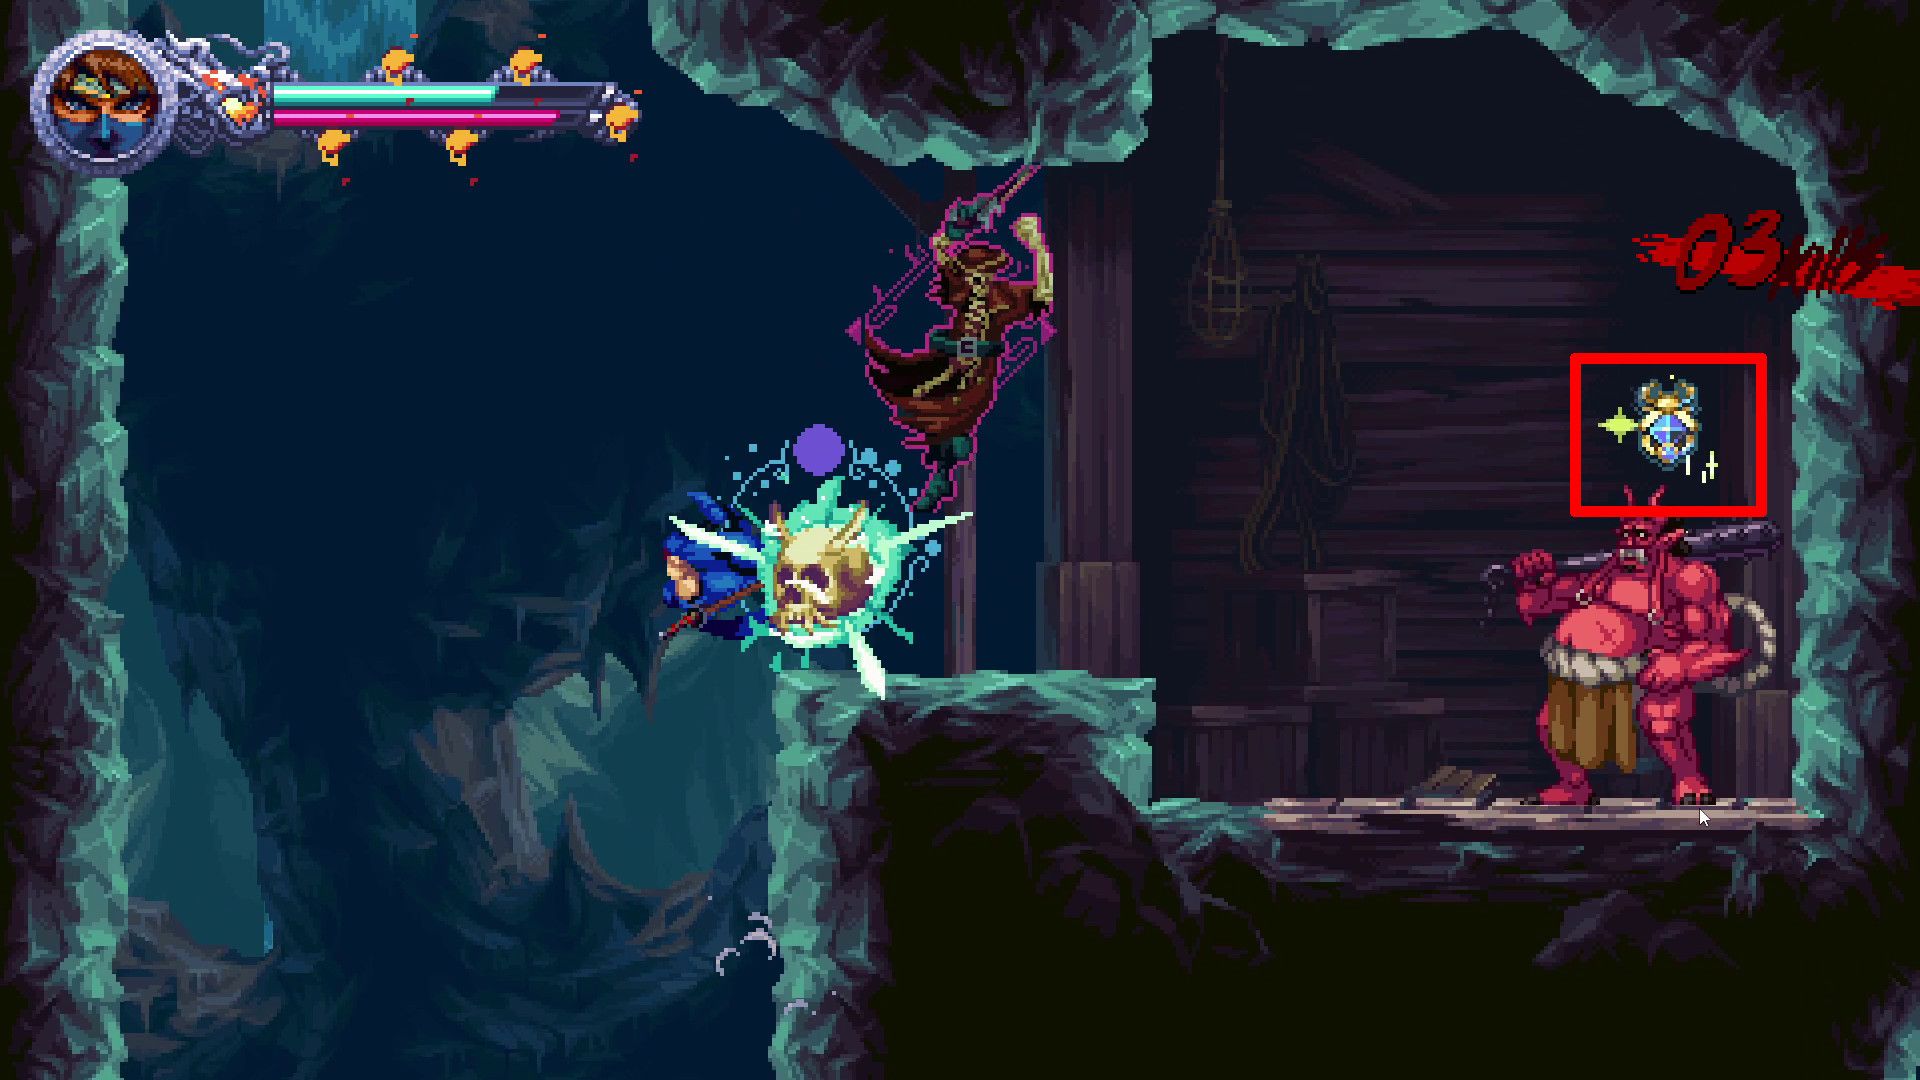
Navy Base Infiltration (4-3)
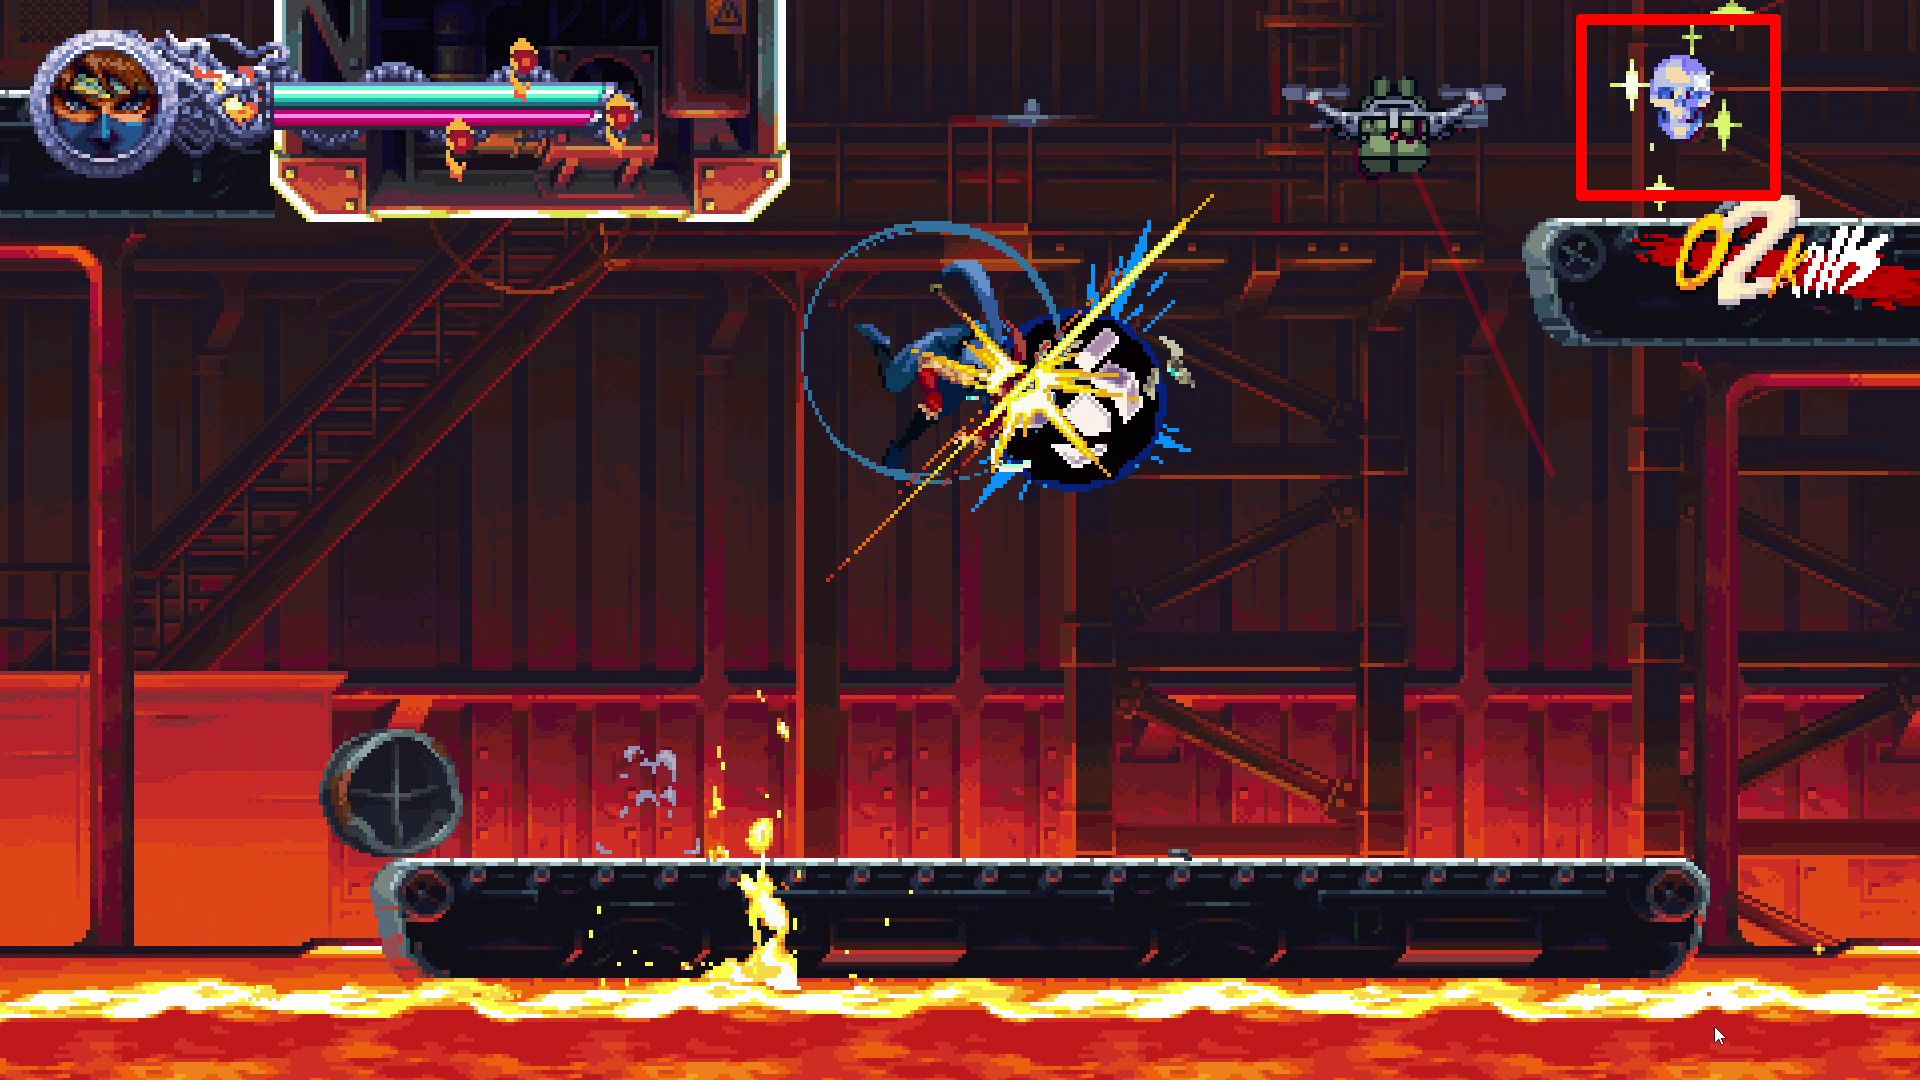
- Crystal Skull #1
Shortly into mission 4-3, gamers will notice they’re traveling on what resembles crates being hoisted aloft. As they ascend, the initial Crystal Skull becomes visible on the left side of the display.
- Golden Scarab #1
Navigate your way through the initial segment of the Demon Altar stage, then find the opening that appears for you to fall through. This will lead you to a designated save point. Near this save point, there’s a Golden Scarab waiting for you.
- Crystal Skull #2
Make your way down below the checkpoint where you’ll find molten lava. From there, veer right to spot two suspended drones in the air. Employ a Guillotine boost on these drones to uncover a platform holding a Crystal Skull.
- Golden Scrabs #2, 3 & 4
As I emerge from the fiery zone, I navigate myself towards the trio of cables ahead, moving steadily to the right. The elusive Golden Scarab lies on the lowest of these cables, but be warned, agile maneuvering is essential as you dodge containers hurtling from the right-hand side of your screen.
- Crystal Skull #3
As a gamer, I’ll tell you this: After crossing the area with three cables running side by side, you’ll find yourself standing on a container. Keep in mind that this container will eventually give way. Once it does, you’ll land on a row of cables beneath. From there, turn left and ascend to locate the elusive Crystal Skull hidden nearby.
- Golden Scarab #5
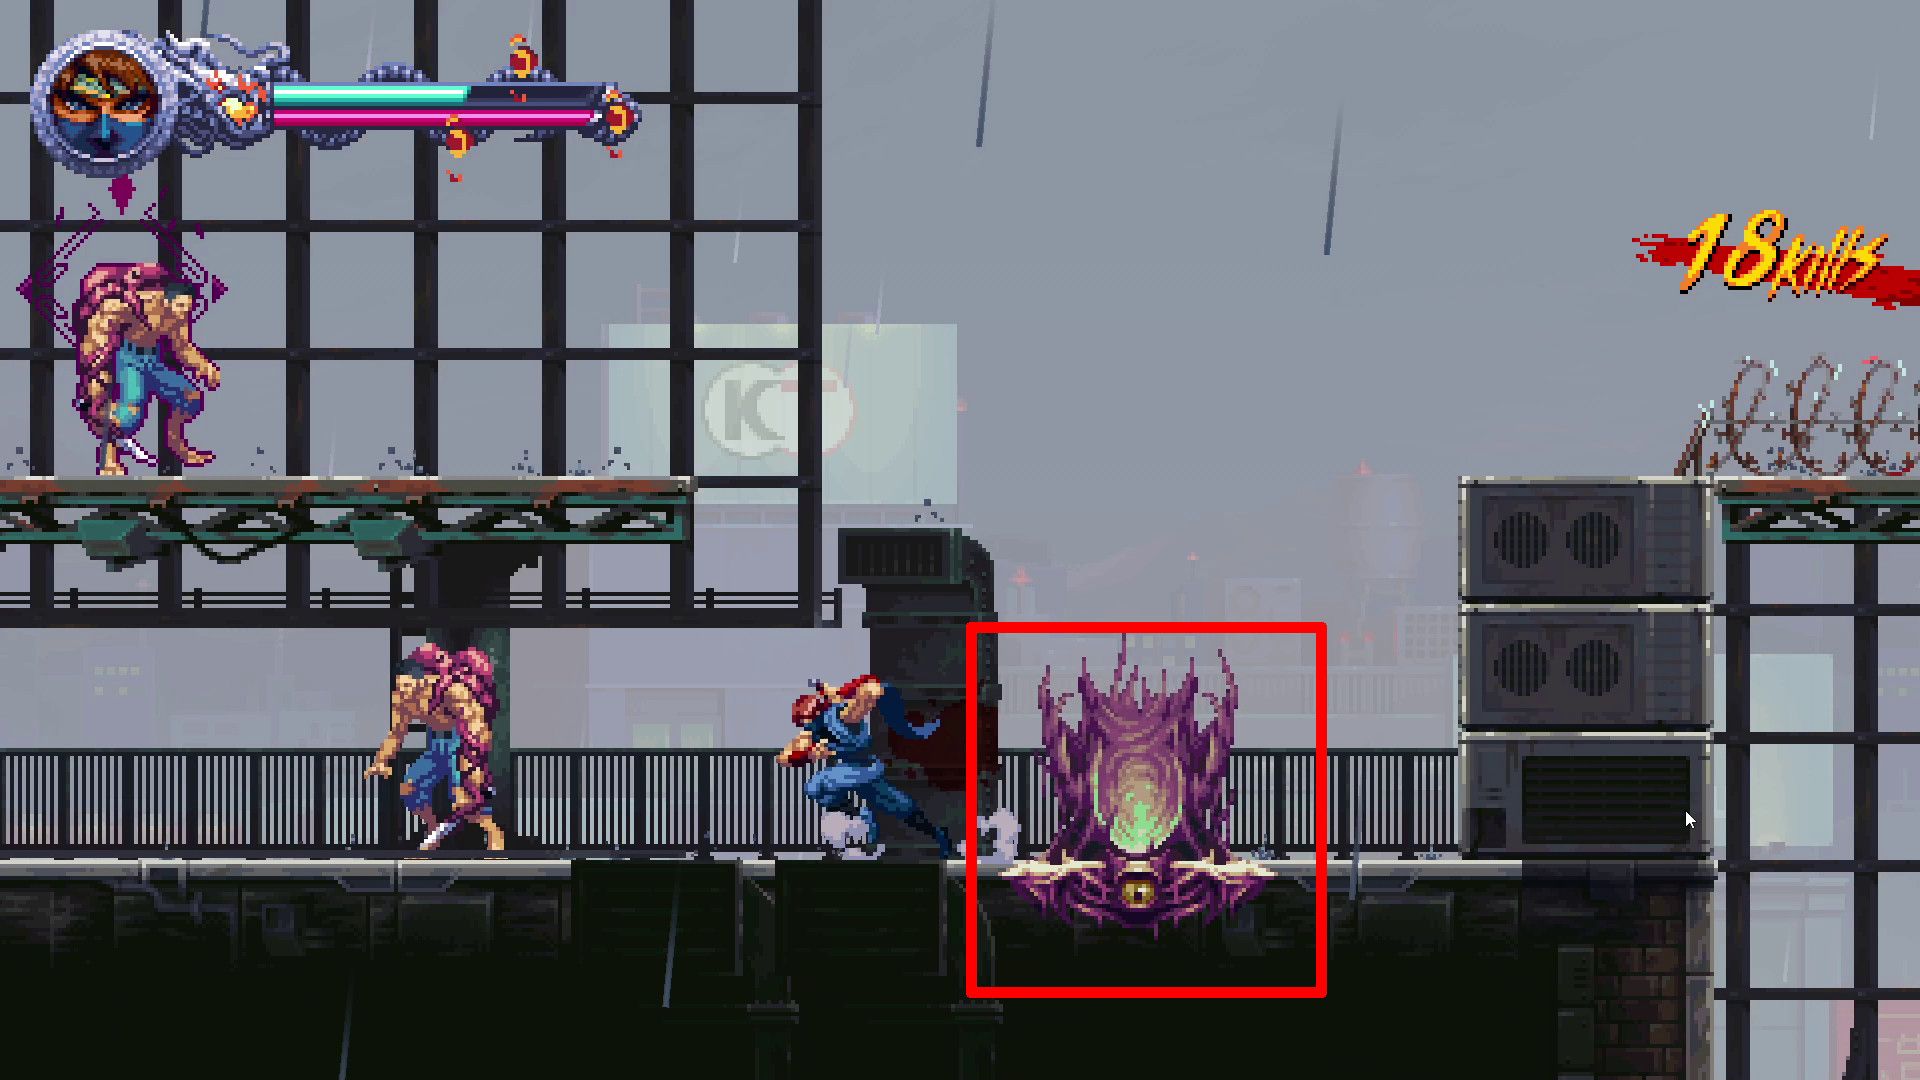
As you progress deeper into the game, you’ll encounter an action-packed segment where a massive truck pursues you. A checkpoint is located just beyond this perilous chase. Nearby the checkpoint, there’s a Demon Altar. To find the elusive Golden Scarab, players should enter this altar and then head upward and slightly to the left.
- Scroll
The Scroll can be located within the area known as the Demon Altar, where you’ll find Golden Scarab number 5. However, to get there, players need to move upward and slightly to the right.
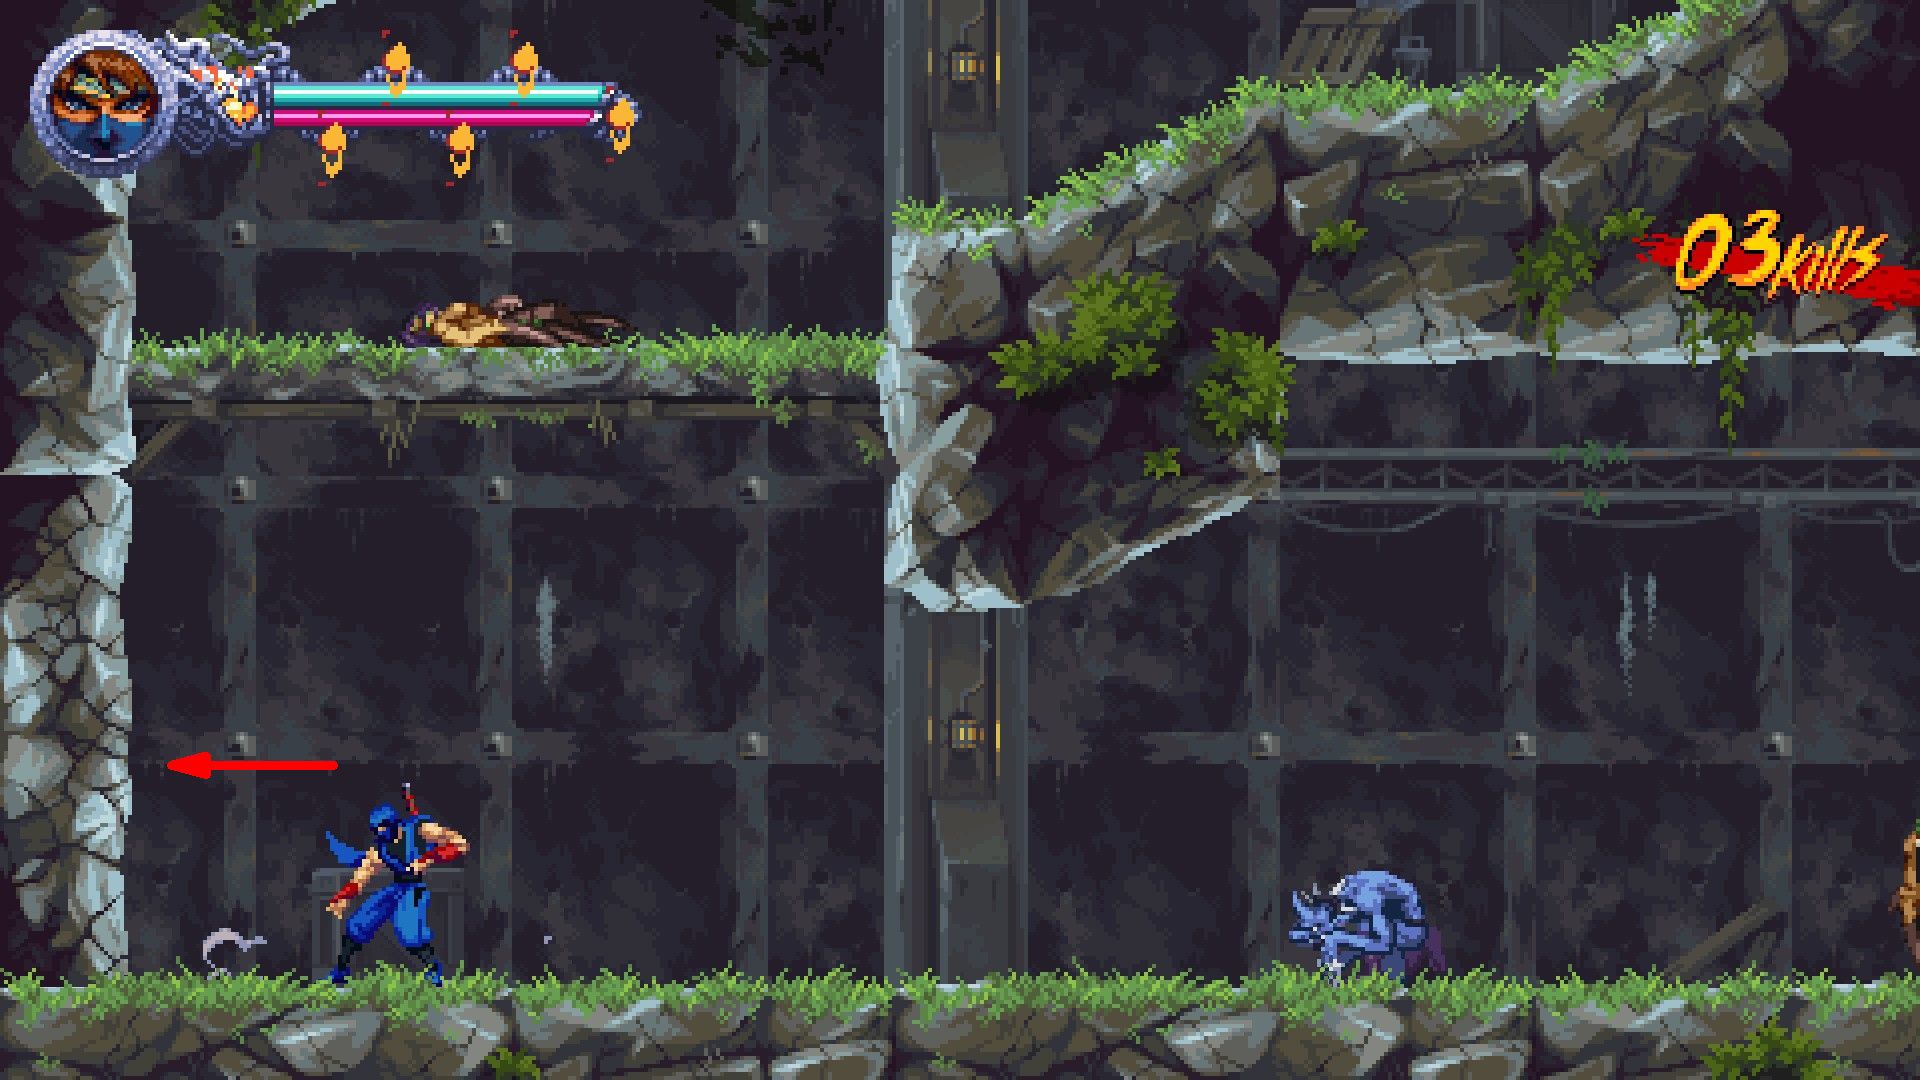
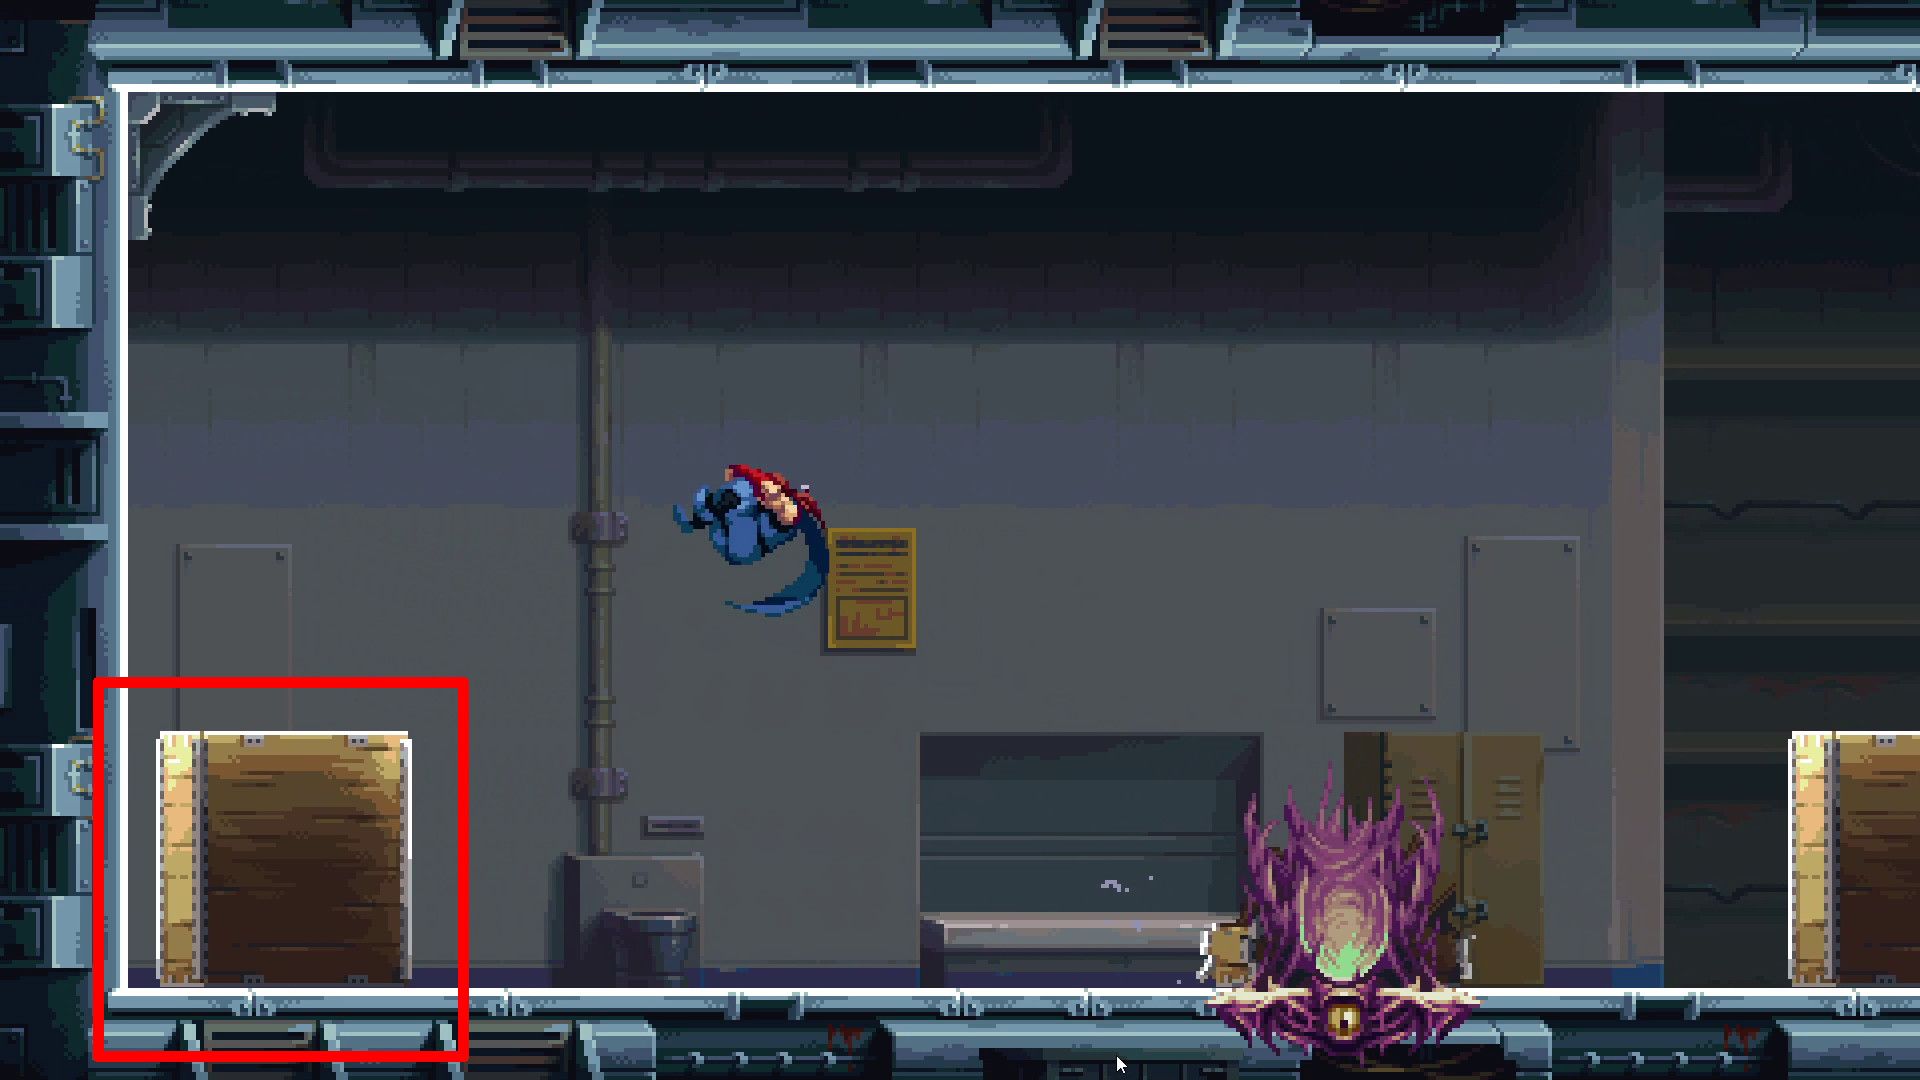
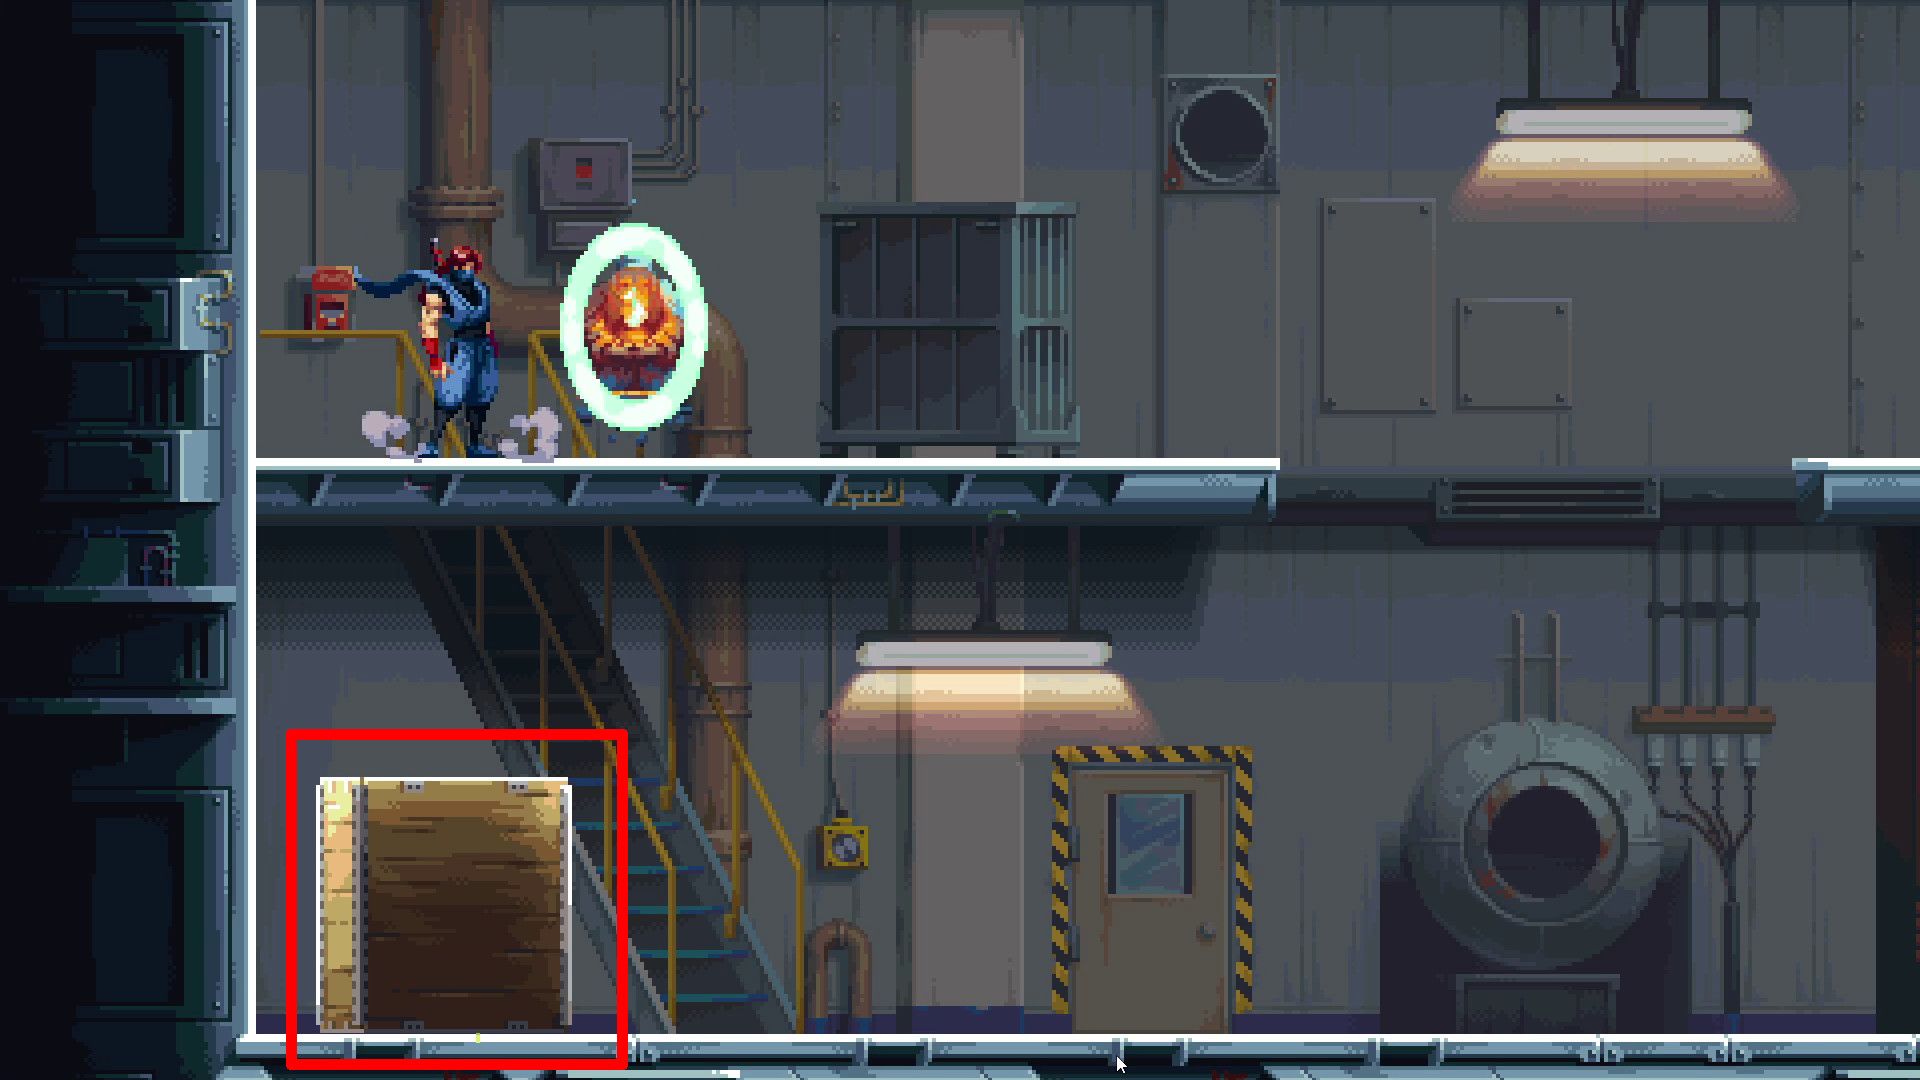
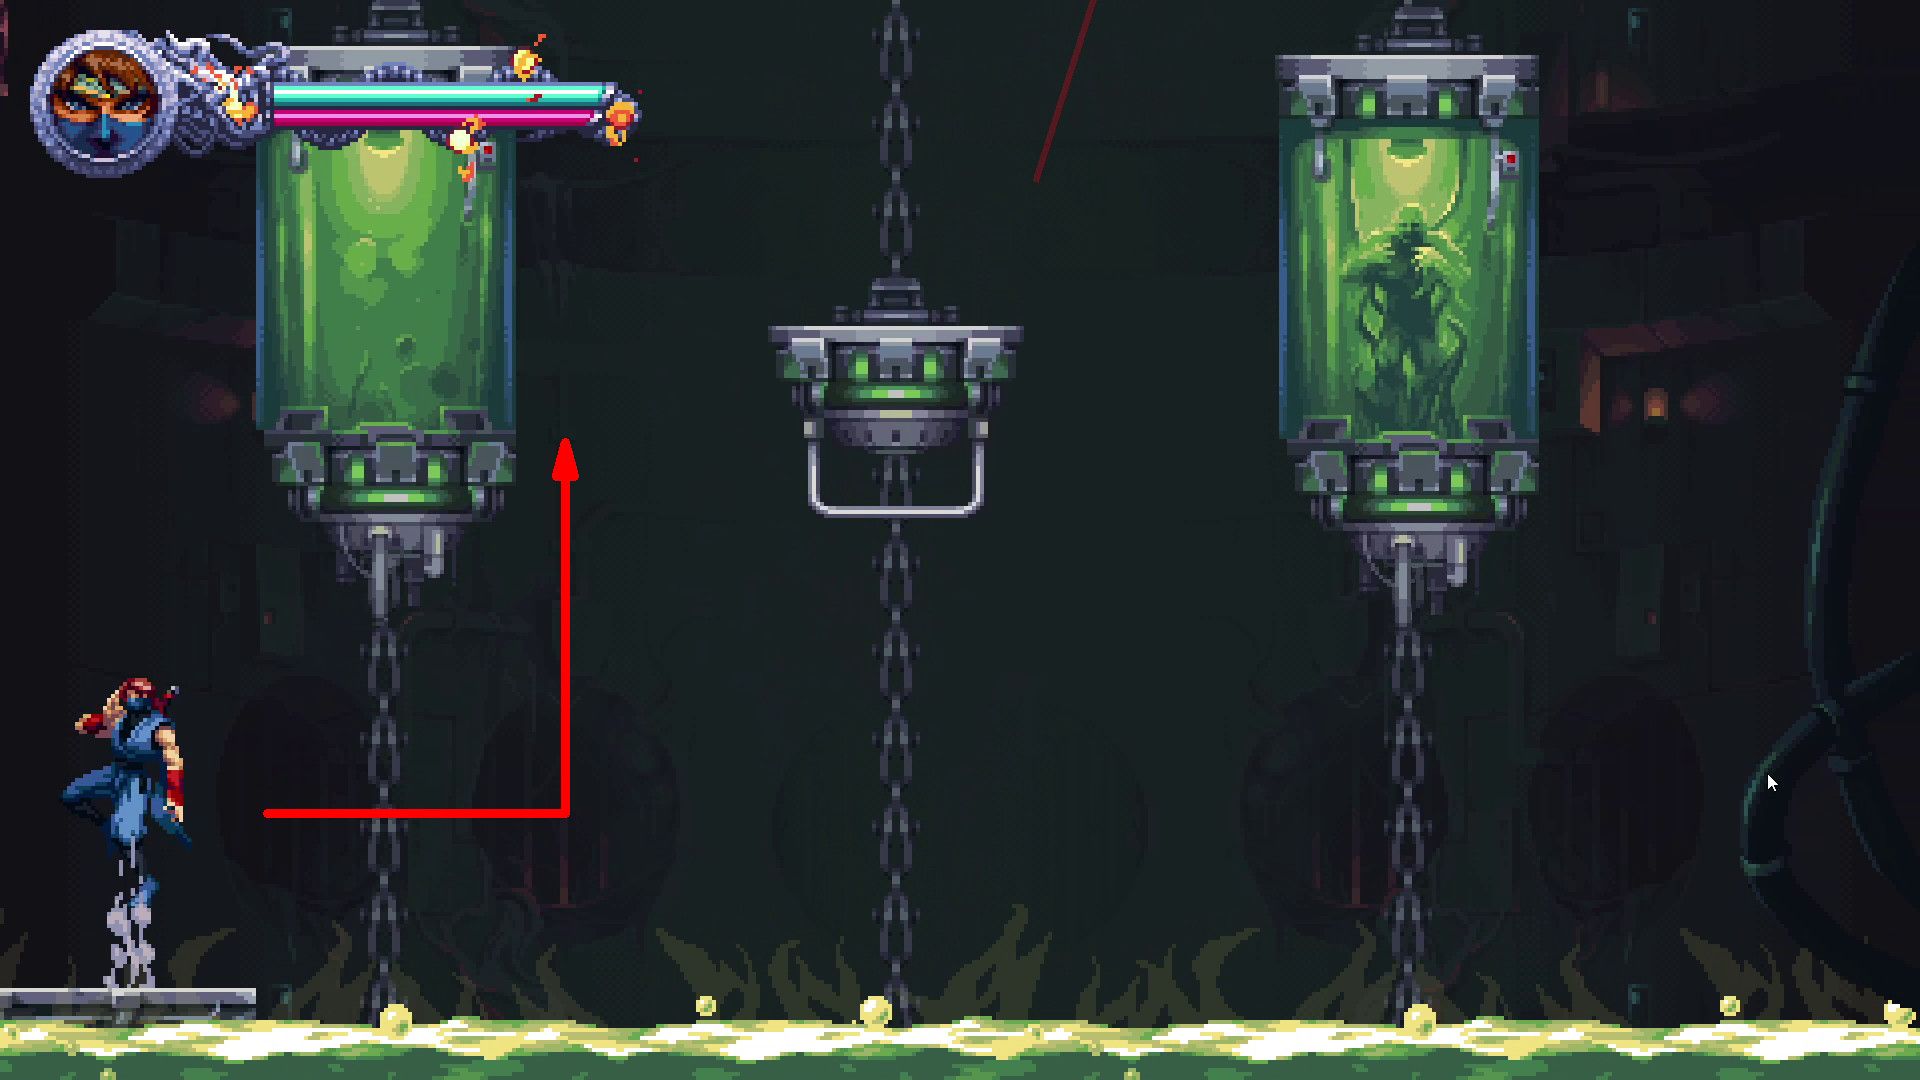
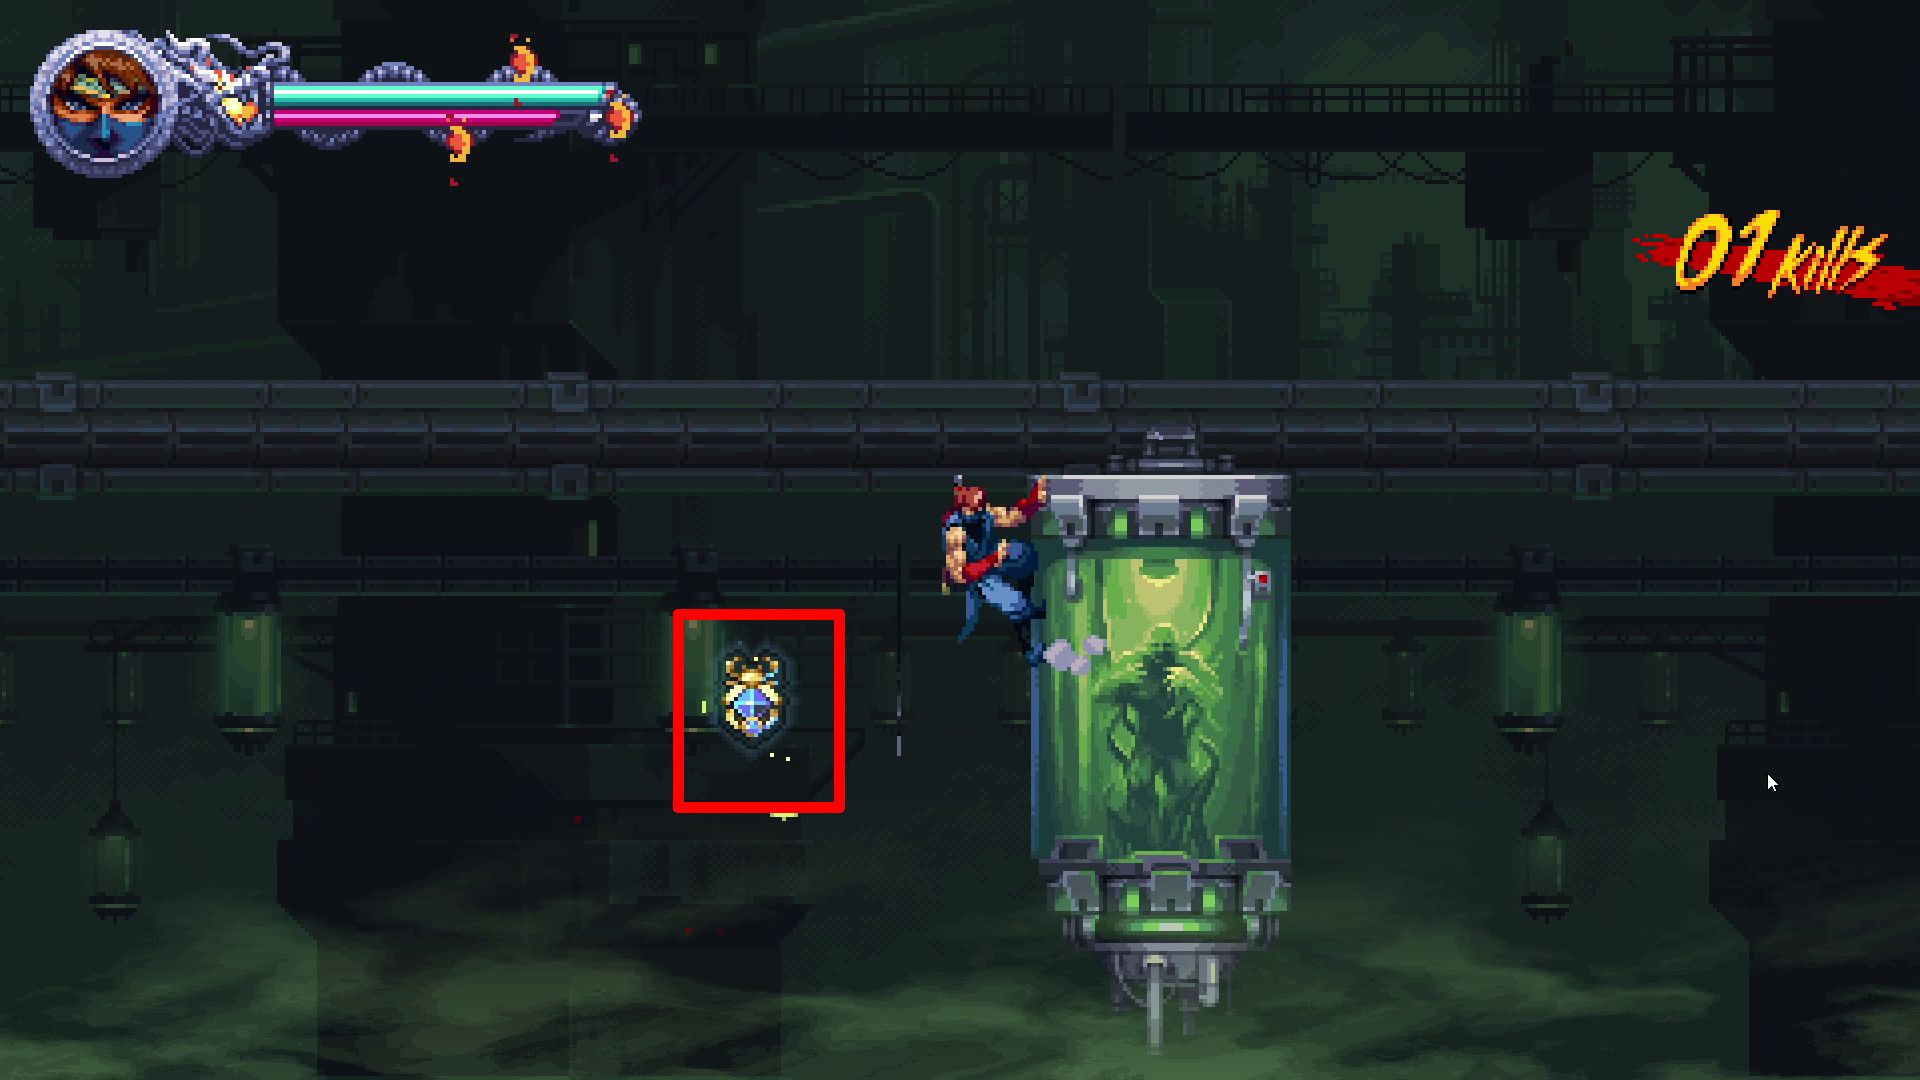
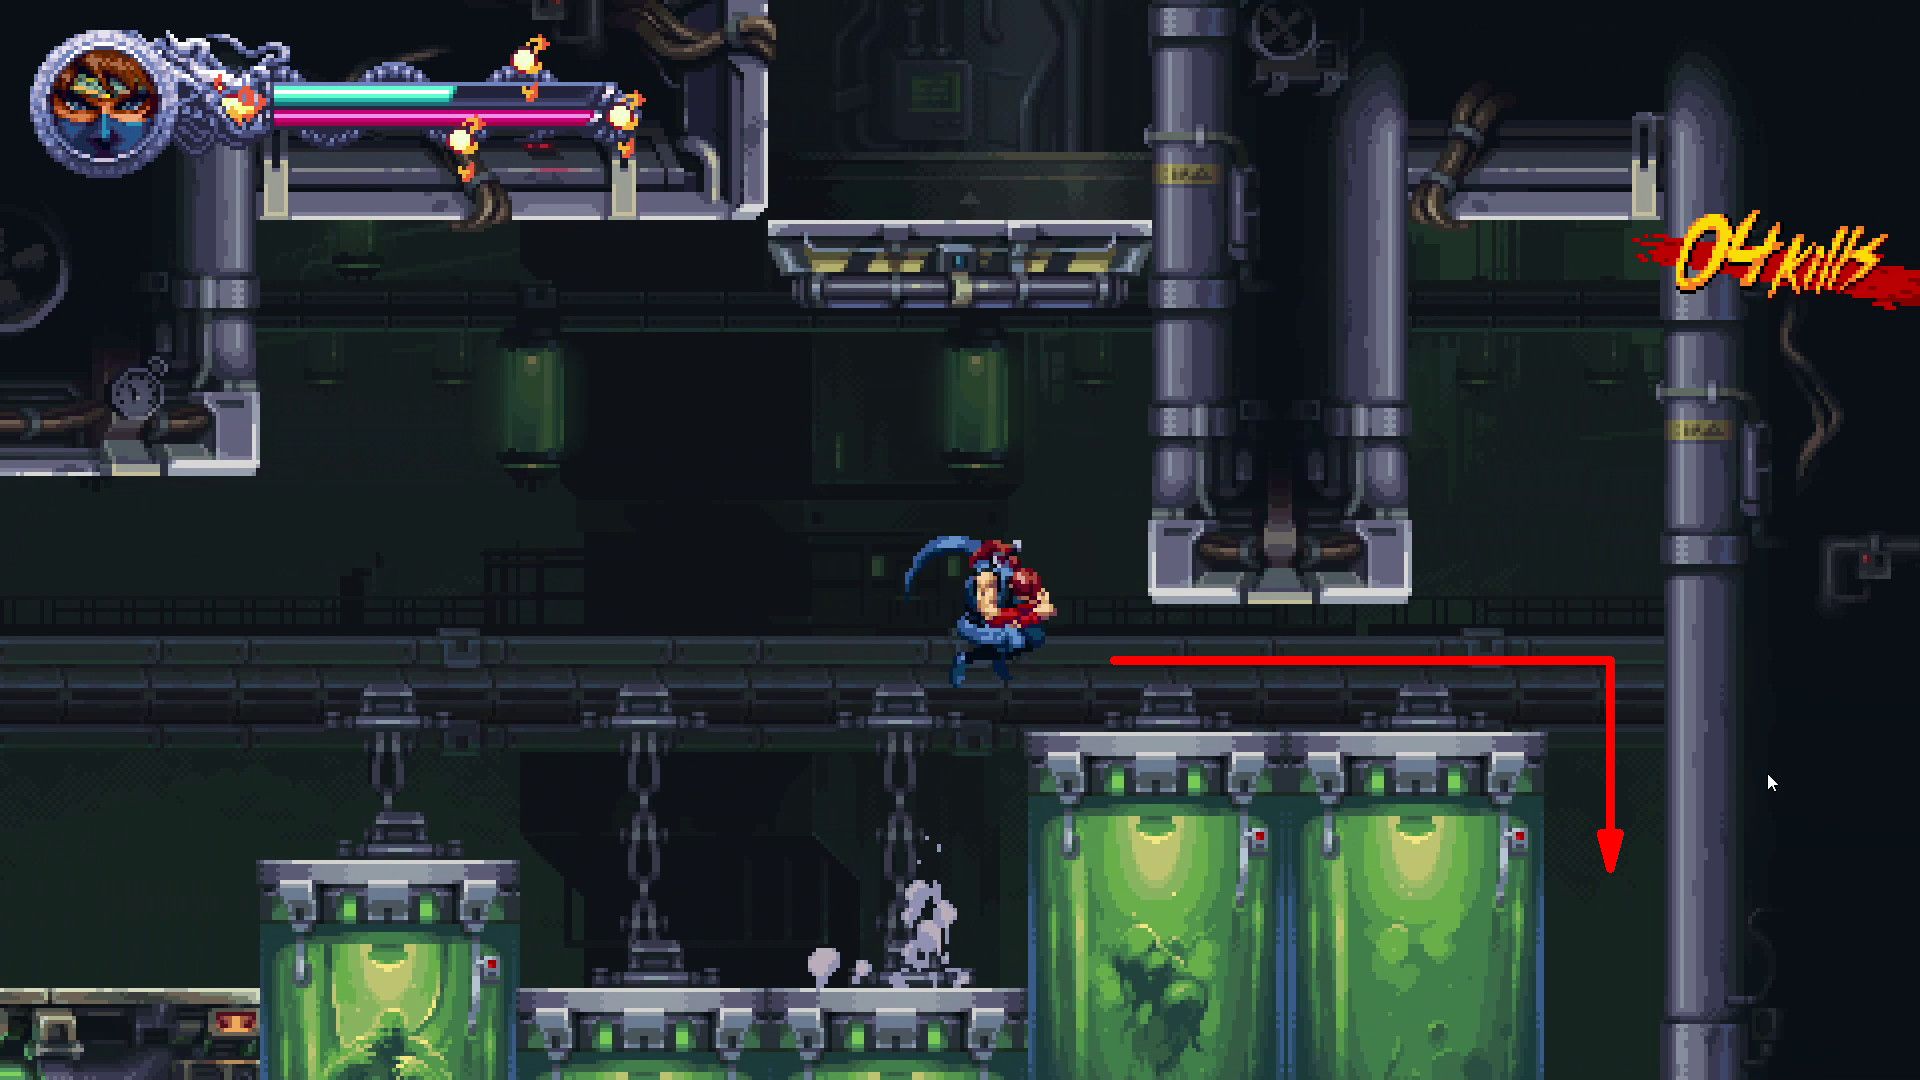
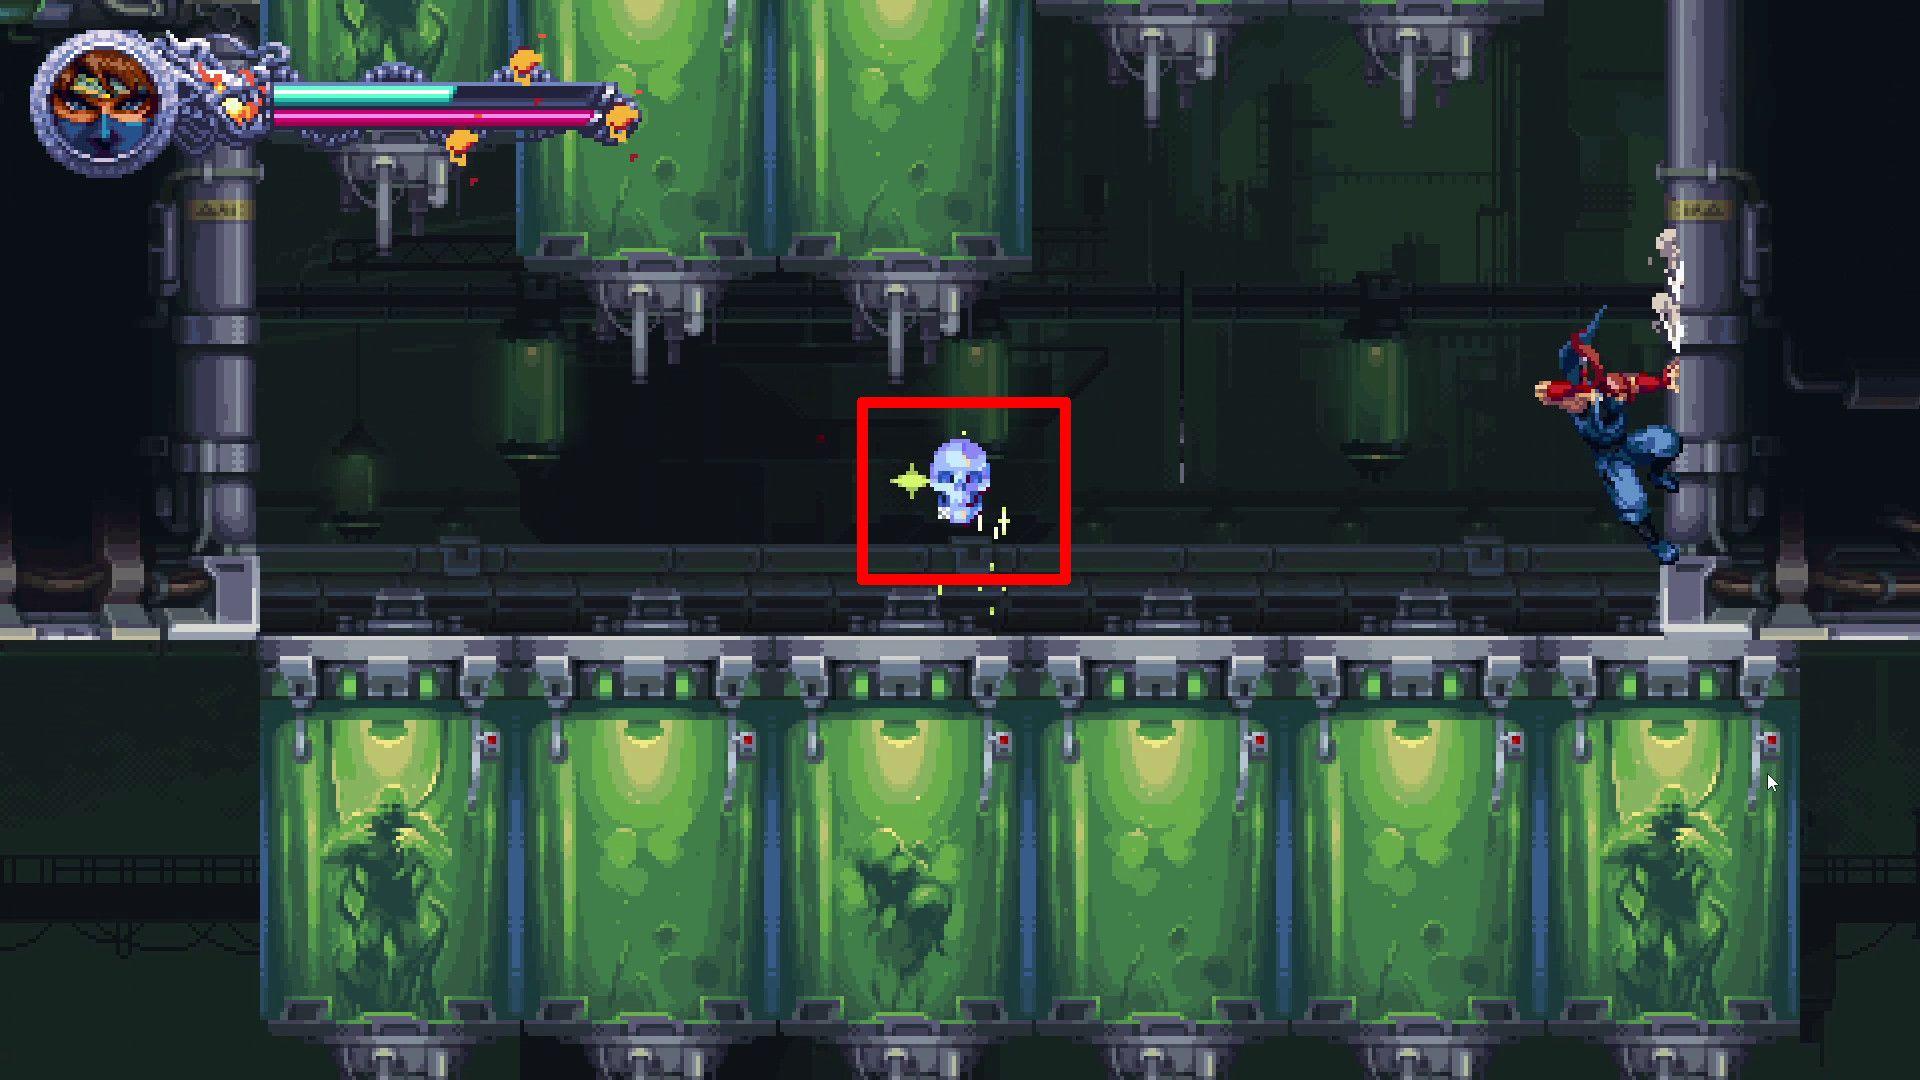
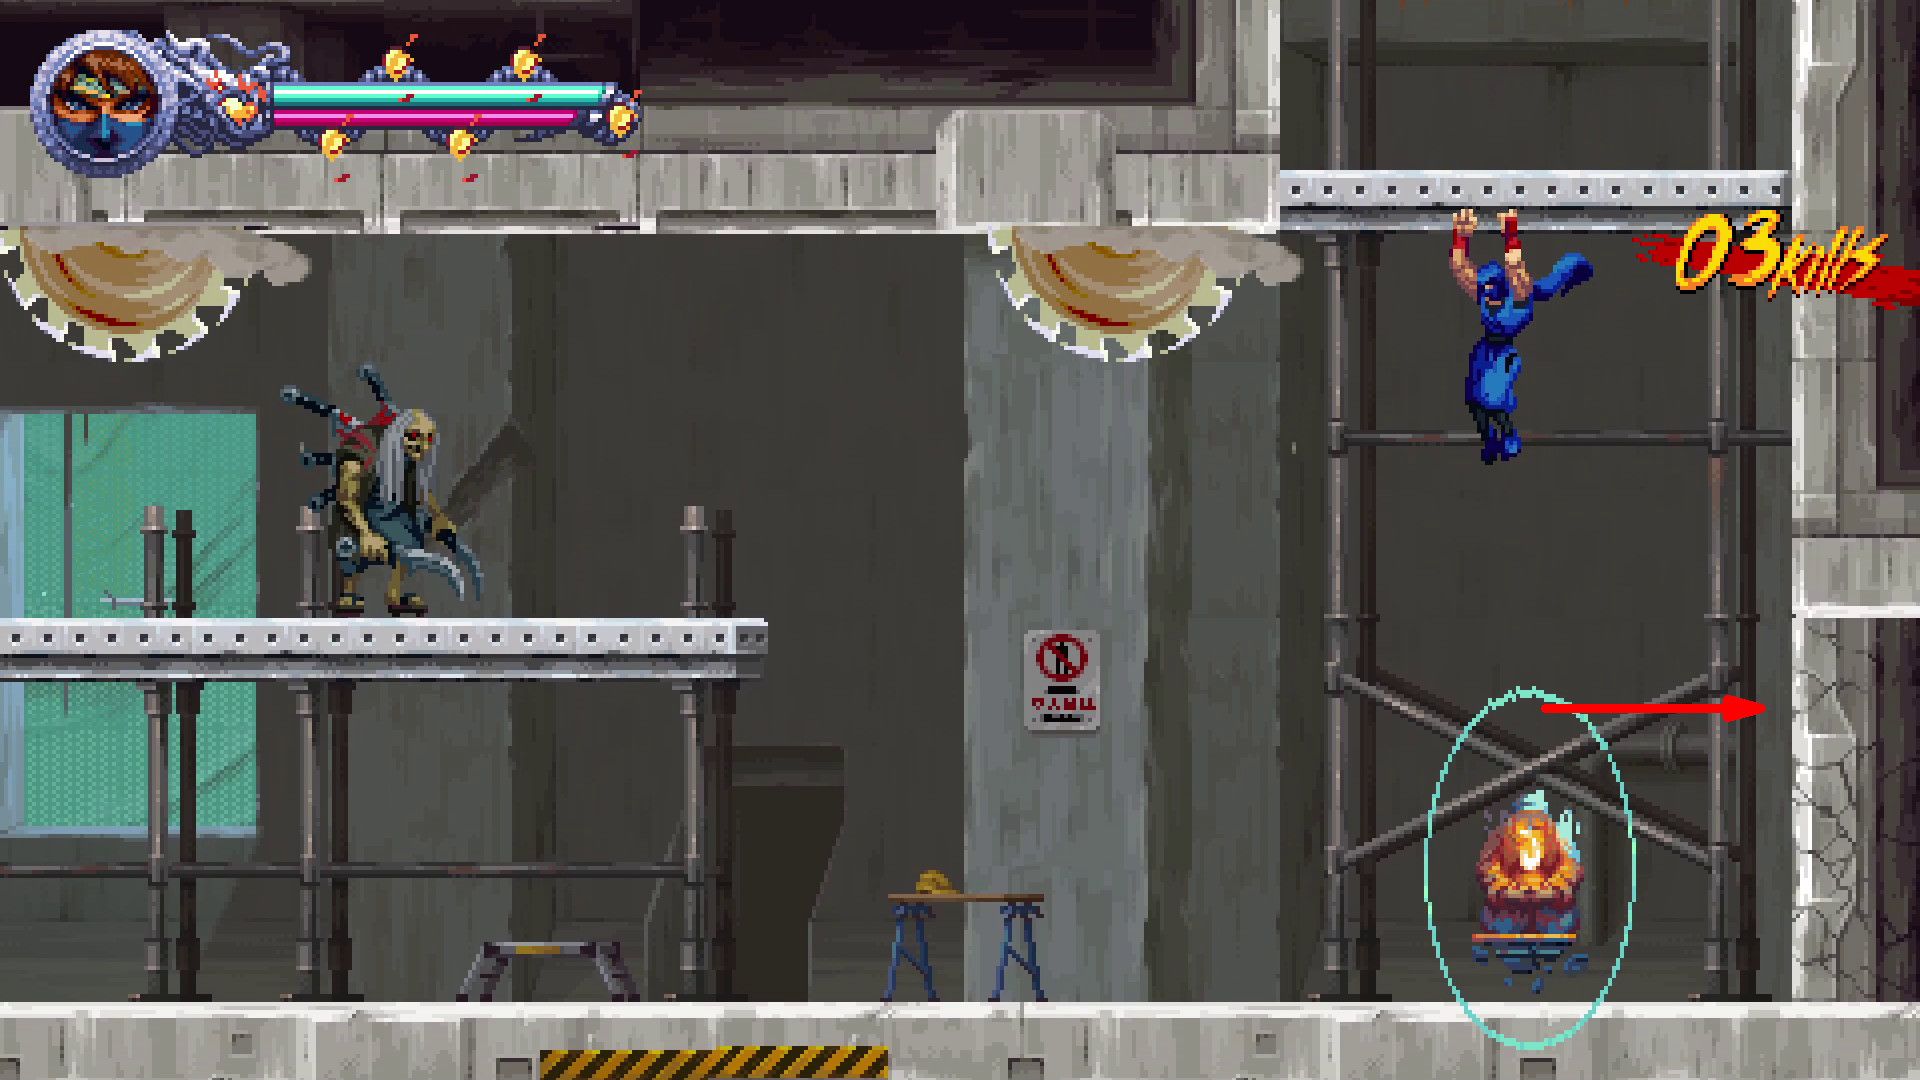
The Secret Lab (4-4)
- Golden Scarab #1
As a keen explorer, I’d guide you towards the corner of the initial chamber on the right side, pausing short of scaling the stairs that mark the room’s egress. The resplendent Golden Scarab adorns the wall, positioned high up and visible at the edge of your screen.
- Scroll
Following the acquisition of the initial Golden Scarab, players board an elevator, engaging foes as they climb higher. Over time, this lift will come to a halt, at which point players must vanquish the enemy using a flamethrower that’s stationed on the left side before moving through the opening it had blocked, thereby gaining access to a room containing a scroll.
Be certain to go through the left-side opening before you defeat all the enemies in the elevator, since once the final enemy is vanquished, the elevator may drop and render that opening impassable.
- Crystal Skull #1
When the elevator descends, swiftly maneuver yourself towards the gap to your left near the checkpoint, which leads into a compact space housing the Crystal Skull.
- Crystal Skull #2

Proceed with your task, aiming to get to an area where you’ll encounter a row of shifting green crates descending below. The Crystal Skull can be found in the upper-left part of this section.
- Golden Scarabs #2, 3 & 4
As players progress deeper into the stage, they will navigate a particular area by clinging to a moving, green crate that travels to the left. In this segment, they’ll find a Golden Scarab hidden away. Players can interact with it by gripping onto the left side of the crate.
- Crystal Skull #3
Following a journey on the left via a green platform, players will ascend multiple green platforms and eventually proceed towards the right. Upon reaching the extreme right corner of this zone, they must navigate through a narrow opening and descend into a region where the Crystal Skull resides.
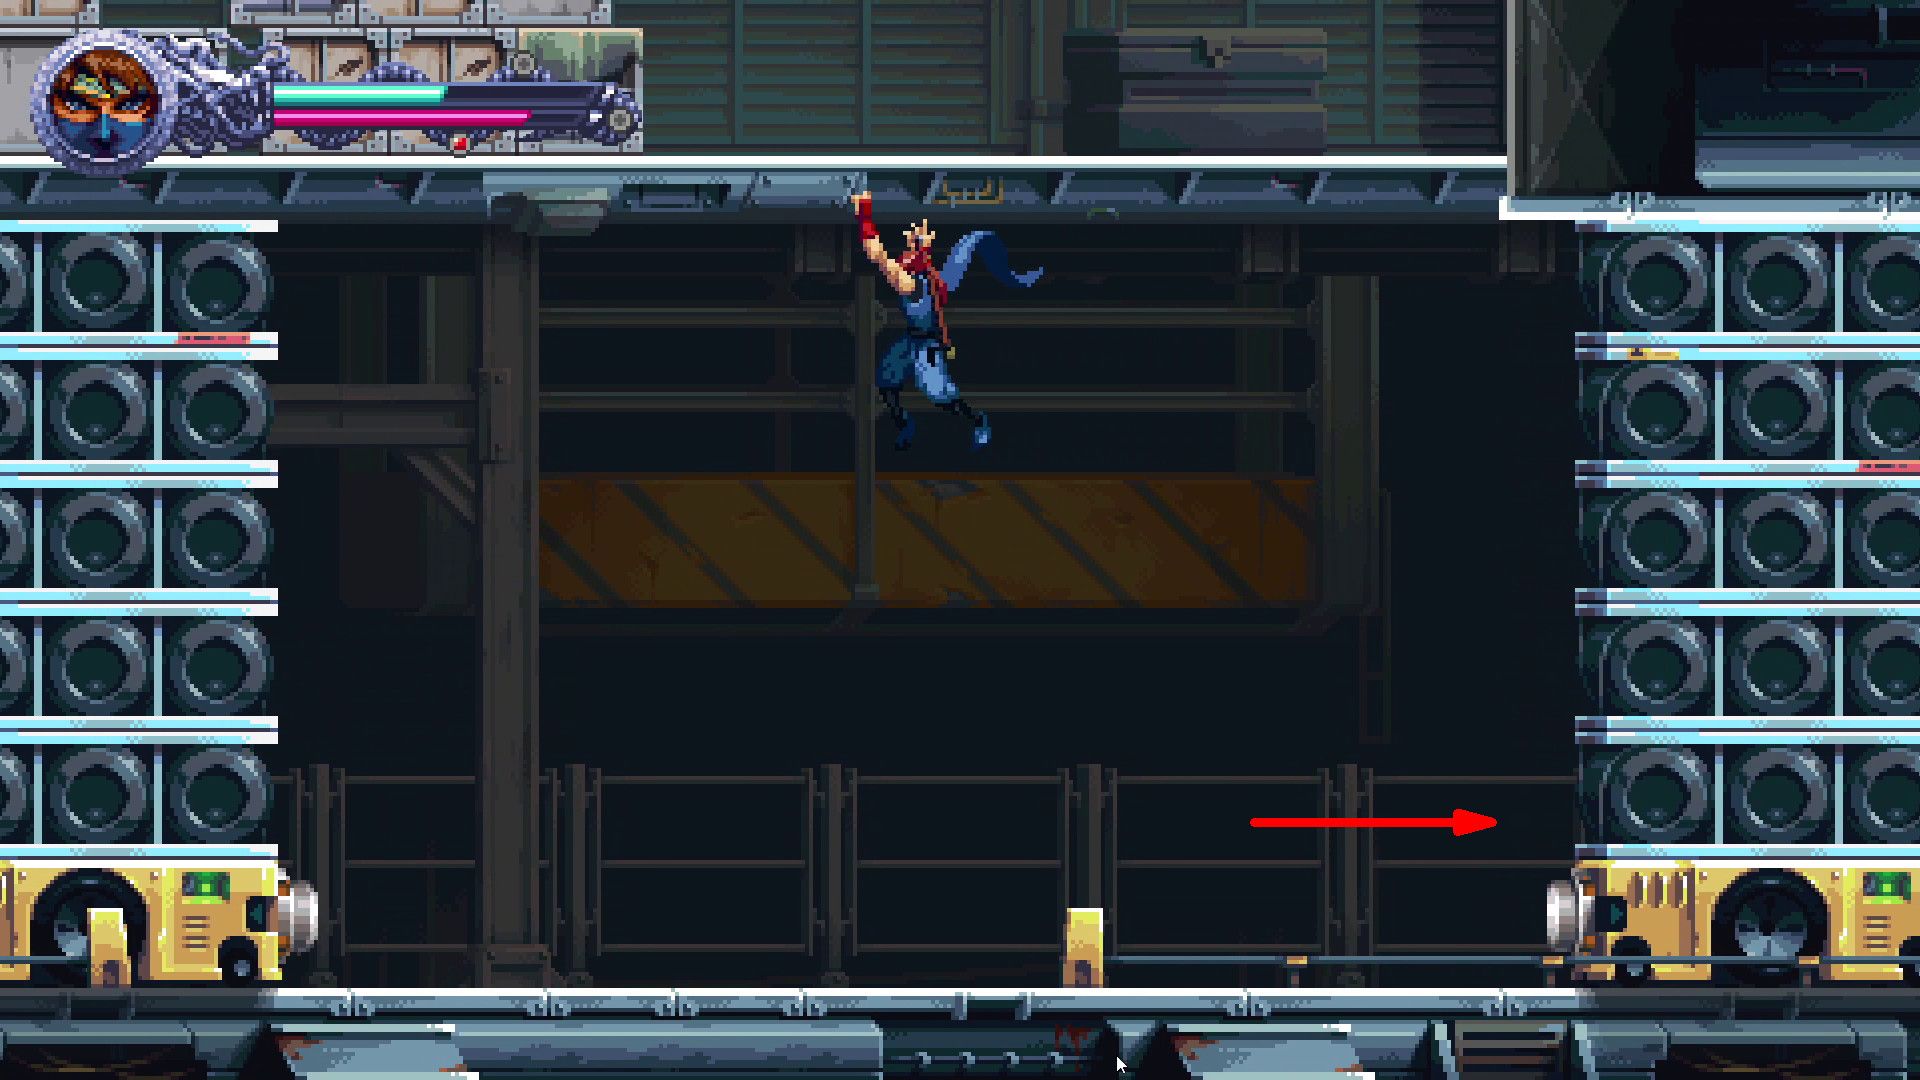
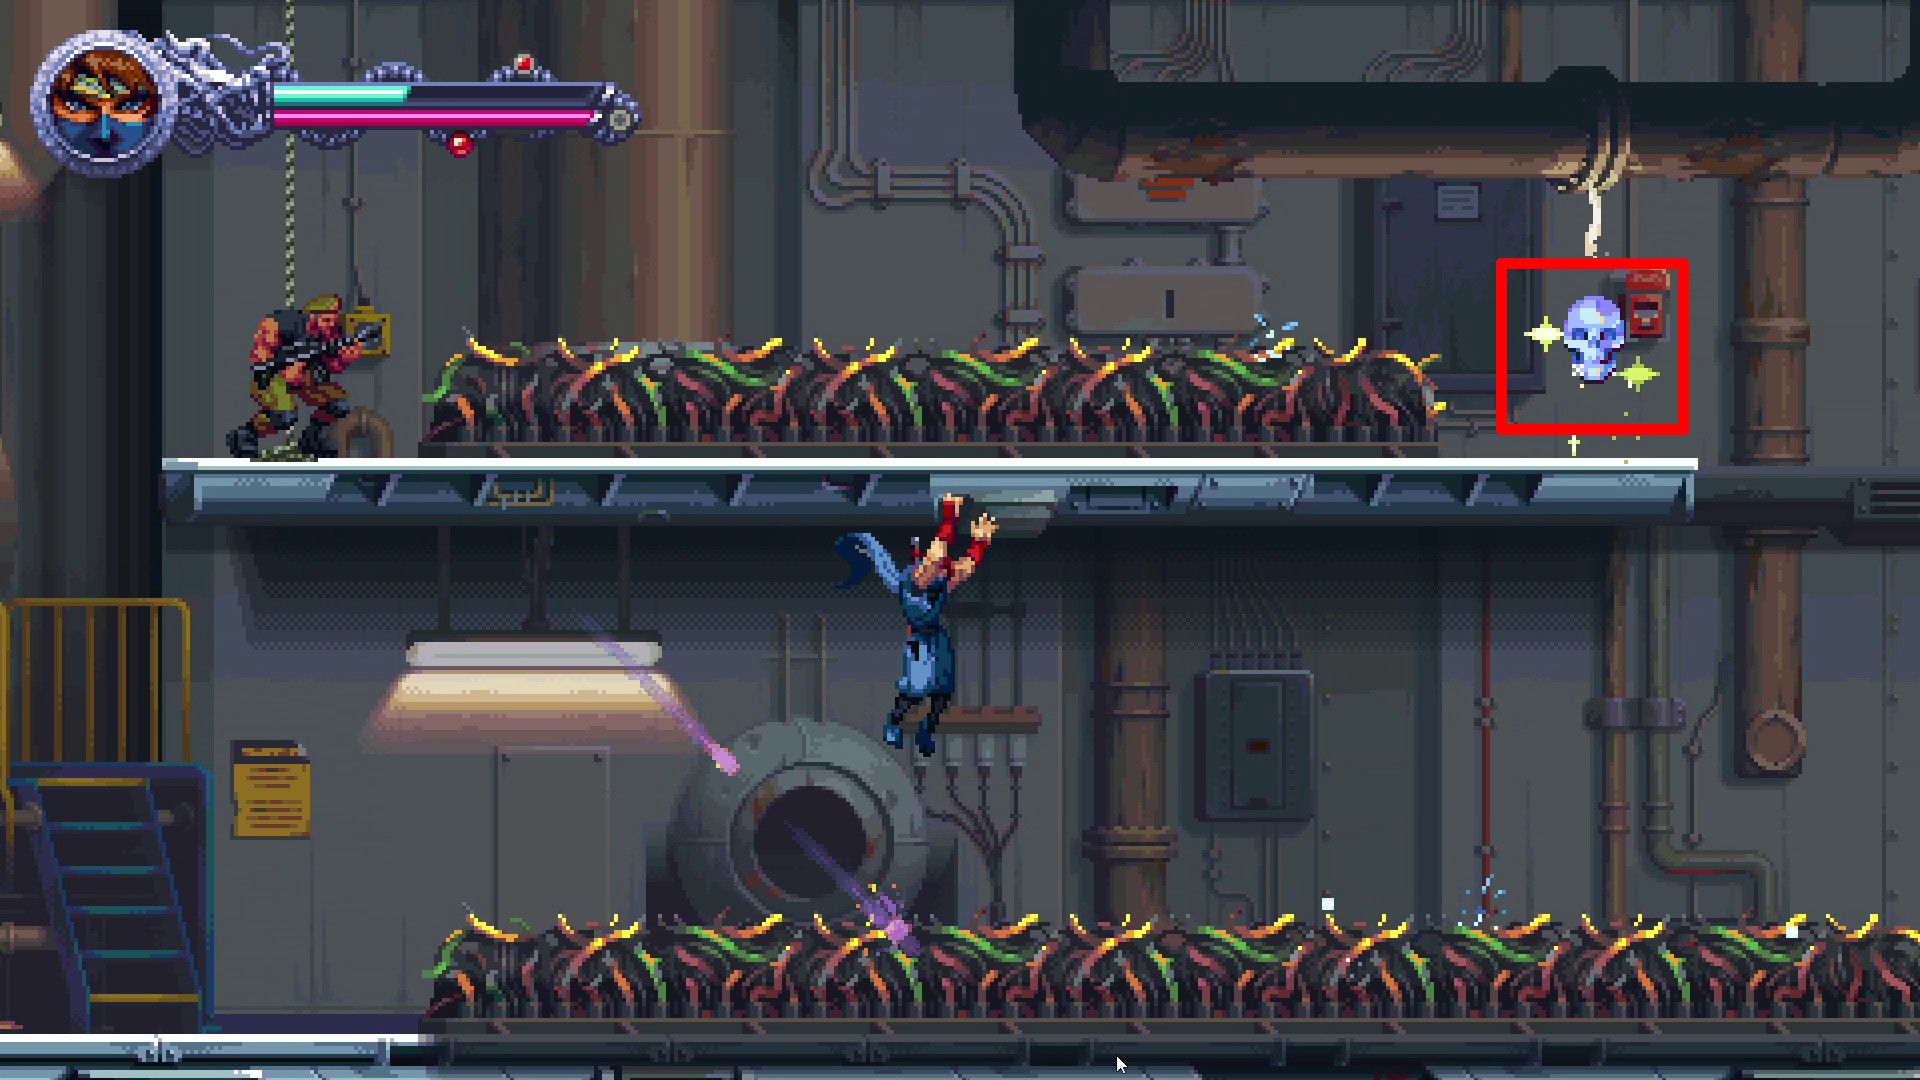
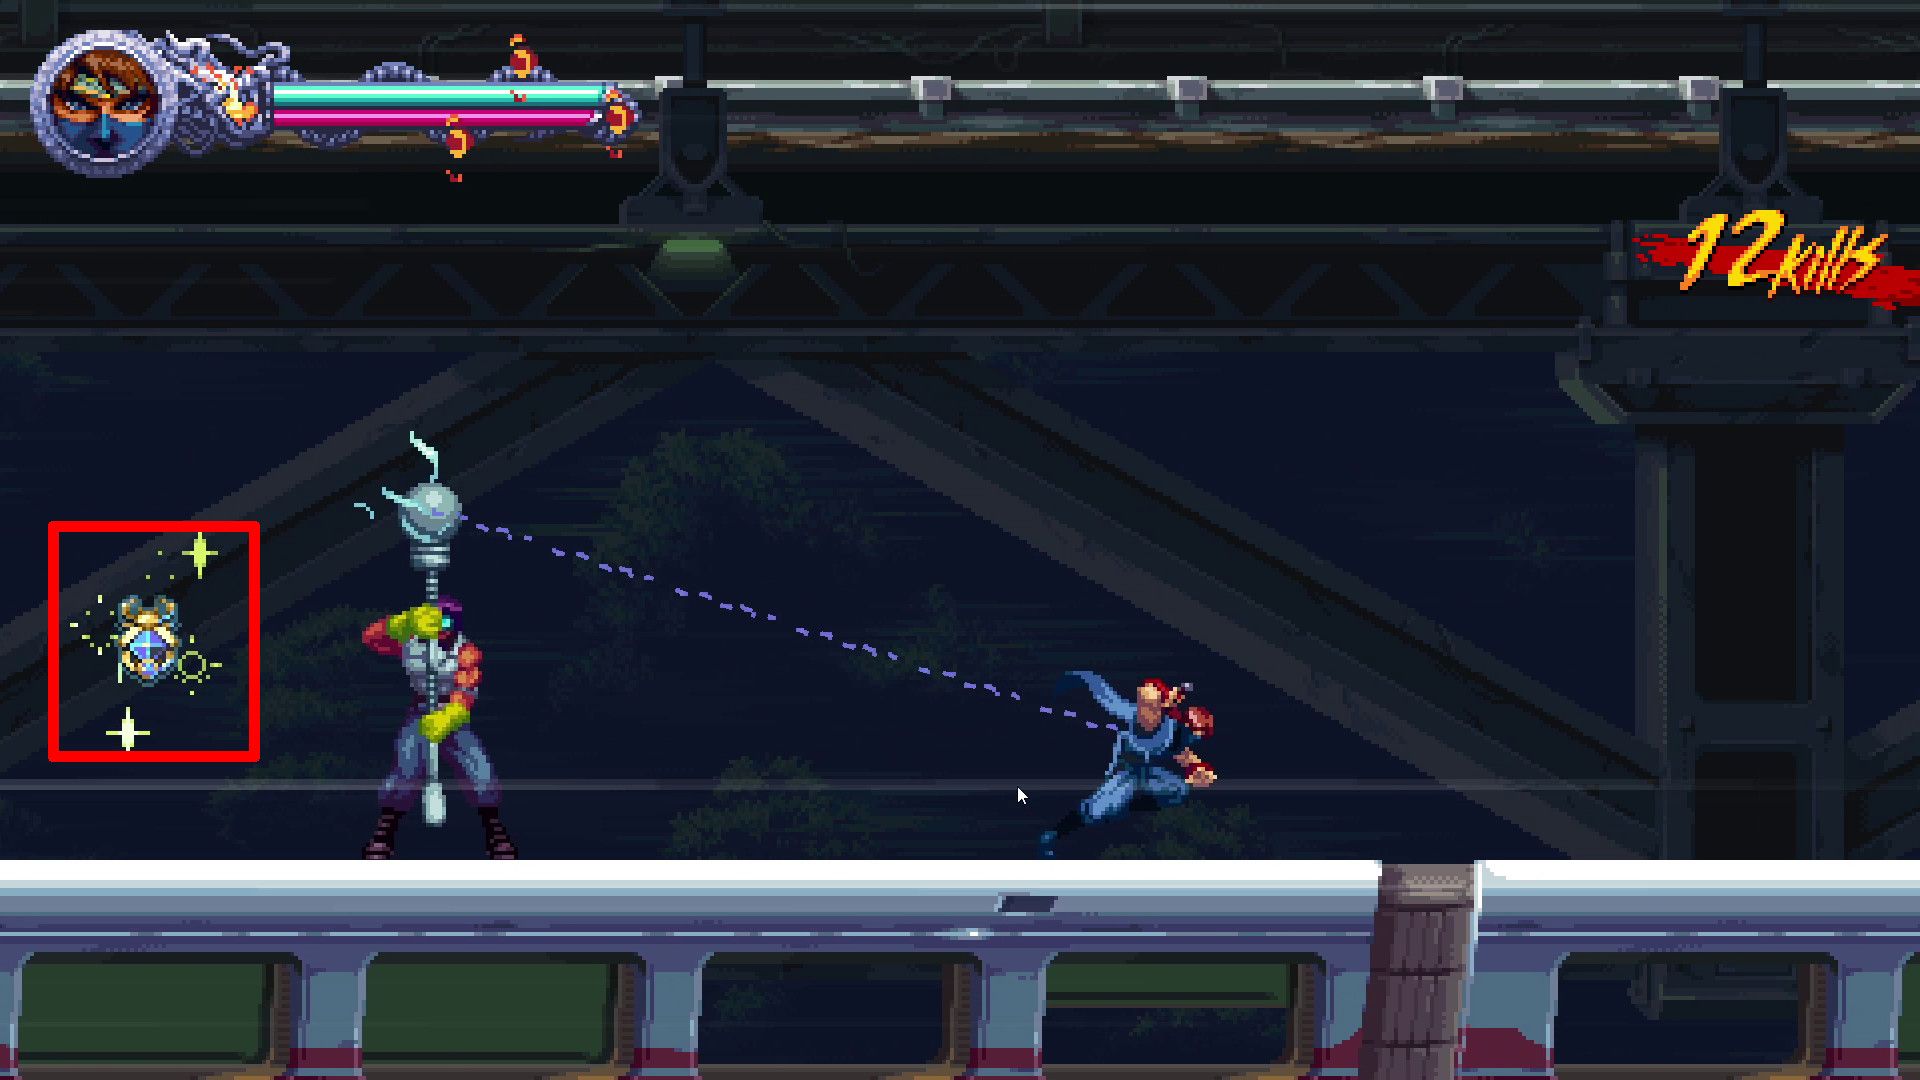
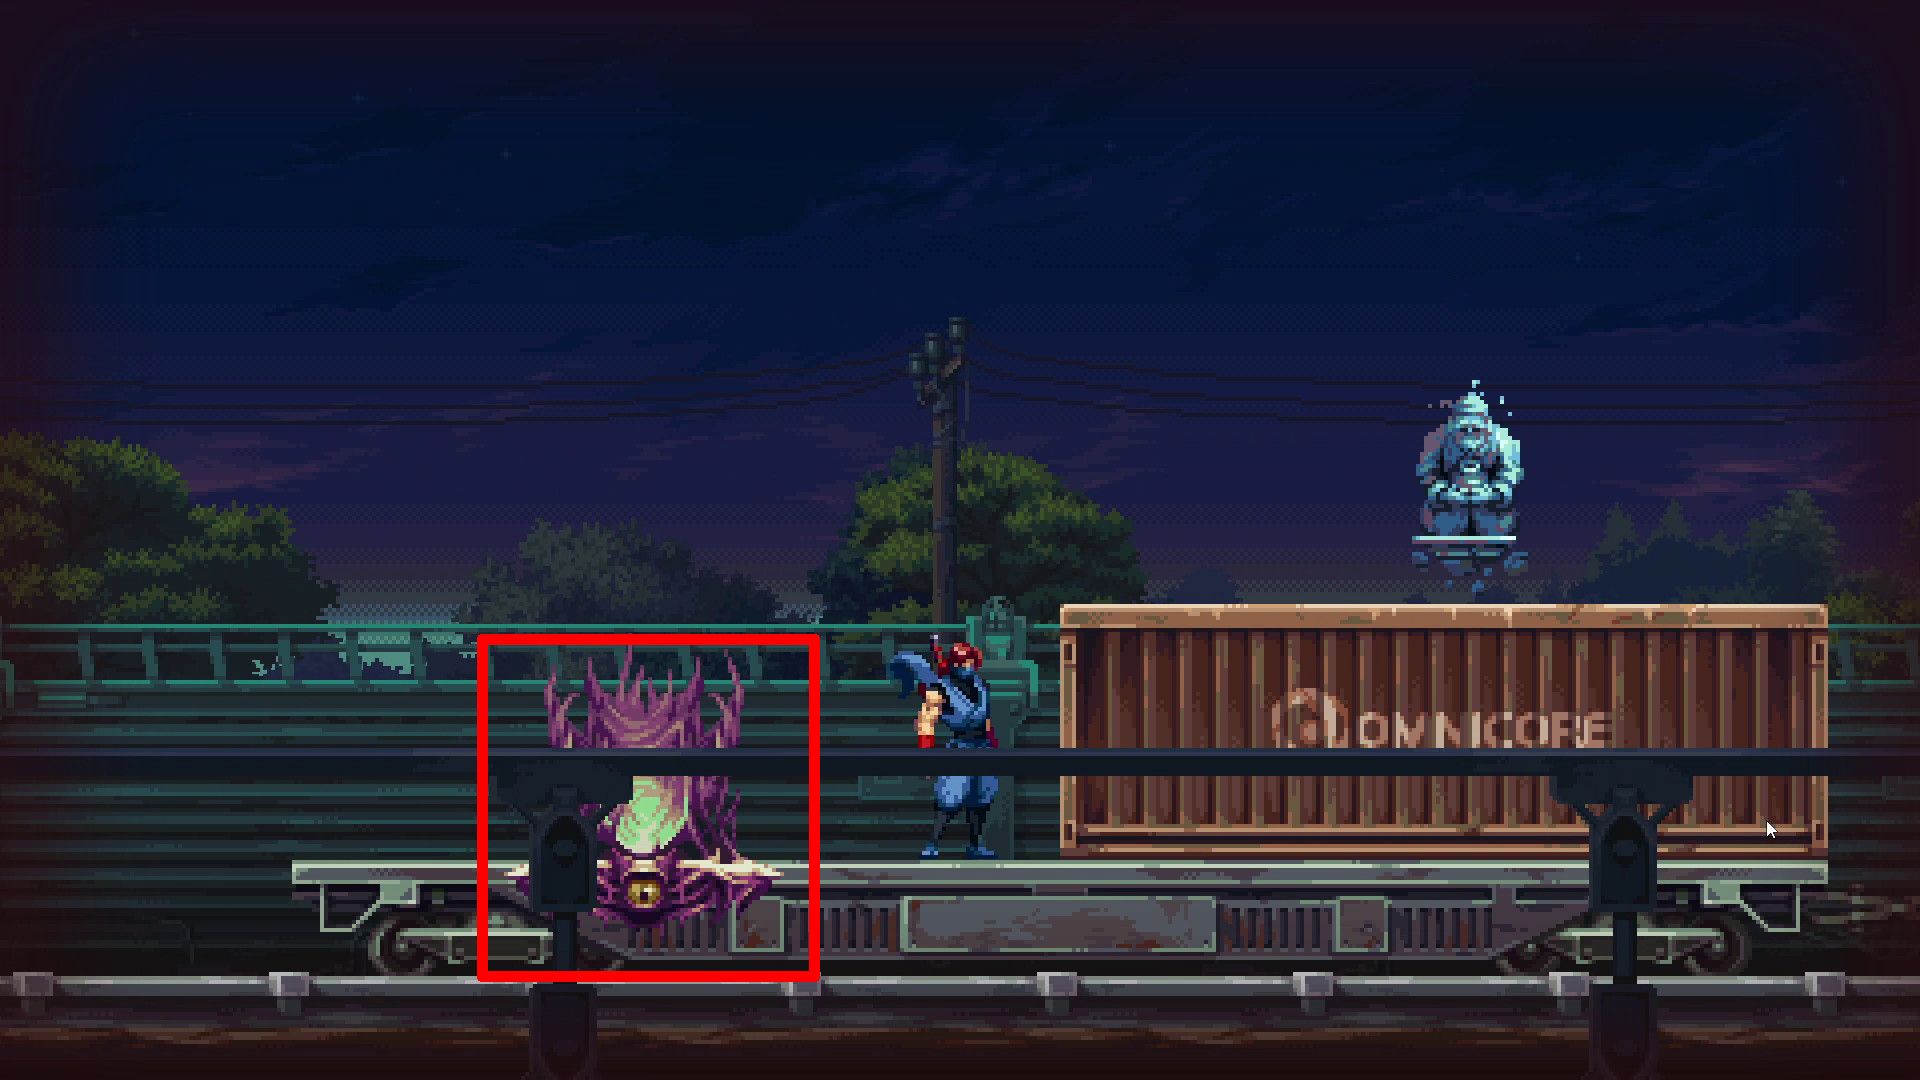
Super Express to Hell (4-5)
- Crystal Skull #1
Prior to triggering any checkpoints, players should ascend a tower made of containers. After reaching the right edge of these containers, they should deliberately jump off (or fall), bypassing the tiny platform. This will lead them to the first Crystal Skull located to the left.
- Golden Scarabs #1, 2 & 3
Make your way towards the initial part that houses a moving train. Shortly following the engagement of the second control point within this area, gamers will spot a Scarab appearing prominently on their screens. They may then employ Guillotine power-ups against adversaries, enabling them to reach this Scarab.
- Golden Scarabs #4, 5 & 6
In this part of the journey, players will leap onto the roof of a high-speed train (think of it as a bullet train) and trigger a checkpoint. To the left of that checkpoint, you’ll find a Scarab.
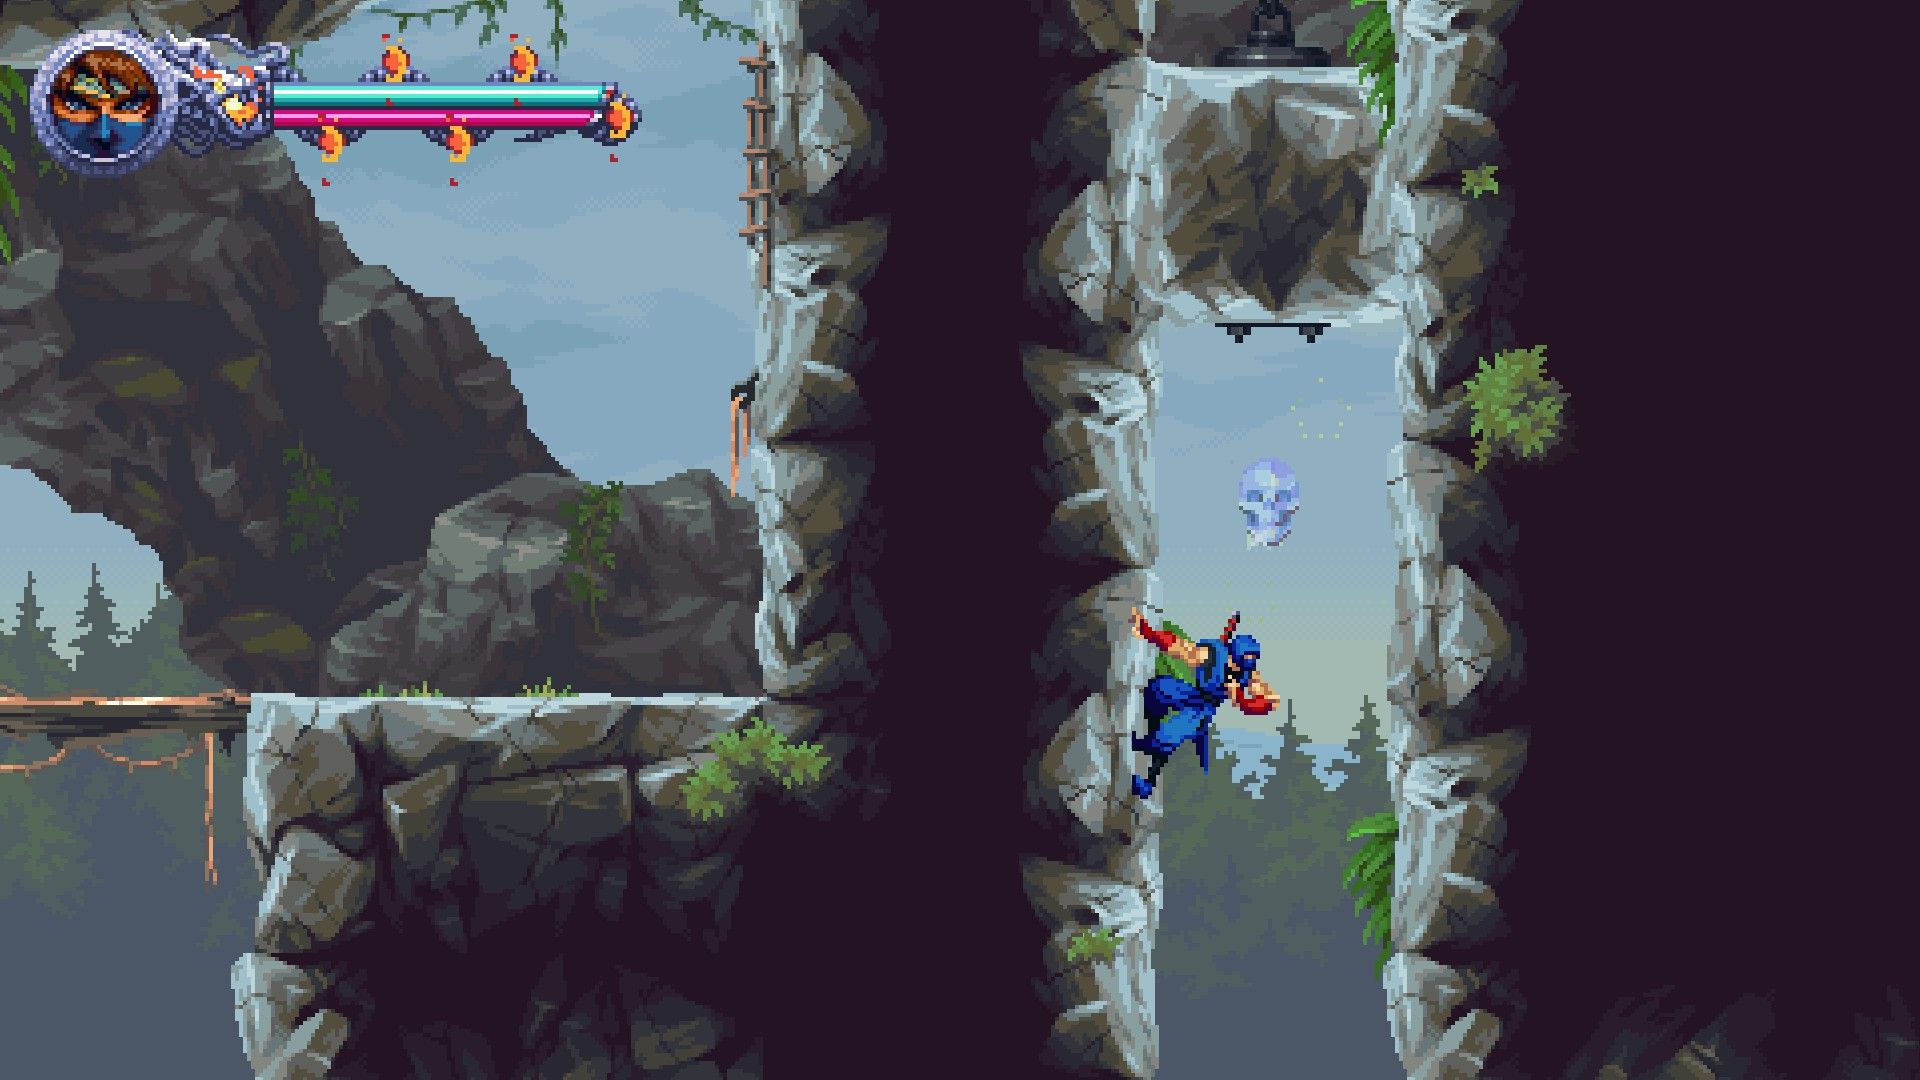
- Crystal Skull #2
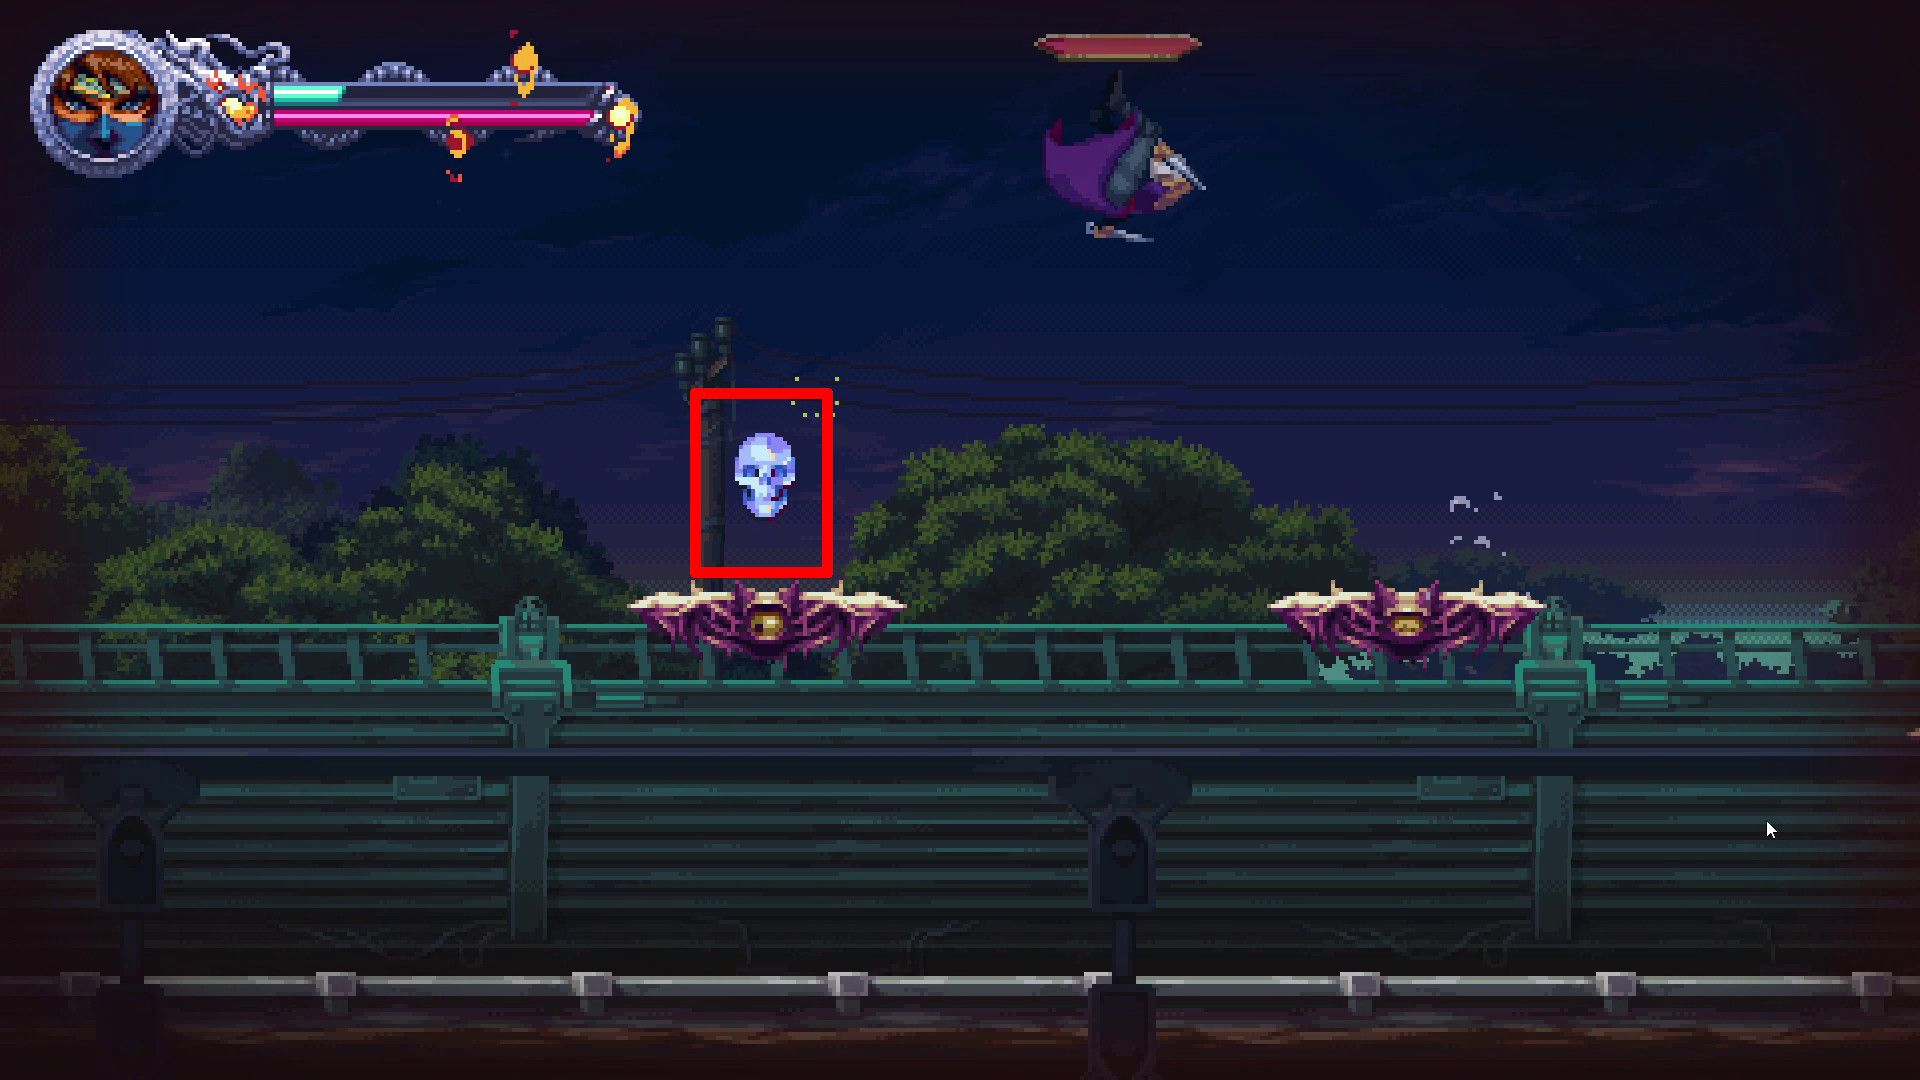
Following their journey on the high-speed bullet train, players will transition to another train, a peculiar one adorned with a Demonic Altar. Venturing into this altar uncovers a path that ultimately ends at a Crystal Skull.
- Golden Scarab #7, 8 & 9
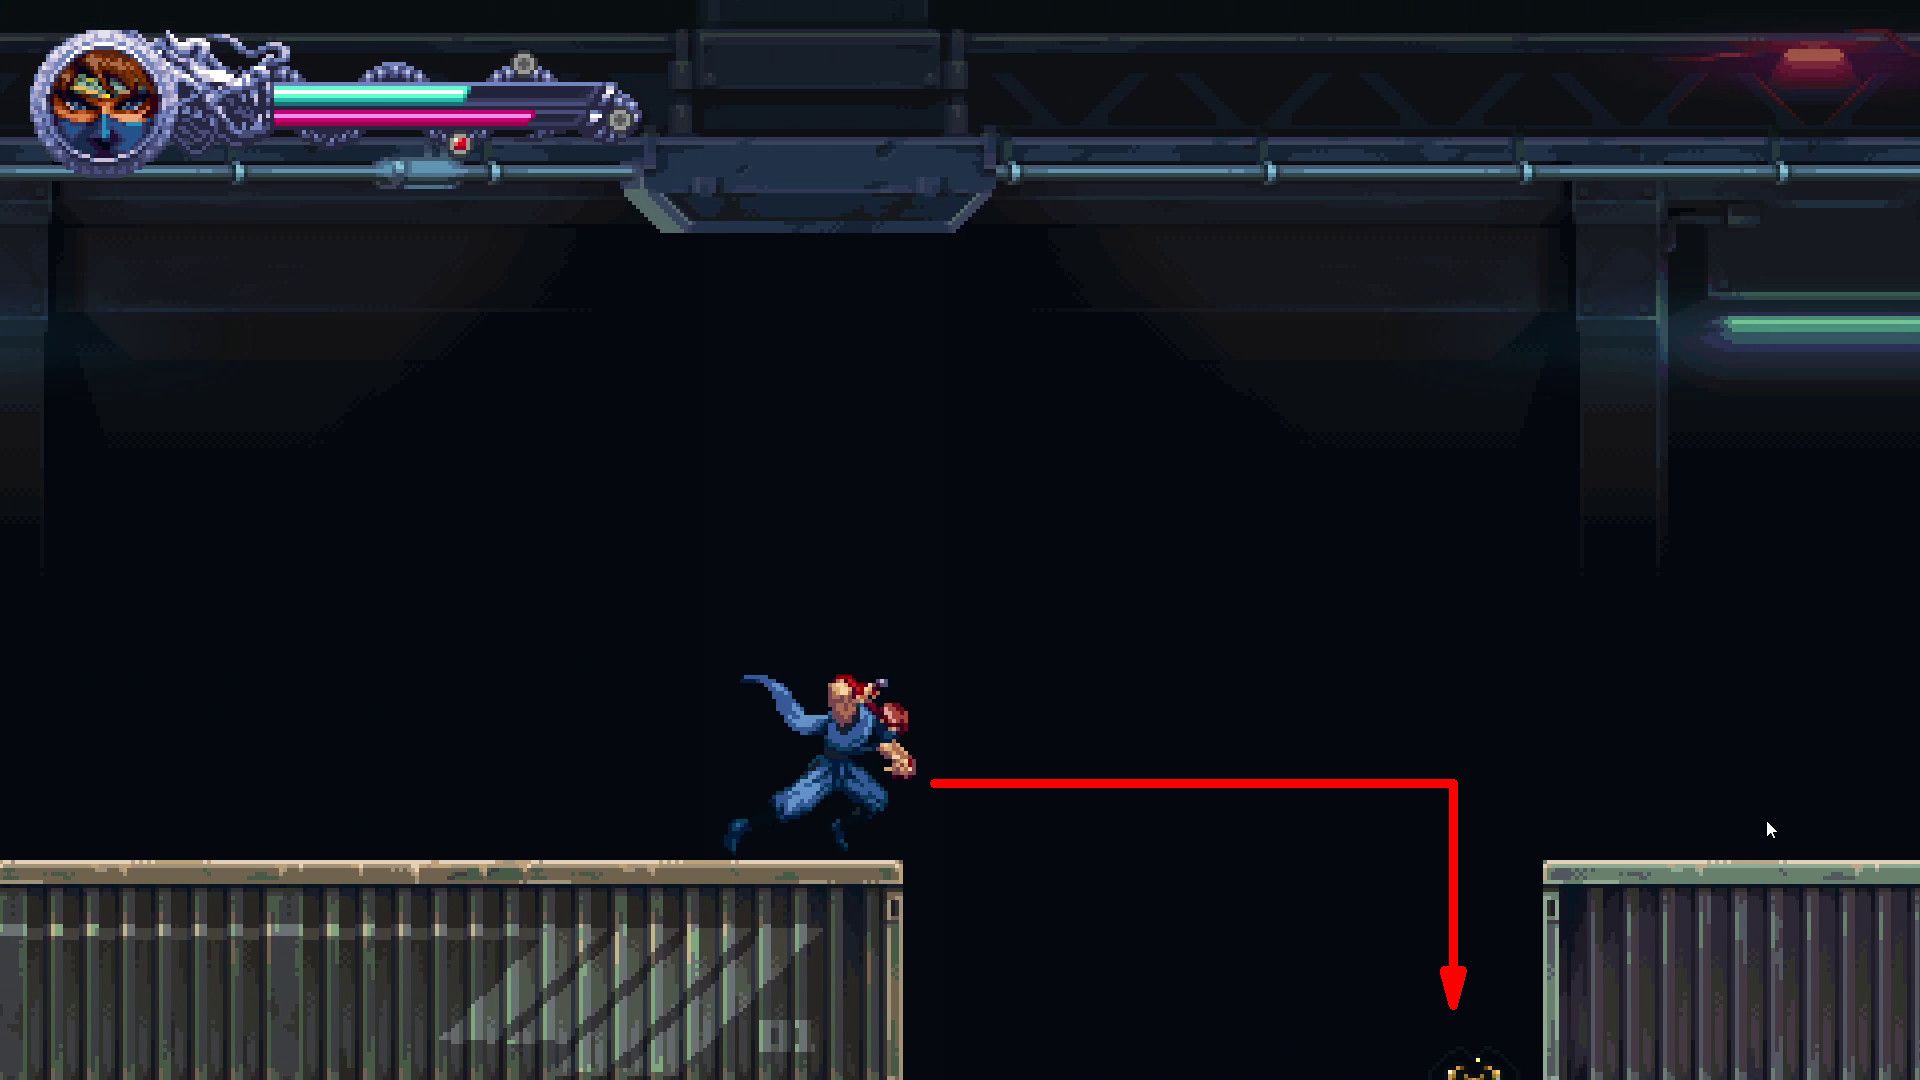
Keep going past the Demon Altar where the backdrop becomes dark. Search for a glimmer close to the screen’s bottom, interact with it to gather the Golden Scarab.
- Crystal Skull #3
During that part, players will encounter the final Crystal Skull while they’re hanging onto a moving helicopter.
Into the Shadows (4-6)
- Crystal Skull #1

At the onset of the stage, prior to triggering any checkpoints, players will encounter a formidable structure known as a Demonic Altar. By venturing into this altar, they can navigate through the ensuing pathway that presents itself to unearth a Crystal Skull.
- Crystal Skull #2
Progress by navigating the part focused on leaping from one ascending truck to another, as the road gradually rises. Climb onto the truck cresting the incline to charge headlong into a Crystal Skull.
Or even more casual:
Make your way through the jumping-truck section leading uphill, then hop on the truck going up the slope and dash straight towards a Crystal Skull.
- Crystal Skull #3
As you make your way up the fiery cavern after reaching a milestone, players will come across an ominous structure known as a Demon Altar slightly beyond. To progress further, step into the altar, utilize the emergent platforms for ascension, and veer left at the summit to uncover a Crystal Skull.
Secret Ops Collectibles in Ninja Gaiden Ragebound
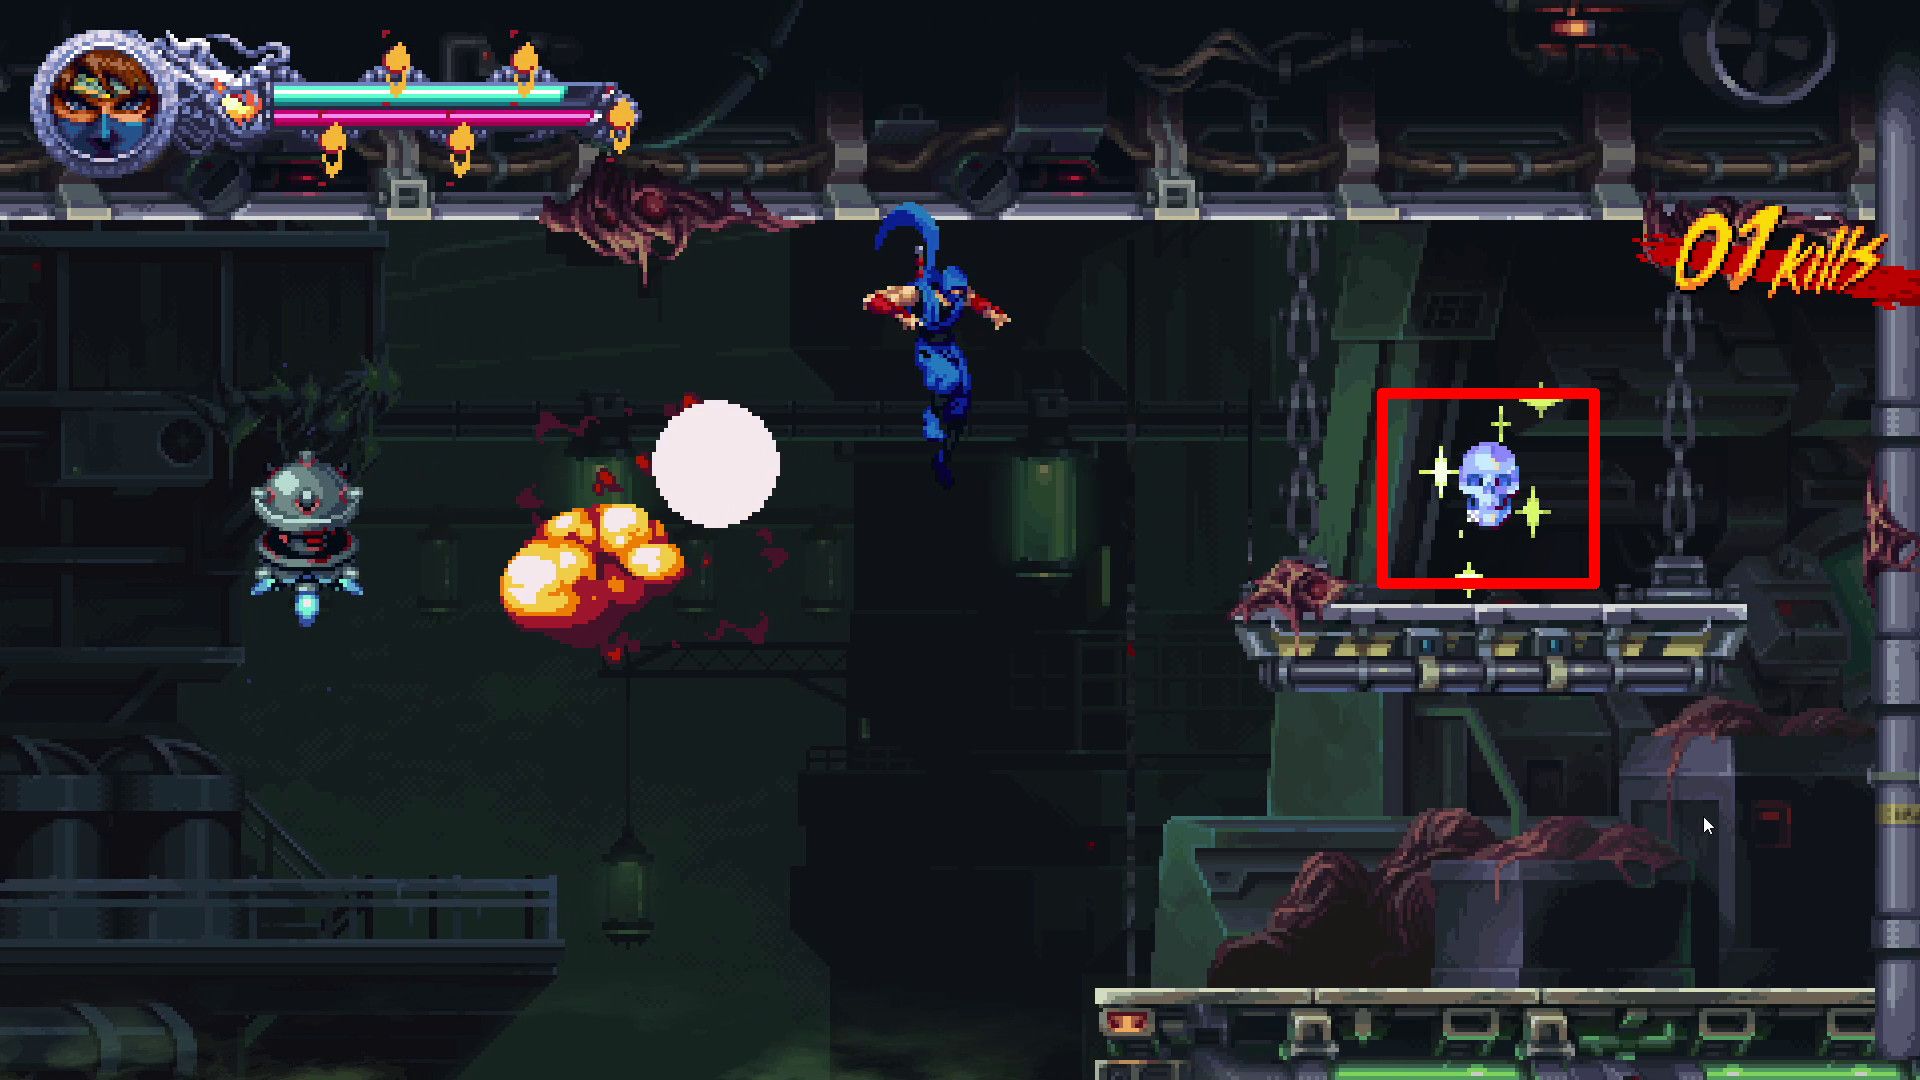
Forest Resistance (S-1)
- Crystal Skull #1
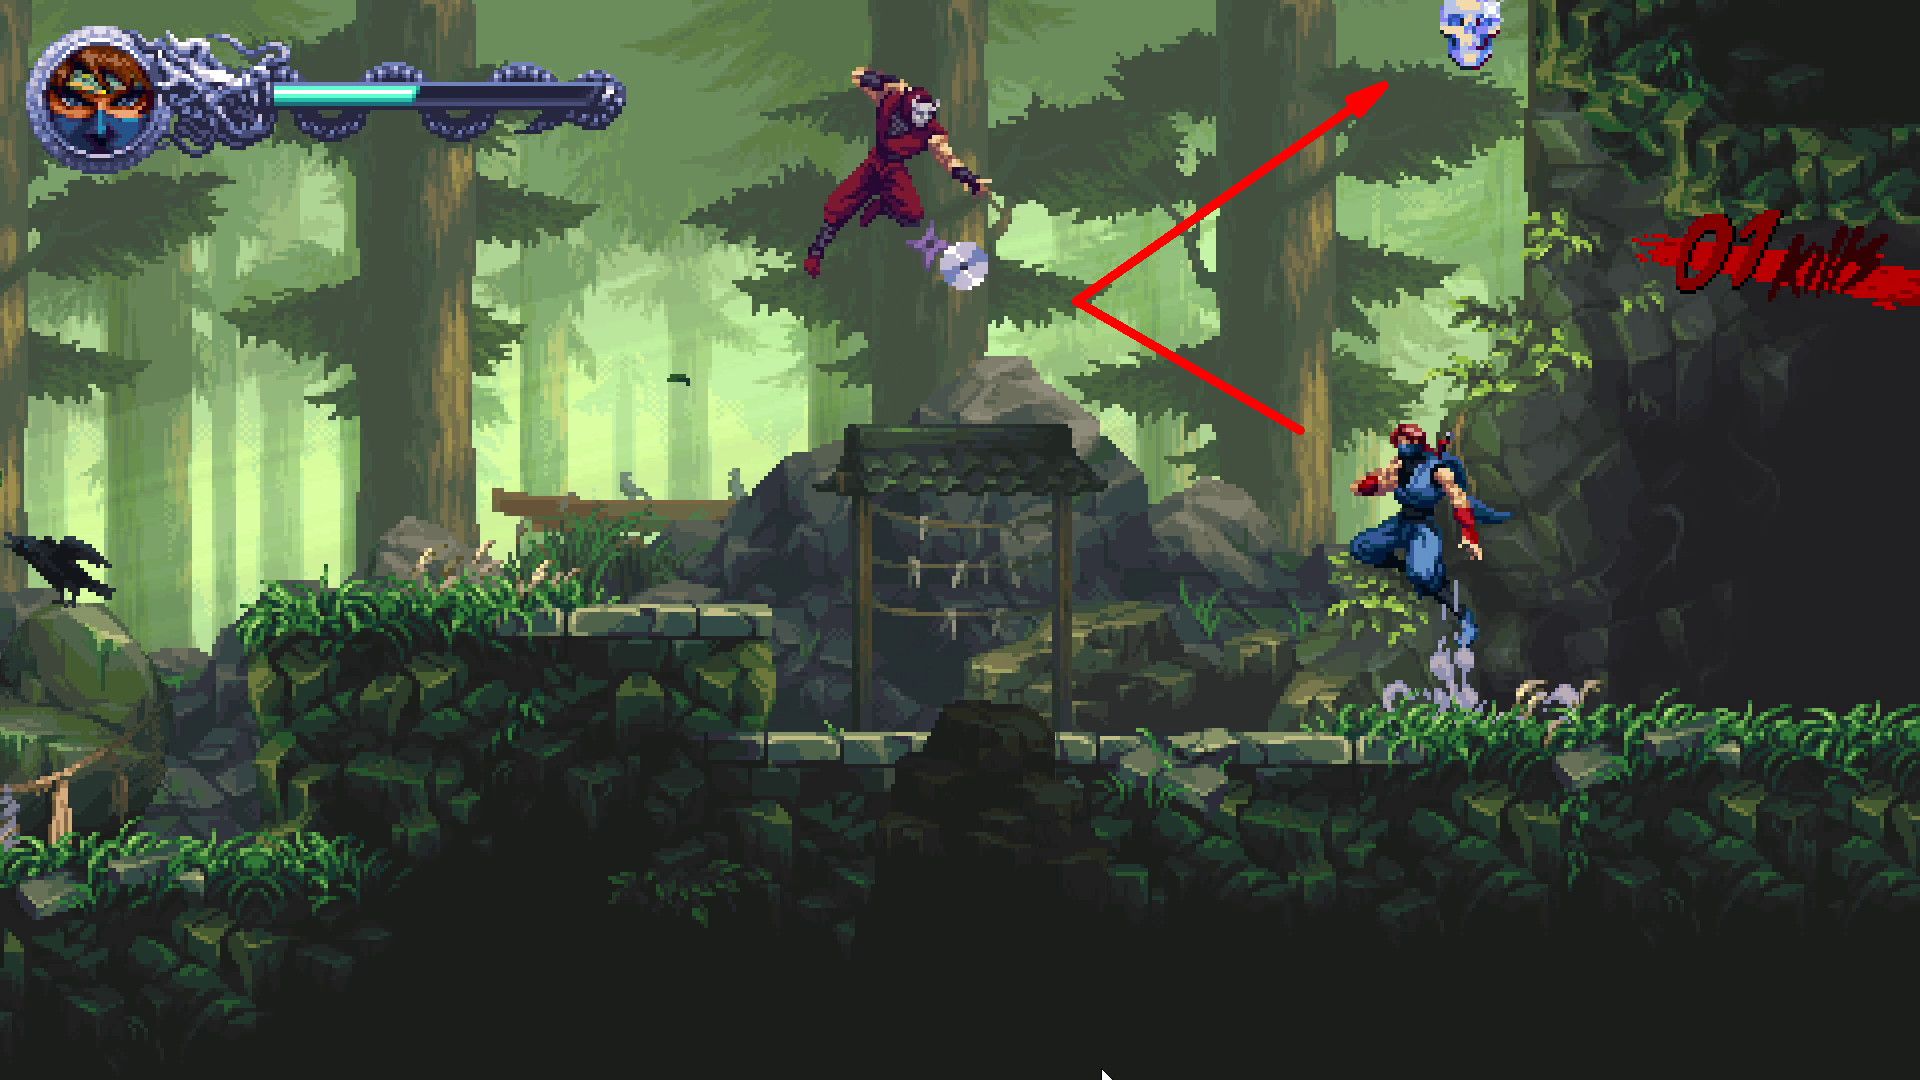
At the start of the level, you’ll find a Crystal Skull positioned above the entrance to the cave. Jump and use Guillotine’s ability to deflect nearby enemies’ attacks, which can help propel you towards the skull.
- Crystal Skull #2
Advance deep into the cave until you spot a fiery-shooting face. Jump and latch onto one of its flaming projectiles, aiming for the central section of the wall on your right side. Ascend by using the propulsion from the projectile to reach the Crystal Skull located higher up.
- Golden Scarabs #1, 2 & 3
Following the cave, players will traverse a part filled with trees. At the conclusion of this area, you’ll find the last Golden Scarab at the highest point on the screen, right before a safety checkpoint.
Demon Pest (S-2)
- Golden Scarabs #1, 2 & 3
As soon as you start the level, go left and slide down a wall to reach a Golden Scarab.
- Golden Scarabs #4, 5 & 6
Shortly following scaling the charged barrier at the start of the stage, gamers will encounter a space inhabited by approximately three bug-like adversaries. To attain the Golden Scarab situated overhead, utilize Guillotine boosts against these foes.
- Crystal Skull #1
After you’ve gathered the second group of Scarabs, proceed towards your right until you encounter an upward ascent. Look for the first opening on your right within this ascending area, and climb through it to discover a Crystal Skull. You can reach this skull by navigating along the ceiling.
- Crystal Skull #2
Proceed ahead, sticking to the main route, as you’ll traverse an inner part of the area. Further along, there’s a brief ascending section. To reach a room containing a Crystal Skull, players should look for the first opening on their left side and enter it.
- Golden Scarabs #7, 8 & 9
Now, players need to get back on track and make their way towards an upcoming checkpoint. Along the way, they’ll encounter electrified barriers that they’ll have to scale. The coveted Golden Scarab is located above these barriers, near the top of the screen.
Mountain Trail (S-3)
- Golden Scarabs #1, 2 & 3
At the initial stage of the game, players will come across a device resembling a gear (or cog) that they can strike to elevate a platform. Climb up the ceiling directly above this gear and move to the right to discover a Golden Scarab hidden there.
- Crystal Skull #1

Keep going beyond the initial barrier, and when you encounter a blue monster resembling a demon, note it has eyes coming from its belly, proceed past it. Sprint through the hole in the wall which the adversary is obstructing to gain access to an area where a Crystal Skull resides.
- Golden Scarabs #4, 5 & 6
Make your way to the upcoming checkpoint, then maneuver through the hole in the wall on your left to find a chamber containing a Golden Scarab.
- Golden Scarabs #7, 8 & 9
This Golden Scarab is in the air just to the right of the aforementioned checkpoint.
- Crystal Skull #2
As players advance along their route, they’ll come across a square stone platform that has a landmine on it. Important to note, the final Crystal Skull is situated to the right of this very platform.
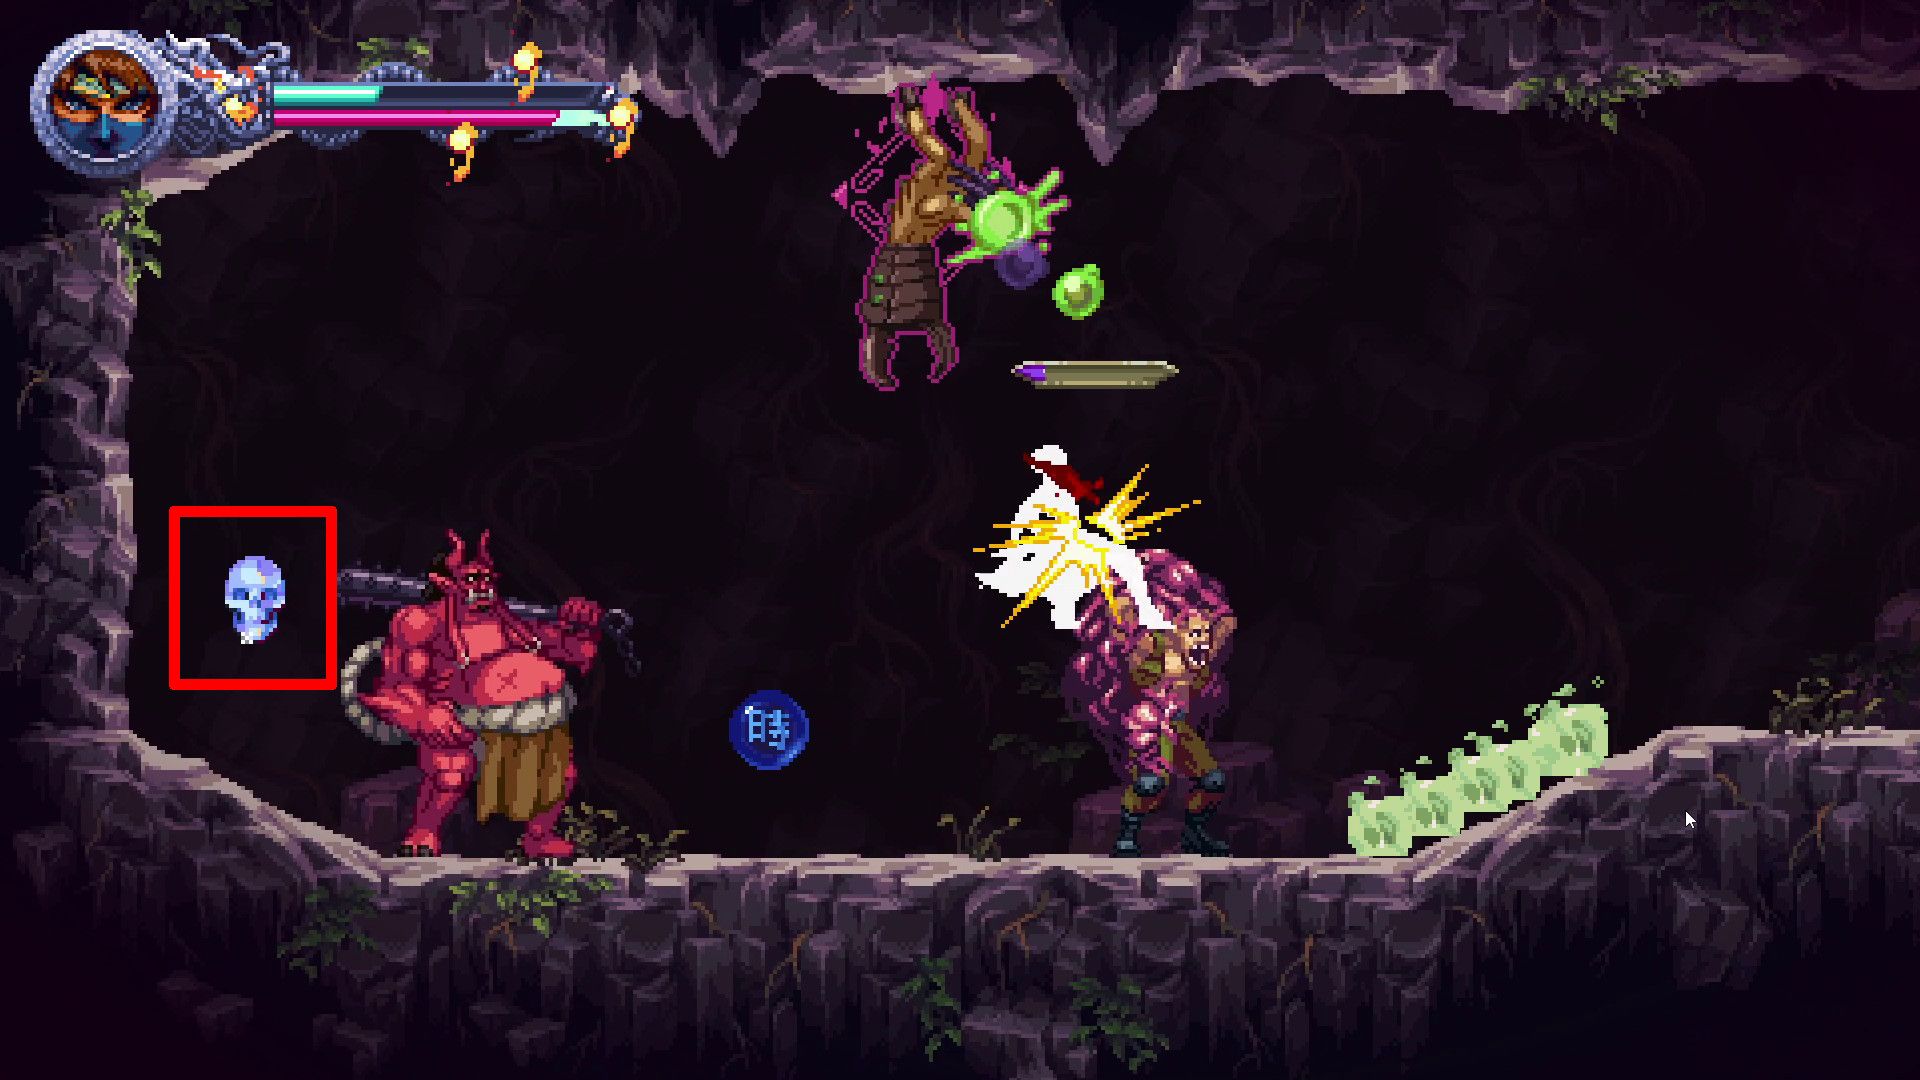
Back in the Caves (S-4)
- Golden Scarabs #1, 2 & 3
Make your way across the level until you reach a cave entrance. Journey to the far right side, then swiftly pass through the narrow opening in the stonewall to gain access to an area featuring a Demon Altar. Utilize this altar to assume command over Kumori, and successfully finish the course that follows to secure a Golden Scarab.
- Golden Scarabs #4, 5 & 6
Make your way back to the main course of action, and carry on exploring the cavern. As adventurers ascend, they’ll discover a recess on their right side. Inside this nook, you’ll find a Golden Scarab, along with a red, demonic figure.
- Crystal Skull #1
Just after grabbing the second set of Scarabs, players will move into an area requiring them to traverse using shifting wooden platforms for ascension. On the right-hand side of this region, there’s a crumbling wall that can be shattered with multiple hits, and behind it lies a Crystal Skull in the adjoining chamber.
- Crystal Skull #2
Follow the essential route until you get to an area where wooden planks shift to the left. Travel on the moving platforms towards the left until you encounter a damaged wall. Beyond that wall lies the chamber containing the last Crystal Skull.
Secret Castle (S-5)
- Golden Scarabs #1, 2 & 3
At the start of the stage, players will navigate through a succession of rooftops, typically green in color. In this part of the level, players can employ two bug-like adversaries to climb upward. After using these creatures, players should head towards the left to uncover a Golden Scarab.
- Crystal Skull #1
Fall into the underground area and dodge through the spikes to the left to grab a Crystal Skull.
- Golden Scarabs #4, 5 & 6
As an enthusiast, I’ll advance towards the next milestone, nimbly weaving my path through the narrow opening in the stone wall on the left side, ultimately finding myself in a chamber adorned with a radiant Golden Scarab.
- Golden Scarabs #7, 8 & 9
Head straight towards the mentioned checkpoint, then swiftly weave your way through to reach a wall with an opening, and seize the Golden Scarab as you pass by.
From the specified checkpoint, make a beeline for a wall with an open space. Dodge through it and snatch up the Golden Scarab on your way.
- Crystal Skull #2
Fall through the hole in the alcove with the Golden Scarab to find the final Crystal Skull.
Evil Redevelopments (S-6)
- Golden Scarabs #1, 2 & 3
At the start of the stage, players encounter a sturdy pillar that needs to be broken to proceed. Breaking the upper part of it will reveal the Golden Scarab.
- Crystal Skull #1
As you traverse the industrial sector, you’ll eventually come across an enclosed area veiled by green barriers. In this particular zone, you’ll encounter a damaged stone pillar under the watchful eye of a red fiend. Upon defeating this guardian, the broken pillar will unveil a Crystal Skull.
- Golden Scarabs #4, 5 & 6
To trigger a checkpoint and demolish the damaged wall on your right, proceed along the crucial route. This way will unveil a path leading to a Demon Altar. Utilize this altar to initiate a path towards the coveted Golden Scarab.
- Golden Scarabs #7, 8 & 9

Move to the left past the mentioned checkpoint, then follow the path as it slopes downhill. Once you reach the bottom, smash the cracked wall located on your left to uncover a path leading to an area containing the Golden Scarab.
- Crystal Skull #2
Move forward to the upcoming checkpoint, then veer right to maneuver past a green barrier. Beyond this barrier, you’ll find yourself in an area where several damaged walls stand. The second wall on your left side conceals a Crystal Skull.
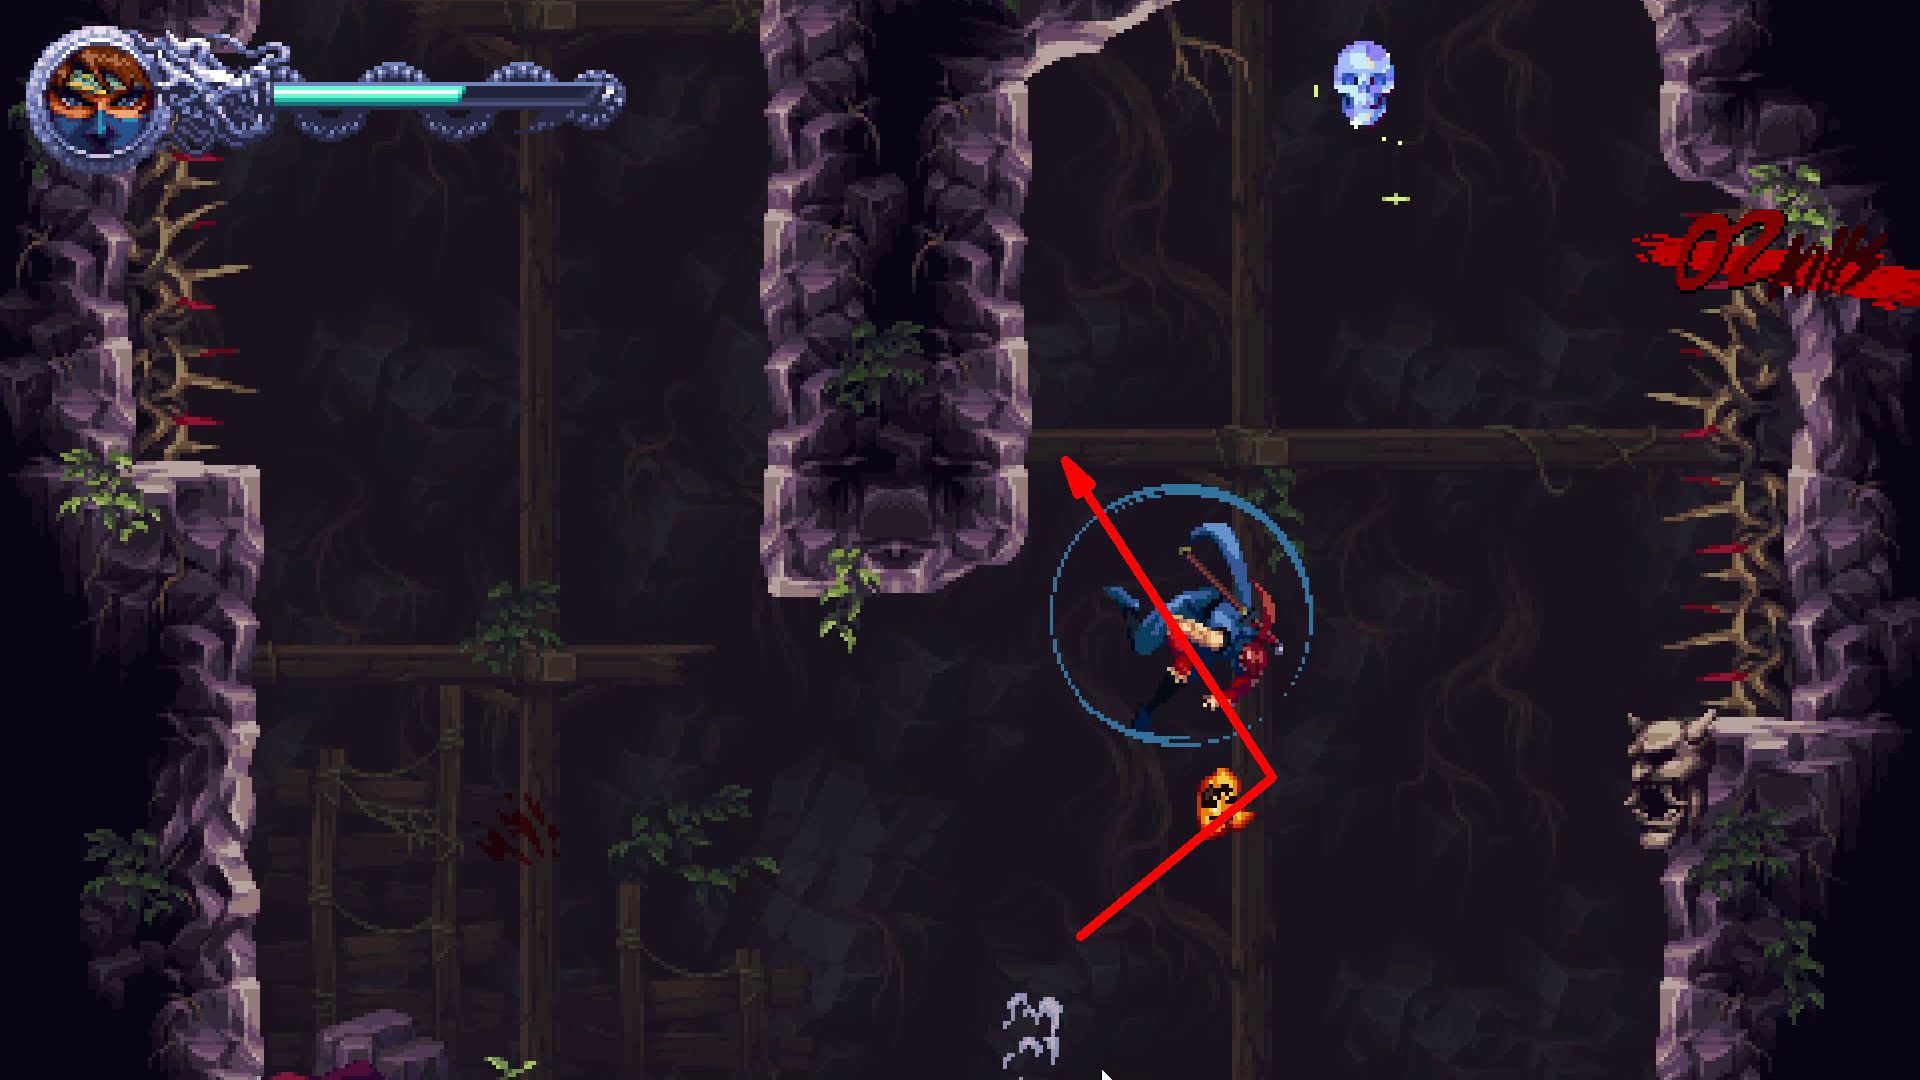
Silent Tides (S-7)
- Crystal Skull #1
In the early part of the game level, you’ll find a structure often referred to as a “Demon Altar.” This is an area players need to access. As they control Kumori, they will navigate by climbing on multiple horizontal ropes or cables scattered throughout. Above the highest one, there’s a distinctive item called a Crystal Skull.
Or more concisely:
Players must enter a Demon Altar at the start of the level while controlling Kumori. They will traverse several horizontal ropes and find a Crystal Skull hanging above the top one.
- Golden Scarabs #1, 2 & 3
Toward the conclusion of the Kumori segment, right before dropping through the gap and activating the button enabling Kenji’s progression, players notice a Golden Scarab positioned on the screen’s left side.
- Crystal Skull #2
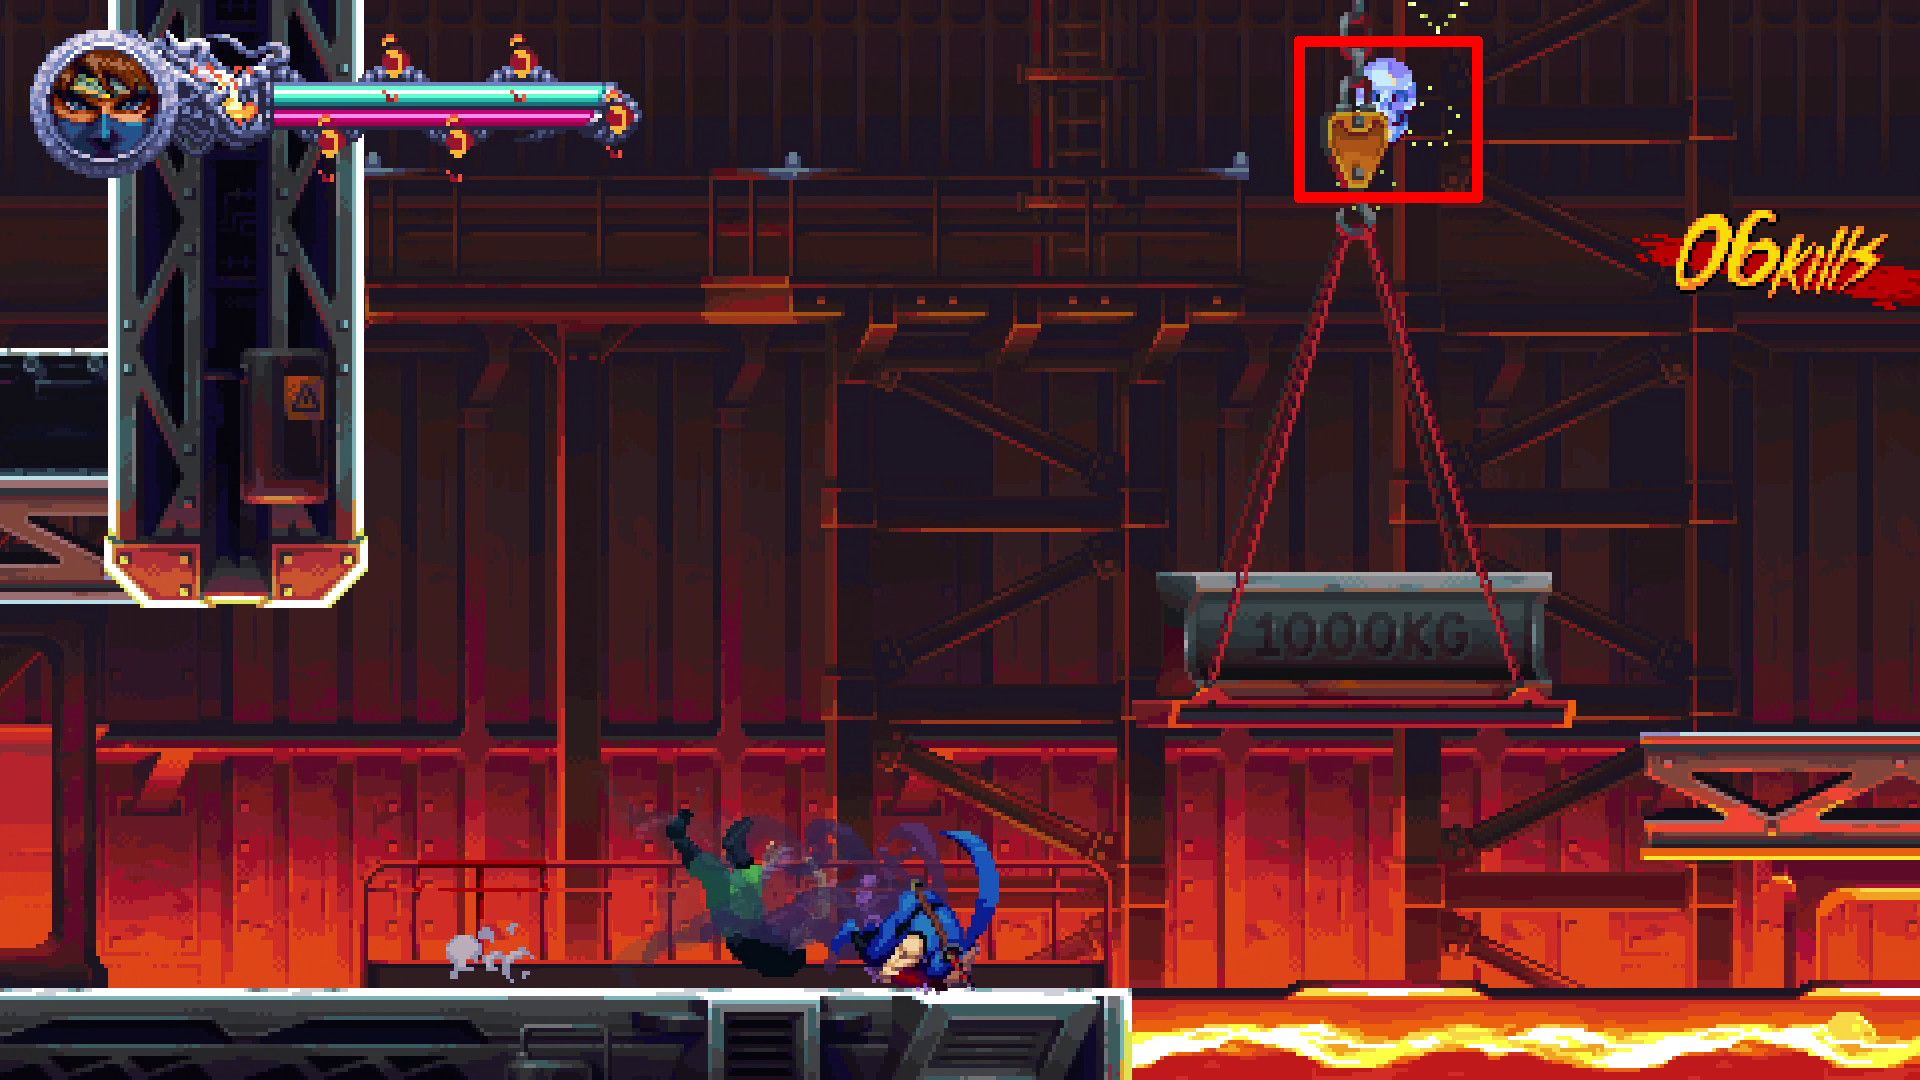
Progress towards the area filled with lava, where you’ll find the Crystal Skull located above the initial heavyweight of approximately 1,000 kilograms that players will first meet.
- Golden Scarabs #4, 5 & 6
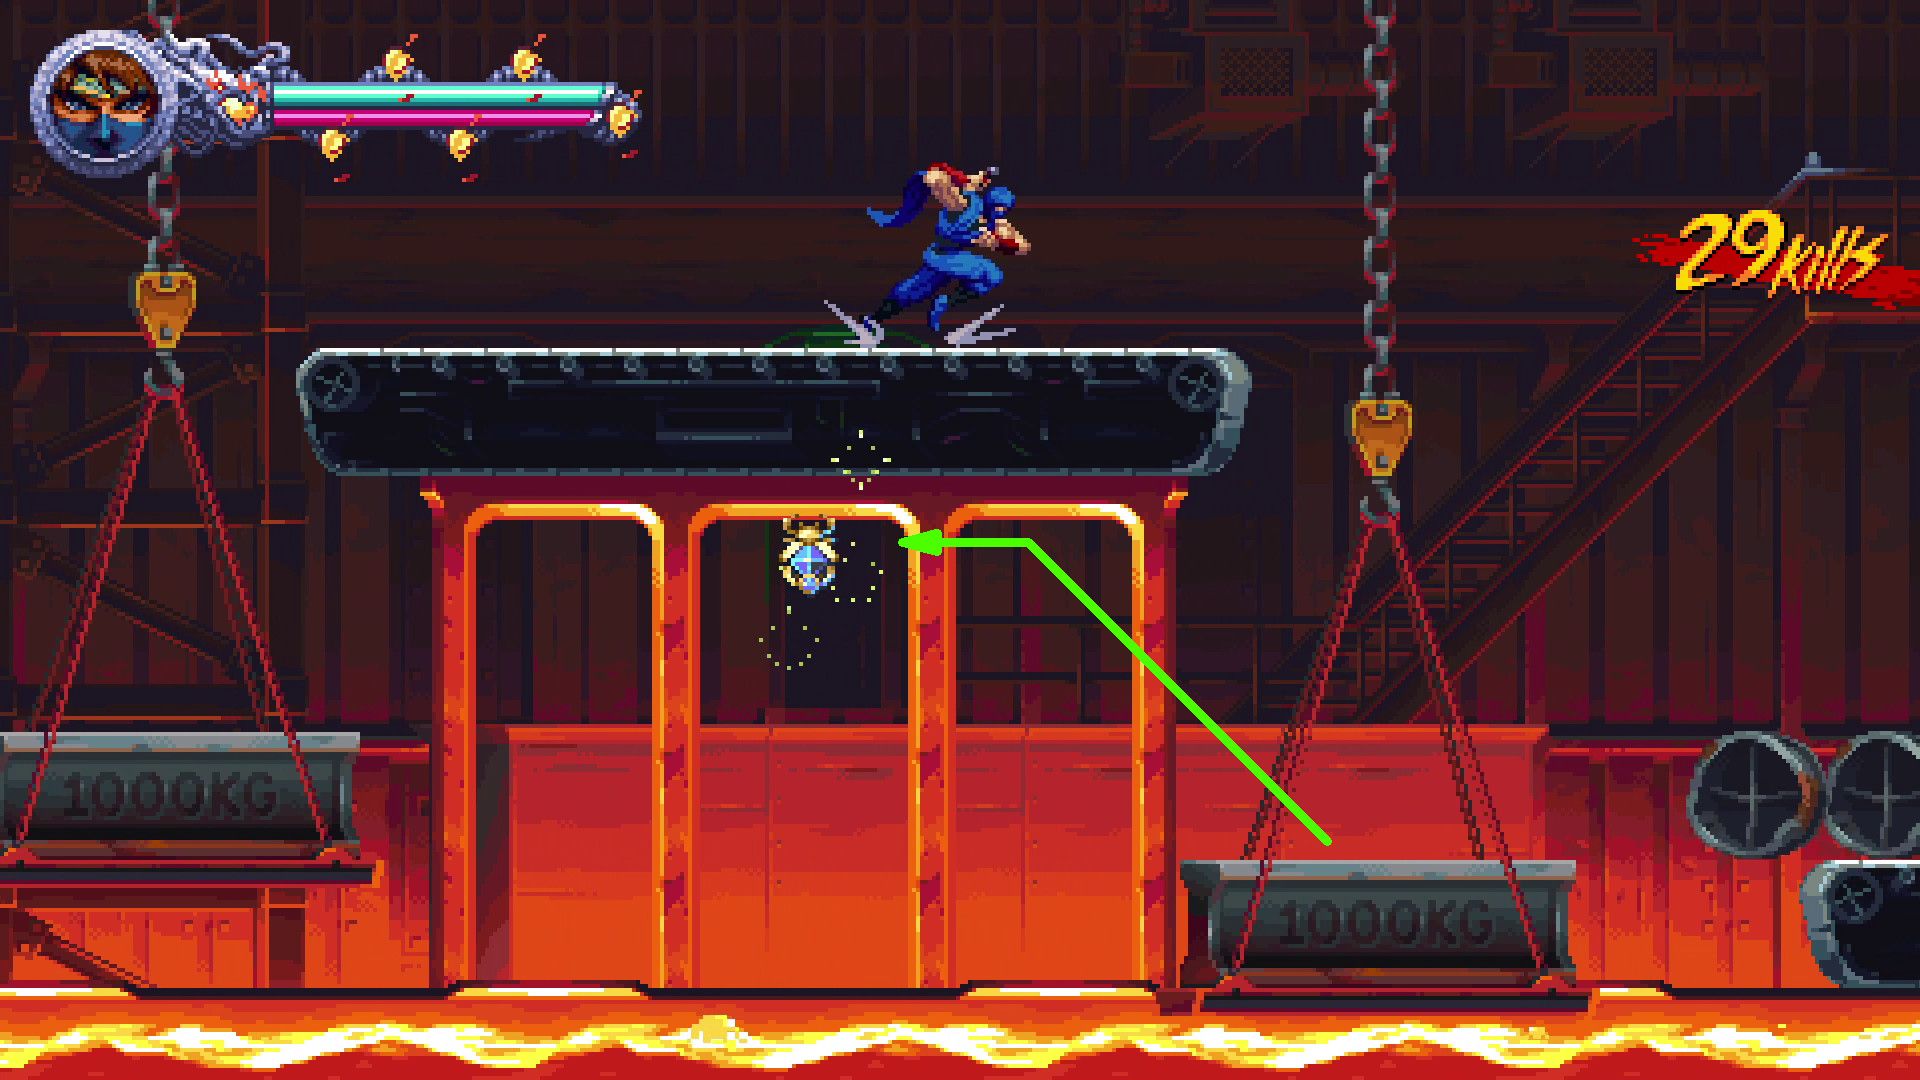
Just beyond the newly activated checkpoint, I stumbled upon a hefty conveyor system laden with two thousand-kilogram weights apiece. Hidden underneath this mechanical behemoth lies the elusive Golden Scarab I’ve been searching for.
Lab Stronghold (S-8)
- Crystal Skull #1
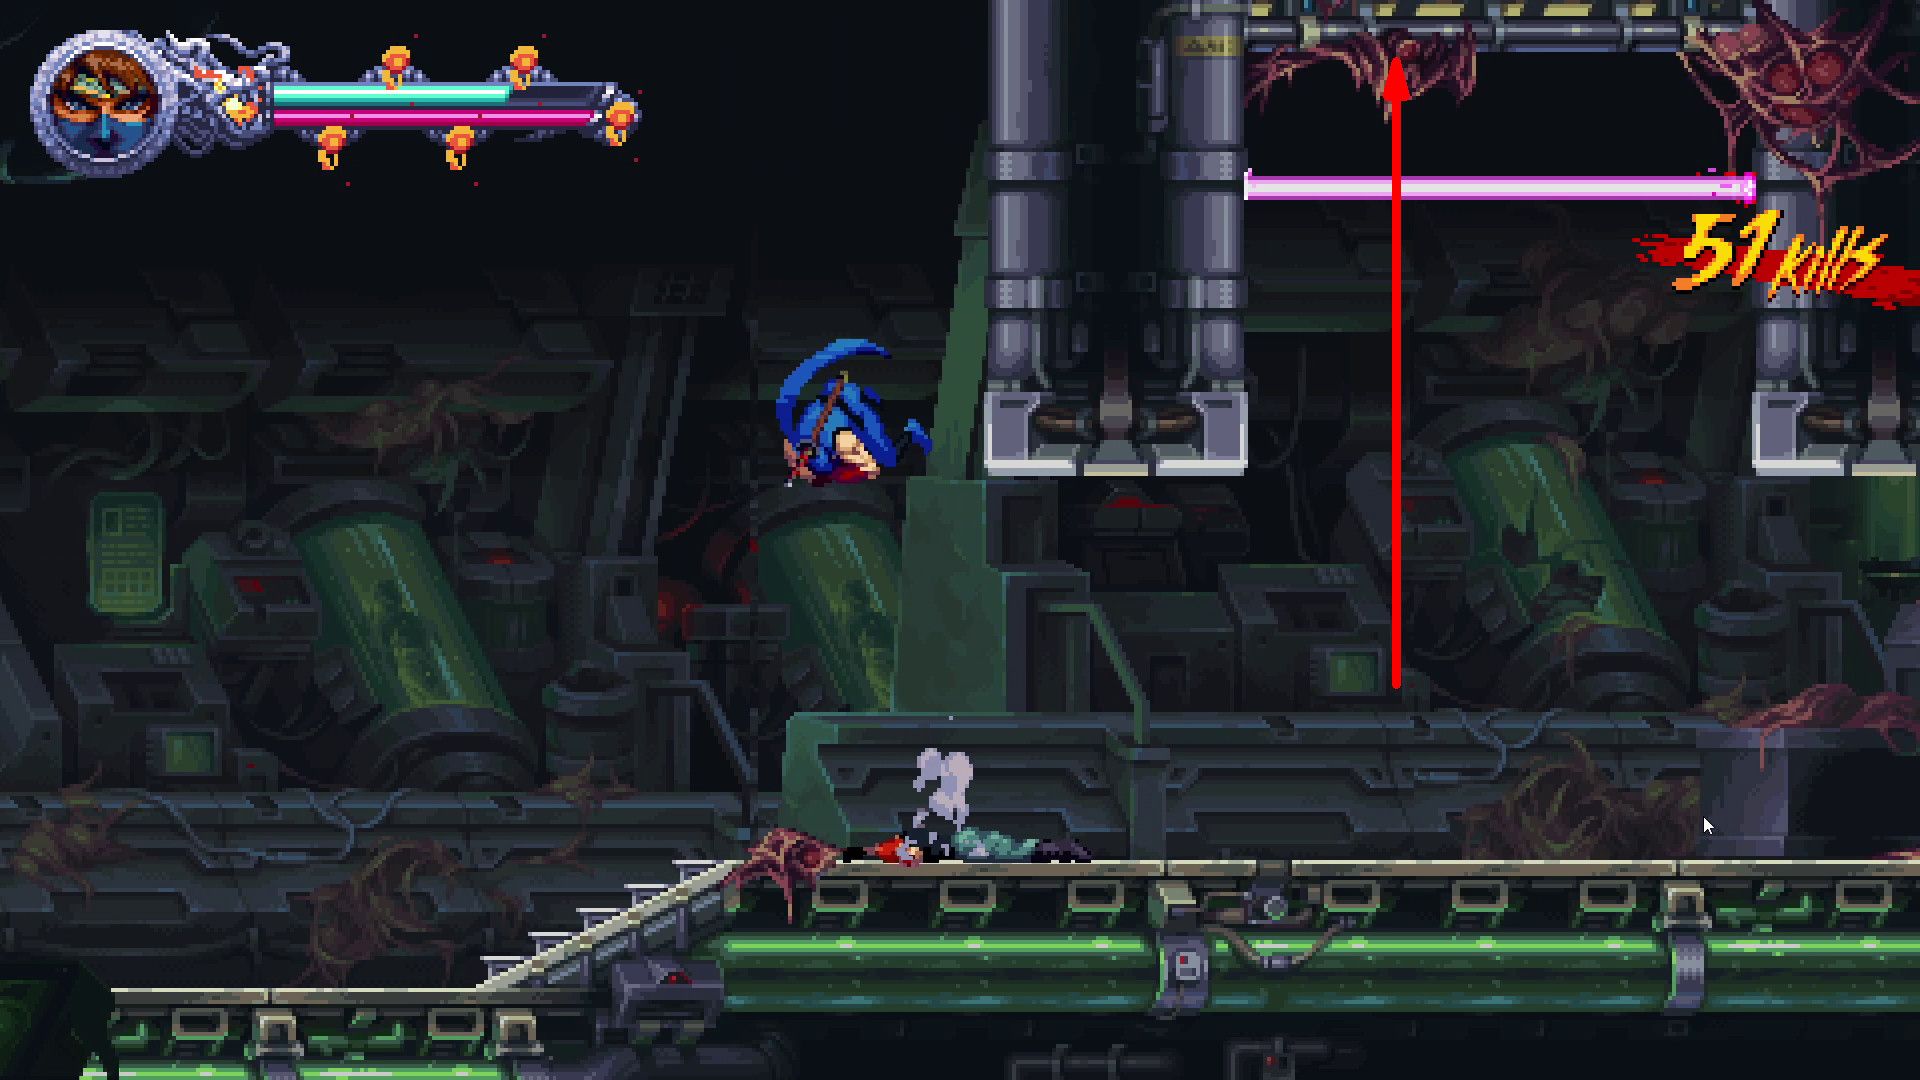
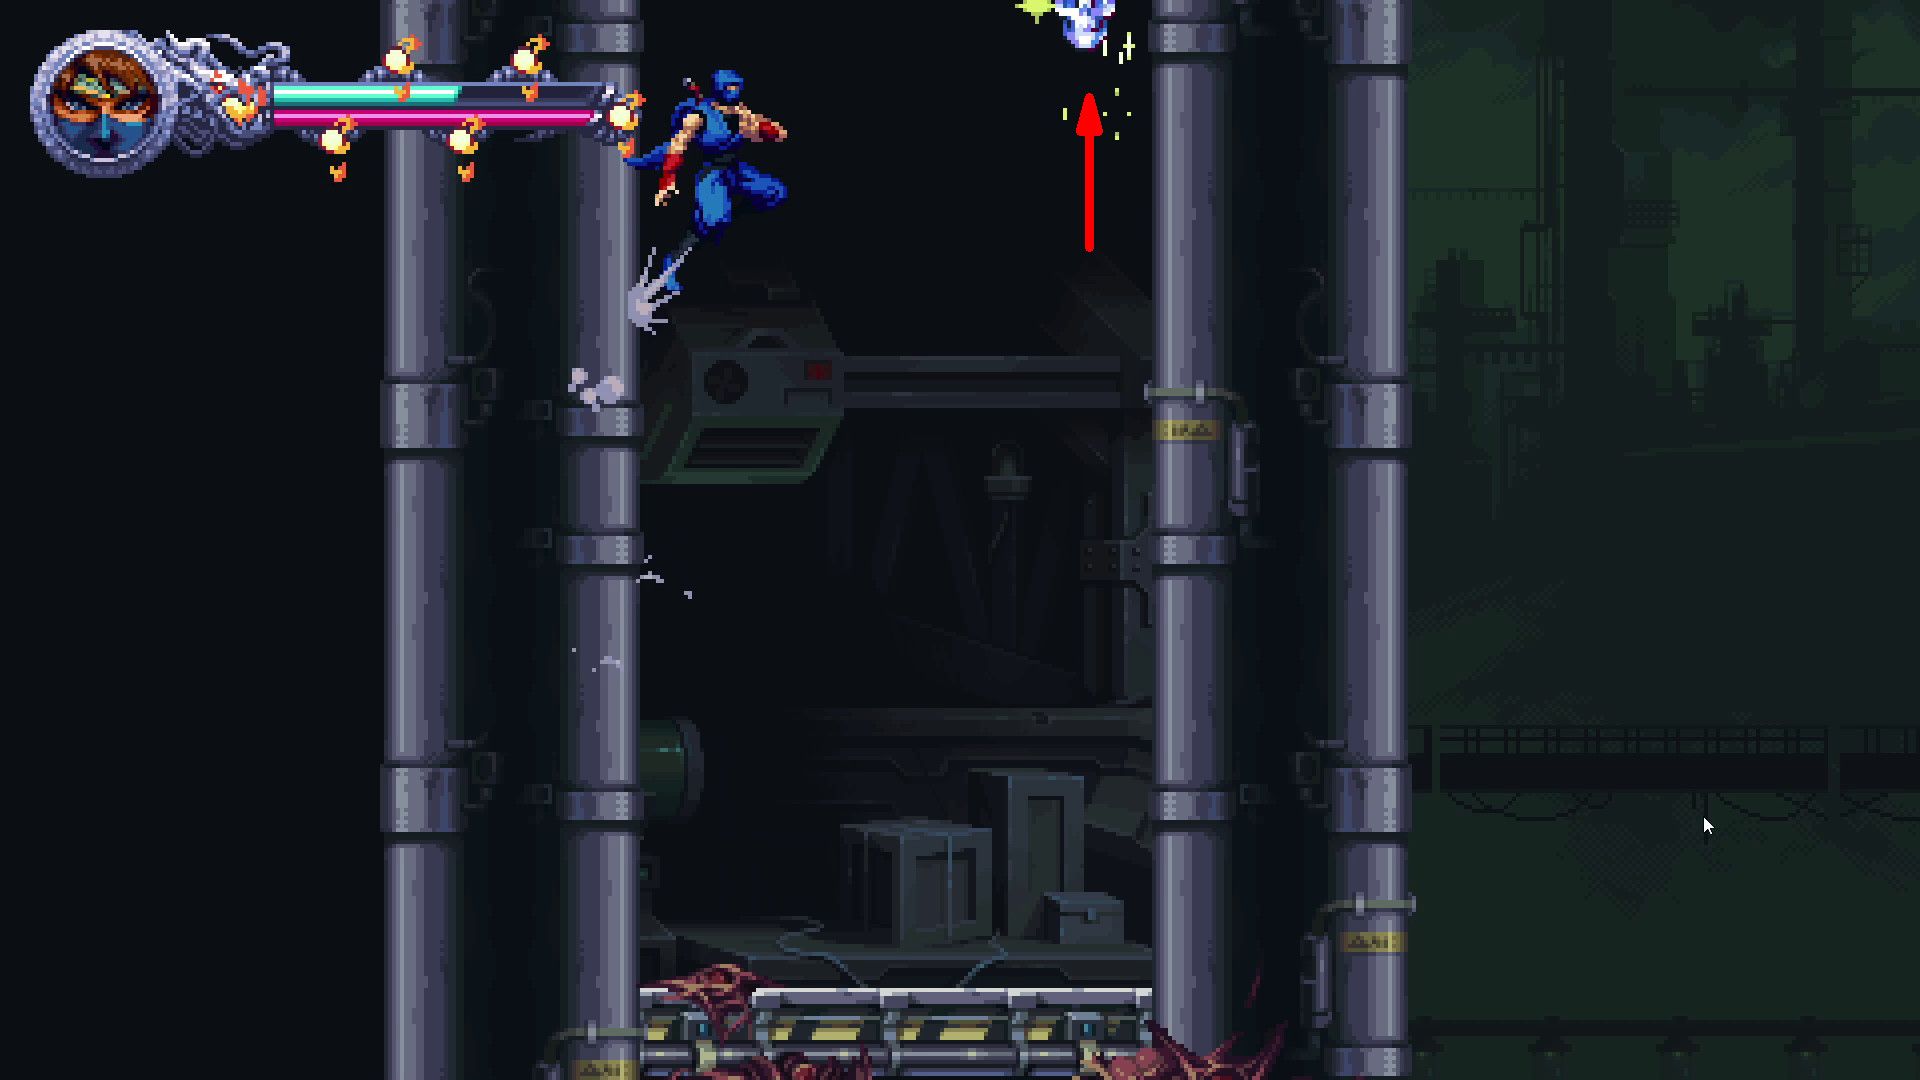
Just beyond the initial checkpoint, gamers will encounter a horizontal laser bar suspended overhead. By navigating upward through this laser barrier, they can access a location where a Crystal Skull rests atop the screen.
- Golden Scarabs #1, 2 & 3
As you proceed on the essential route, you’ll encounter a spot requiring you to leap over some green crates. Don’t forget to glance at the upper part of your screen during this phase to locate a Golden Scarab hidden there.
- Crystal Skull #2
Make your way to the upcoming milestone, sprint through the hole in the wall on your right, and use a Guillotine jump over the adversaries to grab the Crystal Skull.
Read More
- Quantum Agents: Scaling Reinforcement Learning with Distributed Quantum Computing
- Boruto: Two Blue Vortex Chapter 33 Preview — The Final Battle Vs Mamushi Begins
- All Skyblazer Armor Locations in Crimson Desert
- Every Melee and Ranged Weapon in Windrose
- How to Get the Sunset Reed Armor Set and Hollow Visage Sword in Crimson Desert
- One Piece Chapter 1180 Release Date And Where To Read
- Zhuang Fangyi Build In Arknights Endfield
- All Shadow Armor Locations in Crimson Desert
- Windrose Glorious Hunters Quest Guide (Broken Musket)
- Best Dual-Wield Swords Build in Crimson Desert
2025-08-04 21:24