As a seasoned gamer in Avowed, venturing beyond Claviger’s Landing in Dawnshore for the first time could lead you to encounter Sanza, a cartographer who’s currently in a pickle. His map-toting apprentices have mysteriously vanished and now each one is lost, looking for their way back home. It’s an ironic twist that the very people skilled at charting paths can’t find their own, making it my mission to help them. This adventure marks the beginning of the Mapping the Living Lands quest, with Dawnshore as our starting point.
Having ventured into the wild on my own to uncover different totems and treasure maps, it doesn’t really surprise me that these map-makers are missing. In truth, they’ve been gone for quite some time – dead and buried. But rest assured, you’ll need to track down those cartographers to retrieve their notes.
Where to find Sanza
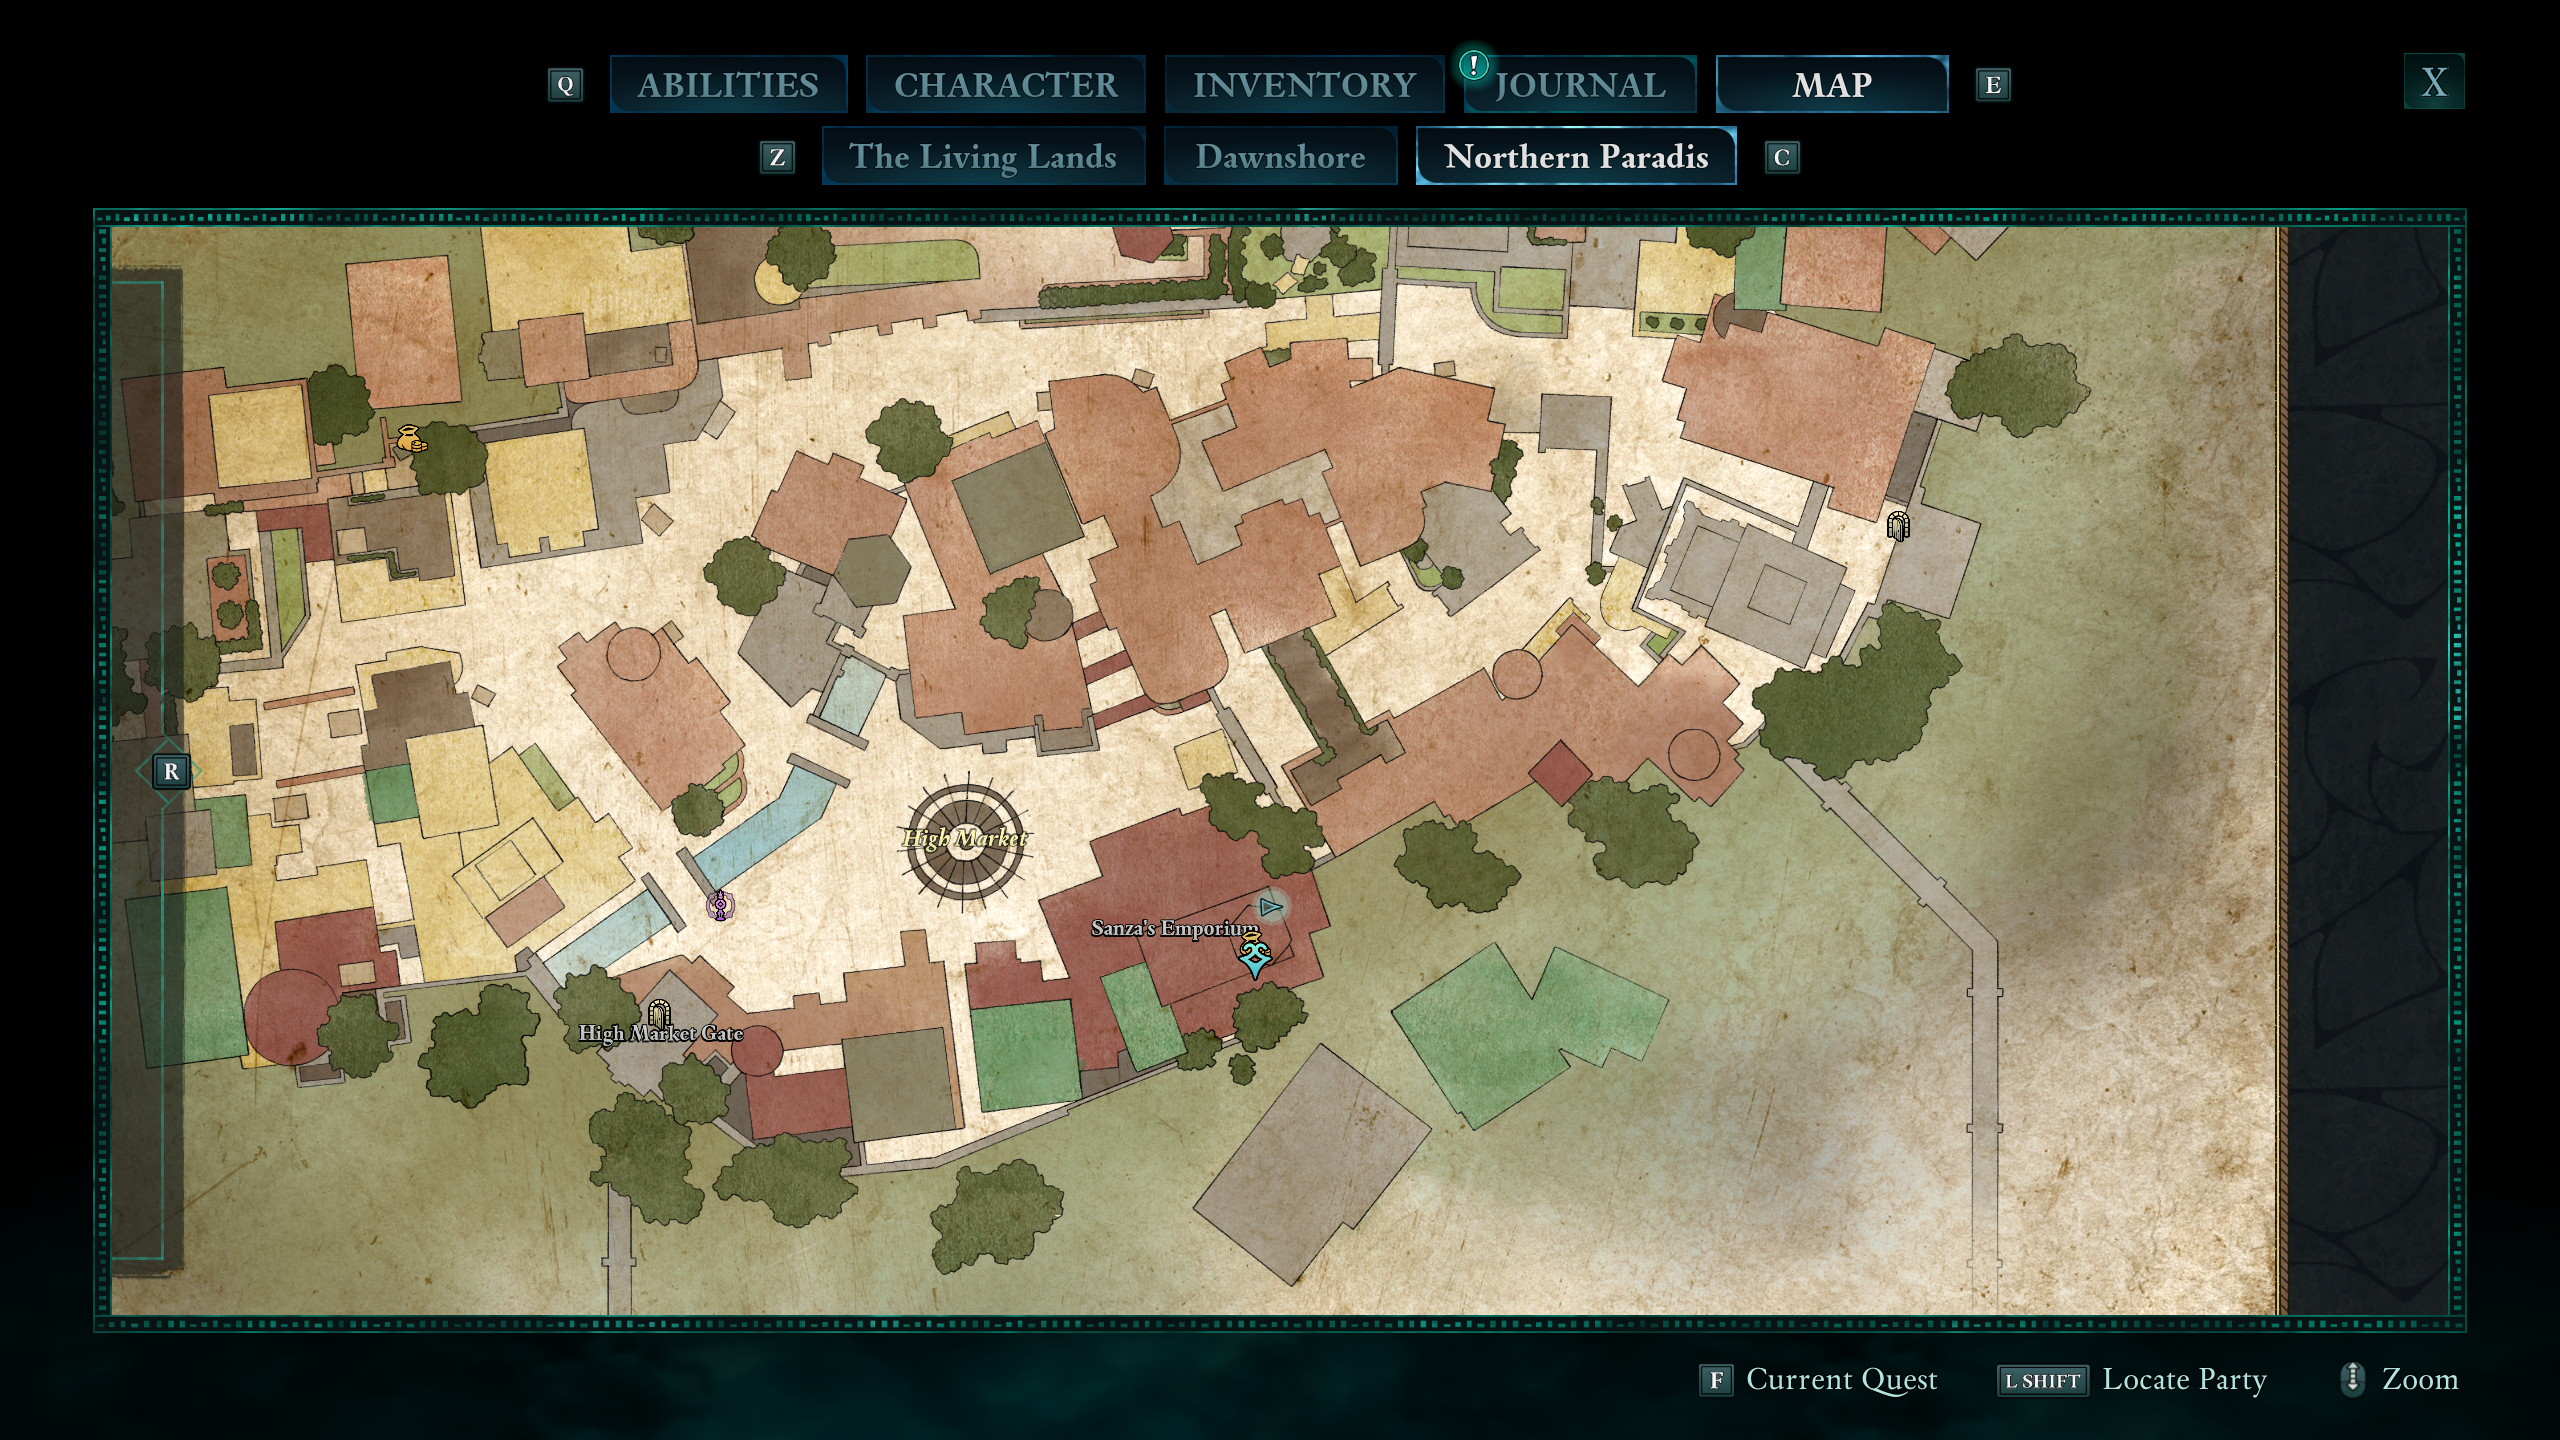
In the bustling town square of Paradis Heights, you’ll find Sanza, the proprietor of Sanza’s Emporium. If you’ve managed to gather notes from one of his unfortunate cartographers, your quest log will instruct you to return to him, but it won’t provide a specific location marker. However, you can hand in each stage of the quest at his shop, which is situated in the High Market square of Paradis Heights, distinct from the rest of the Paradis map.
Mapping the Living Lands: Dawnshore
You’ll likely encounter your first mapmaker in Dawnshore, and he goes by the name of Giermund. It’s mentioned that he was dispatched to the eastern part of the region, close to a cave.
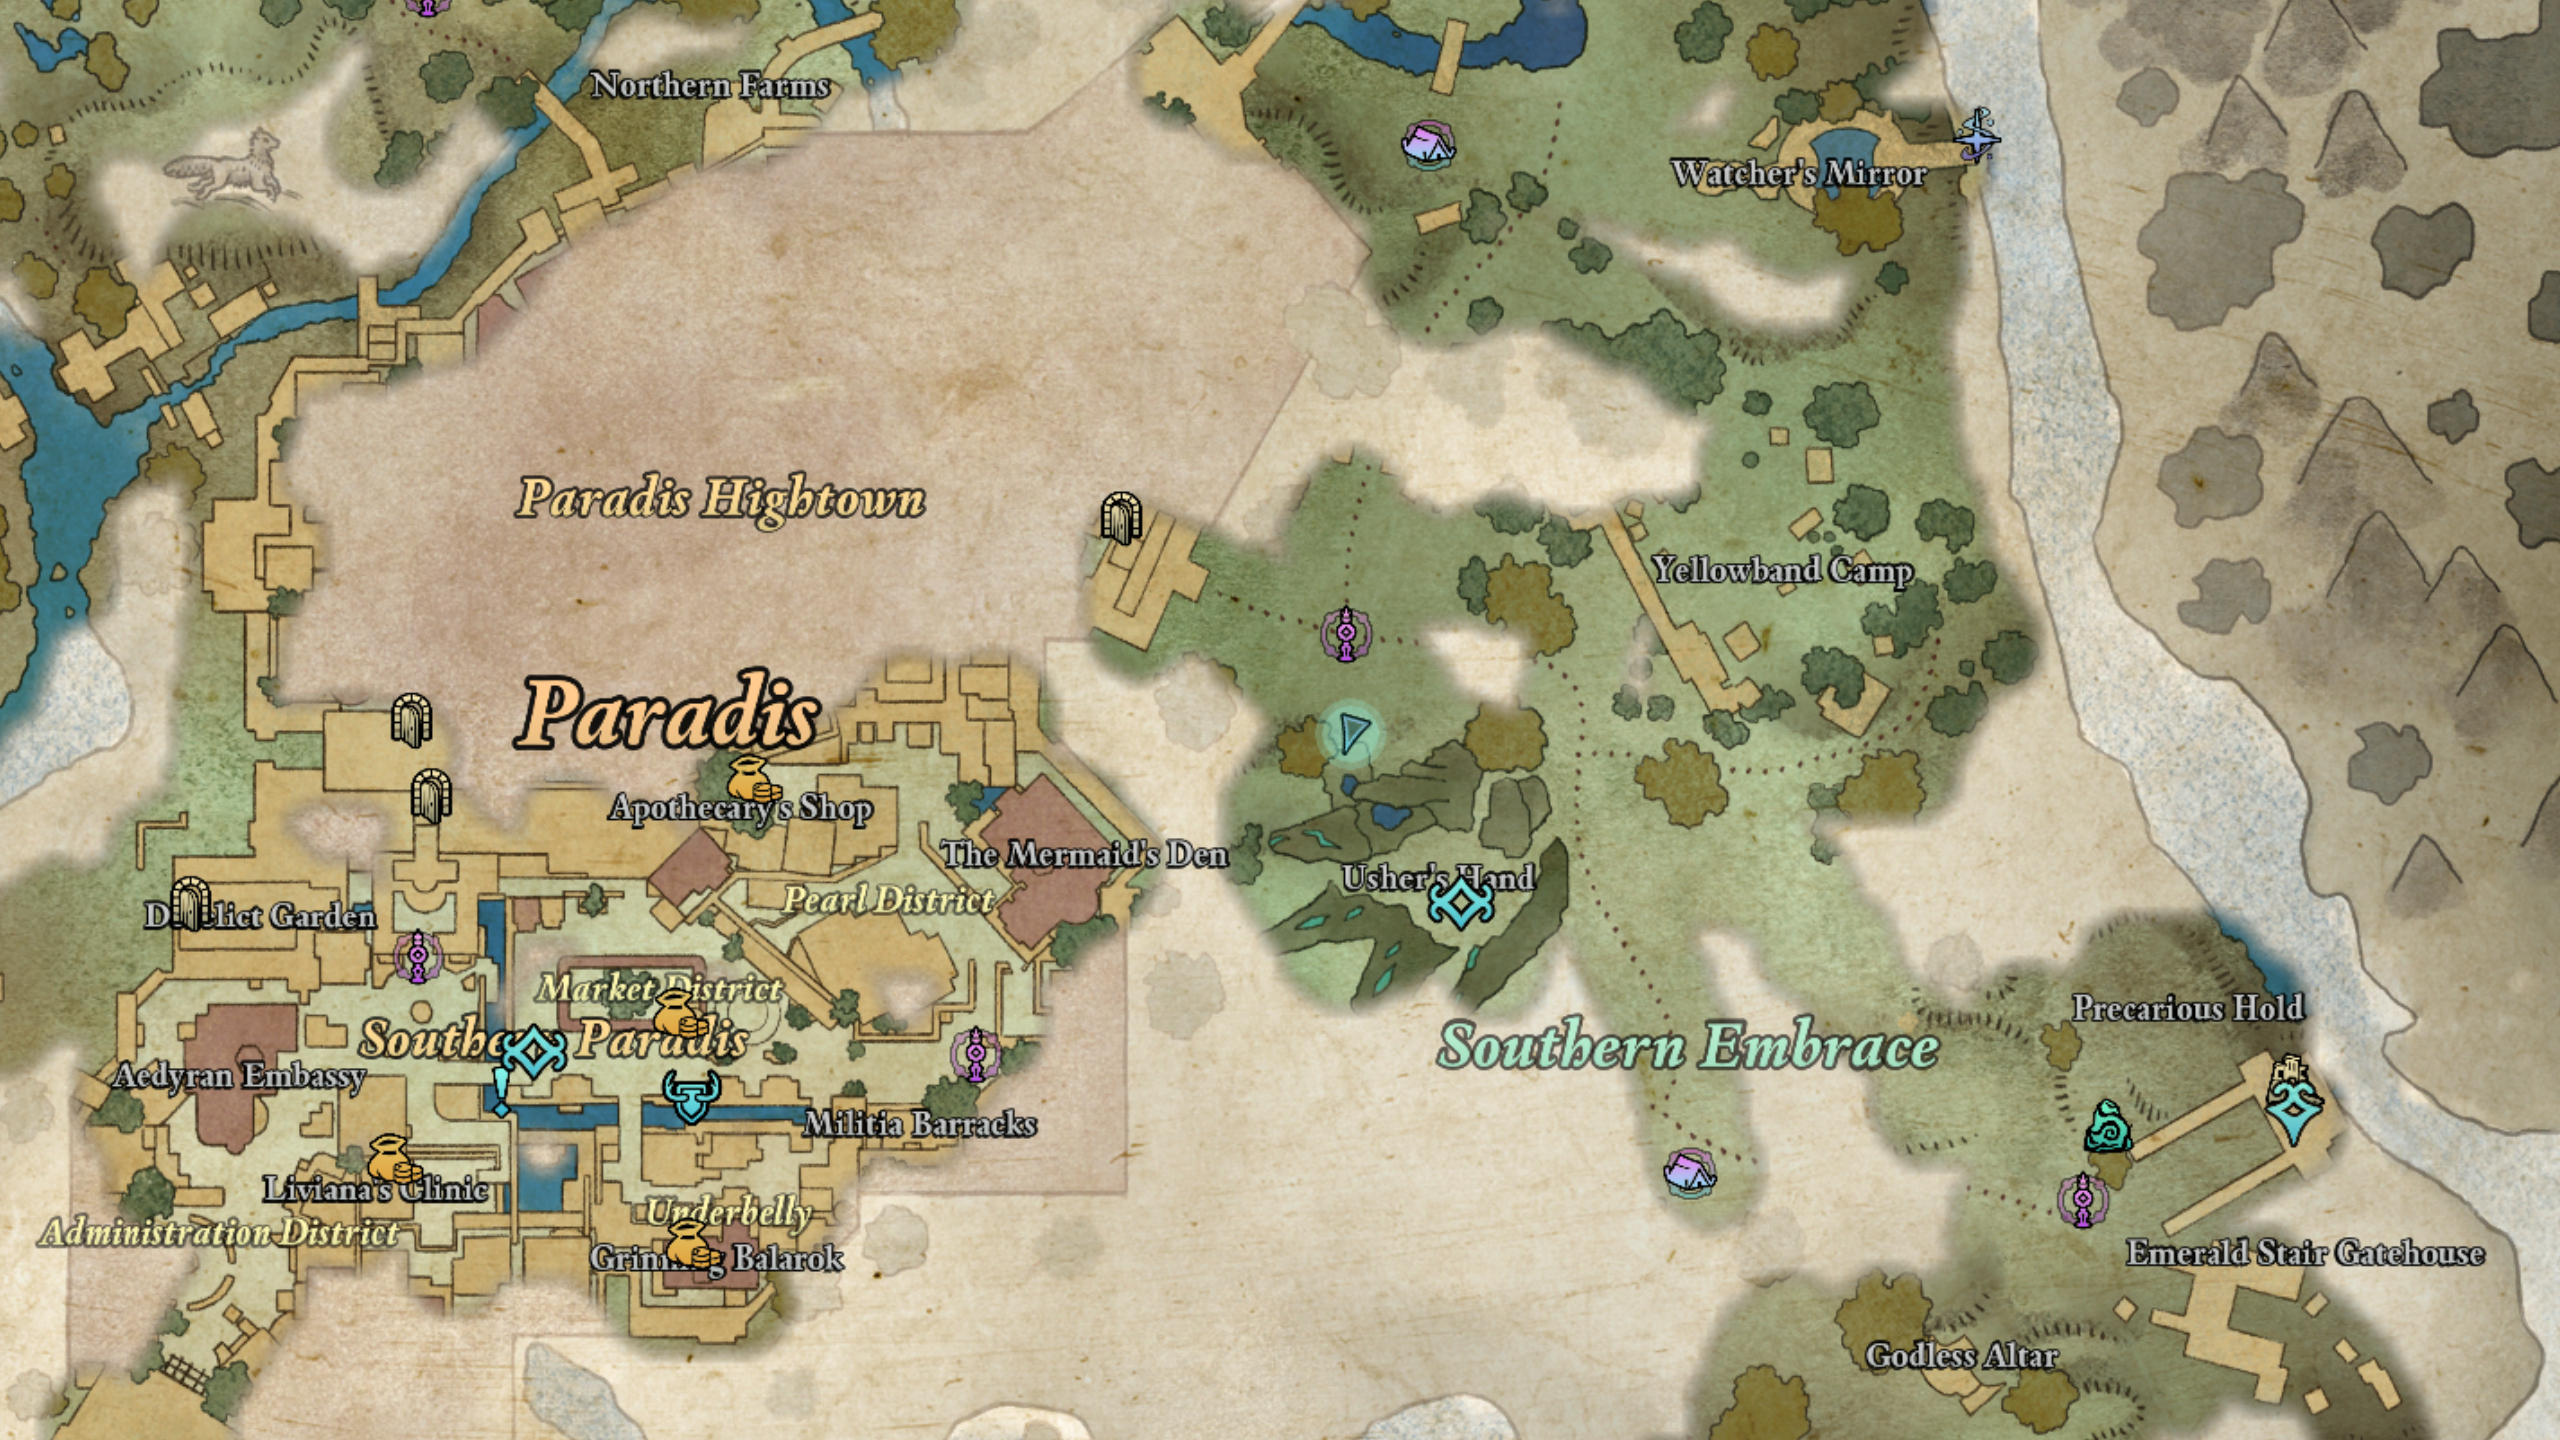
Giermund is located in a tiny pile of debris close to the steps leading to the eastern entrance of Paradis, right beside the God’s Gate fast travel point. He appears to have been crushed by a stone, but you can retrieve his map and bring it back to Sanza if you wish. What a pity!
Mapping the Living Lands: Emerald Stair
As soon as you enter the second significant area of Avowed, you’ll be assigned the “Mapping the Living Lands: Emerald Stair” quest, leading you in search of a character named Fleccia.
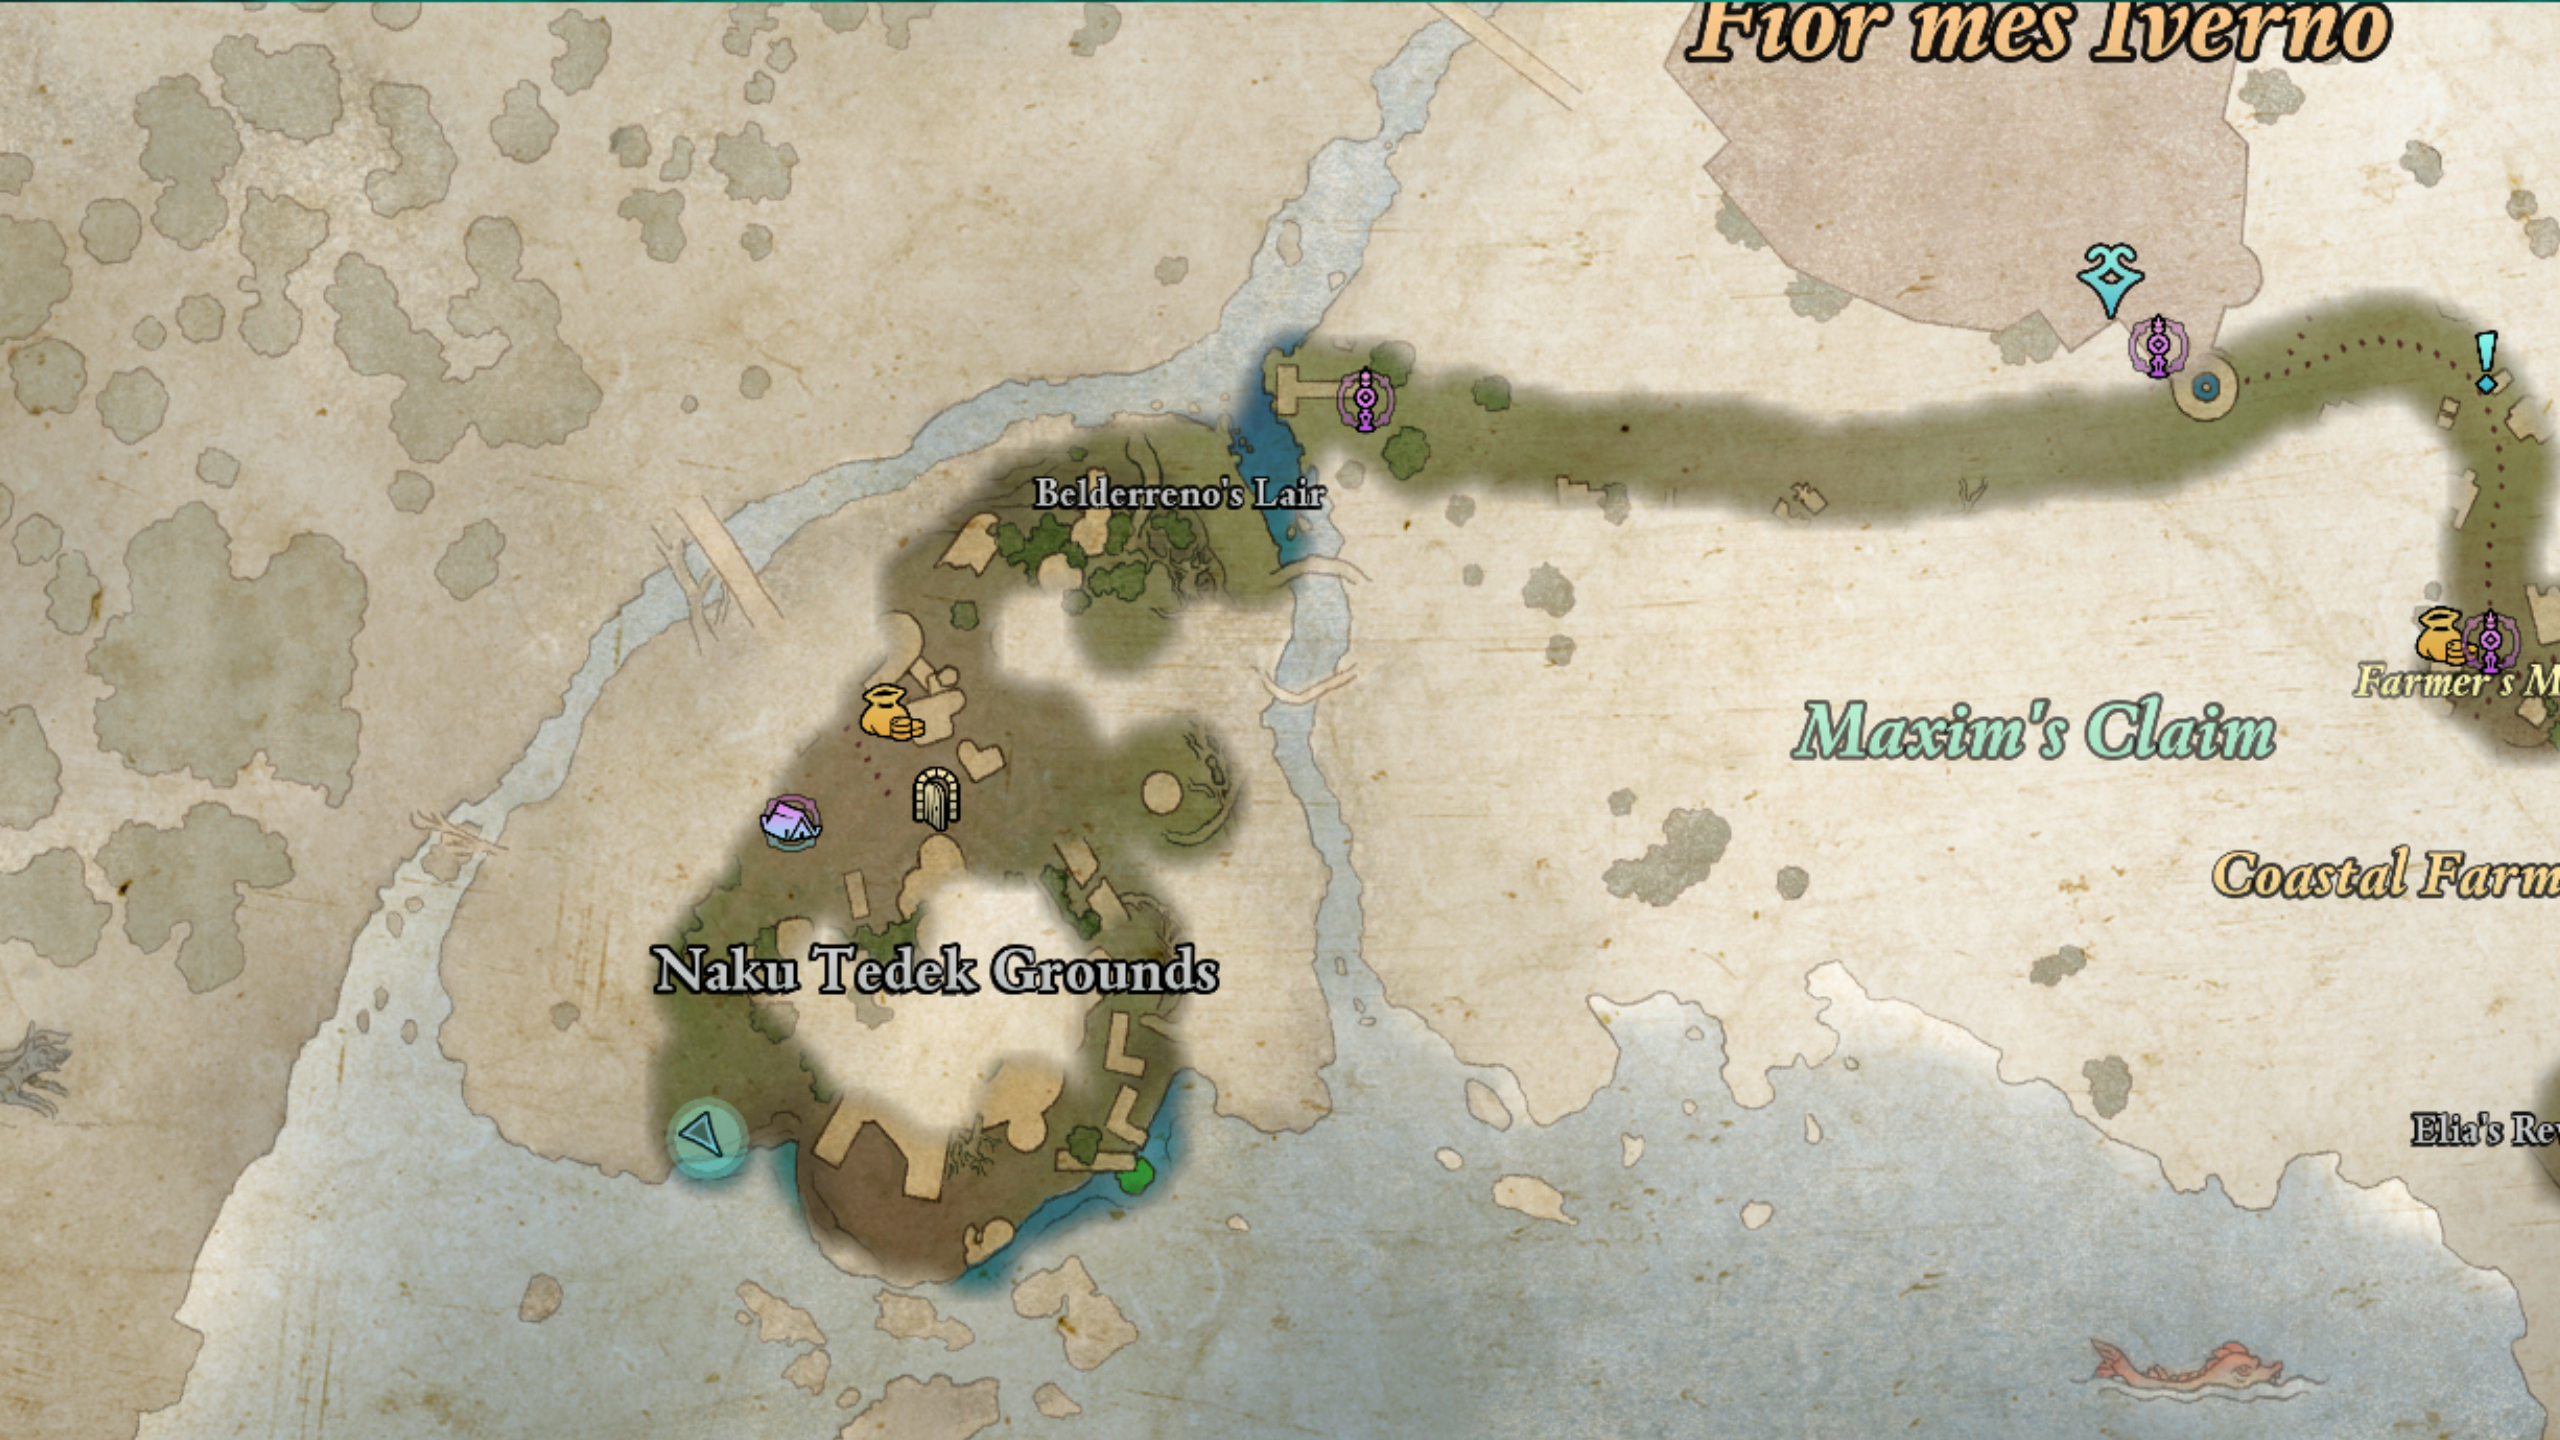
1. You’ll find Fleccia on a cliff that offers a stunning view of the sea, situated at the southwestern border of Naku Tedek Grounds. The easiest way to get there is by fast-traveling to the nearby camp, then following the western path down the hill.
2. Sadly, Fleccia is no more, but her map (along with a potion and some ingredients) remains for you to pick up as a memento.
Mapping the Living Lands: Scatterscarp
Marvel at this, friends! We’re on the hunt for a third missing cartographer – Wilfrith – whose whereabouts can be found in Scatterscarp. To start this mission, make your way to Thirdborn and claim “Wilifrith’s Dispatch” from the bounty board. This will provide you with valuable clues to guide you in recovering the map. Once you have the map, return to Sanza, although it is feasible to complete these tasks without the quest.
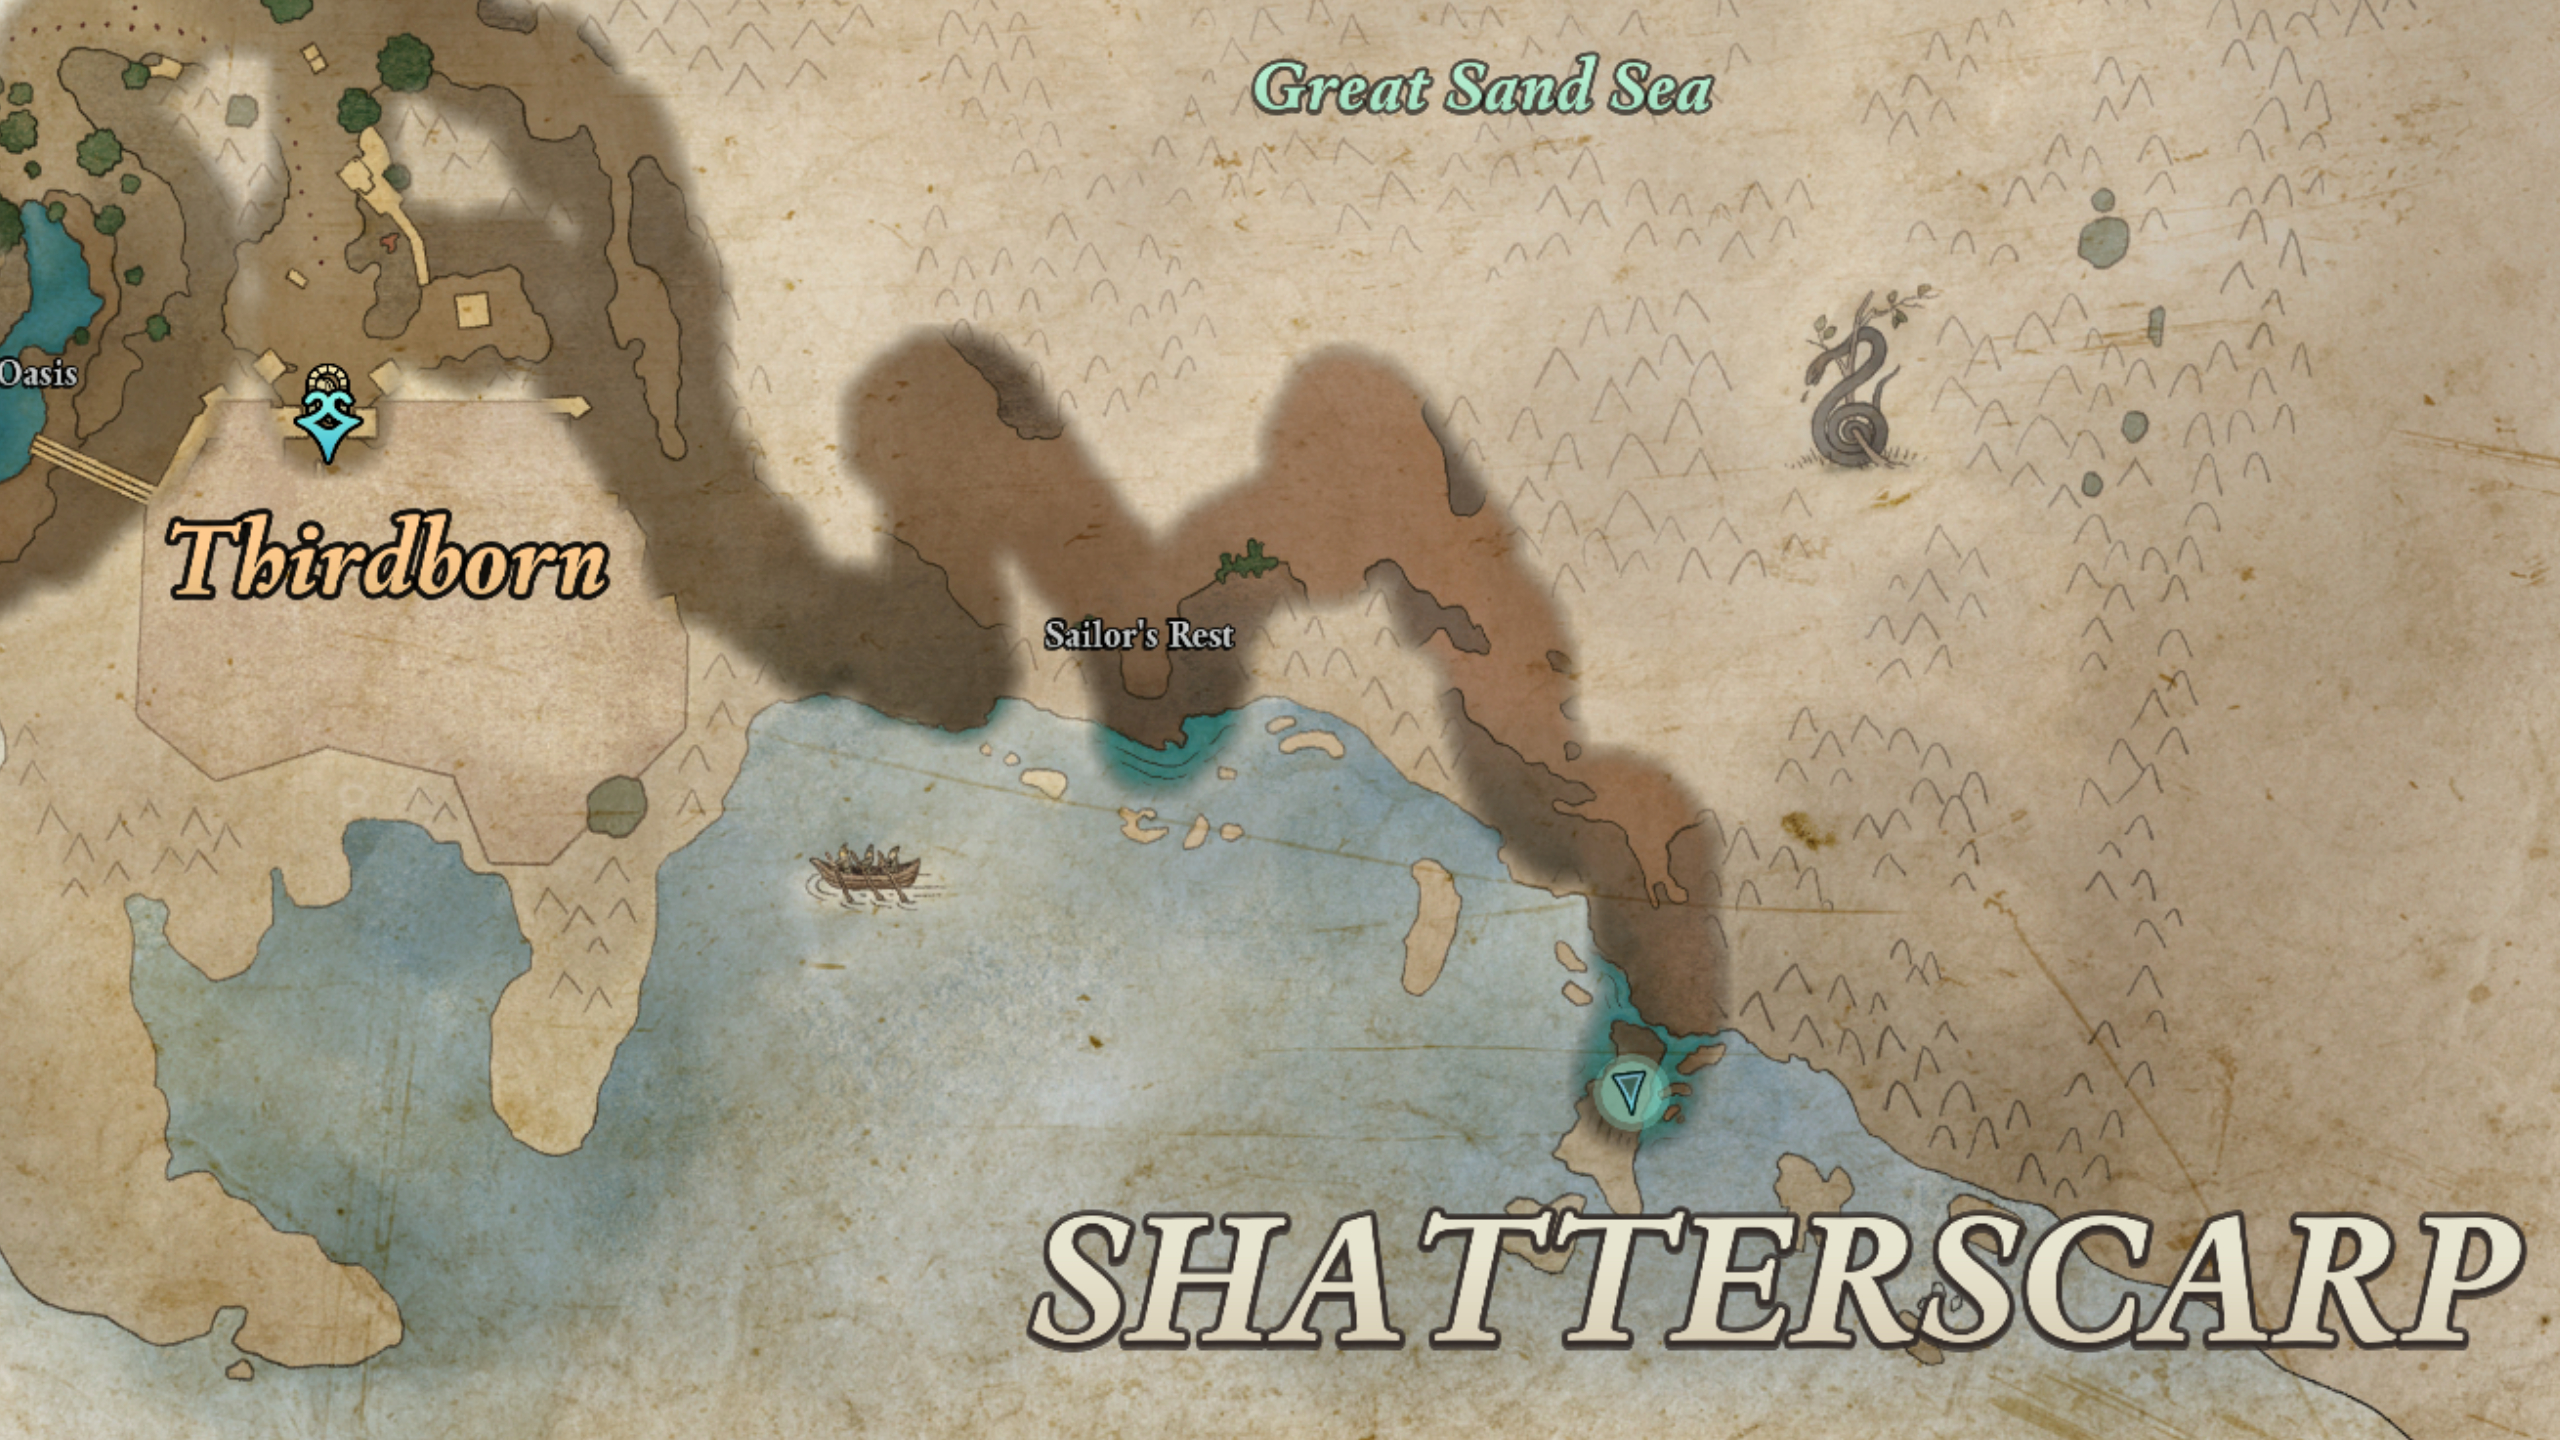
I stumbled upon Wilfrith’s campsite, nestled on a rugged cliffside overlooking the southeastern coast of Scatterscarp, not far from Sailor’s Rest. If you check your map closely, you’ll see it’s perched just above the second ‘T’ in the Scatterscarp title, tucked away in the bottom right corner.
Reaching this spot isn’t too difficult; just walk along the seashore from Thirdborn towards the east. You’ll eventually stumble upon Sailor’s Rest, marking that you’re halfway to your destination. Continue walking until you find a tiny trail leading to a rocky pinnacle – there, you’ll discover Wilfrith’s remains and their map.
Mapping the Living Lands: Galawain’s Tusks
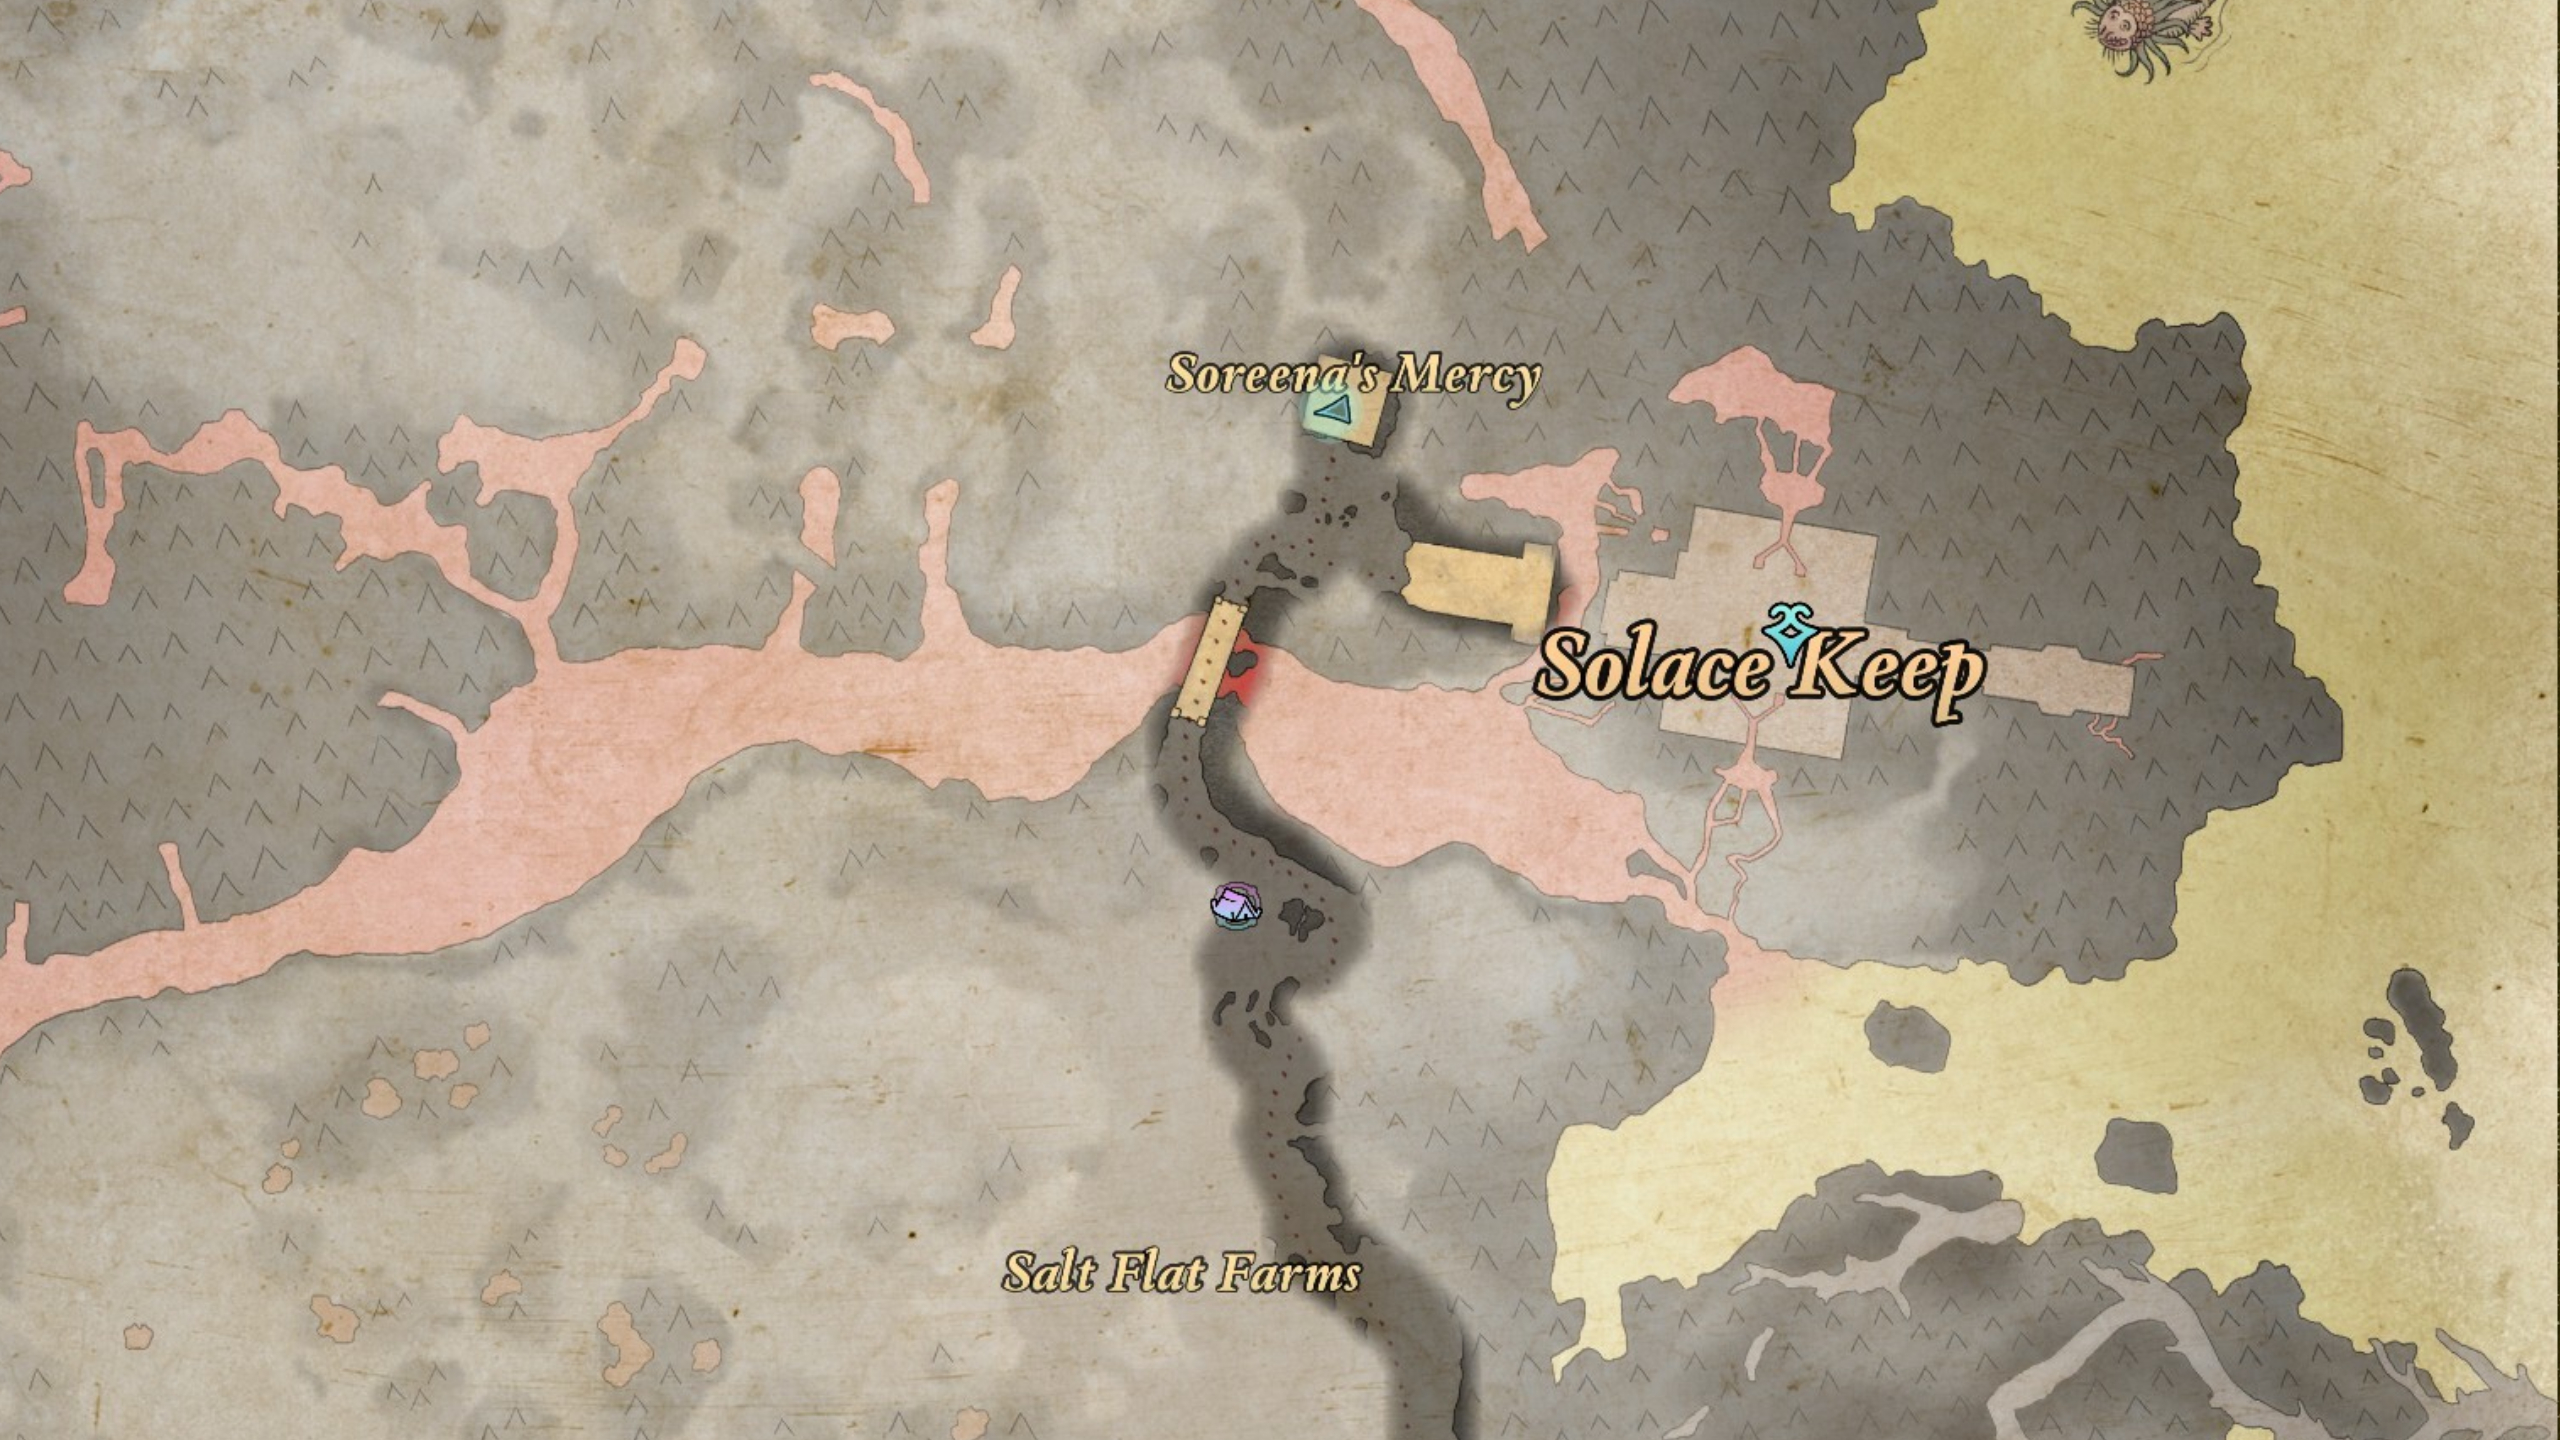
Renato is currently imprisoned in Soreena’s Mercy prison, located near Solace Keep, due to grave-robbing charges. It seems undeniable that Sanza is an incompetent manager and mapmaker, but fortunately, one of his cartographers is still alive for now.
Renato is quite simple to locate. A clue about his whereabouts can be found far away in the Ash Forest region of Galawain’s Tusks, but it’s quite a trek to hike out there for the hint and you might just run into him before you even reach Solace if you’re fond of exploring hidden areas.
Go up to the second level of the prison and have a conversation with Renato, who quickly reveals himself as an employee of Sanza. If you choose to do so, you can free him from his cell without engaging in any dialogue checks by telling the guard “He’s paid his debt. Set him free.” followed by one of the three explanations provided. Alternatively, should you decide not to help Renato, you can still acquire his map notes and later hand them back to Sanza.
Read More
- Invincible’s Strongest Female Characters
- Top 8 Weapon Enchantments in Oblivion Remastered, Ranked
- MHA’s Back: Horikoshi Drops New Chapter in ‘Ultra Age’ Fanbook – See What’s Inside!
- Nine Sols: 6 Best Jin Farming Methods
- How to Unlock the Mines in Cookie Run: Kingdom
- Top 8 UFC 5 Perks Every Fighter Should Use
- Gold Rate Forecast
- USD ILS PREDICTION
- Silver Rate Forecast
- How to Reach 80,000M in Dead Rails
2025-02-18 17:33