
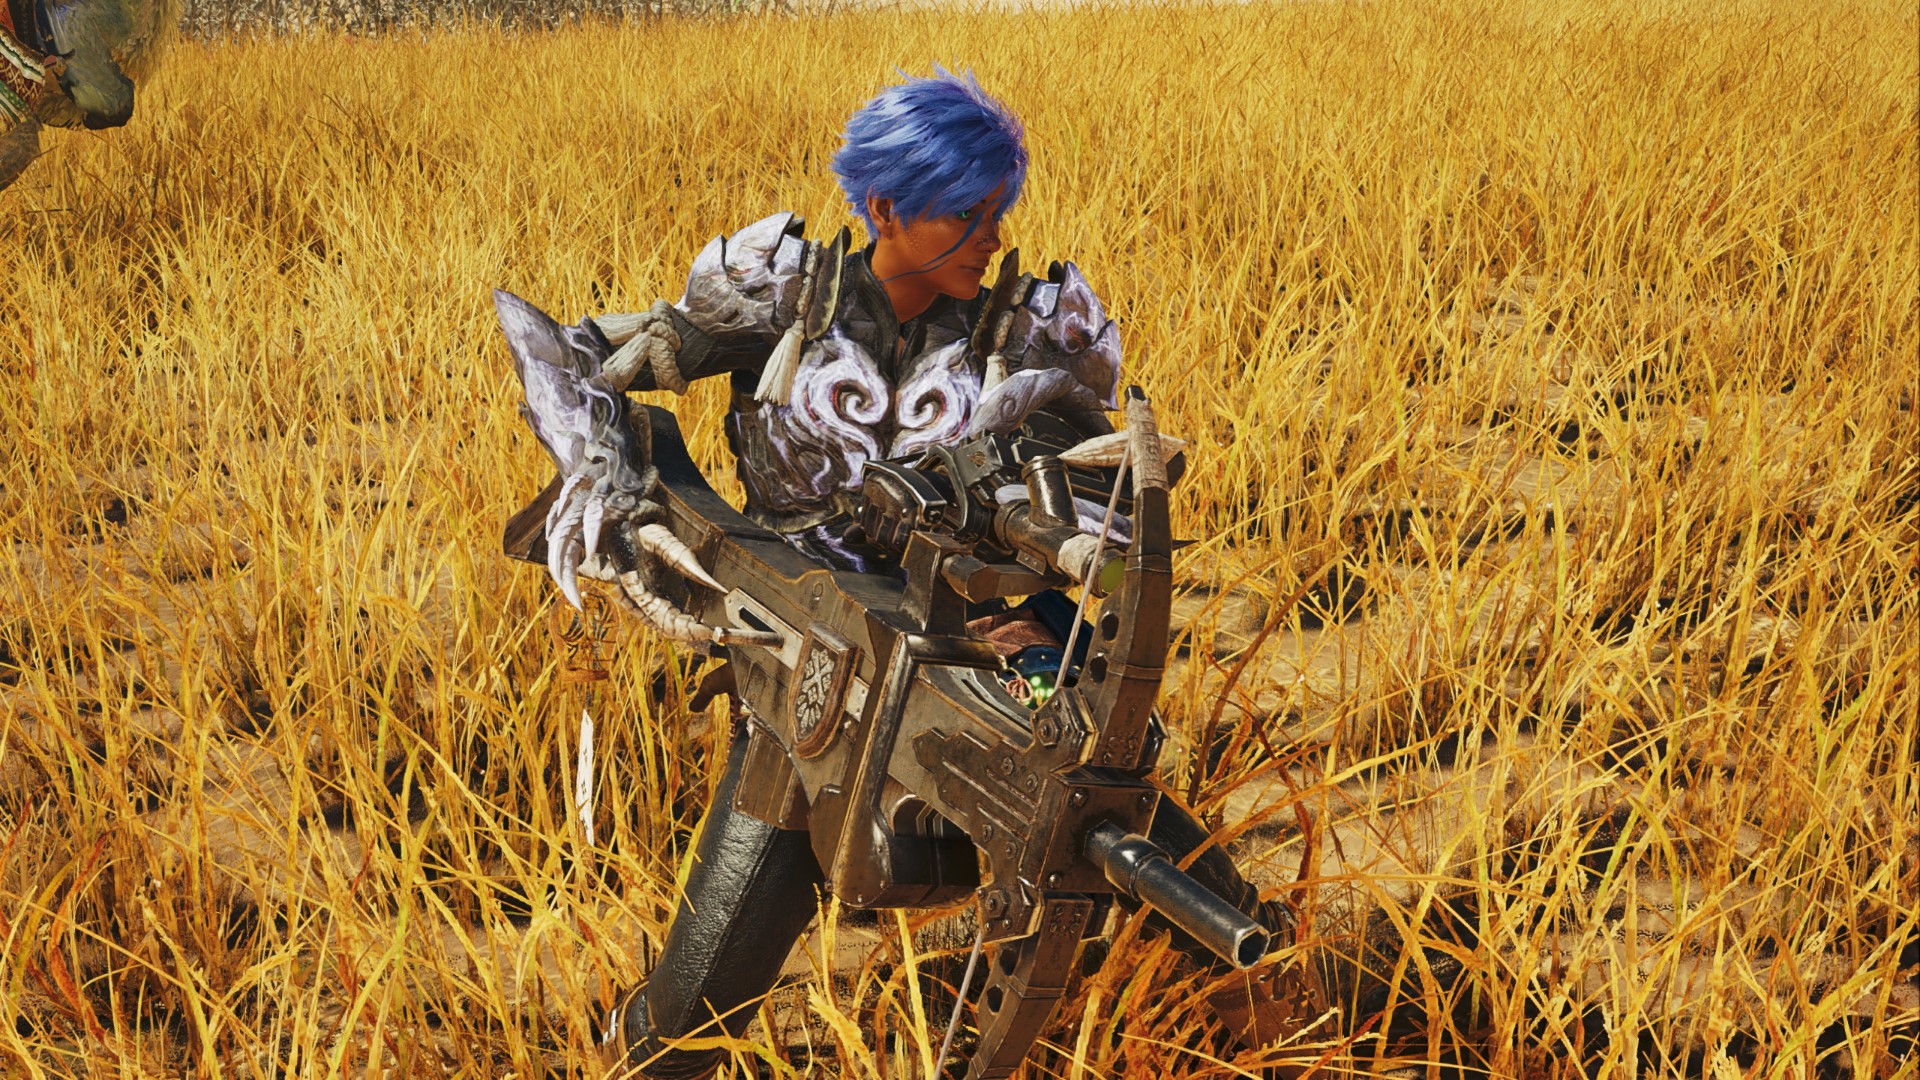
For agile hunters who perform better while on the move, similar to the Sundance Kid, the Light Bowgun is the ideal Monster Hunter weapon. Among the game’s three ranged weapons, it specifically motivates (even necessitates!) swift movement, allowing you to strike monsters from a strategic position that inflicts additional damage based on your ammunition. In contrast, the Heavy Bowgun emphasizes defense, making you a slow-moving turret. On the other hand, the Light Bowgun boasts unique mobility mechanics, enabling quicker reloading and movement, intertwining dodges and attacks. The most effective Light Bowgun builds in Monster Hunter Worlds capitalize on these features to keep the damage rate high.
Using a bowgun in a hunt on your own is definitely possible, but they perform exceptionally well when used in a team setting, with other hunters distracting the monster. The Light Bowgun, in particular, allows for impressive agility, enabling you to effortlessly dodge Rathalos’ charge while simultaneously reloading – and let me tell you, that’s downright thrilling!
Among the weapons in Monster Hunter Worlds, the Light Bowgun is undoubtedly one of the more challenging ones to master due to its numerous customization options, an extensive array of ammo types, and two distinct firing modes to get used to before delving into the intricacies of your combos. Here’s a quick guide on how to wield it effectively, followed by some Light Bowgun builds suitable for Low Rank quests.
This text maintains the original meaning but is written in a more conversational and reader-friendly style.
How to play Light Bowgun in Monster Hunter Wilds
If you’ve been using melee weapons exclusively so far, you might need some time getting accustomed to the Light Bowgun. First, explore your equipment menu to familiarize yourself with the ammunition types that work for your Light Bowgun, then set them to “auto craft” in the Crafting section. Here’s a guide to help you get started!
- Fill up your ammo pouch: Bowguns call for an extra step before each hunt. Step into your tent and hit “restock” on your ammo pouch. If you’re running empty on your best elemental ammos, you’ll want to do a bit of gathering on the map before confronting the monster.
- Research the monster: Having so many ammo options means it’s worth consulting the Monster Field Guide to see what elements or damage types your target is weakest to.
- Swap ammo: Hold LB and press up/down on the dpad to switch ammo types at any time, even while the gun is sheathed.
- Point and shoot: Hold LT to aim and RT to fire.
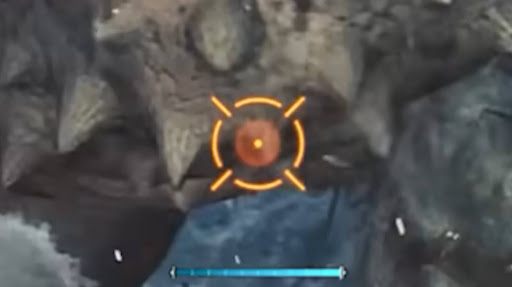
- Watch that reticle: The Light Bowgun has a finicky maximum range. You won’t be dealing full damage unless your reticle is orange with a red center like this:
The Light Bowgun in Wilds offers much more than just aiming and firing. Developers at Capcom have added some intricate acrobatics to this sleek weapon, along with an awe-inspiring Rapid Fire mode that significantly increases the potency of both standard and special ammunition. Once you’ve mastered the basics discussed earlier, here are some additional tips:
In other words, the Light Bowgun in Wilds is not just about aiming and shooting; it has been enhanced with new agile maneuvers by Capcom and a powerful Rapid Fire function that greatly increases the effectiveness of both regular and special ammo. Here’s what to learn once you are familiar with everything mentioned previously.
- Rapid Fire: All Light Bowguns now have a Rapid Fire mode activated by pressing B. In Rapid Fire, certain ammo types fire extra shots per trigger pull, so Normal Ammo’s 3-shot burst becomes a 5-shot burst at Level 1.
- Normal, Spread, and Pierce Ammo are infinite: All Light Bowguns now have access to these three basic ammo types and their ammo is always infinite. You cannot craft better versions of these ammos; their power level is now determined by the bowgun itself or attached mods.
- Focus Blast: Hold LT and press RB to fire a Focus Blast: Eagle Shot, an arched grenade that can destroy monster wounds for big damage. You can bank three Focus Blasts on a cooldown, and the attack can be charged for extra damage.
- Burst Step: While in Rapid Fire mode, press LT+RT+A and move in a direction to perform a Burst Step, sidestepping in the direction of movement while simultaneously firing off a burst. This is great for keeping up constant damage while repositioning away from an incoming blow.
- Step Reload: While in Rapid Fire mode, the same input for Burst Step (LT+RT+A) while your magazine is empty will perform a flashy sidestep reload that’s significantly faster than a manual reload. Once you learn this timing, you’ll barely have to stop firing.

Monster Hunter Wilds manual: Gathering all our suggestions in one spot
Monster Hunter Wilds recommendations: Start your hunting expedition
Monster Hunter Wilds weaponry: A variety of builds to construct
Monster Hunter Wilds best defense: Protect yourself effectively
Monster Hunter Wilds creatures: All the beasts you’ll encounter
Monster Hunter Wilds team play: Mastering cooperative hunting
- Special Ammo: The Light Bowgun supports two special ammos fired with Y+B. Wyvernblast is a mine that explodes for AoE damage when it’s attacked, so plant it near the monster and unload with Rapid Fire. The second is Wyvern Sticky Ammo, a sticky shot that attaches to the monster and procs extra damage when that spot receives subsequent hits (very useful for pierce ammo and multiplayer hunts).
- Rapid Fire Pierce Ammo: Rapid Fire does not affect all ammos equally, and Pierce Ammo seems to benefit more than most. With Level 3 Pierce Ammo, Rapid Fire tripled my number of hits per trigger pull, easily outperforming all the other ammos I tested in Low Rank. Suffice to say: Pierce Ammo is very good with Light Bowguns in Wilds and should be a priority if max damage is your aim (and we have weapon recommendations in the builds below to help).
- Armor, Demon, Recovery Ammo: These support ammo types now create clouds that linger wherever you fire them, allowing you and your whole squad to pass through them to get a quick boost or heal.
- Mods: This is where the “Customize Bowgun” option on every equipment screen comes in. Mods in Low Rank aren’t a huge deal, but they let you extend the magazine of your favorite ammo type and switch which special Wyvern ammo you’re using without having to craft a whole new bowgun.
Best Light Bowgun build for low rank
For bowgun users, low-rank armor might not initially seem thrilling, but once you adjust your attack range to suit your preferences, you’ll find that you won’t require much additional aid to deal consistent elemental damage. These builds will ensure you have enough ammo in the early stages of the game, improve your mobility as the campaign progresses, and eventually boost your damage during the latter stages of low rank.
- First weapon: Chain Blitz I
Typically, Light Bowgun users carry a variety of bowguns catering to various types of in-game damage. However, for beginners, consider using the Chain Blitz bowgun from the Ore tree first. This bowgun specializes in Pierce Ammo, which is incredibly effective when used with Rapid Fire, and it comes with Level 1 Tetrad Shot, making every fourth and sixth shot deal additional damage. To get the most out of this gun, modify it with an extended Pierce magazine.
- Second weapon: Chain Blitz II
Although it may appear as a minor improvement, the Chain Blitz II is comparable to some of the most recent Low Rank bowguns in terms of crafting. This is due to its Level 2 Pierce Ammo and Level 2 Tetrad Shot features. If Pierce ammo isn’t enticing, then the Ajarakan bowguns are another excellent choice that you can access approximately two-thirds into the Low Rank storyline.
- Third weapon: Rey Szelatya II
The Bowgun crafted from the top predator of Rey Dau, the Windward Plains, called the Light Bowgun, performs exceptionally well in late Low Rank and early High levels. Unlike other bowguns, it boasts high-level Pierce ammunition similar to Chain Blitz, but its unique feature is Thunder Ammo. Moreover, this Thunder ammo is not just available at level 2 for the bowgun, but it’s also one of its rapid fire options.
1. MH Wilds: Longsword strategies – Triumph through slashing
2. MH Wilds: Greatsword tactics – Execute grand gestures
3. MH Wilds: Bow plans – Aim for the perfect shot
4. MH Wilds: Dual Blades strategies – Rapid and relentless
5. MH Wilds: Charge Blade schemes – Malicious mace blows
- First armor set: Leather Headgear, Vest, Belt and Pants, Quematrice Braces
In the beginning of your adventure, since your standard ammo types are endless but your elemental ones aren’t, the Botanist skill from the Leather set will be particularly useful. You should gather every herb, bug, and mushroom you see, as these resources will help you craft ammunition and potions in abundance. Maxing out your Botanist skill will give you an additional item each time you harvest. Additionally, once you encounter Quematrice early in the campaign, consider turning it into a hat. Equipping one level of the Flinch Free skill will ensure that damage from enemy attacks won’t interrupt yours.
- Second armor set: Balahara Vambraces, Coil and Greaves, Kranodath Mail, Ingot Helm, Blessing Charm
To get through the second half of Low Rank, it’s advisable to craft the Balahara armor set, which includes three pieces and has the Evade Extender skill. Maximizing this armor skill significantly increases the range of your Light Bowgun’s sidestep and slide moves, allowing you to traverse the arena effortlessly whenever a monster approaches.
The Kranodath Mail (obtainable by defeating certain small monsters) will maintain a point in Flinch Free, while the Ingot Helm is less crucial but provides decent defense and Divine Blessing to reduce incoming damage. You can enhance this to level 2 by crafting a Blessing Talisman once you reach Oilwell Basin.
- Third armor set: Guardian Ebony Helm, Mail, Braces, and Coil, Leaping Charm
For the remaining Low Rank, Evade Extender’s handy dodging outshines any armor skill, but a Leaping Charm talisman lets you swap an older Balahara piece for better defense and higher damage. Four pieces of Guardian Ebony give you Level 3 Burst, boosting both regular and elemental damage on consecutive hits (take advantage of rapid fire!). This also triggers the Odogaron set’s Burst Boost II group skill, enhancing Burst even more. Save your Balahara pants to keep some Evade Extender; when you reach High Rank, you can upgrade your Leaping Charm and maximize dodging again.
Read More
- Invincible’s Strongest Female Characters
- Top 8 Weapon Enchantments in Oblivion Remastered, Ranked
- MHA’s Back: Horikoshi Drops New Chapter in ‘Ultra Age’ Fanbook – See What’s Inside!
- Nine Sols: 6 Best Jin Farming Methods
- How to Unlock the Mines in Cookie Run: Kingdom
- Gold Rate Forecast
- Top 8 UFC 5 Perks Every Fighter Should Use
- USD ILS PREDICTION
- How to Reach 80,000M in Dead Rails
- Silver Rate Forecast
2025-02-27 14:35