If you enjoy puzzles in Hello Kitty Island Adventure, you won’t want to miss the City Town Sewers! They feature thirteen puzzle rooms to unlock, and each one rewards you with special City Town-themed items – perfect for decorating or completing your outfits.
This guide will help you solve all the puzzles in the City Town Sewers of Hello Kitty Island Adventure. The only exception is the ‘Underground Introductions’ puzzle, which we cover in our ‘Above and Below’ quest guide.
Hello Kitty Island Adventure: All Puzzle Room Solutions
City Town Sewers — Big Town Buttons Puzzle Walkthrough
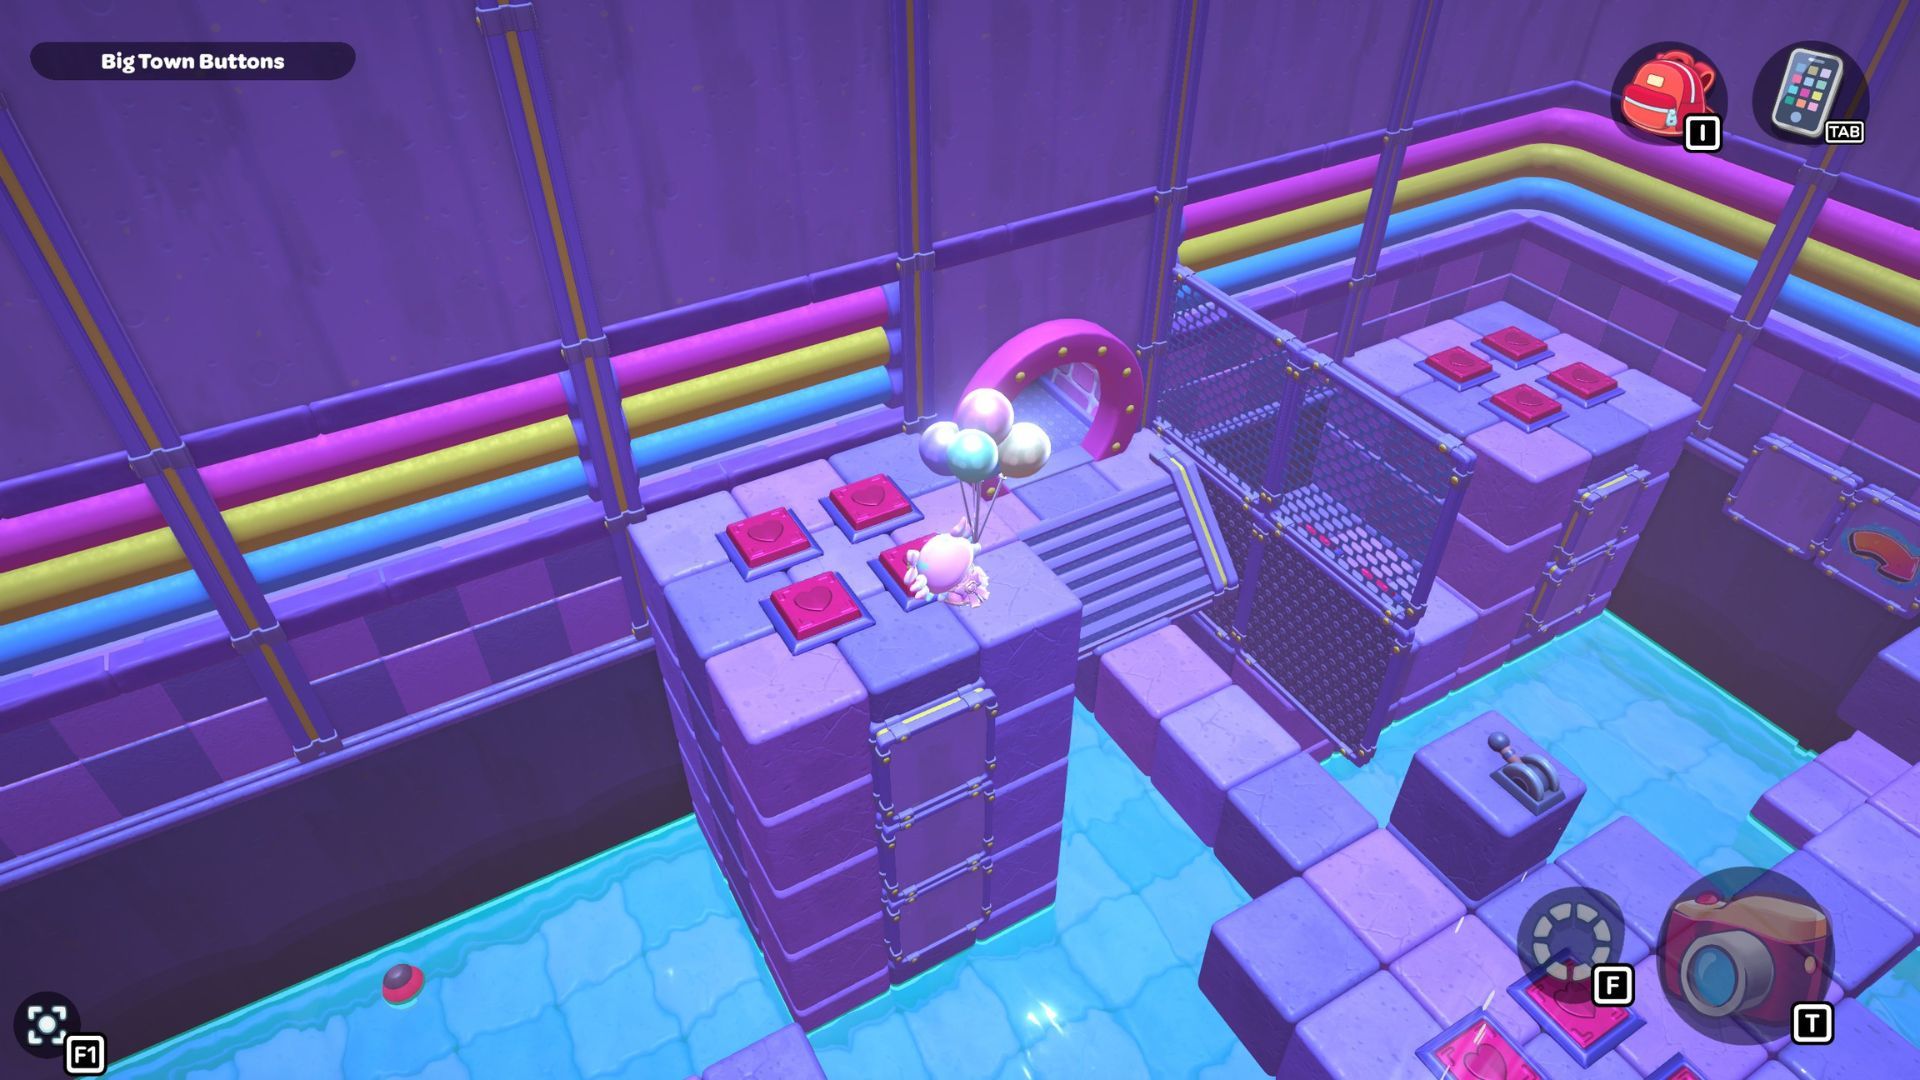
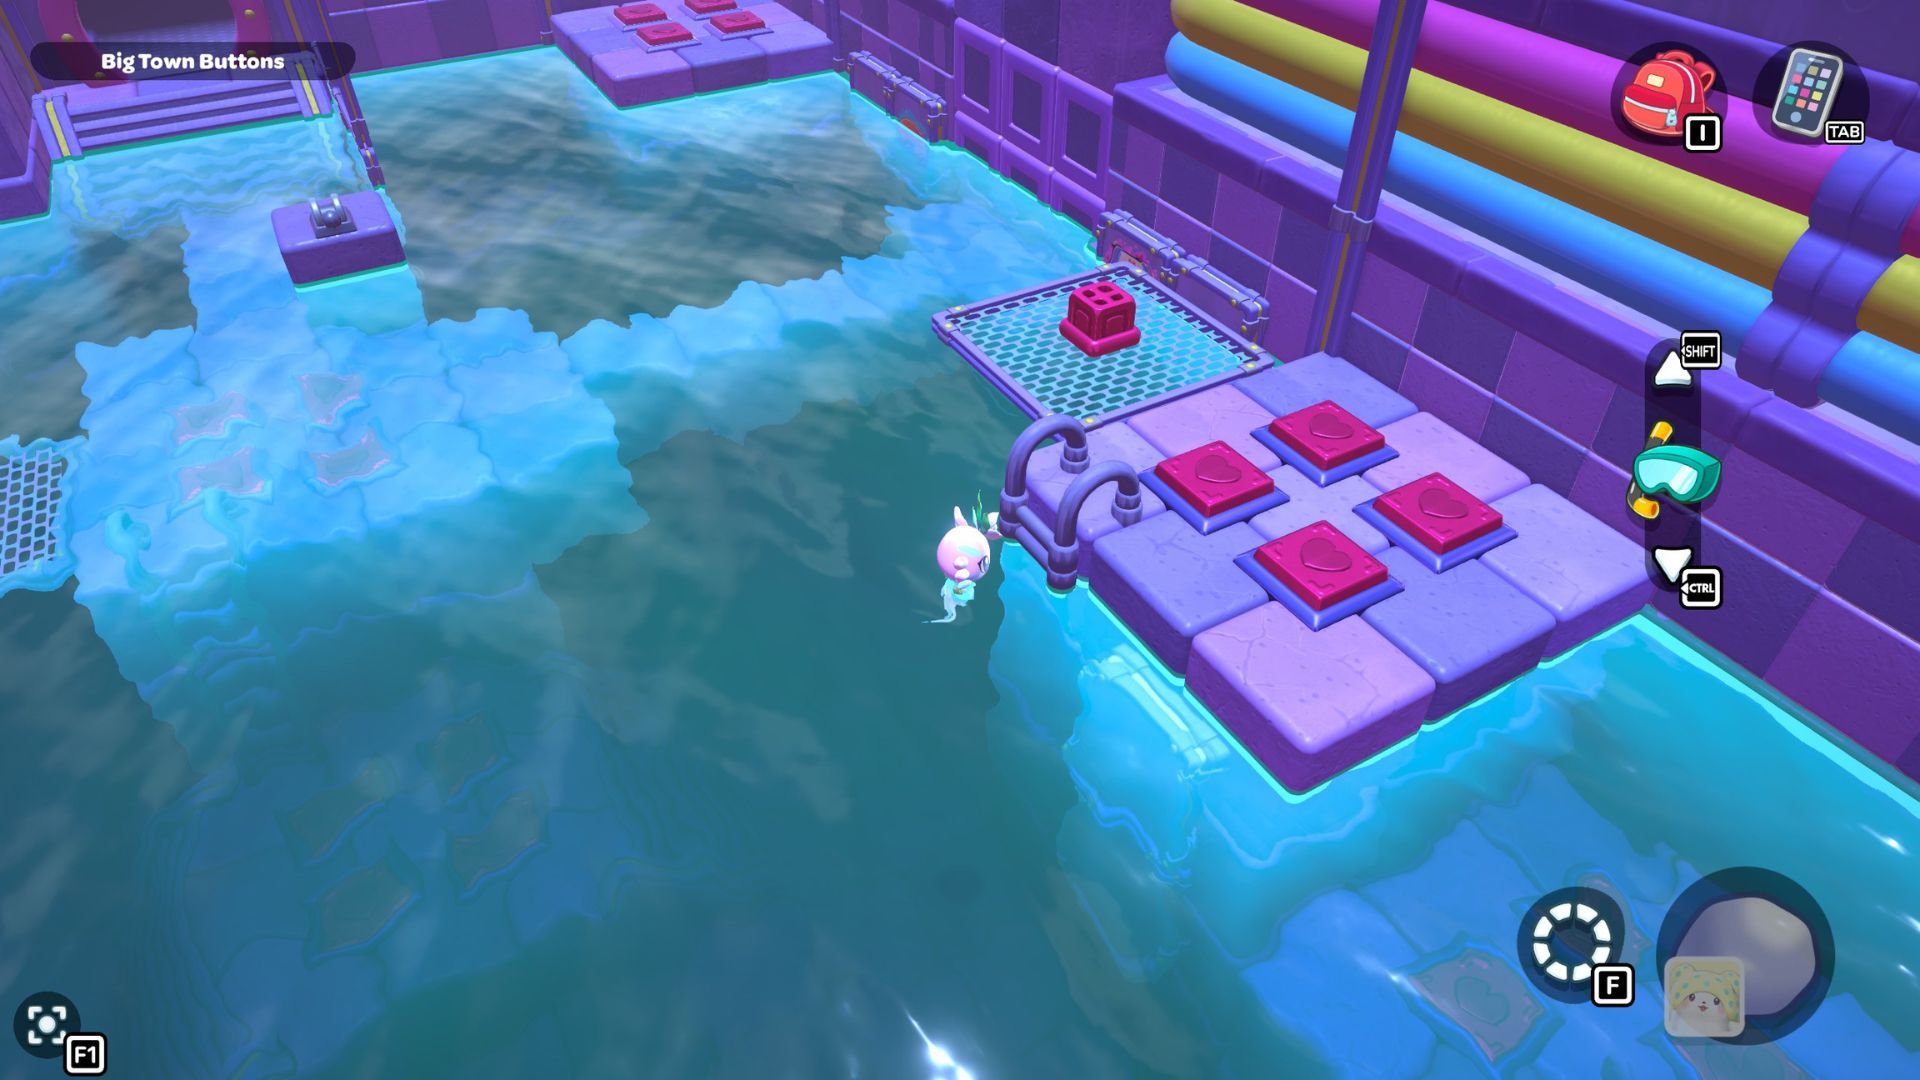
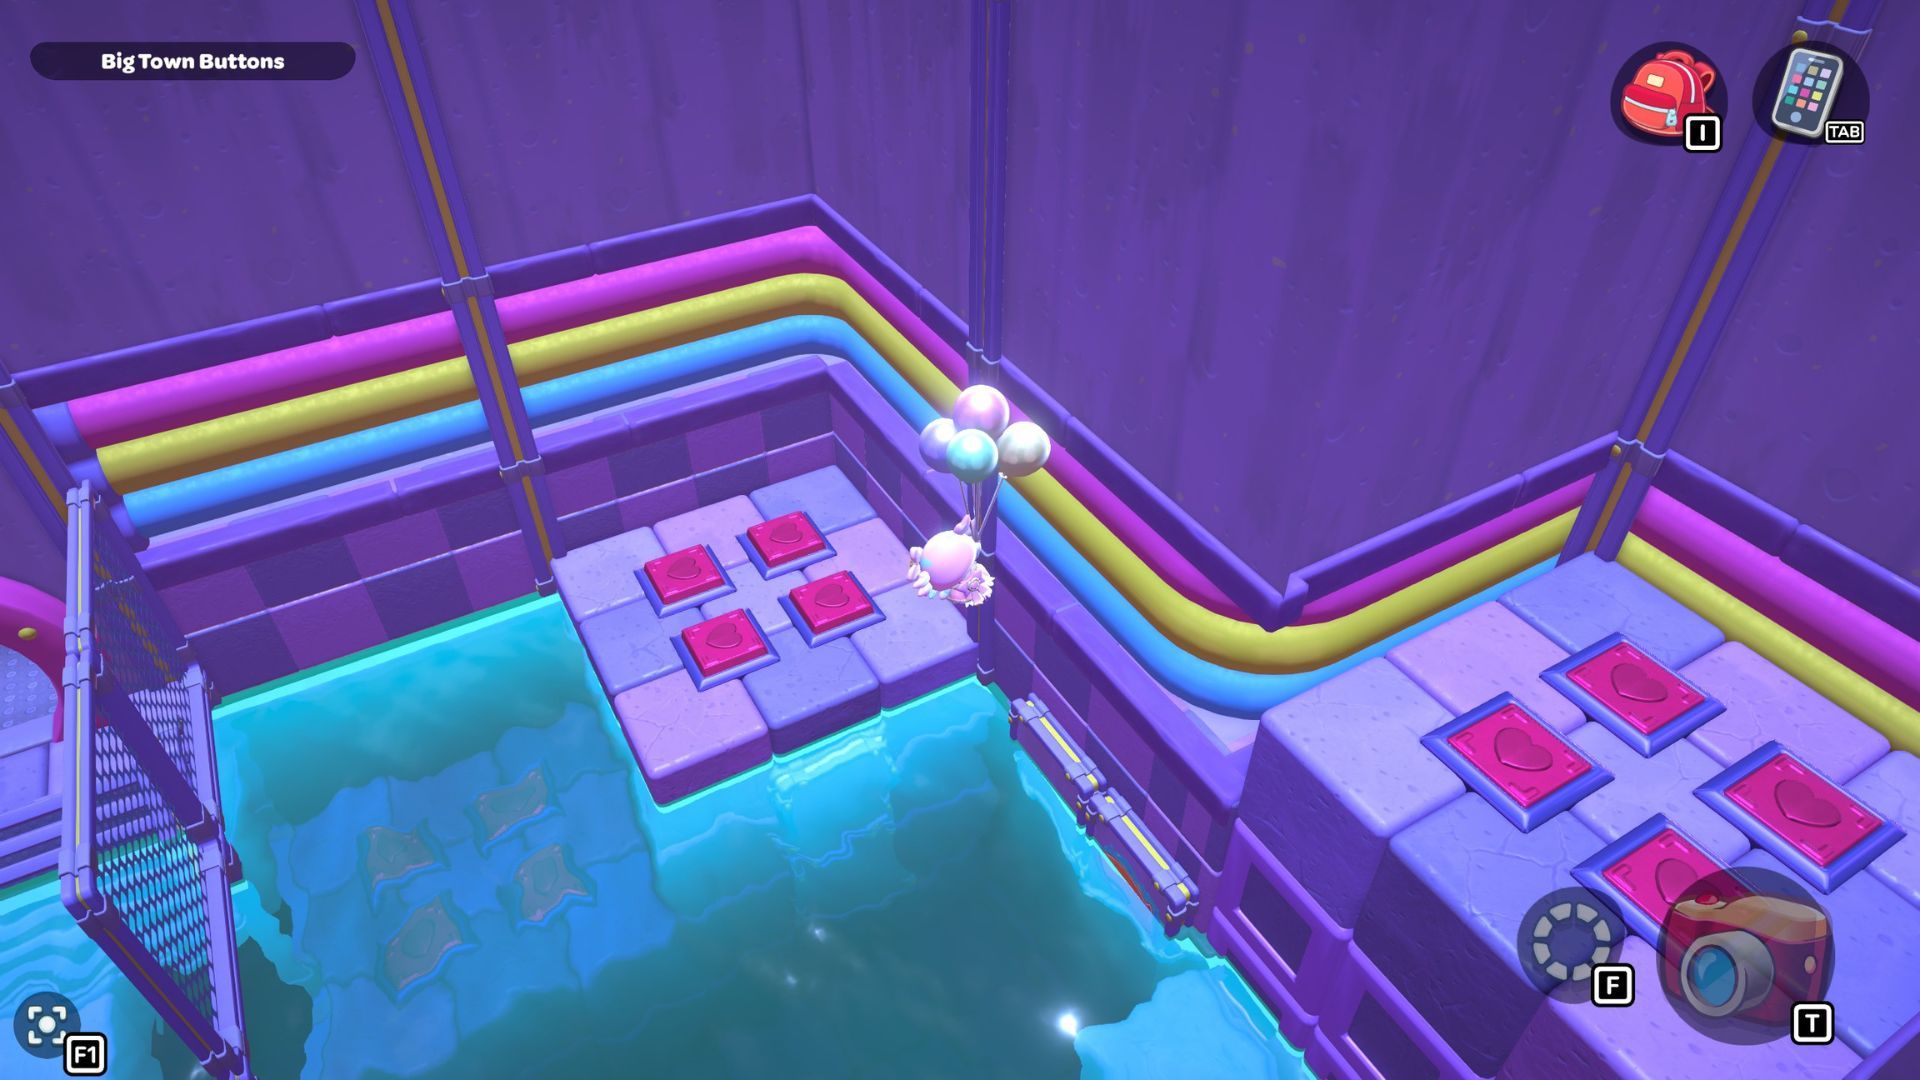
Okay, so I found this puzzle called “Big Town Buttons” deep down in the City Town Sewers – it’s way up in the northwest corner. It’s pretty simple, actually. You just have to step on every single red heart button until they’re all fully pressed down. That’s it!
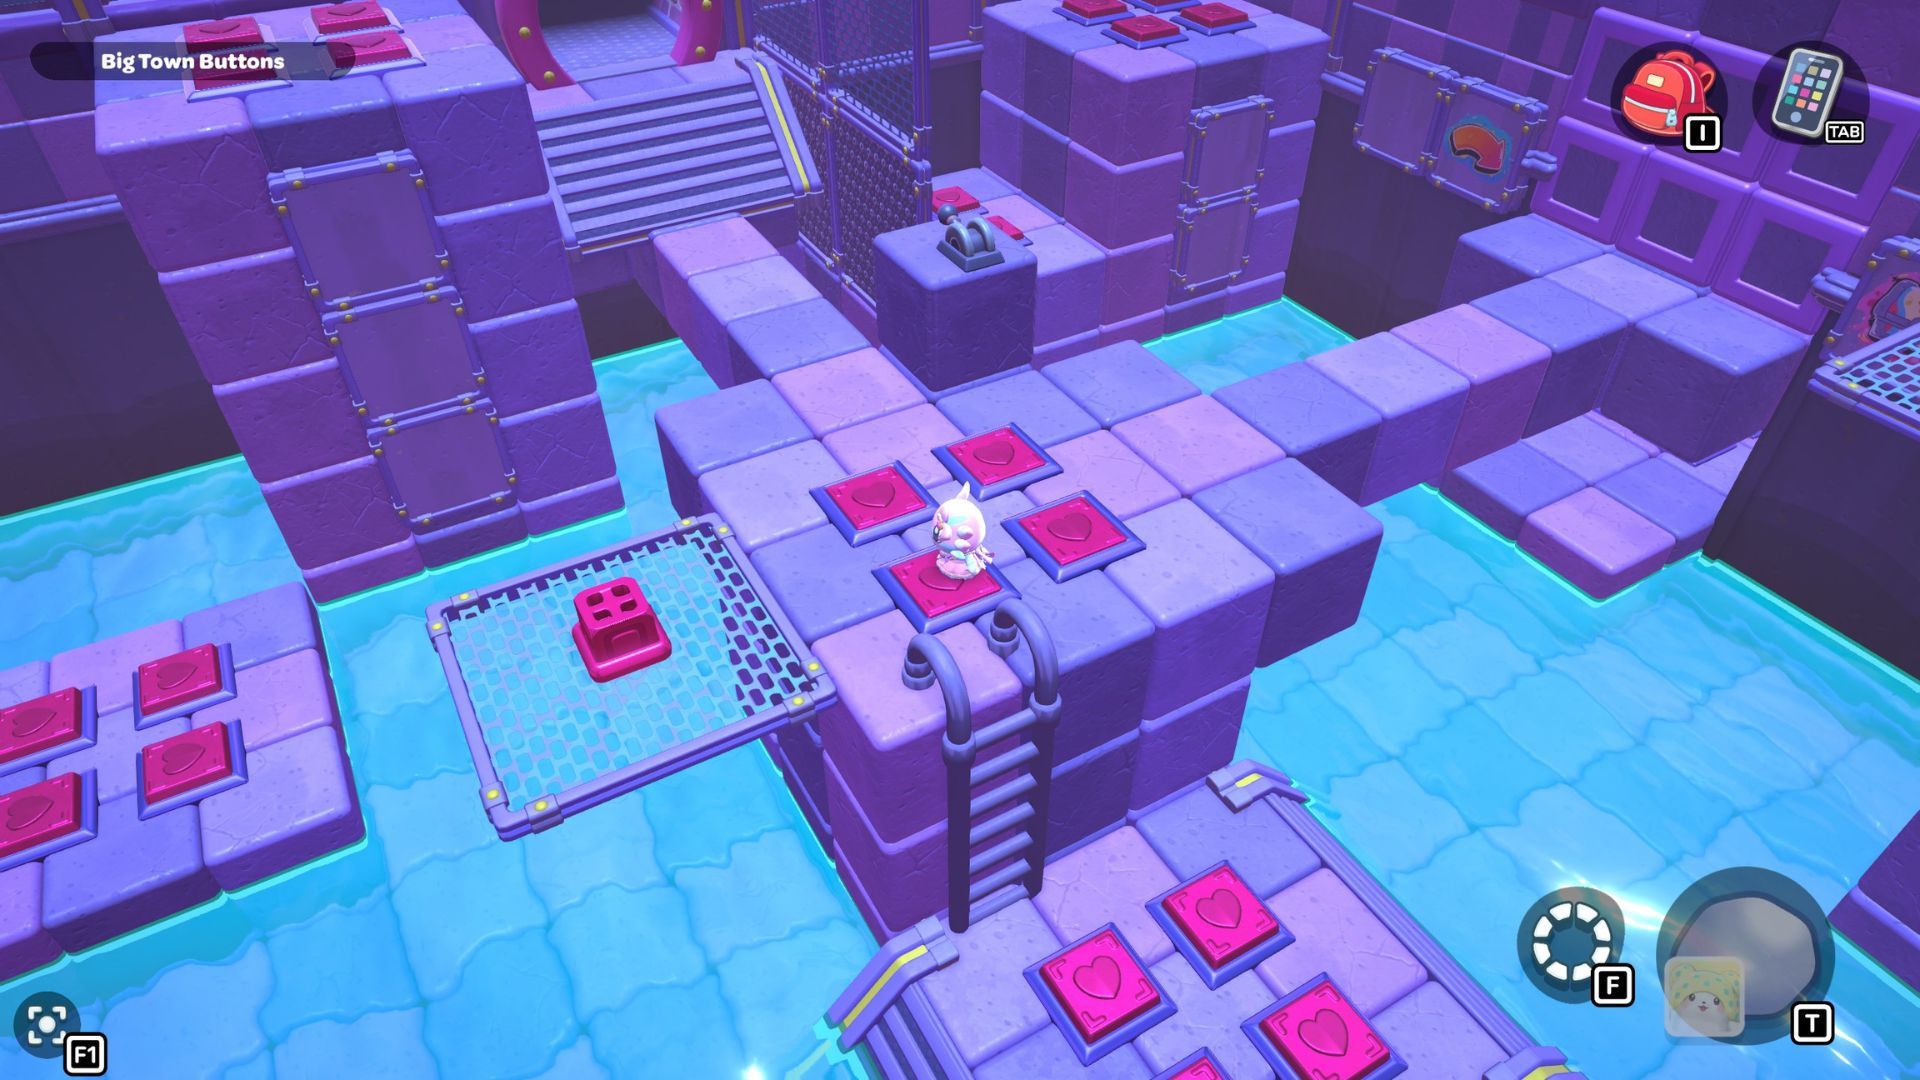
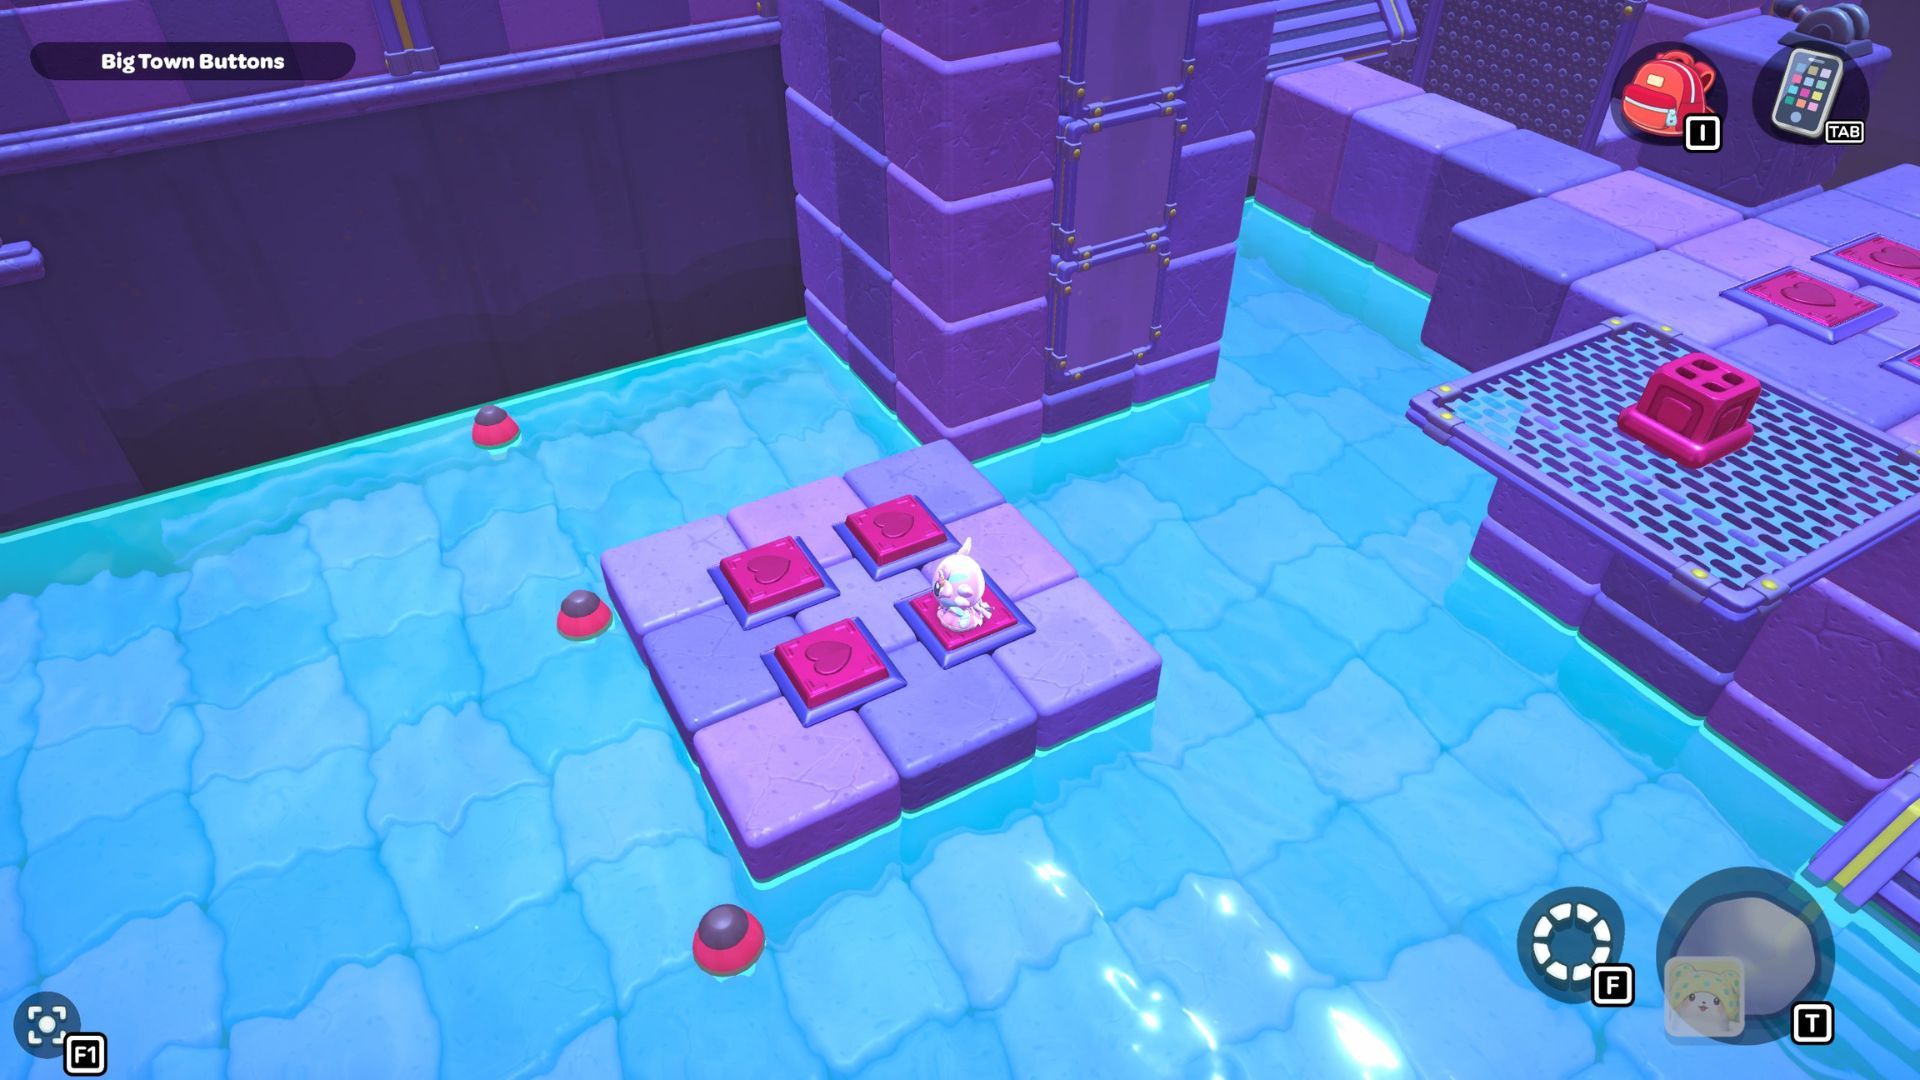
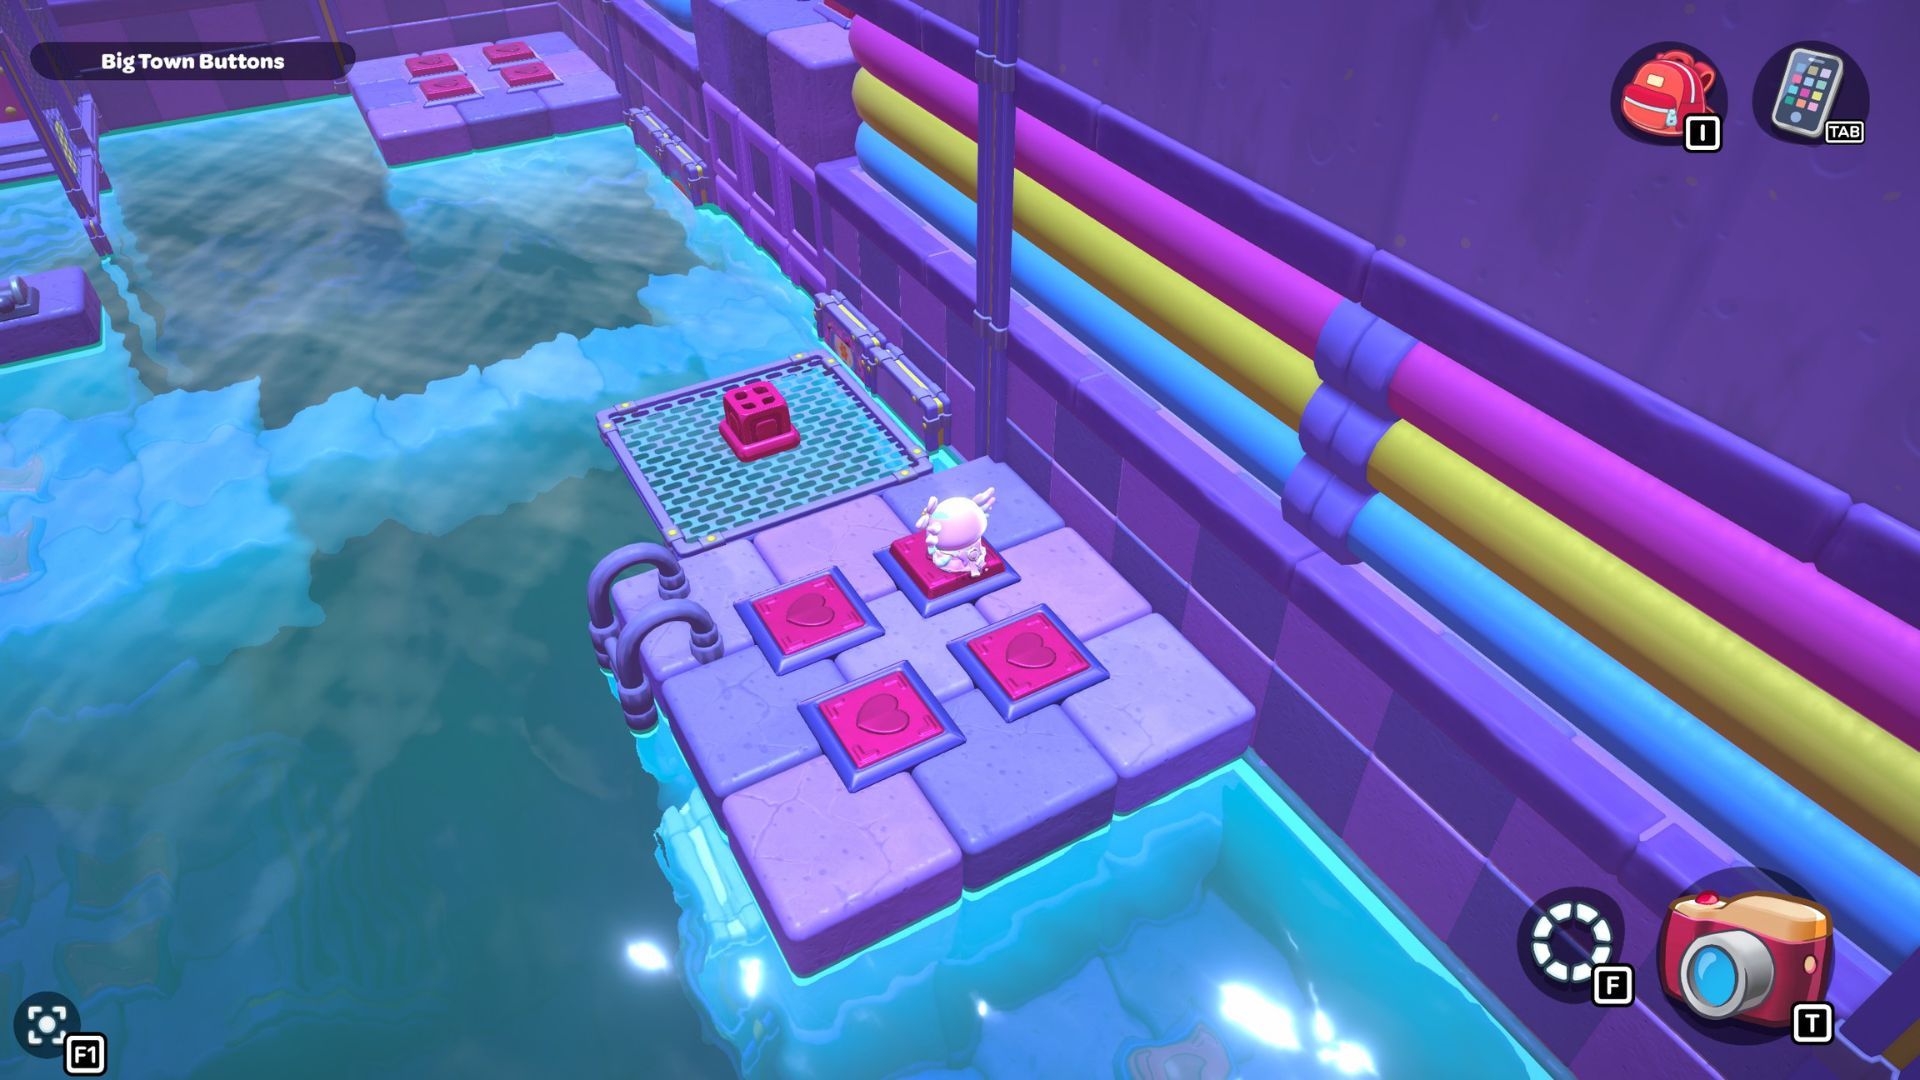
As soon as you enter the room, you’ll find yourself on a platform with four heart-shaped buttons and a lever. Begin by pressing all four buttons, then jump down to the platform directly south. Step on the buttons on that second platform, and then climb back up the ladder to where you started.
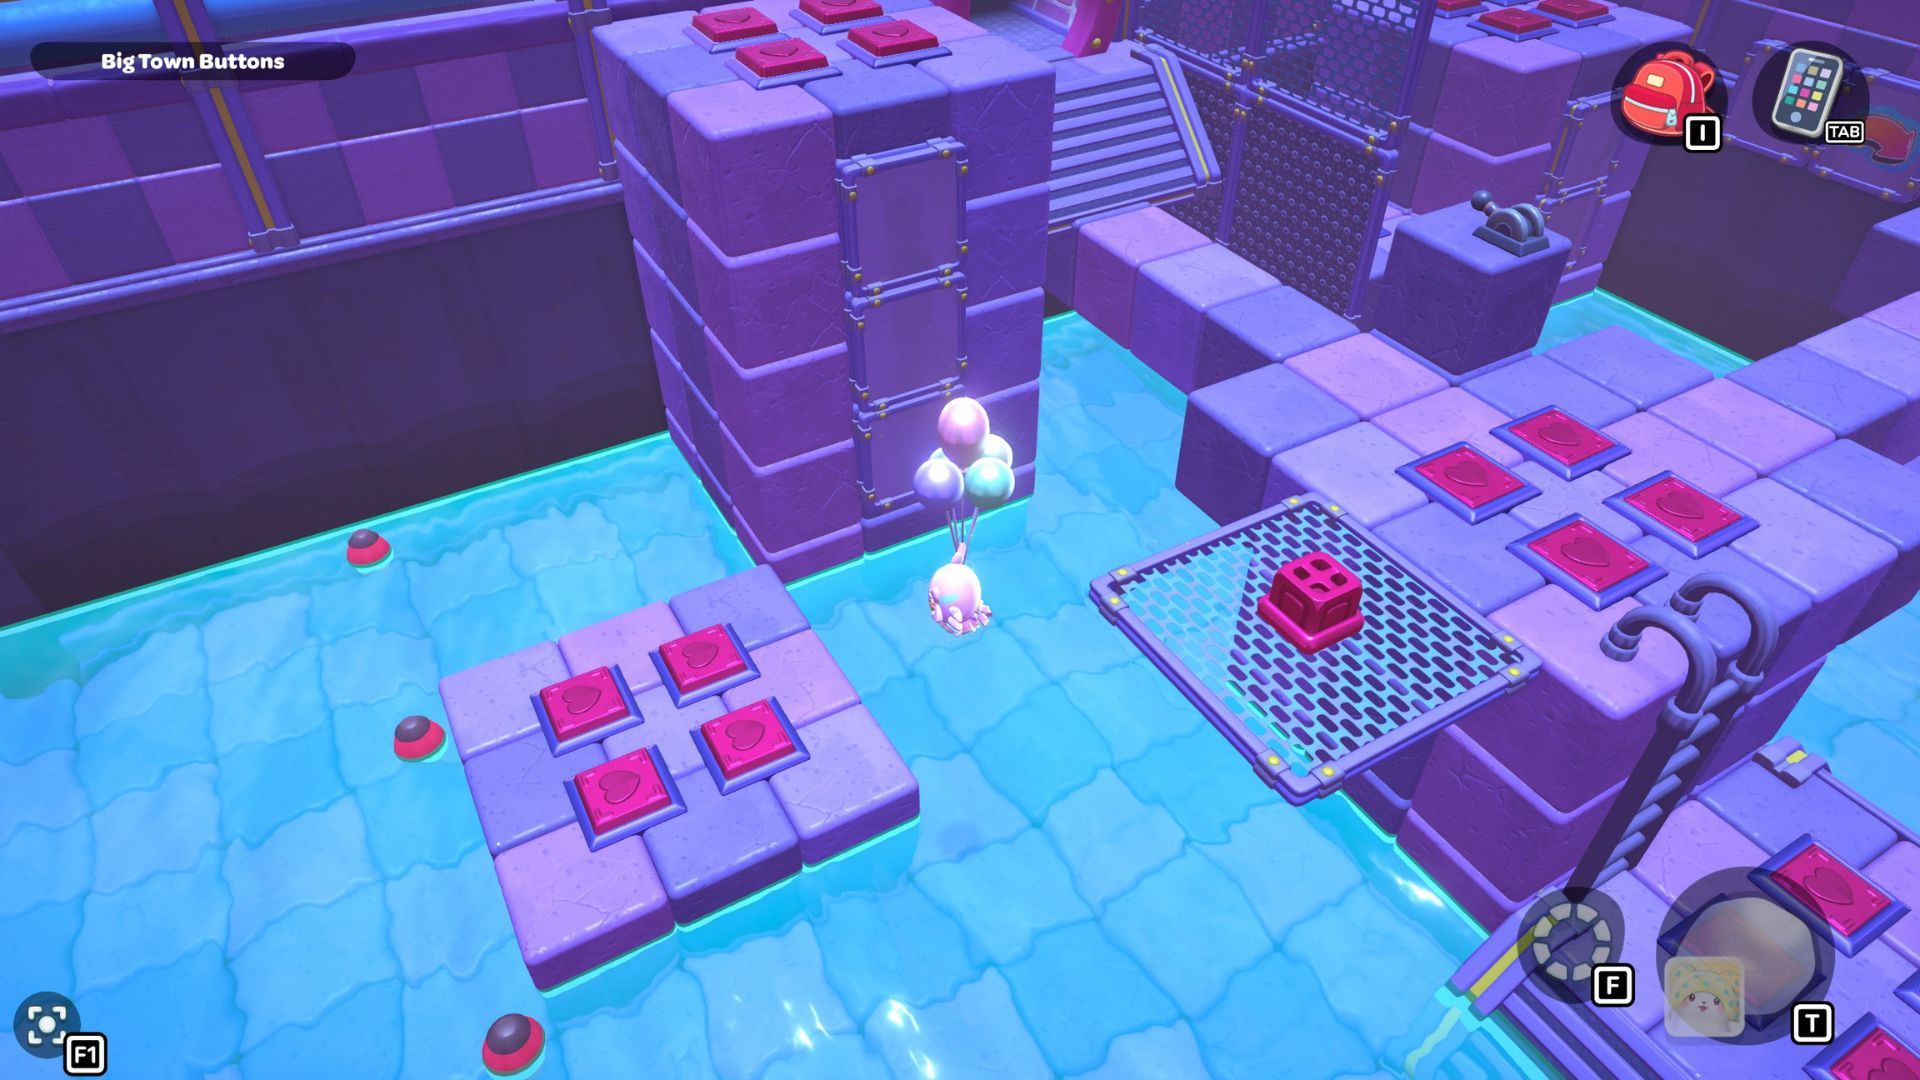
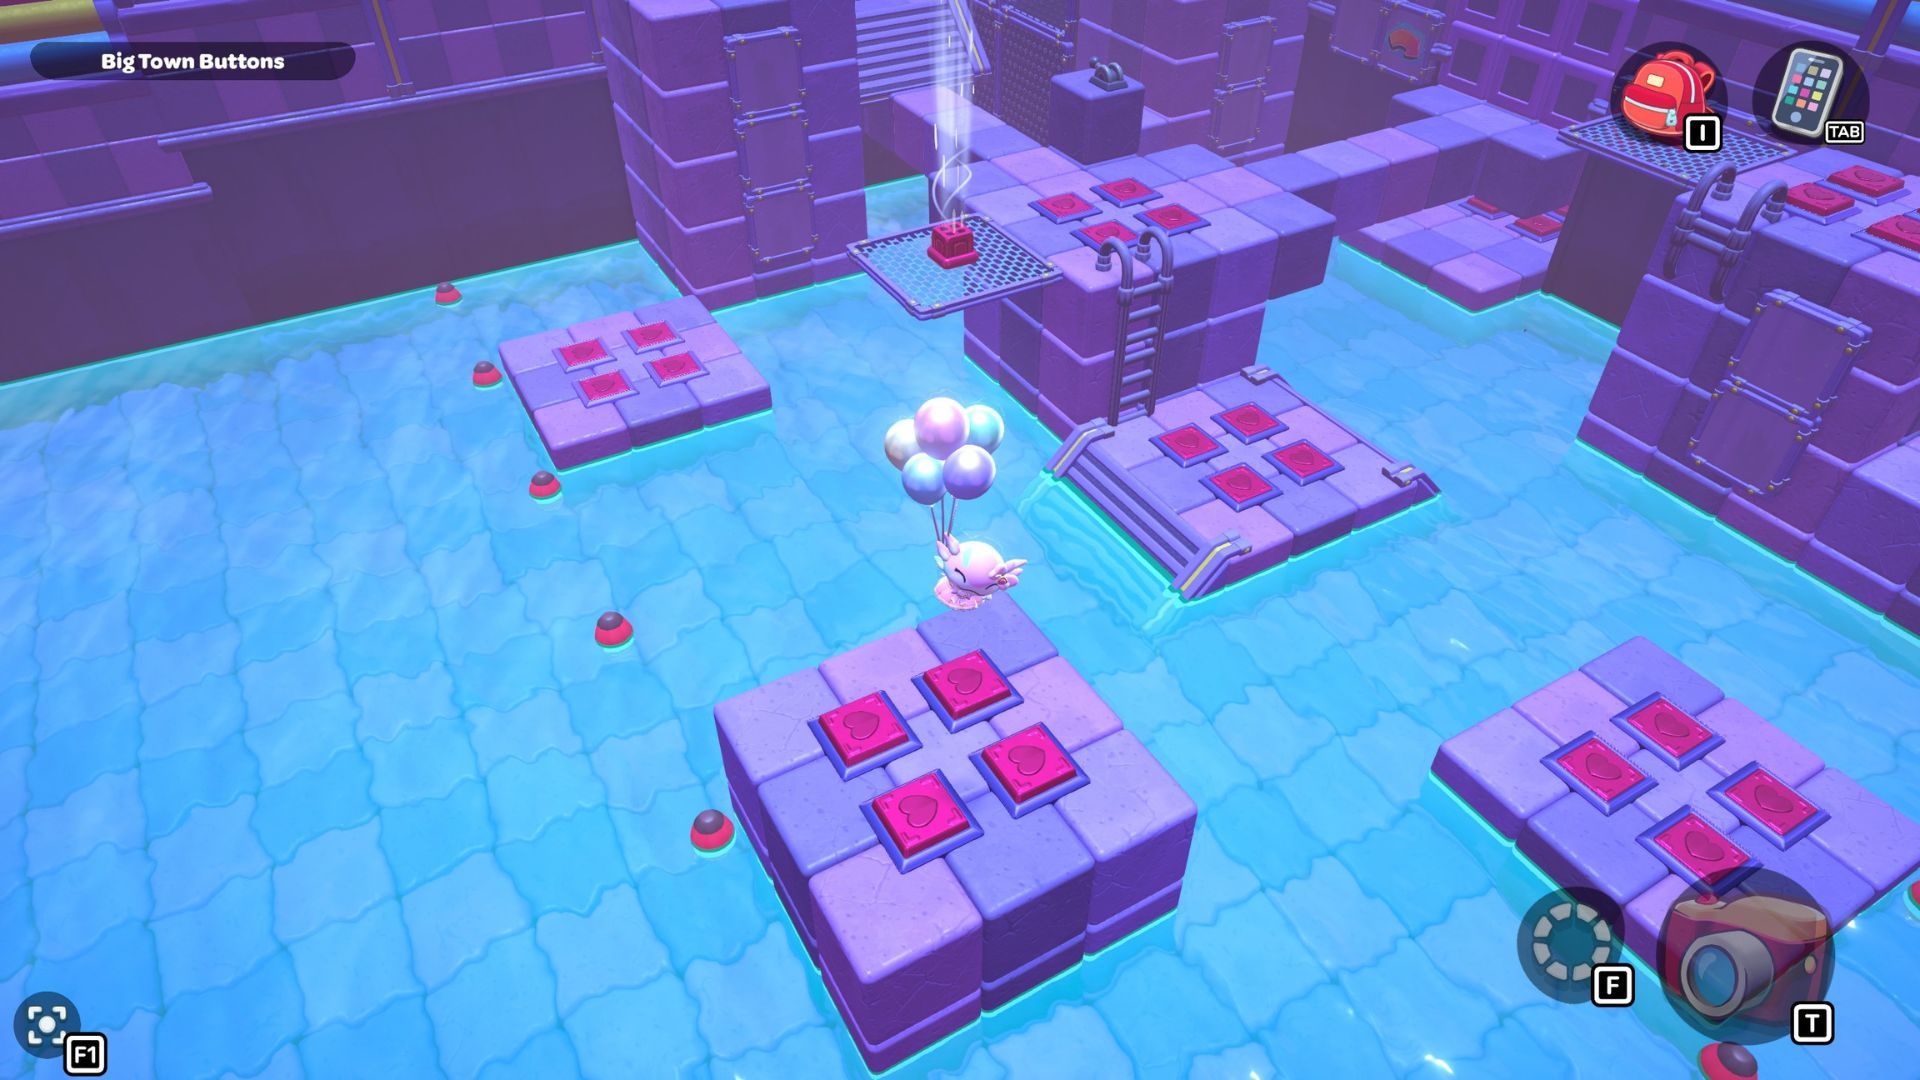
Now, use your balloons to float over to the short platform on the left. Press the buttons there, and then swim back to the ladder you used to reach the first platform and climb up.
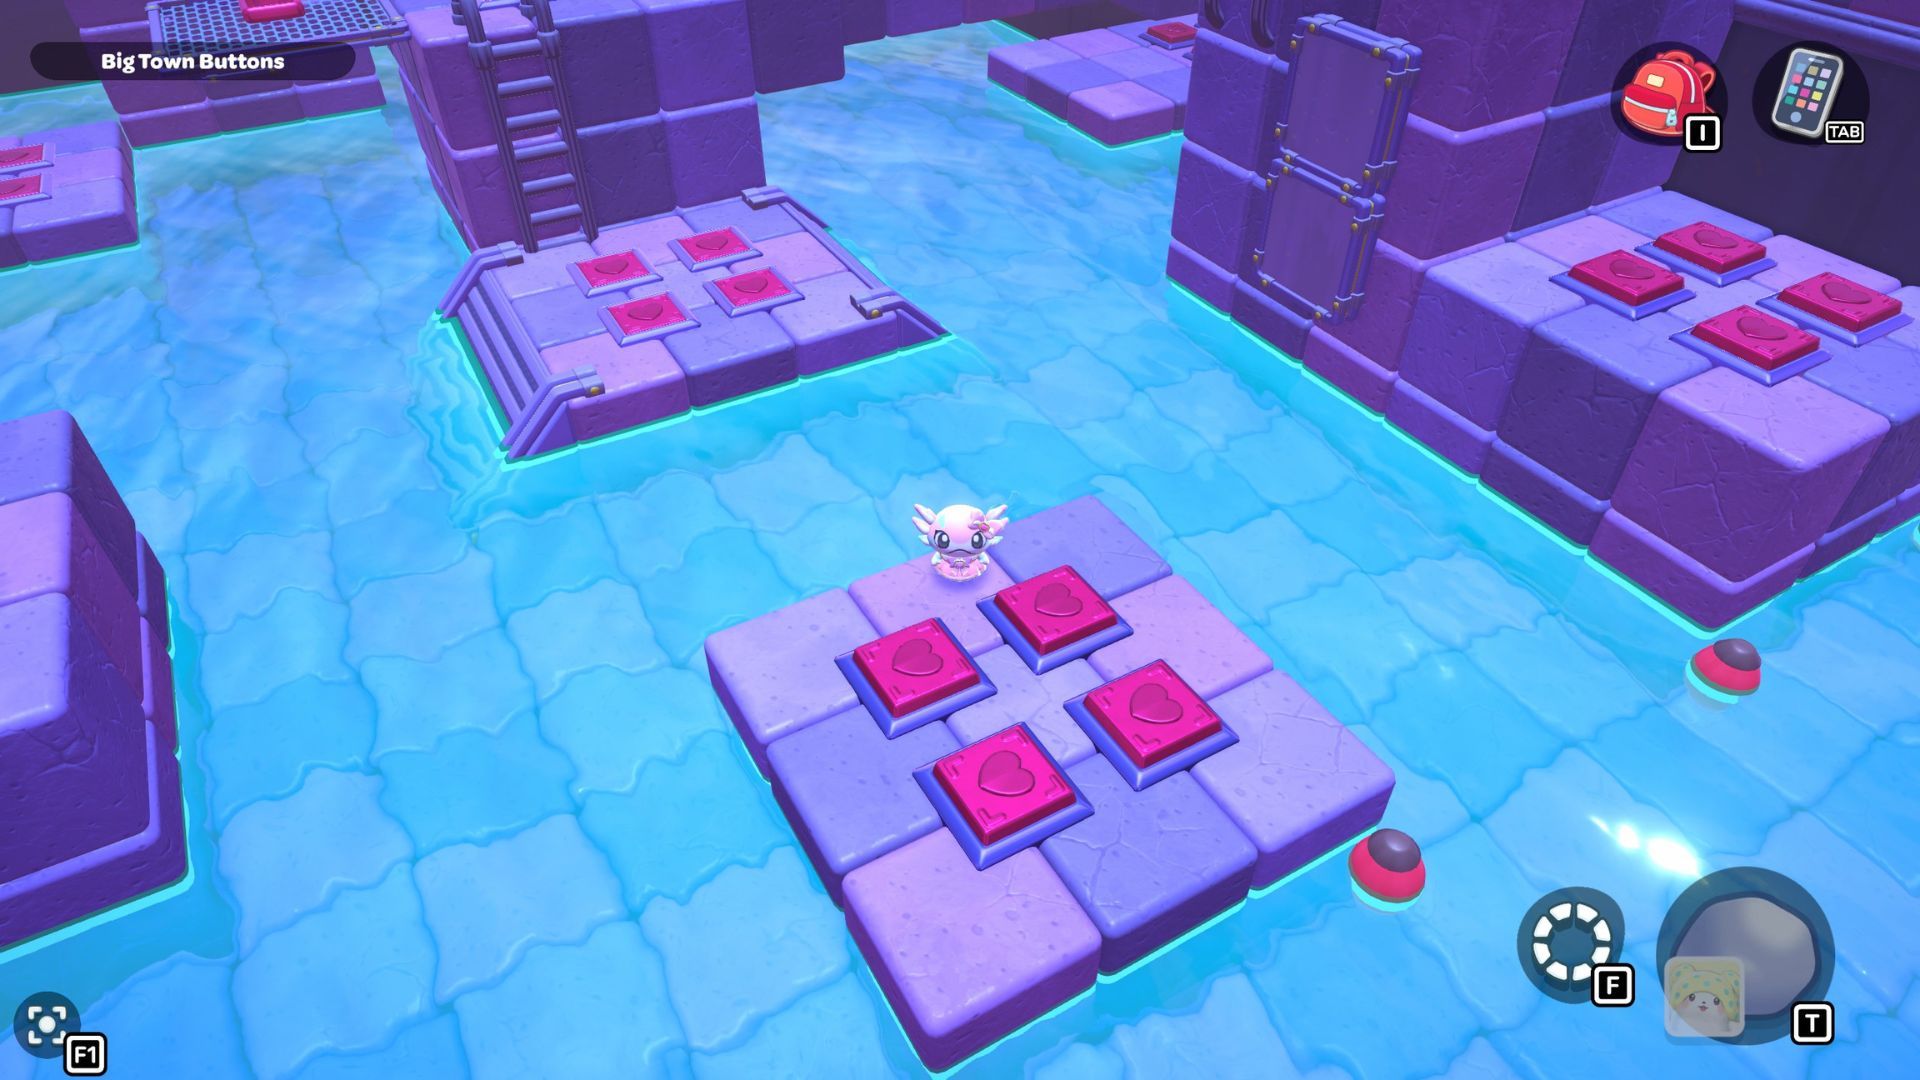
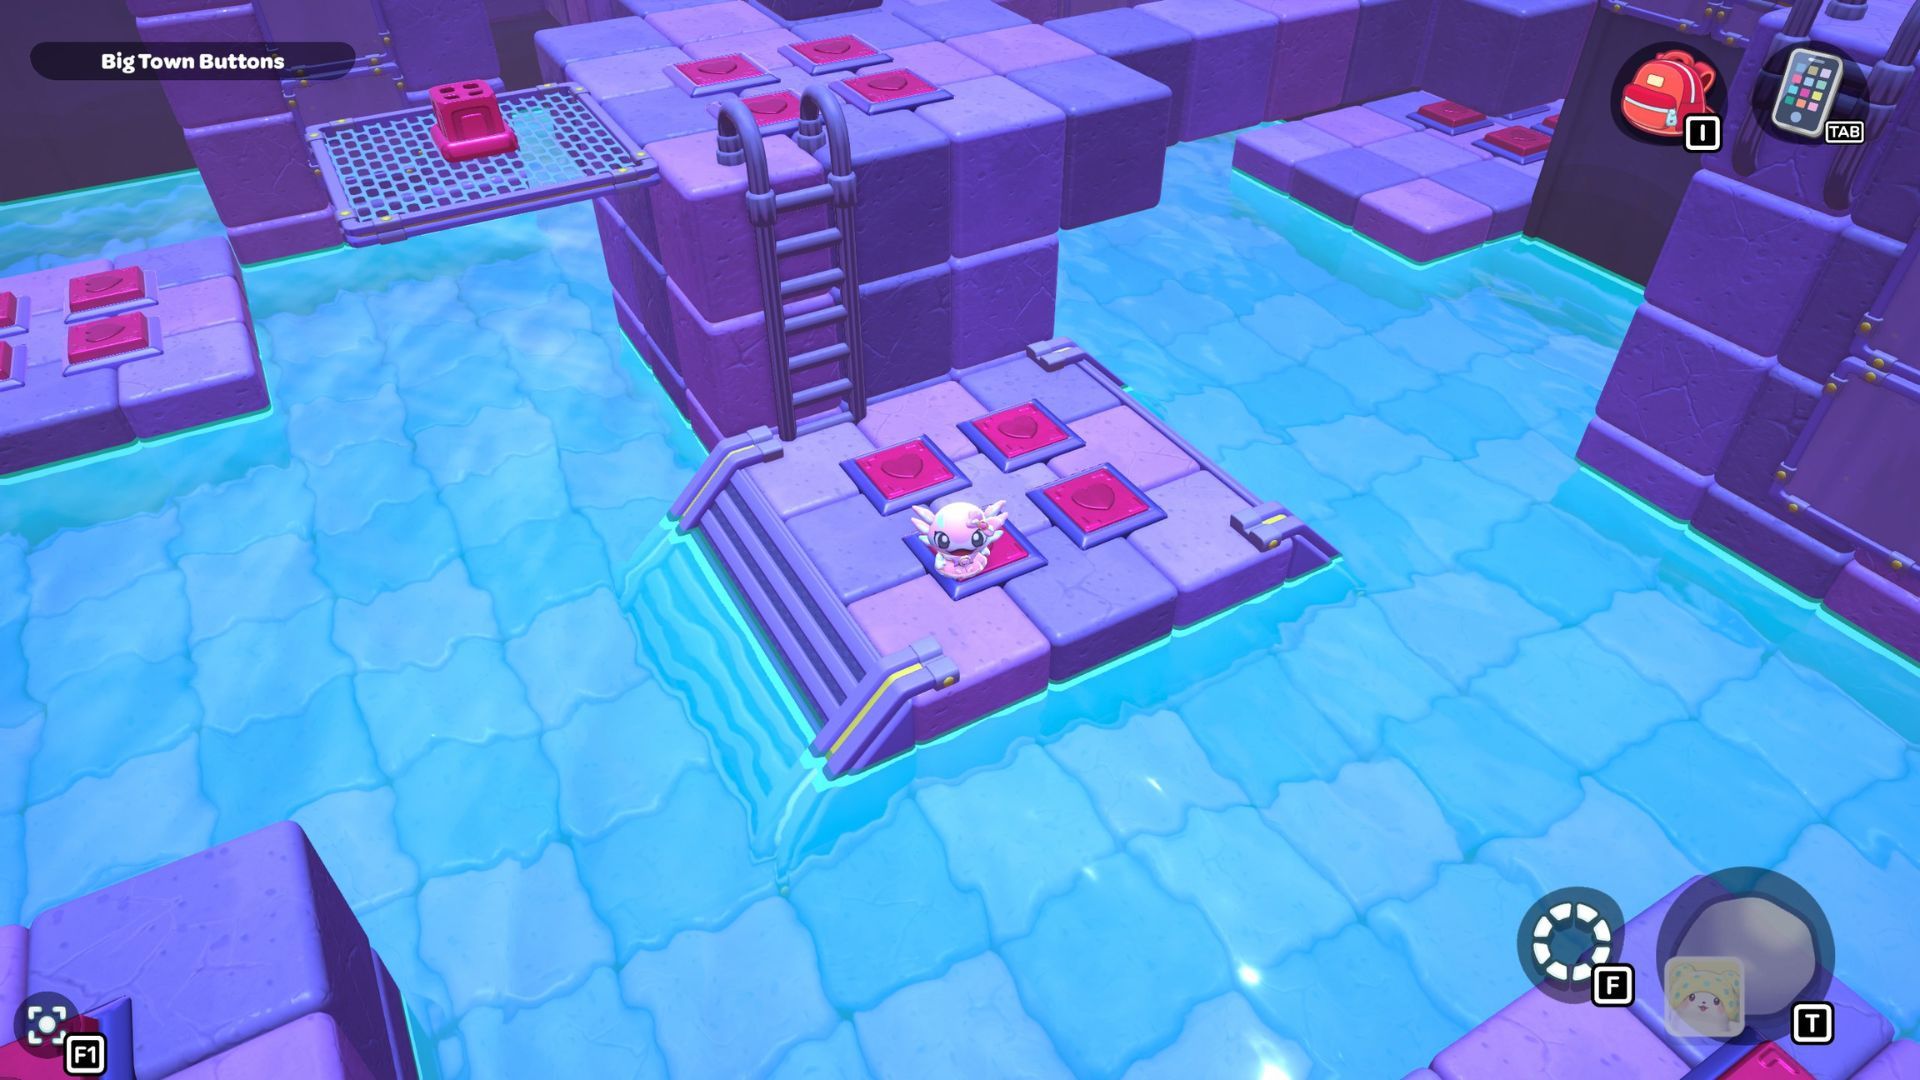
Once you’re back on the starting platform, fly down to the lower platform on the south side of the room. Press all the buttons there, and then fly back to the starting platform.
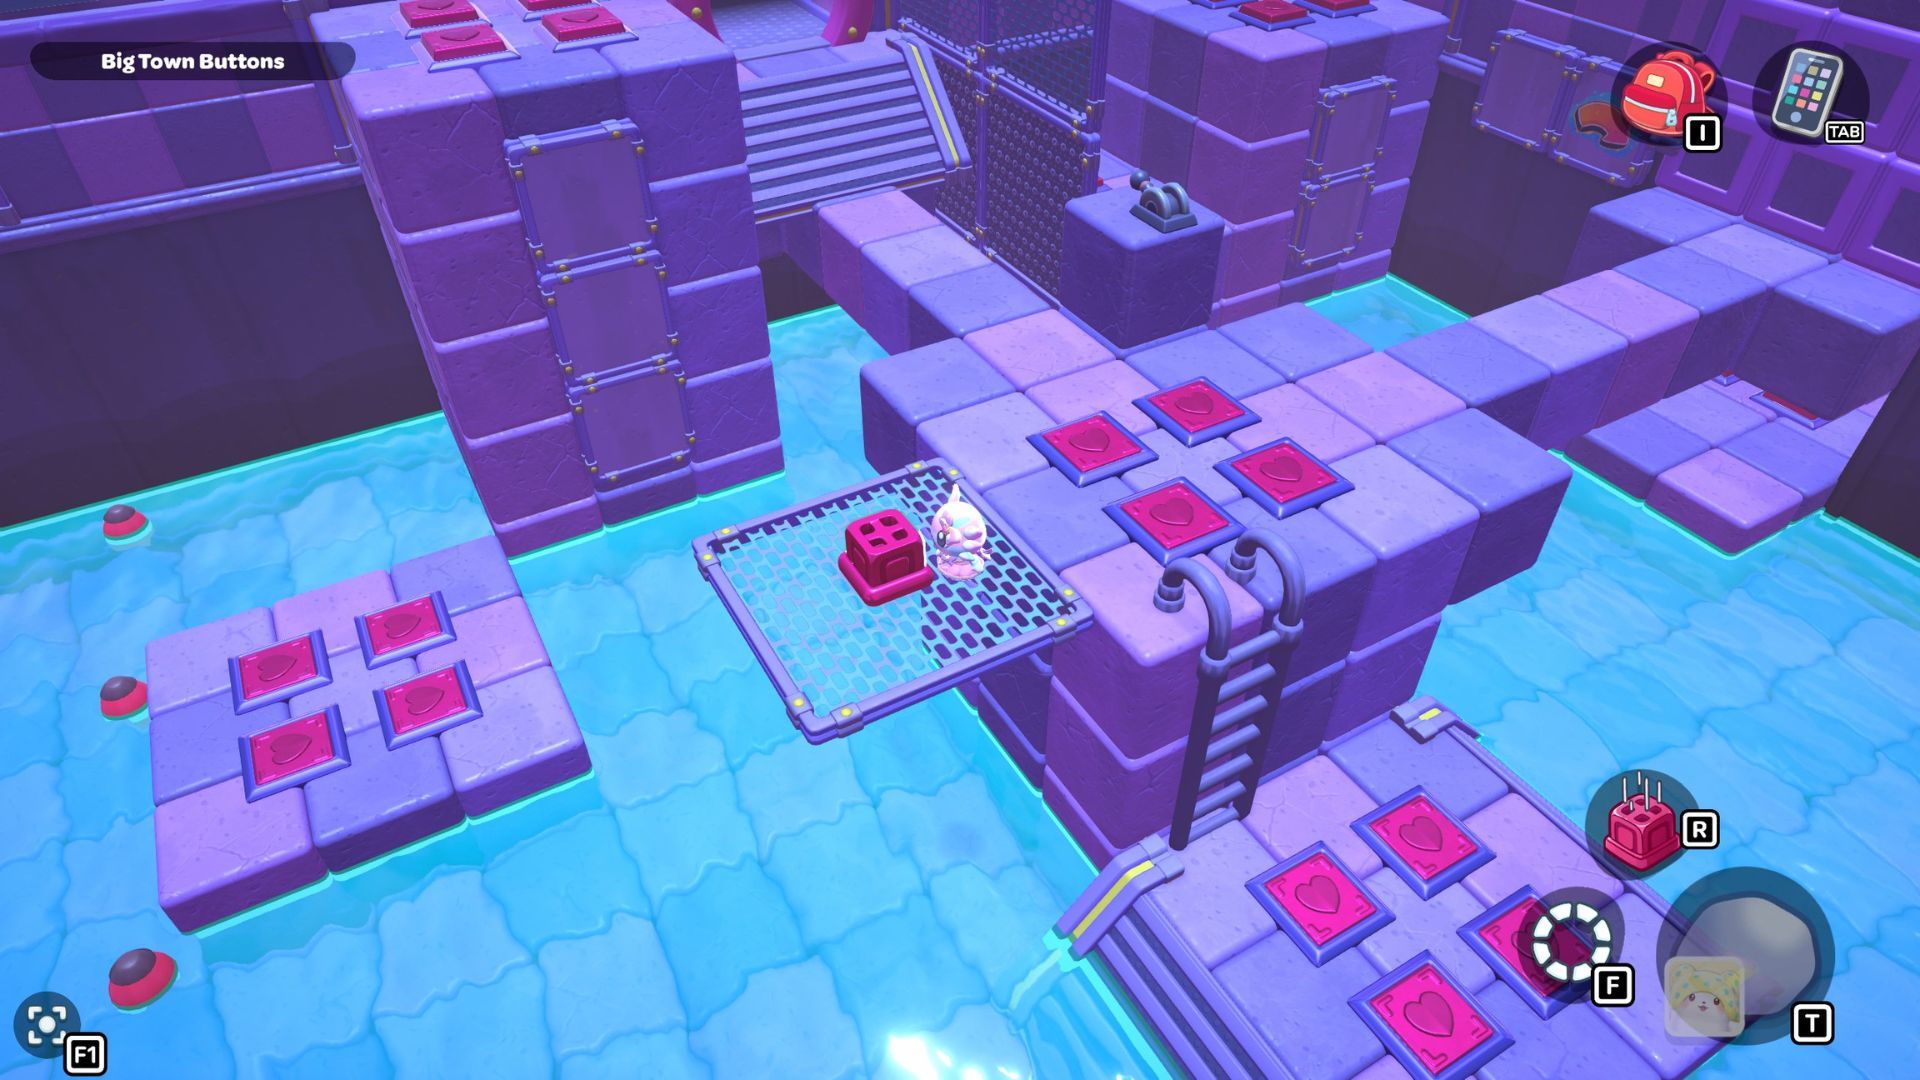
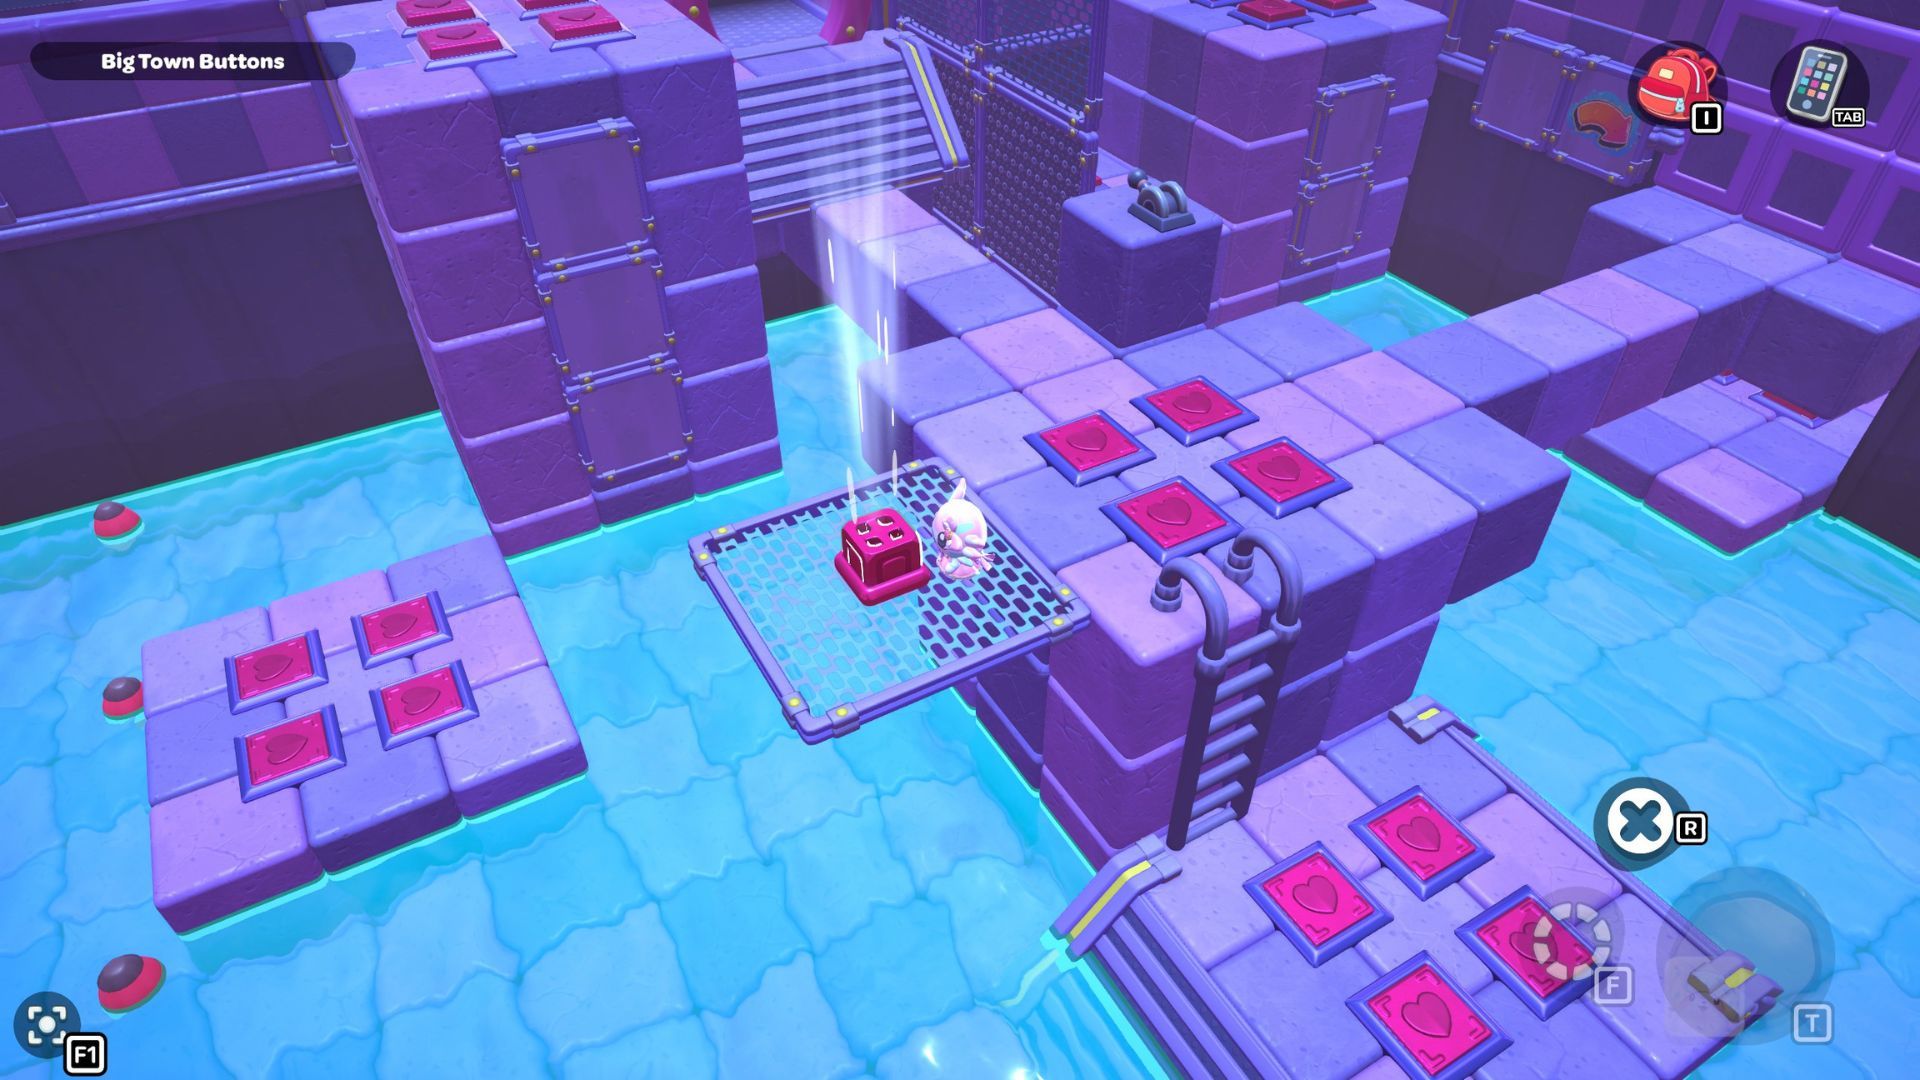
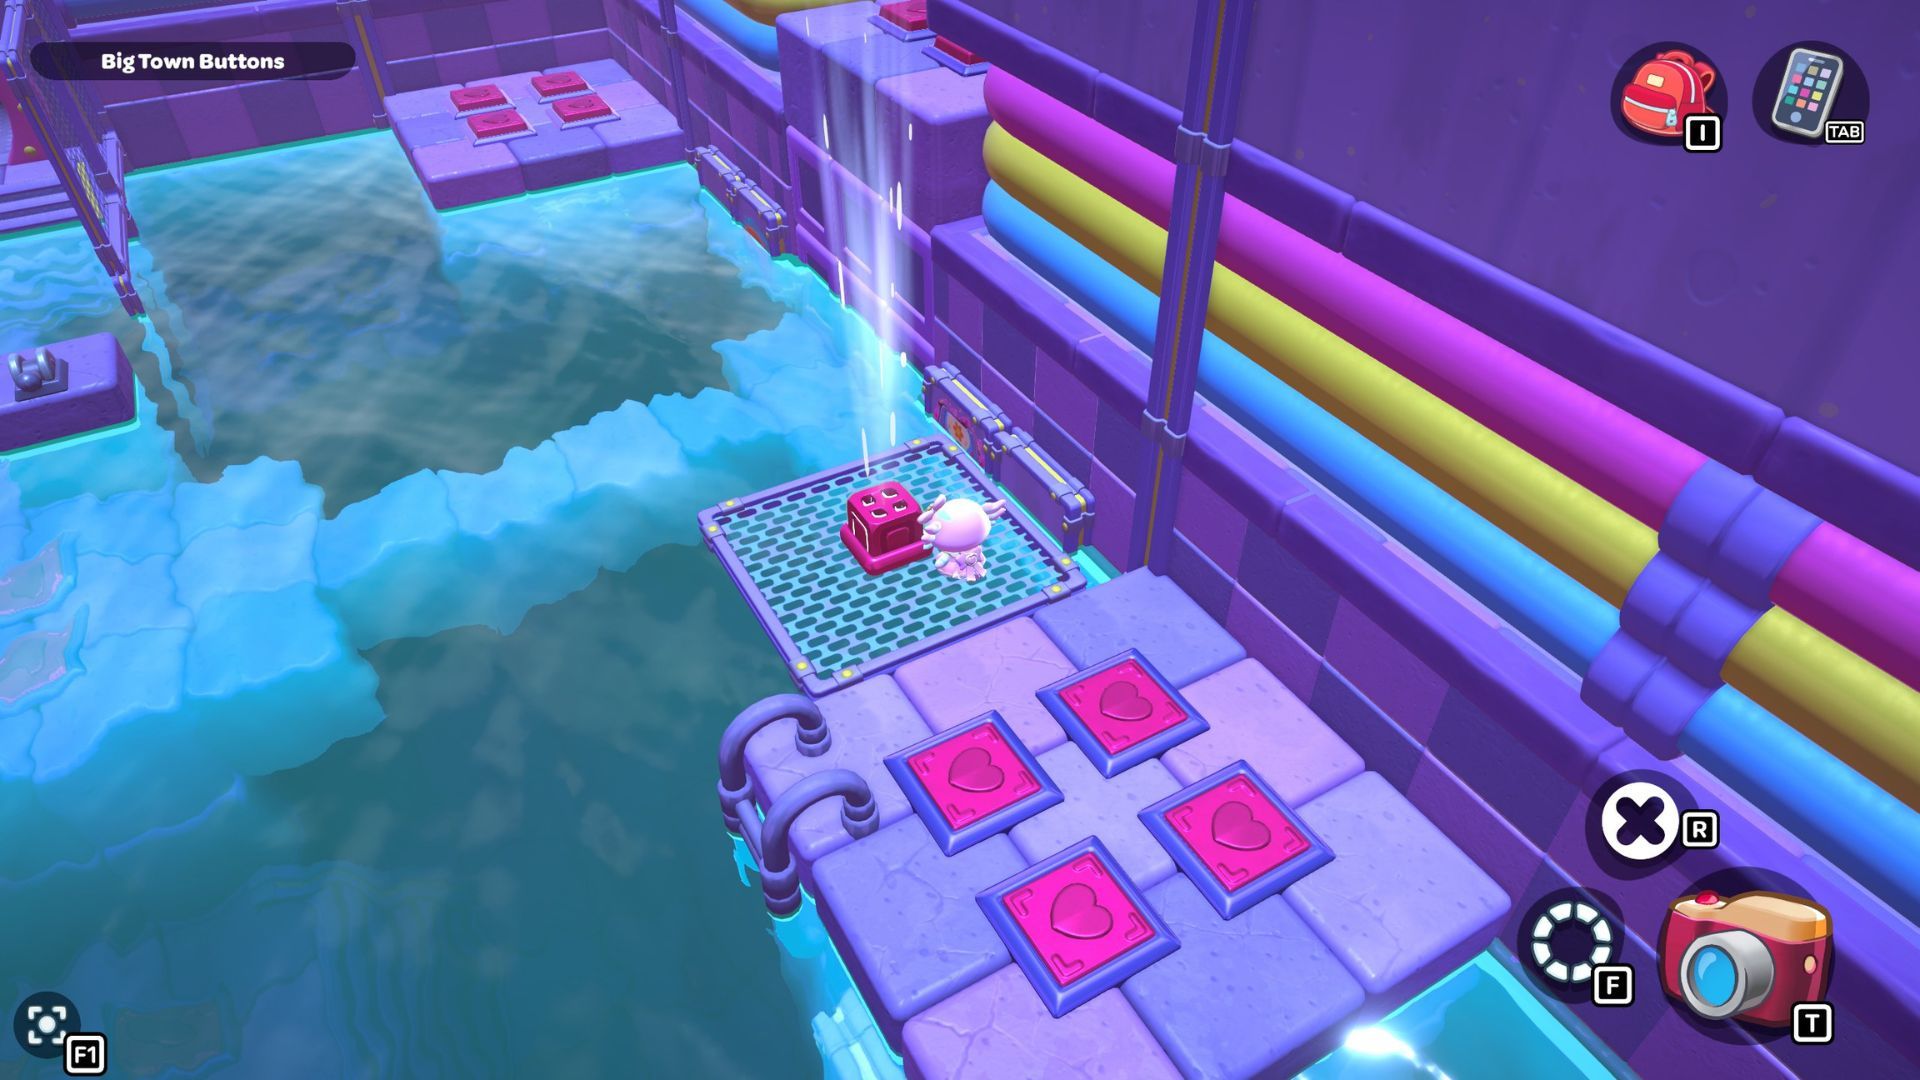
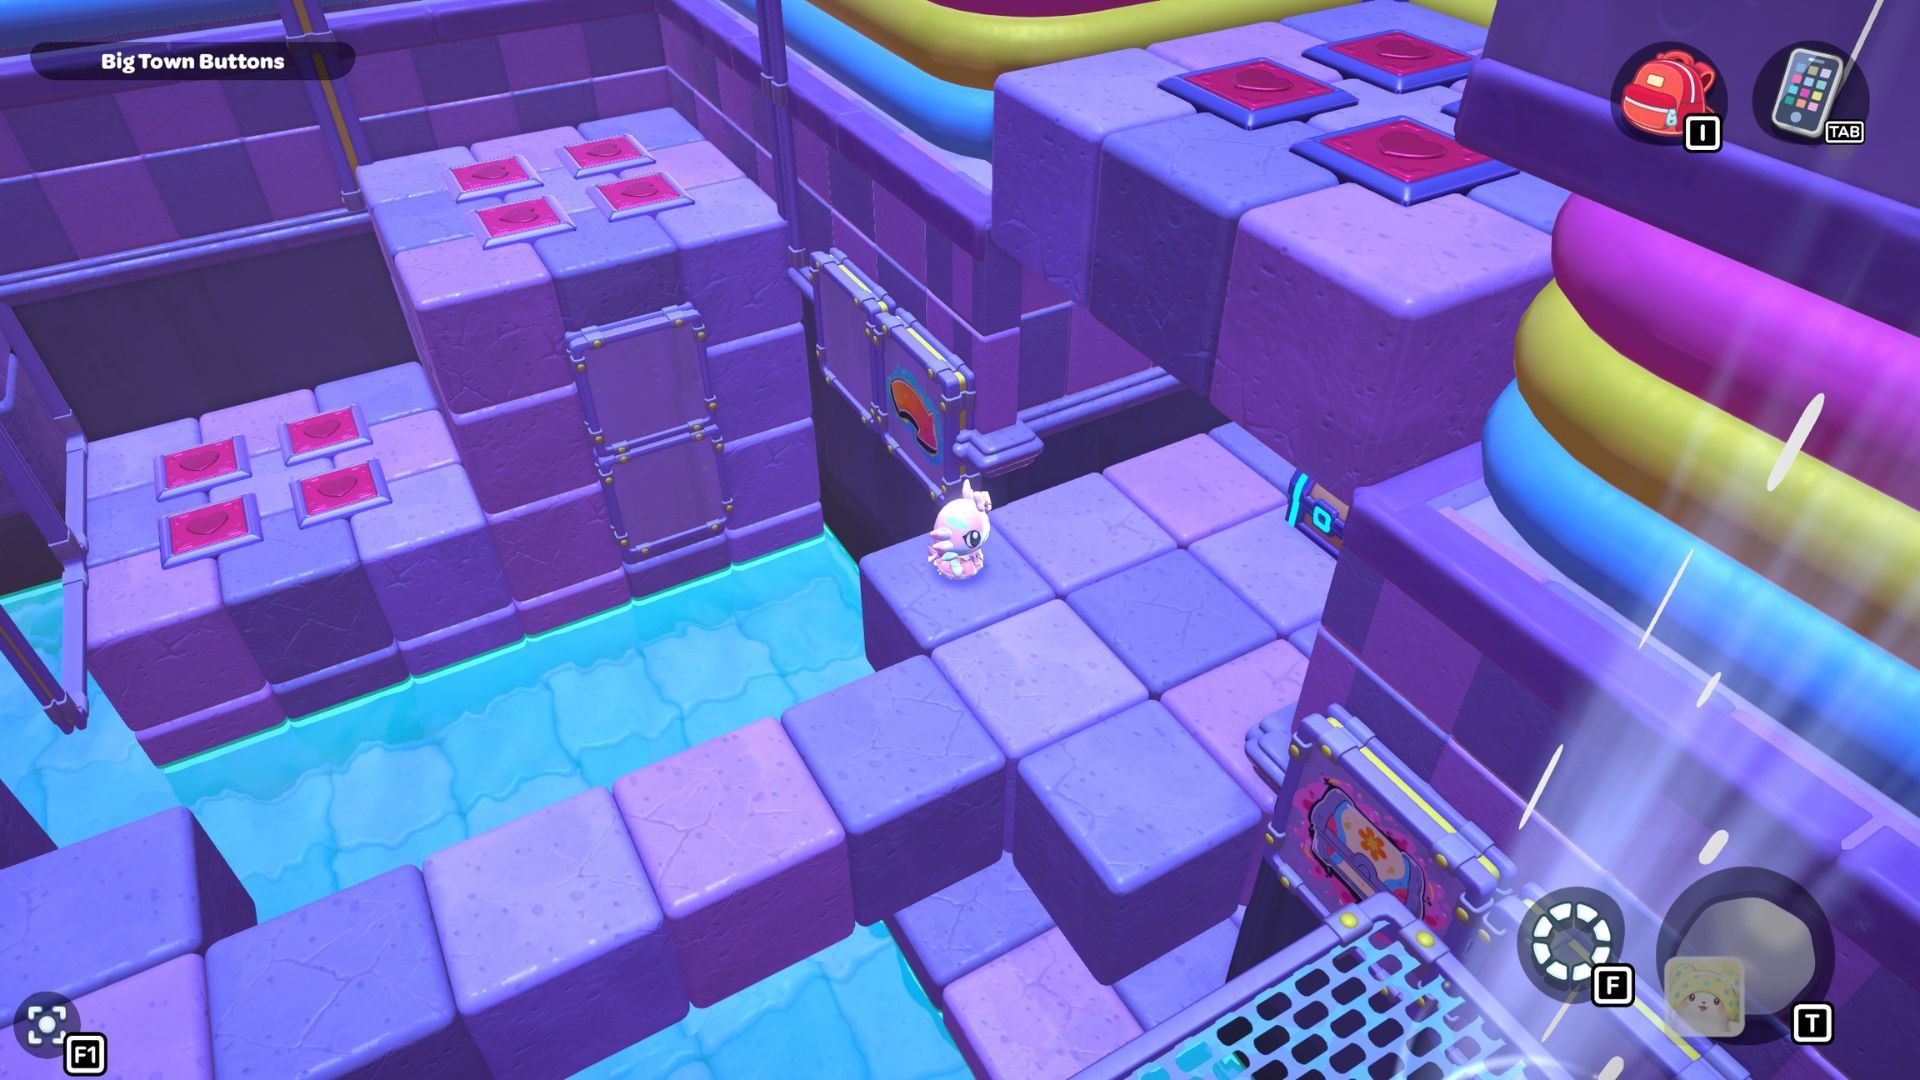
To reach the next platforms, you’ll need to fly higher than a simple jump will take you. To get extra lift, activate the red cube on the left side of the starting platform. This will create an upward air current that you can use.

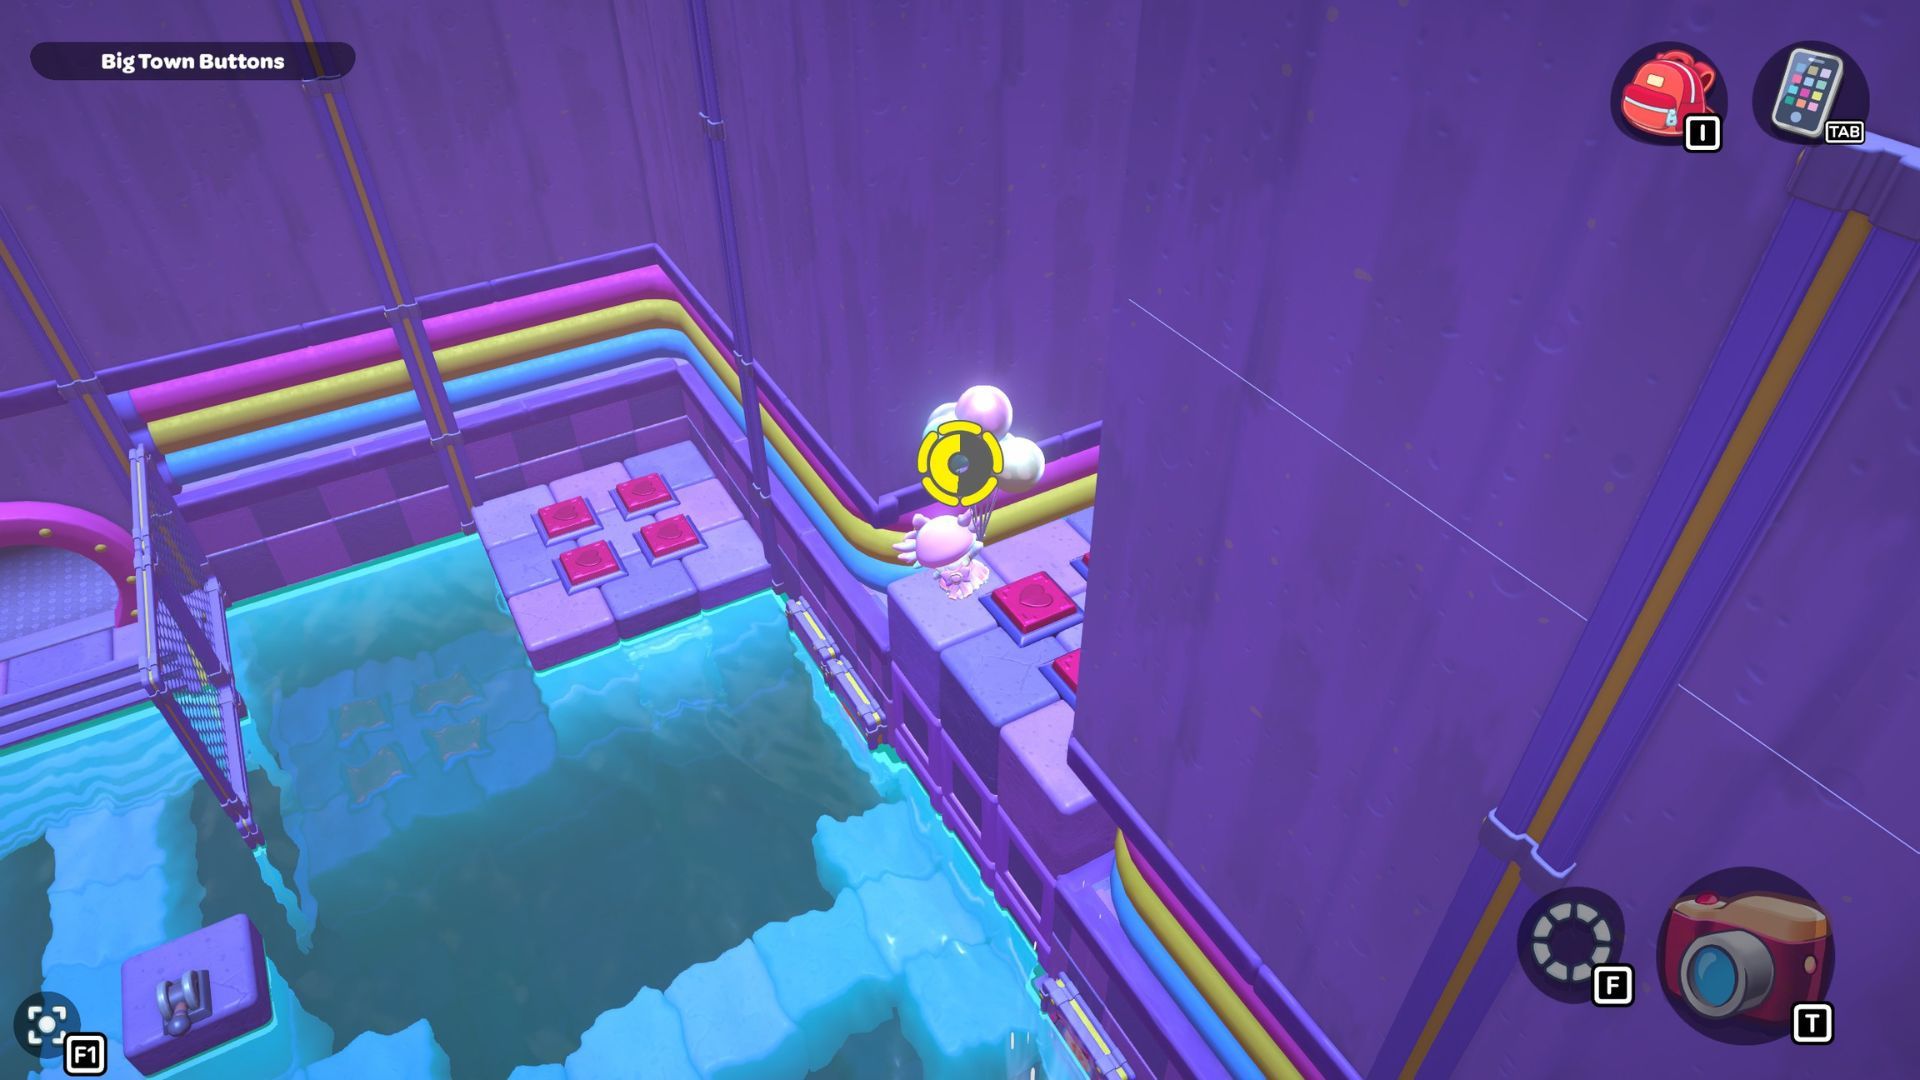
Now that the air current is on, you can reach four new platforms, each with a button on it. Here’s where to find them:
- The tall platform on the left side of the door.
- The tall platform in the southwest corner of the room.
- The smaller platform in the southeast corner of the room.
- The lower platform in the northeast corner of the room.
Once you’ve activated all the platforms around the room, go back to the central platform.
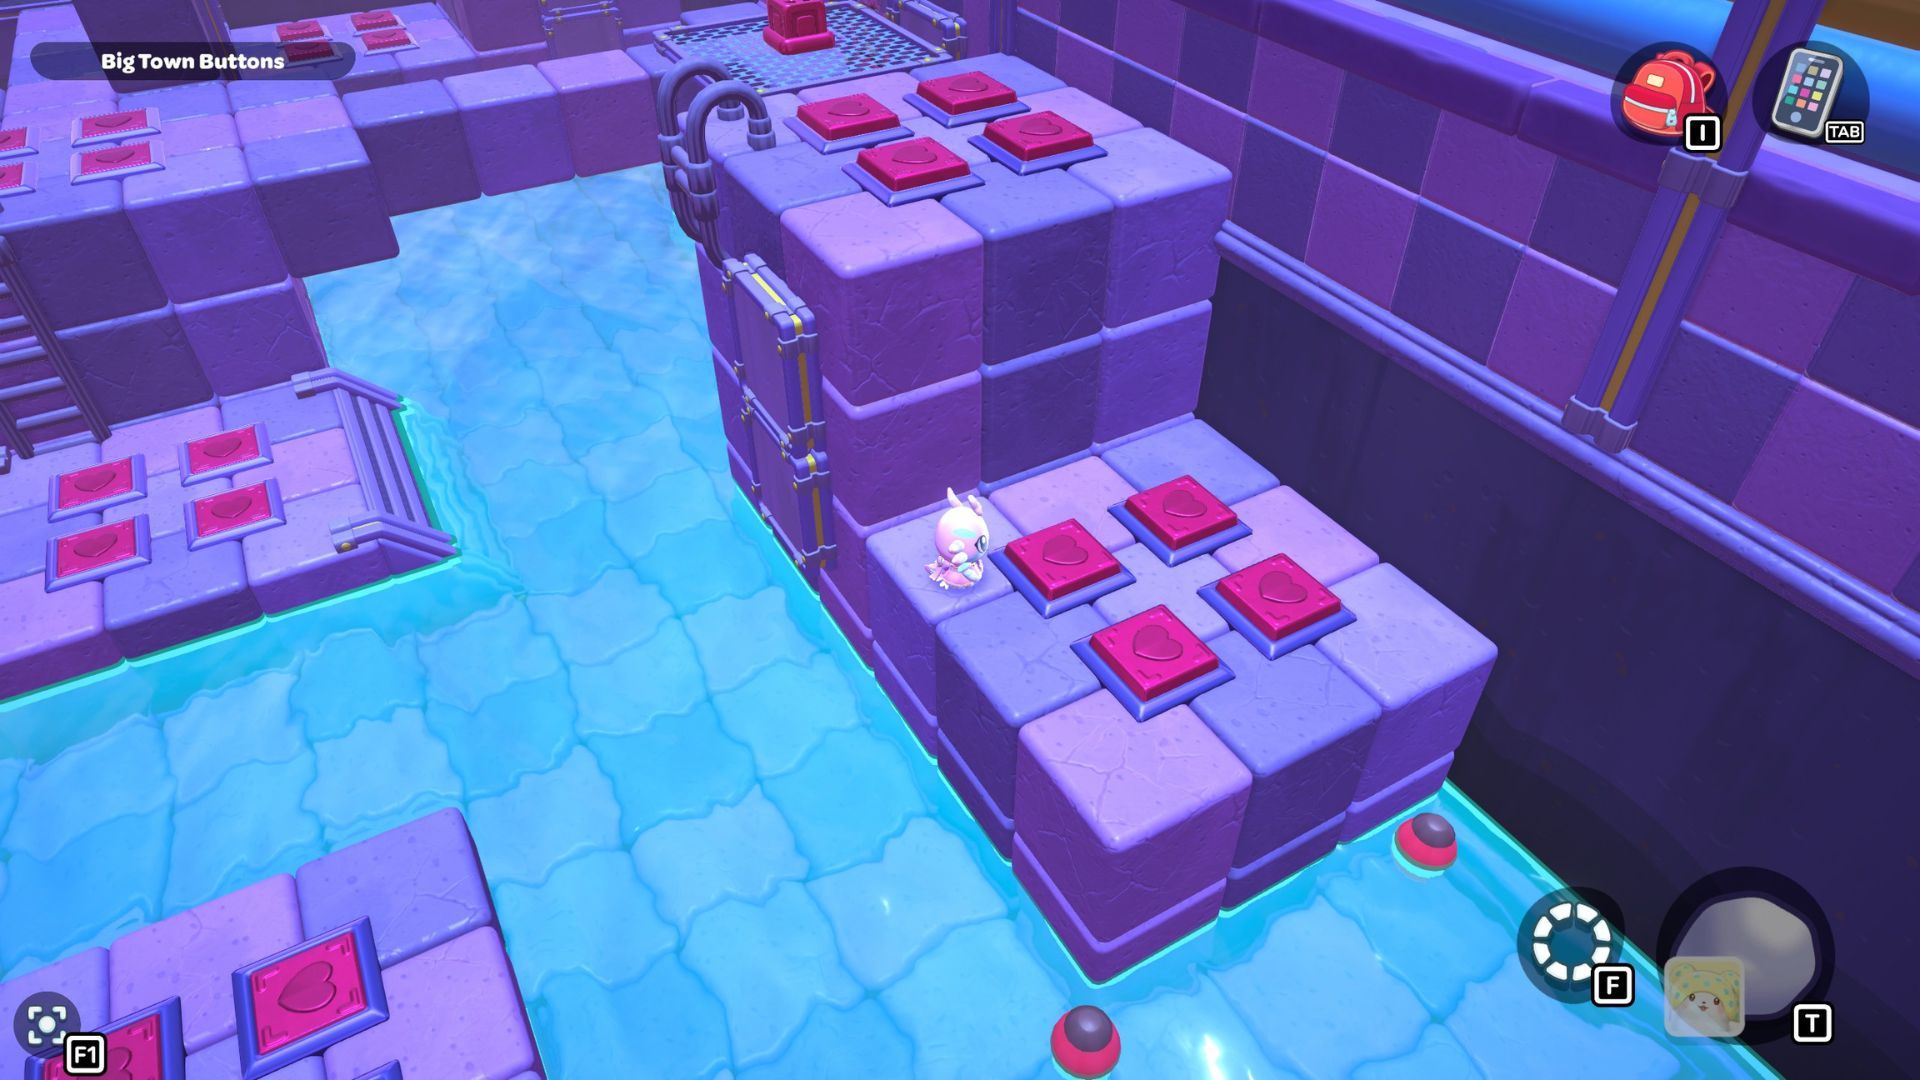
First, cross the narrow bridge to the wall on the right. Below the bridge, you’ll find a small platform. Use your balloons to gently float down onto it.
Okay, so I discovered there are actually four secret buttons hidden around here! You have to find and step on every single one of them, then head back to the main platform when you’re done. It’s a little tricky, but totally worth it!
With all the lower platform buttons activated, pull the lever on the main platform. This will cause the water level in the room to rise.
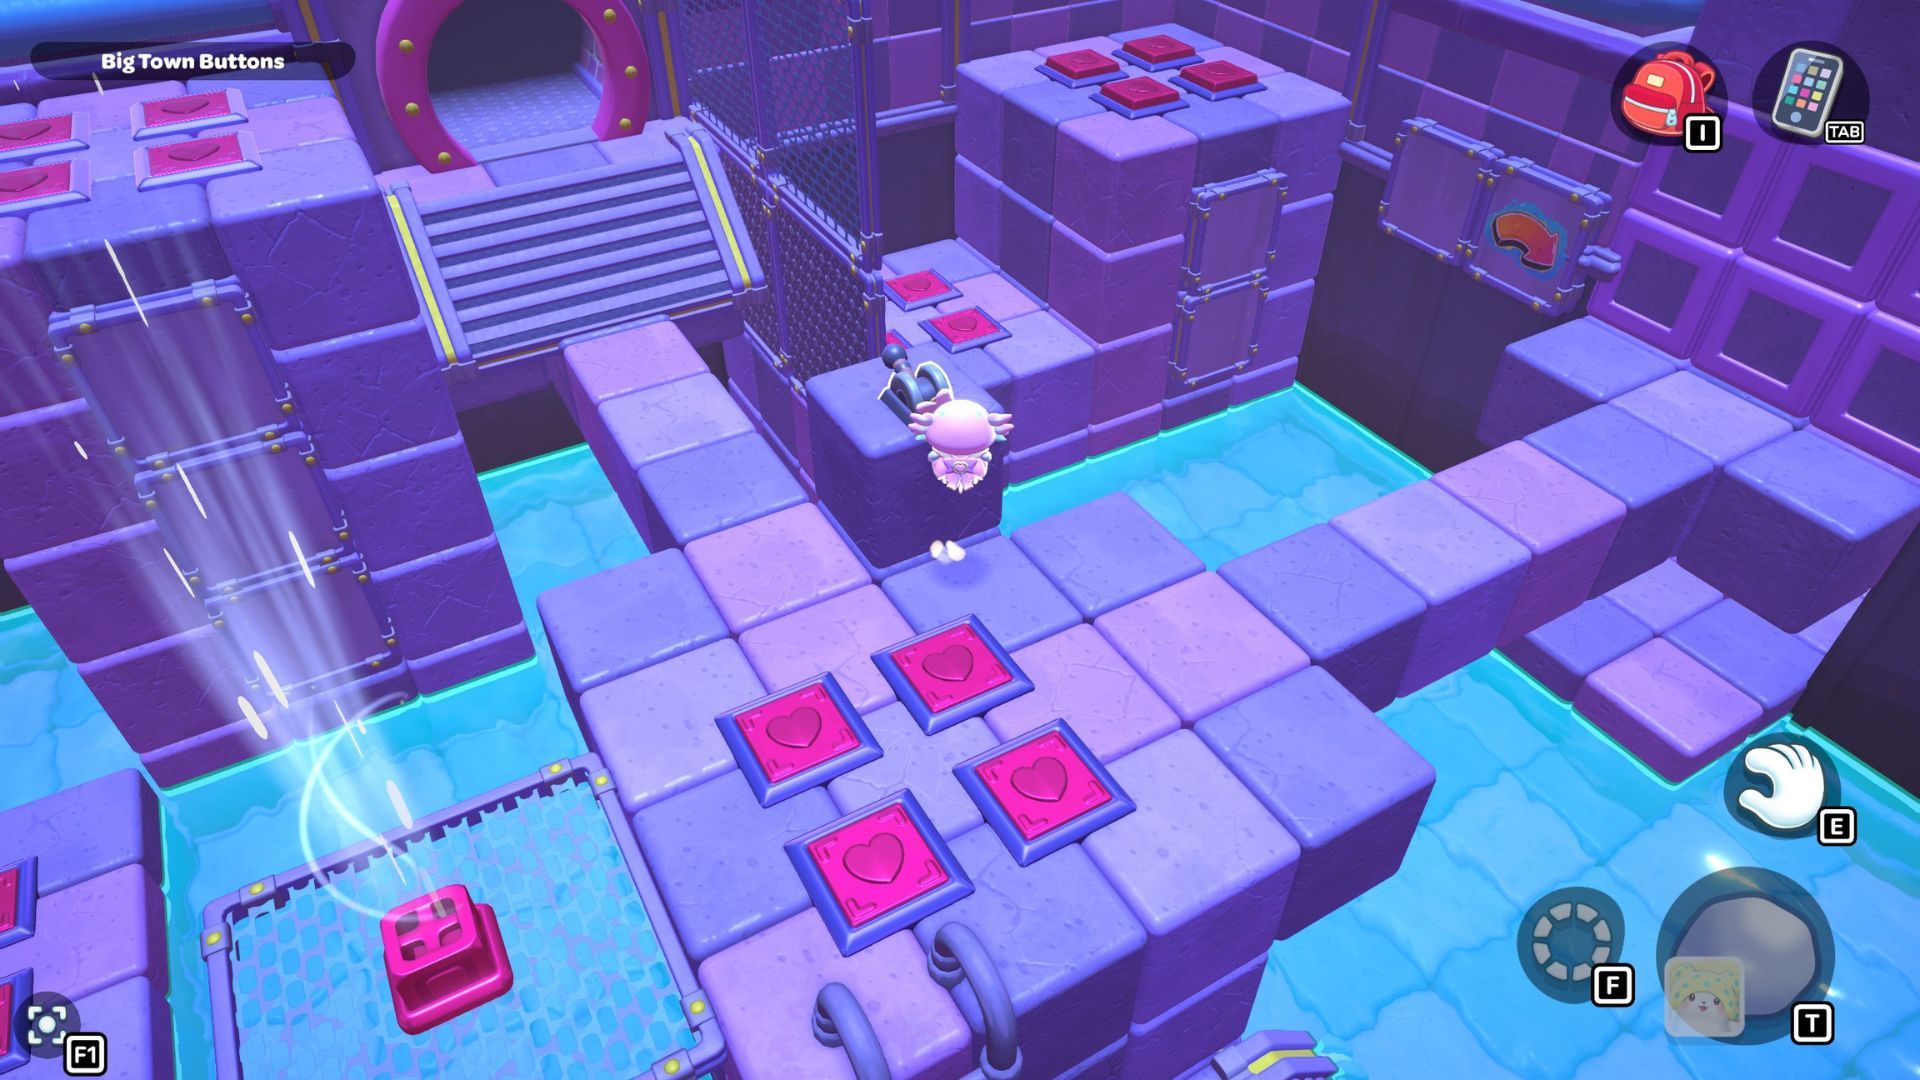
Swim over to the platform on the west side and use the ladder to climb up. Make sure to step on every button on the platform before you continue.
On the north side of the platform, you’ll find an air vent. Turn it on, then use the upward draft to glide into the small alcove on the right wall. After hitting the buttons in the alcove, fly from that ledge to the platform in the northeast corner of the room.
Push the buttons to reveal a secret path with a chest inside. Then, go back to the main platform and pull the lever to drain the water. Once the water is gone, you can walk over to the chest and open it.
This chest contains a City Park Bench item.
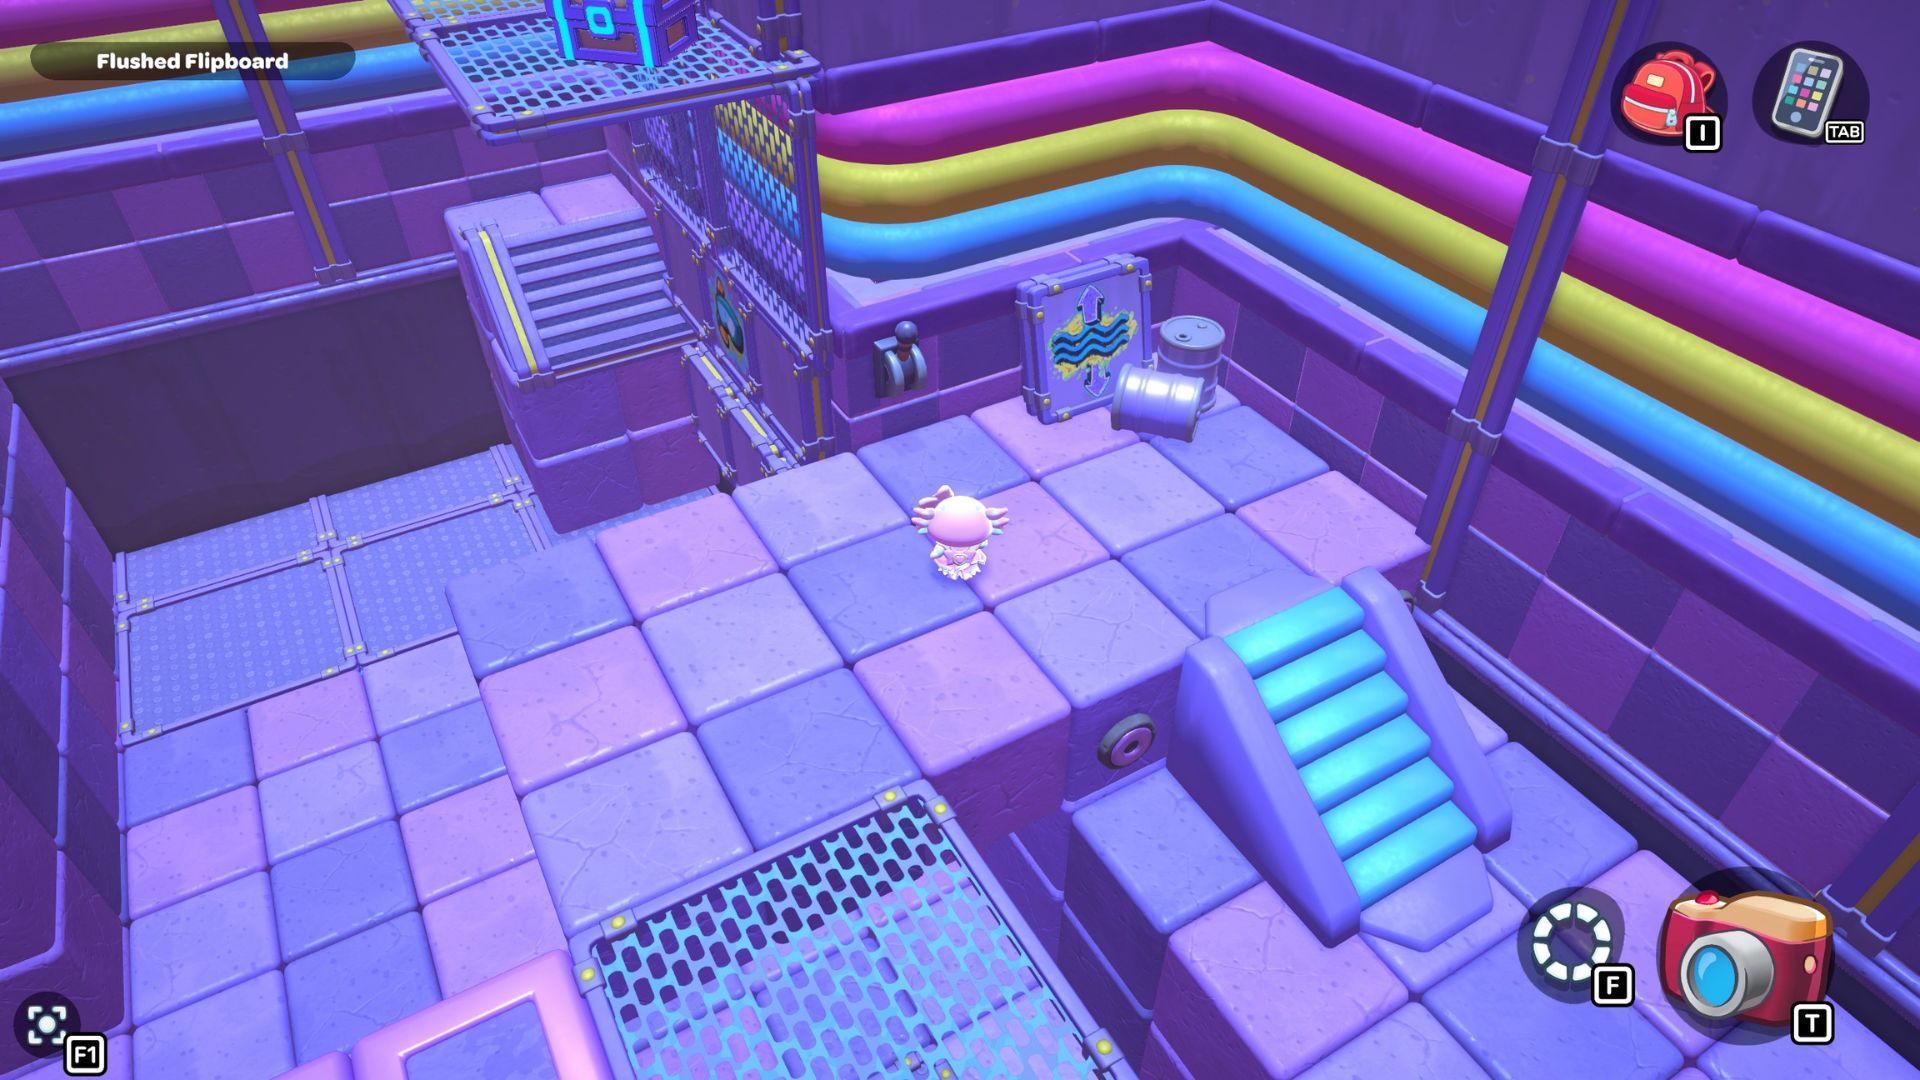
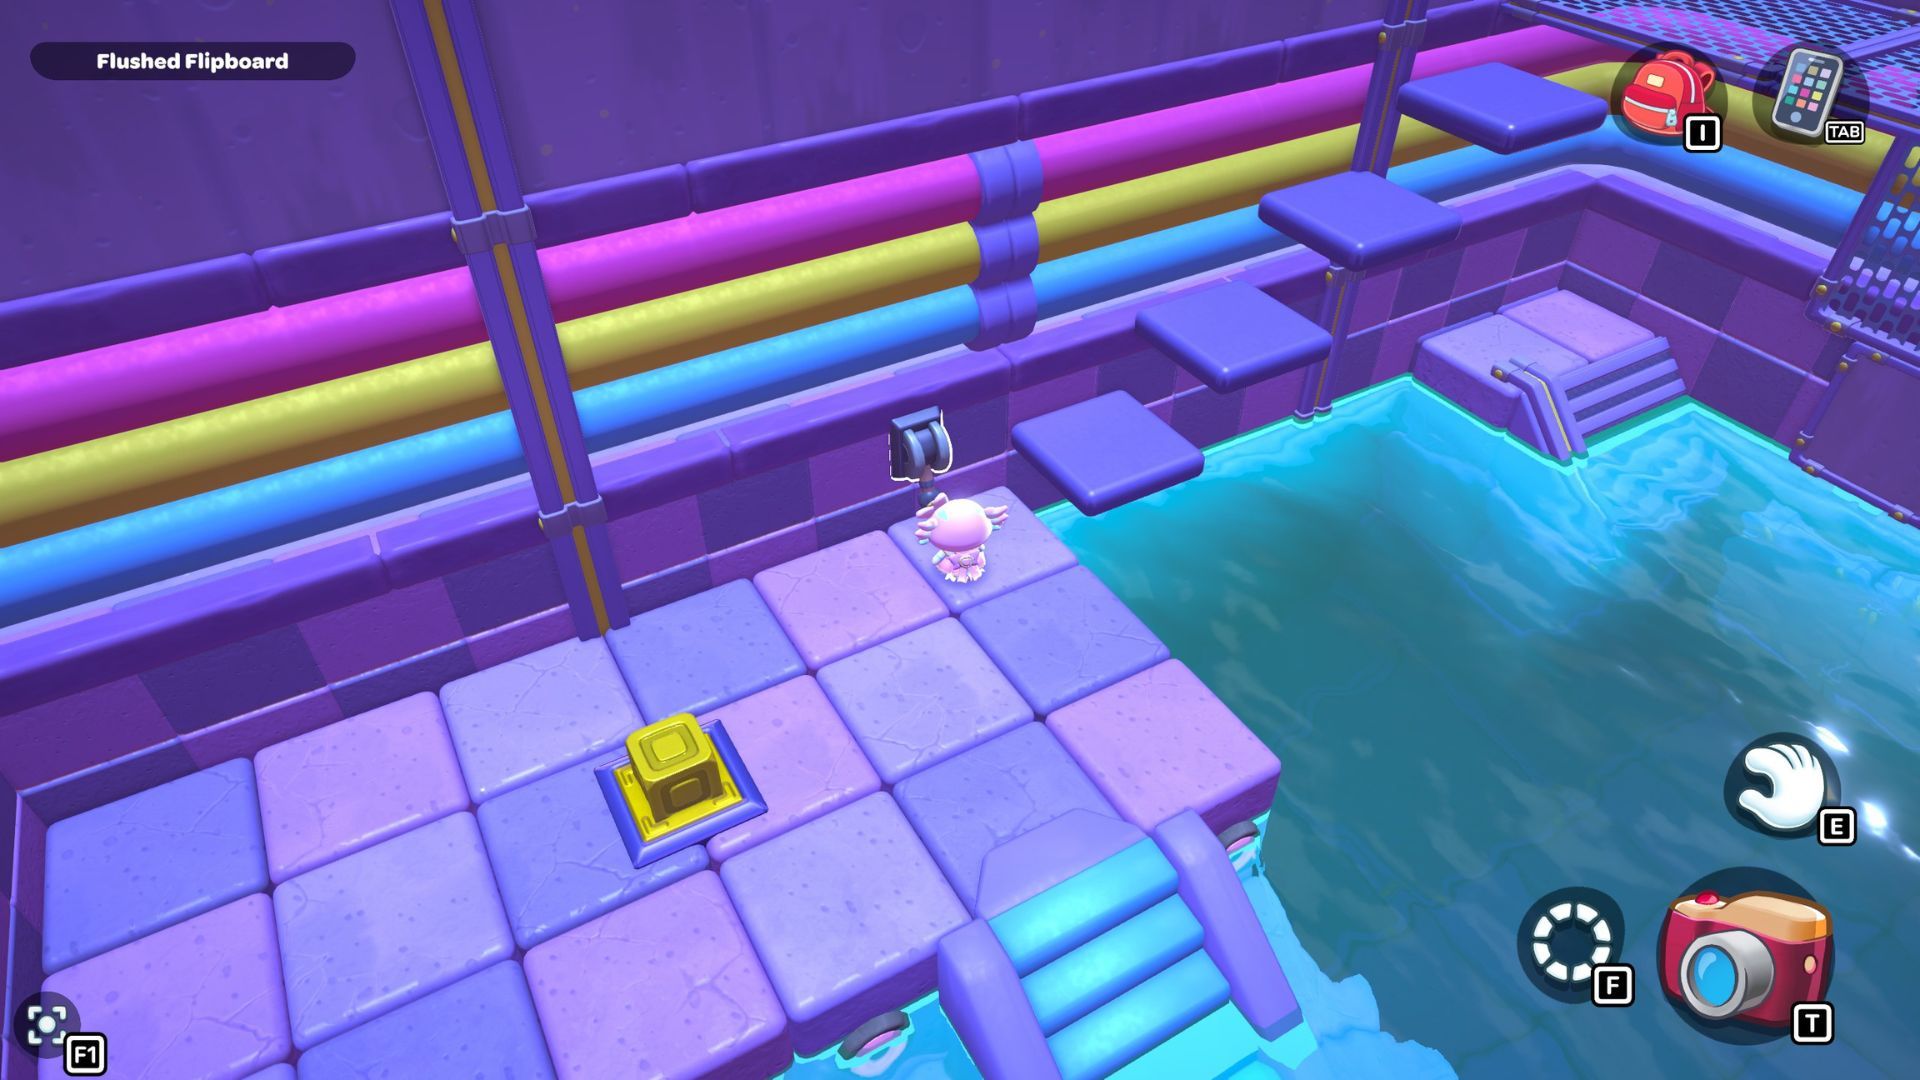
City Town Sewers — Flushed Flipboard Walkthrough
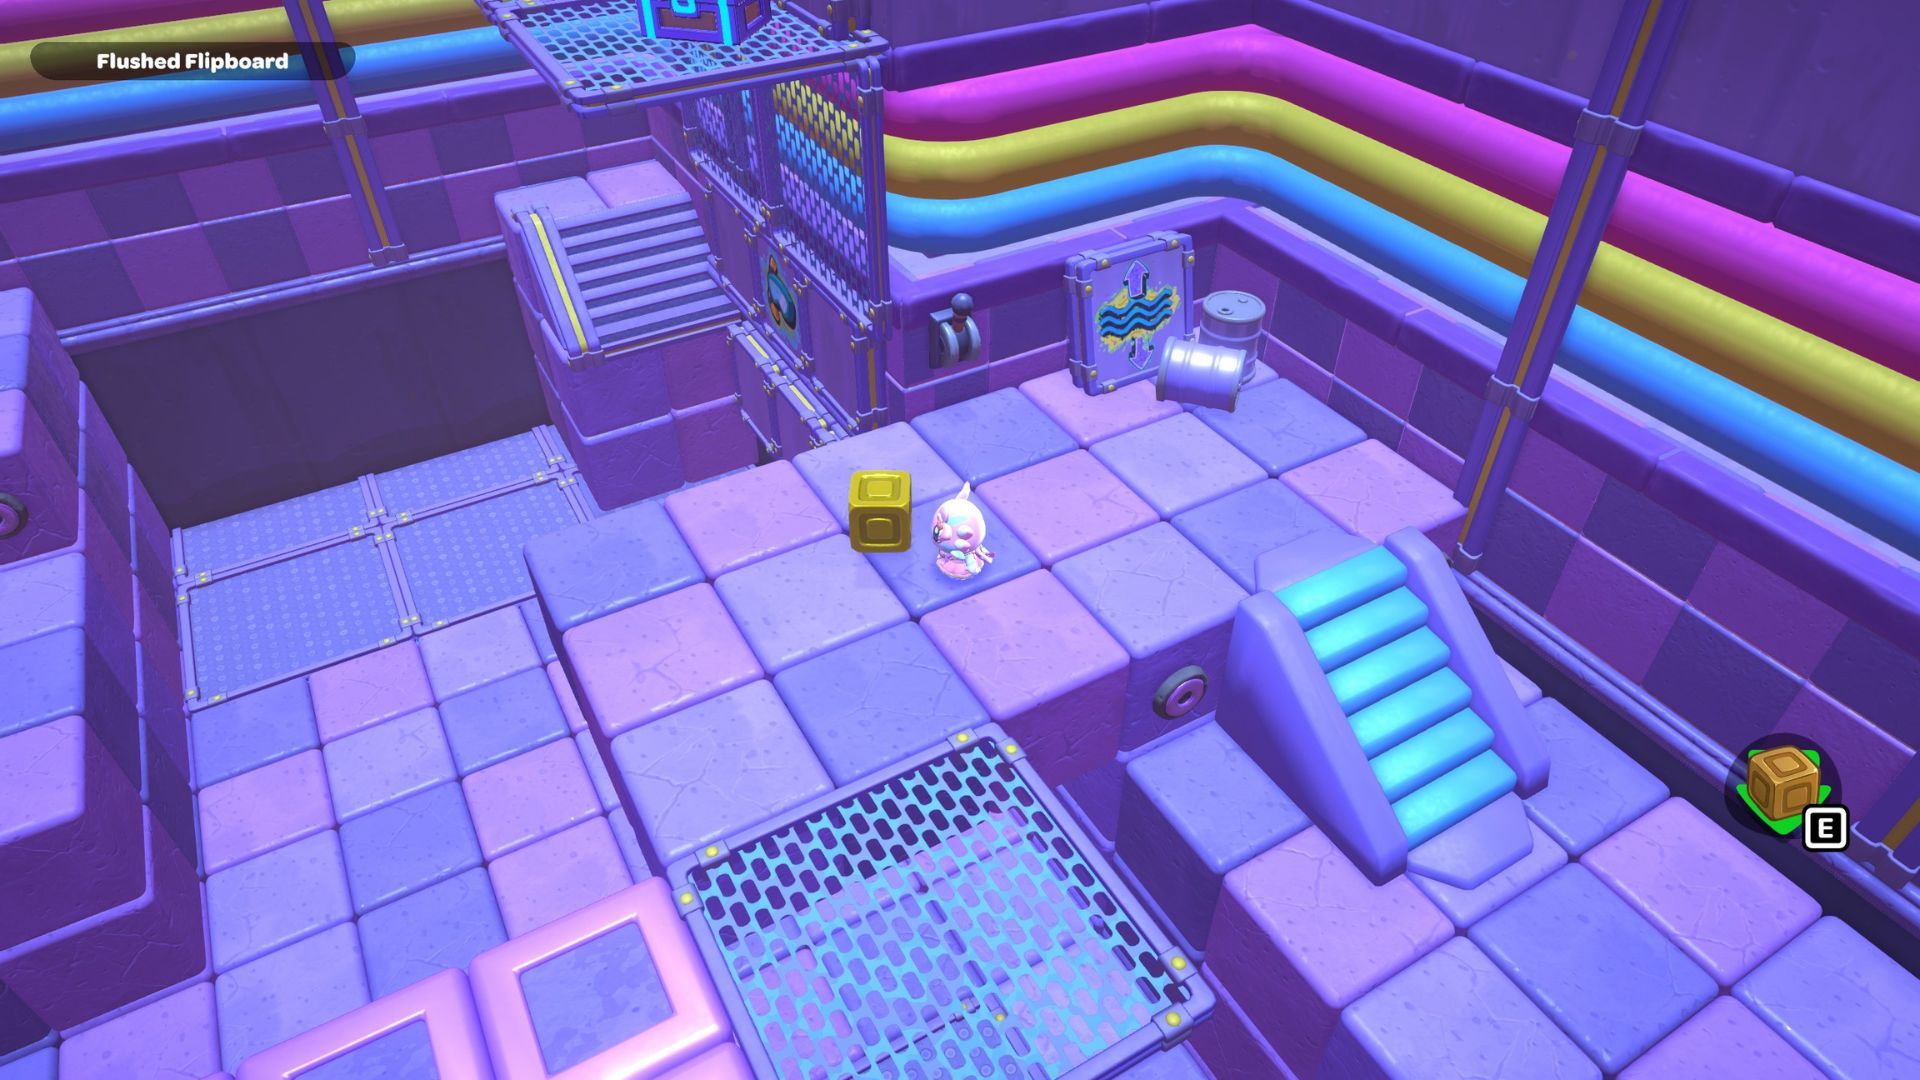
You’ll find the Flushed Flipboard puzzle room in the southwest part of the City Town Sewers. To complete the puzzle, you need to turn on the gold switch at the back of the room. This will cause a staircase to appear, giving you access to the chest.
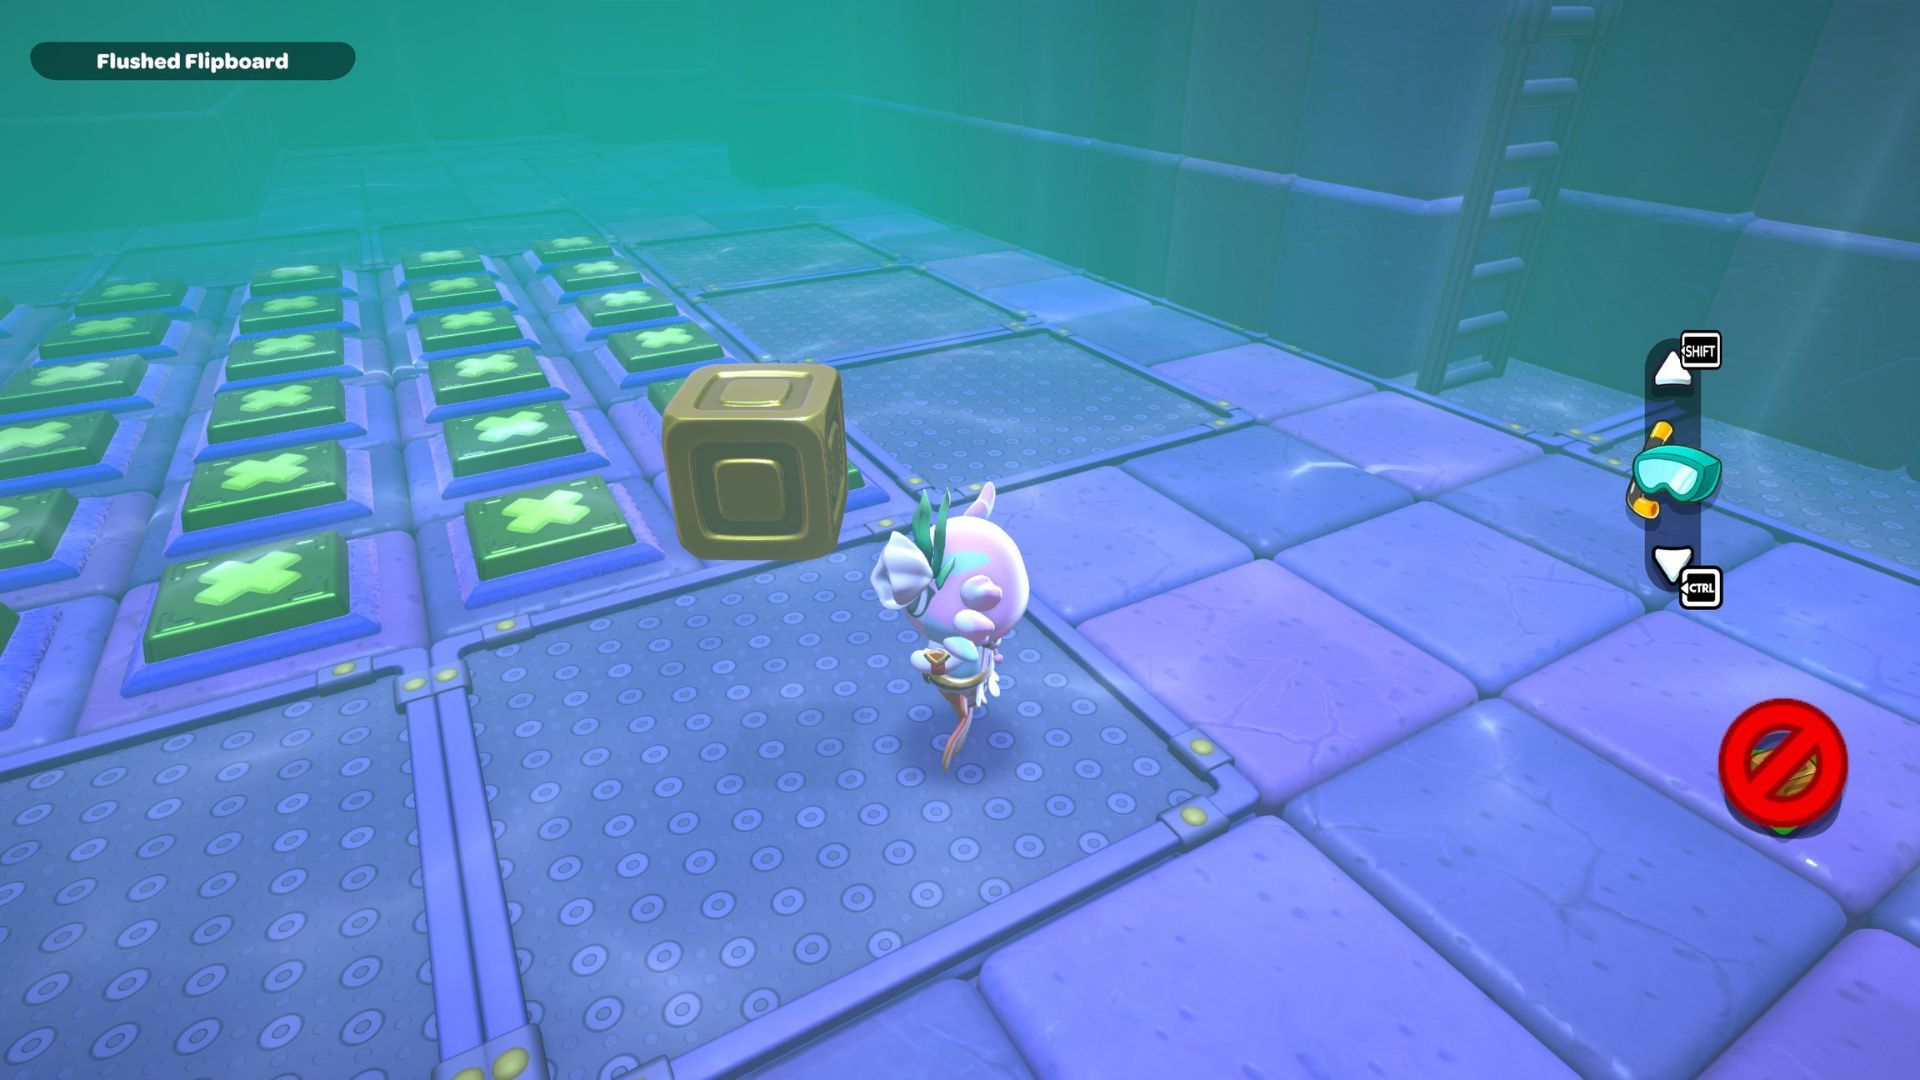
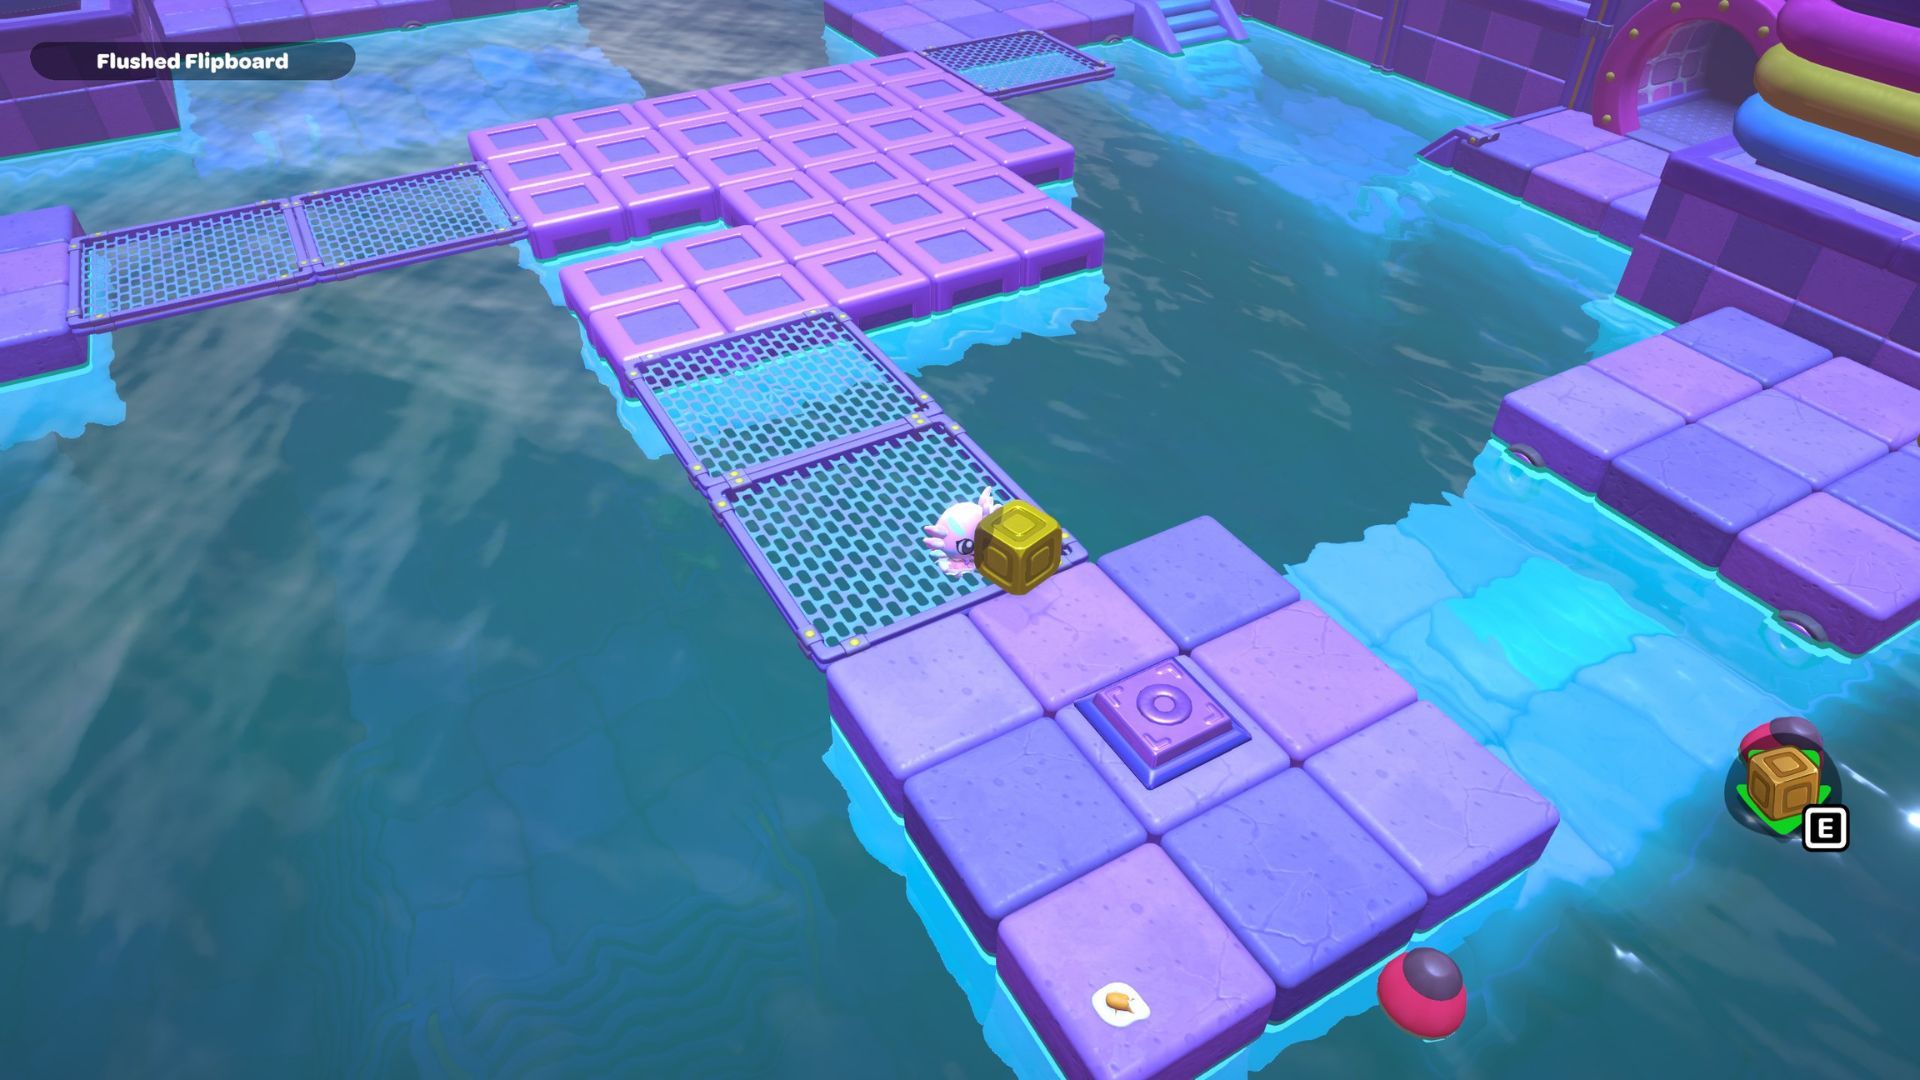
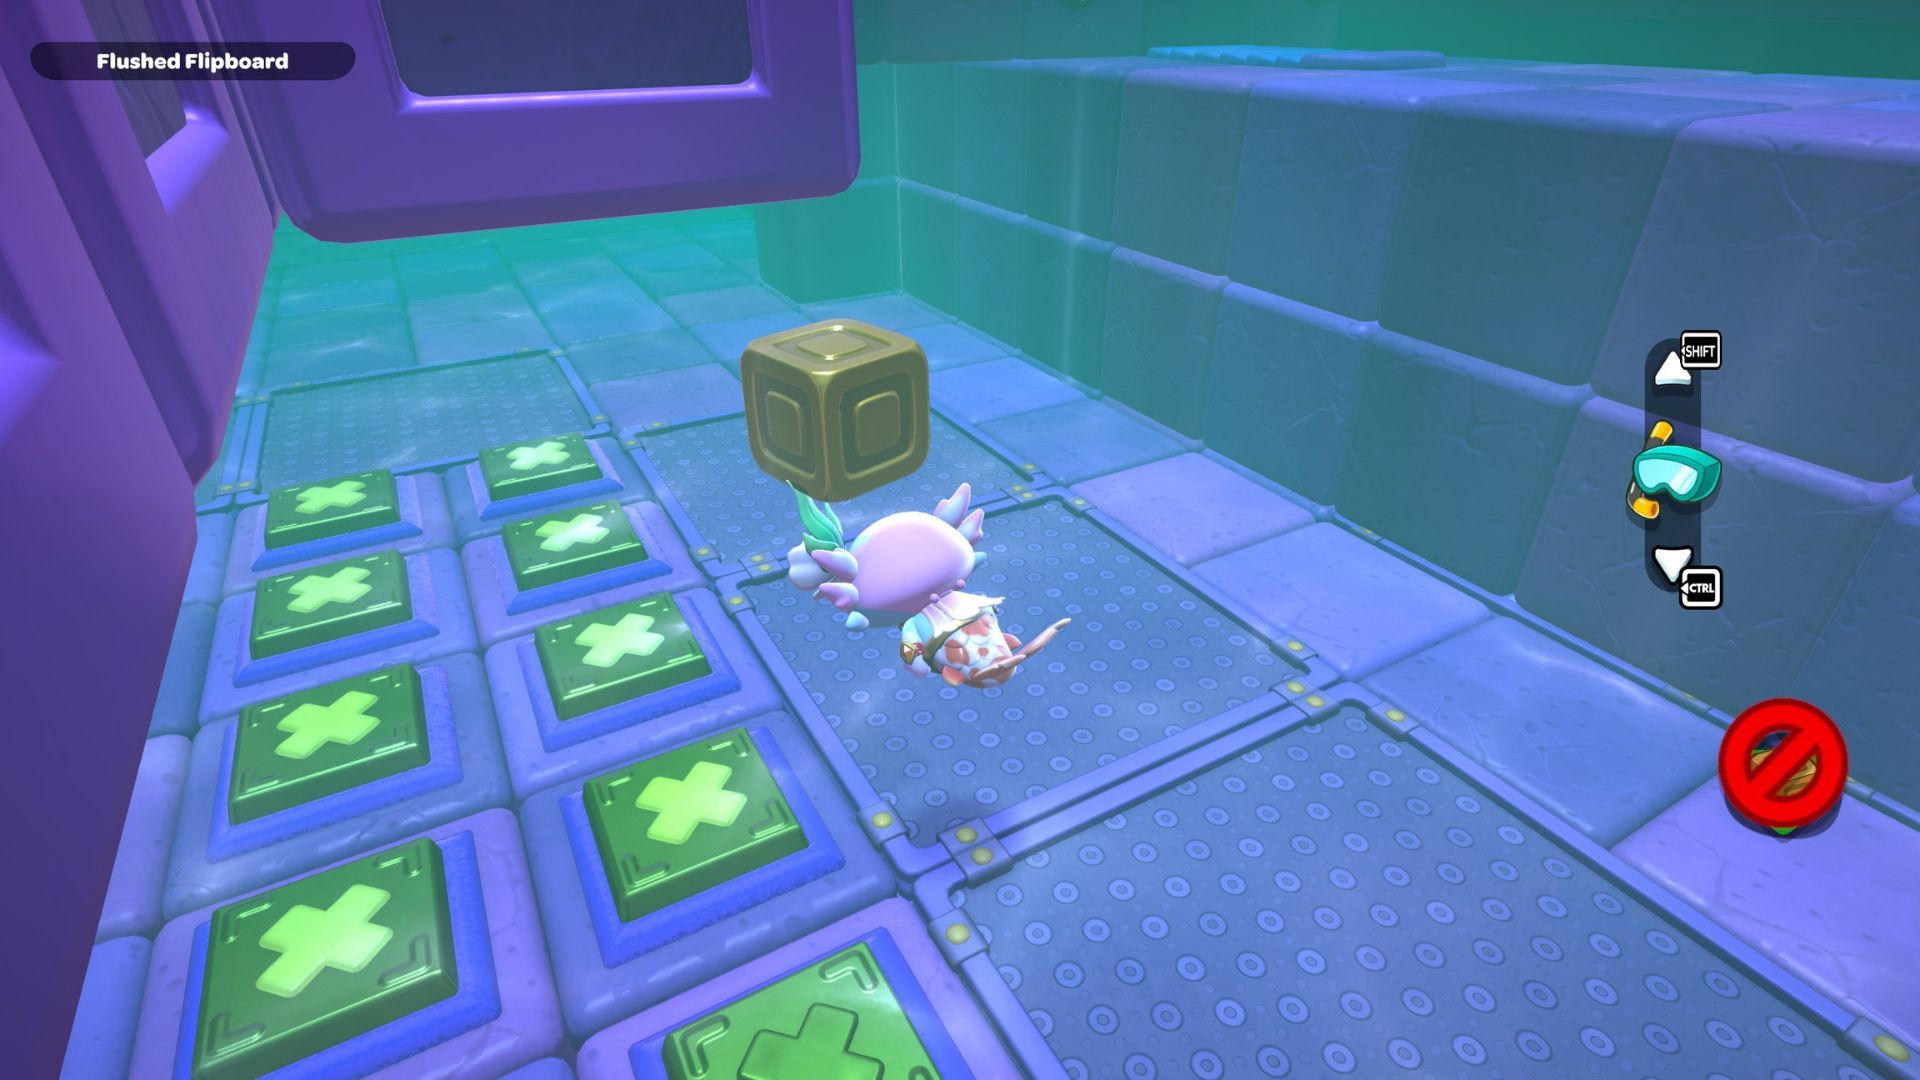
As you enter the room, you’ll notice a large section of the floor covered in green panels marked with X’s. The panels that are glowing will have purple cubes hovering over them.
There are three platforms leading to floating cubes in the room. One is near the entrance, and the other two are at the south and west sides. You need to arrange the cubes to create a connected path between all the platforms.
To create cubes, simply step on the dark floor panels to activate them and make a new cube appear. After you’ve built a connected path between all the platforms, climb the ladder on the right to get back to the stairs near the doorway.
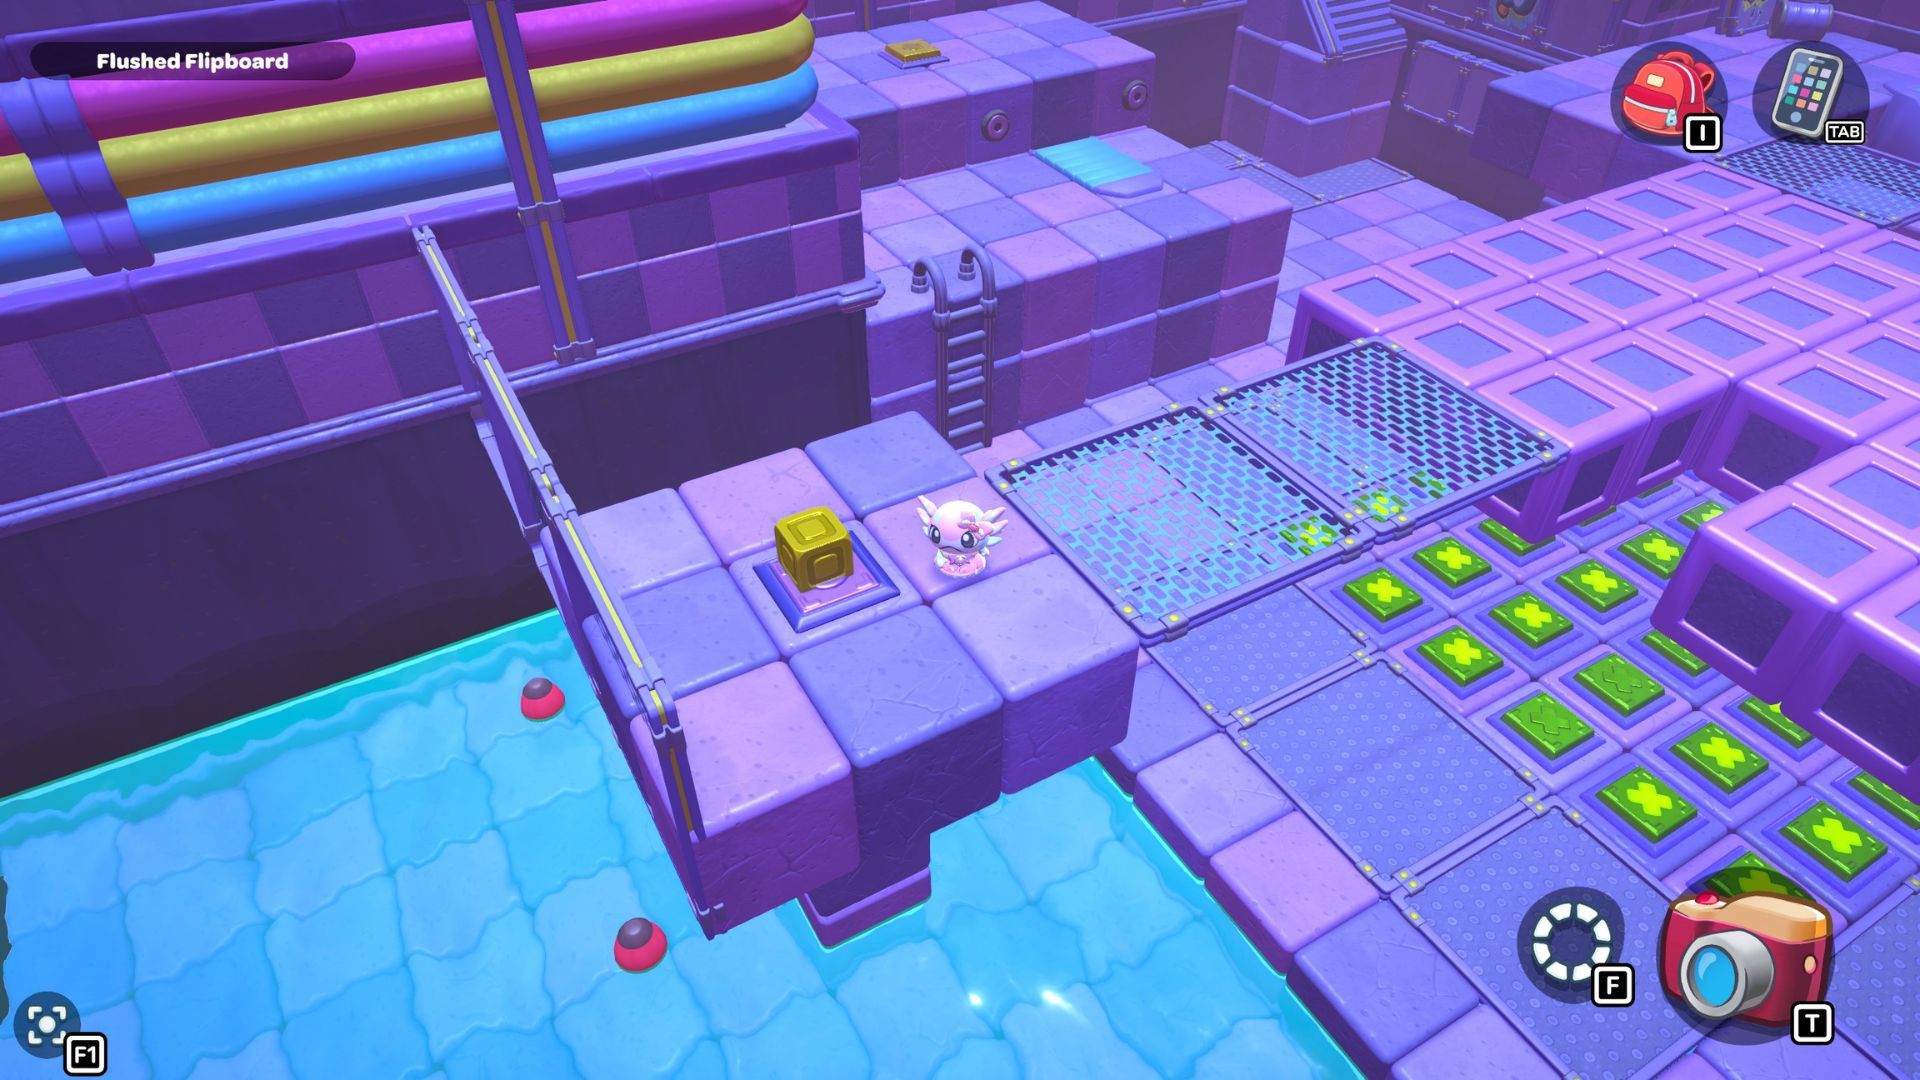
Pick up the metal cube by its handle, and then move it onto the path you created. Walk over to the platform on the west side of the room and set the cube down on the purple switch.
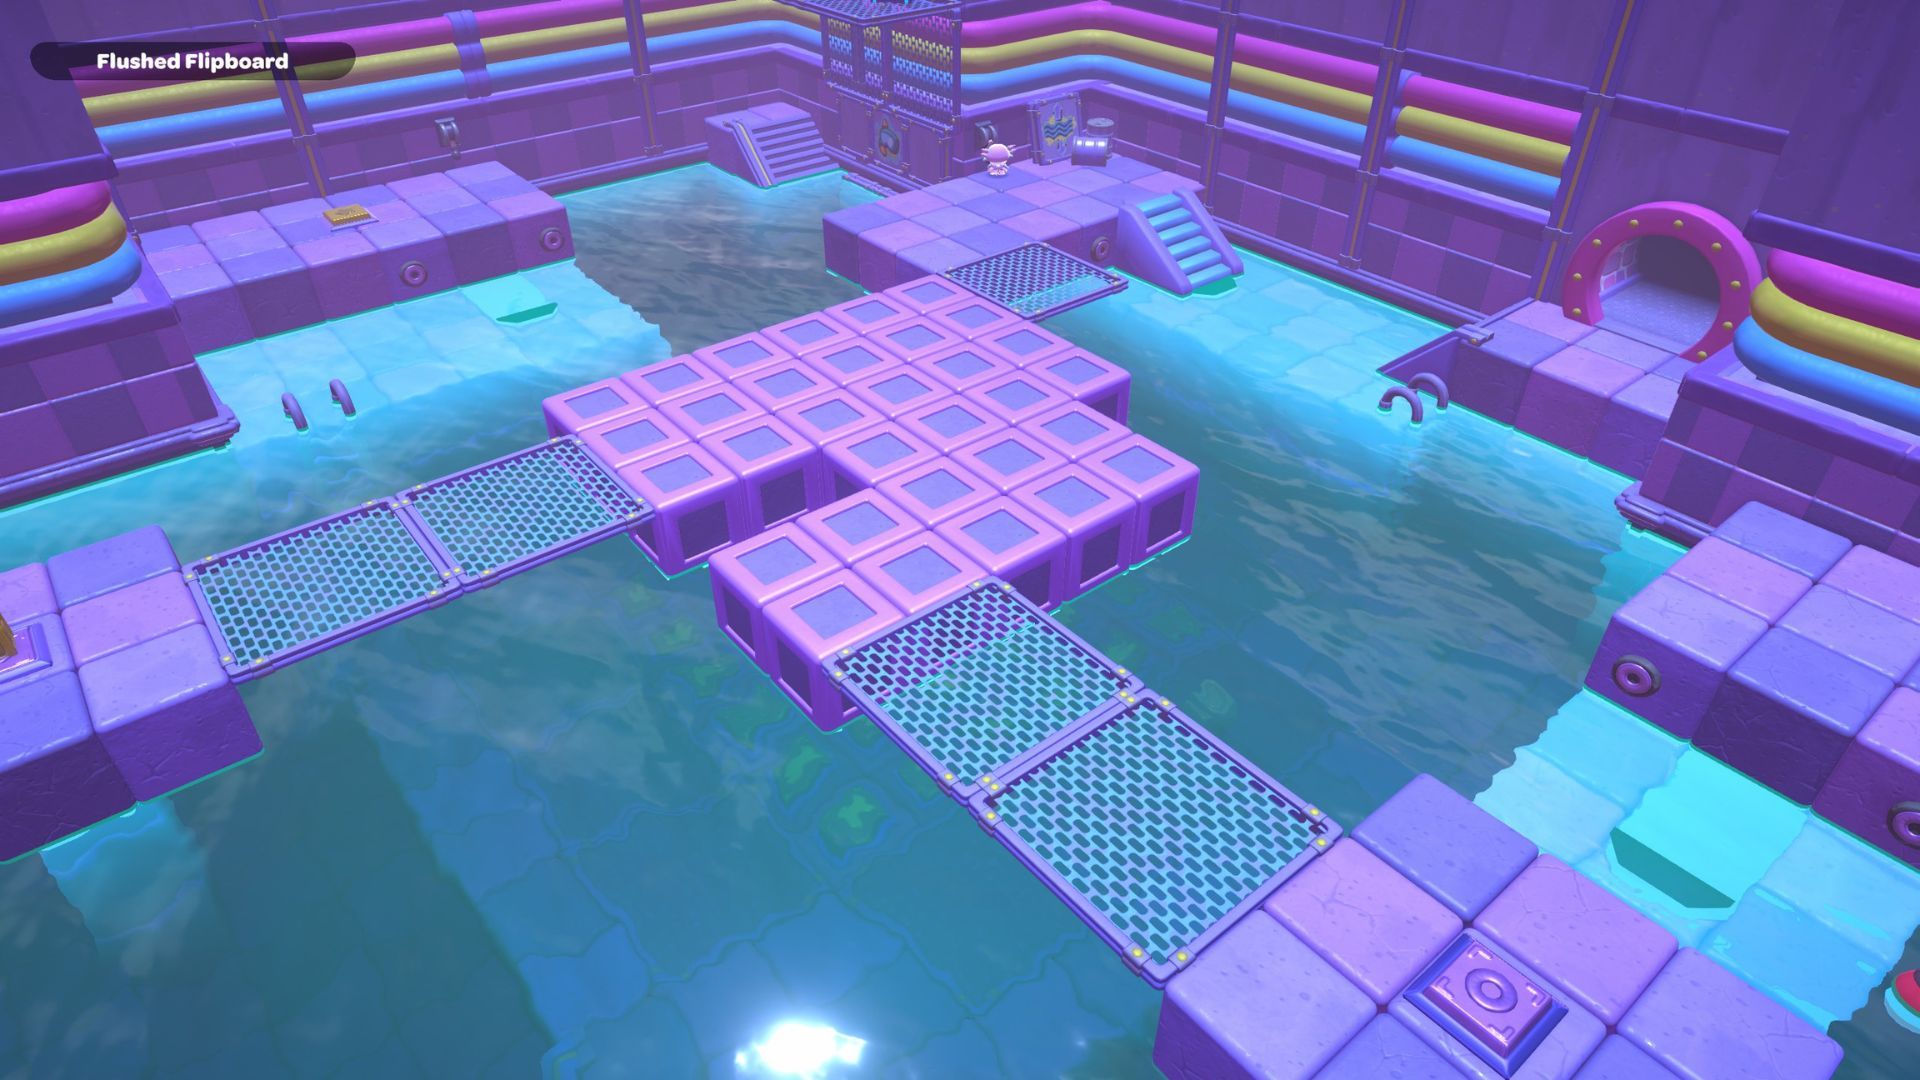
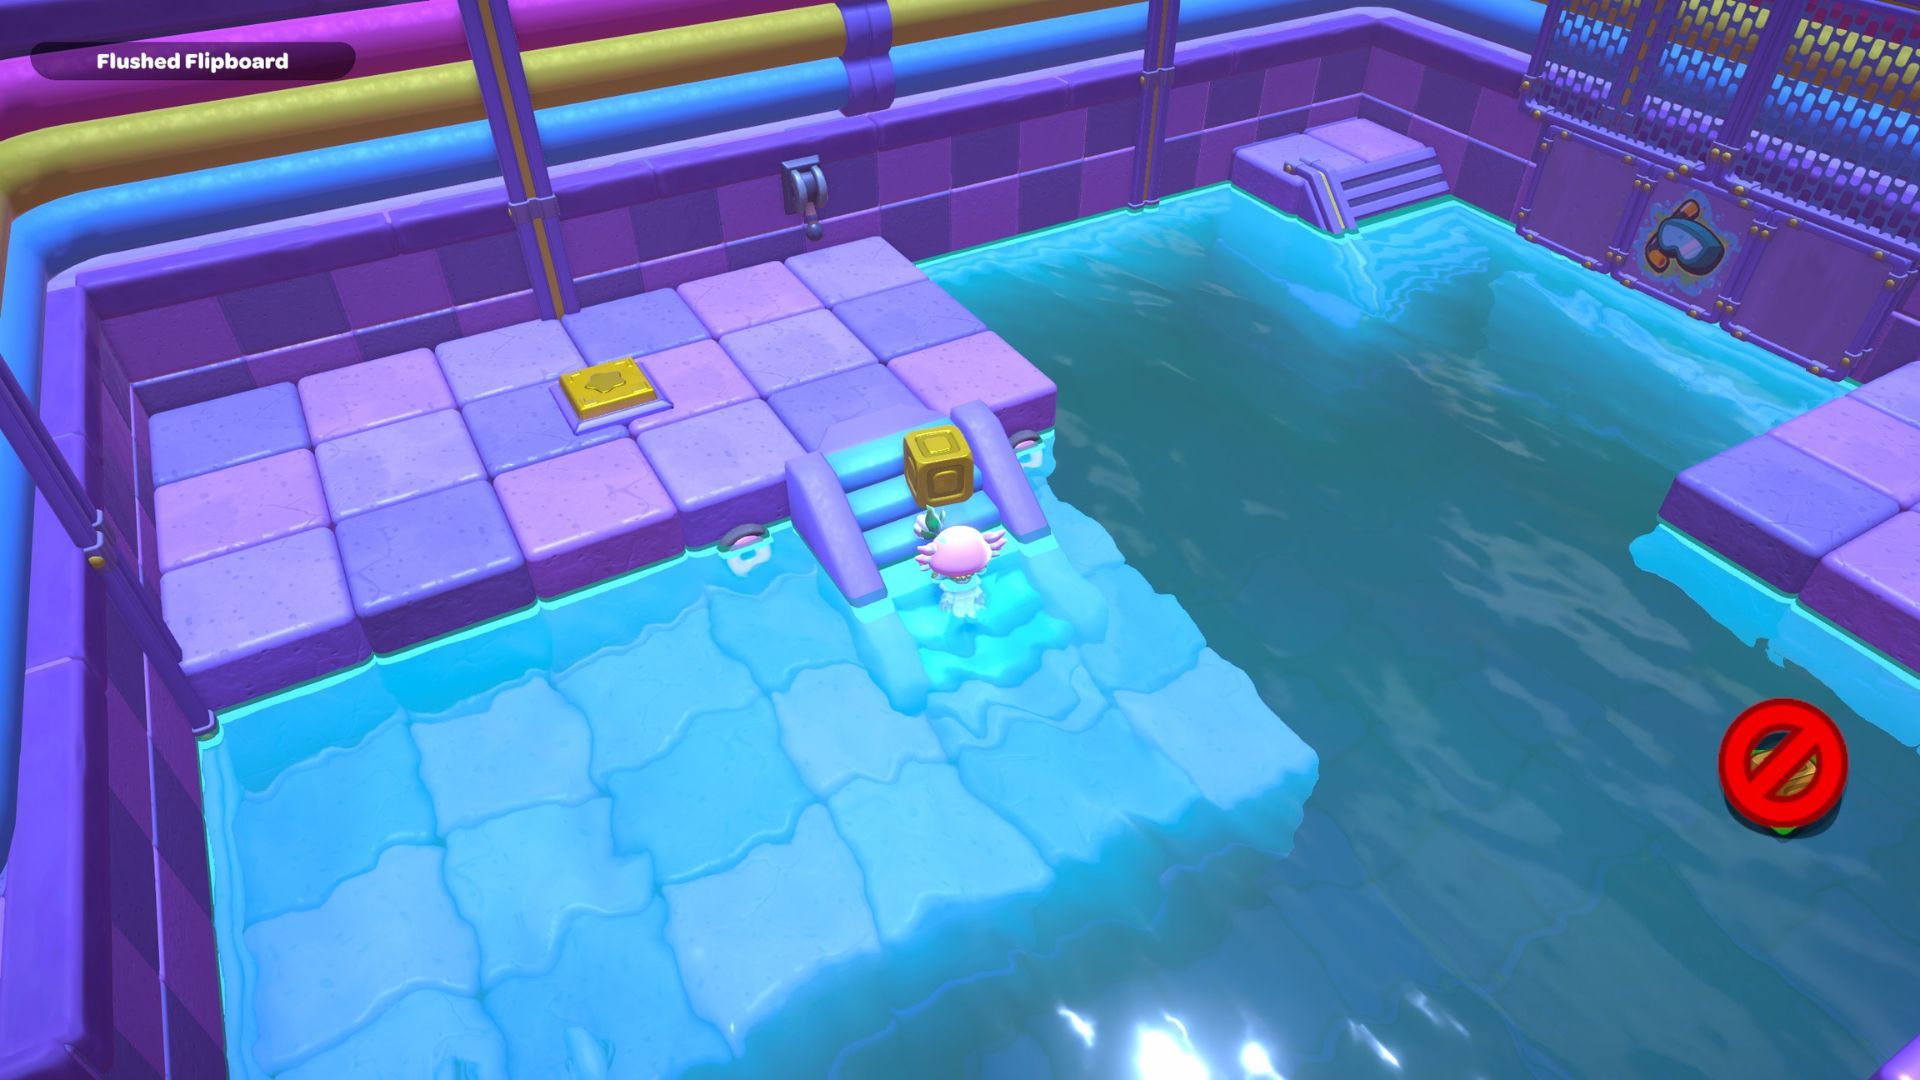
Now that you’ve flipped the switch, go back to the lever on the wall and pull it. This will cause the room to fill with water.
After the room floods, swim down and pick up the box from the floor. Holding the box, swim back up to the stairs located between the lever and the door. Climb the stairs and go back the way you came with the box.
Go to the platform at the south side of the room and put the box on the purple switch. This will make two staircases appear: one to the right of the platform, and another at the back of the room.
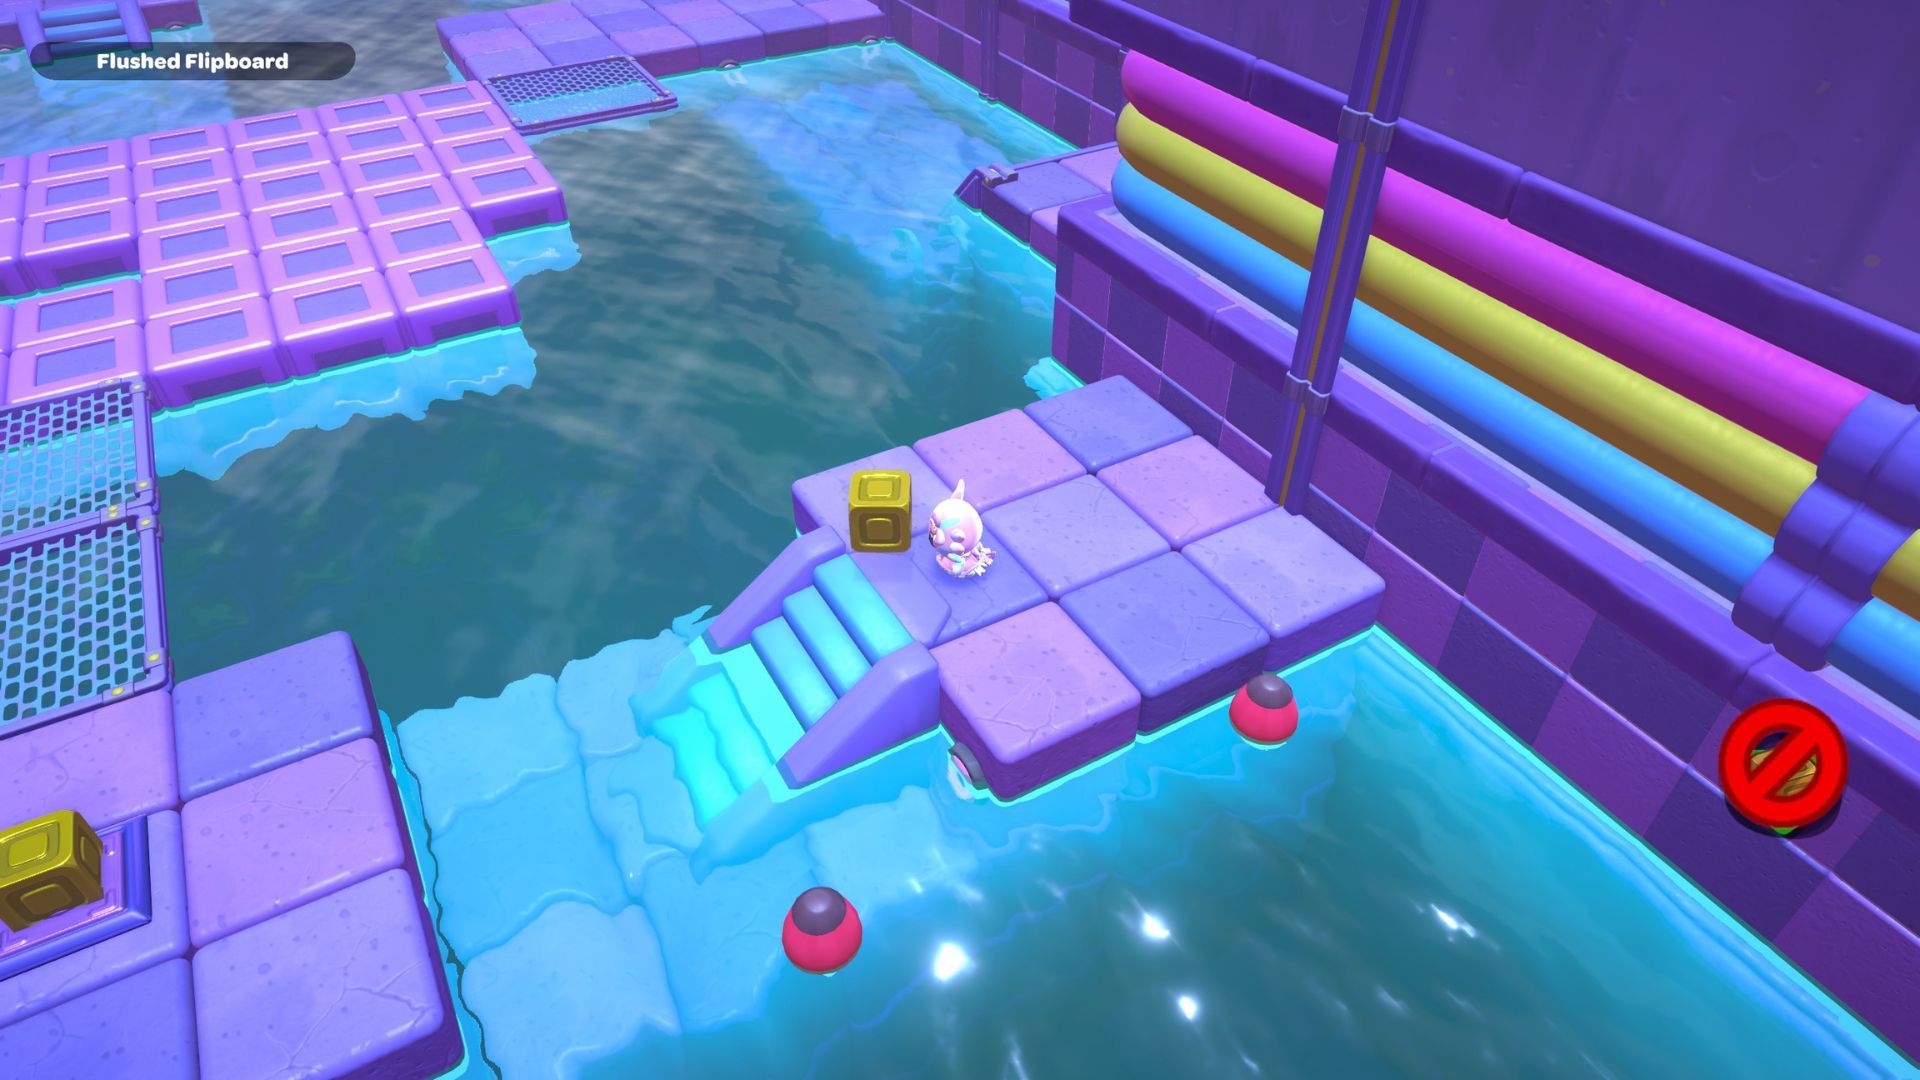
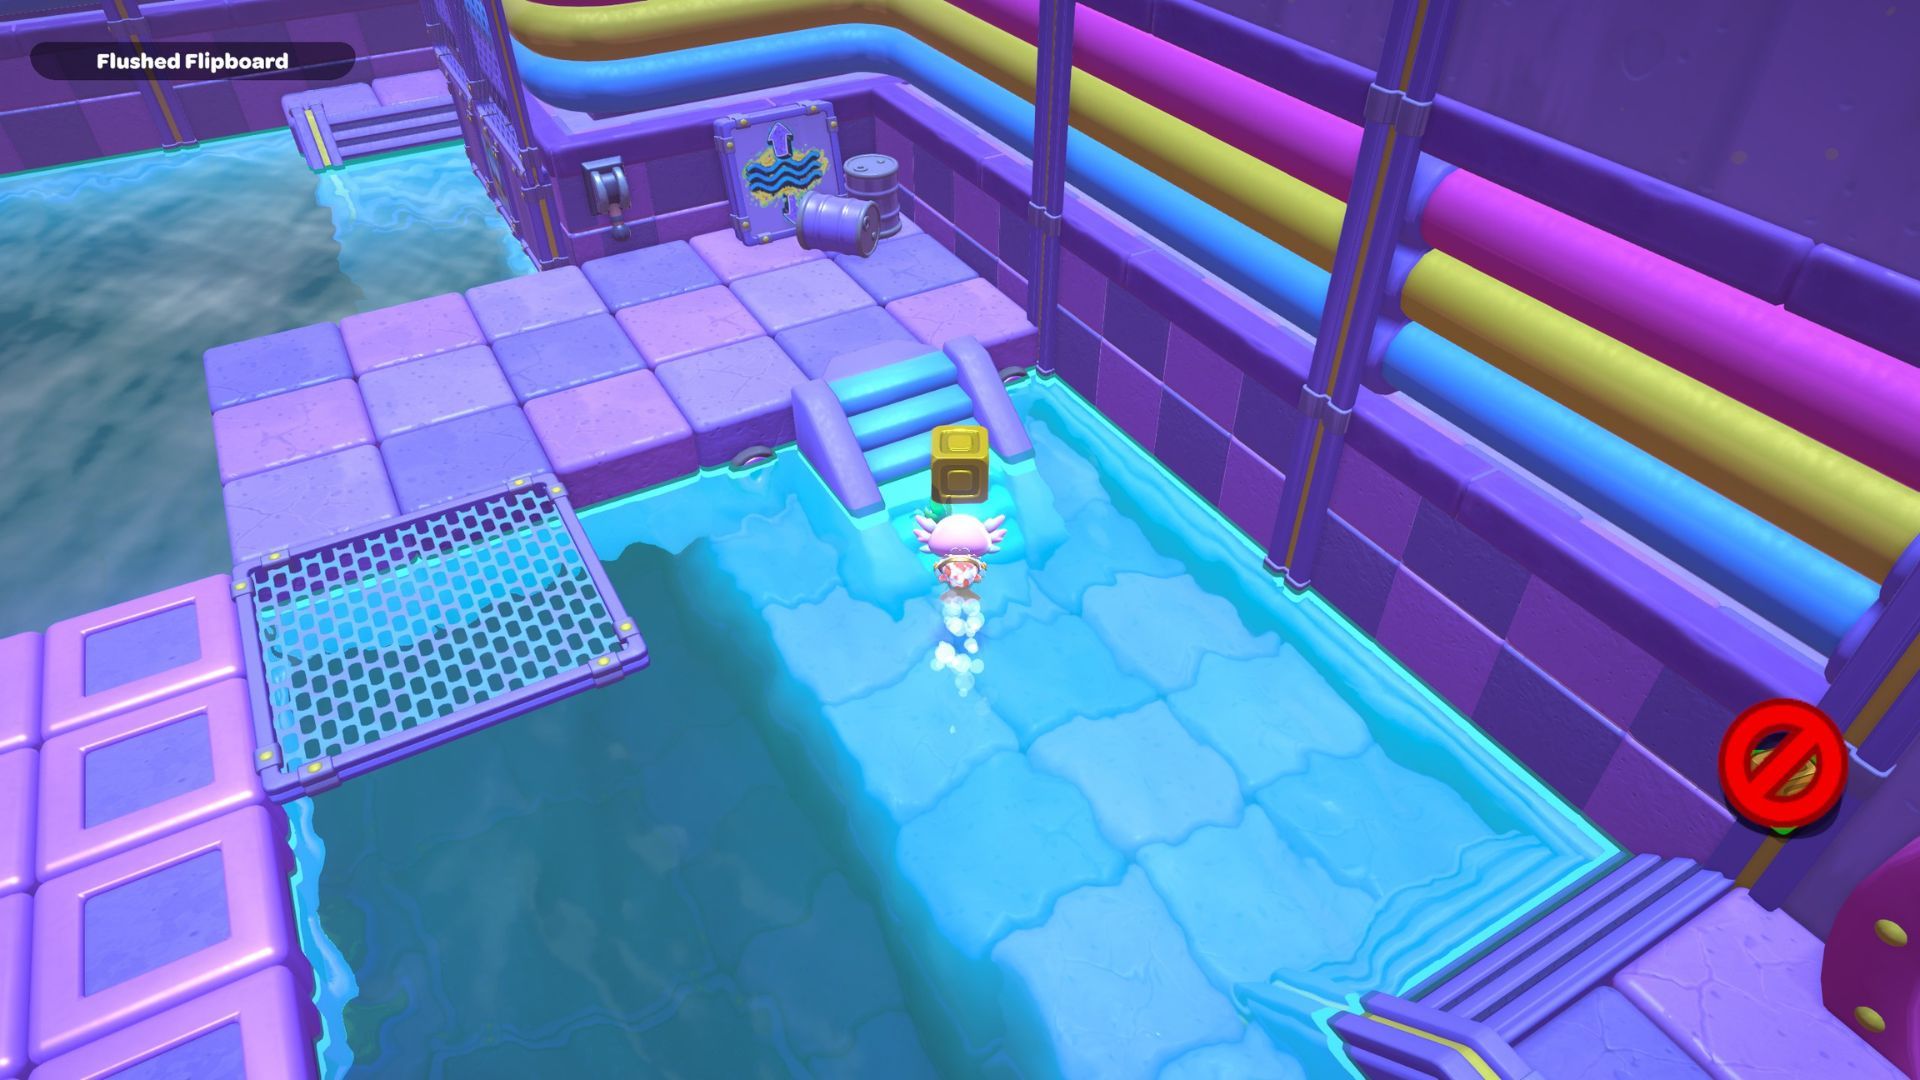
A new staircase has appeared to your right. Walk up it and take the final box in the room. With the box, dive into the water and swim under the walkway to the opposite side. Then, climb the staircase again to reach the platform where you’ll find a gold switch.
Place the box directly on the golden switch to make a staircase. Use the staircase to climb up to the platform where you’ll find the chest for this area. Open the chest to get a Pipe Sofa Table.
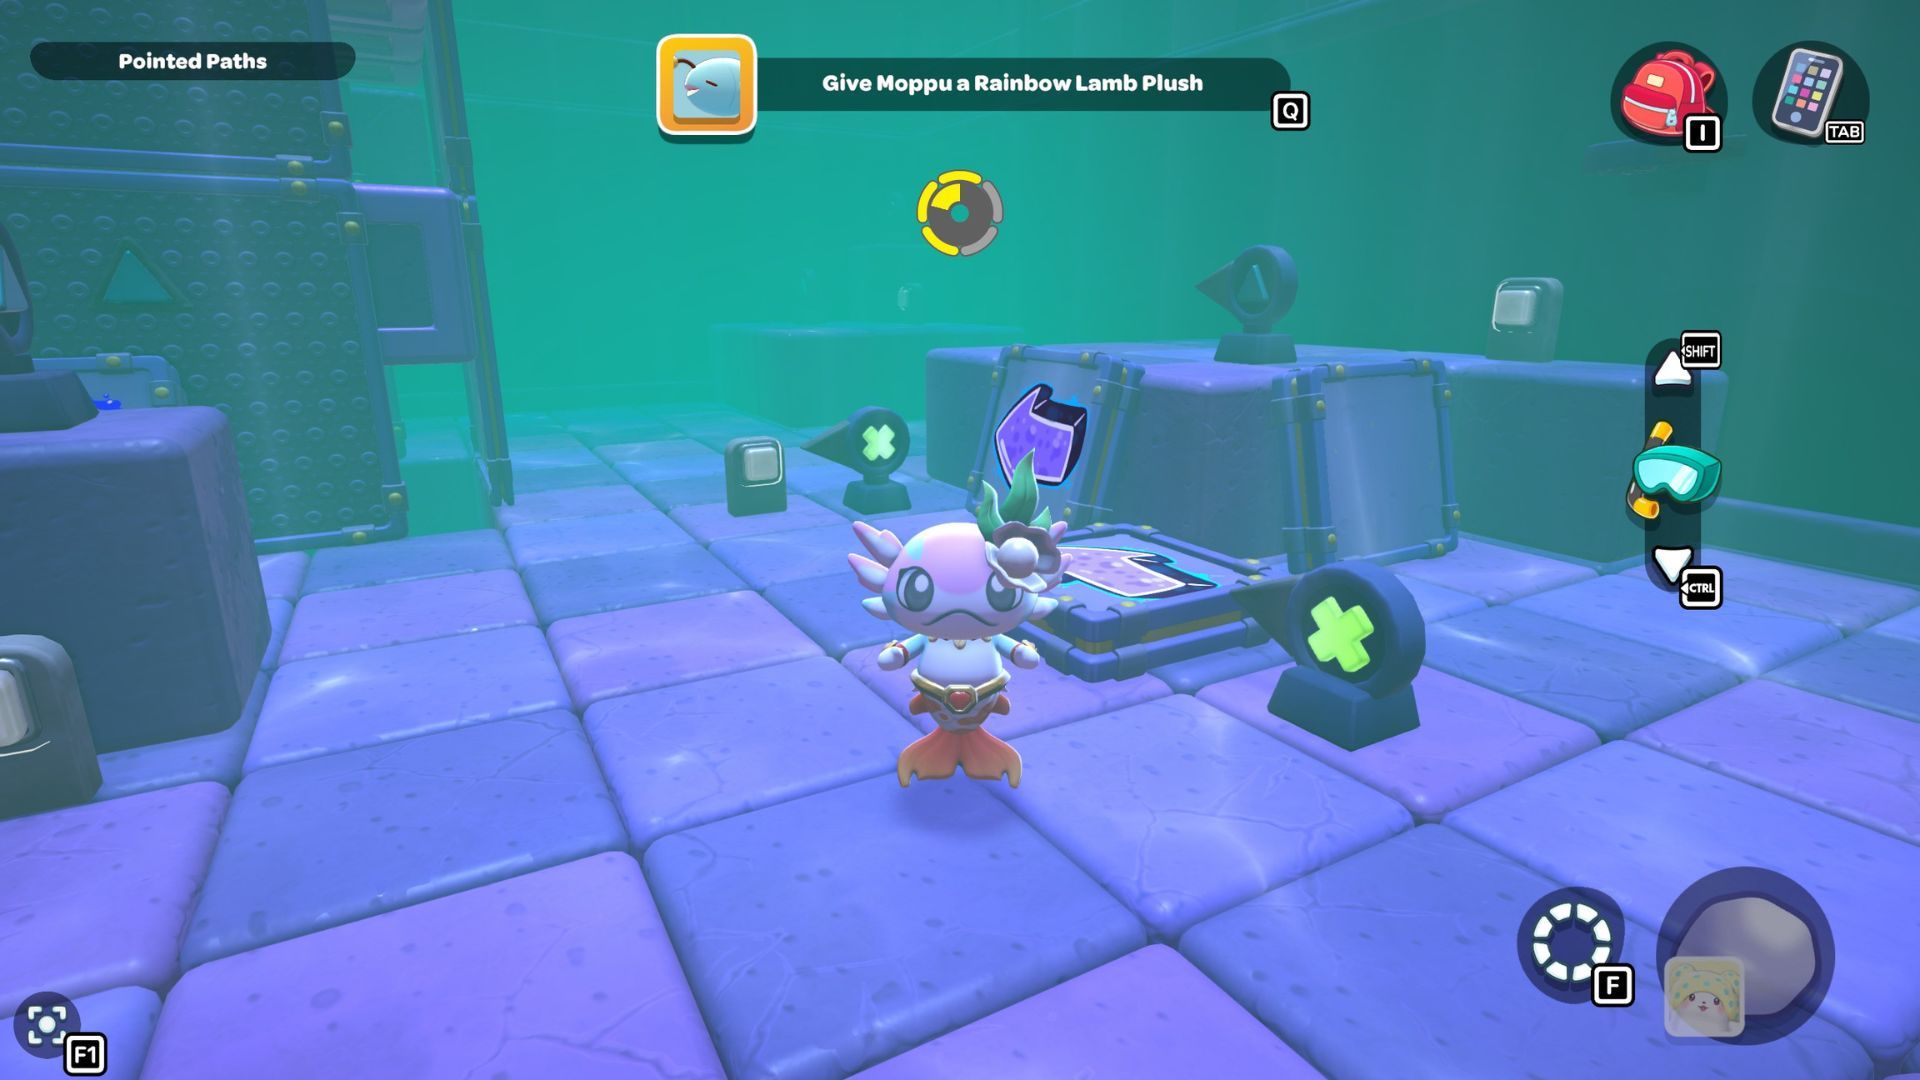
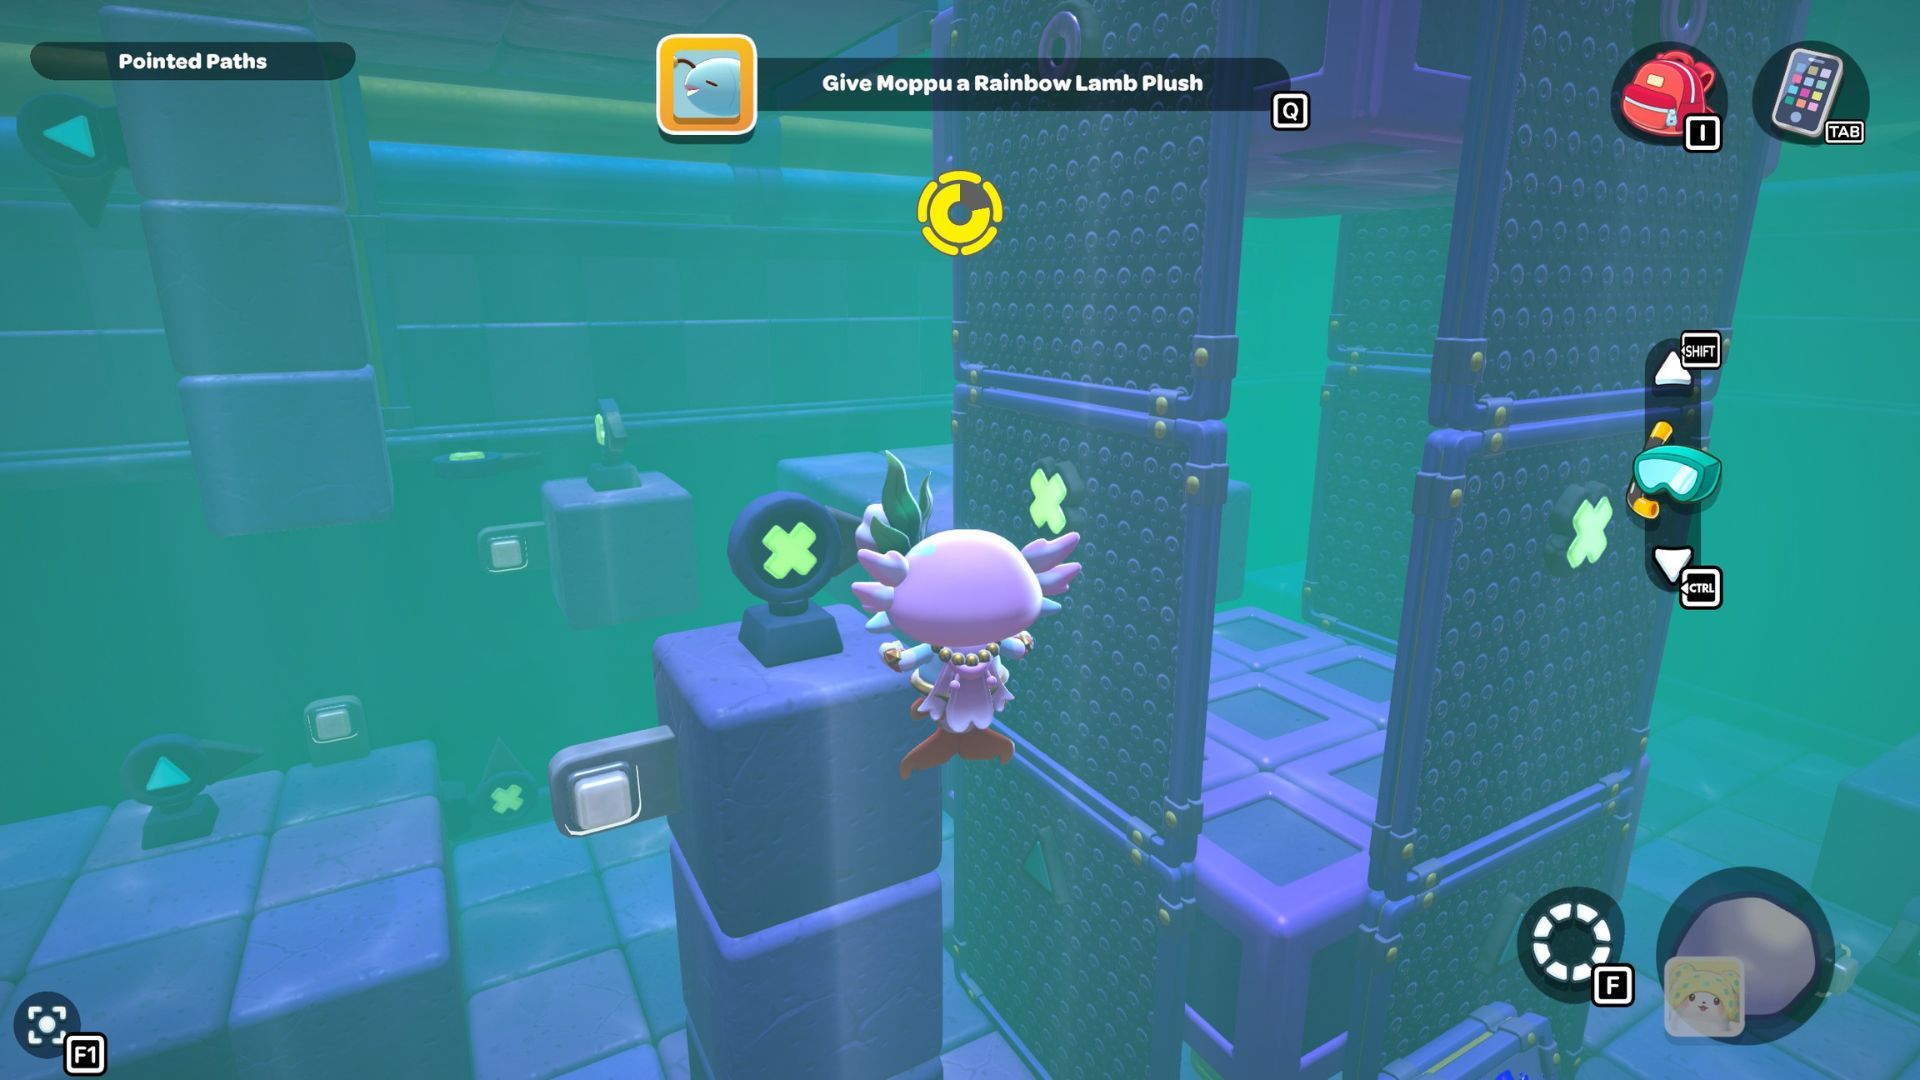
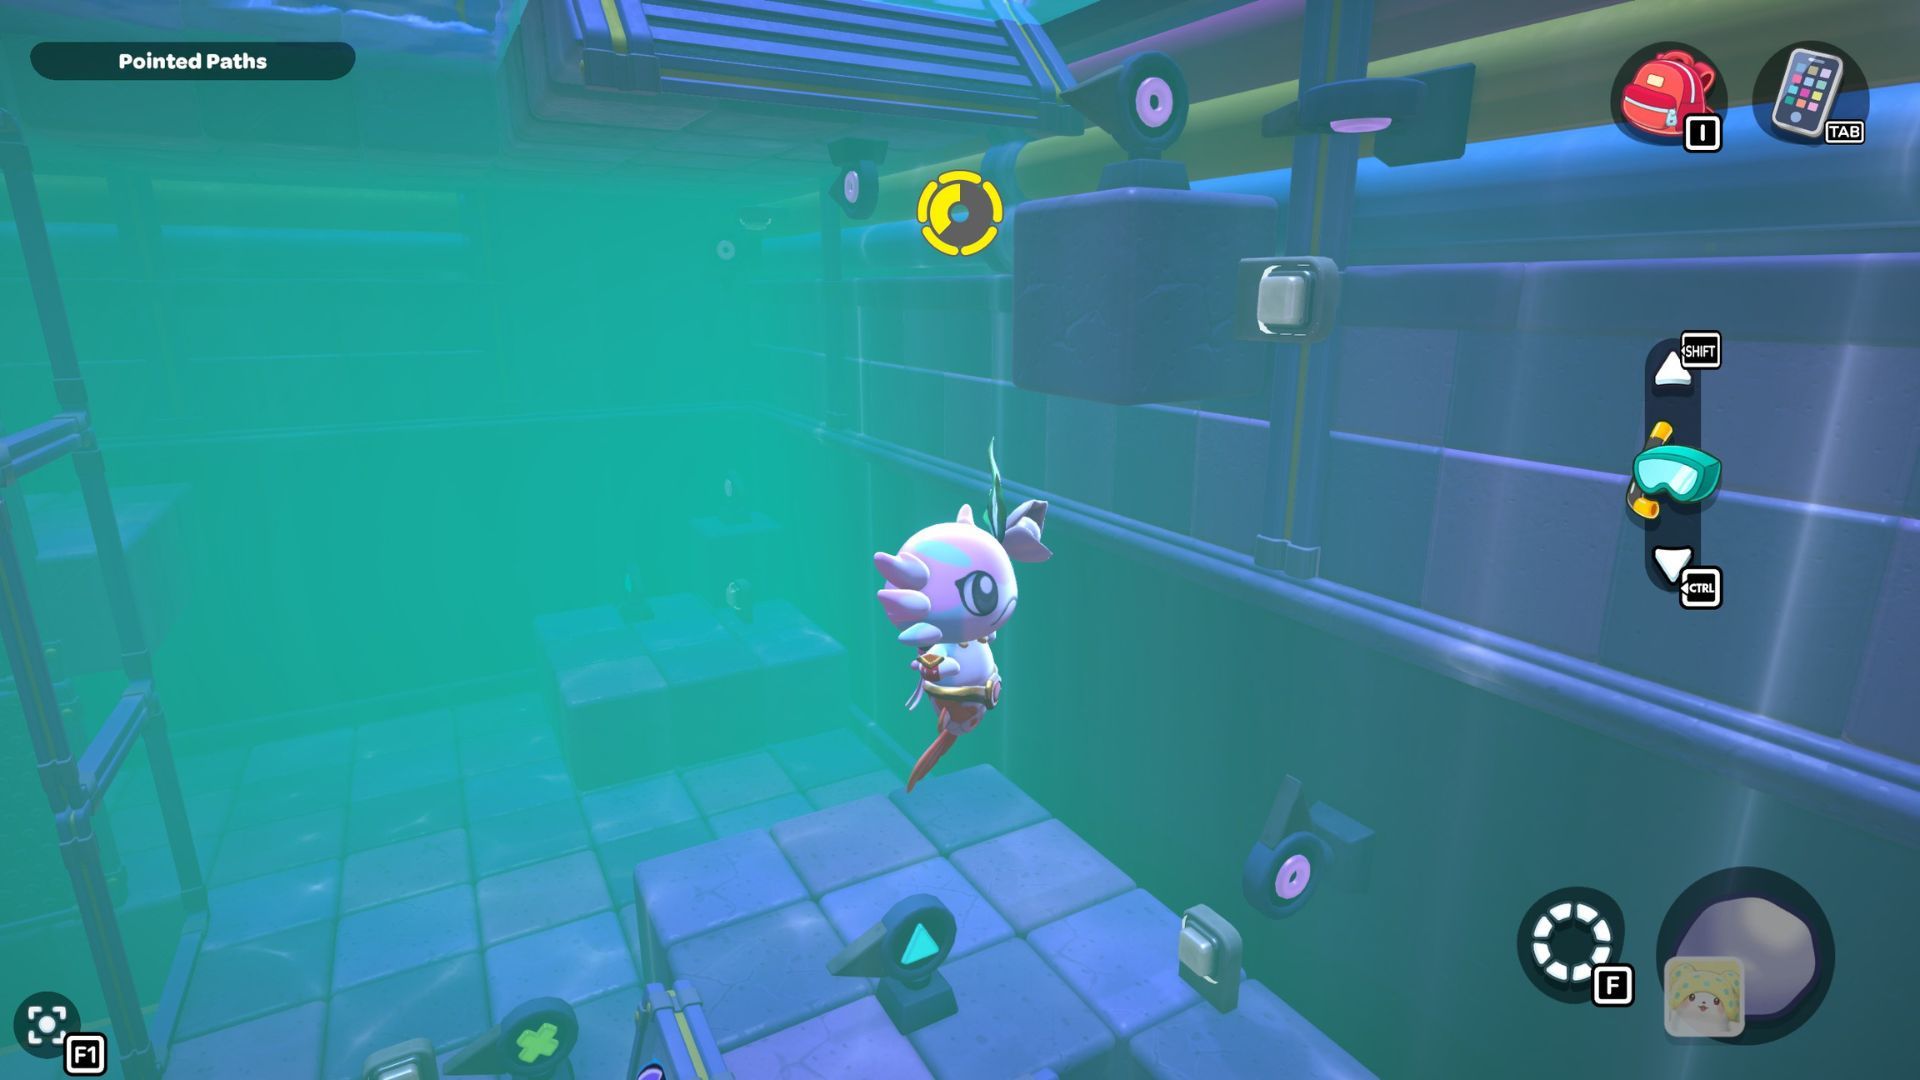
City Town Sewers — Pointed Paths Walkthrough
Okay, so if you’re exploring the City Town Sewers, you’ll find the Pointed Paths puzzle room down south. It’s right next to the Lower Sewer Mailbox, you can’t miss it! Just be prepared to get wet – most of the room is underwater, and there are tons of signs and panels scattered all over the floor.
To solve the puzzle, you need to move a box and place it on the gold switch near the door. This will shift some panels and open the way to the chest. But first, you’ll have to move three other sets of boxes to even reach the box you need!
To move the blocks, you need to activate the panels located around them. These panels are easily identified by circle, x, and triangle symbols. You’ll find these same symbols on signs throughout the room.
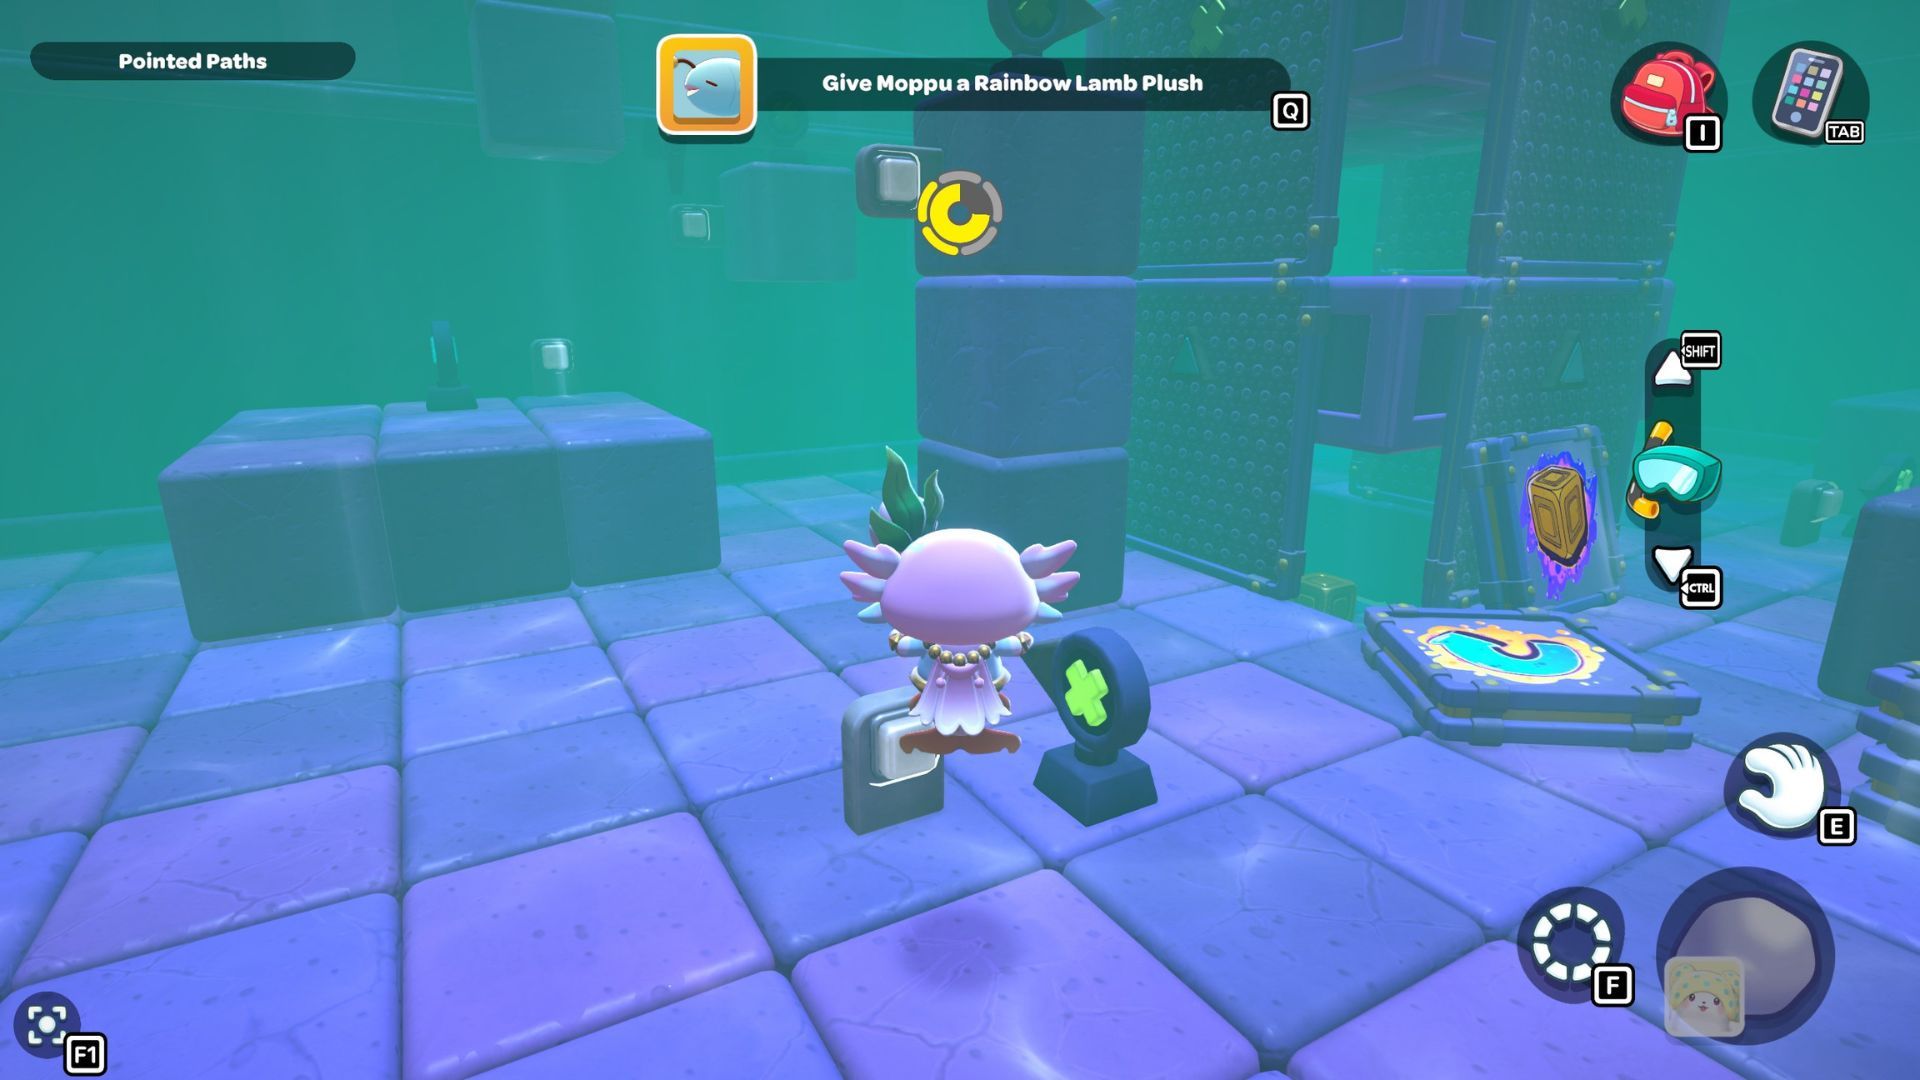
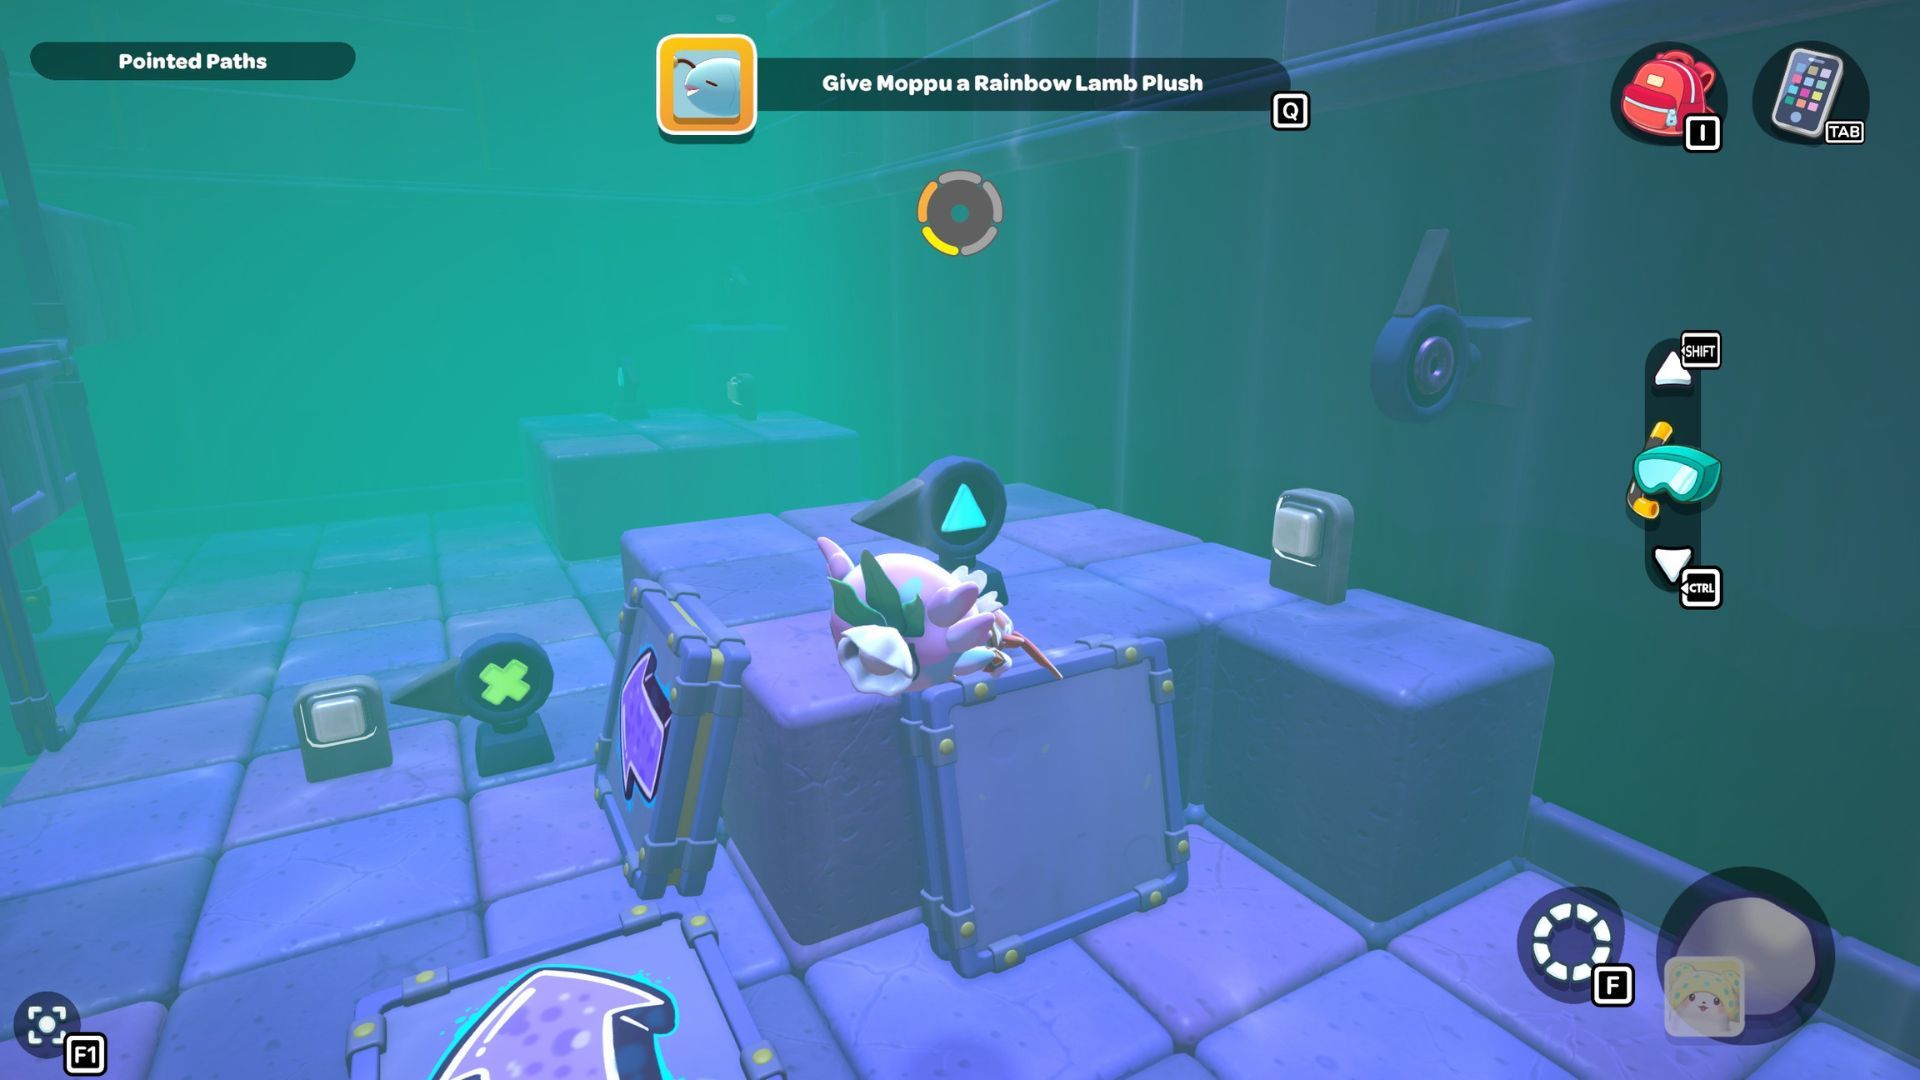
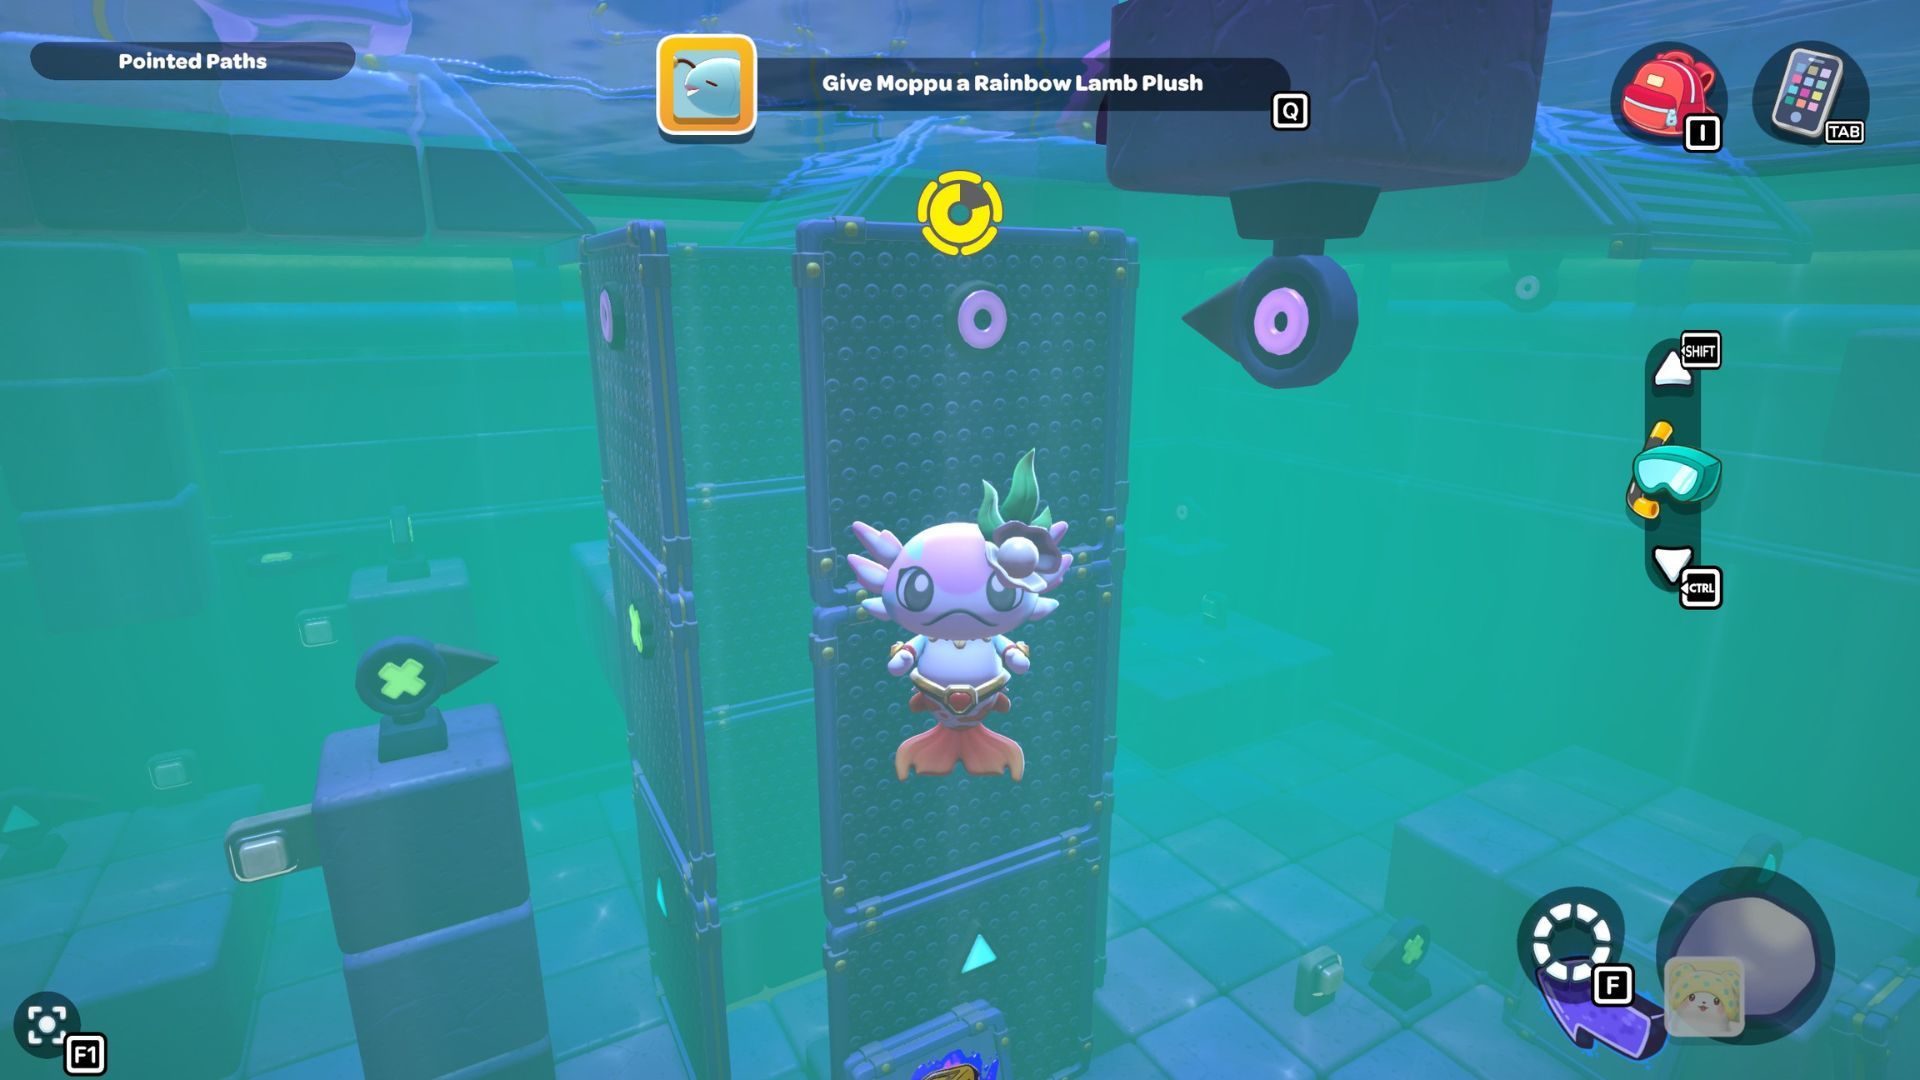
Every symbol has a set of lights connected to it. The first light in the set will be on to help you find it. To finish, you need to arrange the lights so that each one points to the next in the sequence.
You can change the direction of the signs by flipping the white switches beside them. Turn each sign so it faces the next one in the order, and make sure the final sign points to the panel with the same symbol. Getting all the signs to point correctly will clear some blocks, allowing you to reach the cube.
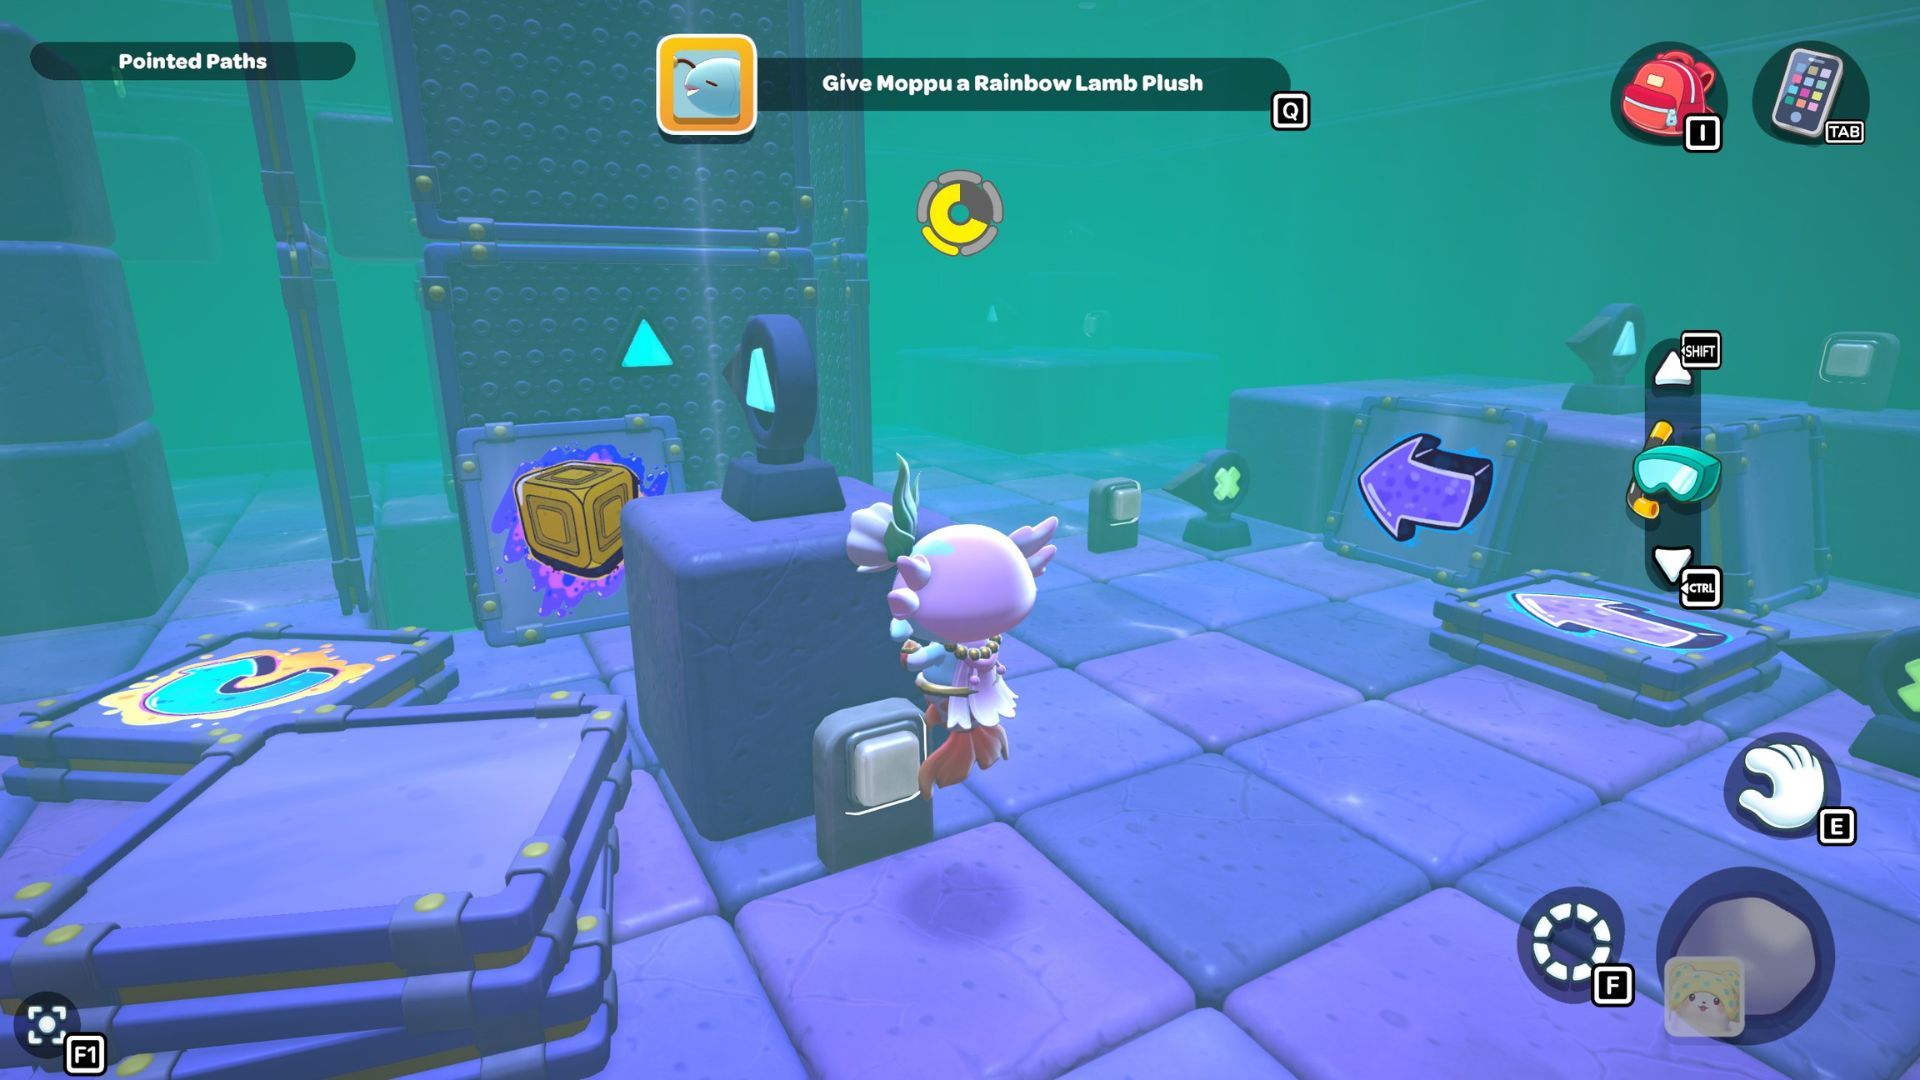
Let’s start with the X signs – they’re the simplest. The first one is on the right side of the room, near the two panels with purple arrows. There are seven signs in total, and you’ll need to rotate them in a specific order.
| Sign Number | Rotation |
|---|---|
| 1 | Original sign; leave as is. |
| 2 | Rotate the sign to point left. |
| 3 | Rotate the sign to point forward. |
| 4 | Make the sign point to the ceiling. |
| 5 | Rotate the sign toward the X sign next to it. |
| 6 | This sign should point at the X sign in front of the panels. |
| 7 | This sign should be facing the panels. |


Let’s move on to the triangle signs. The first one is located on a small block attached to the platform near the chest. Because we already completed the ‘x’ signs, the first and second triangle signs should already be facing the correct direction. You can find a list of the necessary rotations for all the signs in the table below.
| Sign Number | Rotation |
|---|---|
| 1 | Original sign; leave as is. |
| 2 | Pointing to the right. |
| 3 | Pointing to the opposite side of the room, where the first X sign was. |
| 4 | Pointing to the left. |
| 5 | Pointing at the panel with the triangle symbol. |
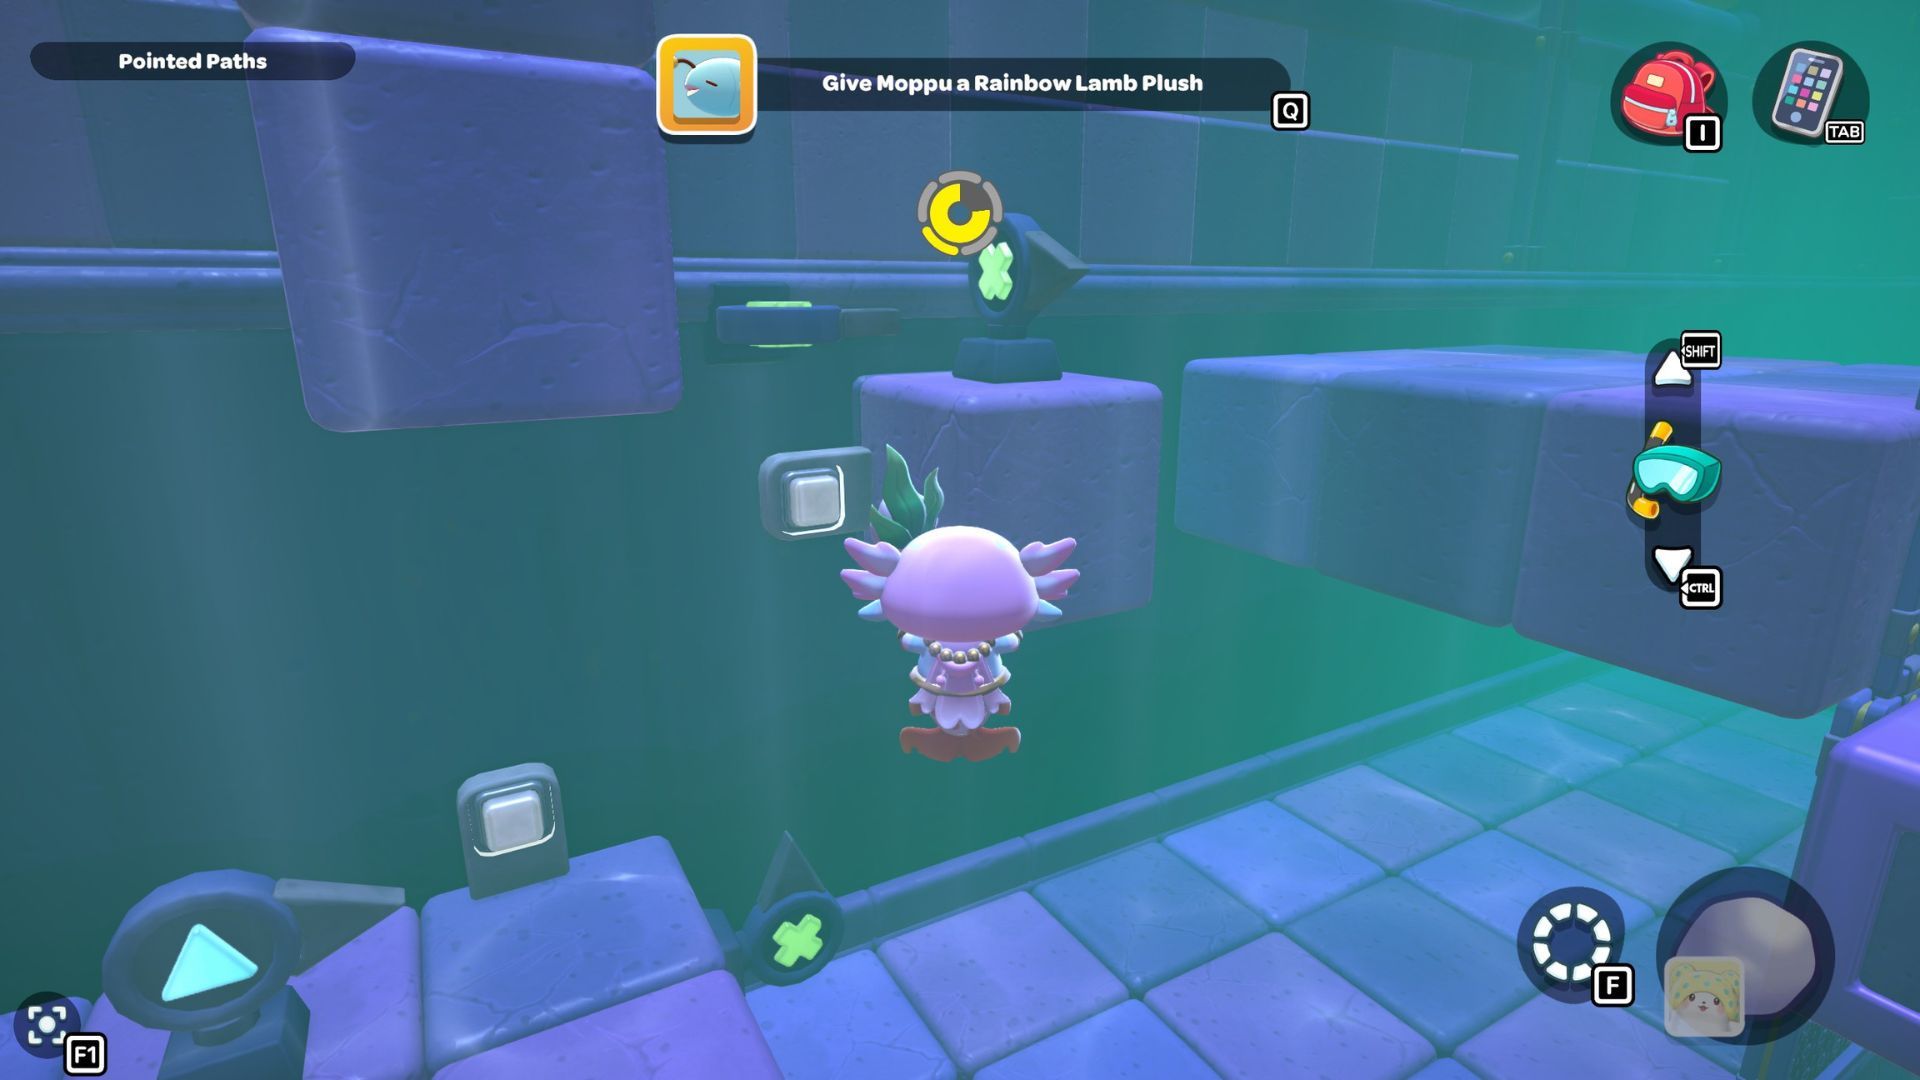
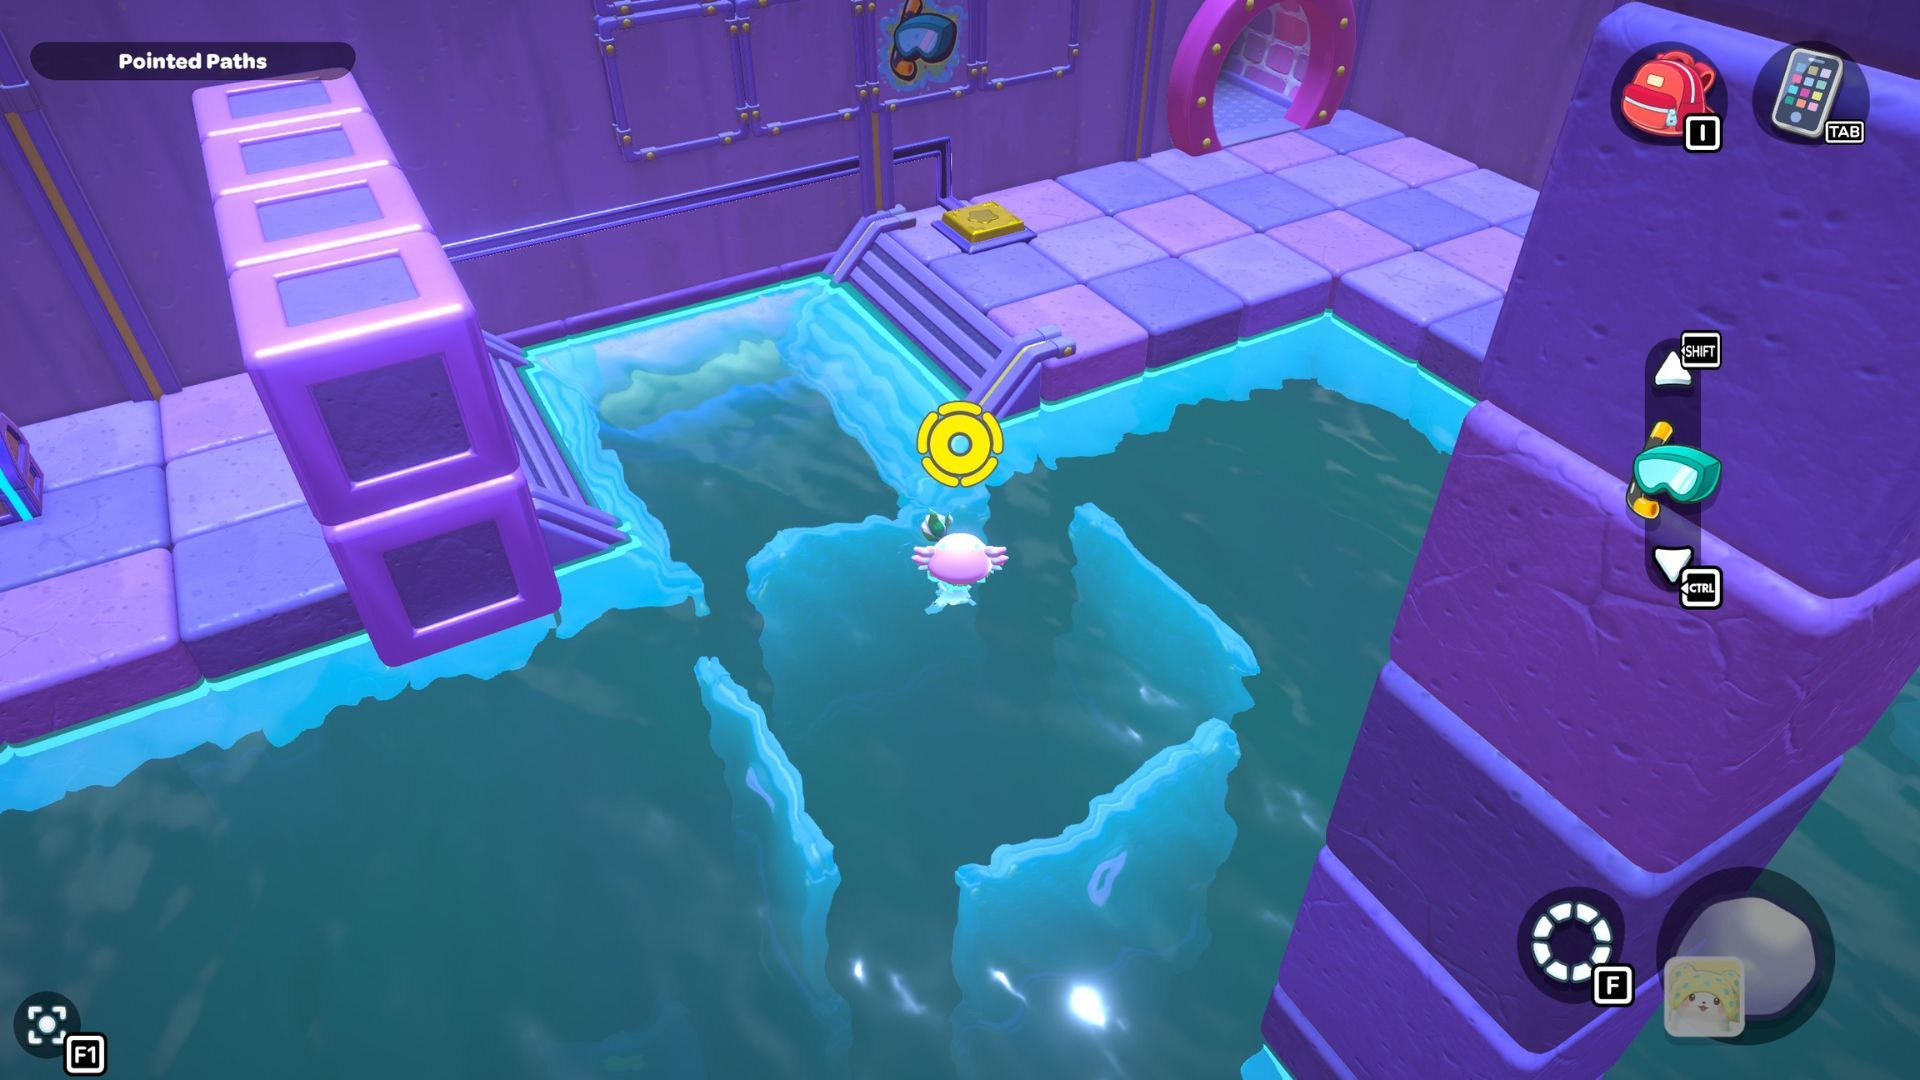
Okay, so the final things we need to adjust are the circles. The first one is right under the platform where the door to the room is. From here on out, we’ll need to rotate them in this specific order to solve the puzzle.
| Sign Number | Rotation |
|---|---|
| 1 | Original sign; leave as is. |
| 2 | Pointing down at the floor. |
| 3 | Pointing to the other side of the room. If you’ve already completed the triangle sequence, this sign is rotated properly. |
| 4 | Pointed toward the ceiling. |
| 5 | Pointed at the circle sign next to it. |
| 6 | Pointing away from the wall. |
| 7 | Pointing at the panel with the circle symbol on it. |
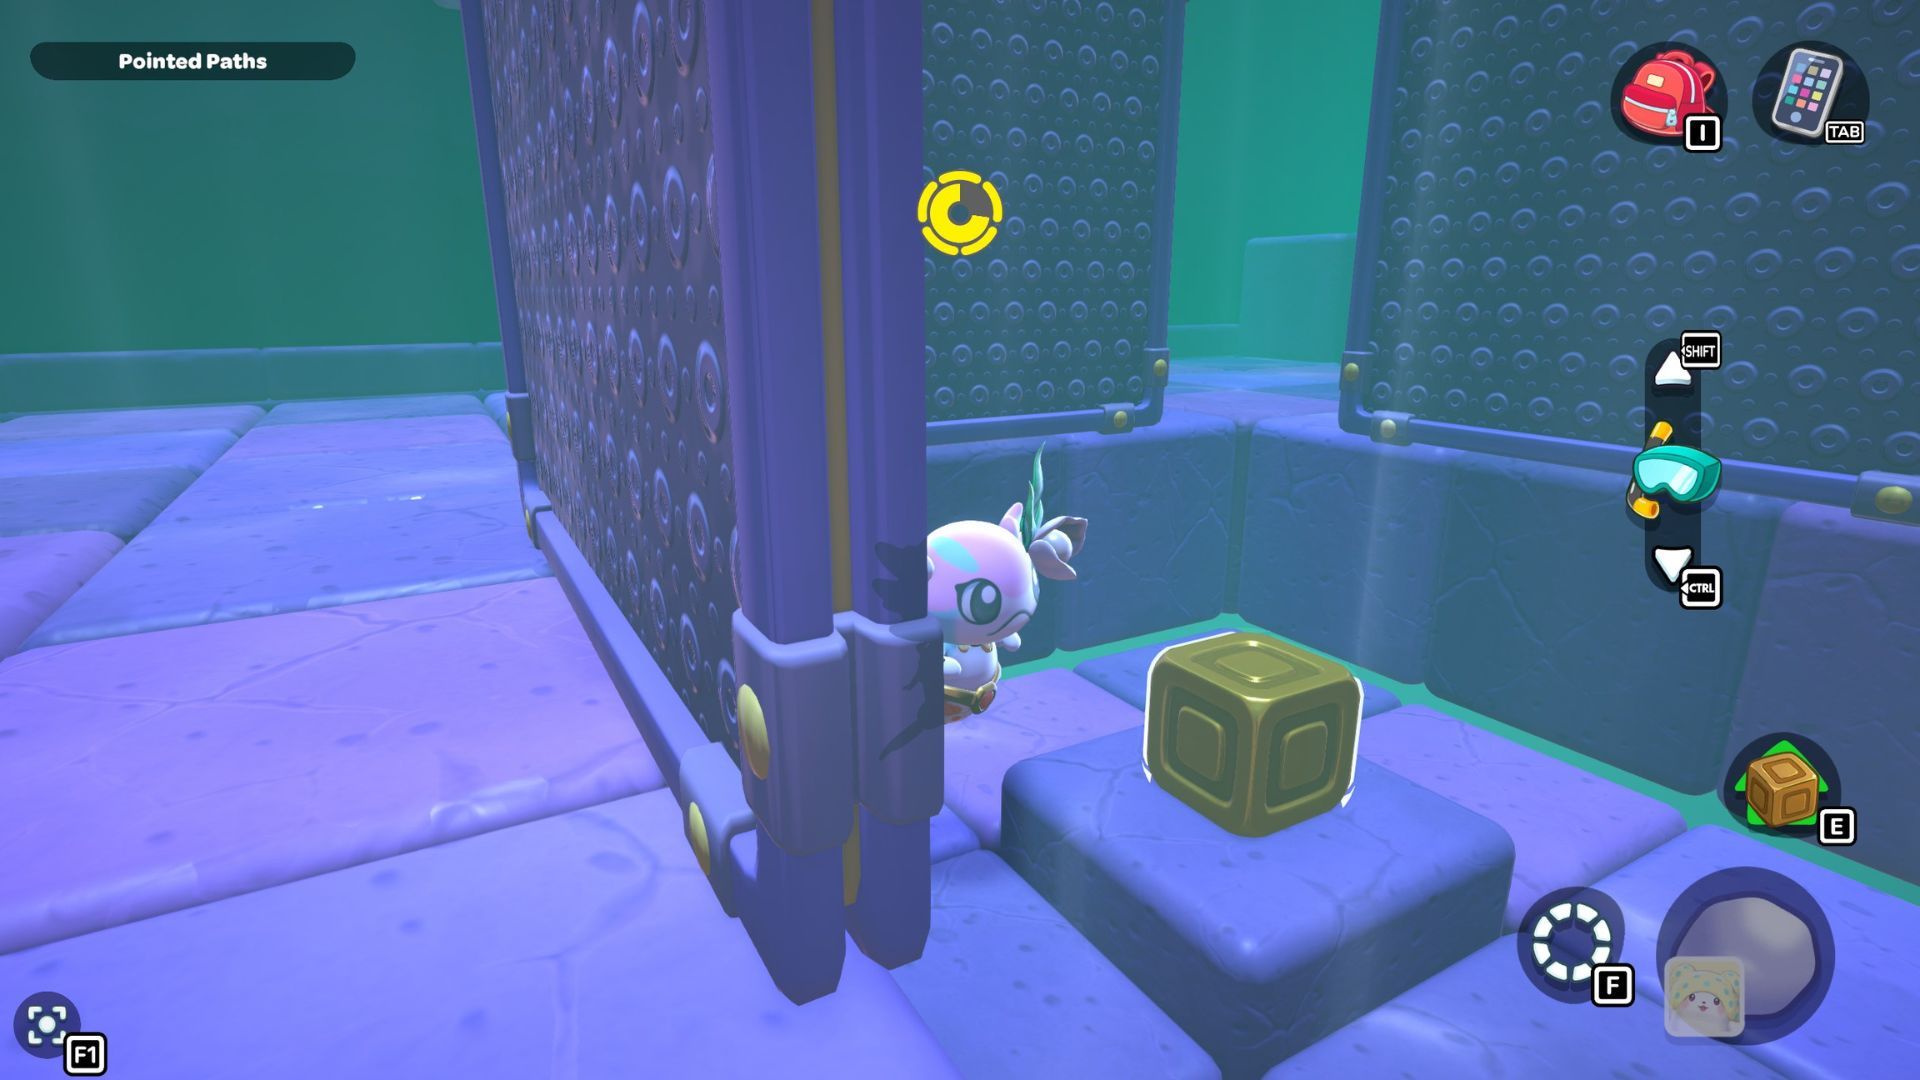

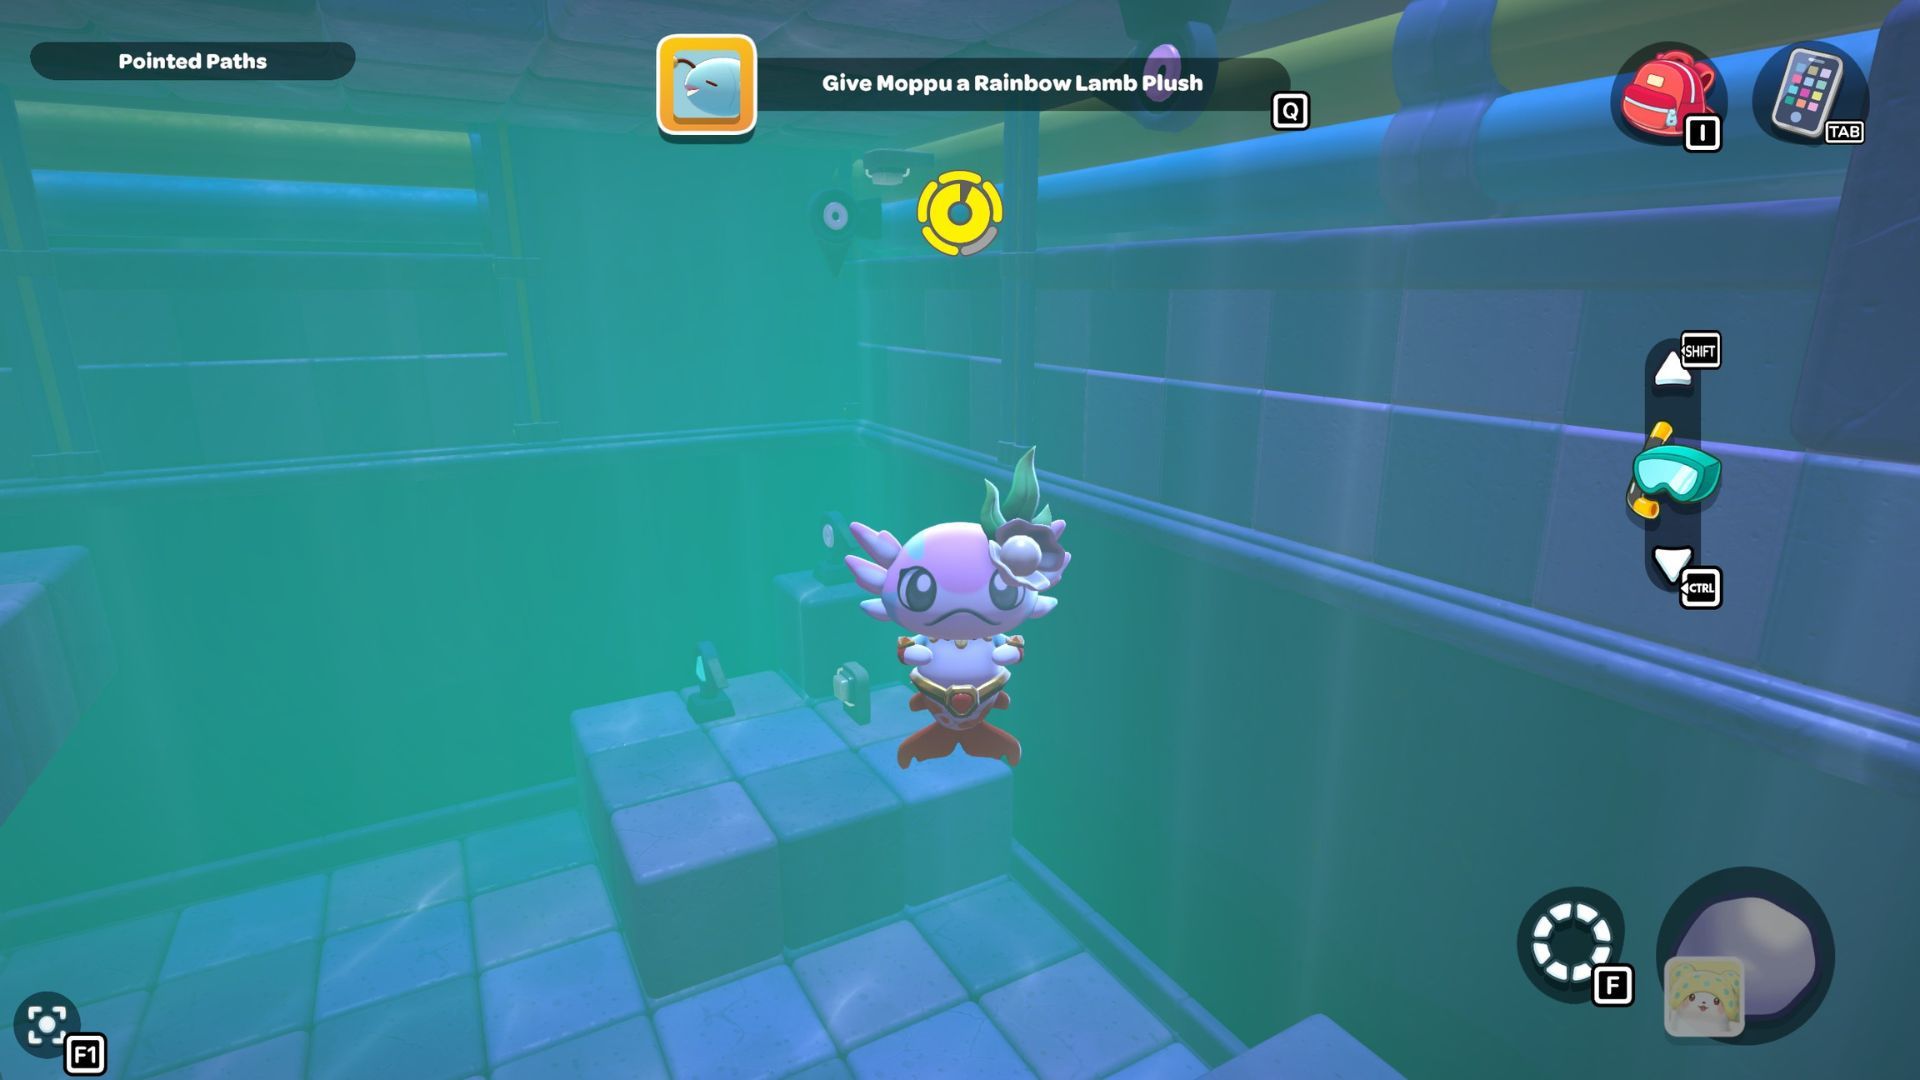
Now that the signs are pointing the right way, swim to the panels in the middle of the room and collect the cube. Carry the cube over to the door and put it on the gold switch. This will open the way to the chest, which holds a Trash Can Dress.
City Town Sewers — Downtown Delve Walkthrough
The Downtown Delve puzzle room is located deep within the City Town Sewers, hidden behind a waterfall in its southern section. The area includes both sections above and below water, and is covered with signs featuring various symbols. Players can discover a second room by exploring the underwater parts of the puzzle area.
At the beginning of the area, you’ll find five groups of signs. Each group has a central, rotating pointed sign, encircled by four round signs. Importantly, every sign within each group features a different symbol, so be sure to observe them carefully.
Each group of signs needs to have its central sign turned to face a particular sign. You can discover these correct combinations by searching the underwater area and the second room.
You’ll see five signs in these two areas, each marked with a unique symbol and pointing towards another sign with a different symbol. Figuring out which signs go together will reveal how to rotate the signs in the first room.
The puzzle has five groups of symbols, and you need to locate five matching pairs – one pointed symbol and one rounded symbol – hidden around the room. When you find a pair, go back to the main puzzle and turn the symbol clusters until the matching pointed and rounded signs are aligned. Here’s what the pairs look like:
| Pointed Sign | Sign it Points At |
|---|---|
| Triangle | X |
| Circle | X |
| Heart | Triangle |
| X | Triangle |
| Star | Circle |
If you correctly align all the signs, you’ll be able to move the boxes that are blocking the doorway to the chest. Inside the chest, you’ll find the Sewer Wallpaper.
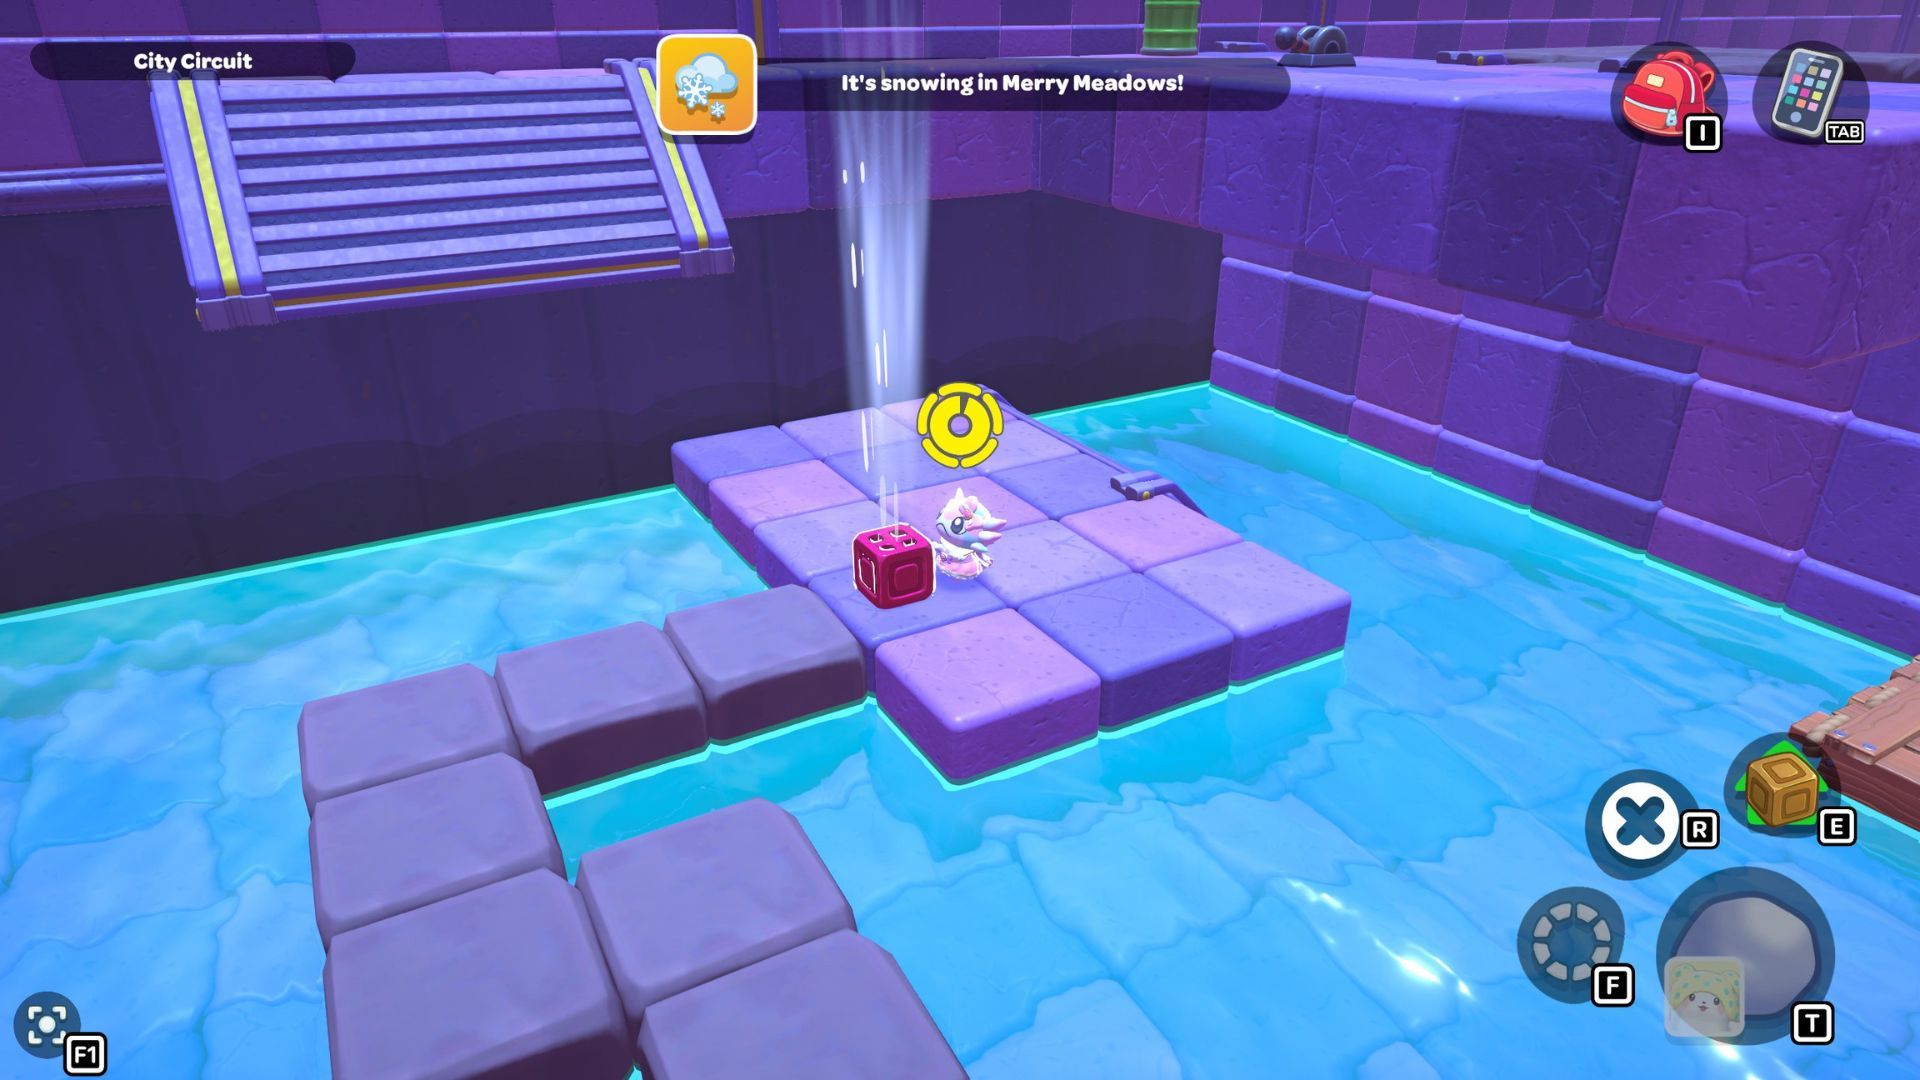
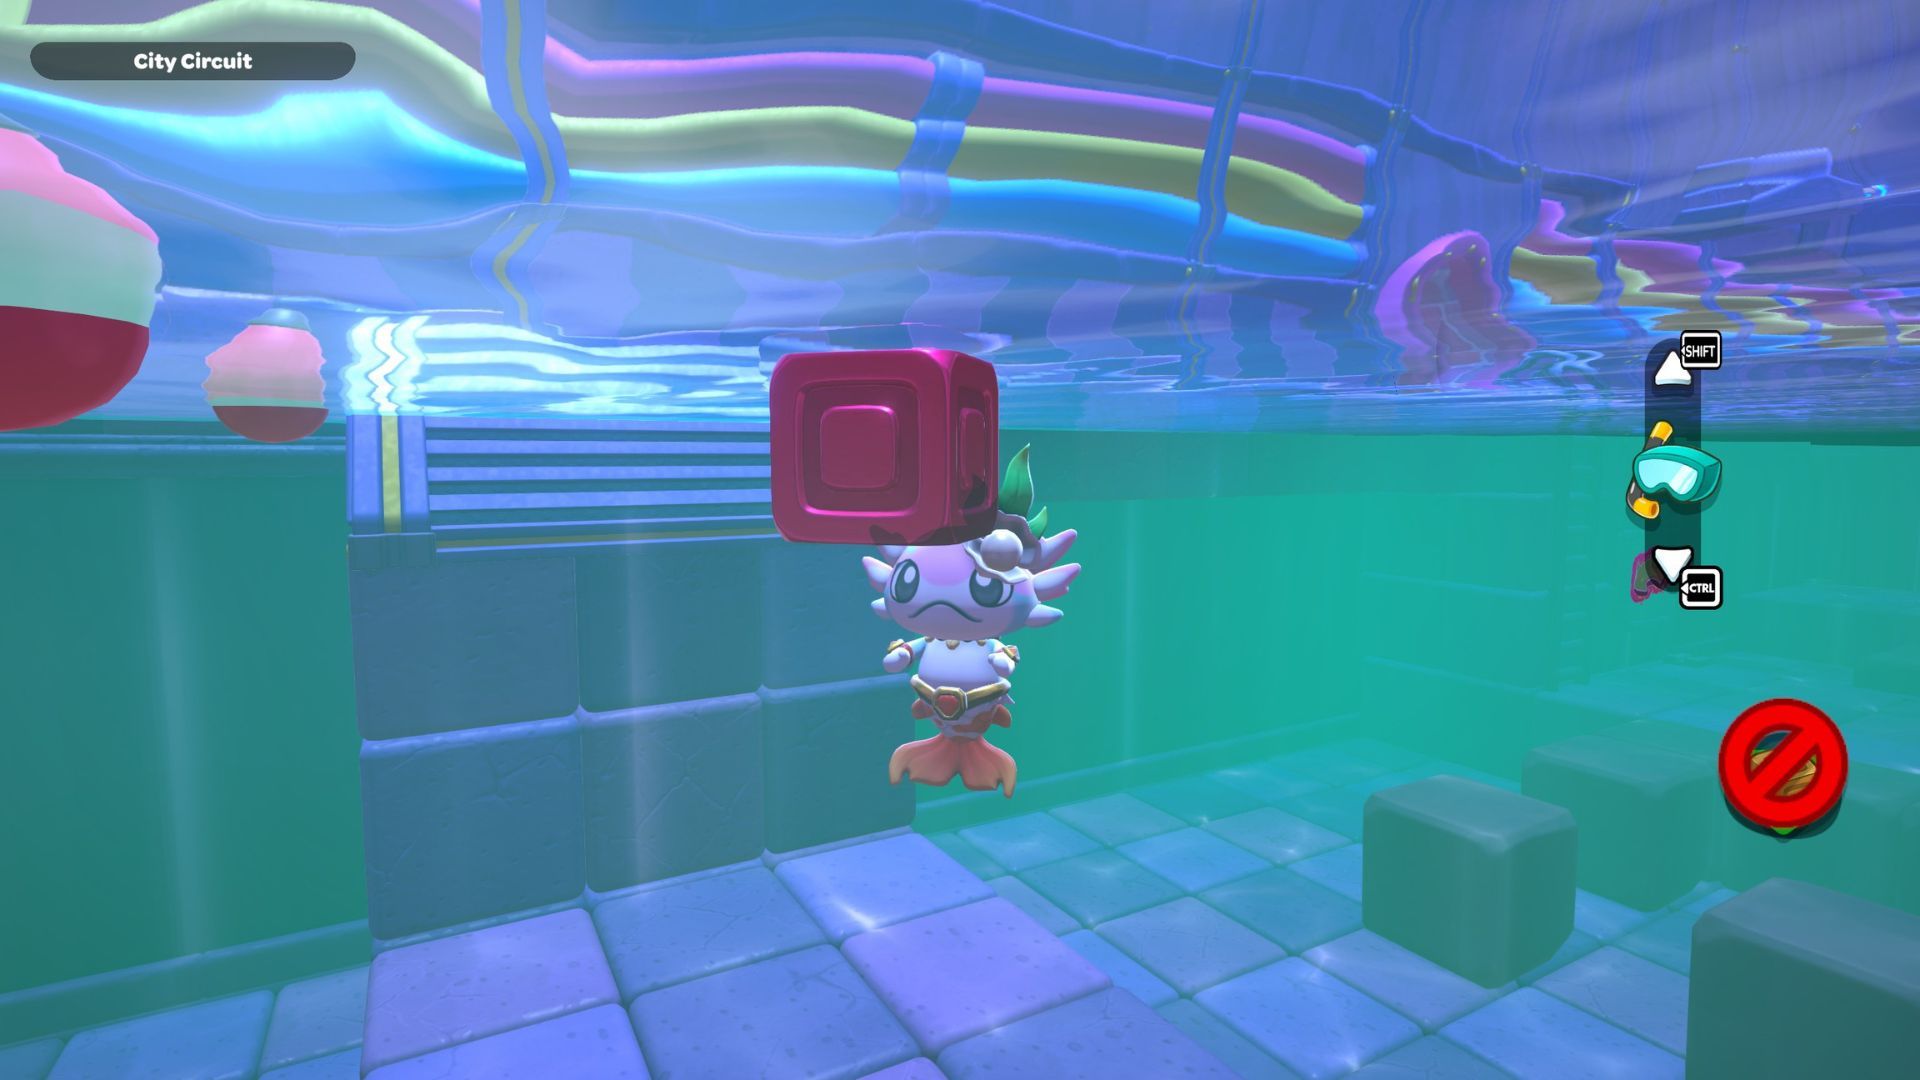
City Town Sewers — City Circuit Walkthrough
The City Circuit puzzle room is found on a small platform off to the side in the City Town Sewers. To solve it, you have to swiftly arrange blocks to create wind currents that push falling objects along the correct path.
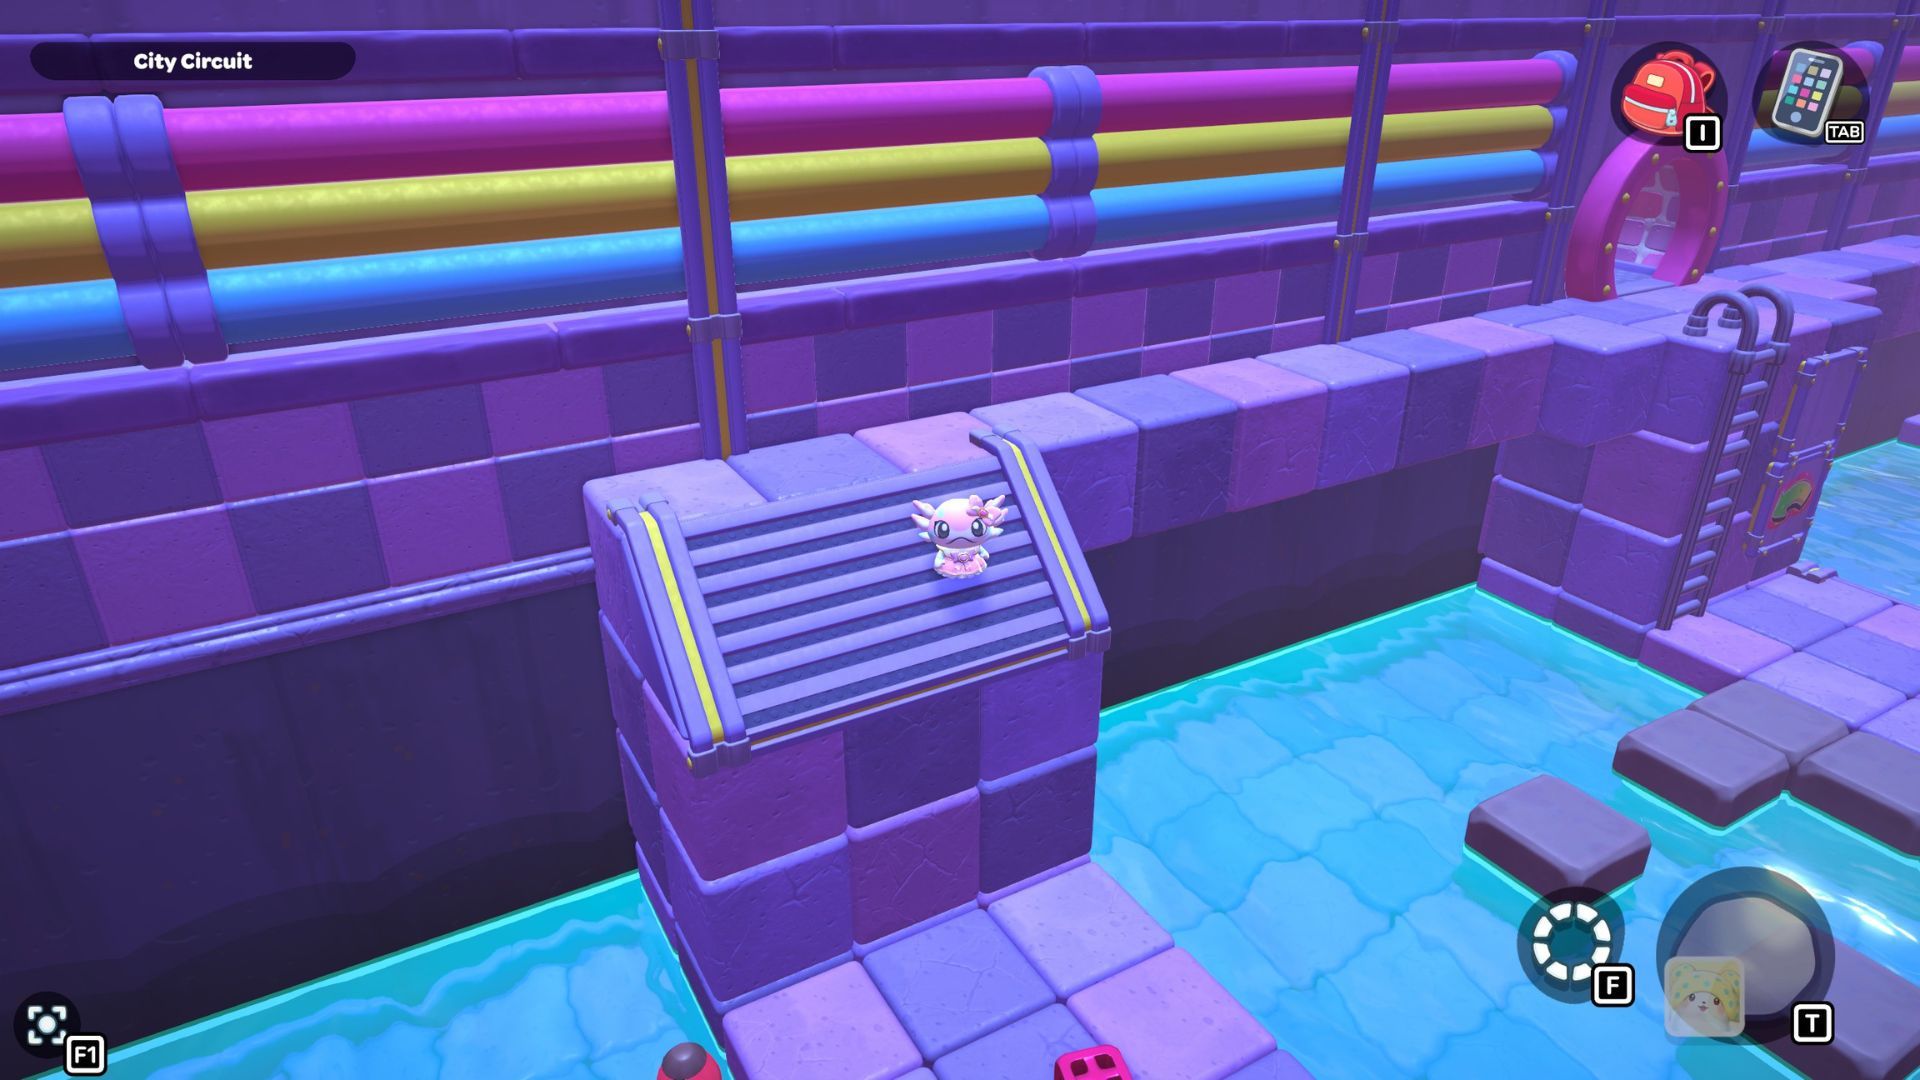
Okay, so you begin by heading to the left side of the room and jumping down the stairs to the platform below. Once you’re down there, the first thing you need to do is grab that red block – it’s super important! Then, just carry it over to the next platform on your right.
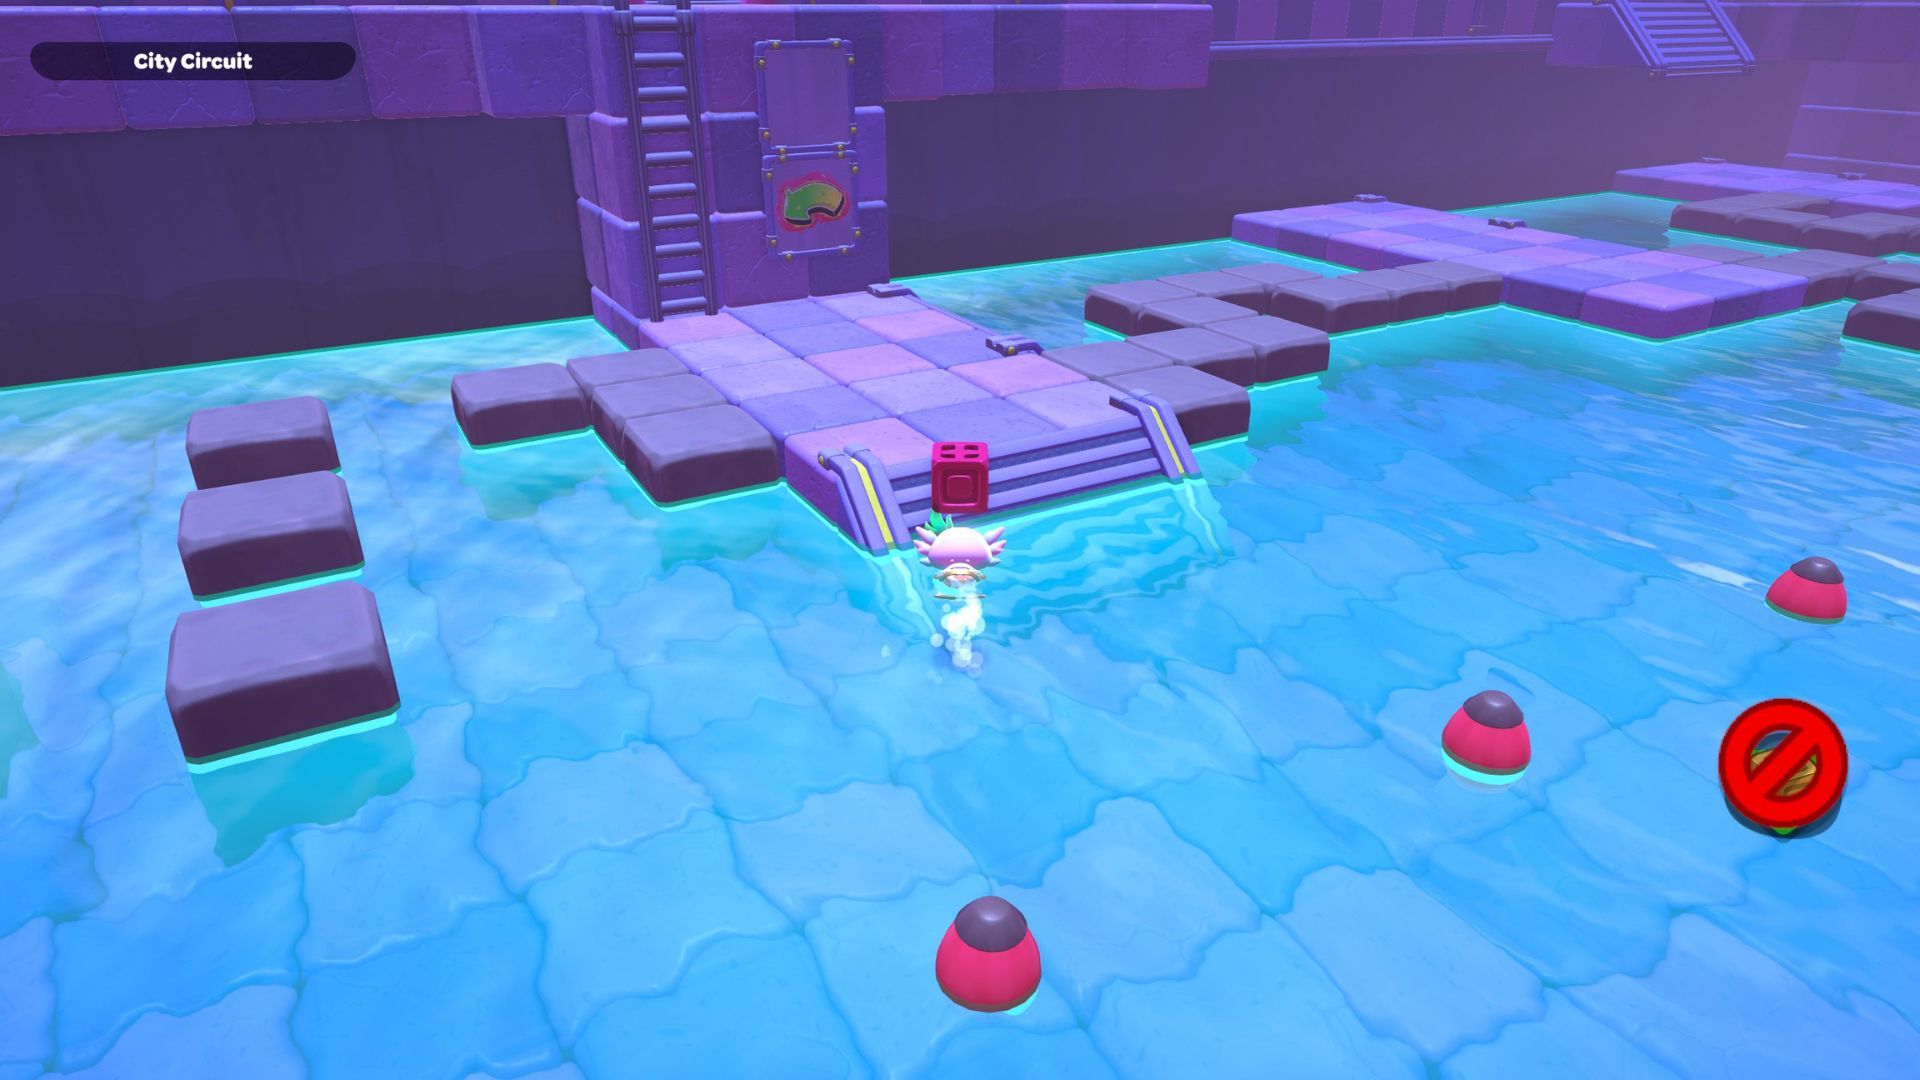
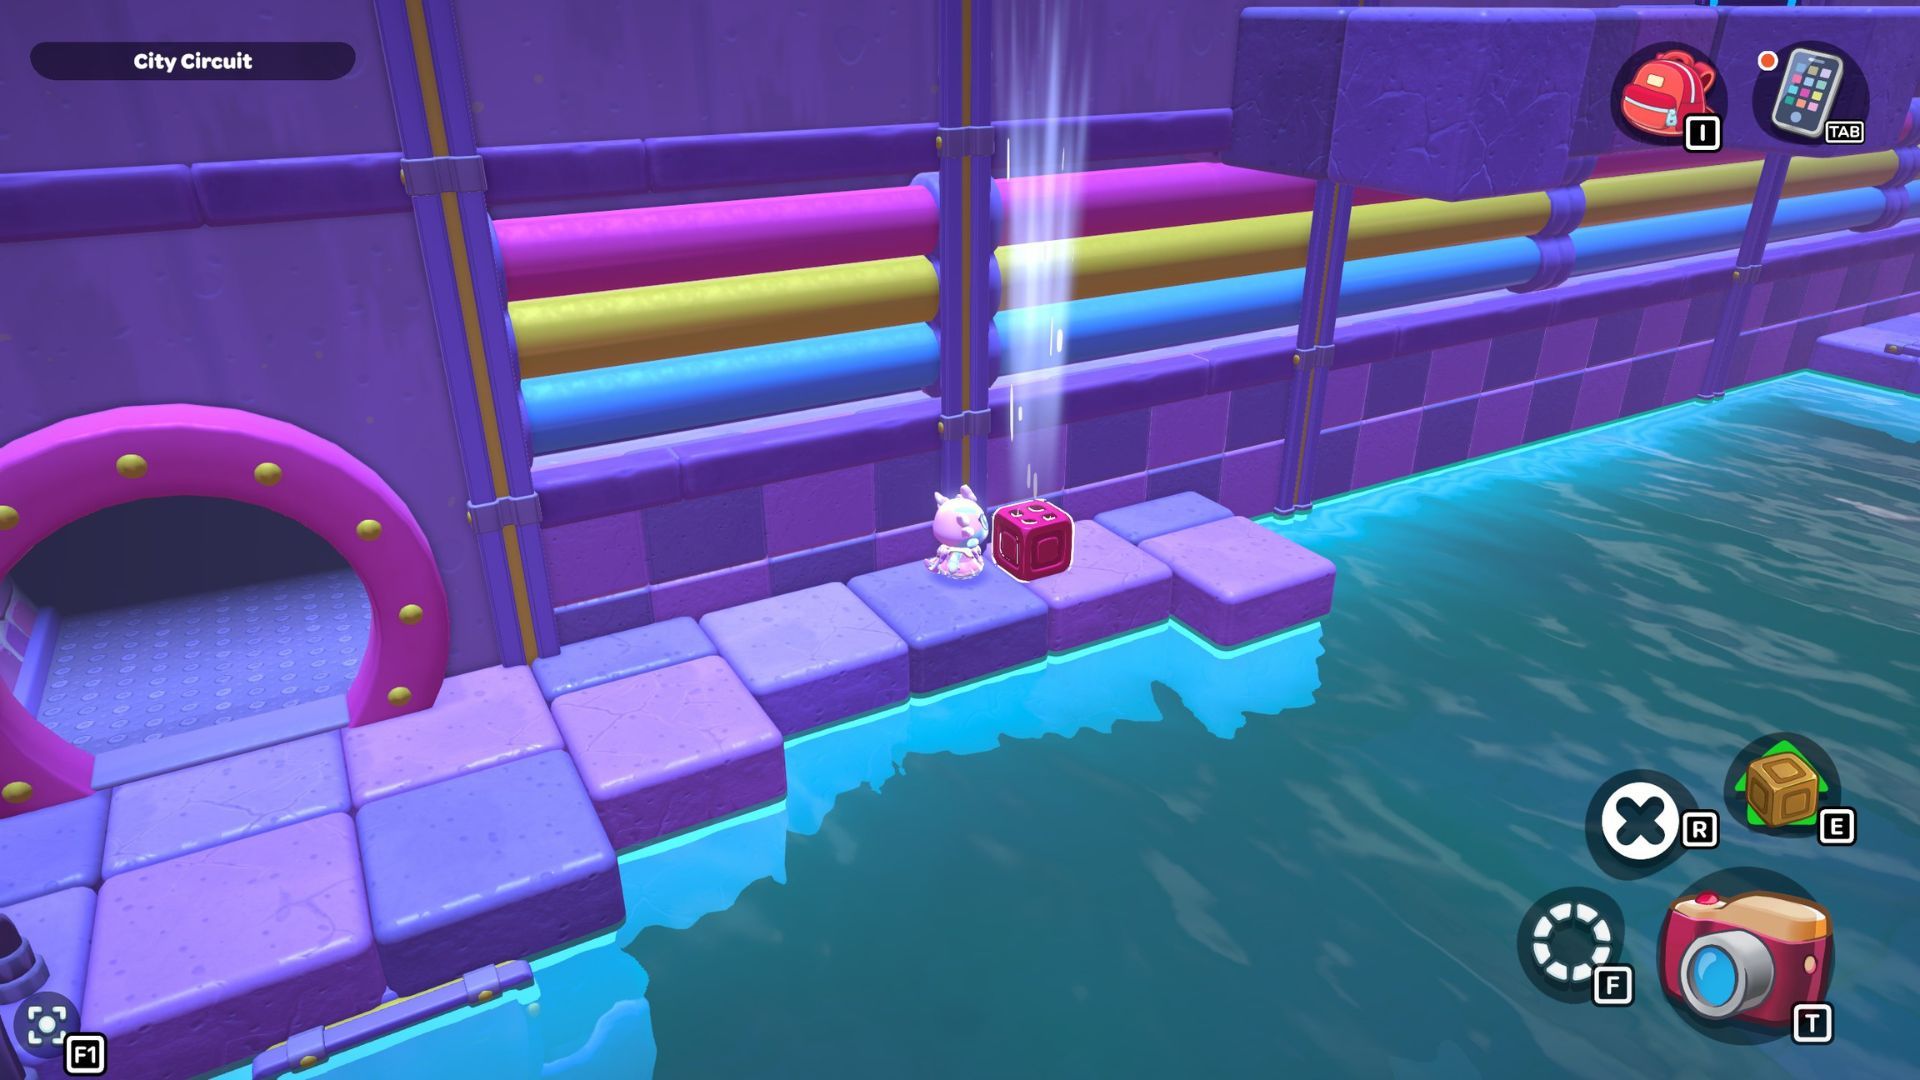
Position yourself at the edge of the platform, right beside the brown path that leads to the next one. Be careful – these blocks break easily and crumble fast! You’ll need to move quickly across them to avoid falling into the water.
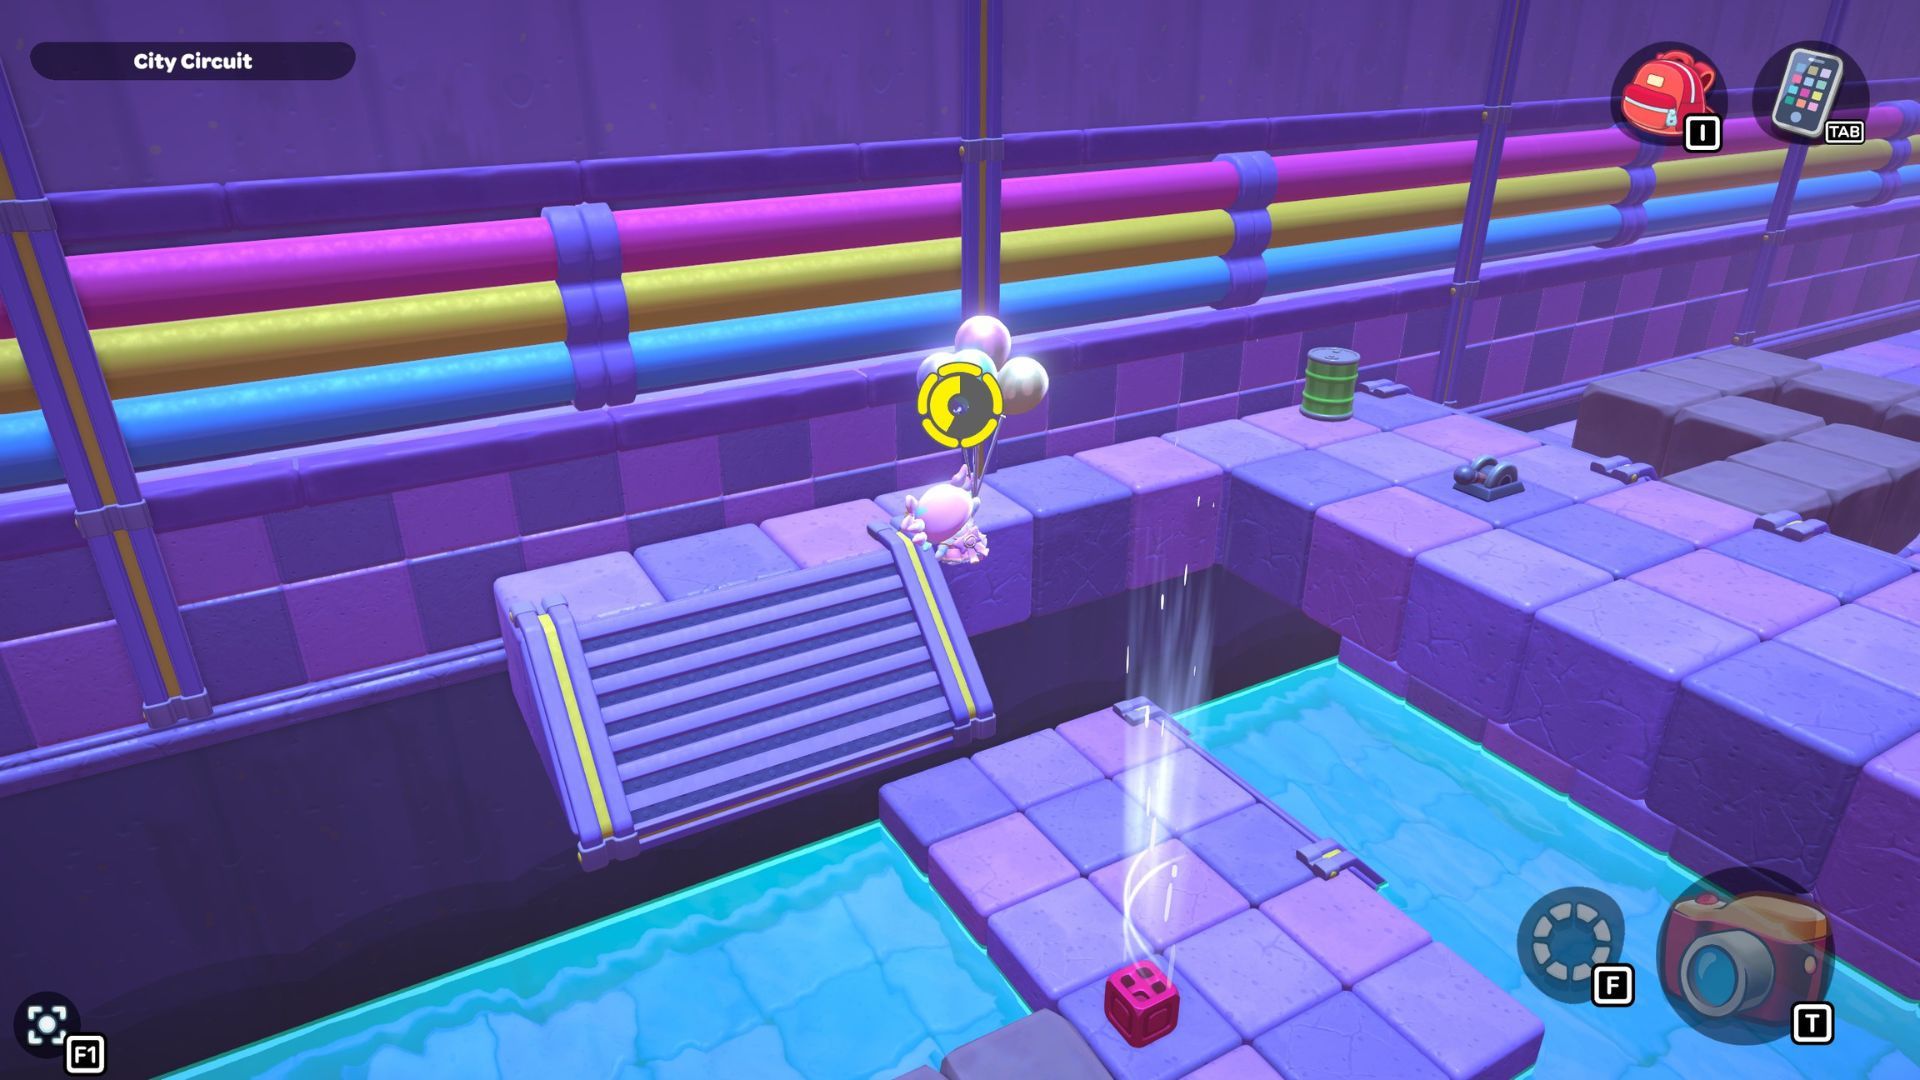
To move forward, repeat the same process to get from this platform to the one below the next set of stairs. Once you reach the stairs, place the block down and turn it on. This will create a current you can ride to reach the staircase.
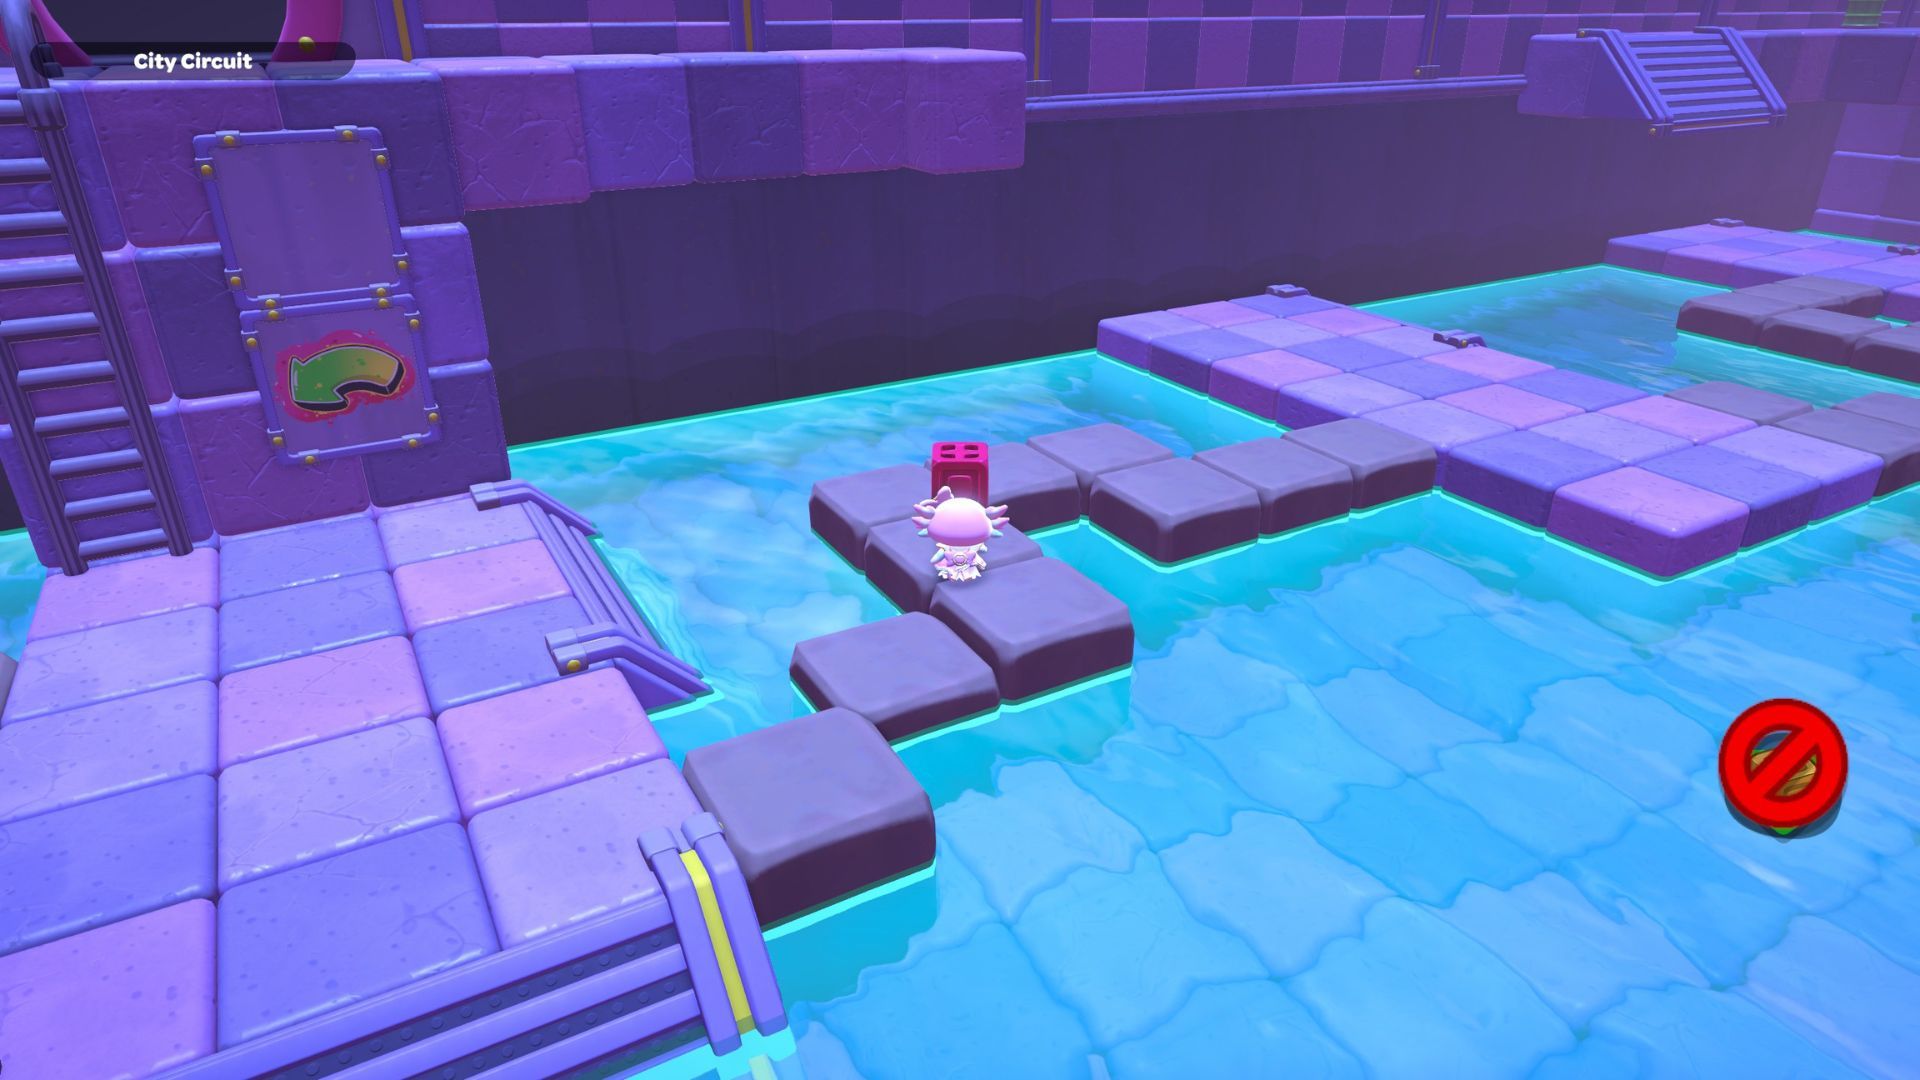
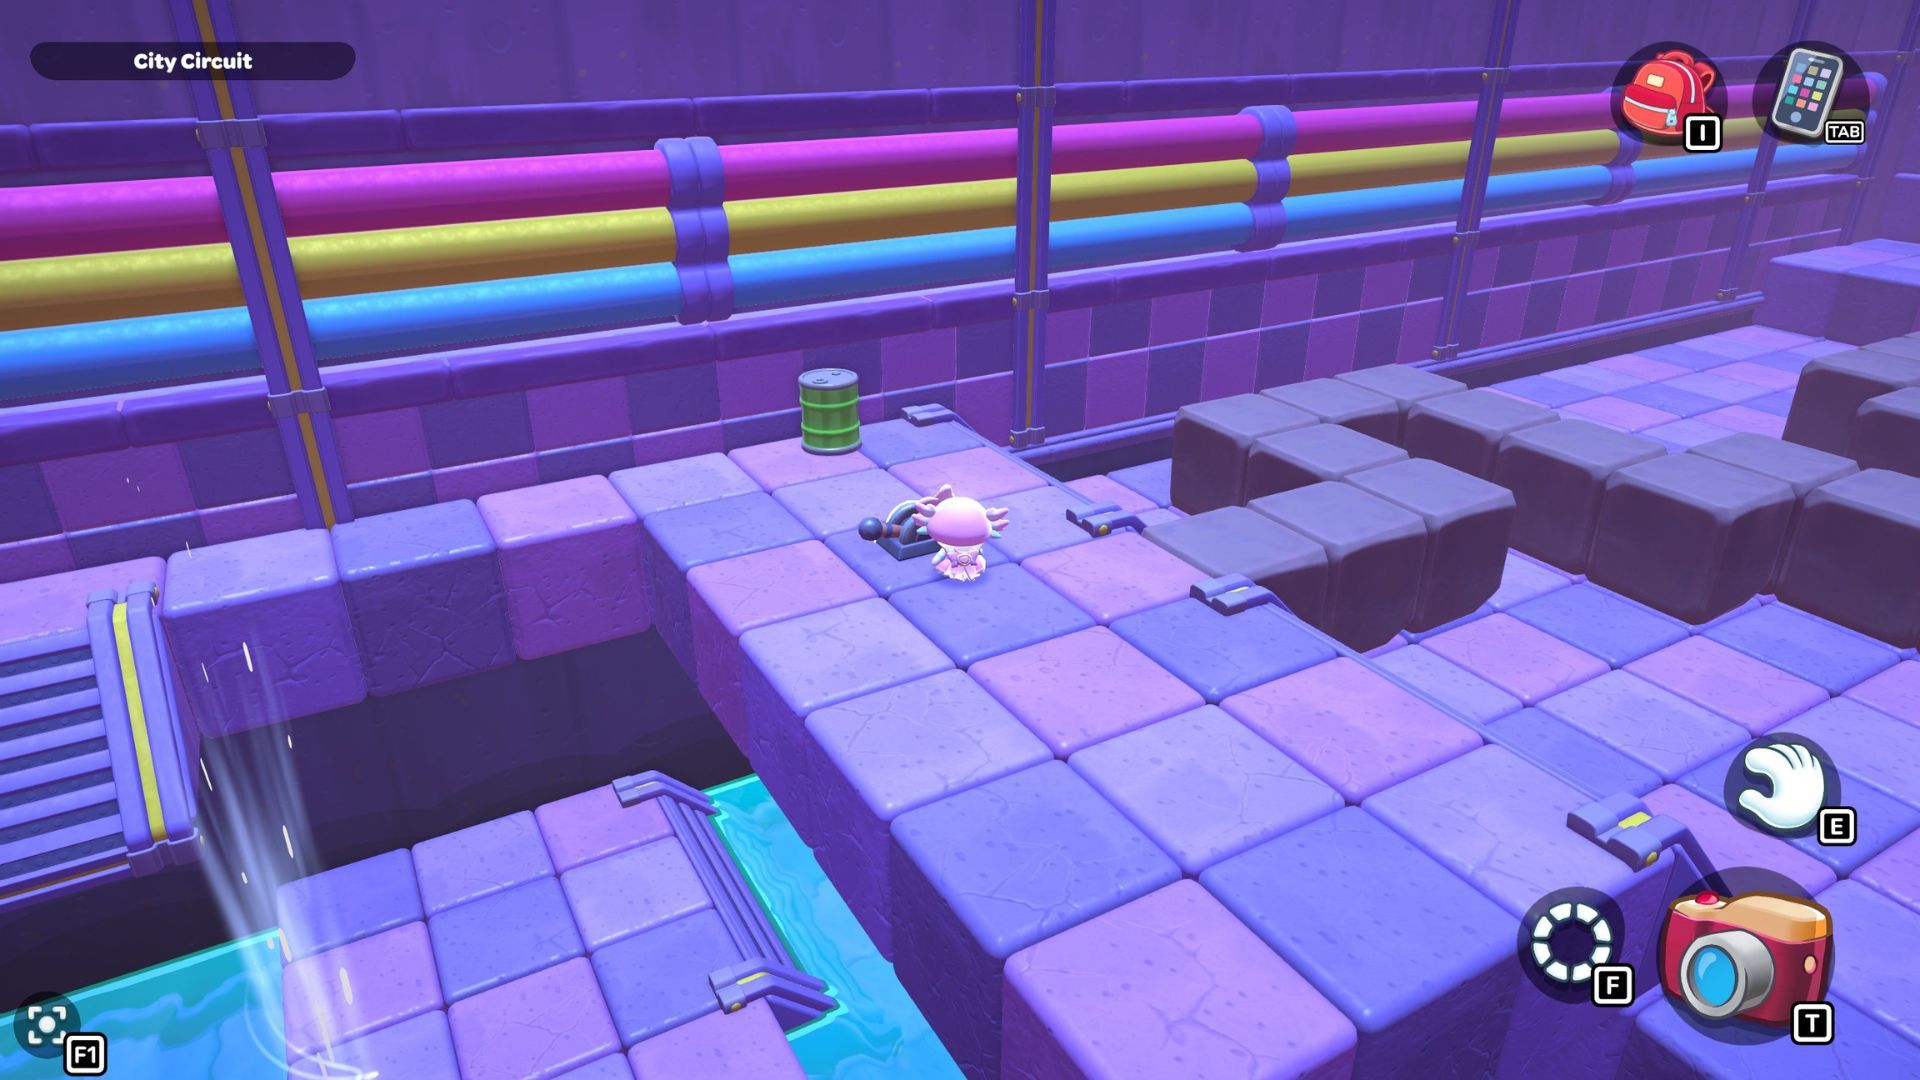
If you accidentally fall into the water while crossing the bridge, here’s how to get back up: If you fall near the beginning, swim to the left to reach the stairs that lead back to the main platform. If you fall closer to the end, swim to the right to find stairs leading up to the platform below the higher set of stairs.
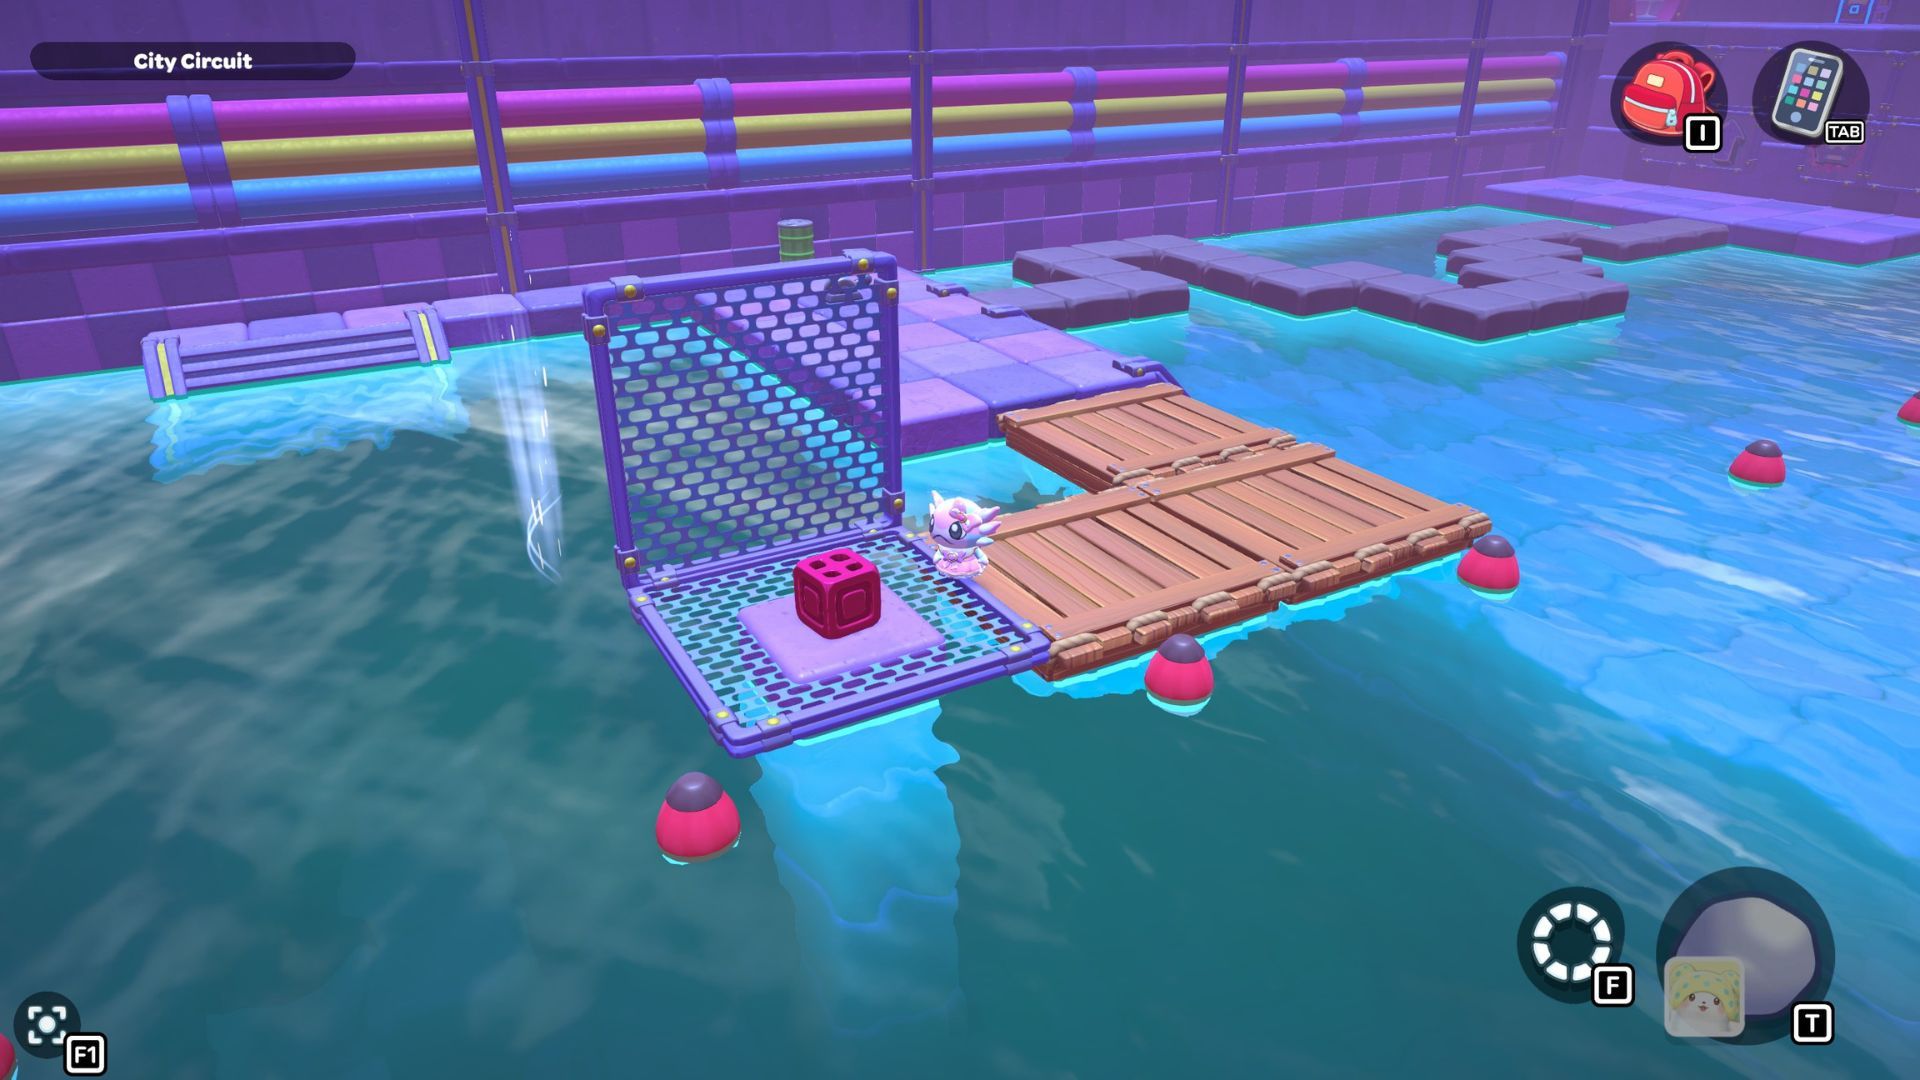

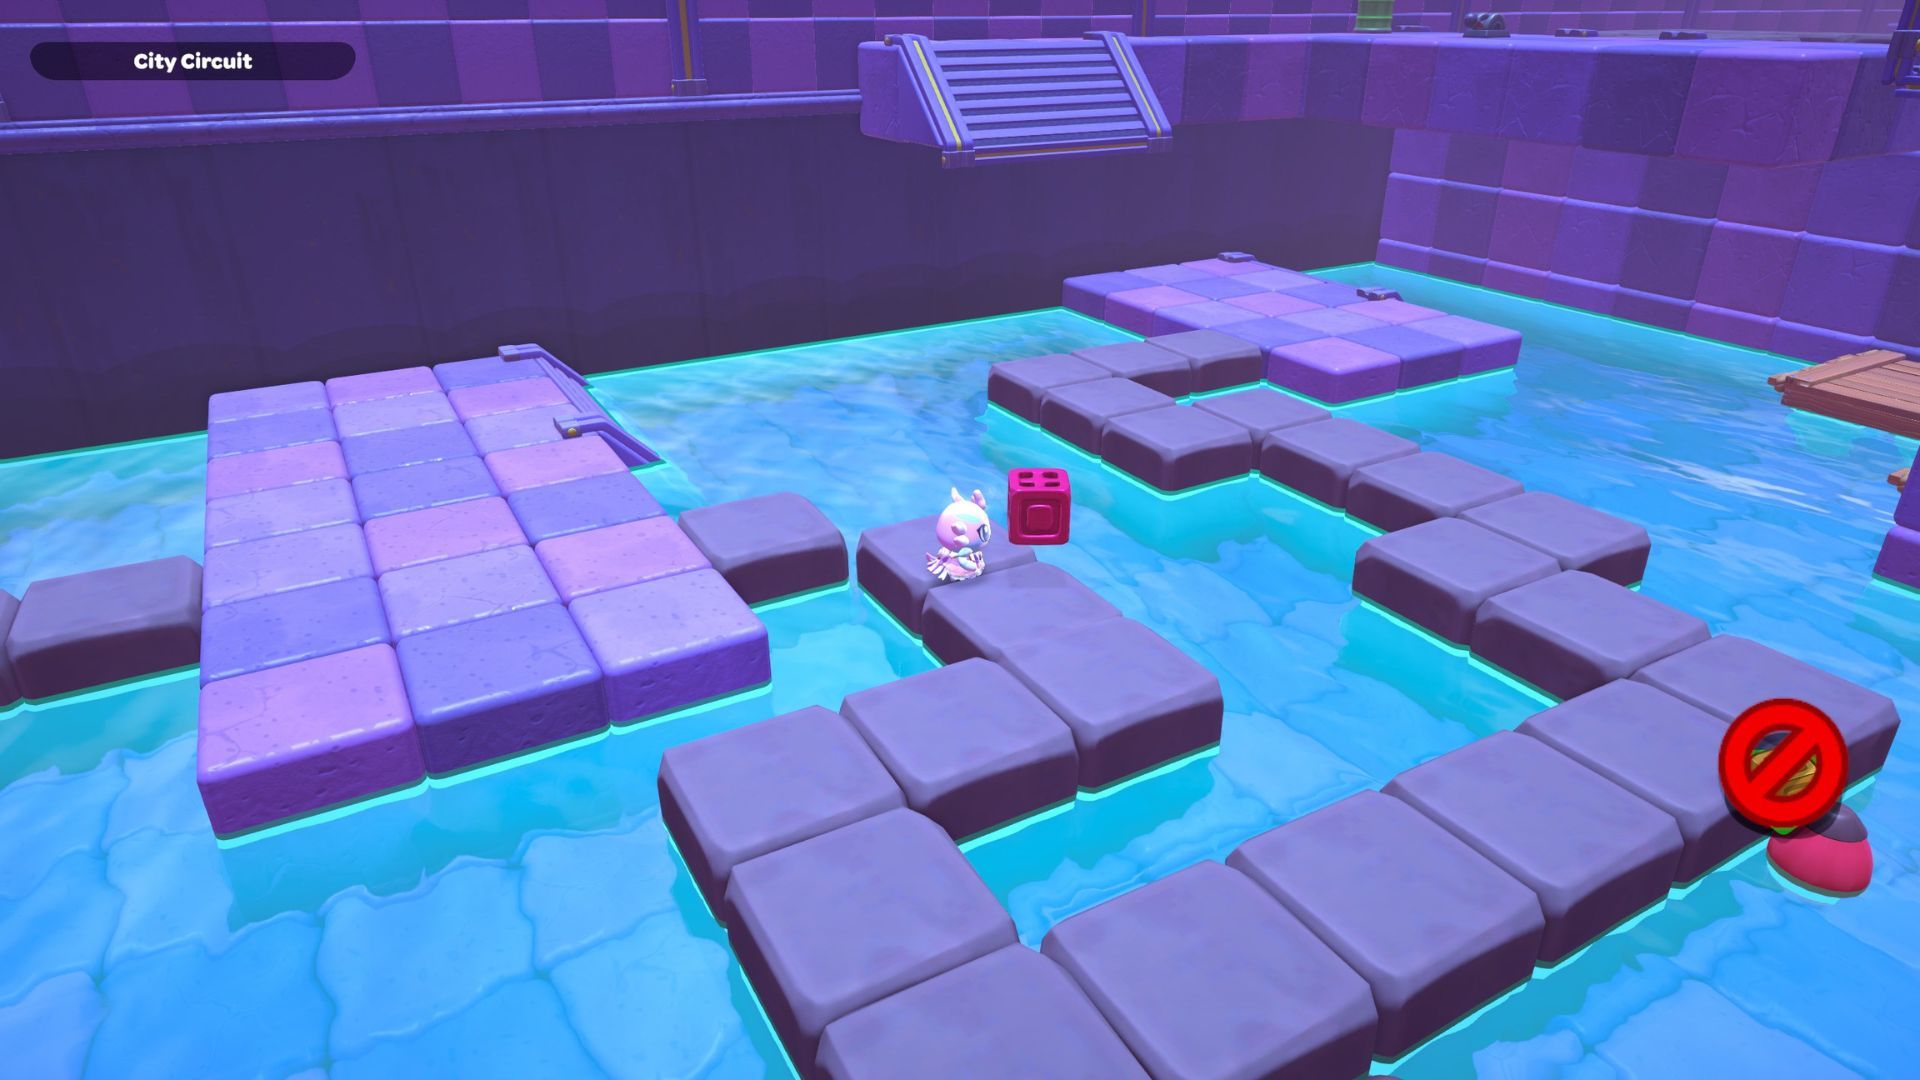
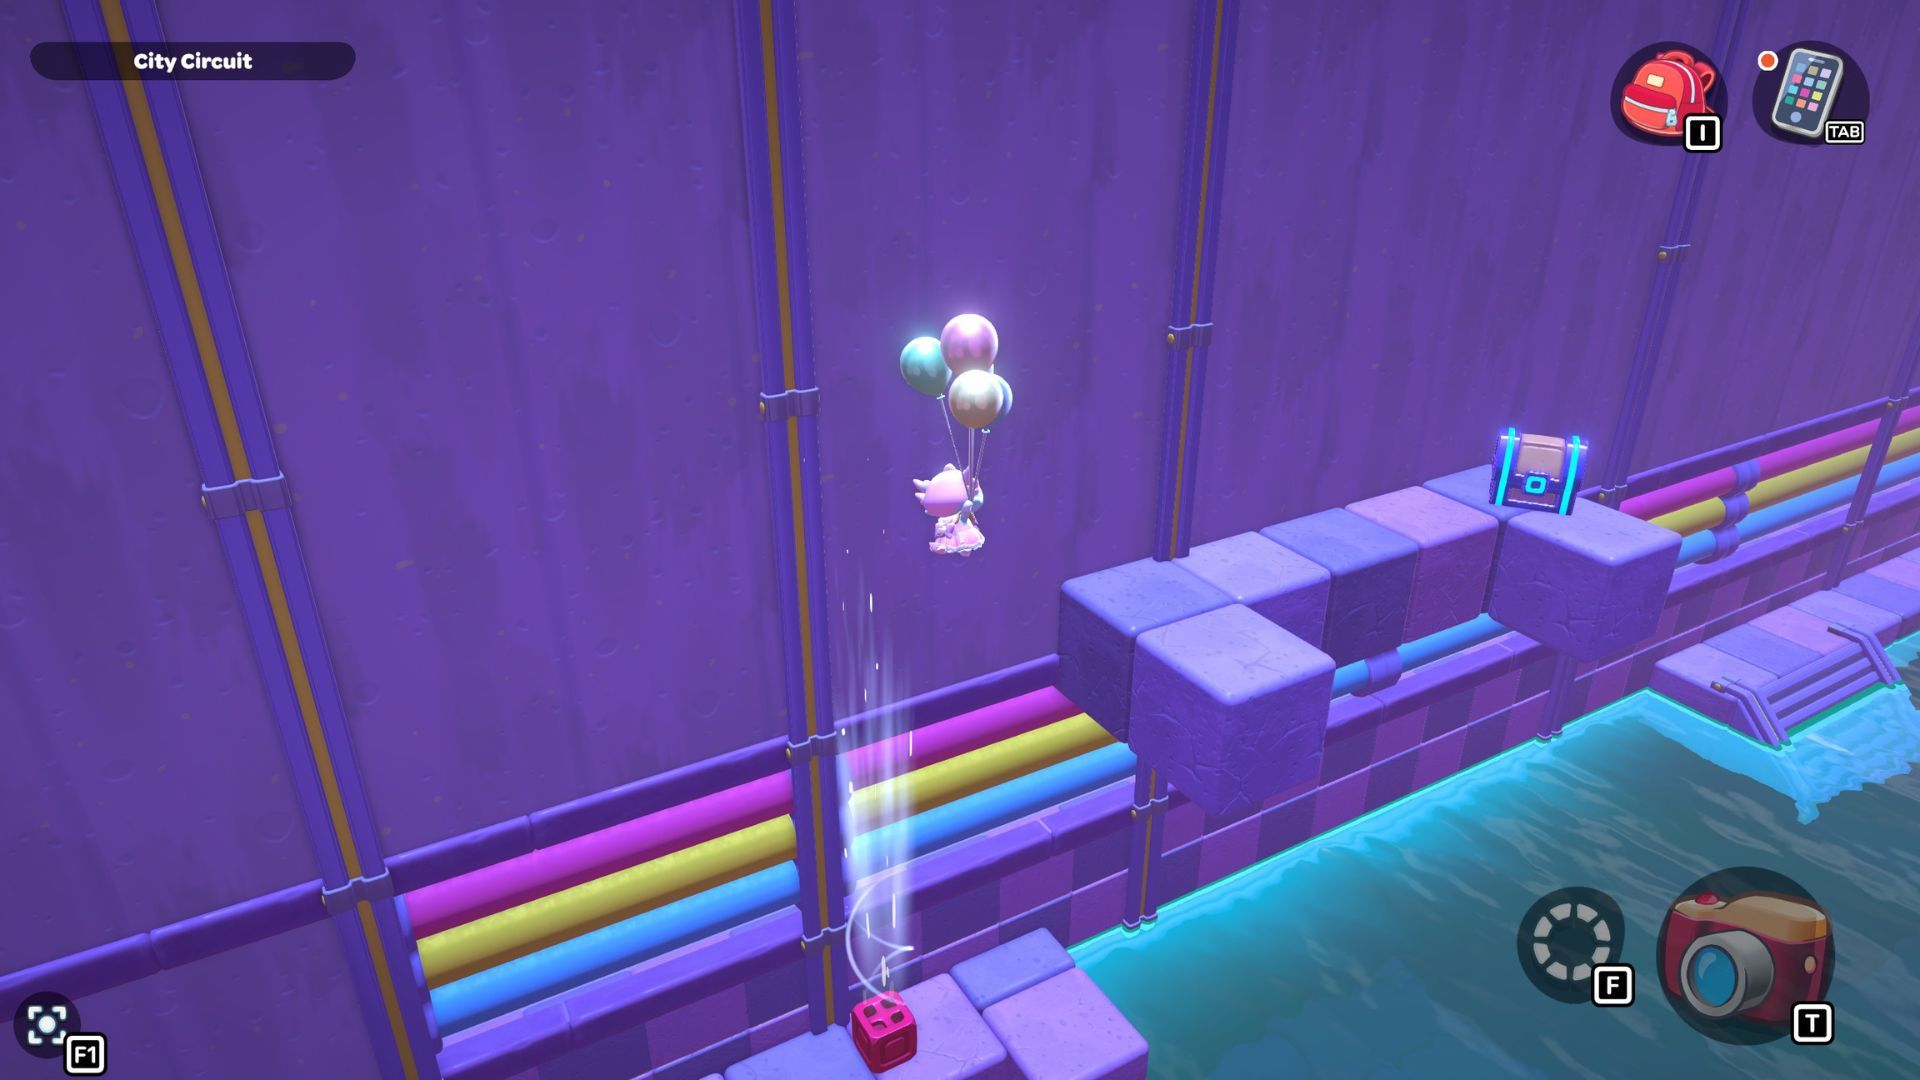
Pull the lever here to make the water rise. Then, walk across the wooden platforms to your right and pick up the red cube. Be careful when carrying it across the next bridge – the blocks disappear quickly!
Okay, so I made it across and dropped the block, then turned it on. It created these updrafts, which I used to float up to the next platform. There was a chest up there with a Manhole Cover inside – nice! Now I can head out through the second door on this platform and keep going.
Once you leave this room, the doorway won’t glow anymore. This is due to a hidden chest located at the beginning of the level. Go back through the door to the start, and then find the staircase on the left side.
Swim in front of the stairs to grab a red cube. Carry it to the right side of the platform and use it. Then, swim up to the higher level to find a secret chest with 20 Sticks inside.
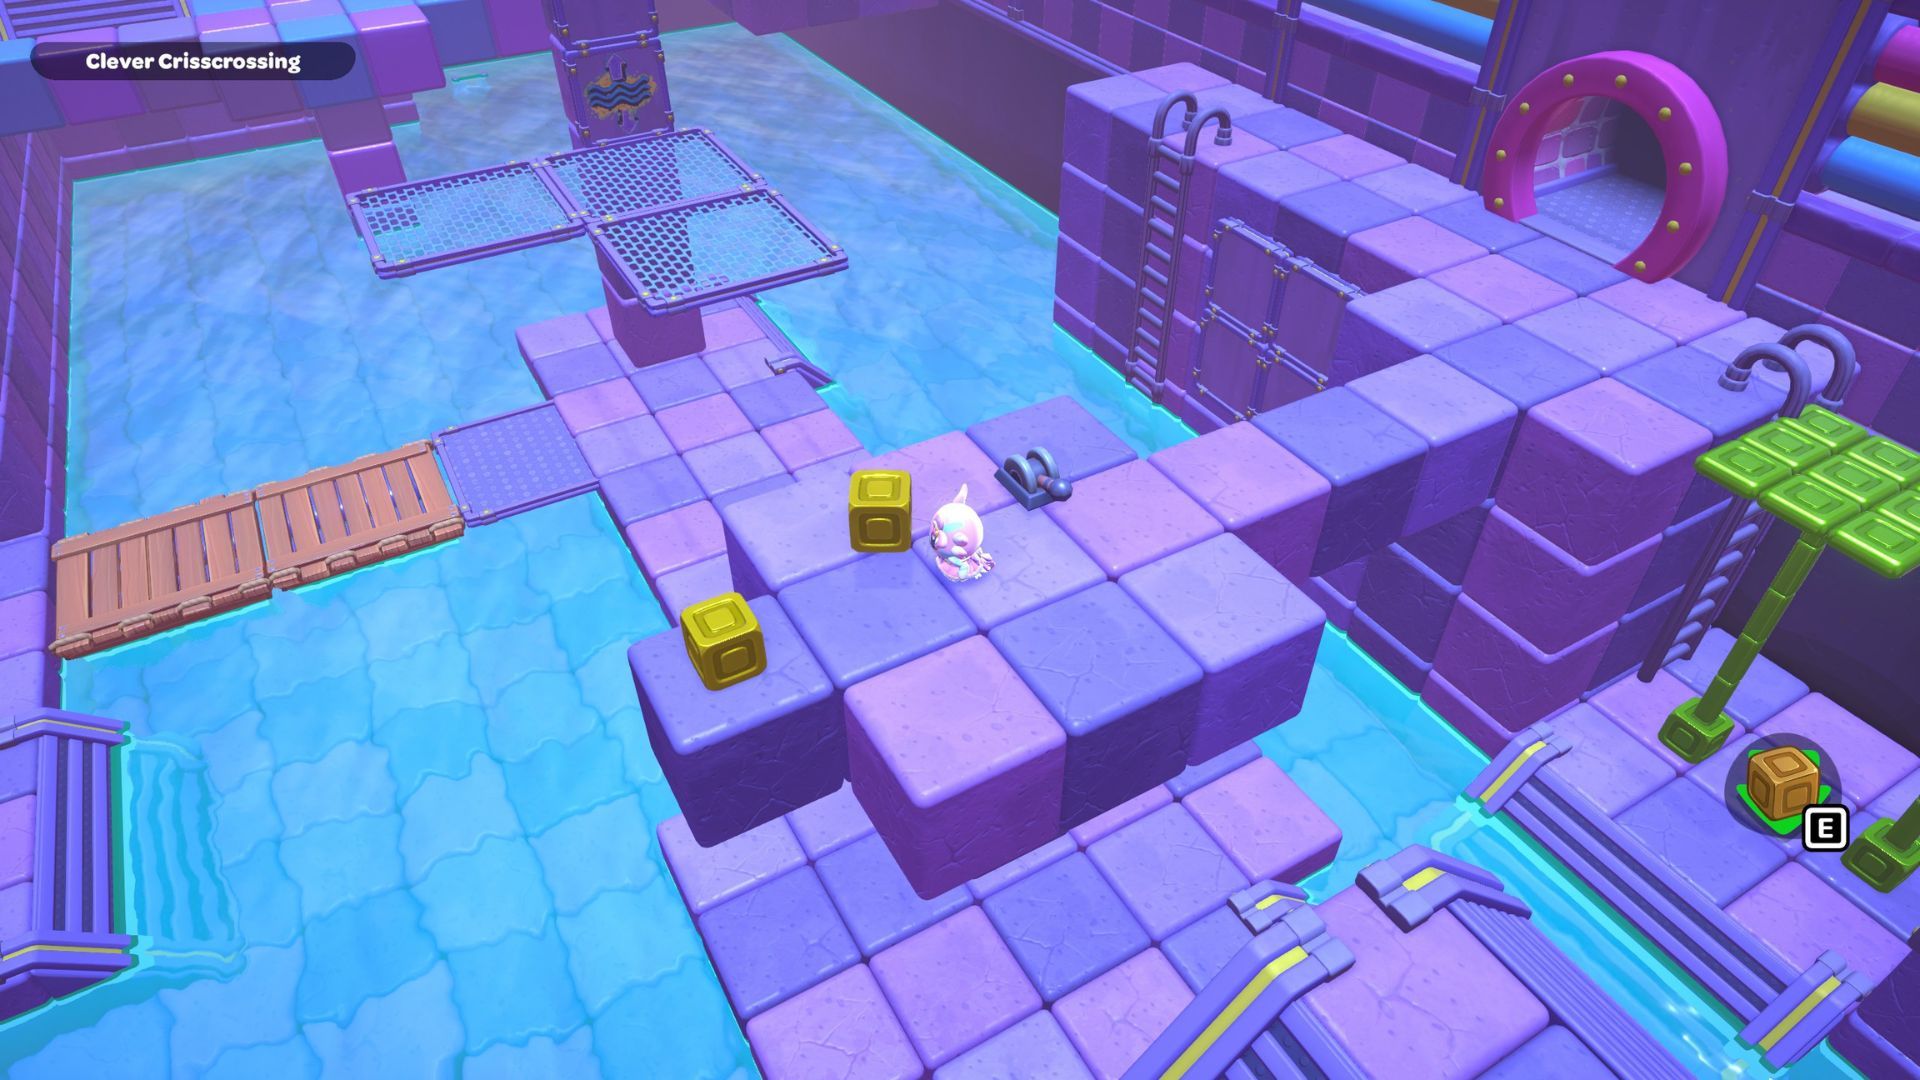
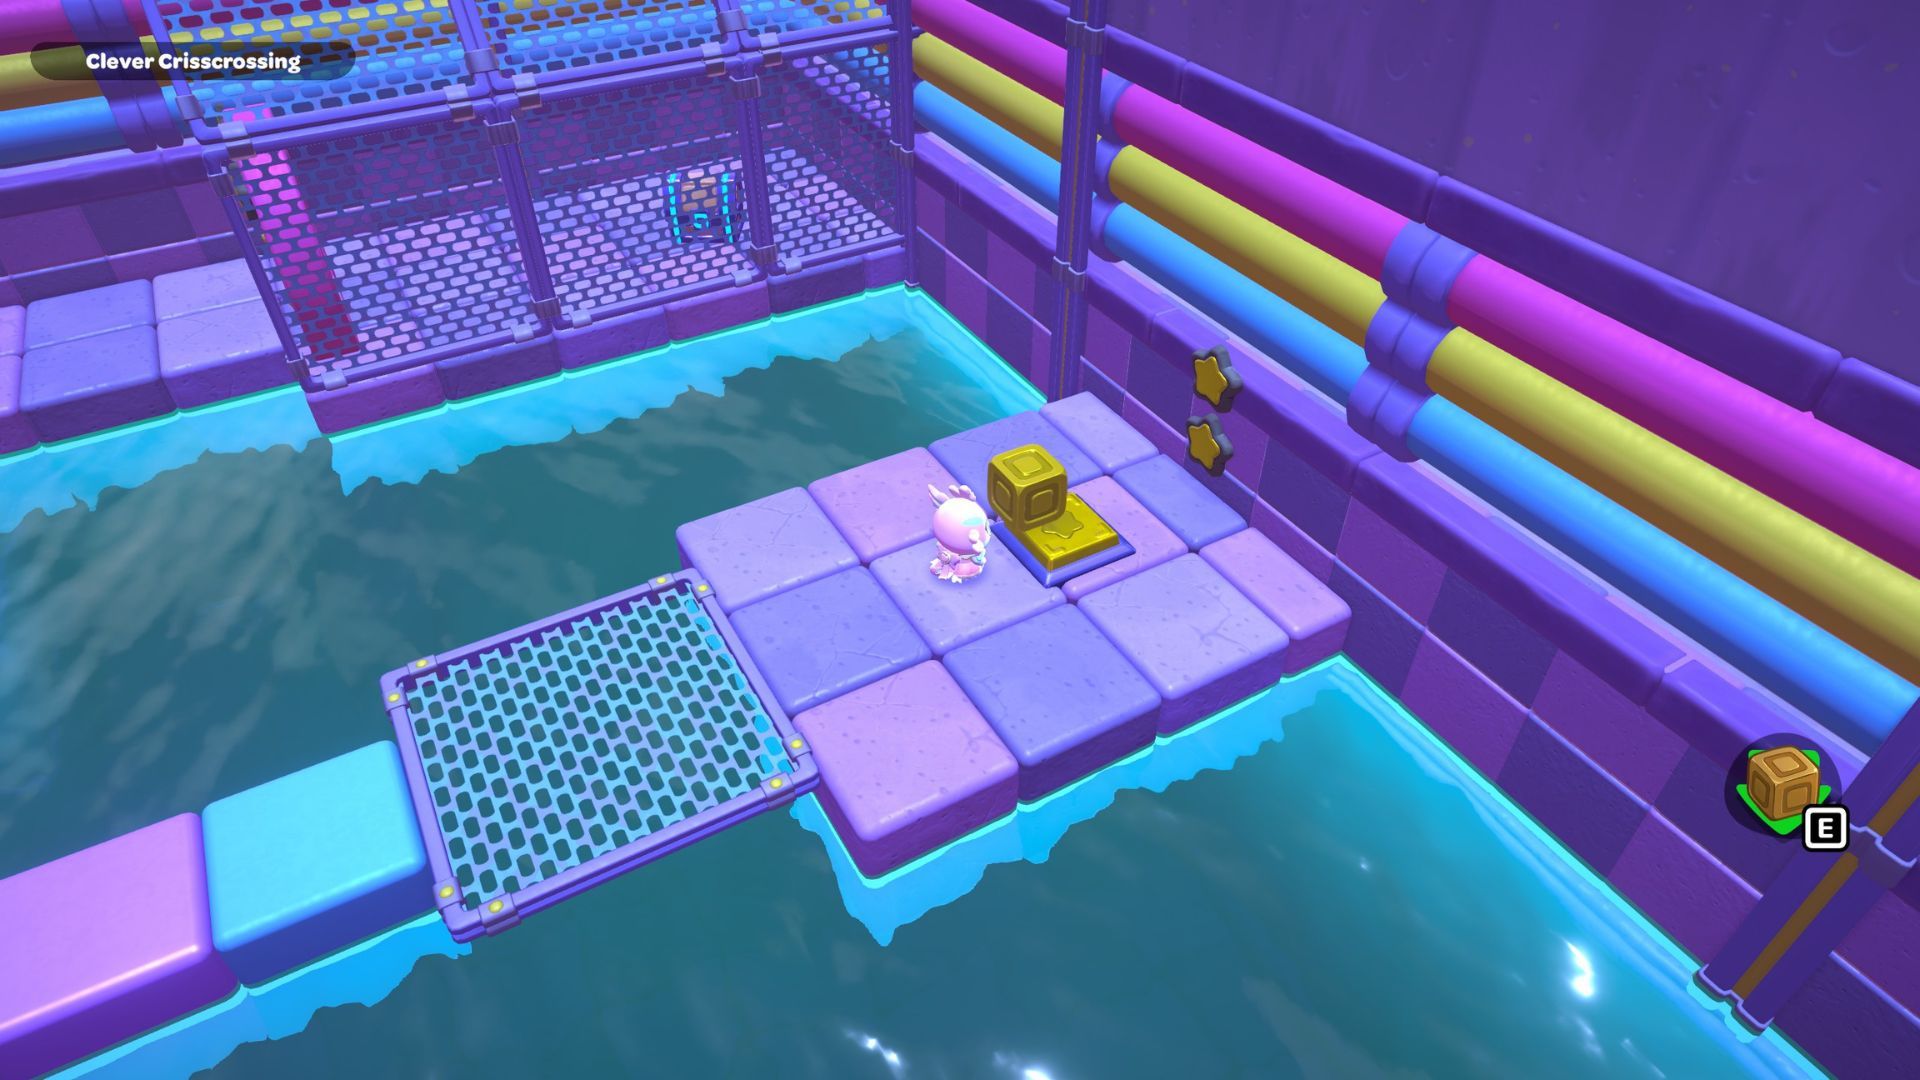
City Town Sewers — Clever Crisscrossing Wallkthrough
The Clever Crisscrossing puzzle is located in the middle of the City Town Sewers. To solve it, players need to move two golden cubes from the south side of the room to the top of two gold switches on the north side.
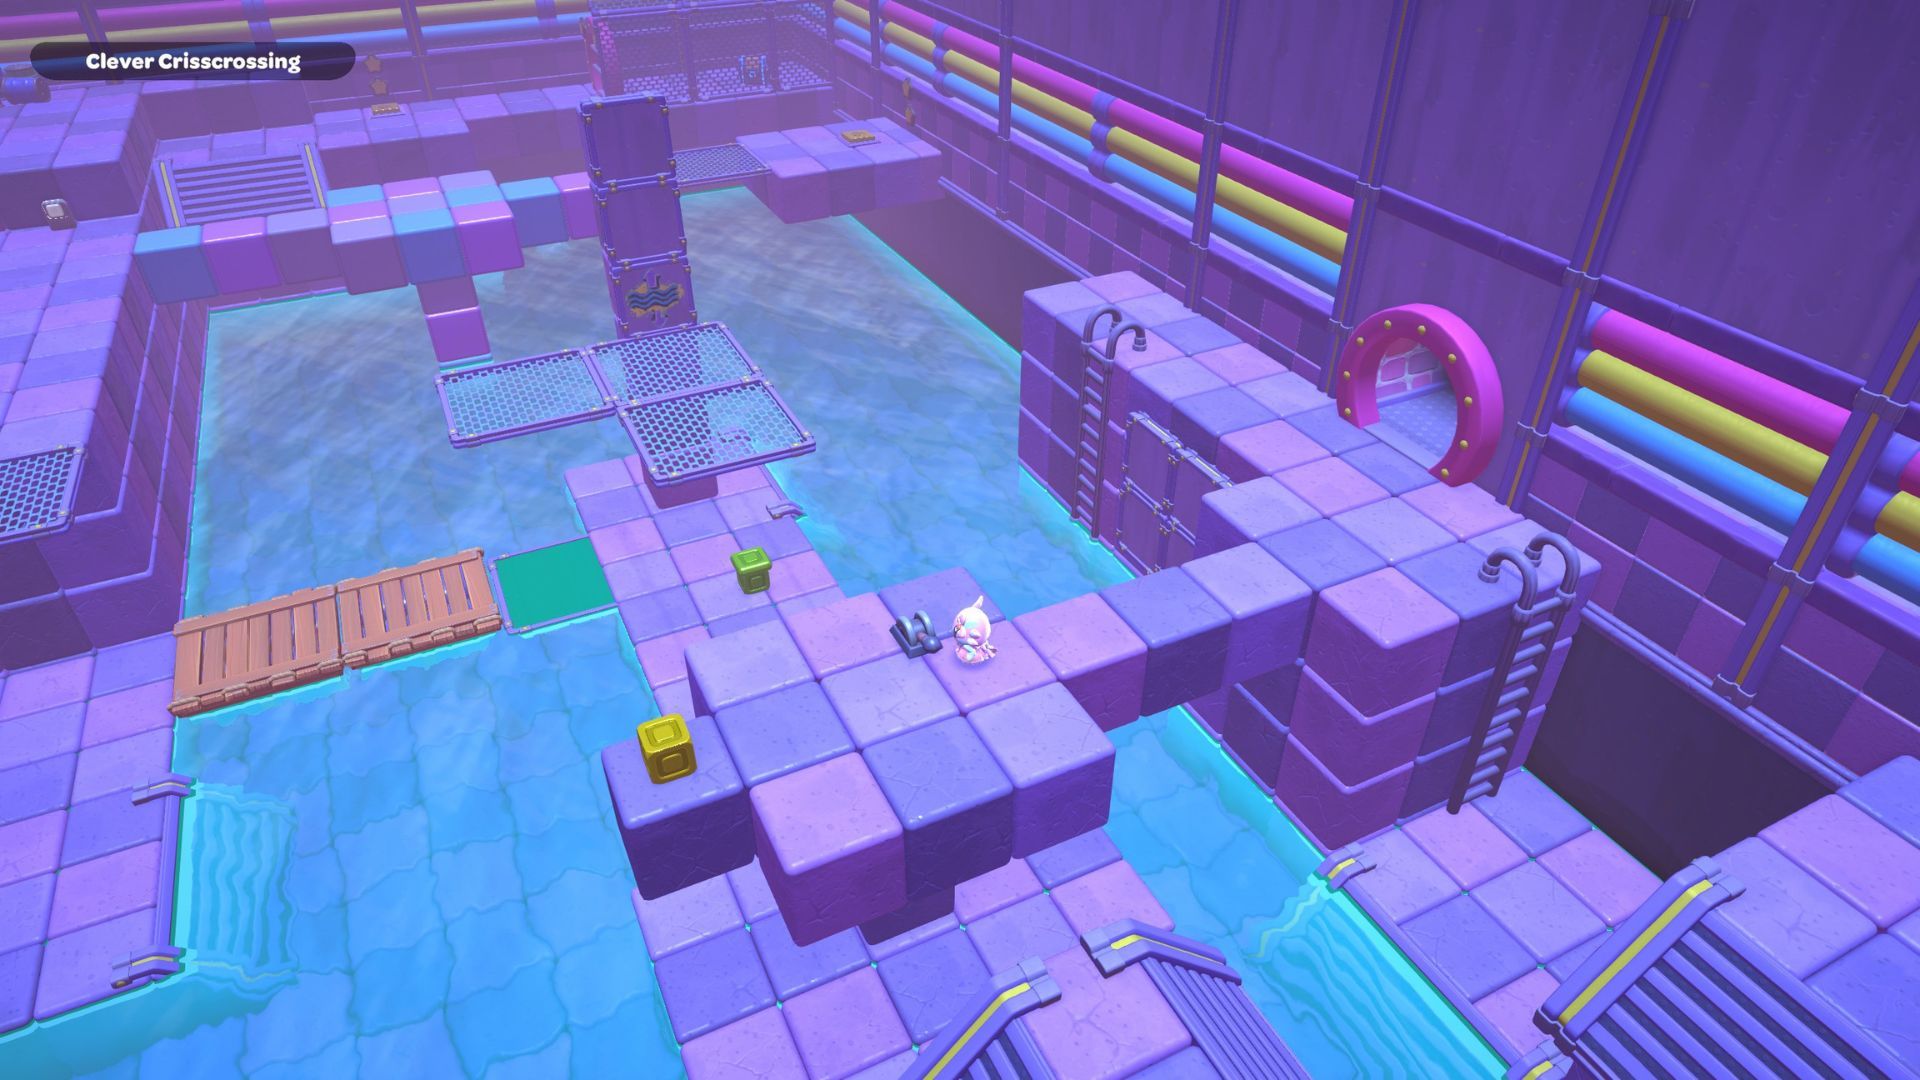
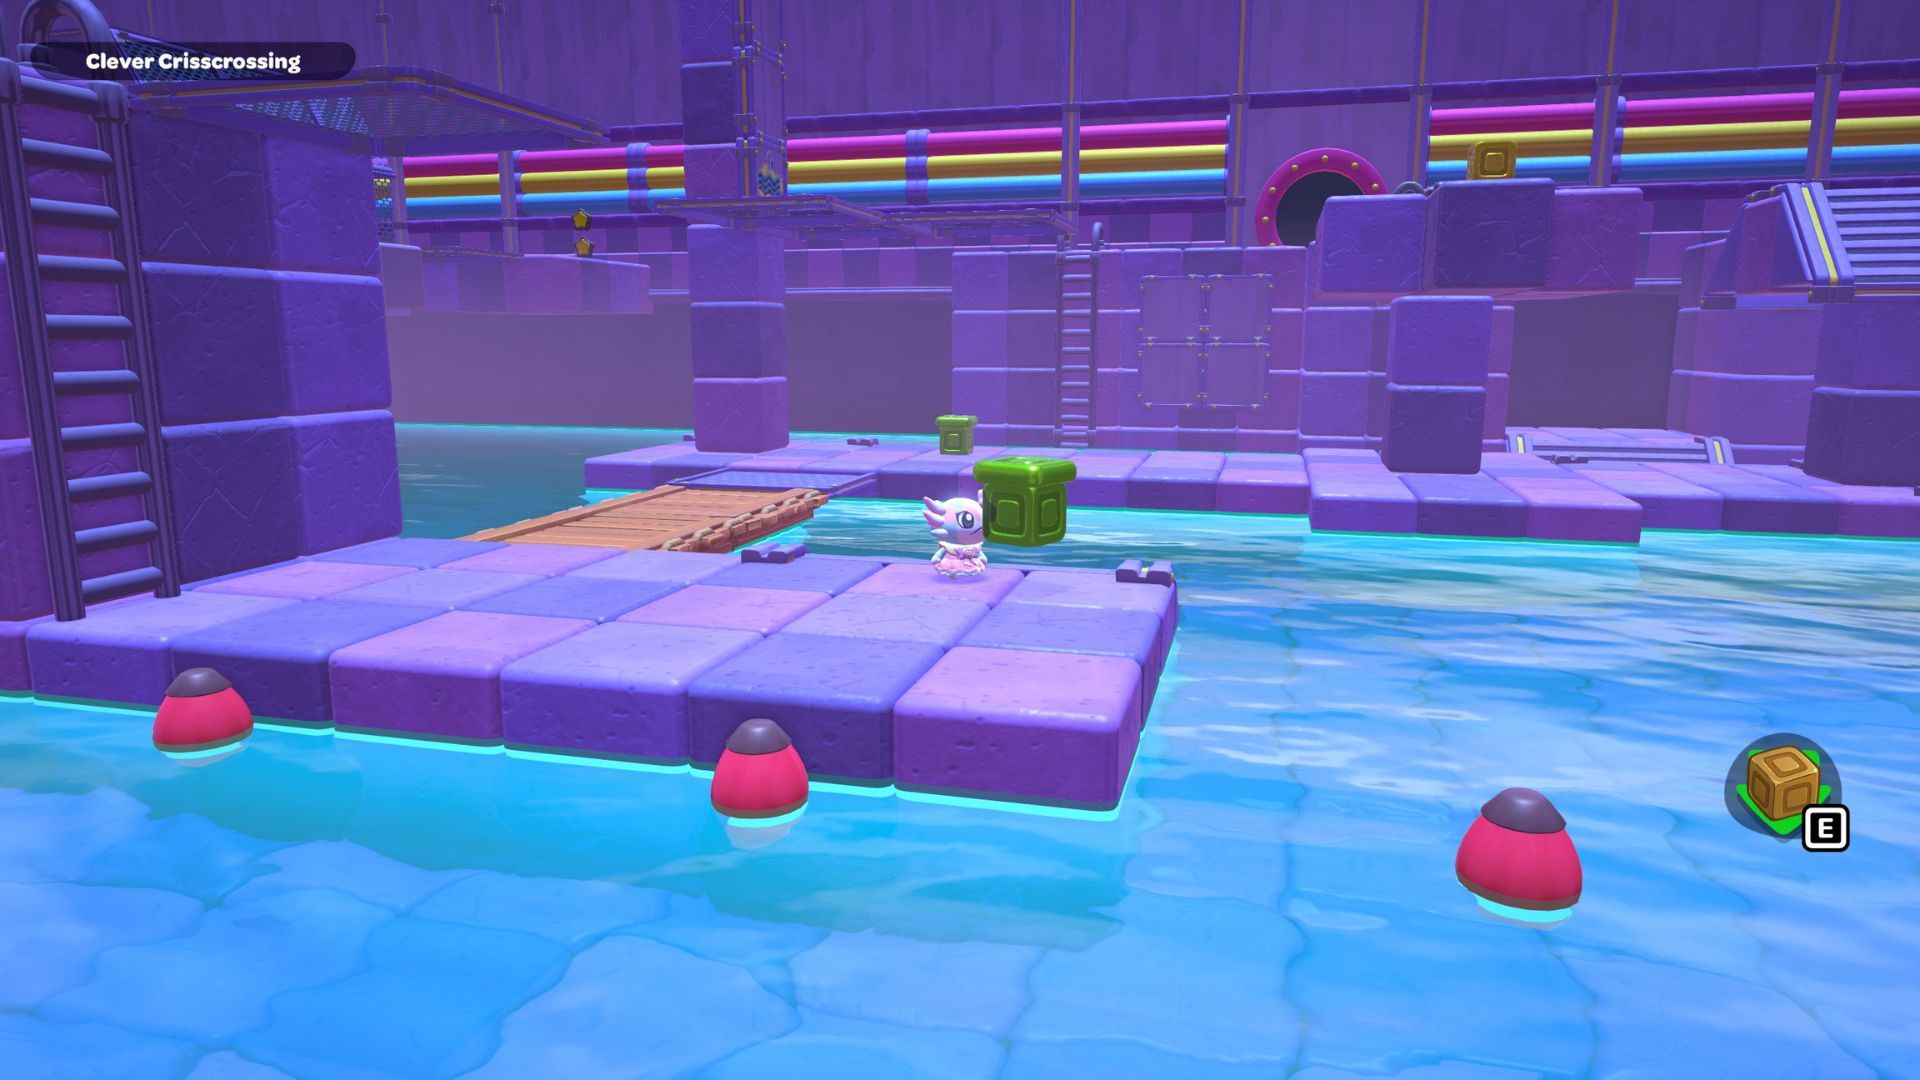
Begin the puzzle by pulling the lever in the middle of the room—this will lower the water. After the water drains, climb down to the floor. You’ll find two green cubes: one near the center of the room and another to the left of the wooden platforms.
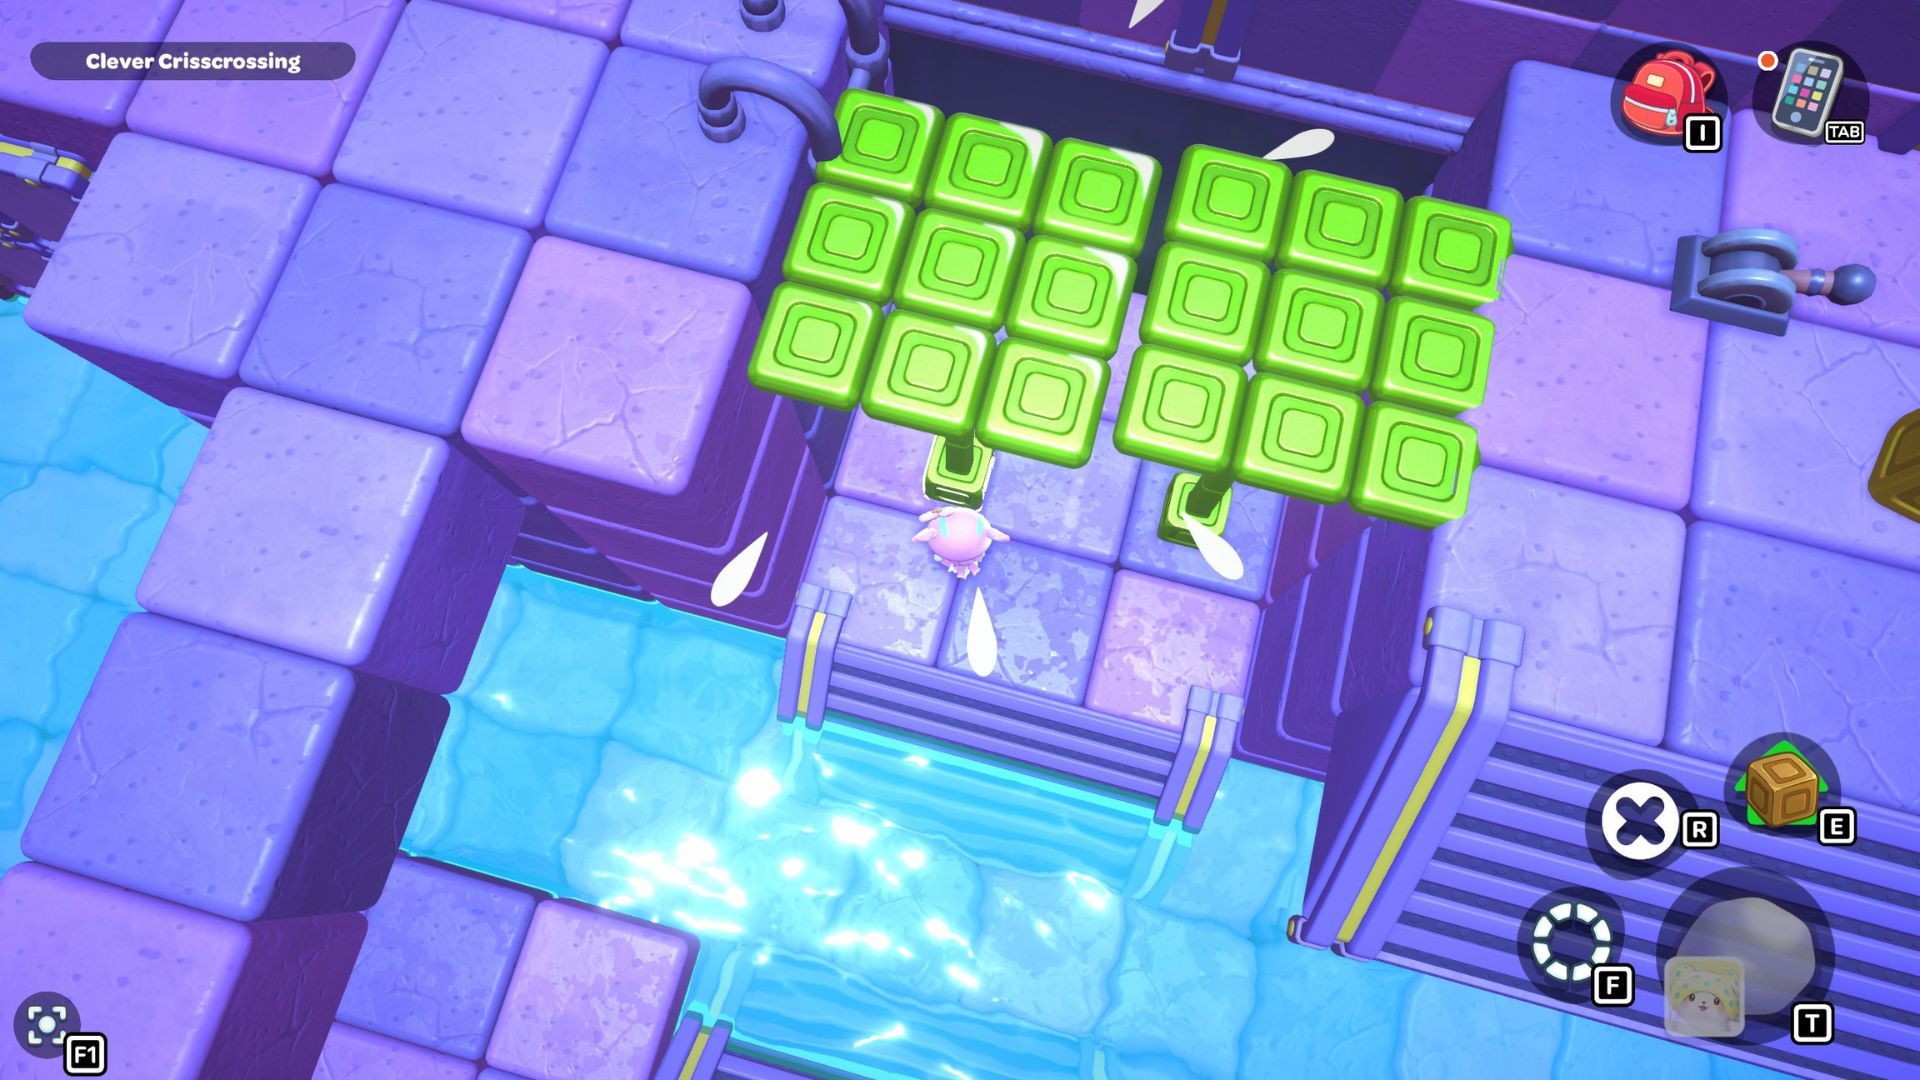
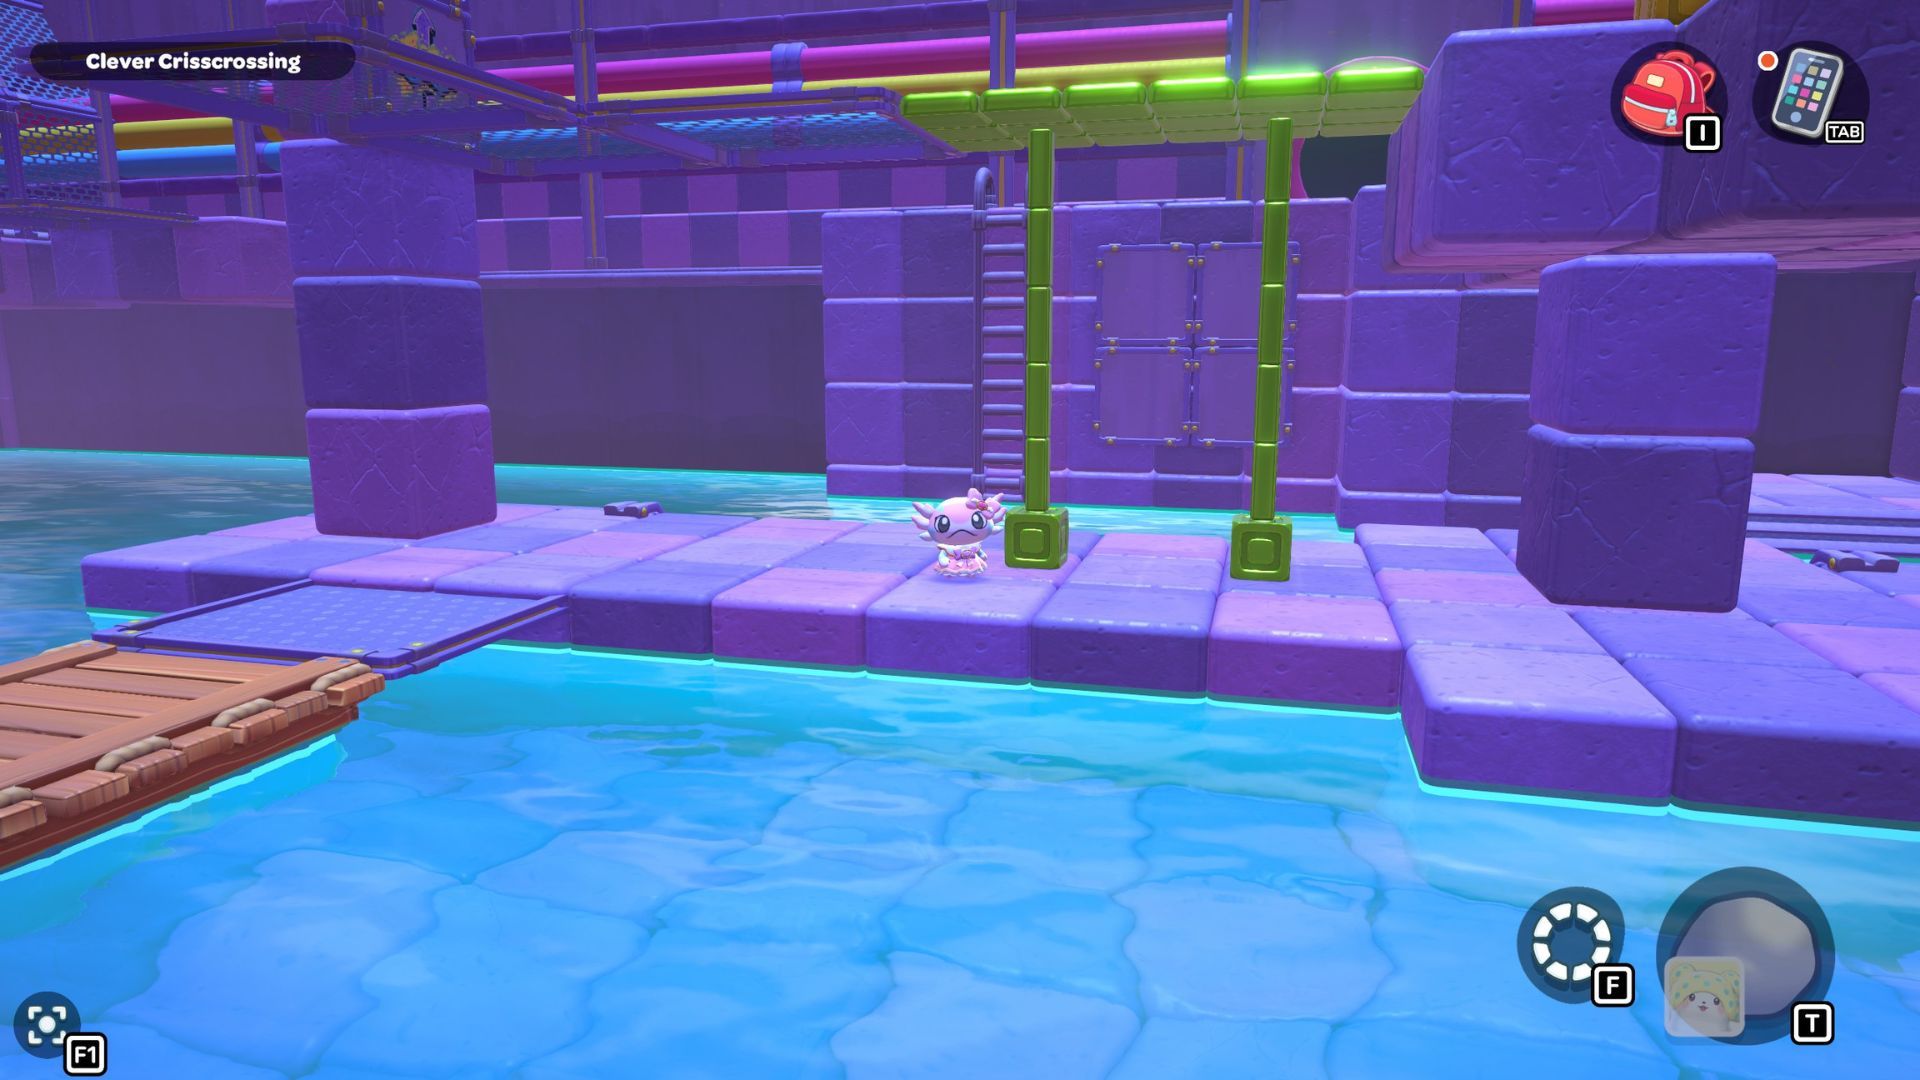
First, take the green cube and put it on the small platform to the left of the door. Set it down next to the ladder on the wall, then go back and get the second green cube. Place this second cube on the other side of the platform, against the opposite wall. Finally, activate both green cubes to make raised platforms.
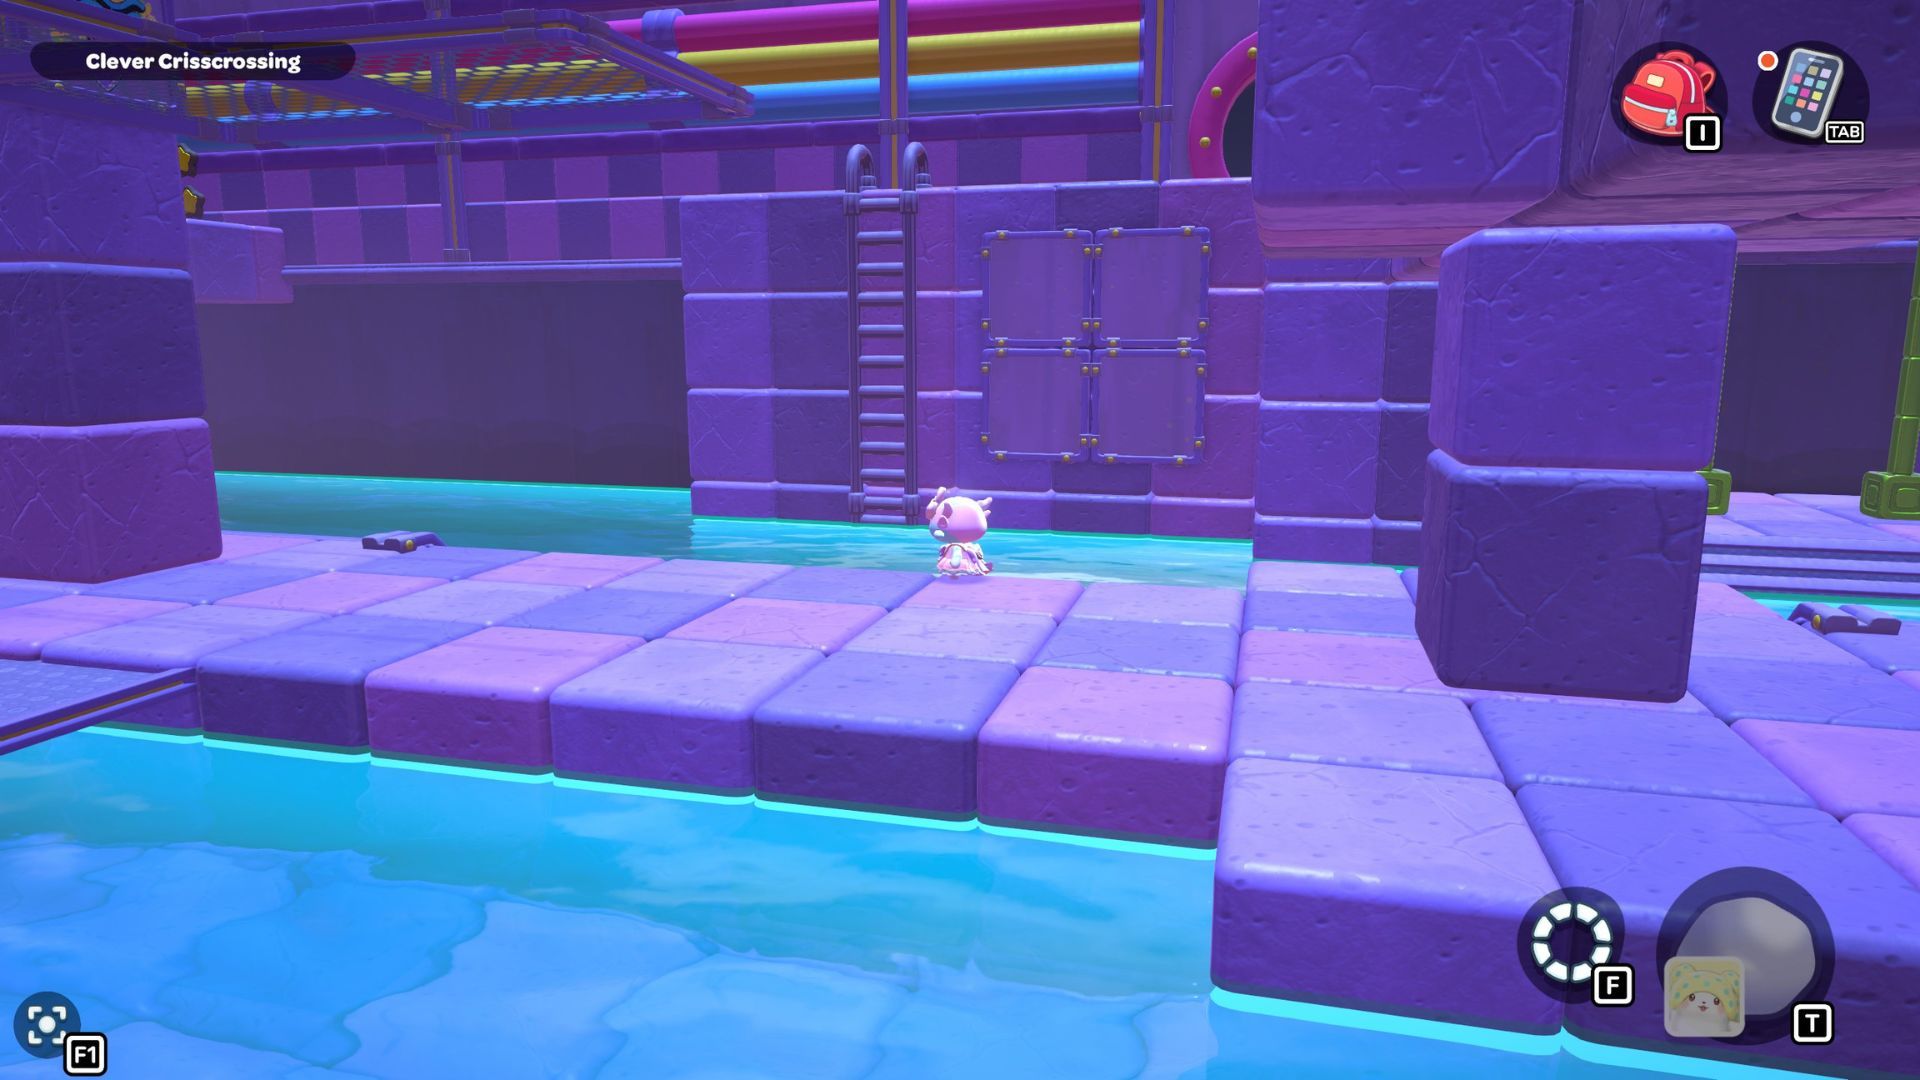
The green cubes create a barrier blocking the ladder here. To continue, walk to the left around the platform and use the second ladder to reach the door. Once across, grab the gold cube on the next platform and bring it to the central platform where the other gold cube is located.
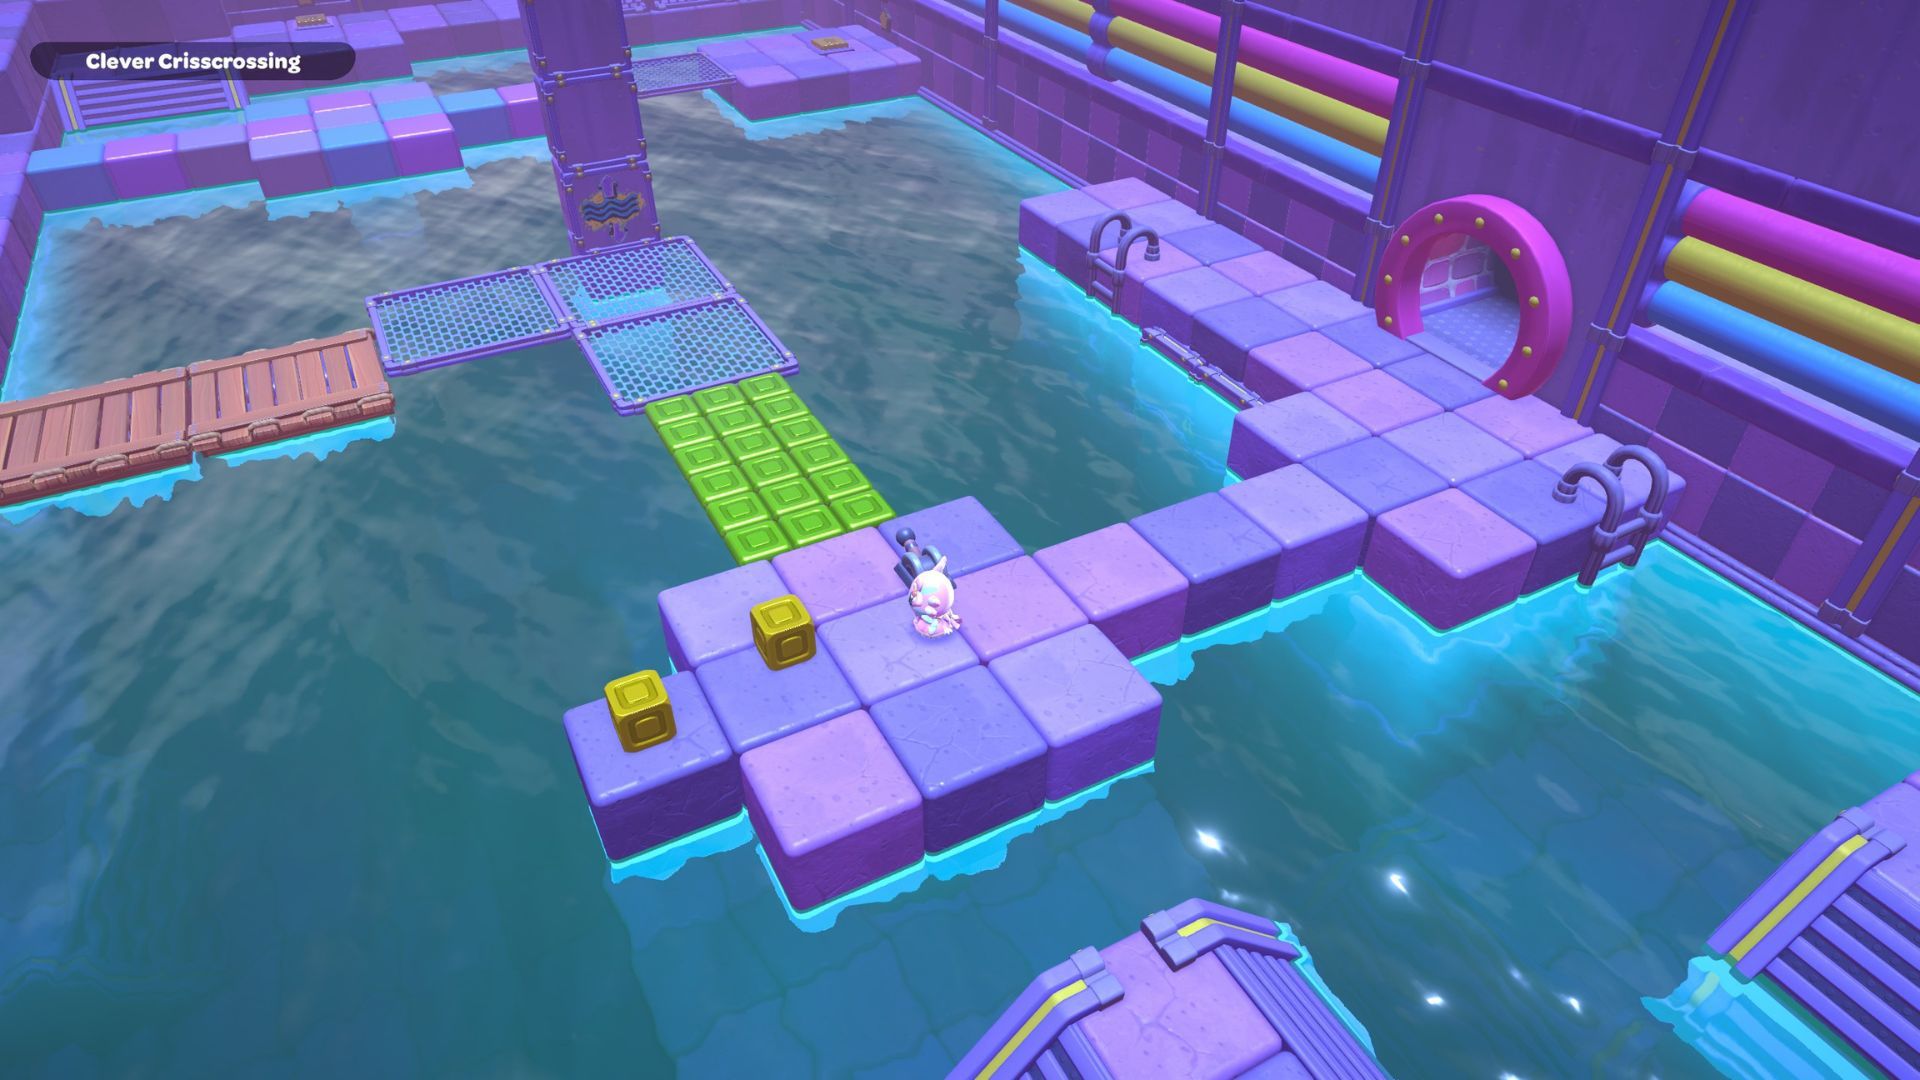
Return the green cubes to the middle of the floor. Position one near the mesh panels in the room’s center, and the other under the edge of the platform where the gold cubes are. Then, activate both green cubes to build a pathway connecting the gold cubes’ platform to the mesh path.
Okay, so I headed back up to the main platform and pulled that lever. As soon as I did, the water started rising, and all those wooden pallets floated up, finishing the path I’d been building. Then, I grabbed both of the gold blocks and carried them across that new floating path.
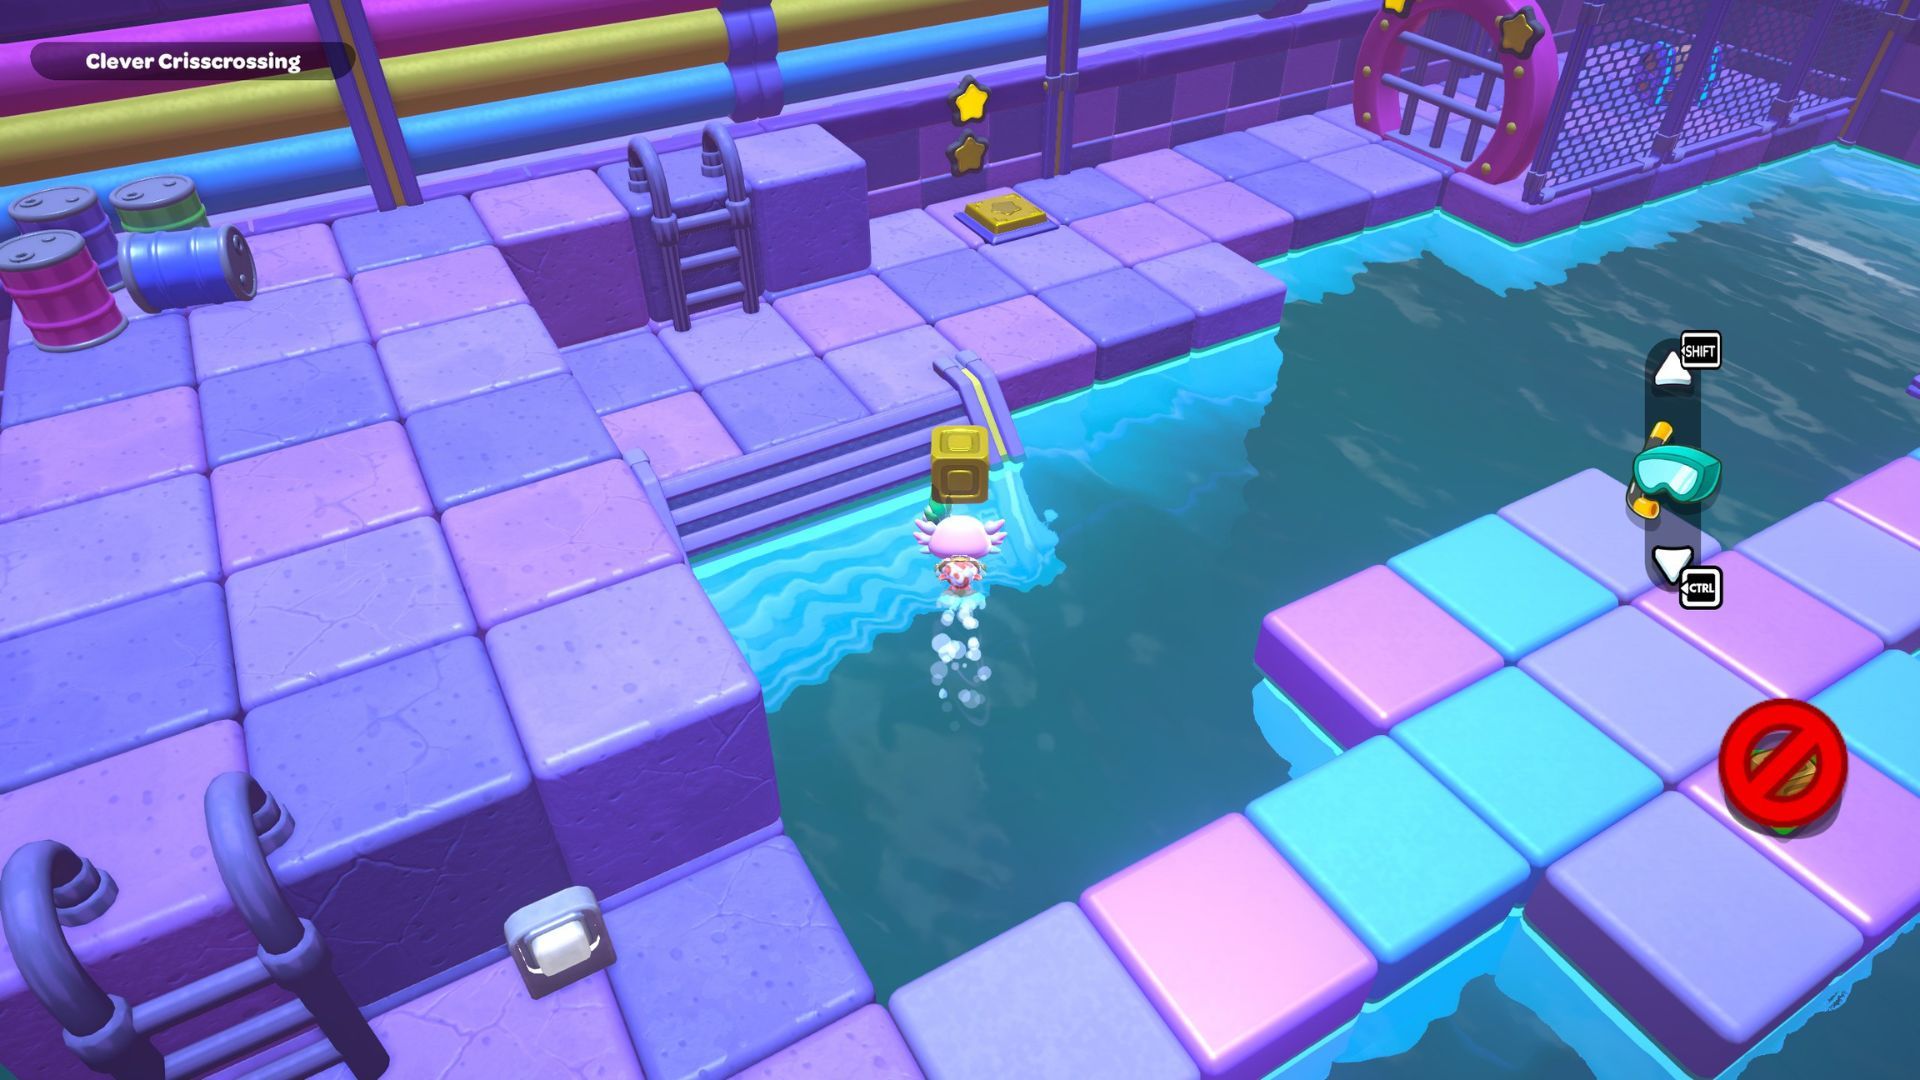
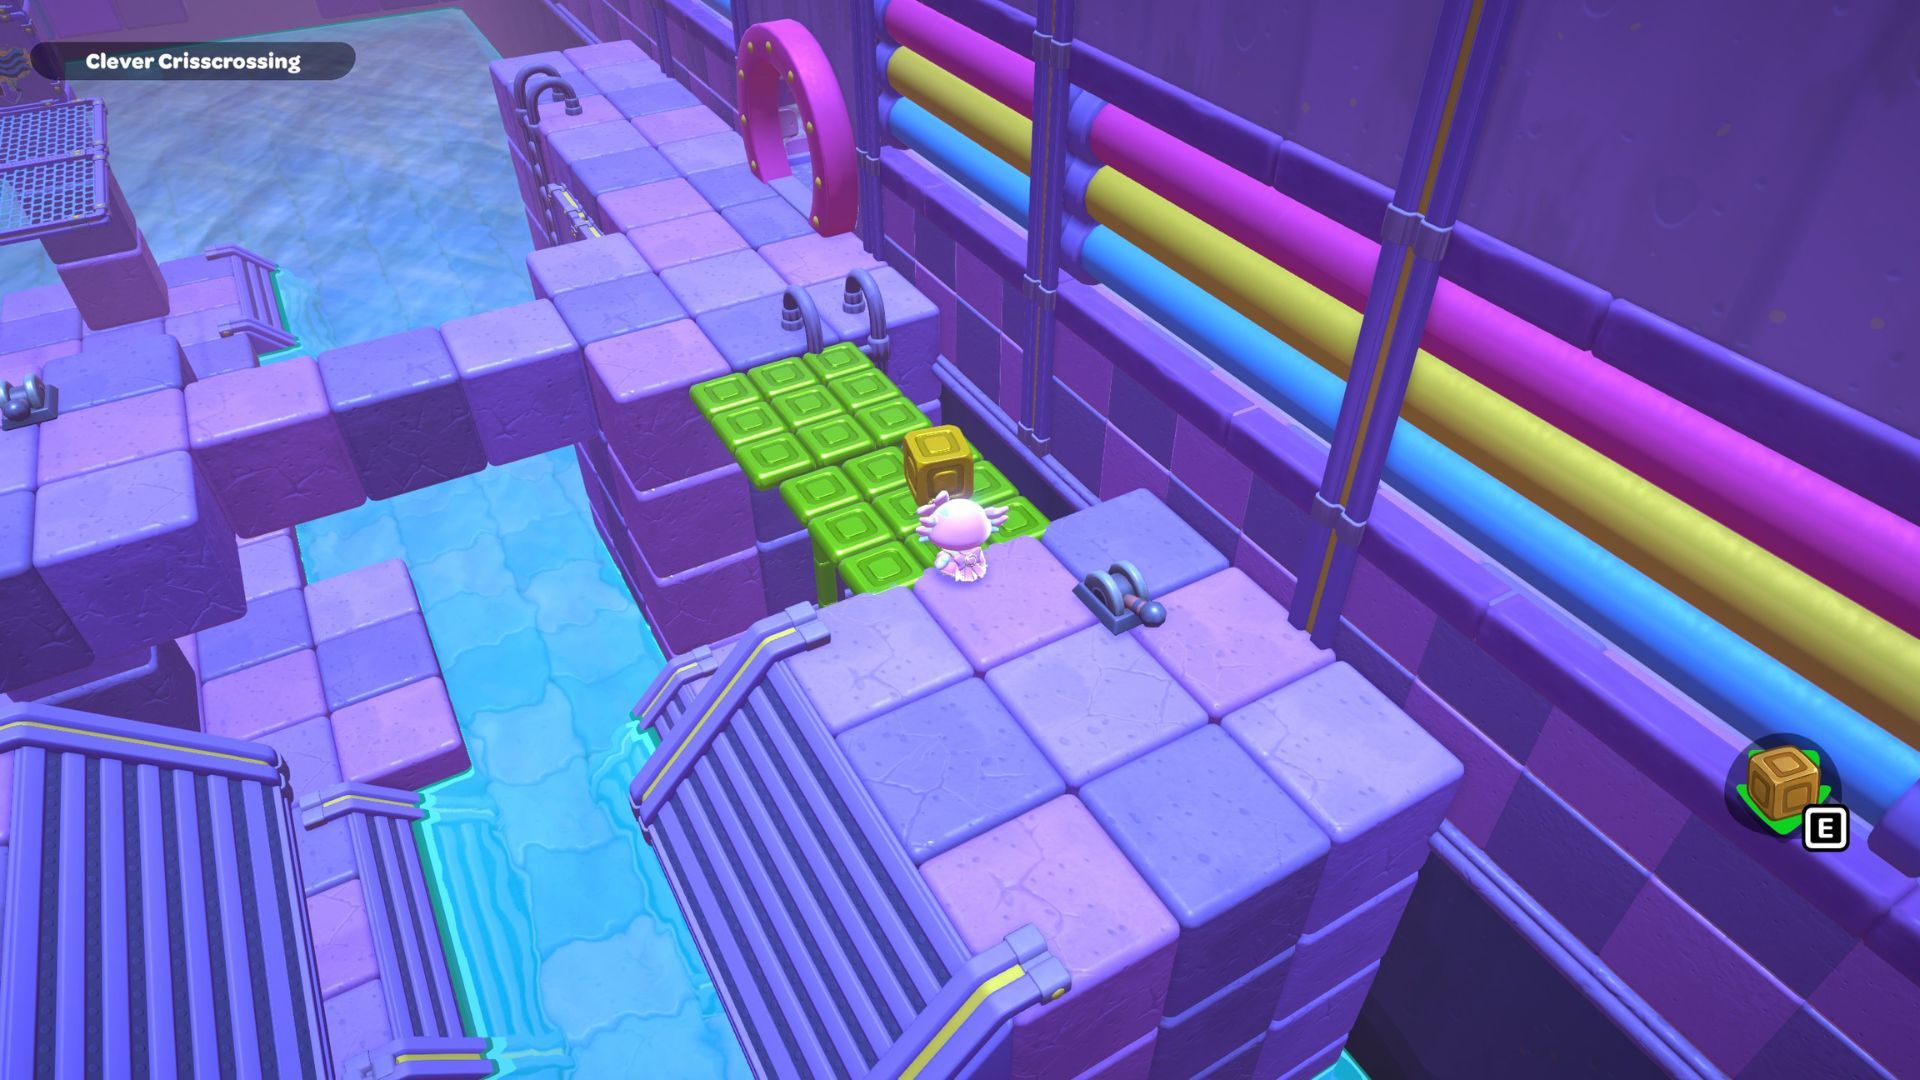
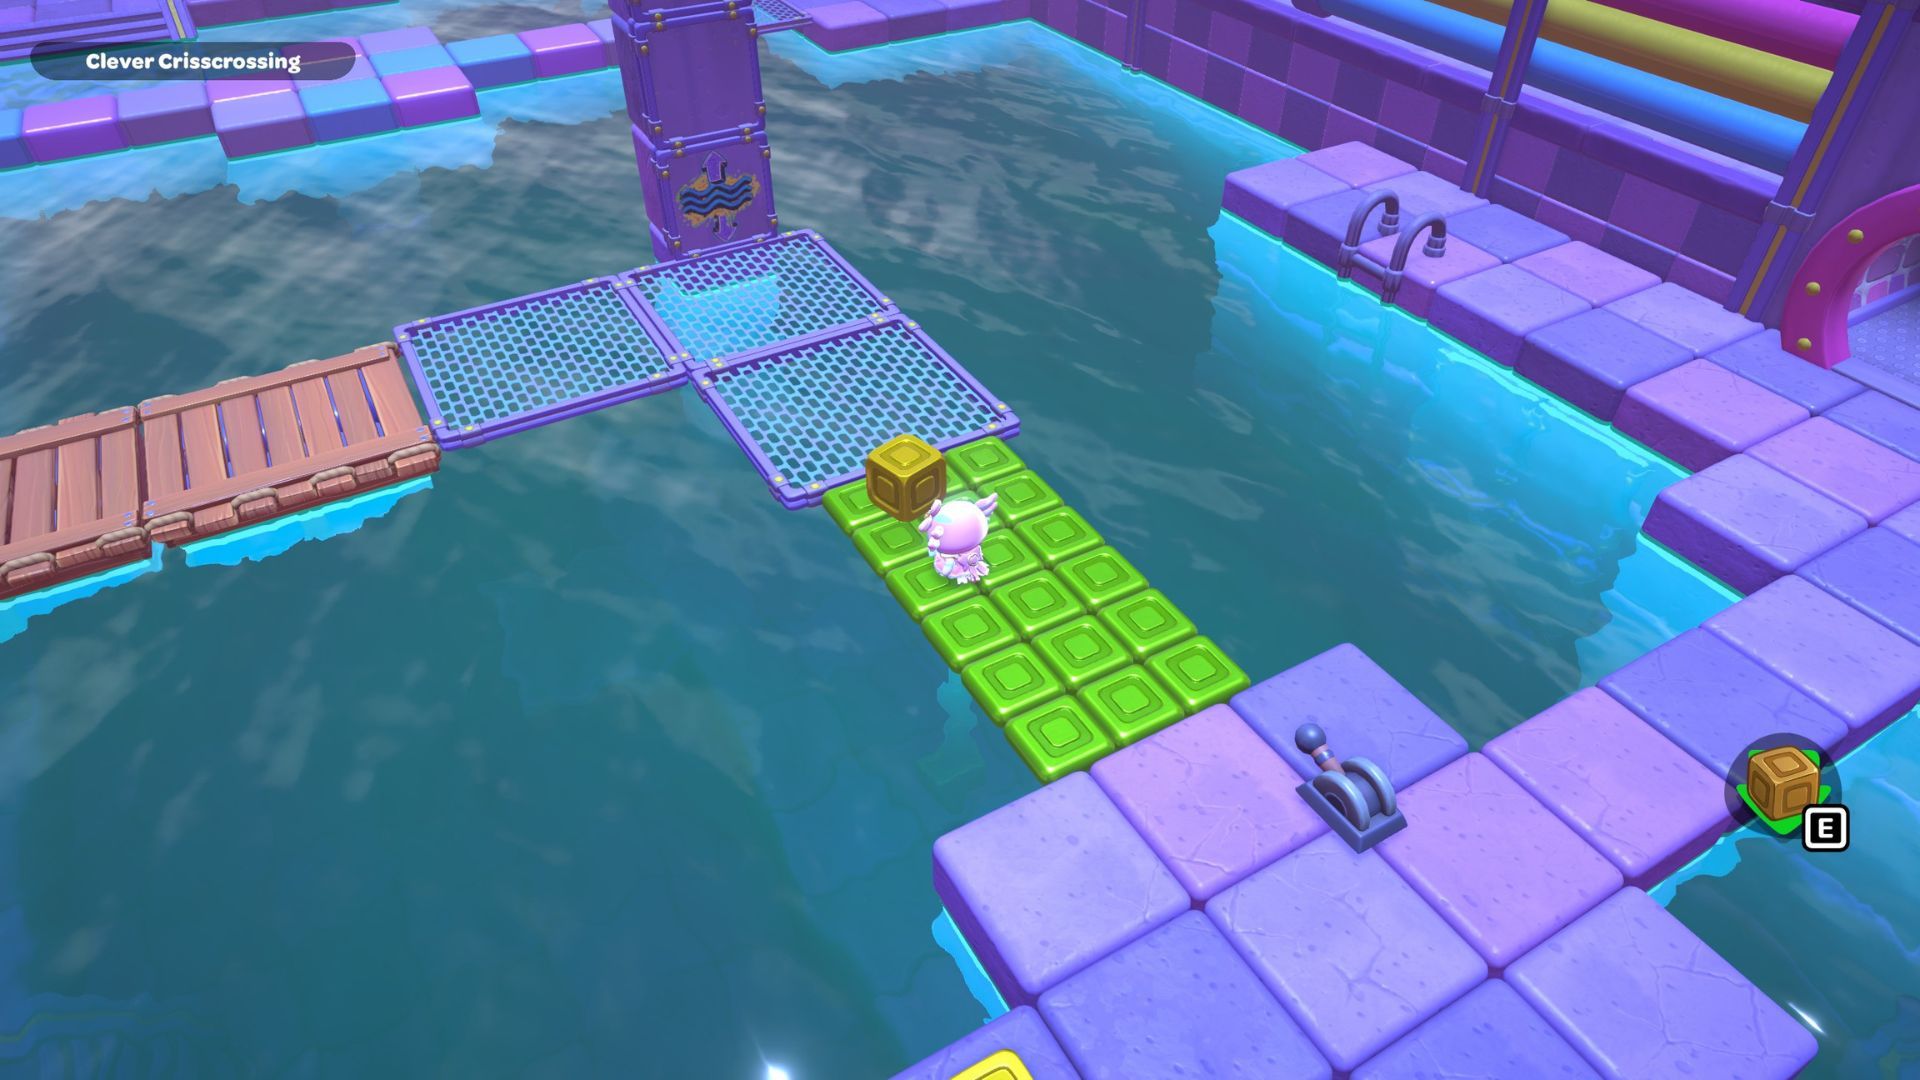
Take a gold block and move it to the bridge at the side of the area. Put the block on the first gold switch, and one of the stars on the wall will light up.
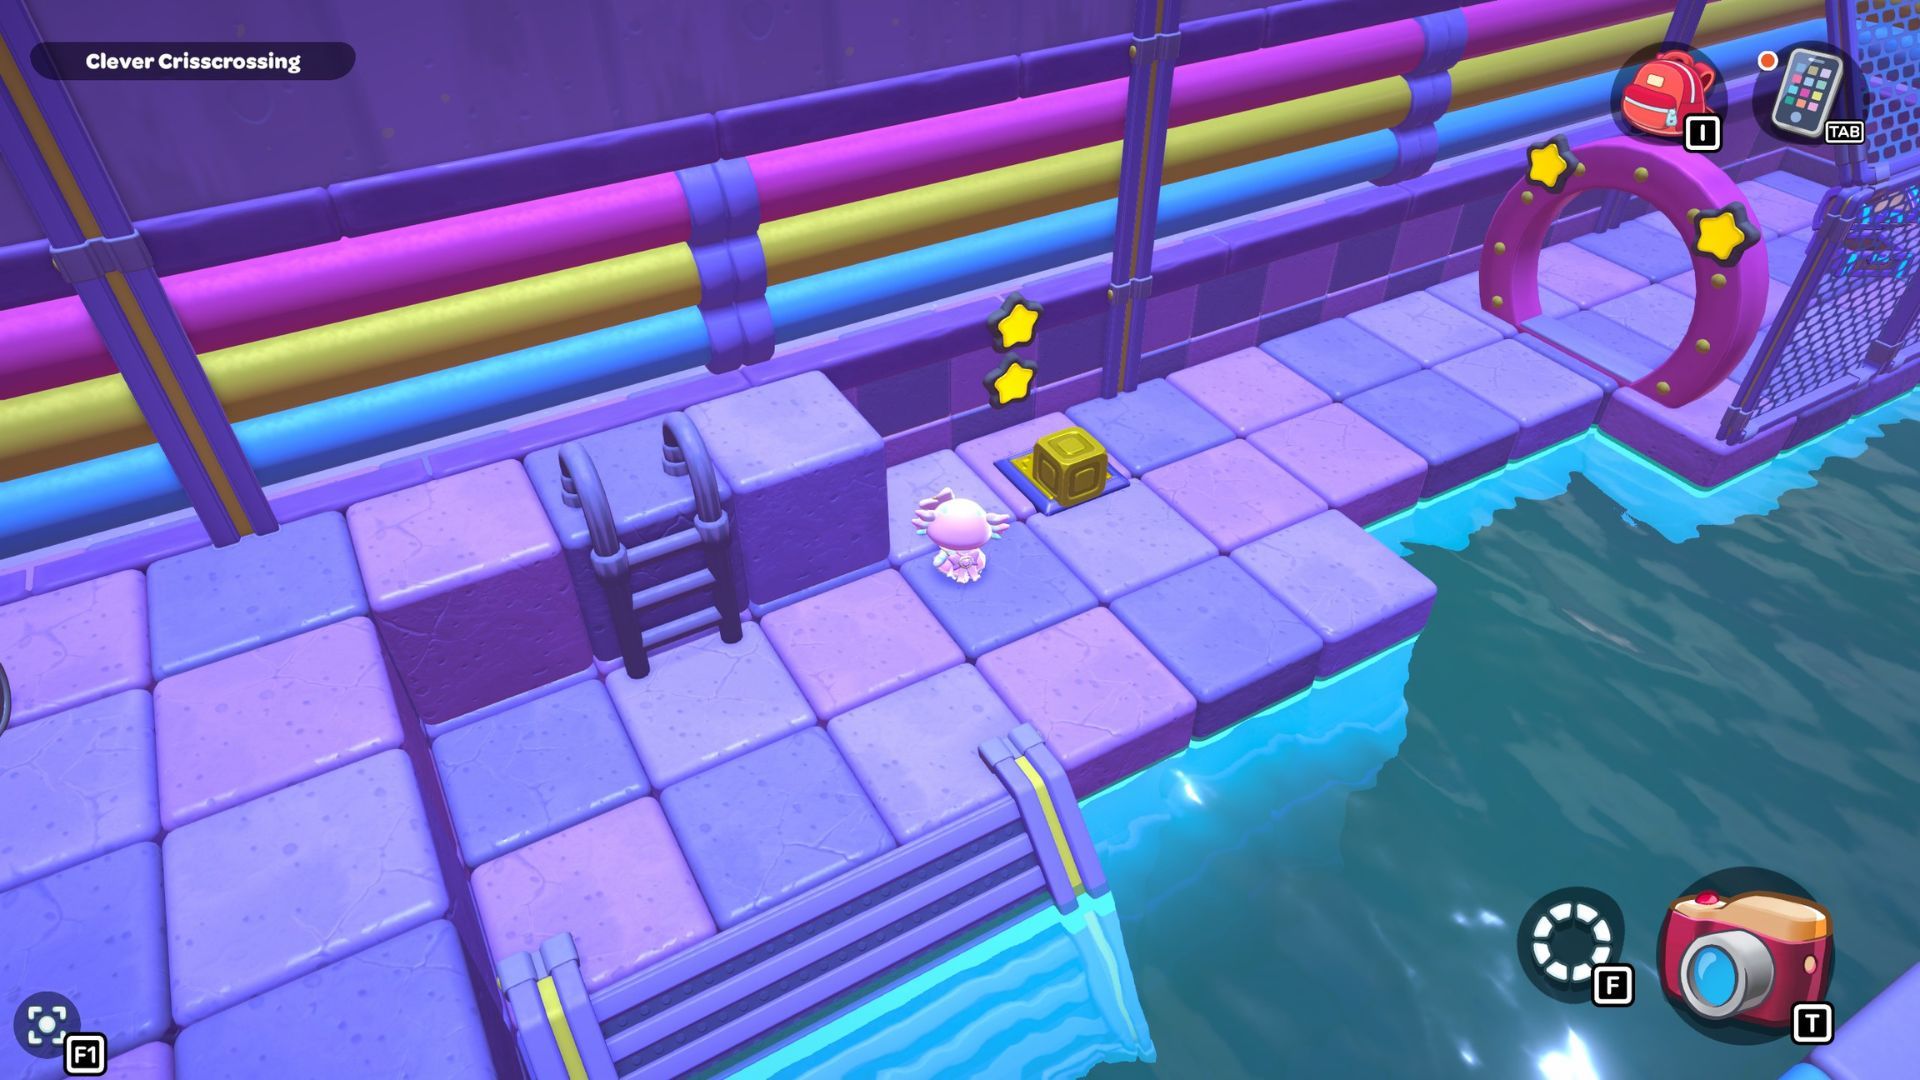
Go back to the second gold block, pick it up, and walk off the left side of the bridge. Swim upwards to reach the staircase and the platform with the second gold switch. Place the block on the switch to open the door and reveal the treasure chest.
Opening the chest rewards players with the Banana Peel Hat. After you get it, you can go back to the beginning of the room and exit through the door.
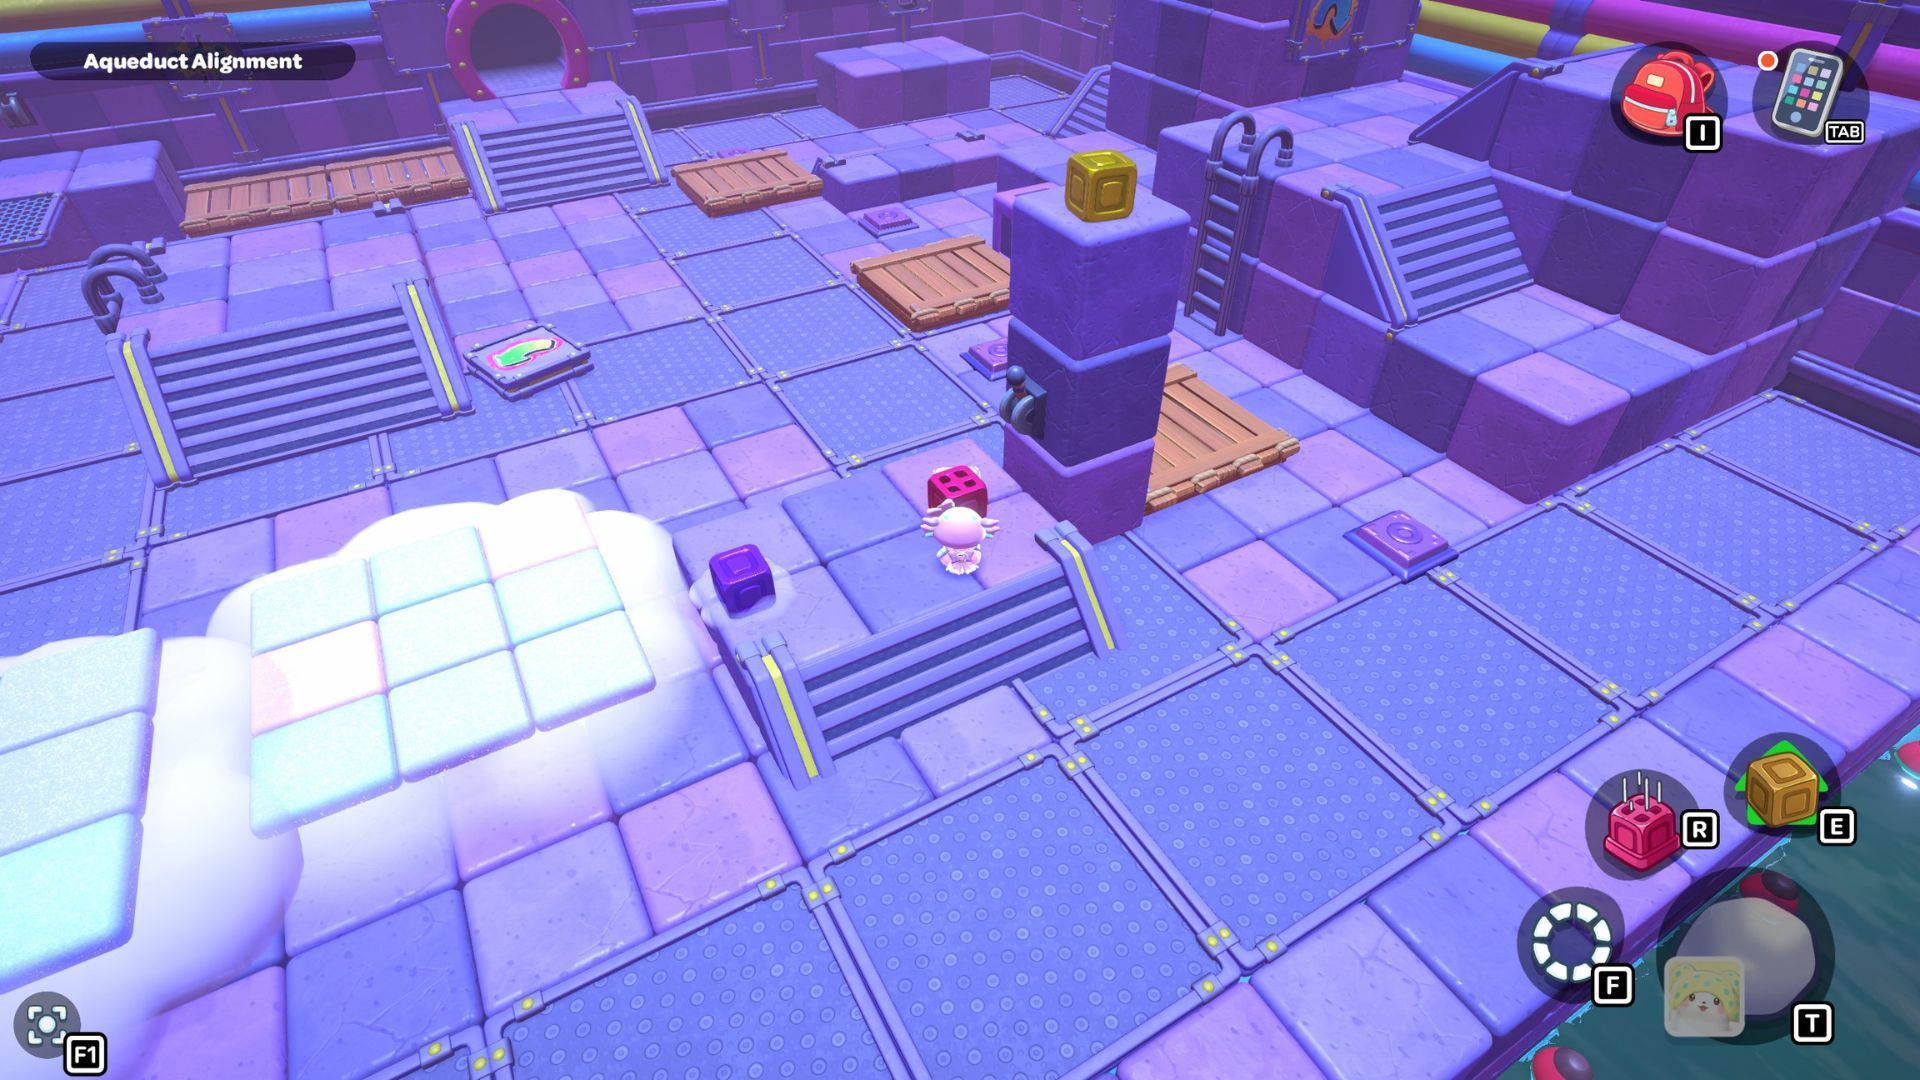
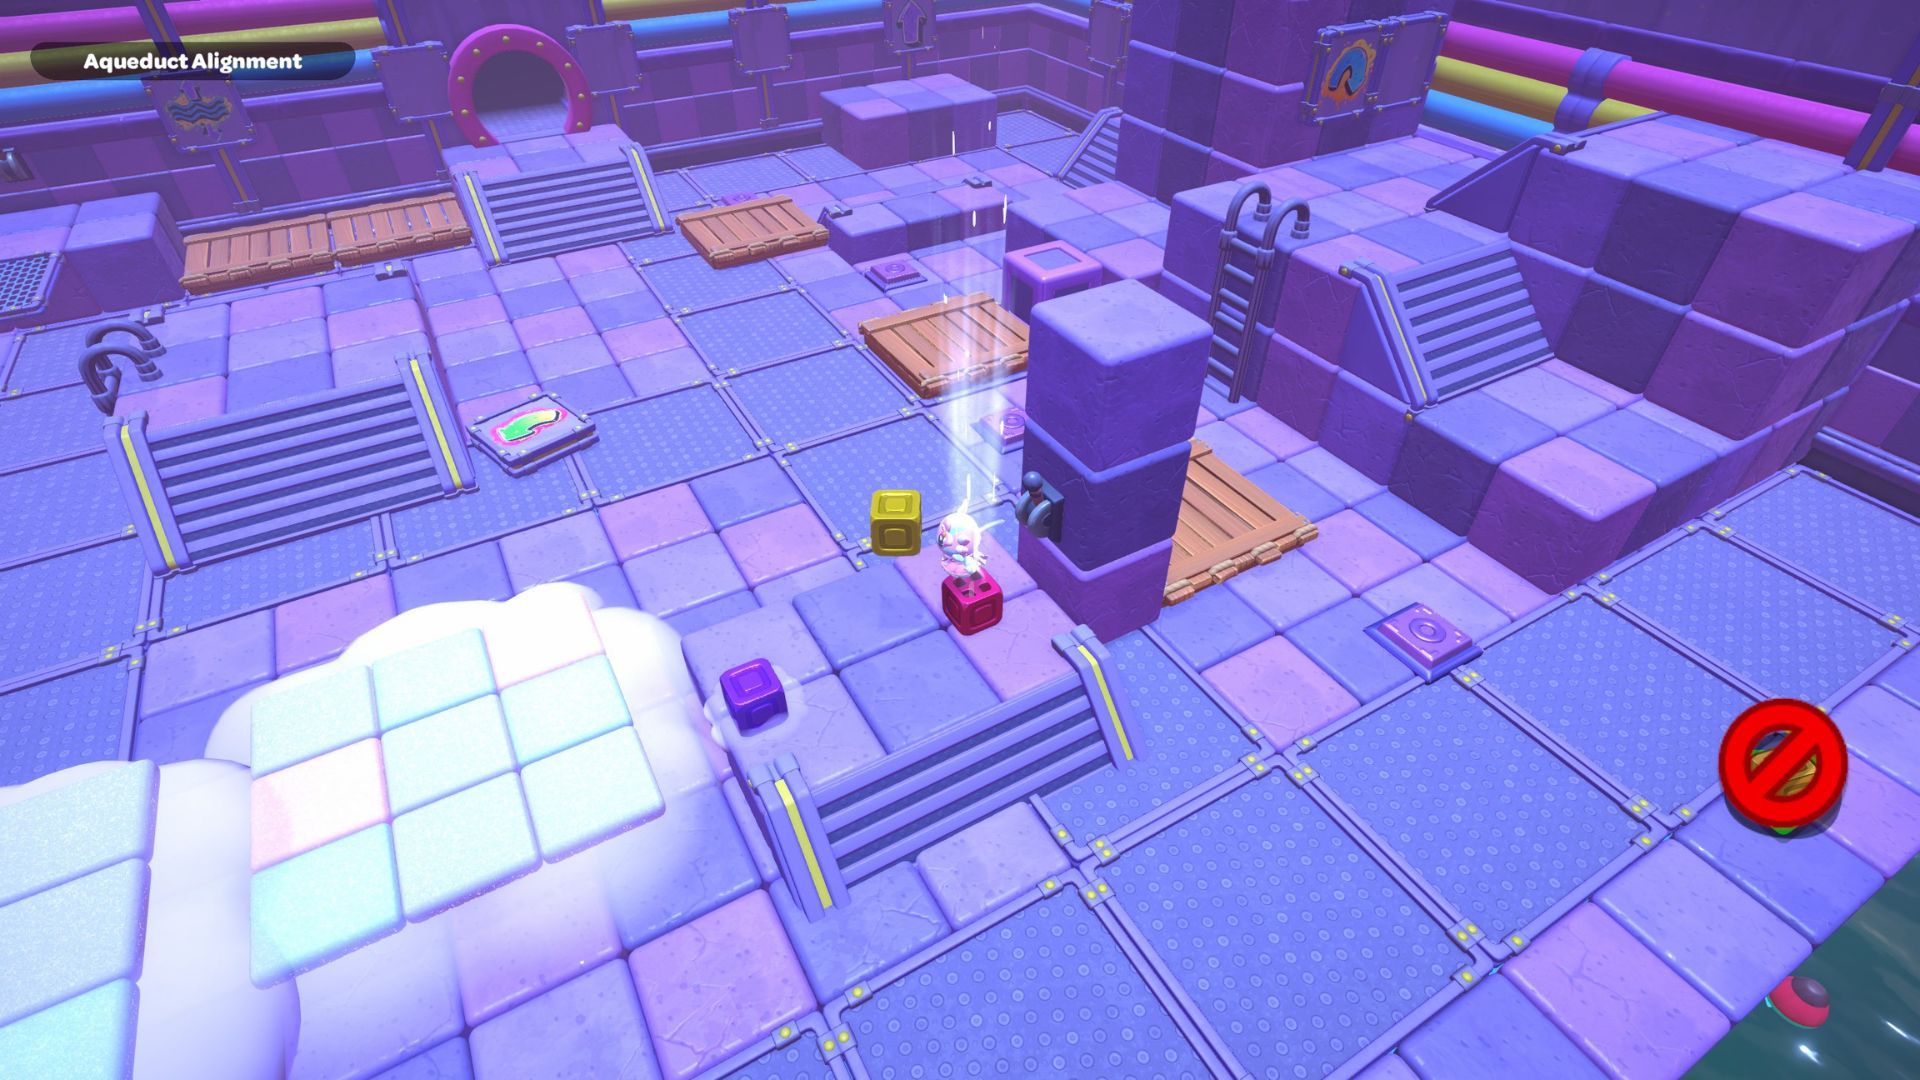
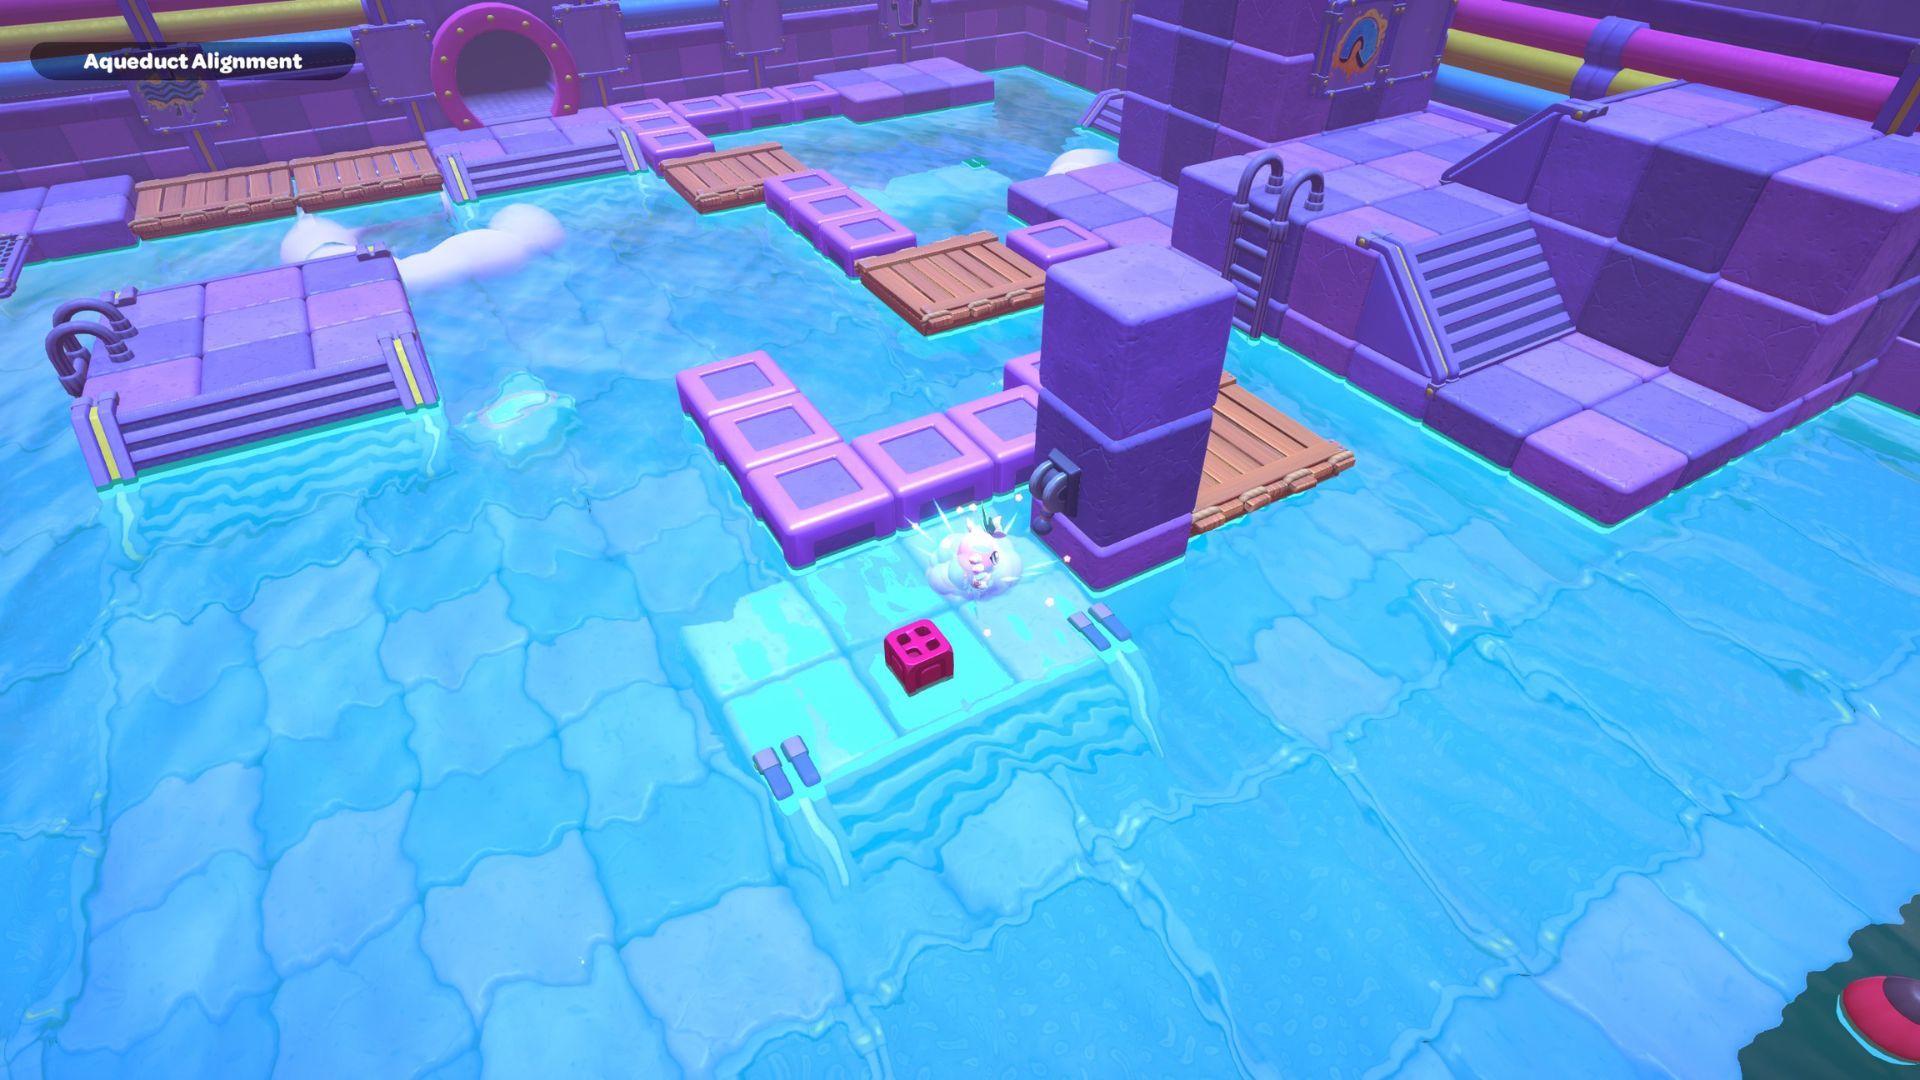
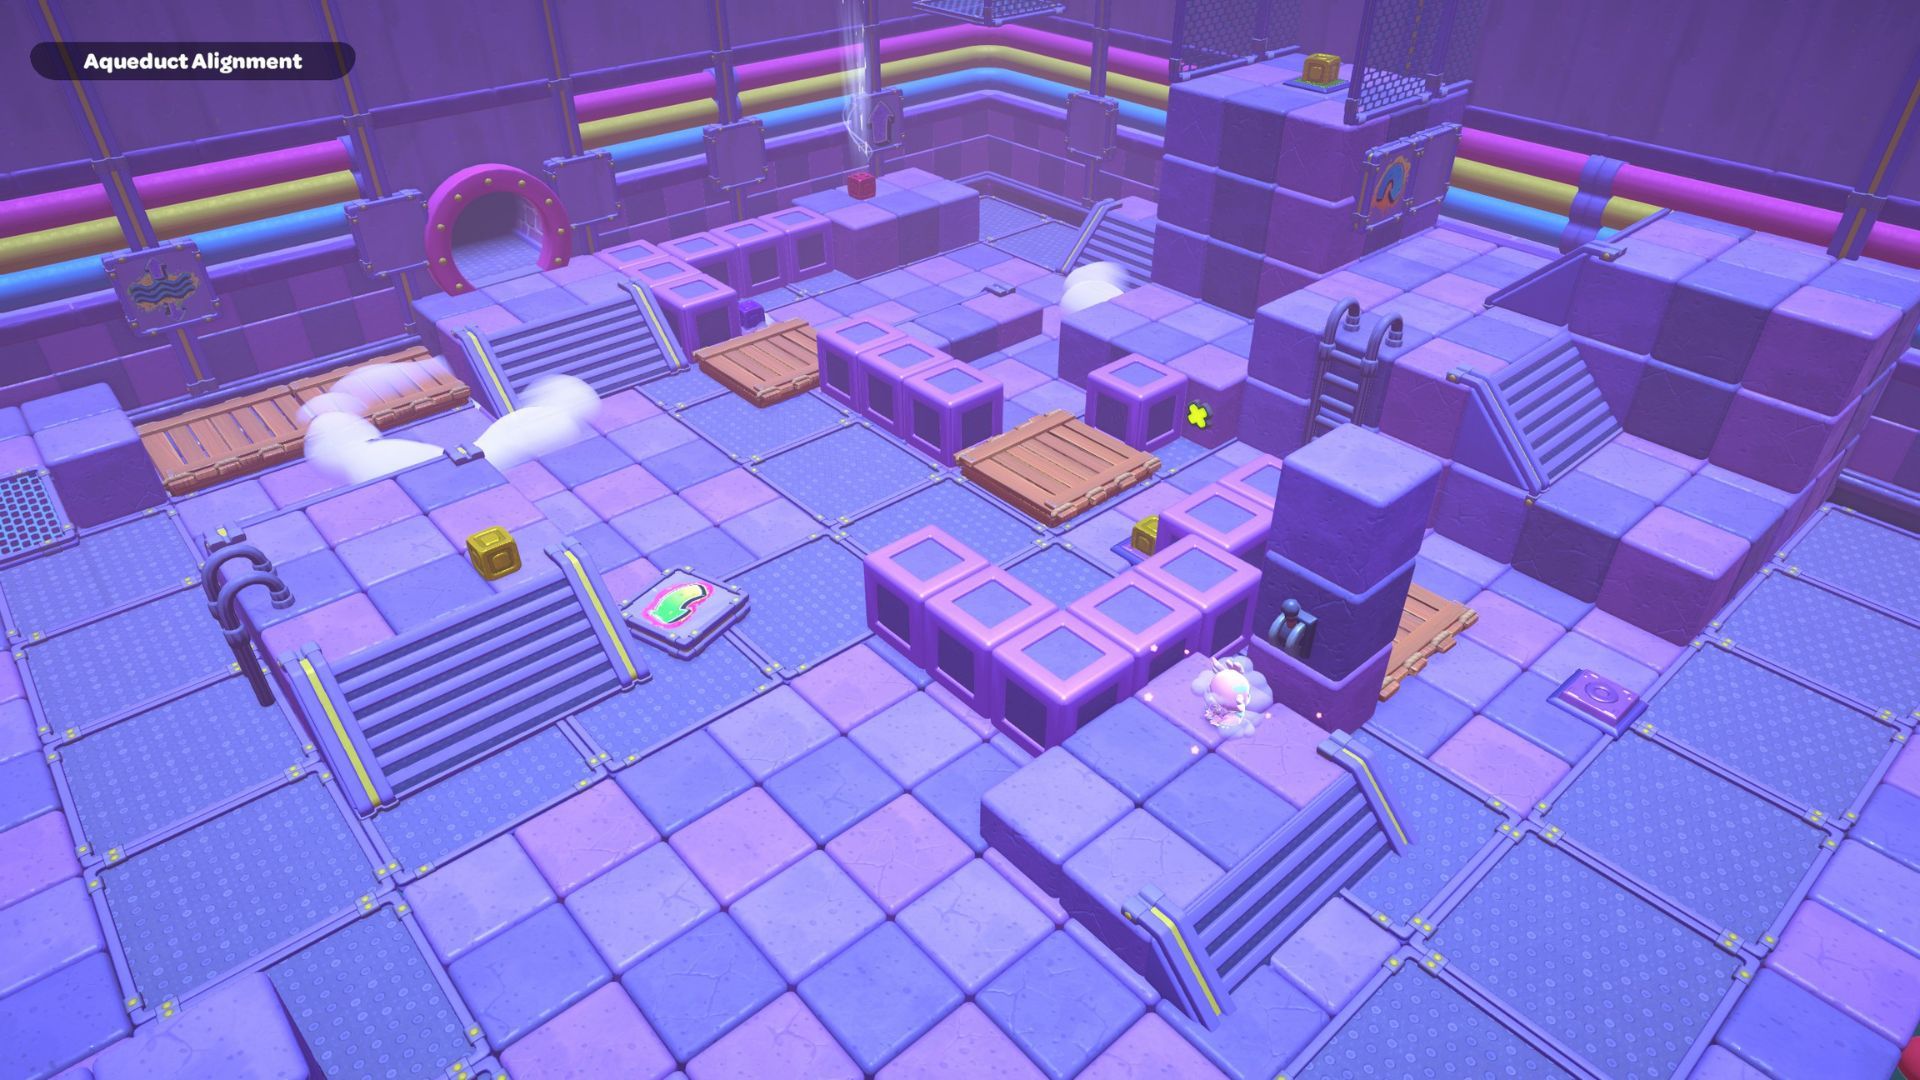
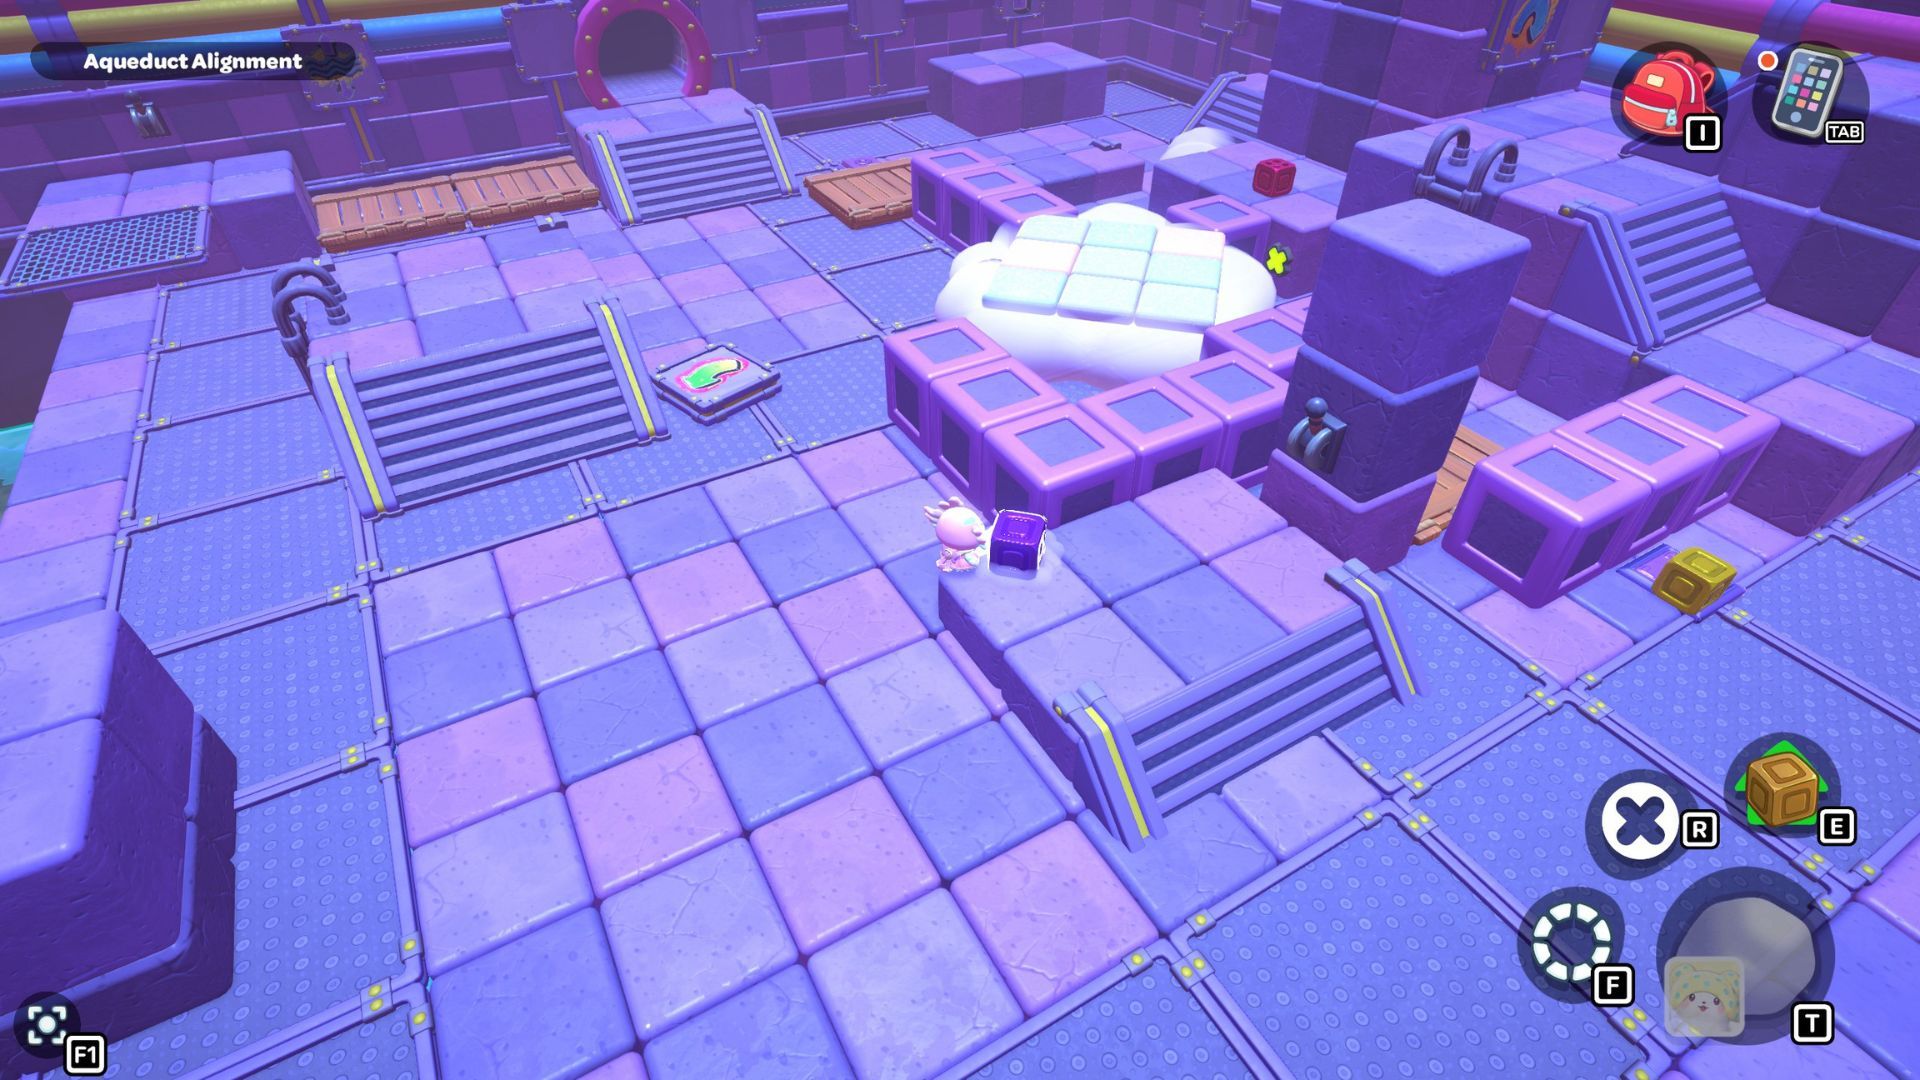
City Town Sewers — Aqueduct Alignment Walkthrough
The Aqueduct Alignment puzzle room is located on the west side of the northern section of the City Town Sewers. To solve the puzzle, you must move a red cube onto the platform under the chest.
Begin the puzzle by stepping onto the wooden pallets to the left of the door. Then, pull the lever next to the wall to drain some water from the room. After that, pick up the purple cube from the nearby platform.
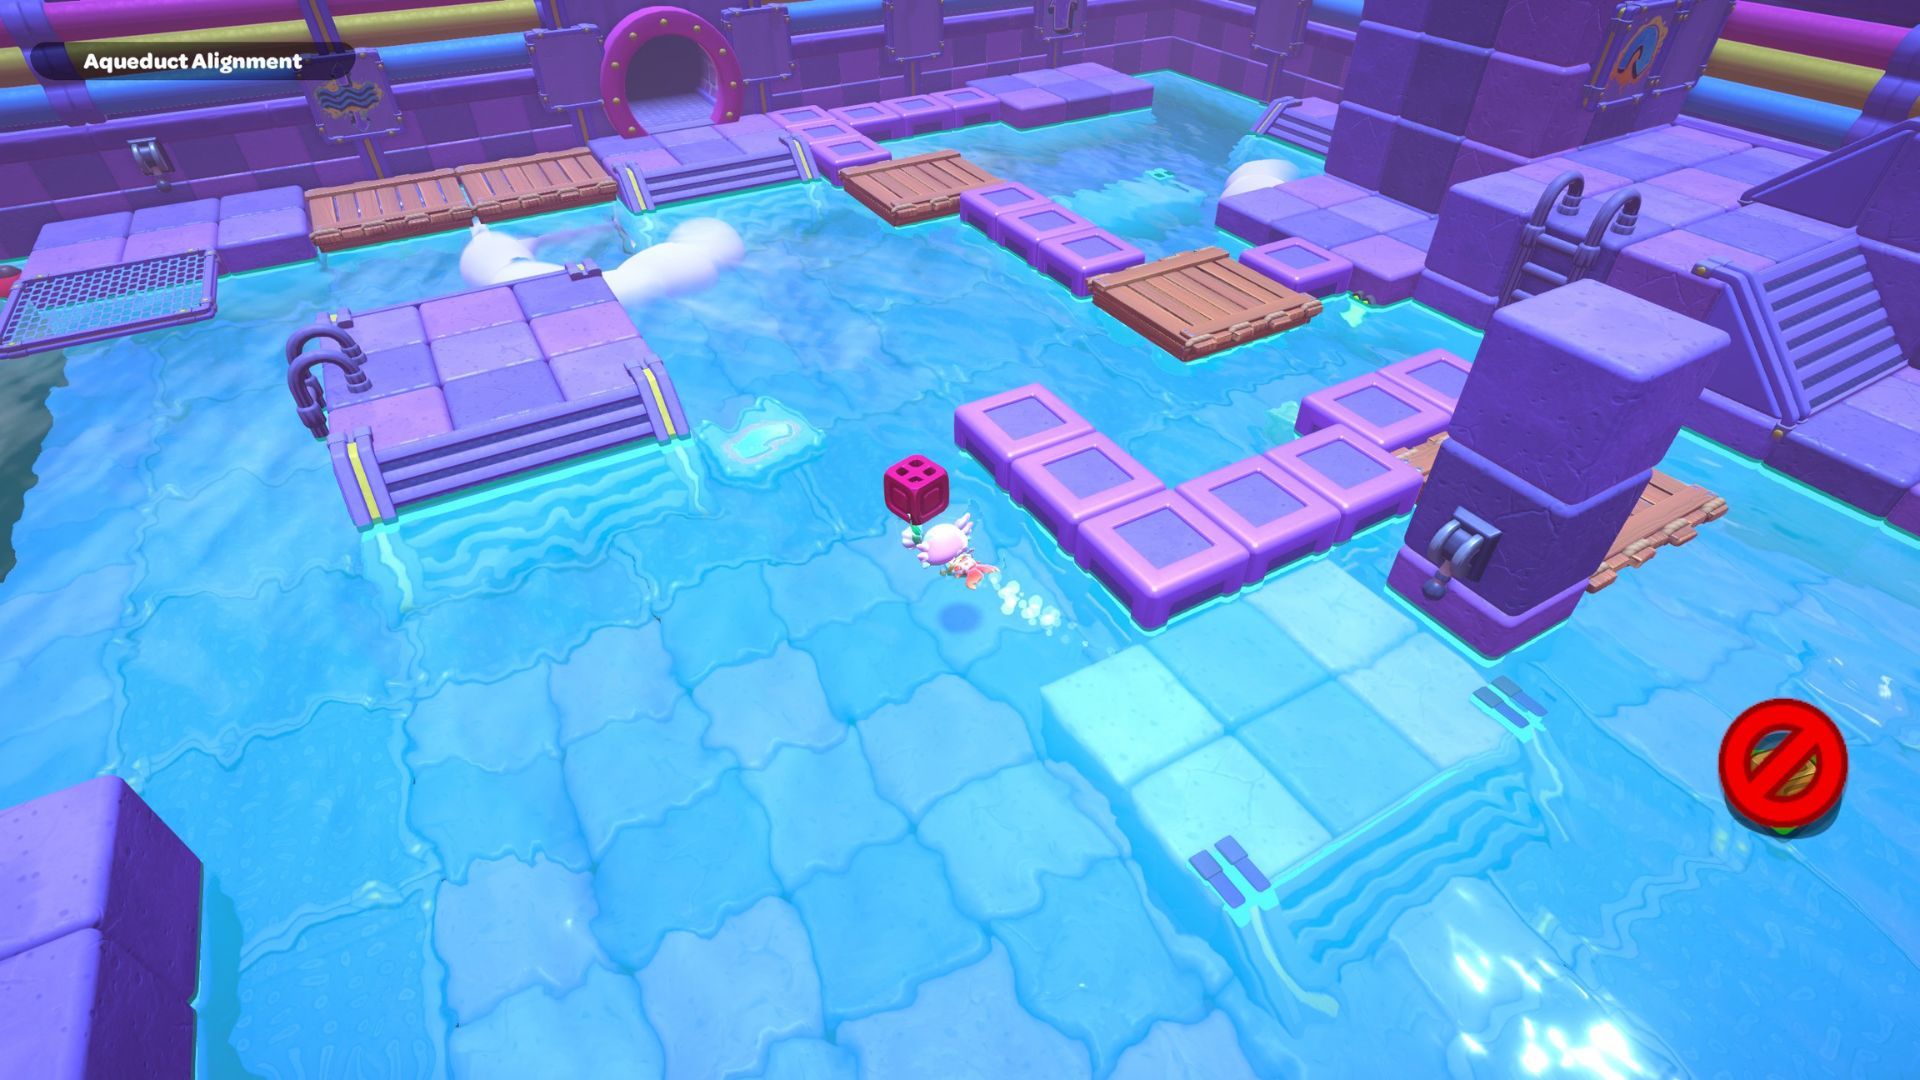
If you move the cube, the cloud by the entrance will move with it. Carry the cube to the left side of the room until you get to the furthest left purple switch. Putting the cube on the switch will make a bridge appear, leading to another purple cube. Go across the bridge and pick up that second cube.

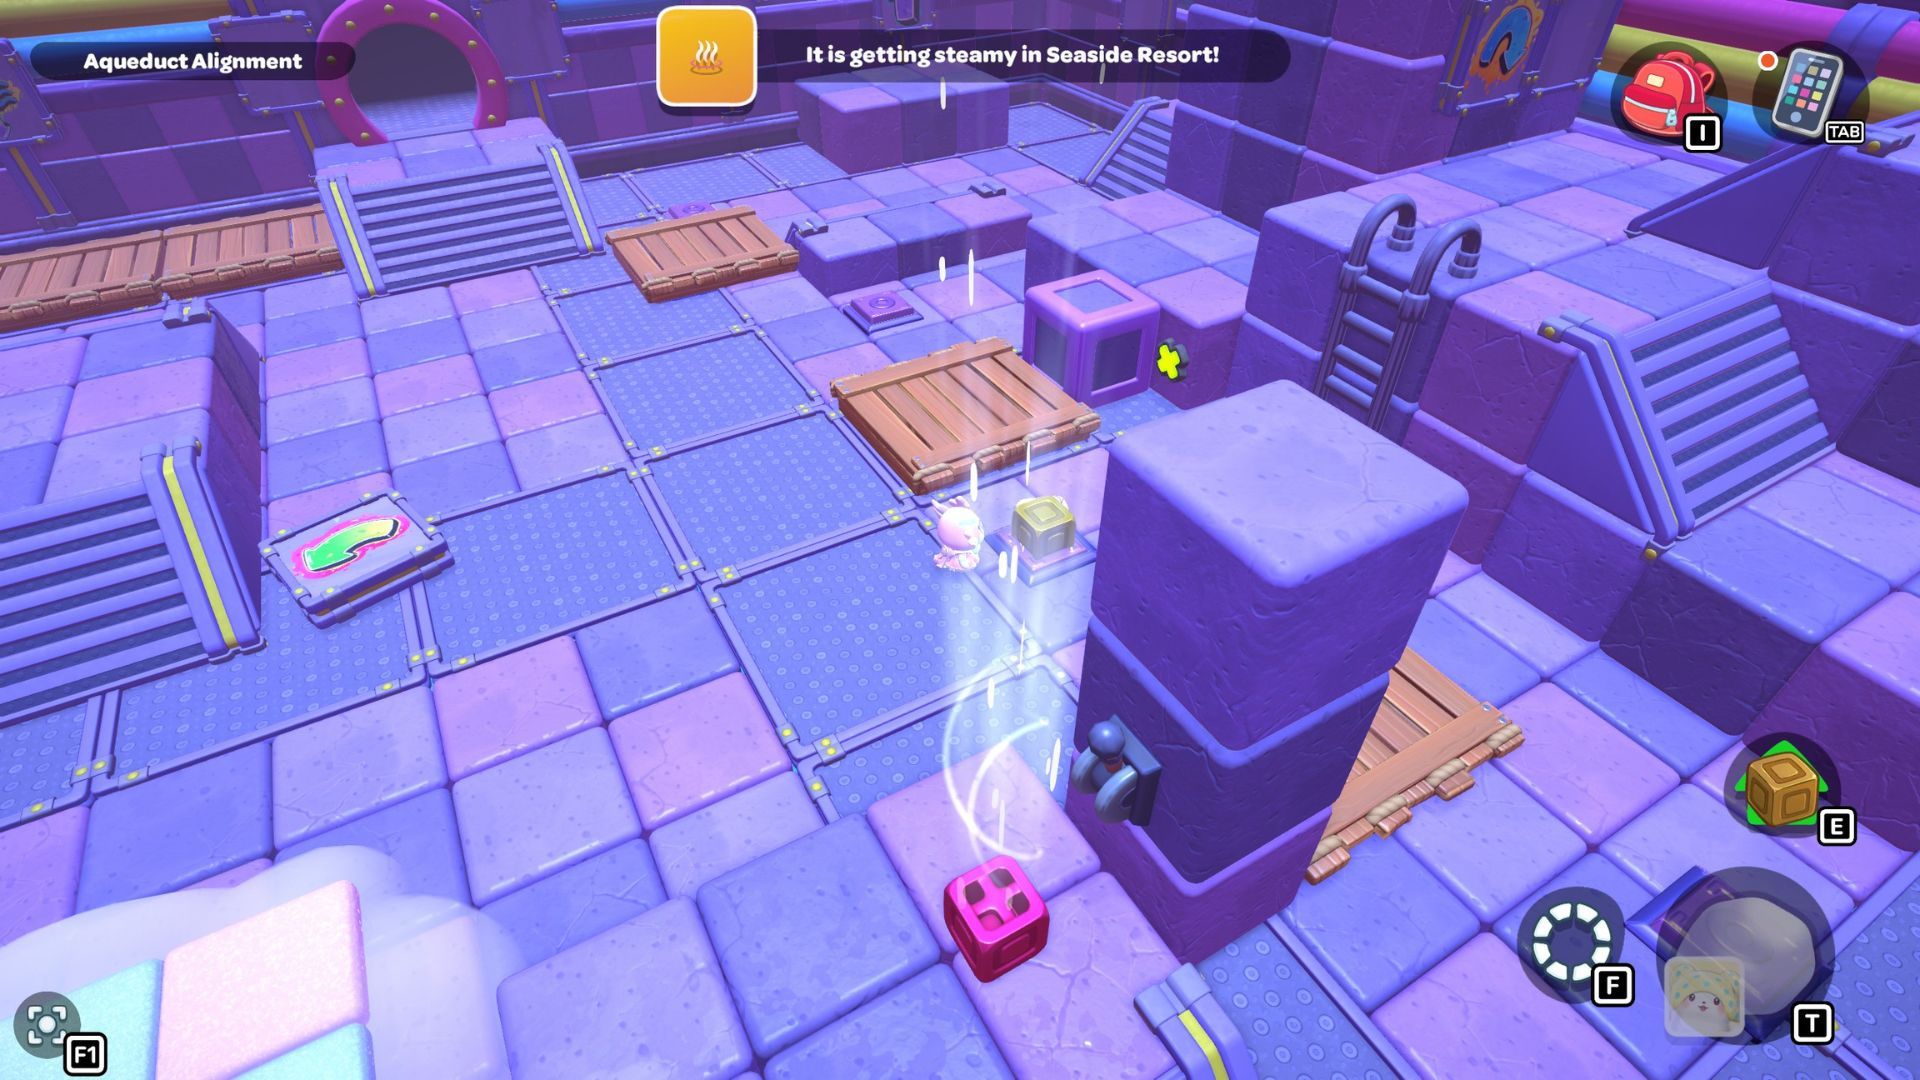
Take both purple cubes and place them by the corner of the room where the platform with the red cube is located. Position one of the purple cubes on the edge of the platform that has the lever, making sure it touches the platform holding the red cube. Turning on this purple cube will begin building the first section of your bridge.
Okay, so I need to grab the second purple cube and walk it over to the edge of the room. Then, I’ve gotta place it down so the cloud it creates touches the platform where I already put the first cube. Once I activate this new cube, that should finish building the cloud bridge – awesome!
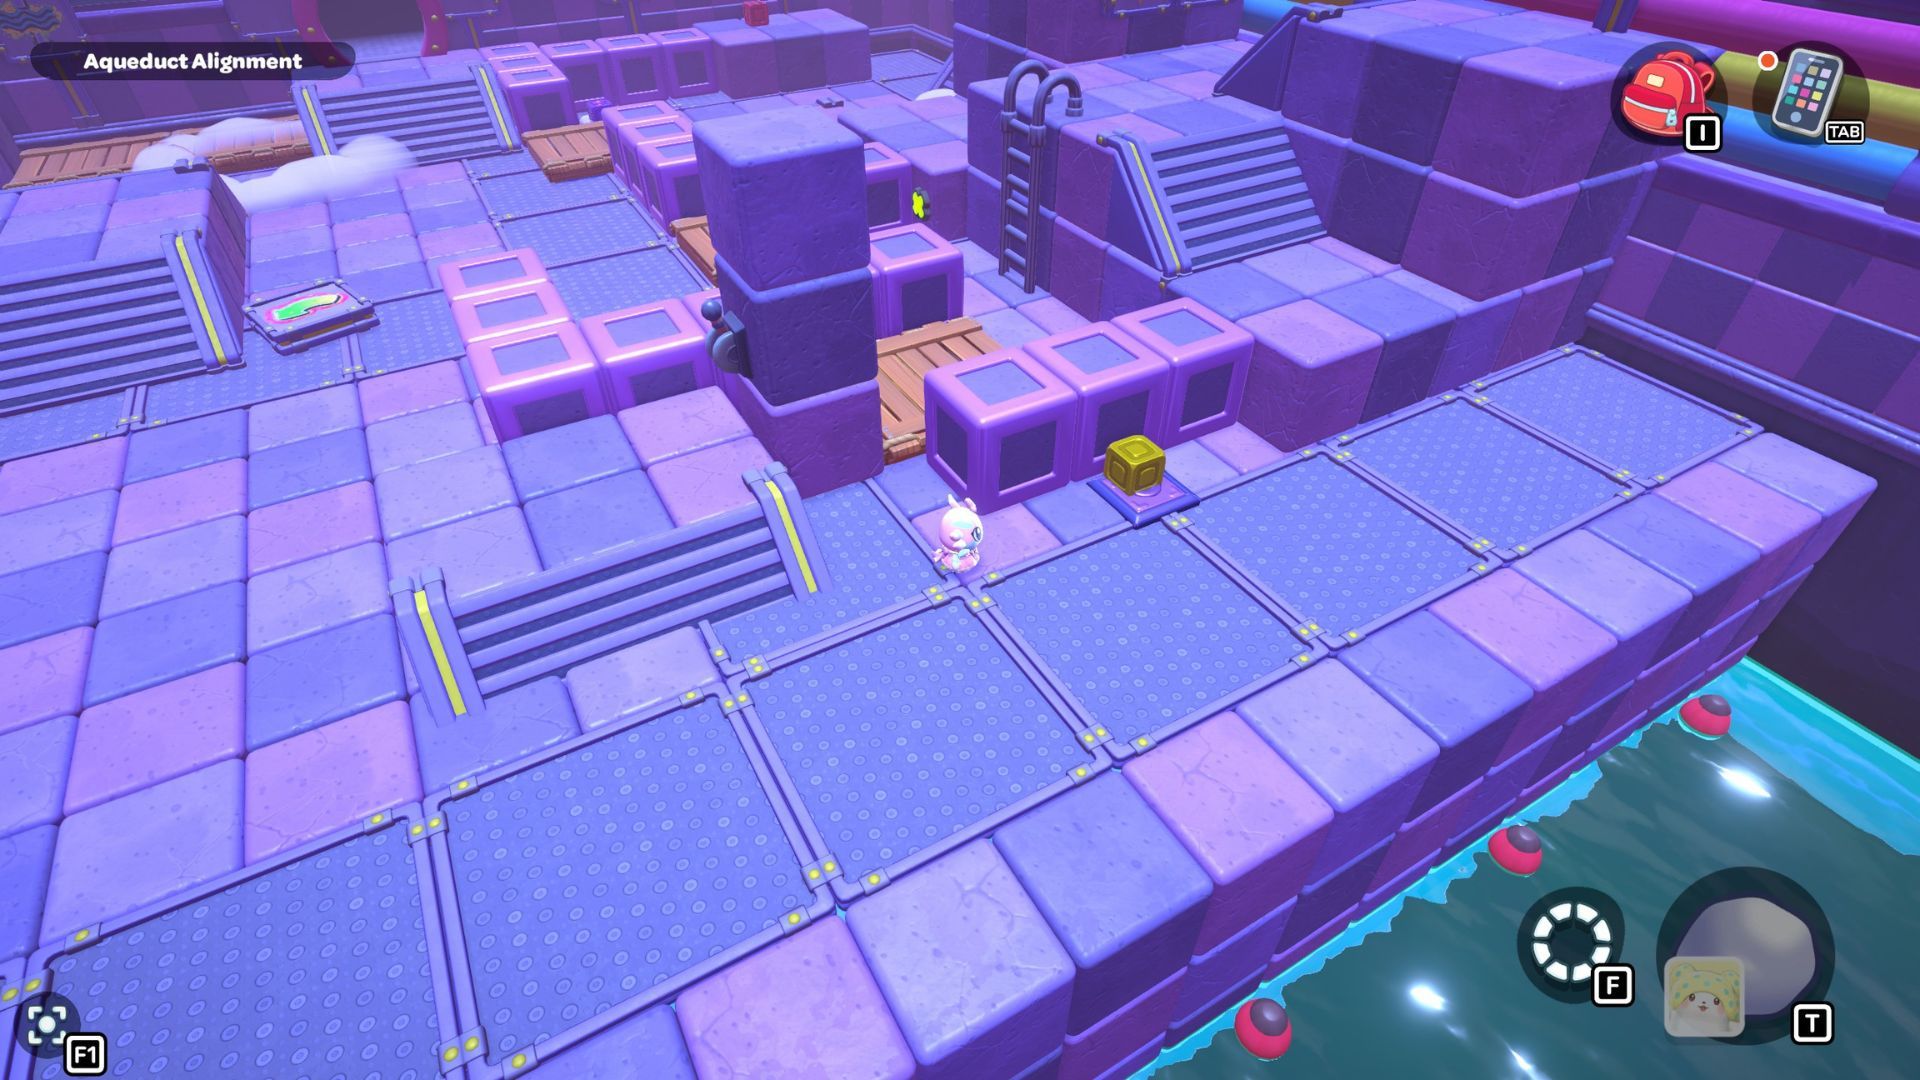
Now, cross the cloud bridge to get the red cube. Then, while you’re there, put the red cube in front of the lever. After that, fly up and take the first gold cube from the pillar.
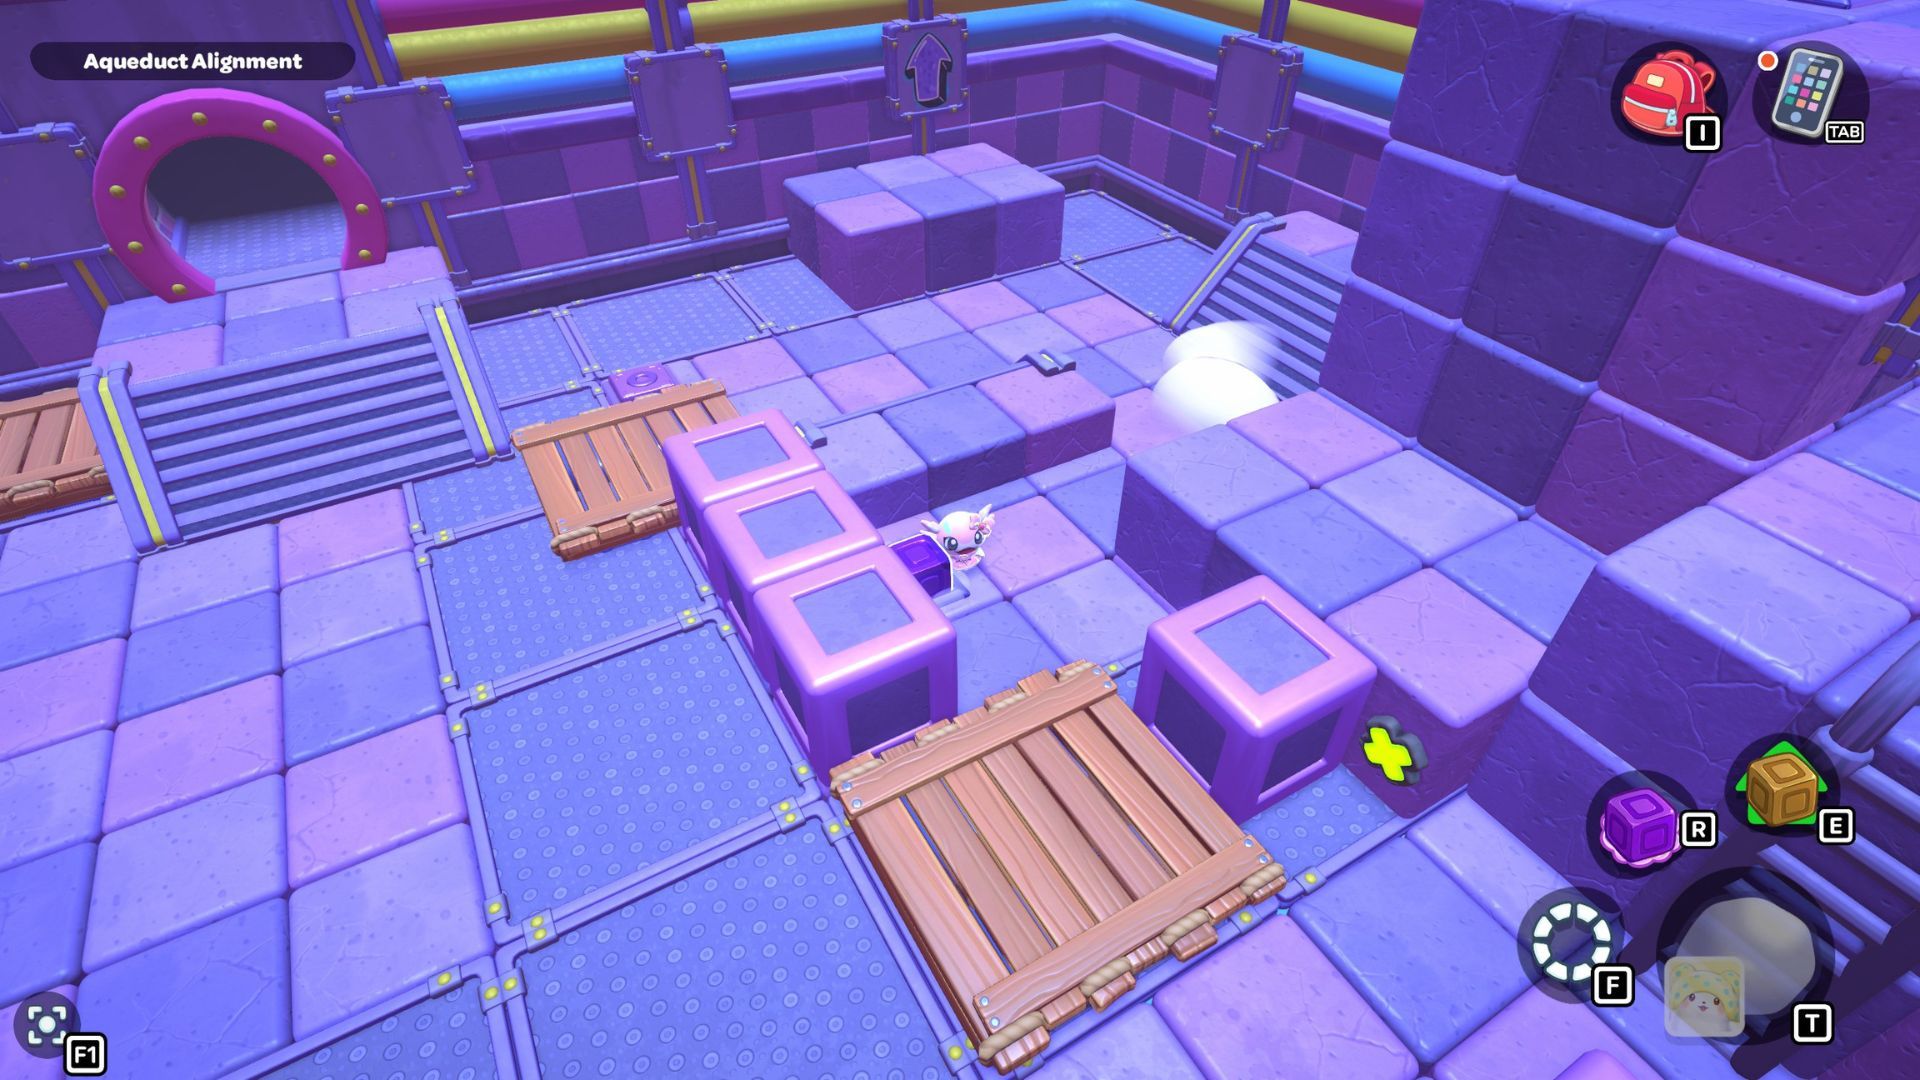
You need to use the three blocks to activate some switches. Place one block on the closest switch to the left. Then, put a second block on the next switch to the left, and the last block on the switch closest to the wall.
After you’ve dealt with all the switches, go back to the platform with the red cube. Then, pull the lever to make the water rise again.
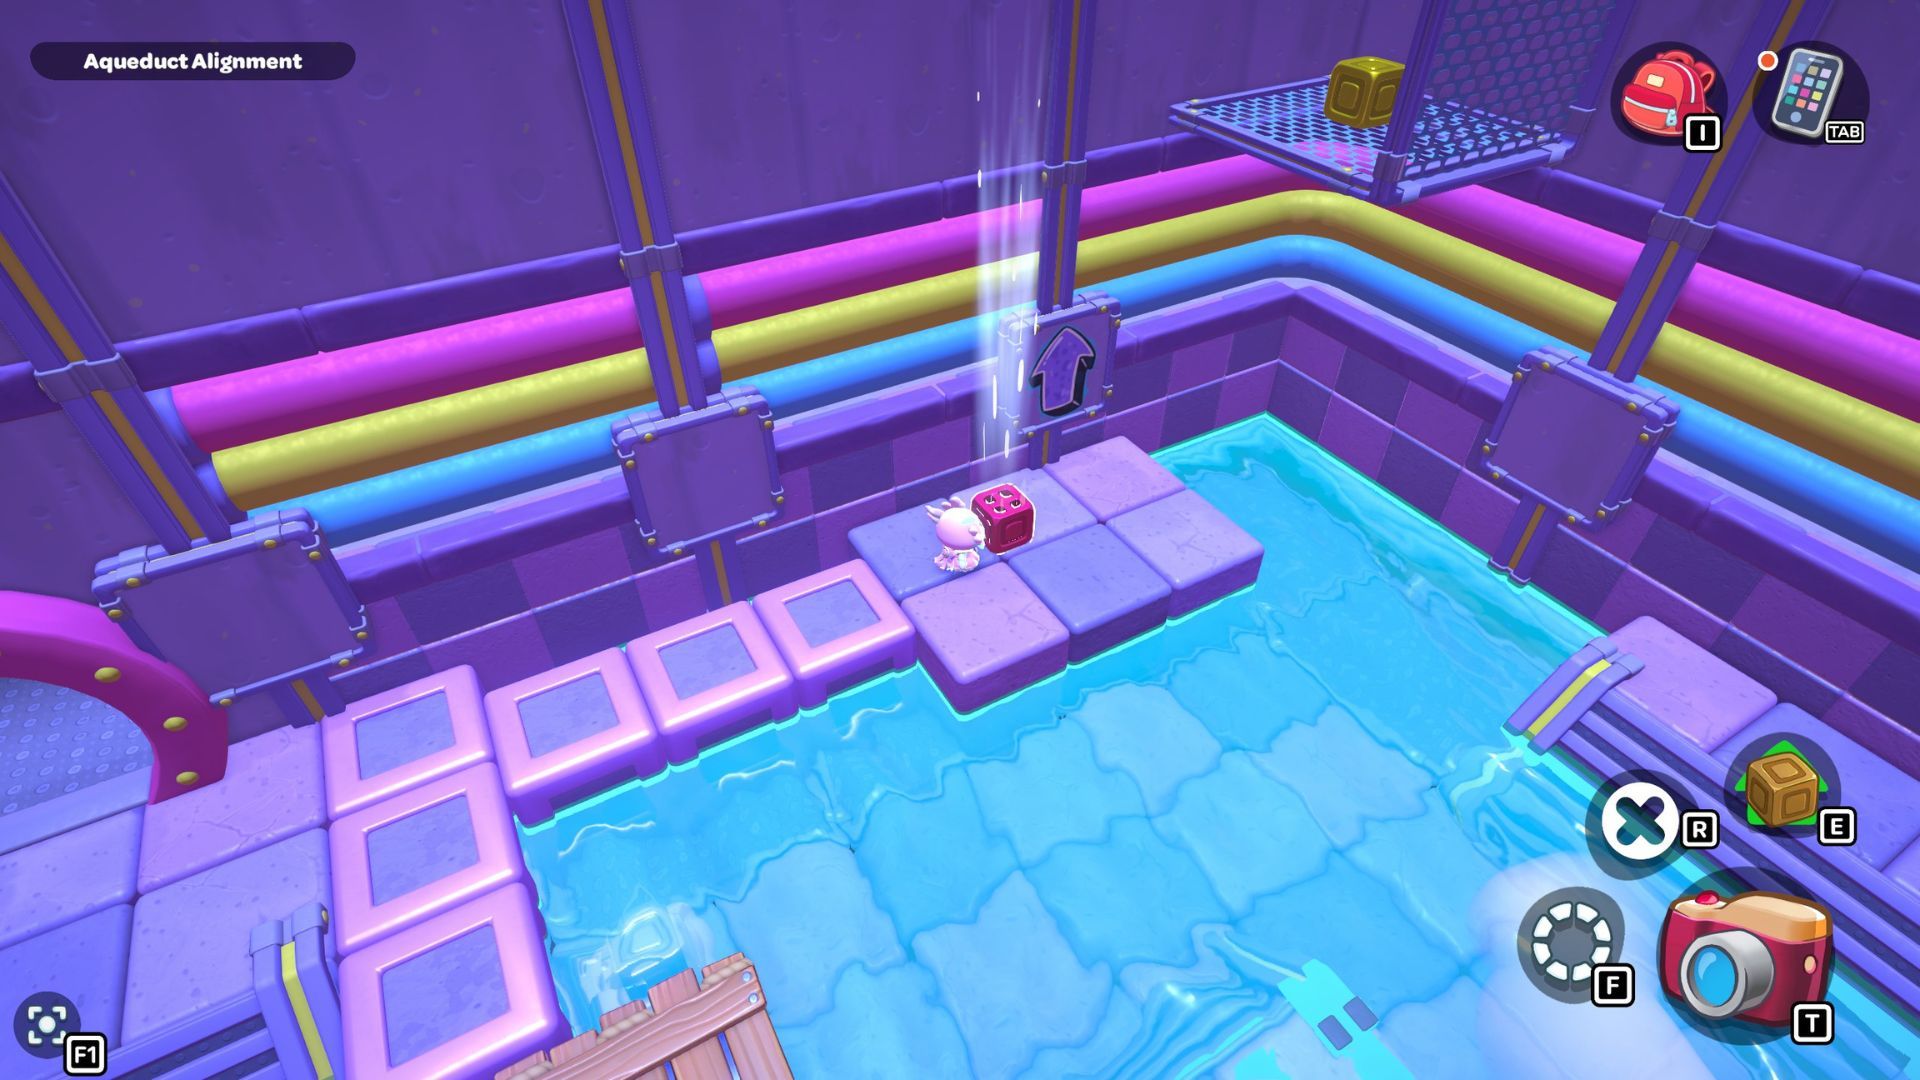
Take the red cube and swim over to the stairs near the door. Carry it across the blocks on the right side, and then put it directly in front of the tall platform that has a gold block on it. Turn on the red cube – the air it creates will let you float up to the gold block.
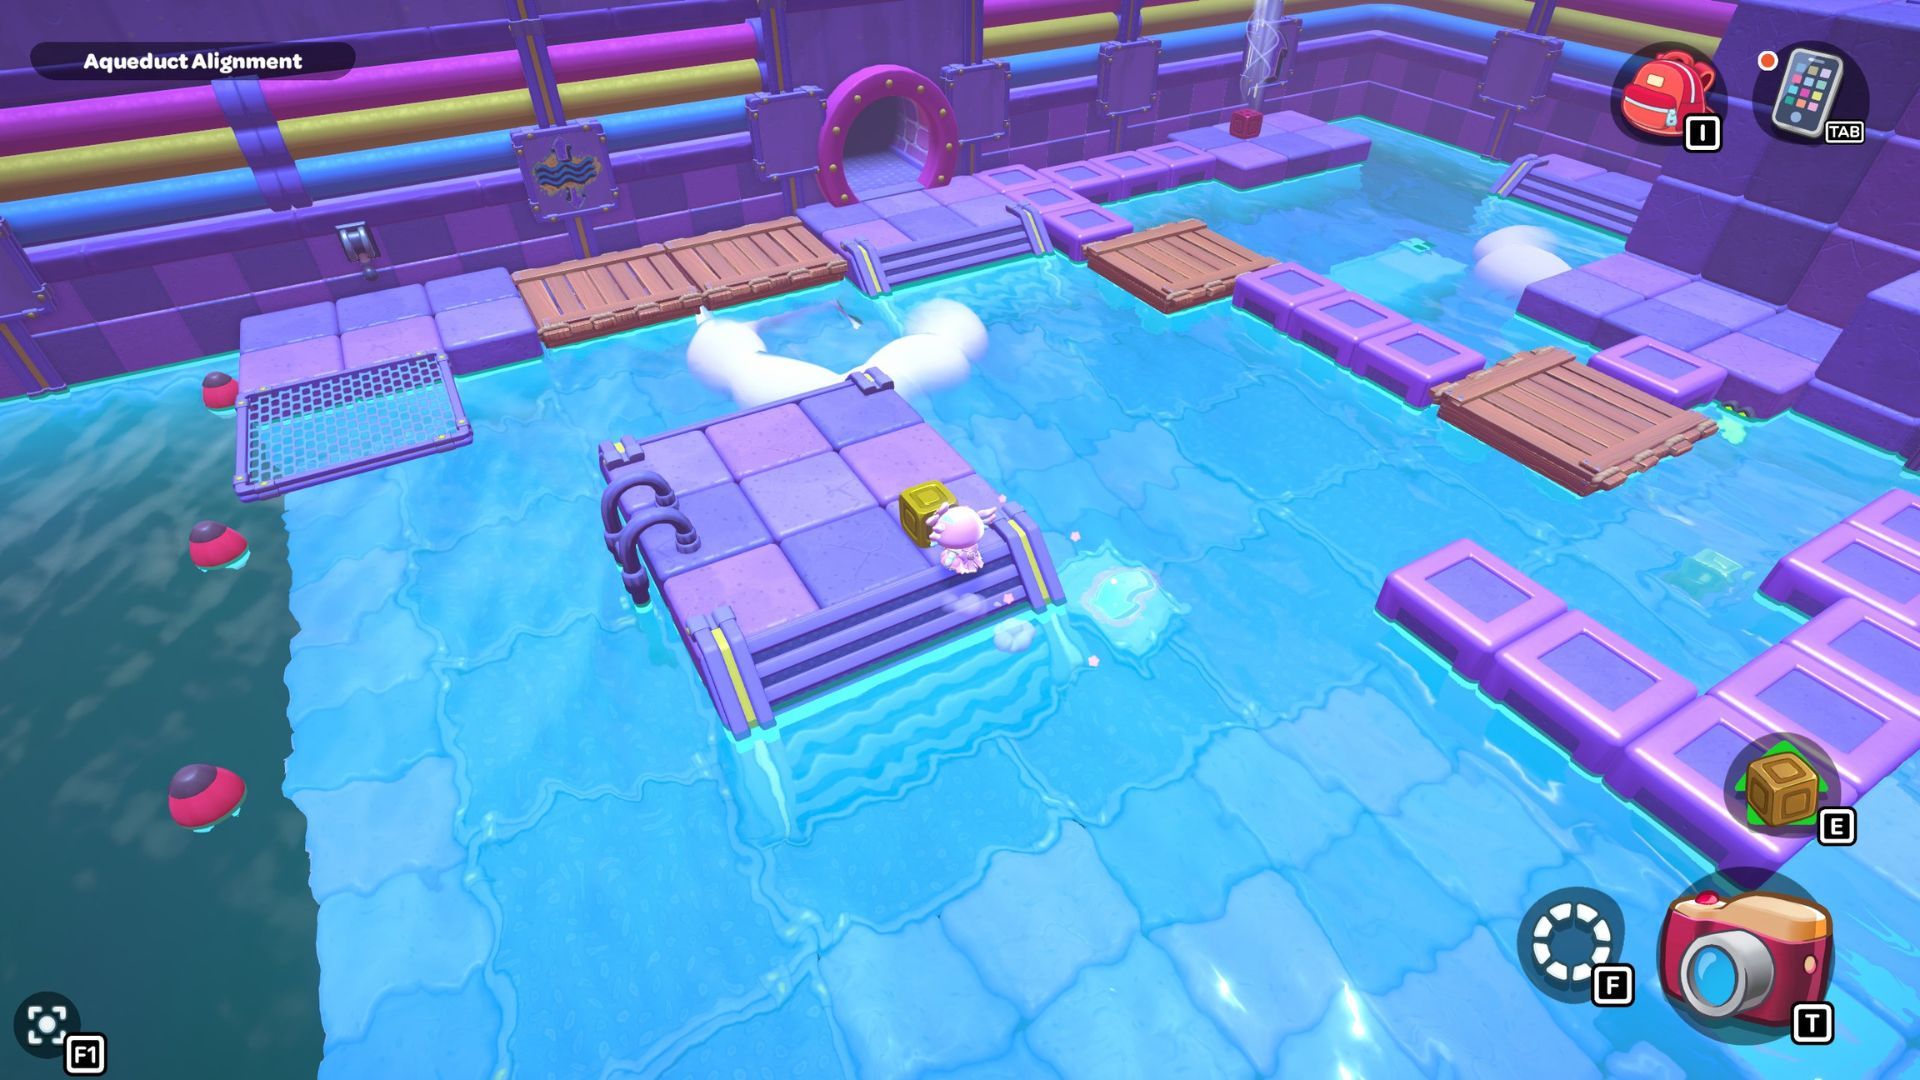
Take the gold block and place it on one of the high platforms. Then, go back to the lever in the center of the room and pull it to drain the water.
Okay, so I just snagged the final gold block. Now I’m heading over to put it on that purple switch on the right. Alright, done! Time to go back to the lever and crank the water level up again.
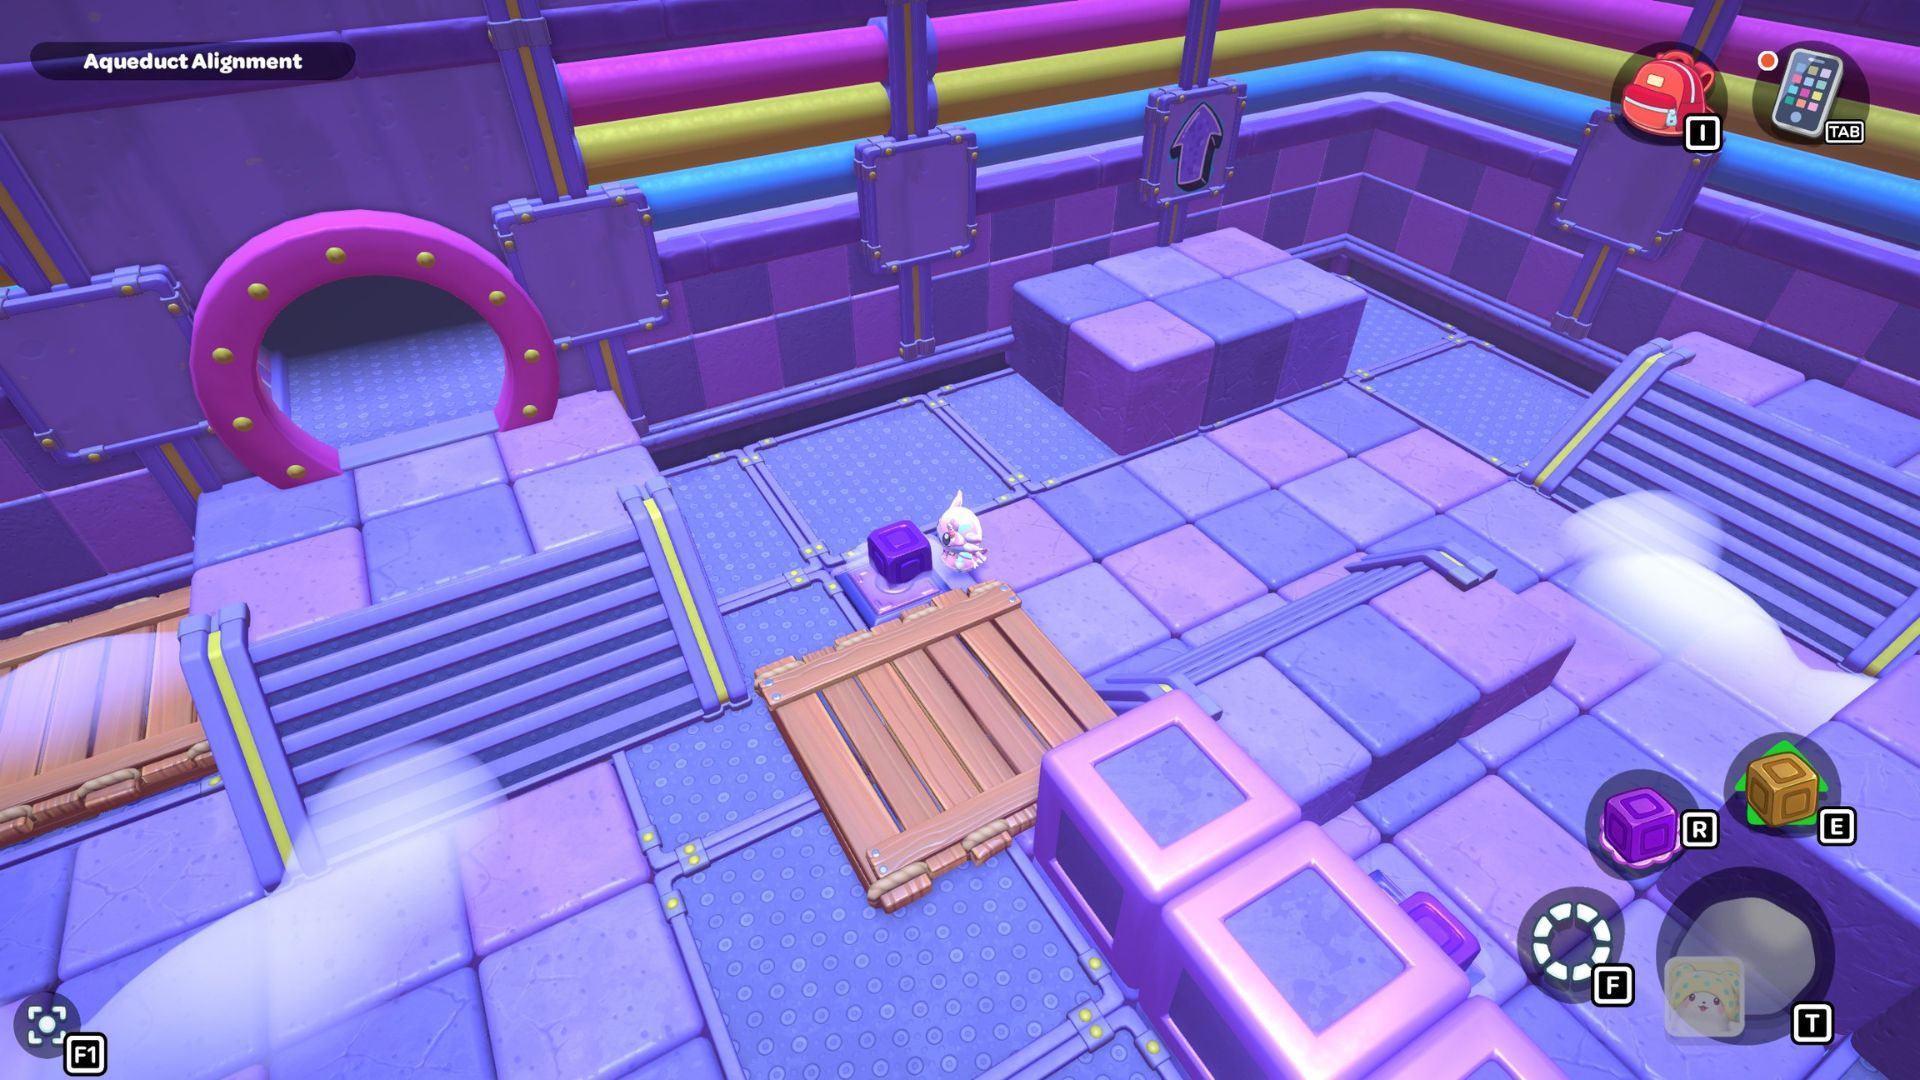
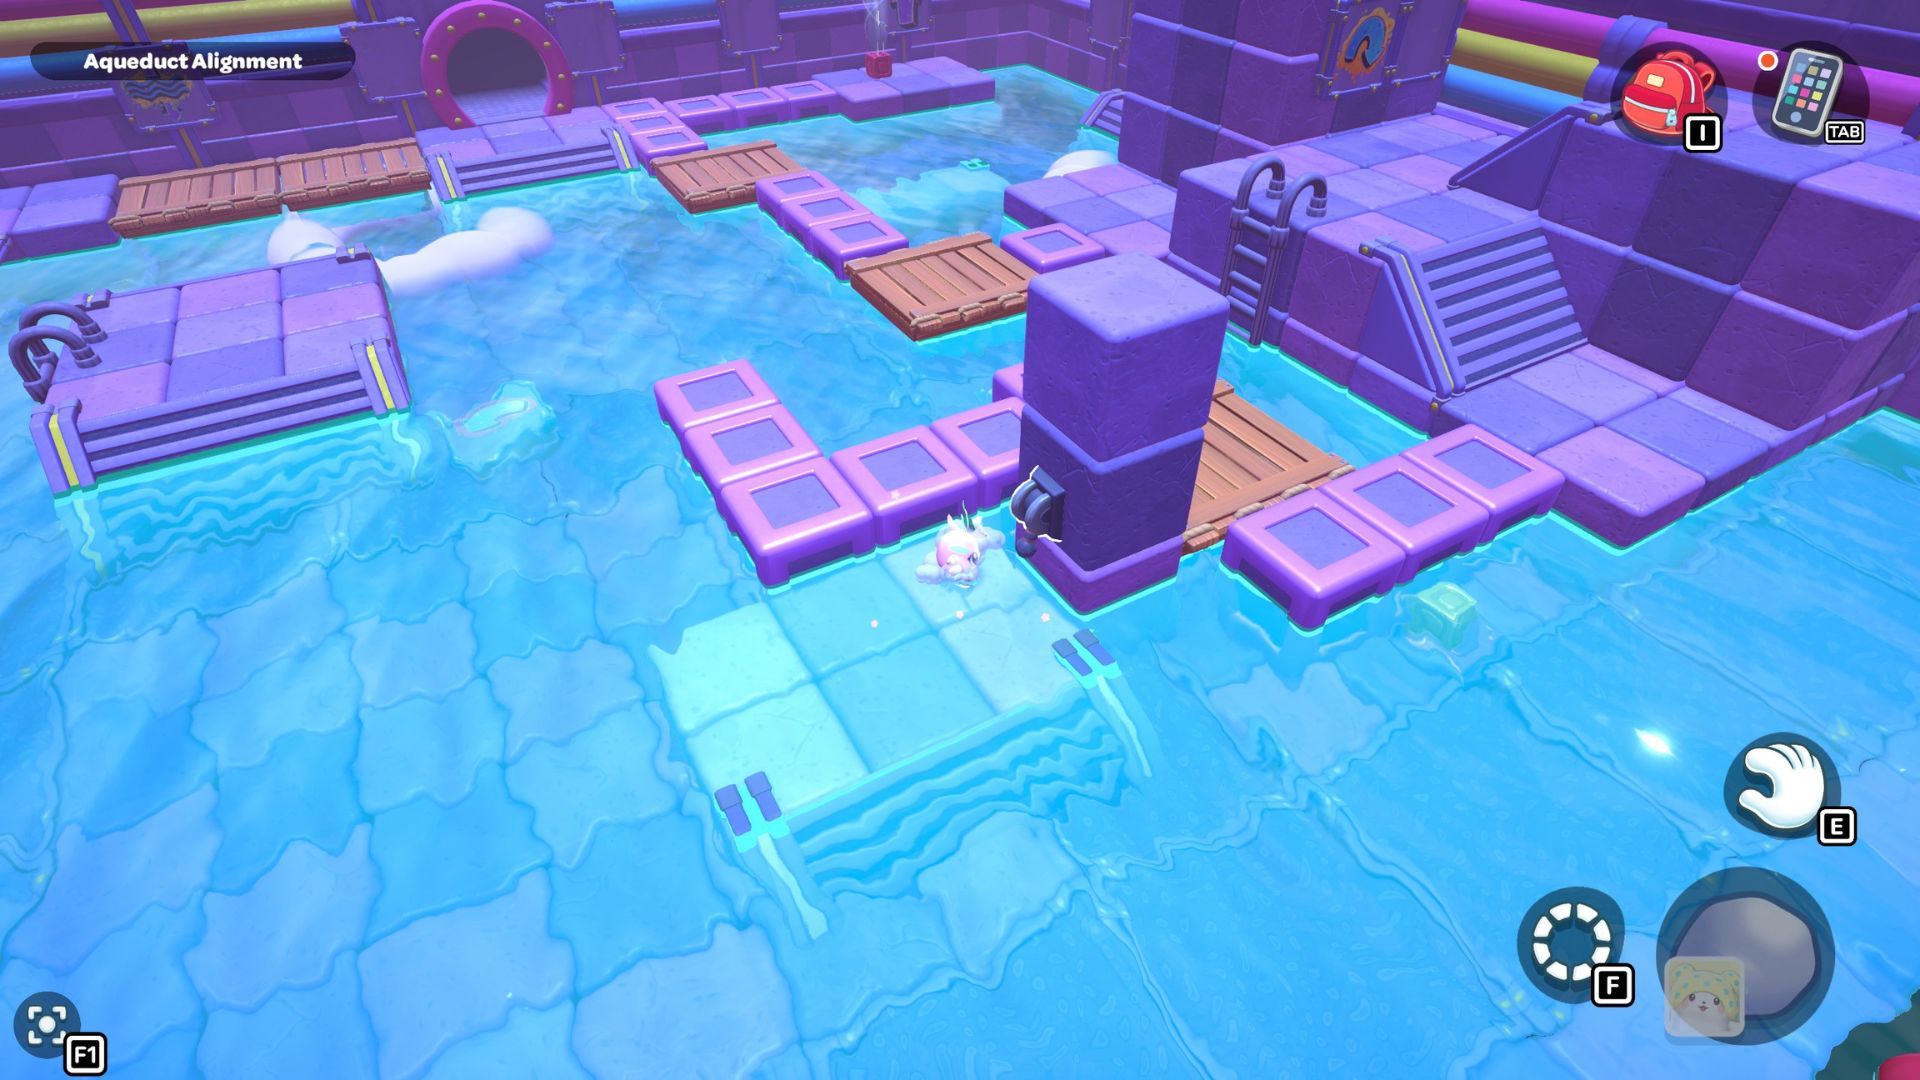
Swim to the left side of the room and pick up the red cube. Carry it across the first section of the bridge, and then place it on the platform directly in front of the tall structure that has a gold cube and a green switch.
Go back to one of the levers and bring the water level down. Pick up the purple cube from the far left side and place it on the platform in the middle of the room where the lever is. Turn the cube so the cloud symbol is over the opening you made. Use the cube to build platforms for the cloud, then raise the water level once more.
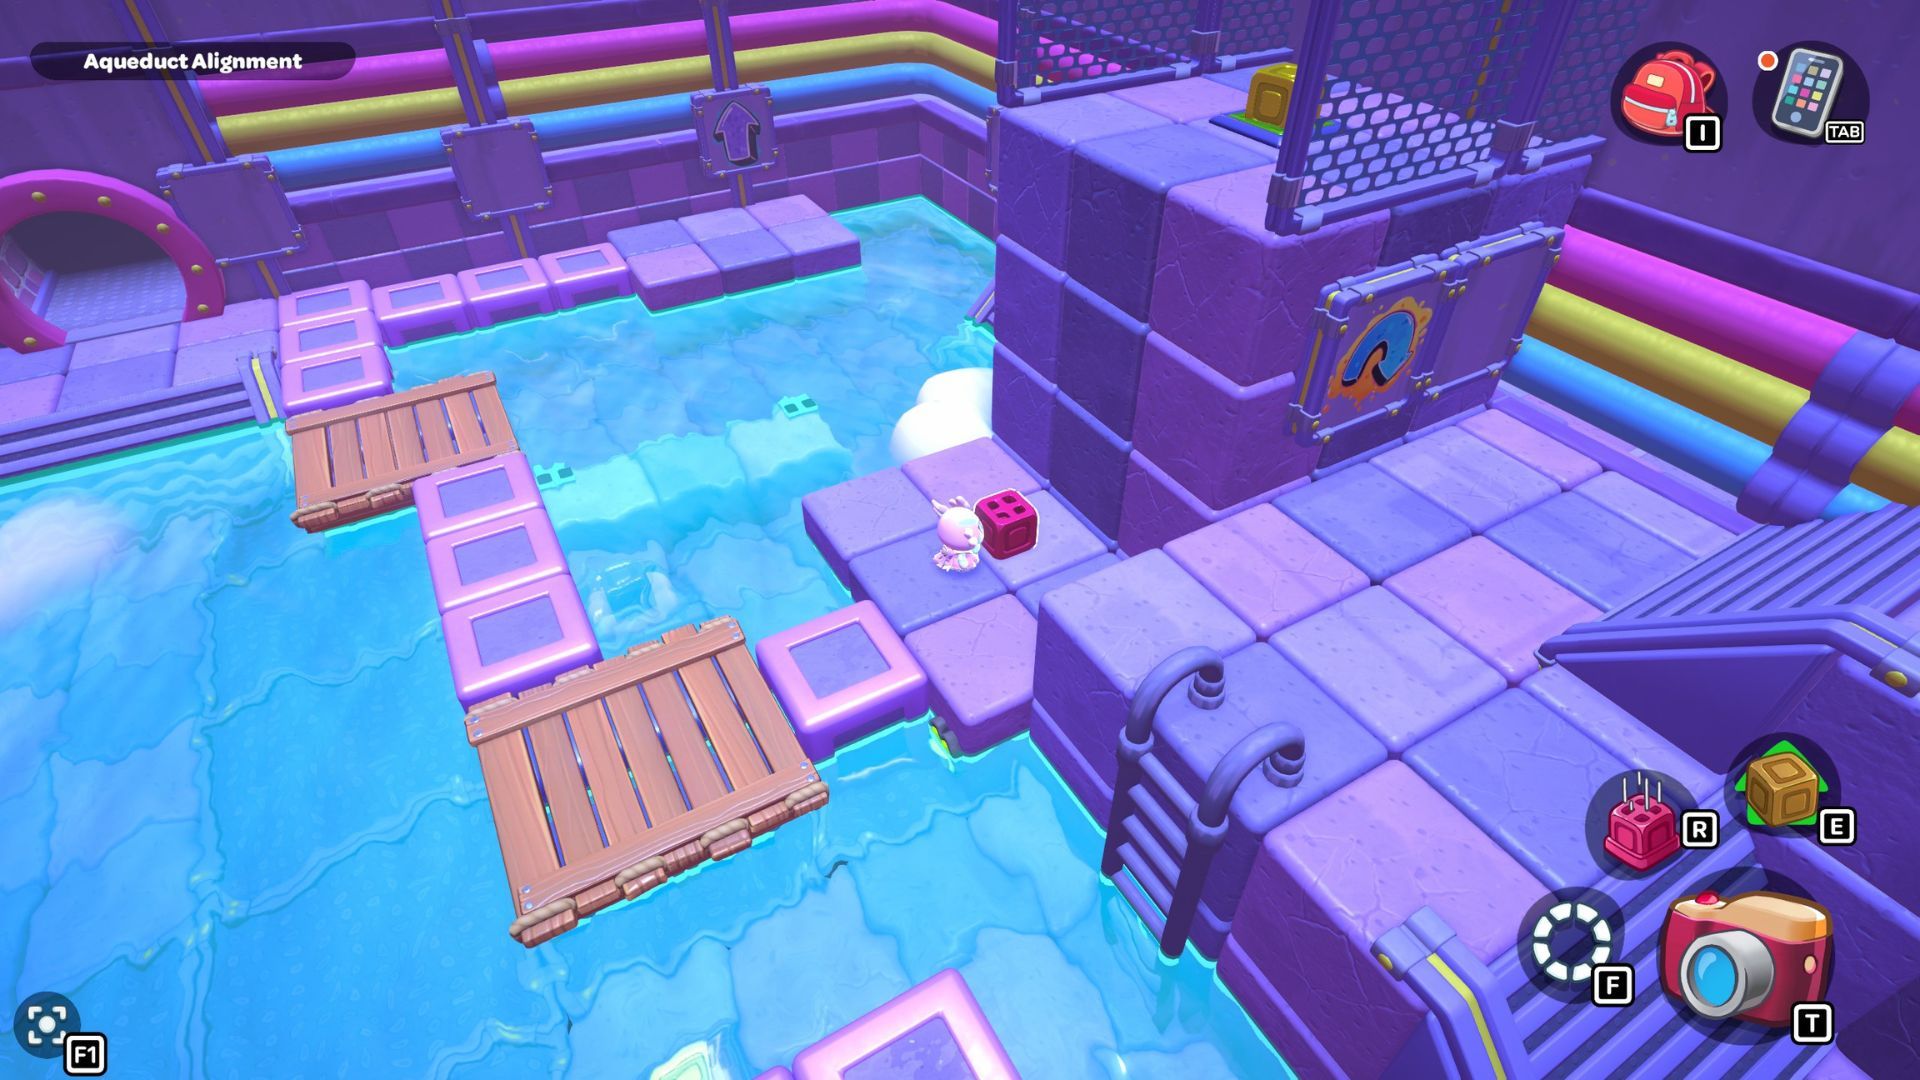
Go back to the red cube. Now you can move it along the path to the platform under the ledge where the chest is located. Place the cube down and turn on its air current. Then, use your balloons to float up to the chest and open it.
This chest contains the City Cone item.
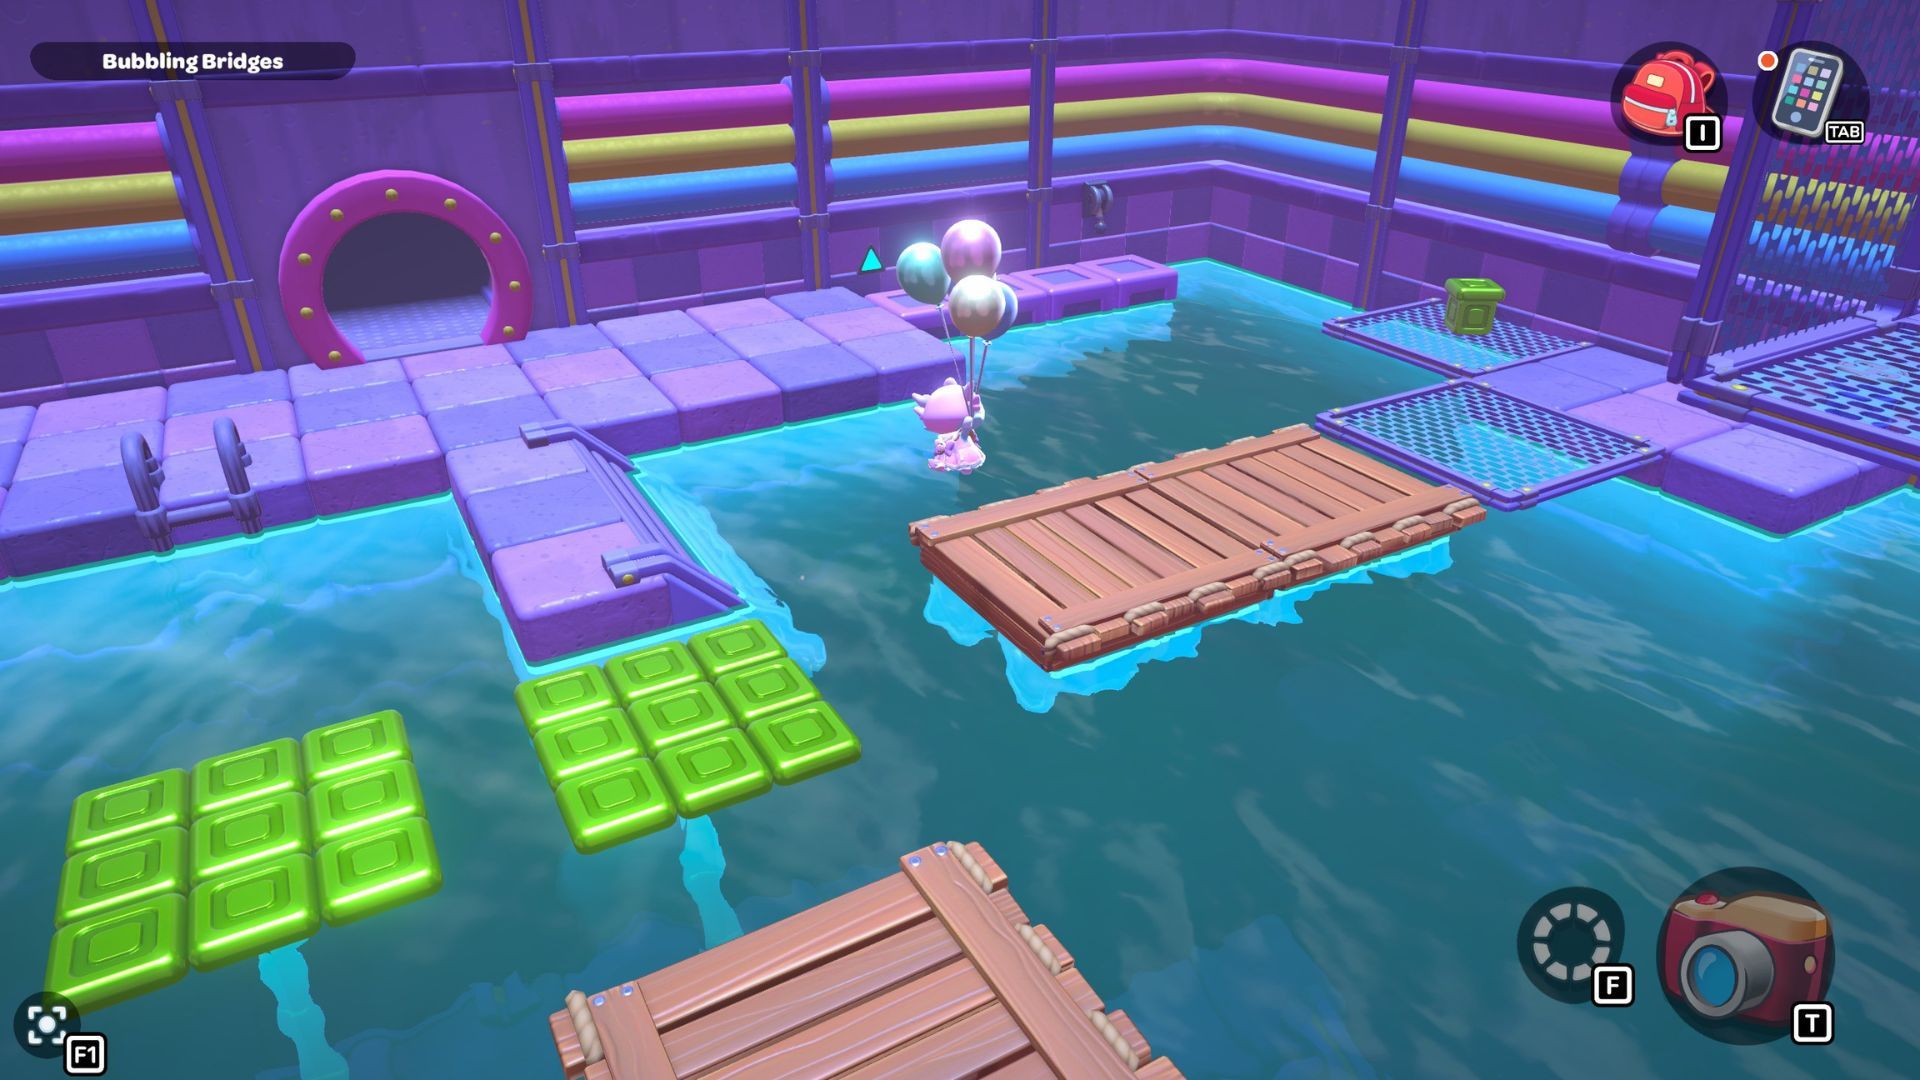
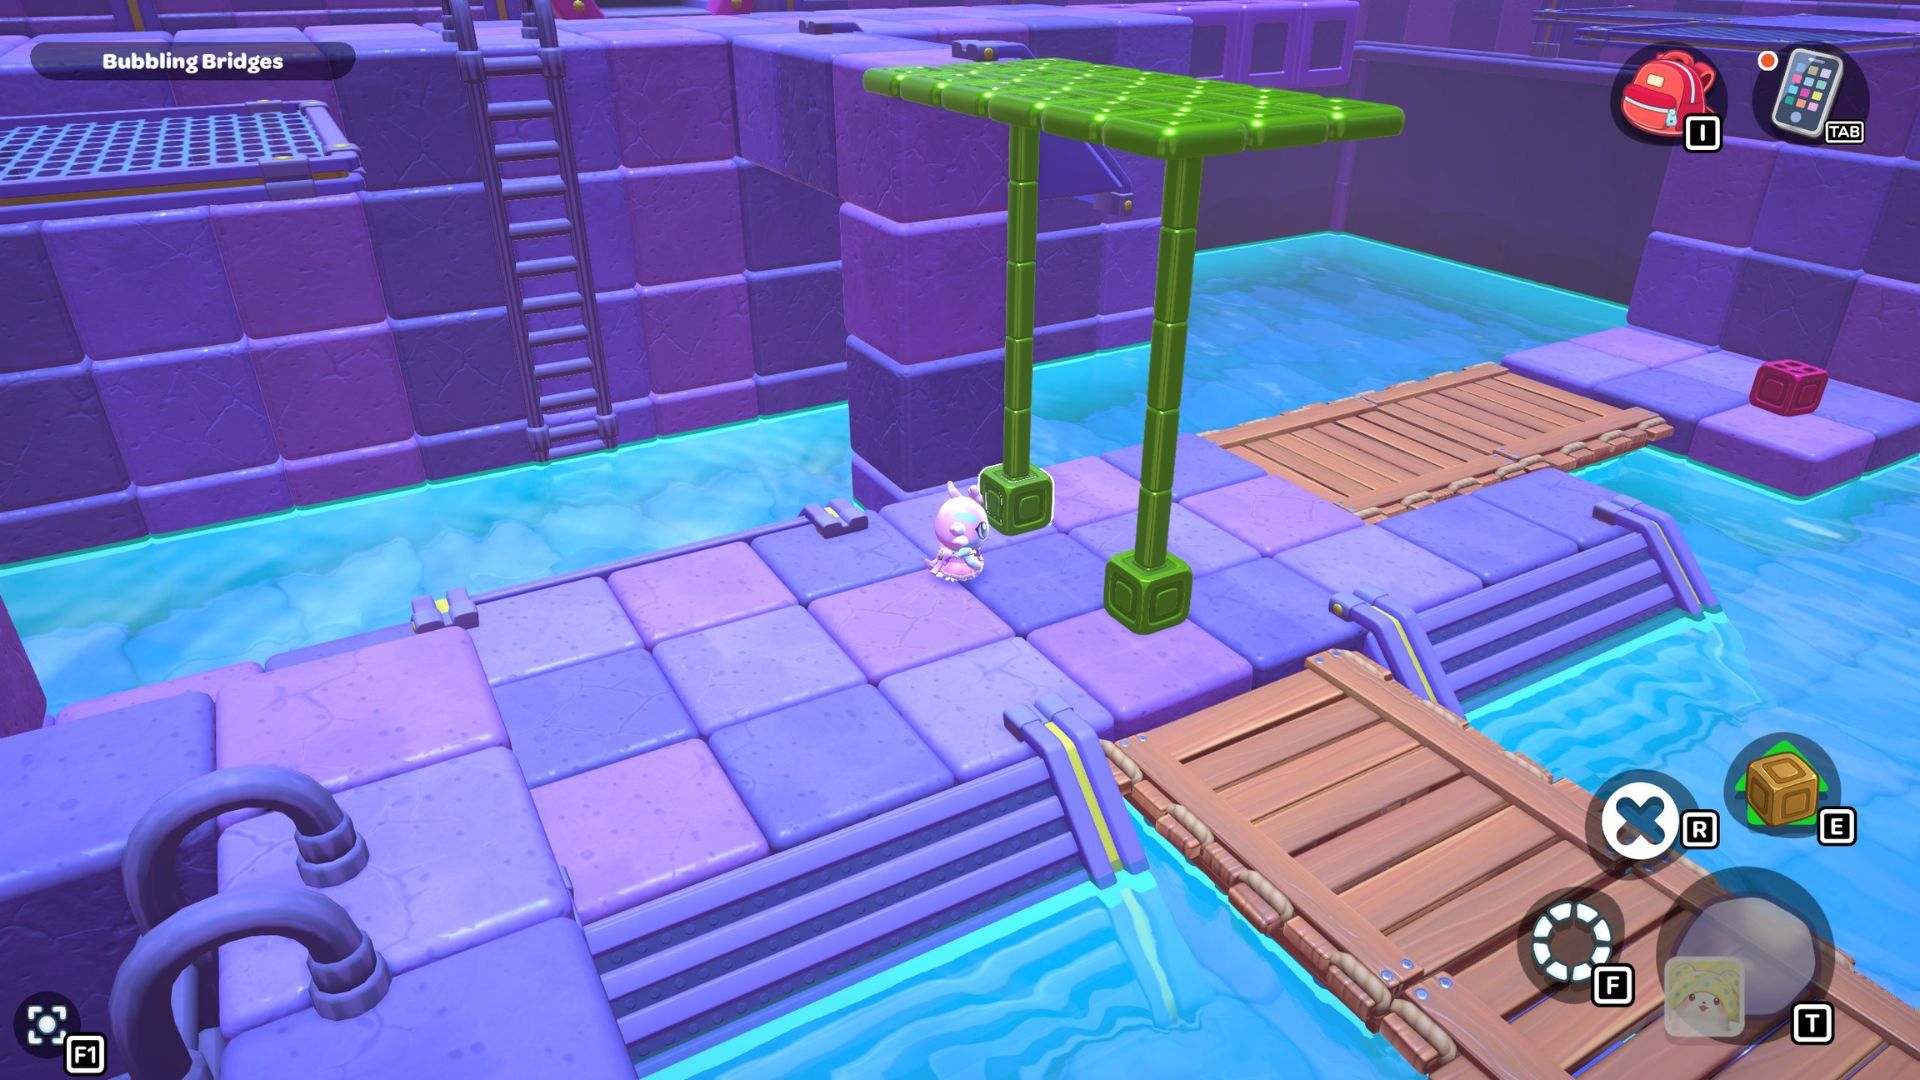
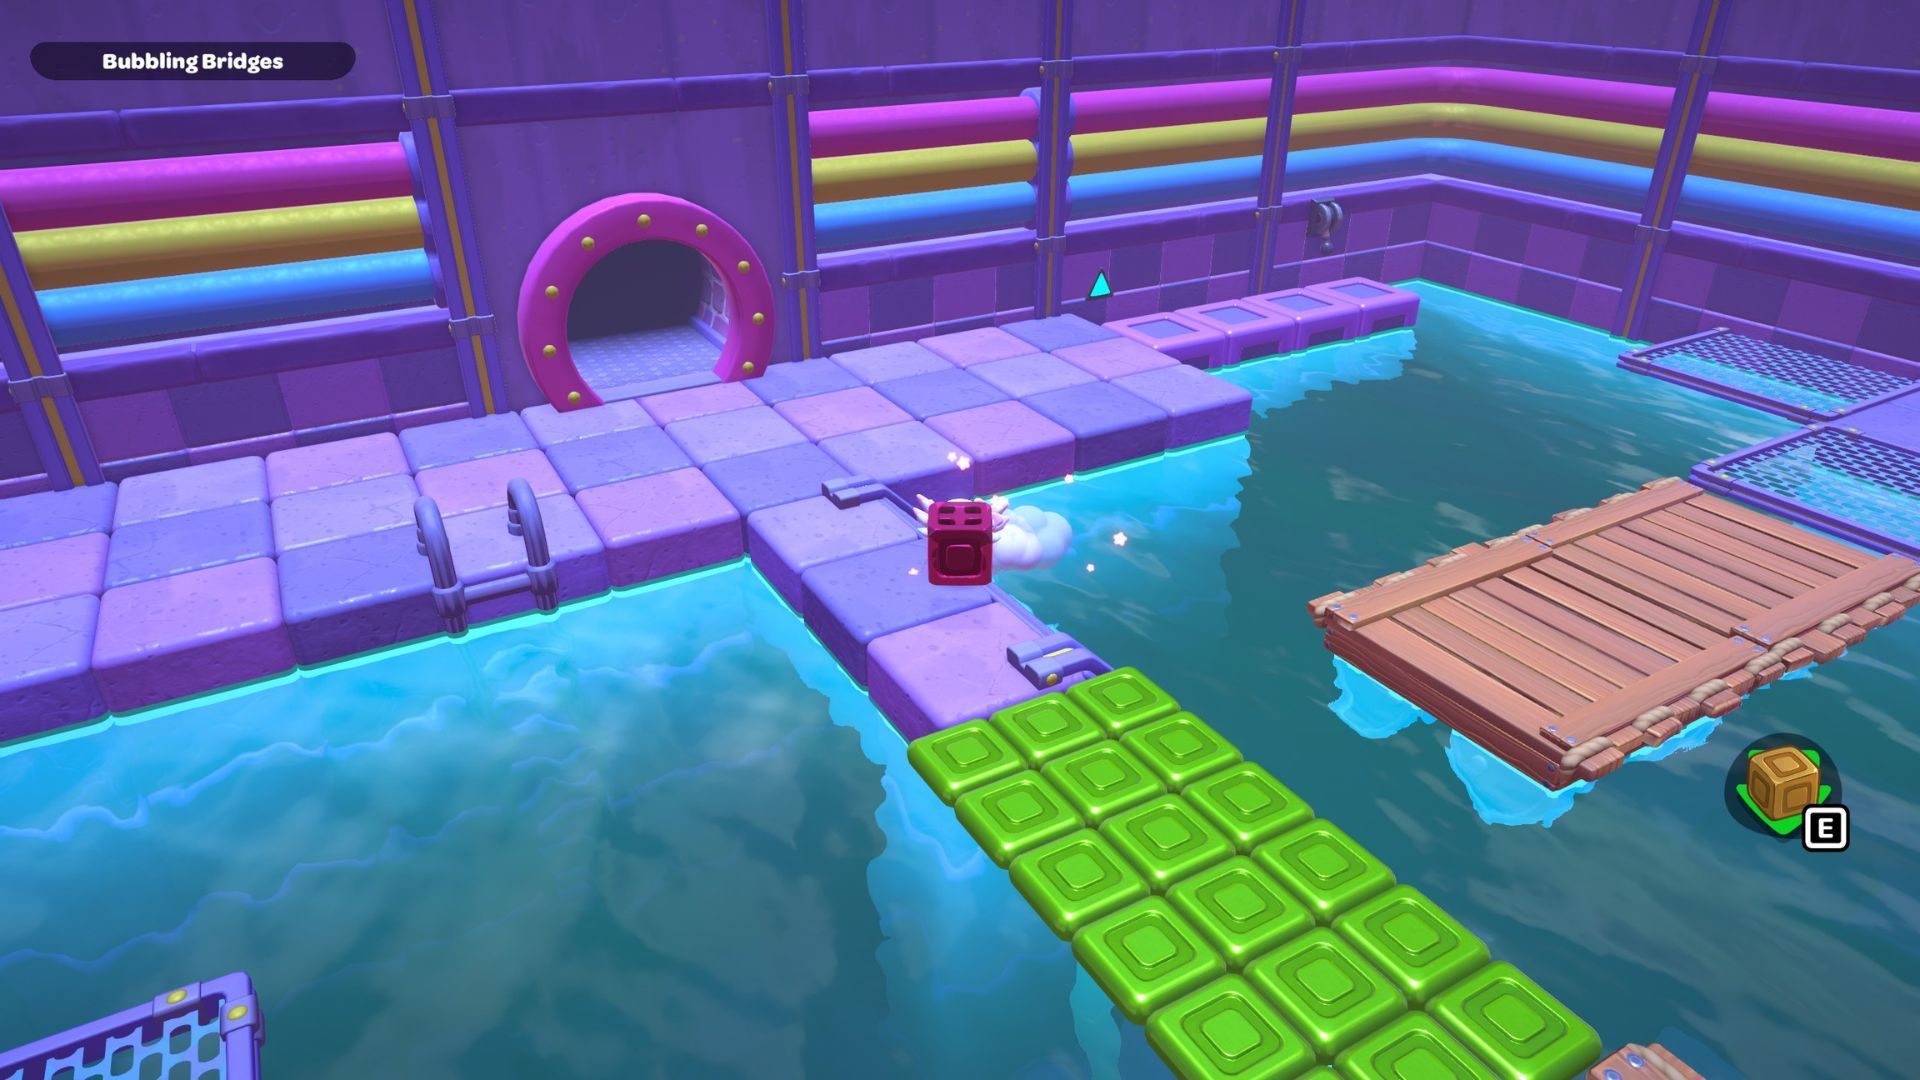
City Town Sewers — Bubbling Bridges Walkthrough
You’ll find the Bubbling Bridges Puzzle Room by going through the left door in the northeast corner of the City Town Sewers. The puzzle requires you to build bridges using the green cubes. Once you’ve created the bridges, you can move a red cube, which will allow you to reach the chest in the room.
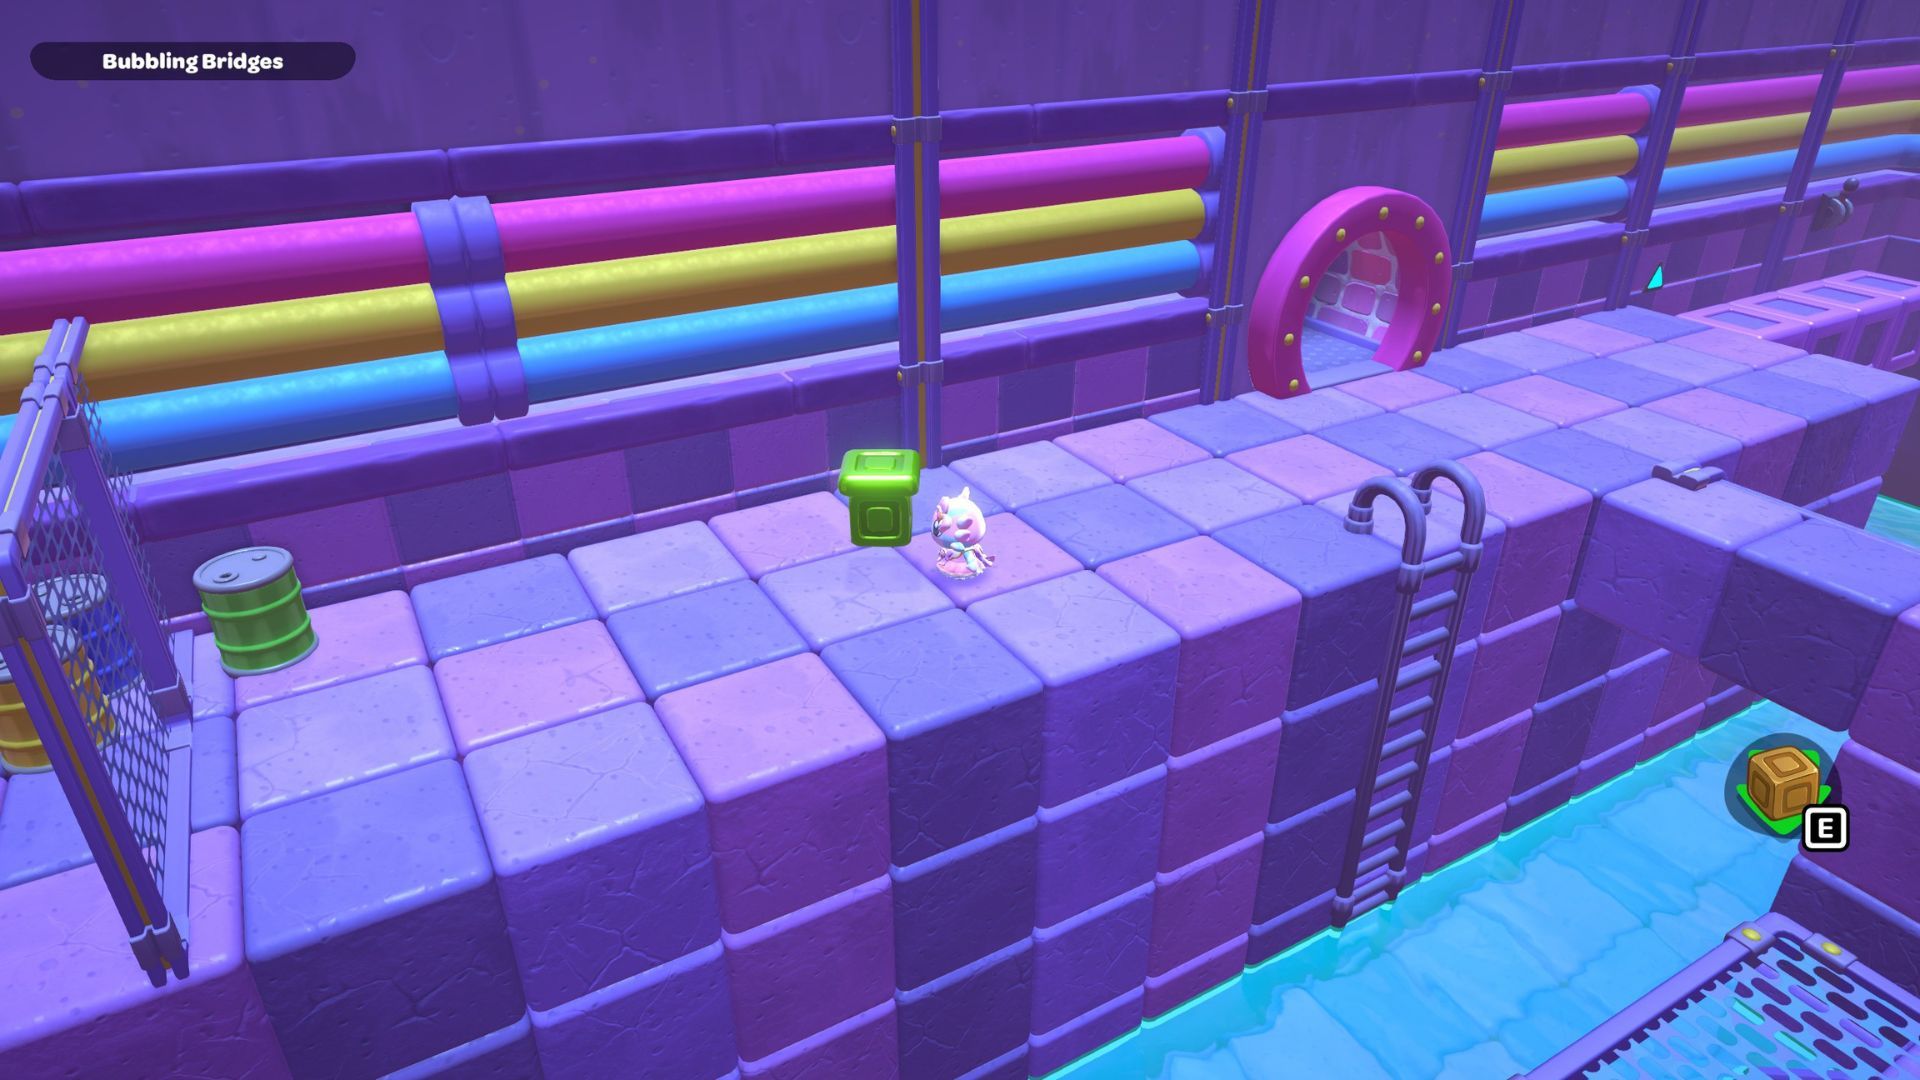
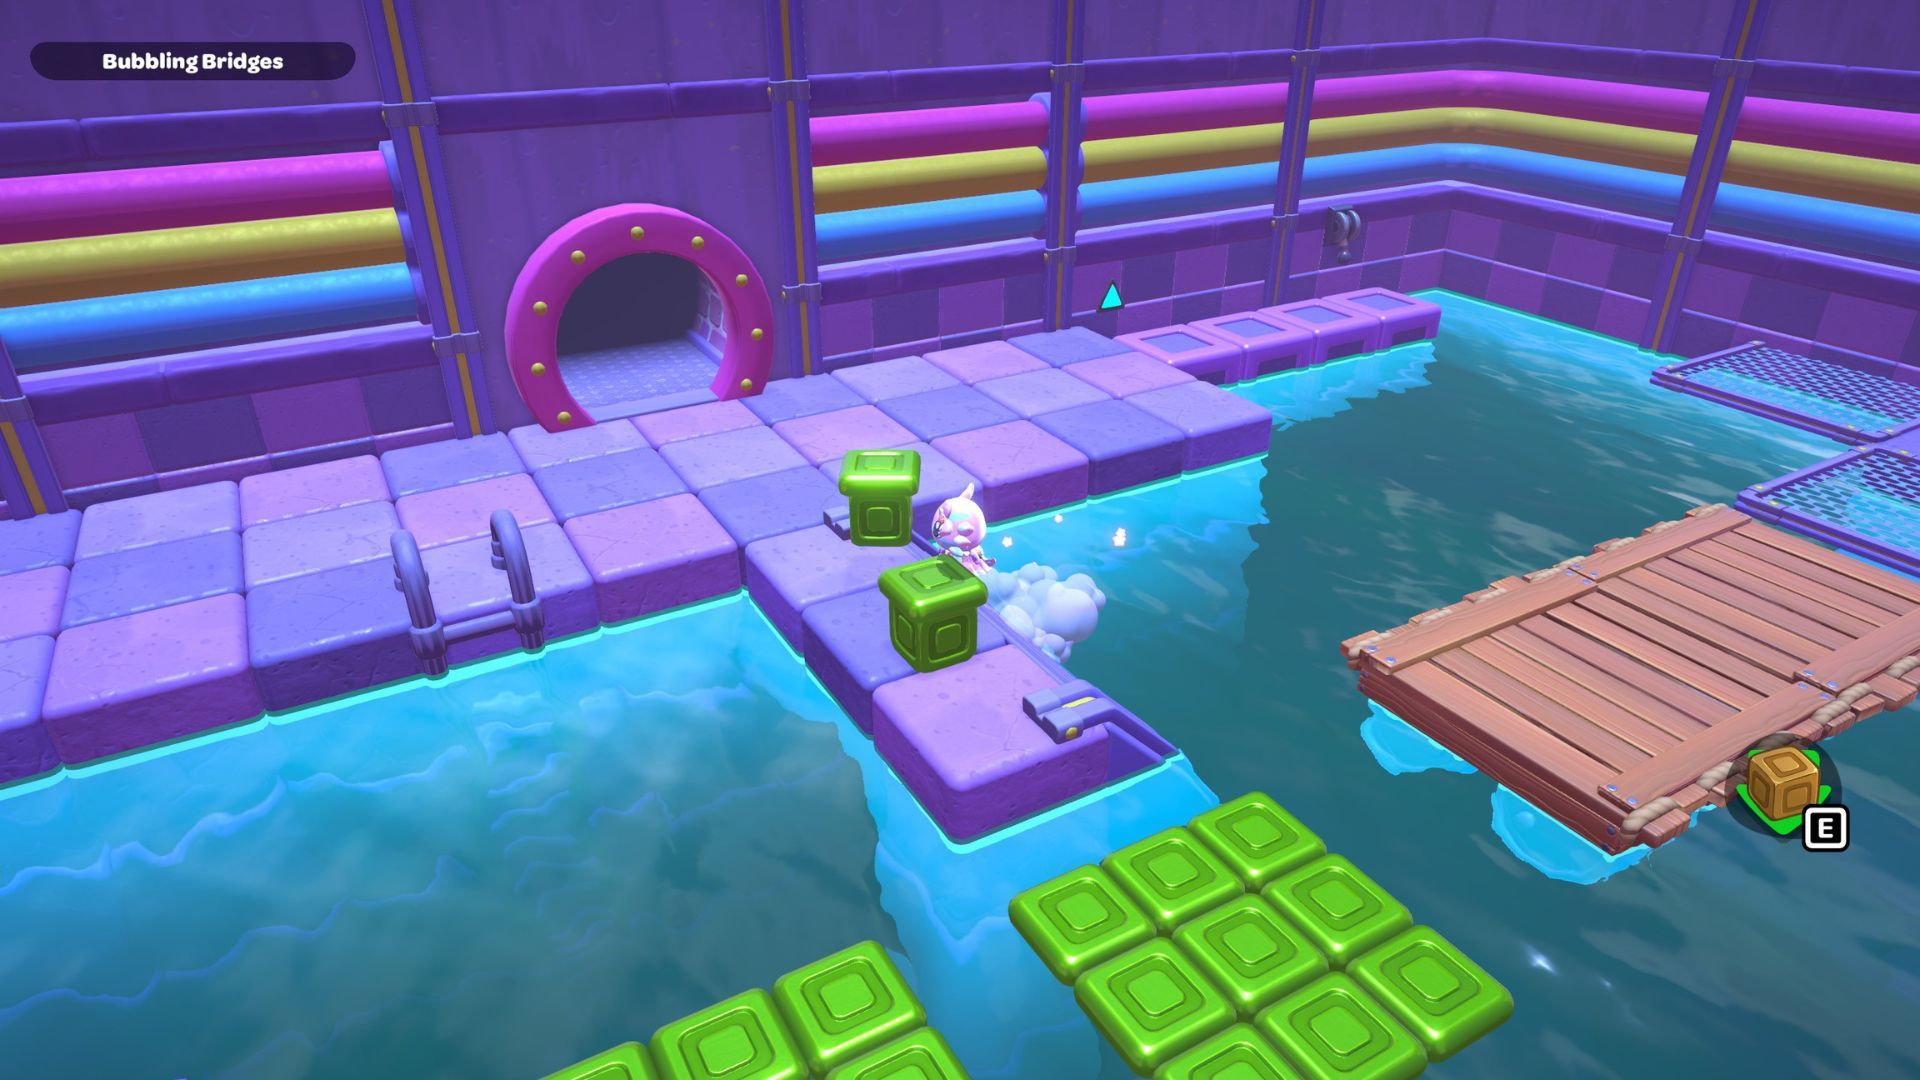
First, pick up the green cube that’s to the left of the door. Then, drop to the floor while still holding it. Place the cube between the first green cube you find and the platform immediately to the left of that cube. Once it’s in place, activate both cubes. This will create a pathway extending from the platform where you started, near the door, to a platform with a mesh panel.
Climb the ladder to reach the door, and then jump back across the platform you created. Press the triangle button to create a path of blocks that leads to the lever, which controls the water level in the room.
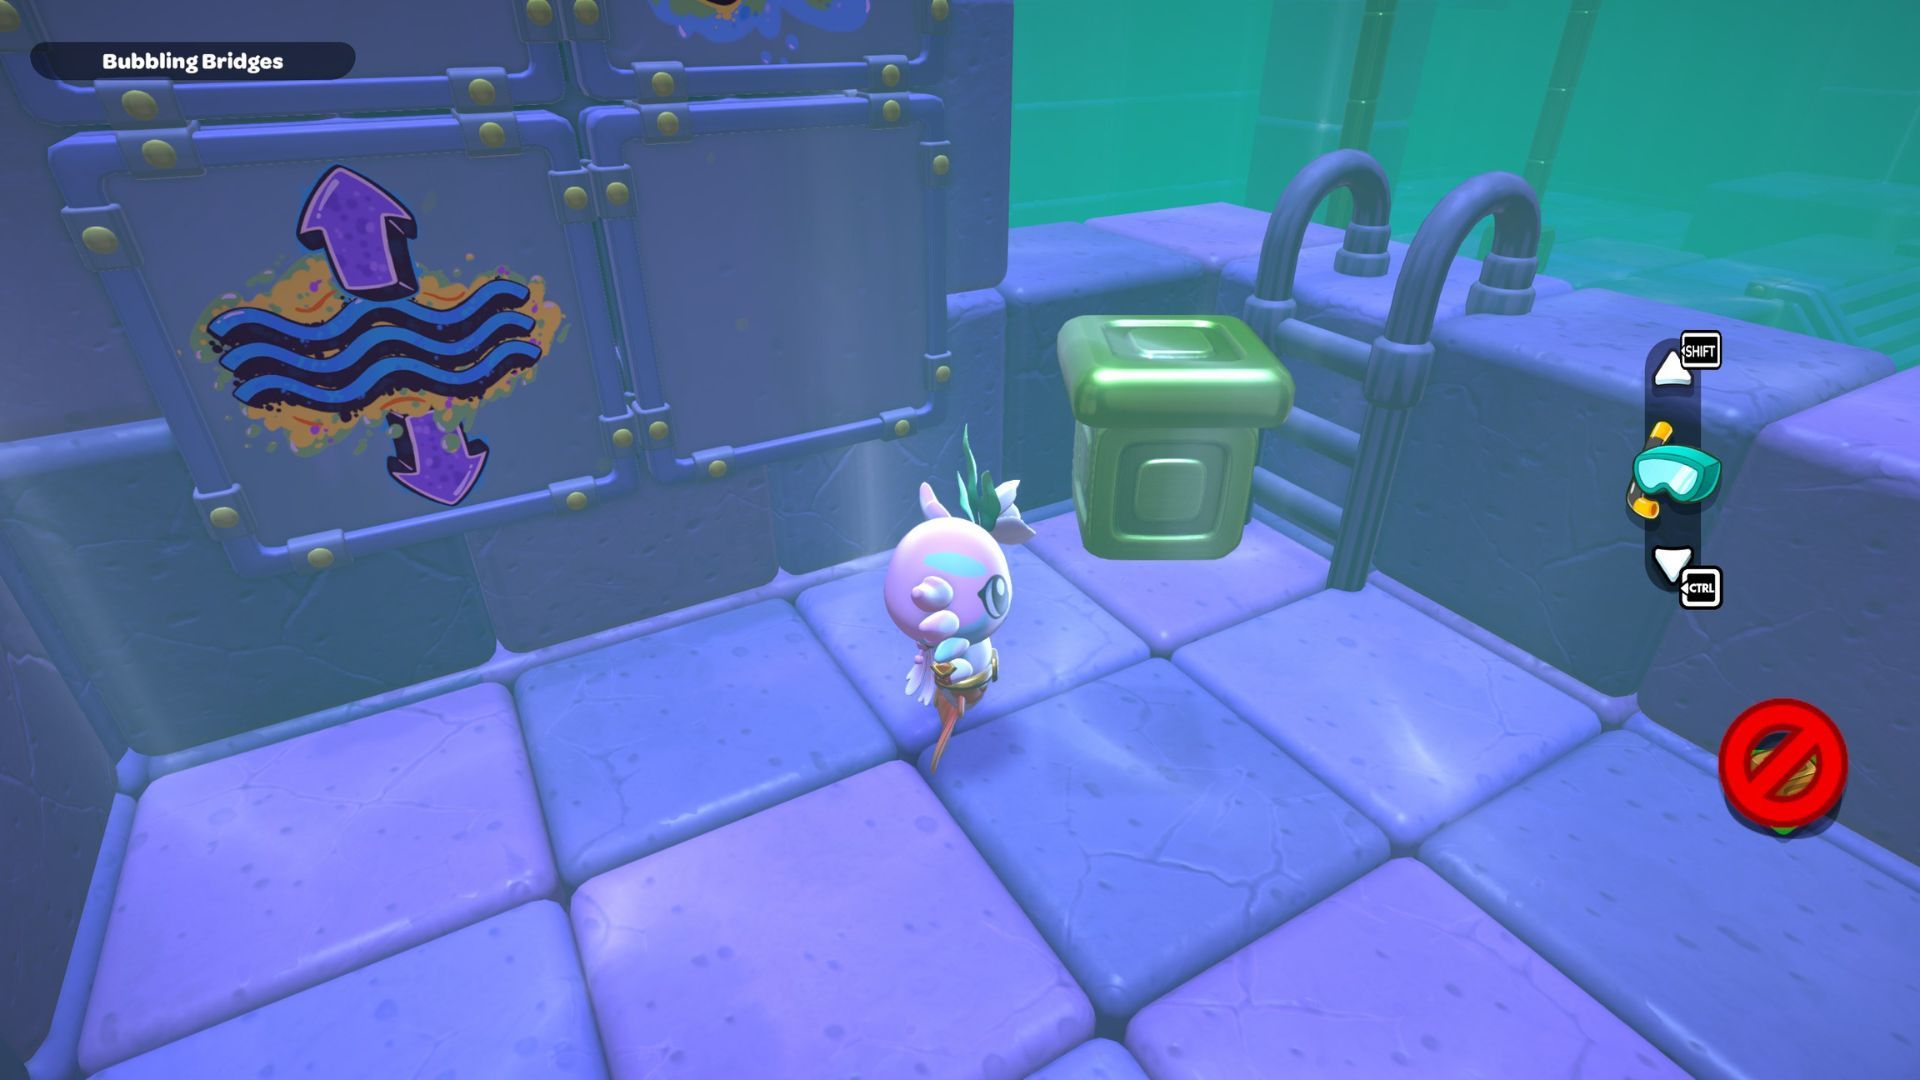
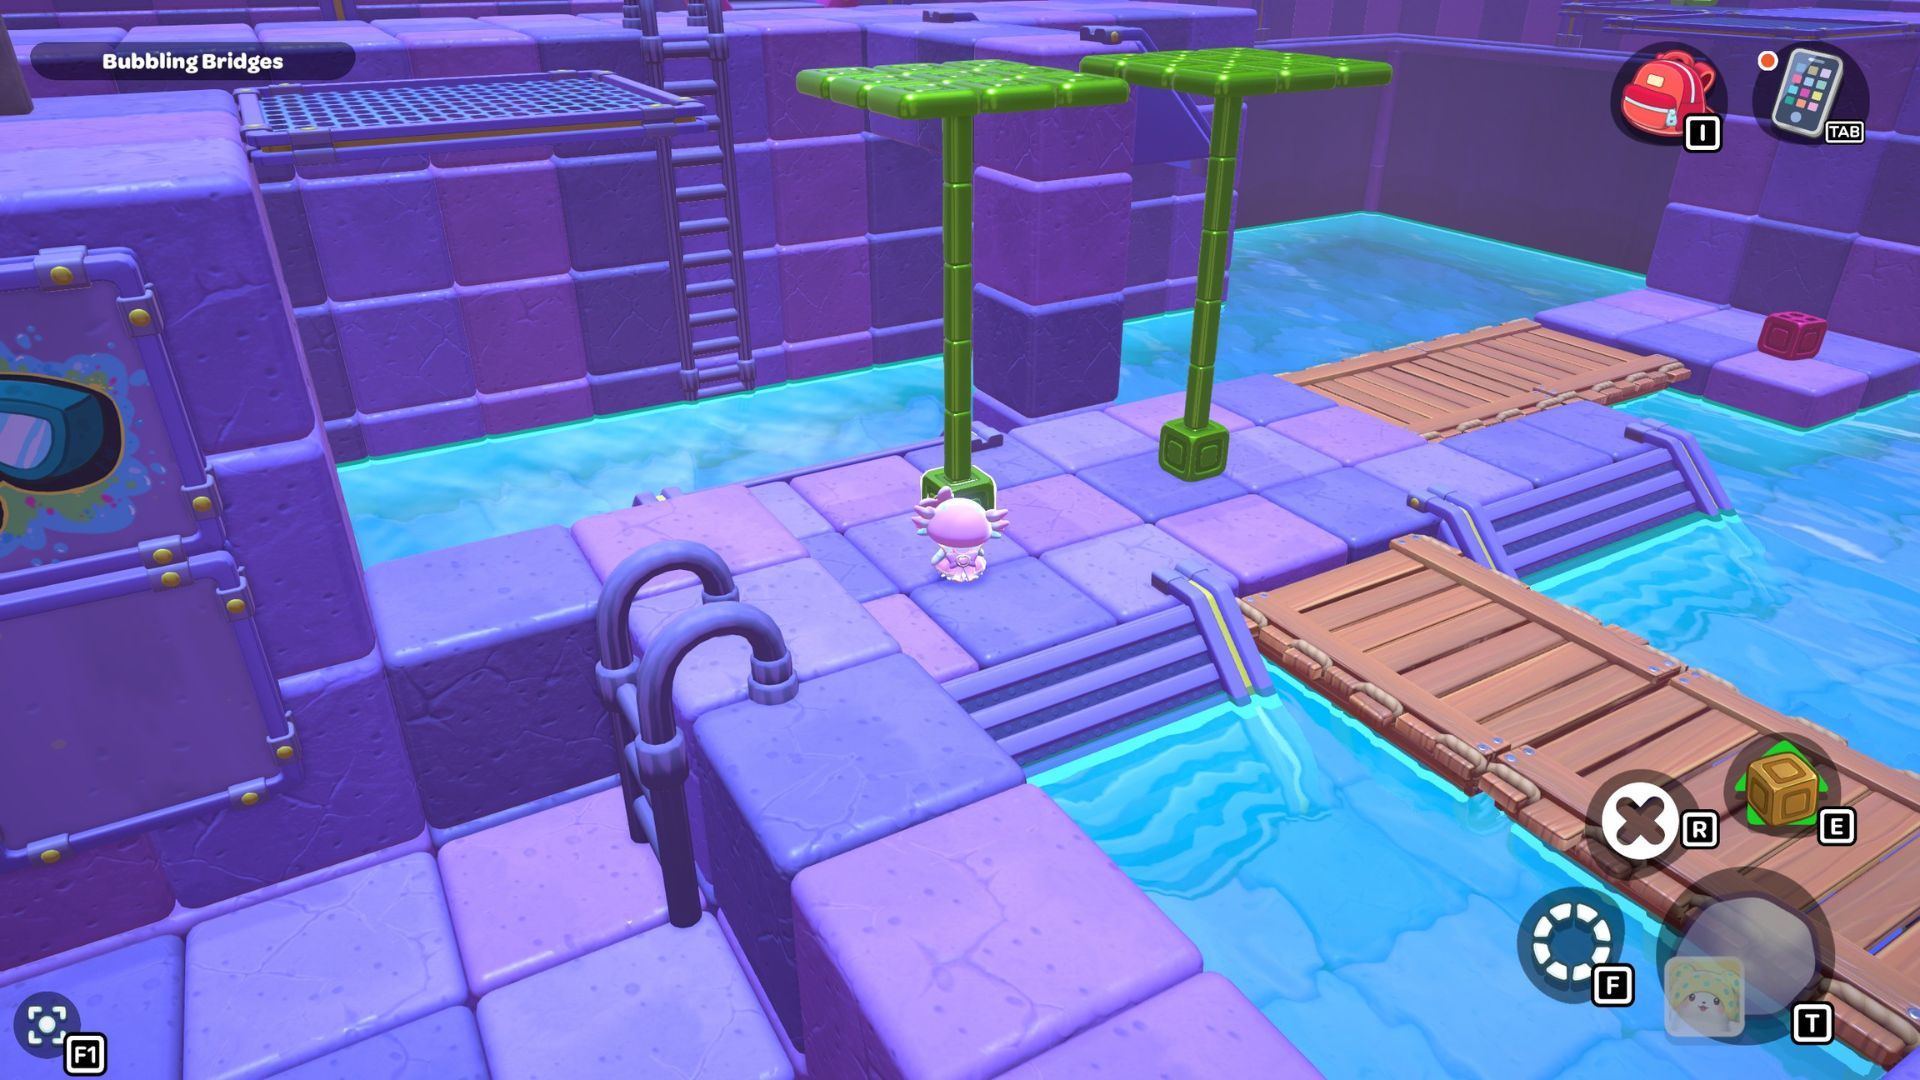
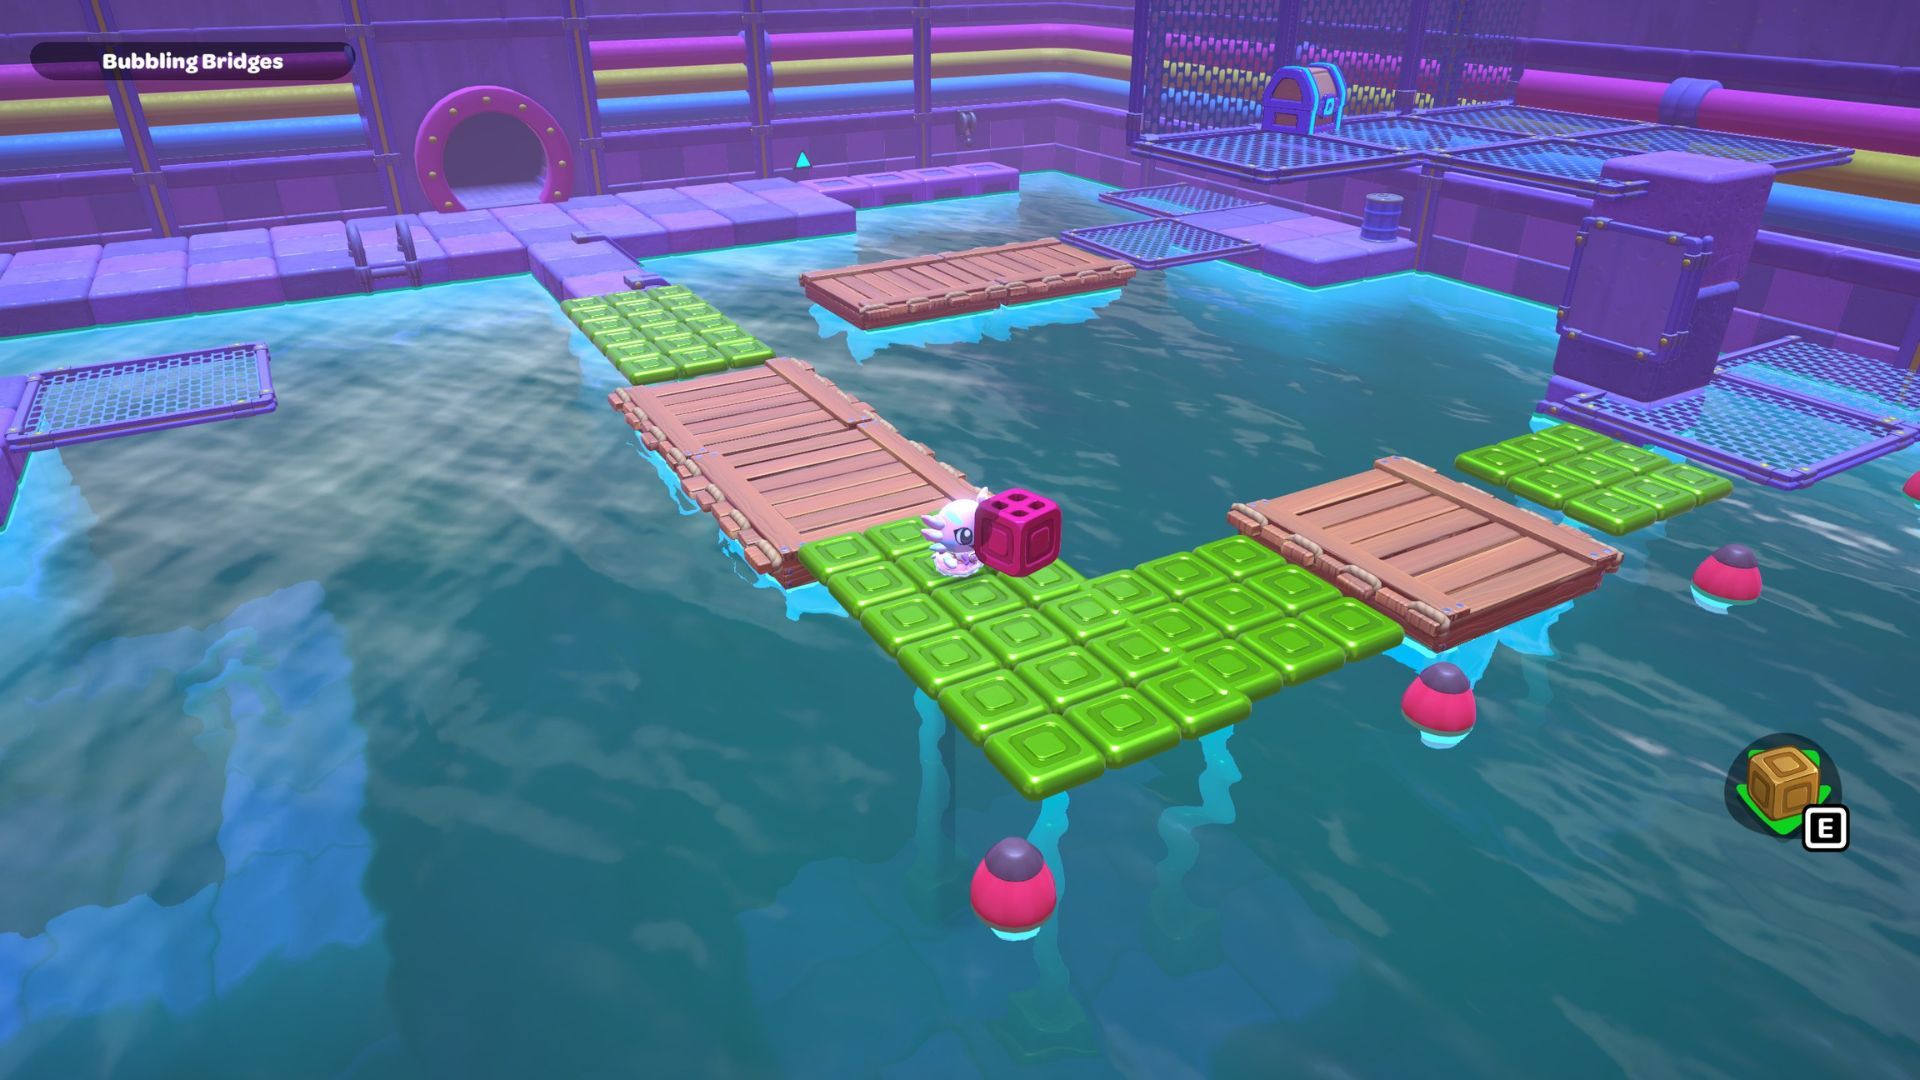
Go to the lever and pull it down to make the water rise. This will let you pick up two green cubes.
The first cube is to the right, past some wooden pallets. Pick it up and briefly set it on the stairs.
Okay, so I found the second cube! It’s underwater, right in front of that platform with the triangle symbol. I had to jump across this little path to get to it, then dive down to grab it. Once I had it, I put it on the staircase next to the first cube. Now, the cool part – I pulled that lever again, and it finally lowered the water! Awesome.
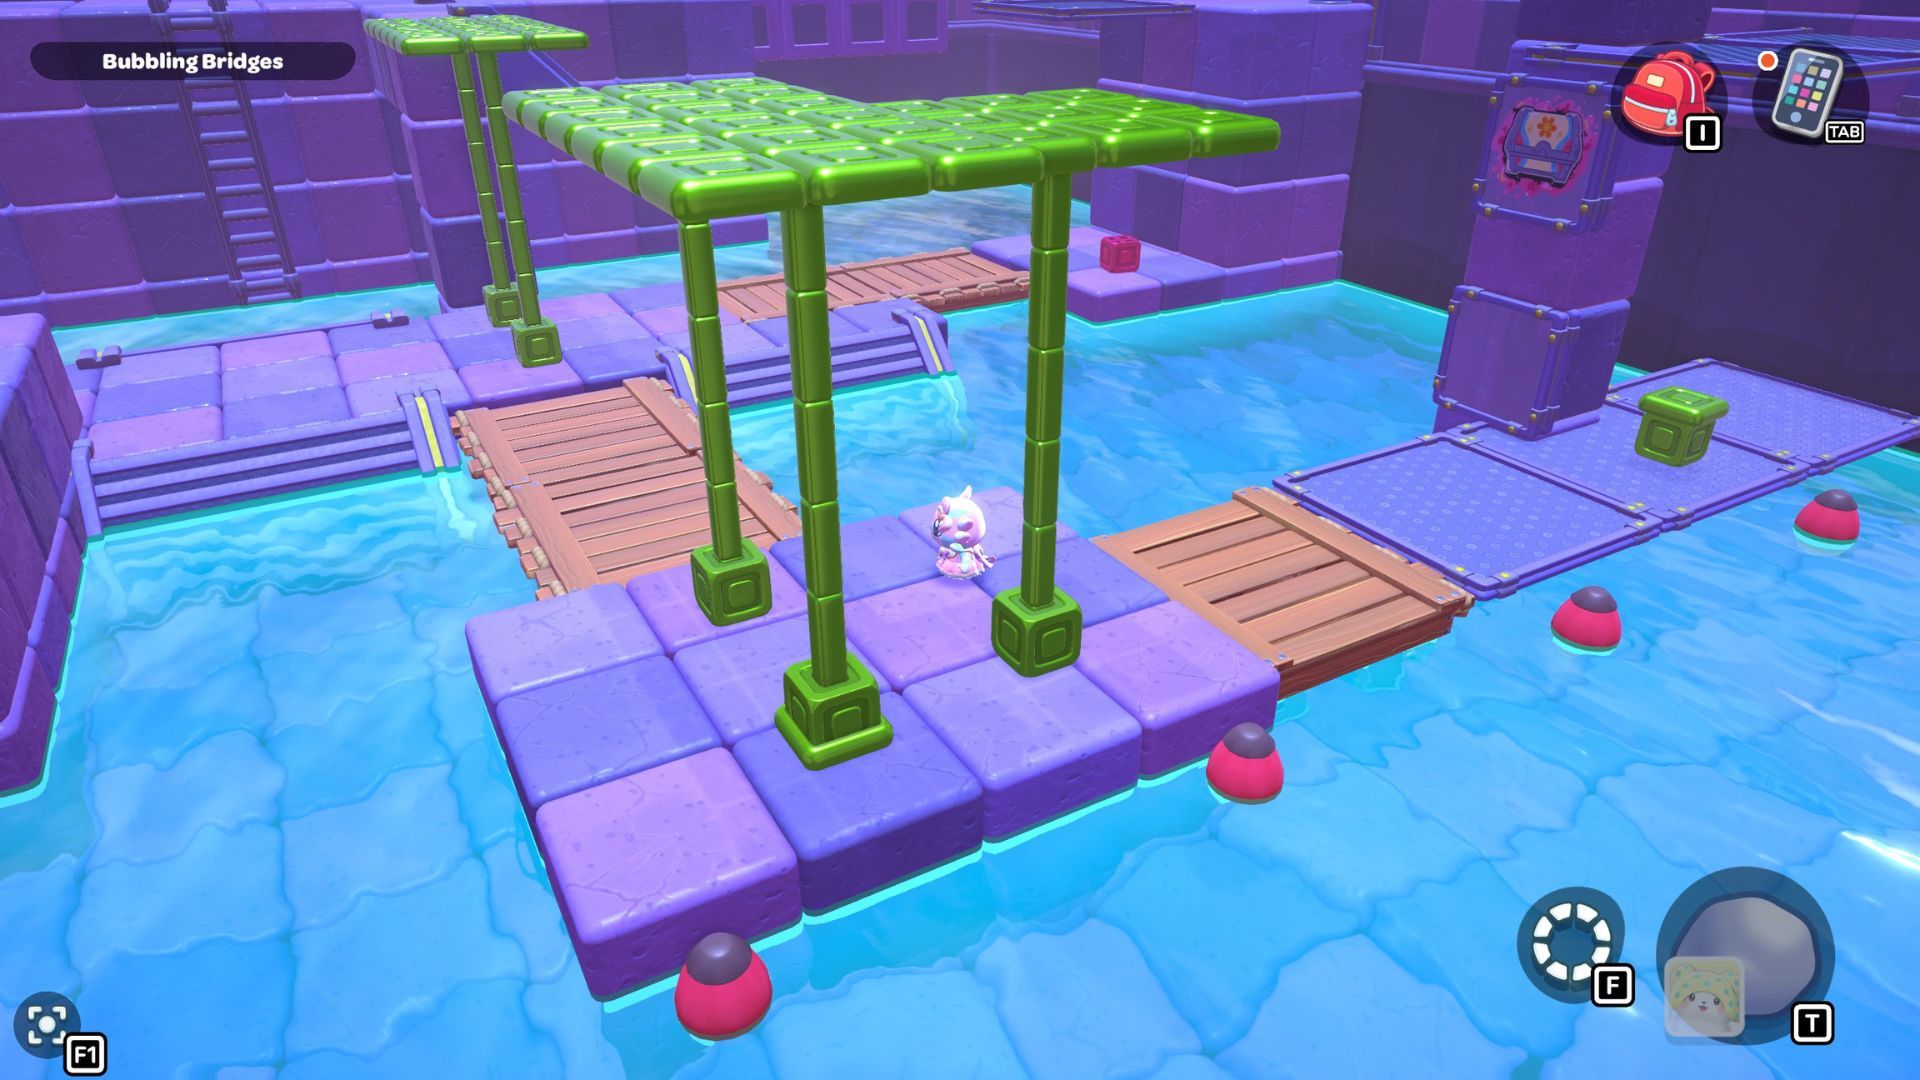
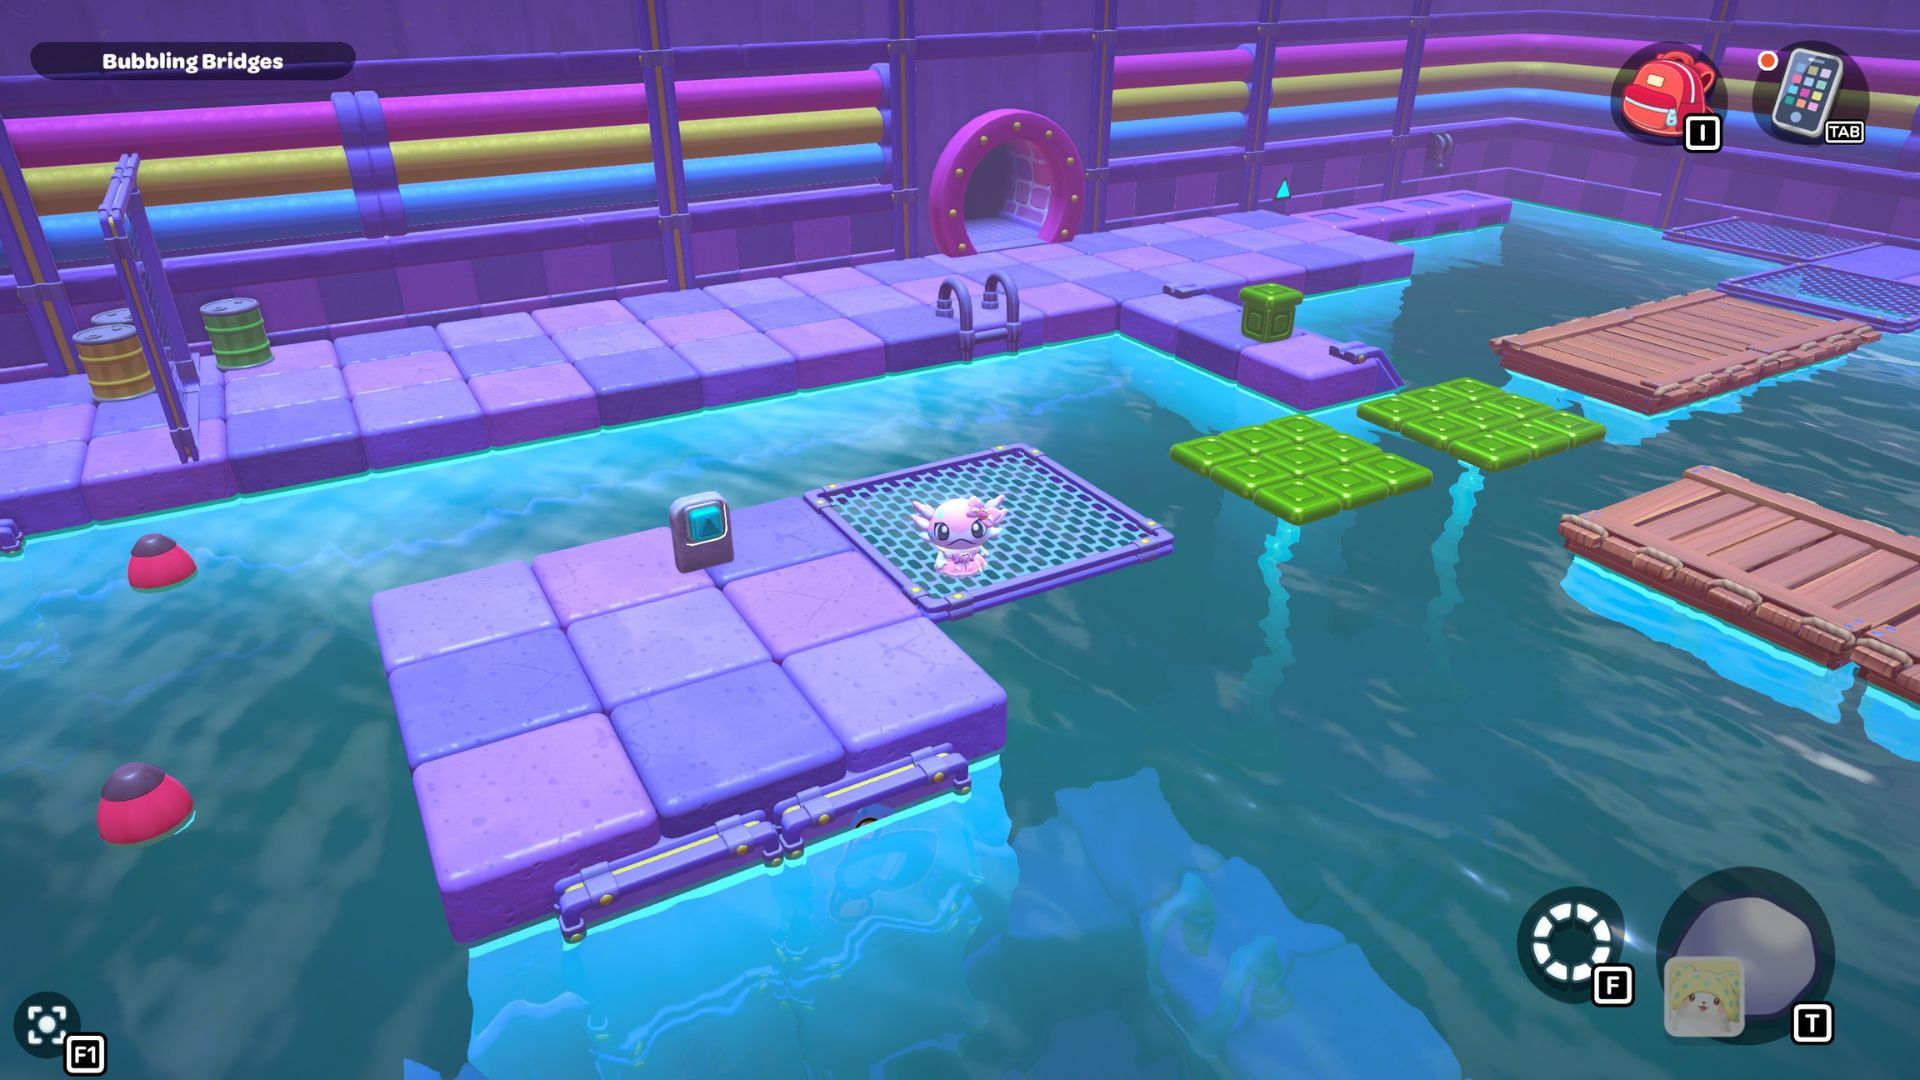
Now, all you need to do is create a bridge from the stairs to the platform where the chest is. Start by connecting the top of the stairs to the wooden pallet directly across from them. You’ll need to move the two green cubes on the platform under the stairs slightly to make this connection.
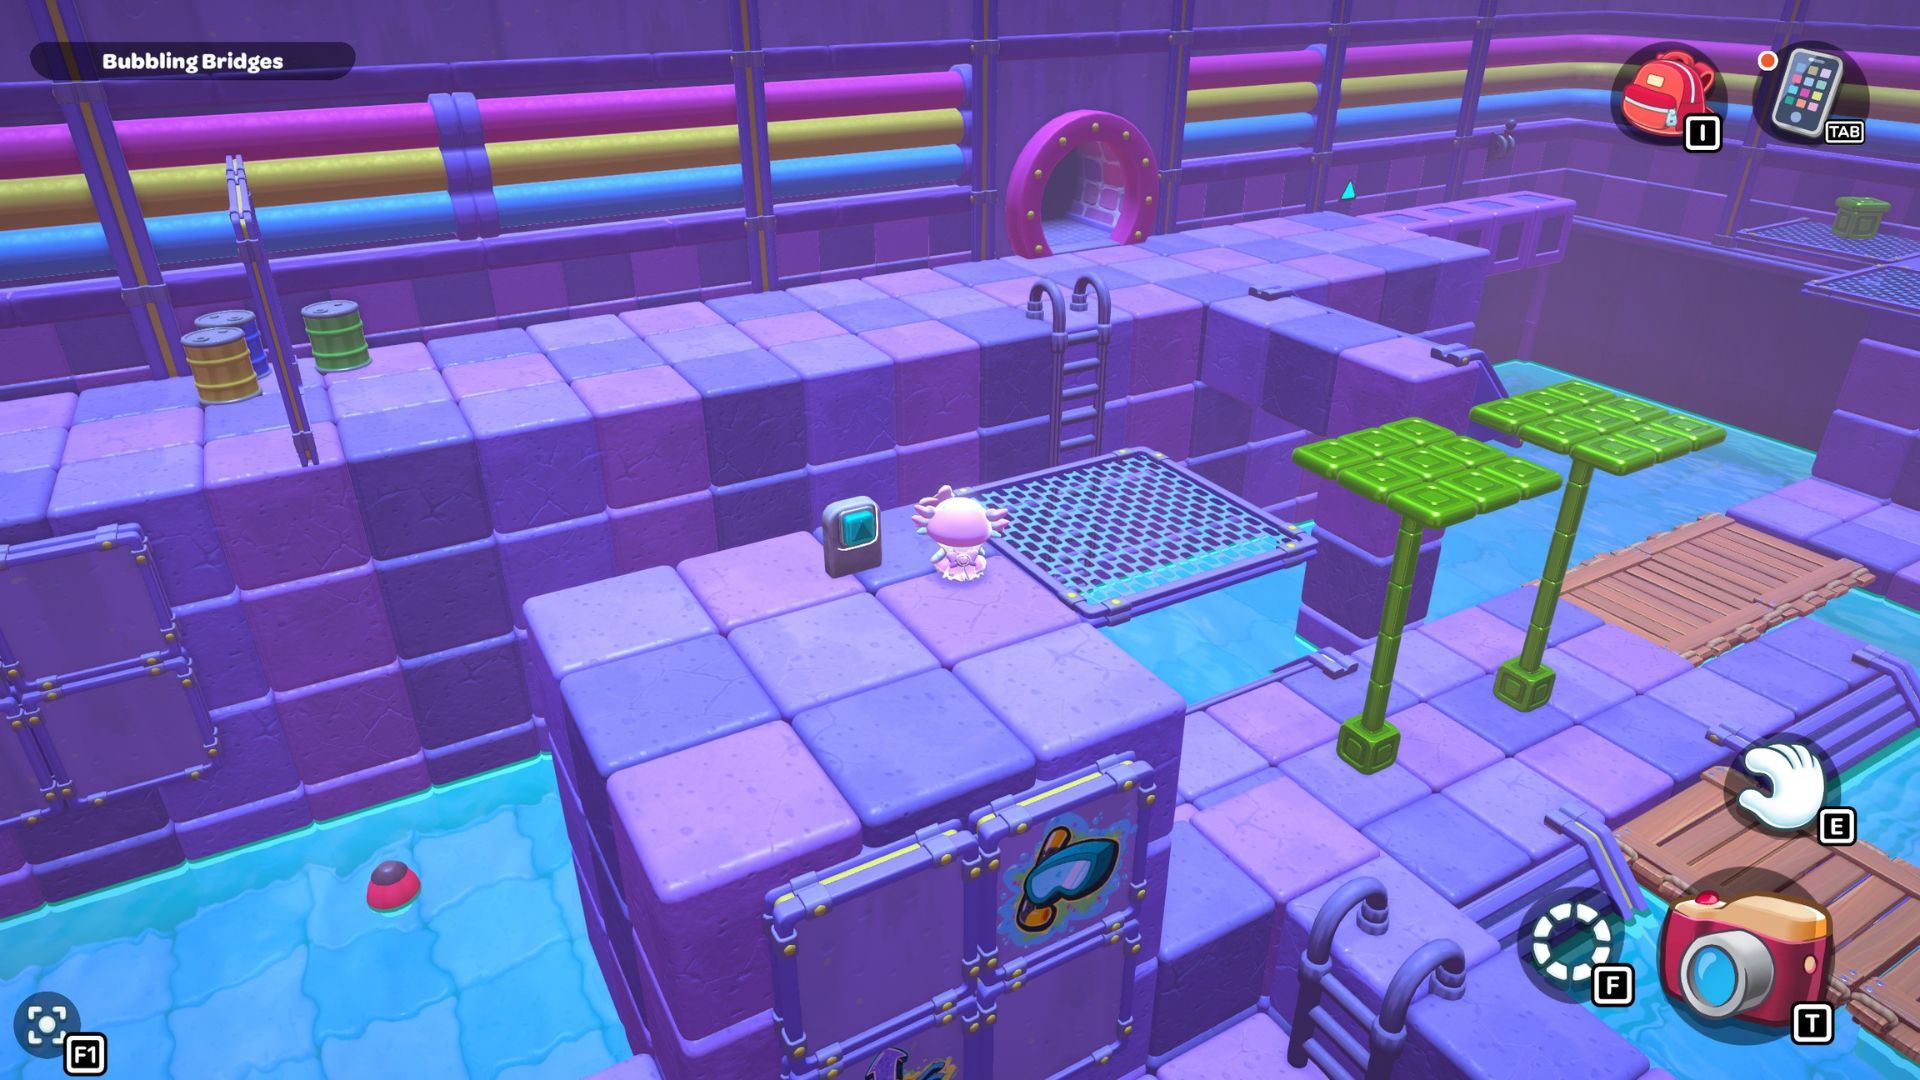
Put one of the green cubes about half a block from the stairs, and the other about half a block from the wooden pallet. Then, turn both of them on to open the first section of the path.
Now, move the two green blocks from the top of the stairs to the corner of the path. You’ll see a green cube there that’s fixed in place. Turn that cube on first, and then use the other two blocks to create a bridge connecting it to the wooden pallets on both sides.
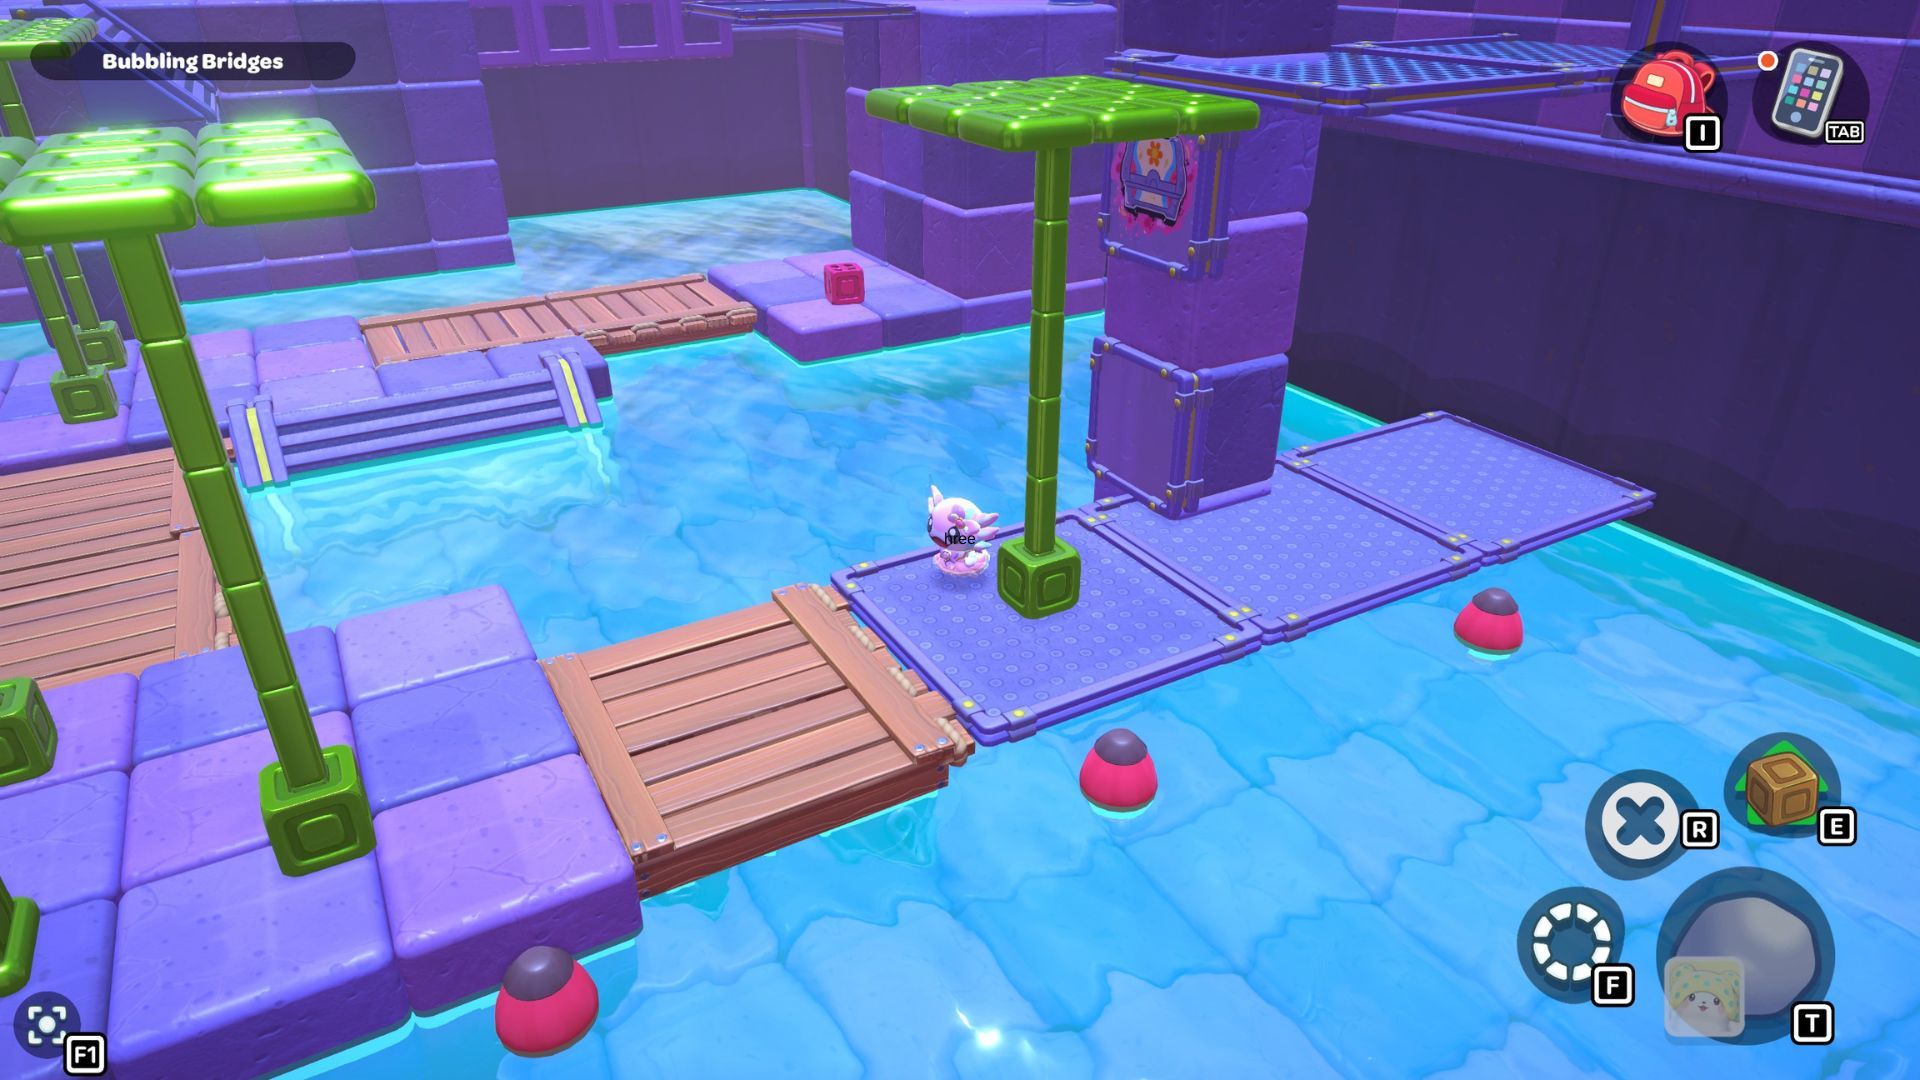
Finally, attach the wooden raft to the platform under the chest. You’ll see a green block nearby – move it into the gap between the bridge and the platform, then activate it to finish building the path.
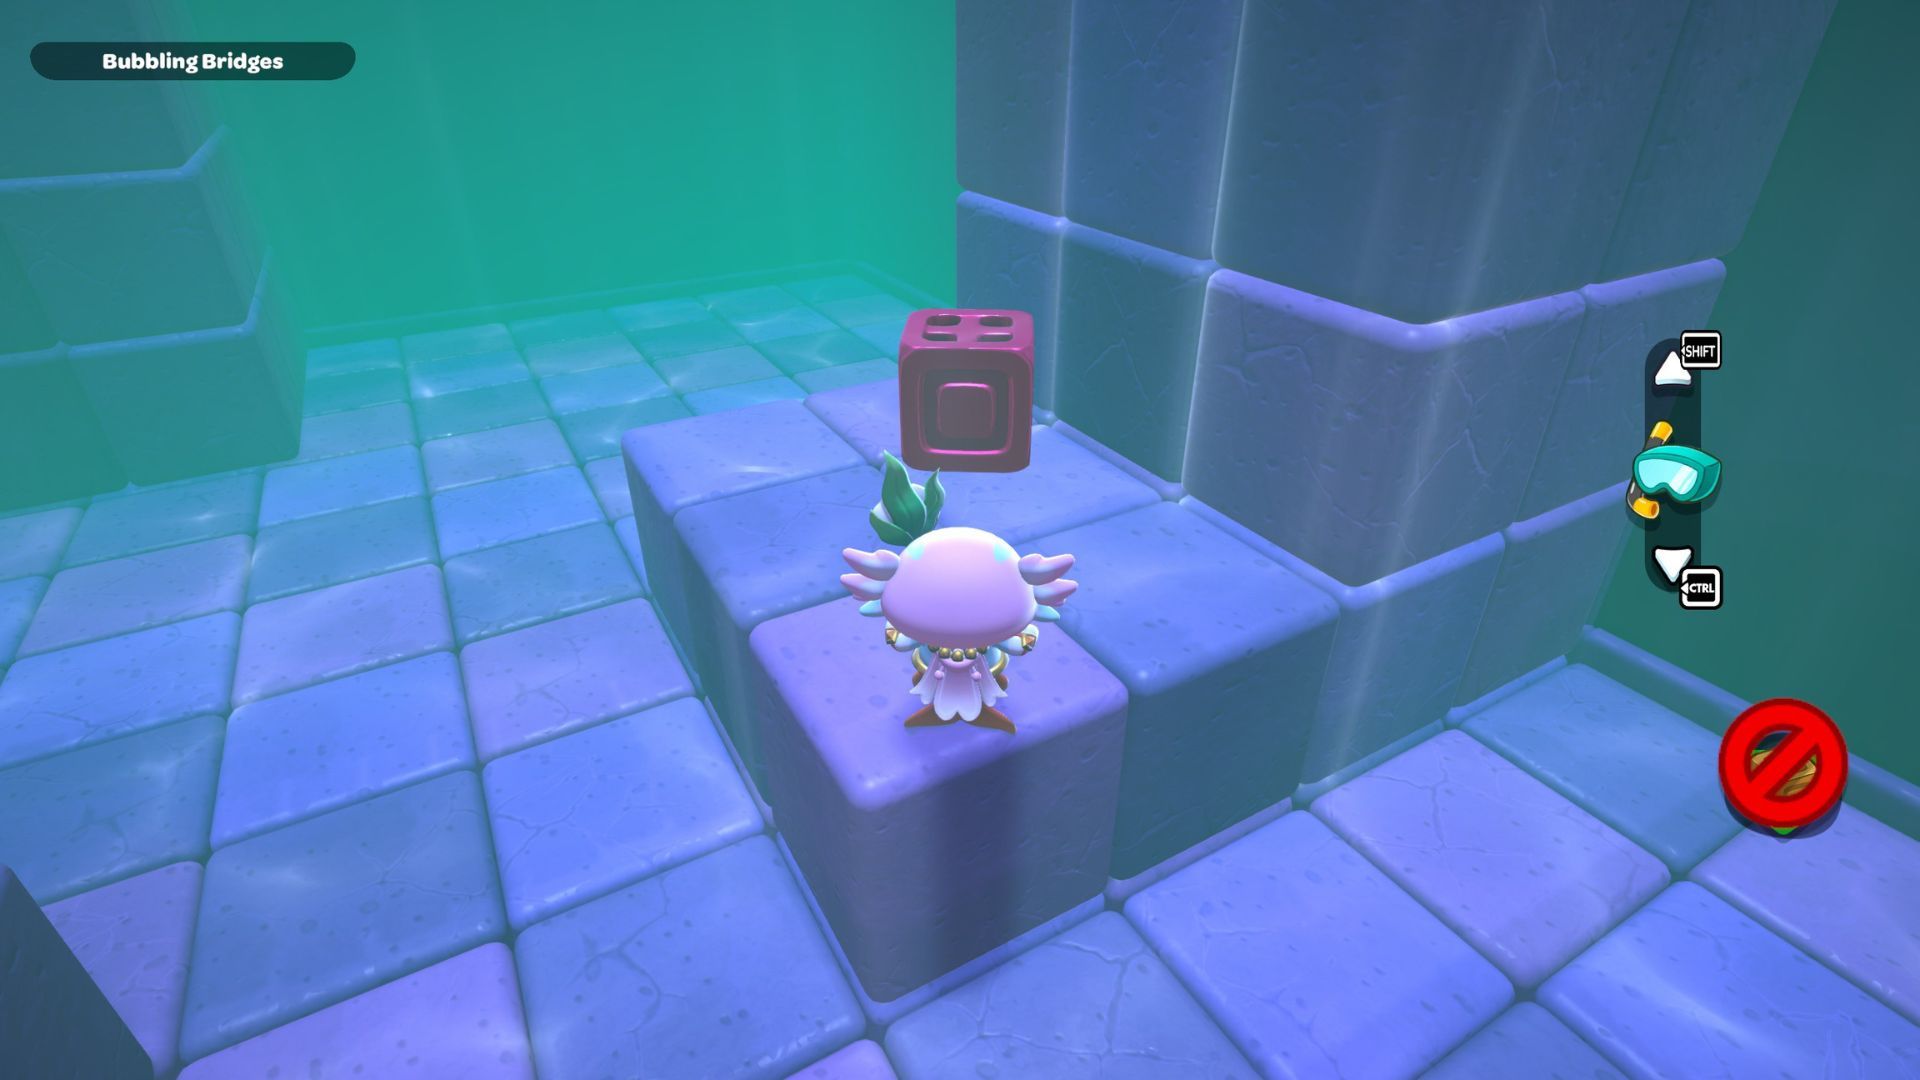
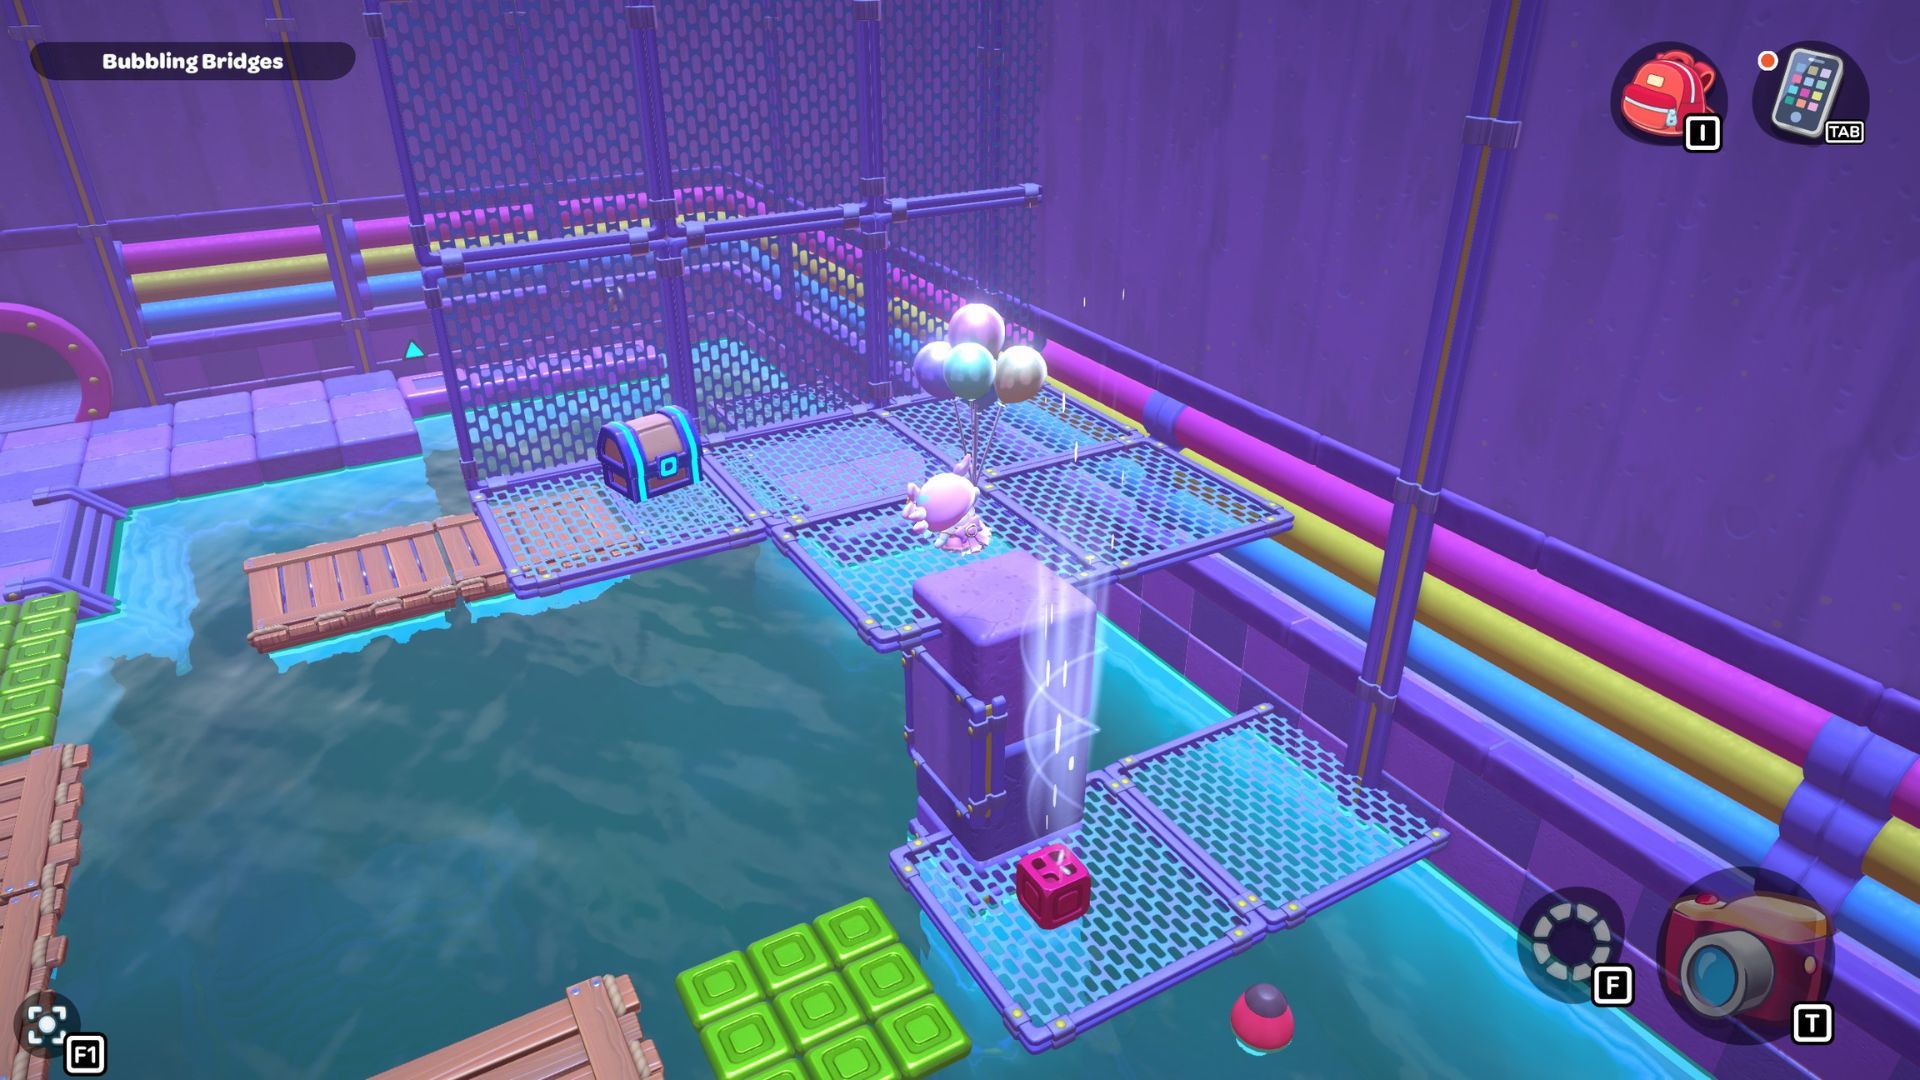
Now, go back to where you started and use the lever to fill the room with water. Once it’s full, dive in and swim down the right side to find the red cube. Then, swim back to the starting platform and climb the stairs with the cube.
Follow the path with the red cube until you’re under the platform where the chest is located. Place the cube down, turn it on, and then fly up to the higher platform. Opening the chest up there will reward you with a Seaweed Hat.
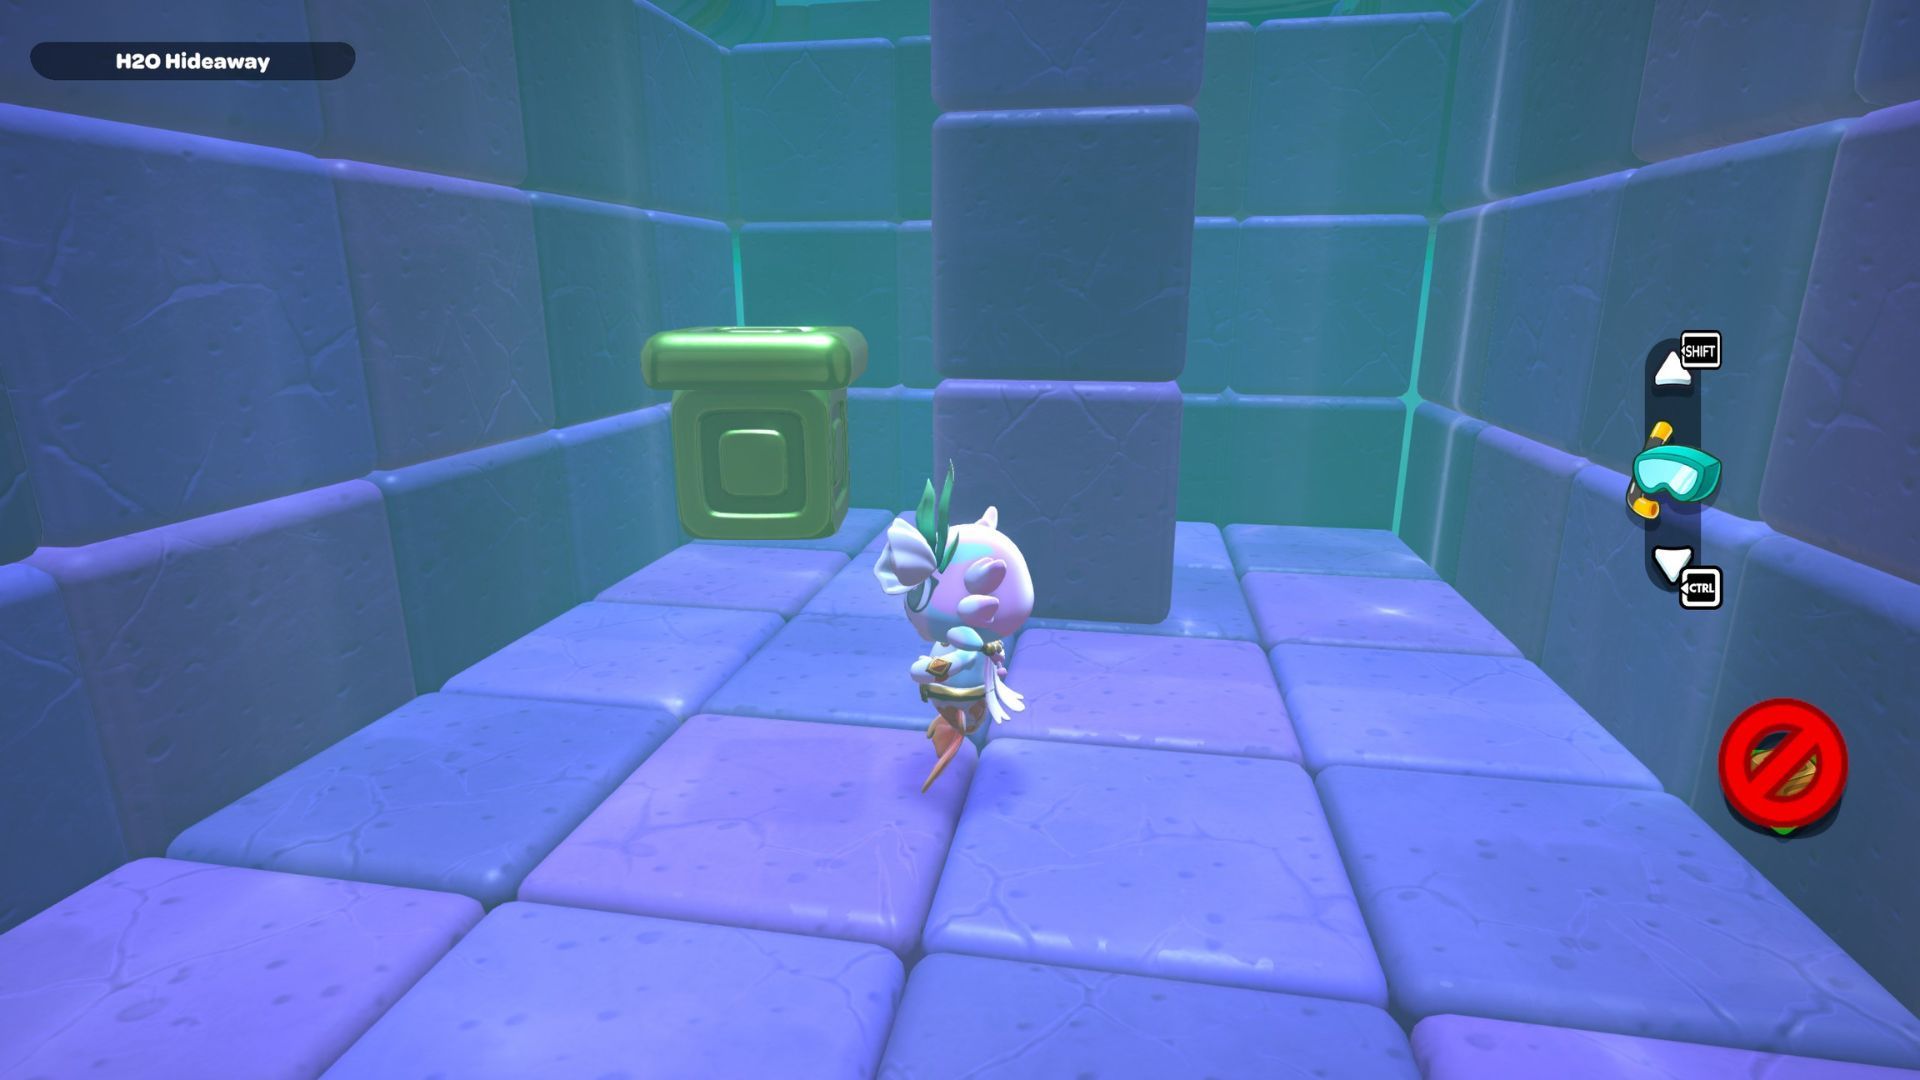
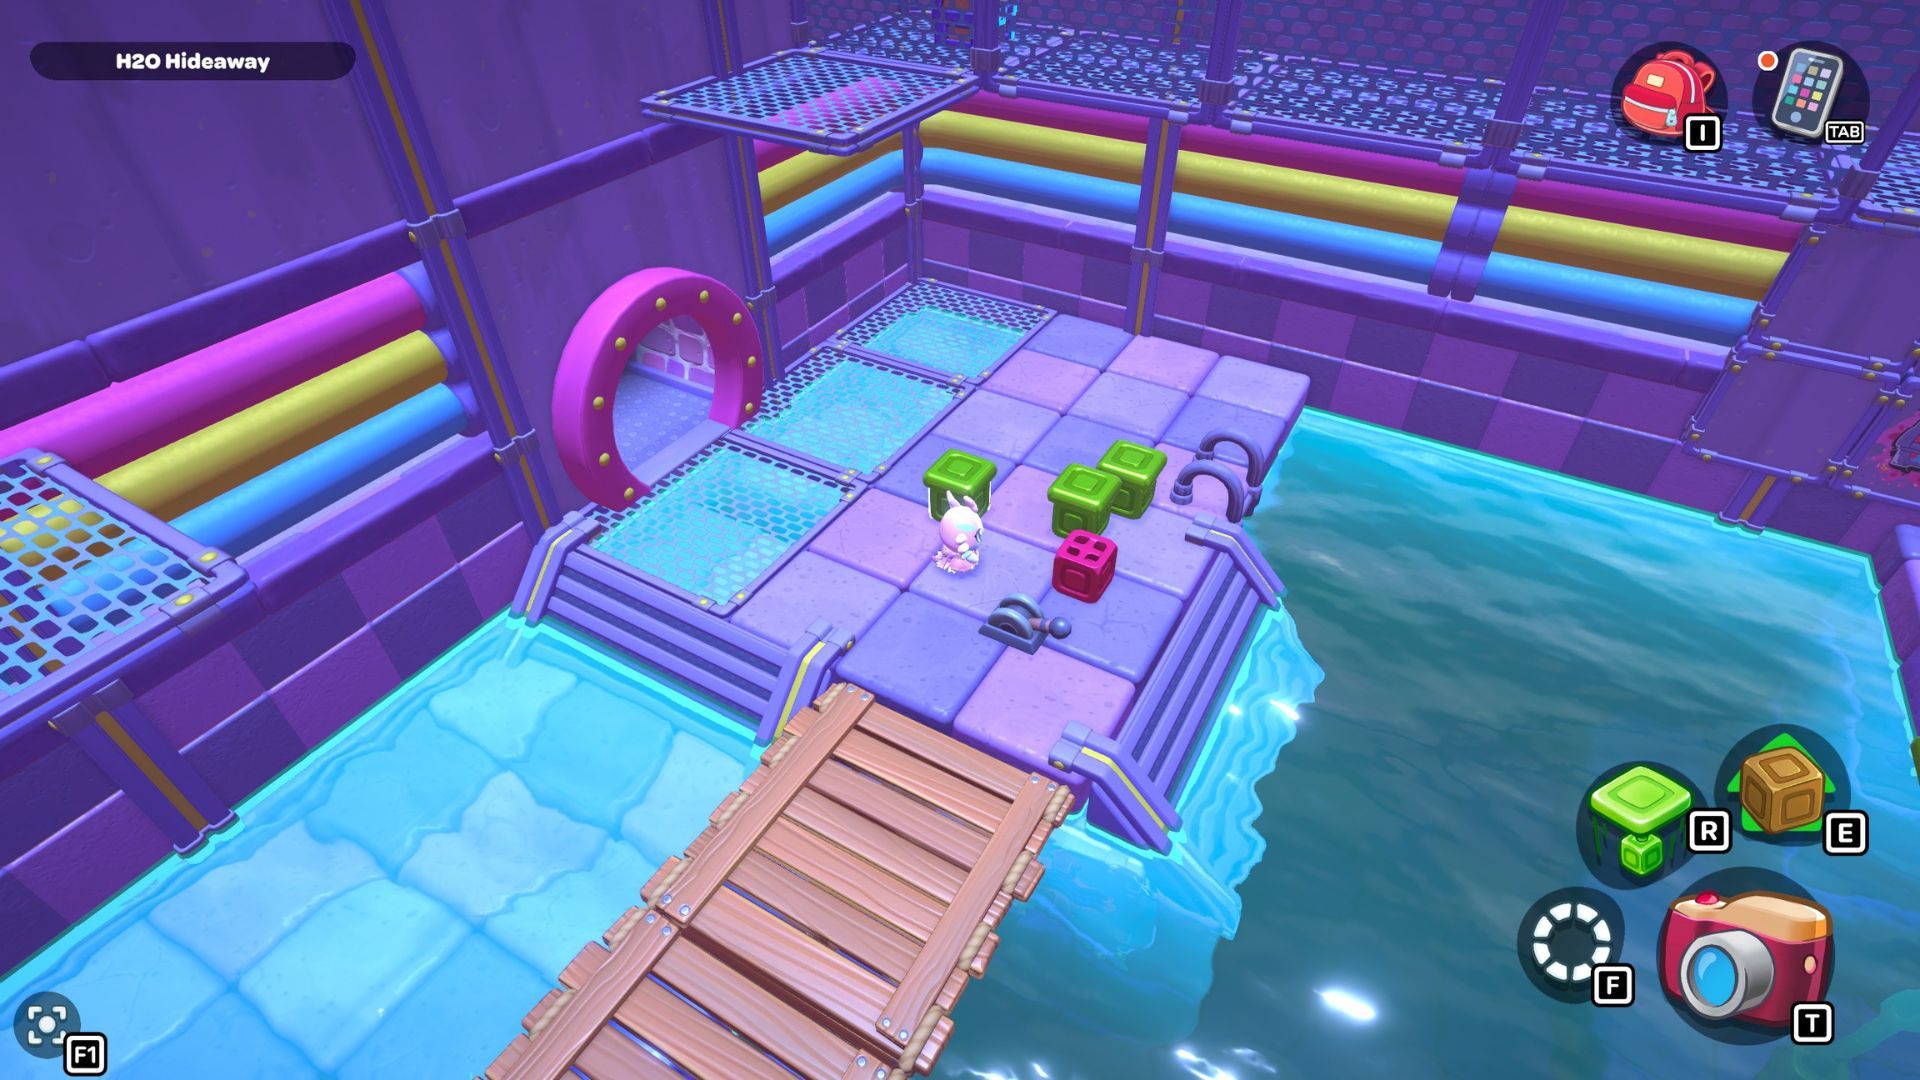
City Town Sewers — H2O Hideaway Walkthrough
You’ll find this puzzle room through the right door in the northeast corner of the City Town Sewers. To complete it, you need to get to the treasure chest located in the upper right corner.
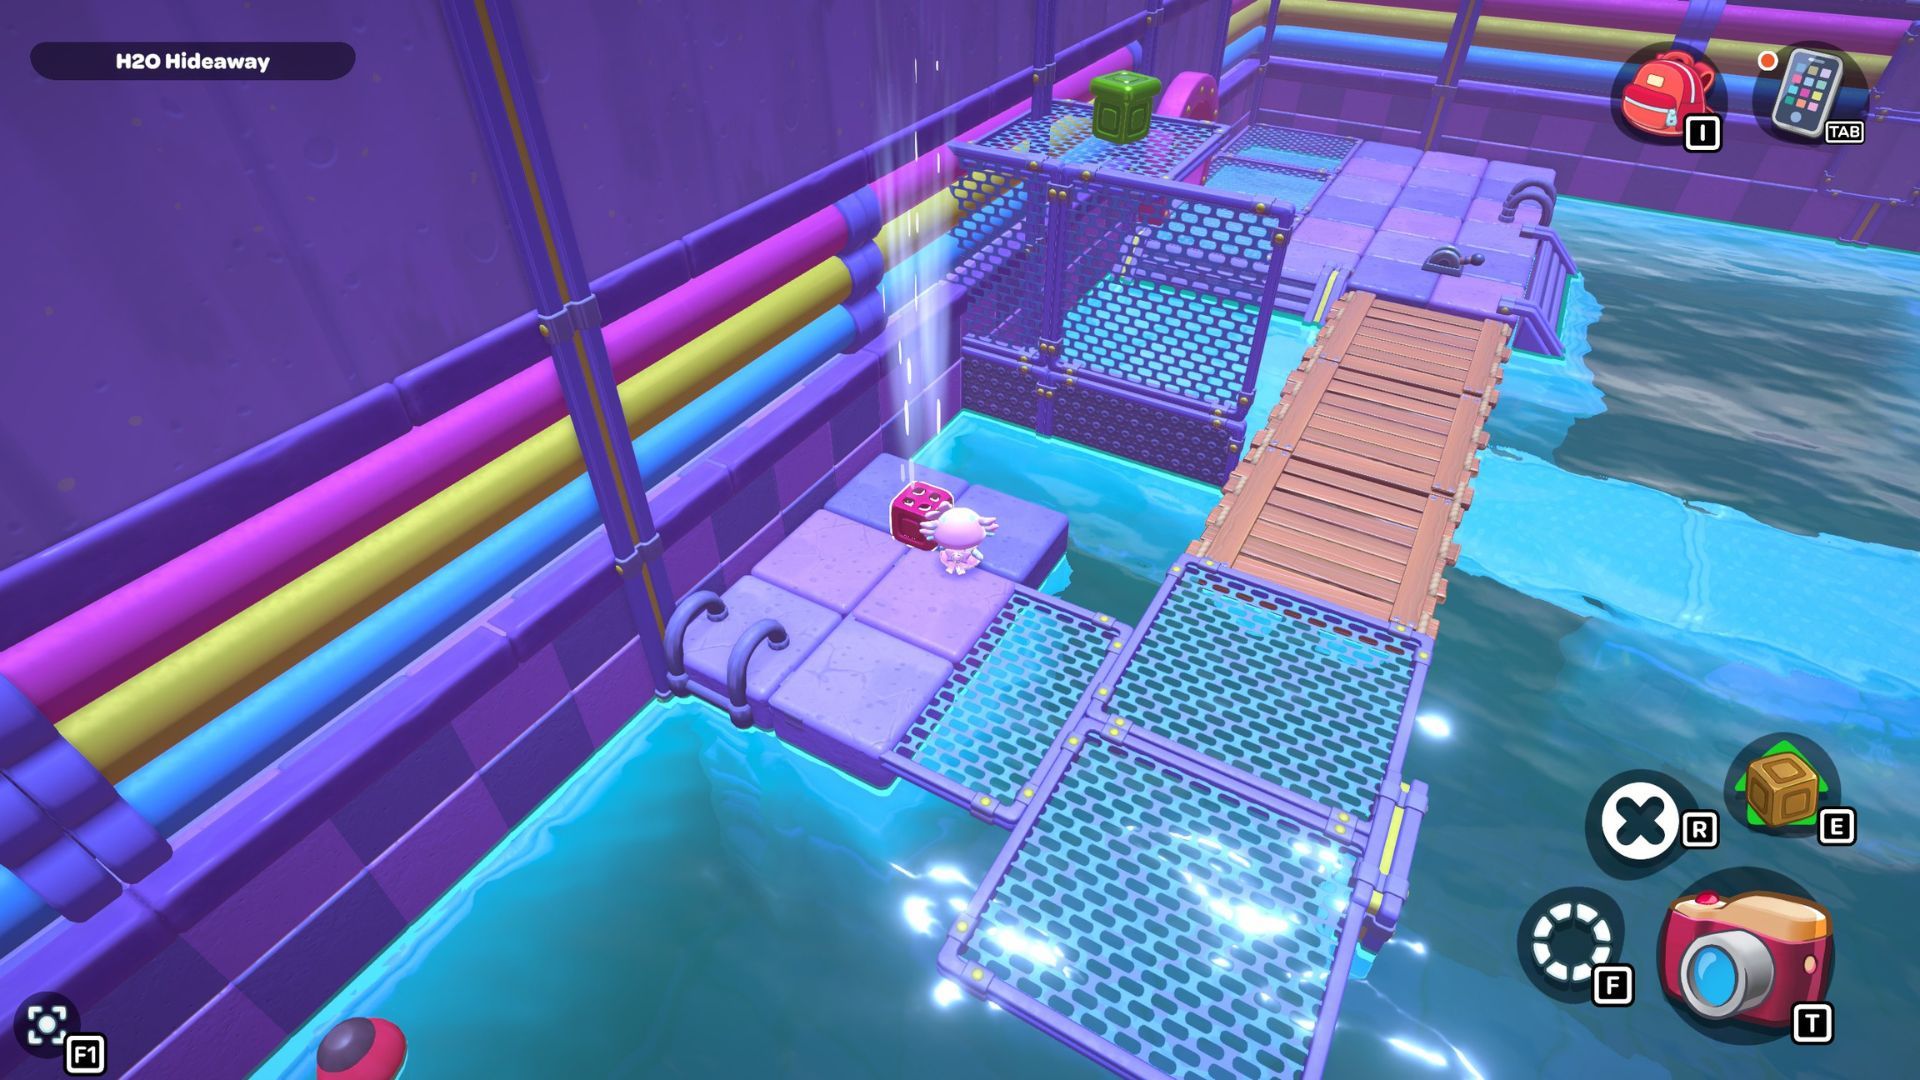
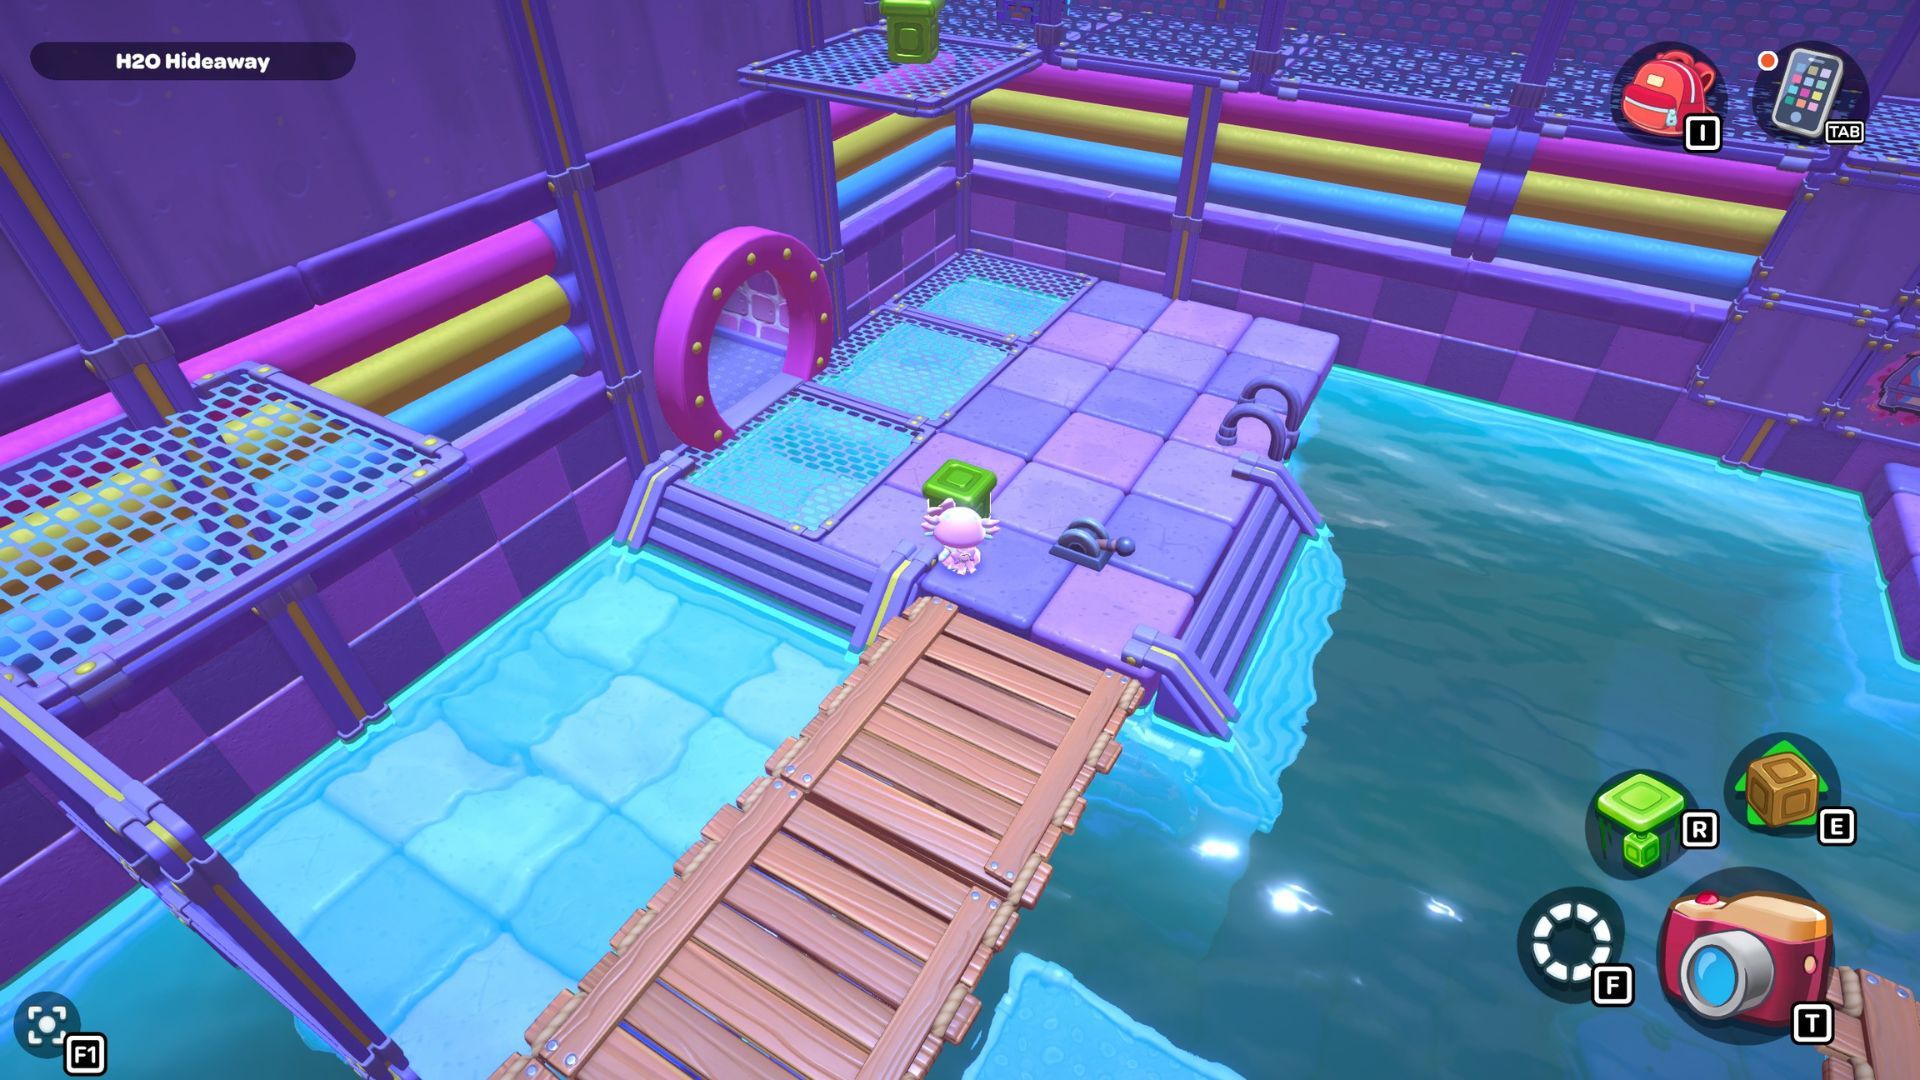
Begin by walking over the wooden pallets on the left side of the starting platform and touch the red cube to activate it. Then, use the red cube to float up to the green cube directly above. Pick up the green cube and place it on the first platform, close to the lever.
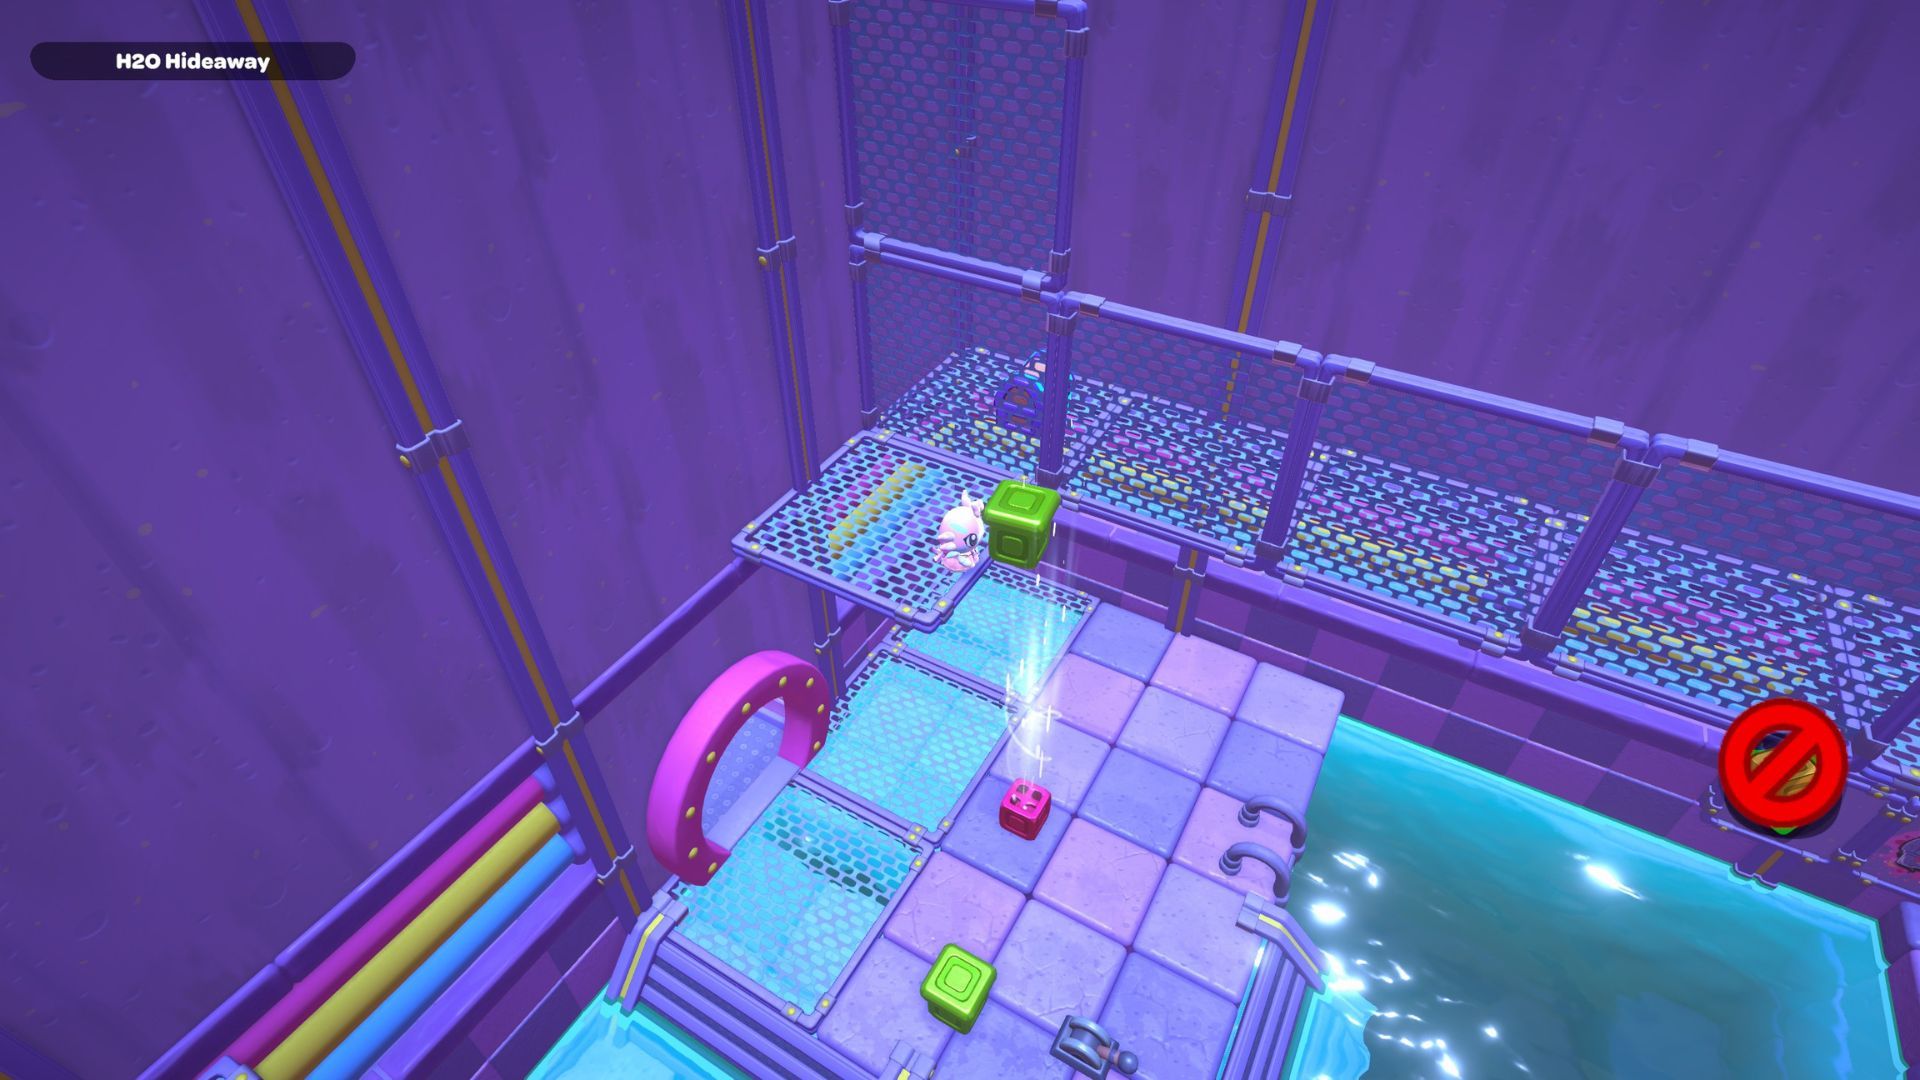
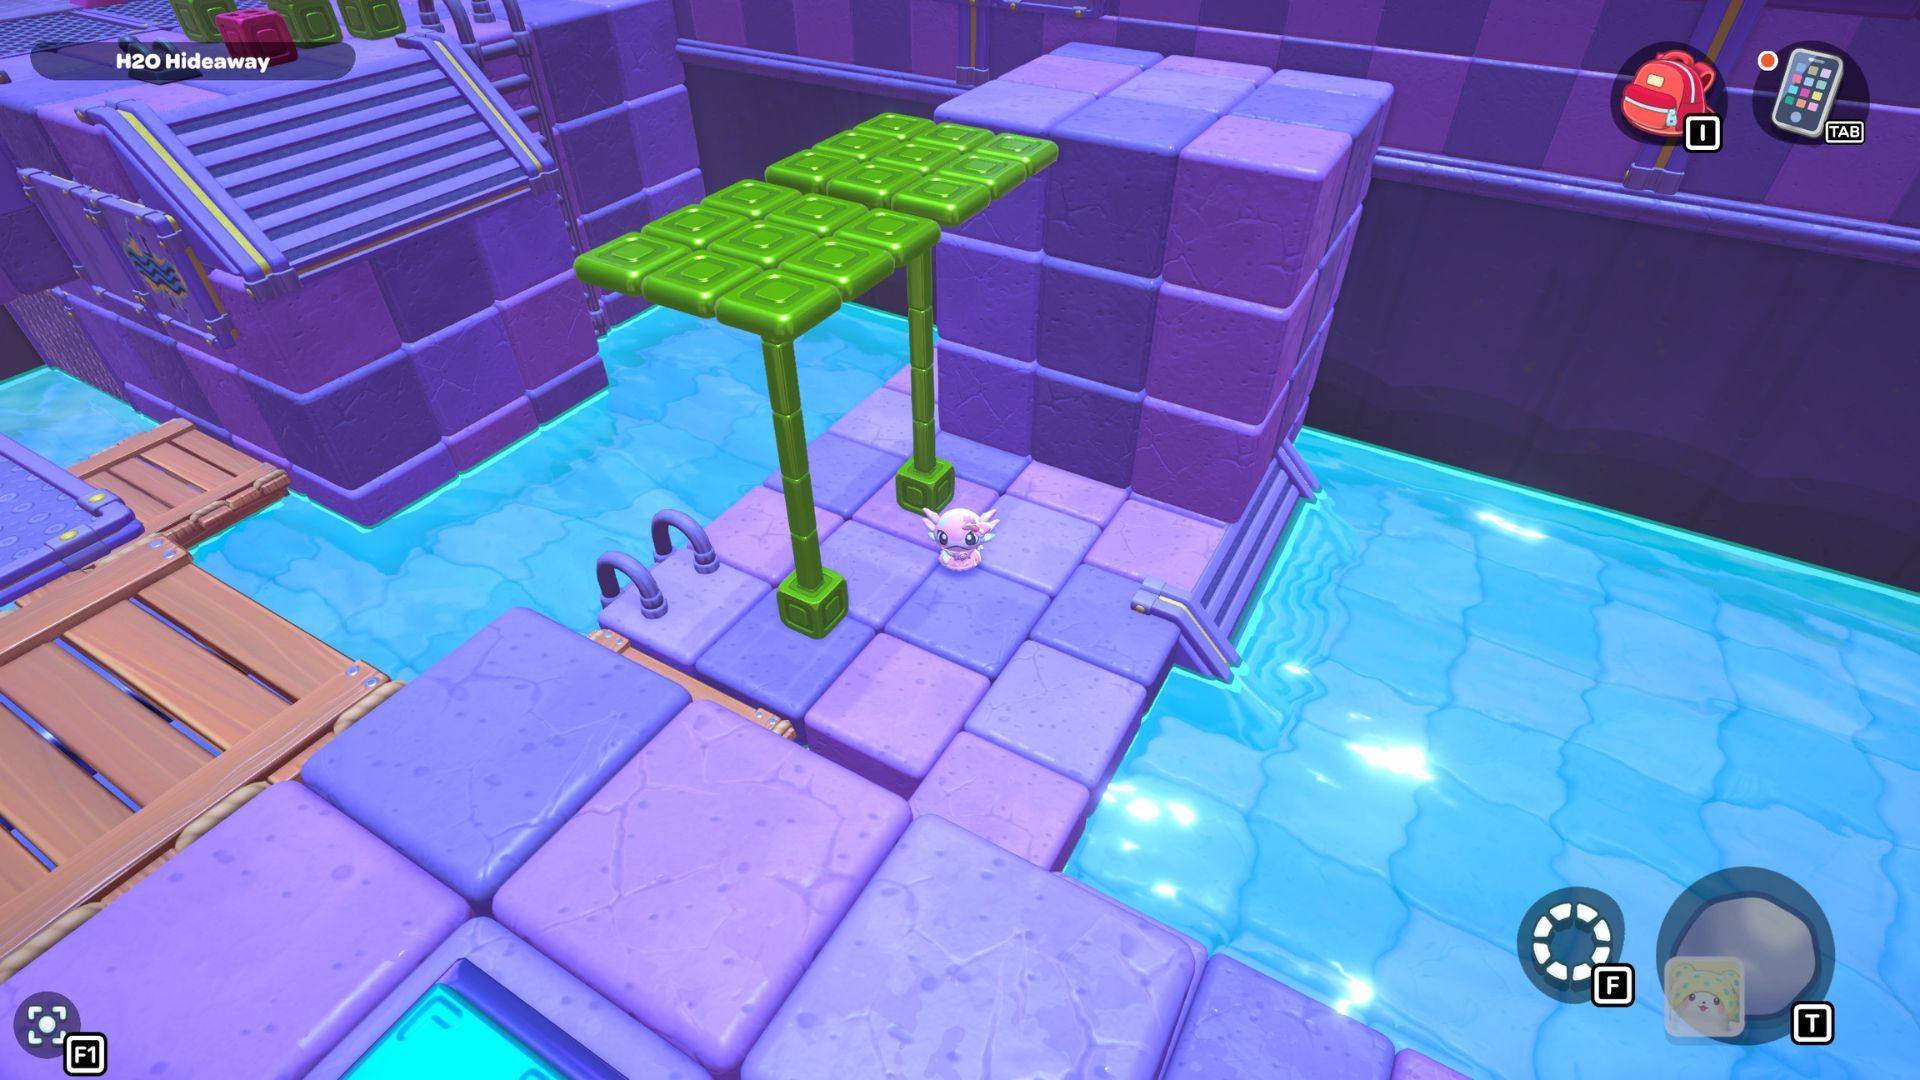
Go back to the red cube, pick it up, and place it on the platform. Then, find the green cube on the higher ledge. Use the red cube again to fly up and get the green one.
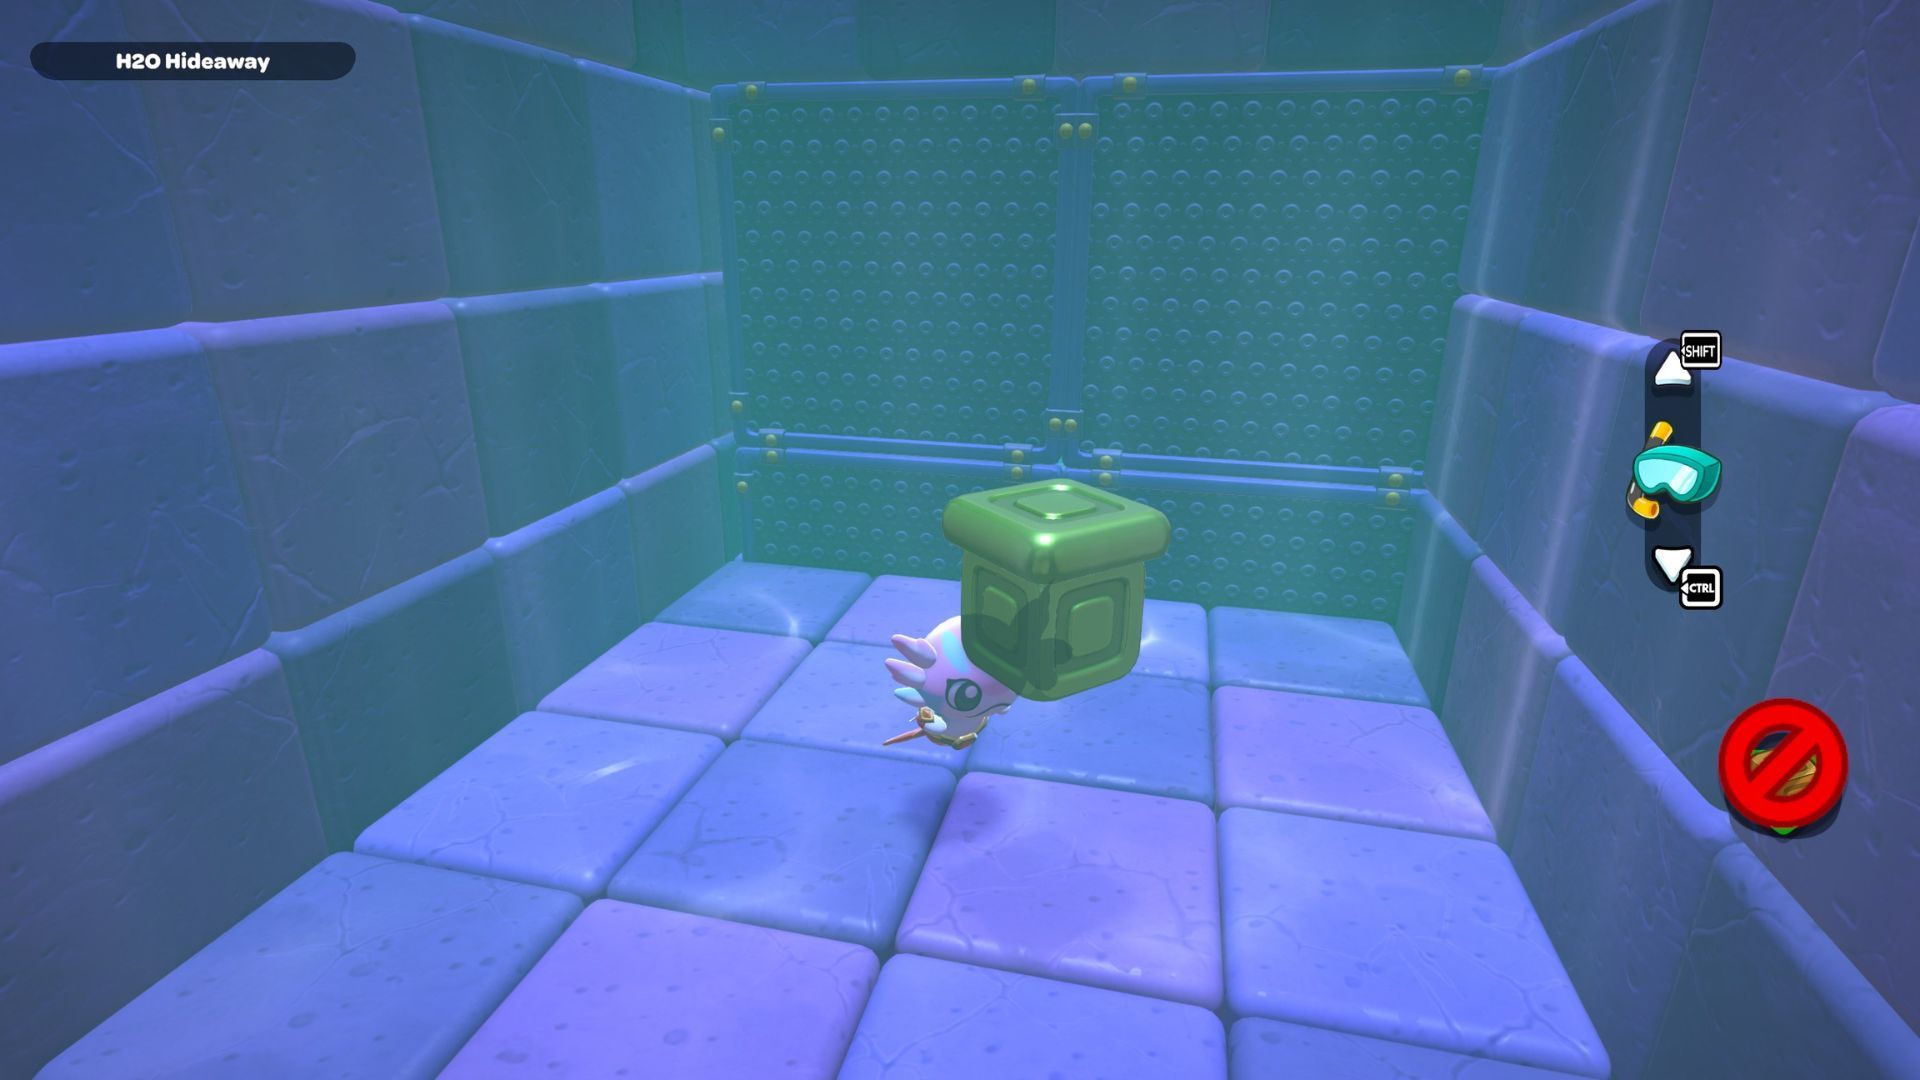
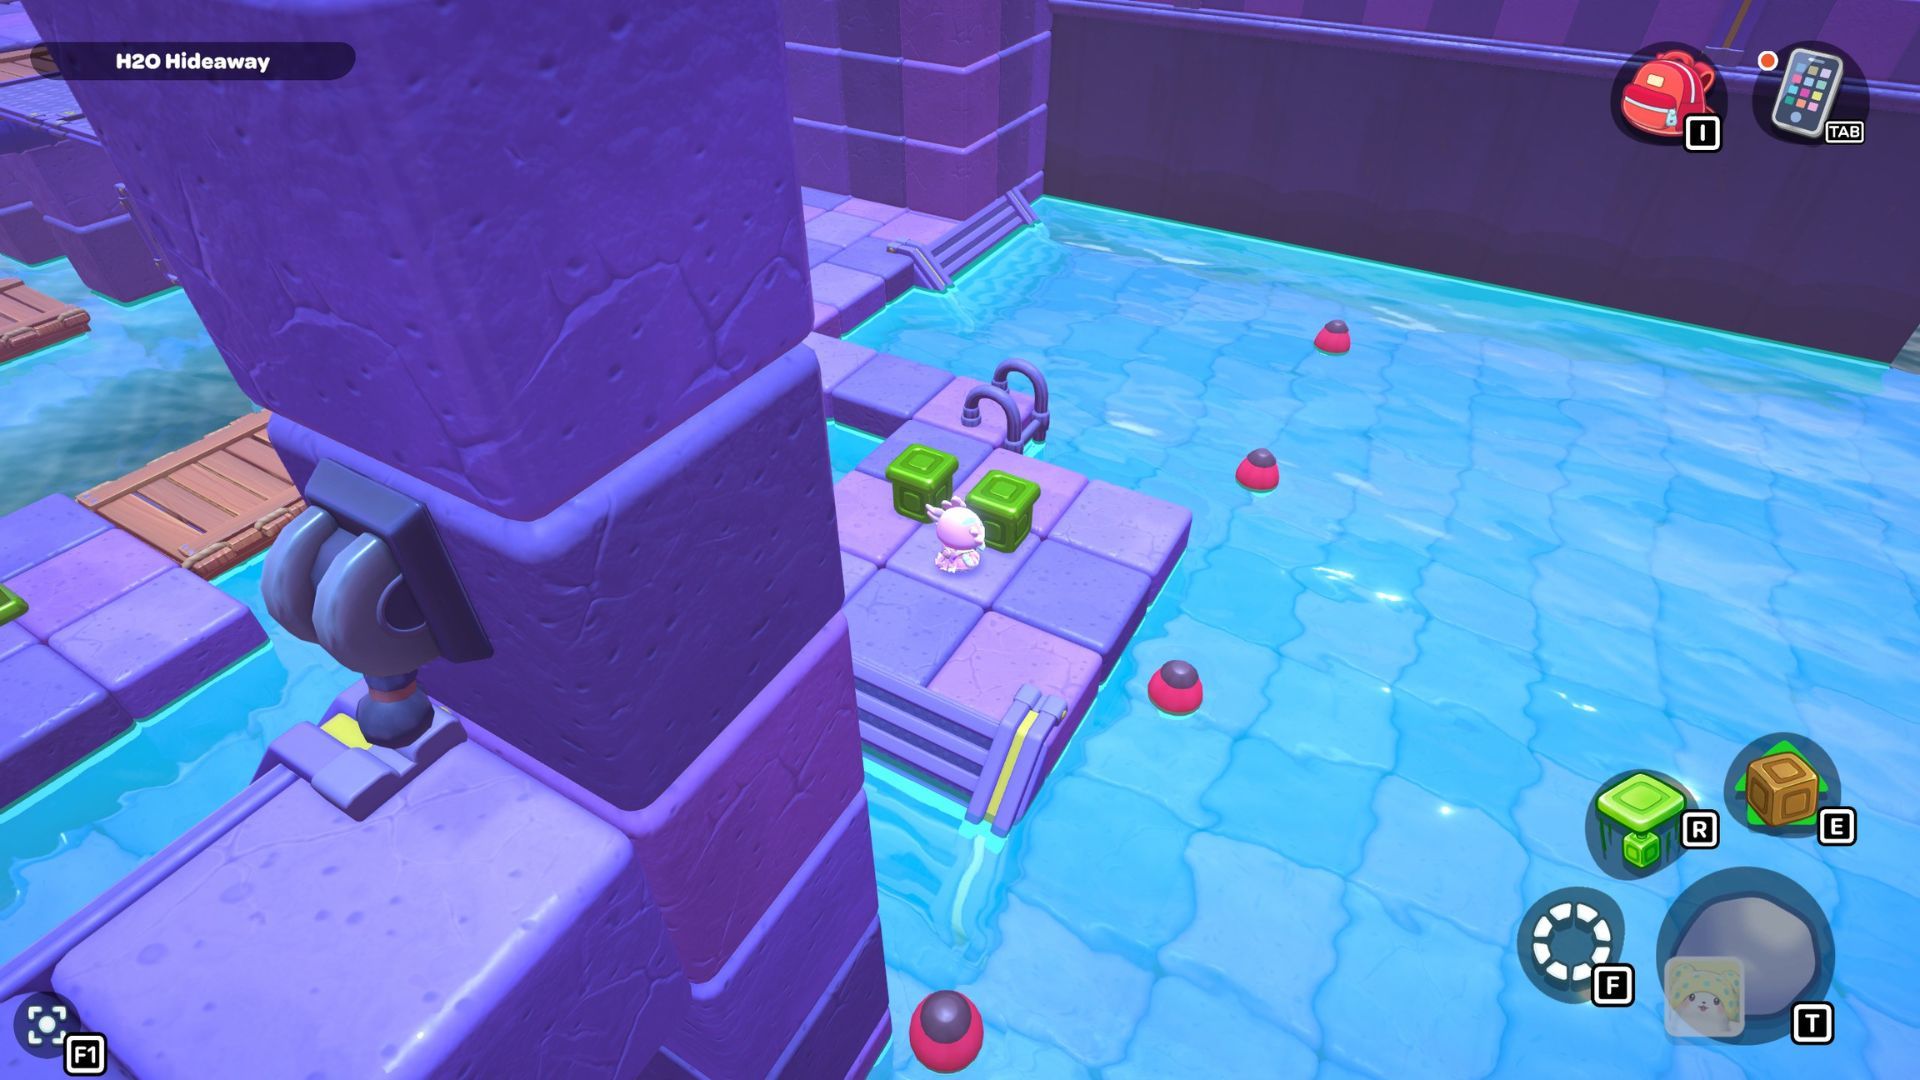
First, pull the lever to make the water rise. Then, pick up one of the green blocks and carry it over to the blue triangle switch. Placing the block on the switch will open a hole in the floor. Carefully drop down towards the hole, entering on the left side, to find a green cube waiting on the floor.
Grab the cube and carry it up the stairs on the right. Set it down, then swim back to the hole and enter from the right side. Once inside, pick up the green cube and bring it to the same platform where you placed the first cube.
First, fill the room with water. Then, pick up the red cube and swim to the bottom-right corner. Use the red cube to activate a switch and reach the green cube. After that, bring the red cube back to the platform near the door, and swim back to the bottom-right platform.
Please pick up the green cube and place it on the platform near the door. When the water is high, remove the green cube from the blue triangle button and put it on that same platform. This action will result in you having three green cubes and one red cube near the door.

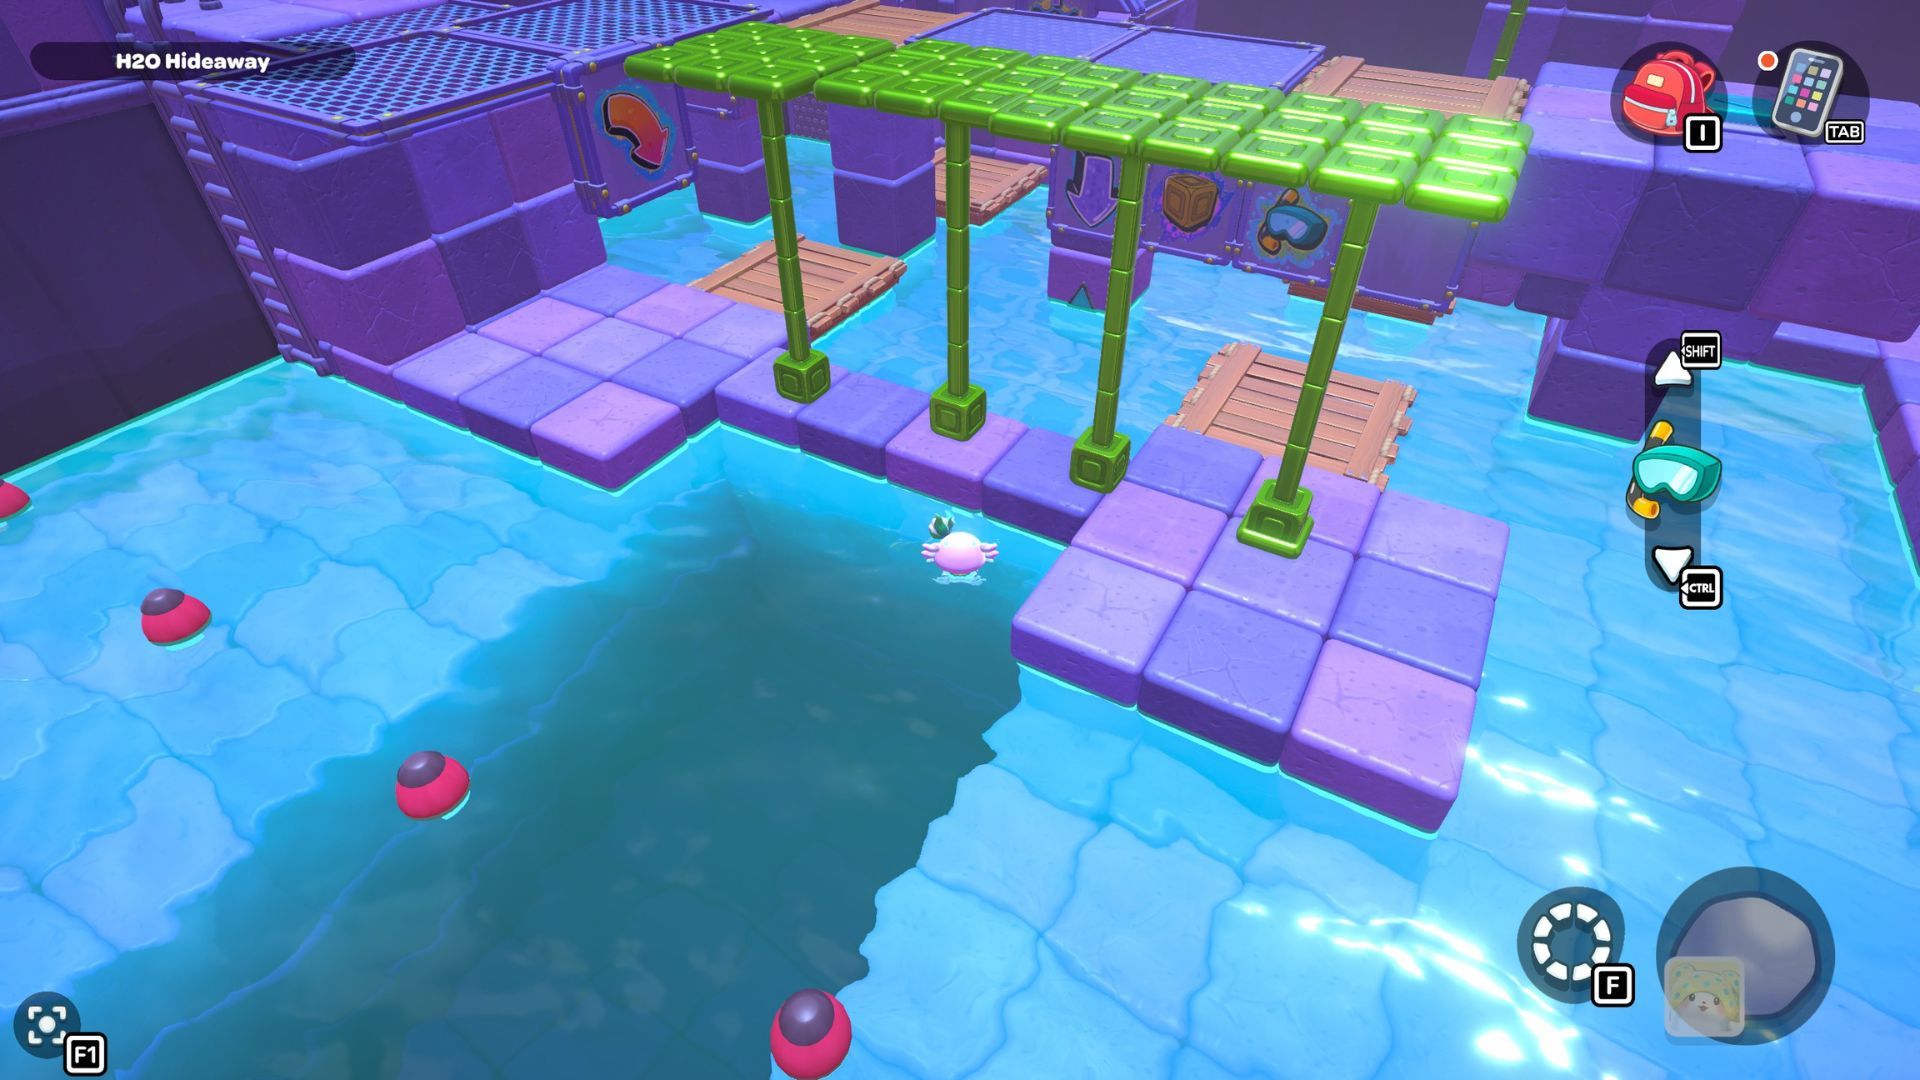
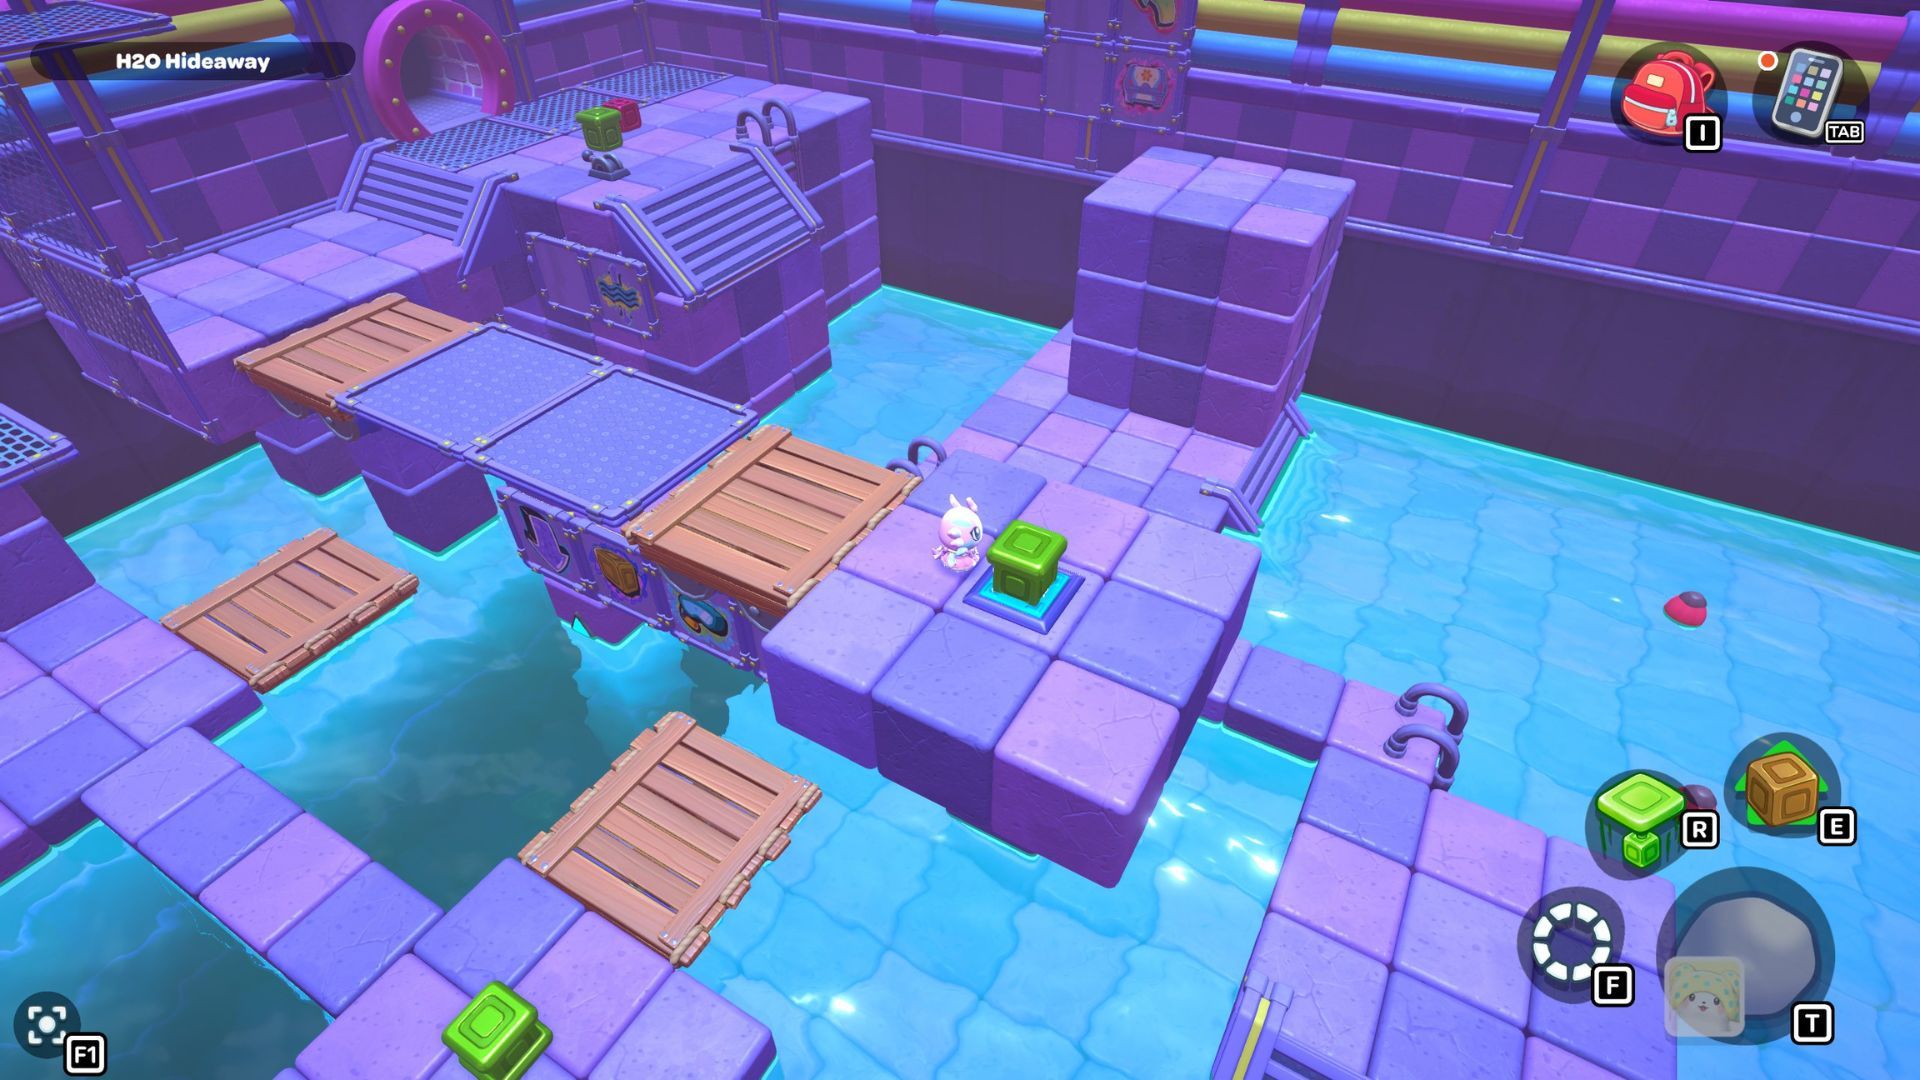
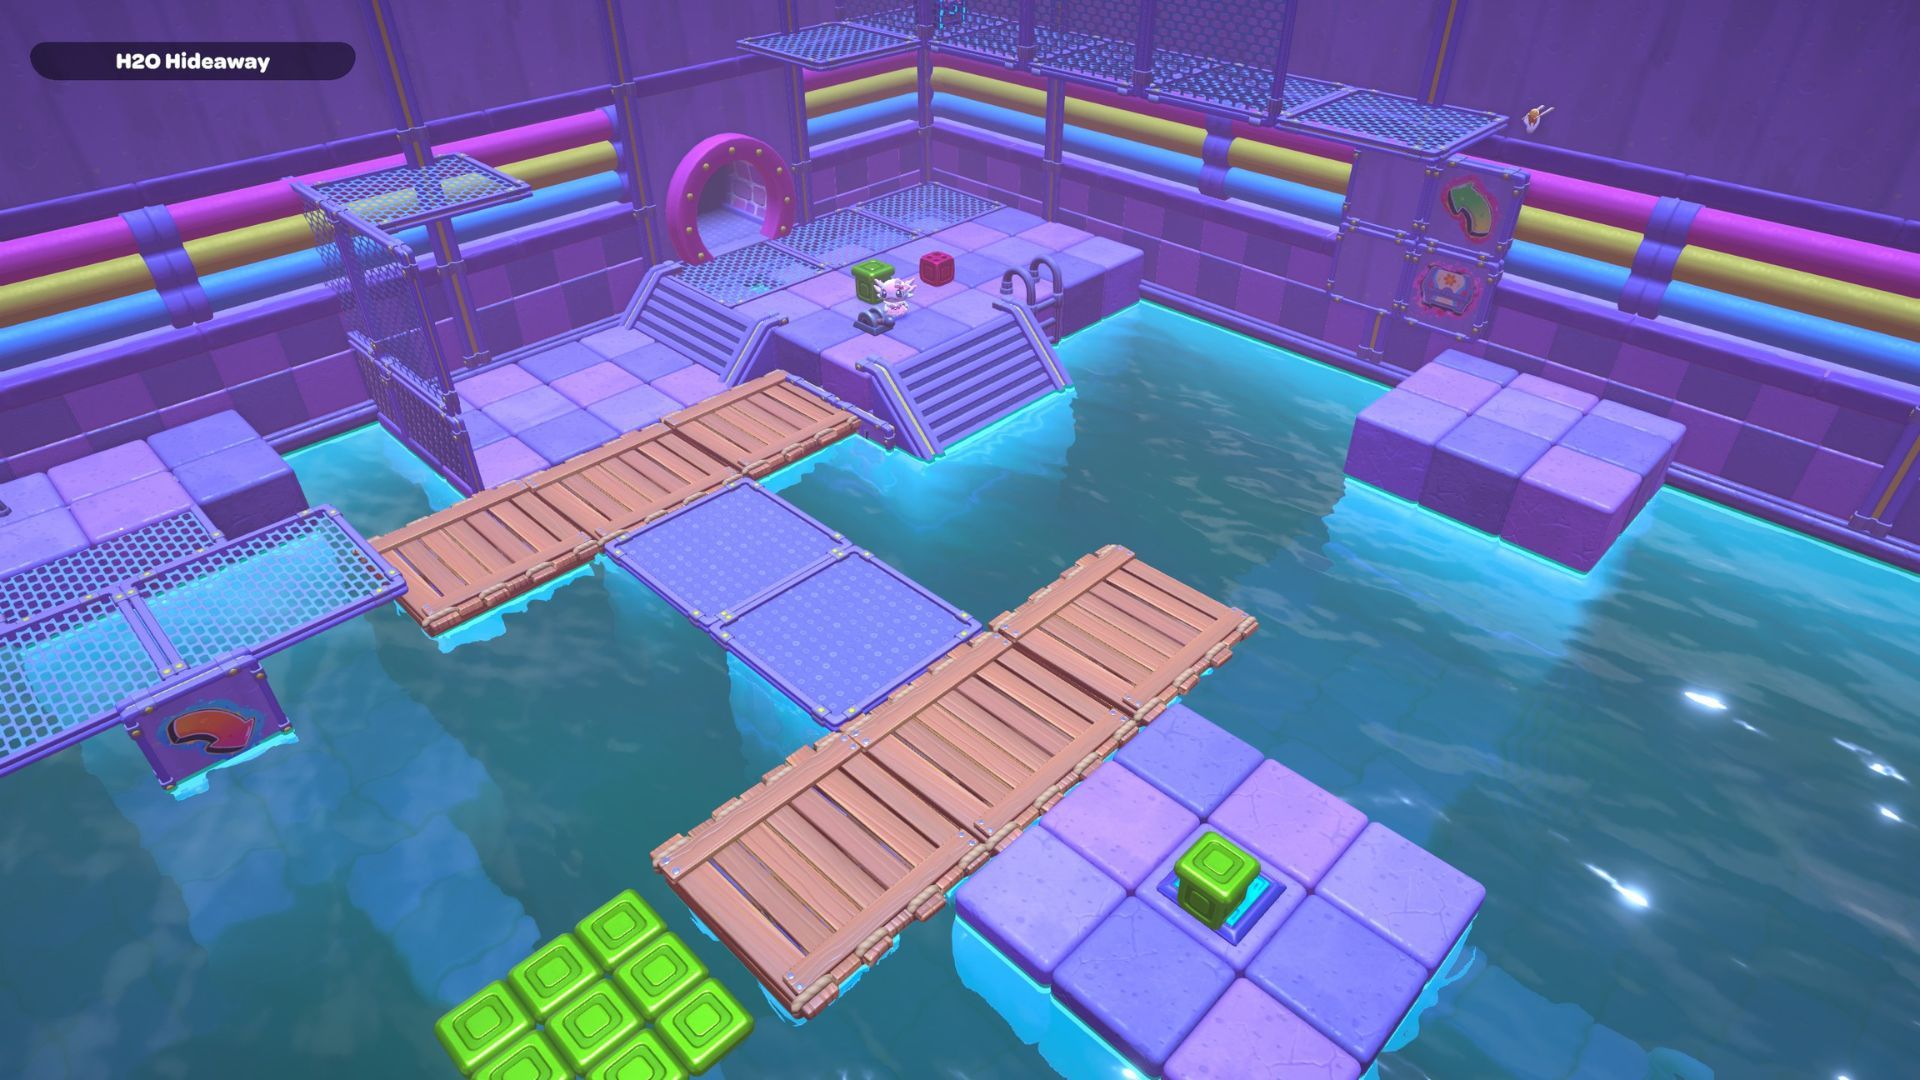
First, drain the water so you can build a path from the starting point to the platform where the chest is. Begin by moving the two underwater blocks near the final platform. Position one block close to the platform itself and the other near the wooden pallet. These blocks should create a continuous walkway from the pallet to the platform.
Now, focus on the three cubes at the beginning. Step onto the first wooden plank of the bridge, then jump down to the platform on the left. You’ll notice one green cube that you can’t push or move.
Turn on the stationary green cube. It marks the finish line for this part of the course. To reach it, use the three cubes on the starting platform to bridge the gap to the mesh platform in the room’s corner.
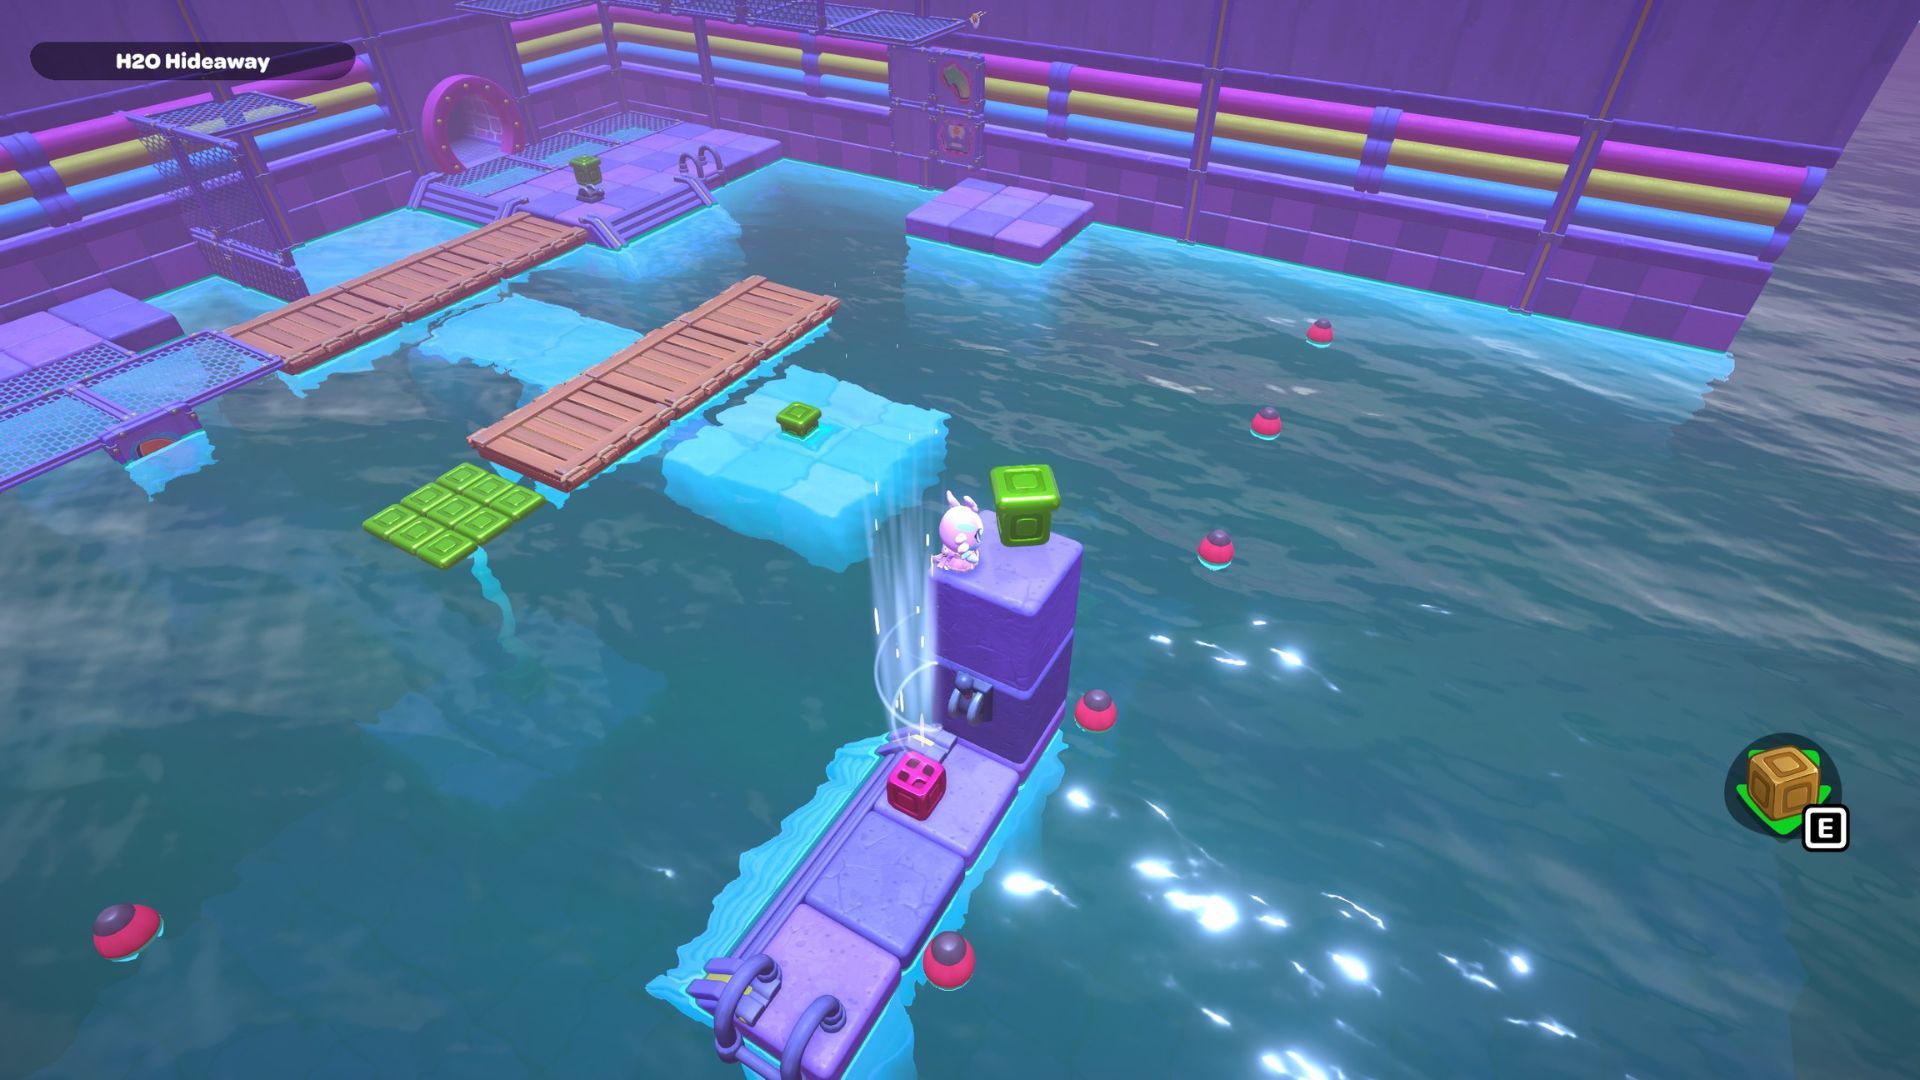
Go back to where you began and fill the area with water. Then, pick up the red cube and walk across the new path it creates. Once you reach the last platform, let go of the cube and turn it on.
You can now fly up to the platform with the chest. Open the chest to get the Storage Barrel item.
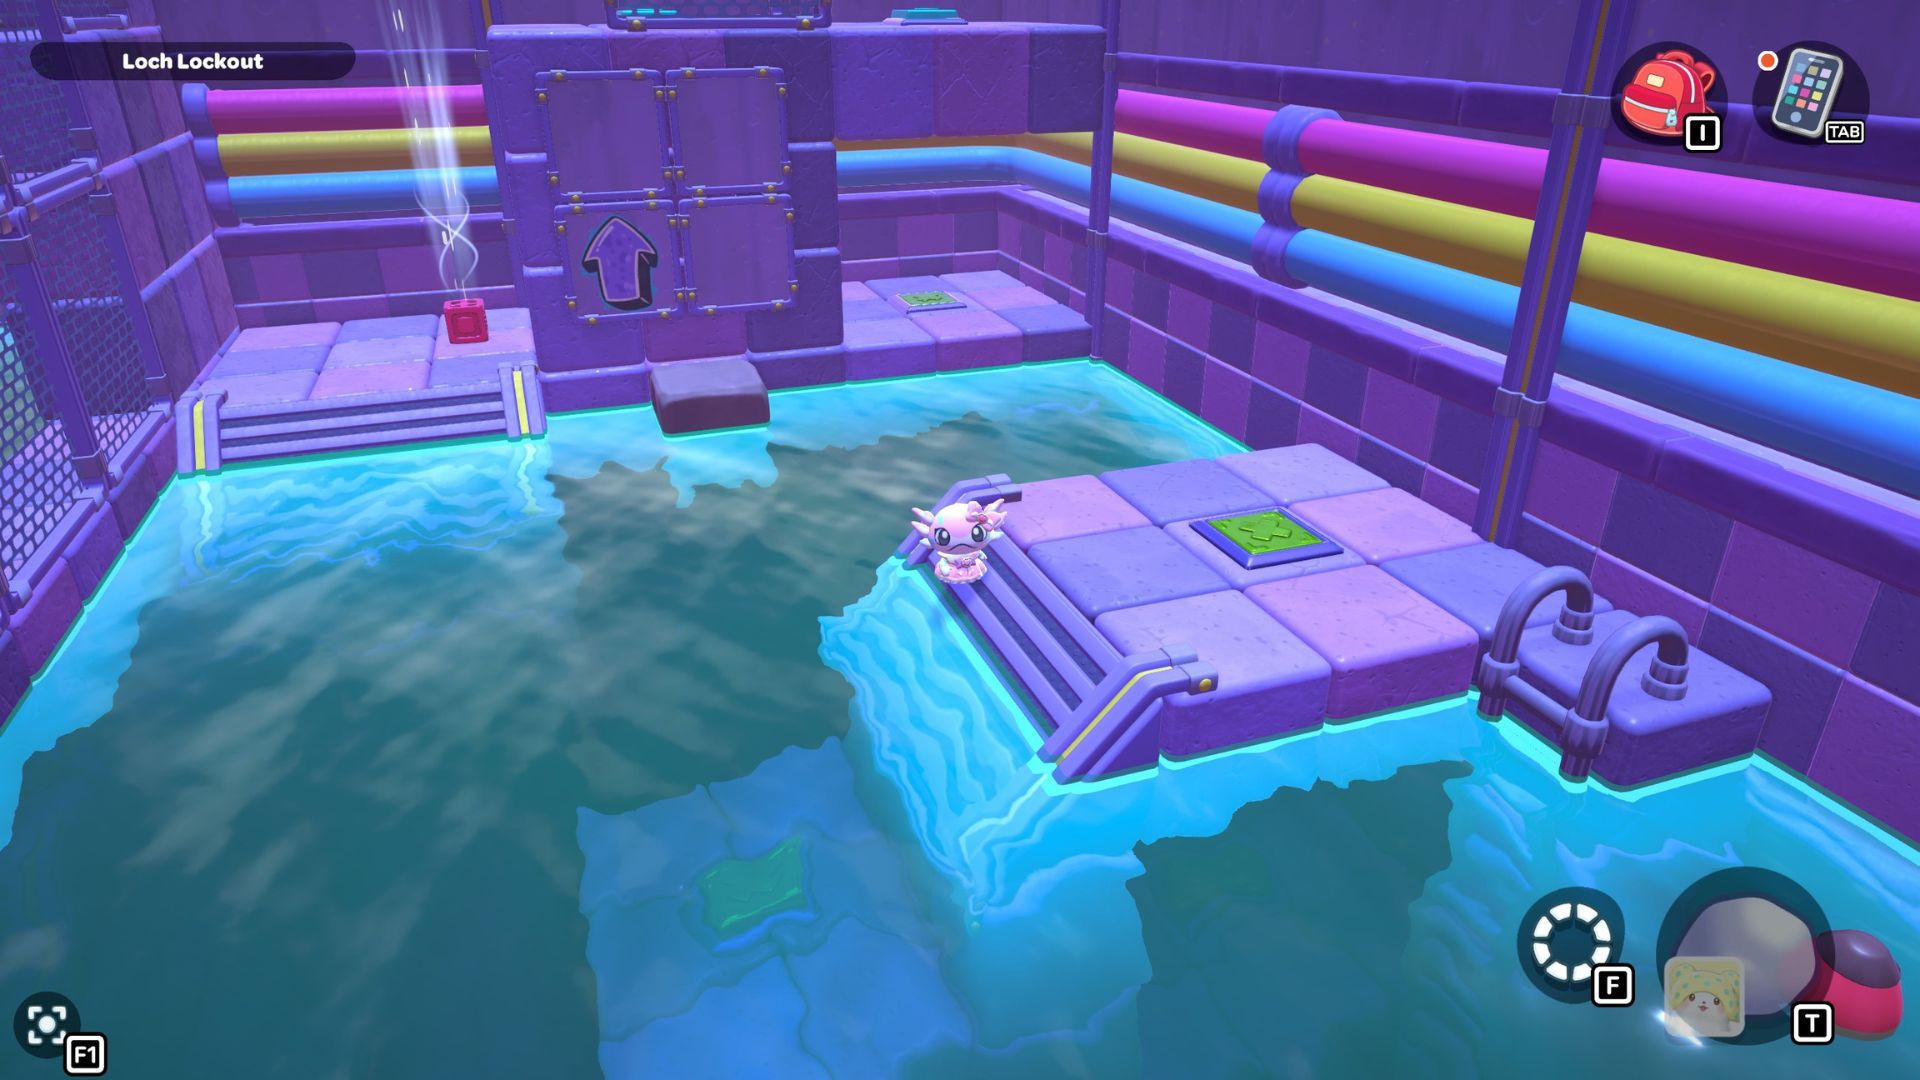
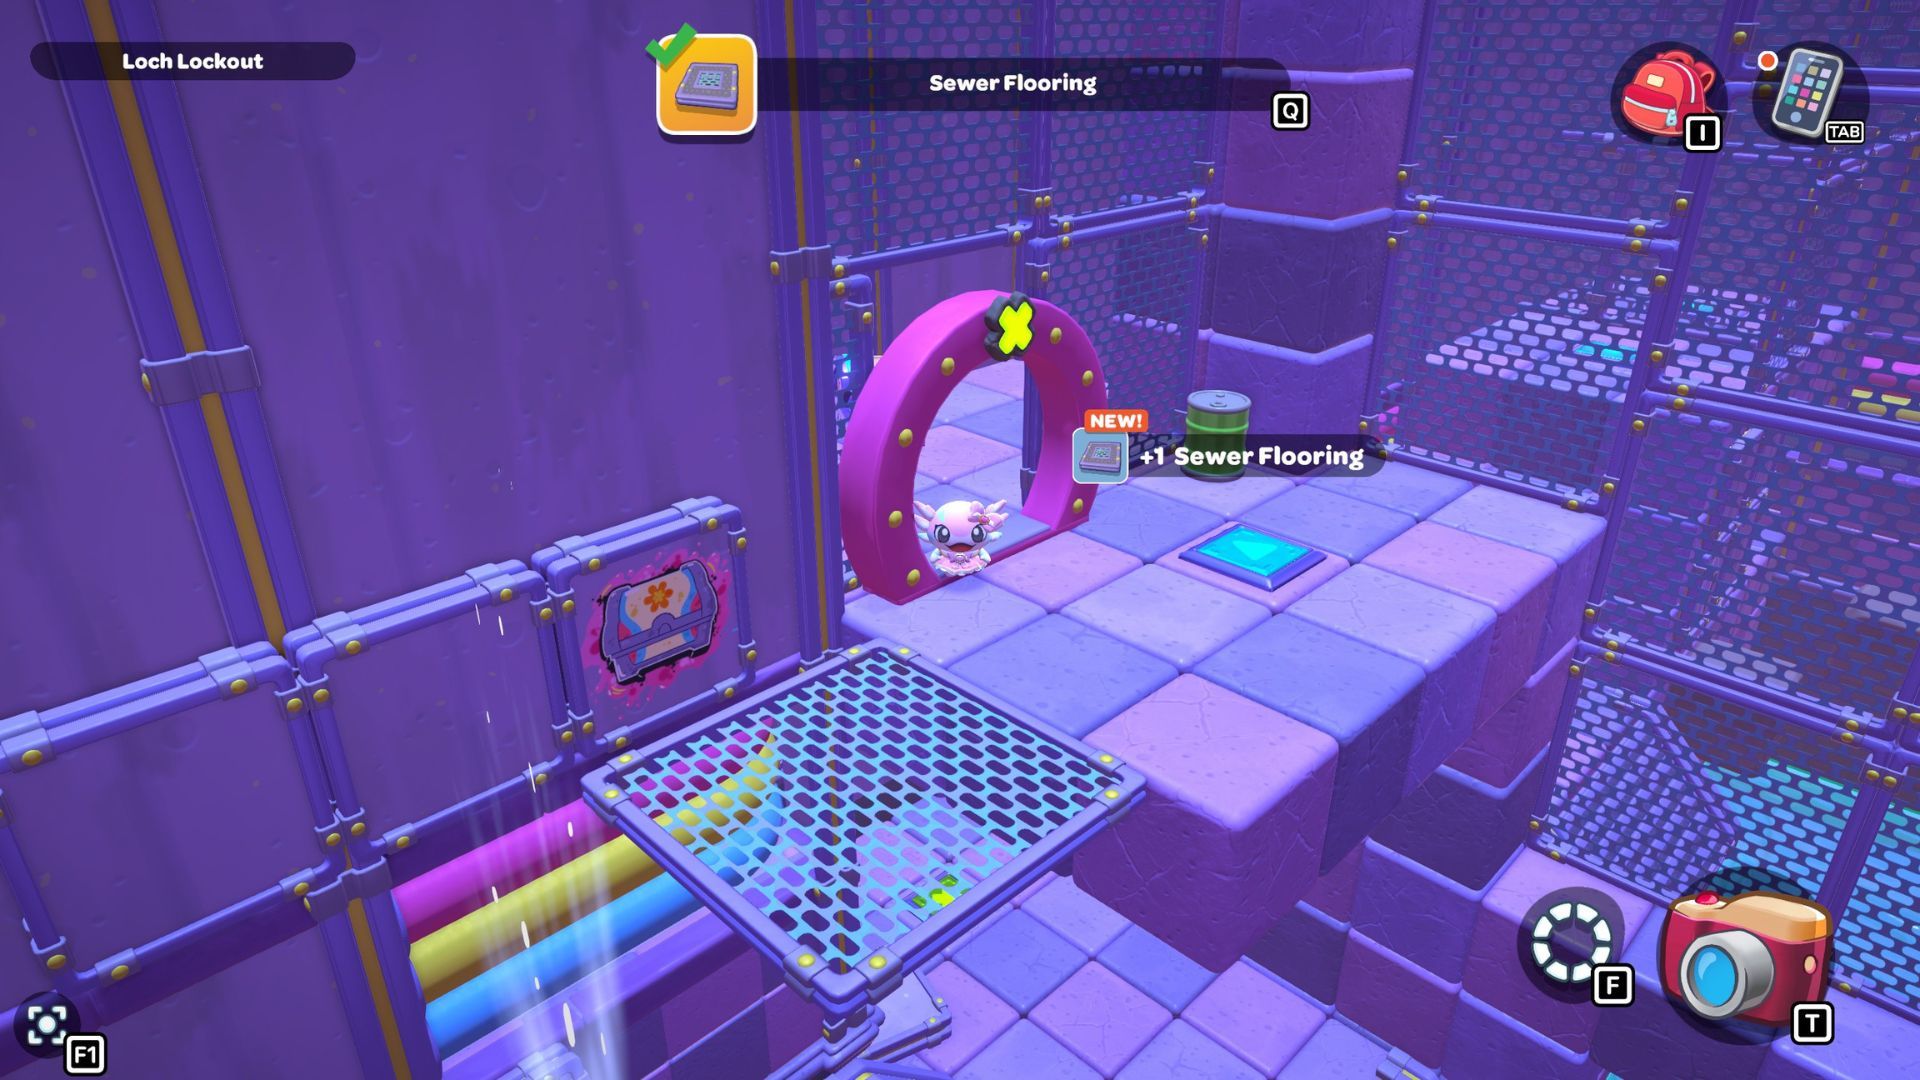
City Town Sewers — Loch Lockout Walkthrough
The Loch Lockout puzzle room is located on the eastern edge of the City Town Sewers. To solve it, you must step on every switch in the room and hold it down until it’s fully pressed.
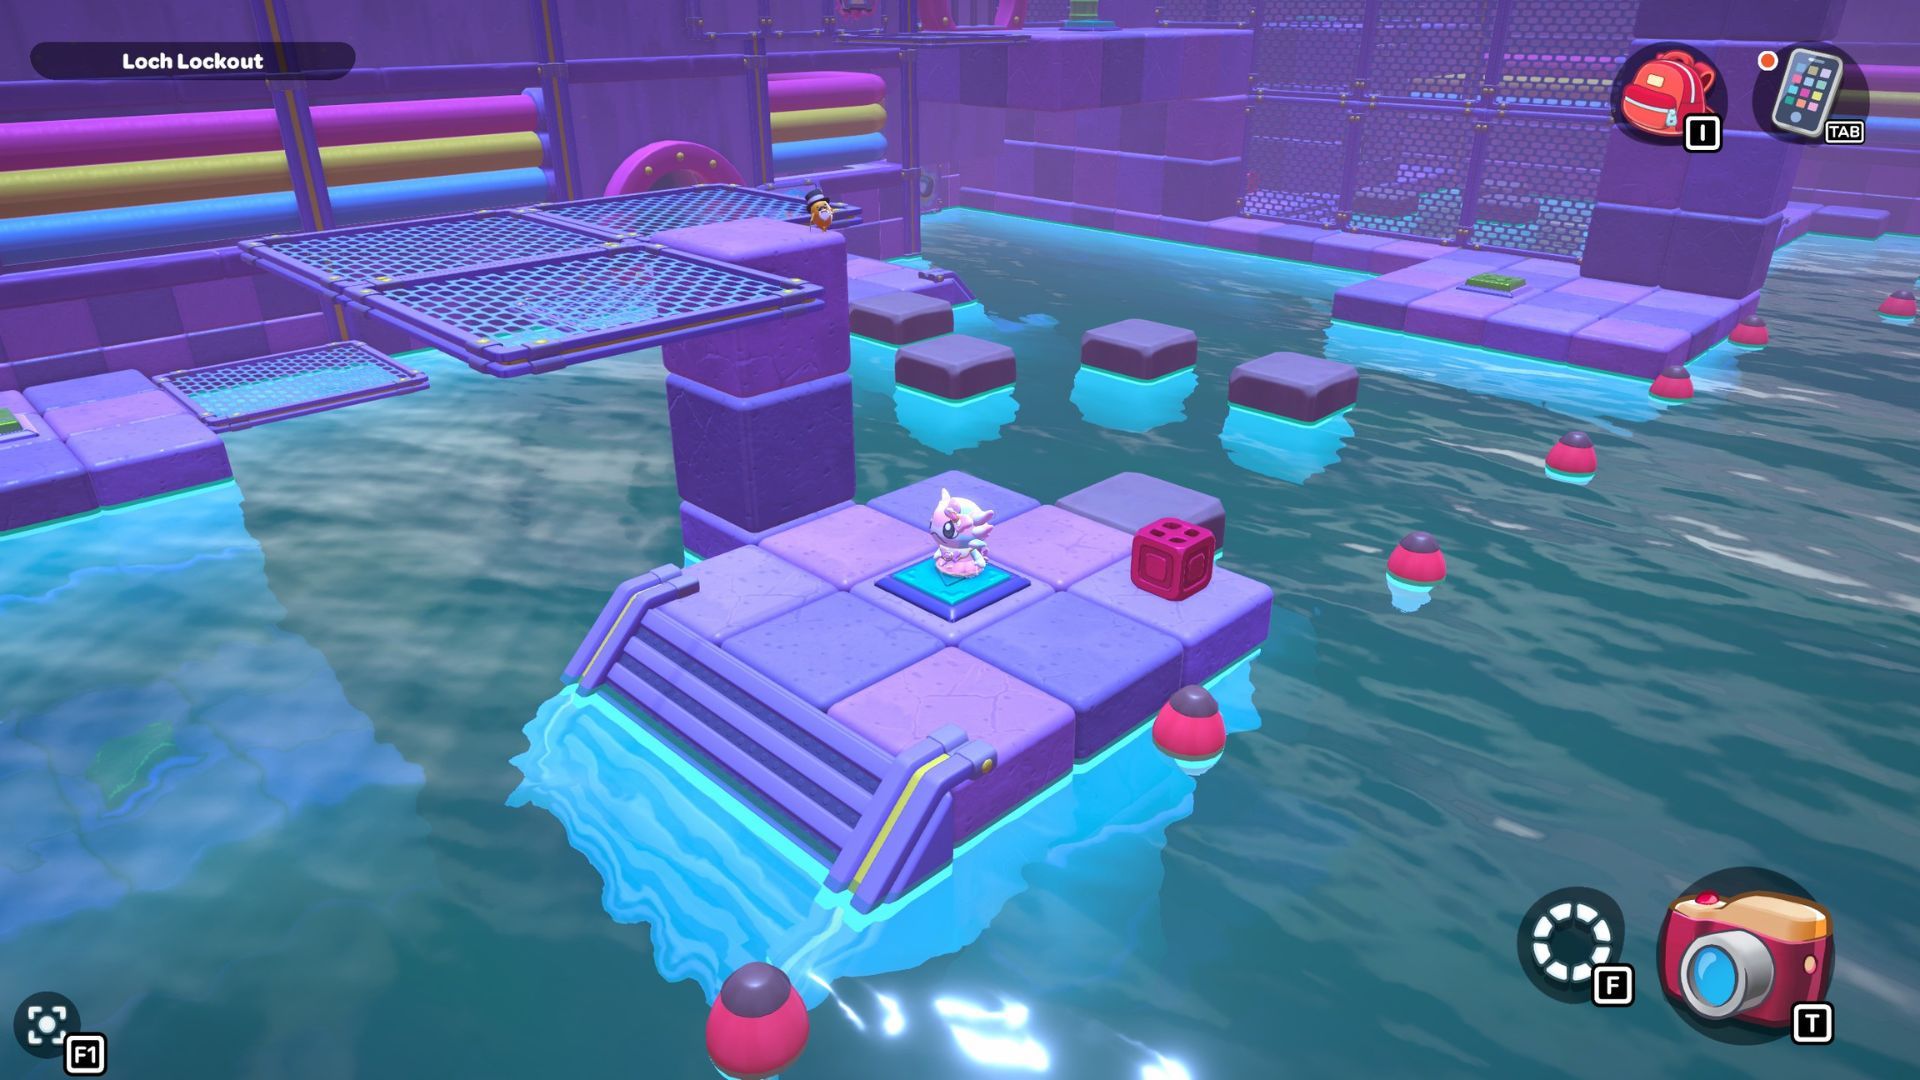
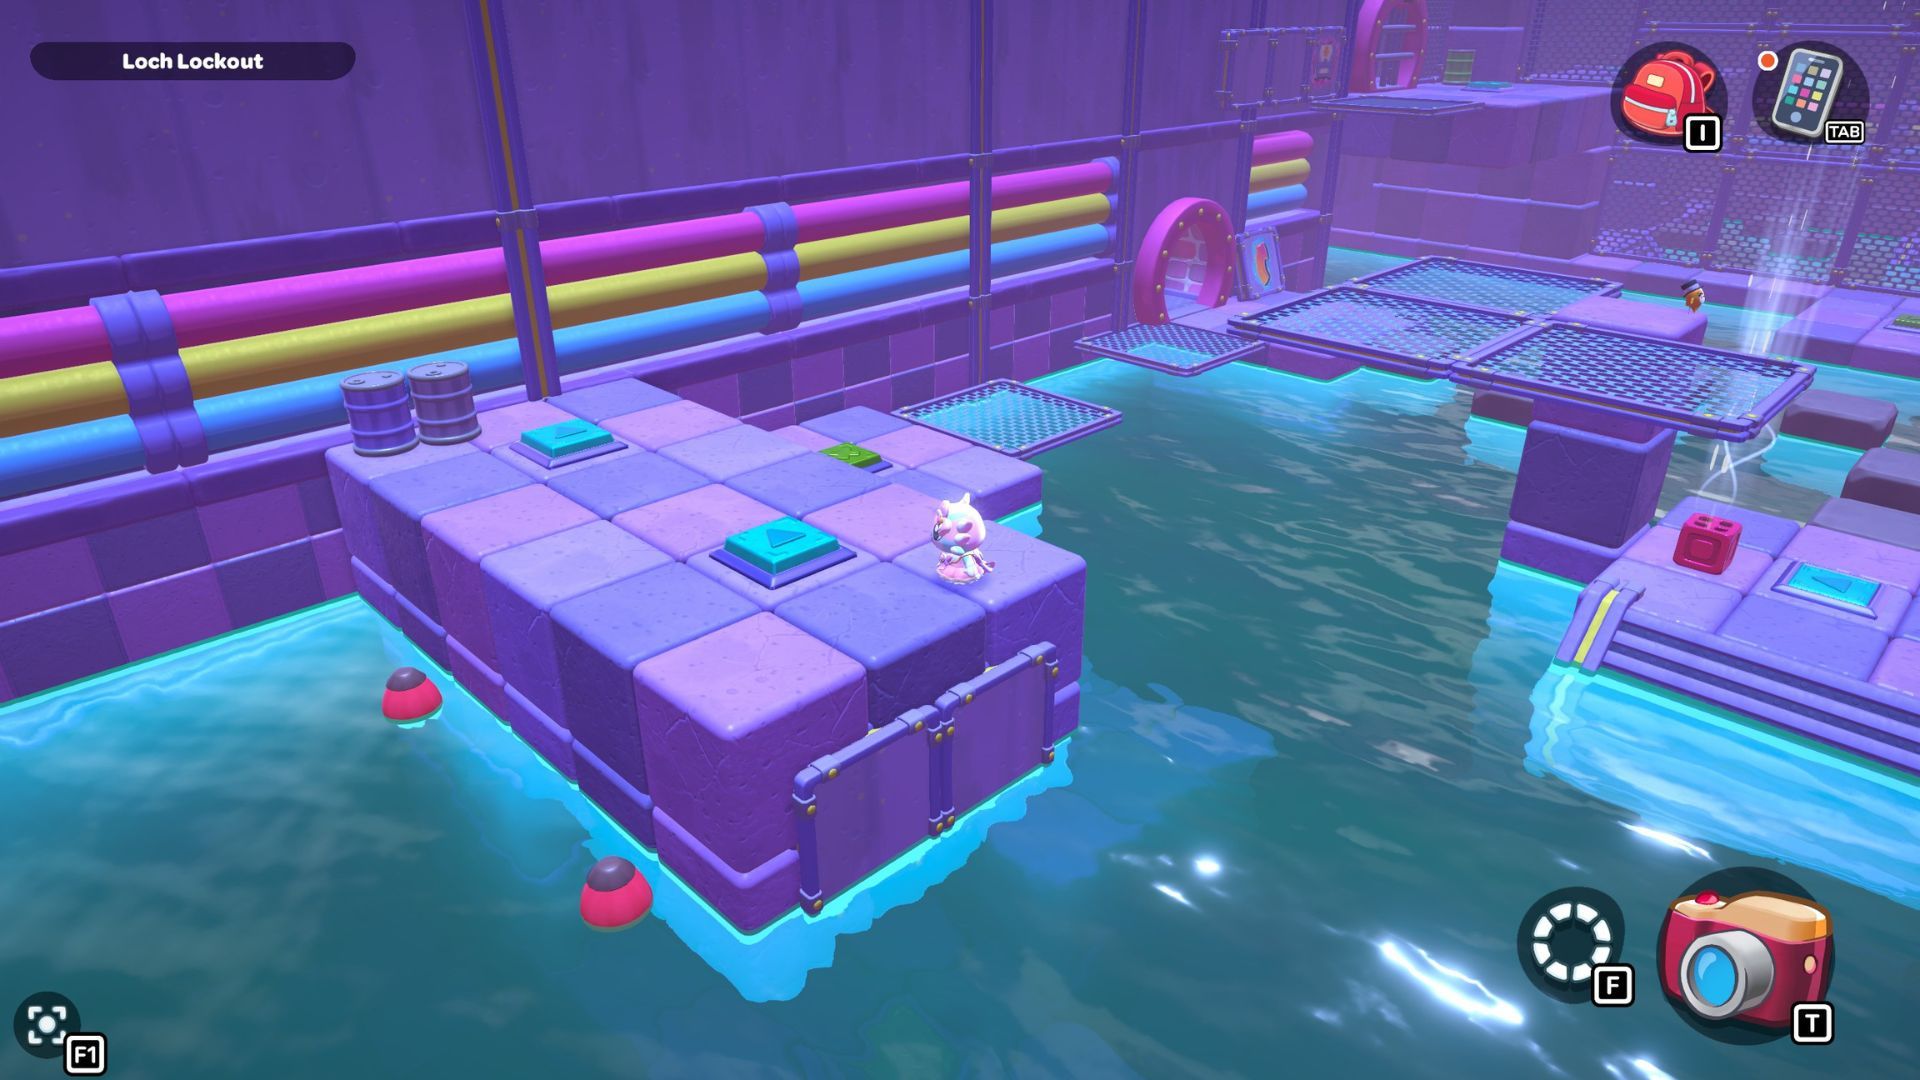
Begin by jumping across the rocks in the water. Once you reach the next platform, step on the blue triangle switch. Then, pick up the red cube and place it by the pillar at the edge of the platform to activate it. Jump up high above the cube and fly towards the platform on the west side of the room.
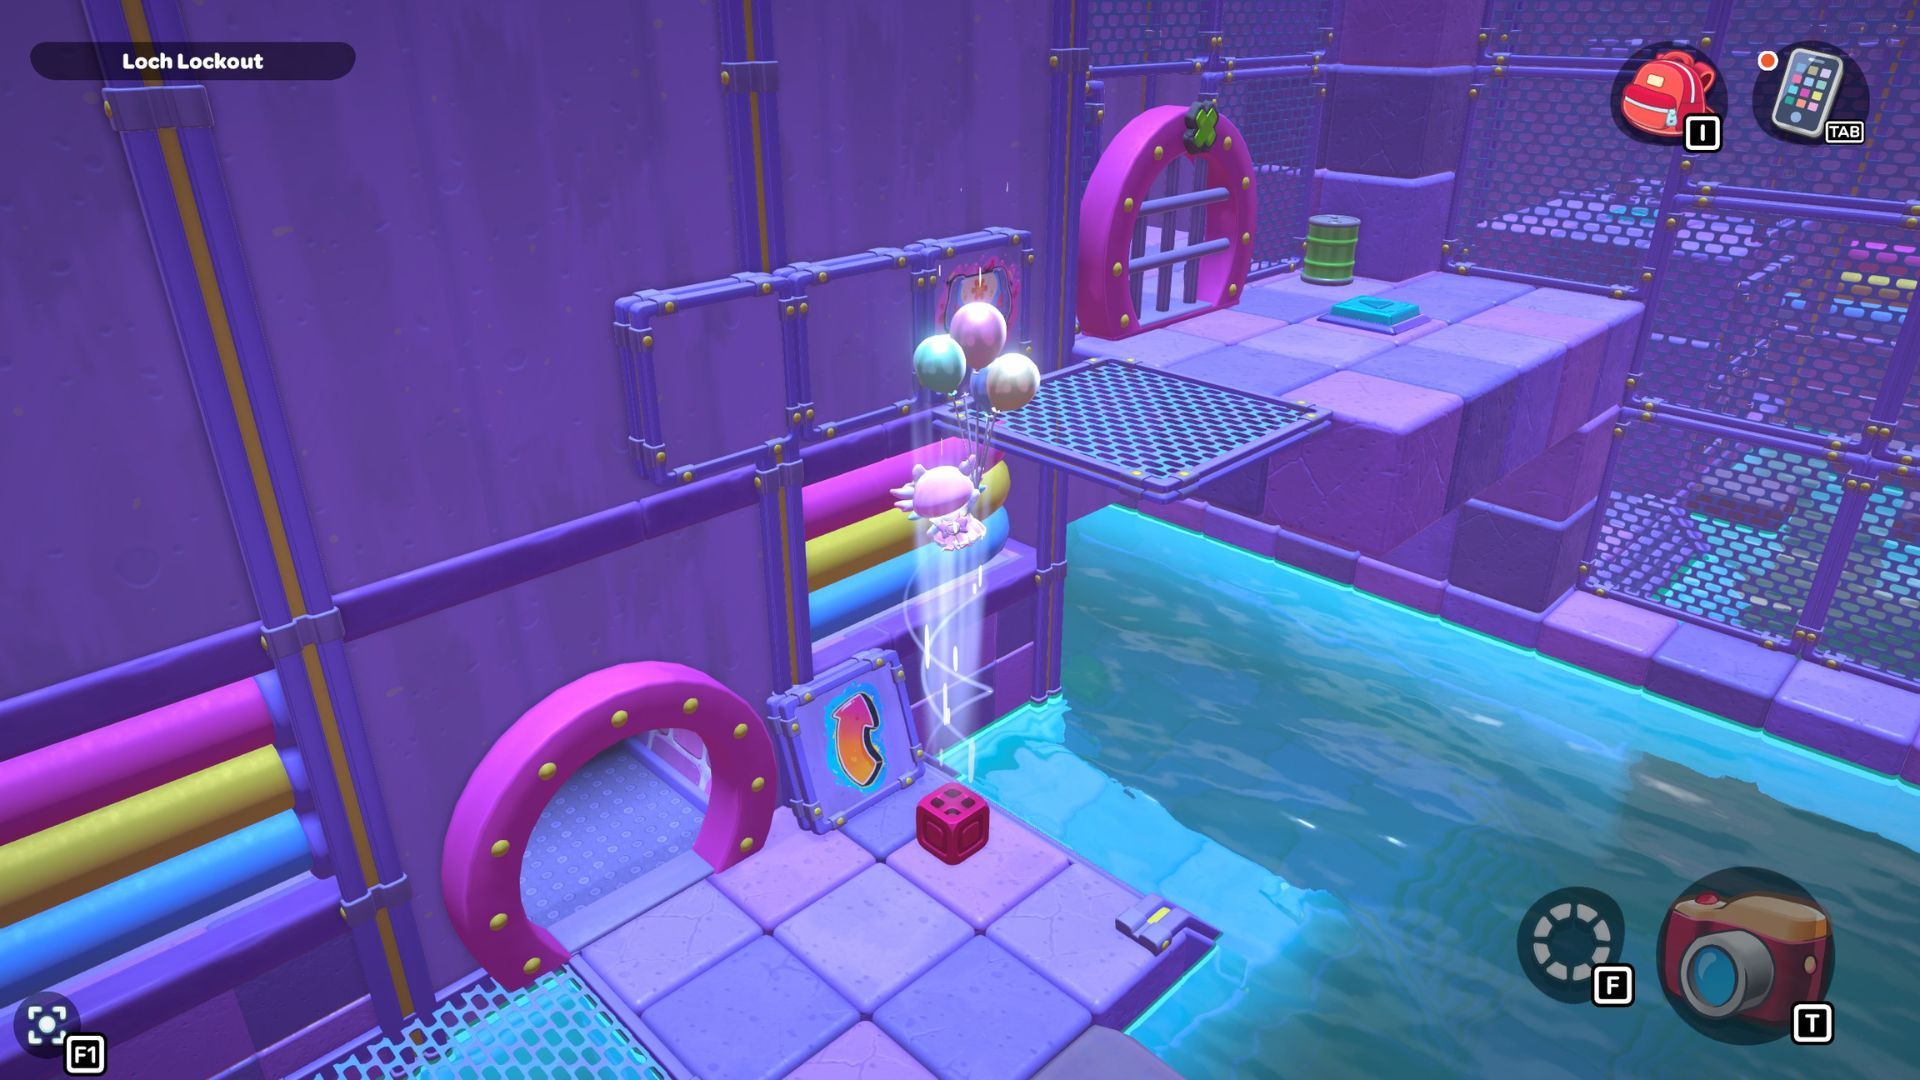
Okay, so I stepped on those two triangle switches, then dropped down and hit the X switch. After that, I swam back to the first platform and jumped across the rocks to where the red cube was. I grabbed it and carried it all the way back to where I started. That let me glide up to the ledge with the X gate. Don’t forget to hit the blue switch up there!
Jump from here and glide over to the platform with the X-shaped switch in the corner, then press it. After that, jump into the water and swim under the wall on the right to reach the next area.
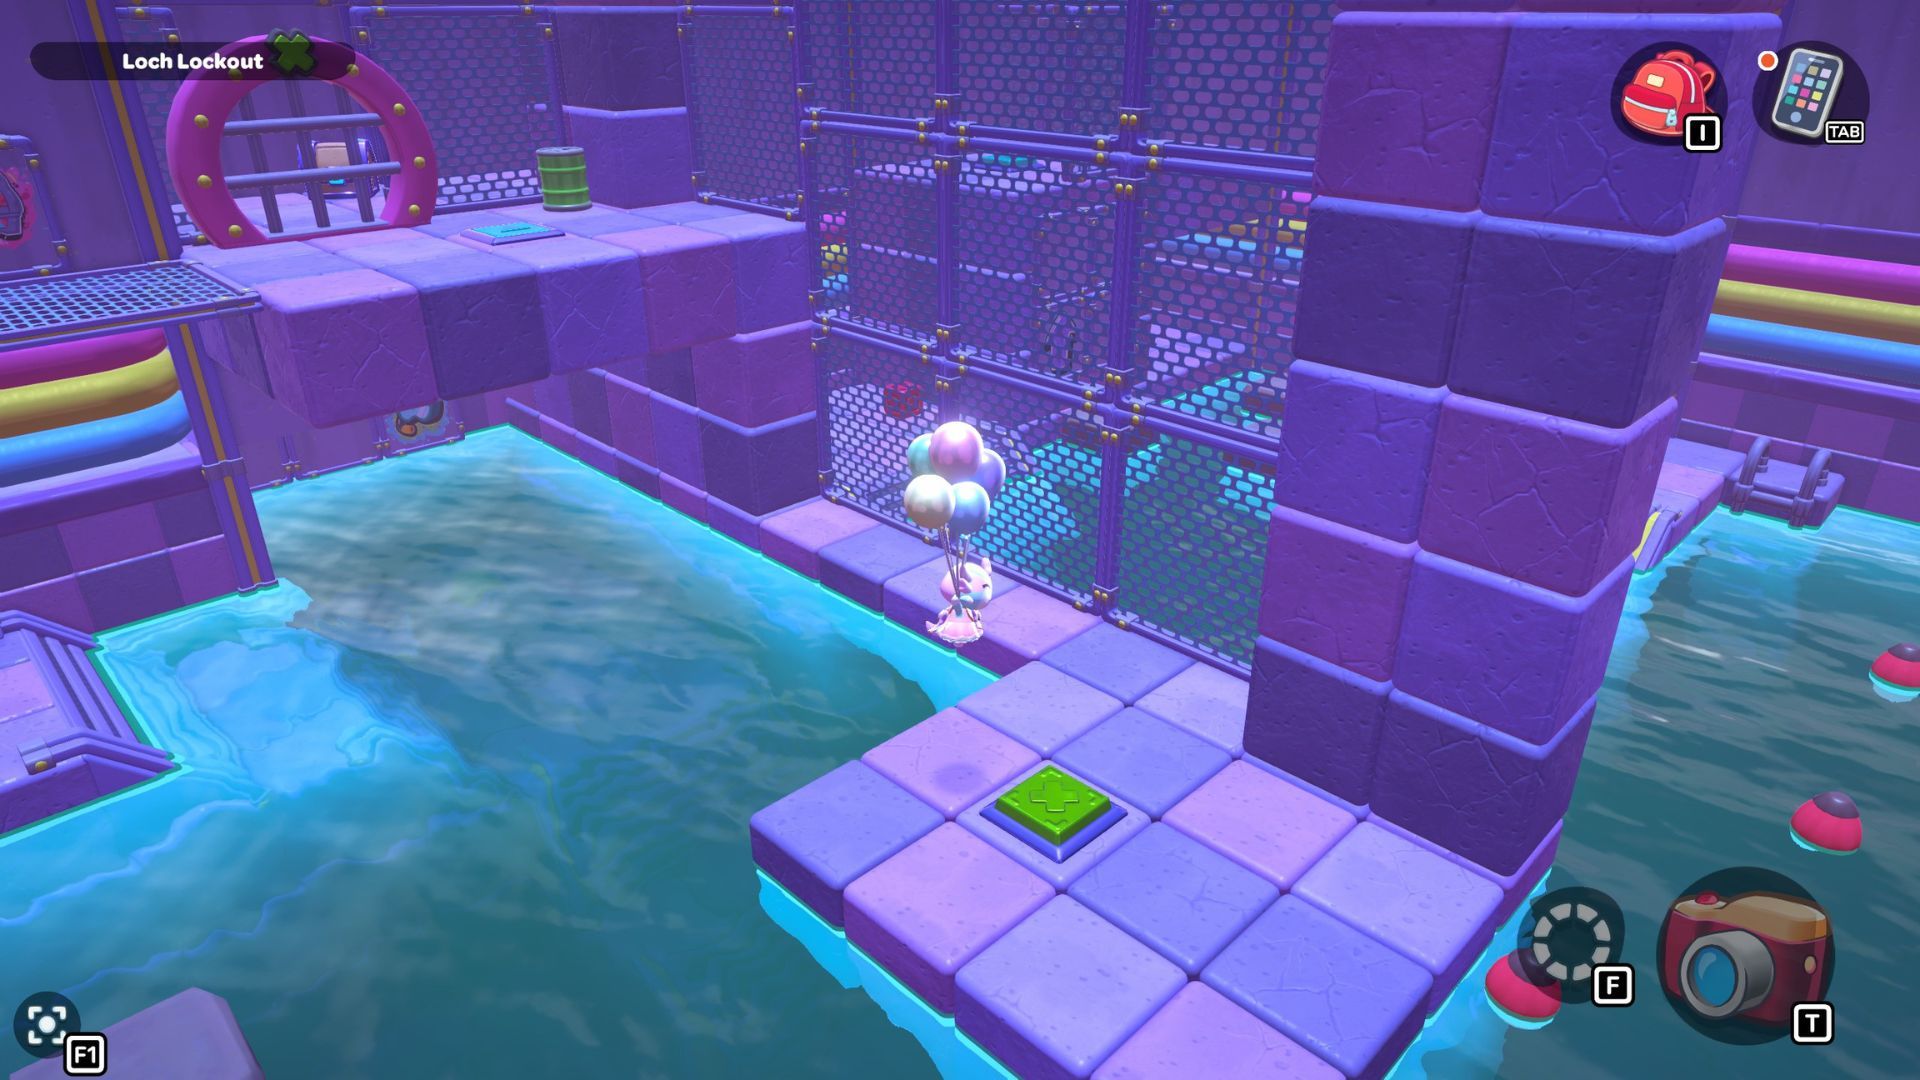
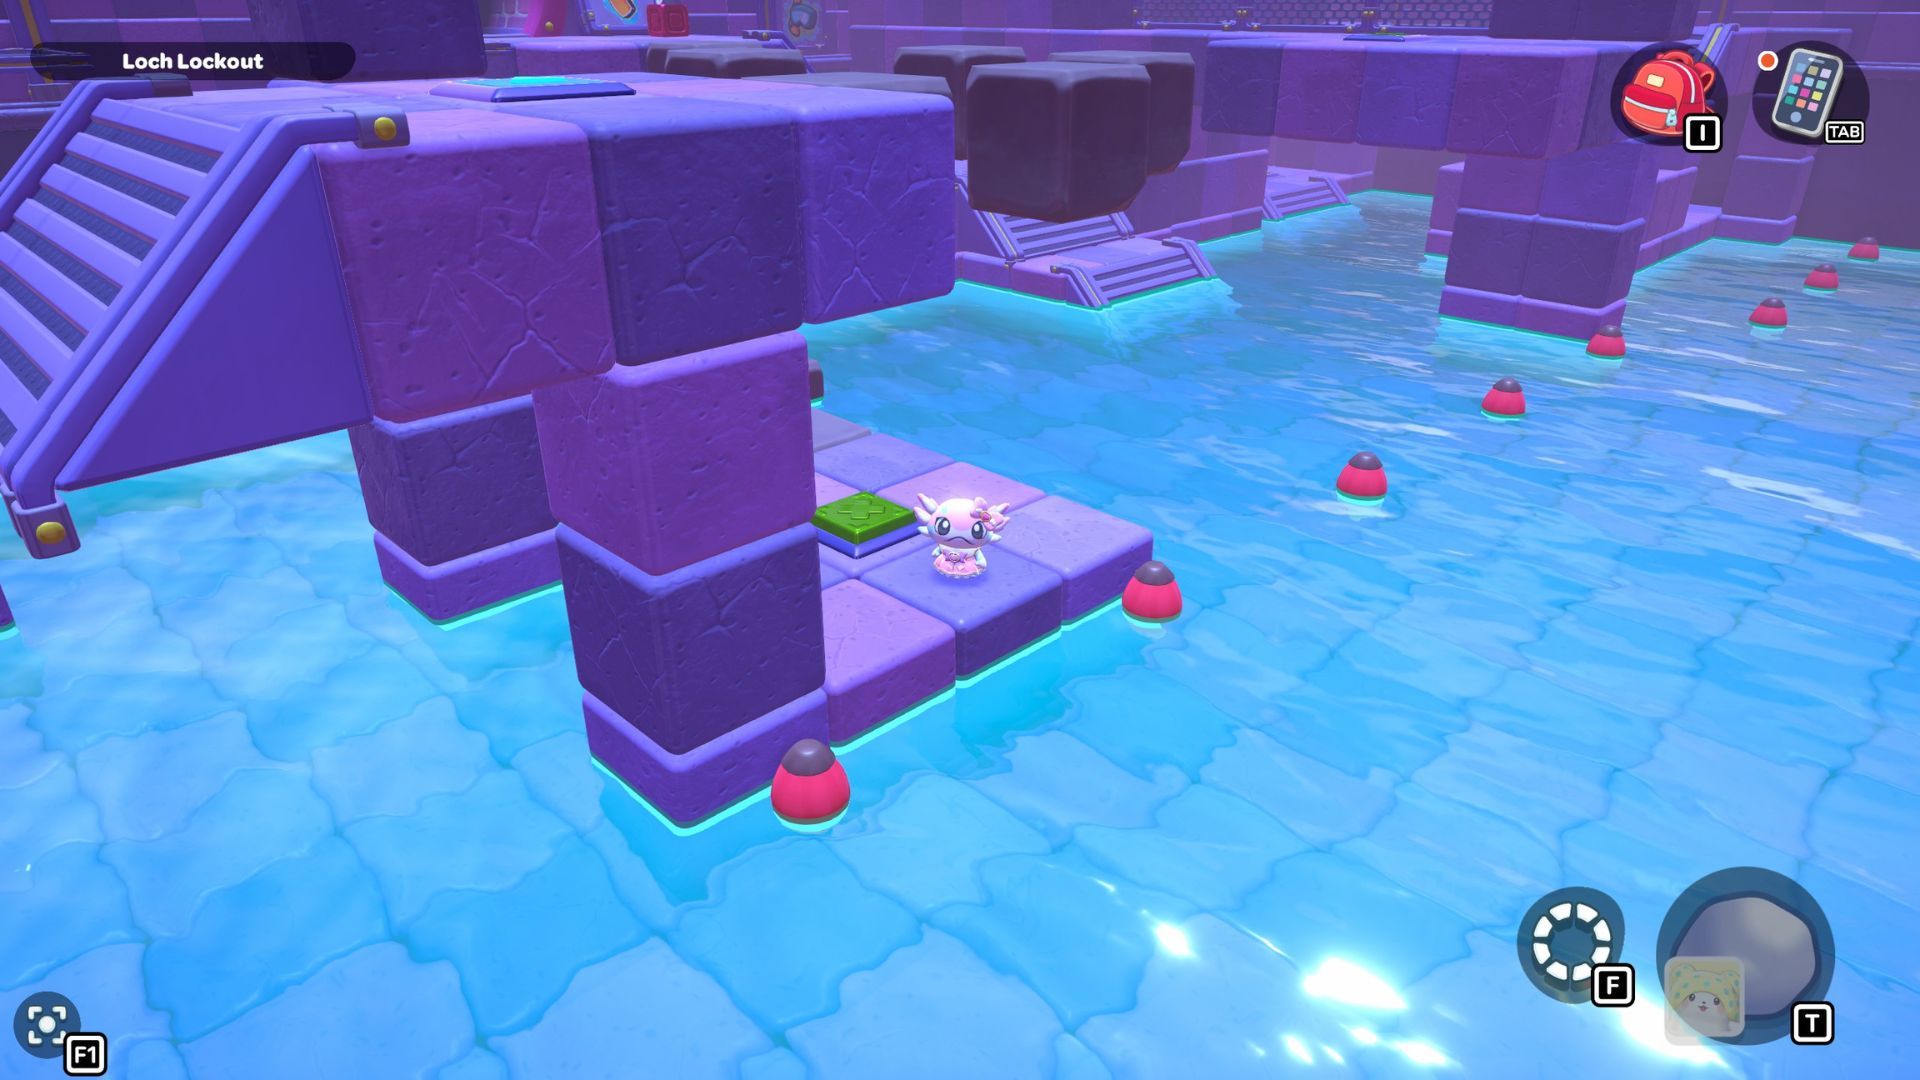
Okay, so in this part of the room, I need to start by standing on the platform on the right and hitting that X switch. Then, I gotta jump across those rocks to get to the other X switch in the corner. After that’s done, I swim over to the northwest corner and activate that red cube.
Grab the red cube and fly up to the higher platform to hit the blue switch. Then, return to the lower platform and pick up the red cube again. Carry the cube to the platform on the west side of the room. Carefully place the cube right at the edge of that platform and activate it. This will create a small opening that allows you to fly across the room to the next platform.
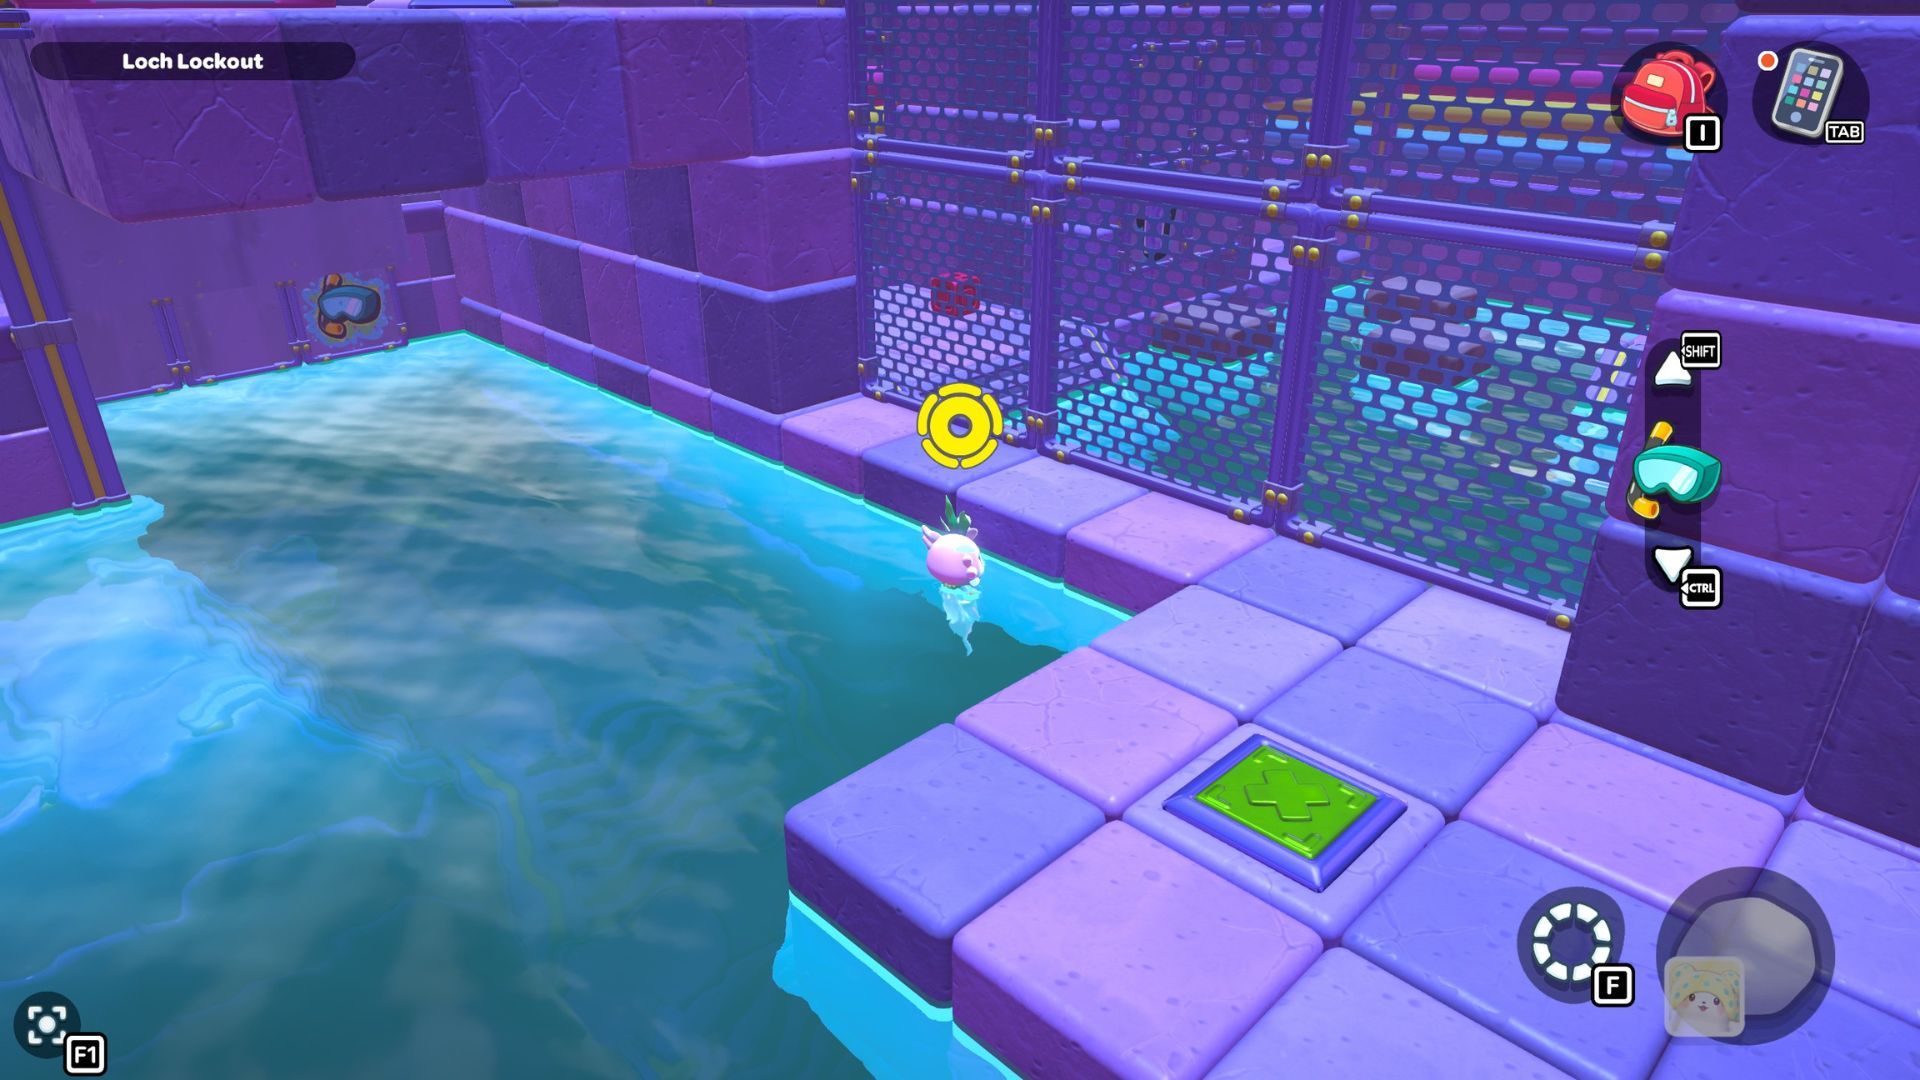
This platform has one last switch – a blue triangle. Pressing it will drain the water from the room.
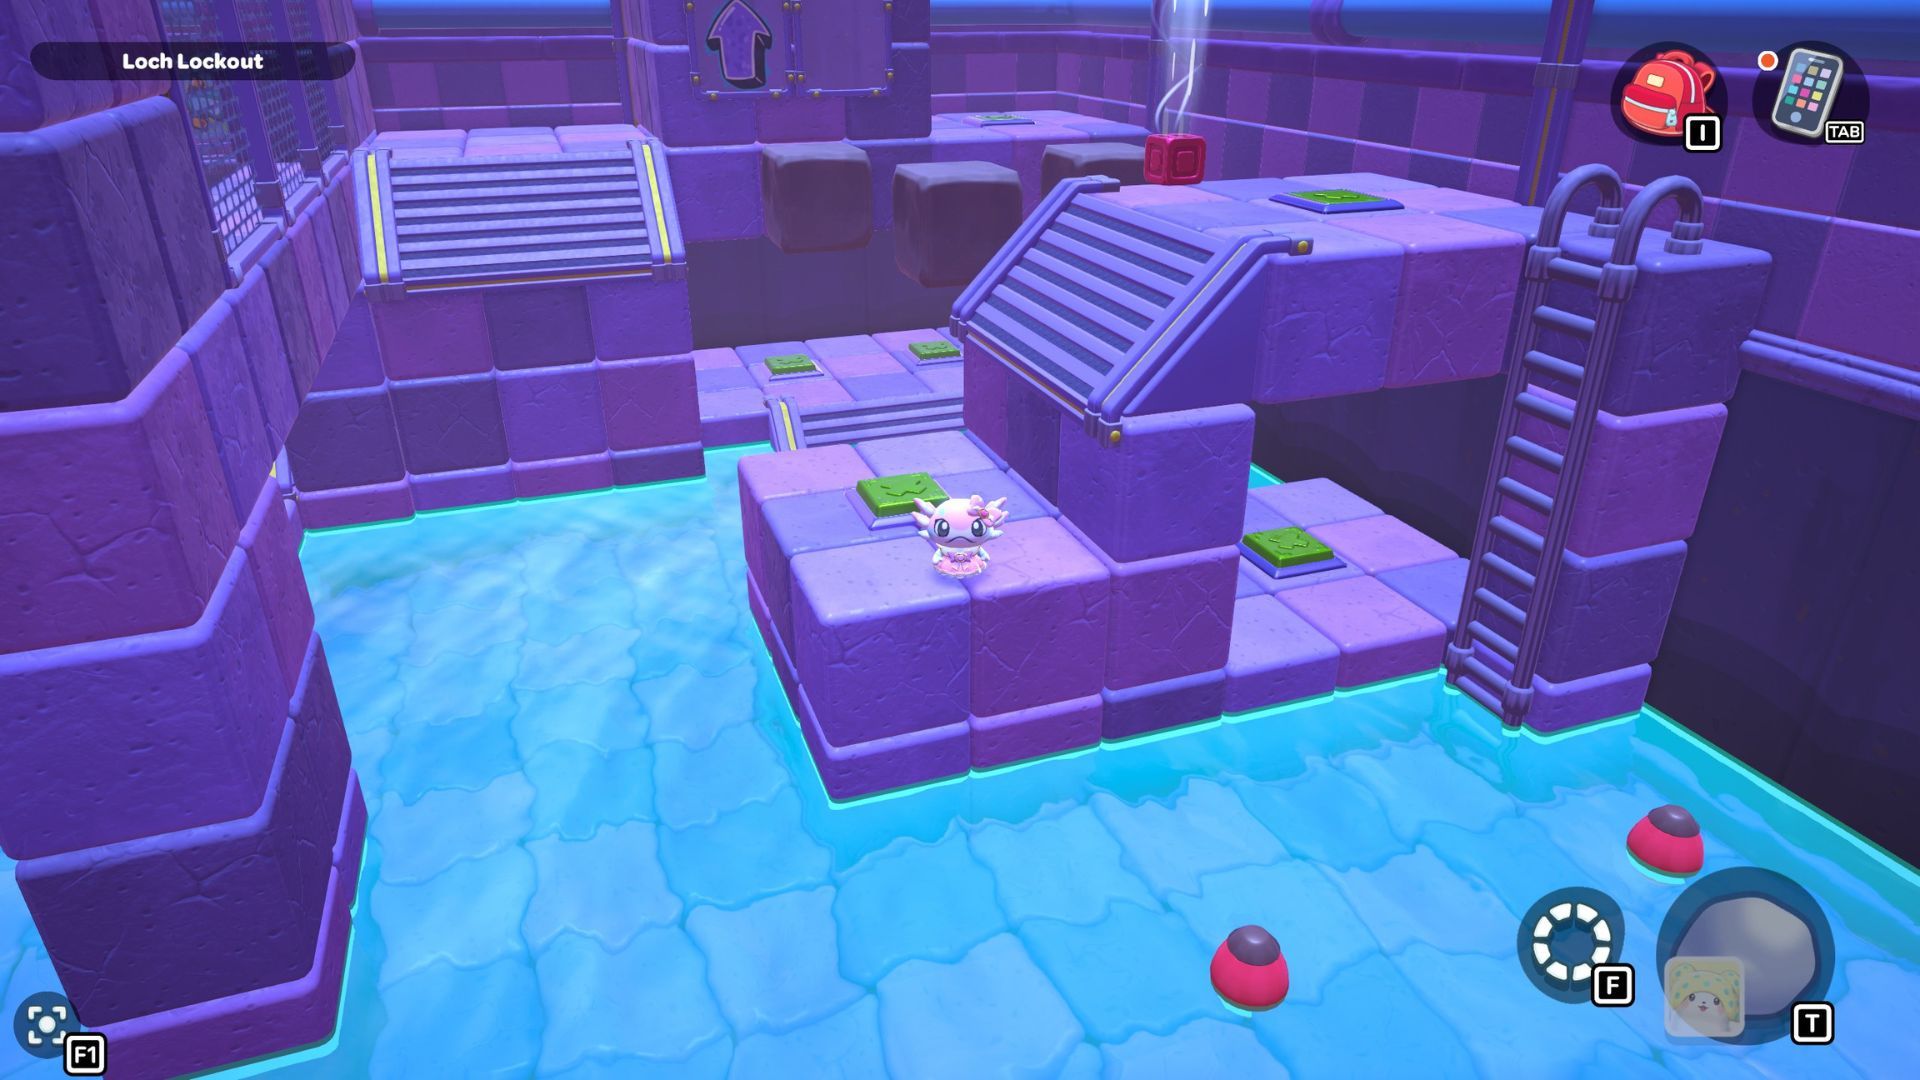

You’ll find four green switches you can activate in this room. One is near the stairs to the western platform, another is under the platform itself, and the last two are at the back of the room. Once you’ve hit all four, you can leave the room.
The next switch is at the top of the stairs, to the left of the door. Keep going up, and when you notice a space between the metal floor tiles, drop down to activate two more switches.

Jump across the rocks on the floor to get to the platform in the middle of the room. There’s an X switch hidden on that central platform, so be sure to activate it. Then, go back up the stairs in the corner.
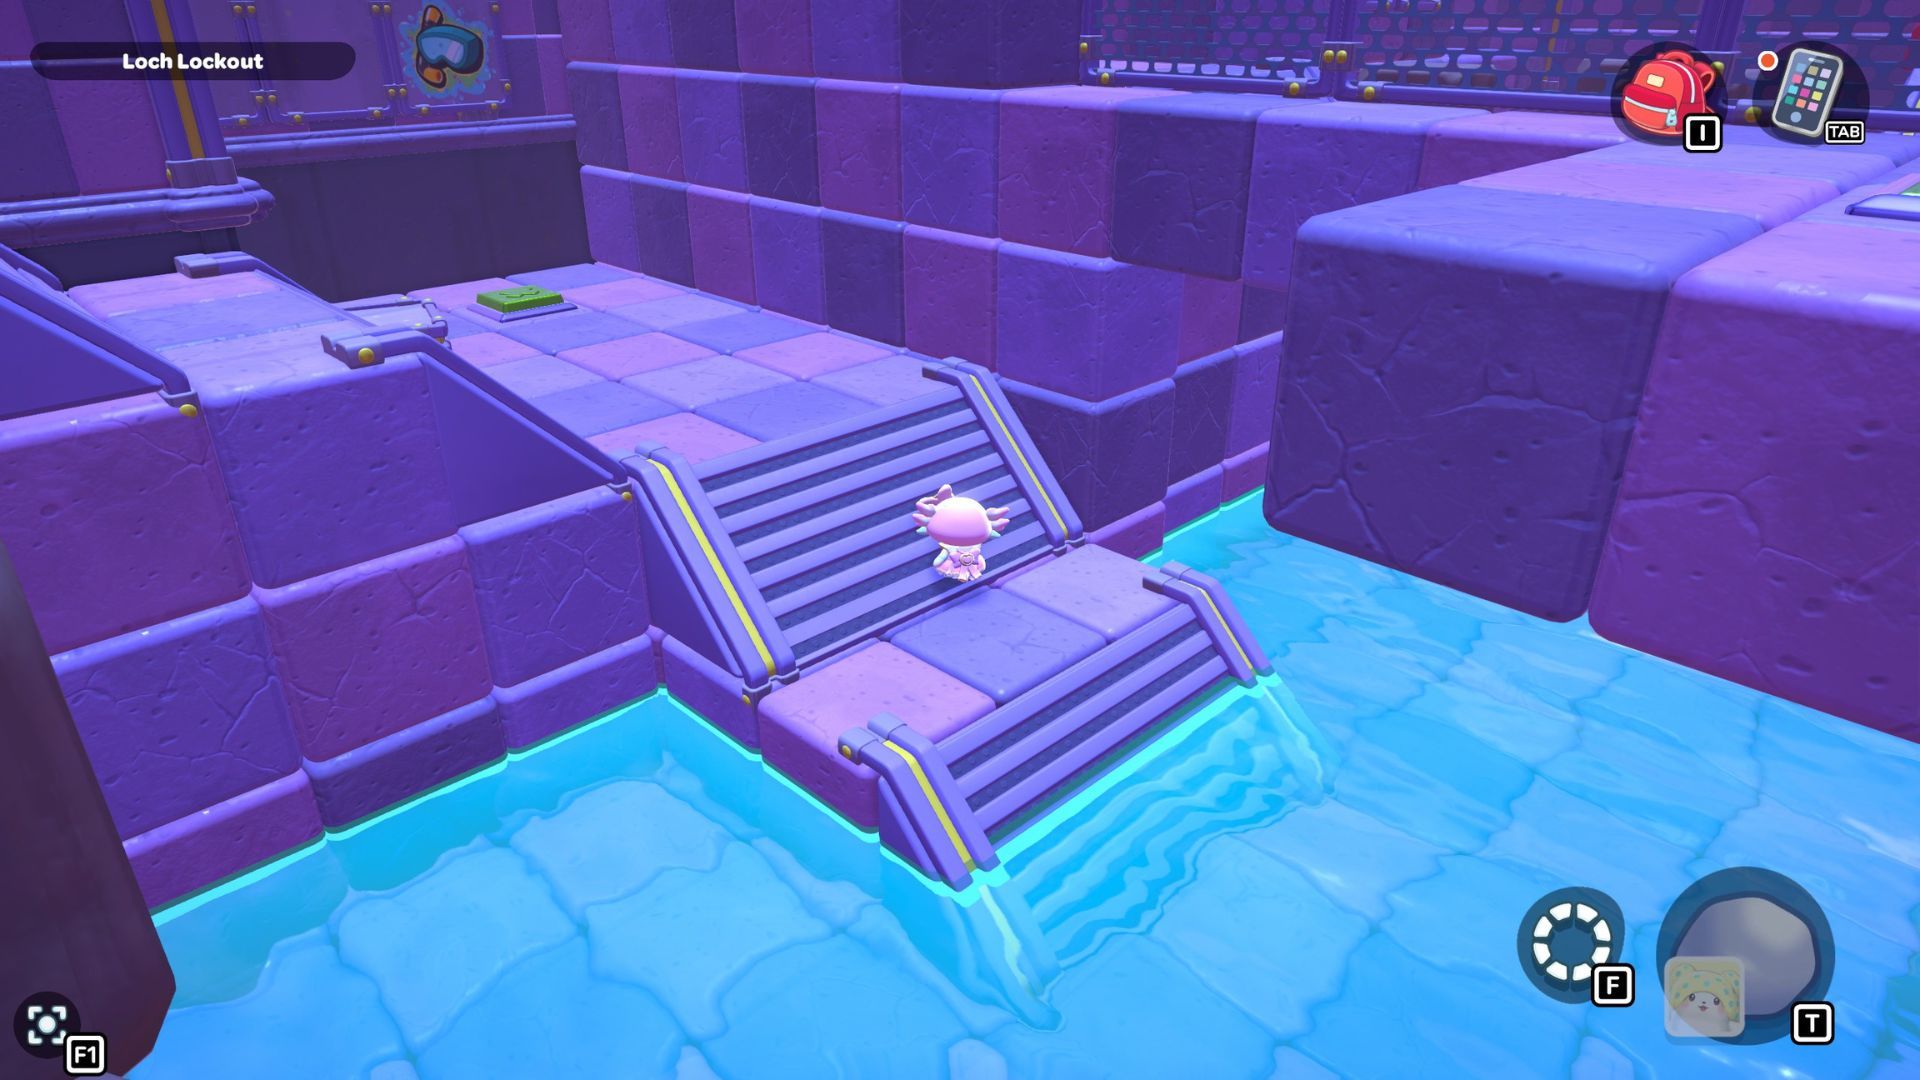
Leap over the gap between the platforms, landing on the platform below with the red switch. Activate that switch, then quickly drop down to the platform on your left to press the final red switch.
Once you activate the last switch, the X gate above the starting platform will open. Float up to this new platform and open the chest behind the gate to find the Sewer Flooring item.
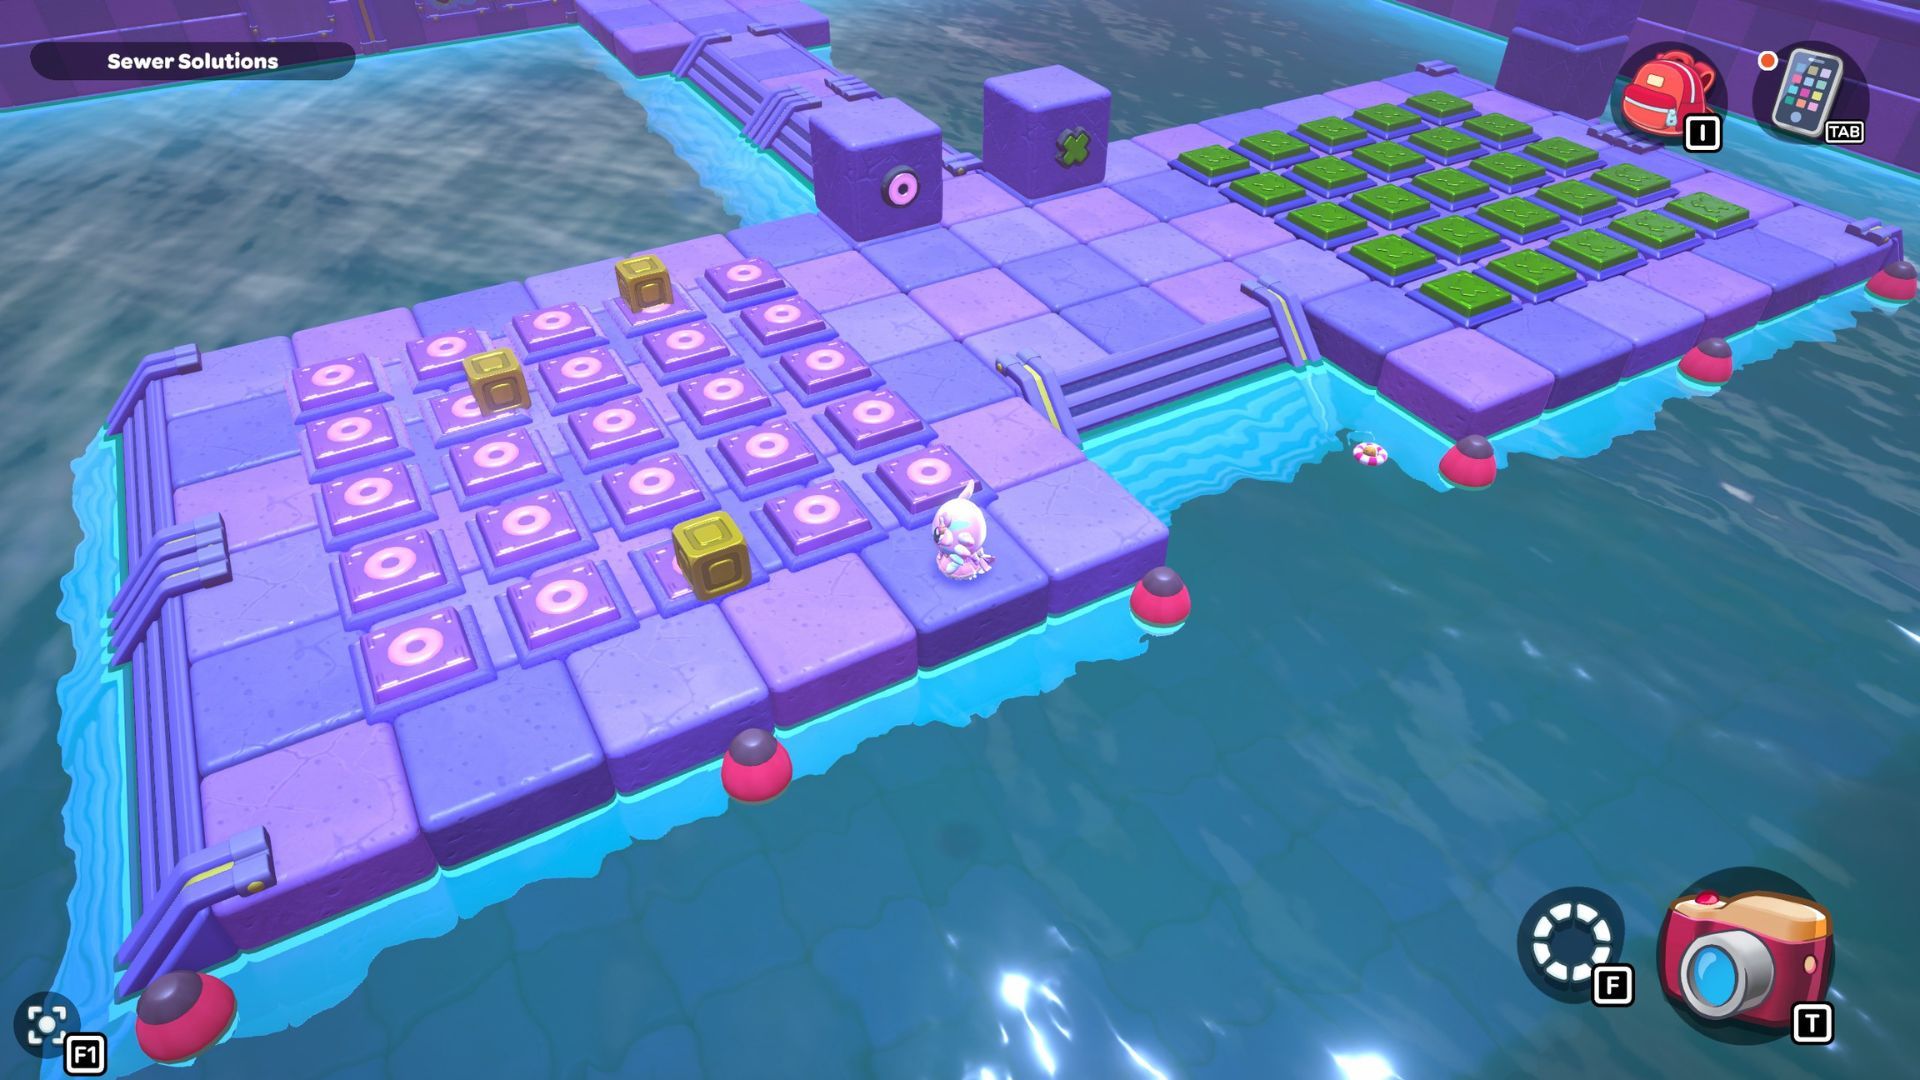
City Town Sewers — Sewer Solutions Walkthrough
You can find the Sewer Solutions puzzle room in the southeastern part of the City Town Sewers. The puzzle requires you to put boxes on the switches marked with ‘X’ and ‘O’.
First, swim to the right side of the room and look for a group of O switches that are identical to the ones you see above water. You’ll notice some switches have gold boxes, and others are blocked by gold boxes that can’t be moved. Pay attention to these immovable boxes – they tell you which switches you need to press down on the surface.
Okay, so I headed back to the middle of the room and jumped into the water on the left. Down there, I found a bunch of X switches, just like the ones I saw up top. The trick is the same as with the O switches – I need to look for the switches that have been replaced with gold boxes and press those!
A red cube is on one of the X-shaped switches. Please move it to the switch furthest to the right.
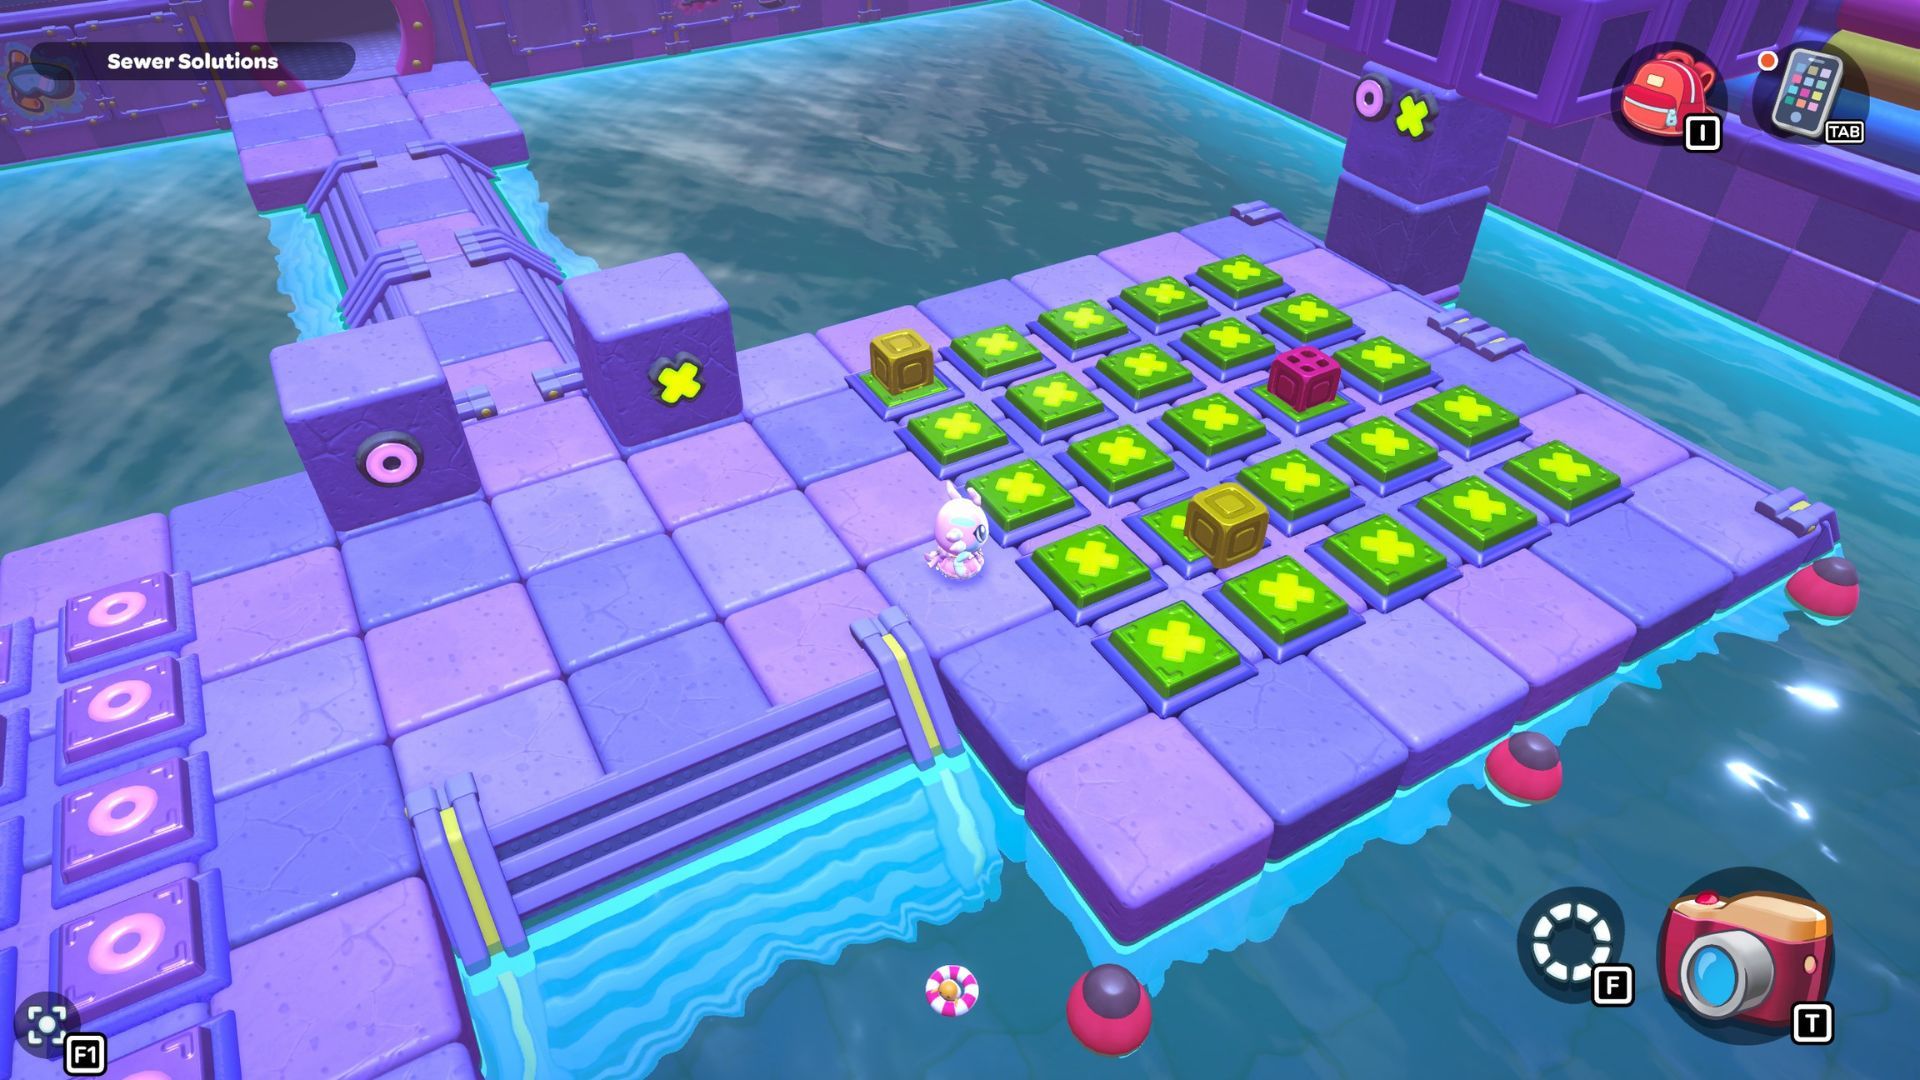
Simply move the boxes from the switches underwater to the ones above the surface. Once you activate the right switches, they’ll light up, showing you’ve completed that set. Repeat this on both sides, and a path will form, leading to the chest in the room.
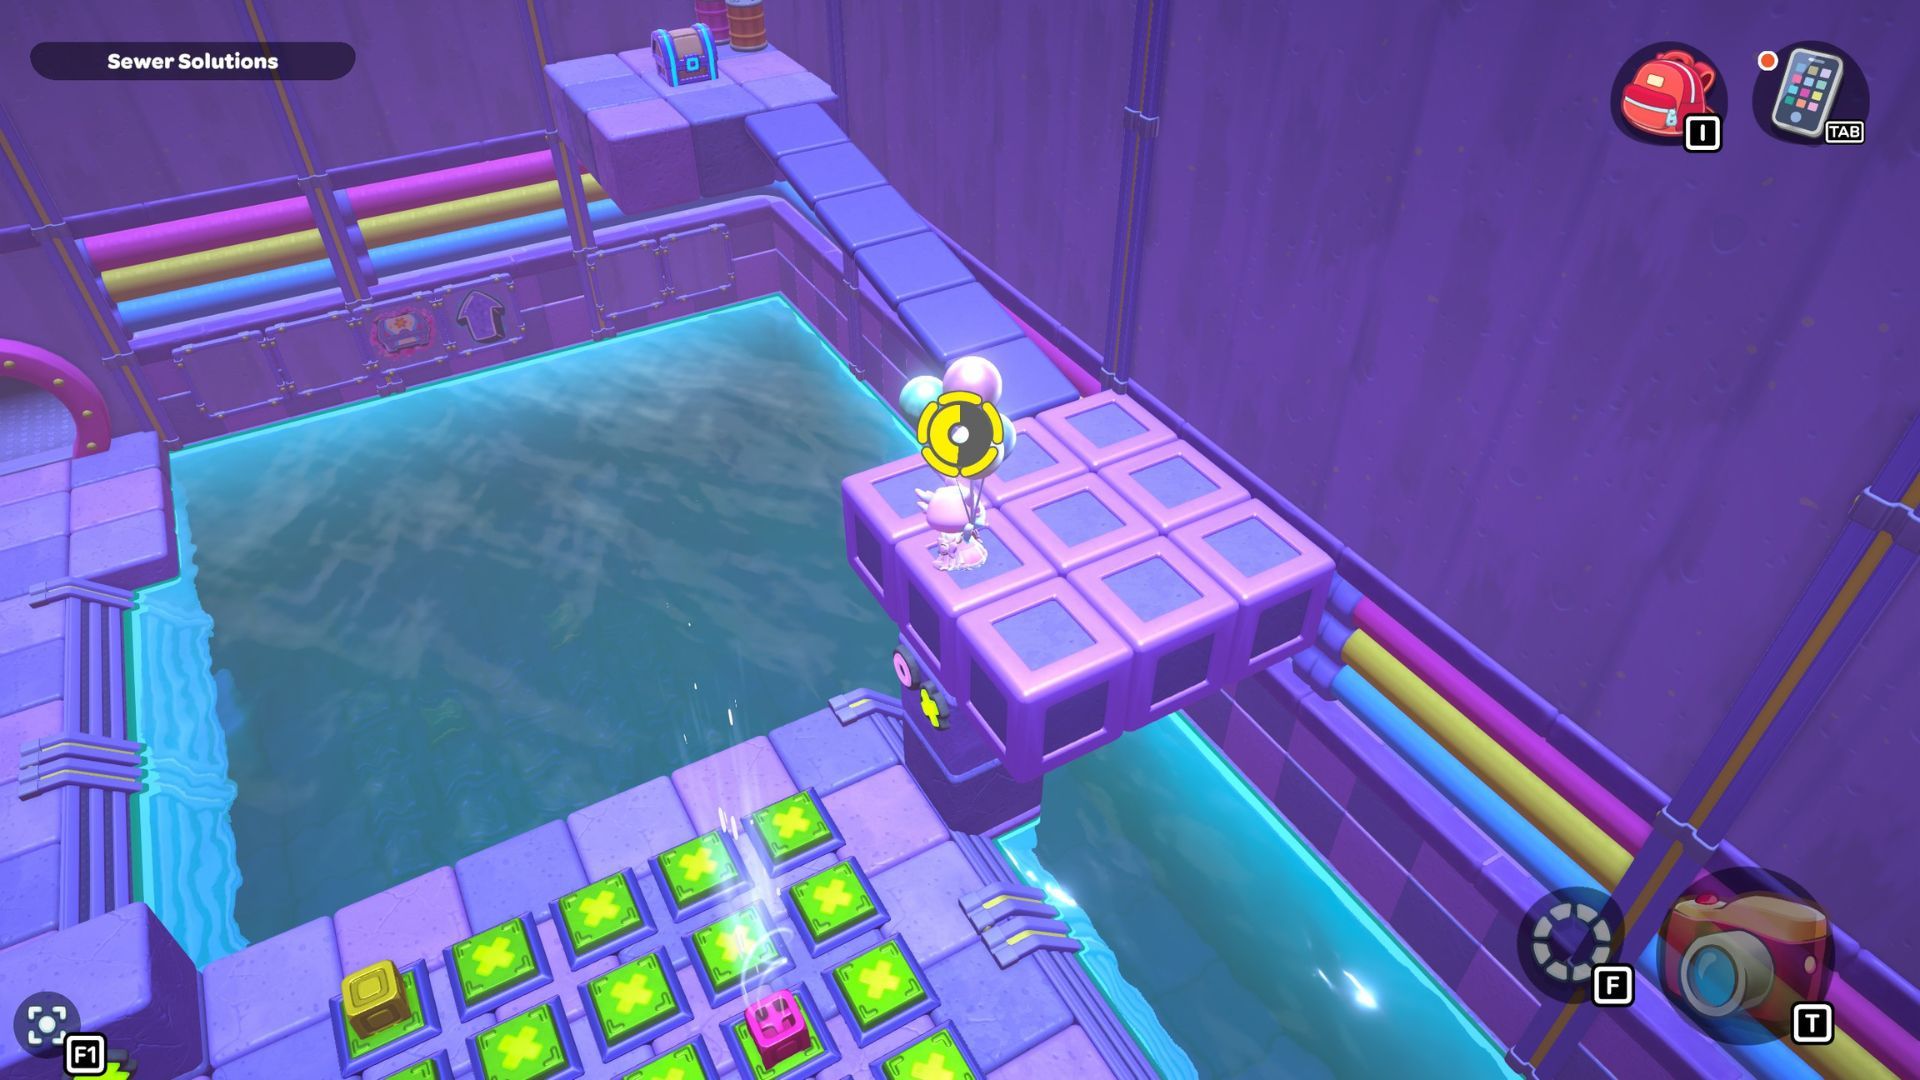
To get the chest, place the red cube on the switch right next to the new platform. Stepping on the switch will lift you up to the platform where you can collect the chest. Inside, you’ll find a Pipe Table.
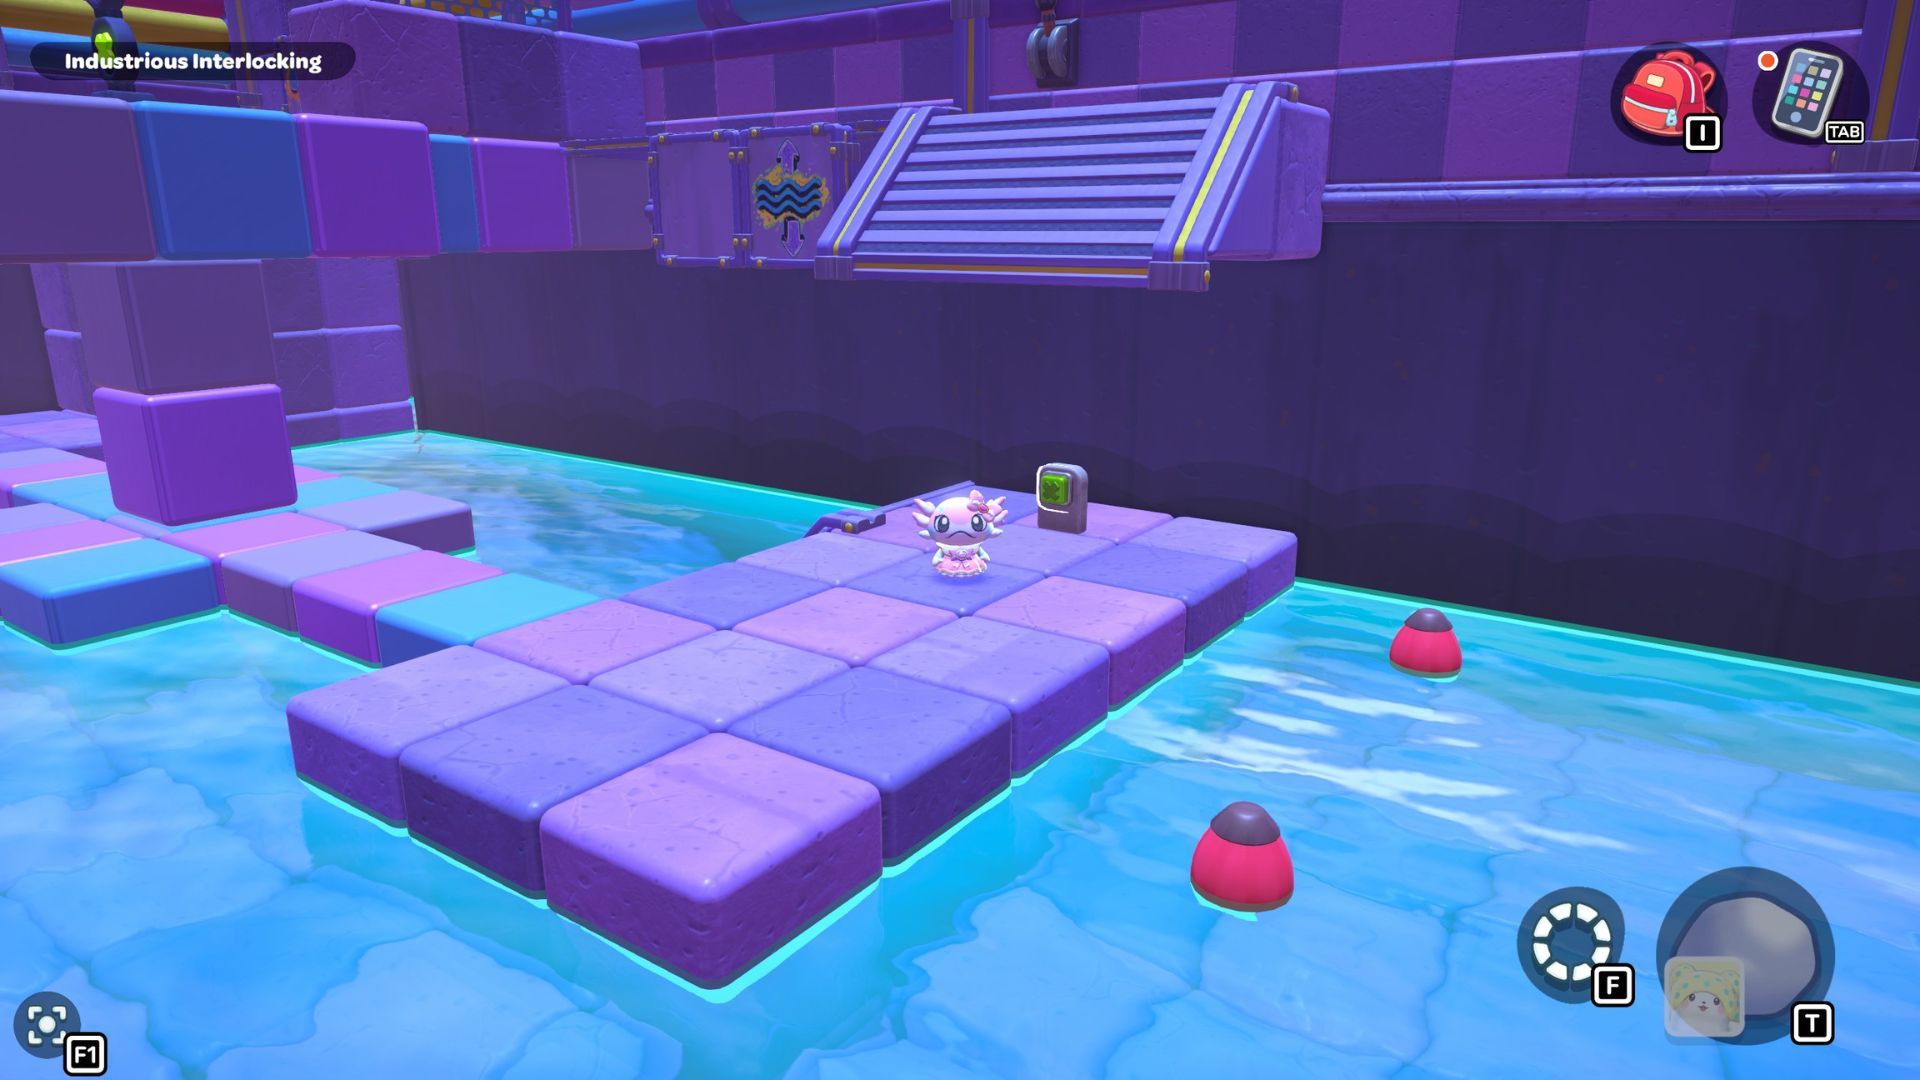
City Town Sewers — Industrious Interlocking Walkthrough
The Industrious Interlocking puzzle room is located in the City Town Sewers, right in the middle. It’s hidden underwater, and the only way to find it is by looking for a ladder leading down into the water.
In the center of the room, you’ll find a pillar displaying four circular signs. These signs feature different symbols – a heart, an X, a triangle, and a star. Your task is to rotate all of these signs so that their symbols are facing forward.
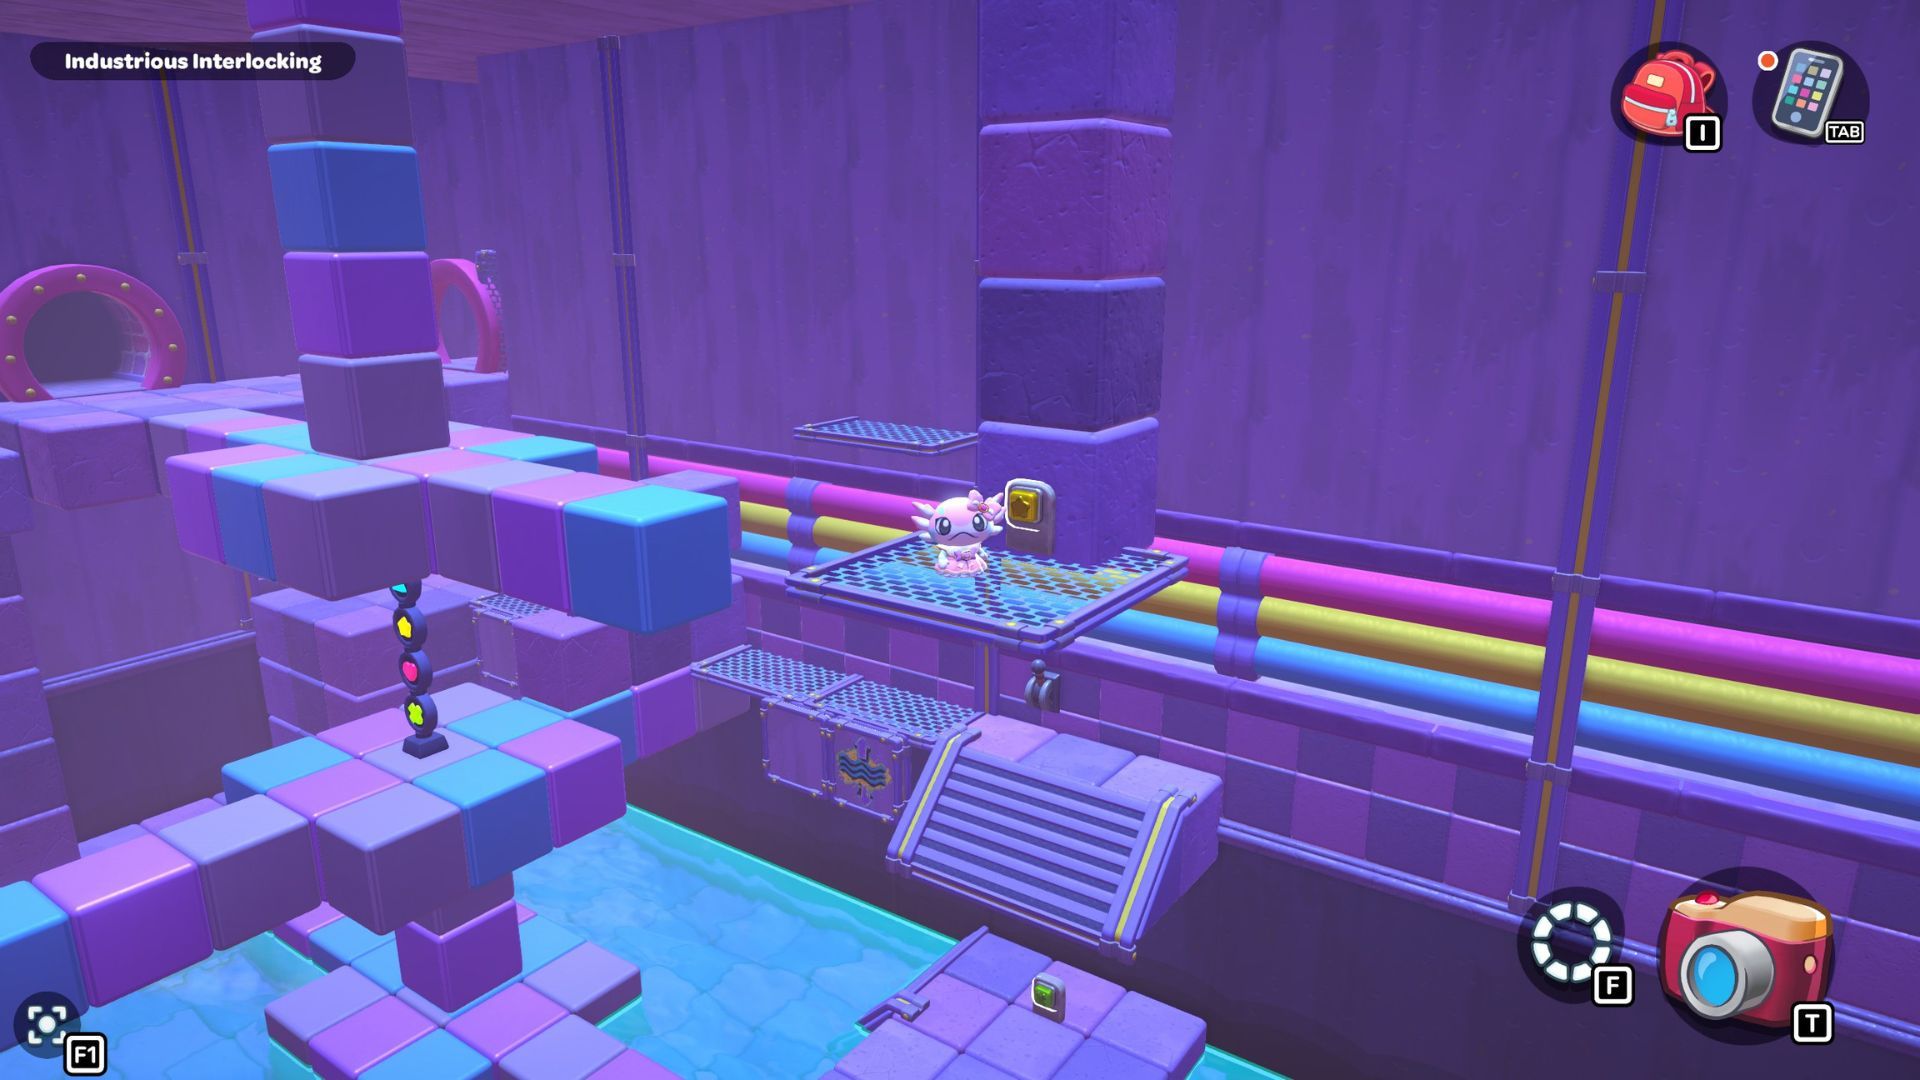

Okay, so those rotating sign things in the middle? To control them, you need to find four buttons hidden around the room. Here’s where I found them:
- The Star button is near the ceiling on the other side of the room.
- The Heart button is on the left of the staircase leading up to the starting platform.
- The Triangle button is on a ledge beneath the locked gate.
- The X button is in the back right corner of the lowest level of the room.
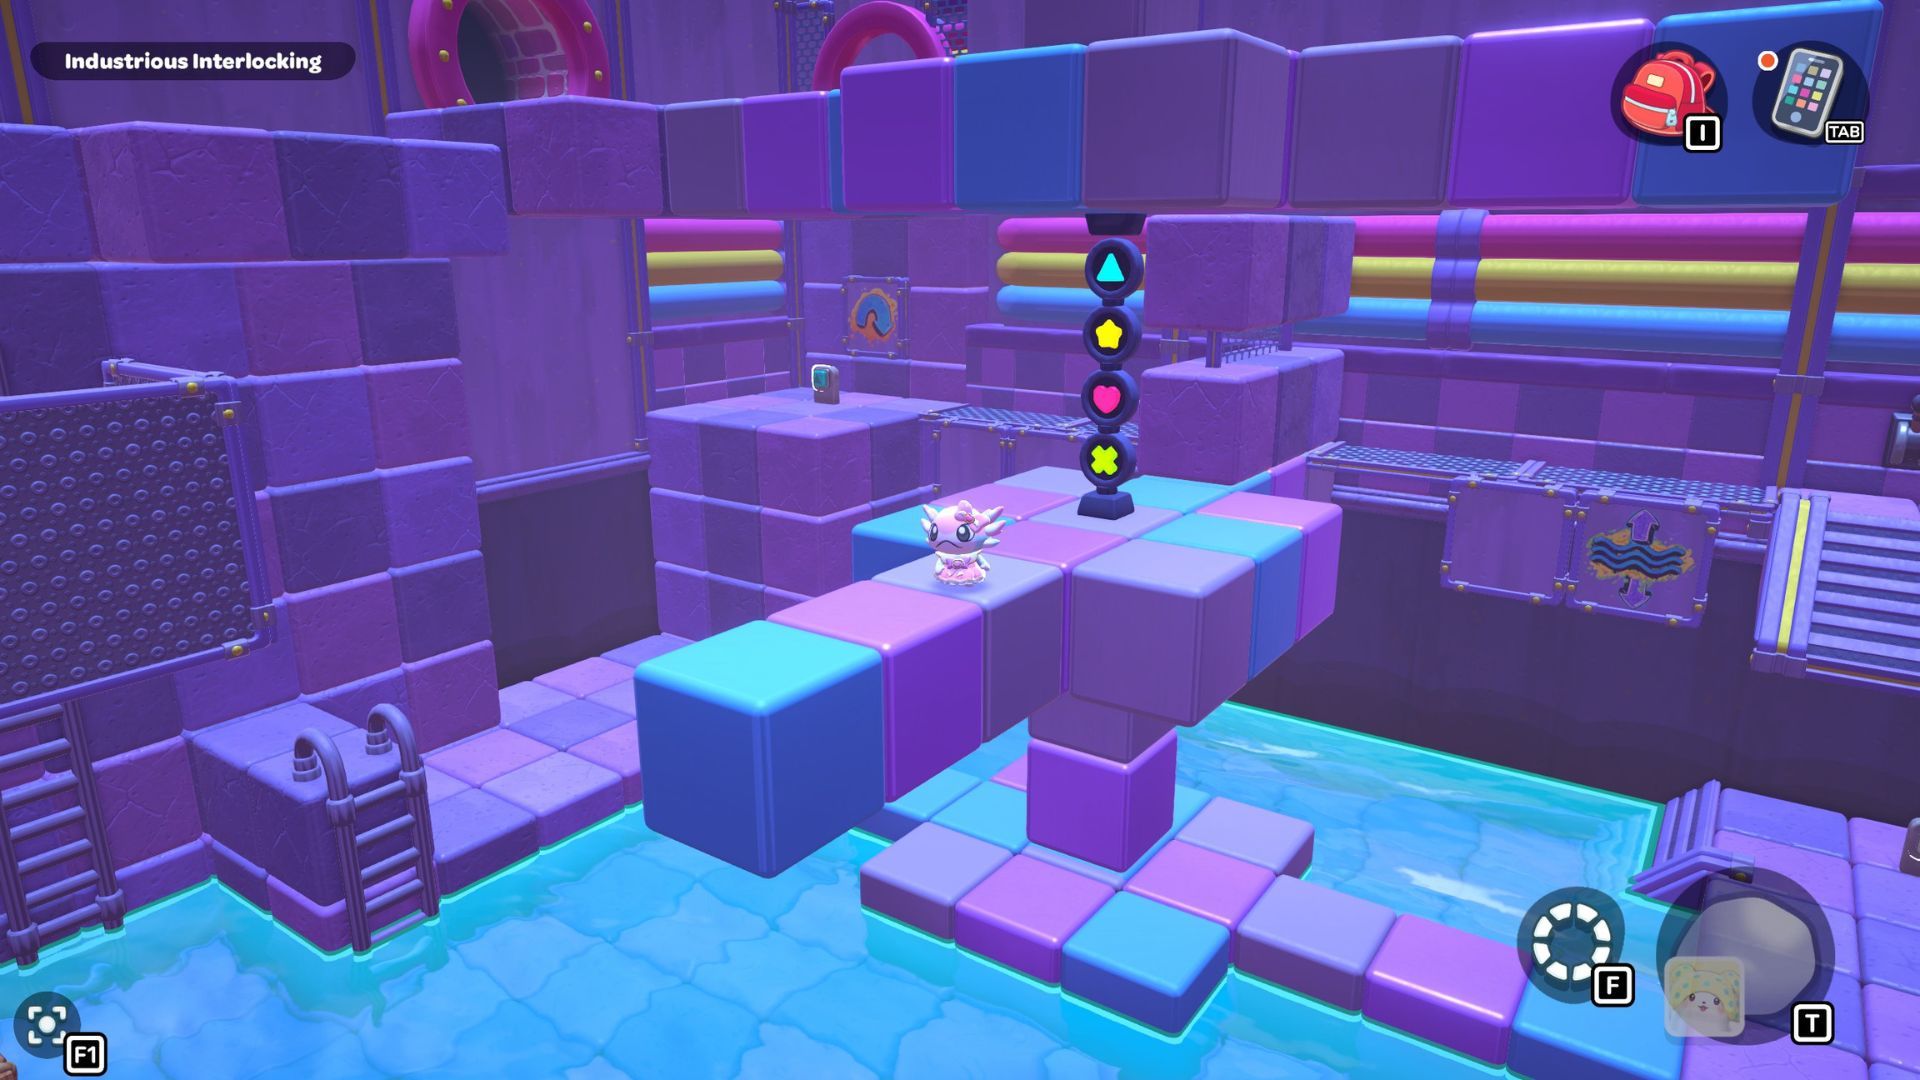
Each button spins its corresponding symbol. Begin by pressing the triangle or X button to turn the platform, creating enough room to jump to the Star button’s platform. After aligning the star symbol, you can then use the triangle, heart, and X buttons to rotate their symbols into the correct positions.
If all the directional signs are pointing straight ahead, the gate blocking the chest will open on its own. Inside the chest, you’ll find a Traffic Cone Hat.
Read More
- Forza Horizon 6: Find the Ohtani Treasure Chest Location
- LEGO Batman Legacy of the Dark Knight Batcave Minikits & WayneTech Caches
- NTE Drift Guide (& Best Car Mods for Drifting)
- USD RUB PREDICTION
- Sega’s “Super Game” is Said to Release Next Month, But Nothing is Known About It
- How to Open Locked Door in Tenryu River in Nioh 3 (Dirty Key)
- Skyblivion Gets Encouraging Development Update
- New Steam Game is Like Pokemon If It Were a Sci-fi Shooter
- Cookie Run Kingdom Timeline of Fate Update Guide
- God of War Shadow Drops New Game and Confirms Greek Trilogy Remake
2026-04-16 19:51