As a dedicated enthusiast of Destiny 2, I wasn’t expecting to see a new Episodic Exotic Mission like Heresy until the game’s third act. However, to my surprise, we got our hands on its exotic weapon ahead of schedule!
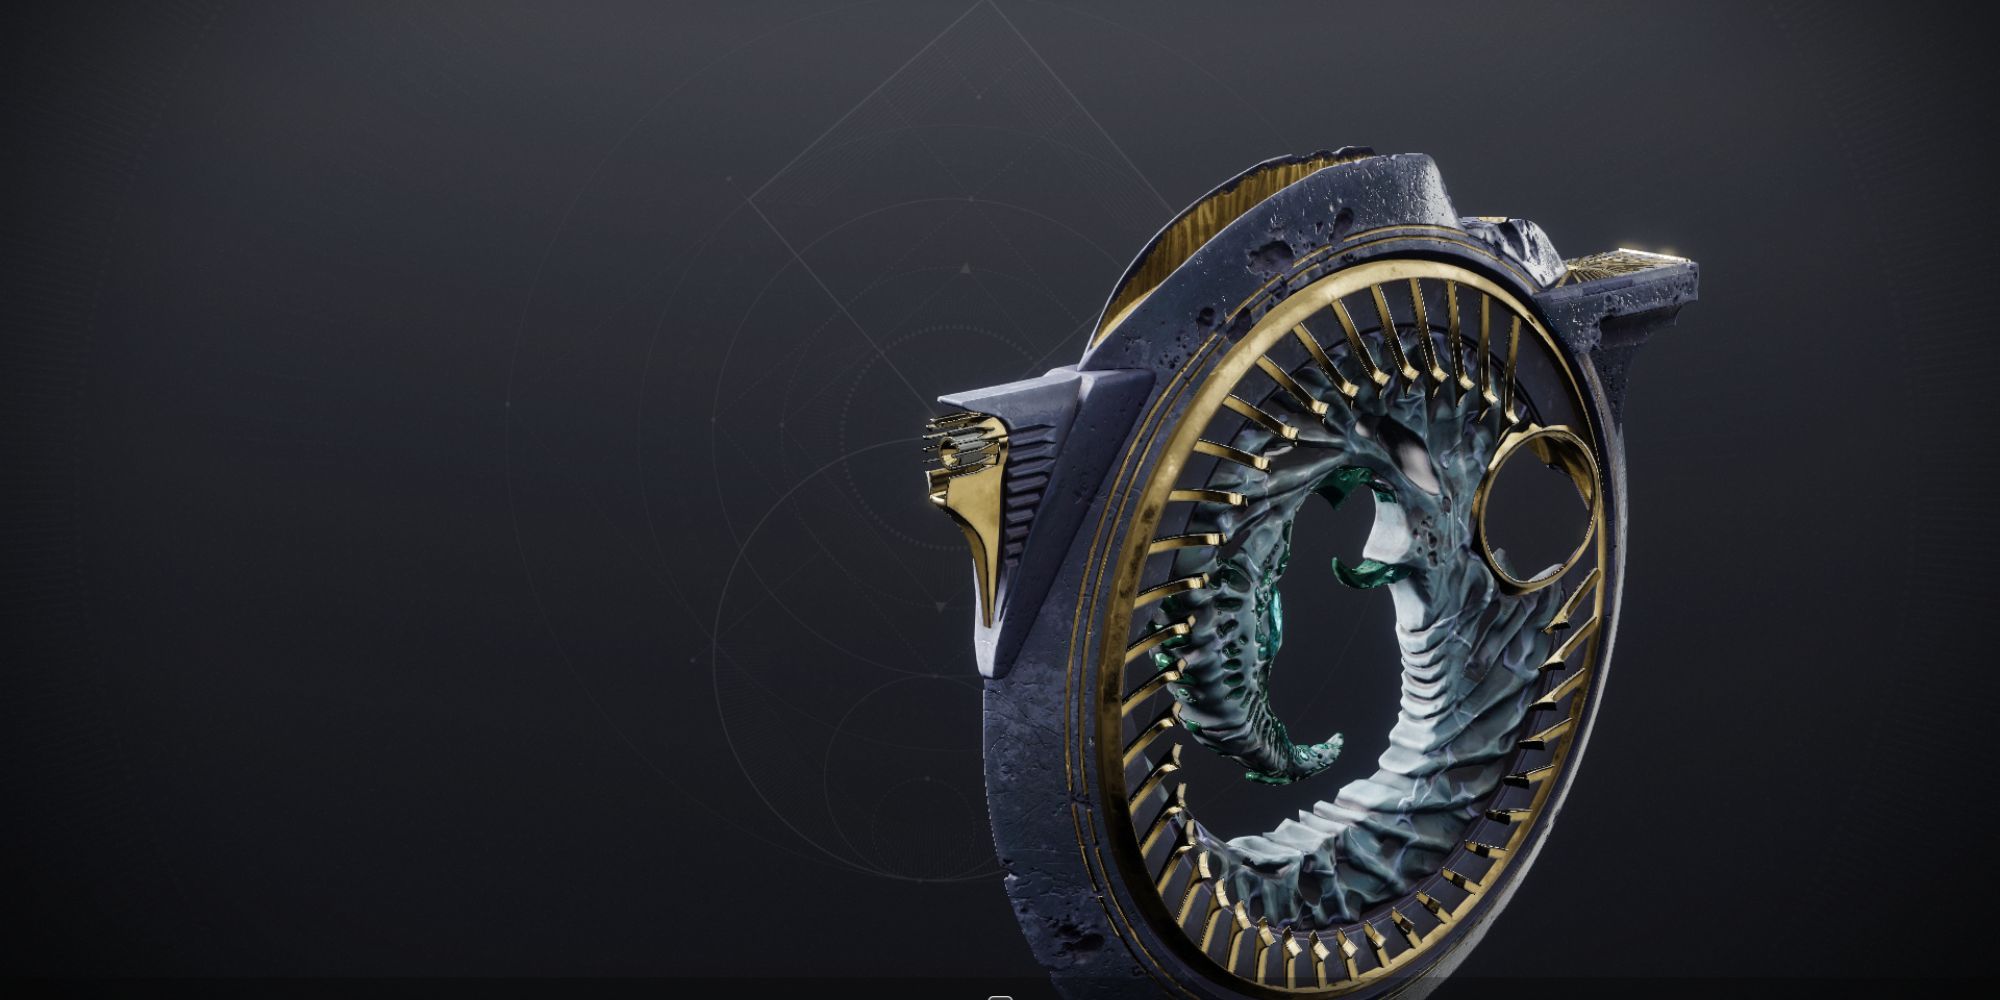
Instead of Choir of One and Slayer’s Fang, Heresy has Barrow-Dyad, a unique SMG linked to the fresh “Derealize” Exotic mission. By completing this mission, you can then create and personalize the Barrow-Dyad further.
Approximately two weeks following Bungie’s developer livestream teaser, they introduced a fresh Exotic quest series within the second week of the Heresy update.
This SMG boasts an uncommon structure resembling a flying disc, and it comes with an exclusive built-in advantage: upon accumulating charge, it discharges a volley of harmful objects towards your adversaries.
In a throwback to the thrilling quests from The Taken King era, obtaining Barrow-Dyad isn’t as simple as buying it from a vendor. Instead, you’ll find yourself embarking on an investigative journey, reminiscent of the time spent scavenging for Touch of Malice across the Dreadnaught.
Quick Links
- How To Start The Barrow-Dyad Exotic Quest
-
“The Taken Path” Quest
- Sorrow’s Harbor Secret Location
- Forgotten Shore Secret Location
-
Taken Curses
- Curse Of Endurance
- Curse Of Urgency
- Curse Of Revenge
-
Nether Osseous Fragments
- Hall Of Souls
- Mausoleum
-
Complete Exotic Mission “Derealize”
How To Start The Barrow-Dyad Exotic Quest
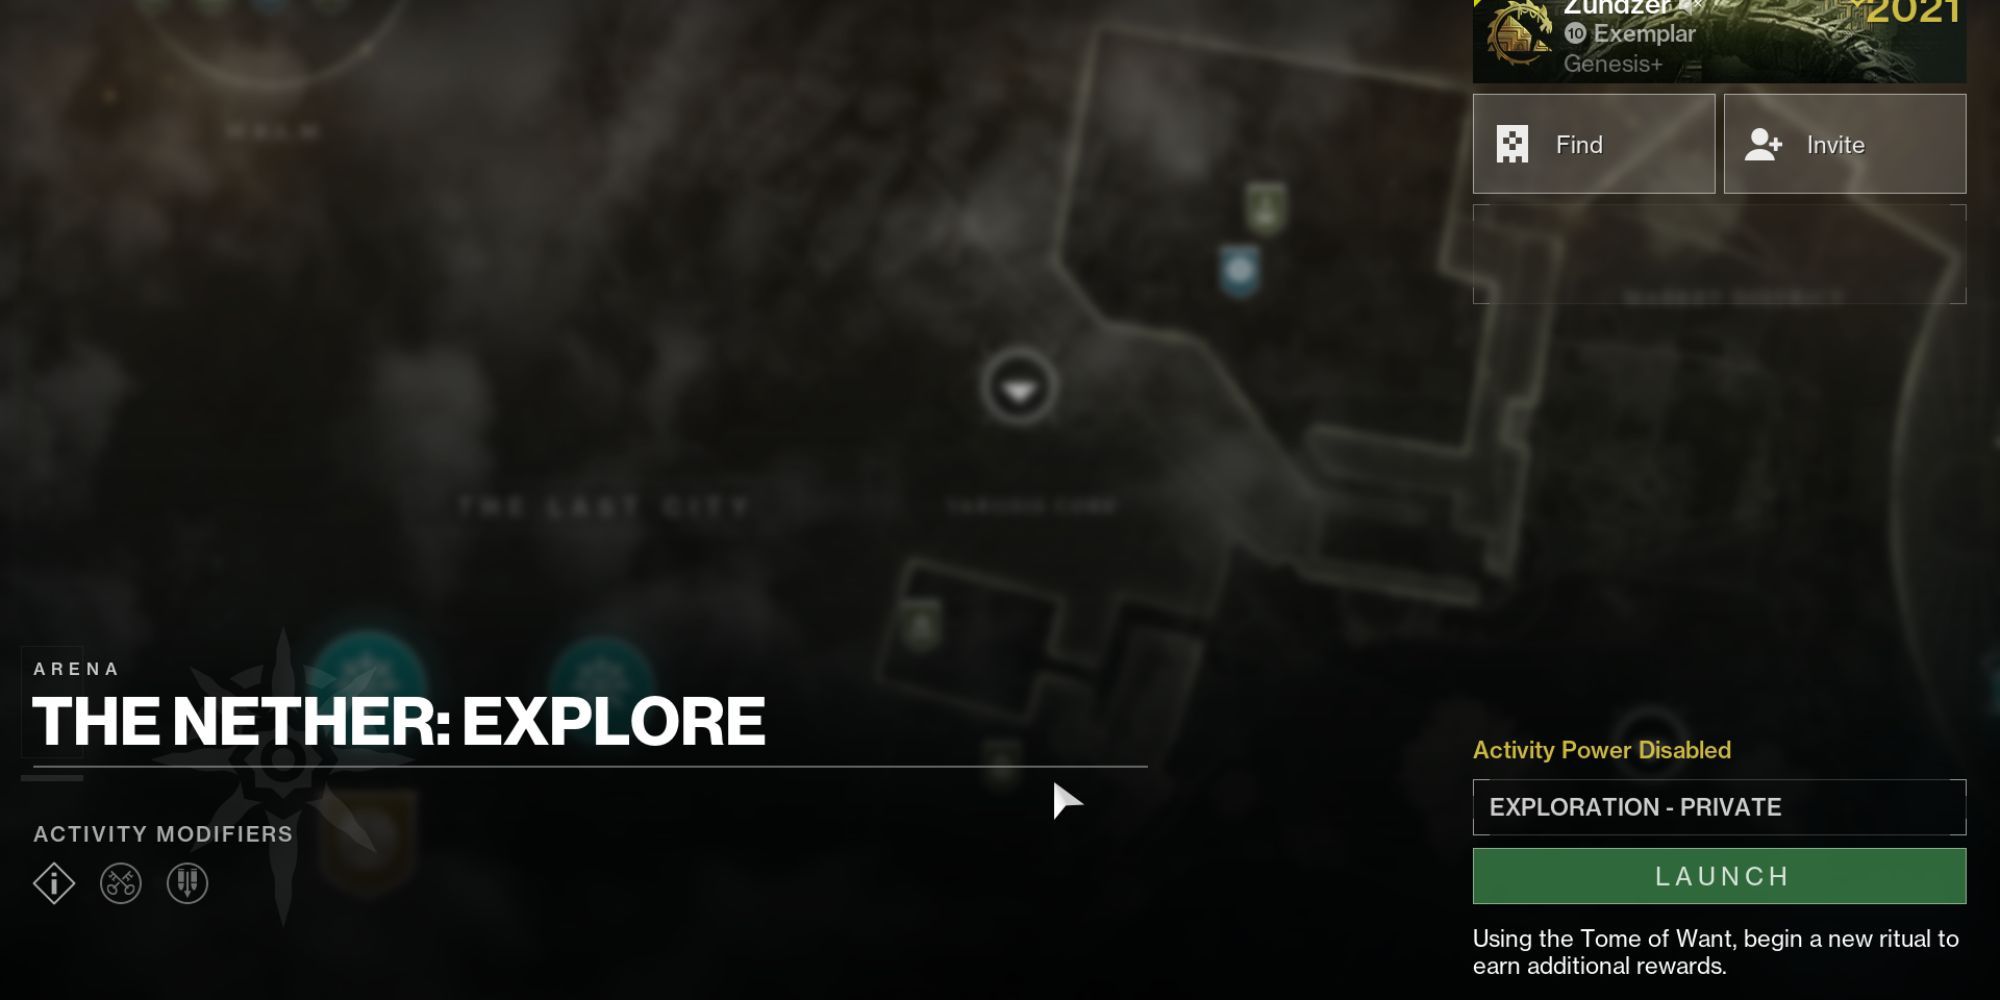
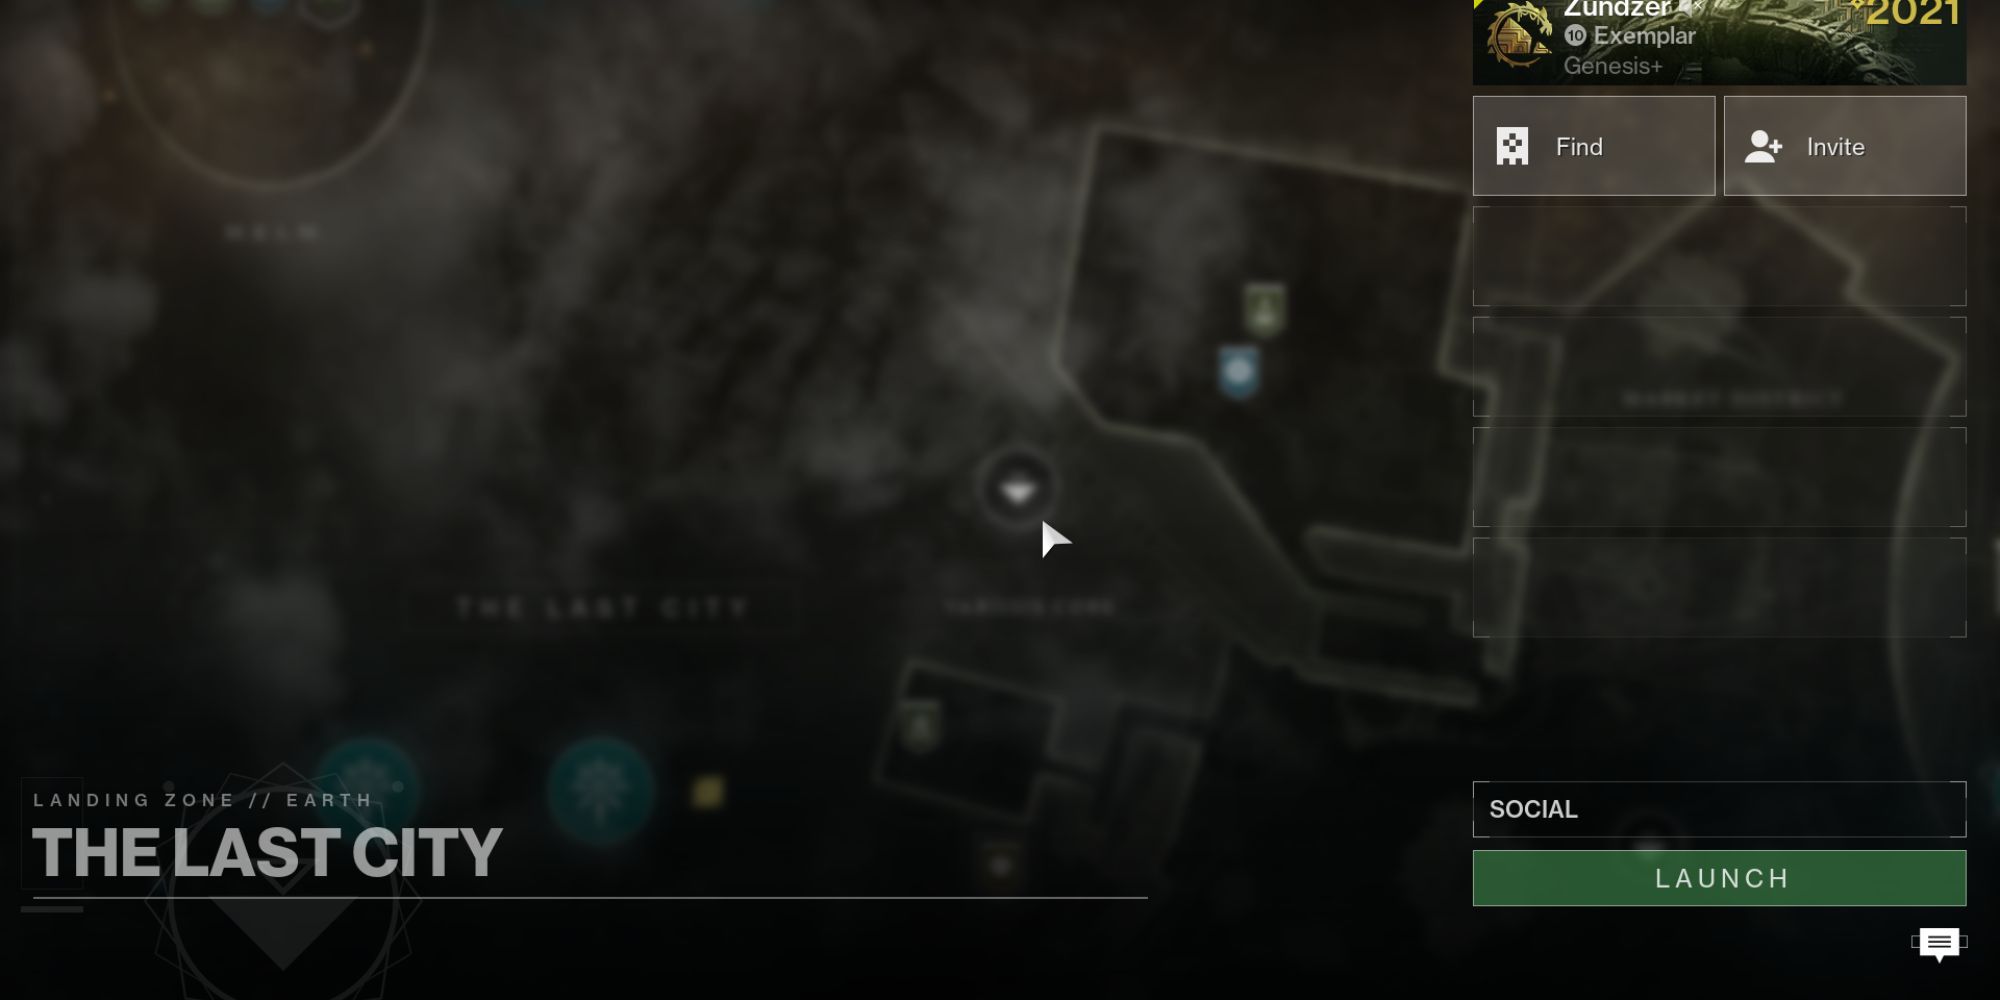
Hang on a minute–you won’t find the Exotic quest simply handed to you; instead, you need to search for it yourself. What you’re after is a hidden Taken Blight in one out of three specific areas. The Taken Blight near the Hall of Souls, close to the Court of Oryx, might just be one of the well-known access points you should investigate first.
Start a solo gameplay session in The Nether, as this lets you control the pace and progress at your convenience.
Due to the random nature of where you start, it’s possible you won’t end up at the Hall of Souls initially. To avoid wasting time by going through the whole activity, try refreshing until you reach the Hall of Souls. This way, you can skip ahead directly.
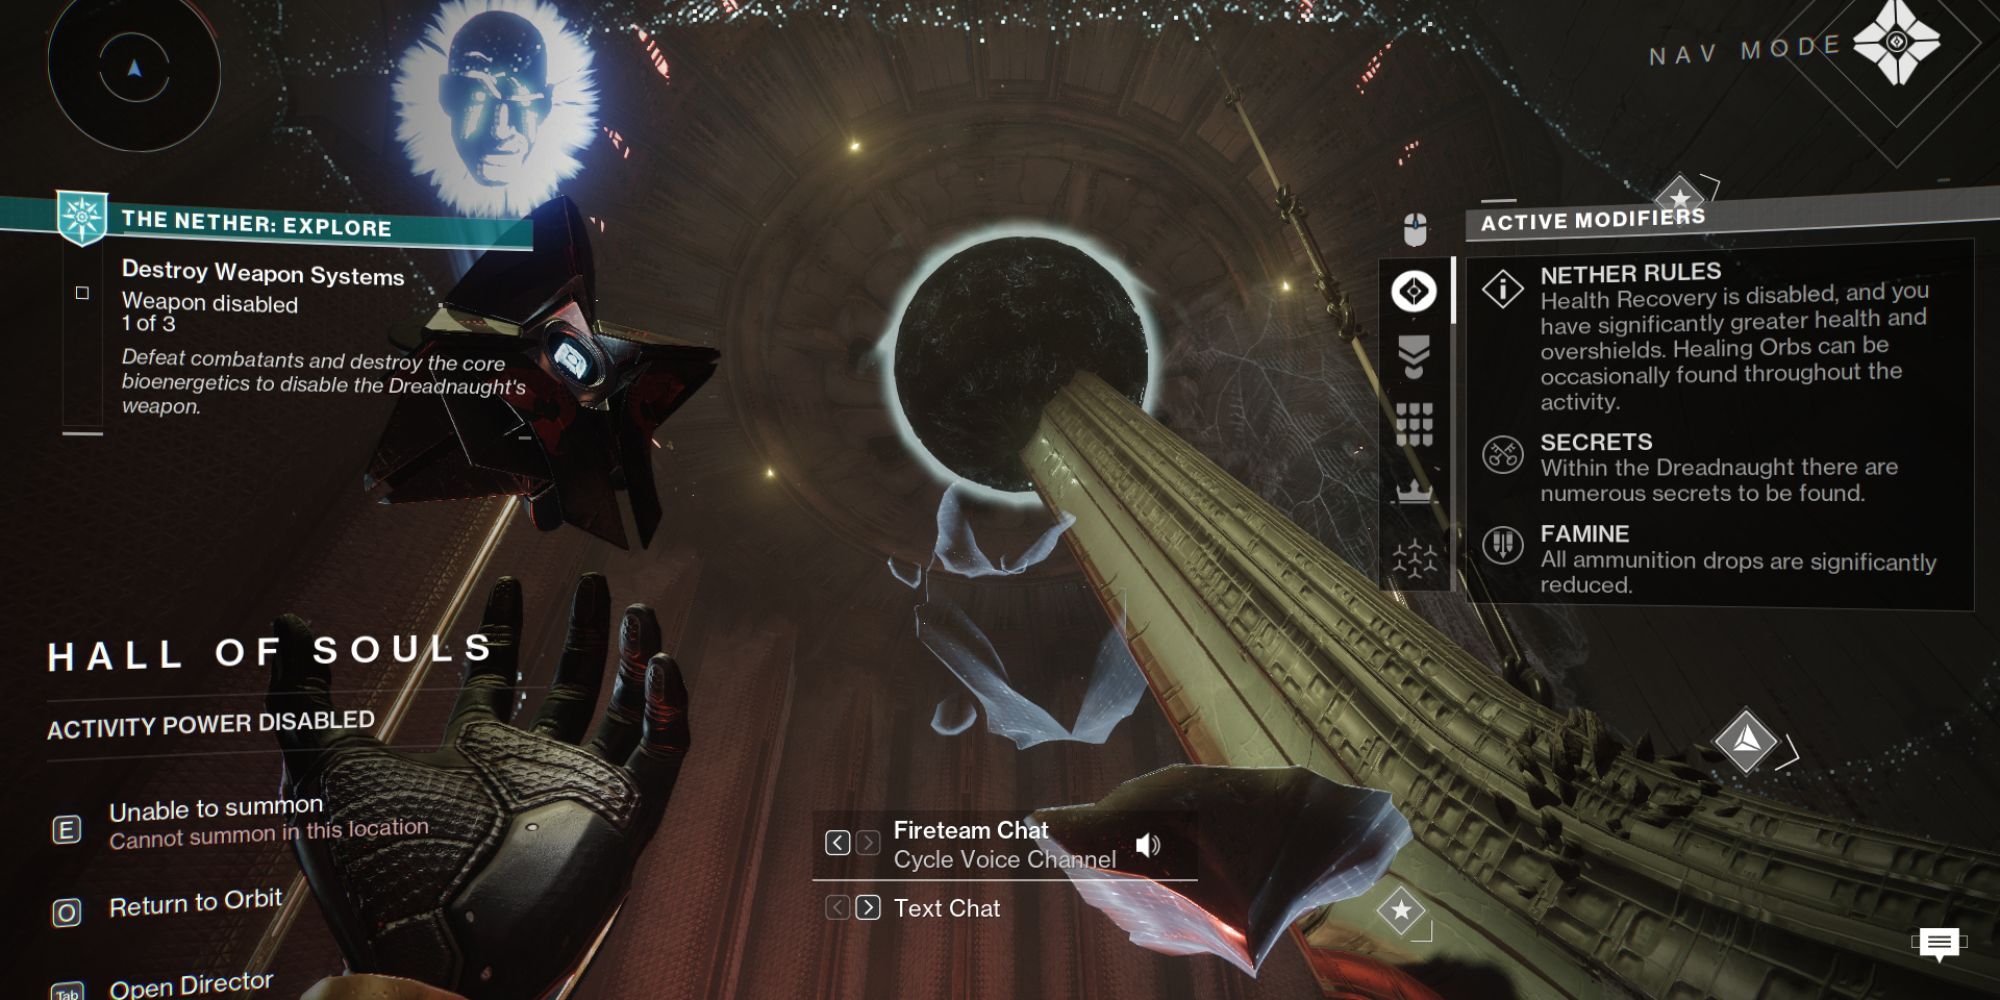
In this activity, you’ll come across a room that has an orange hue, inhabited by creatures known as Grims, along with a mini-boss named Tormentor. This is just one of the many encounters in the activity. You have the option to either pass it by or engage in the encounter.
Regardless of your choice, retrieve your phantom figure, and you’ll notice hidden ledges that materialize as you get near. Leap onto them, and the Blight’s gravitational anomaly will draw you in.
Upon entering a pocket dimension, you’ll find a portal, a small tray, and an odd control panel behind a green energy barrier. Avoid jumping through the portal, as it will propel you back to normal space. Instead, place your foot on the tray, which in turn will activate the panel directly in front of you.
You’ll observe that the dialogue box indicates, “A whisper seems to come from the right.” This is your signal to move to the right side of the platform. Keep this mechanic in mind as it will be essential for the upcoming steps and the “Derealize” Exotic mission.
After finishing this mini-challenge, you’ll receive a Bone Piece as a reward, helping advance your quest.
This will unlock “The Taken Path” quest, obtainable by heading to Eris’s apartment.
“The Taken Path” Quest
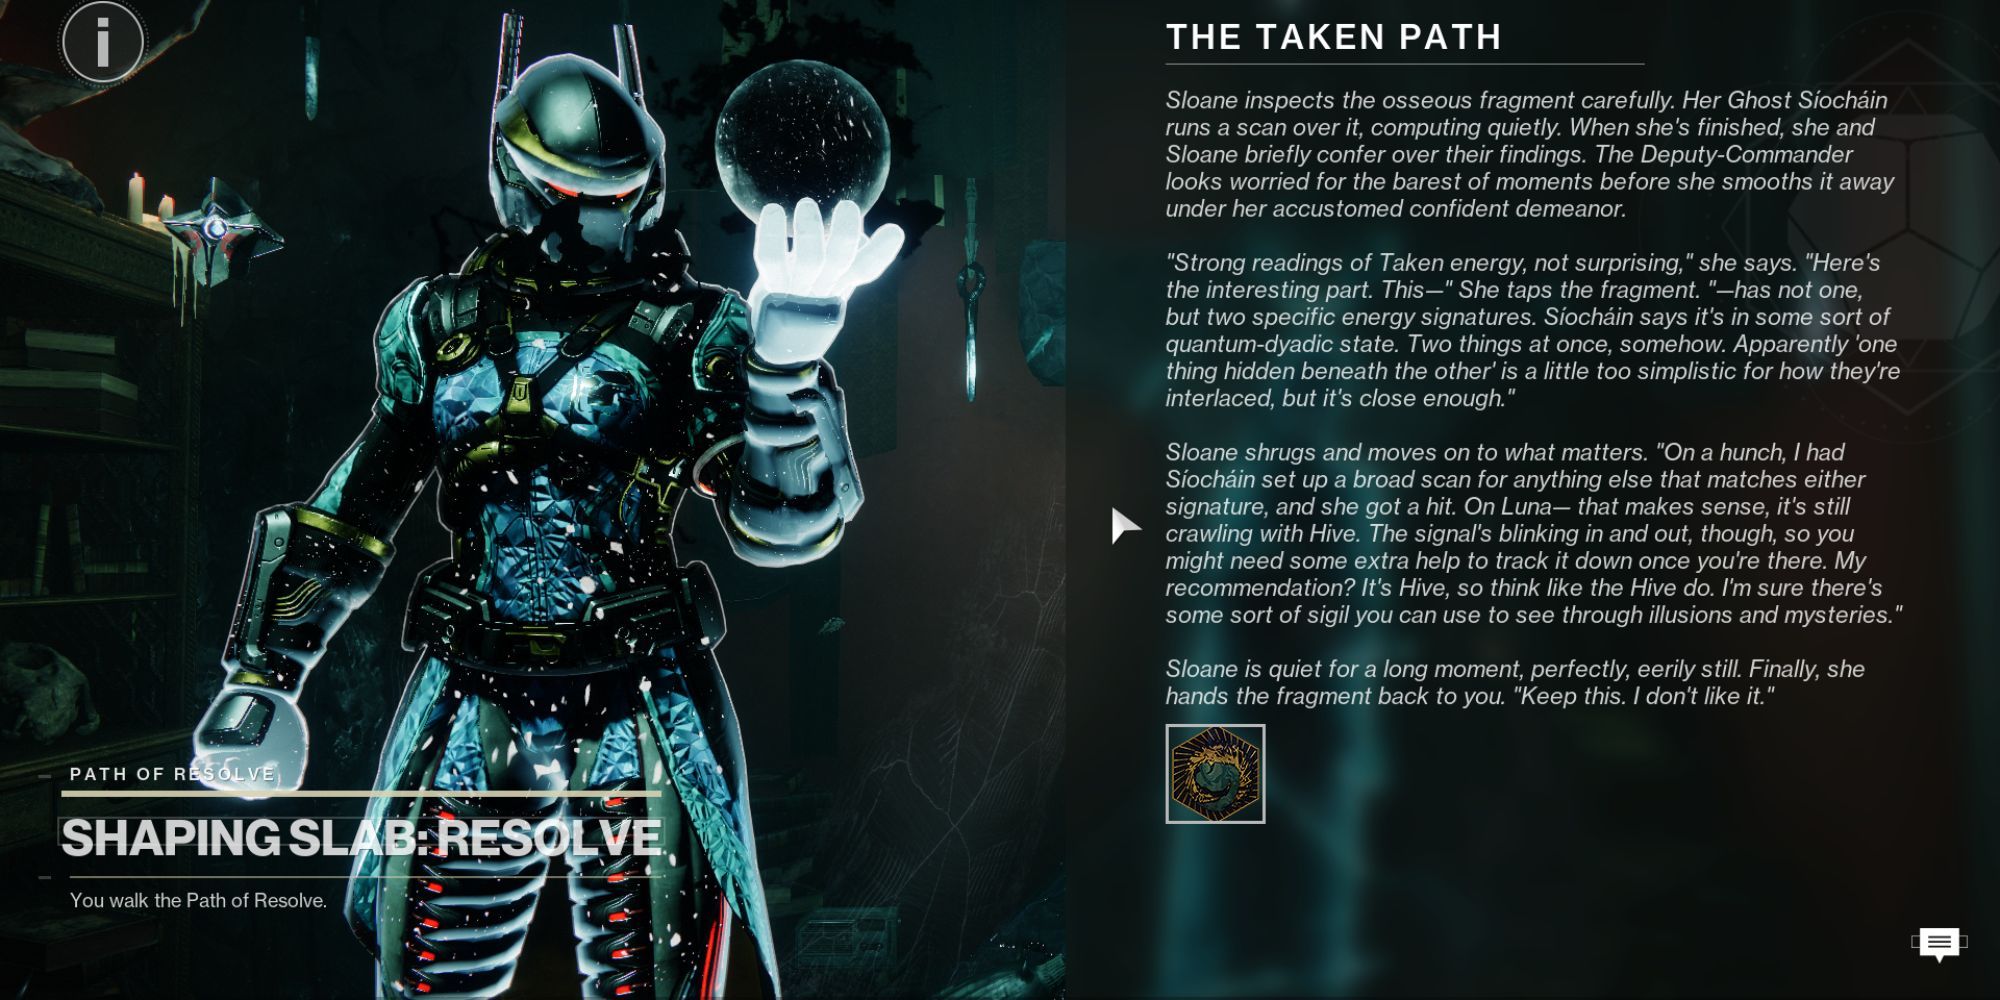
This brief adventure, titled “The Taken Path“, typically won’t consume much of your time, not even exceeding a few hours, considering it encompasses the completion of the Derealize Exotic mission.
The mission includes several goals, leading you to the Moon, the Cosmodrome, and ultimately back to the Nether, forming an extraordinary journey in the end.
Finishing “The Taken Path” mission grants you the Barrow-Dyad Exotic Submachine Gun as a reward, obtainable during the mission itself. You’ll acquire it upon completing your initial playthrough.
Later on, you’ll have to repeat the mission several times with different approaches for the Intrinsics and Catalysts. However, before that, you’ll need to follow some key stages to obtain your newly acquired Submachine Gun (SMG).
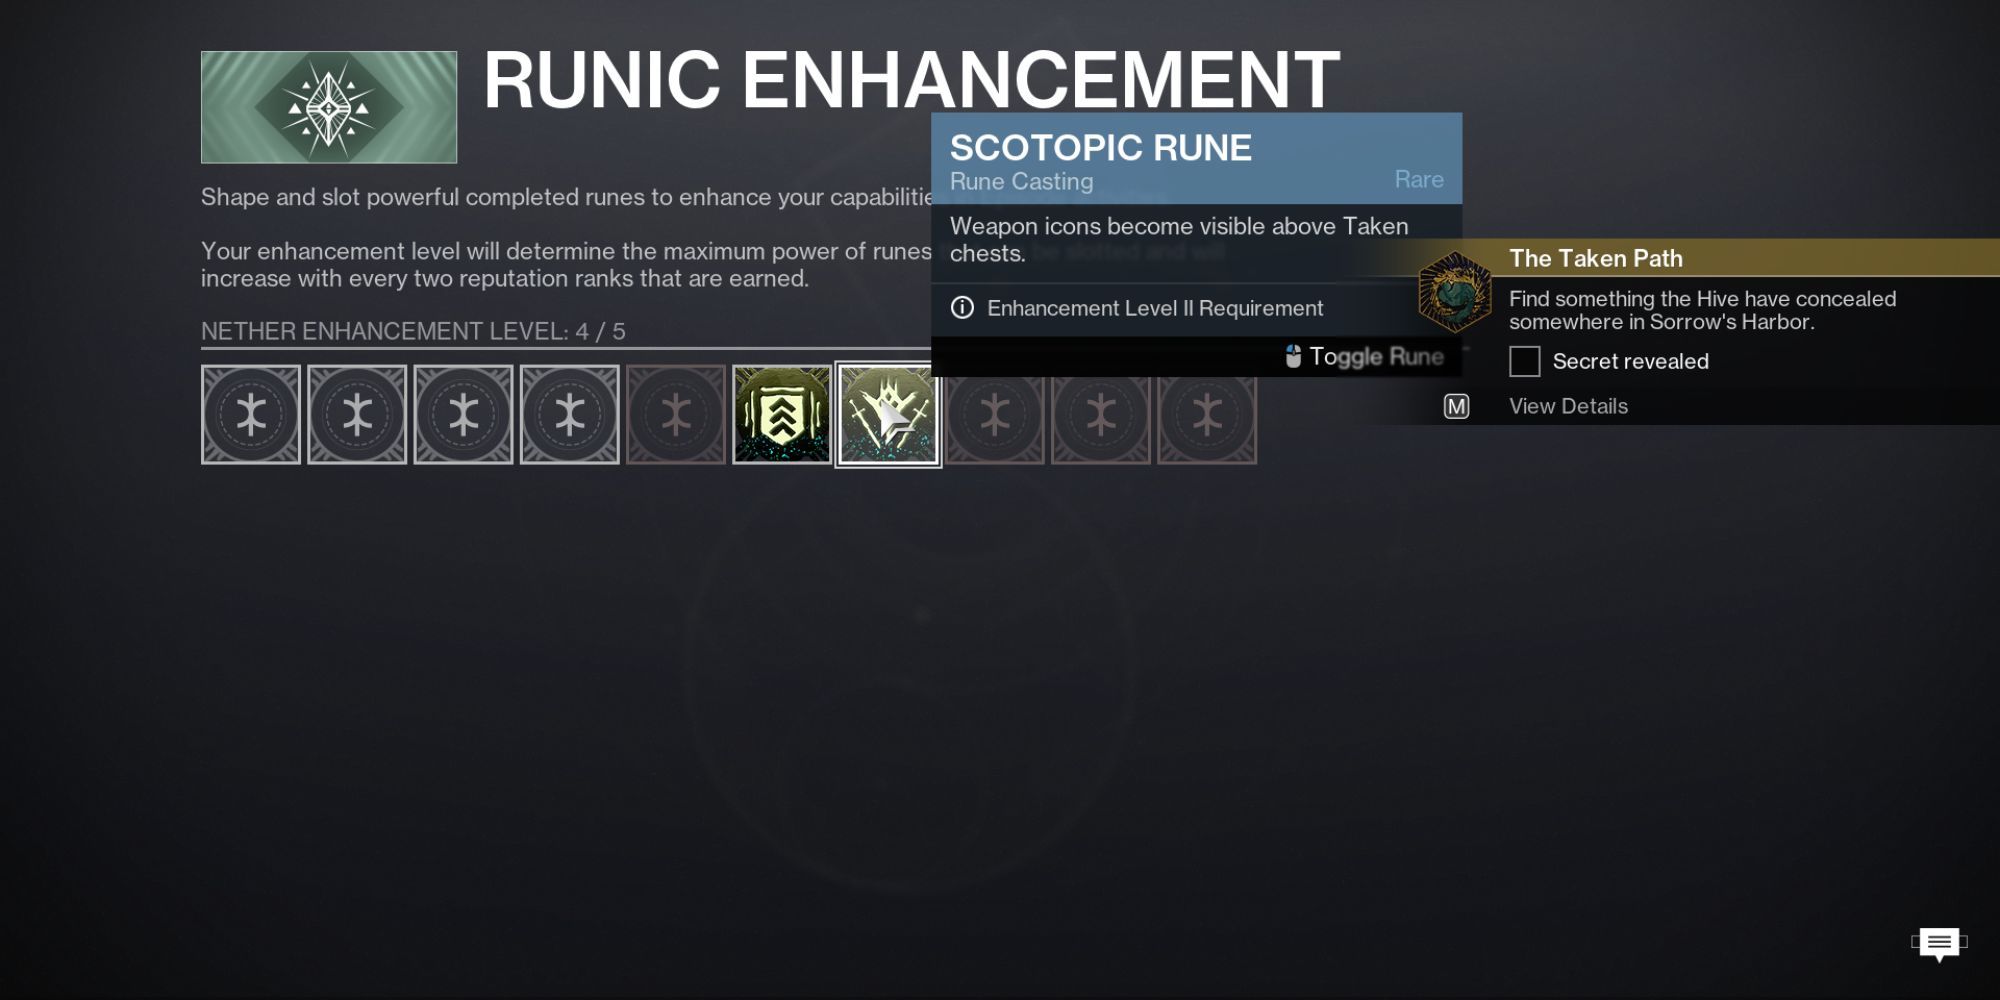
To proceed with the following instructions, please use the Scotopic Runestone from the ‘Runic Upgrades’ section, which will require approximately 100 Sigil Fragments. Once activated, this enhancement will allow you to continue as directed.
Sorrow’s Harbor Secret Location
The adventure suggests that a hidden truth lies within the Sorrow’s Harbor on the lunar surface. However, contrary to common assumptions, this secret is not found at the Altar of Sorrows – for now, it remains undiscovered there.
Head towards the K1 Revelations hidden area. Carry on as usual, and you’ll spot a tiny Taken infested orb hovering over a mini dome. Fire at the orb and then stand on the platform when instructed by the on-screen prompts.
In this scenario, you’ll find yourself in a sector overrun by Taken energy. Your objective is to eliminate all the hostile creatures and vanquish the Taken Ogre boss. Successfully completing these tasks will grant you an Osseous Fragment as your reward.
Forgotten Shore Secret Location
In the game, there’s another section in “The Forgotten Shore,” located within the Cosmodrome. Regrettably, there isn’t a designated landing spot for that area; instead, you can land closest at “The Steppes.” From there, you can navigate through a valley and eventually reach The Forgotten Shore.
The Fragment can be found within the intricate labyrinth known as Veles Labyrinth, a name that aptly reflects its complexity. To locate it, you’ll have to track down the identical Taken Orb, navigate the plate puzzle three times in total (once more after stepping on and off the plate), and eventually reach the conclusion of the Lost Sector.
You might be puzzled about why there’s no action, but it’s because you’ll have to retrace your steps from the end of the Lost Sector to locate Taken enemies that you can defeat.
You’ll re-enter the labyrinth, where you’ll ultimately encounter a Taken Phalanx boss. Defeating this boss will grant you the next Osseous Fragment, guiding you towards the subsequent stage.
Taken Curses
To embark on the Derealize Exotic mission, gather an additional three Taken Bone Fragments. These items are hidden within smaller quests known as “Curses”.
In each challenge, you’ll engage in combat against adversaries using a sacred artifact known as the Taken Relic. Accumulating sufficient eliminations with this relic will empower it, allowing you to conclude the mini-task by depositing the charged artifact.
After completion, it would be best to rejoin the Dreadnaught in order to locate the Fragment. It might be more efficient to complete the initial stages of each quest prior to venturing back into the Nether.
Curse Of Endurance
You’ll discover the Taken artifact at the base of the initial flight of steps in Sorrow’s Harbor. Once you wield this new Taken force, you can relentlessly attack your adversaries until the Artifact is content.
You’ll receive a text message suggesting it’s filled with strength, which you will later return to its original source.
In simpler terms, during regular attacks, you unleash bursts of Taken energy toward opponents, while activating your special ability summons a large, lingering cloud of Taken corruption in front of you, inflicting heavy damage on nearby enemies.
Curse Of Urgency
To reach the location for “Curse of Urgency,” you’ll touch down at “The Mire” in the EDZ, then make your way into the “Consecrated Forest” Lost Sector.
Grab the Mysterious Artifact, but remember, you’ve got a set duration to clean up this place before the countdown reaches zero. Killing enemies will add more time to your clock, so be sure to take care of every last one.
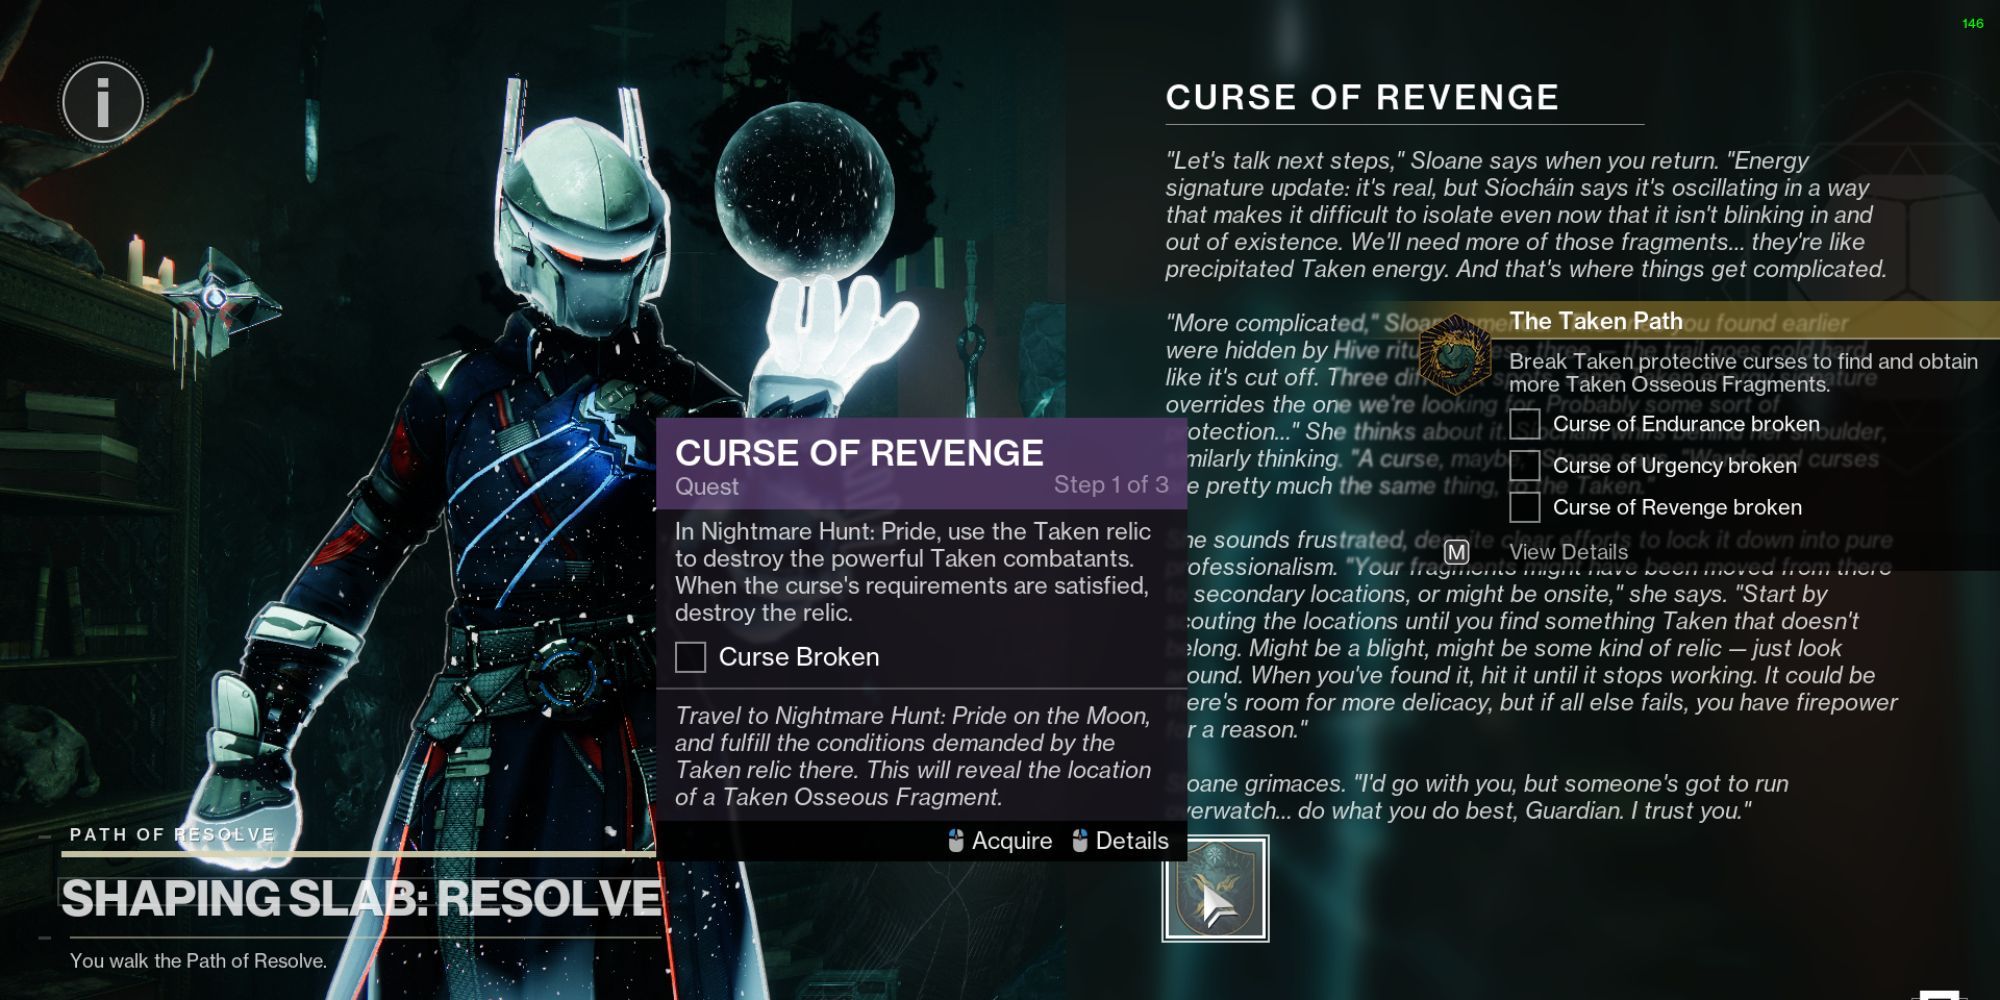
Curse Of Revenge
Ultimately, we face Taniks yet again in the game titled Curse of Revenge. Given his immortal nature, it falls upon us to deliver a fitting retribution in the Nightmare Hunt: Pride, situated on the lunar landscape.
During your mission, you’ll navigate through the Fallen Ketch. Since you’ll be teamed up with other players, defeating enemies won’t present much of a challenge for you.
1. Complete the mission, and you’ll find the Taken Relic that lets you battle Taniks. Defeat him, and proceed to the next stage.
2. Work your way through the mission, and you’ll acquire the Taken Relic needed to challenge Taniks in combat. Overpower him, then advance to the following phase.
3. Make progress in the mission until you obtain the Taken Relic for confronting Taniks. Defeat him, and continue onto the next part of the process.
4. As you move through the mission, you’ll eventually collect the Taken Relic to engage Taniks. Eliminate him, and then advance to the subsequent phase.
5. Progress in the mission until you get the Taken Relic for fighting Taniks. Defeat him, and proceed to the ensuing step.
6. Advance through the mission, and you’ll eventually come across the Taken Relic to engage with Taniks. Defeat him, and then transition to the next step in the process.
Nether Osseous Fragments
After finishing the initial stage of each curse, proceed by locating the respective Bone Fragments hidden within the Nether. Start a personal session in The Nether for a more leisurely approach to accomplishing this task.
Each Osseous Fragment can be found by activating a Hive statue hidden in each patrol space.
To engage with it, you’ll receive a message instructing you to “activate its power,” which subsequently summons a “Powerful Hunter” mini-boss in close proximity. Defeating this mini-boss will enable you to interact with the statue again, granting you access to your fragment.
During my individual gameplay sessions, each session varies for every player. However, to make things easier, I suggest restarting the activity until you respawn at your preferred starting point. In the Nether realm, I discovered not just two statues, but I believe there are more statues and bosses scattered throughout other areas as well.
Hall Of Souls
If you begin at the Hall of Souls, the statue will be located directly to your right as soon as you spawn.
Once you activate it, there’s a chance you’ll summon either a Wizard from the Taken or a Dread Psion. The Fragment will appear on the statue after defeating the mini-boss.
Mausoleum
Upon entering the mausoleum, promptly pivot to your right and leap into the hole containing colossal tentacles.
Or more casually:
Once you step inside the mausoleum, swing by your right side and jump into the pit teeming with massive tentacles.
Behind a wavy tentacle, you’ll encounter a statue. Interact with this statue to defeat the Taken Wizard that appears, and as a result, the fragment will materialize on the statue.
Complete Exotic Mission “Derealize”
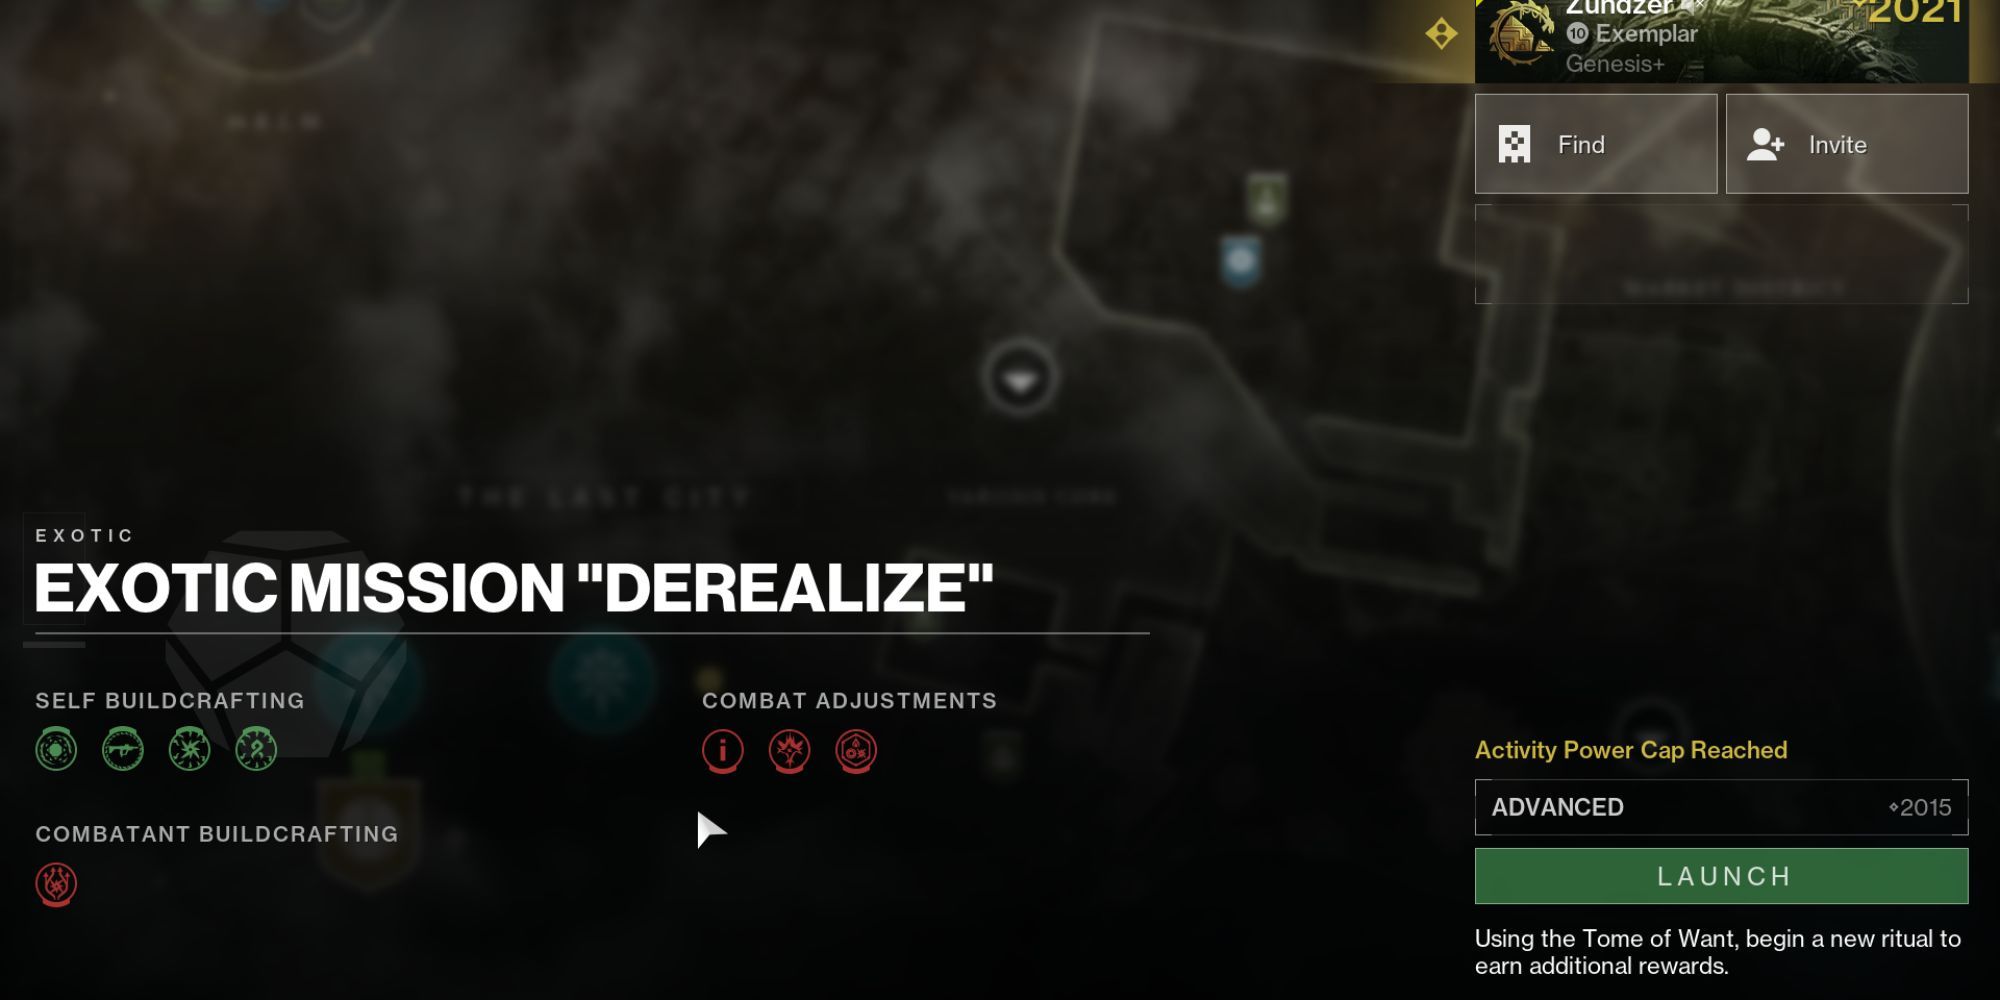
After wrapping up all the previous tasks, your last move is to embark on the “Derealize” Exotic mission, nestled beneath the Nether mission node within the Last City’s node network – as a dedicated fan, I’d be eagerly diving right in!
By opening the Barrow-Dyad, you’ll gain the ability to tailor your weapon even more at the Enclave within Savathun’s domain. Hidden secrets and successful expert runs offer additional crafting possibilities.
Currently, Barrow-Dyad’s catalysts are locked based on time progression, and they become accessible as the episode unfolds further.
Unlocking the Barrow-Dyad could lead you to discover additional Bony Remnants as you traverse the Nether. Gathering these remnants will open up new stages in a quest that enhances your exotic weapon’s built-in attribute.
Read More
- Invincible’s Strongest Female Characters
- Top 8 Weapon Enchantments in Oblivion Remastered, Ranked
- MHA’s Back: Horikoshi Drops New Chapter in ‘Ultra Age’ Fanbook – See What’s Inside!
- Nine Sols: 6 Best Jin Farming Methods
- Gold Rate Forecast
- How to Unlock the Mines in Cookie Run: Kingdom
- Top 8 UFC 5 Perks Every Fighter Should Use
- USD ILS PREDICTION
- How to Reach 80,000M in Dead Rails
- Silver Rate Forecast
2025-02-19 18:15