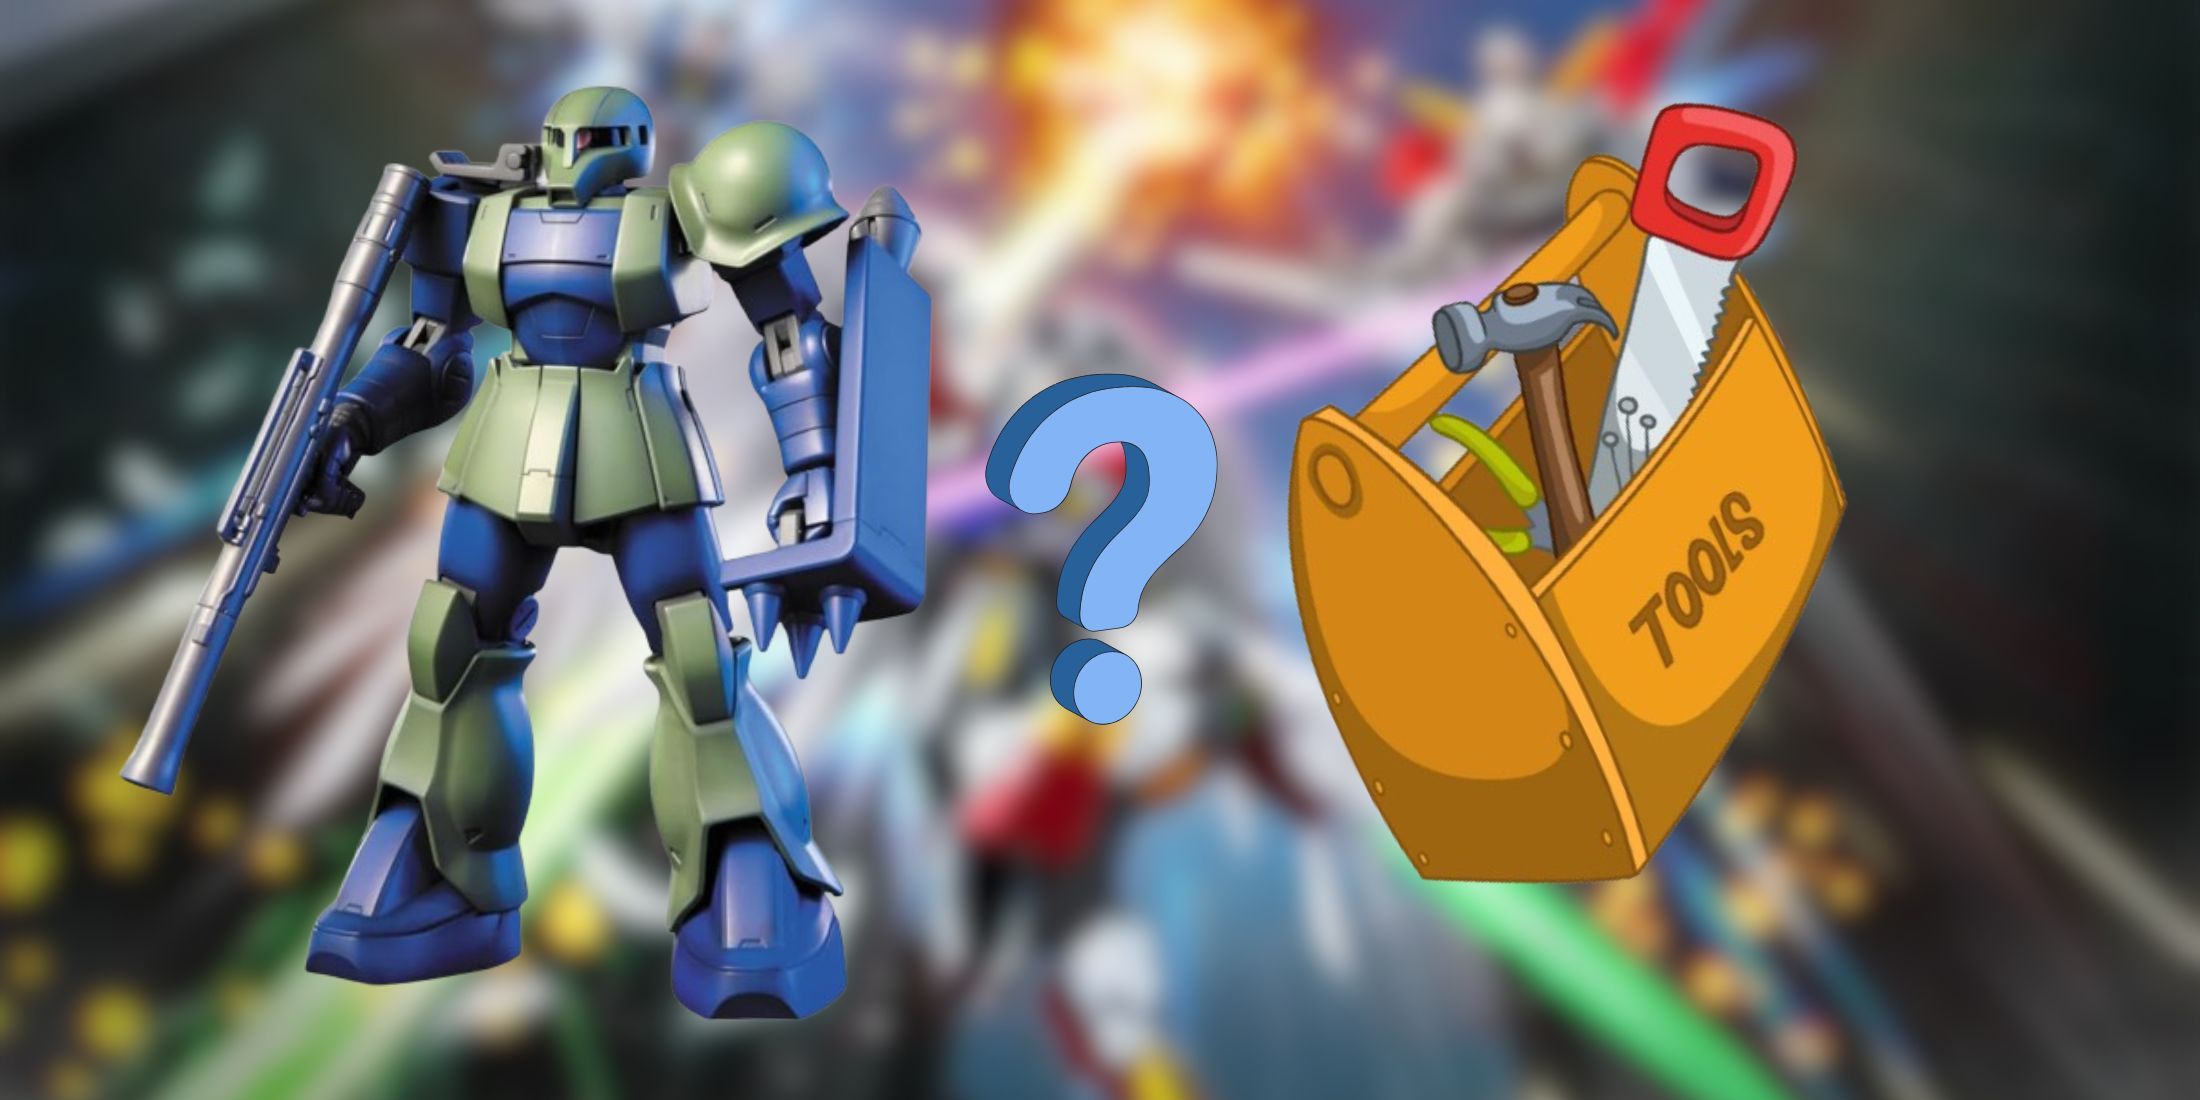
At long last, here it is! You’ve unwrapped the packaging on your first Gundam model kit and caught a whiff of that new plastic scent. Now, you find yourself faced with thousands of miniature pieces scattered across your desk, and you’re questioning if biting off parts from the runners with your teeth is the way to go or if there could be a more refined method.
Warning: Plot twist ahead! Contrary to what your late-night shopping impulse on HobbyLink Japan might lead you to believe, you don’t necessarily have to re-mortgage your house right away for a comprehensive modeling workshop. Let’s explore the Gunpla tool ecosystem, from the “bare essentials to prevent disaster” to “congratulations, now you own more precise tools than your local dentist!”
This version maintains the original message but is rephrased in a more engaging and conversational tone, with added emphasis on the exploration of the Gunpla tool ecosystem.
Tier 0: Survival Mode (AKA: I’m Not Buying Anything)
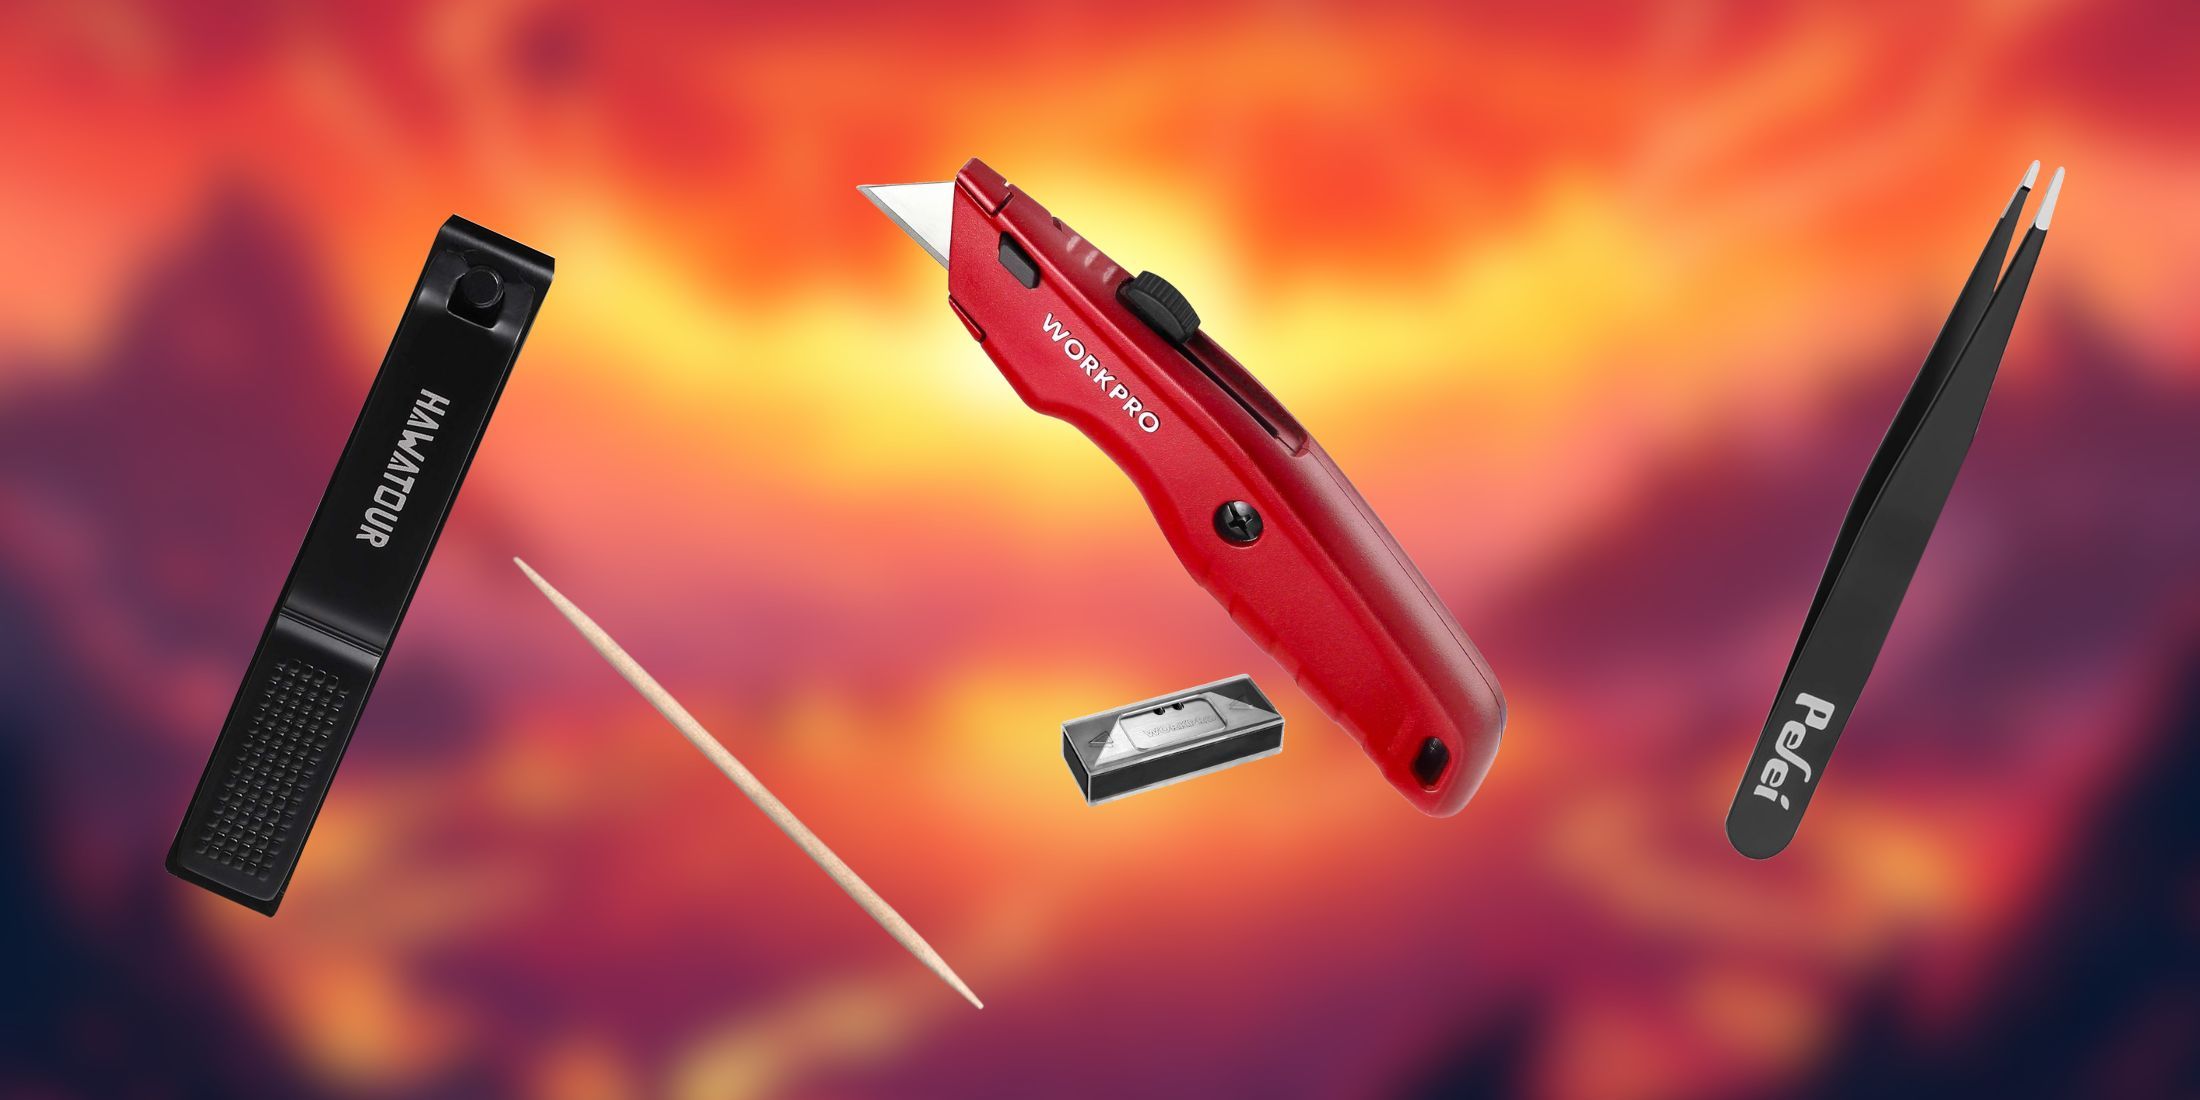
If you’ve found yourself with a Gundam model kit but no tools at hand, don’t worry! Whether it was an impulse purchase or a thoughtful gift from a relative, finding yourself without the necessary tools can be frustrating. But remember, necessity is the mother of invention, and there are household items that can stand in as makeshift tools when the need arises.
Although not typically discussed in formal model kit building communities, it is possible to use common household tools such as nail clippers to cut or remove parts from plastic runners in a pinch. However, keep in mind that these tools can leave unsightly stress marks resembling small scratches on the plastic, similar to tiny scars. This method should only be used in extreme situations where no other options are available.
Instead of a regular utility knife or box cutter, you might find it unexpectedly effective for smoothing out small residues. In place of specialized tweezers used in modeling, everyday bathroom tweezers could serve as a handy substitute for those tiny adhesive leftovers.
This method might not lead to the finest Gundam mecha model you’ve ever seen. It may even leave some nightmares about stress marks behind. However, in theory, you can construct a kit using these common household items. Just as theoretically speaking, you could perform surgery with a spoon – it’s possible, but very few would advise it.
| Tool | Purpose / Use Case |
|---|---|
| Nail Clippers | Emergency runner cutting; causes stress marks but works in a pinch. |
| Utility Knife | Removing nubs; not ideal, but better than nothing. |
| Tweezers (Basic) | Applying stickers, handling small parts. |
| Toothpicks | Helps position stickers or press down edges. |
Tier 1: The Bare Essentials ($20-30 Total)
Let’s transition from the creative yet challenging “MacGyver constructing a Gundam” style, to a more traditional and comfortable method of Gunpla building. This level signifies the absolute essential investments required for assembling Gunpla, ensuring a smooth and pain-free experience for viewers.
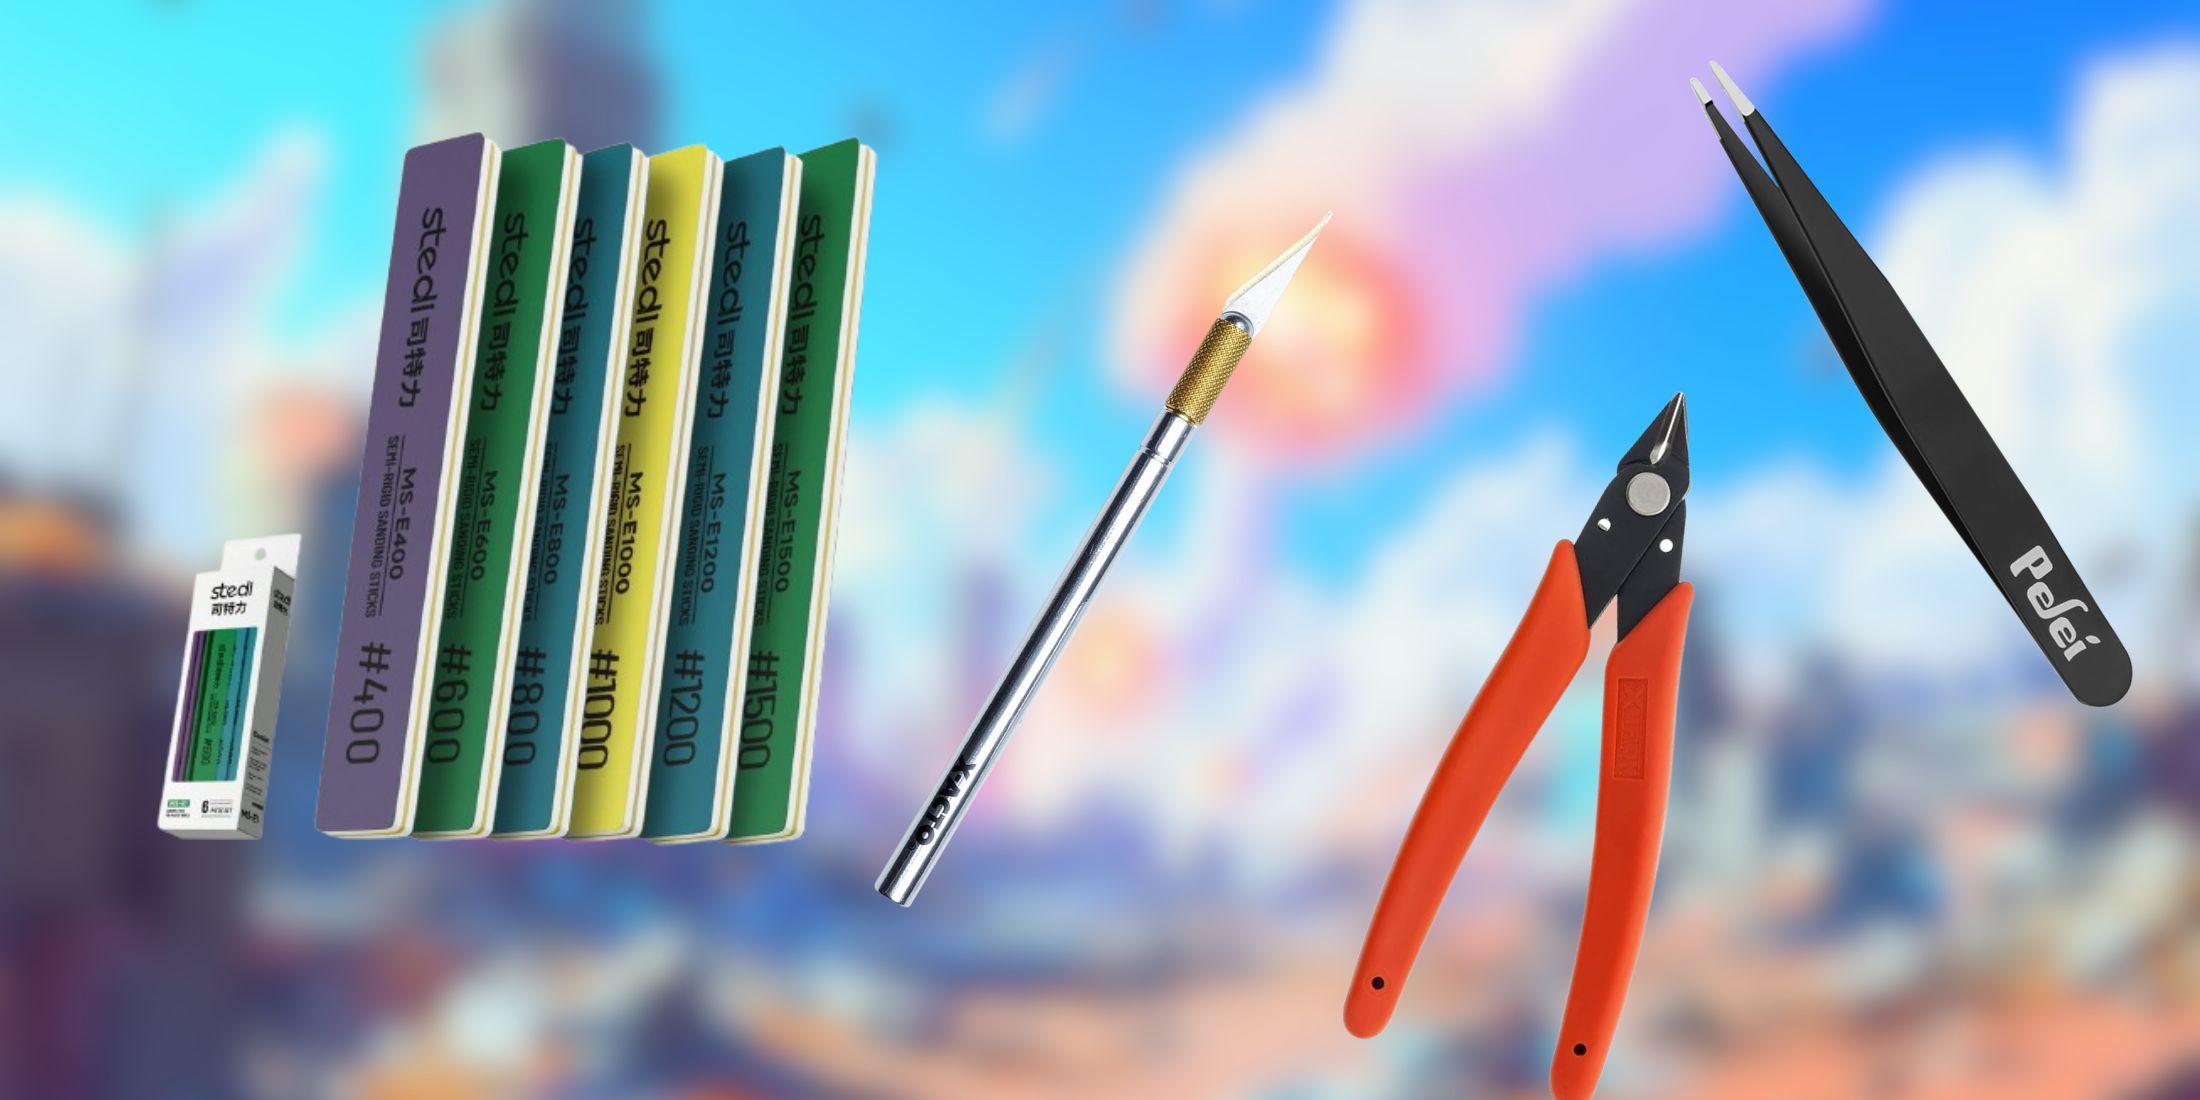
When starting with a new hobby that involves model making or crafting with plastic materials, your initial and indispensable purchase should be hobby nippers or side cutters. Notably, the Xuron 410s or Bandai Basic Cutters are suitable for beginners within a budget of $10-$15. Compared to common household cutting tools, these specialized hobby nippers are designed to effortlessly cut plastic without causing damage or crushing it, making them an essential tool for your workbench.
An ideal hobby knife featuring interchangeable #11 blades can significantly streamline your process of trimming knots. These tools typically cost between $5 and $10. This straightforward instrument can reduce up to 90% of the noticeable stress marks usually caused by other cutting techniques. The true advantage lies in mastering the art of using the blade at a gentle angle, which allows you to remove the knot in thin, delicate layers, much like shaving it off.
600-1000 grade sandpaper or sanding blocks will finish off the smoothing job after you’ve made cuts and trims on your workpiece, removing any rough marks. For around $5, you can purchase a pack that offers different grits; the coarser ones for initial shaping, and the finer ones for a smooth polish.
As a cinephile who cherishes my collection of movie props, I’ve found that no toolkit is complete without a reliable pair of straight-tip tweezers. They’re my go-to when dealing with minute details, whether it’s carefully placing a tiny sticker or rescuing the microscopic piece that somehow managed to evade me and take refuge in my carpet. These essential tools can fit neatly into a pencil case and won’t break the bank, costing roughly as much as a High Grade kit.
| Tool | Purpose / Use Case |
|---|---|
| Hobby Nippers | Precise runner cutting; reduces stress marks. |
| Hobby Knife (#11 Blade) | Trimming nubs cleanly and accurately. |
| Sanding Sticks / Paper | Smoothing nub marks, polishing parts. |
| Straight Tweezers | Accurate part handling and decal application. |
Tier 2: The Weekend Warrior ($50-80 Total)
As we progress, we’re venturing into the realm where building becomes more of a personal passion or craft. At this stage, you’ll notice your creations becoming noticeably more refined, with finesse and detailing that transform them from simple playthings to artistic masterpieces worthy of display. Investing in high-quality nippers will prove to be a valuable decision at this level.
High-end models such as God Hand SPN-120, Dspiae ST-A, and Tamiya Sharp Pointed Side Cutters offer cutting performance that feels almost supernatural compared to standard nippers. The first time you use top-quality nippers, you’ll have a moment of enlightenment as parts seem to effortlessly detach from the runner with the precision of a surgeon’s scalpel.
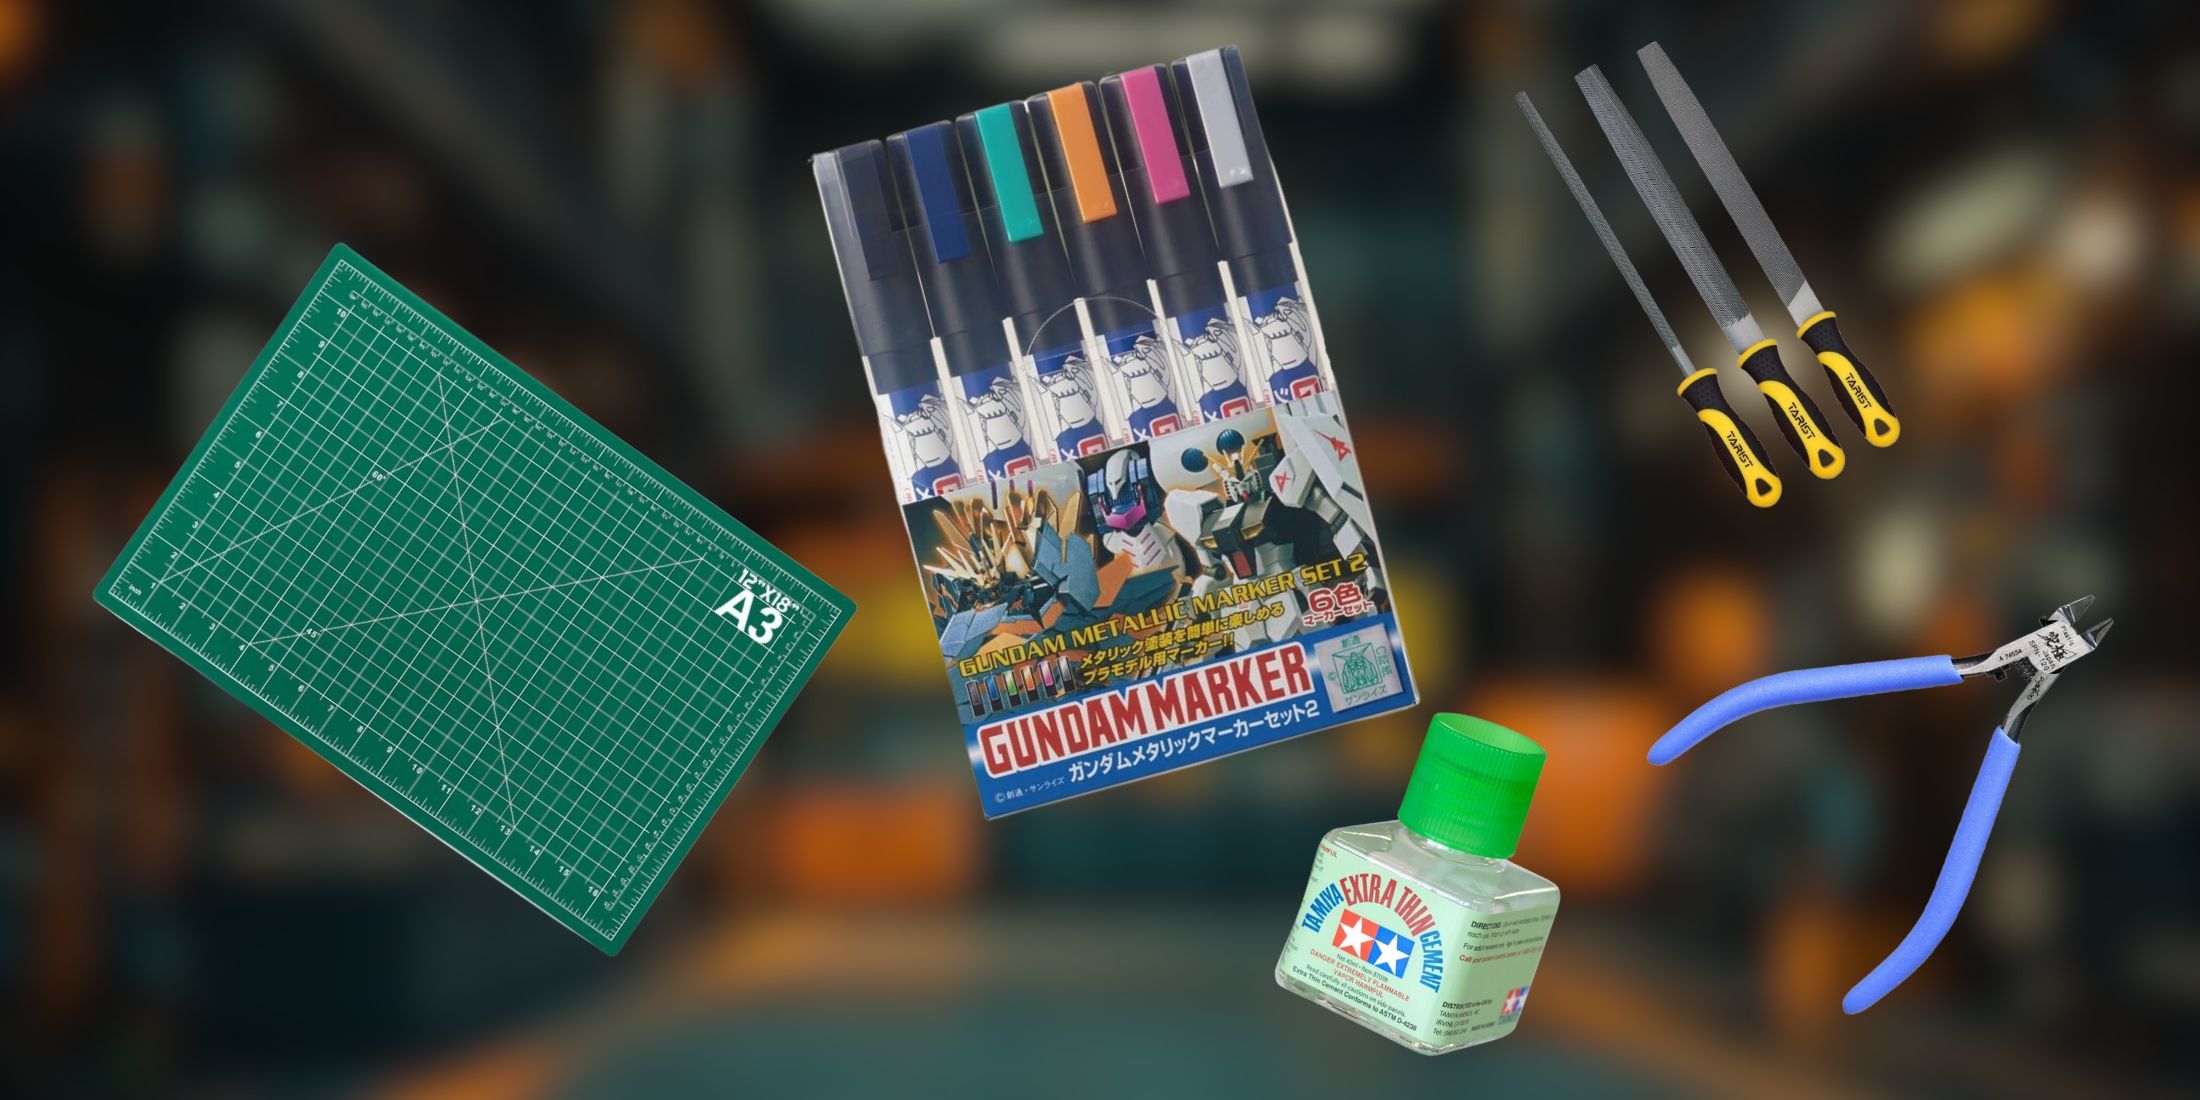
Gundam Markers, approximately $10 per set consisting of black, gray, and brown, are perfect tools for outlining lines, enhancing the intricate details and creating a sense of depth on your mecha models. The black markers work best when used on white or light-colored sections, while gray is ideal for parts that are red or medium-toned. Lastly, use the brown marker to subtly accentuate the yellow areas.
An affordable cutting mat (around $10-15) might not seem essential at first glance, but once you experience its benefits during your construction projects, you’ll appreciate how much it simplifies the process for you. These innovative surfaces not only safeguard your workspace by preventing accidental cuts and scratches, but they also offer measurement grids and angle guides to ensure precision in your work.
We’ll switch from sandpaper to metal files next, as they provide a superior finish. Commonly, a basic set includes shapes like flat, round, and triangular, which can access areas that sandpaper cannot. These metal files are great for precise material removal, particularly on flat surfaces where maintaining sharp edges is crucial.
In every modeler’s toolkit, a basic plastic cement like Tamiya Extra Thin Cement ($5) is indispensable, even though Gunpla models are primarily snap-fit. This isn’t for everyday building but rather for fixing broken parts, modifying components, or mastering the intricate art of… seam line elimination. As you progress in your Gunpla craft, your models will exude a more polished, professional appearance with their clean construction and intentional detailing, setting them apart from typical kits that are merely assembled casually.
| Tool | Purpose / Use Case |
|---|---|
| Upgraded Nippers | Cleaner, almost scar-free cuts near part surface. |
| Basic Gundam Markers | Adds depth and mechanical detail to recessed lines. |
| Cutting Mat | Protects surfaces and improves measurement and cutting accuracy. |
| Metal Files | Precision smoothing on flat and tricky surfaces. |
| Plastic Cement (Extra Thin) | Fix broken parts, fill seams, bond plastic permanently when needed. |
Quick Tips & Warnings For Beginners

At present, let’s pause for a brief refreshment and discuss some key aspects that might be beneficial for those who are relatively new to assembling Gundam models. More seasoned builders, or Tier 3 enthusiasts, probably wouldn’t require this information, but it serves as a great opportunity for us to cover the basics!
| Tip / Warning | Why It Matters |
|---|---|
| Don’t use plastic cement on polycaps | It can melt the soft rubbery material and ruin the joint. |
| Cut twice, not once | First cut away from the part, then do a second cut closer. This is going to reduce some of the stress marks. |
| Never twist parts off the runner | Causes stress marks, bends pegs, or breaks small details. Always snip! |
| Panel line before applying topcoat | Panel lining over a matte finish can make cleanup difficult or smear ink. |
| Use a toothpick or cotton swab for sticker pressure | Fingers can be too oily or rough. Using a toothpick can help avoid tearing or bubbling. |
| Don’t rush seam line removal | It’s an advanced technique that can mess up your kit if rushed, so make sure you practice on scraps before. |
| Beware of pets and carpets | Small parts vanish into fur and floor forever. Use trays or light-colored mats. |
Tier 3: The Dedicated Enthusiast ($100-200 Total)
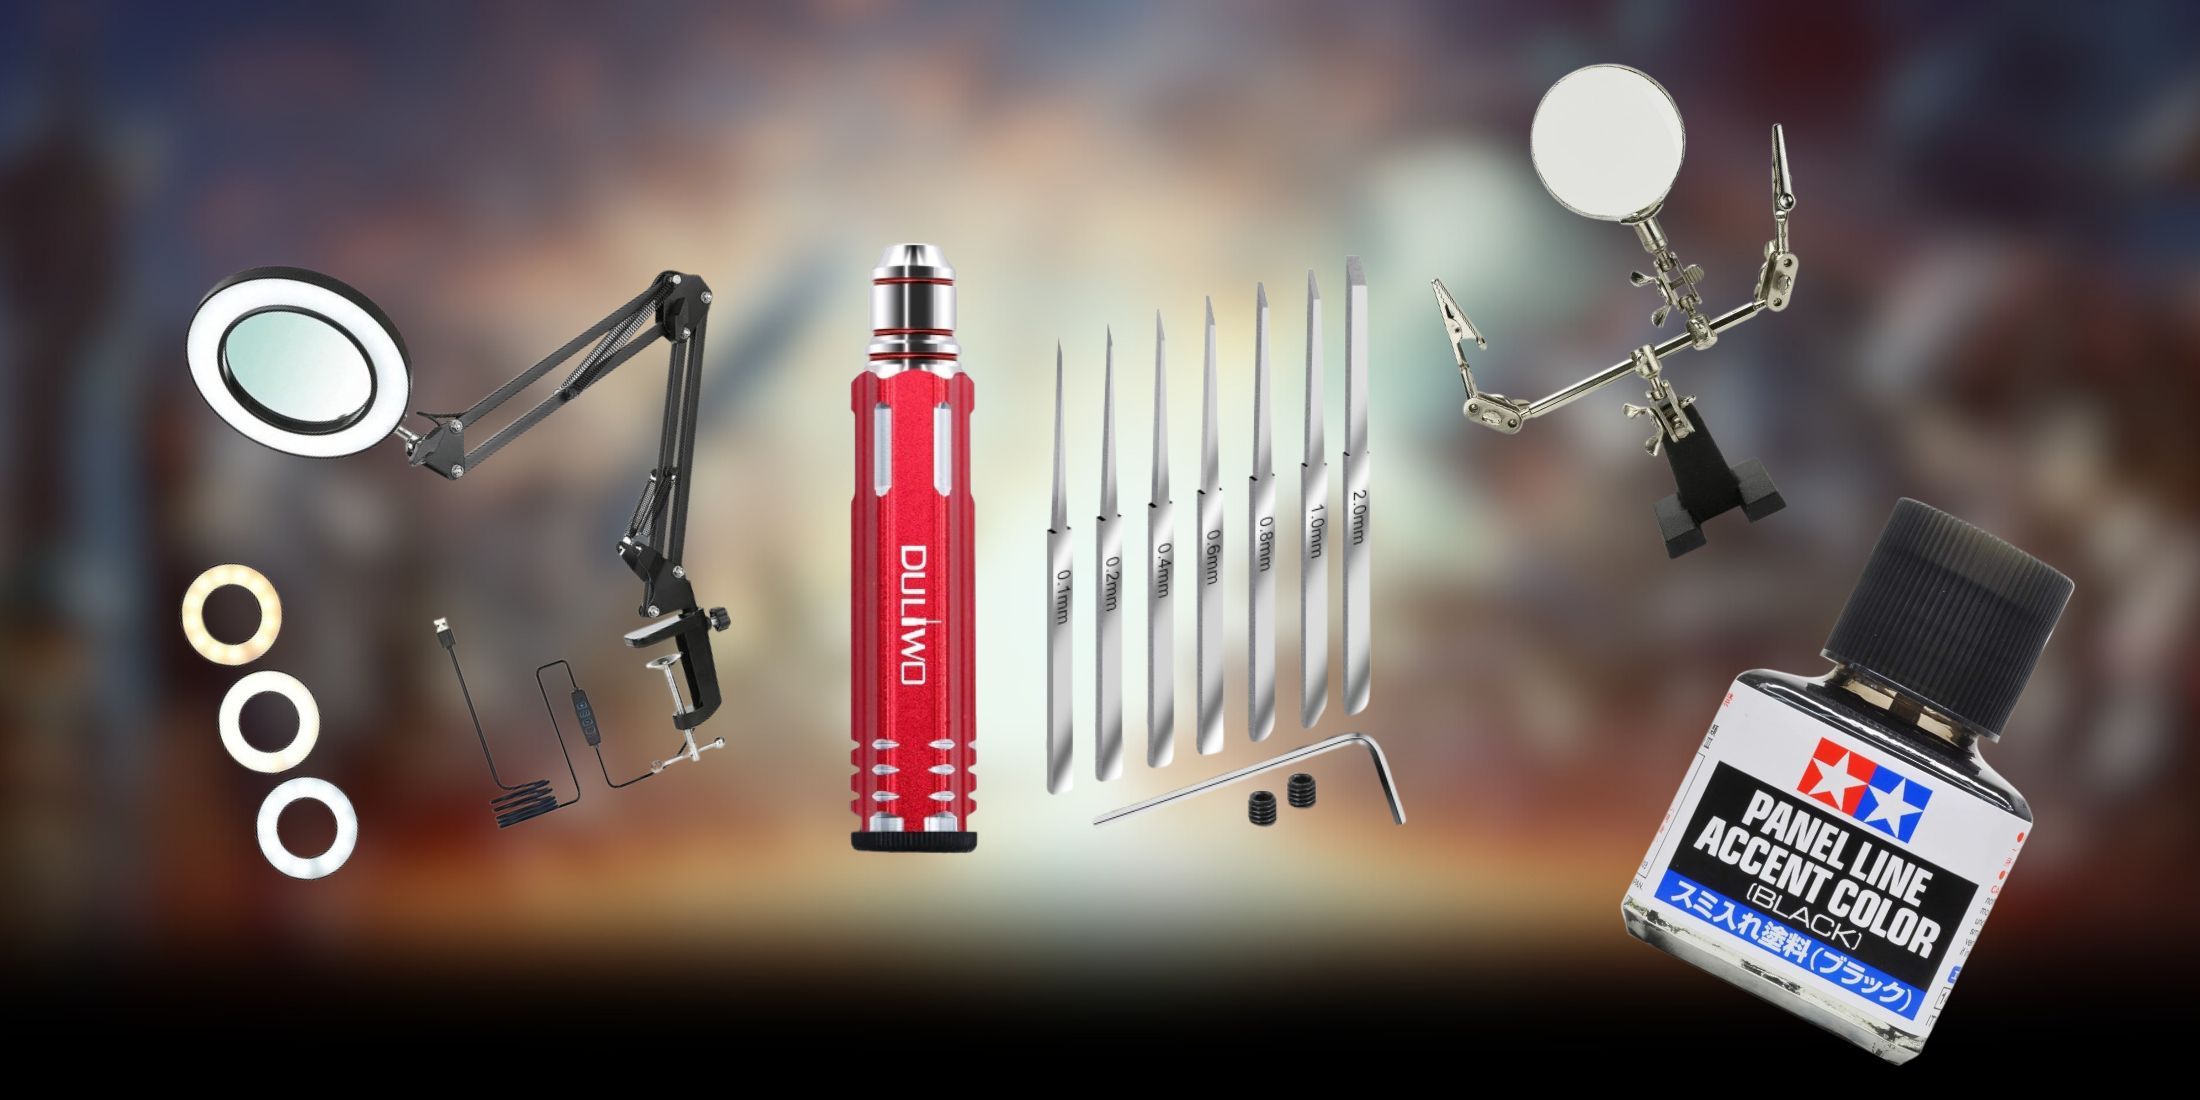
Step into the high-risk area, where unexpected deliveries from Japan spark curiosity from your partner, and your “I just need one more gadget” assurances are as convincing as a toy robot in outer space. At this stage, you’re crafting mini masterpieces with precision that rivals professional manufacturing quality.
From now on, take note that using a dual method of cutting will be the norm. For the initial removal of the runner (the piece that interferes with the mold), use the robust nippers we previously saw (referred to as GodHand). Afterward, reserve your high-end cutters like SPN-120 for the final cut close to the part’s surface.
Instead of using markers, I’d suggest opting for Tamiya Panel Line Accent Color instead. This choice will significantly reduce the time you spend on your project. Unlike markers that demand a steady hand and careful application, this enamel-based product automatically seeps into the recessed panel lines thanks to capillary action.
A suitable hobby organizer (priced between $15-20) addresses an often neglected problem in model construction: preventing skin oils from contaminating plastic parts during handling. These tools securely grasp parts, offering a convenient handle that you can use on your preferred Gundam character, enabling you to work comfortably from various angles without physically touching the part directly. Some models also include additional features like magnifying glasses, making them particularly useful for intricate builds.
Affordable micro chisel sets (ranging from $15-$25) significantly expand the scope of intricate detailing and personalization. These meticulously crafted tools are perfect for navigating tight spaces, removing mold lines in complex areas, and even applying custom panel lines and damage effects.
Micro chisel sets (costing between $15-$25) broaden the horizons of detail work and customization. These finely-tuned tools are ideal for maneuvering in tight spots, removing mold lines from intricate areas, and even adding personalized panel lines and damage effects.
Using a well-designed modeling light equipped with a magnifying glass (one simple option and one advanced) helps overcome the physical constraints that often hinder intricate tasks. The built-in magnifying glass enables you to examine your craftsmanship at higher magnification, revealing minute flaws that would otherwise be invisible to the unaided eye. This allows for more accurate work on even the tiniest details.
| Tool | Purpose / Use Case |
|---|---|
| Dual Nipper Setup | Rough cut with regular nipper, final cut with premium nipper for best results. |
| Tamiya Panel Line Accent Color | Liquid enamel flows into panel lines for professional finishes. |
| Hobby Parts Holder | Holds pieces securely to avoid fingerprints and improve angles while working. |
| Micro Chisels / Scrapers | Clean mold lines, add custom panels, reach tight corners. |
| Magnifying Lamp / Modeling Light | Boosts visibility for precision detail work. |
Tier 4: The “This Is My Personality Now” Collection ($300+)
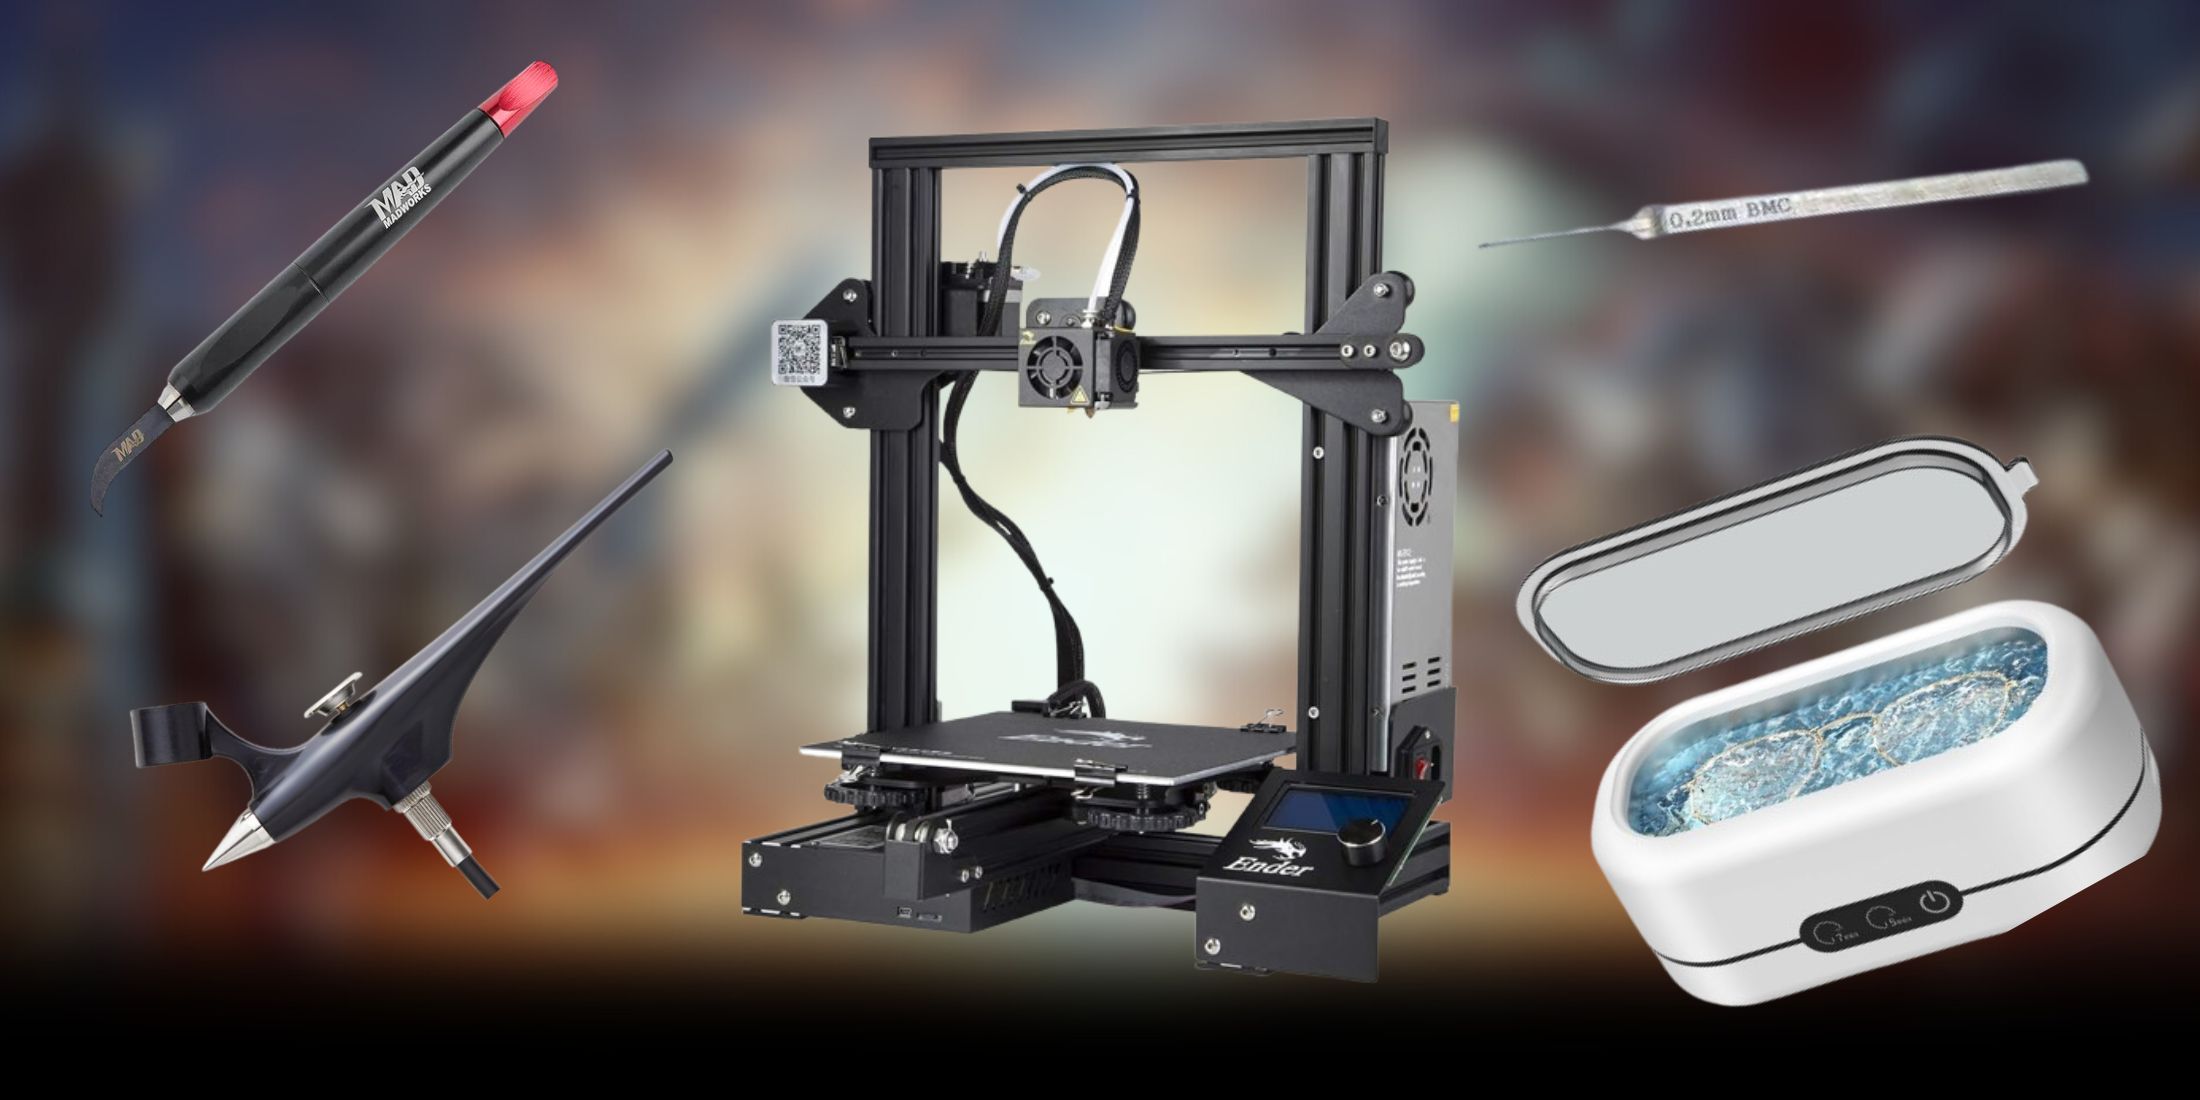
At this stage, you’ve surpassed a boundary. Constructing Gunpla isn’t merely an activity for you, it’s an integral part of your identity. Your workspace looks like a scaled-down NASA lab, and you address your tools with the respect usually given to ancestral weapons, referring to them by their Japanese names.
An ultrasonic cleaner employs powerful sound waves of high frequency, dislodging dirt and residue that regular hand-washing can’t manage. This device proves particularly handy when dealing with an older model kit. In addition, it may be wise to transition to advanced drafting tools now. Once prepared, items such as BMC chisels or Madworks scribers will empower you to create custom panel lines and surface details on the kit, essentially redefining certain aspects of the model according to your creative vision or reference materials.
Tier 4 encompasses all the tools found in Tier 3, along with some high-end, specialized equipment. Imagine it as an expansion or upgrade to your current collection, transforming your pastime into a more refined experience with premium customization and polishing tools.
Redefining your Gunpla experience comes with the introduction of an airbrush setup. Now, instead of being confined to the colors pre-molded by Bandai, you have the freedom to transform every plane as your personal art canvas, where your understanding and creativity in color theory can truly shine.
For dedicated enthusiasts, a 3D printer signifies the pinnacle of personal customization. When pre-made parts fall short of your imagination, you can merely design and produce your own. These individuals no longer assemble Gunpla models; instead, they craft miniature engineering feats that bear a striking resemblance to mobile suits from the Gundam universe.
| Tool | Purpose / Use Case |
|---|---|
| Ultrasonic Cleaner | Deep cleans parts before painting or after sanding for dust-free results. |
| Pro Scribing Tools | Create or enhance custom panel lines with precise depth and width. |
| Airbrush + Compressor | Full surface painting control and color customization. |
| 3D Printer | Print custom parts, accessories, or fix missing kit pieces. |
Effective organization methods can save you from the aggravating experience of losing a crucial piece during a project. Compartmentalized part organizers help distinguish and separate different runners, while magnetic trays are useful for holding small items like screws, polycaps, and metal components that tend to vanish mysteriously.
Bottom Line
We’ve examined a wide range of Gunpla tools, ranging from everyday household items to specialized professional equipment. However, one fact remains consistent throughout: the skill of the builder outweighs the importance of the tools. Even the most advanced toolset cannot compensate for patience, careful observation, and mastery of technique. If you’re new to this and feel overwhelmed by impressive tool collections you see online, keep in mind that these collections were amassed over many years of building.
Frequently Asked Questions
My first build looks like it was assembled by a caffeinated raccoon. Is this normal?
Initially, it’s perfectly normal, even considered a milestone. That first toolkit acts as a guide, helping you identify areas for improvement. Make sure to keep it visible, as a subtle reminder of how much you’ll grow. By your tenth, it will show marked improvement, and by the twentieth, you’ll be educating puzzled visitors about the accurate panel lines on your RX-78-2, which are historically significant.
The stickers look terrible. Is there a better way to go about this?
Absolutely, these markings are known as waterslide decals. Unlike the standard stickers that come with High Grade kits, which can appear as harsh and unrefined as a neon sign, waterslide decals offer a more harmonious integration with the plastic surface of your model. Real Grade, Master Grade, and Perfect Grade kits typically include these waterslide decals, where a thin film is gently applied to the model using water.
If your model kit doesn’t come with it, you can buy waterslide decals from other suppliers on the internet. However, remember that these might require some extra equipment like a mark setter, a mark softener, and a lot of patience, as they may need time to adhere even longer than continental drift.
Do I need to watch the Gundam anime to build Gunpla?
Just as you don’t necessarily need to know the inner workings of a chicken to savor a bucket of fried chicken, some of my builder friends, who happen to be Gundam series novices, can still admire the intricate mechanical designs.
By doing so, examining the original content enhances the emotional bond with your creations and aids in comprehending why specific mobile suits have their unique designs. At a bare minimum, recognizing which faction your model aligns with could explain why you’re using numerous red decals throughout your work.
Read More
- All Shadow Armor Locations in Crimson Desert
- All Skyblazer Armor Locations in Crimson Desert
- How to Get the Sunset Reed Armor Set and Hollow Visage Sword in Crimson Desert
- Best Bows in Crimson Desert
- Marni Laser Helm Location & Upgrade in Crimson Desert
- All Helfryn Armor Locations in Crimson Desert
- All Golden Greed Armor Locations in Crimson Desert
- Wings of Iron Walkthrough in Crimson Desert
- How to Craft the Elegant Carmine Armor in Crimson Desert
- Keeping Large AI Models Connected Through Network Chaos
2025-04-27 20:08