
In Oblivion Remastered, there are four guilds a player can join and explore with. Among these four, it’s clear that the most accessible is unquestionably the Fighter’s Guild. With an incredibly low threshold for entry, players can become part of the Fighter’s Guild right at the start of Oblivion Remastered, and then tackle the associated quests at their own pace – whether swiftly or leisurely. The Fighter’s Guild has three main bases in Cyrodiil, each offering its own sequence of quests. Although these quests might not be the most intricate, they provide an excellent opportunity to develop your character early in the game. In this guide, we will walk you through a comprehensive overview of the Fighter’s Guild in Oblivion Remastered.
How to Join the Fighter’s Guild in Oblivion Remastered
Visit any Fighter’s Guild:
In the game Oblivion Remastered, becoming a member of the Fighter’s Guild is straightforward; you can do so once you finish the tutorial and unlock the entire map of Cyrodiil.
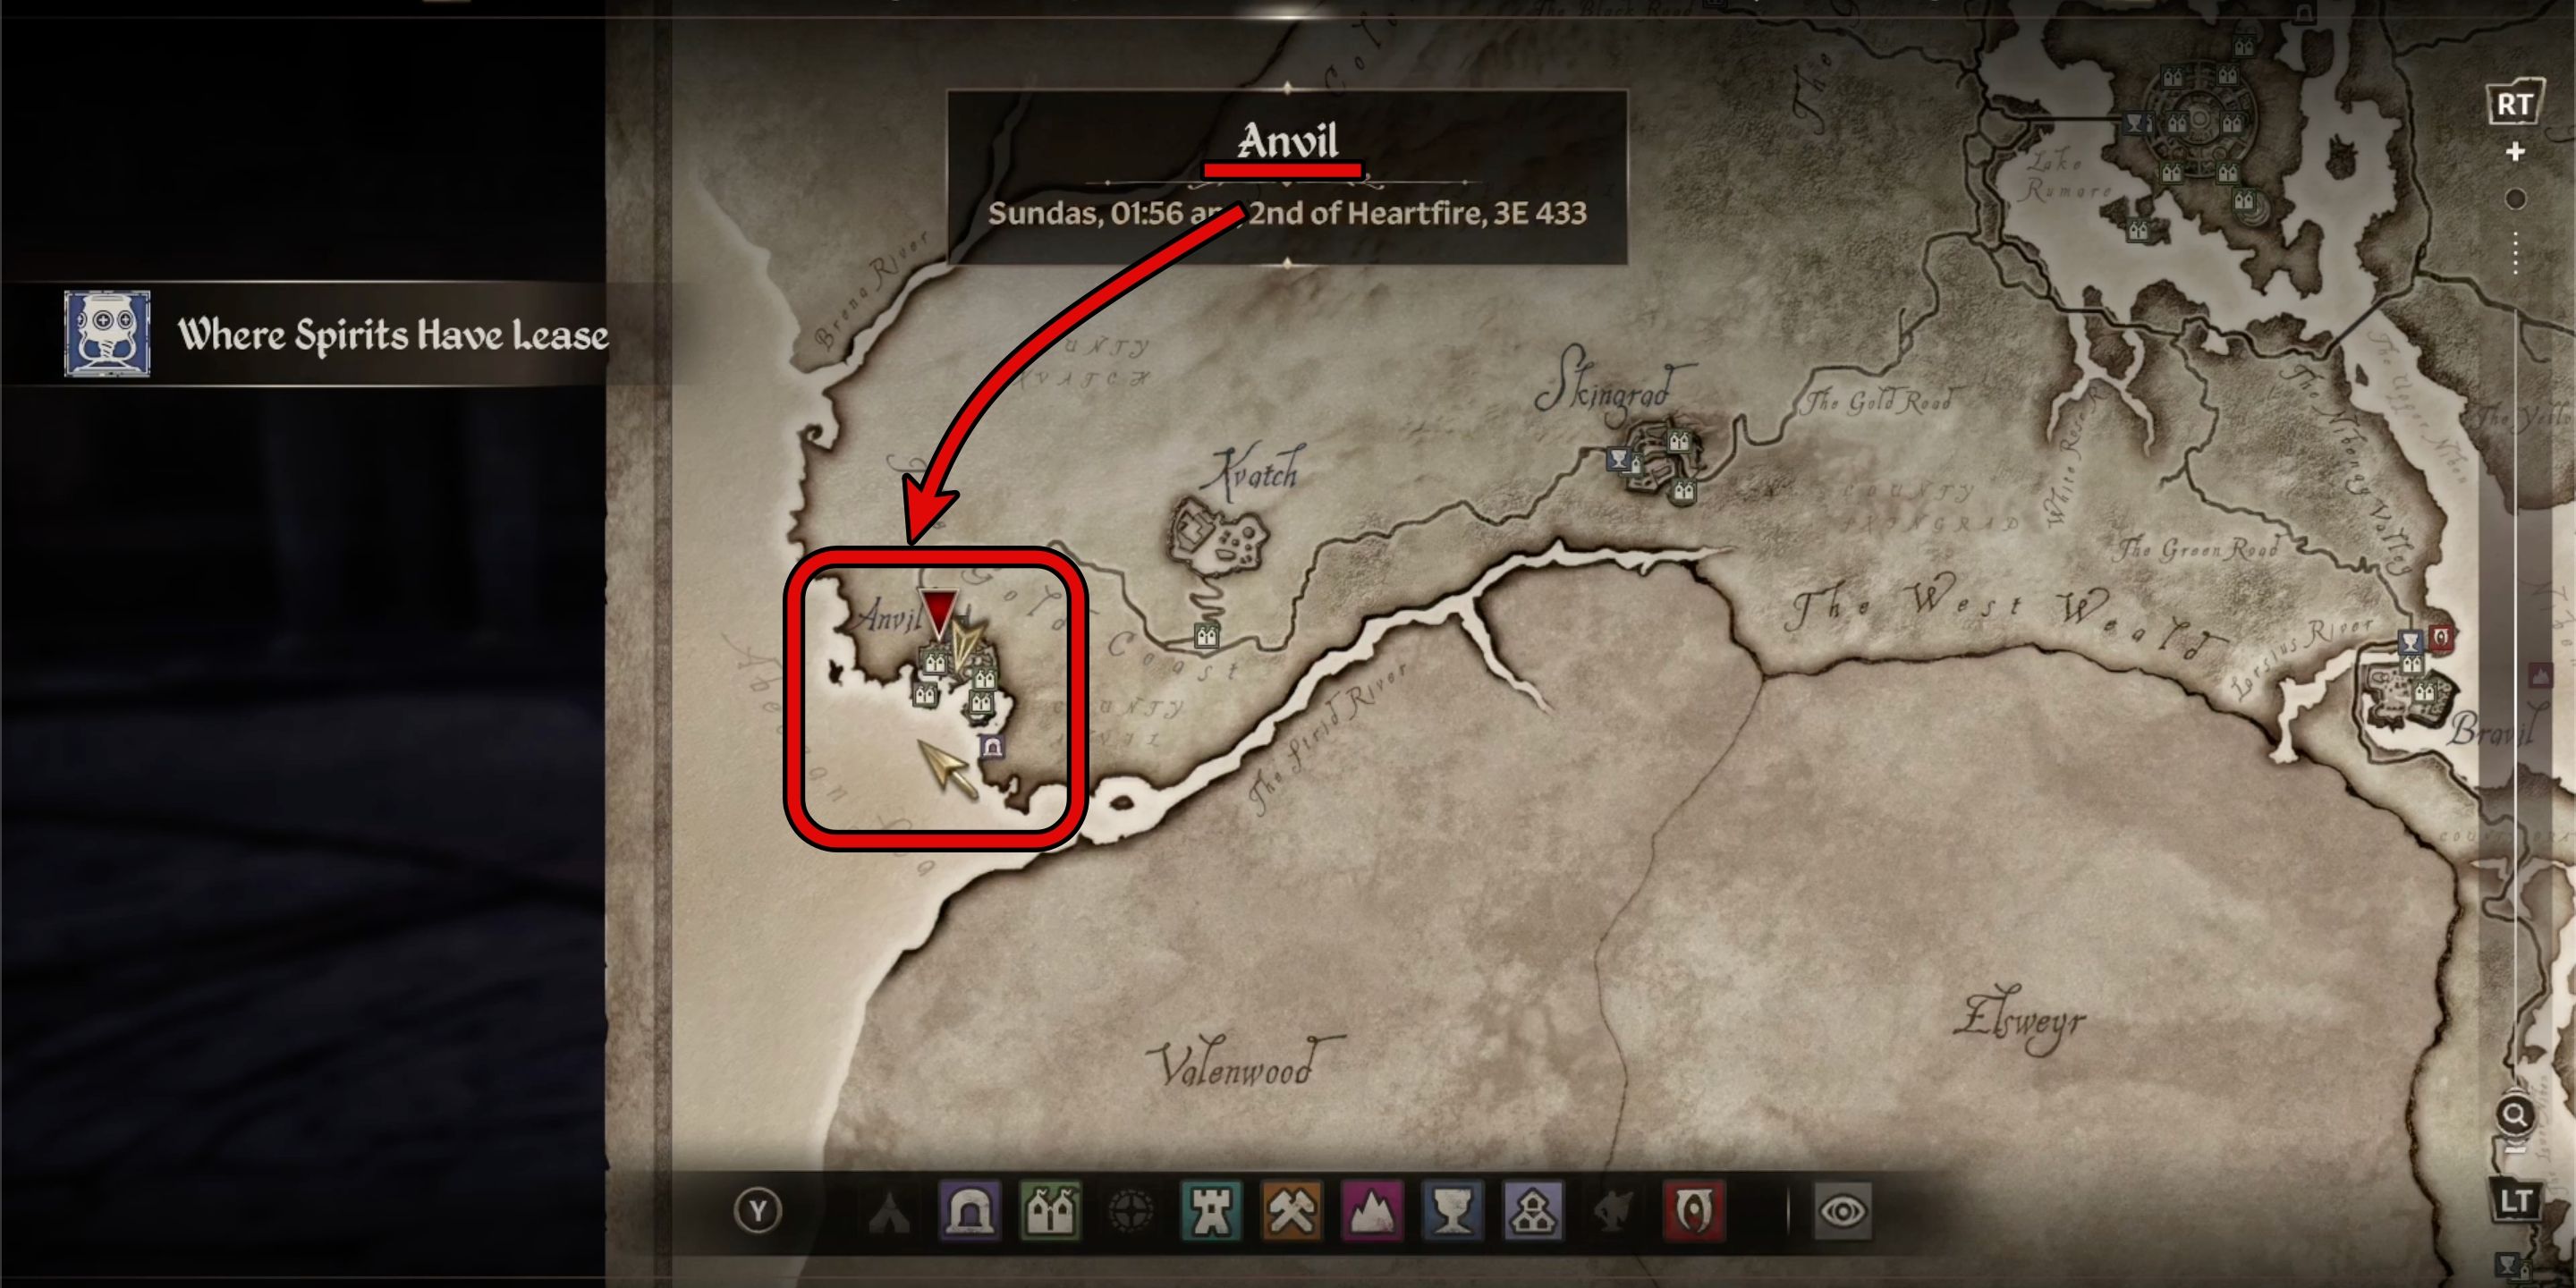
There are three Fighter’s Guild locations you can visit to become a member:
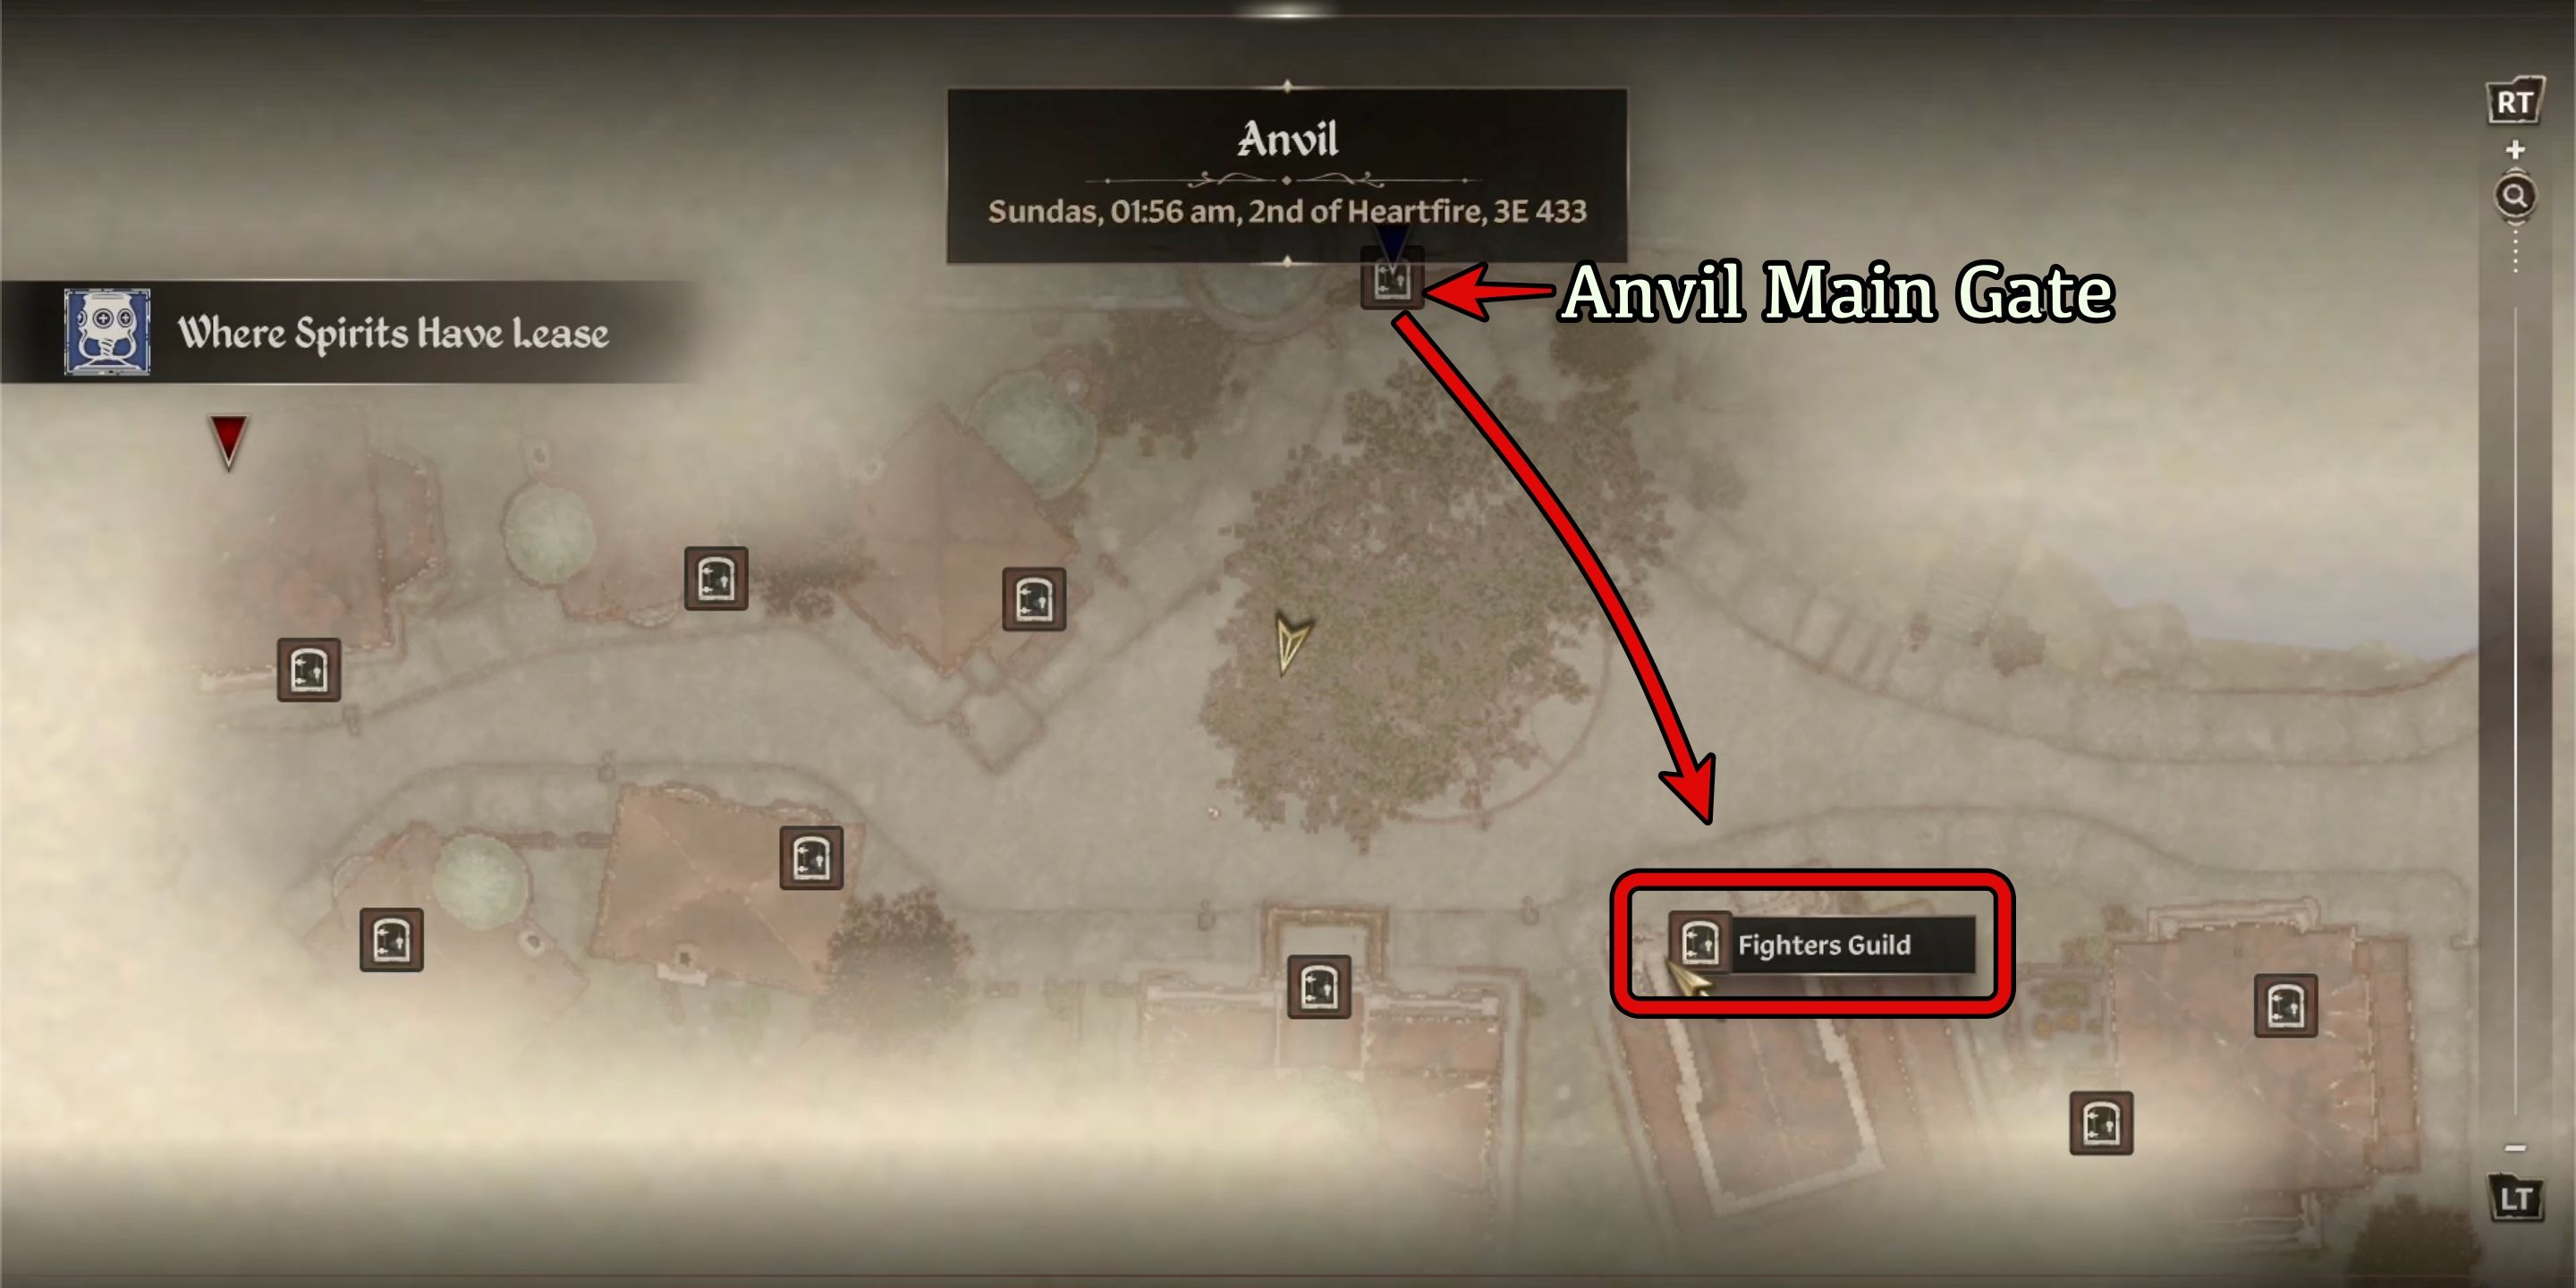
- Anvil – Directly across the street from the main gate. Speak to Azzan.
- Chorrol – North end of town, along the roundabout. Speak to Vilena Donton.
- Cheydinhal – Western side of town. Speak to Burz gro-Khash.
All Fighter’s Guild Contract Quests in Anvil – Oblivion Remastered
Upon entering the Fighter’s Guild for the first time, you’re informed that it’s essential for you to travel to Anvil for your initial missions.
Speak to Azzan:
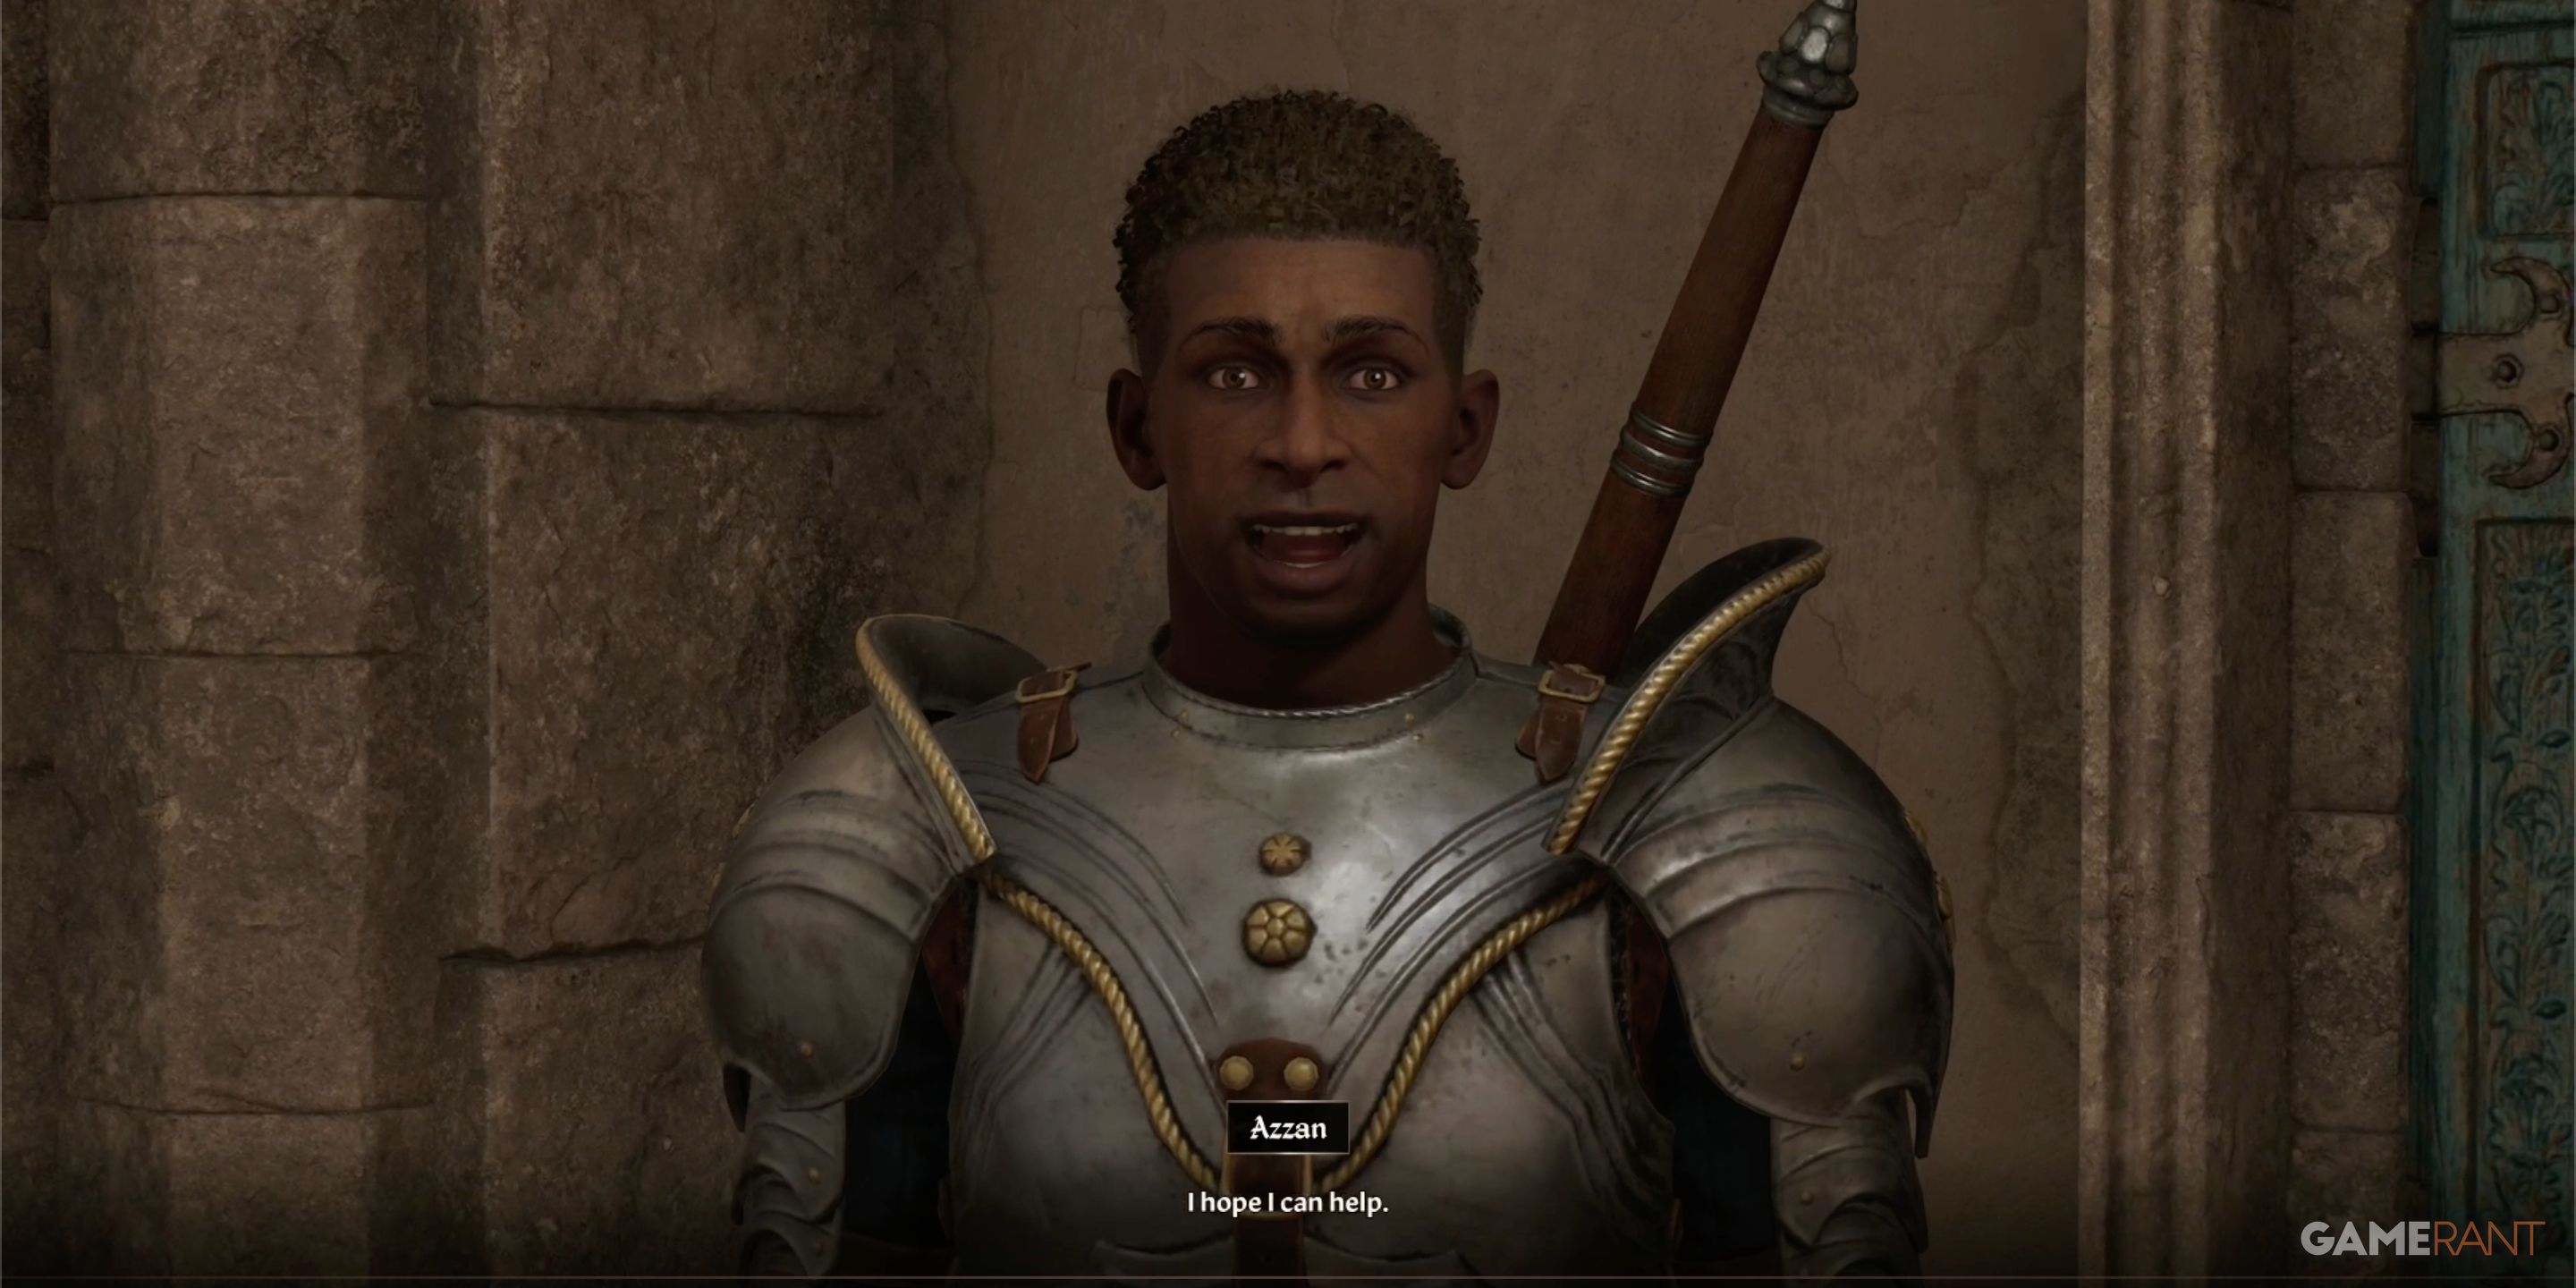
To start accepting jobs from the Fighter’s Guild located in Anvil, locate Azzan. You can find him in his office on the third level, his private quarters on the second floor adjacent to the Dining Hall, strolling around the guild building, or within its premises.
Contract 1: A Rat Problem:
Initially, it appears that the task titled “A Rat Problem” is merely an initiation rite involving exterminating rodents. However, it soon becomes apparent that this assignment is somewhat more complex than initially perceived.
- Head to Arvena Thelas‘ house.
- Kill the Starving Mountain Lion in her basement.
- Speak to Arvena, visit Pinerus Inventius.
- Walk with the hunter outside the city gates, defeat the Starving Mountain Lions
- Return to Arvena, kill the second mountain lion in her basement.
Arvena implies that her neighbor, whom we know as Quill-Weave, is likely involved in this incident. She requests you to track him down. Instead of doing so directly, conceal yourself in the bushes near Arvena’s home for a vantage point overlooking the basement entrance. Exactly at 8:00 PM, you will observe Quill-Weave emerging and depositing uncooked meat into the basement.
- Confront Quill-Weave after she drops the meat.
- She will admit what she’s done, but ask you not to tell Avena, as she was only trying to lure the rats outside, so the guards would kill them.
- Return to Arvena. You have two options:
- 1. Tell Arvena the truth. She’ll reward you with 200 Gold and one point in Speechcraft.
- 2. Do not tell Arvena about Quill-Weave. She will give you 200 Gold.
- Return to Quill-Weave, who will reward you with a point in Acrobatics.
Contract 2: The Unfortunate Shopkeeper
The Robbed Shopkeeper” – An Apprentice-level Contract
Remember to proceed after completing your last mission. In this task, you are required to venture to the store owned by Norbert Lelles, who has been a victim of multiple burglaries. Azzan is counting on you to uncover the culprit behind these thefts.
- Visit Norbert Lelles’ shop and speak to him about the situation.
- Use the Wait mechanic to sit until 12:00–2:00 AM. During our playthrough, the thieves came some time after midnight, within that two-hour window.
- There will be three strong attackers. Defeat them all.
- Find Lelles next door at The Flowing Bowl. Receive your 200 Gold reward.
Currently, you won’t find any more Novice or Apprentice missions in Anvil. Instead, Azzan might advise you to take on a contract in Cheydinhal. Should you encounter difficulties completing contracts or staying in one location, just proceed to the next until you find a suitable one.
Contract 3: Den of Thieves
In the storyline “Den of Thieves“, your mission revolves around eliminating a band of thieves from the cave system known as Hrota Cave, , located just beyond the city walls of Anvil. If you assisted Maglir in “Unfinished Business”, Azzan may assign him to join you on this particular task.
- Question the townsfolk in Anvil about the thieves.
- This will lead to Newheim the Portly.
- Newheim will give you the Hrota Cave lead.
- Clear the thieves from Hrota Cave. They are each marked on the compass.
- Return to Azzan for your reward.
Contract 4: The Wandering Scholar
Azzan requests your assistance in guiding Elante from Alinor towards the hidden Dwemer shrine within Brittlerock Cave, situated to the northwest of Kvatch.
The Brittlerock Cave is filled with numerous helpful artifacts. After finishing your assignment, it’s definitely worth investigating.
- Meet Elante of Alinor at Brittlerock Cave.
- Stay close to her as you make your way through the cave system, defeating any enemies that come your way.
- Once she finds the shrine, she’ll tell you she’s fine to continue by herself.
- Don’t backtrack. Go through the door to the Lower Passage, which takes you back to the Gold Coast eventually.
- Return to Azzan.
Contract 5: The Stone of St. Alesia
As a devoted follower, I find myself on an arduous journey deep into the heart of the Jerall Mountains, tasked with the recovery of a sacred artifact that has been unjustly taken. This final mission for Azzan is no small feat, but I am ready to brave the unknown in pursuit of restoring what was rightfully ours.
- Travel to the Great Chapel of Talos in Bruma.
- Speak to Cirroc to get the details of the theft of the Stone of St. Alesia.
- Follow the quest marker, and you’ll encounter K’Sharr, one of the original thieves. He’ll tell you that his whole group was killed by ogres. They stole the stone and fled into the hills to the ruins of Sedor.
- Sedor is found in an extremely remote area that is tough to traverse. While K’Sharr says it’s not far, it’s actually very difficult to reach from his location. It’s better to head from the southeast and make your way up.
- The ruins of Sedor are filled with ogres, so be prepared for a fight.
- Once you collect the stone, return to Azzan to close out the Chorrol section of the Fighter’s Guild questline.
All Fighter’s Guild Contract Quests in Cheydinhal – Oblivion Remastered
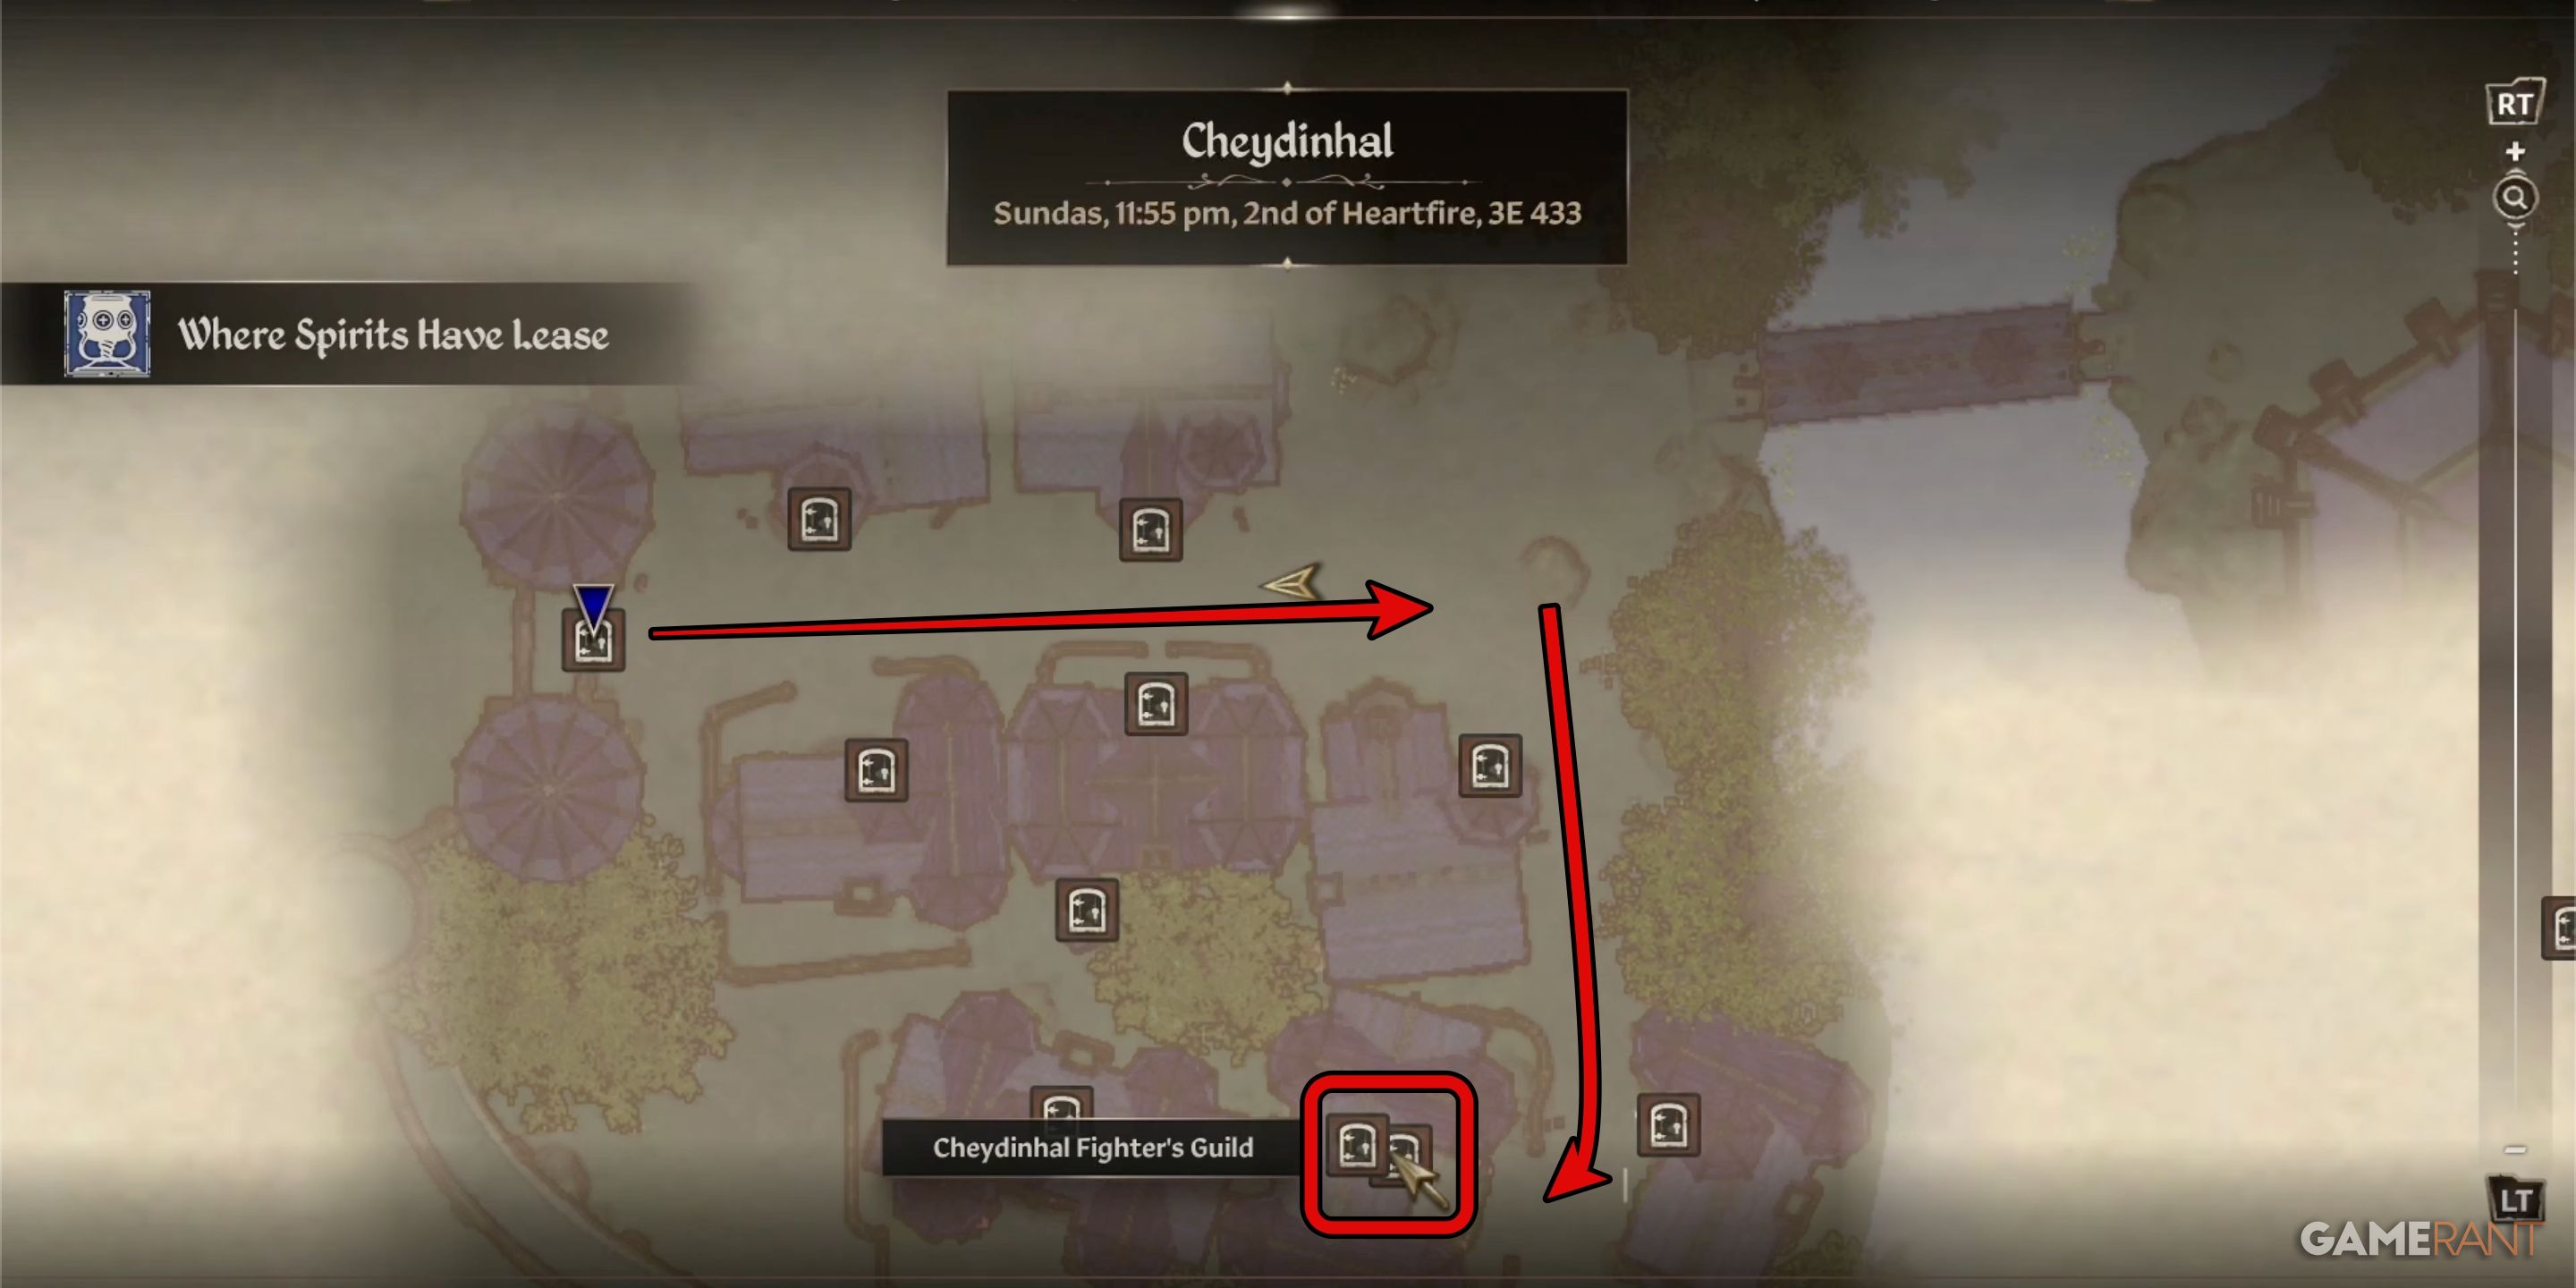

Speak to Burz gro-Khash:
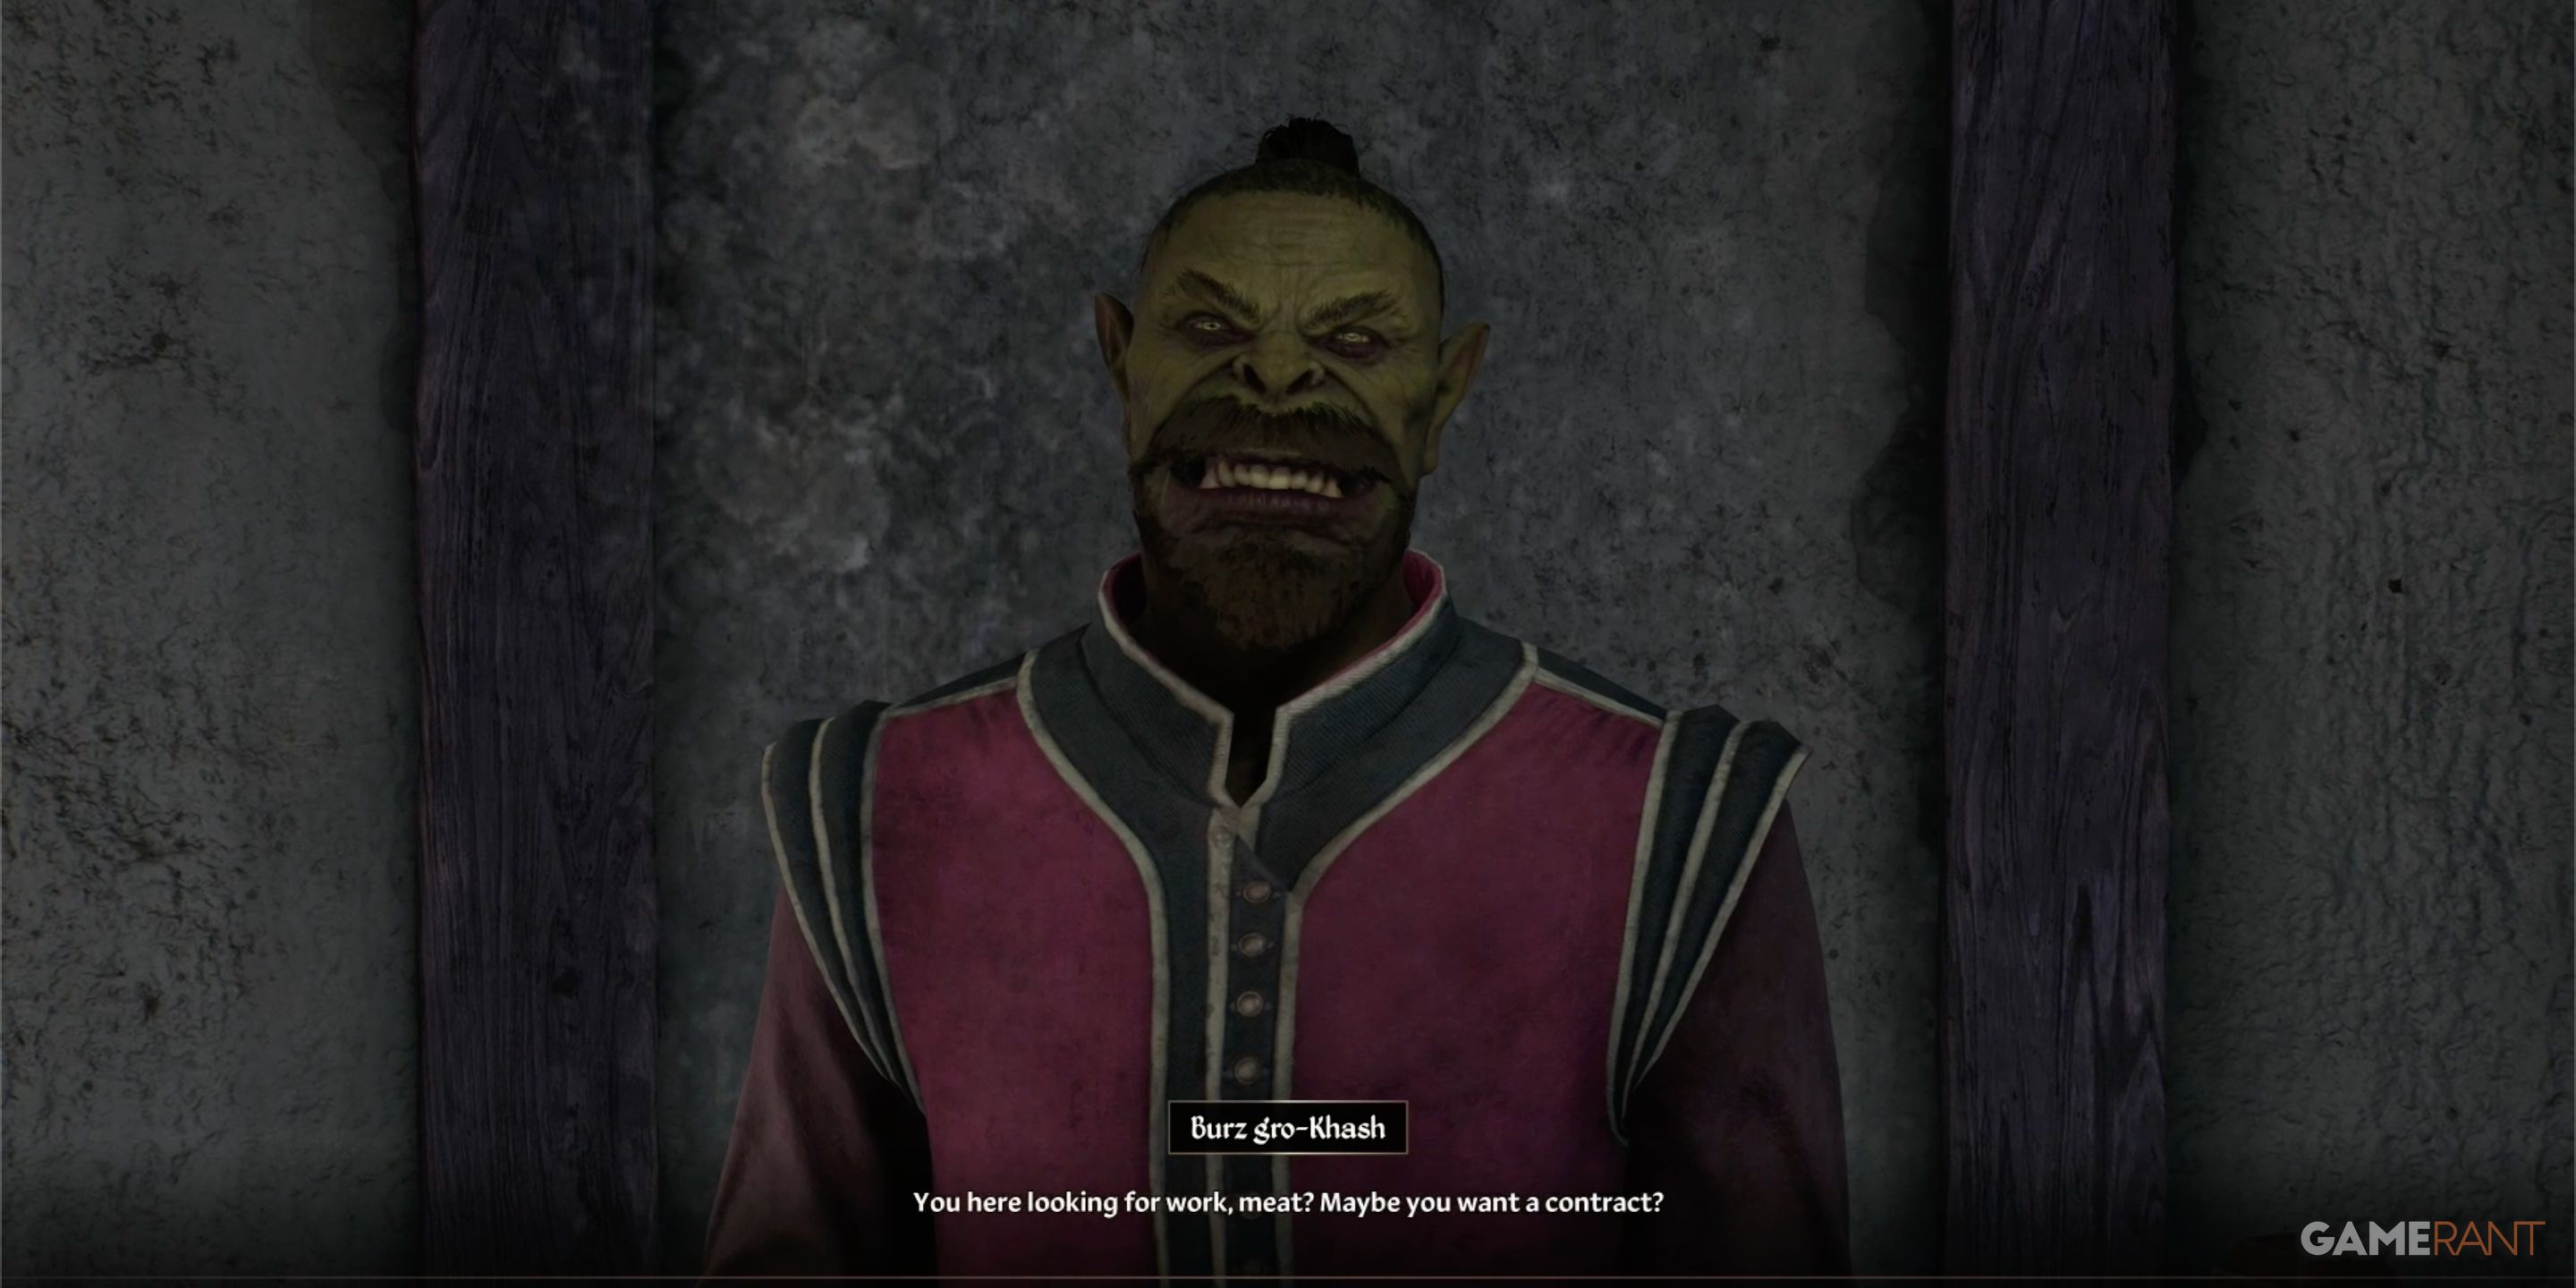
To begin taking contracts at the Cheydinhal branch, speak to Burz gro-Khash.
Contract 1: The Desolate Mine
In the city of Cheydinhal, “The Desolate Mine” is your initial task waiting for collection. Talk to Burz gro-Khash, who will entrust you with a load of weapons meant for miners at the mine located northwest of Cheydinhal. You’ll be delivering these arms yourself.
- Defeat the Goblins outside the mine.
- Enter the mine, and speak to Rienna.
- Distribute the weapons. Give the hammer to Brag gro-Bharg, and the sword to Elidor.
- Help clear the mine of all goblins.
- Return to Burz gro-Khash to receive your reward. He claims you get a bonus if everyone survives, but the HUD says you get 200 Gold like always.
Once you’ve finished your initial assignment in Cheydinhal, your next task will transport you to Chorrol. Be sure to progress to the Journeyman level prior to departing.
Contract 2: Amelion’s Debt
In the adventure known as “Amelion’s Debt“, you are asked to travel to the settlement of Water’s Edge close to Leyawiin. Biene Amelion is in a tight spot due to her father’s gambling debt, and she needs your help. She requests that you either provide her with the money to settle the debt, or retrieve her father’s armor and sword for her so she can sell them to clear the debt. You have three possible choices: first, offer Amelion the required sum of money directly. Second, get the armor and sword, keep them for yourself, then give her the equivalent amount in cash. Lastly, hand over both the armor and sword to Amelion.
- Visit the Water’s Edge settlement.
- Speak to Biene Amelion.
- Visit the Amelion Tomb and collect Brusef Amelion’s Sword and Brusef Amelion’s Cuirass.
- Choose whether to keep the items, or return them.
- Return to Burz gro-Khash
Contract 3: The Fugitives
Burz gro-Khash sends you to Bravia to hunt down four fugitives.
- Head to Bravia and ask the locals for Rumors of the Fugitives.
- Head to Bloodmayne Cave.
- Defeat the first two fugitives in the cave’s upper level.
- Continue to the Bloodmayne Cave Labyrinth.
- Defeat the second pair of fugitives.
- There is an exit from the Labyrinth.
- Return to Burz.
Contract 4: The Noble’s Daughter
Burz gro-Khash asks you to help Lord Rugdumph – an orcish noble – find his missing daughter.
- Head to Lord Rugdumph’s estate in the northeast.
- Speak to Lord Rugdumph about his daughter
- Defeat the Ogres who have kidnapped Lady Rogbut
- Return to Lord Rugdumph to receive Rugdumph’s Sword.
- Return to Burz.
Contract 5: Mystery at Harlan’s Watch
In the concluding agreement at Cheydinhal, your assignment involves delving into a series of mysterious vanishings that have occurred close to Harlun’s Watch.
- Speak to Drarana Thelis at Harlun’s Watch
- She will inform you of the missing parties who had gone to Swampy Cave.
- Make your way down to Swampy Cave. If you go between dusk and dawn, you’ll face several Will o’ the Wisps. These can only be defeated with magic weapons.
- Search the caves for the missing residents, then kill every troll you encounter.
- You must clear every troll out of the entire cave system. Unfortunately, they are unmarked, so you may have to make several trips through the tunnels. Make sure to check the tunnels that start at the bottom of the many pits you encounter in the cave system’s larger chambers.
- Return to Harlun’s Watch to receive the Mind and Body Ring once done.
- Return to Burz to finish out the contract, and receive your promotion to Champion.
All Fighter’s Guild Quest Contracts in Chorrol – Oblivion Remastered
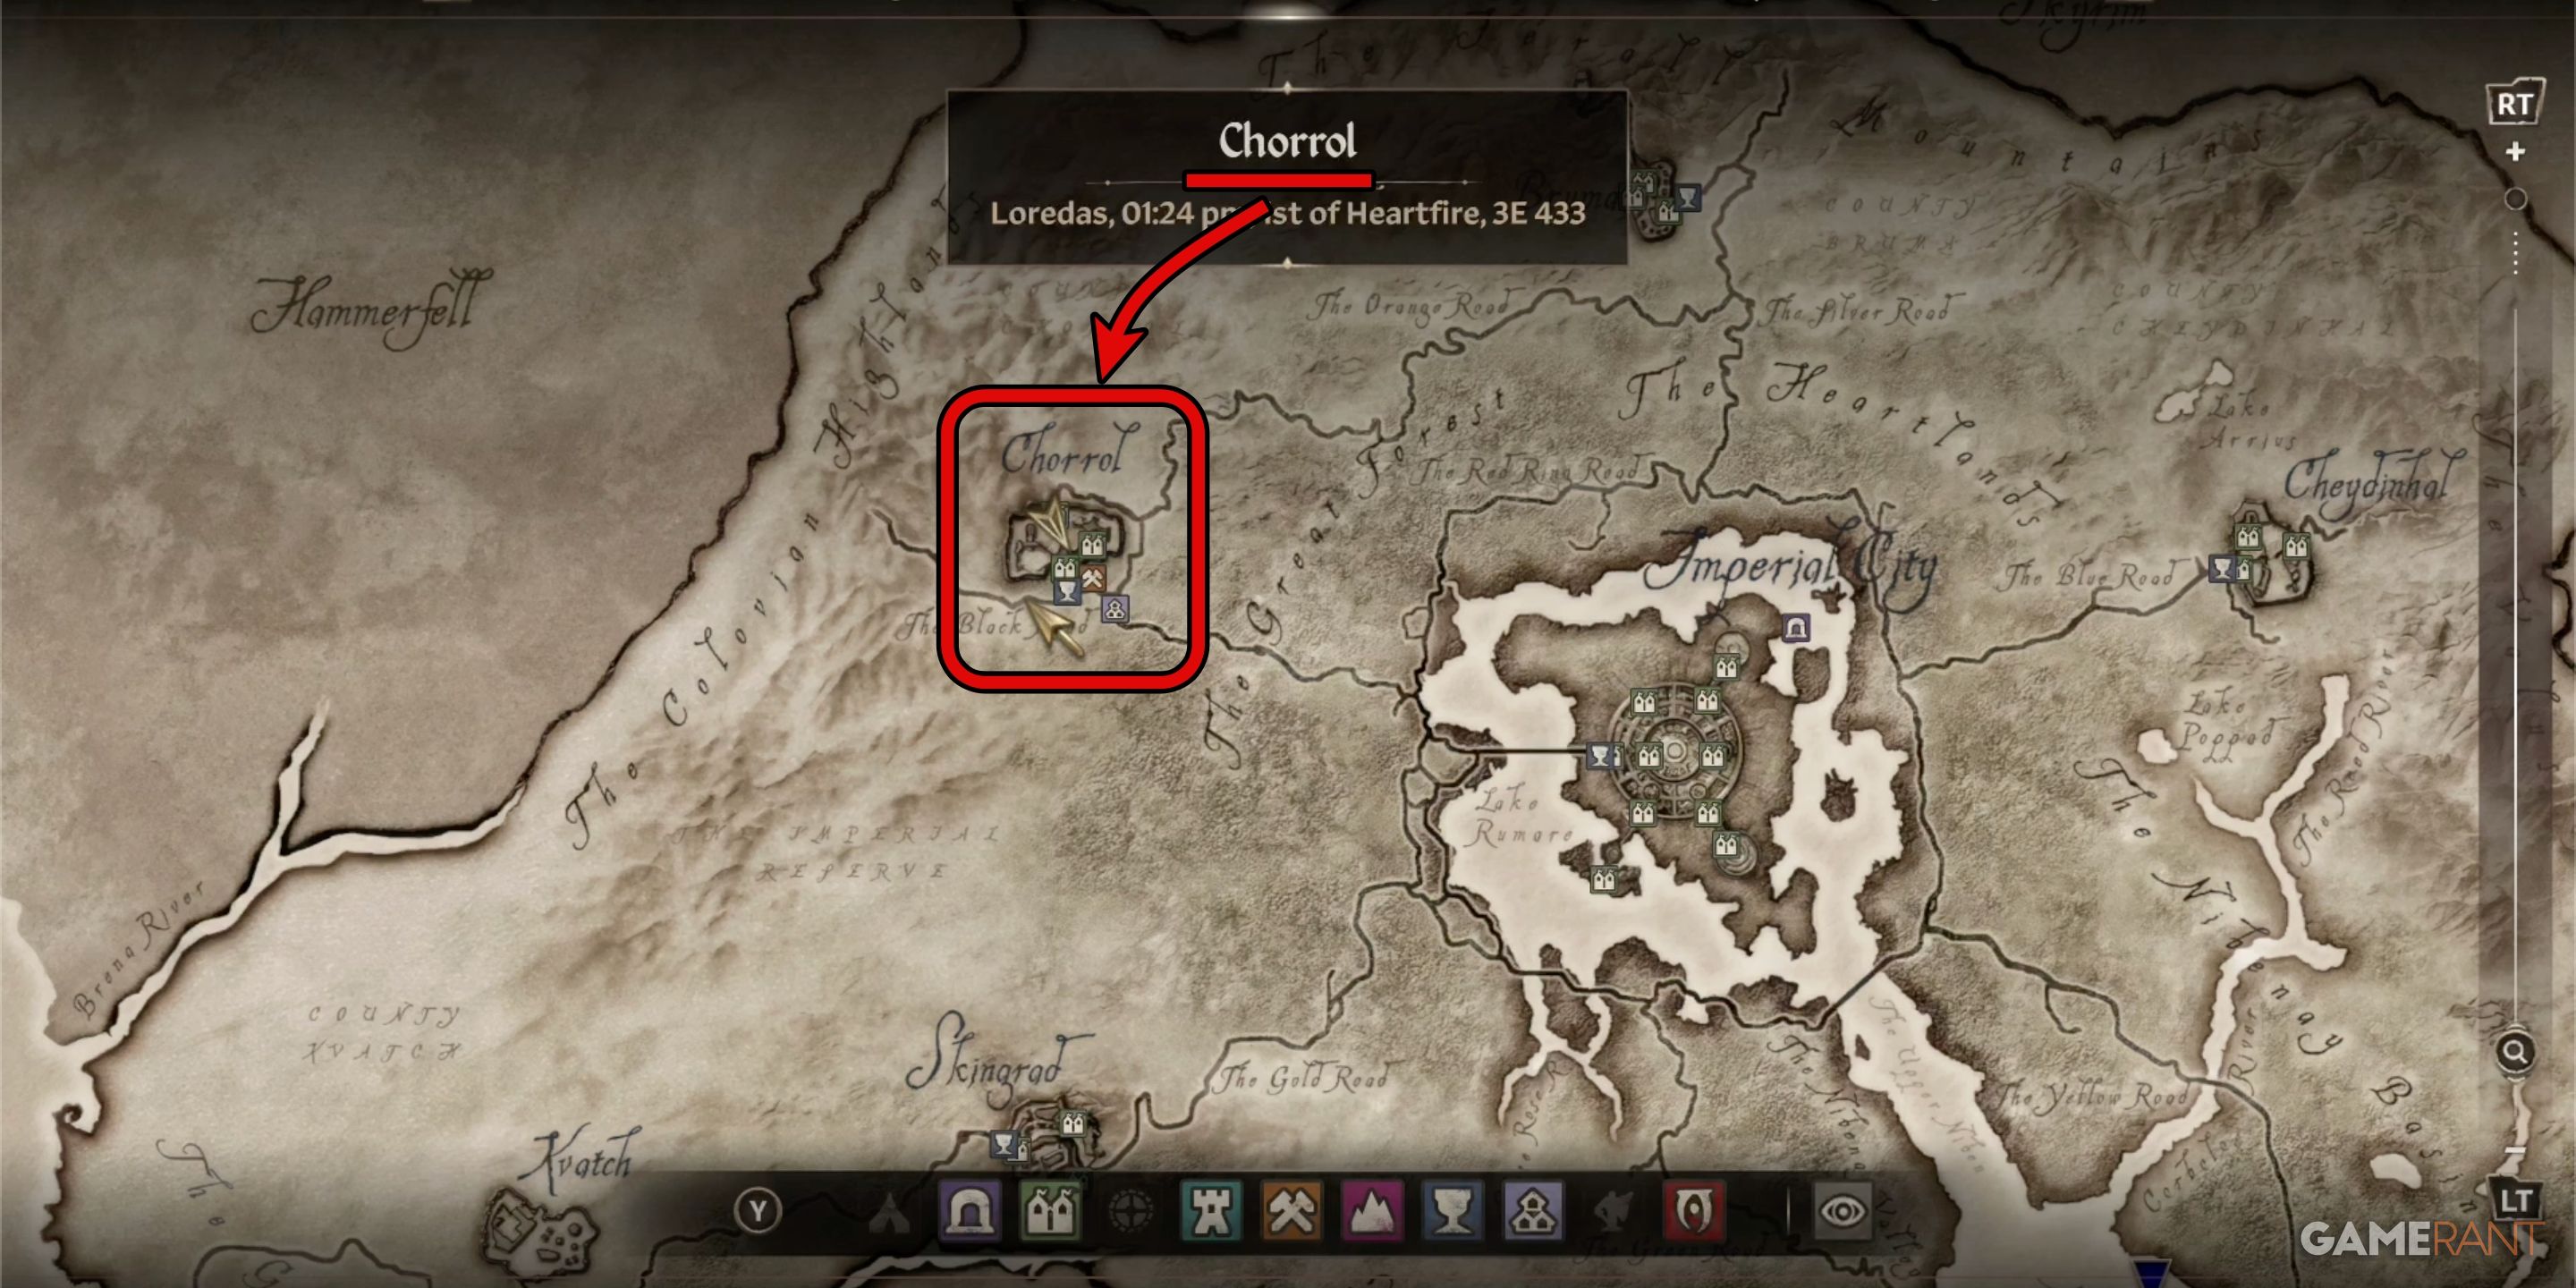
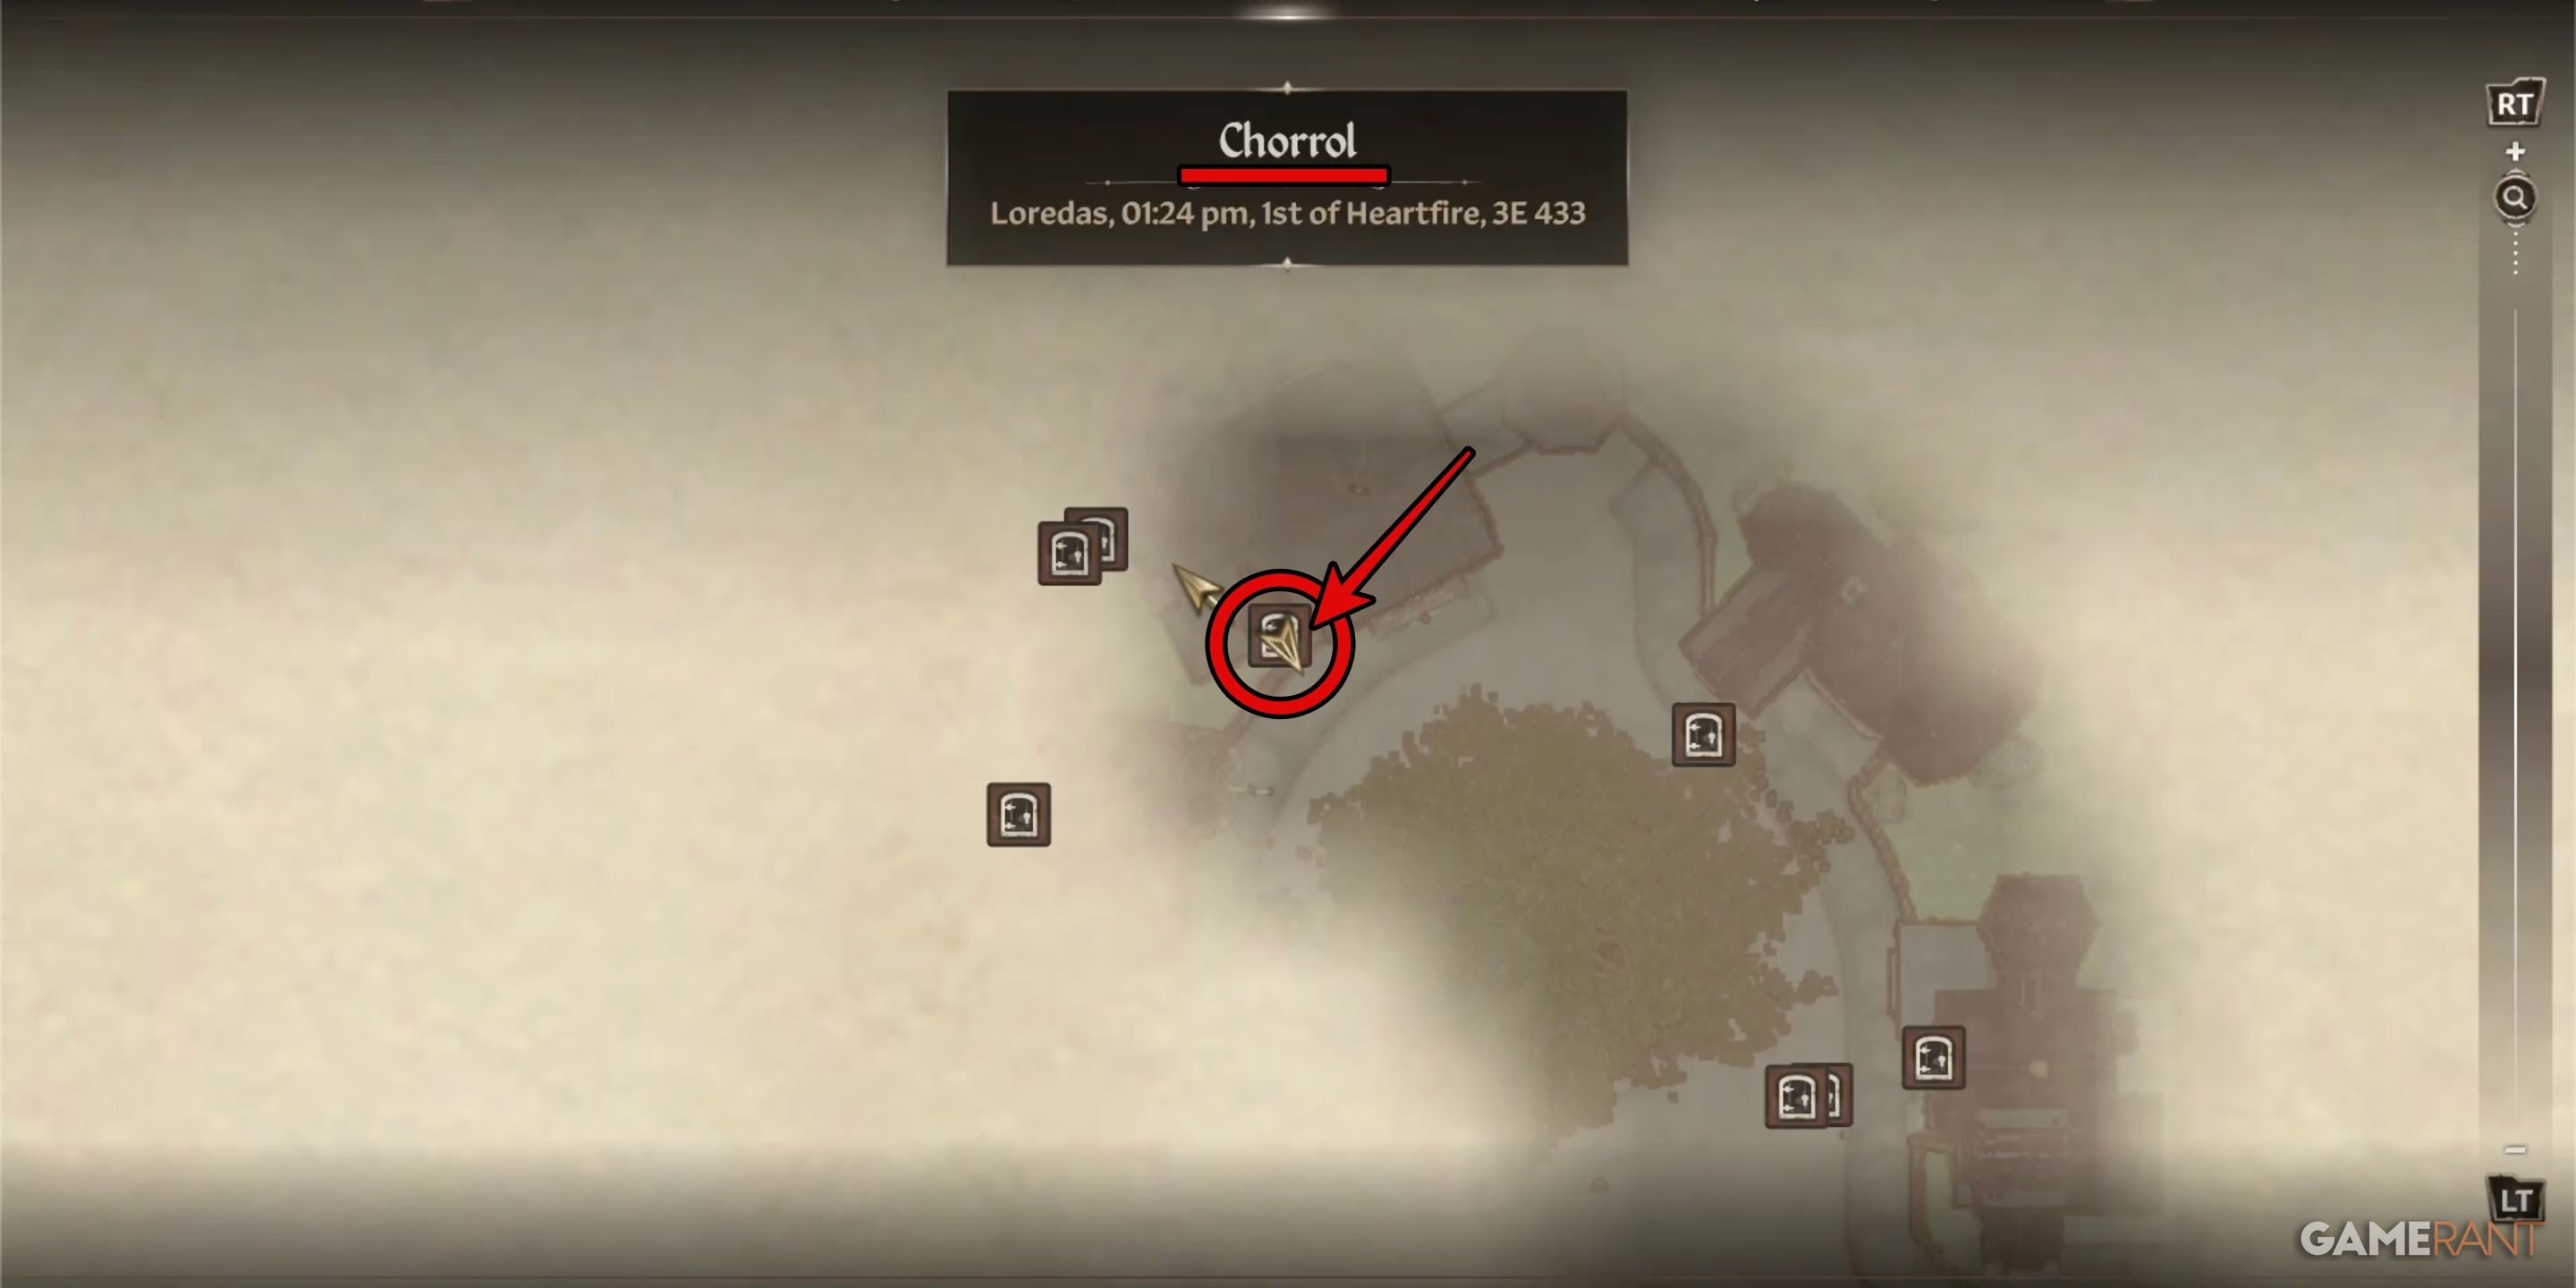
Speak to Modryn Oreyn:

Initially, you’ll converse with Vilena Donton, but most of your interactions at the Chorrol branch will be with Modryn instead.
Contract 1: Unfinished Business:
Burz gro-Khash requests that you visit Vilena Donton upon finishing “The Desolate Mine”. Doing so will trigger the questline, “Unfinished Business”.
- Speak to Vilena Donton. She will ask you to speak with Modryn Oreyn.
- Oreyn will send you to find Maglir, another member who has defaulted on a contract.
- You’ll find Maglir in a tavern in Skingrad. He says the pay is not good enough, and that we can have the contract.
- Head to Fallen Rock Cave.
- Make your way through the cave until you come to a large chamber with a small rock path over a chasm. Drop to the lower path and head west to find the Journal.
- You can return to Maglir and let him know that you are going to cover for him, or turn him in.
- Return to Modryn Oreyn for your reward. 200 Gold.
Contract 2: Drunk and Disorderly
Following your last assignment, Modryn Oreyn will share information about a band of Fighter’s Guild comrades causing trouble at a nearby inn.
- Travel to Leyawiin, the southernmost city in Cyrodiil.
- Speak to the townspeople about any Rumors. You’ll eventually be told about the Five Claws Lodge.
- Visit the Five Claws Lodge and speak to the soldiers.
- Ultimately, it’s better to convince them that you’ll find them work.
- Ask around town, and you’ll eventually be led to Margate.
- Margate will agree to offer the members work if you bring her 5 Ectoplasm.
- Ectoplasm is looted from ghosts. Some old forts and ruins will have ghosts.
- After returning the Ectoplasm, Margate will agree to hire the rowdy Fighter’s Guild members.
- Return to Oreyn to receive your reward: 200 Gold.
Contract 3: The Master’s Son
In “The Master’s Son,” Modryn Oreyn tasks you with searching for a lost soldier, and he enlists the aid of Viranus Donton, the Guldmaster’s son, to assist in your quest.
- Locate Viranus Donton at his home. If he is behind the locked door, pass the time until he comes out.
- Locate Galtus Previa‘s dead body at the end of Nonwyll Cavern.
- Make sure to pick up the Broken Shield from the ground near Previa’s body.
- Return to Modryn Oreyn and give him the Broken Shield.
- Receive your reward: Longsword of Jinxing.
Contract 4: More Unfinished Business
In “More Unfinished Business,” ol’ Maglir’s at it again, reneging on his most recent deal. It seems I’ve got some unpaid favors to collect this time around, old friend.
- Head to Bravil and ask around for Maglir.
- Enter the Lonely Suitor Lodge and speak to Maglir.
- He will not come with you this time, as he has joined the Blackwood Company.
- Return to Modryn, and he’ll tell you where the client is located.
- Head back to Bravil and speak with Aryarie.
- She needs 10 Imp Galls.
- Collect the Imp Galls from Robber’s Glen Cave
- Return the items to Aryarie. She’ll give you the Ring of Aegis.
- Return to Modryn Oreyn.
Contract 5: Anzani Blackheart
Modryn wants you to meet him at his house after dark to speak about the Blackwood Company.
- Meet Modryn Oreyn after sundown at his home.
- Modryn wants you to help him resolve an old case. Head to Arpenia.
- After leaving Arpenia, follow Modryn as he very slowly walks to Atatar.
- Make your way through the ruins and defeat Azani Blackheart.
- Make sure to pick up Blackheart’s Ring.
Contract 6: Trolls of Forsaken Mine
Modryn tasks you with locating Viranus Donton at the Forsaken Mine.
- Head to the Forsaken Mine outside Leyawiin
- As you make your way through the tunnels, you’ll notice dead bodies everywhere, including the Blackwood Company.
- At the end of the mine, you’ll find Viranus Donton dead. Make sure to loot the journal from his body.
- Return to Modryn.
To complete the final contracts related to Chorrol, you must first wrap up the contracts at Anvil and Cheydinhal, and achieve the rank of Champion.
Contract 7: Information Gathering
In the new phase of his life outside the Fighter’s Guild, Modryn seeks your assistance in apprehending a prominent figure within the Blackwood Company.
- Speak to Modryn at his home.
- Head to Glademist Cave
- Fight your way through the Blackwood Company guards. They are extremely dangerous at lower levels.
- When you reach Ajum-Kaijin, he won’t put up a fight. Head back to Modryn.
- You must interrogate Ajum-Kaijin. Use the Disposition mini-game to get one answer, then use hand-to-hand combat to ‘torture’ him for the second answer.
- He will kill himself before giving up the third answer.
- Speak to Modryn.
Contract 8: Infiltration
Modryn sends you to infiltrate the Blackwood Company in Leyawiin.
- Speak with Modryn at his home.
- Head to Leyawiin and speak with the Blackwood recruiter, Jeetum-ze.
- Drink the Hist Sap when prompted, then play out the terrible scene that follows.
- After you wake up back and Modryn’s house, return to Water’s Edge to see what actually happened.
- Return to Modryn’s house and prepare for the final showdown.
Contract 9: The Hist
In “The Hist,” Modryn tasks you with taking down the Blackwood Company once and for all.
- Return to the Blackwood Company’s headquarters building in Leyawiin
- As soon as you enter the building, your cover will be blown. Be prepared for a serious fight.
- You’ll pick up Jeetum Ze’s Room Key off Ja’Fazir. Use it to enter the recruiter’s quarters and defeat him.
- Collect Ri’Zakar‘s key from the body of Jeetum Ze.
- Head to the top floor and fight Ri’Zakar, the leader of the Blackwood Company. Collect the Blackwood Co. Basement Key from his body.
- Head back downstairs and enter the basement.
- Defeat the enemies around the tree. Look on table behind the tree to find two Loose Pipes. Pick them up.
- Activate the Sap Pumps on each side of the tree. This will destroy the tree.
- Return to Modryn. He’ll tell you to go speak with Vilena Donton, and reward you with the Helm of Oreyn Bearclaw.
Upon your arrival at Vilena Donton’s location, she will elevate you to the rank of Guildmaster. Inform Modryn that he will serve as your deputy in this new role. Choose the ‘Duties’ option, and you’ll be able to choose three priorities for the Fighter’s Guild moving forward.
- Focus on Recruitment – more gear will be available.
- Focus on Contracts – more gold left for you.
- Focus on both equally – some gold and some equipment.
The treasure chest upstairs in the Chorrol Fighter’s Guild headquarters, specifically belonging to the Guildmaster, will contain the gold. Completing this quest will mark the end of the Fighter’s Guild storyline.
Read More
- Robinhood’s $75M OpenAI Bet: Retail Access or Legal Minefield?
- All Skyblazer Armor Locations in Crimson Desert
- How to Get the Sunset Reed Armor Set and Hollow Visage Sword in Crimson Desert
- How to Catch All Itzaland Bugs in Infinity Nikki
- Speedsters Sandbox Roblox Codes
- Who Can You Romance In GreedFall 2: The Dying World?
- Top 10 Must-Watch Isekai Anime on Crunchyroll Revealed!
- Black Sun Shield Location In Crimson Desert (Buried Treasure Quest)
- Invincible: 10 Strongest Viltrumites in Season 4, Ranked
- Madden NFL 26 Cover Star Revealed
2025-04-29 17:19