
Tomodachi Life: Living the Dream has a really popular concept – players create their own characters (Miis) and watch them live and interact in funny and unexpected ways. However, Nintendo made it surprisingly tricky to share screenshots and videos from the game with friends online or through social media by removing the direct upload feature from the Nintendo Switch App. Luckily, there are still a few ways to share your favorite moments from the game!
How to Share Screenshots and Video Clips in Tomodachi Life Living the Dream
You can share screenshots and videos from Tomodachi Life: Living the Dream in a couple of ways: by connecting your Switch 2 to your computer with a USB-C cable, or by saving the files to a MicroSD Express card and then using that card on another device.
Sharing Screenshots and Video Clips via USB-C Cable
The simplest way to transfer screenshots and videos from your Switch 2 to a computer is with a USB-C cable. Just plug one end into the port on the bottom of the Switch 2 and the other into your computer.
After completing that step, power on your Switch 2. Then, navigate to System Settings – you’ll see a cogwheel icon – and choose Data Management from the menu on the side.
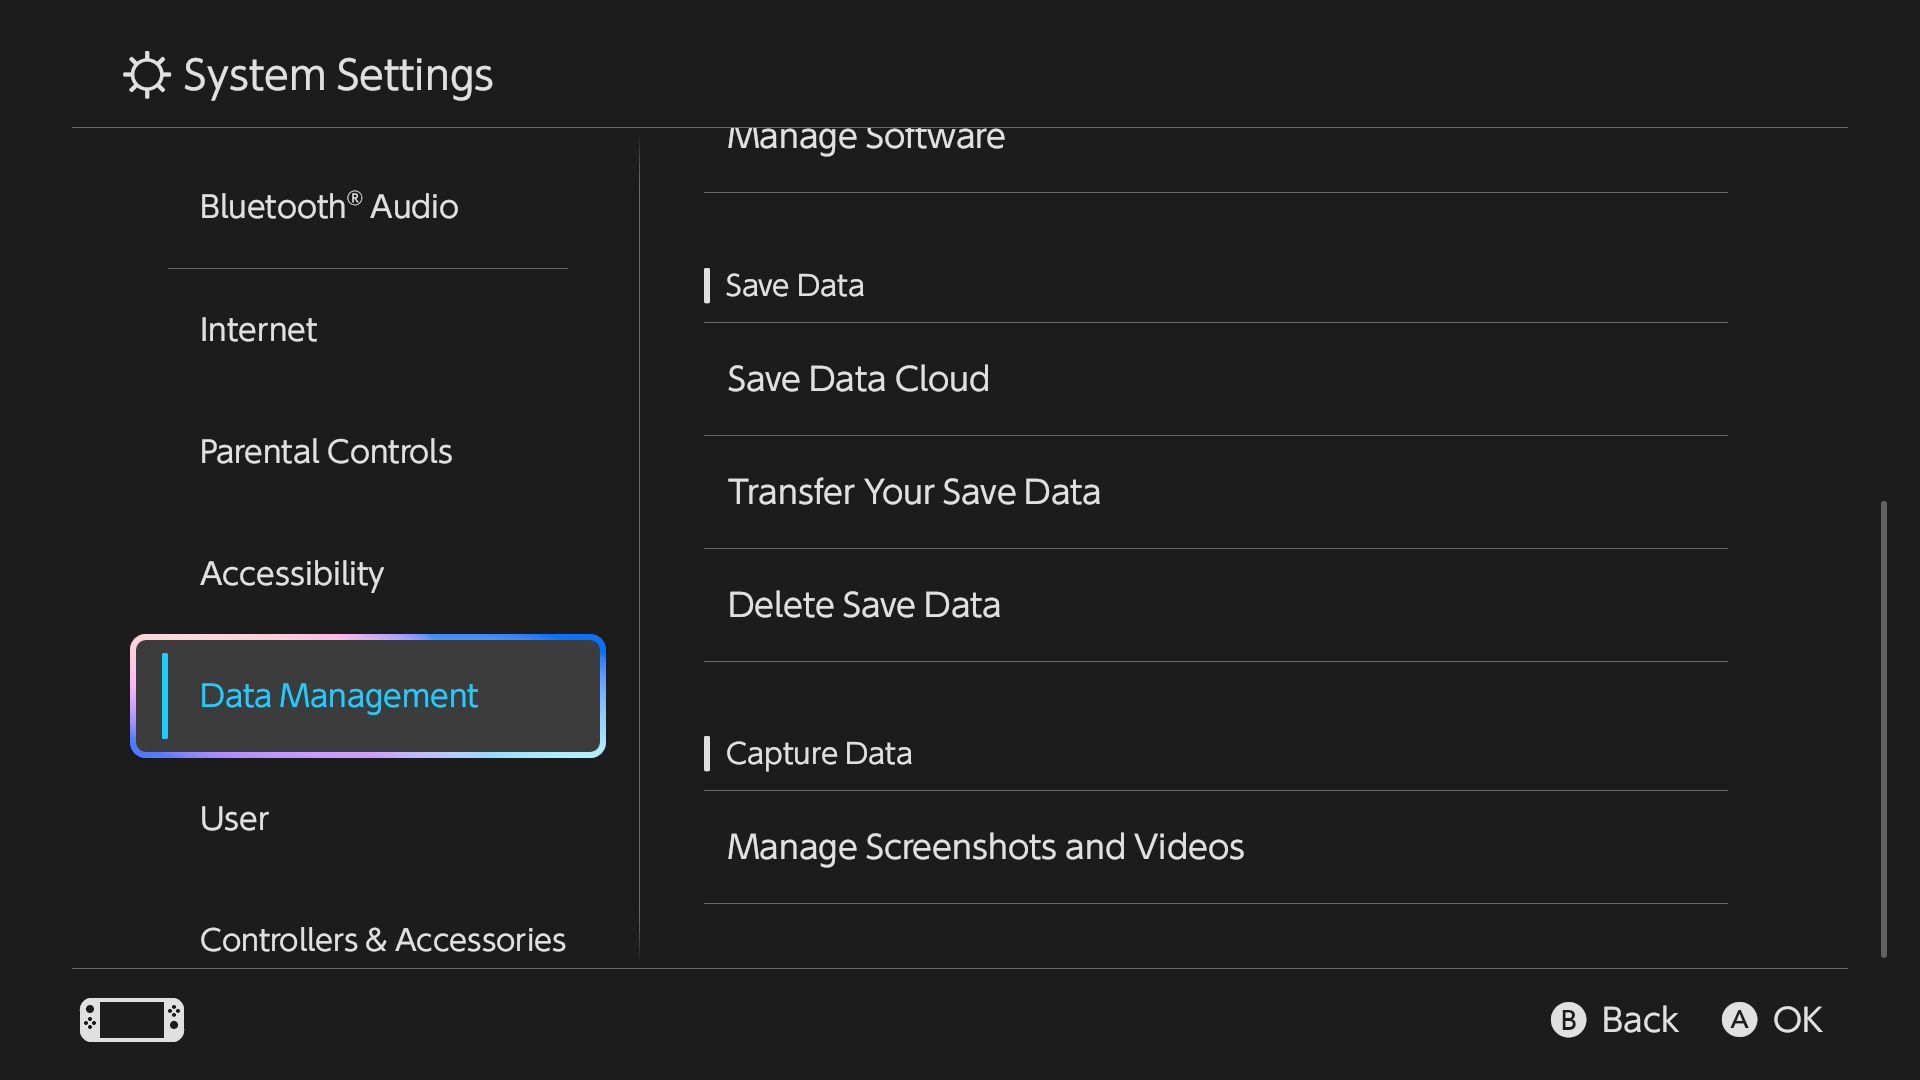
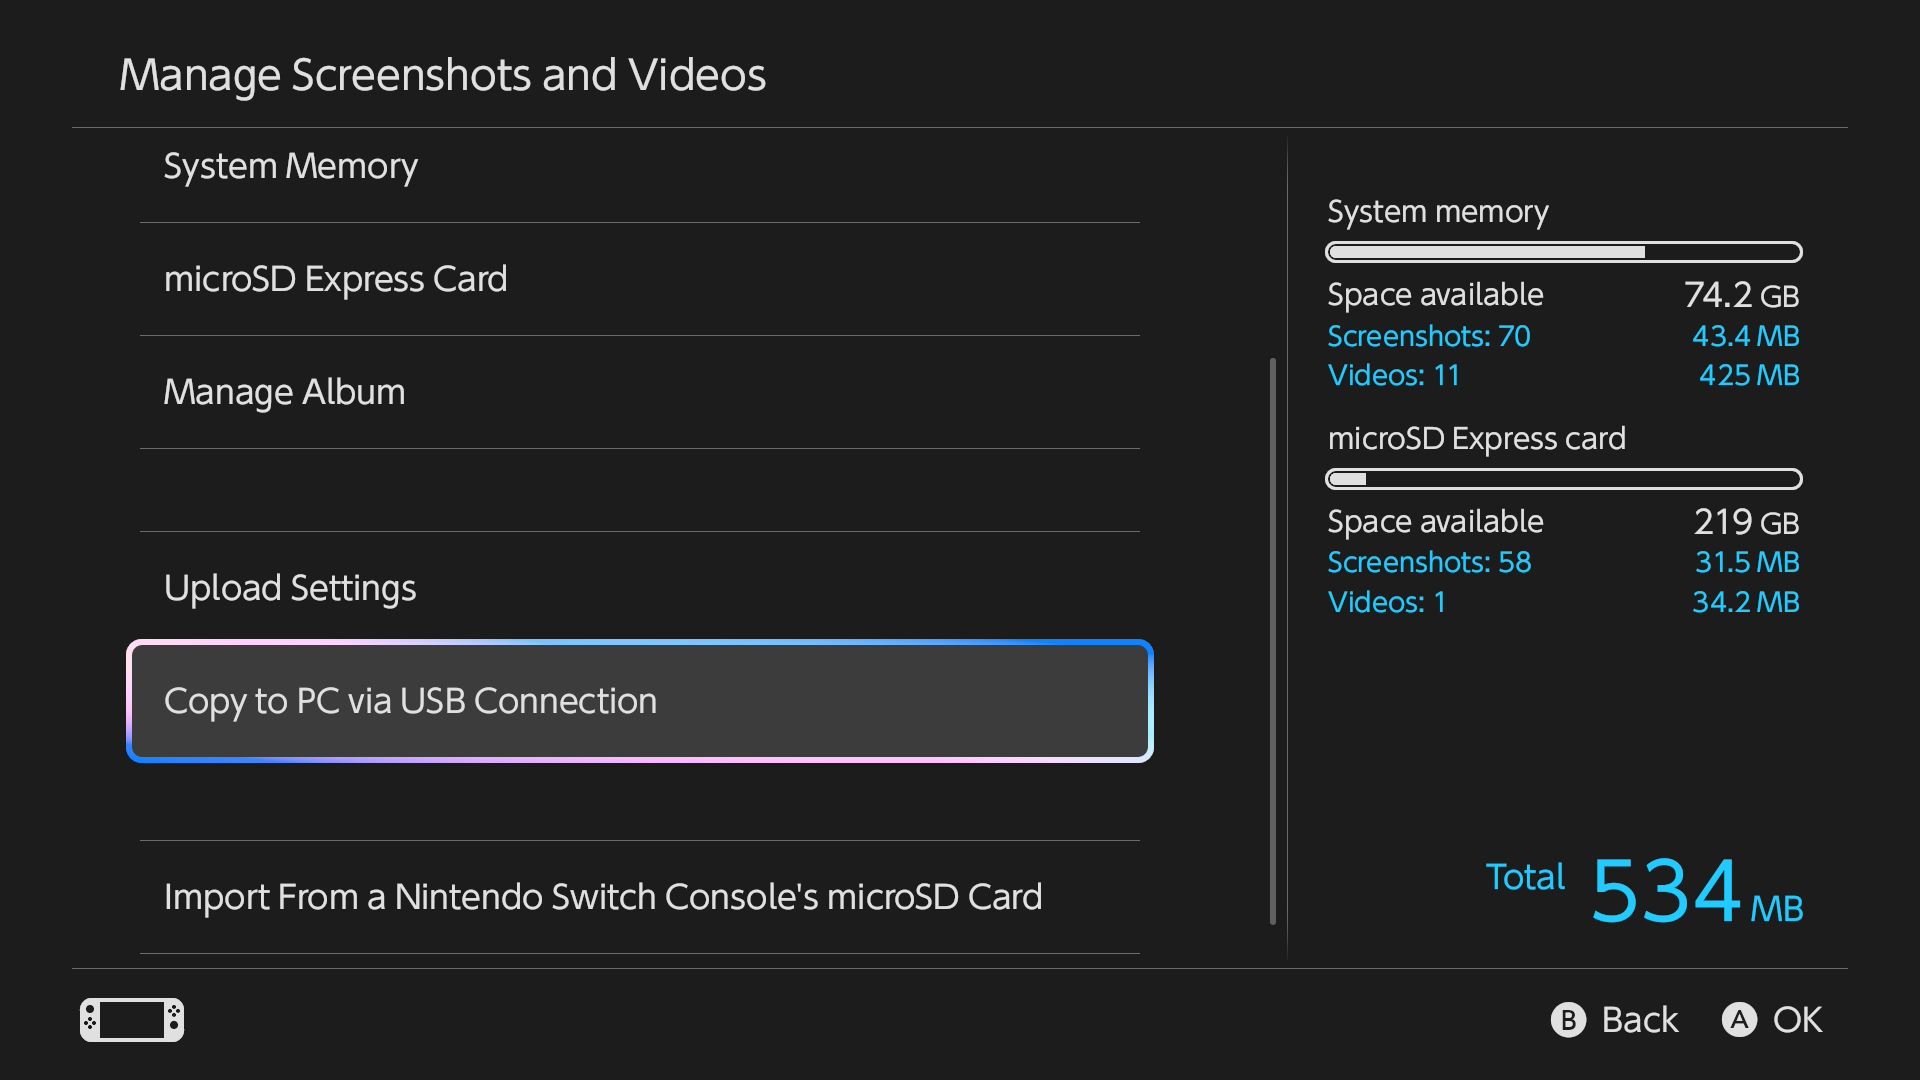
To transfer screenshots and videos, go to the Data Management menu and choose ‘Manage Screenshots and Videos.’ Scroll down until you find ‘Copy to PC via USB Connection’ and select it. On your Windows computer, your Nintendo Switch 2 should appear as a drive under ‘Devices and Drives.’ Your Switch 2 will then let you know it’s connected. Don’t press any buttons on your Switch 2 while this message is showing, or the connection to your computer will be lost.
To get your screenshots and videos, simply open the “Switch 2” option on your computer, then navigate to the “Tomodachi Life: Living the Dream” folder. You’ll find everything there – just copy and paste it to a folder on your PC!
Once the files have finished transferring, choose the disconnect option on your Switch 2, then unplug the USB-C cable.
Screenshots from the game will always be saved at 720p, even if you’re playing on a TV or in handheld mode. This is a bit surprising, considering Nintendo said the game would show graphics in 1080p when played as a handheld.
Transferring Screenshots and Video Clips via MicroSD Express Card
If you have a MicroSD Express card, you can save screenshots and video clips to it. Just make sure the card is inserted into your console, then go to the ‘Album’ option on the home screen.
Choose the screenshot or video you’d like to move, then press the ‘A’ button to open it. Press ‘A’ again to bring up the menu. Select ‘Copy to microSD Express Card’ and wait for the transfer to complete—it’s very quick for photos!
Remove the microSD Express Card from your Switch 2 – it’s located behind the stand on the right side. Then, put the card into a microSD card reader and plug the reader into your computer. You should now be able to view your screenshots and videos.
Read More
- Forza Horizon 6: Find the Ohtani Treasure Chest Location
- LEGO Batman Legacy of the Dark Knight Batcave Minikits & WayneTech Caches
- NTE Drift Guide (& Best Car Mods for Drifting)
- USD RUB PREDICTION
- Sega’s “Super Game” is Said to Release Next Month, But Nothing is Known About It
- How to Open Locked Door in Tenryu River in Nioh 3 (Dirty Key)
- Skyblivion Gets Encouraging Development Update
- New Steam Game is Like Pokemon If It Were a Sci-fi Shooter
- Cookie Run Kingdom Timeline of Fate Update Guide
- God of War Shadow Drops New Game and Confirms Greek Trilogy Remake
2026-04-16 20:14