
The journey through Hollow Knight: Silksong can sometimes be perplexing, even for those who’ve acquired a map within the game. For example, many players often find themselves trapped in the Far Fields, due to a particular path requiring a specific skill to escape from. This article aims to assist such players by providing guidance on navigating and determining directions within the Far Fields in Silksong, particularly for those who keep getting stuck in this area.
Far Fields Map In Silksong – Hollow Knight: Silksong
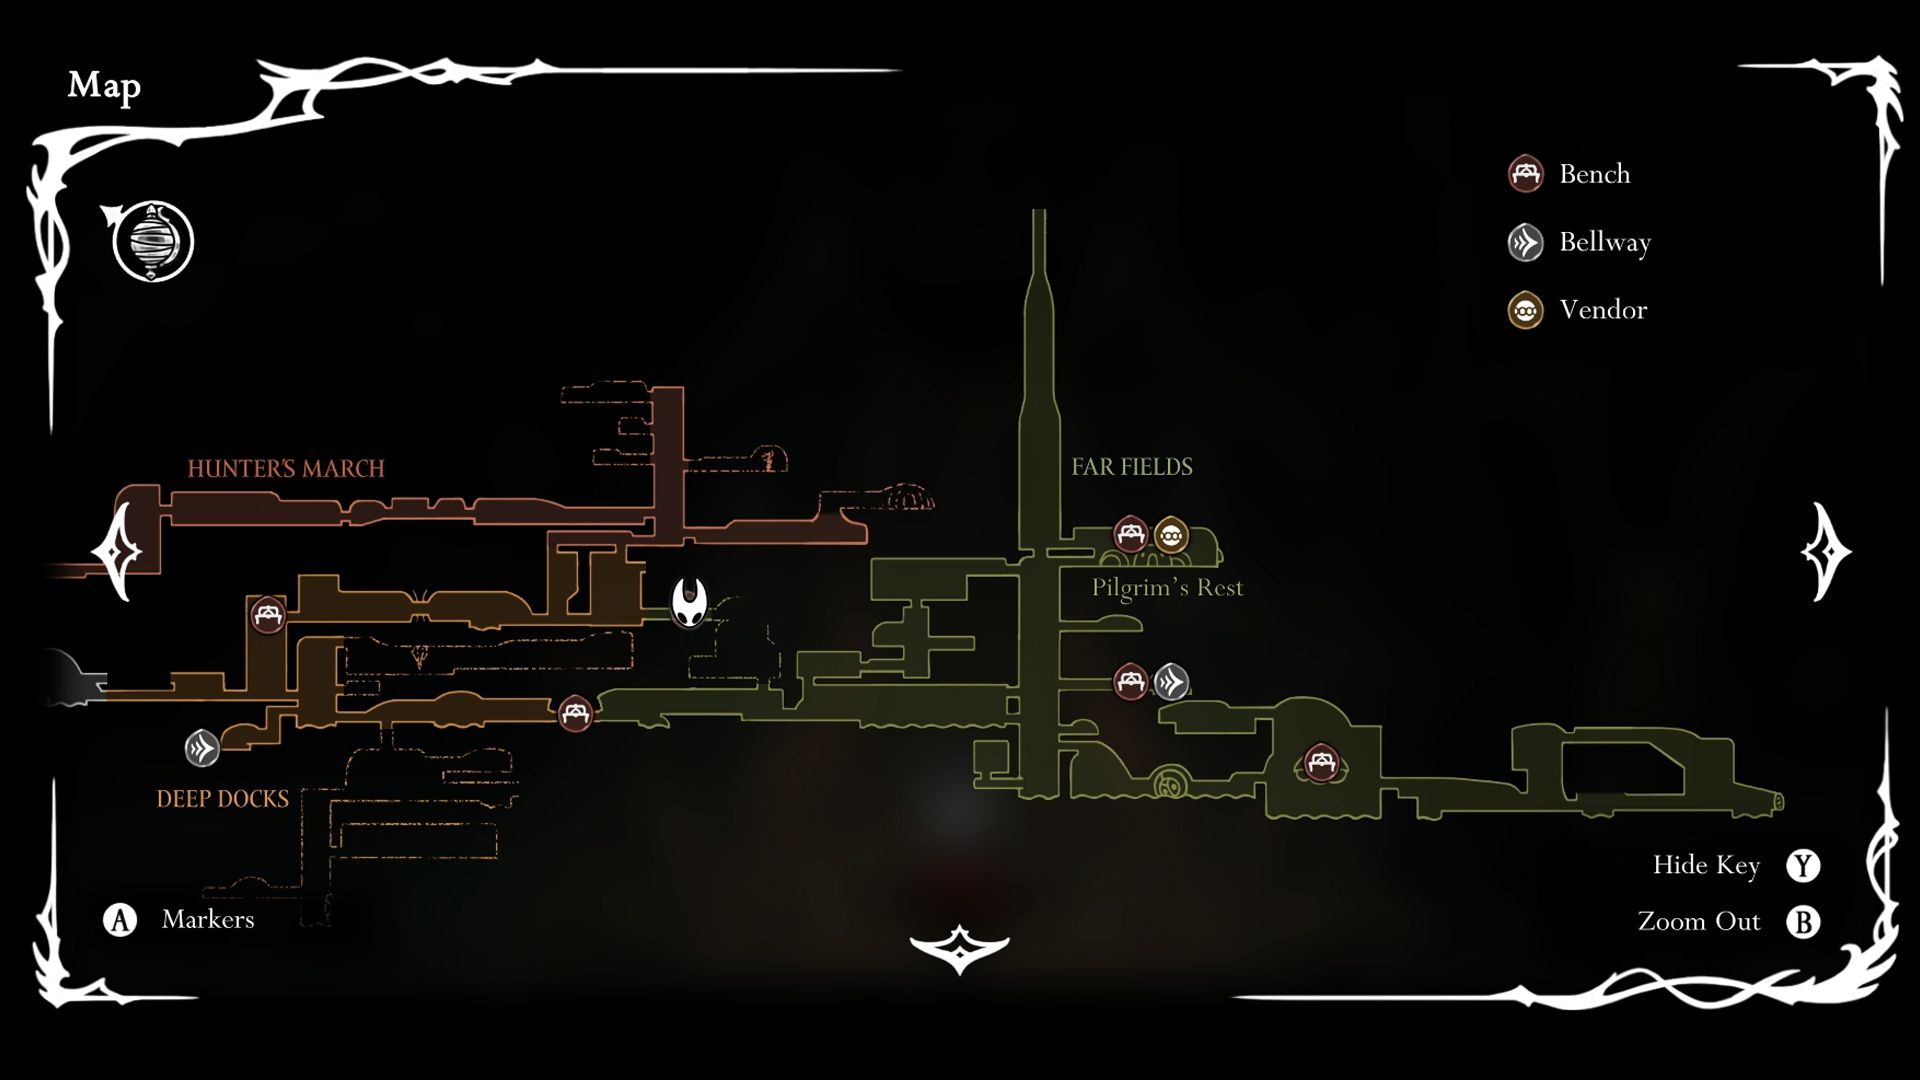
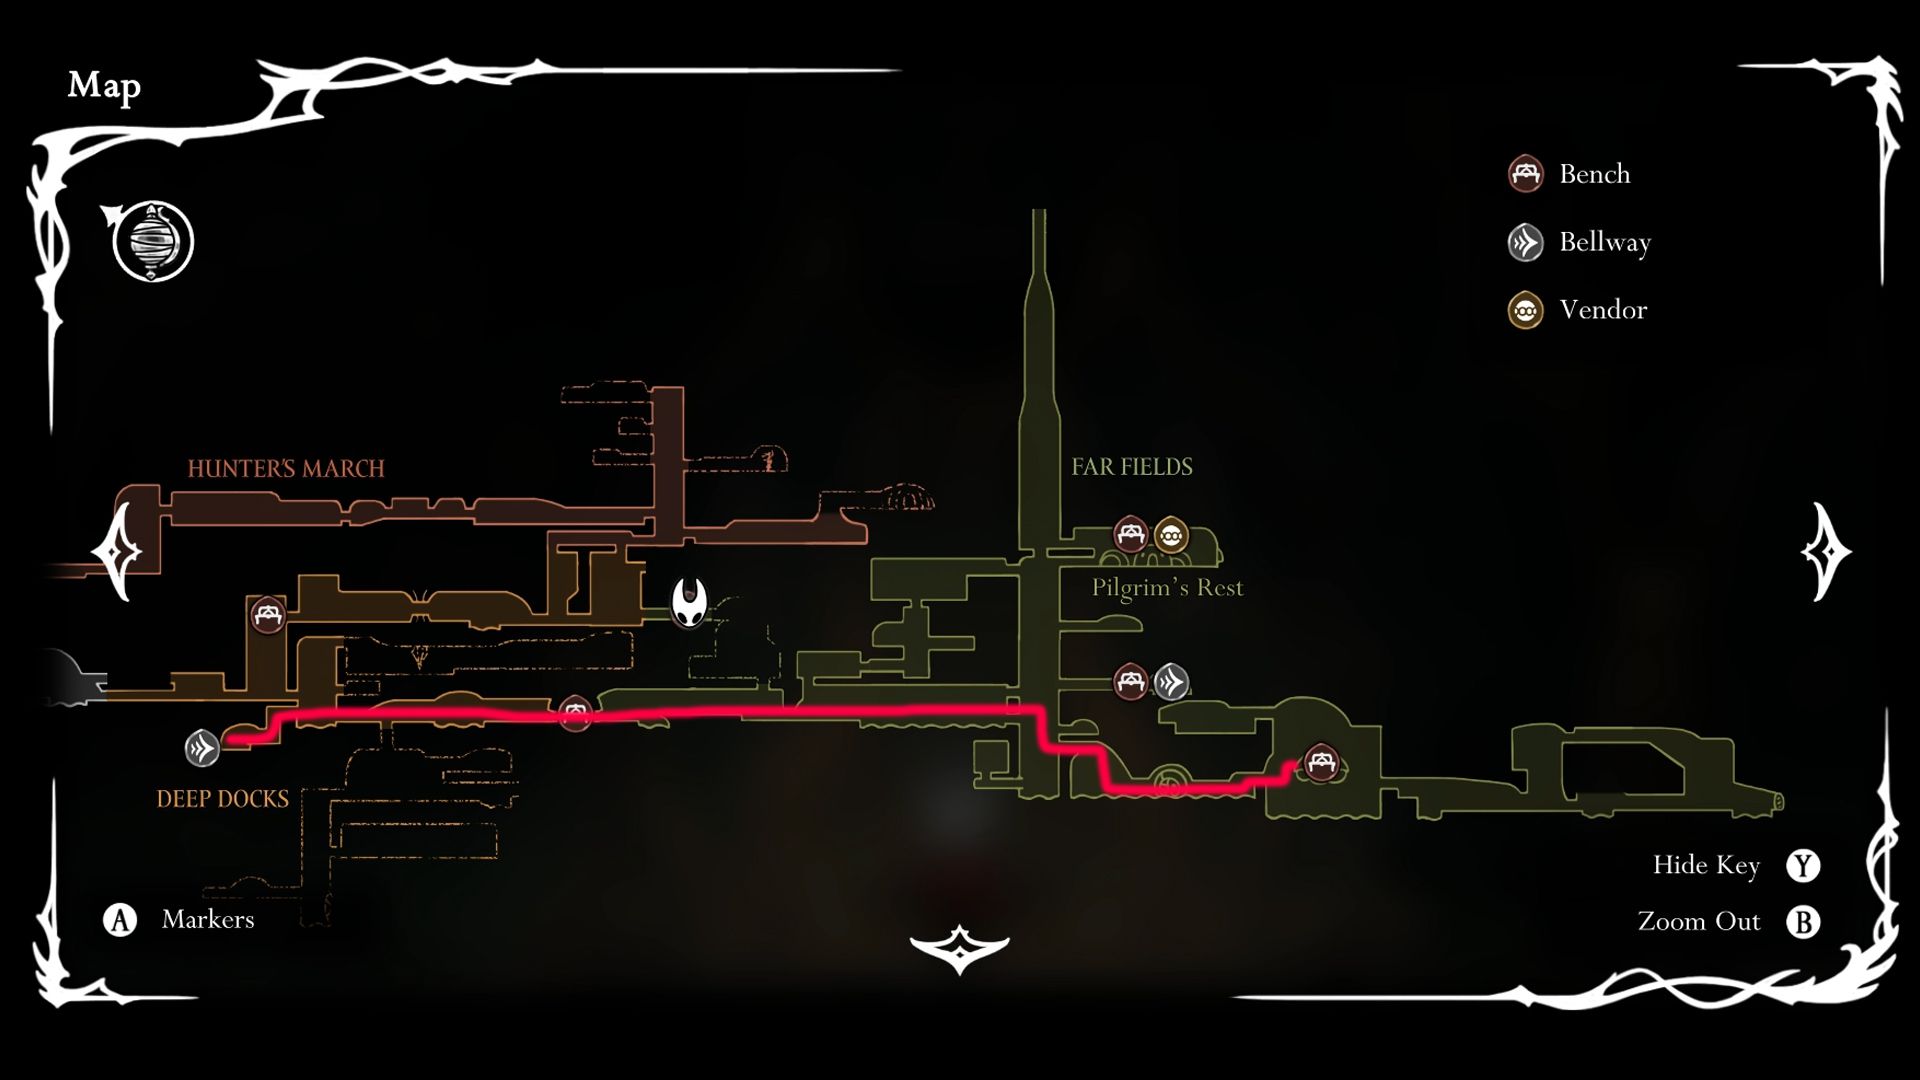
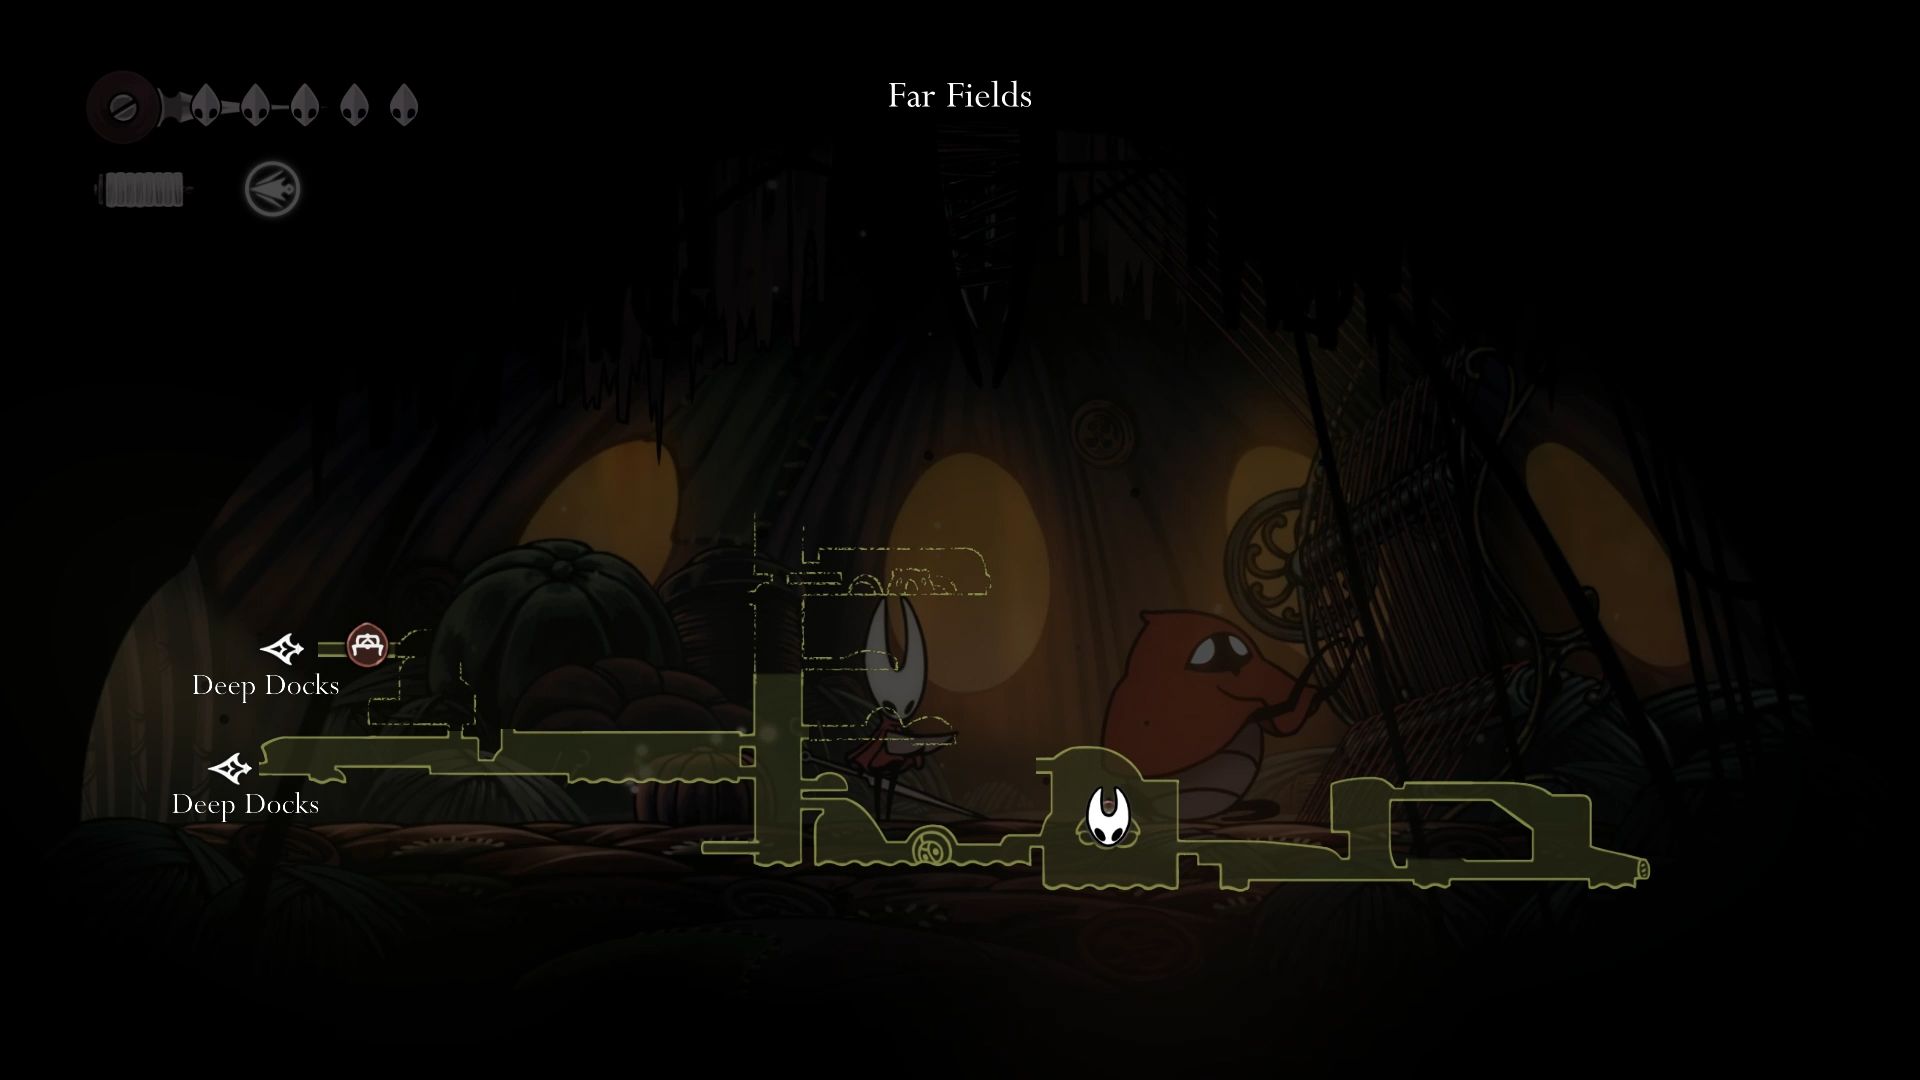
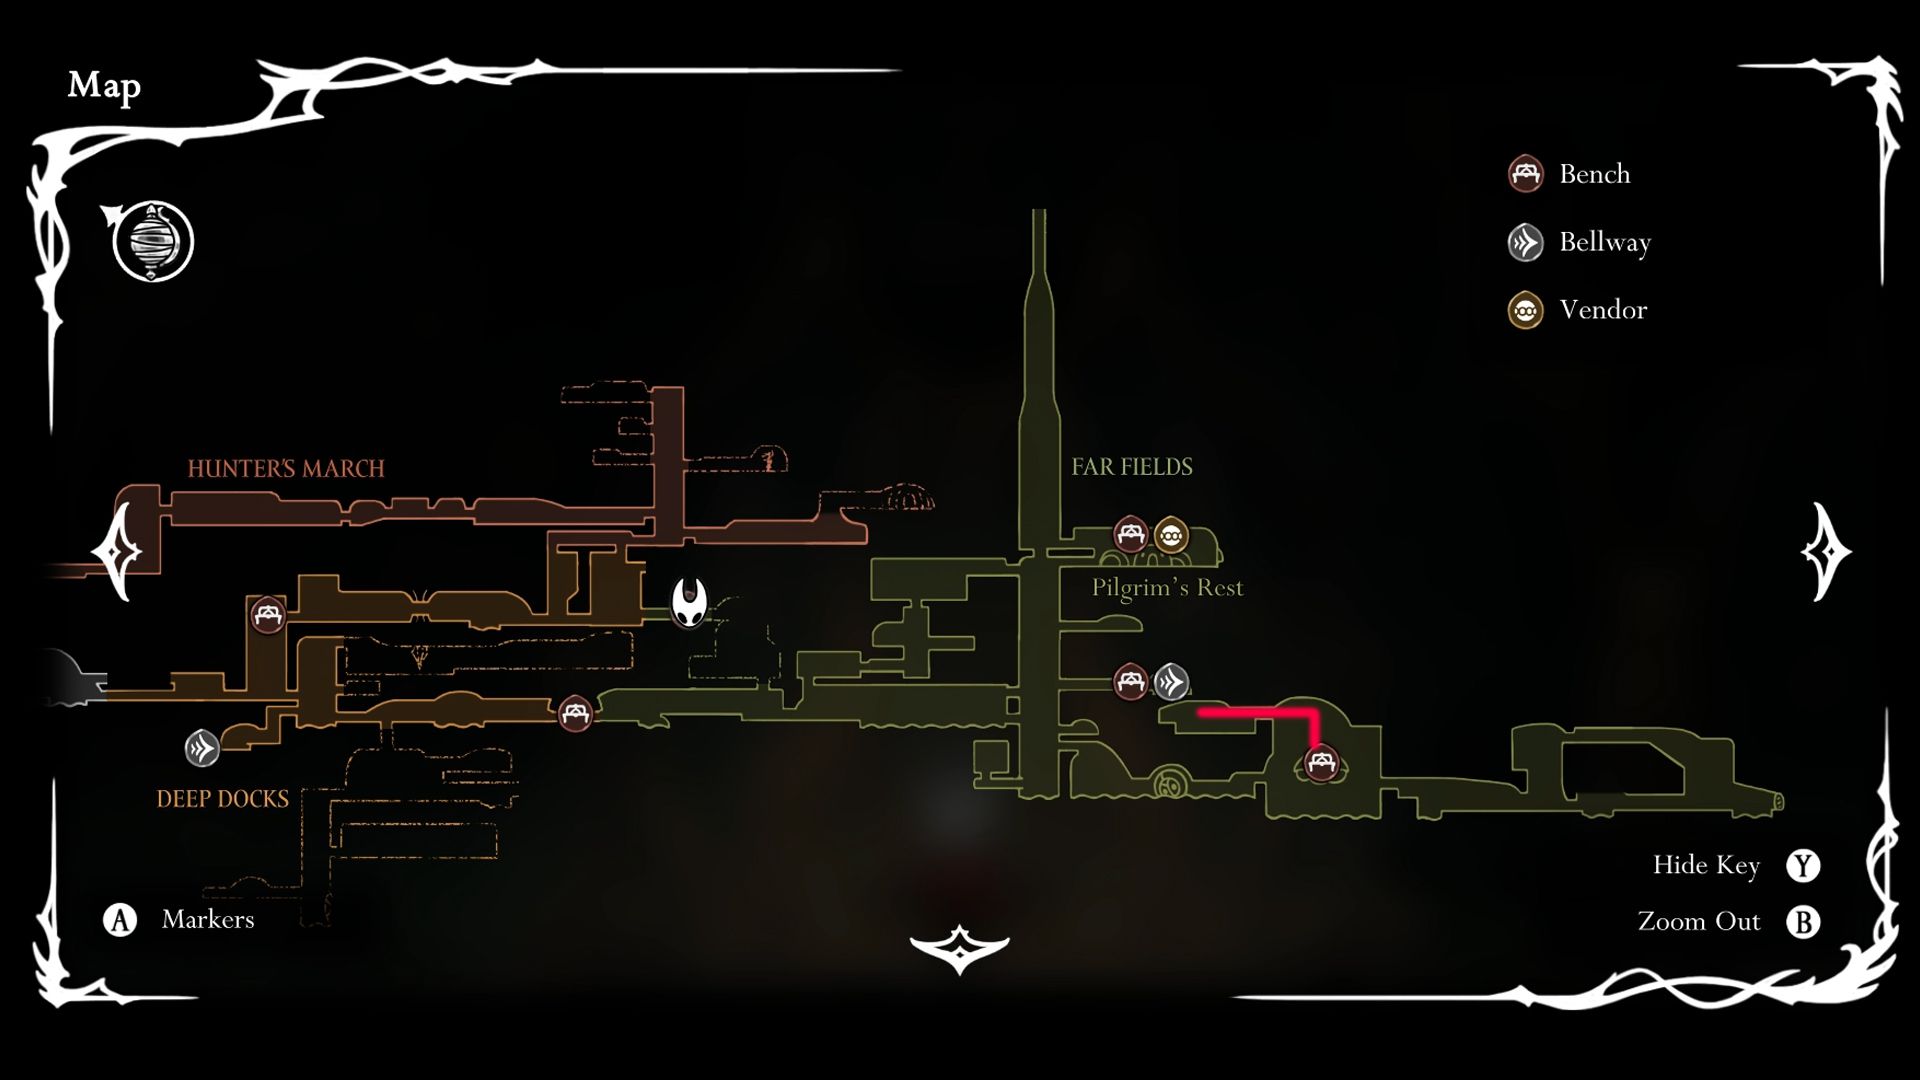
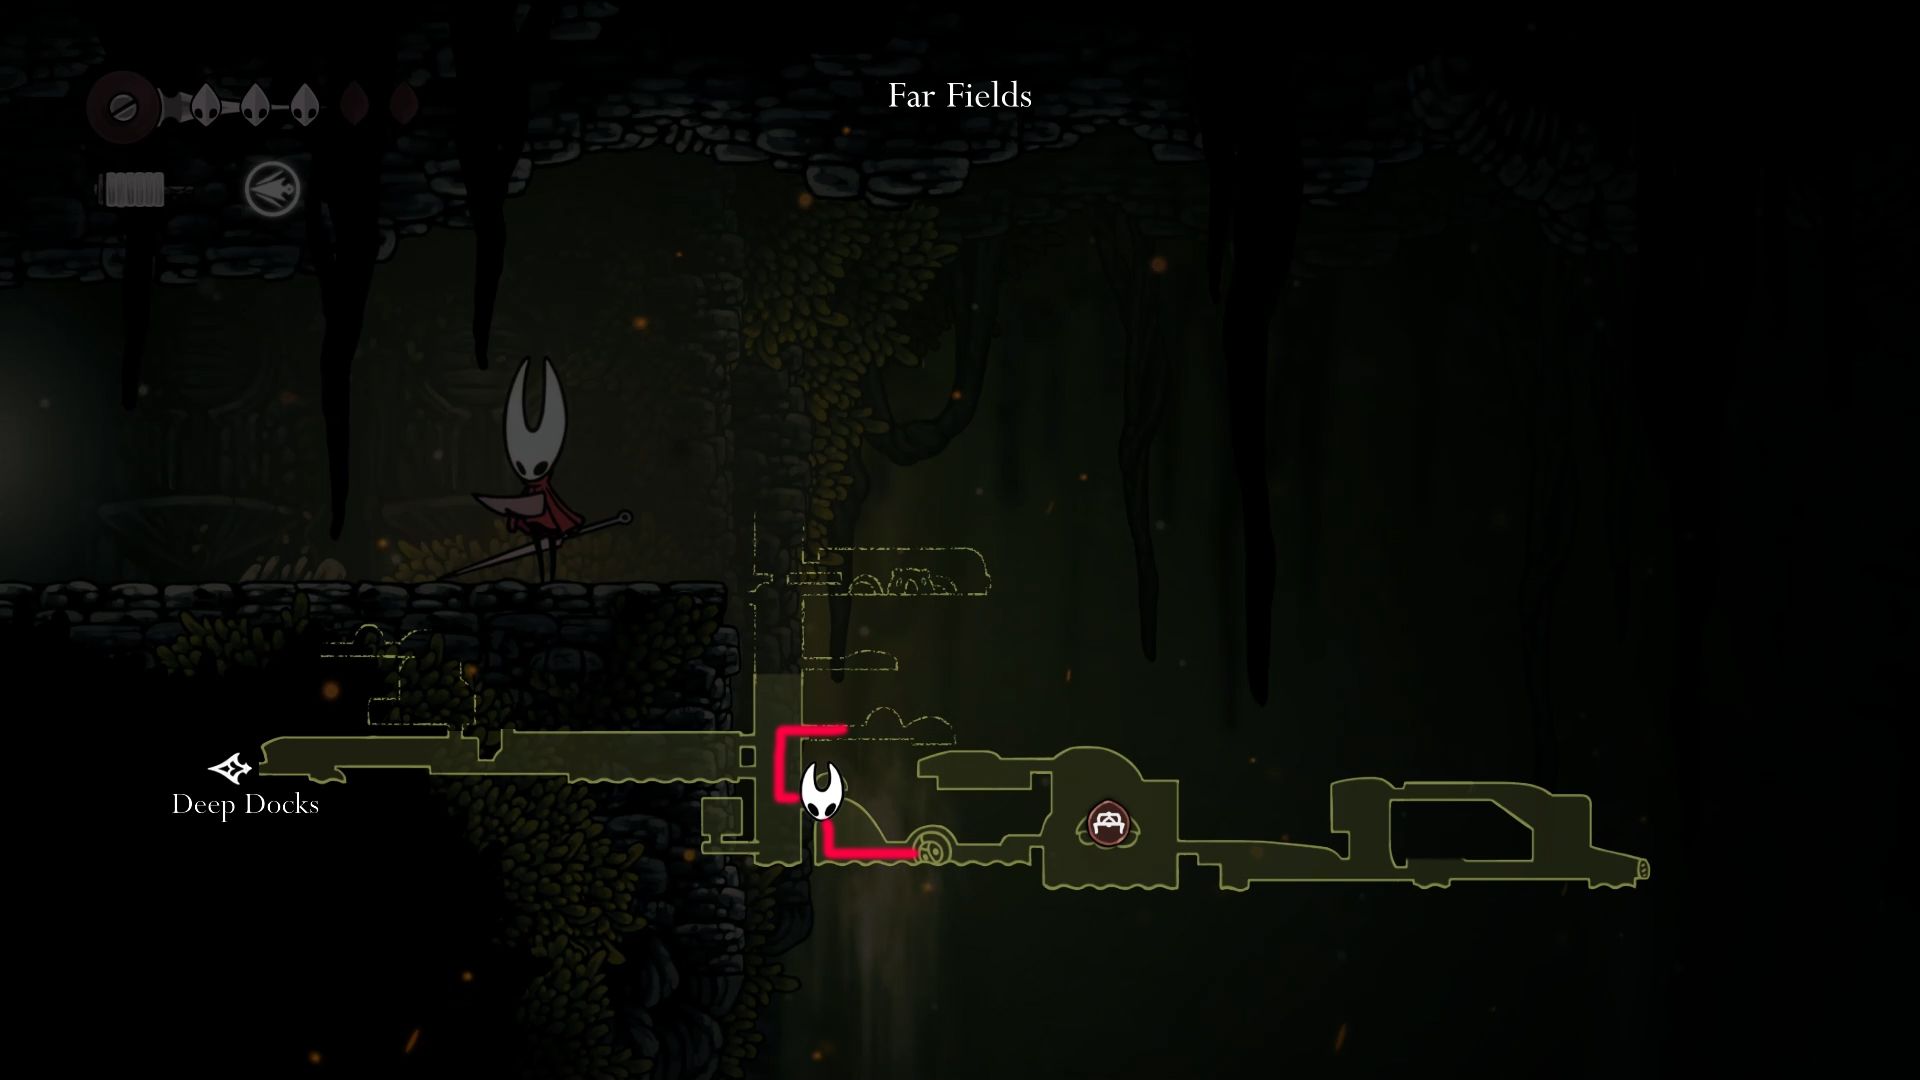
In the game HK Silksong, Far Fields lies to the east of Deep Docks. It’s also east of Hunter’s March, yet it’s separate from this region. To its north, however, is the Greymoor, a location that players can reach and navigate through from Far Fields.
How To Progress In Far Fields In Silksong – Hollow Knight: Silksong
As a die-hard fan of Hollow Knight: Silksong, I found myself in a pickle when my character was stuck in the enigmatic Far Fields. It dawned on me that I had overlooked the Flexile Spines quest – a crucial mission that grants the amazing ability to hitch a ride on wind currents. Without this skill, I realized I was caught in an endless loop around Far Fields. The key to breaking free? Completing the Flexile Spines quest, of course!
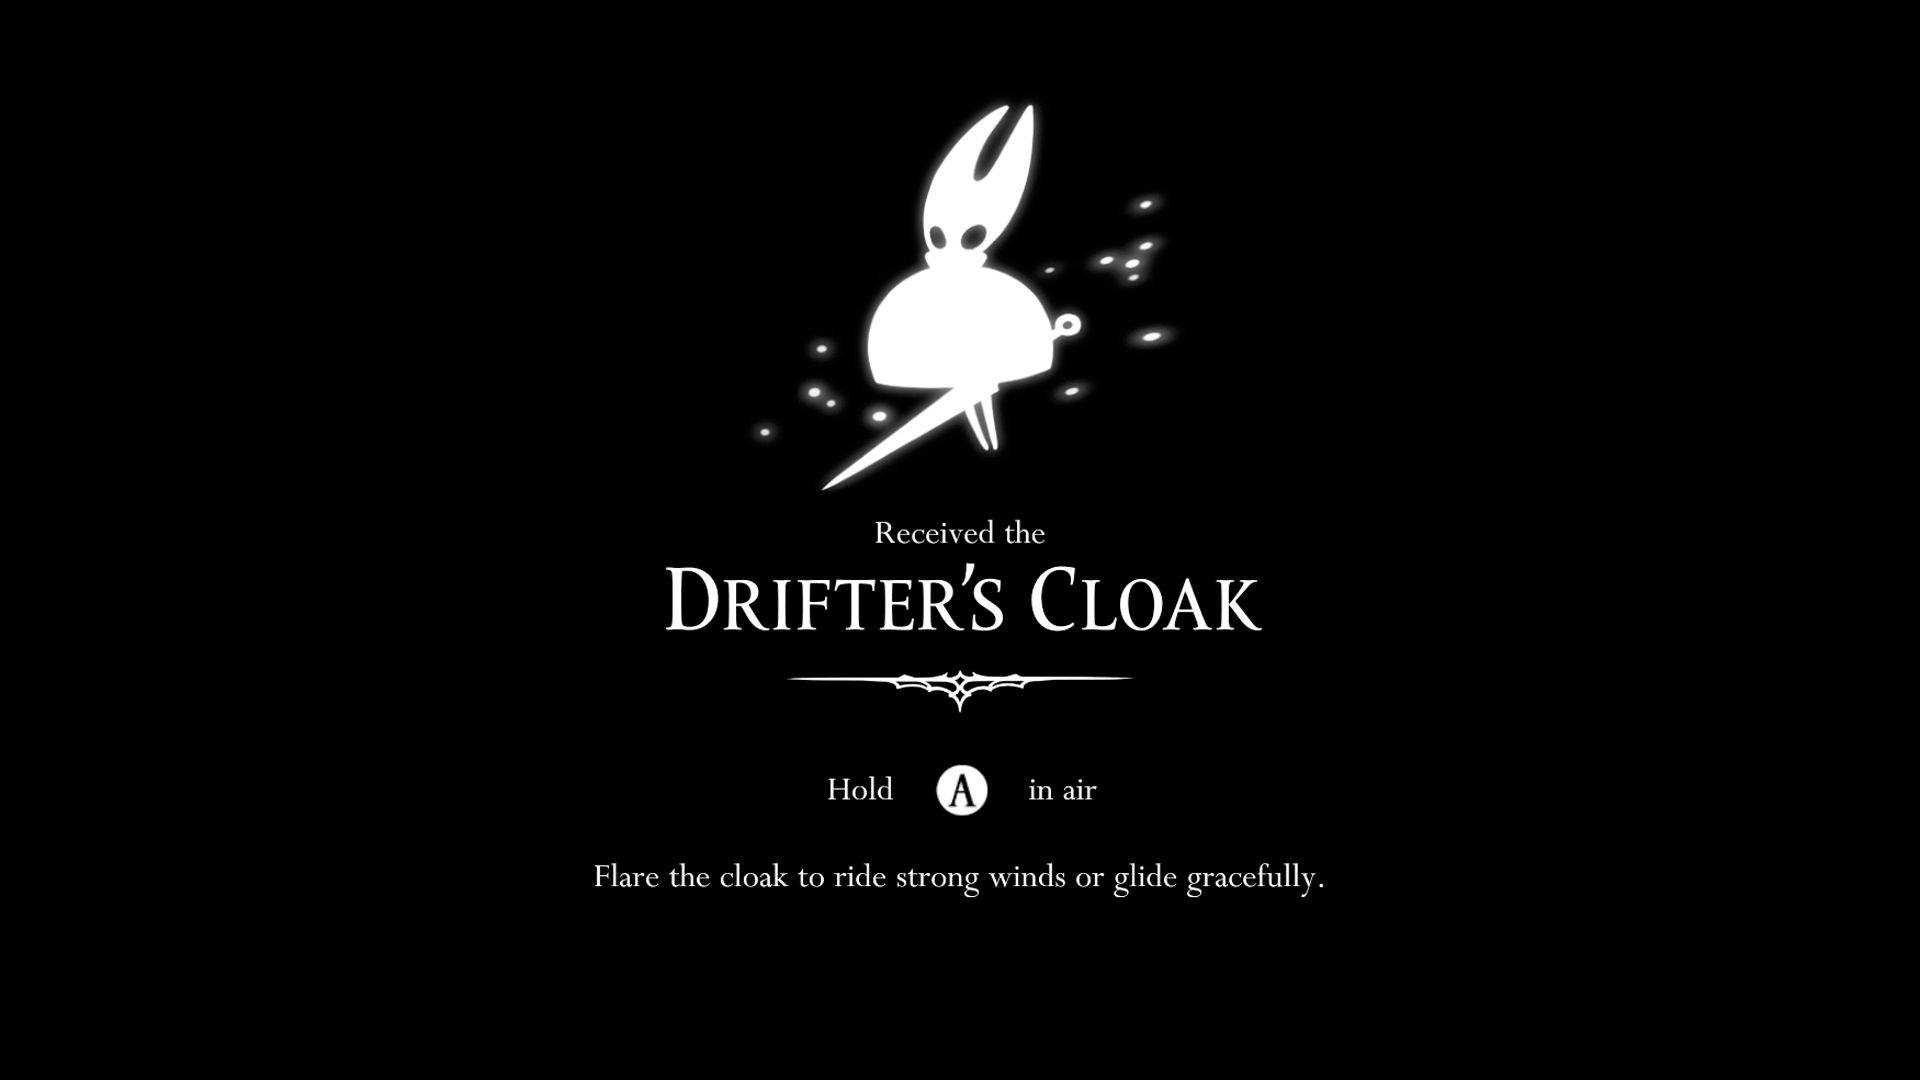
Get The Drifter’s Cloak
In simpler terms,
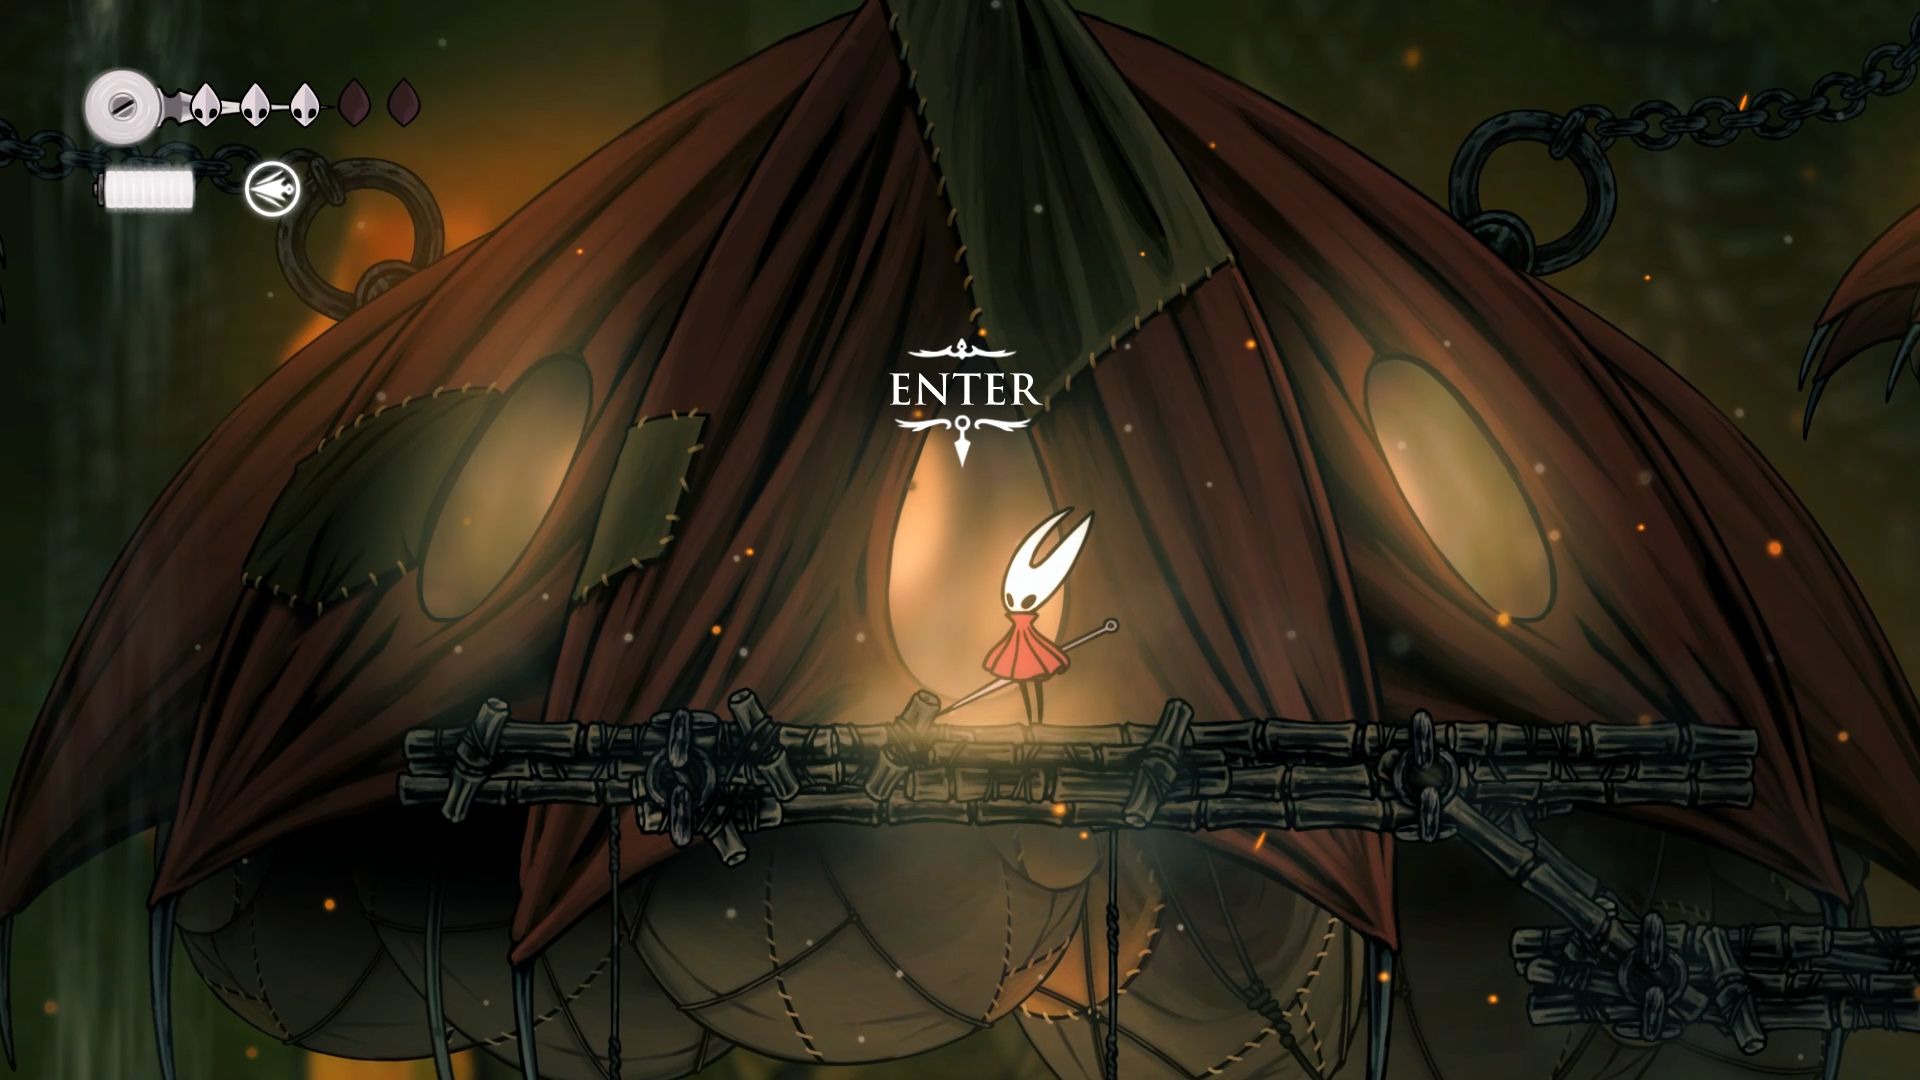
The quest named “Flexile Spines” can be found in the extensive region located south of Far Fields. Navigate upwards towards the floating hot air balloon, and once there, have a chat with the seamstress who is inside.
Following obtaining the Drifter’s Cloak, you can find three possible exits from the Far Fields in Hollow Knight: Silksong.
- Back to Deep Docks
- Use Bell Beast Bellway
- Go up to Greymoor
Optional Step: Mask Shard In Far Fields

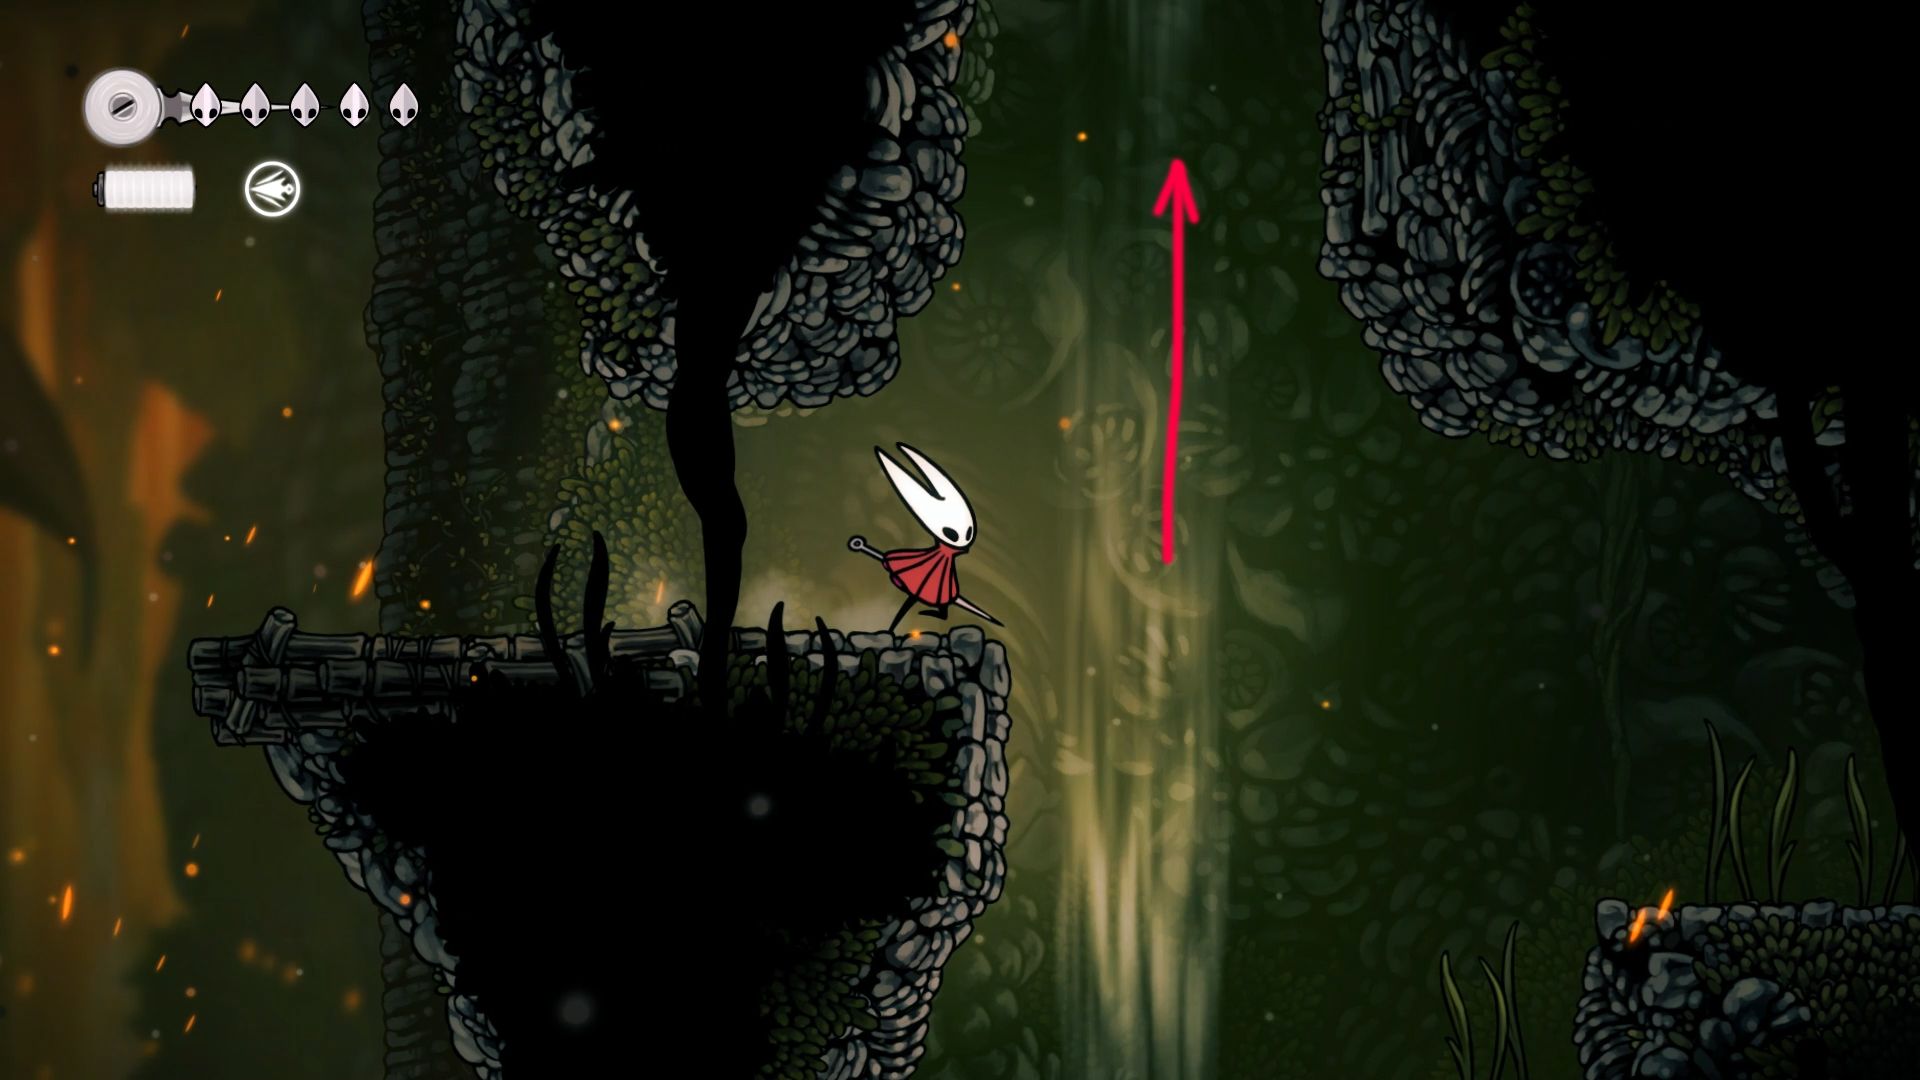
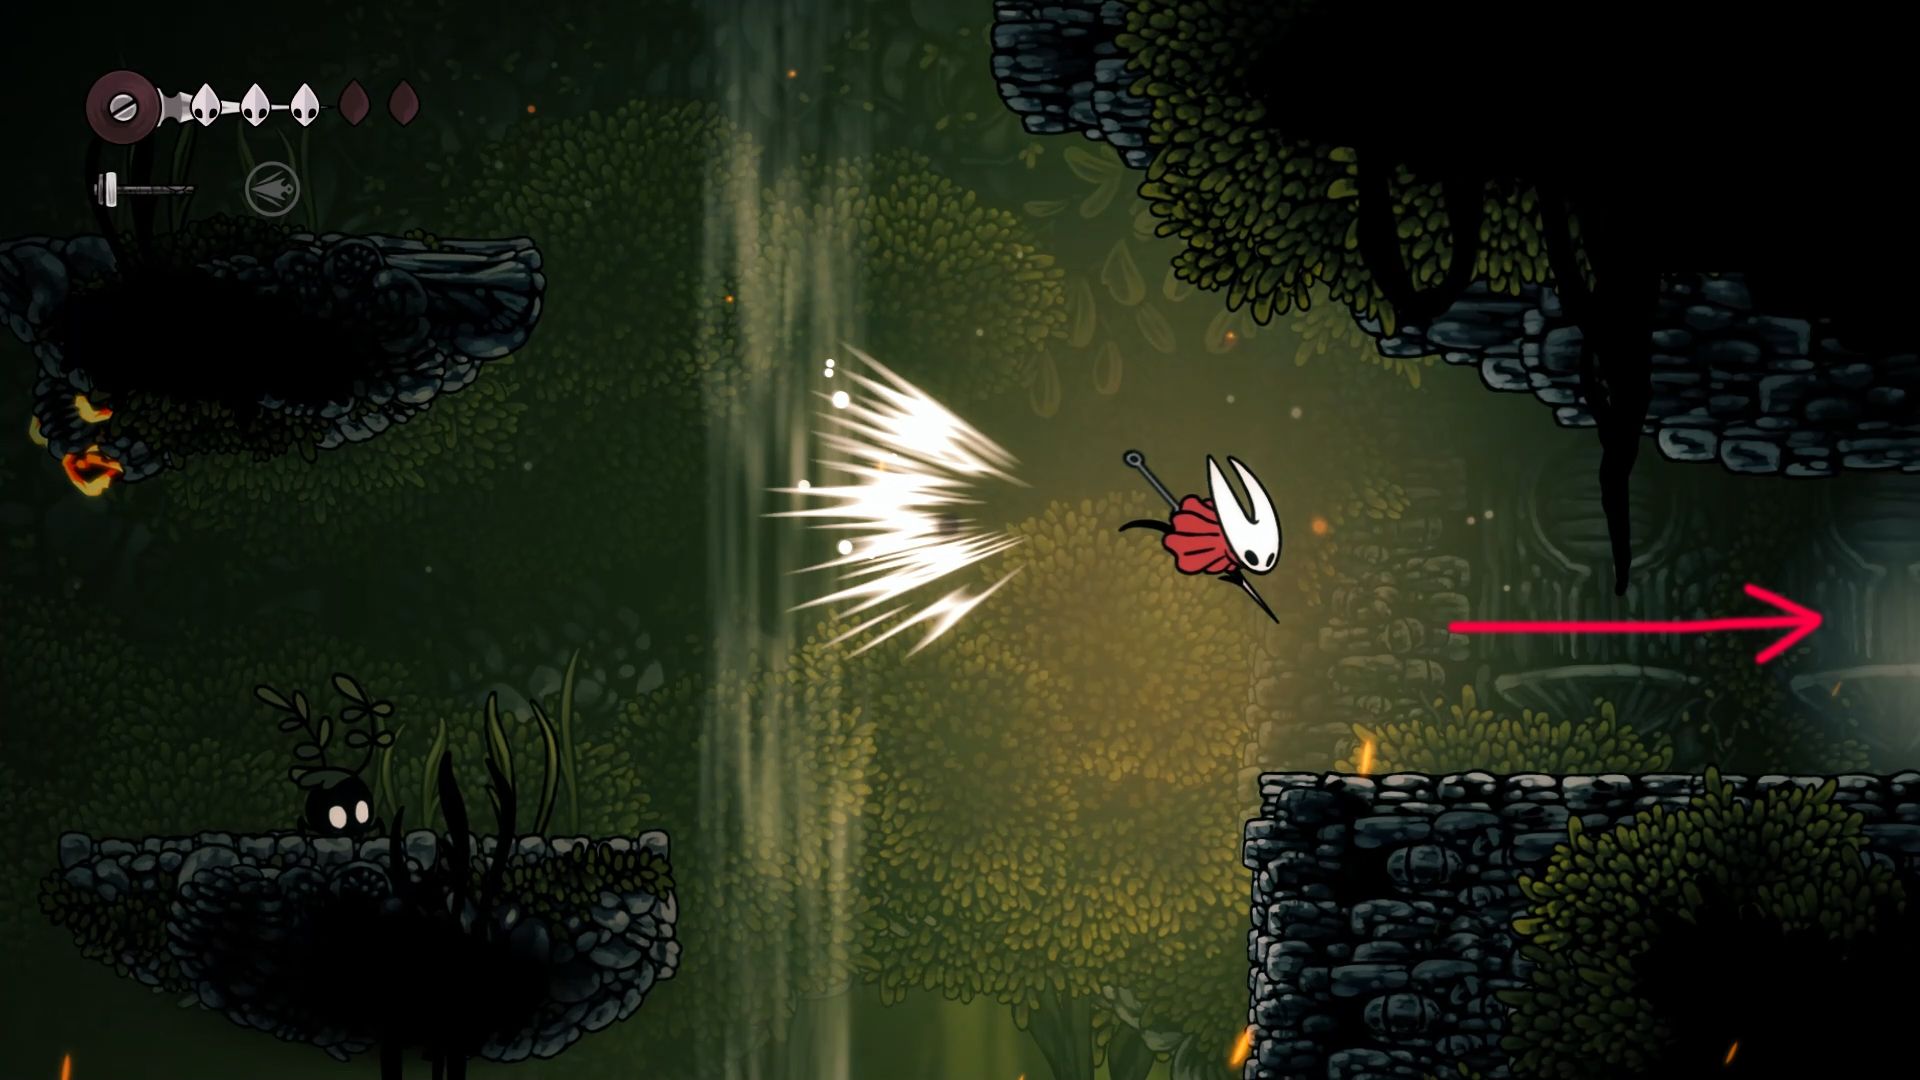
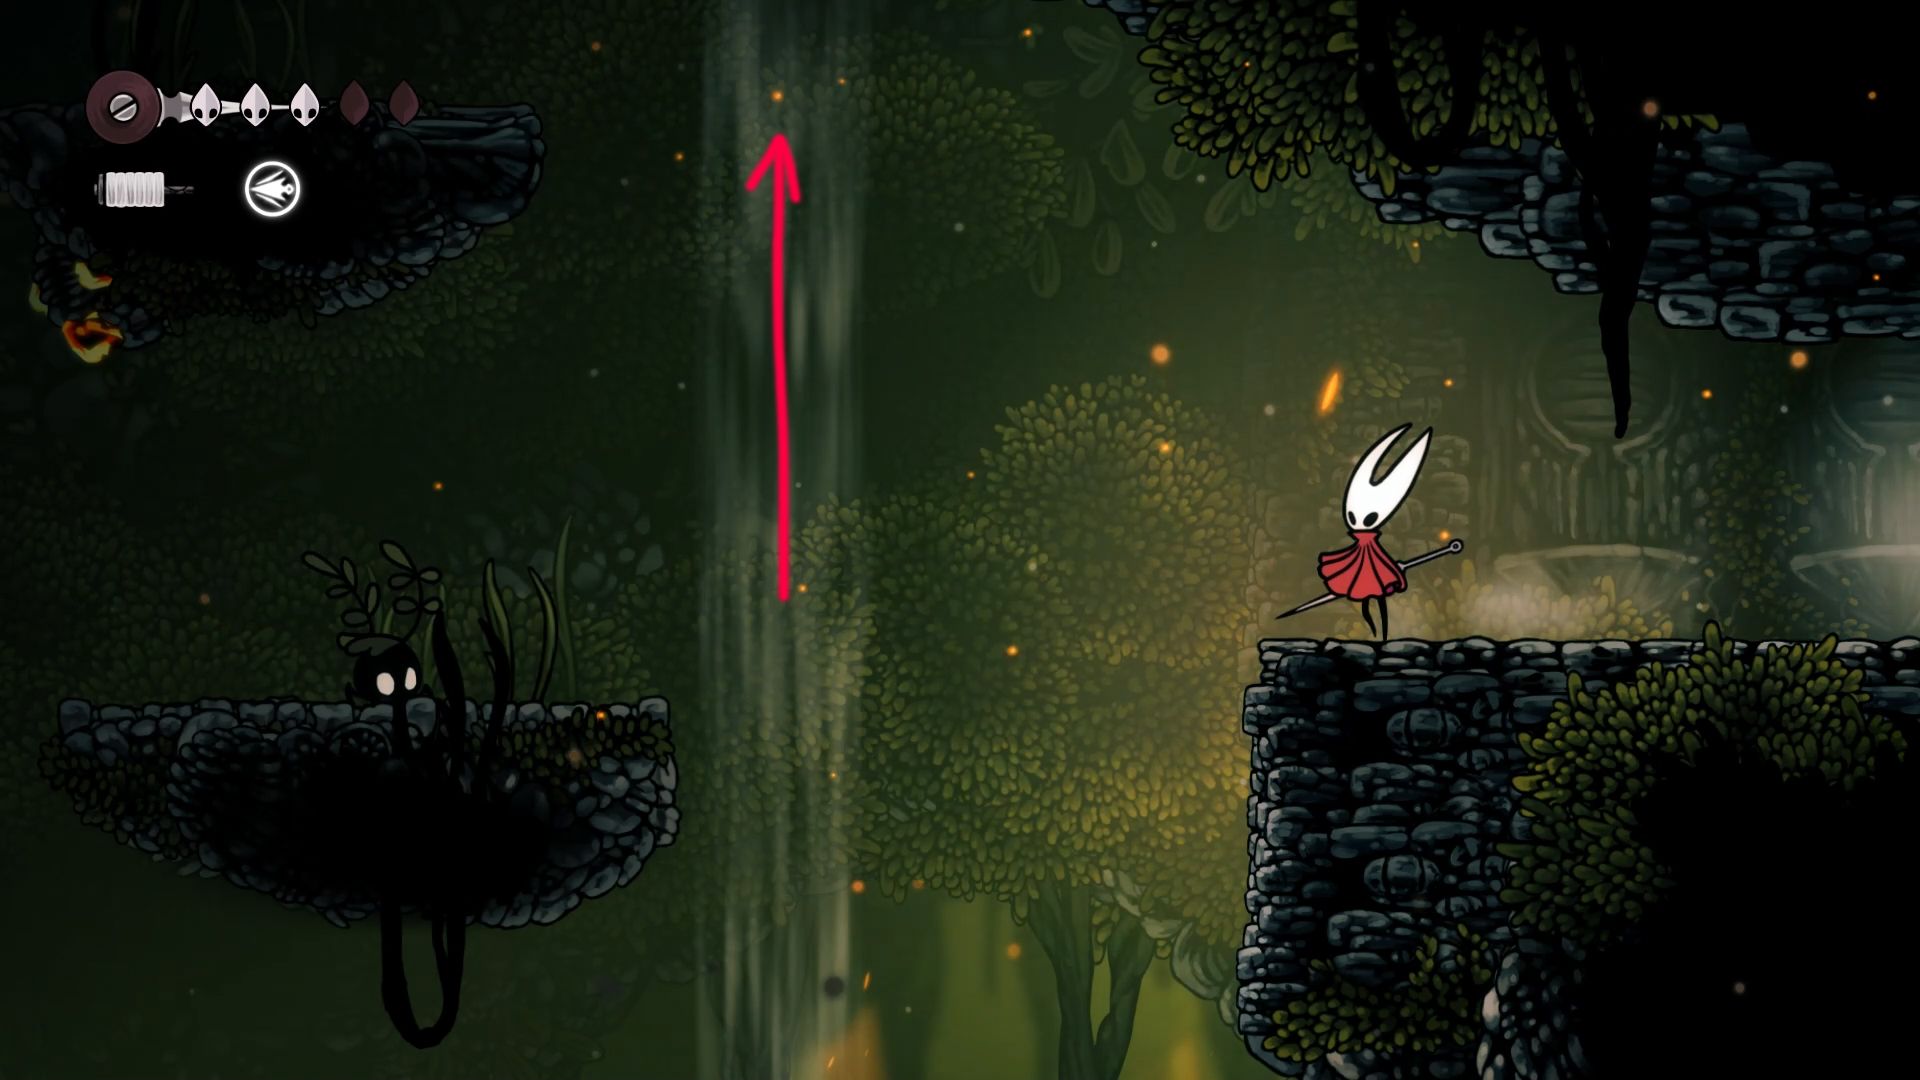
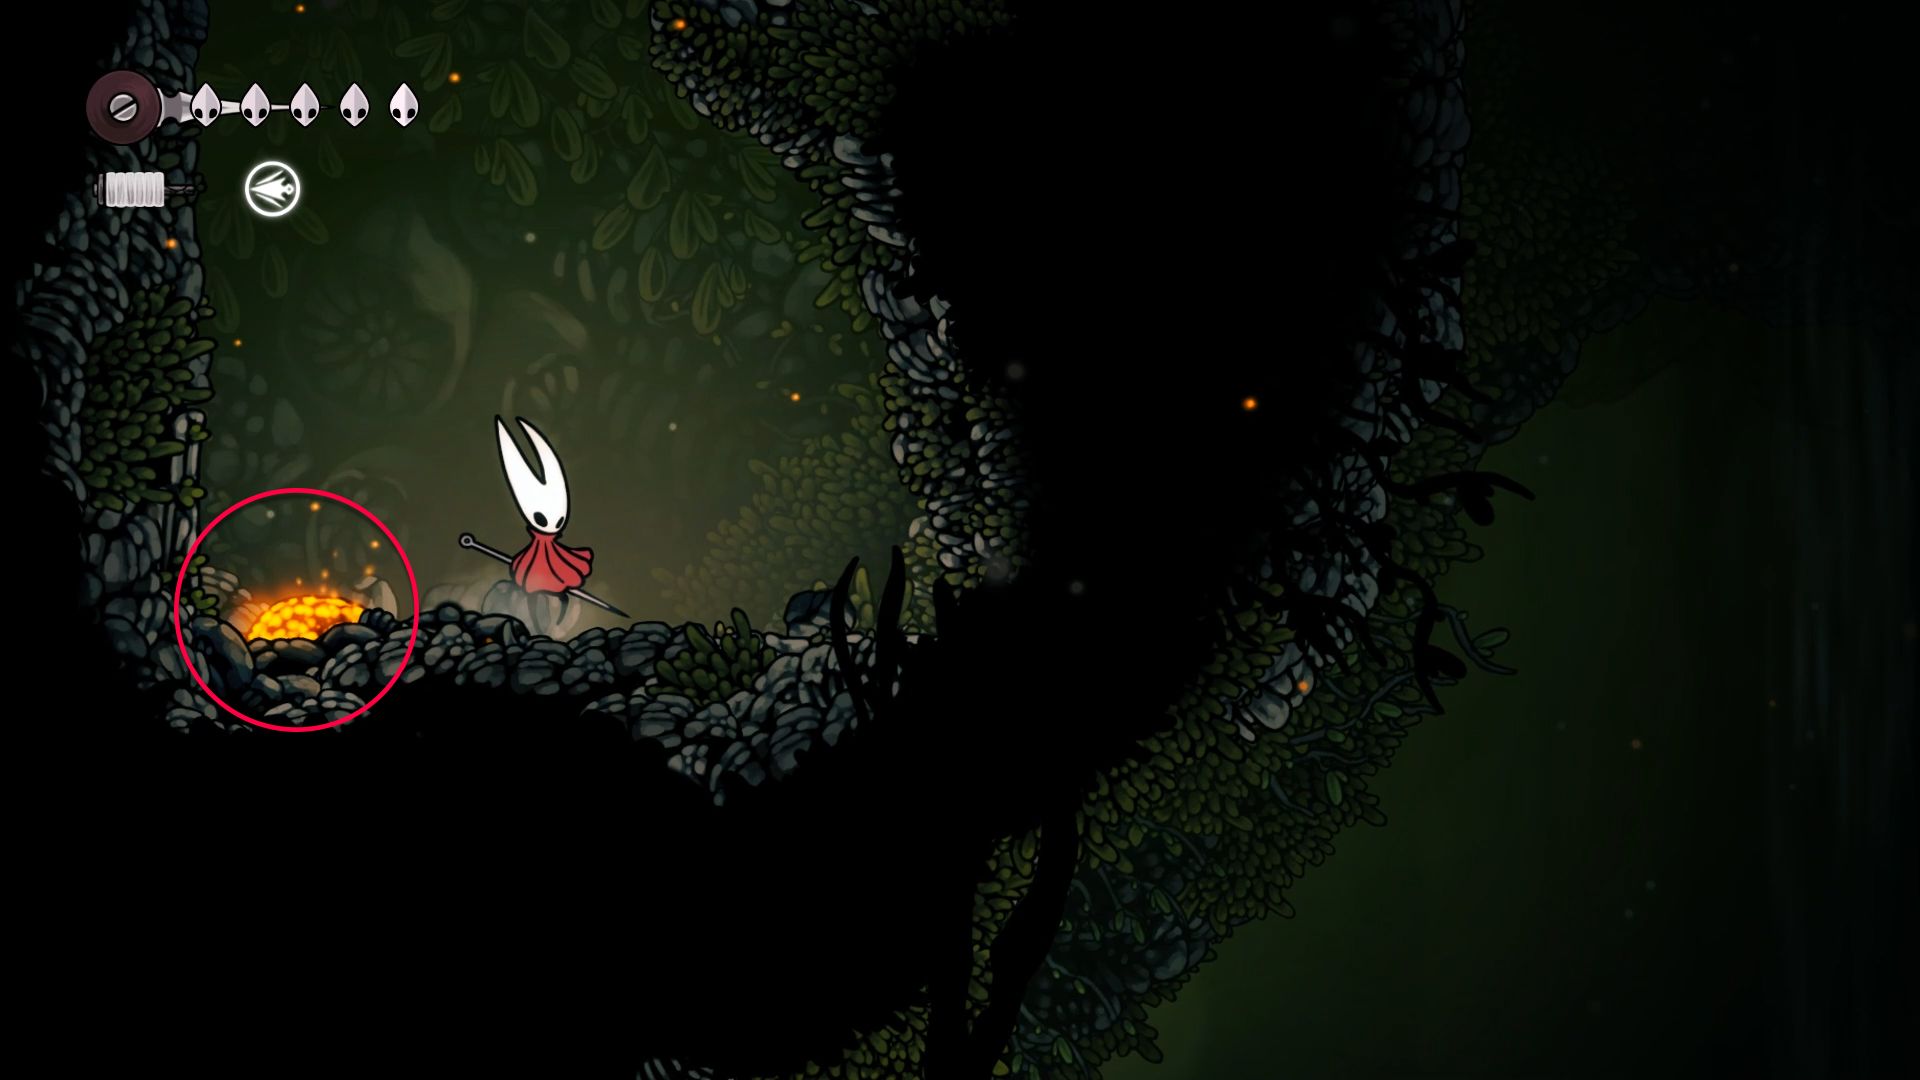
After mastering the glide move, players may choose to explore the region above the Seamstress’s floating balloon. This part isn’t compulsory but is strongly advised because it contains a Mask Shard. To reach this location, start by moving right from the Seamstress’s residence until you find an upward current. Ascend using that current, then ride another wind stream before touching down and proceeding left.
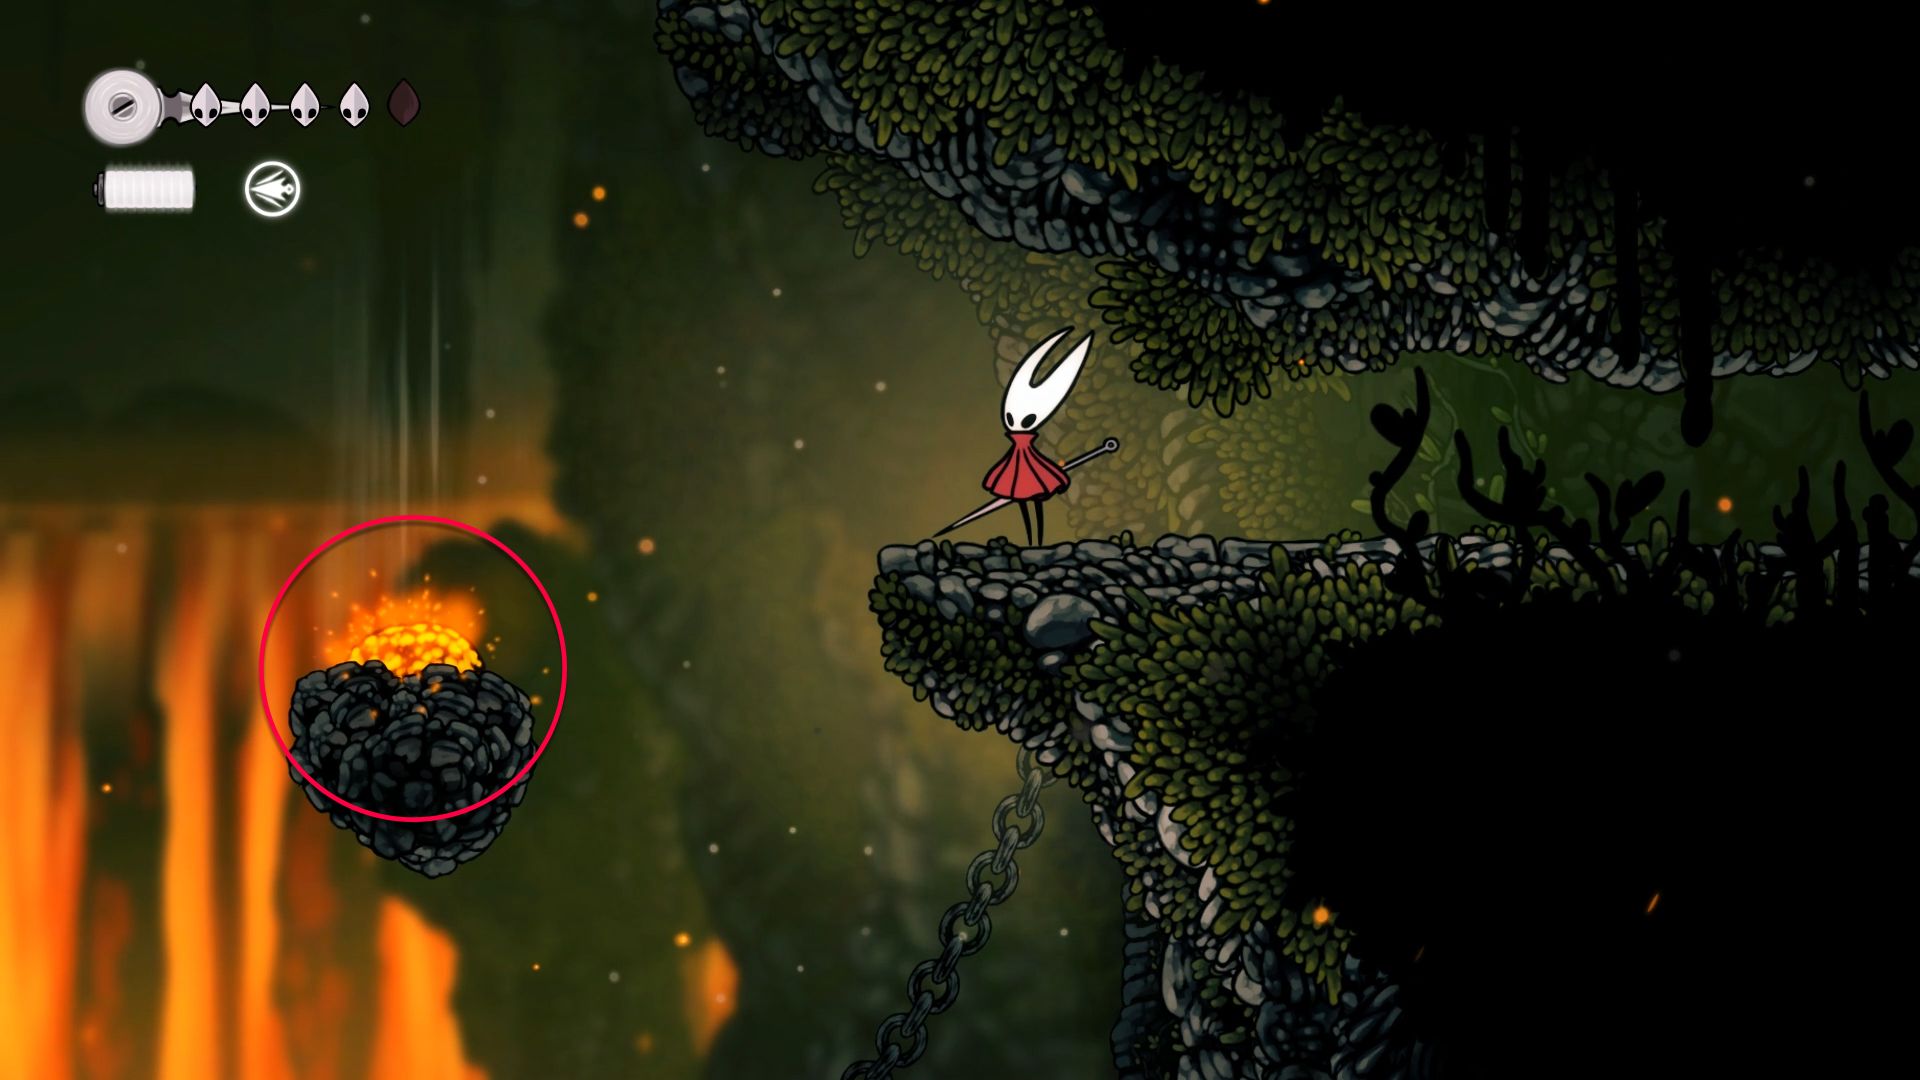
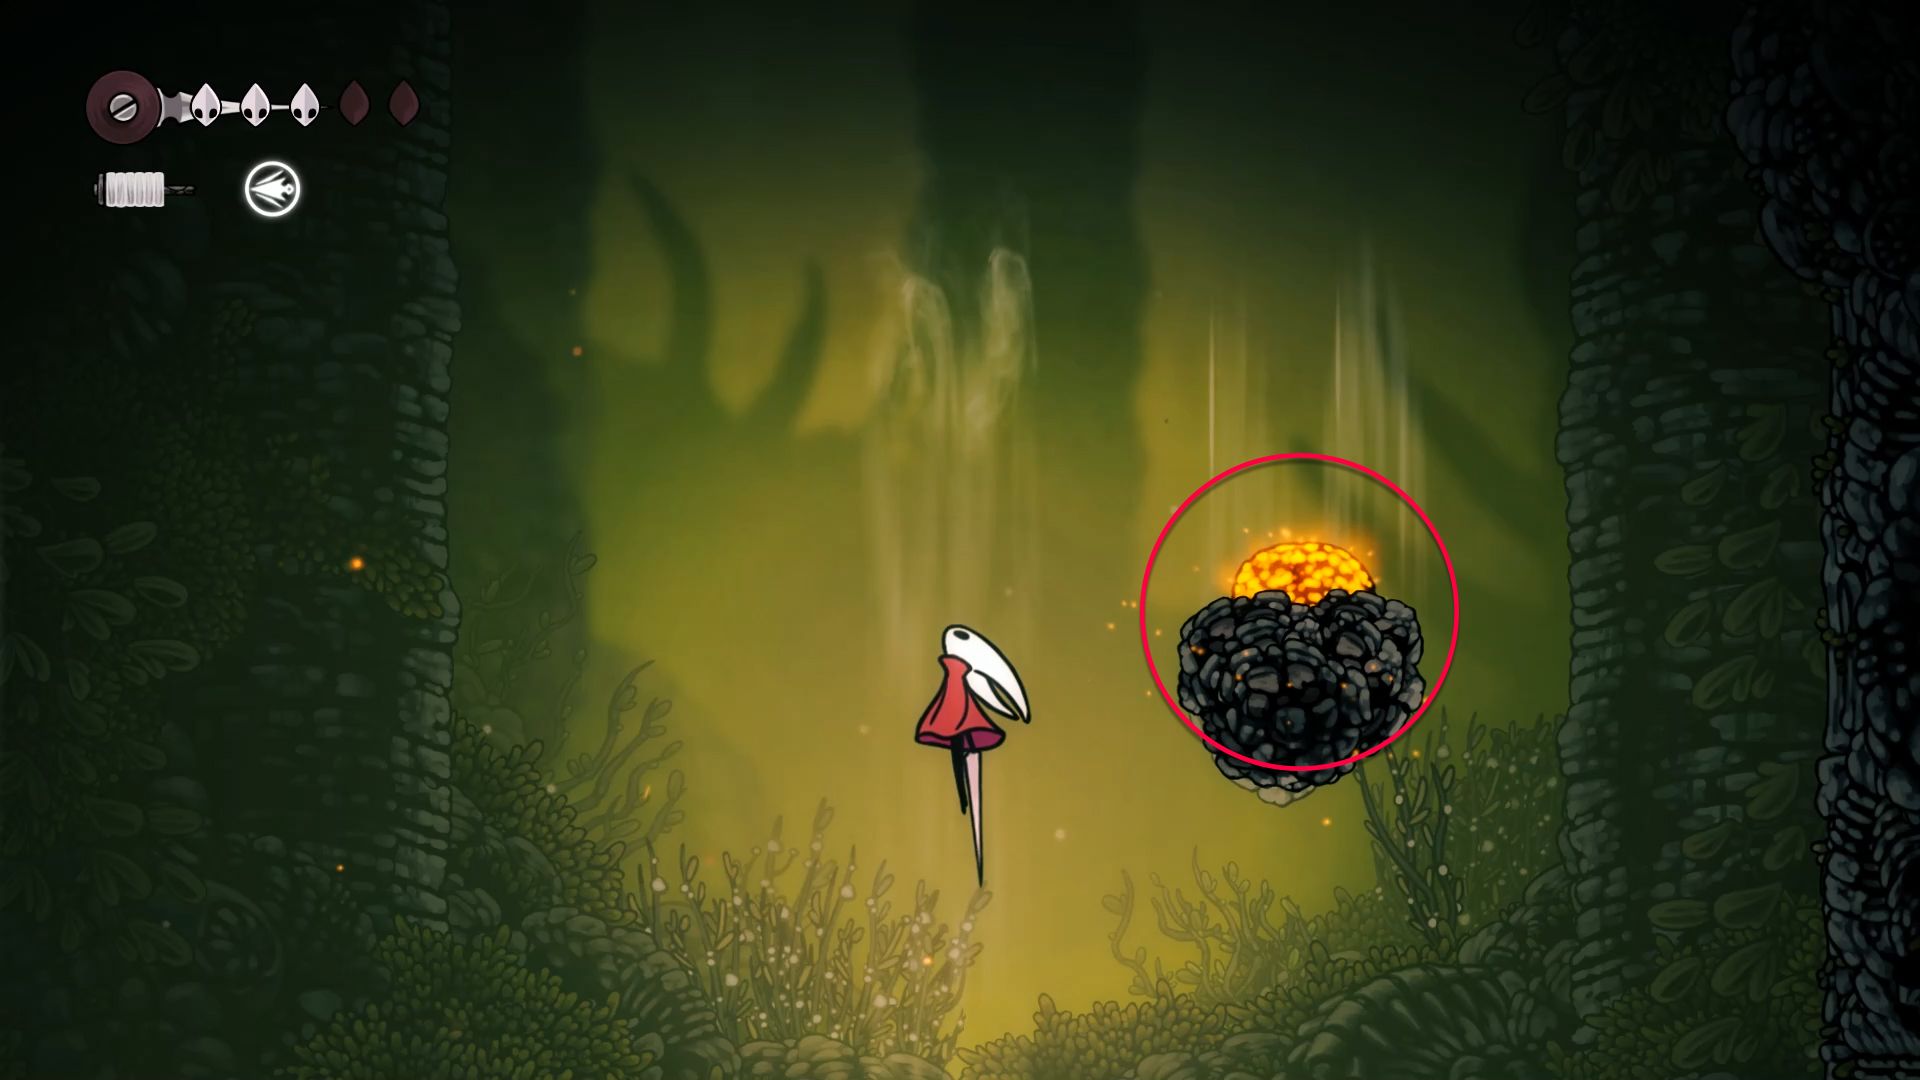
Afterward, you’ll come across three rocks that can detonate. Tread cautiously as striking one will create a gust of wind, but be wary of the ensuing blast damage. Use these winds to navigate to similar rocks and set them off sequentially. In summary, there are three explosive rocks for you to activate.
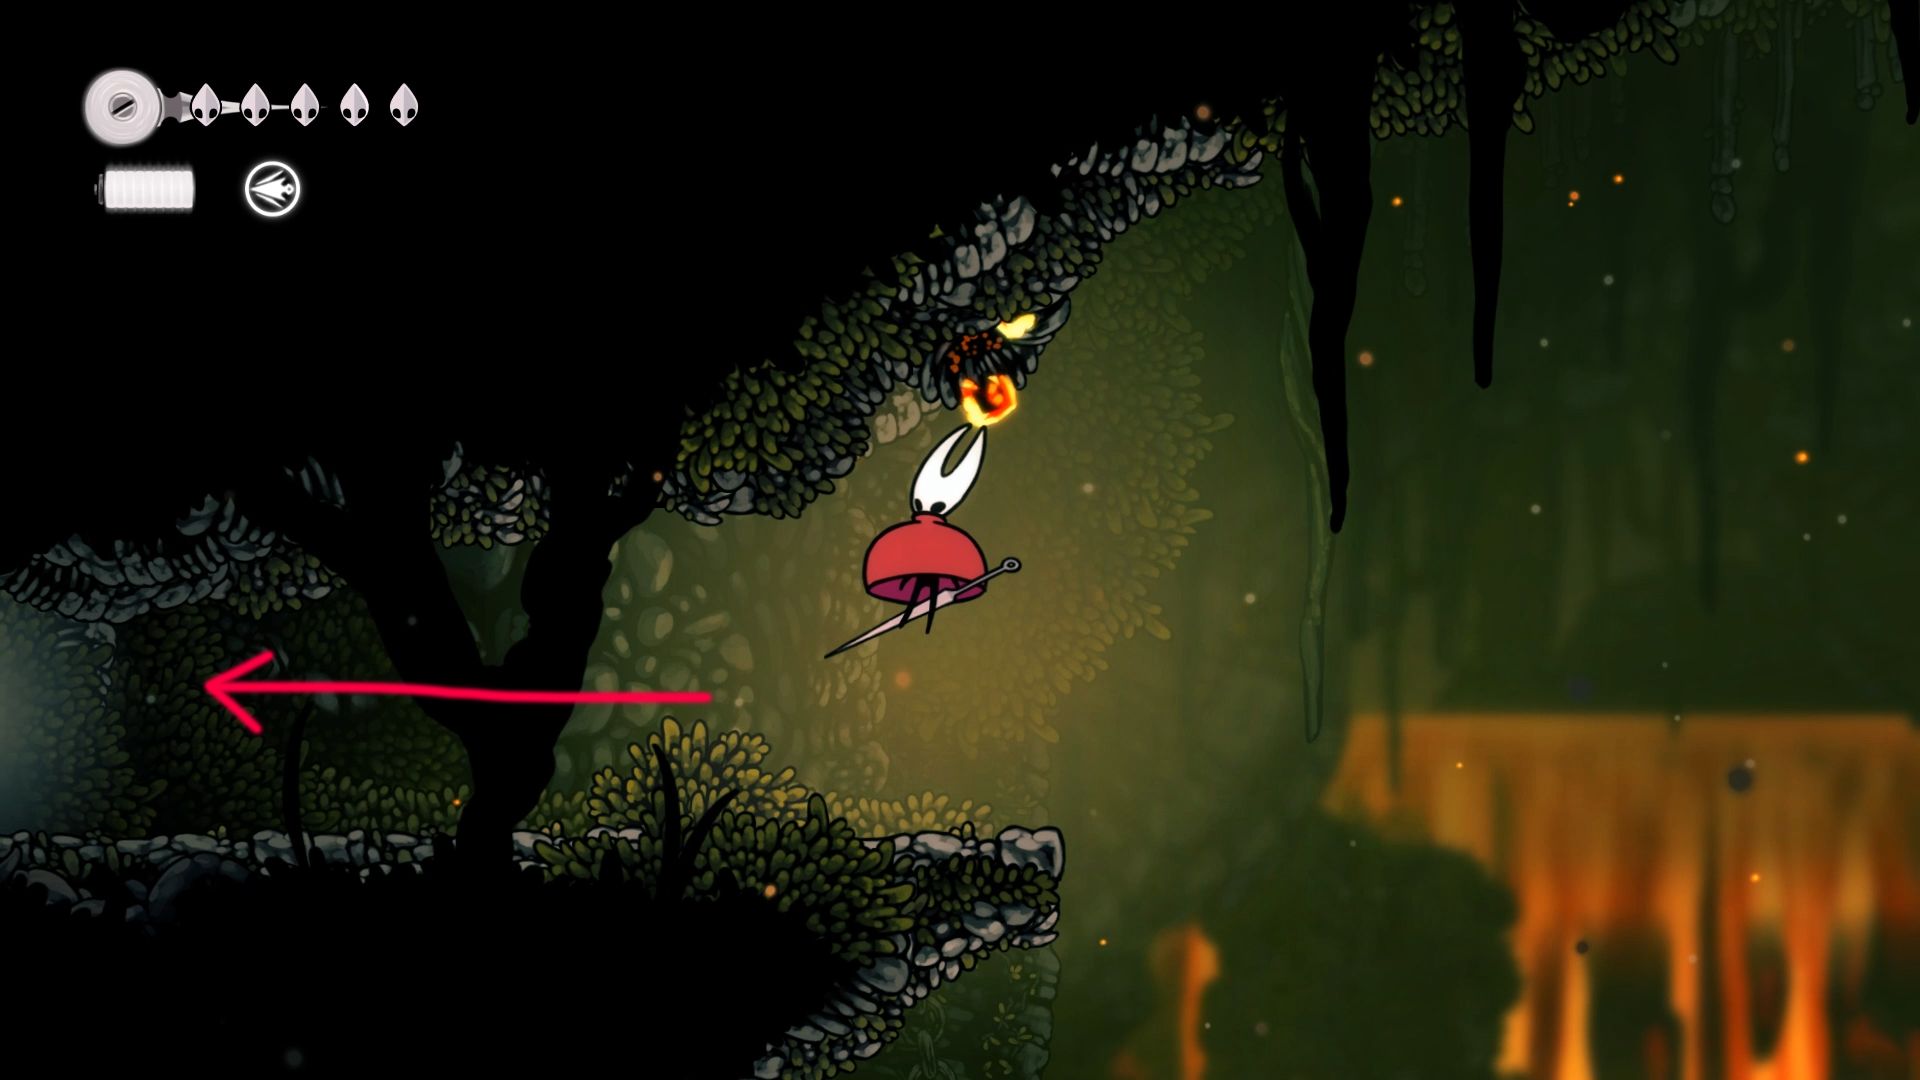
Slide gently towards the left-side opening ahead, then make your entry. If any rocks along the way explode, break them until they’re all cleared out.
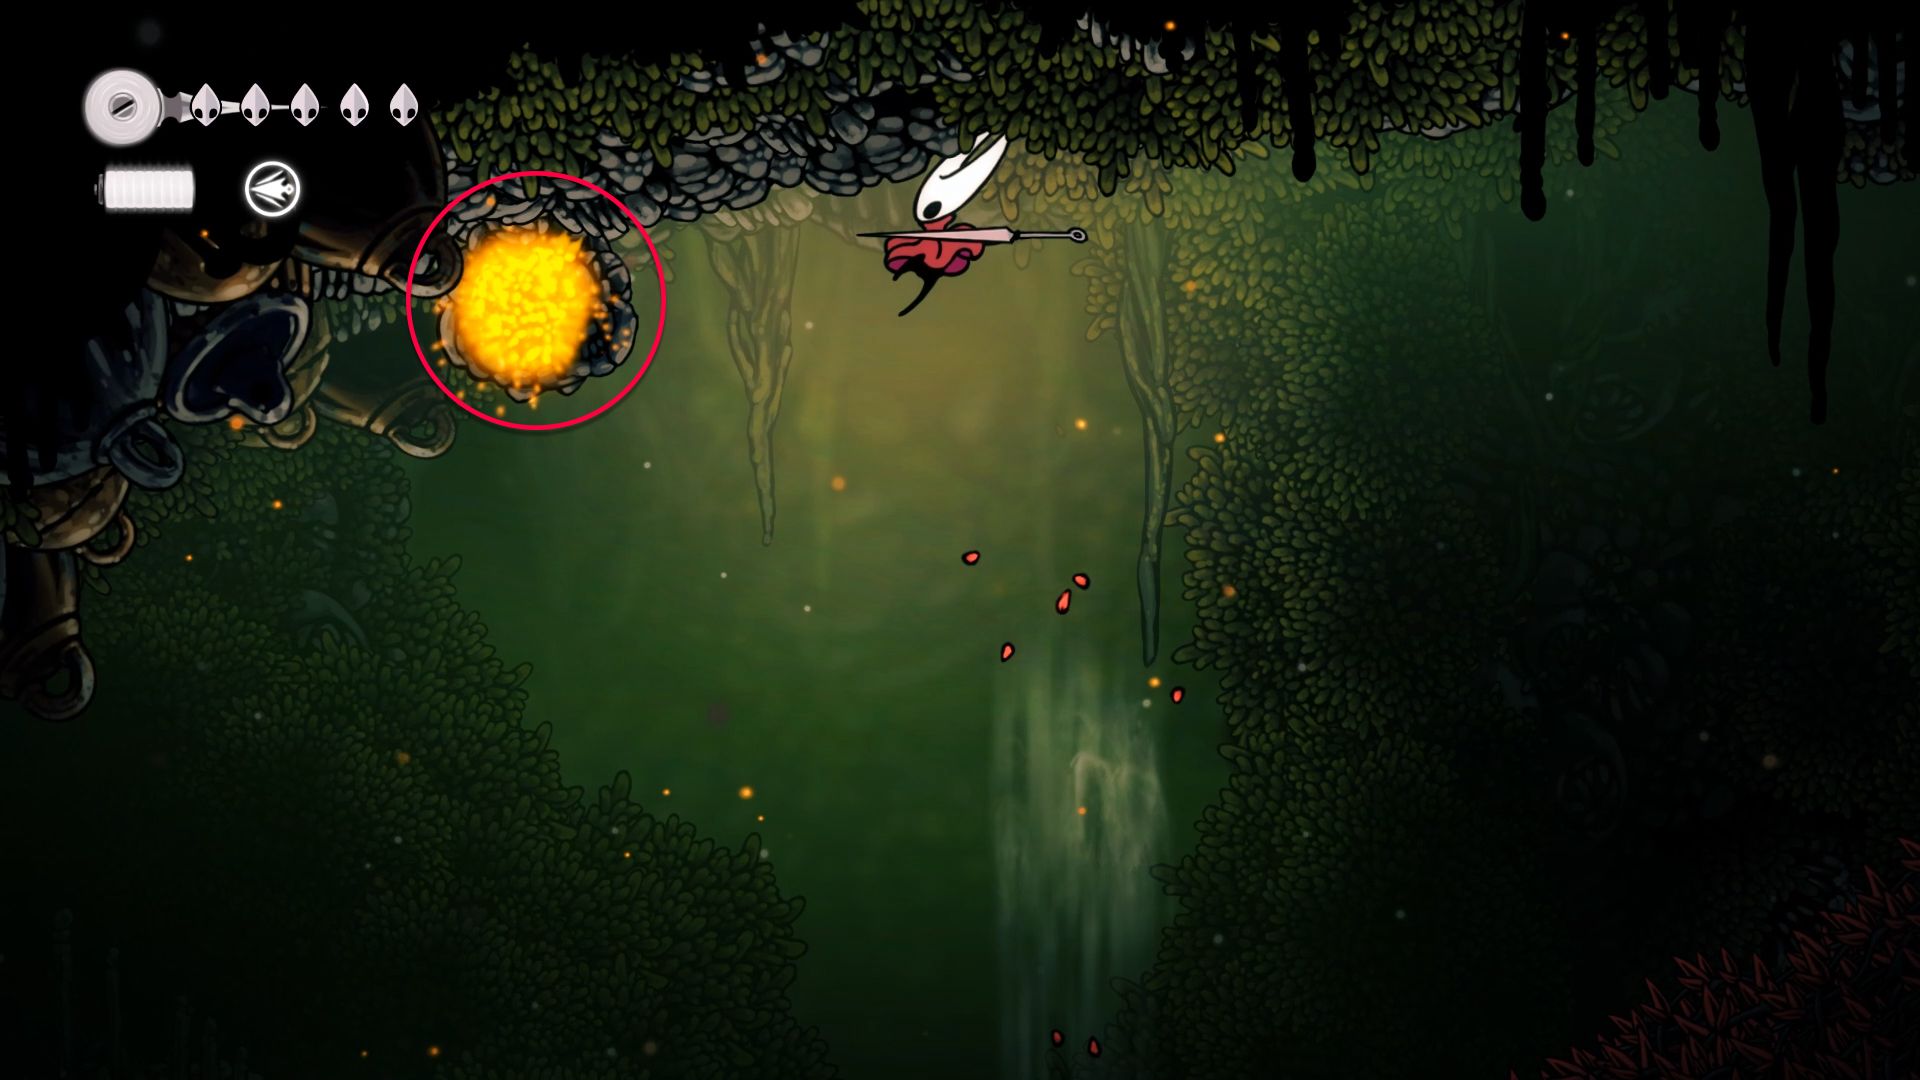
In the Far Fields, locate the Yellow Bomb positioned high above, and utilize the wind currents to navigate your way up, aiming to break it. This will ultimately expose the Mask Shard.
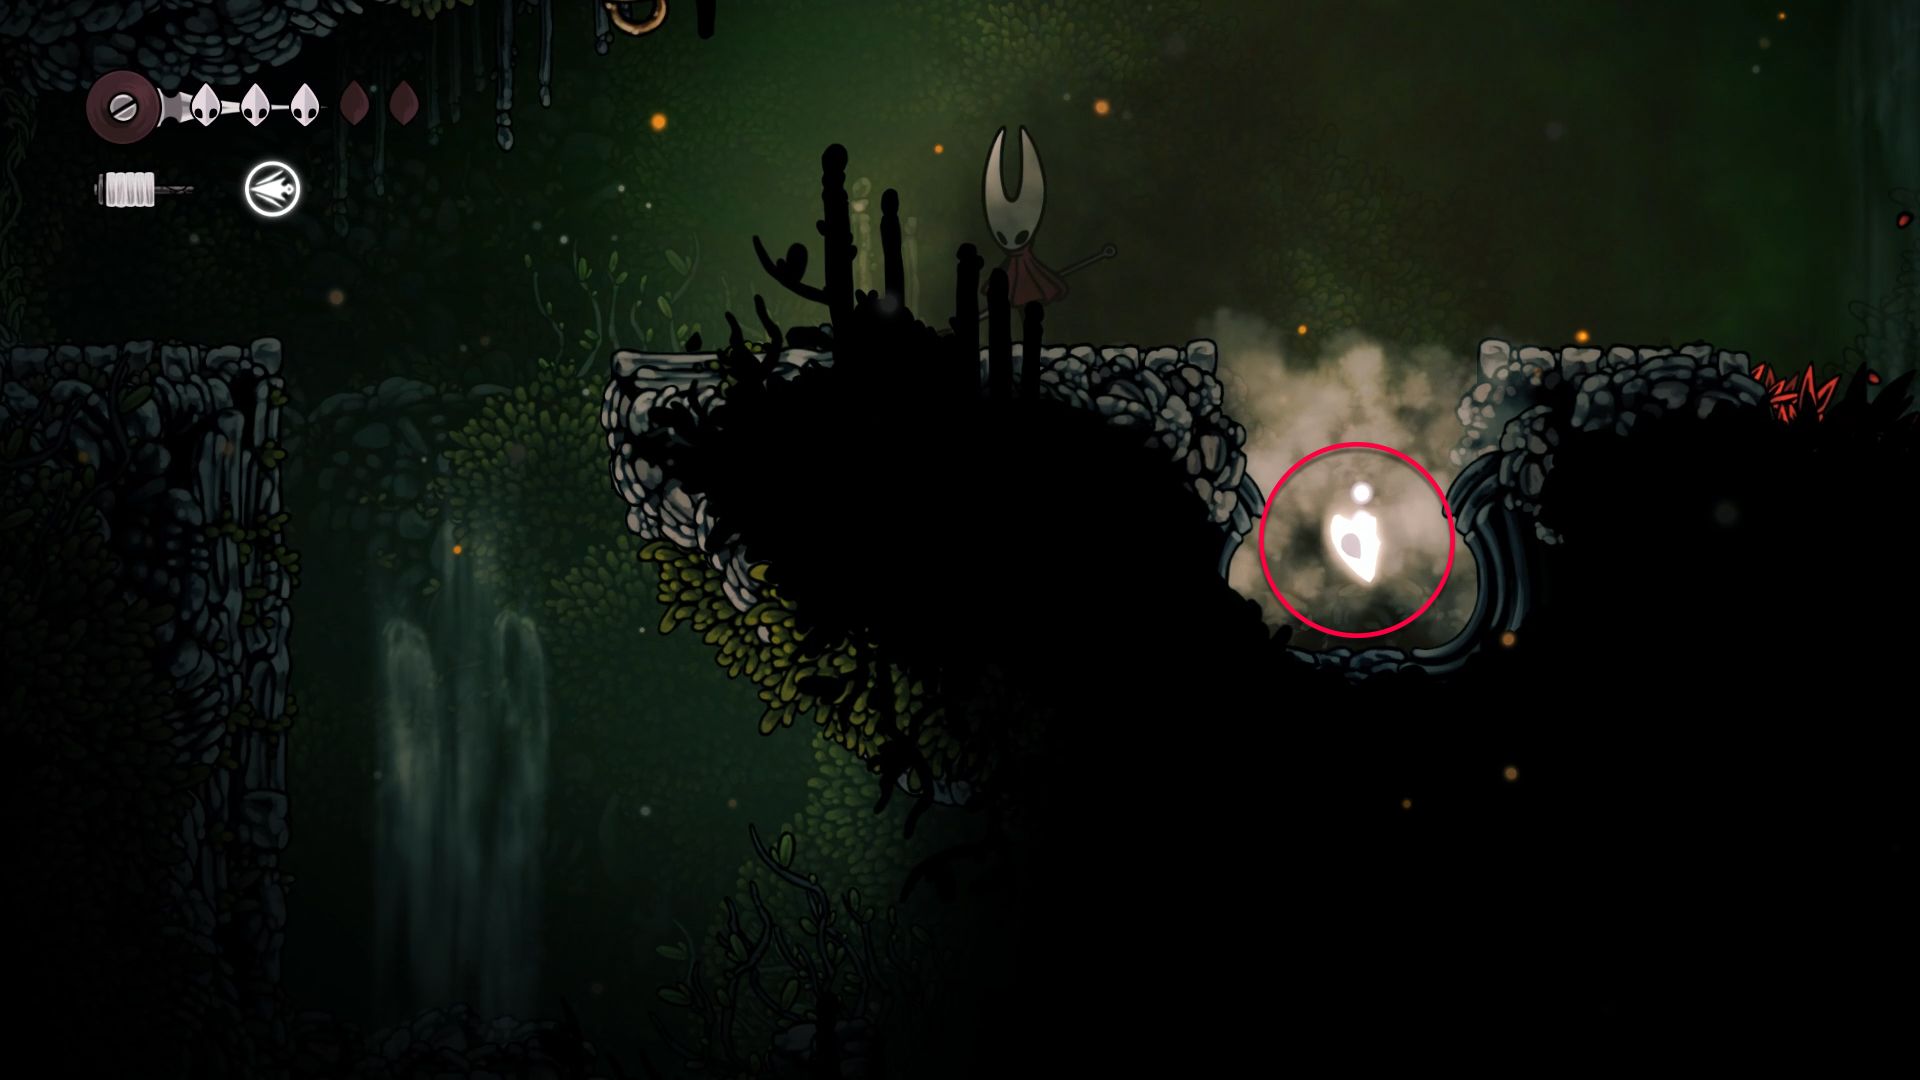
1. Observe the bomb descending, ensuring you dodge the impending blast, before retrieving the buried Mask Shard below. (Fostering an engaging narrative style)
OR
2. Keep your eyes on the falling bomb, making sure to steer clear of the ensuing explosion, and afterwards, uncover the Mask Shard concealed beneath the earth. (Maintaining a concise and straightforward approach)
Both sentences convey the same meaning but offer varying degrees of complexity for different reading preferences.
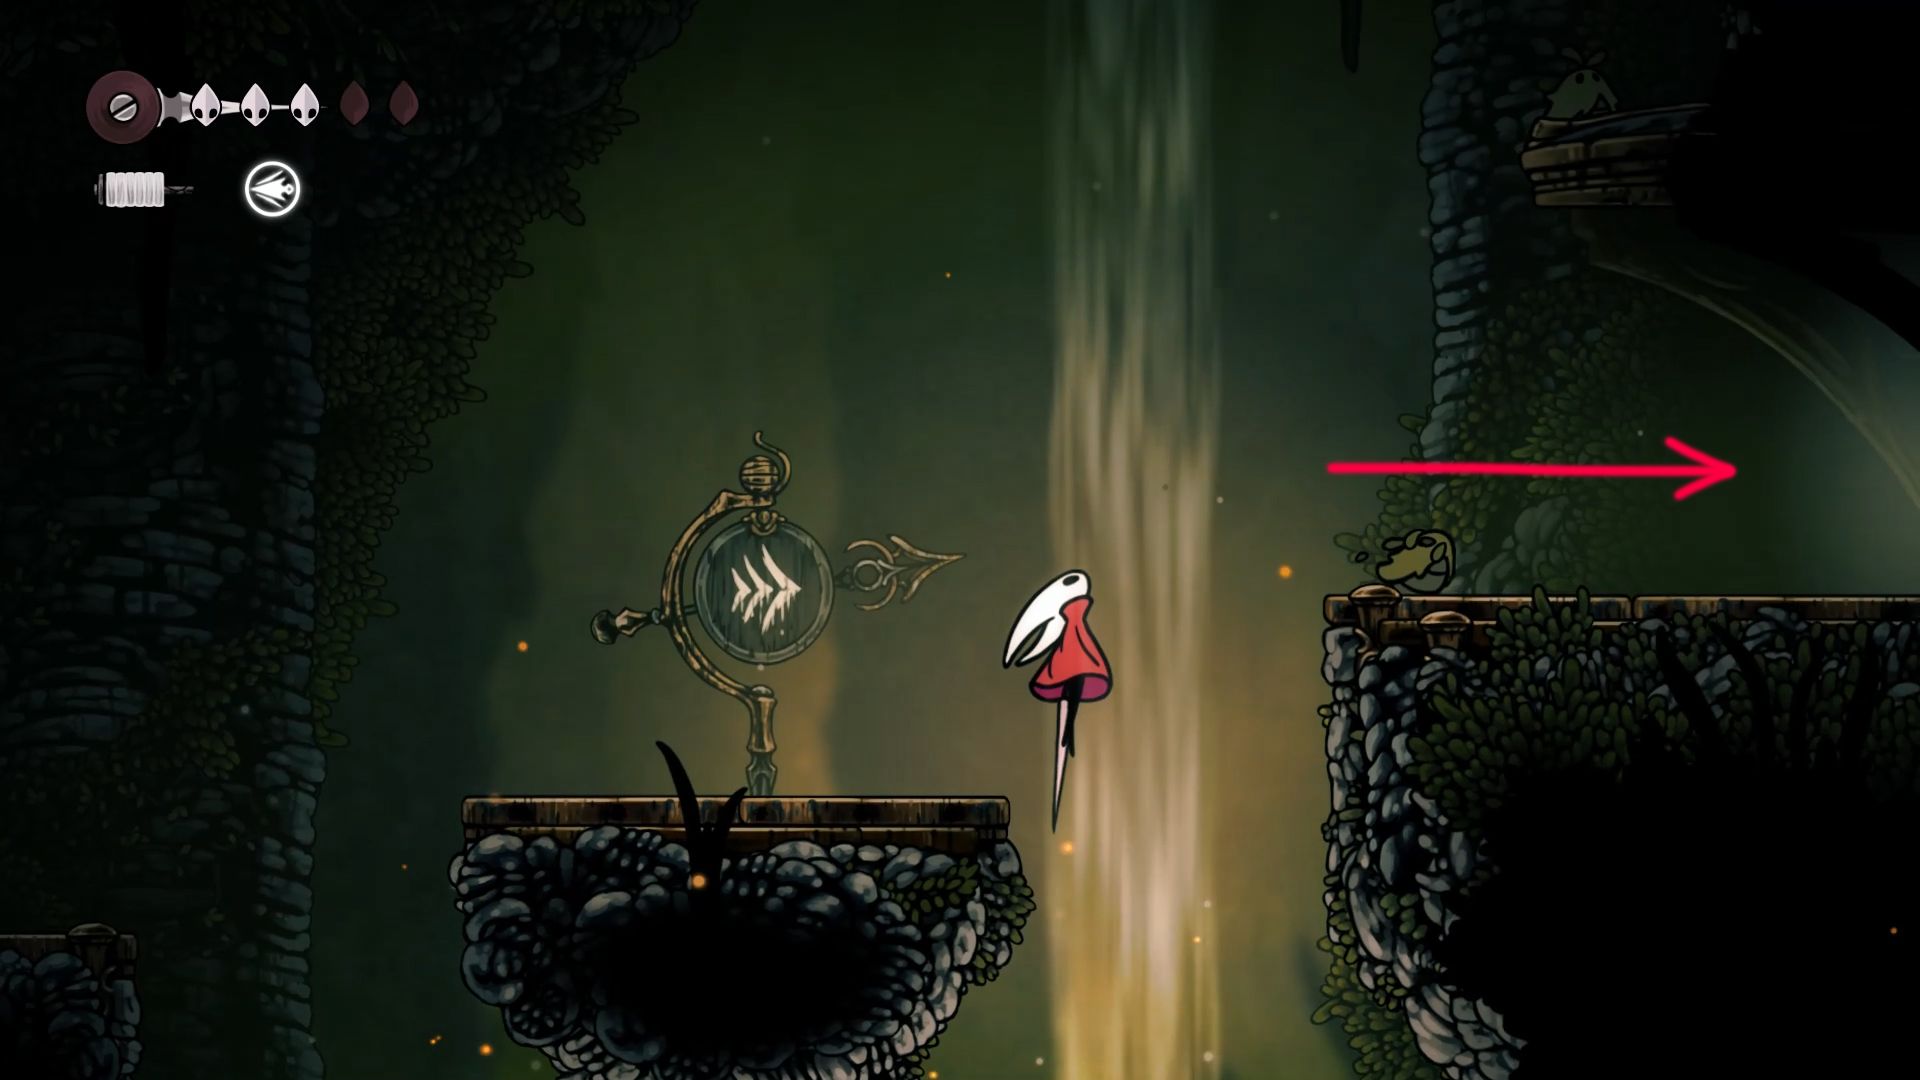
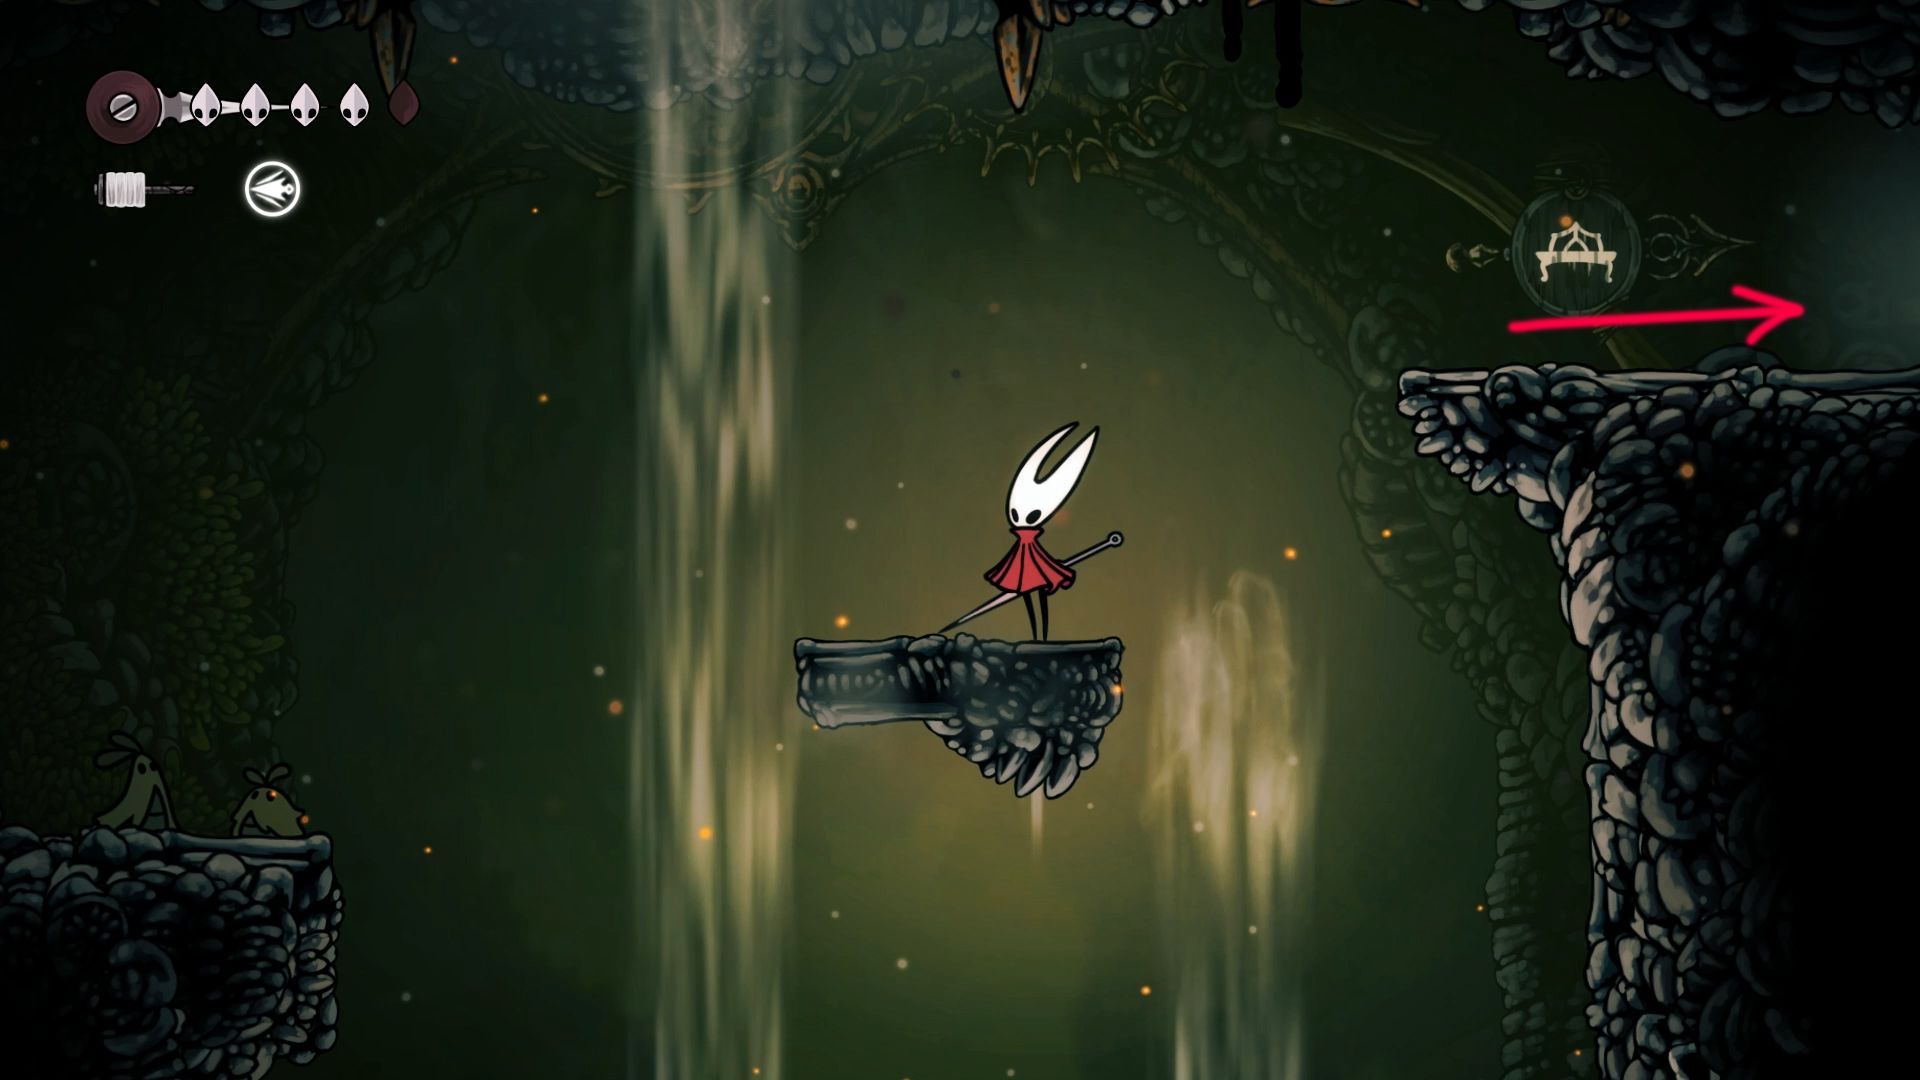
How To Reach The Bellway


To break free from Far Fields, seek out the Bellway. Travel on the most bottom path, and you’ll encounter the fourth boss in Silksong known as the Chorus. Overpower the boss, then keep moving to your left until you notice a wind gust.
As a devoted cinephile, I’m thrilled to share some insider tips for those navigating the surreal landscapes of Far Fields! The Drifter’s Cloak is your ticket to defying gravity here. Soar upwards, and you’ll break free from the endless loop that traps many wanderers. Once aloft, veer left, and you’ll find another gust of wind. Hang on tight and let it carry you higher!
Above, you’ll find another rock that could explode. After breaking it, harness the newly created wind draft and use it to navigate towards the Bellway destination within Far Fields.
Pilgrim’s Rest
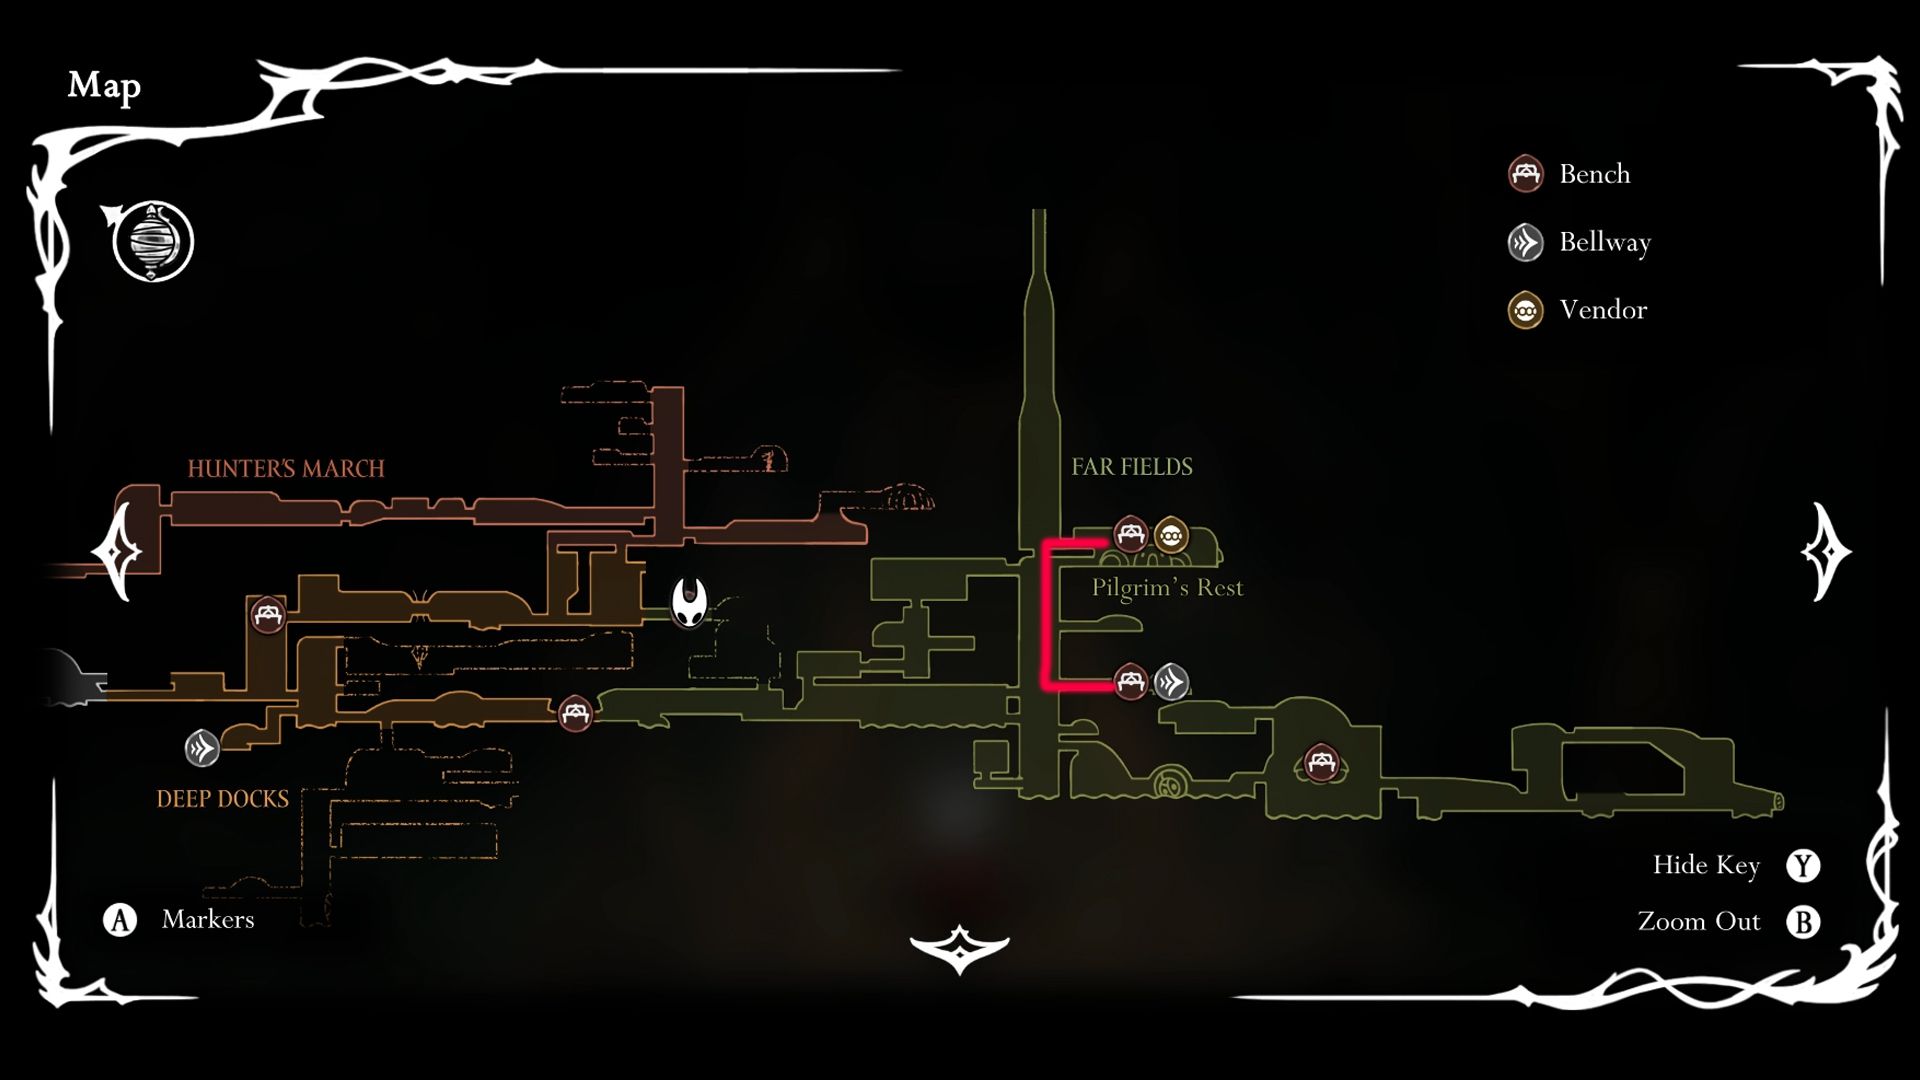
After opening the Bellway, you are now free to visit any location you’ve previously unlocked. Should you choose to proceed towards Far Fields, simply head towards the Pilgrim’s Rest region.

Like before, you simply have to float up while destroying any explosion rocks you can find.
Greymoor
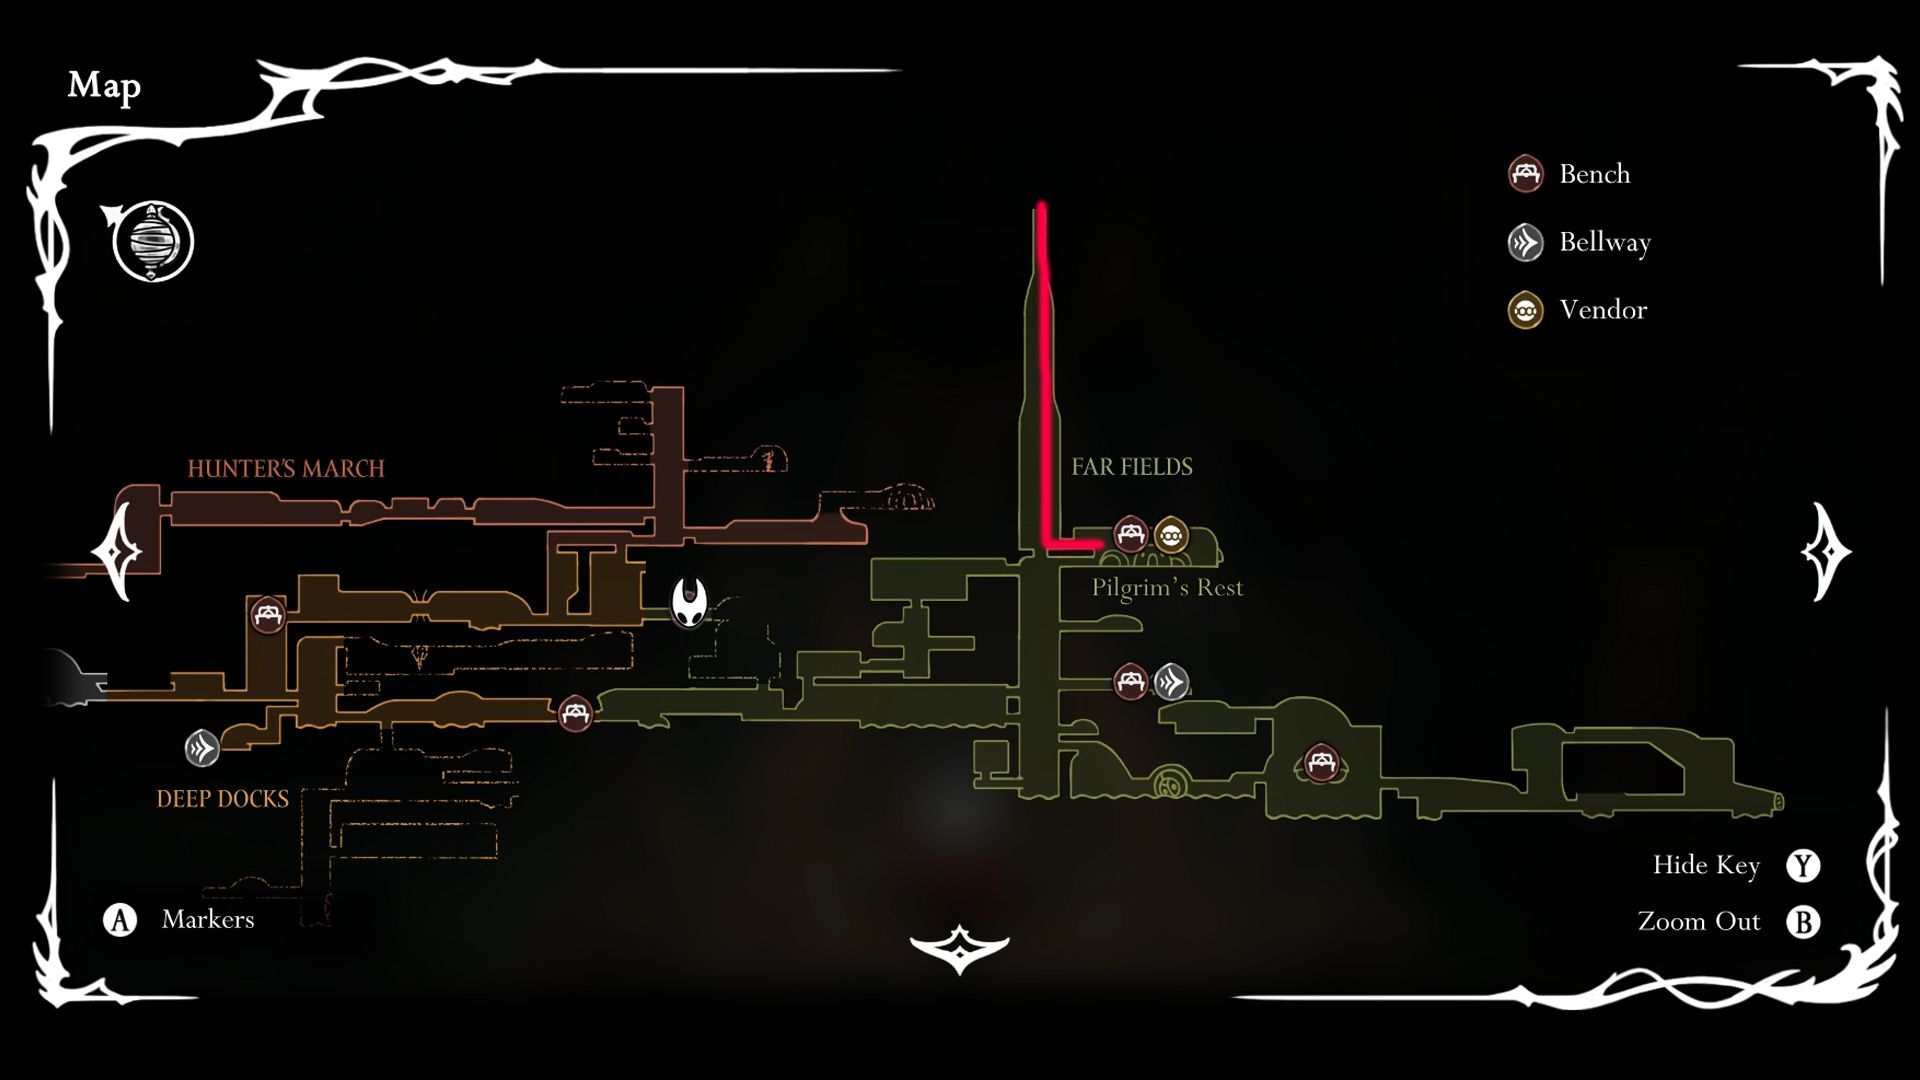

Upon arriving at Pilgrim’s Rest, keep following the identical approach to ascend further. Eventually, this path will guide players towards an area known as Greymoor.
Read More
- Re:Zero Season 4, Episode 6 Release Date & Time
- NTE Drift Guide (& Best Car Mods for Drifting)
- How to Get the Wunderbarrage in Totenreich (BO7 Zombies)
- How to Beat Turbines in ARC Raiders
- All Aswang Evidence & Weaknesses in Phasmophobia
- How to Get Necrolei Cyst & Strong Acid in Subnautica 2
- Diablo 4 Best Loot Filter Codes
- Alan Wake Event in Phasmophobia, Explained
- Brent Oil Forecast
- How to Craft Repair Tools in Subnautica 2
2025-09-05 15:17