Totenreich has two powerful items called Grim Relics, and the first one you can find is the Power Switch. When equipped, the Power Switch changes your starting weapons and tactical gear each round. If you like the idea of a random loadout, check out our guide to learn how to unlock it!
This guide provides a step-by-step walkthrough for getting the Power Switch Relic in Totenreich. We’ll explain how to solve the puzzle involving the bear pelts and altars – it can be tricky without a map! Plus, we’ve added some helpful strategies and tips for completing the trial.
You can find the Power Switch Relic on any difficulty of Cursed mode and at any point during a run. While all you strictly need is a Combat Axe, we suggest also bringing a Sniper Rifle with a scope, and we’ll explain why further down.
How to Unlock the Power Switch Relic in Cursed Mode
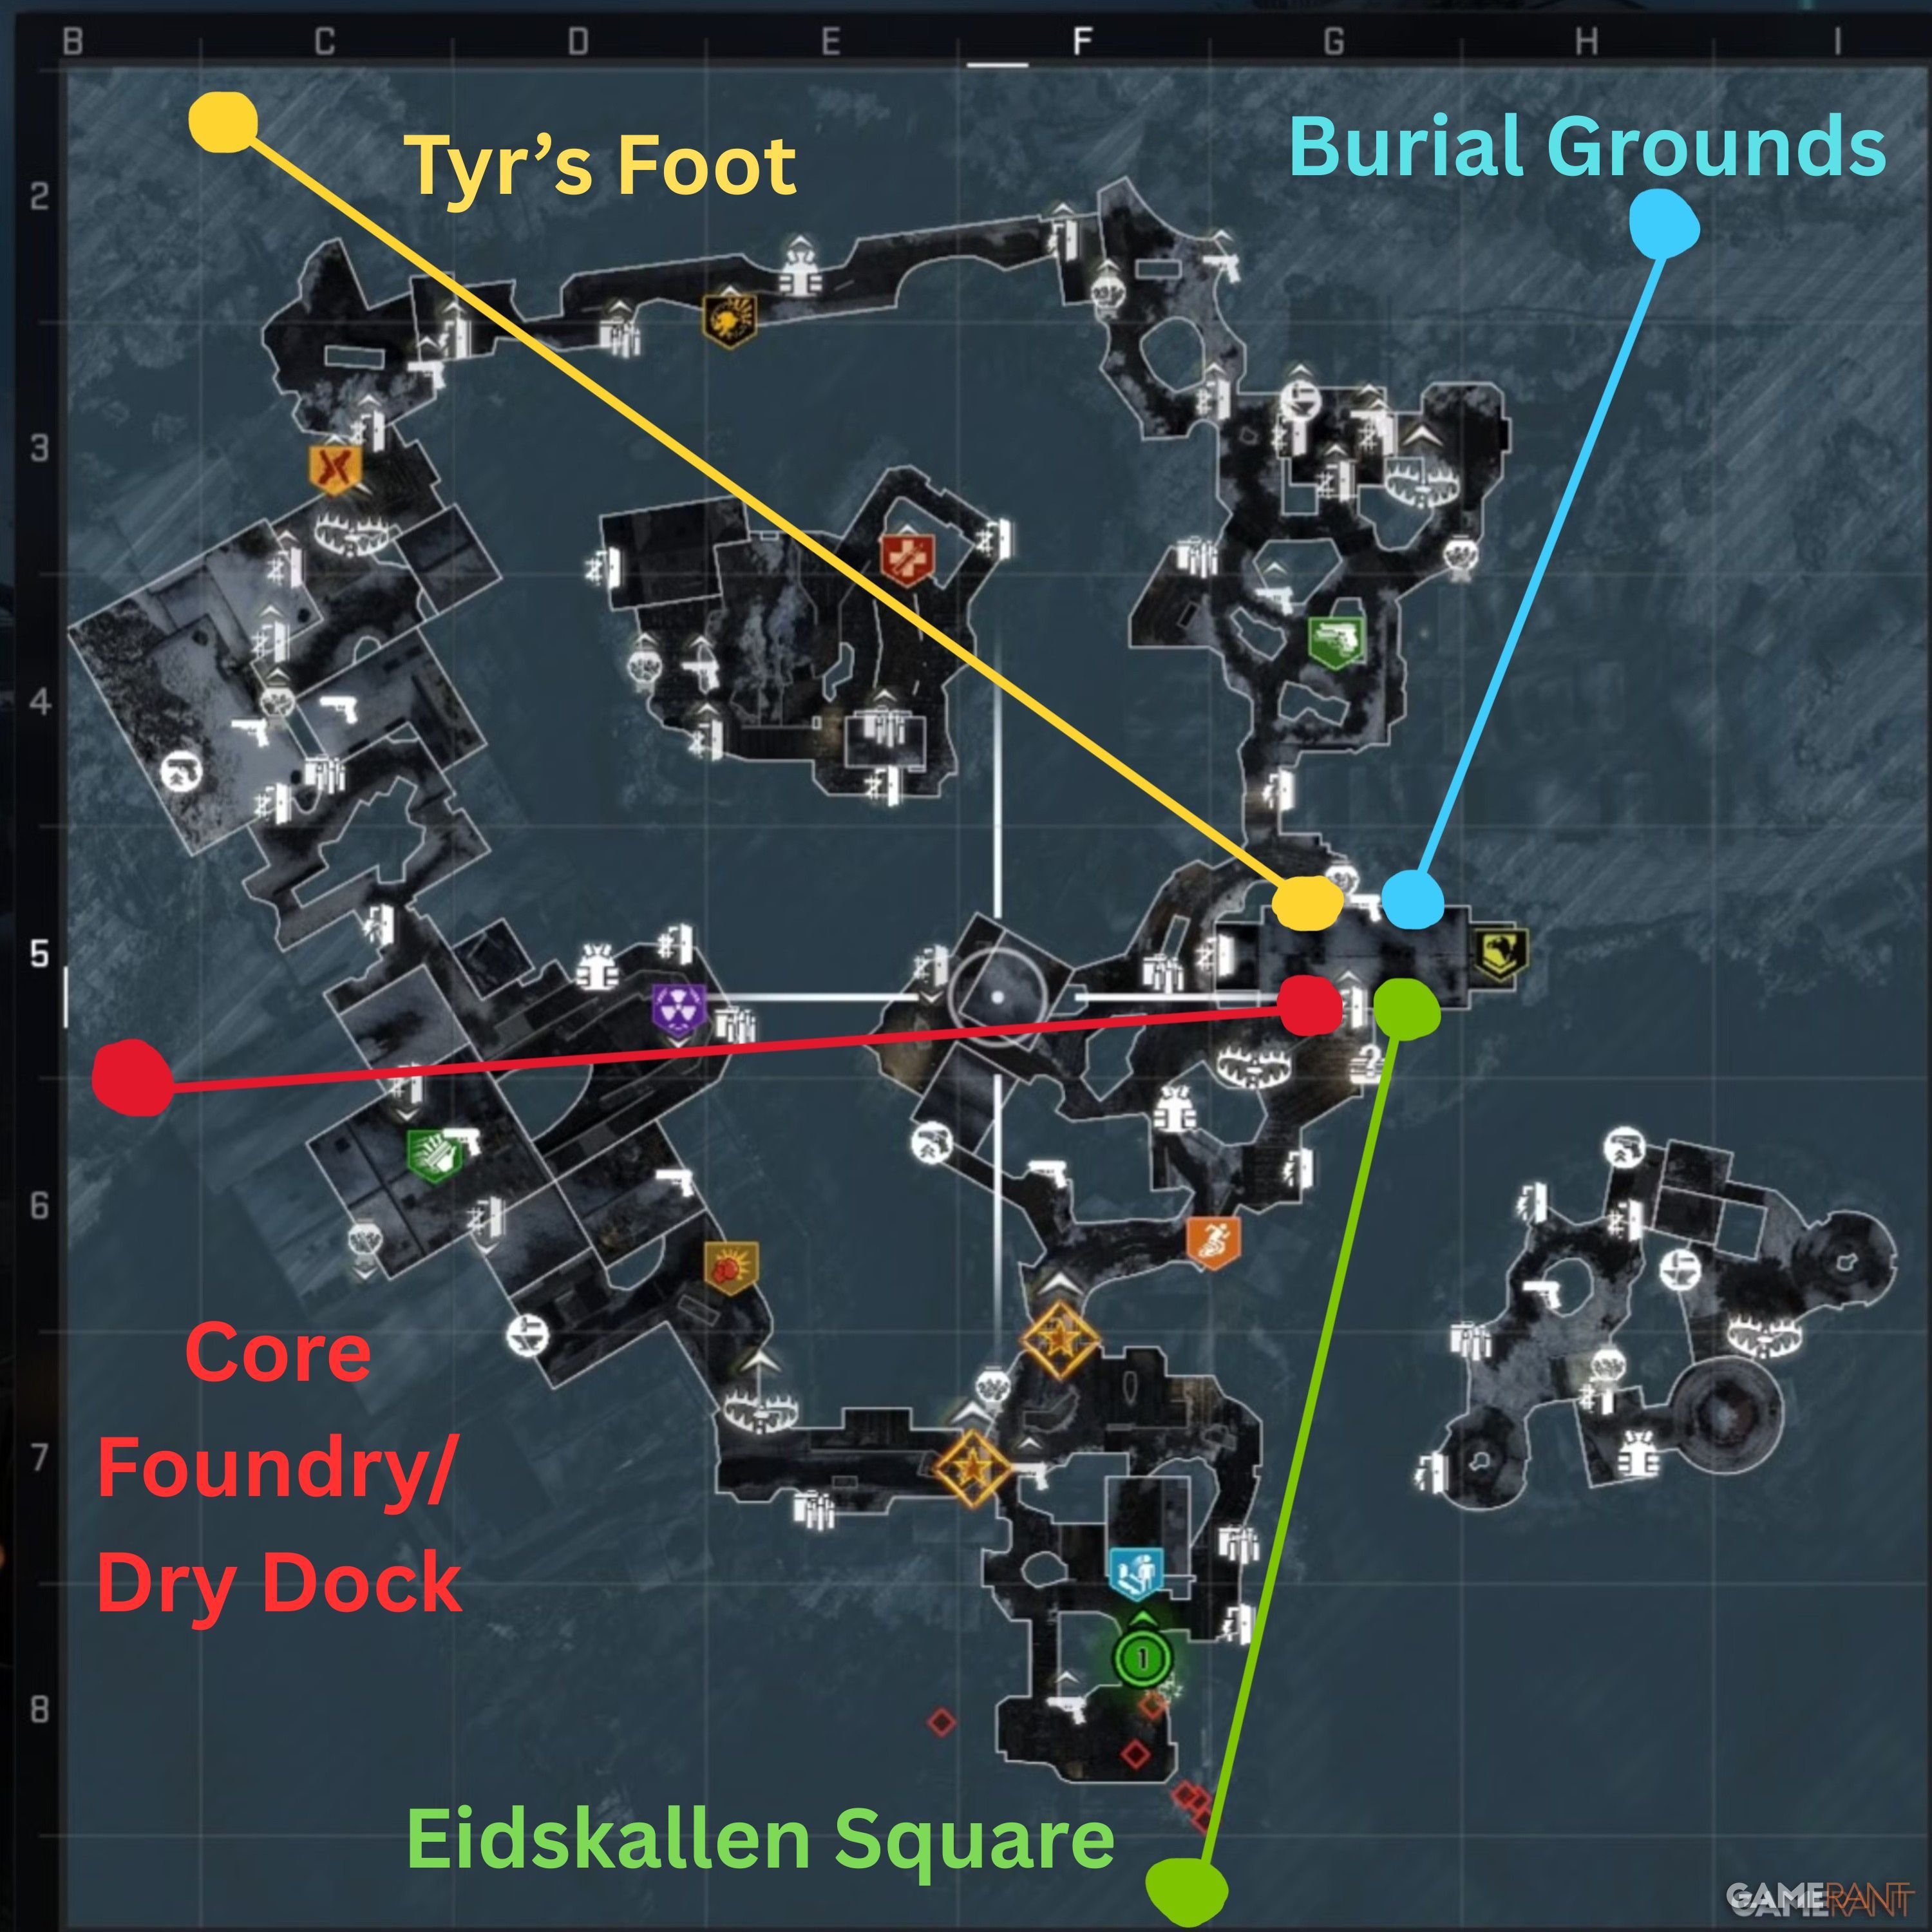
First, you need to find four altars scattered around the map. Each altar will have between one and four deer skulls on top. Your goal is to locate all the altars and list them in order, starting with the one that has only one deer skull and ending with the one that has four.
Eidskallen Landing
When you first spawn in Eidskallen Landing, go away from the Rampage Inducer and towards the barrier with barbed wire. You’ll find the altar far off in the distance, along the southwest shoreline.
Core Foundry/Dry Dock
Go to the Core Foundry and head west until you reach the Dry Dock, right before the entrance to the War Factory. Then, look up at the cliff to the west – you’ll see the altar there.
Tyr’s Foot
Okay, so after you head west from the Core Foundry, you’ll end up in Tyr’s Foot. The altar you’re looking for is way up in the northwest part of the mountain. It’s easy to spot – just turn your back to the Tyr’s Foot teleport spot, and you’ll see it!
Burial Grounds
Starting at Skallen Market, go northeast and look up at the cliff edge overlooking the Burial Grounds – you’ll be able to see the altar from there.
The altars are quite far away, making it hard to see the skulls unless you use a Sniper Rifle. We suggest getting the Shadow SK from Tyr’s Shoulder to help with this.
Now that you’ve organized the altars by the number of deer skulls they have, go to Blodheim Hall to find Vulture Aid. Inside, you’ll see four bear pelts hanging on the south and north walls.
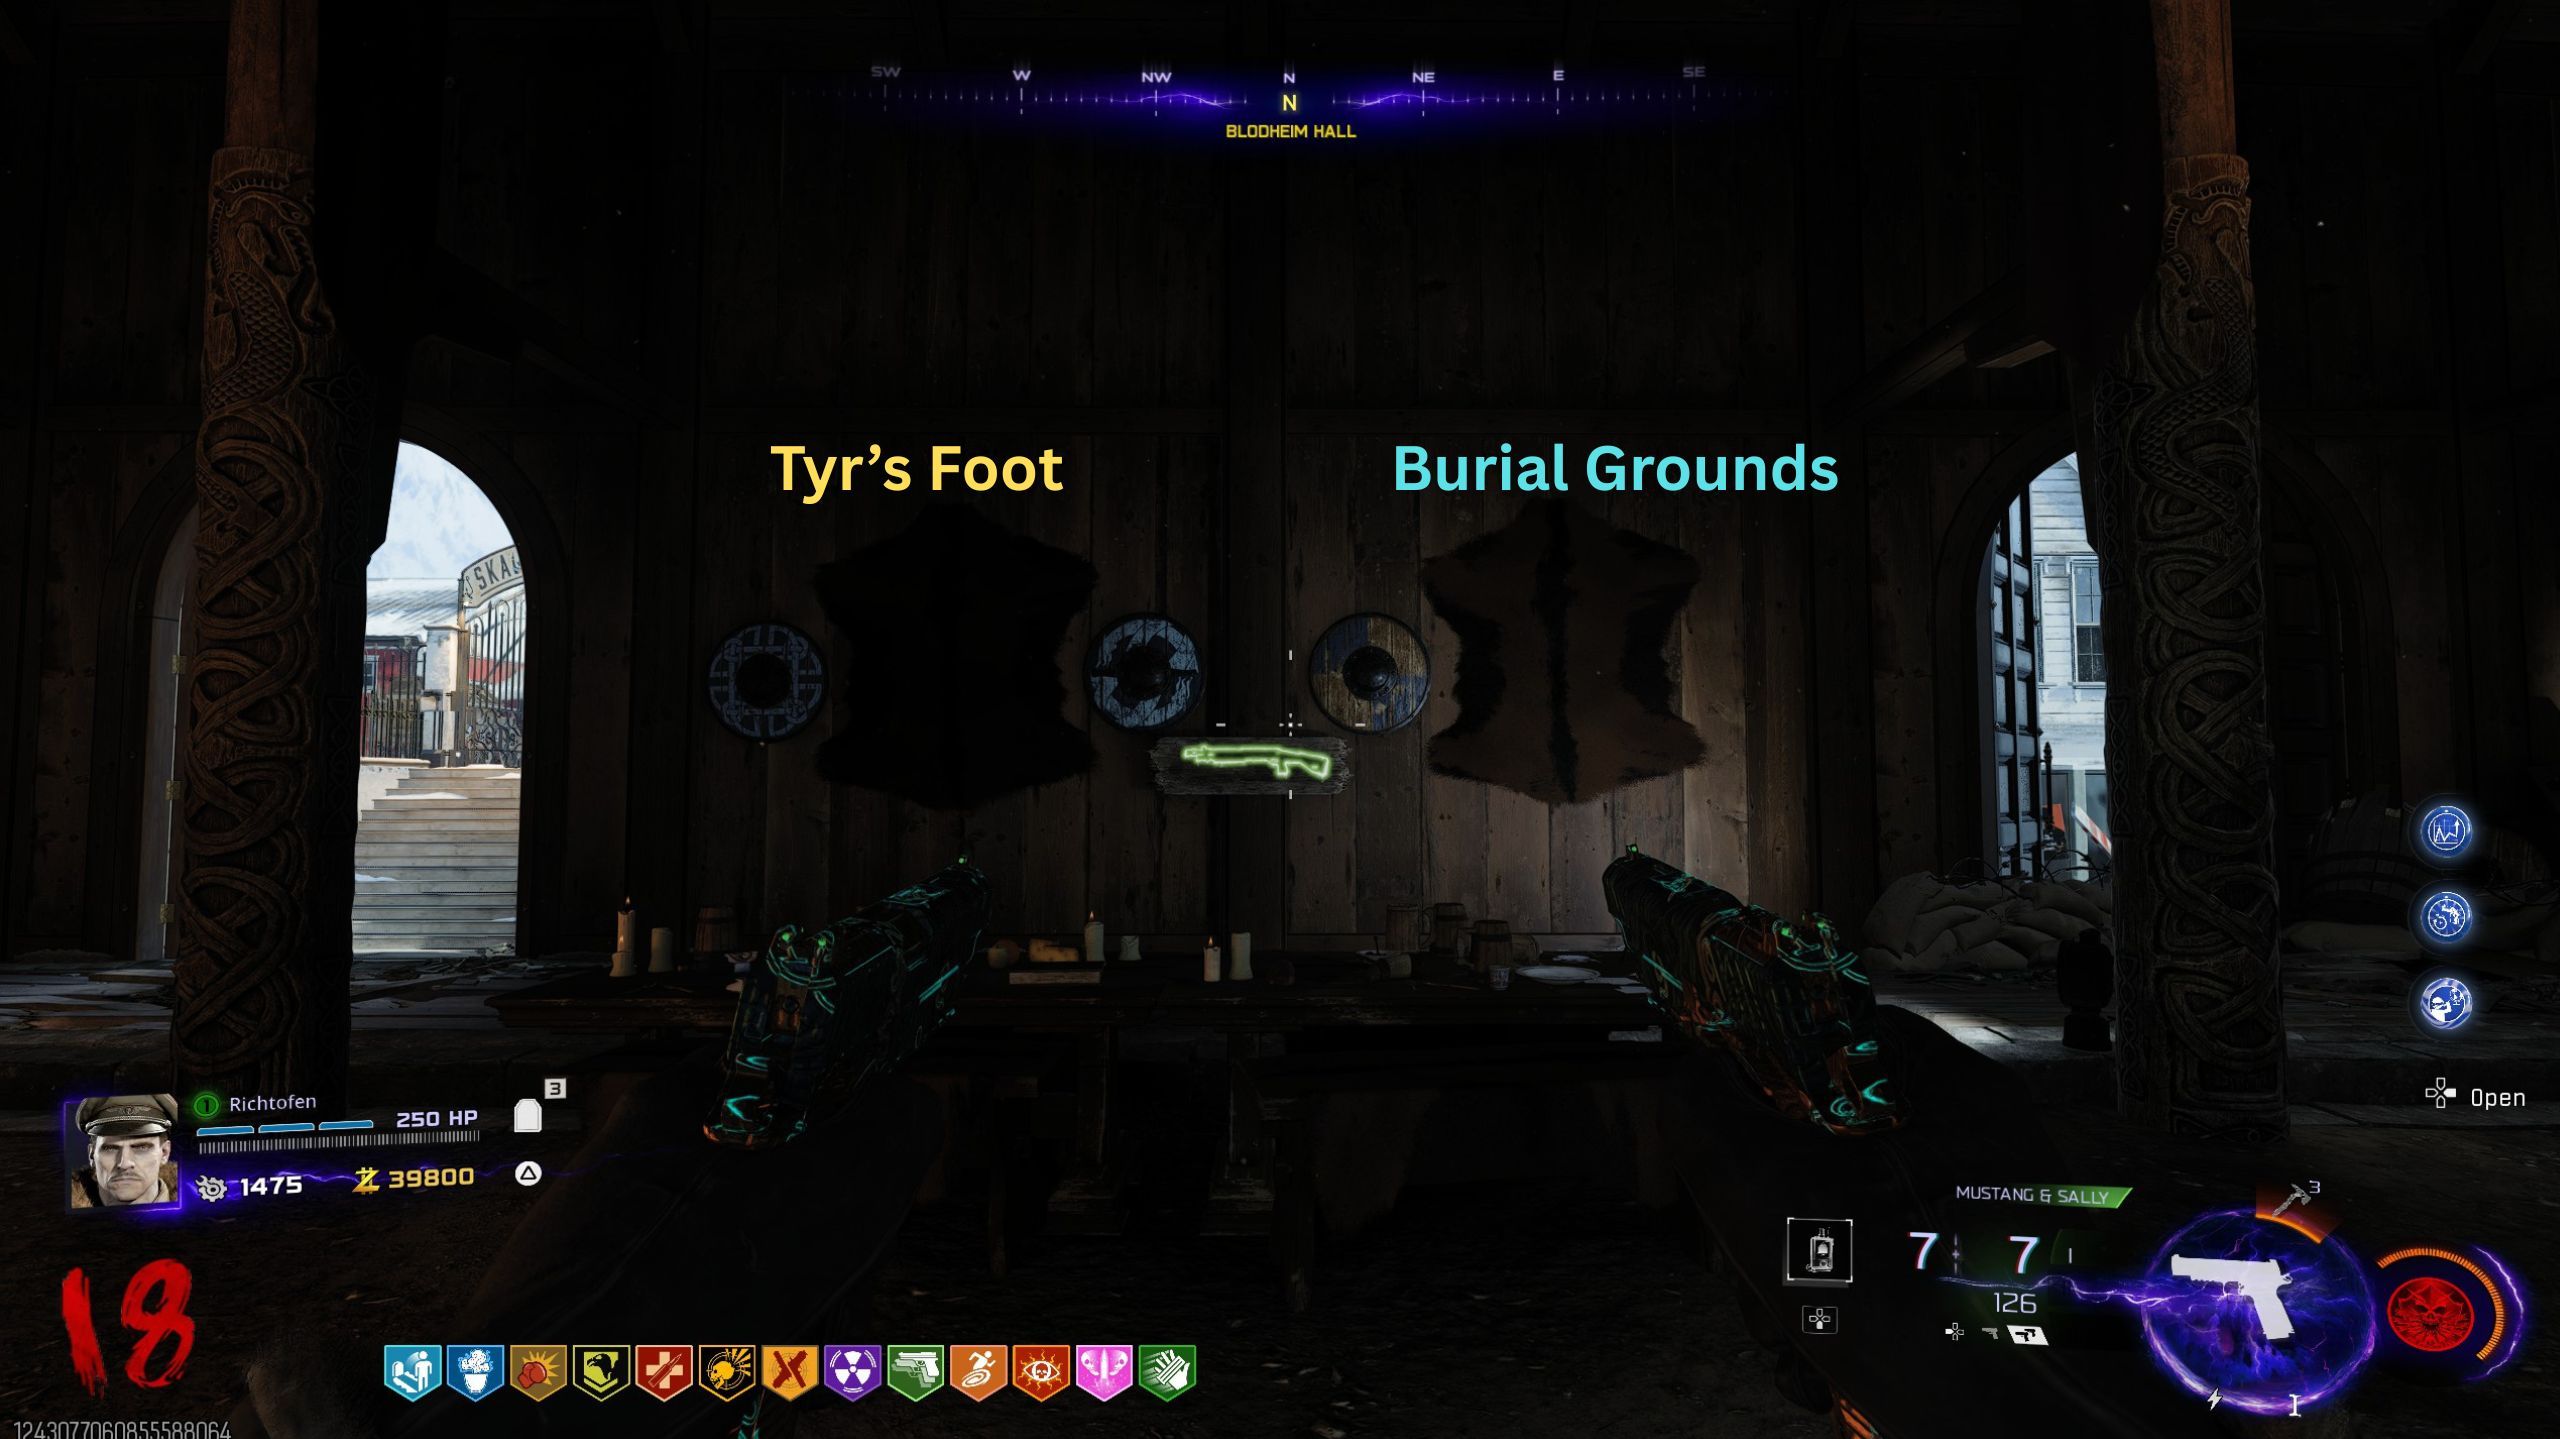

Your task is to hit four bear pelts with a Combat Axe, one after the other. Each pelt marks the spot of an altar – start with the first in your sequence, then move to the second, third, and finally the fourth. The map shows where each pelt is located.
It’s okay to make mistakes with the Combat Axe sequence. If you get the order wrong, you can just start over without needing to move on to the next round.
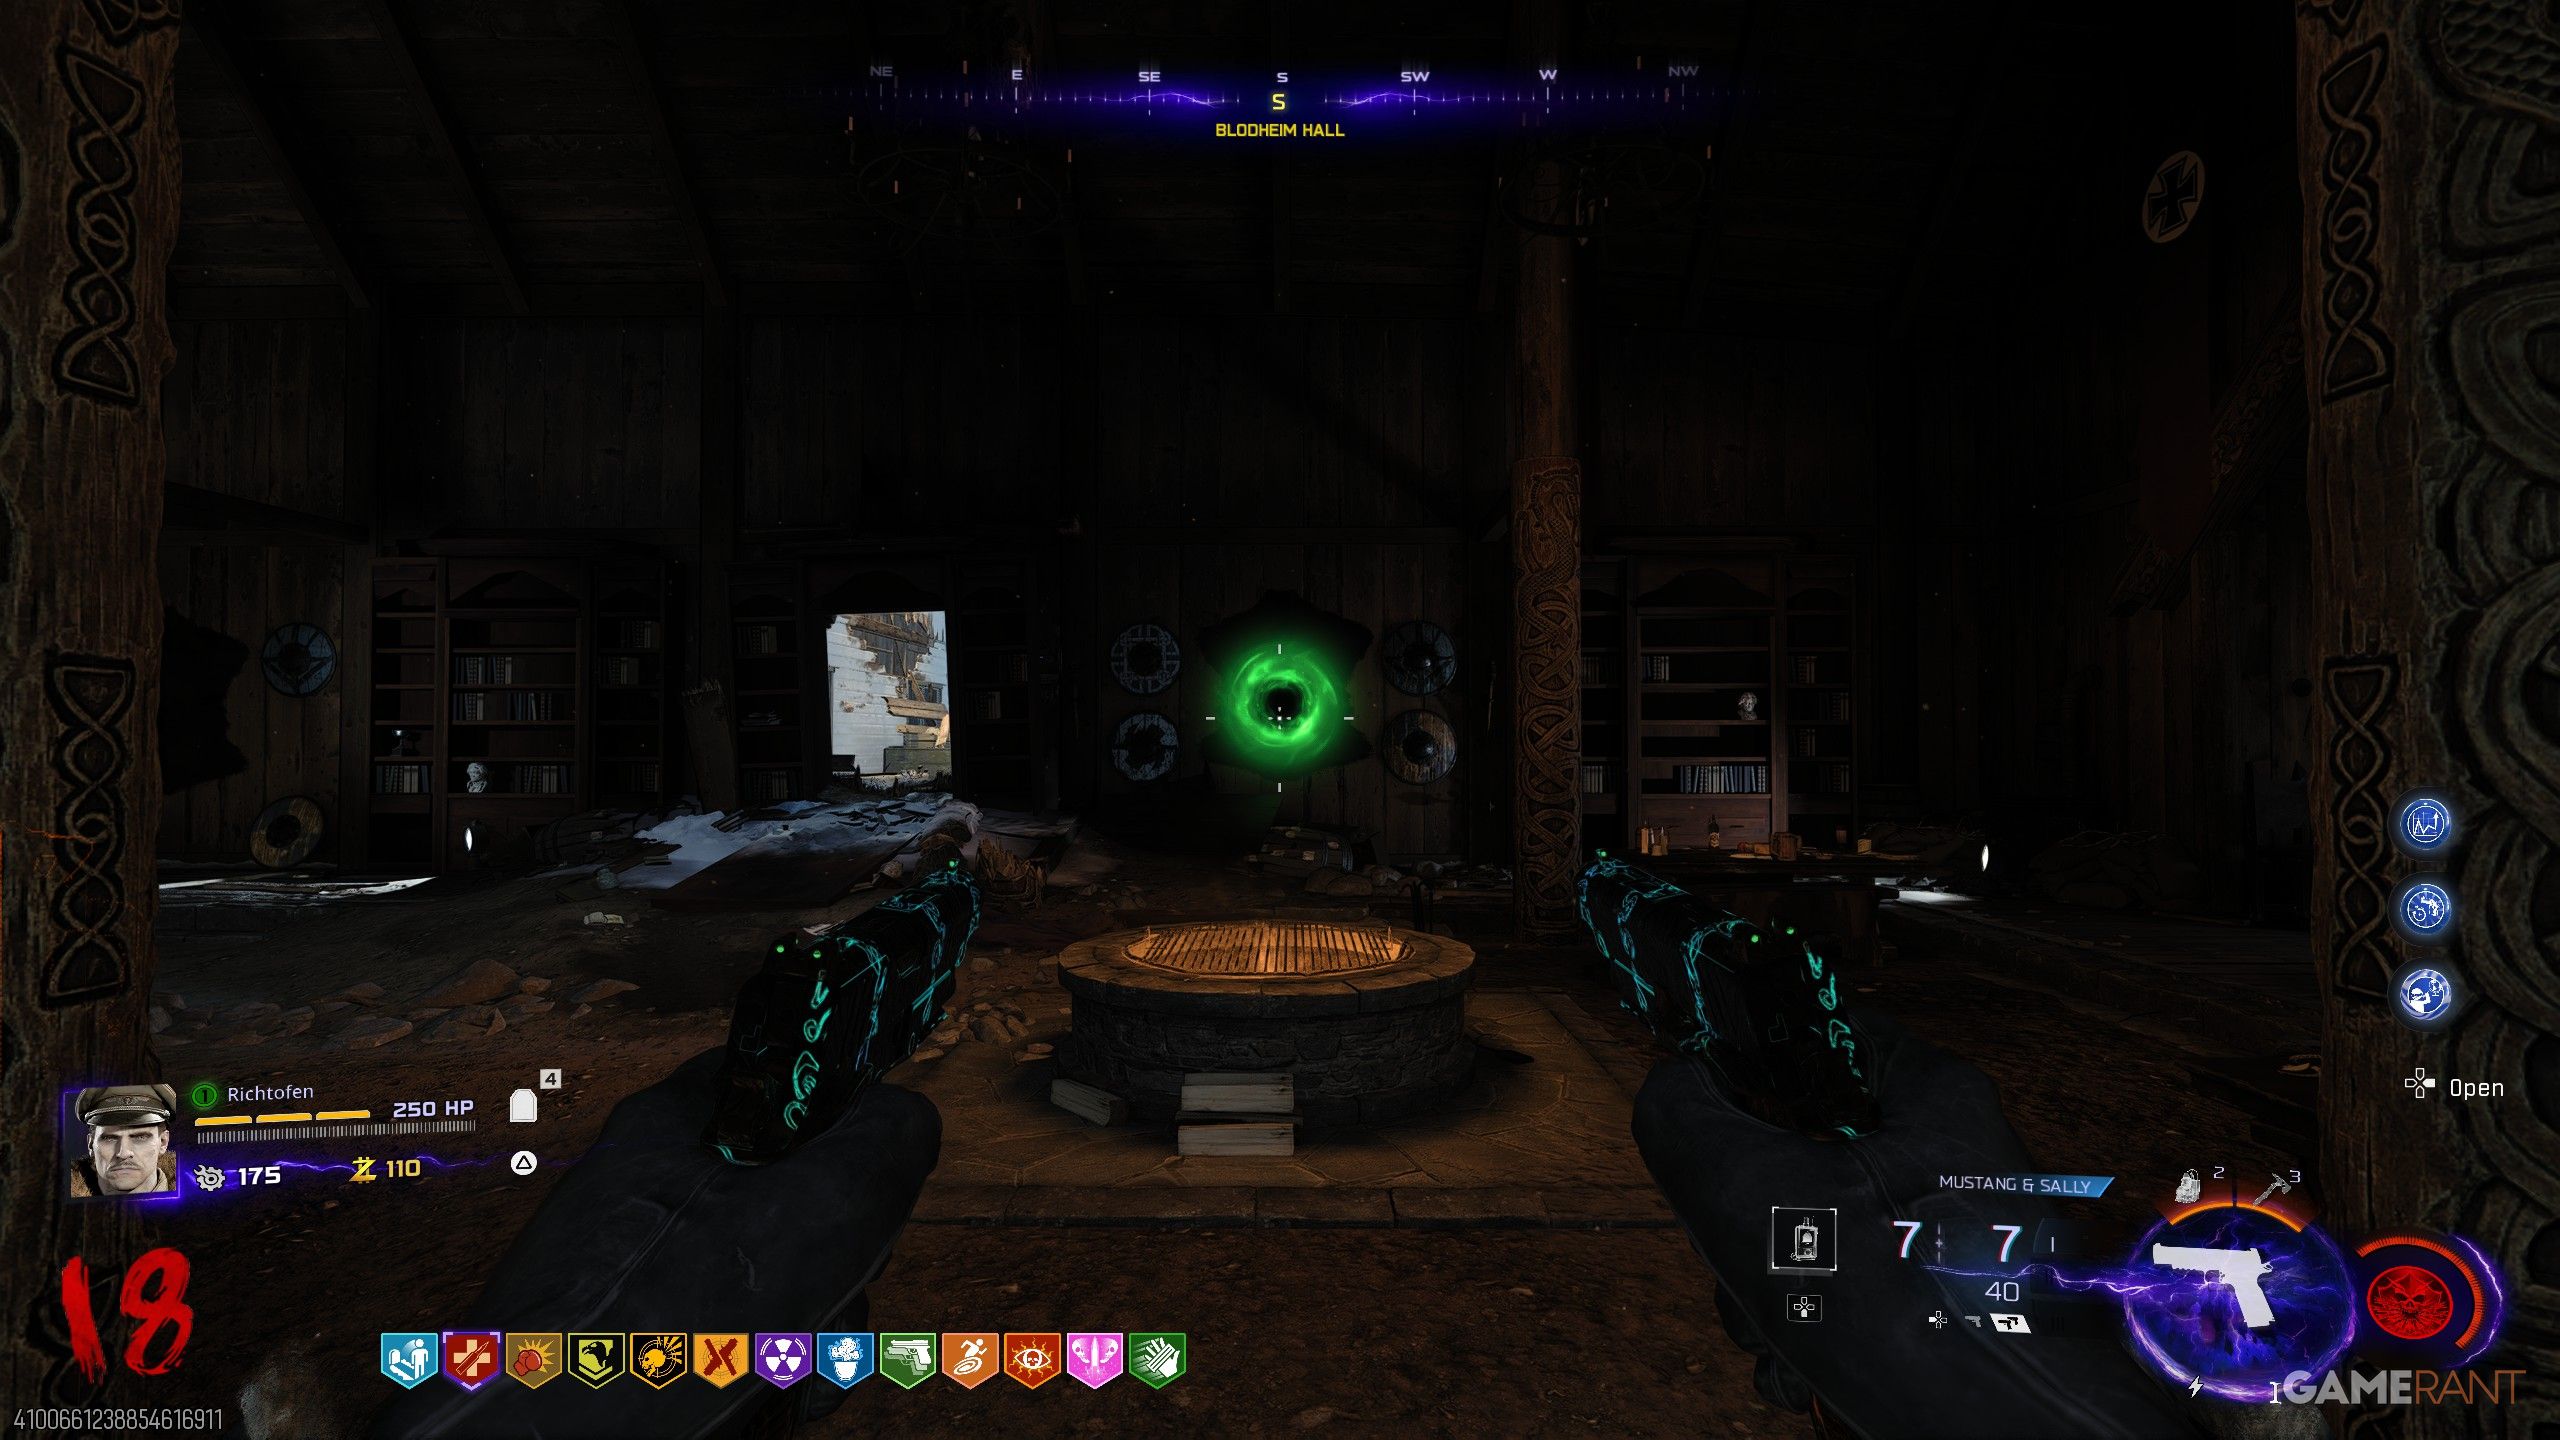
If you successfully hit all four bear pelts with the Combat Axe in the right order, a magical portal will appear instantly on the south wall of Blodheim hall, positioned between the last two pelts.
In the Power Switch trial, you can only defeat zombies using traps. Because you can’t earn any points during the trial, make sure you have more than 10,000 Essence before you start. Good news: there are no High Value Targets to deal with!
How to Complete the Power Switch Trial in Totenreich
The Power Switch challenge is likely the simplest one so far. You’ll face only three waves of zombies, including Acid and Frost types. To complete it, you need to eliminate these zombies using the Flammenfalle Trap. This trap can be found throughout the map and costs 1,000 Essence each time you use it.
During this test, we used the zipline to get to Beacon Island, which has a Flammenfalle Trap. We gathered a group of zombies and turned on the trap, then positioned ourselves in the back left corner. After the trap stops working, just wait a minute and gather the zombies again before activating it once more.
Since weapons don’t hurt zombies, it’s smart to bring Aether Shroud or Disciple Injection to help you escape if you get surrounded. However, these waves are pretty small and don’t include any tough enemies, so it shouldn’t be too difficult.
Is the Power Switch Relic Worth Using?
If you’re aiming for Tier 3 in Cursed without using any Wicked Relics, the Power Switch Relic can be really helpful.
The Power Switch Relic shuffles your Lethal and Tactical equipment at the start of each Round. If you need to, you can use the Crafting Table to get the gear you want instead.
Honestly, I’m not a big gear person, so the random equipment didn’t really affect my game much. What I did love was that it basically gave me an extra Relic slot! It meant I could avoid using some of the tougher Relics just to reach Tier 3, which was awesome.
Cursed Mode has tons of Relics to find, and we’ve created guides to help you collect them all!
- All Ashes of the Damned Relics
- All Astra Malorum Relics
- All Paradox Junction Relics
- All Totenreich Relics
Read More
- Change Your Perspective Anomaly Commission Guide In NTE (Neverness to Everness)
- How to Get the Wunderbarrage in Totenreich (BO7 Zombies)
- All Nameless Hospital Endings Full Guide In NTE
- How to Beat Turbines in ARC Raiders
- NTE Drift Guide (& Best Car Mods for Drifting)
- Beware! Phishing Emails Are Deceiving Robinhood Users in a Sneaky Plot!
- Robinhood’s $75M OpenAI Bet: Retail Access or Legal Minefield?
- NTE Banners (Current, Next, And Upcoming Banners)
- NTE Fan Shows Off Mint Cosplay
- All the Free Games You Can Claim in May 2026
2026-05-09 22:05