Okay, so I’m putting together a guide to help you finish the last mission in Mouse: P.I. for Hire – the ‘Big Mouse Little Hope’ one. I’ll walk you through everything, including how to beat Soyer and find all the collectibles. You’ll be going back to Der Harzerburg, which you saw at the very beginning of the game, but this time there’s a lot more to do. If you’re stuck at any point, I’ll cover every step to get you moving again.
Once you finish the “Fair Enough” mission, you should have collected 36 Newspapers, 41 Baseball Cards, and 28 Comic Books. If you don’t have these amounts, it’s best to load an earlier save file to ensure you don’t miss out on achieving 100% game completion.
Make sure you find all the collectibles during the final mission of Big Mouse Little Hope, because you won’t be able to get them later if you miss any.
How to Complete Big Mouse Little Hope Final Mission in Mouse: P.I. for Hire
Key Objectives
- Chase after Soyer.
- Survive the BMP onslaught.
- Defeat Soyer.
Best Route to Get All Collectibles in Big Mouse Little Hope Final Mission
If you want to find everything in one playthrough, completely search each area before moving on. Parts of the final mission in Big Mouse Little Hope become inaccessible as you progress, particularly after going through doors that shut behind you.
In particular:
- Grab the first Comic Book before you jump off the big ledge early in the level.
- Collect the first Newspaper and Schematic in the room with the vault door before you enter the casino.
- Pick up the final Newspaper and two Schematics before you approach the locked door you must tailpick.
If you follow these steps, you’ll ensure you collect everything without having to reload a saved game or replay the level to achieve full completion.
If you’re looking for step-by-step instructions, jump to the full walkthrough below.
Core Rule for Big Mouse Little Hope Final Mission Collectibles
The final mission in Big Mouse Little Hope forces you to move forward without being able to go back, so make sure you find everything important before reaching each checkpoint.
Before going through a door or starting a new challenge, always assume the area you’re leaving will soon be sealed off. Make sure you’ve finished everything in the current area before proceeding. If you skip even one step, you’ll have to reload an earlier save to achieve 100% completion.
All Big Mouse Little Hope Final Mission Collectibles
The final mission in Big Mouse Little Hope features six collectible items, such as comic books, newspapers, and schematics. Here’s a complete list detailing where to find them all.
| Collectible | Location |
|---|---|
| Comic Book #1 | In front of a Warp Pipe. After climbing the ladder early in the level, shoot the target to the right and complete the parkour section. |
| Newspaper #1 | Under a crate in the room with the vault door before the casino. |
| Schematic #1 | Inside the customer service booth in the room with the vault door before the casino. |
| Newspaper #2 | In an alcove on the stairwell after the crate-filled corridor. |
| Schematic #2 | Up a ladder in the stairwell after Soyer goes down in the elevator. |
| Schematic #3 | In a safe before a door you must tailpick. |
Big Mouse Little Hope Final Mission Walkthrough (All Der Harzerburg Collectibles)
It’s simple to overlook collectibles when rushing to follow the on-screen objectives. Here’s how to finish the final mission in Big Mouse Little Hope without missing anything. If you need help finding items in other missions, check out our complete collectibles guide for Mouse P.I. for Hire.
Go After Soyer
Go down the stairs and get into the elevator. Press the button to call it, then follow the detective’s instructions through a door and up a ladder.
Be careful not to fall off the edge of the walkway. Falling means you’ll miss a comic book and have to reload a previous save to get it.
Comic Book
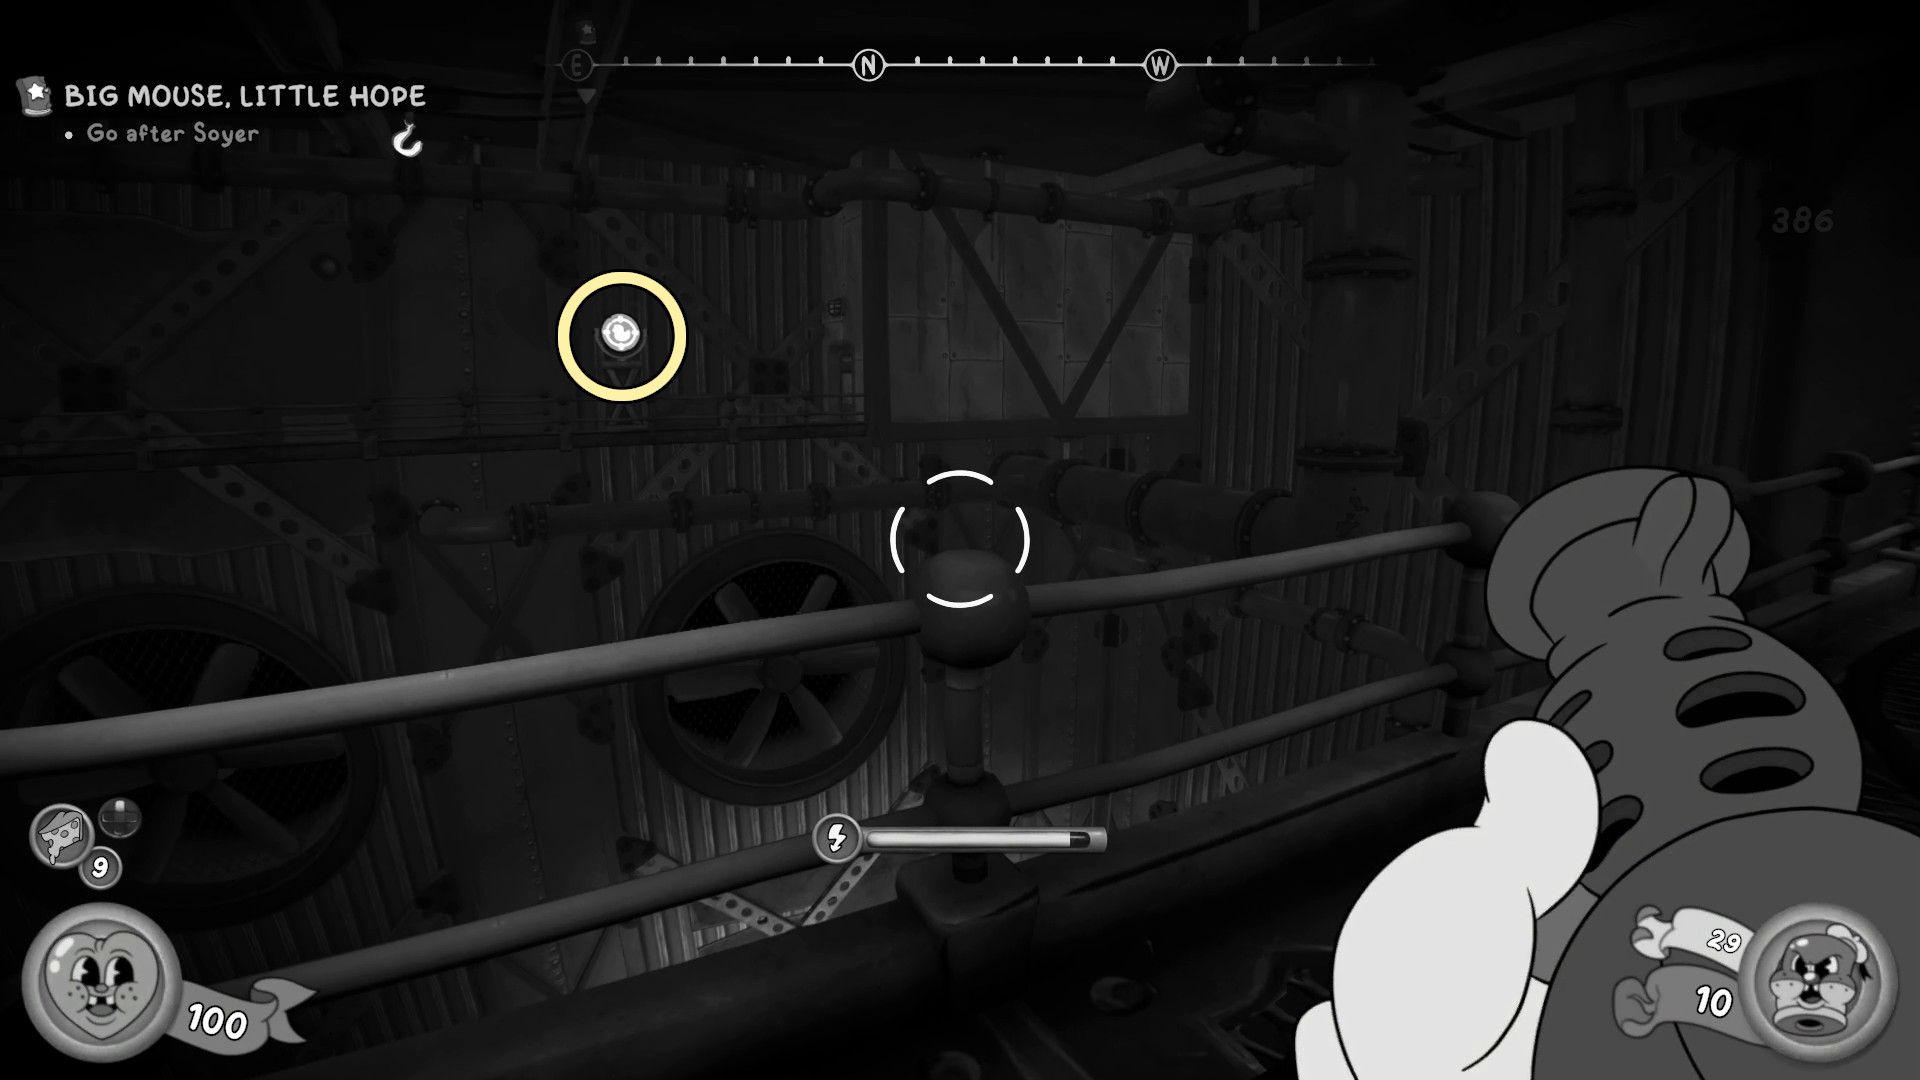
Don’t go to the edge—instead, look over the railing on your right. Shoot the target on the opposite side of the room; this will lower two points on the Grapple Tail system, allowing you to swing to the other side.
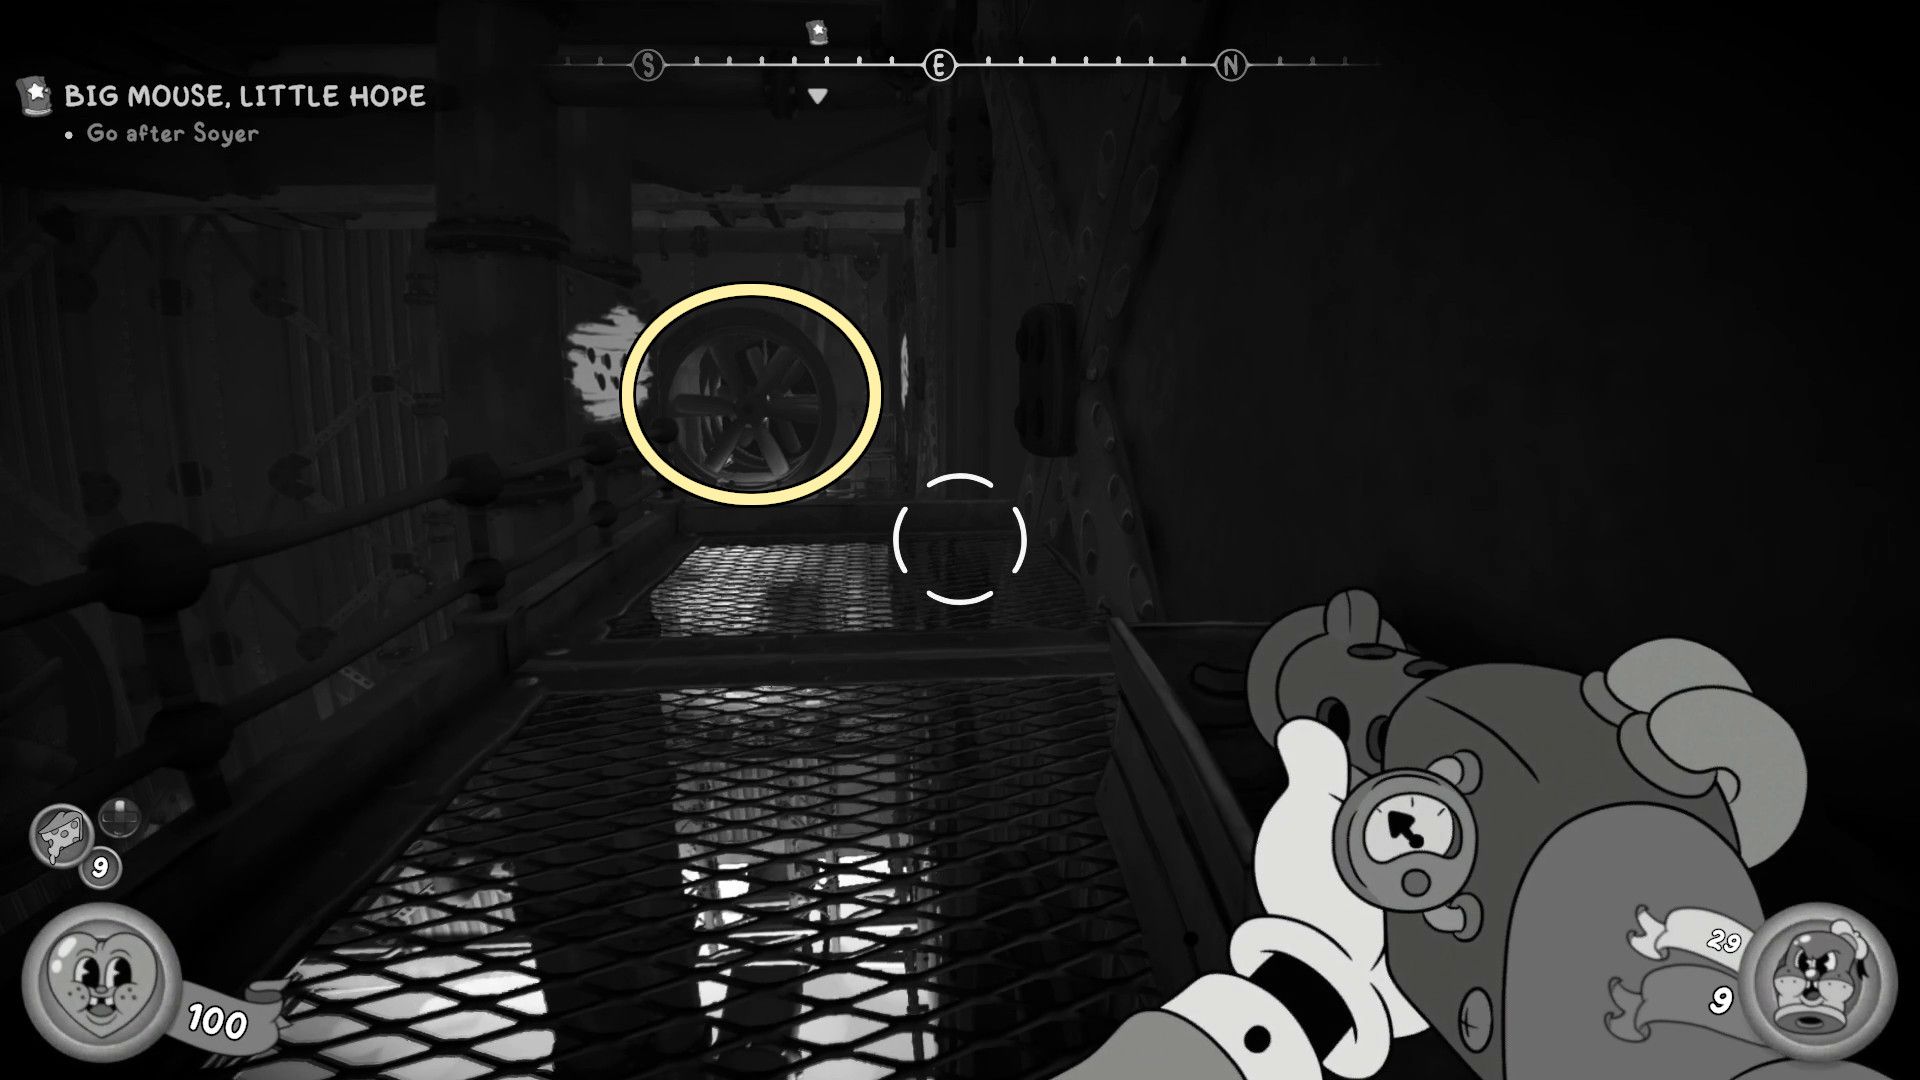
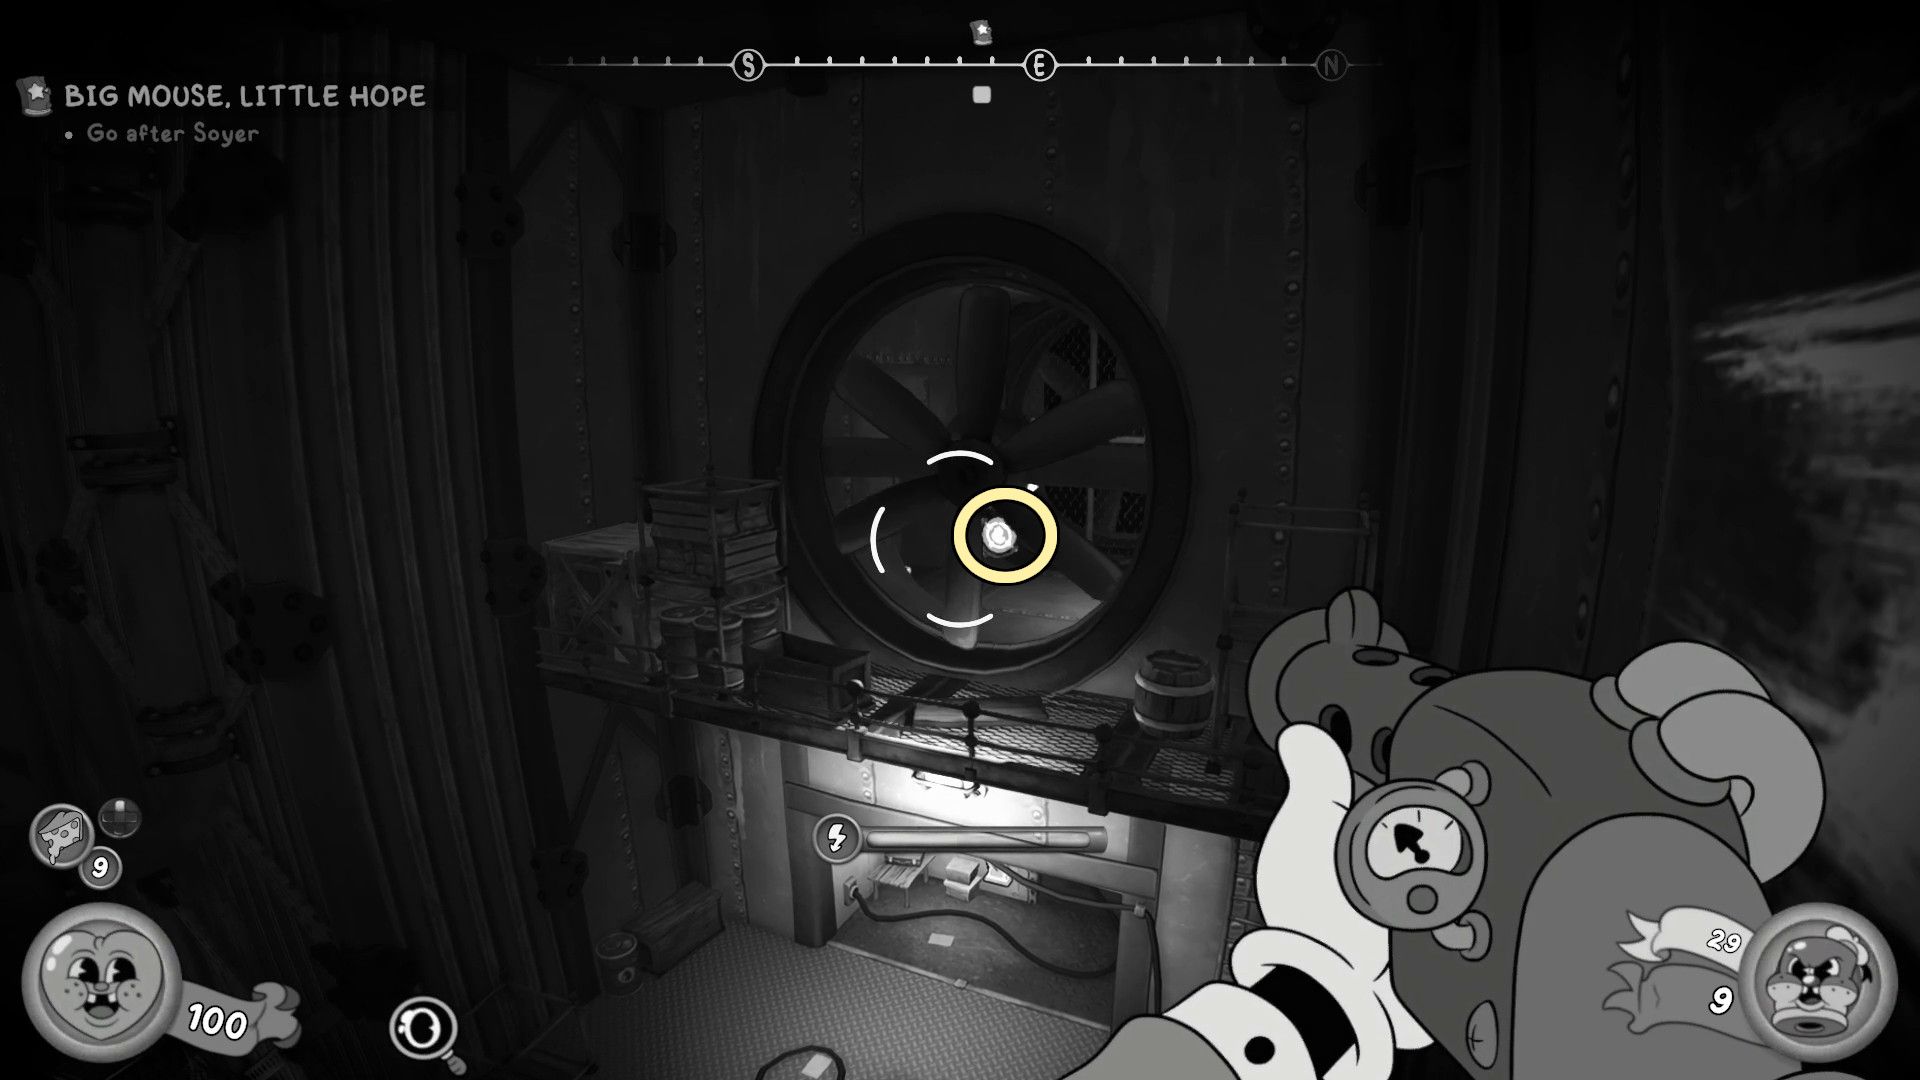
Use the wall jumps to get to the big fan, then shoot the target hidden behind it to make the fan stop. Go behind the fan and look in front of the Warp Pipe for a Comic Book. This is the last Comic Book in the game, so don’t miss it! Collecting it will unlock the “The Prequel” achievement.
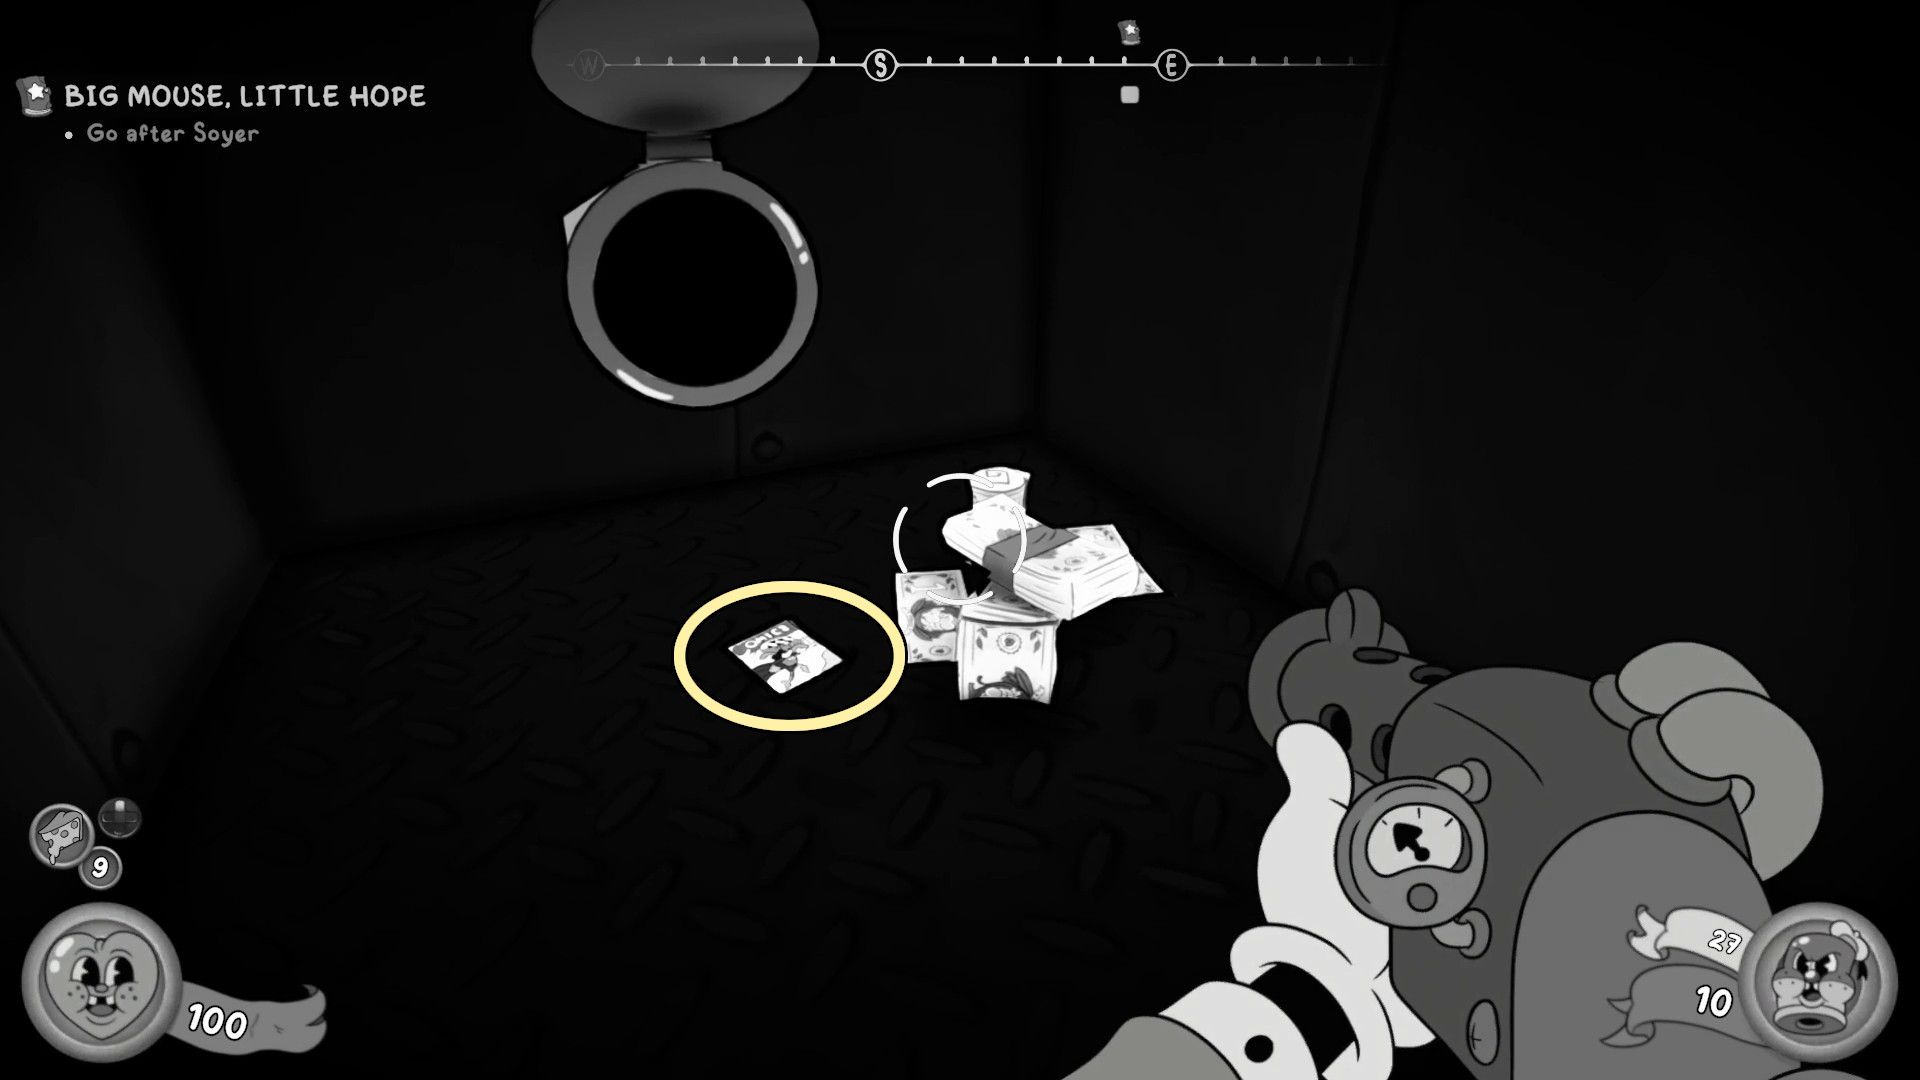
Okay, so once you get that achievement, head through the Warp Pipe and take the lift up. You’ll end up in a room with a typewriter, and there’s a safe there too. Don’t bother trying to open it though – it’s just filled with cash, nothing special!
Once you’ve saved your progress, go to the next room. There, you’ll see a locked vault door. To open it, like you did in the beginning of the game, find the customer service booth in the middle of the room and flip the switch inside.
Hold off on going through the vault door for now. It’ll seal shut once you pass through, and there are a few items to collect in this room first. If you’ve already gone through the door, you’ll have to restart from a previous save.
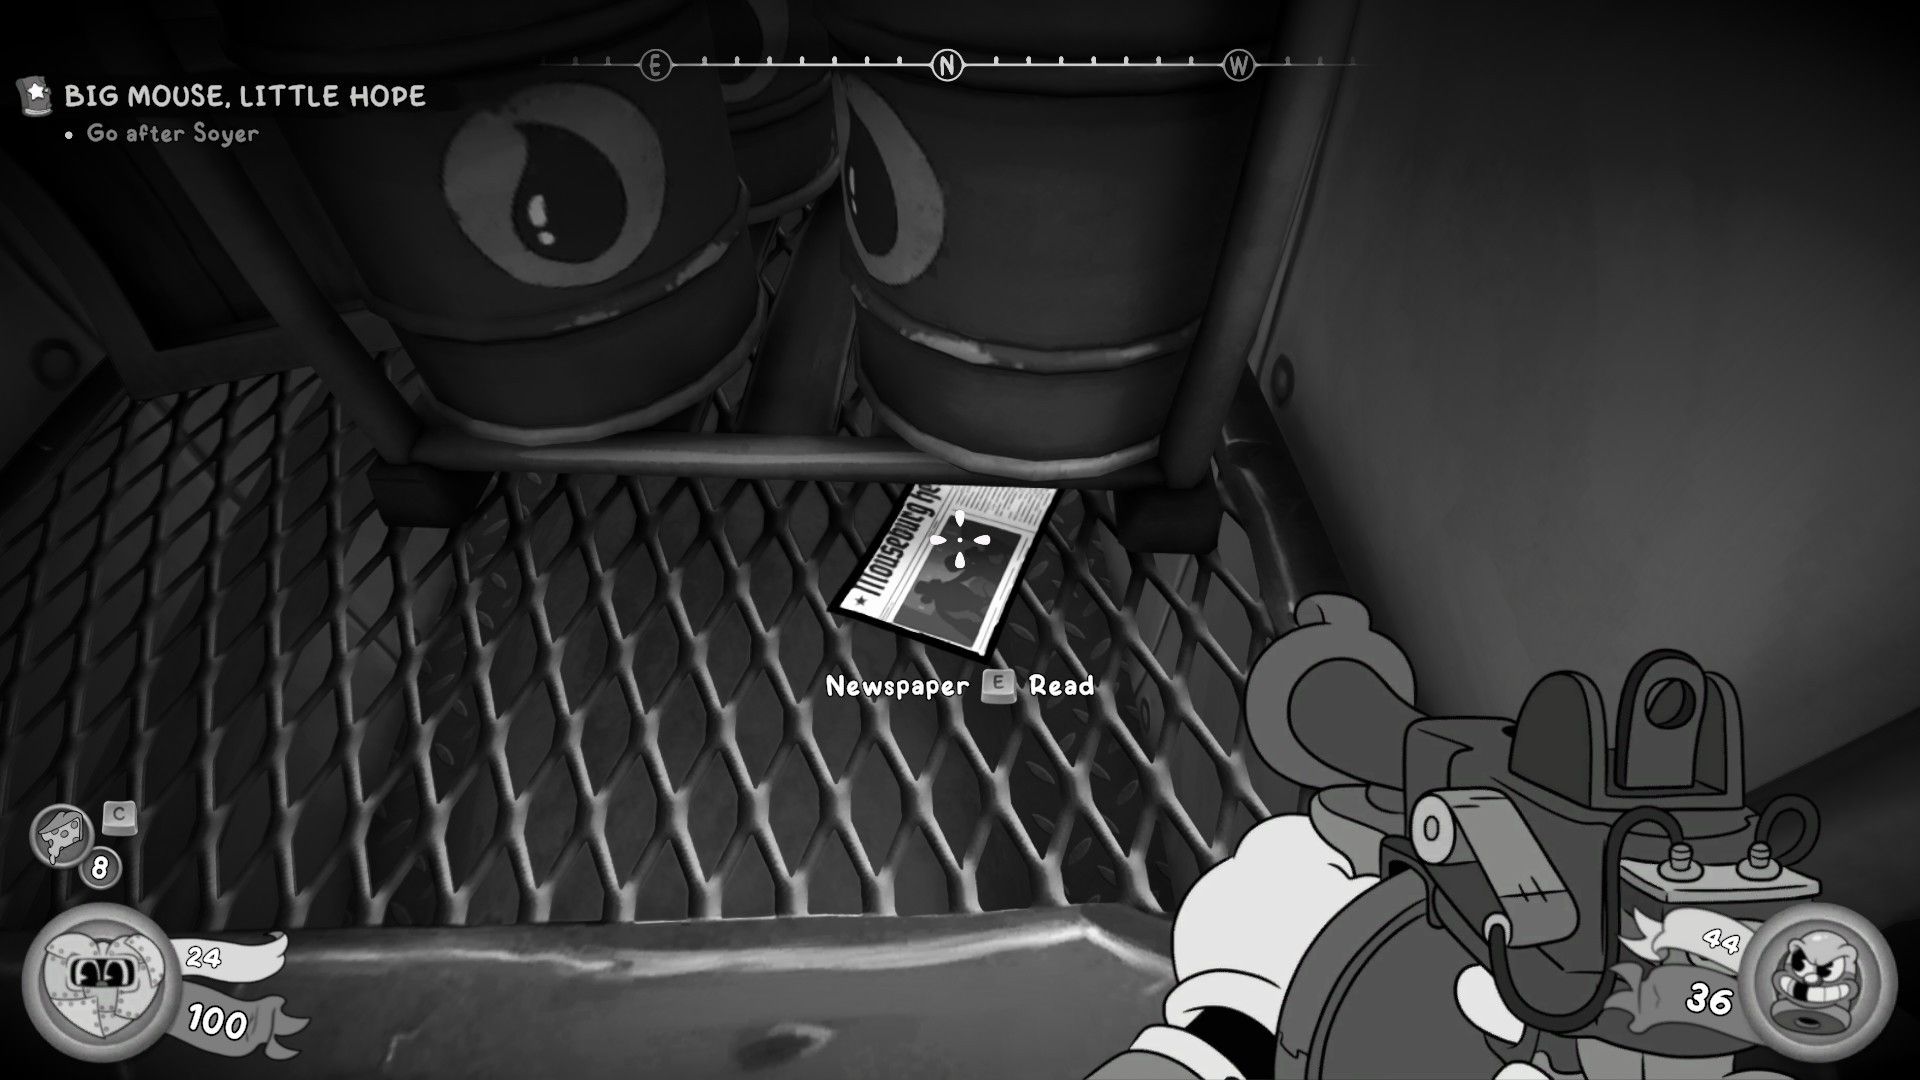
Newspaper
There’s a single crate on the west side of the room. Break it to reveal a Newspaper.
Schematic
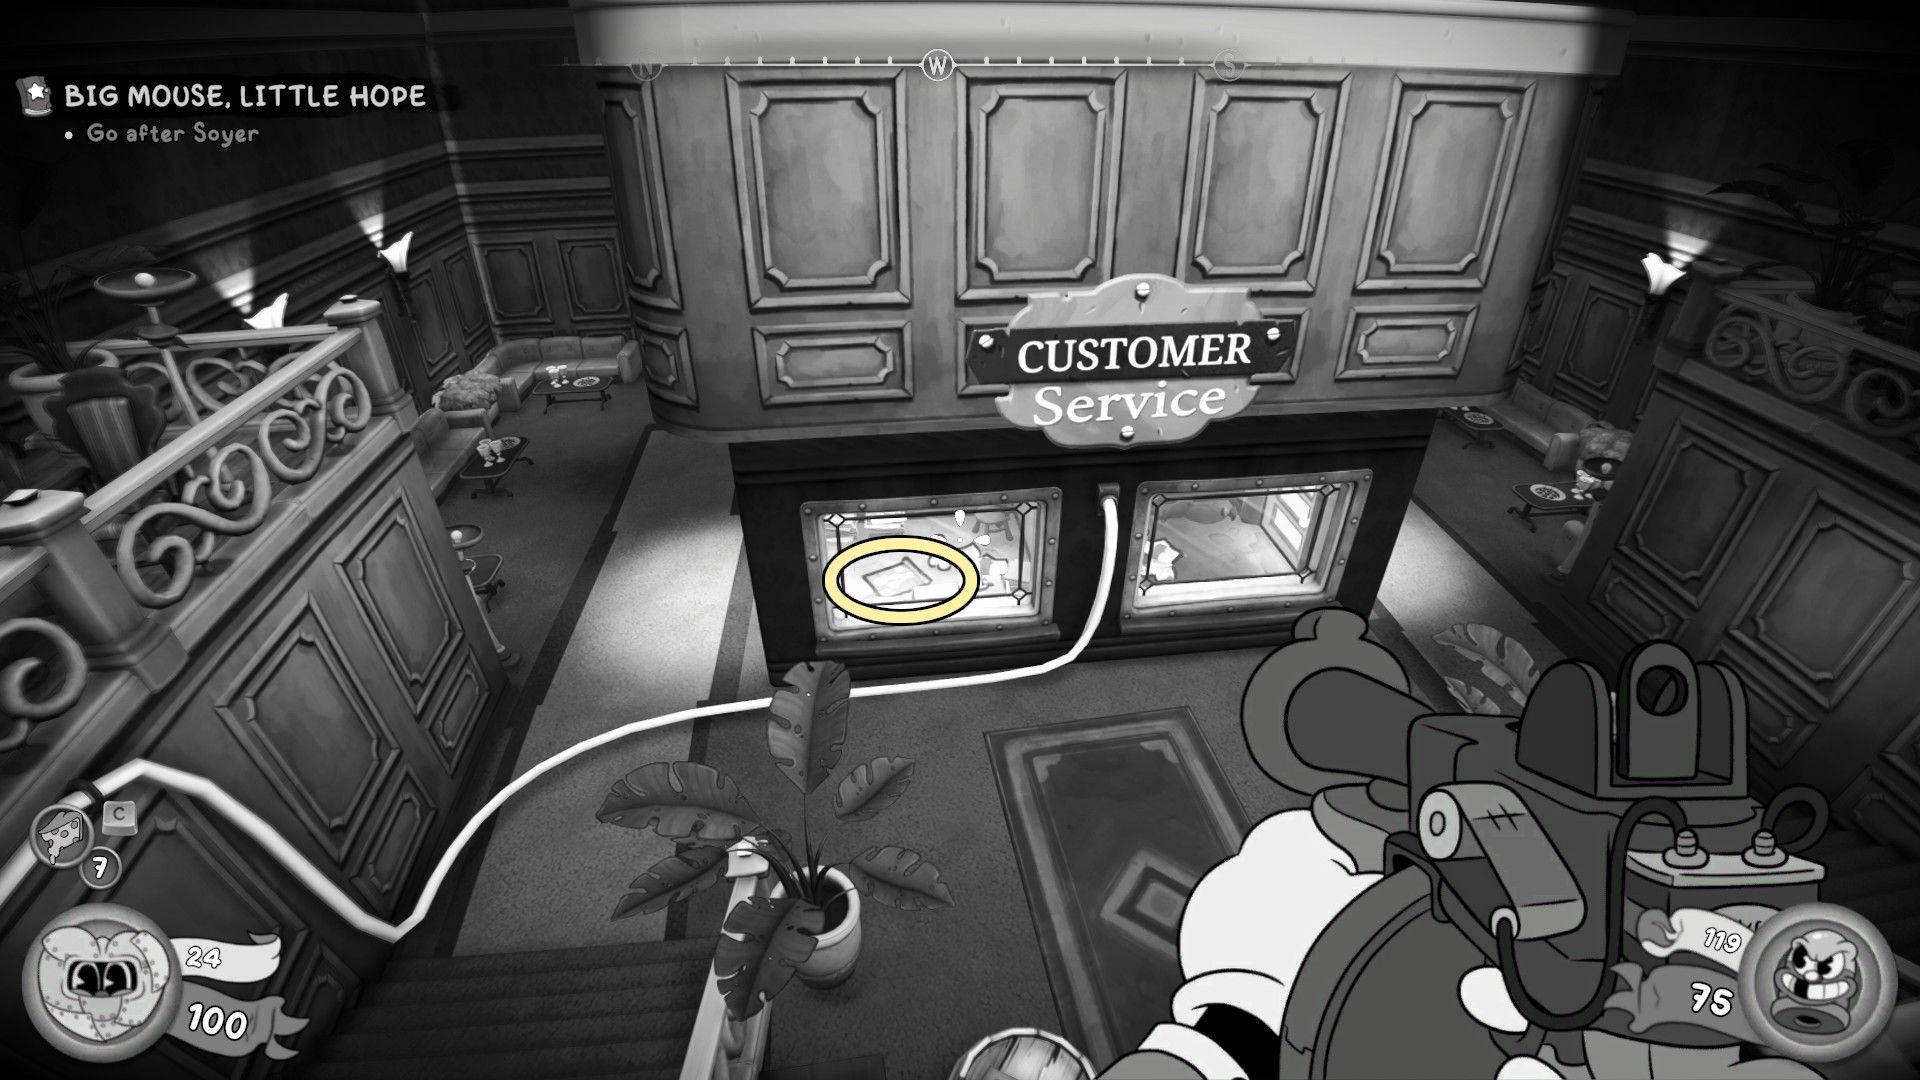
You’ll find a schematic inside the customer service booth, in the area that doesn’t have a switch. You’ll need to break the glass window to get to it.
After collecting both items in the room and unlocking the vault, you’ll enter the casino. Be aware that the door will shut behind you, preventing you from returning to earlier sections.
Newspaper
Okay, so after you clear out all the bad guys in the casino, you need to follow the Detective’s Brush – it’ll lead you down a hallway packed with crates. When you get to the end, there’s a short set of stairs. As soon as you’re at the top, quickly look to your right – you’ll see the last newspaper collectible on the floor. Make sure you grab it now, because you won’t be able to come back for it later! Picking it up will also unlock the ‘Extra Extra’ achievement, which is awesome.
Schematic
Continue along the main path until you spot Soyer near an elevator. Then, go down the stairs and climb the ladder you find in the stairwell to get a Schematic.
Schematic
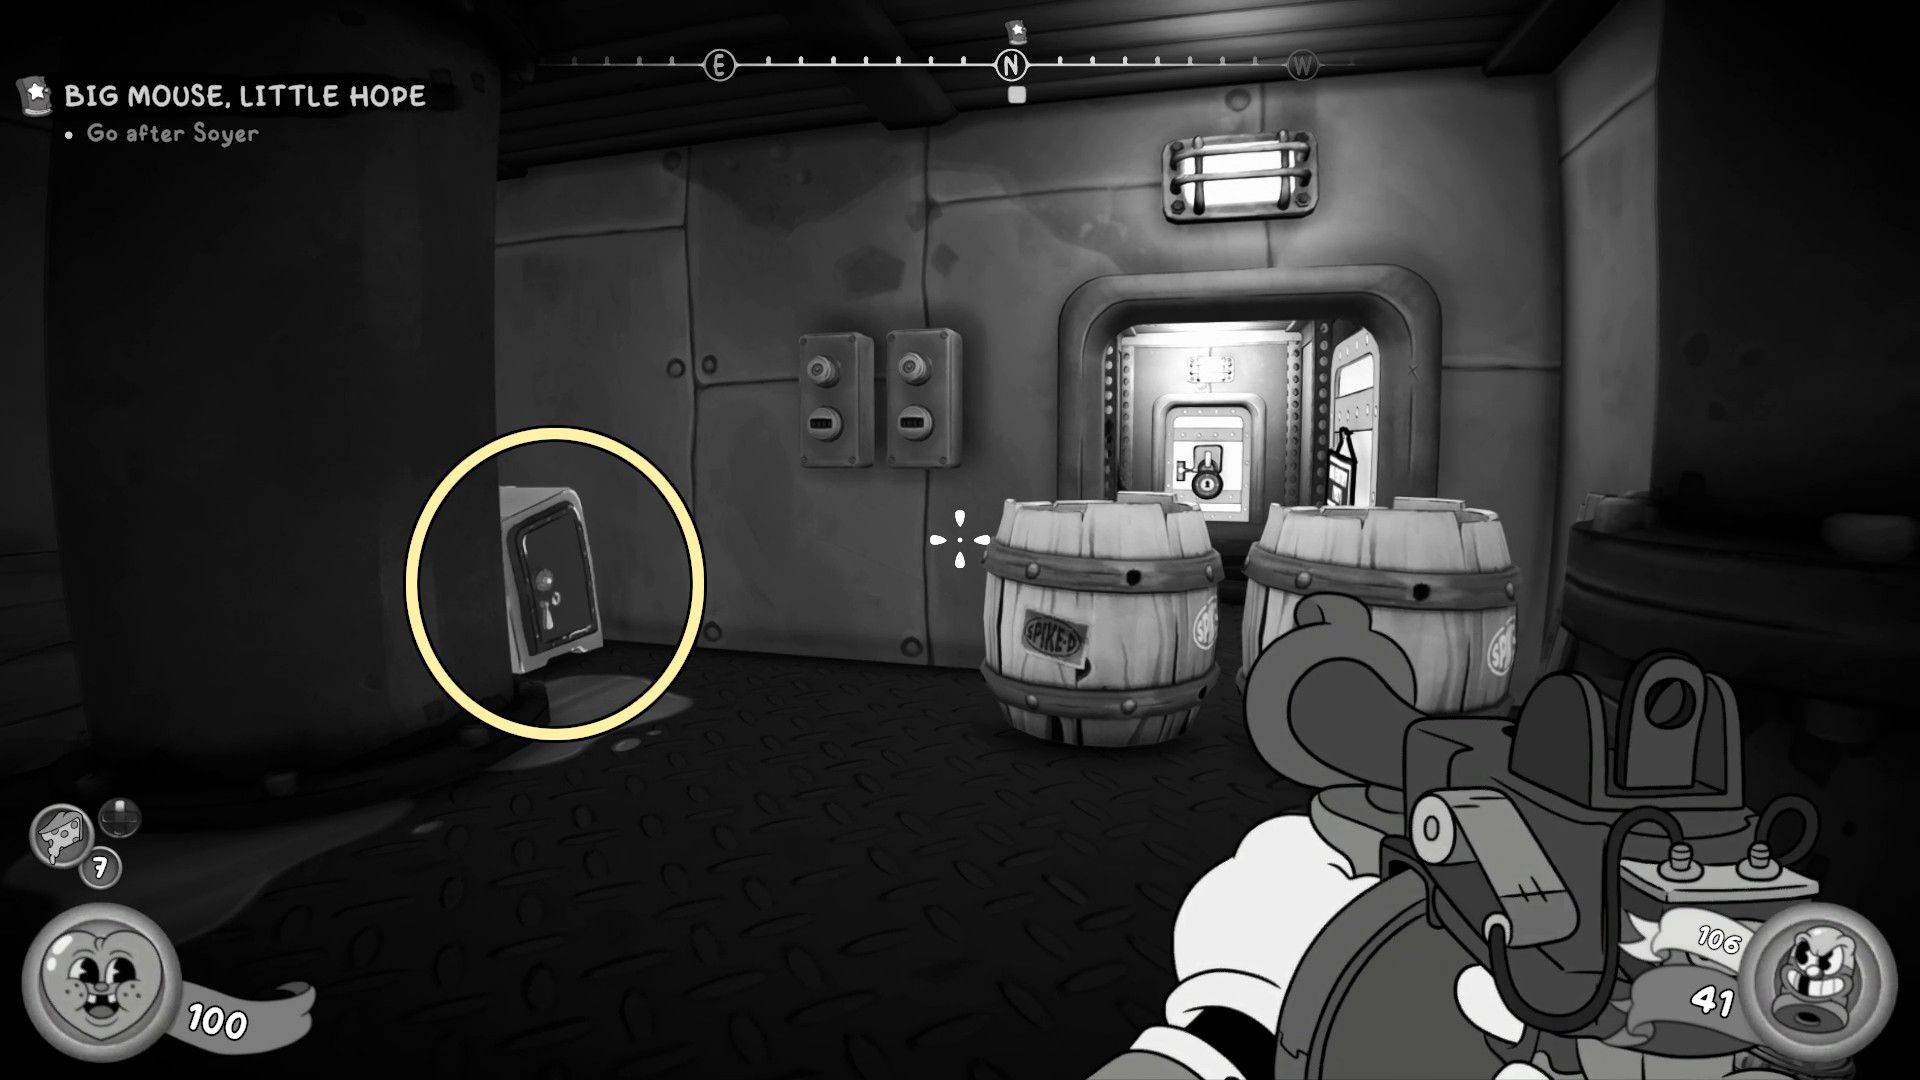
Go through the door at the bottom of the stairs. When you see the barrels blocking your way, look to your left to find a safe. Open the safe by picking its lock to obtain the last Schematic needed for the game.
Hold off on destroying the barrels for now—doing so will block your progress. Before you break them, make sure you’ve already found the Newspaper and both Schematics. If you’ve gone past the barrels and are missing either of those items, you’ll have to restart from a previous save.
After passing the barrels, use the tailpick to open the locked door. Save your game in the next room, then go outside to the area where Jack fell at the beginning of the game. You’ll fall again, but Tammy will catch you, starting a new cutscene.
Survive the BMP Onslaught
This part of the game, where you jump between planes and destroy both the planes and the bombs they drop, can be frustrating. Falling means you have to start over. Players often fail because they rush or don’t destroy the bombs quickly enough, and those bombs can knock you off the planes.
Don’t rush this part – focus on making accurate jumps and, most importantly, shoot down the bombs before they get too close. Once you’ve done that, you’ll reach the final plane and escape the airspace.
Pick Up the Chase
Go through the vault doors to find a room with a typewriter and plenty of ammunition. Grab as much as you can – you’re about to face the final boss!
Make sure to use the B.A.N.G. device on the ground right before entering the boss arena to fully upgrade all your weapons. This is the final opportunity to reach tier 3 for everything and unlock the “We’ll B.A.N.G. OK” achievement – once you start the boss fight, you can’t go back. Don’t worry though, you can always reload an earlier save if you forget to do this.
How to Defeat Milford Soyer
The main goal is to survive the initial phase of the fight, which begins with a period where you can’t harm Soyer. During this time, prioritize destroying the enemies appearing on the walls, while also dodging the targets on the floor and laser beams. Fortunately, the arena has plenty of health and armor pickups around the edges, so you can collect them safely when the lasers are inactive.
Eventually, you’ll reach a final fight against Soyer’s bodyguard. Don’t worry about running out of ammo – you have unlimited! Use your Loose Cannon and fire away. While you’re fighting, watch for smaller enemies to drop cheese, which you can collect to restore your health.
Once you’ve beaten the bodyguard, you can start attacking Soyer on his platform. You’ll still have endless ammo, so keep firing with the Loose Cannon to do a lot of damage. Just remember to dodge Soyer’s rockets! It’s easy to get caught up in attacking the boss and forget about them, but those rockets can quickly defeat Jack and force you to fight the bodyguard again.
Release John
Okay, so when Soyer goes down, make sure you talk to him. Then, look to your left – you’ll see John hanging from a rope. Talk to him after he drops to the ground, and that’ll finish the Big Mouse/Little Hope mission. That triggers the final cutscene and finally lets you beat the game! It’s a bit of a relief, honestly.
Missable Collectibles & Common Mistakes
In the final mission of Big Mouse Little Hope, the most common error players make is rushing to the next objective marker without completely securing their current location.
Okay, so this level isn’t super hard, but it’s pretty much a straight shot from start to finish. The biggest problem I’ve seen – and I’ve definitely fallen for it – is assuming you can go back for those collectibles you missed. A lot of times, once a door closes or something happens on-screen, you’re stuck and can’t backtrack. It’s frustrating, but you really need to grab everything the first time around!
- Before jumping off the big ledge early in the level: grab Comic Book #1.
- Before entering the casino: grab Newspaper #1 and Schematic #1
- Before approaching the tailpick door: grab Newspaper #2 and Schematics #2 & #3.
Just remember this key point: always finish dealing with enemies in a room before moving on to the next area or starting a cutscene.
FAQ
How many collectibles are on Der Harzerburg?
The final mission in Big Mouse Little Hope features six collectibles: a single Comic Book, two Newspapers, and three Schematics.
Are Der Harzerburg collectibles missable?
Once you finish the final mission in Big Mouse Little Hope, you won’t be able to go back to Der Harzerburg to collect anything you missed. If you’re aiming for full completion, be sure to find all collectibles during your playthrough.
More Mouse P.I. for Hire Collectible Guides
- Glugging from the Deep walkthrough collectibles
- Jack Squat walkthrough collectibles
- The House of the Empty Mouse walkthrough collectibles
Read More
- NTE Drift Guide (& Best Car Mods for Drifting)
- All Aswang Evidence & Weaknesses in Phasmophobia
- Where to Find Prescription in Where Winds Meet (Raw Leaf Porridge Quest)
- Conduit Crystal Location In Subnautica 2
- How to Get Necrolei Cyst & Strong Acid in Subnautica 2
- Diablo 4 Best Loot Filter Codes
- Boruto: Ikemoto Has Already Hinted At Sasuke’s New Eye After Return
- How to Get the Wunderbarrage in Totenreich (BO7 Zombies)
- Best Burst & Full Auto Builds for the M16A4 in BF6
- USD RUB PREDICTION
2026-04-30 16:47